
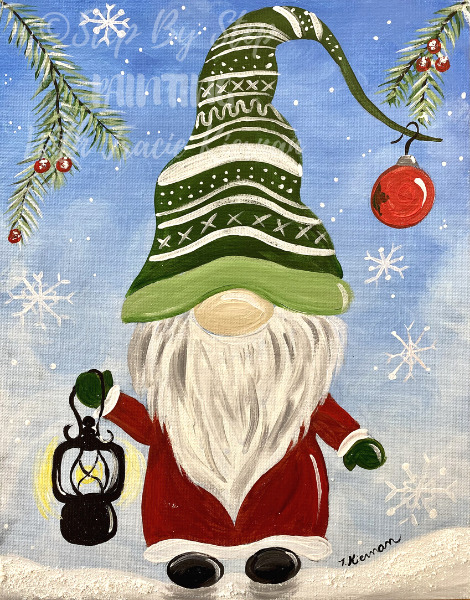
This free online acrylic painting tutorial will show you how to paint a winter gnome.
This is a part of a seasonal series of gnomes! You can see my Fall Gnome Painting Tutorial Here.
Would you like to save this?
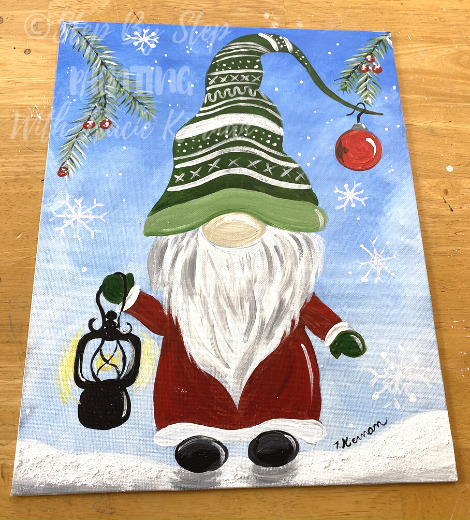
This was done on an 11 x 14 Canvas With Acrylics!
I also added some Snow-Tex by DecoArt in the snow at the bottom of the painting (and a little frost on the berries). This is a fun medium to use if you want to add snow texture to you winter paintings.
In the video of the tutorial, I will show you how I drew the gnome. If, however, you want to use a traceable, I have that as well!
Enjoy and happy painting!
This post contains affiliate links. If you click on a link and order a product, I may earn but at no extra cost to you. See my full affiliate disclosure for details.
Materials
How To Paint A Winter Gnome

Free online acrylic painting tutorial. Learn how to paint a seasonal Winter Gnome step by step.
Materials
- 11 x 14 Canvas
- Acrylic Paint
- Brushes
- Pencil
- Optional Tracer
- Optional Transfer Paper
- Optional Snow-Tex by DecoArt
- Optional palette knife to apply the snow-tex
Colors
- Cadmium Red Medium Hue
- Primary Yellow
- Hookers Green Hue Permanent
- Cobalt Blue
- Mars Black
- Titanium White
- Unbleached Titanium
Brushes
- 8 Round
- 4 Round
- 3/8" Angle
- 10/0 Spotter (or white paint pen for snowflakes)
- Mop Brush (I used a makeup brush by Elf)
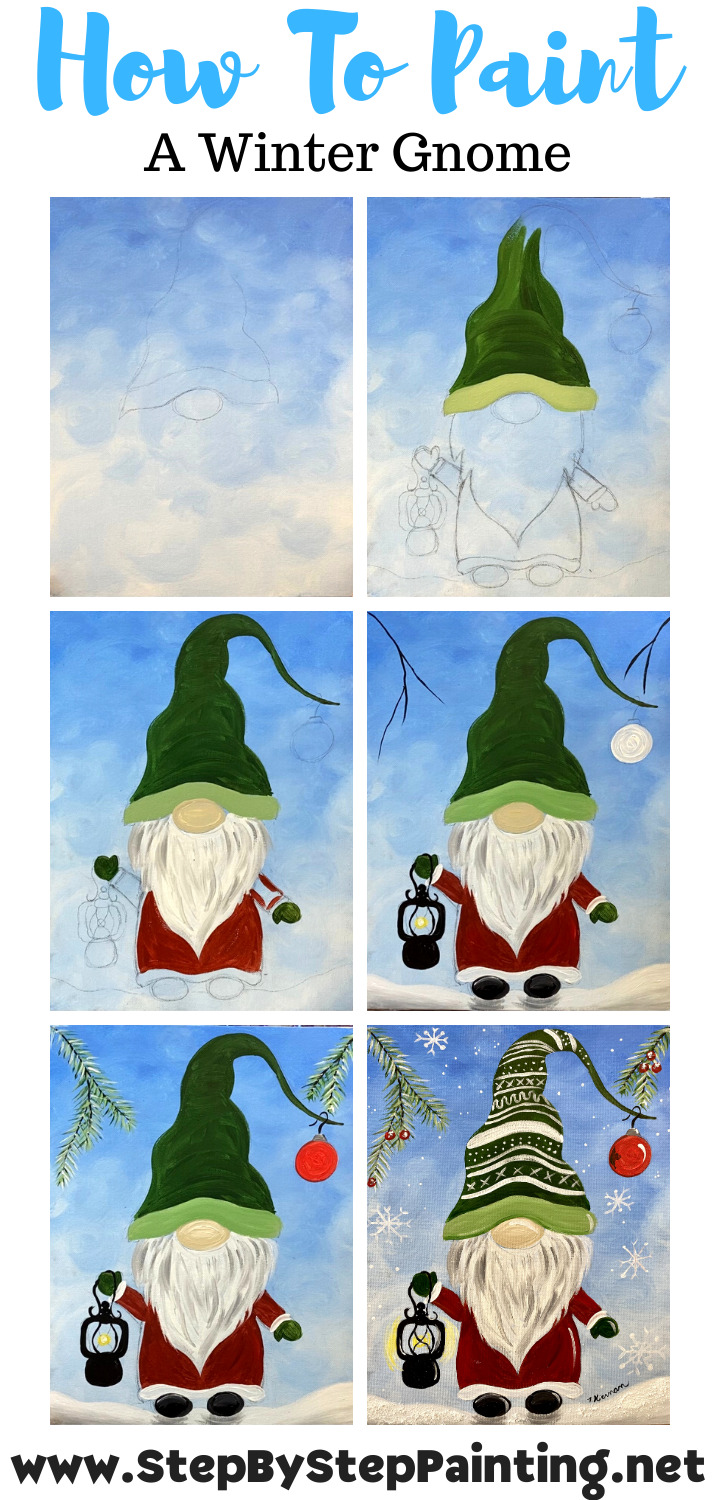
Instructions
- Paint the background using a large mop blender brush (or makeup brush). Use cobalt blue and titanium white.
- Wait for background to dry.
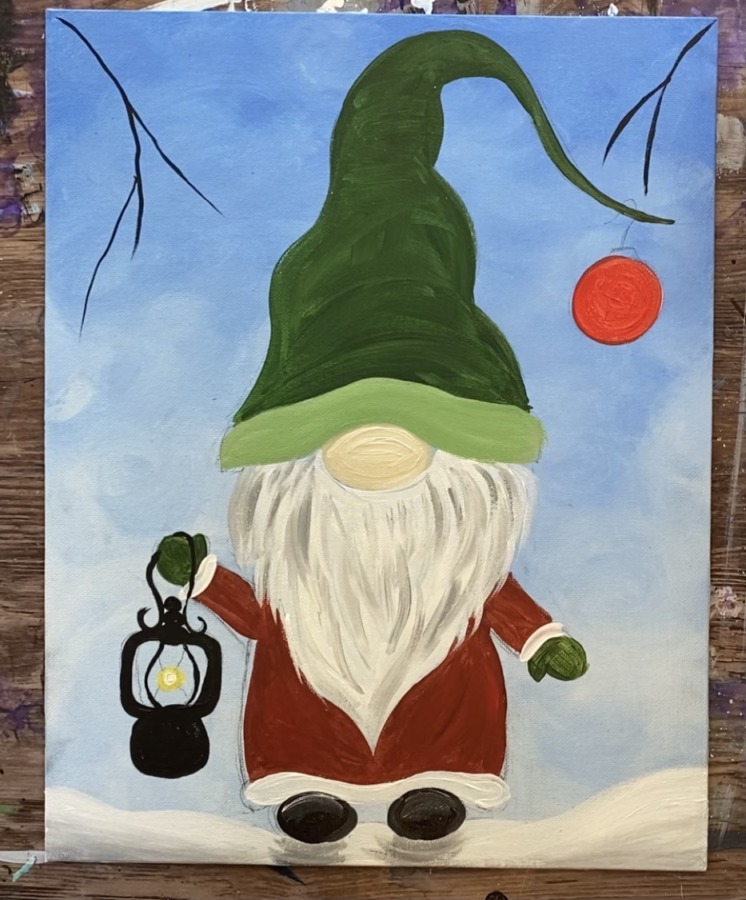
- Draw the gnome on the canvas (or use traceable).
- Paint the hat (dark green), nose (unbleached titanium), beard (white and gray), robe (dark red), mittens (dark green) and shoes (black).
- Paint the lantern black with yellow light.
- Paint the snow on the ground.
- Paint the holly using green and white paint.
- Paint the holly berries.
- Paint snowflakes in the sky.
- Add designs to the hat.
- Add optional snow-tex onto the snow for added fun texture.
Color Palette

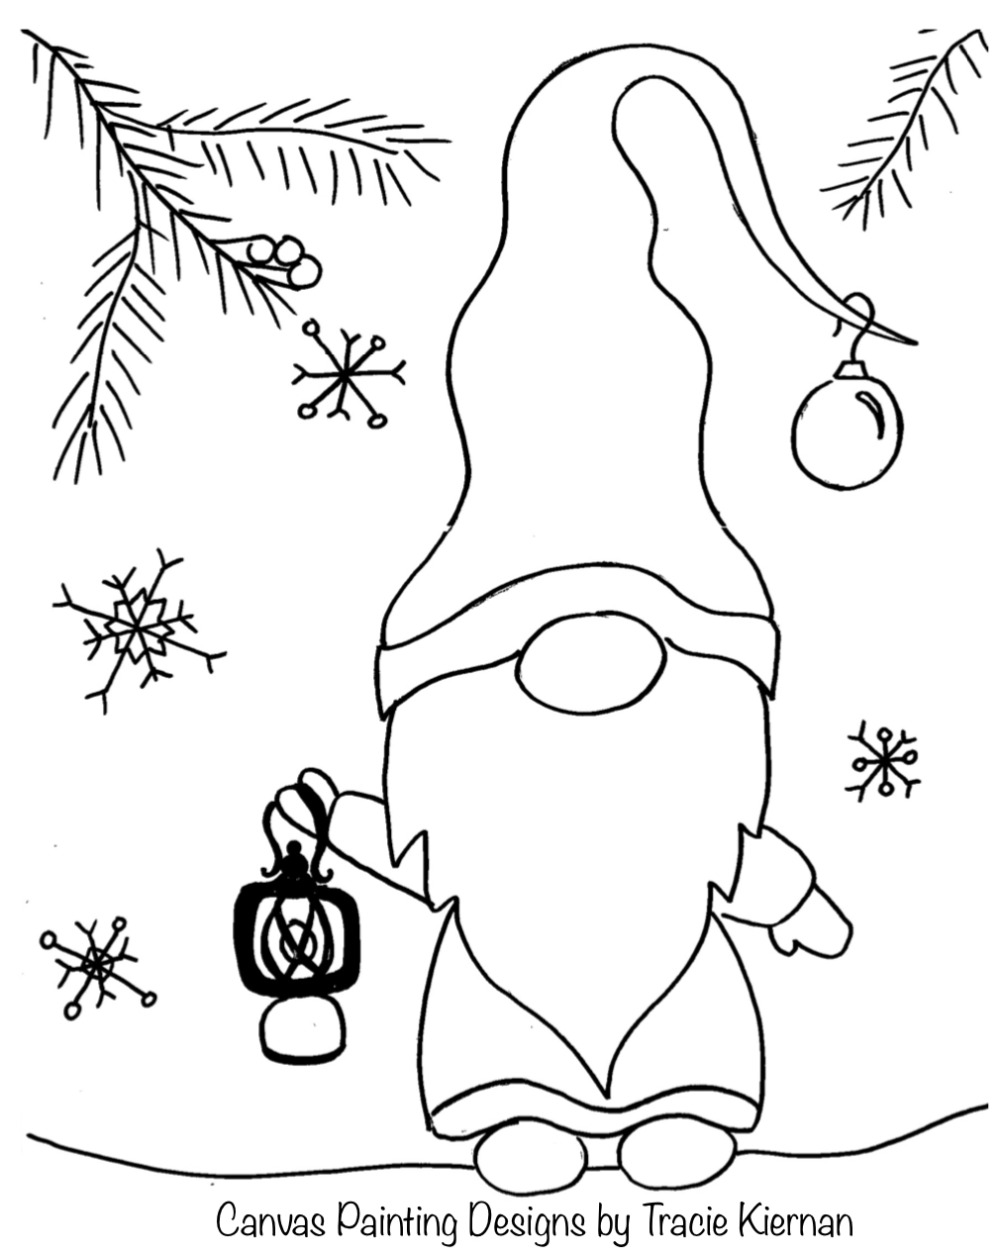
Traceable
In the video I will show you how to draw this gnome! If you want to use my traceable, print this on two sheets to tape together. Or use the 8×10 version for a smaller size canvas painting.
Directions At A Glance
Video
Step By Step Directions
1. Paint the background
For this background I used a round mop makeup brush! You can use one too or an acrylic paint mop brush.
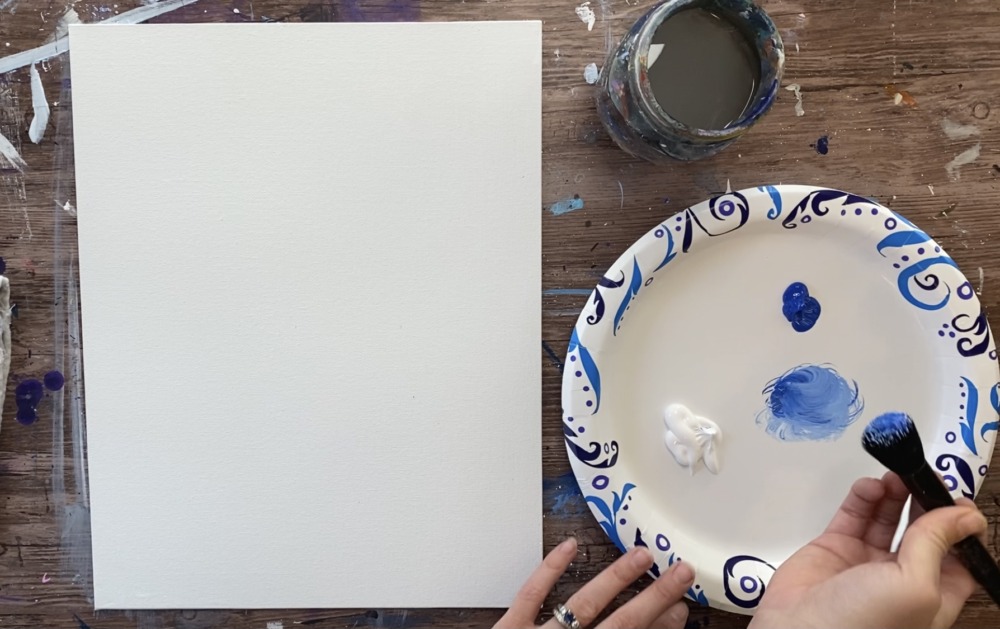
You can also use a sponge or a 3/4 Wash Brush for this technique.
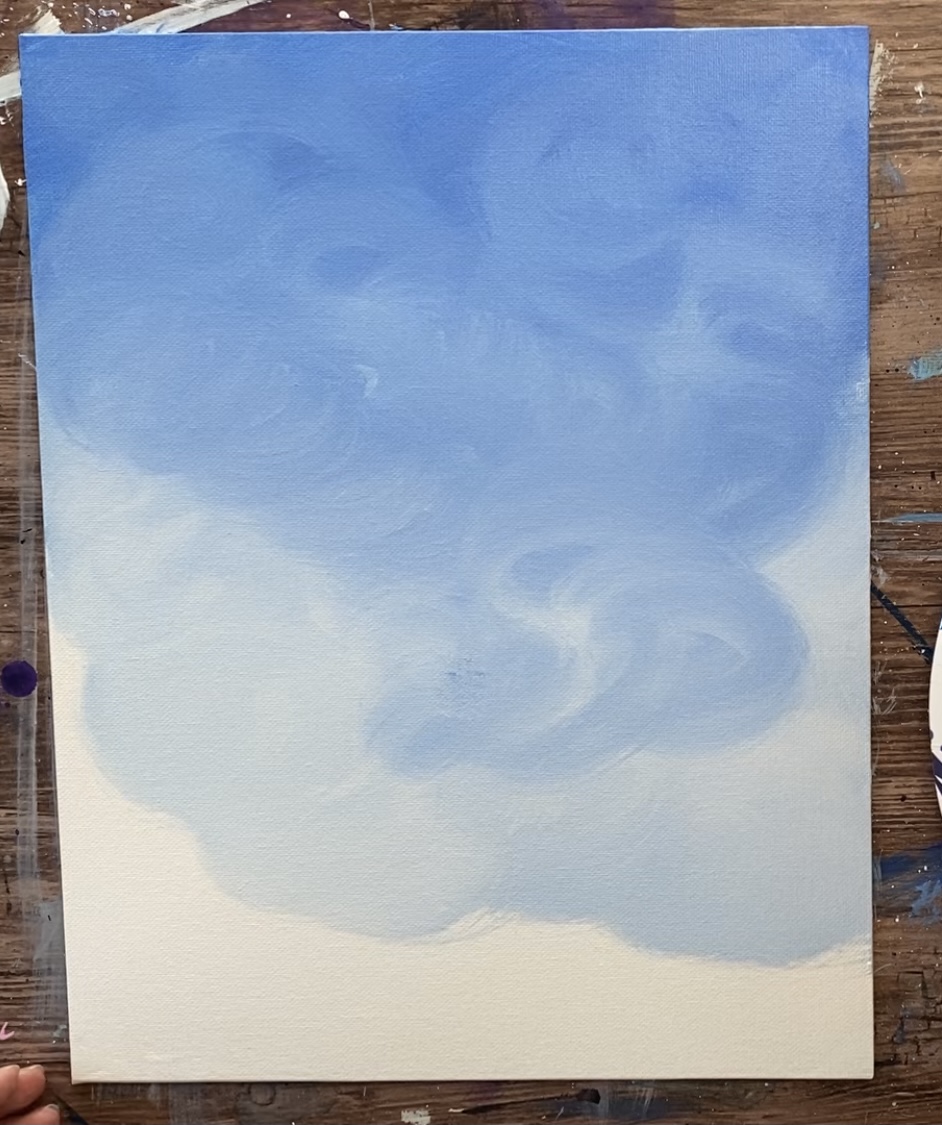
Start at the top with cobalt blue mixed with a little bit of white. Paint circular strokes.
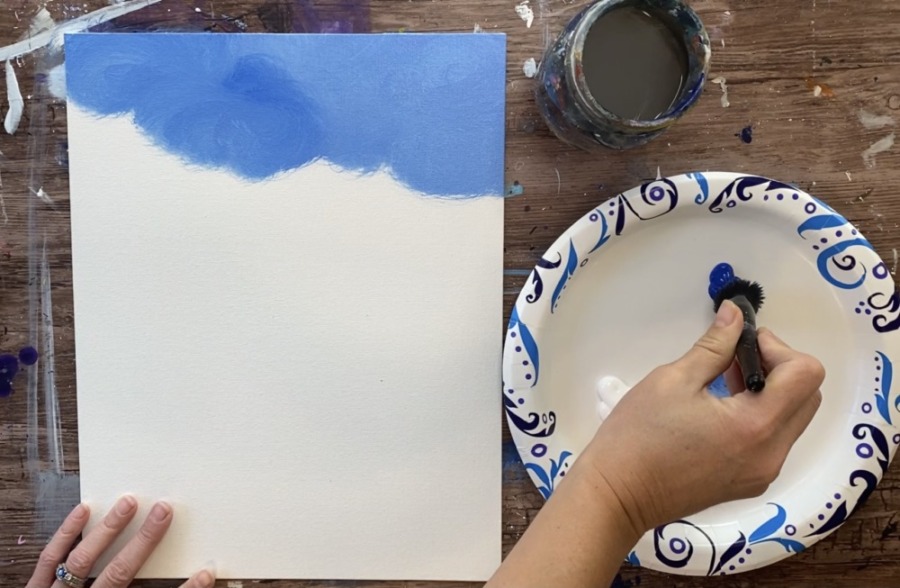
As you work your way down the canvas, add in more and more white so the sky background gets lighter and lighter.

Blend the blue and white together. You can have smooth strokes or do more circular strokes.
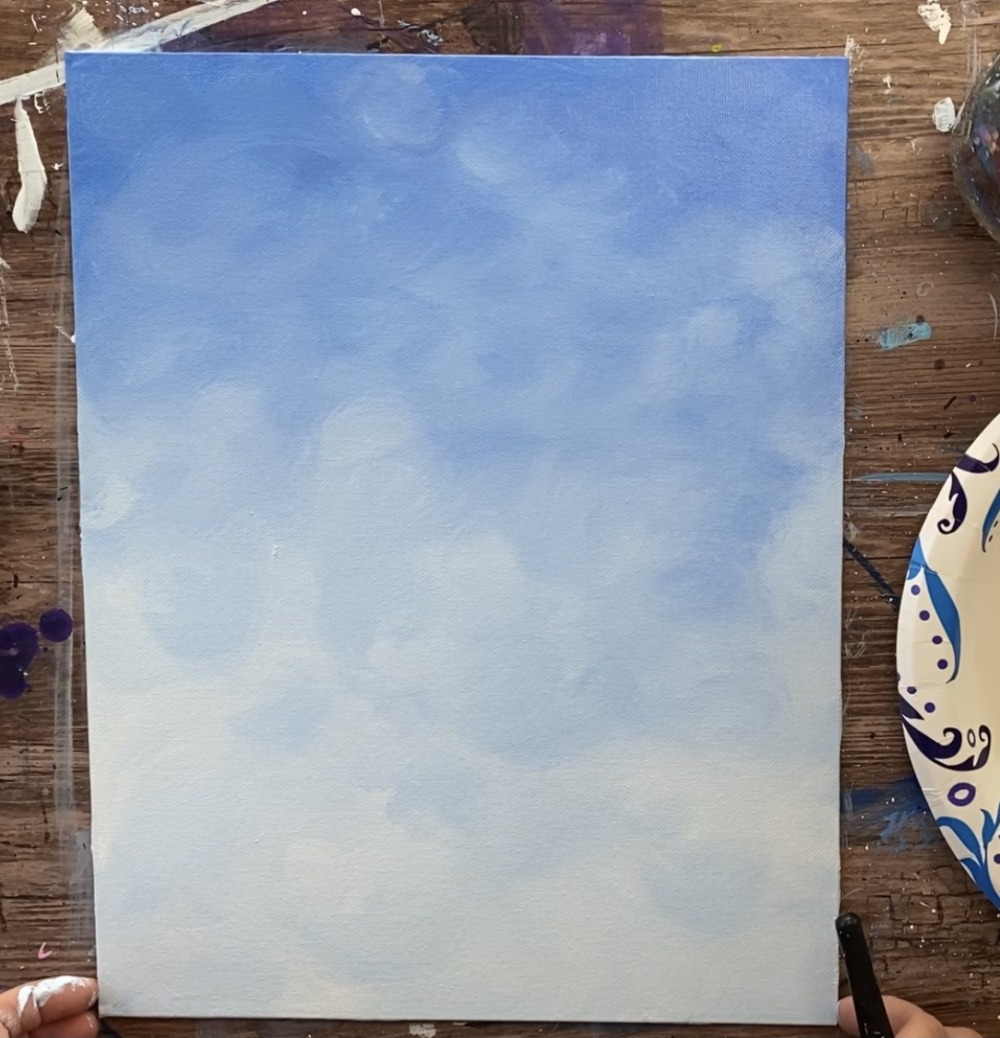
2. Wait for the background to dry
Before drawing the gnome with pencil or using the traceable, you will need to let the background dry.
3. Draw or transfer the gnome to the canvas.
If you are using the traceable, place a sheet of graphite transfer paper below it and trace to transfer the design to the canvas.

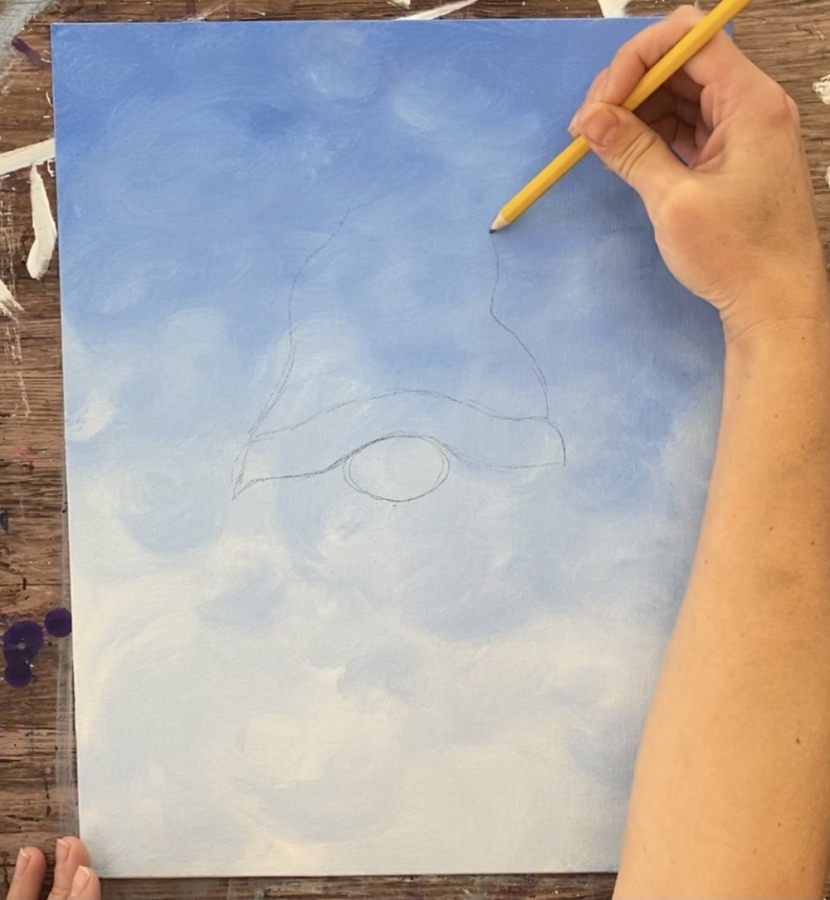
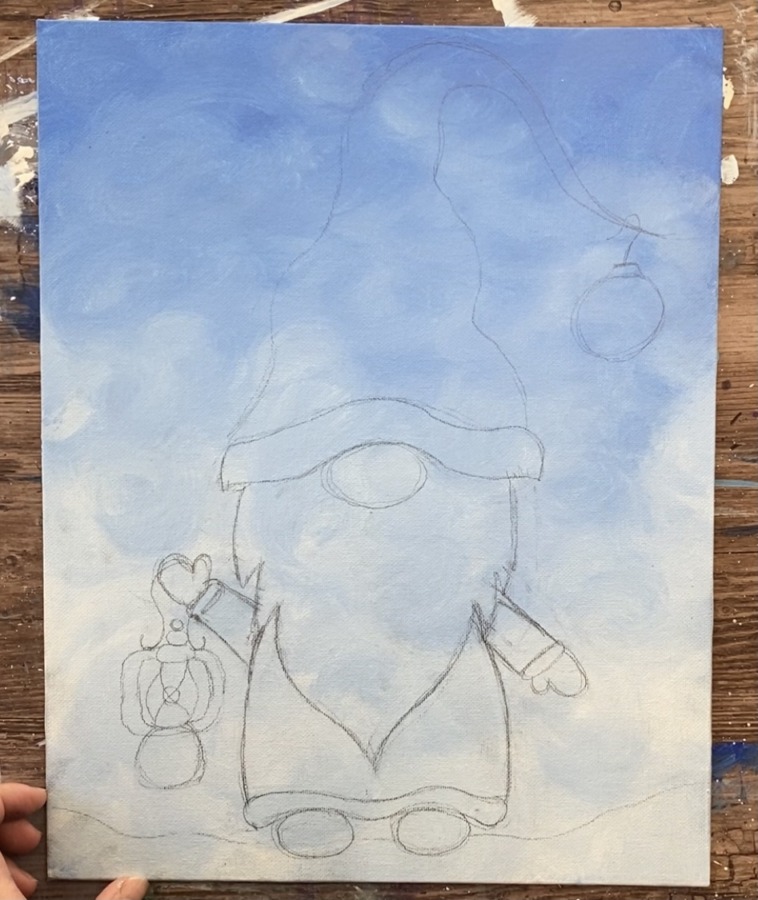
To draw…
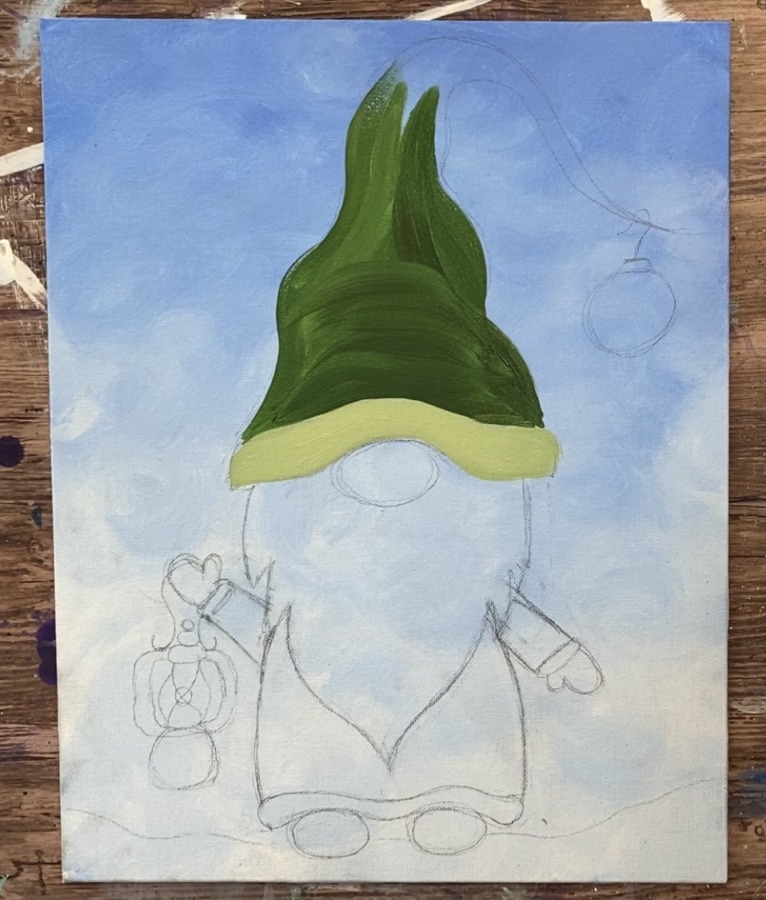
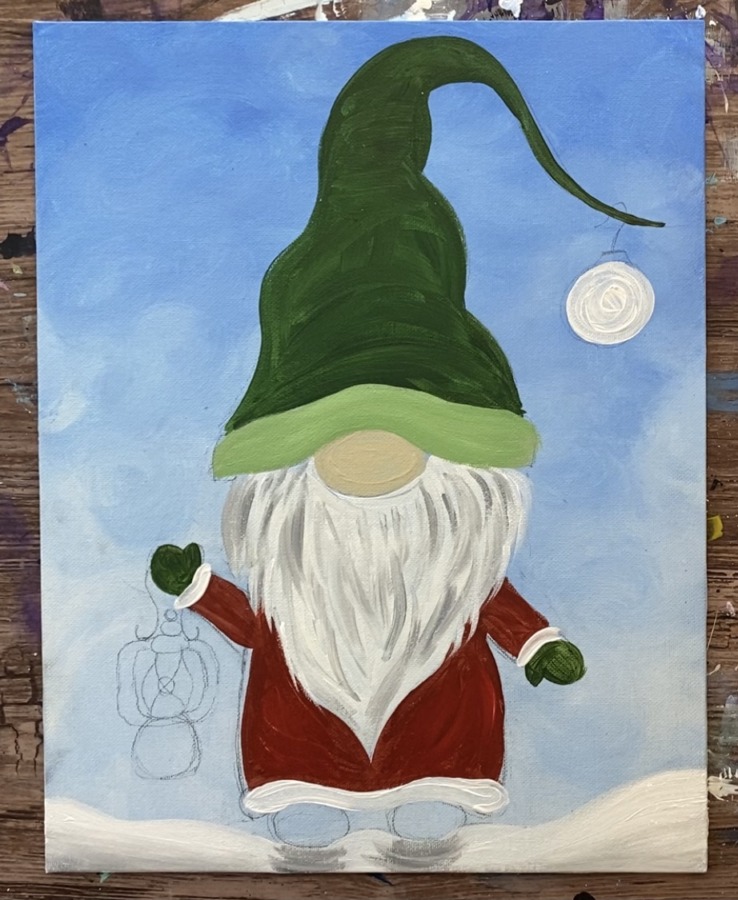
Use a pencil to lightly draw the gnome. I started my drawing with the nose which is relatively in the middle of the canvas.
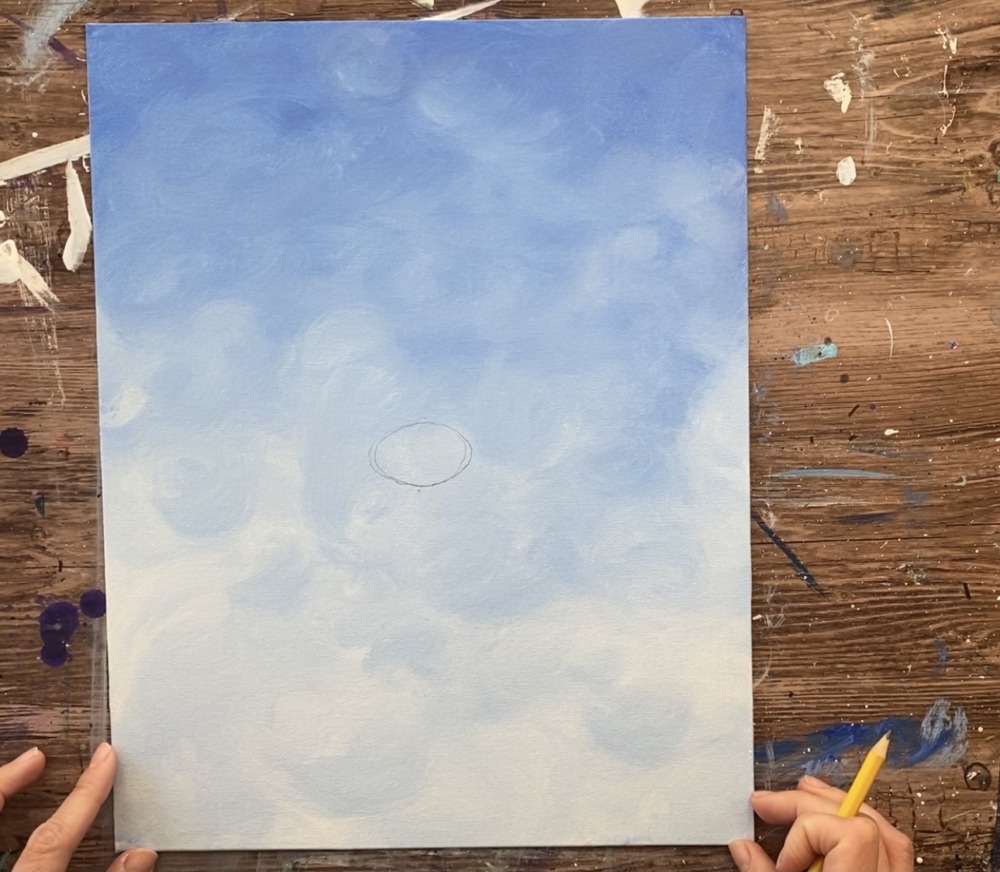
Then draw the hat so it goes almost all the way to the top of the canvas and dips down.
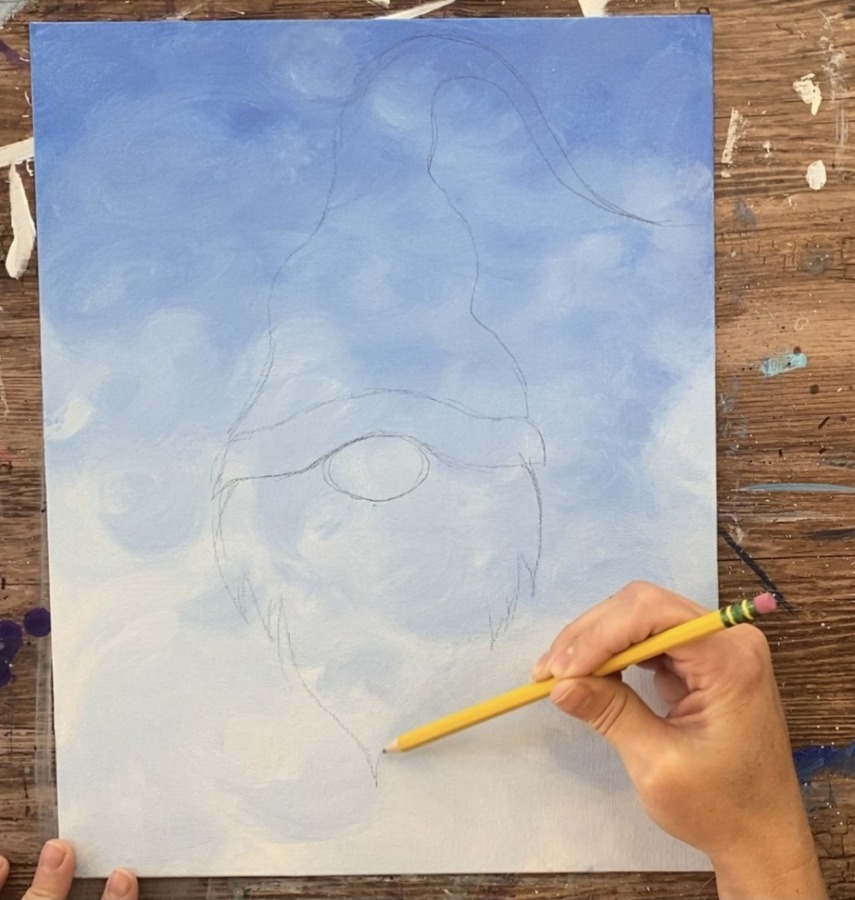
Then draw the beard and feet.
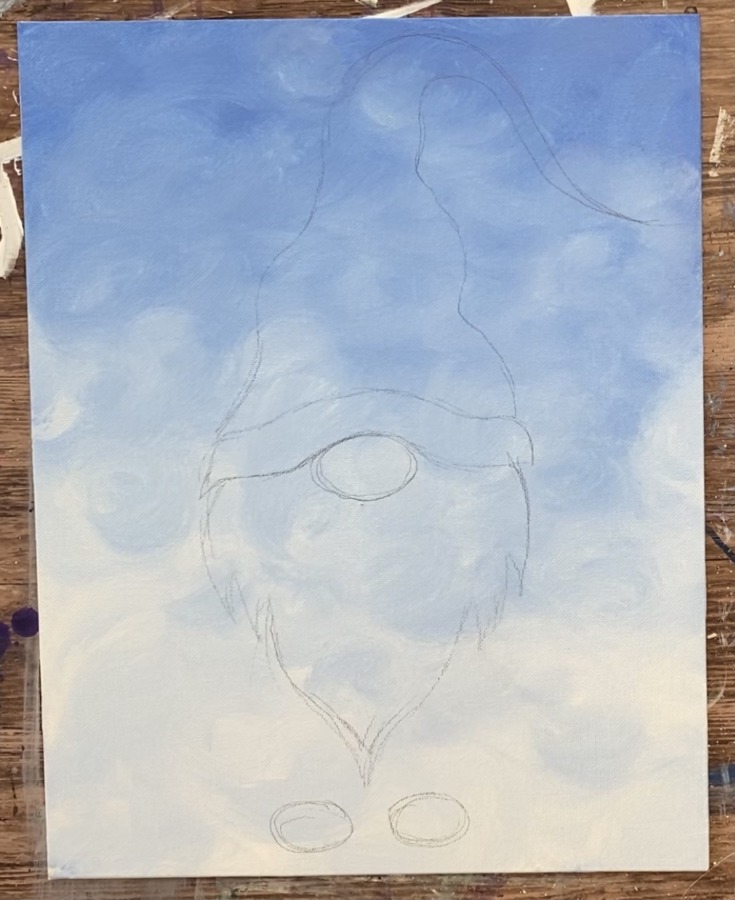
Next draw the robe.
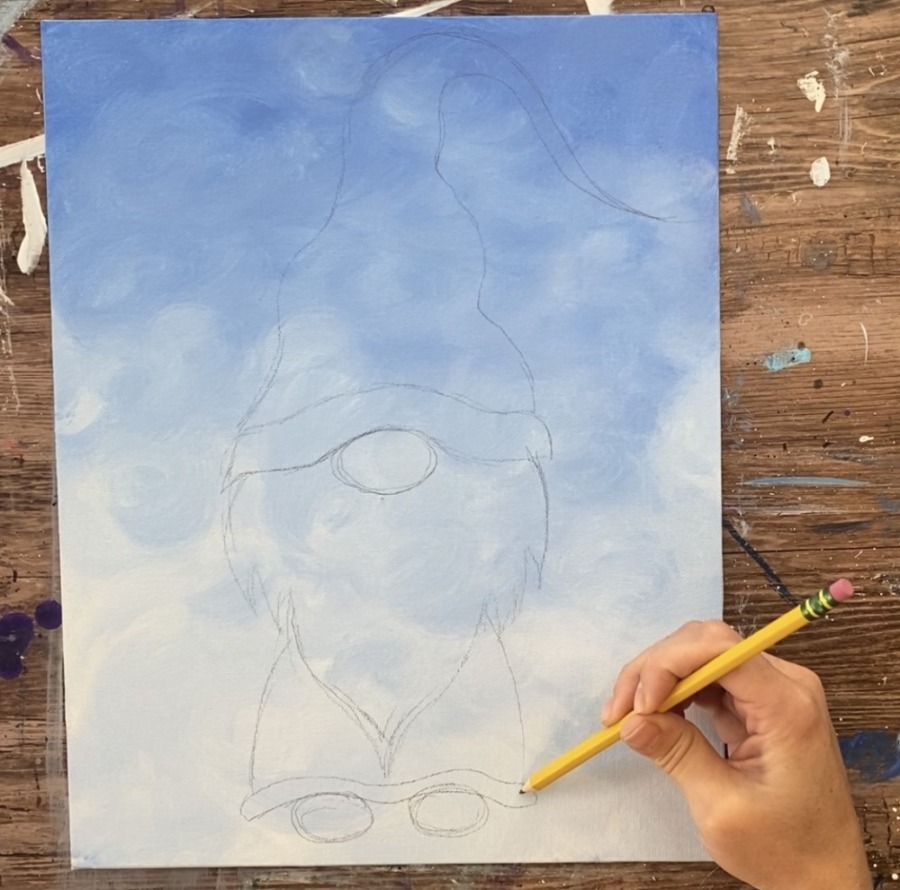
Then draw the arms. One of the arms is elevated because he will be holding a lantern.
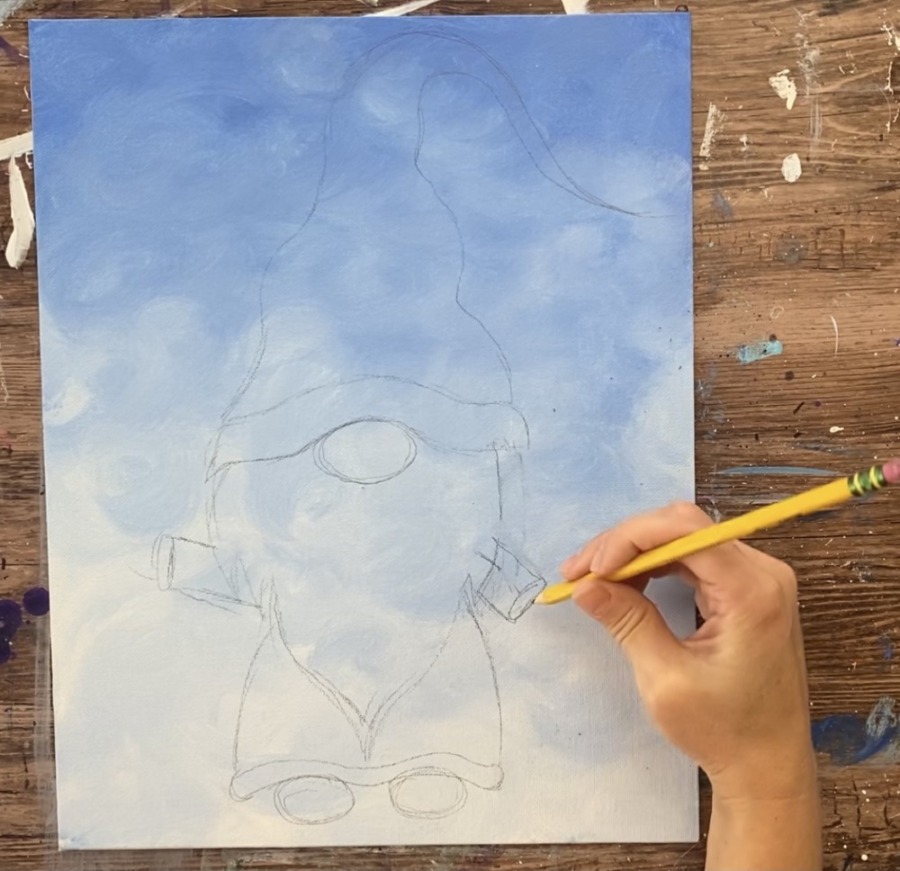
Draw the mittens.
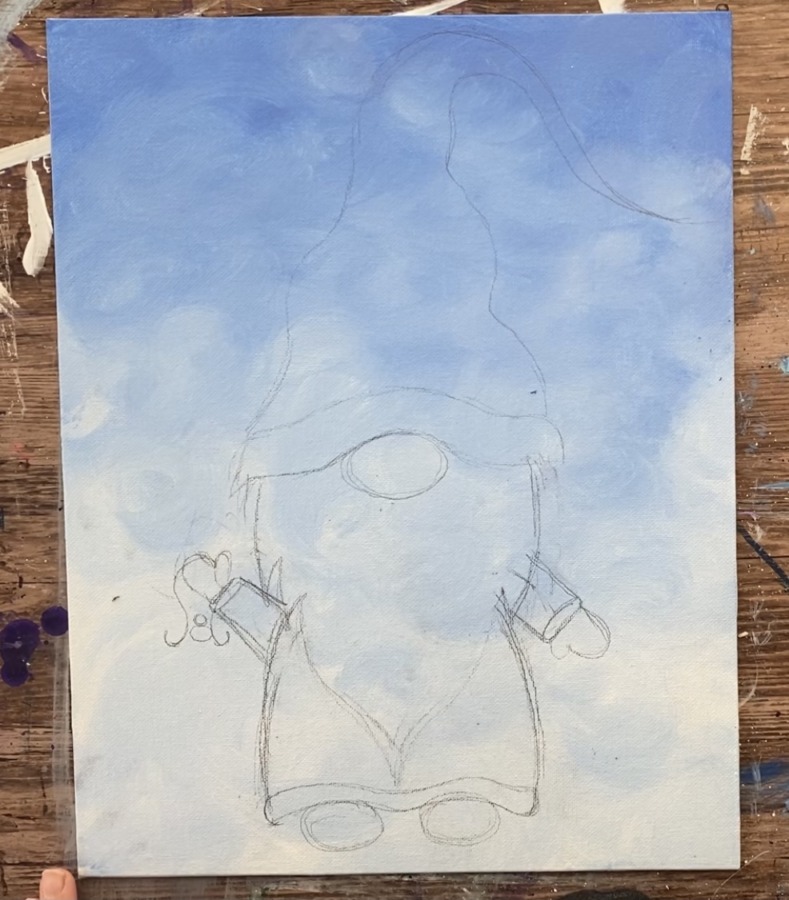
Then draw the lantern.
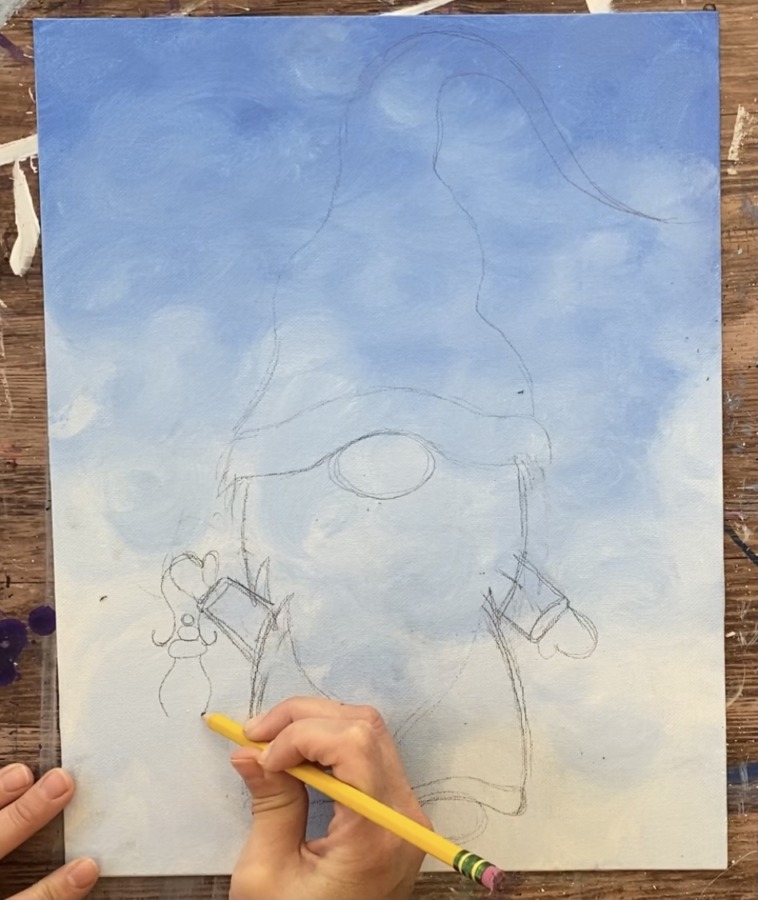
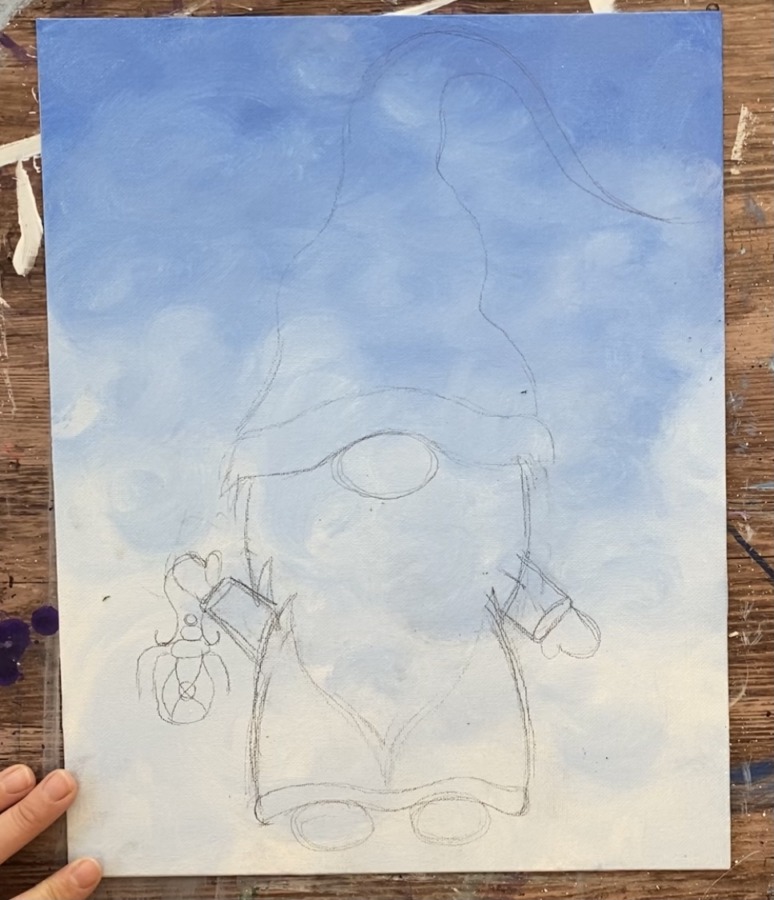
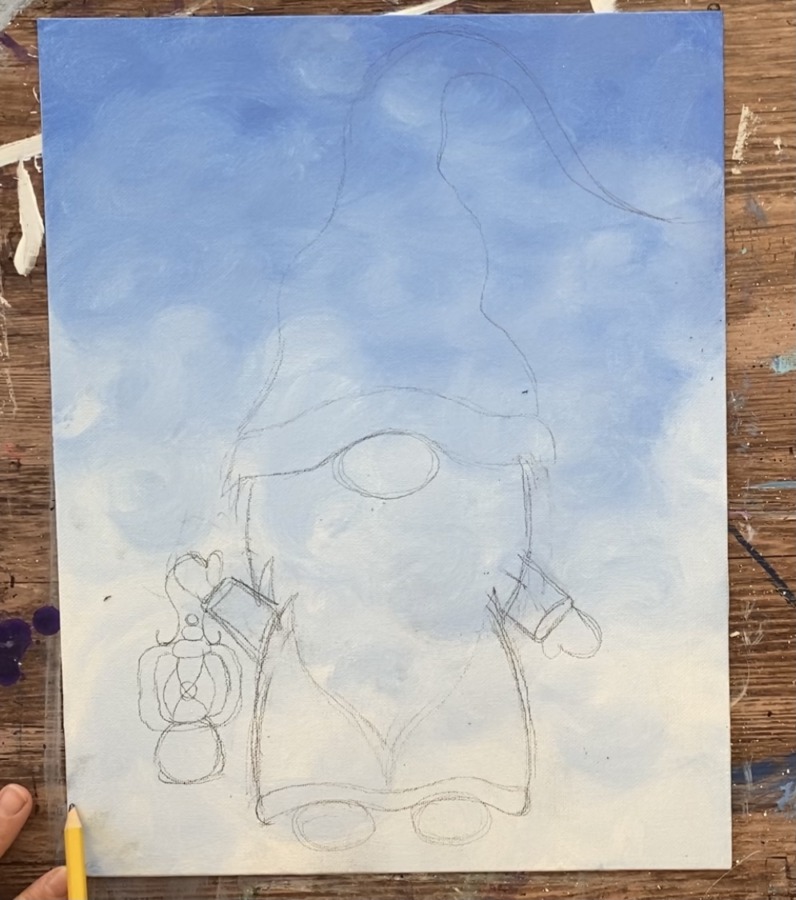
Finally, draw the snowy ground he will be standing on.
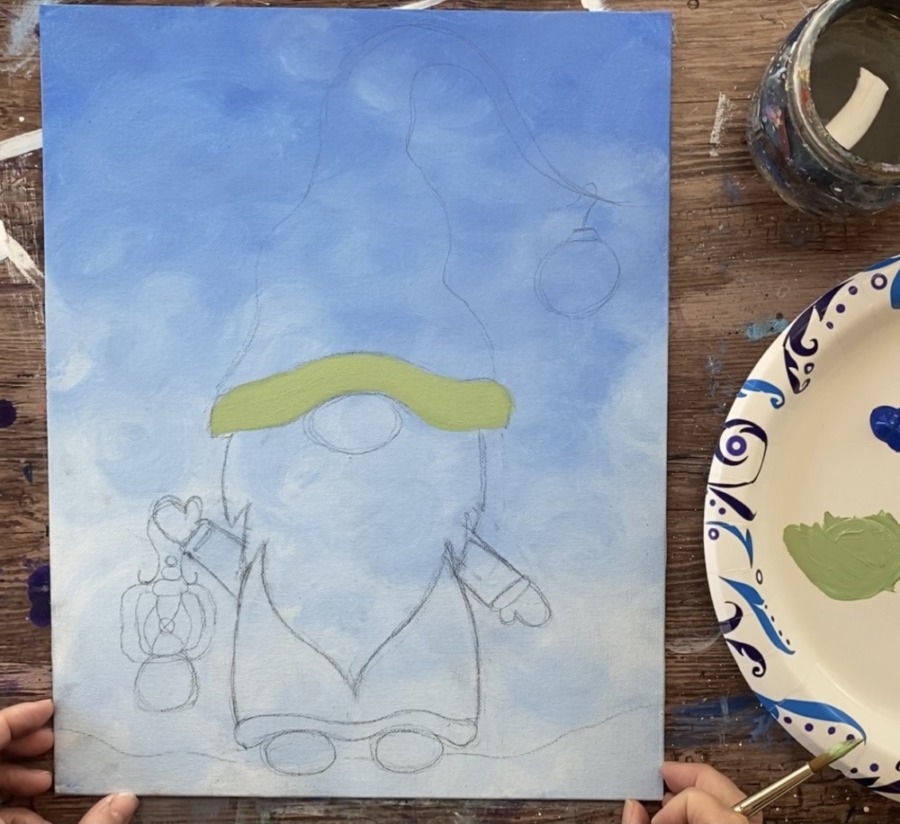
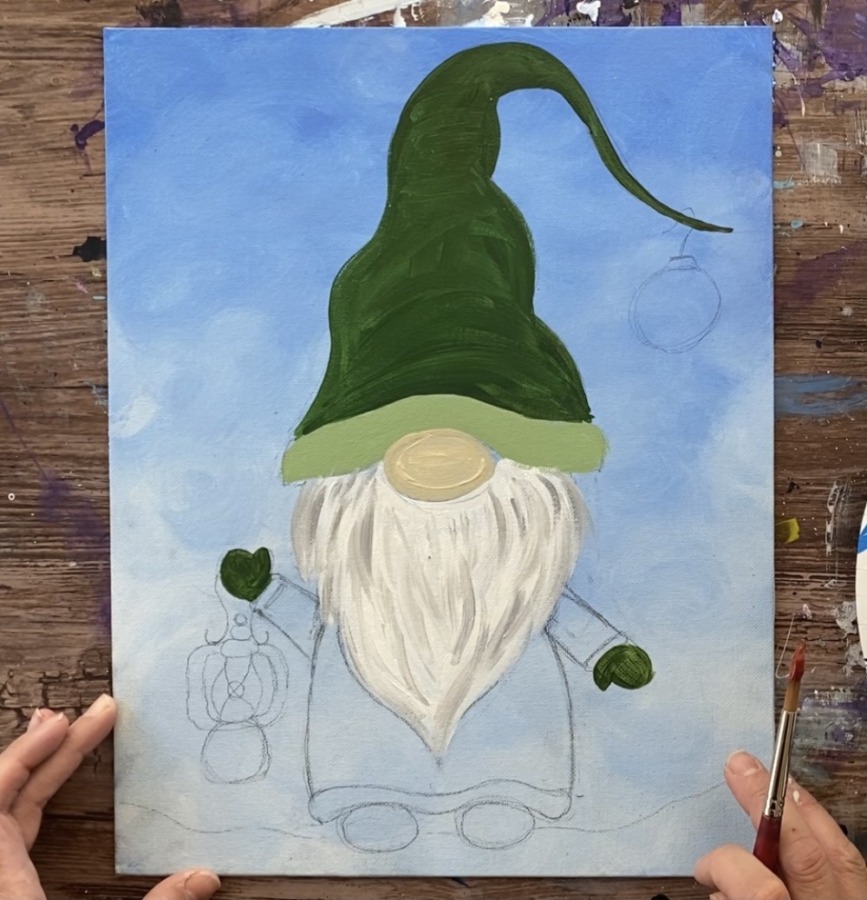
4. Paint the gnome starting with the hat & mittens.
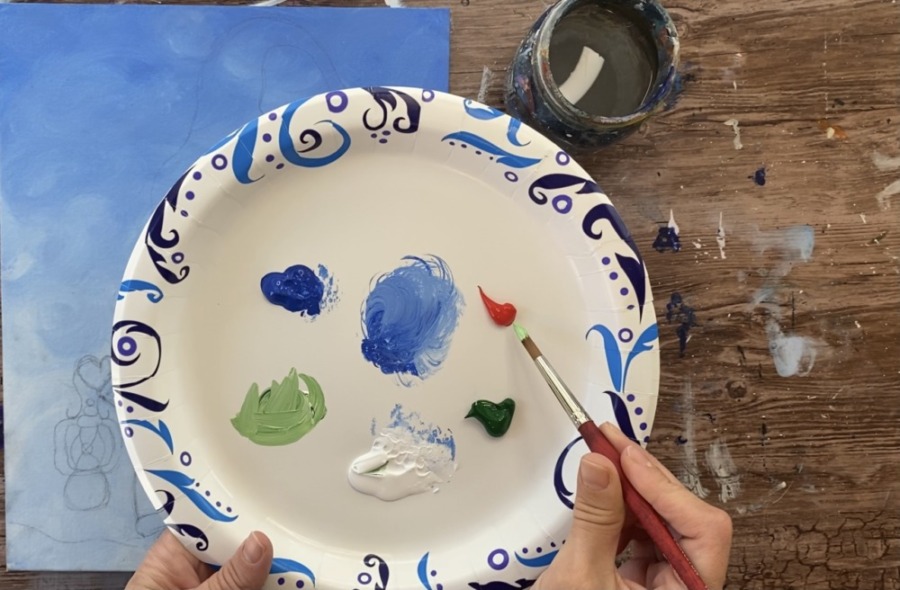
To make the light green color on the bottom of his hat, I mixed 3 parts hookers green hue, 1 tiny part cadmium red medium and 4 parts white. It should be a light green. The tiny bit of red gives it more of a warm green color.
Paint the bottom of his hat. I used my #8 round brush for this part, however, you may choose to use a smaller brush.
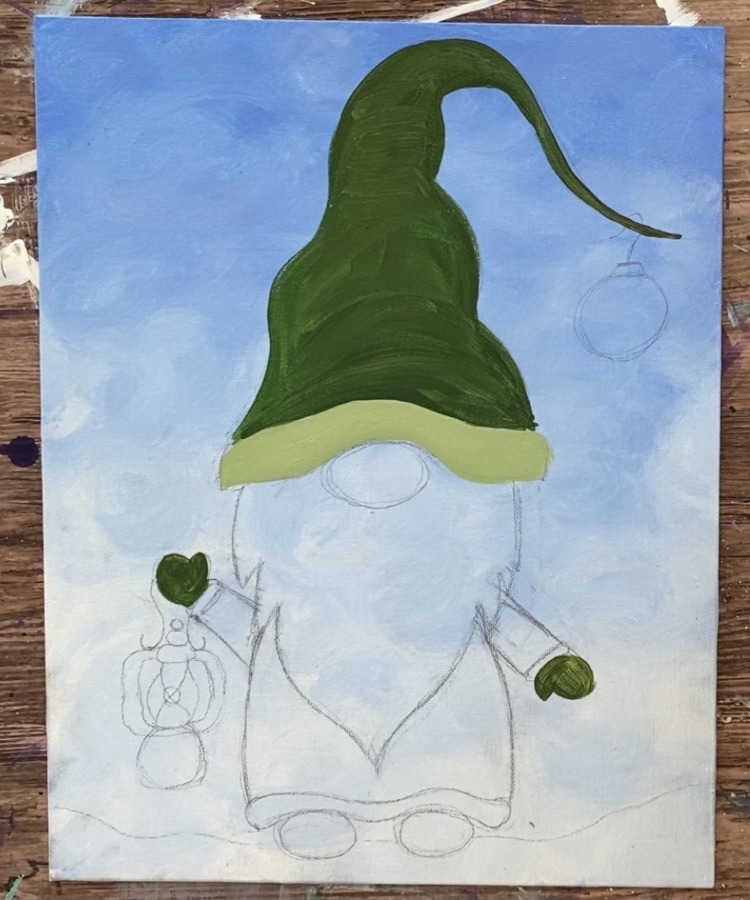
Next mix on your palette that hookers green with a tiny bit of red. That tiny bit of red will make your green slightly darker and warmer. Paint the entire hat using a #8 round brush.
For that tip of the hat, you may want to water the paint down slightly so that it forms a tip/ flows better.
Paint the gloves of the gnome the same color. (You can always change the colors of this too!)
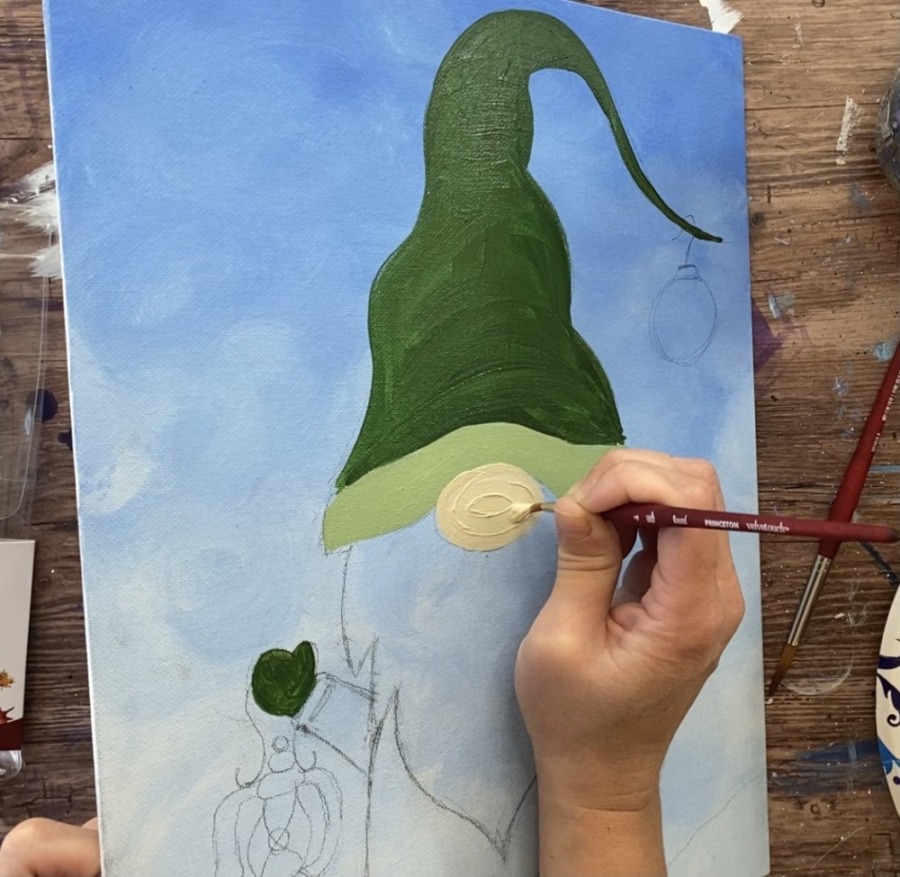
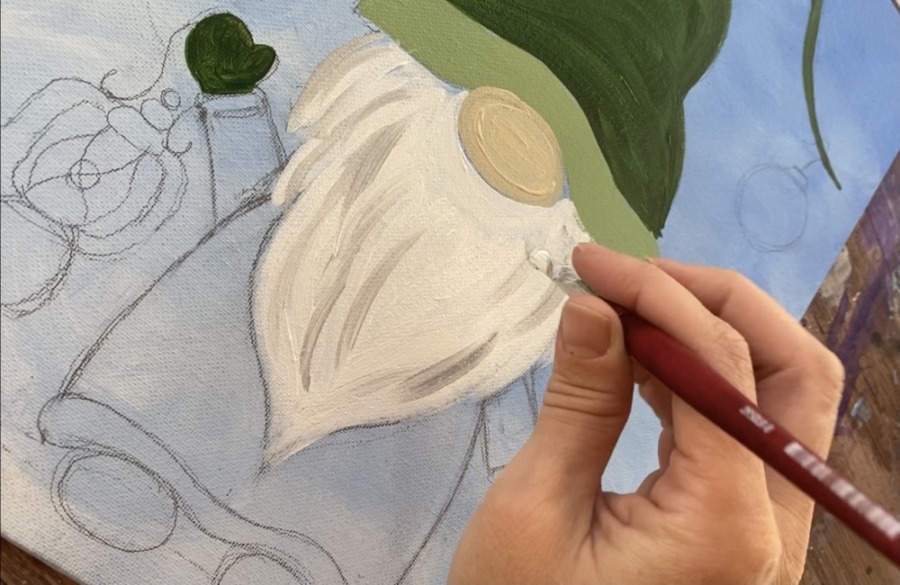
5. Next paint the nose.
For the nose, I used the color unbleached titanium and my #4 round brush.
6. Paint the beard and beard texture.
Then use any of your round brushes to paint the beard. First paint it solid titanium white. Have your strokes curve and go in the direction of the beard.
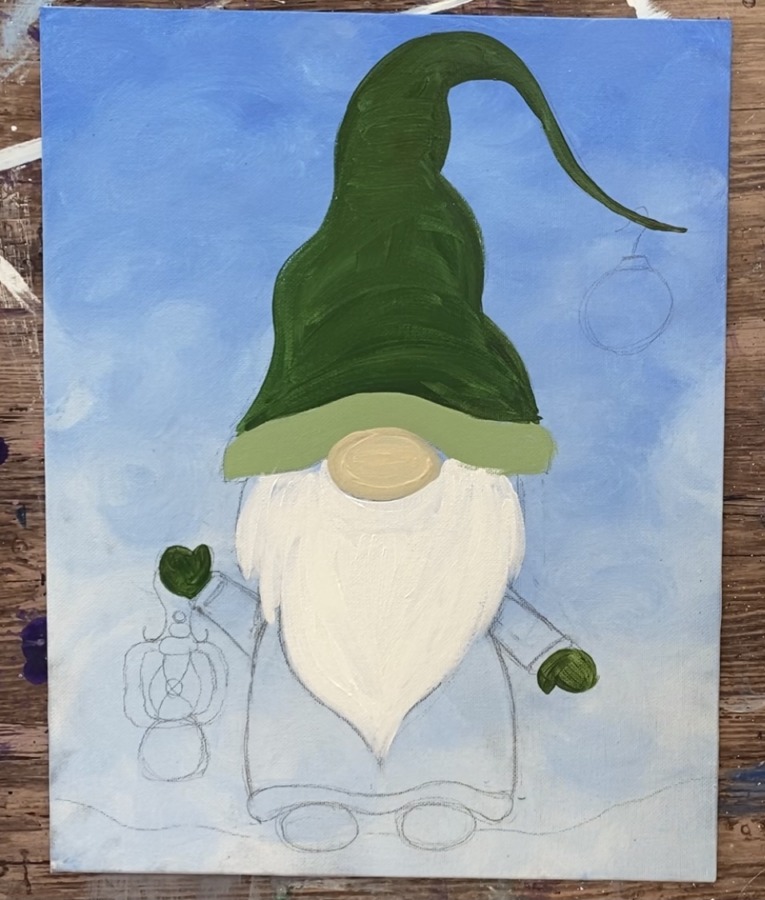
To add texture, mix a tiny bit of black into the titanium white to make a light gray. Paint curved lines going in the direction of the beard to create the texture.
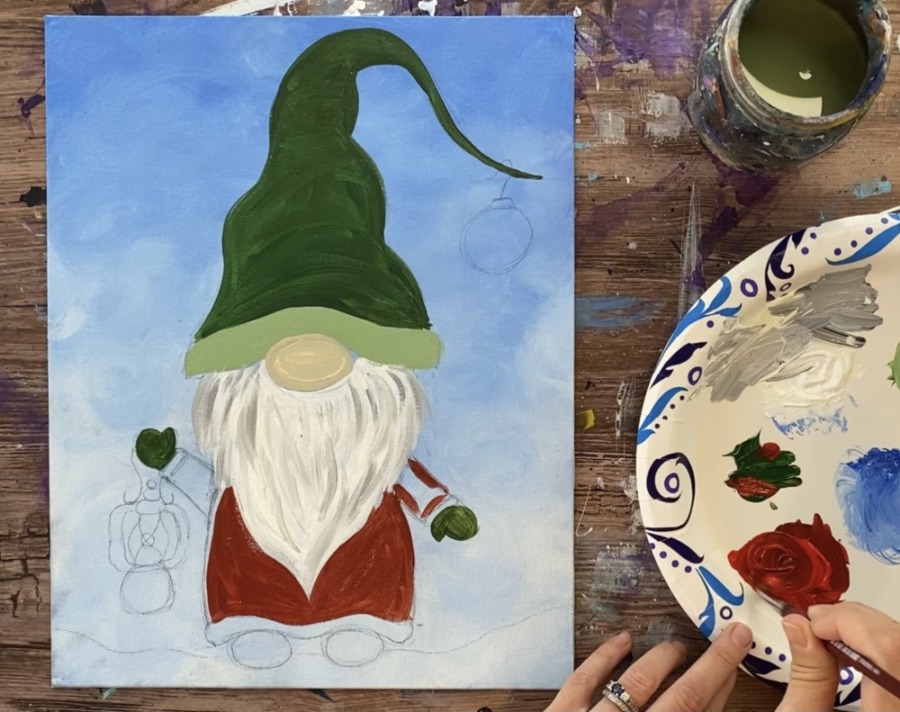
7. Then paint the robe
To make the deep red in the robe, mix a little bit of hookers green into the red to make it darker.
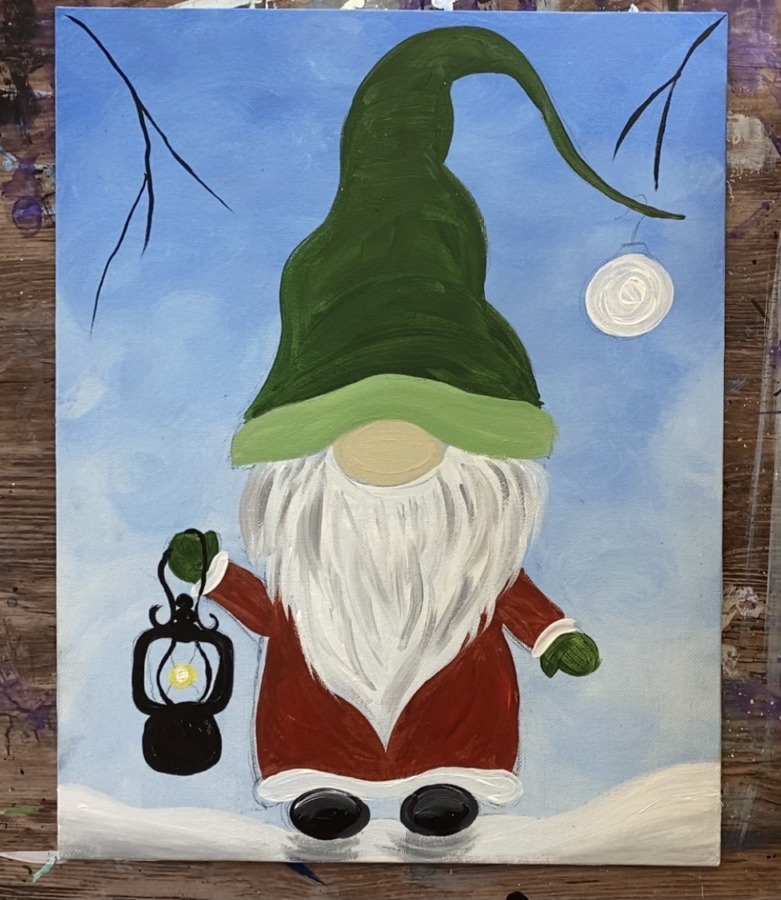
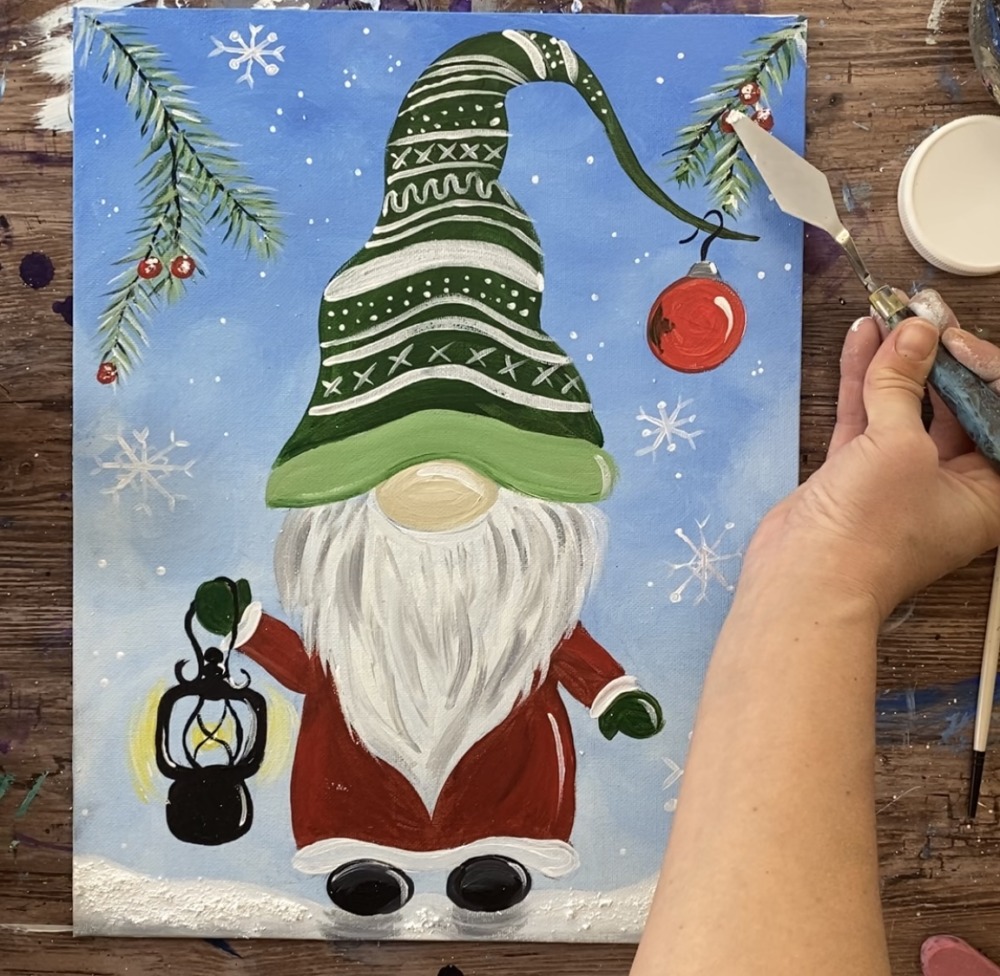
8. Paint the snowy ground, ornament base and white edging on robe
Then use titanium white to paint the snow on the ground, the edging on the robe and the ornament base color.
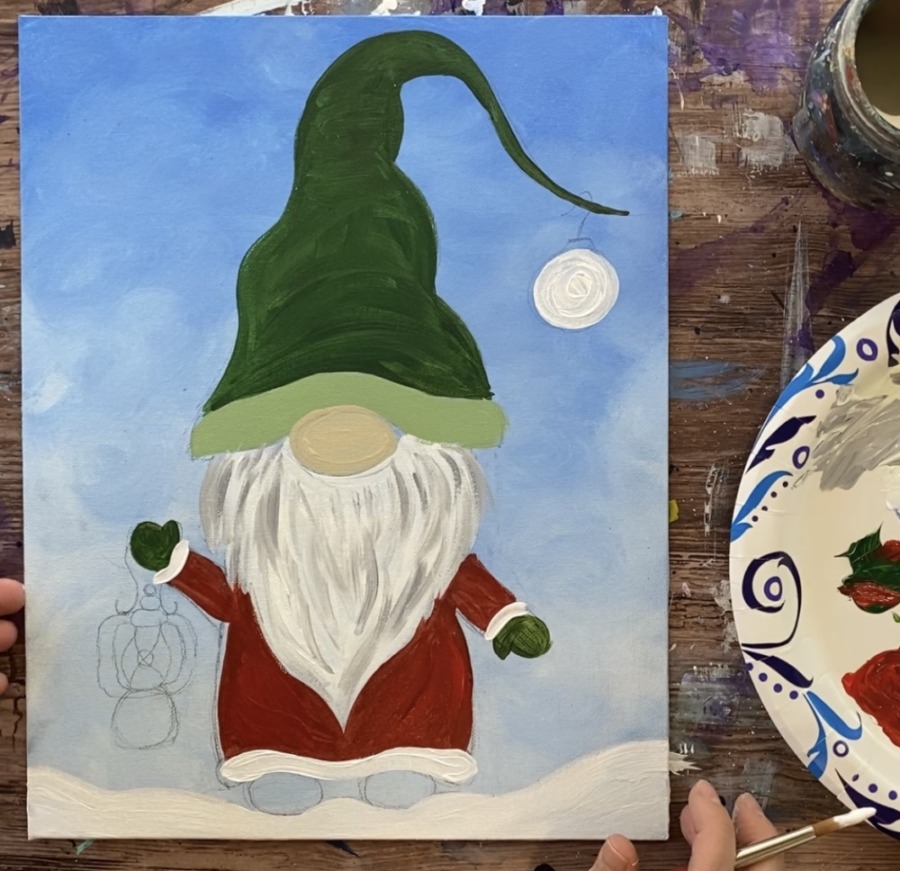
Then add some gray on the very bottom of the snow and blend it up. You can also add some gray under the shoes to make shadowing.
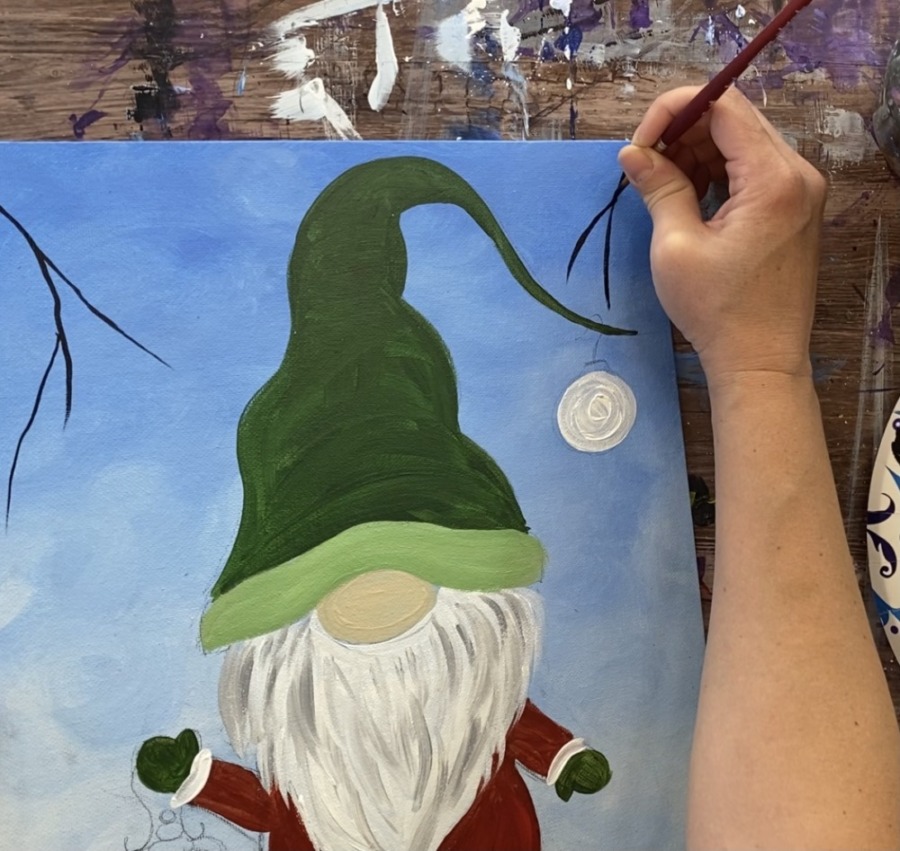
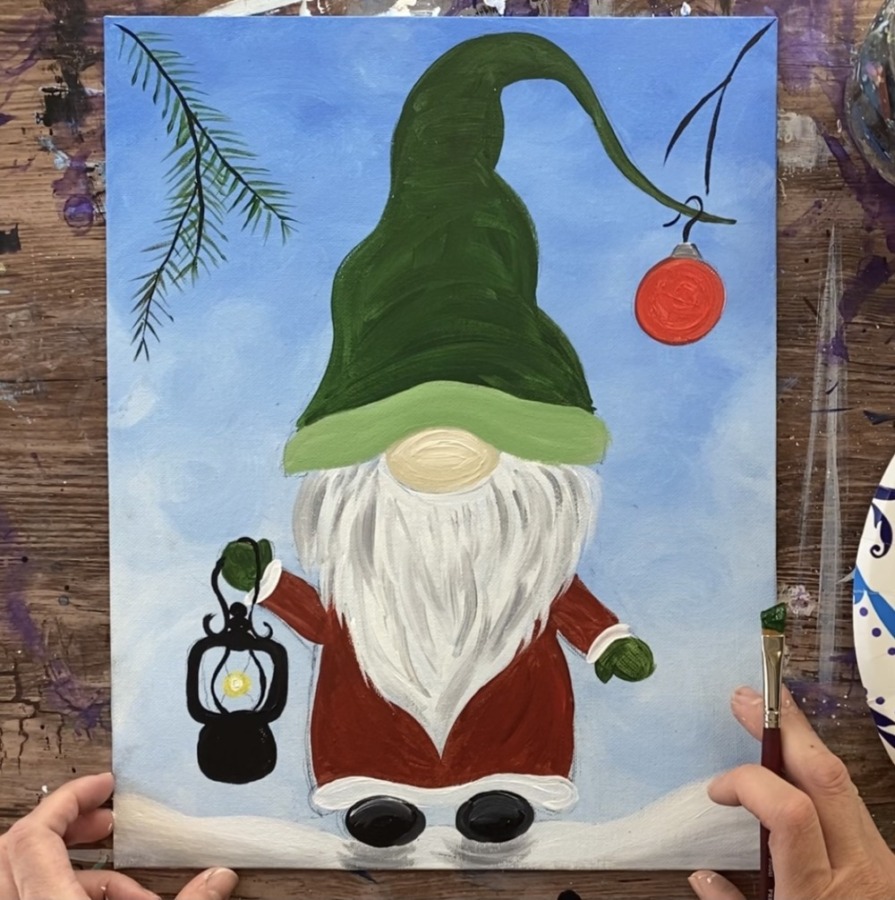
9. Paint the pine branches
Use a #4 round brush to paint the branches of the pine needles. I used mars black (slightly watered down for flow).
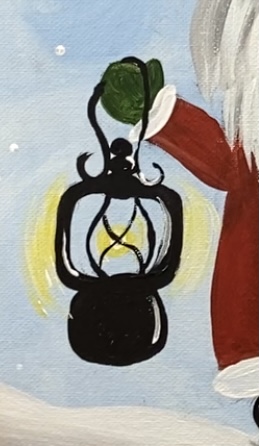
10. Paint the lantern
Paint the outer shape of the lantern with mars black. Use a small brush for this (I used a #4 round). You can also use a black paint pen for better control.
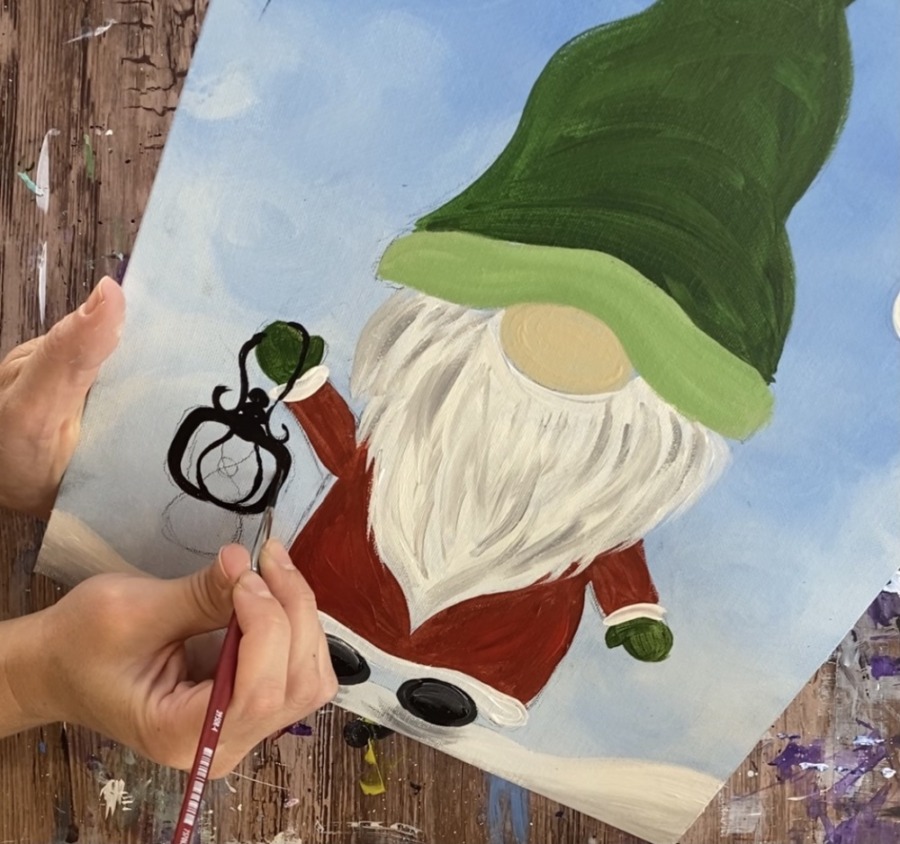
For the light in the middle of the lantern, I used my finger to stamp on a primary yellow “smudge”. Then I painted a white circle in the middle of it.
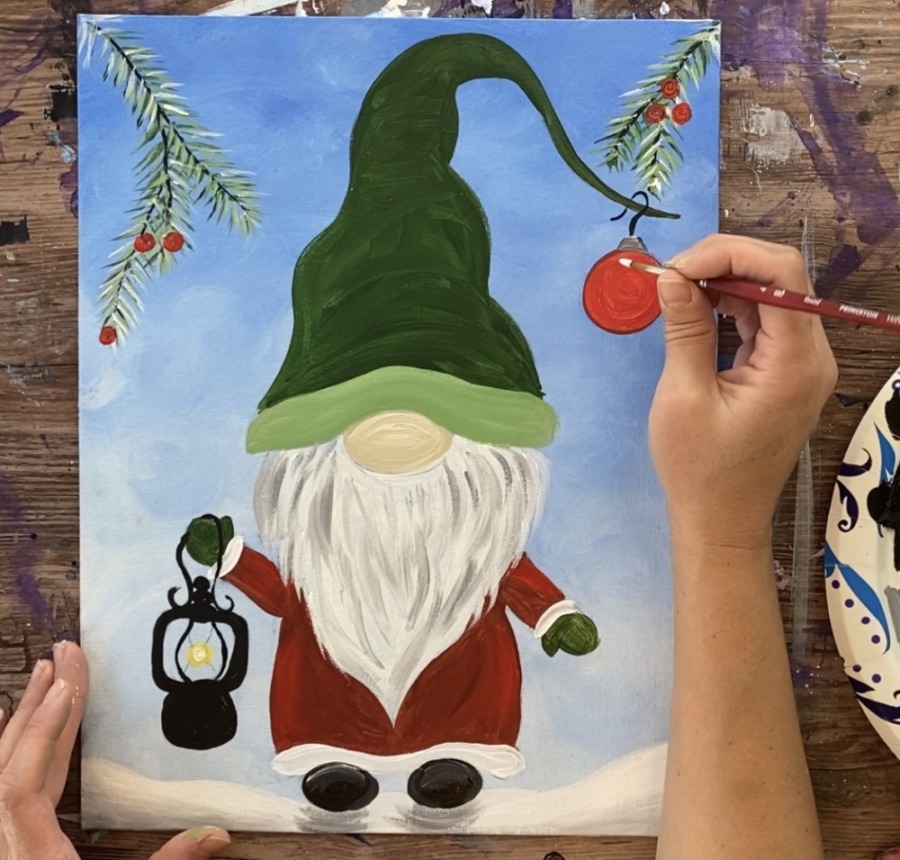
11. Paint the ornament Red
When the white on the ornament is dry, paint it red (or other color if you want).
12. Paint the pine needles, berries & ornament hook
To do the pine needles, I used my 3/8″ angle brush. You can also do this with a small round brush. Use hookers green and paint the angled pine needle lines pointing downwards.
Start at the tip of the branch and work your way upwards.

Then do a second layer over the dark green layer. Mix on your palette a lighter green (about 2 parts white, 3 parts green). Use the angle brush and paint more pine needles starting from the end of the branch and going up.
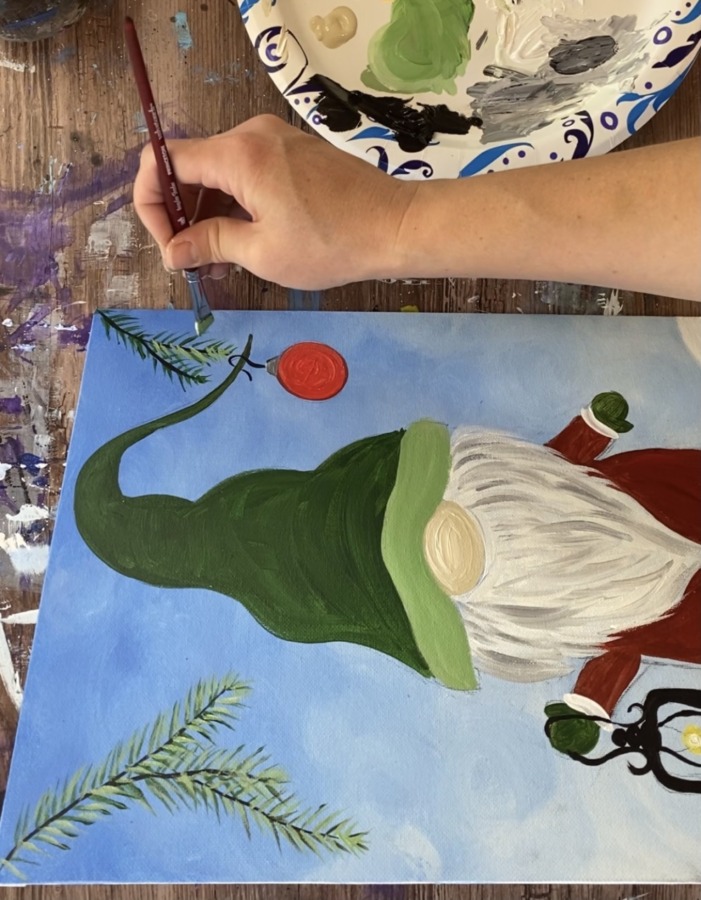
Then do a third layer of pine needles with just titanium white.
Use a round brush to paint the berries.
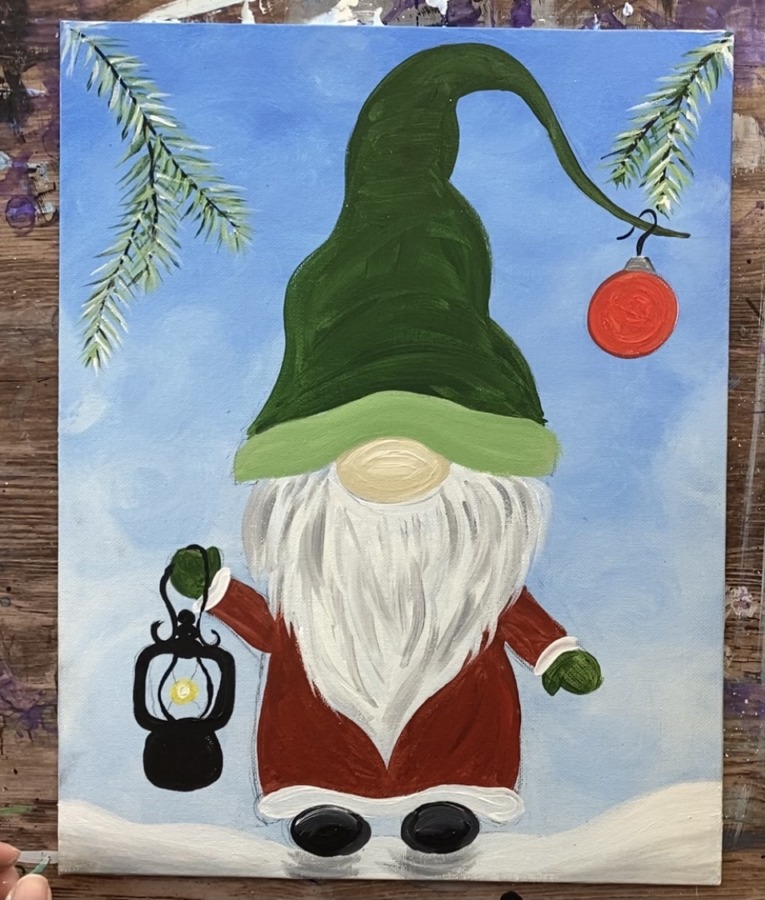
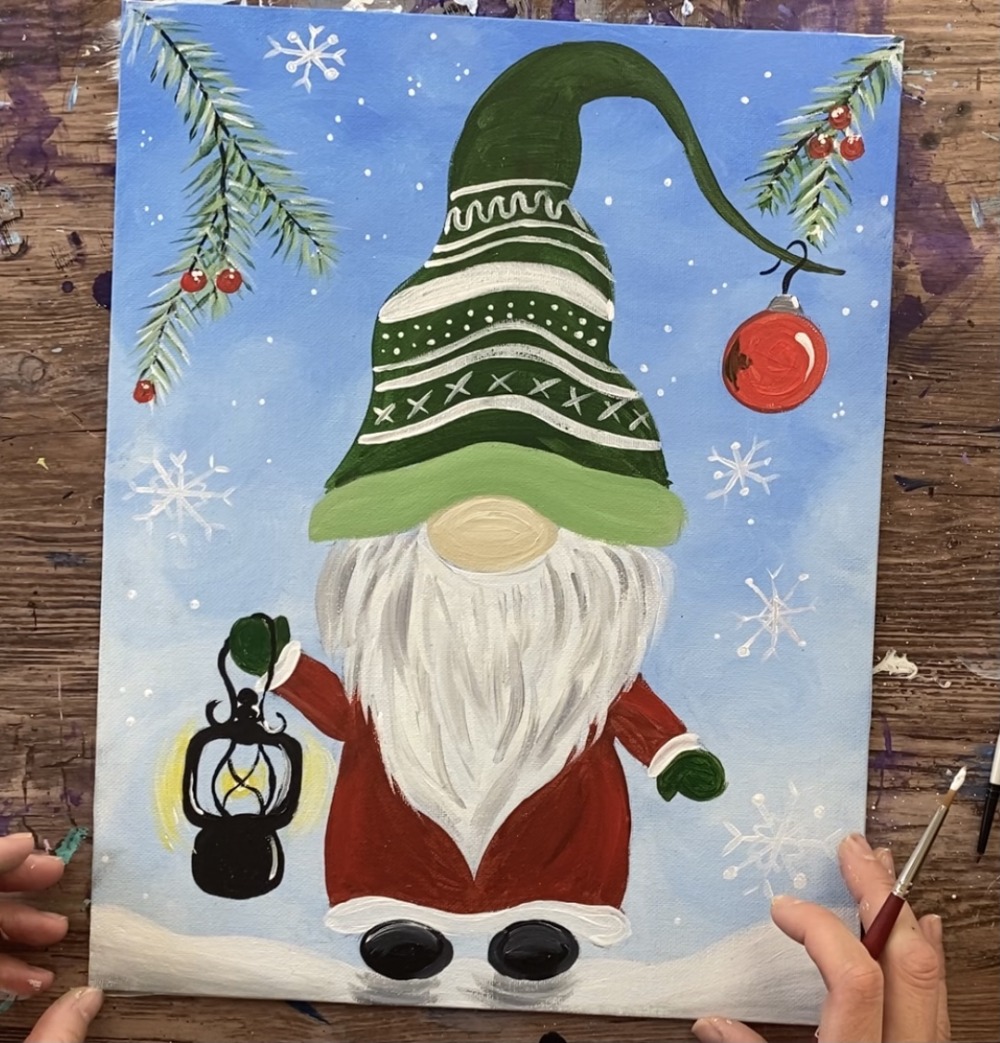
13. Paint snowflakes, frost & ornament highlight
Paint a white highlight on the right of the ornament. Add a few dots of frost on the berries. Then paint snowflakes.
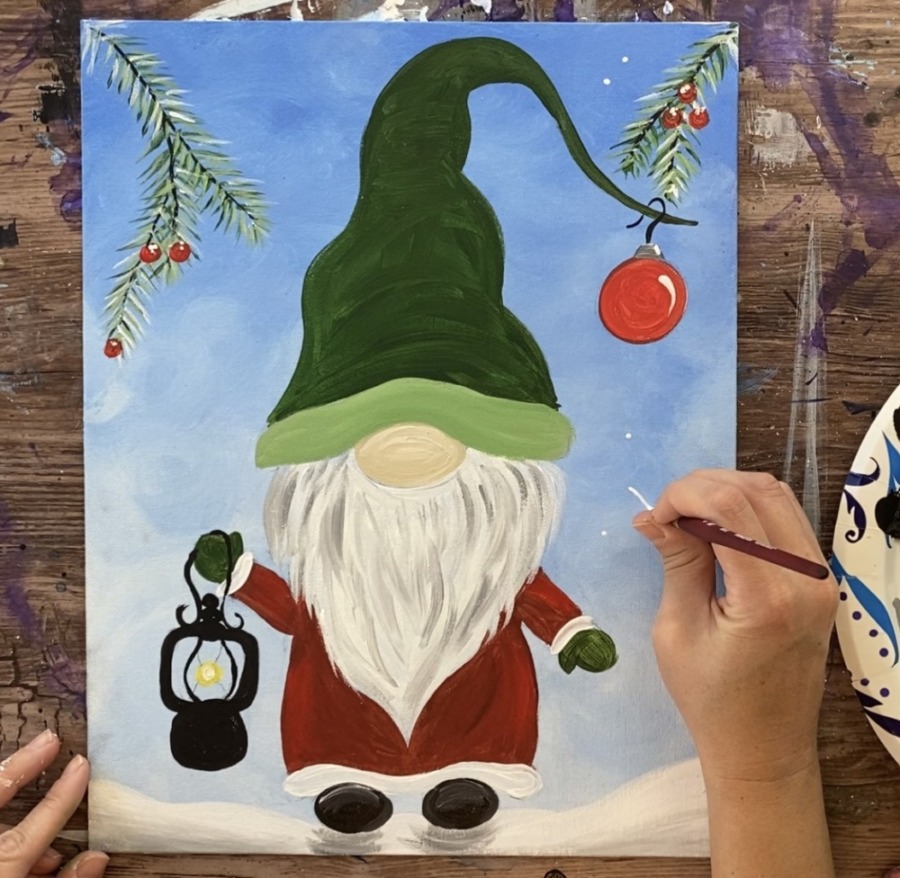
You can do different kinds of snowflakes all over the sky. Some larger, some smaller. You can also paint just dots all over the sky for snow.
I used mostly my 10/0 spotter brush for this step. If you have a white paint pen, it can be useful here too!
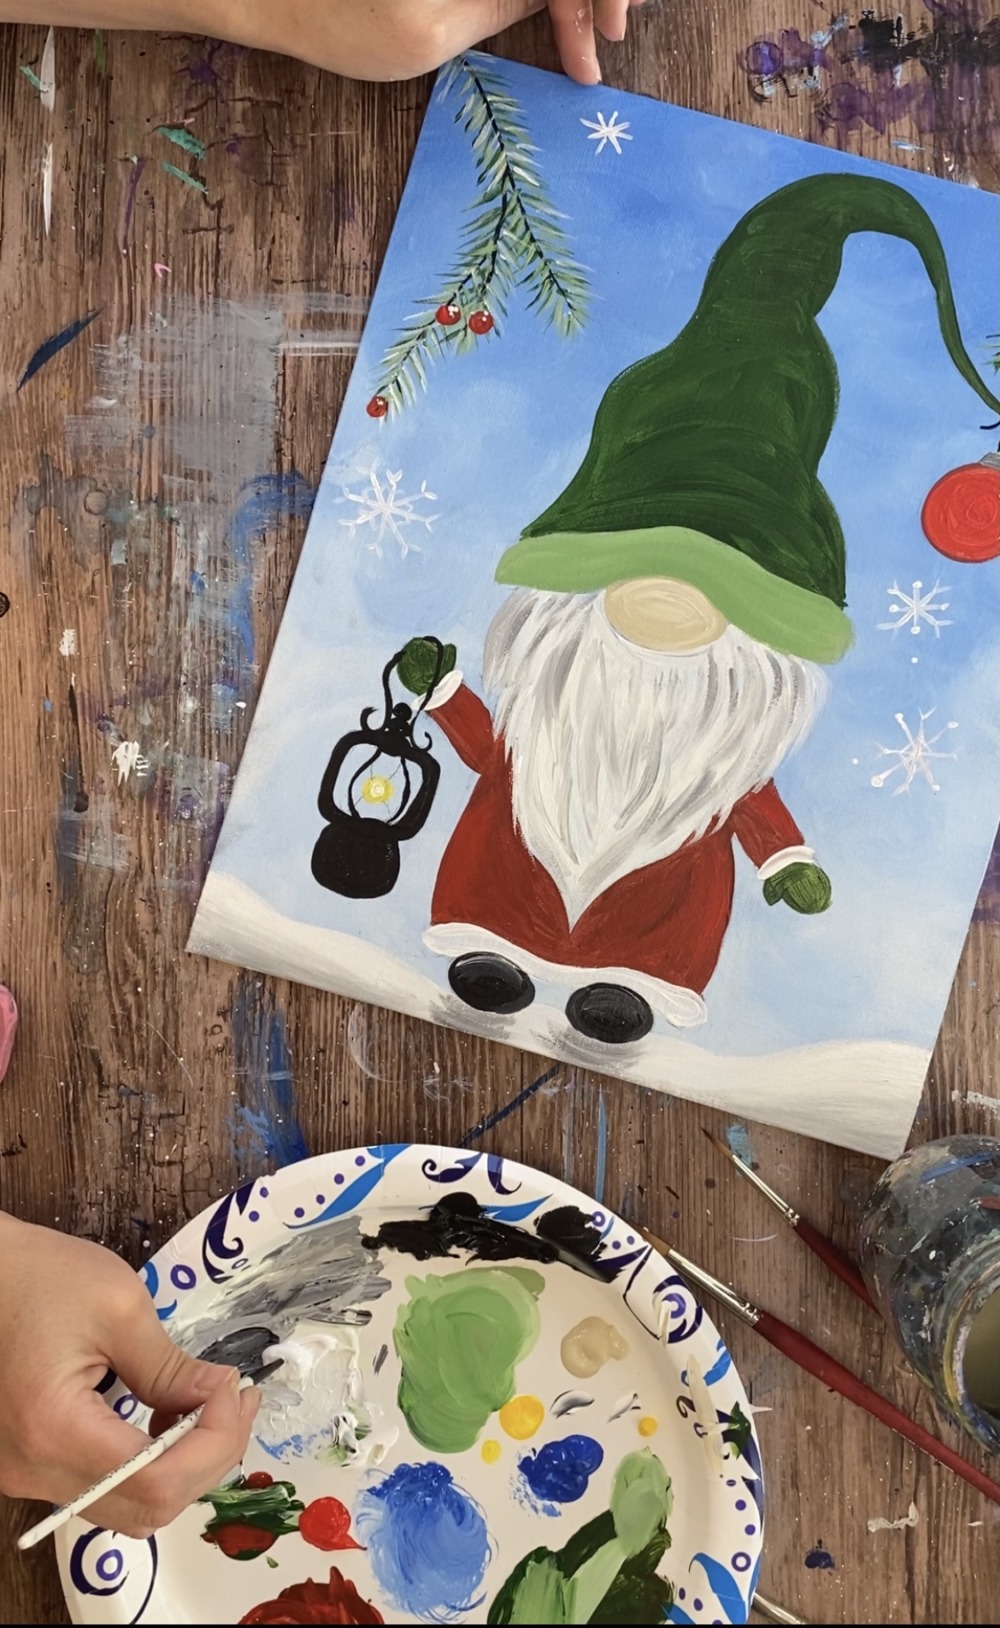
14. Paint details on lantern
Paint a few white highlights on the lantern. Then “dry brush” some yellow/white lines on the sides of the lantern to make it look like it is glowing.
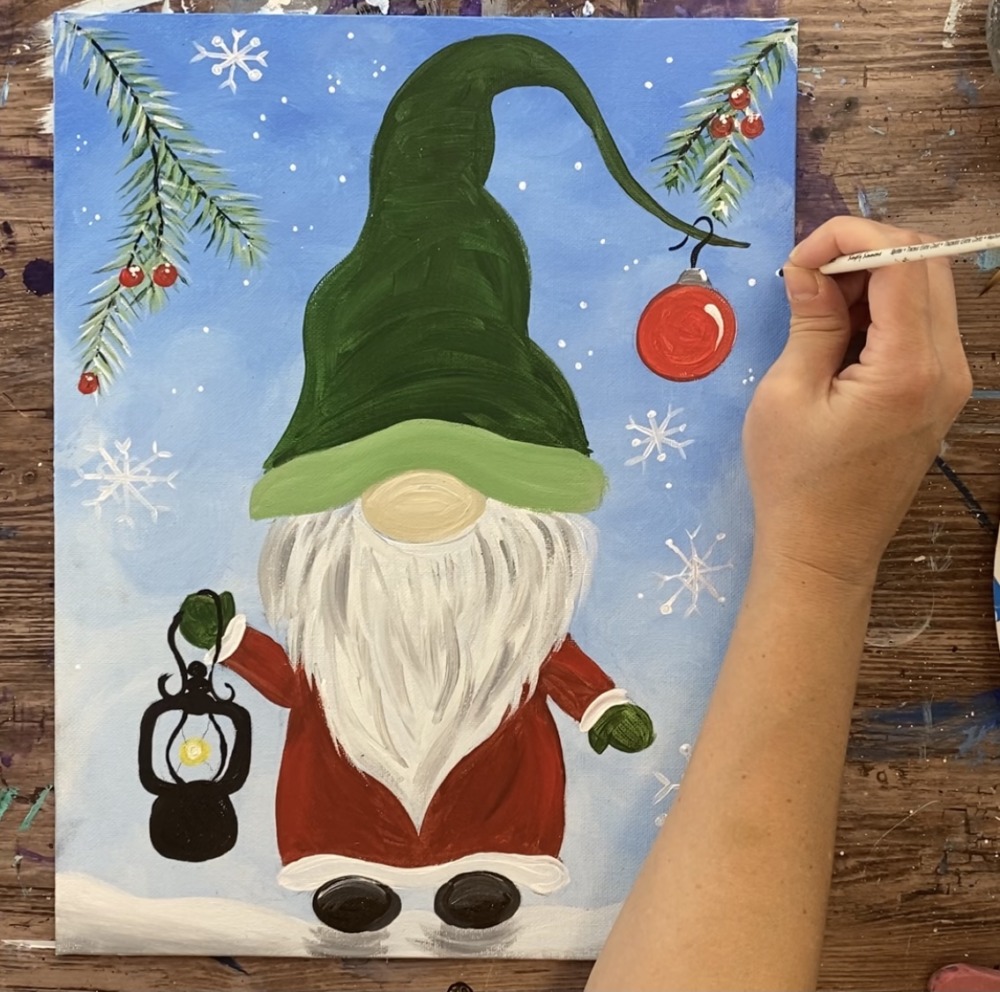
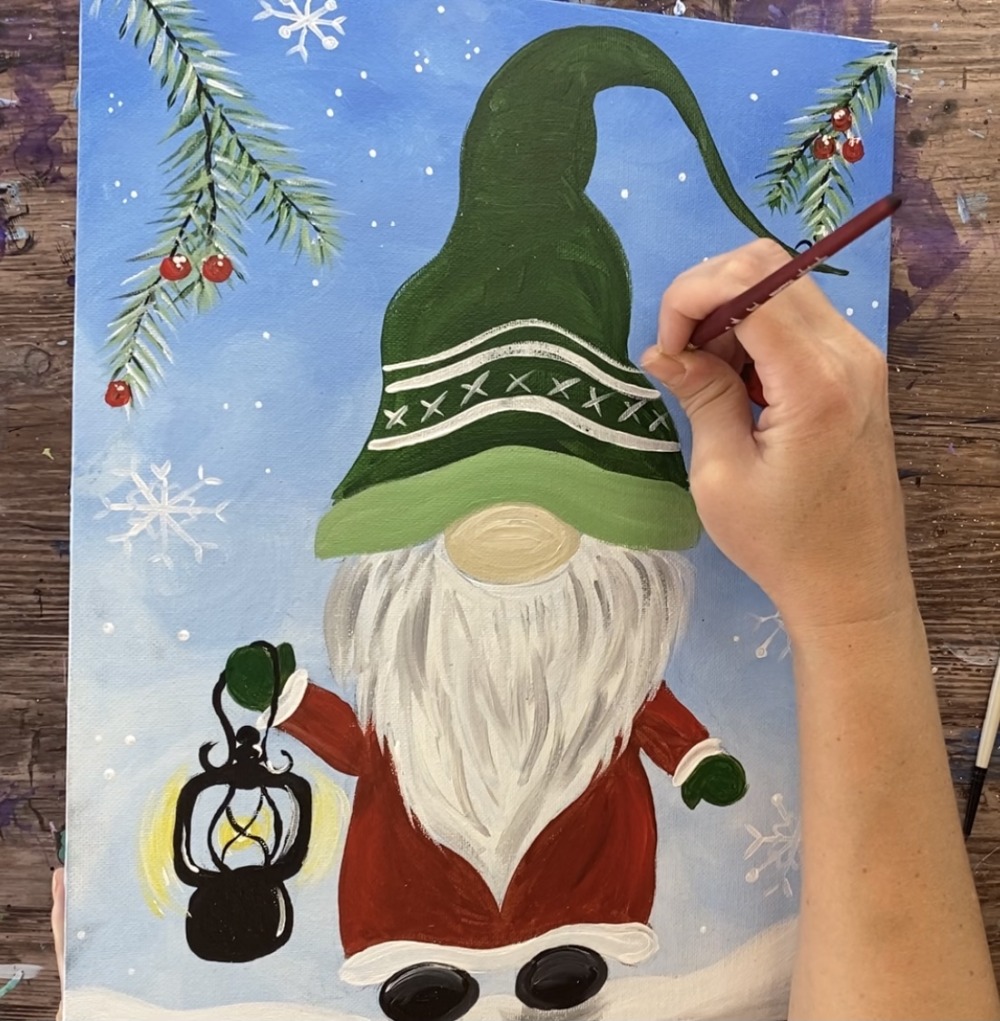
15. Paint designs on hat
These designs are optional but I think it gives his hat a fun festive Christmas Sweater look! I used a #4 round brush and titanium white to paint designs.
Lastly, I threw in a few last minute highlights on his nose, robe and shoes.

16. Add optional Snow-Tex!
Snow-tex is a texture medium that gives your painting 3D snow effect. I experimented with it a bit and found it useful to use a palette knife to apply the texture.
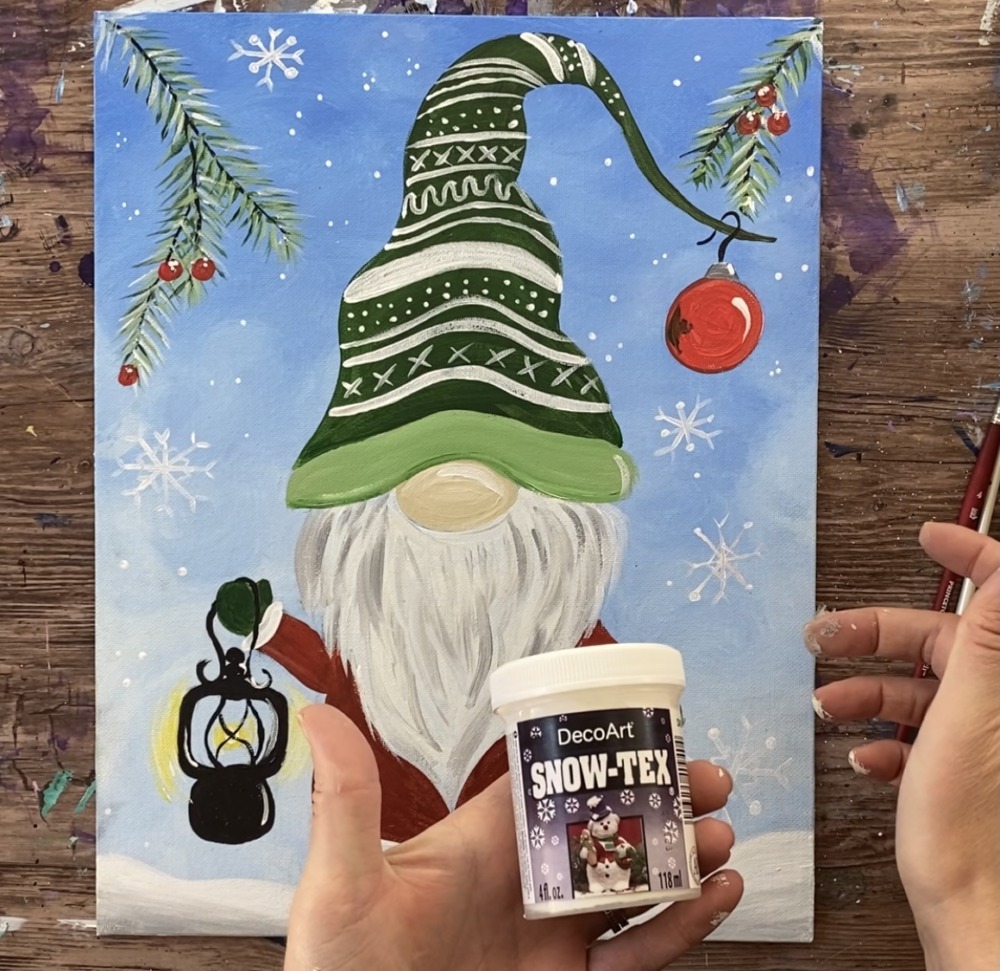
If you do not have a palette knife you can use any brush!
I added this on the bottom snow area and a little bit on the berries.
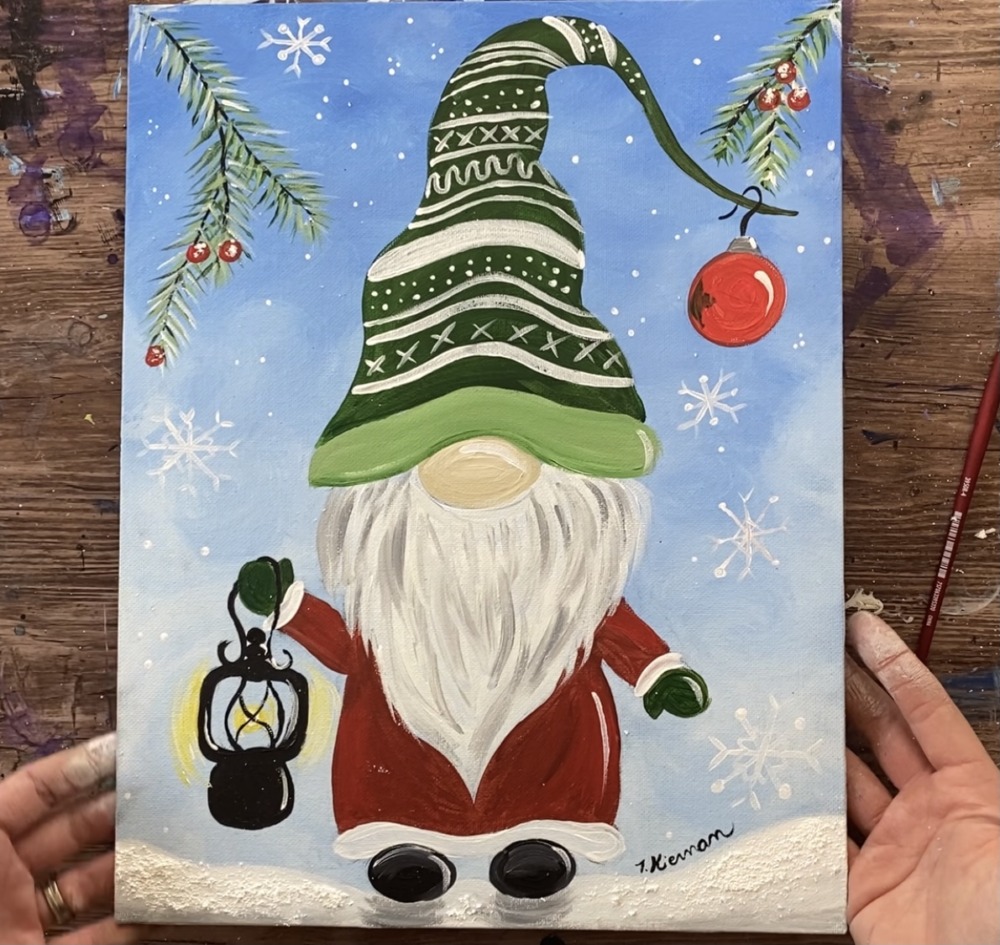
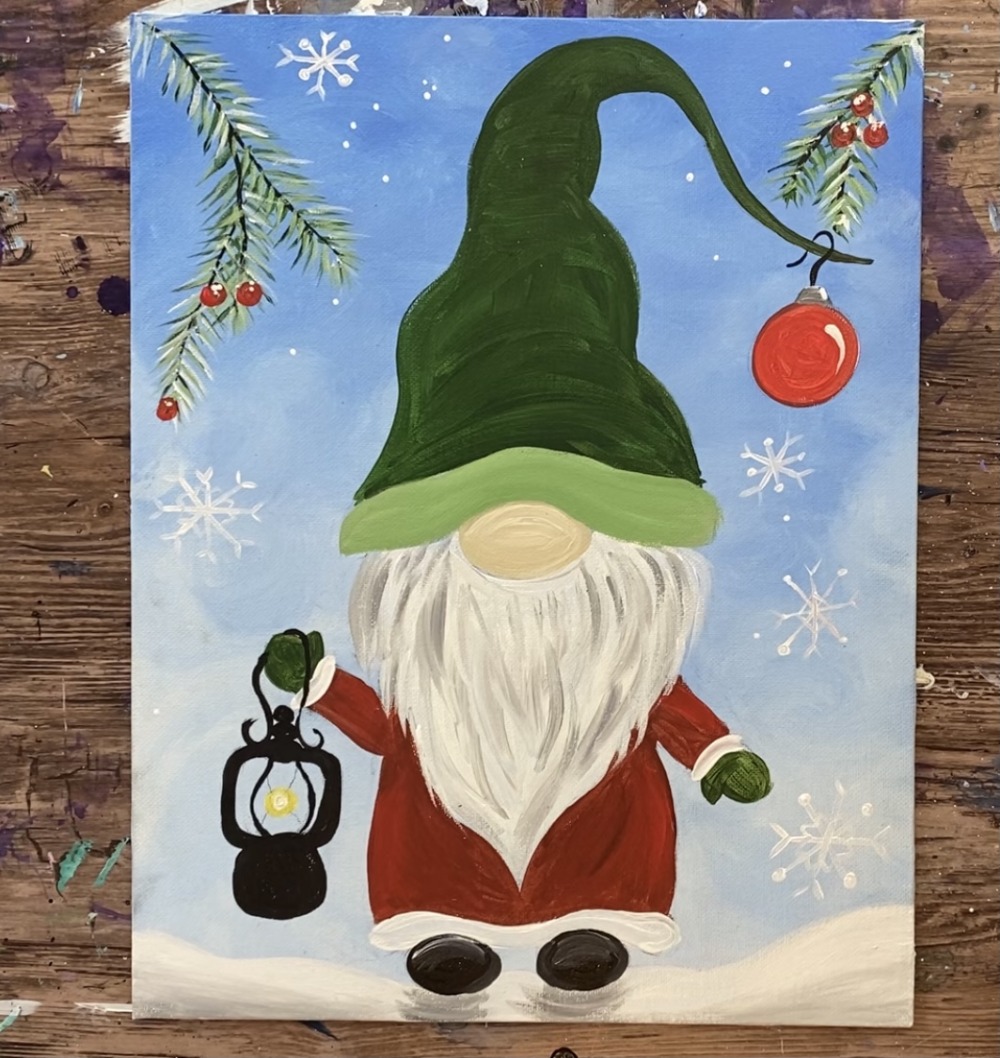
Finished!
Share Your Art Here!


Thank you for the tutorial and the traceable! I posted my painting on my blog. You can see the post here. https://2jackies.blogspot.com/2020/11/a-winter-gnome.html
Oh how awesome Jackie! I love how your gnome turned out!
So fun! I did this with my daughter tonight! Thank you!
You’re welcome!!
You’re welcome!
Thank you Tracie, I love your work and you make it easy for us to follow.
You’re welcome!!
Tracie I’ve enjoyed your tutorials step by step and feel I’ve accomplished two paintings can’t wait to do more watching you. Snowman on the beach, Christmas Gnome I just completed. Thank You..
You’re welcome Tammy!
Please do a spring and summer gnome. My daughter, grandson and I did the winter gnome together through FaceTime. A fun time together when we can’t be together due to COVID 19. Thank you for a fun time.
I definitely will! Thank you, I’m so glad you loved doing the winter one!
Thanks so much for the very helpful tutorial! This was my first painting with acrylic paints – so much fun! 🙂
Hello! I just started using your site and love it! Why does it seem like my acrylic paint won’t spread easily?
Hi Amanda! That’s a super common question! This kind of depends of what brand of paint you are using. A quick way to get your acrylics to spread more is to add a bit of water to them.
I just started acrylic painting, and love it! I’ve used your tutorials on the fall leaves, red barn and now I’m doing the gnome one. They’re so easy to follow for a beginner, so thanks for that. It’s a relaxing craft I can do, and it’s going to be great for this winter. Thanks again for doing these. Also, how do I know which of your paintings are the newest ones added?
Hi Donna! Thanks so much! The newest ones are on the homepage. In the gallery, it would be the first one.