

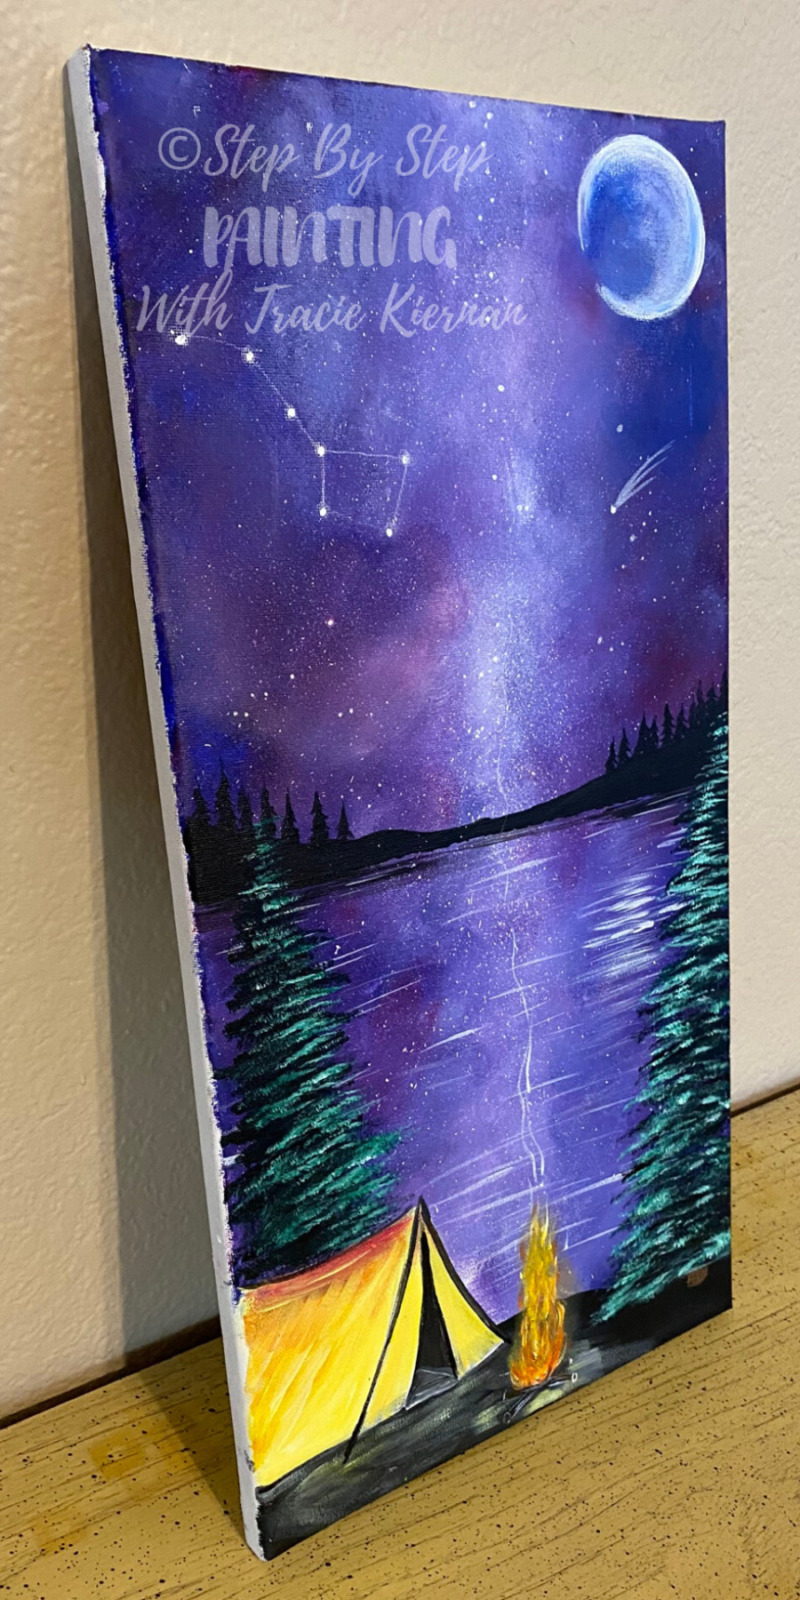
Learn How To Paint “Galaxy Campsite”
Would you like to save this?
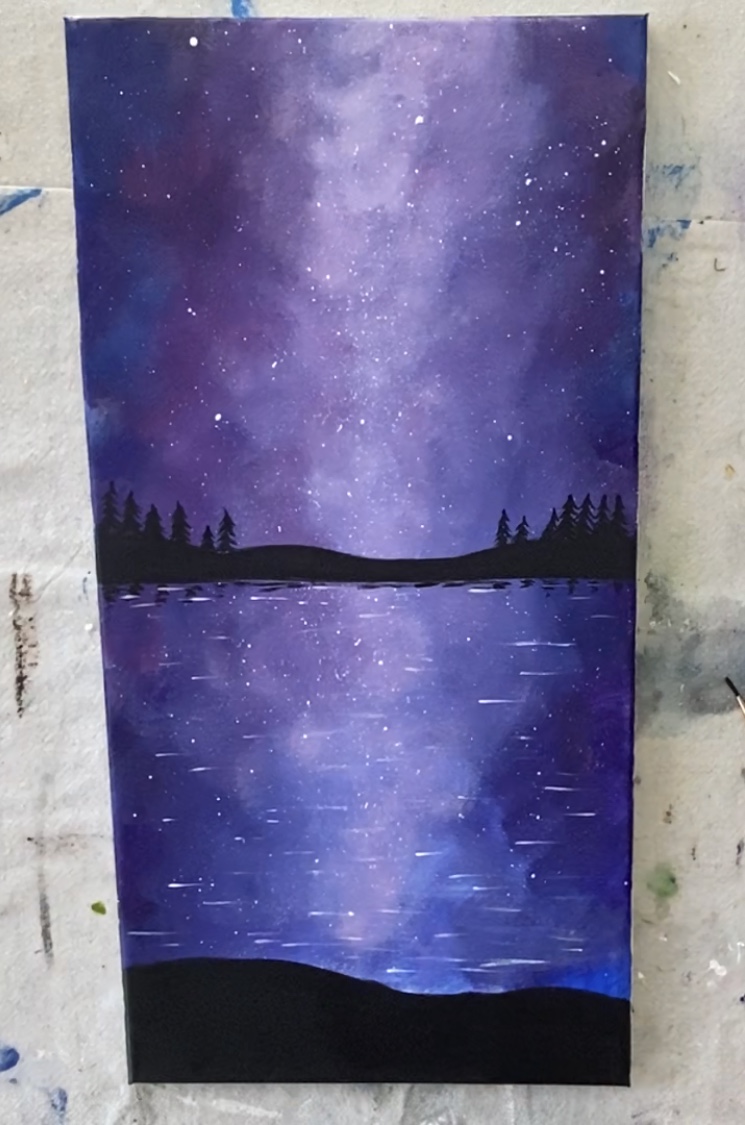
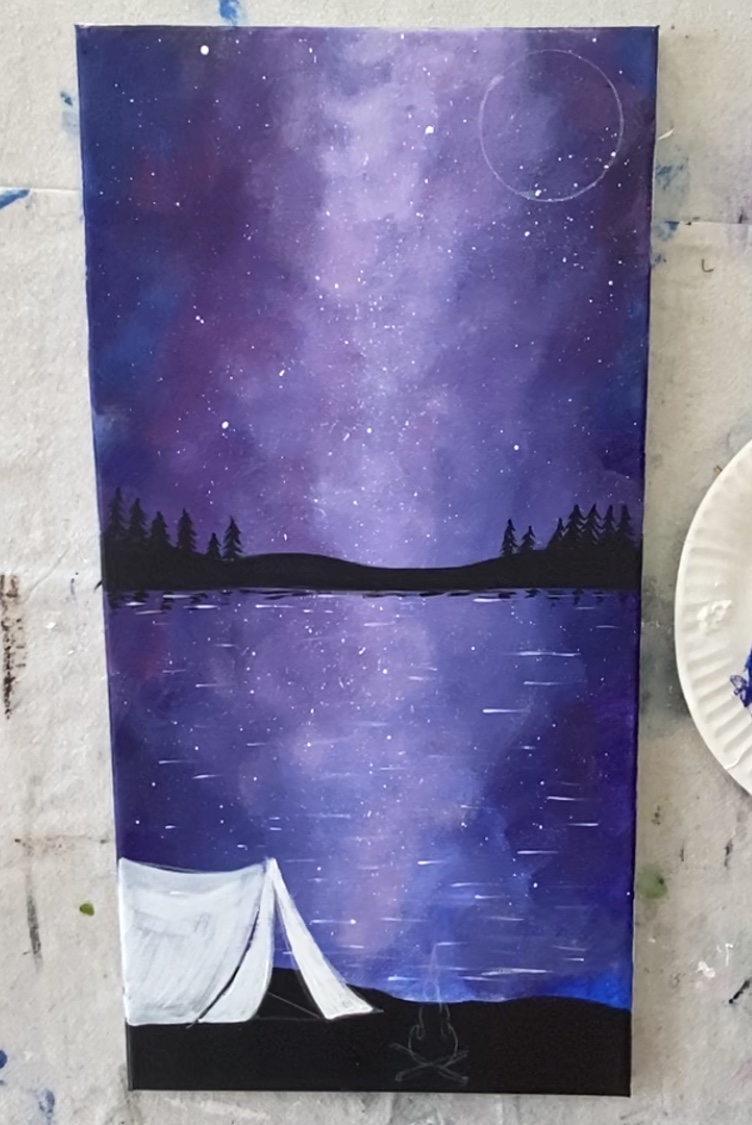
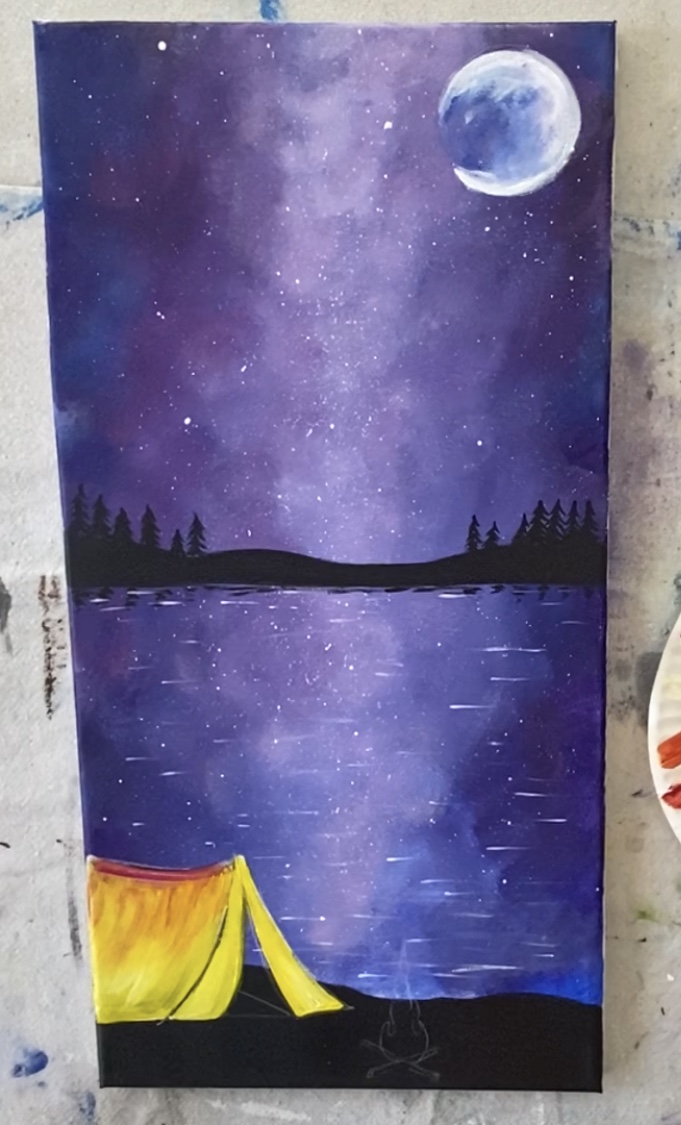
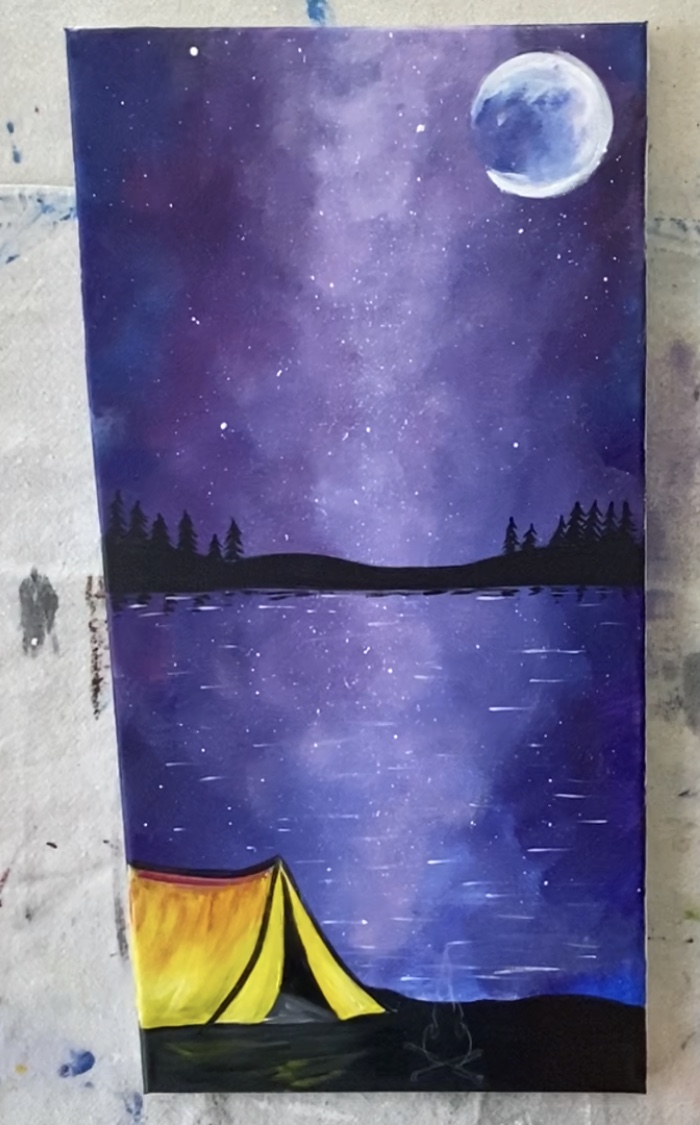
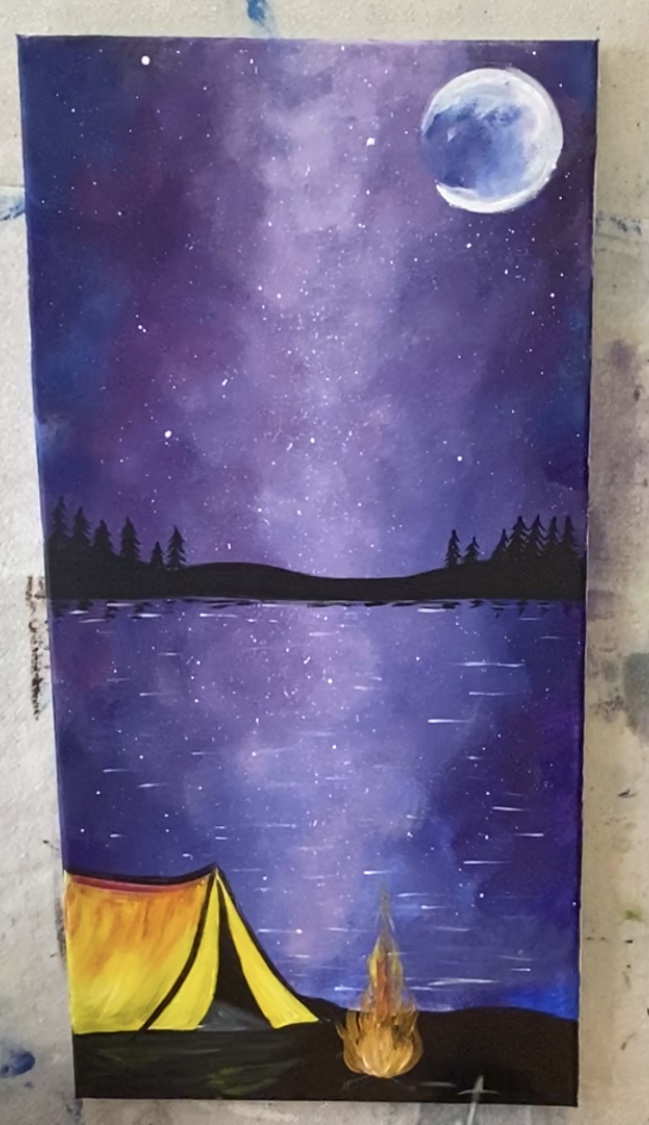
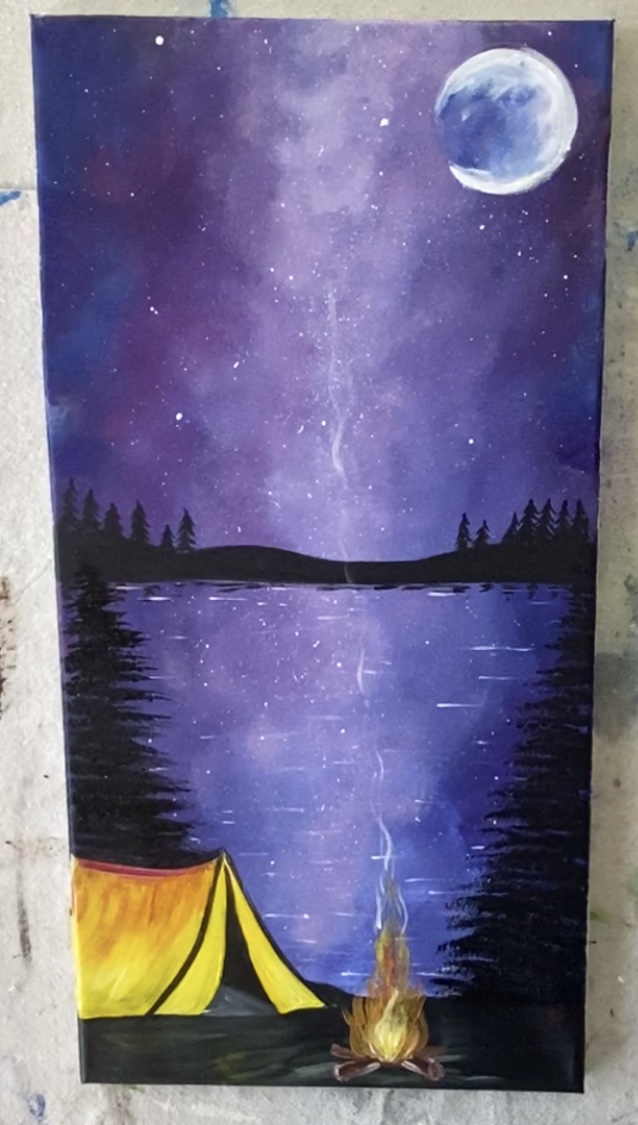
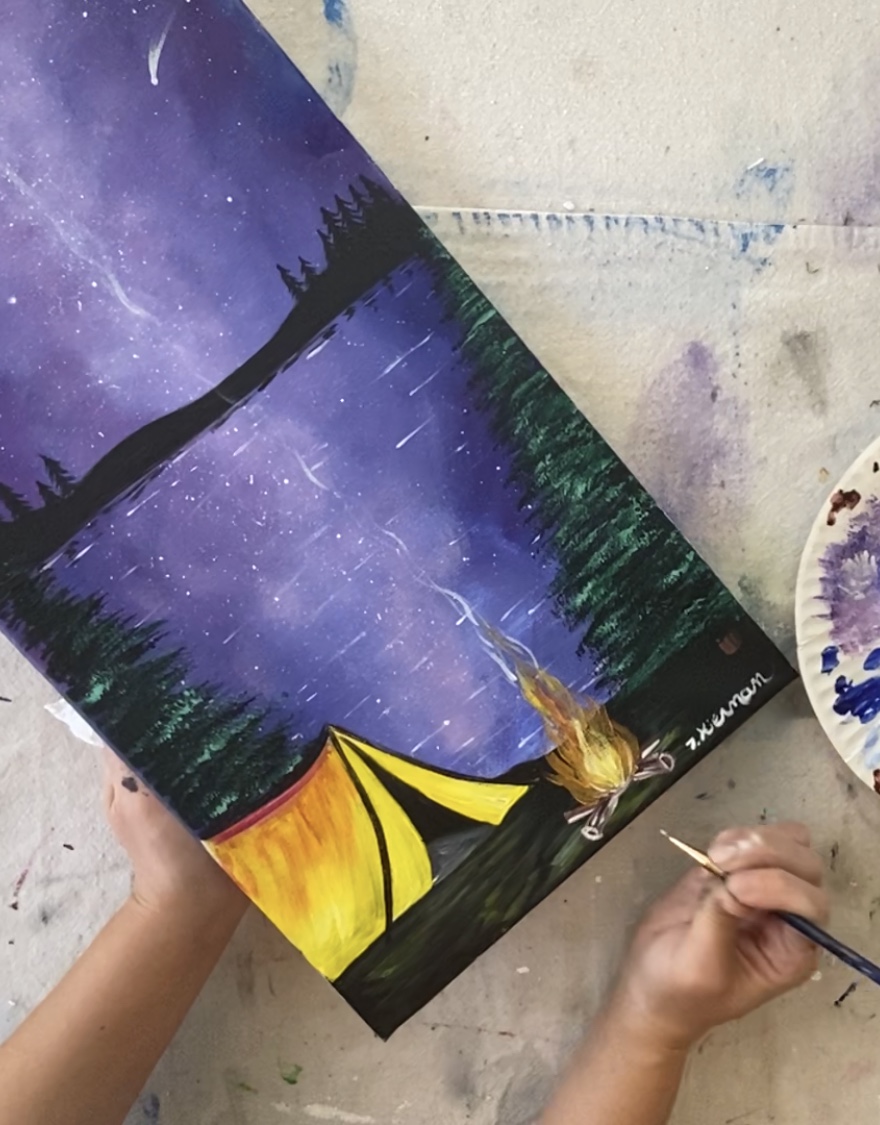
It’s no secret that I love to do galaxy, space, moon, and camping paintings! This one pretty much combines them all together.
I don’t usually describe underlying meanings in my paintings. However, this one does have something special!
When I painted it, I had this image in my mind of a galaxy reflecting on a big lake! Then I painted that image and found that the painting was very dark. What could I put in it to brighten the painting up?
Then I added a glowing campfire and a bright tent! I think this painting represents a time of darkness. Yet in that time of darkness there is still light and beauty left in this world. Be that light! Find that beauty.
Any how, I am so thrilled to teach you this painting! This was done on one of those 10×20 size canvases.
I grabbed a few of these at Michael’s a few months ago but had no idea what to paint on them! It’s kind of an odd size because your painting composition either has to be very vertical or a panoramic scene.

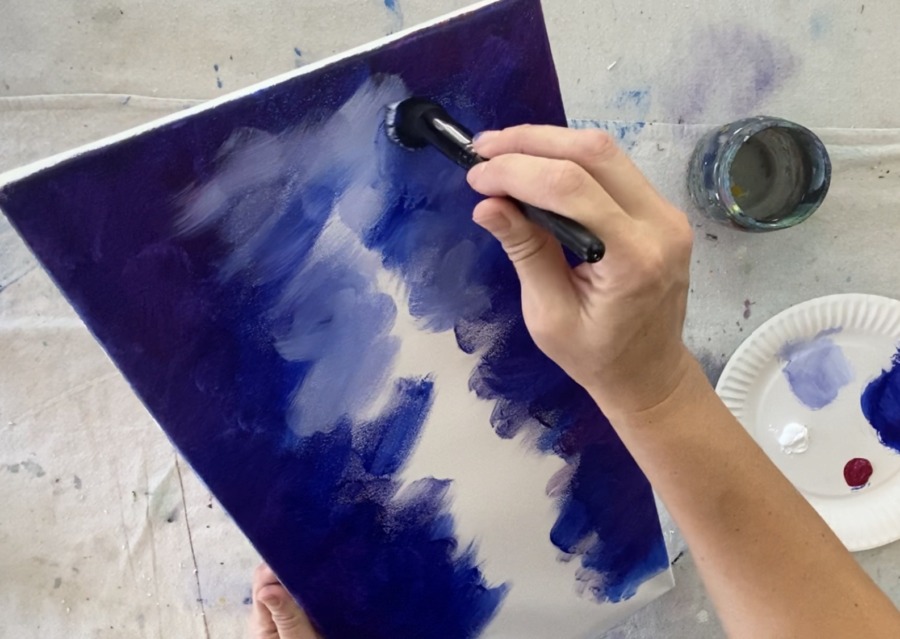
And about that galaxy! I actually used a makeup brush to paint it! It is one of those elf brand makeup blender brushes, I will link to it here. You can, however, get a round mop brush designed for acrylic painting. This kind of brush makes it easy to blend paint and apply it to such a large surface.
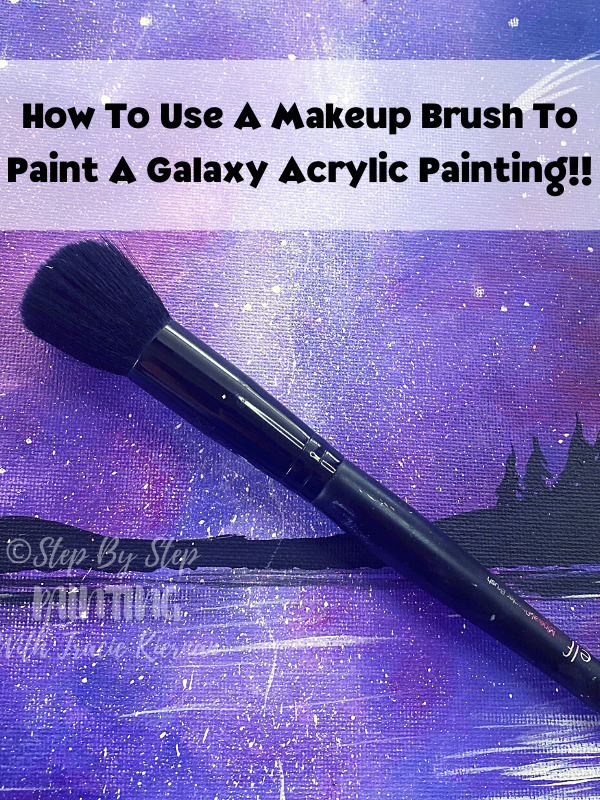
I have done a few other galaxy tutorials in the past, however, those were with sponges. So if the sponge technique never worked well for you, I encourage you to try it with this makeup/blending brush!
Enjoy and happy painting!

Materials
Galaxy Campsite Acrylic Painting Tutorial

A galaxy reflecting on a lake with a glowing tent and campfire. Learn how to create this beautiful camping theme painting with acrylic on canvas!
Materials
- 10 x 20 Canvas
- Acrylic Paint
- Brushes
- White Chalk Pencil (or regular chalk)
- Toothbrush for splatter painting
Colors
- Titanium White
- Mars Black
- Cad Orange Hue (just a tiny bit)
- Quinacridone Magenta
- Ultramarine Blue
- Deep Green Permanent
- Cad Yellow Medium
- Burnt Umber (just a tiny bit)
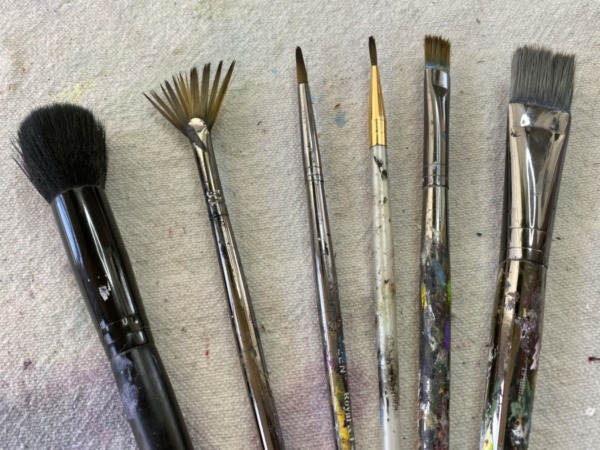
Brushes
- Makeup Blending Brush (for galaxy)
- 3/4 Flat
- 2 Round
- Toothbrush (for splatter star effect)
- 4 Bright
- Fan Brush (I used Zen #2)
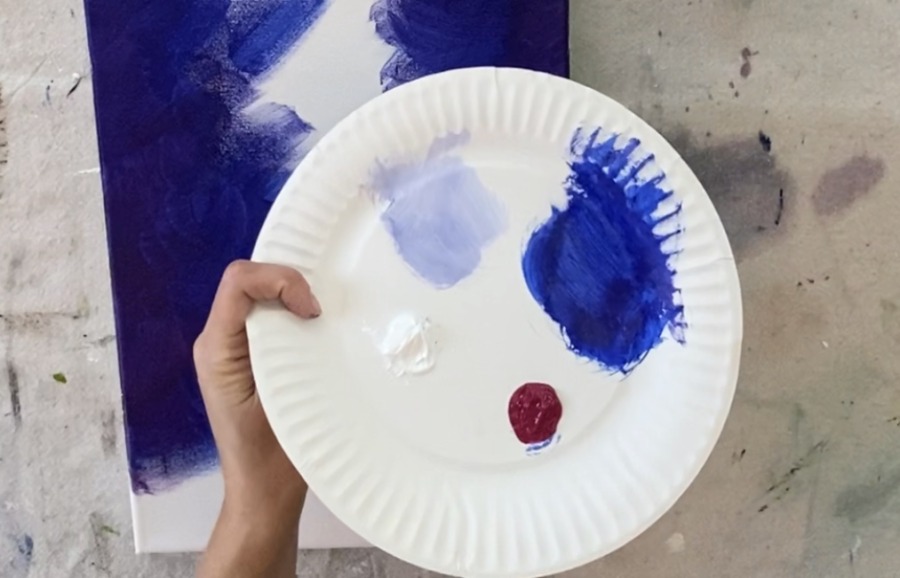
Color Palette

Brushes
I used a plethora of brushes for this! If you want to condense this, you can omit one of the flats and one of the round brushes. Also, you may want to “brush up” on your fan brush trees real quick because I used that technique.
Directions At A Glance

Video
Step By Step Directions
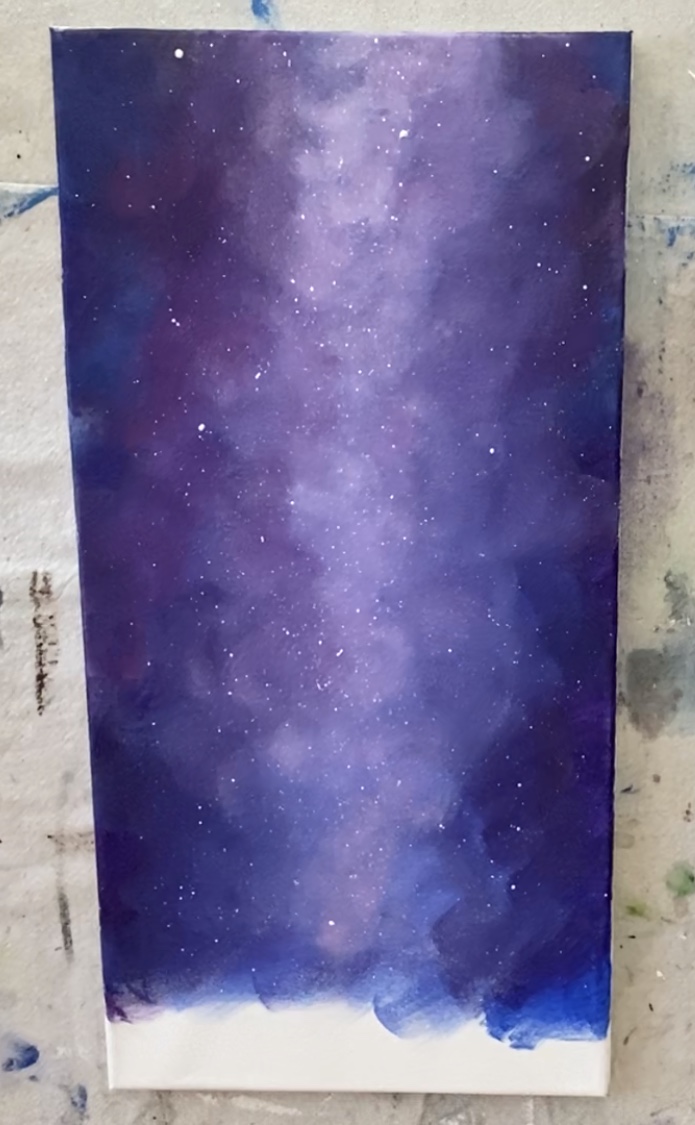
1. Paint the galaxy
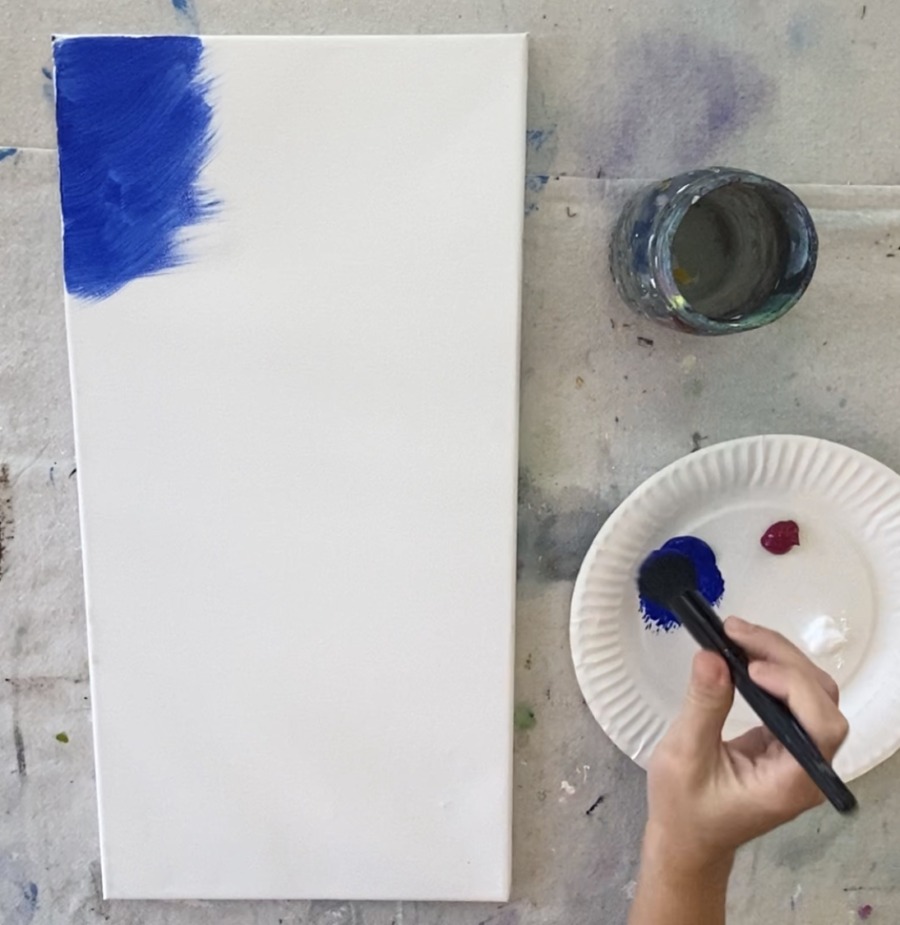
First I loaded my blending brush in water and patted it dry. You do not want a dripping wet brush, just slightly damp. Be careful because this brush can hold a lot of water!
Then load it in ultramarine blue. When you do your strokes, make them short and angular. Paint just the far edges of the canvas leaving the middle completely blank (that’s where the bright part of the galaxy will be).
Also realize that the sky and lake are the same in this painting!
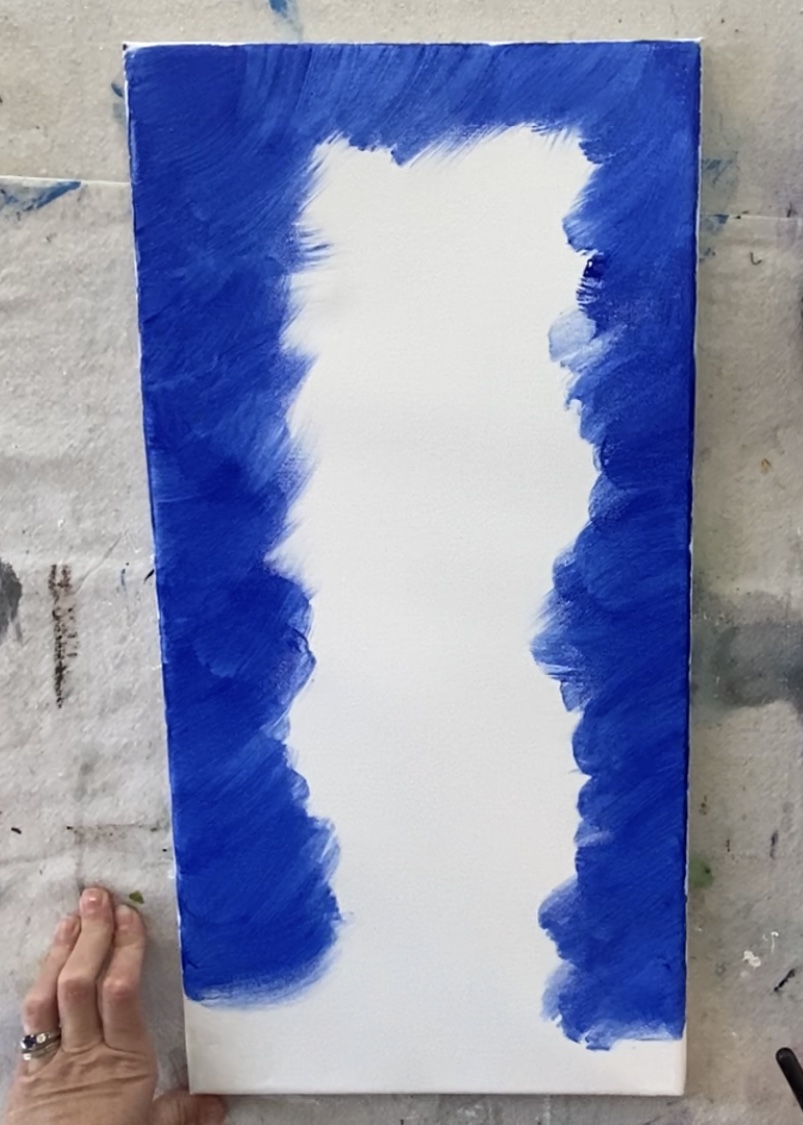
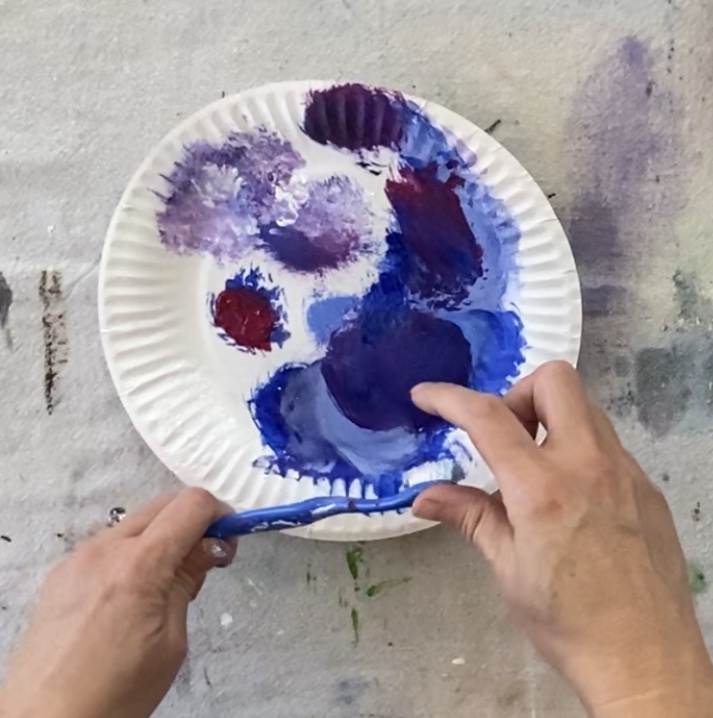
Then load your brush in the quinacridone magenta. Add the magenta over the blue area so it blends to a deep purple color. (OR if you prefer – mix the ultramarine blue and the quinacridone magenta on your palette so the two mix together to a purple).

You don’t need to cover the blue, just blend the magenta into it. When you do your strokes, do short little “X” shaped strokes. You can also do circular strokes or a combo of the two. The nice thing about this brush is it easily blends your strokes to look soft!
Remember to keep the very center blank! The very bottom I kept blank because I knew that is where my ground will be.
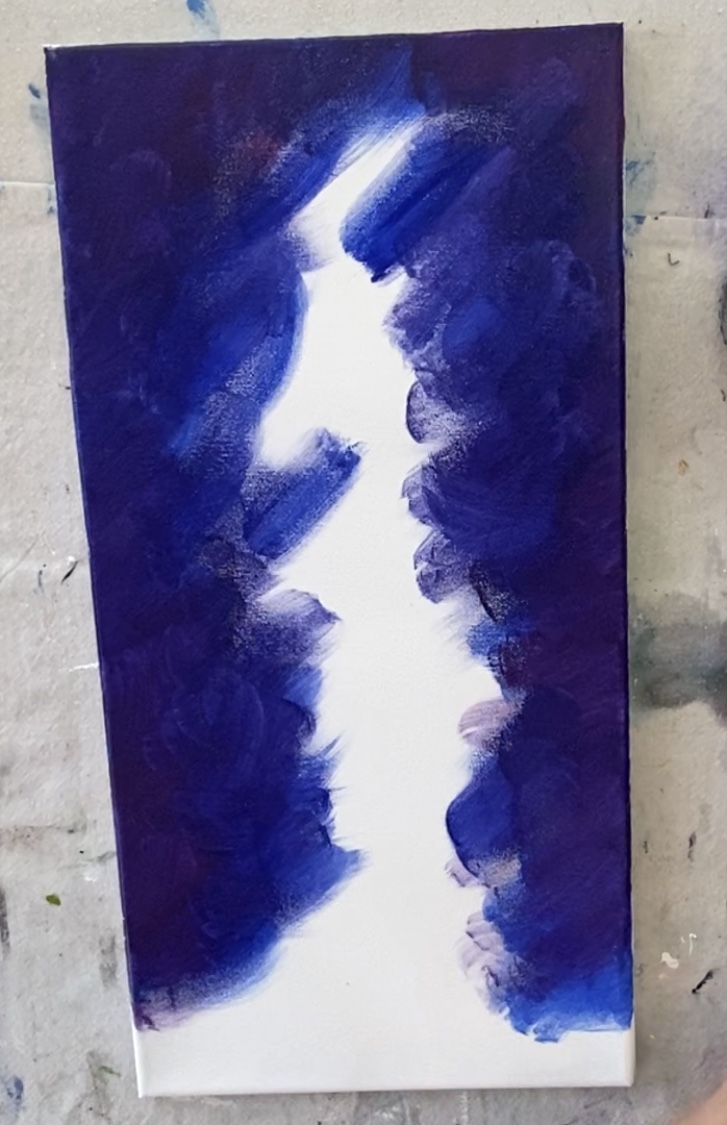
Then on your palette, mix blue and white together to make a light blue.
Apply that light blue to the middle area! You really need to work that blending brush now! Keep adding that light blue to the middle and blending it out into the dark area. Don’t put too much light blue in the dark area.
It’s going to look like a big light blue blob in the middle of your painting but keep going!
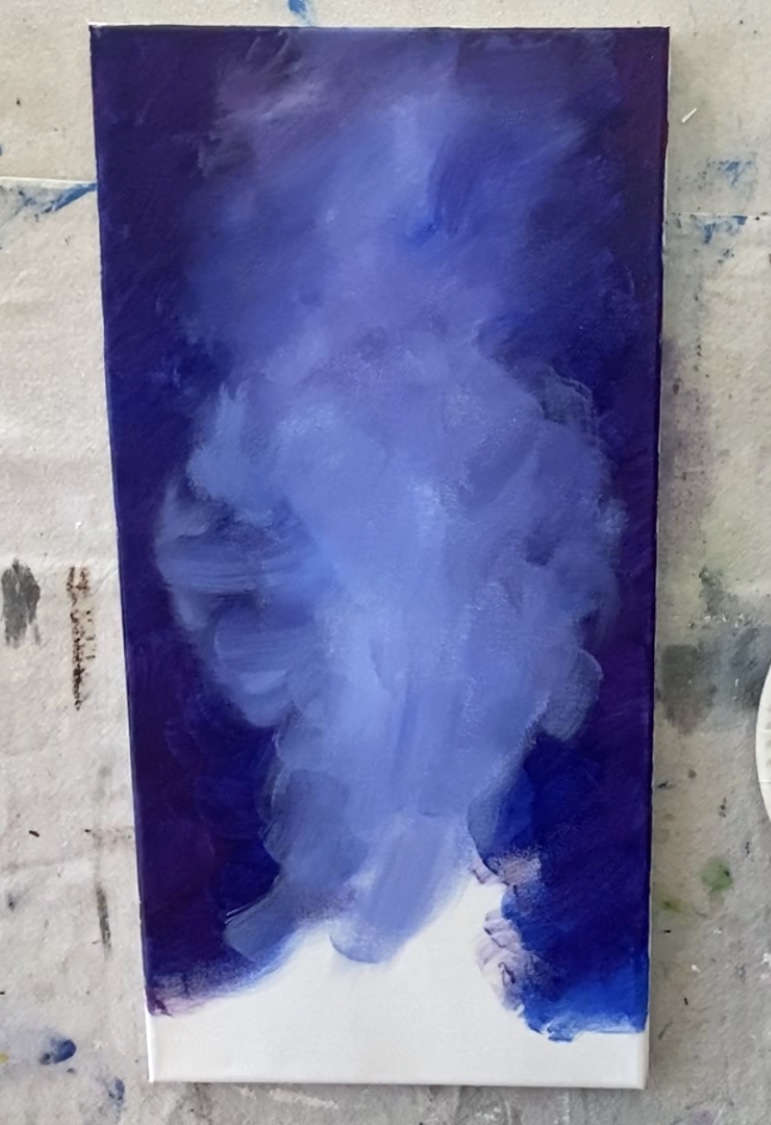
At no point did I rinse my blender brush. Then I added some more magenta and blue in there but kept the middle part lightest.

And I got even closer to that middle!
Then I did more light blue in the middle and blended it back out. Circular strokes with your blending brush will give you that cloud look in the sky.
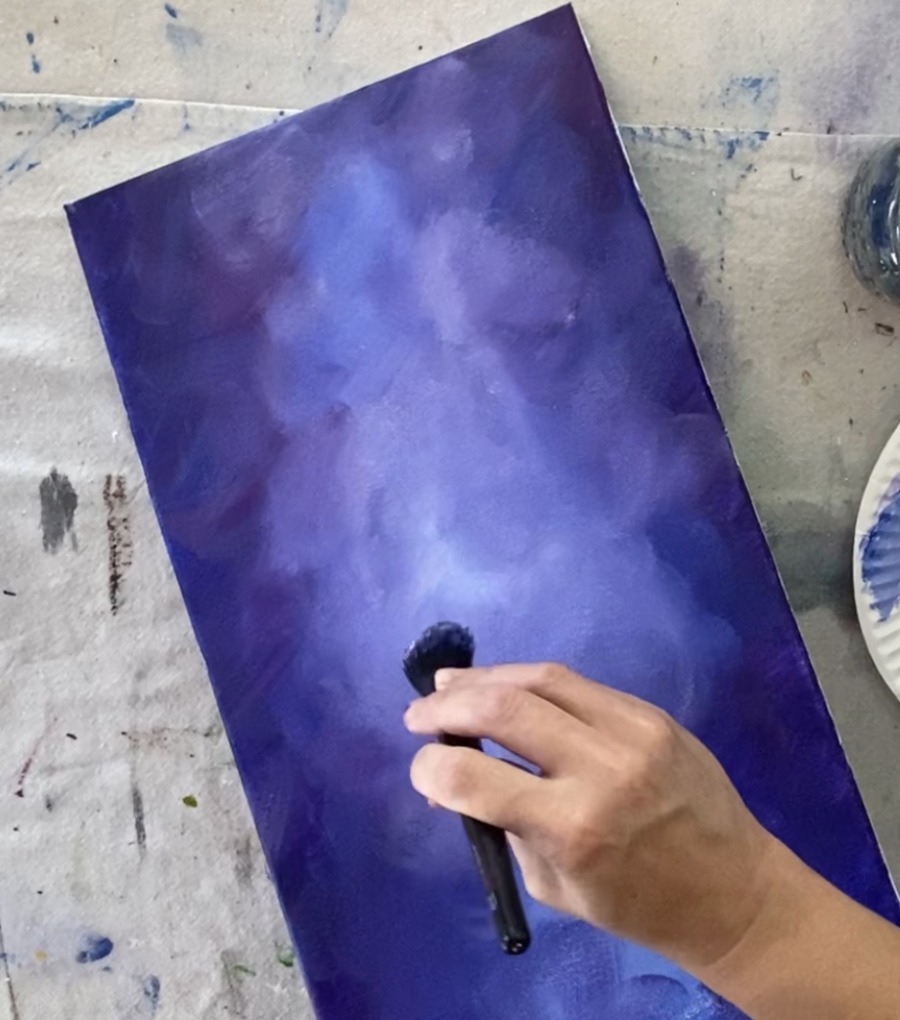
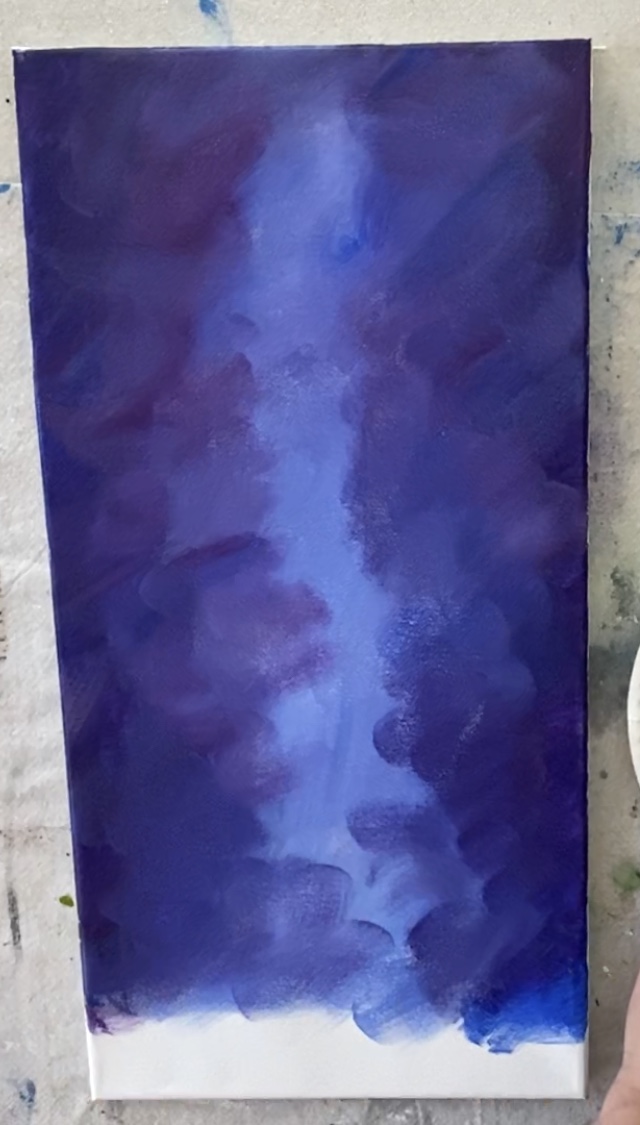
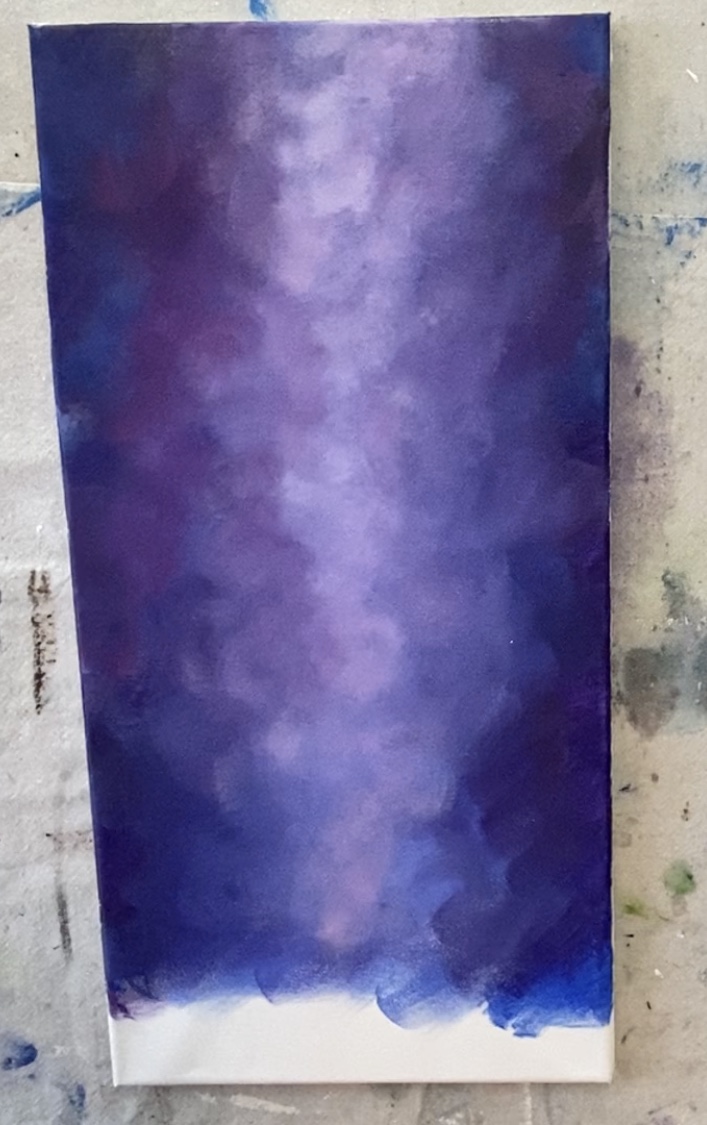
This looks good pictured below! But I wanted more purple in my sky so I added more of that magenta to my brush and did more circular strokes. Remember to keep the middle the lightest!
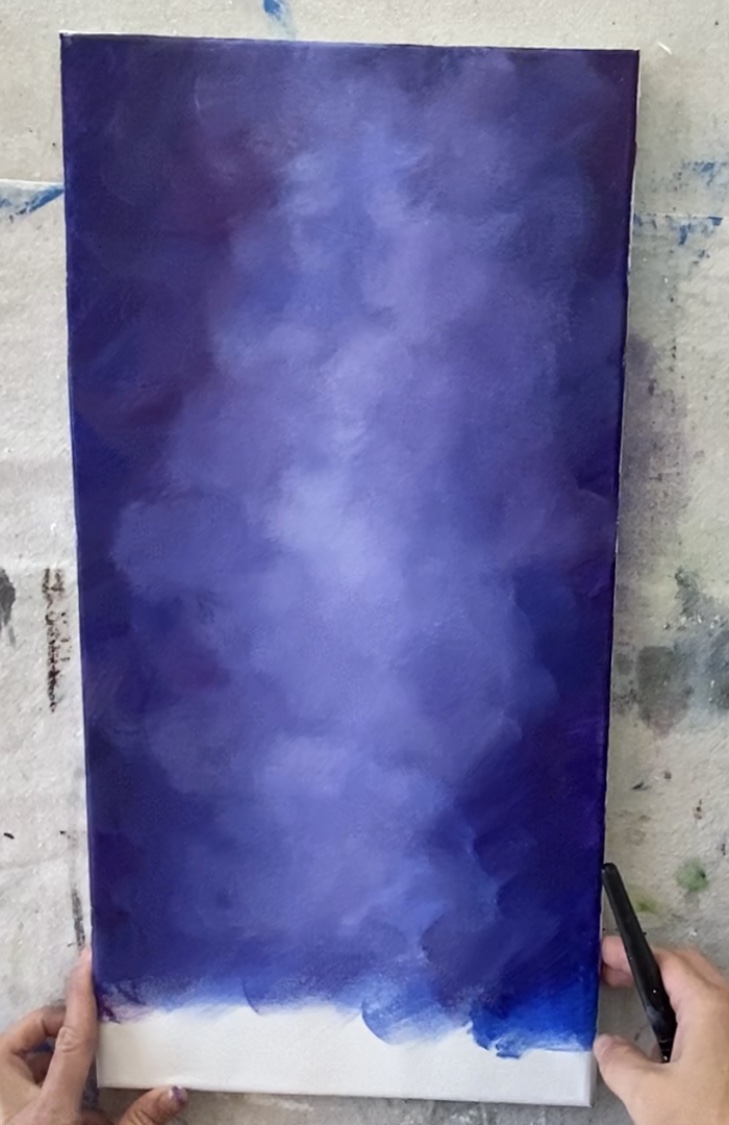
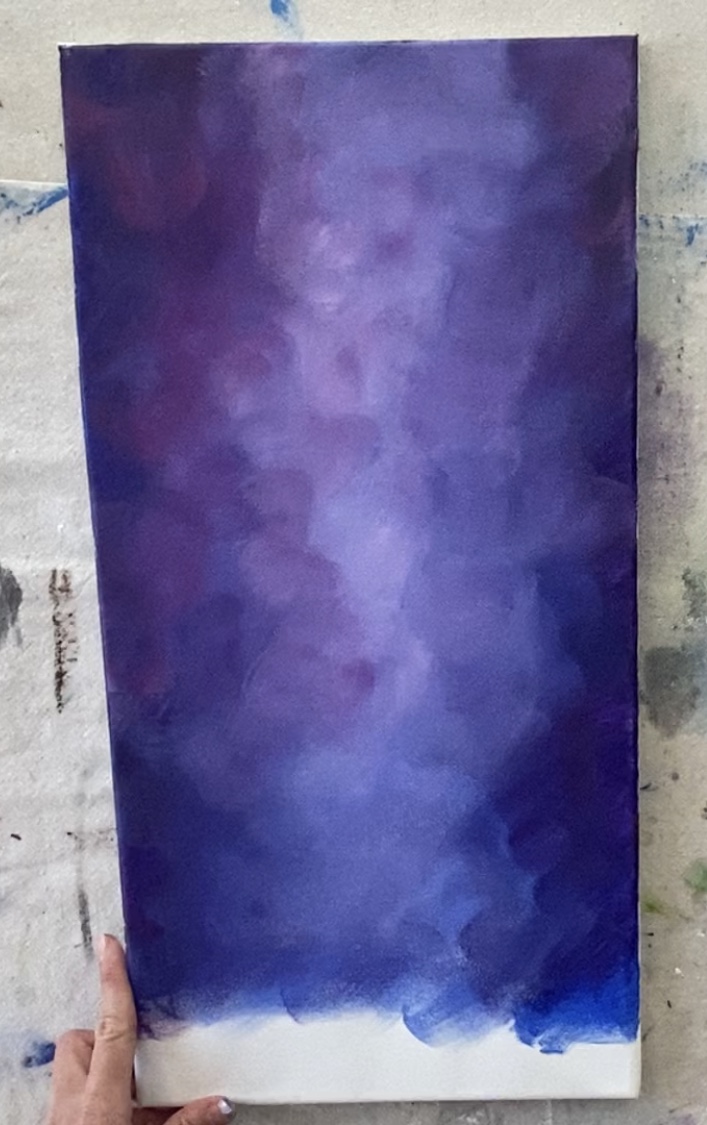
Finally, if you want your middle to be super bright, add a bit more white to your brush and blend circular strokes in the middle. Just be careful not to add too much white because it can take over fast!
2. Splatter Star Effect
This is not the first time I’ve used a toothbrush in a painting to create a splatter star effect! If you have not done this yet, I recommend practicing elsewhere first. That way you do not mess up your painting.
I practiced on my palette first to get the consistency right.
When I do splatter stars, I like to slightly water the white down. You want a consistency that is not dripping but not too thick.
Then splatter on your canvas over the sky and water areas. Try to get a good concentration of stars right in the middle.
It’s great if you get a bunch of larger and smaller stars in there! You will enjoy how this turns your entire painting into a galaxy!
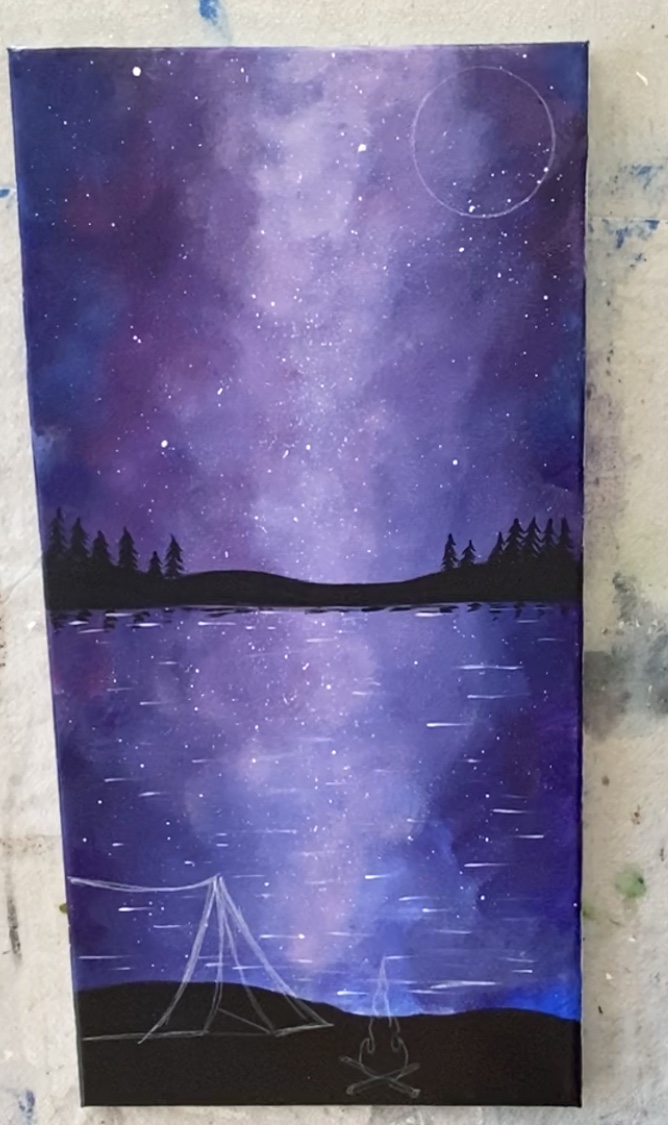
3. Paint the land silhouettes
Find the very middle of your canvas (I eyed it) and paint a horizontal mars black line. I used my 3/4” wash brush for this. I made my line slightly dip down in the middle.
Then paint the bottom area a larger black land area and a slightly bumpy edge.

4. Paint the little trees in the distance
I used a little #2 round brush for this. Use mars black to paint the tiny trees way in the distance.
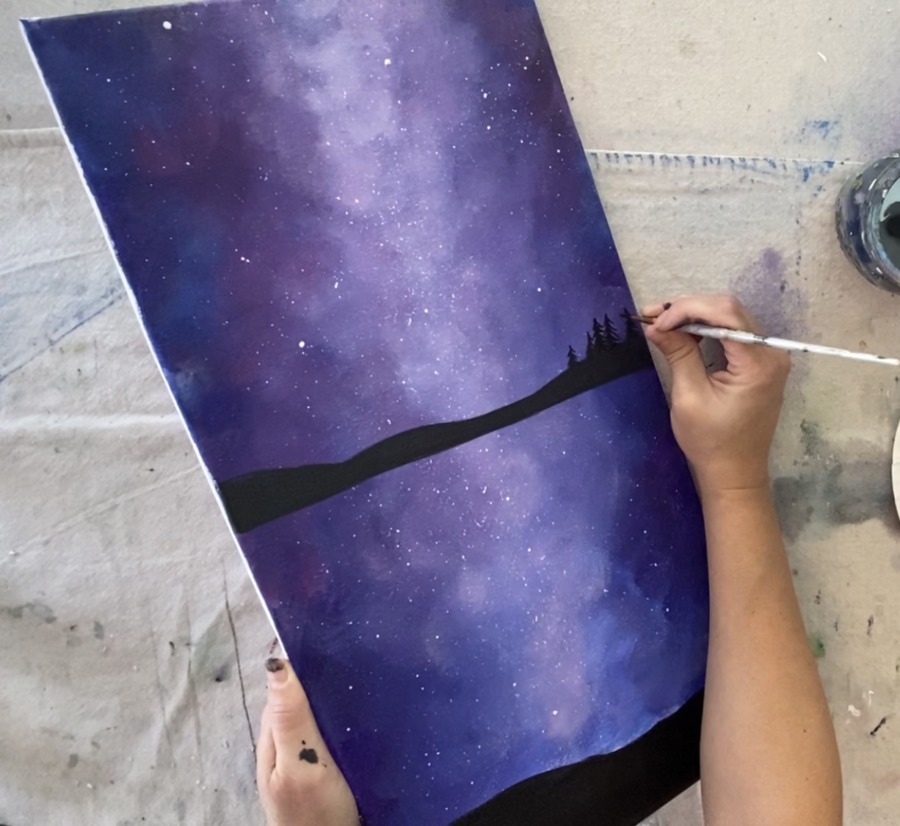
I did not do my trees all the way across, just on the sides.
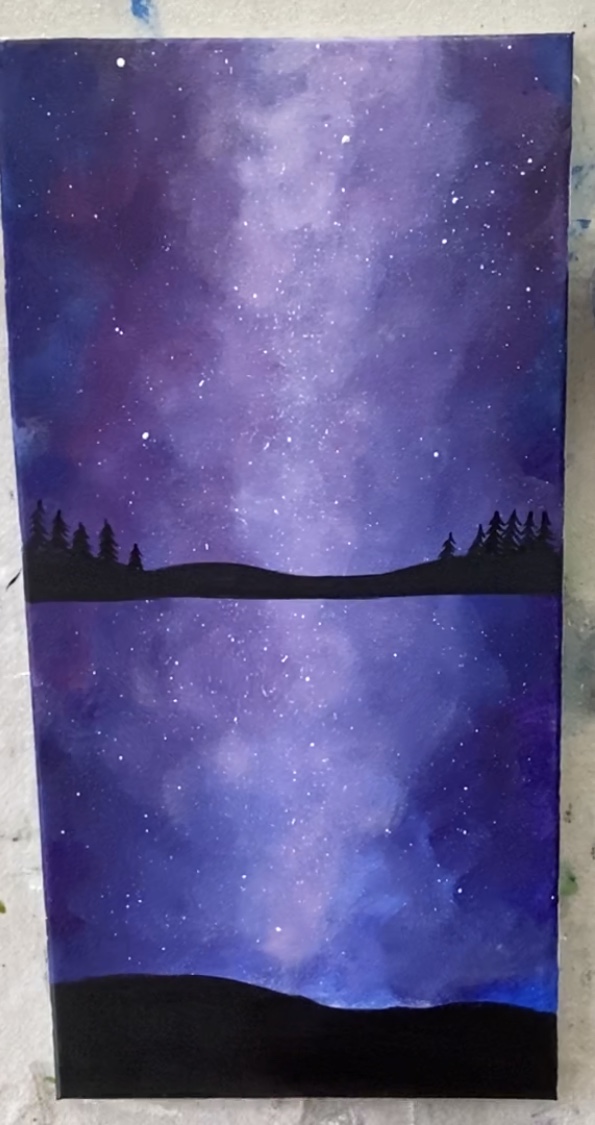
5. Paint the reflection lines
Then use that #2 round brush to paint black reflection lines under the trees and land. Simply make little horizontal lines.
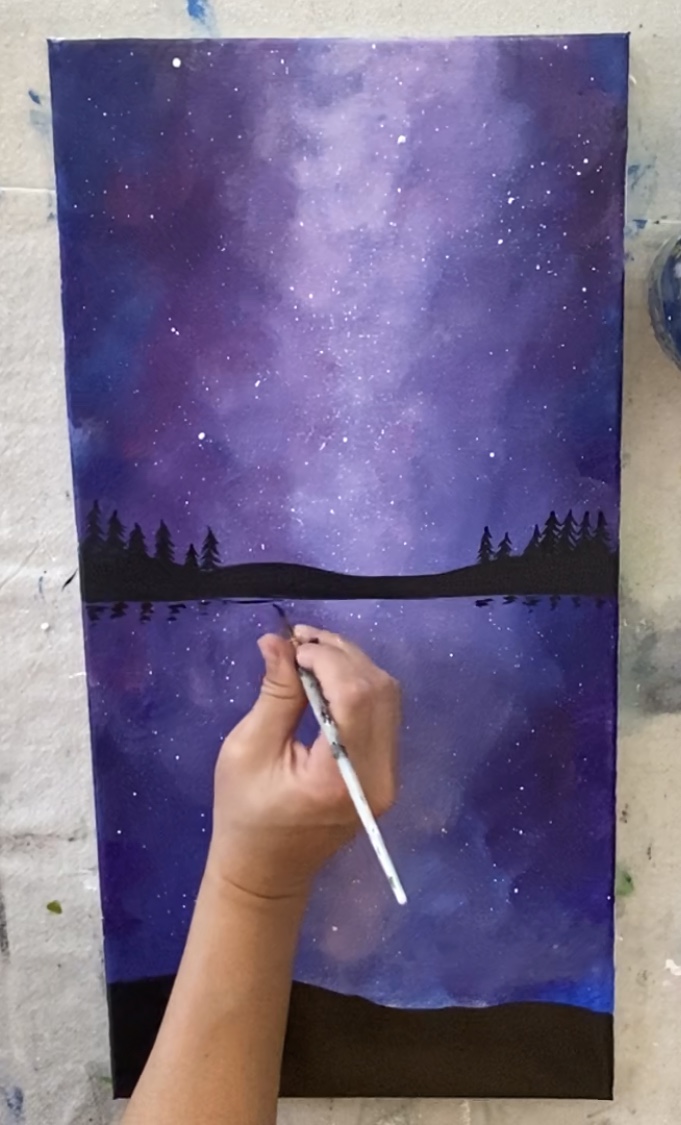
Rinse the brush off and add the white lines all over the water and even over the black lines.
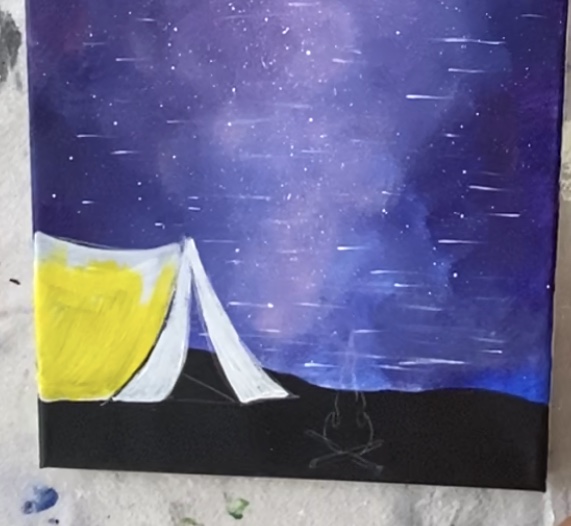
6. Draw the tent, fire & moon with chalk pencil (or chalk)
The tent is a basic, easy drawing to do! I used a chalk pencil. This pencil is amazing by the way! You can use regular chalk too, however, I really like how this pencil does thin lines.
Start at the top of the tent and draw a curved line (I’m about 6” from the bottom of the canvas).
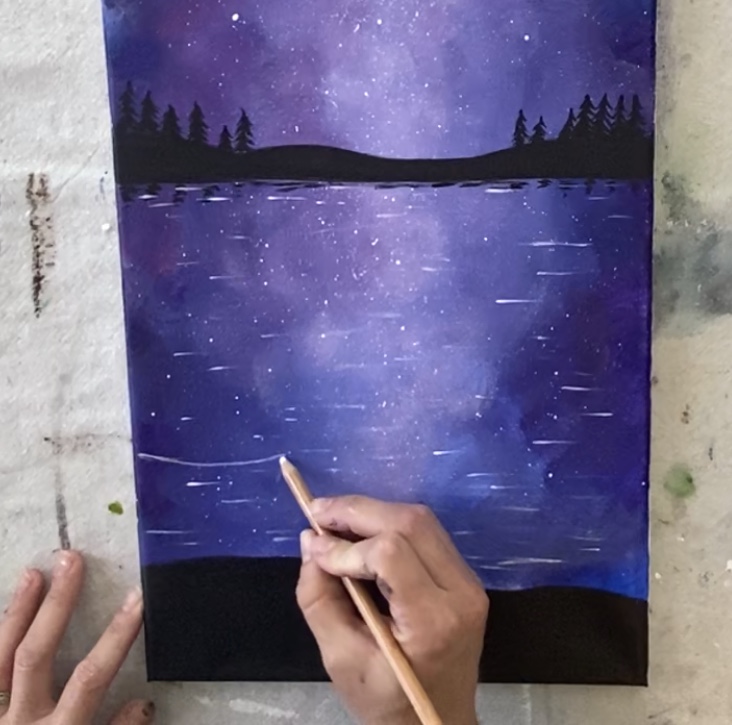
Then draw the triangular side of the tent.
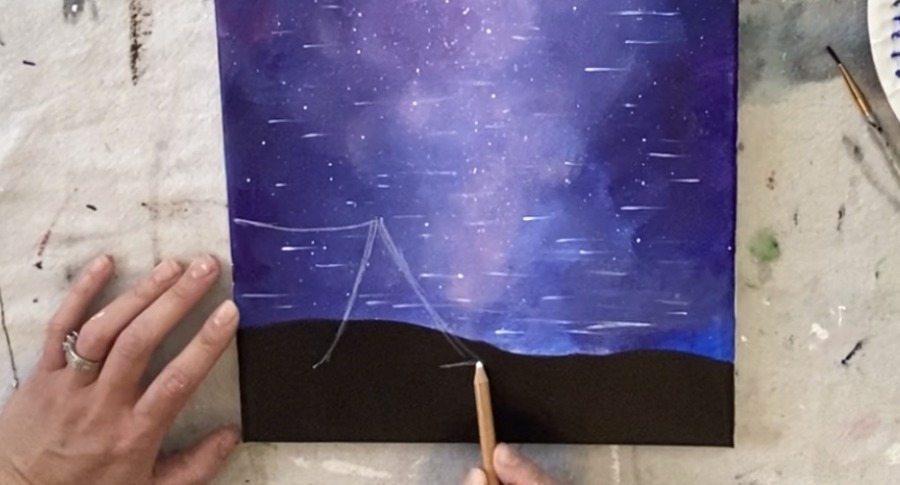
Draw two horizontal lines on the bottom parts of the opening and draw the opening so the point goes to the top of the triangle.
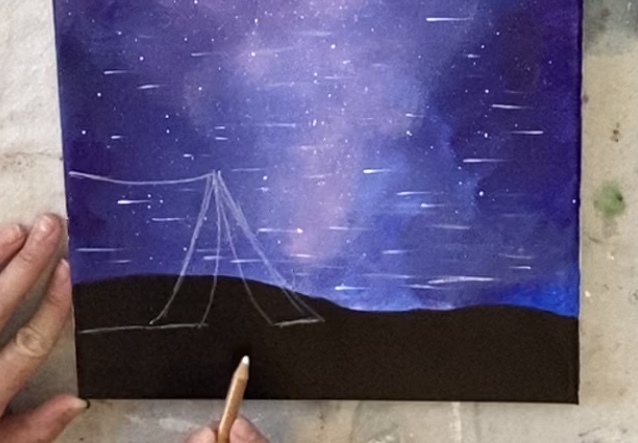
Then draw a diagonal line that goes inside of the opening of the tent.
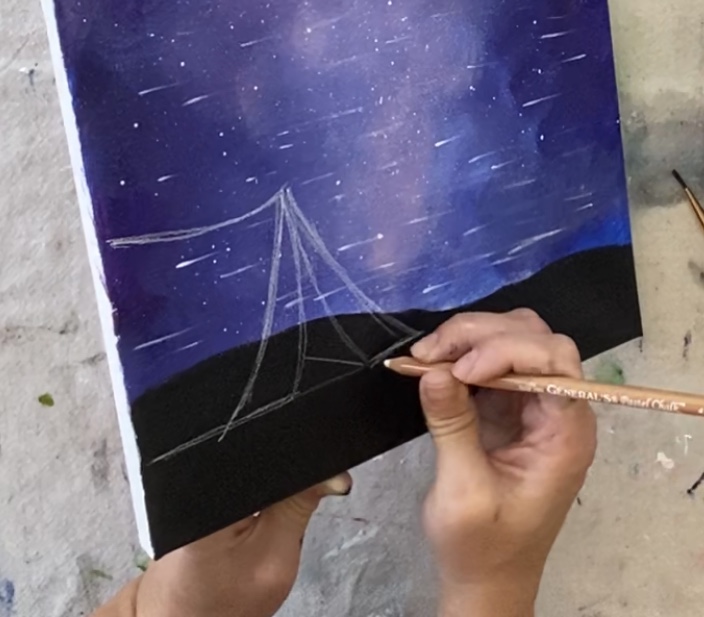
Then I drew the fire pit starting with a little “X” on the bottom and then the flame.
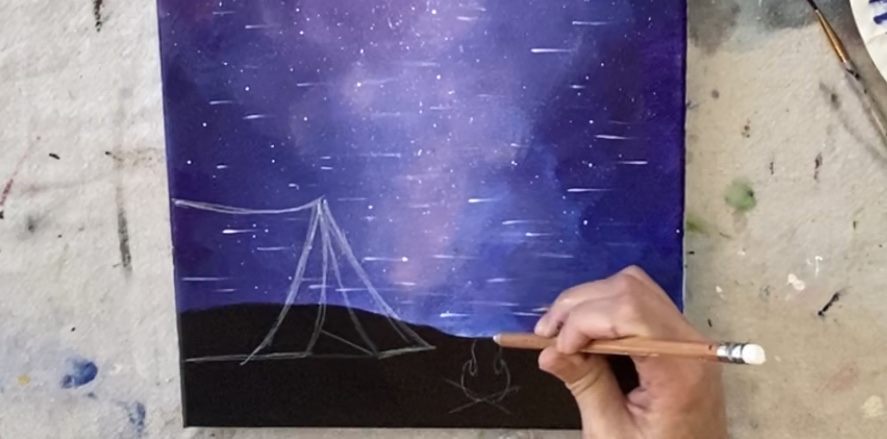
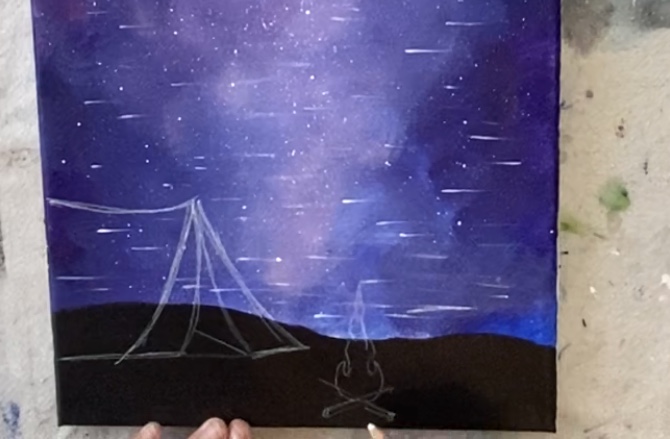
For the moon, I found a circle to trace! This happens to be a flash light (how appropriate for a camping painting)! You can free draw the circle or use anything that is 2“-3” in diameter.

The composition is finally coming together!
7. Paint the tent white
Because the tent is such a bright area of the painting, the base of it needs to be white. Use any brush to paint it titanium white but leave the opening blank and the line next to the triangle.
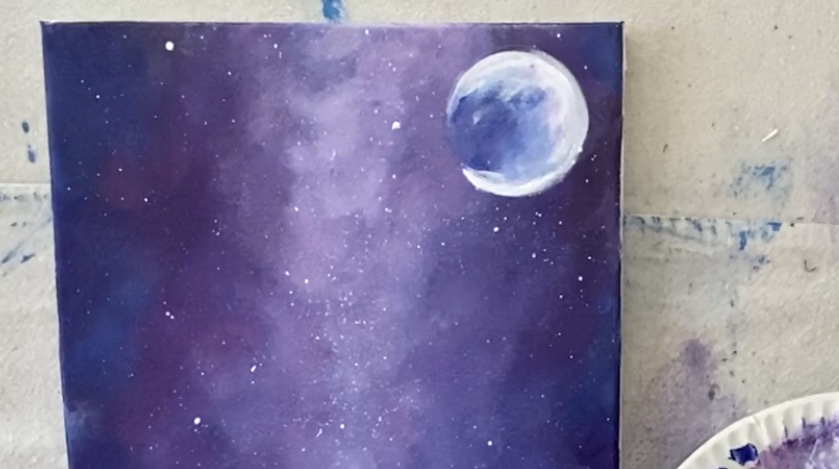
8. Paint the moon
Ahh the moon was a bit tricky! I wanted to do a crescent whimsical moon. With my round brush, I painted the crescent shape inside the circle.
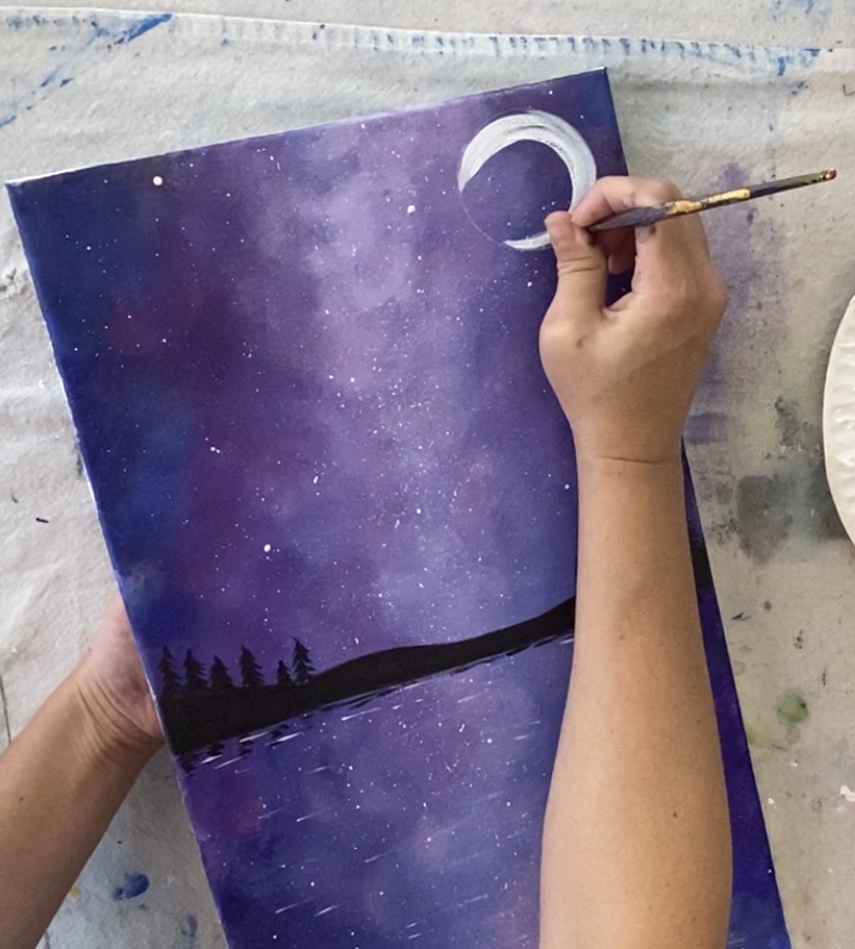
Then I used my finger to smear the edge to the middle part.

And then I added a bit of ultramarine blue in there and used my finger to blend it!
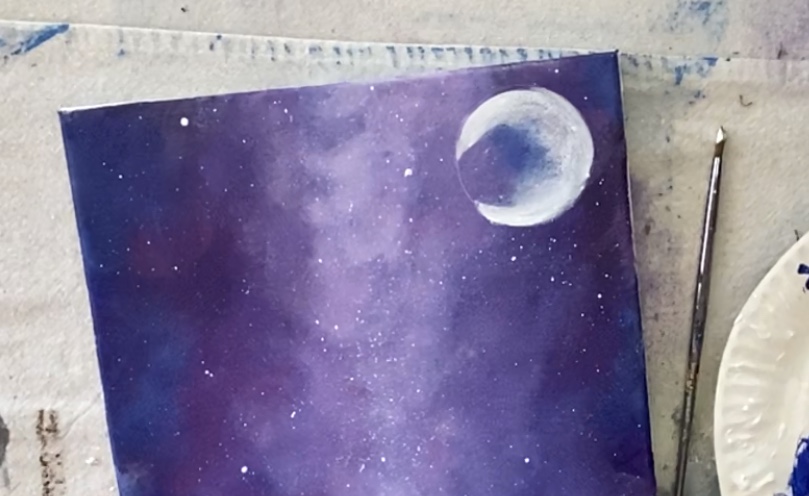
Then the entire circle was painted. The white forms the crescent part and the rest of the space was ultramarine blue that I smeared with my finger. It kind of looks like a face!
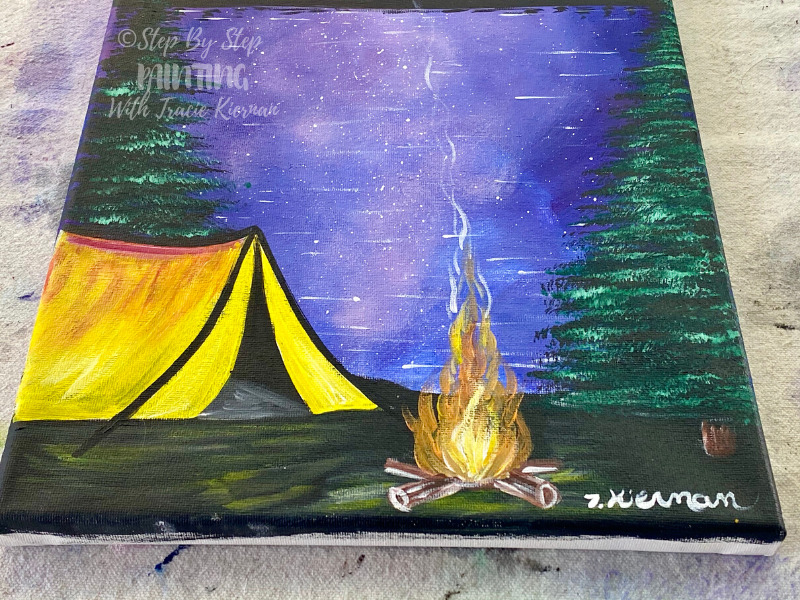
9. Paint the tent
Now that the white is dry on the tent, I panted it cad yellow medium! Use any brush you want, I used a #4 round brush. Start at the bottom on the left side and paint that yellow. Your strokes should go in a diagonal direction. Leave the top white.
Then at the top, add some quinacridone magenta and blend it down into the yellow. Be careful because the magenta is strong – you only need a little bit! Strokes are going sort of curved and diagonal.
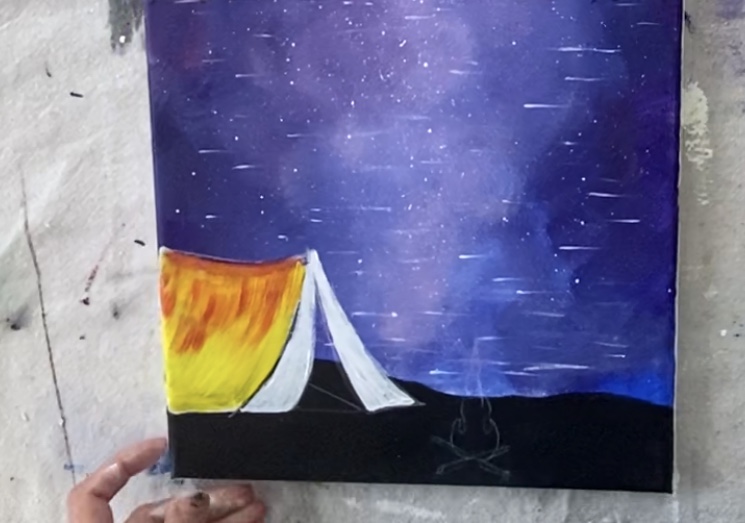
Then paint the front part of the tent yellow where the opening is.
Then outline the edges of the tent with a round brush and mars black (I used the #2 round brush).
Paint the inside bottom area gray and the inside right area mars black.
Also, I added some “dry brush” marks on the ground with some yellow and white. Dry brush means you are only loading a tiny bit of paint on your brush.
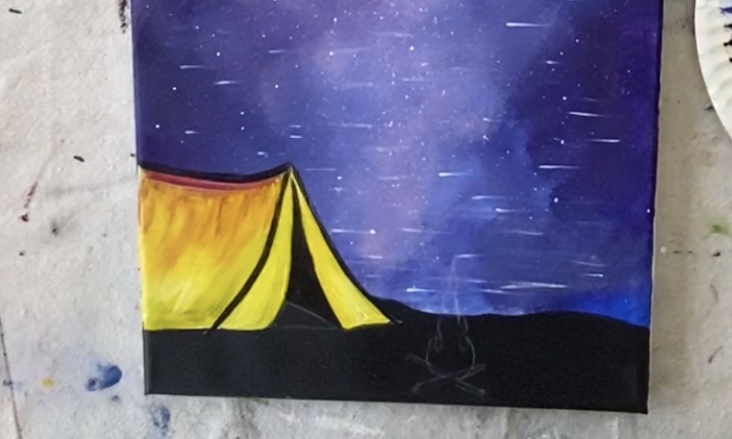
10. Paint the fire
This is a mini version of my campfire tutorial! However, because it is so small, I just did a combination of cad orange hue, cad yellow medium and some white. I did this very loosely!
I used my round brush and basically painted the flame loosely so my oranges and yellows blended.
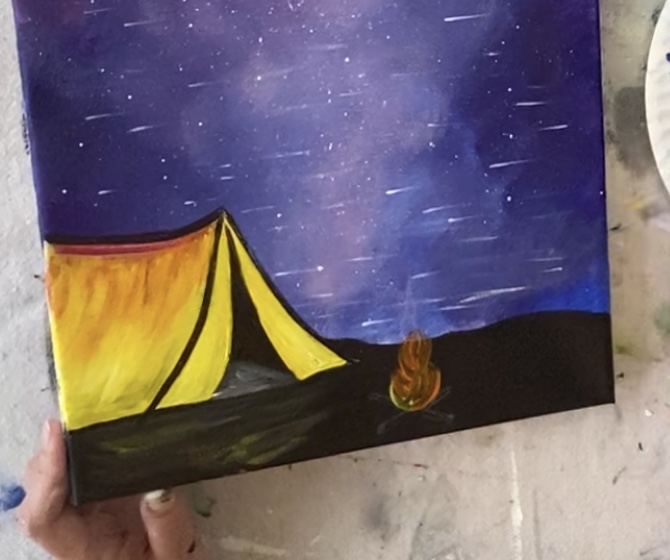
Adding white will help your flame be brighter, especially on the bottom.
Then I loosely painted the logs with burnt umber and titanium white on the edges.
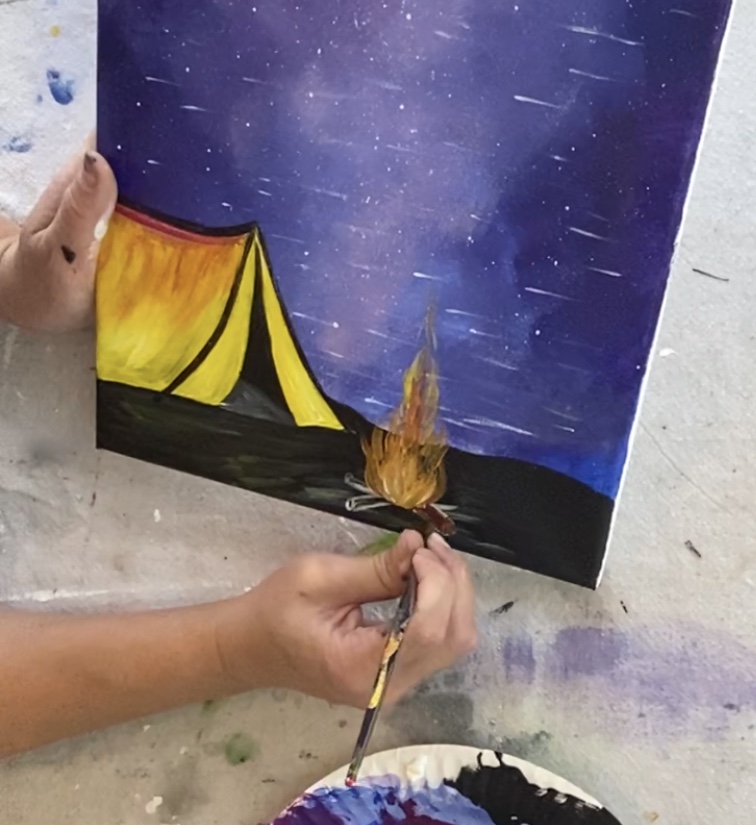
Then use that #2 round brush to lightly paint a smoke line coming from the flame up into the galaxy.
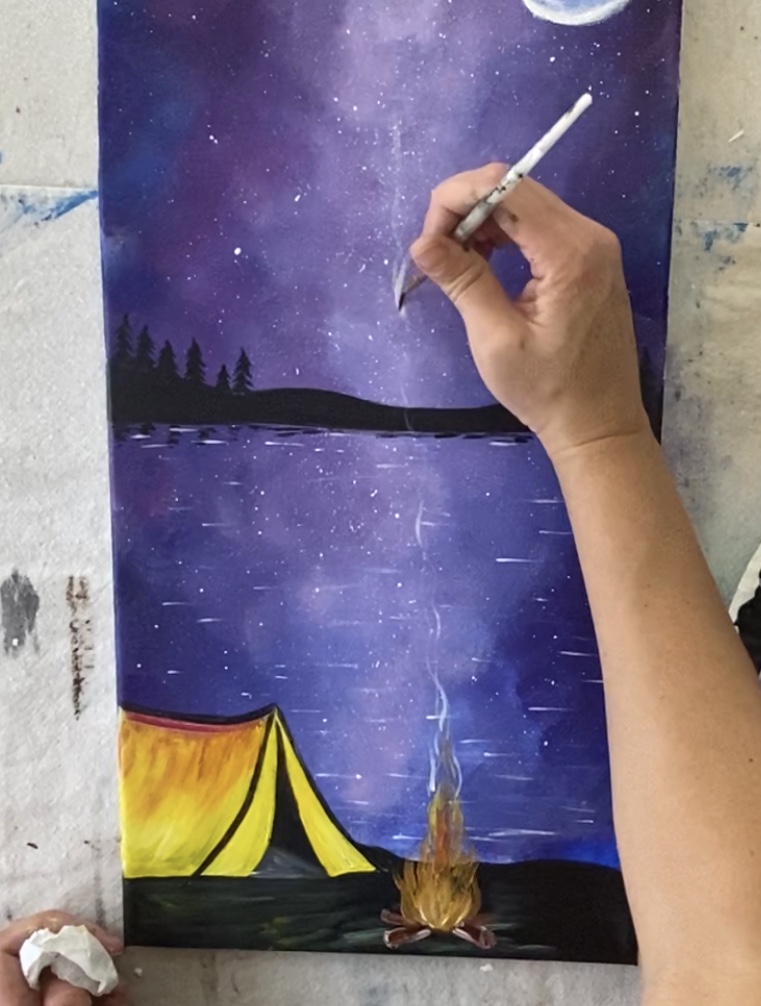
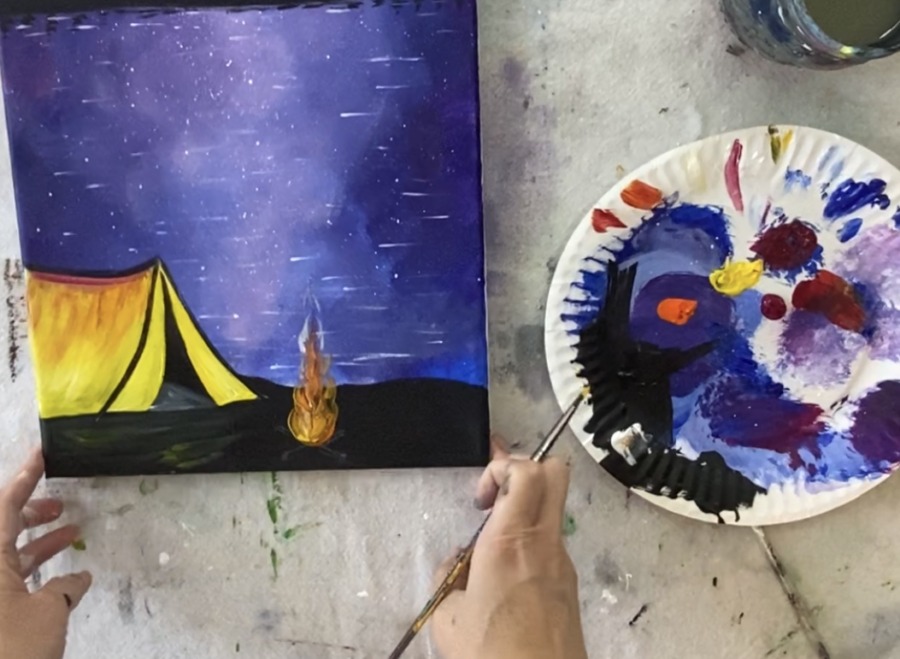
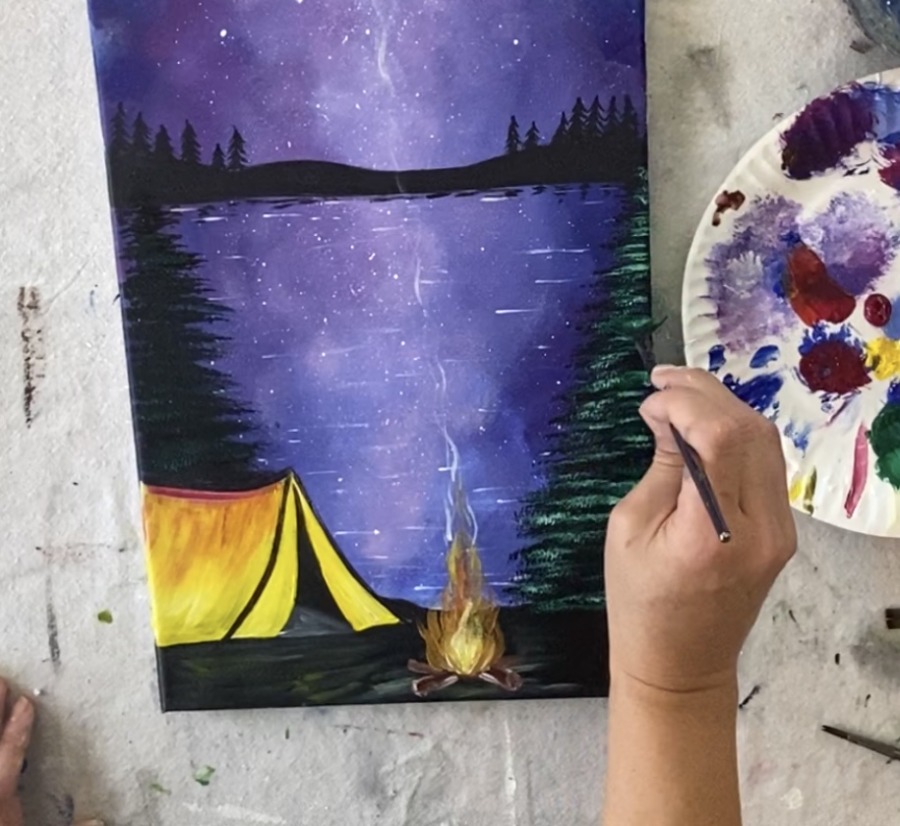
11. Paint the trees
Grab your fan brush for this step! I started by doing two black silhouette trees. They both are the same height with their tips starting at the horizon line.
Load your fan brush in some mars black (slightly watered down for better flow). Make a small mark where you want the top of your tree to be.
Then stamp the tip of your brush. Work your way down in a zig-zag direction and let your tree get wider on the bottom.
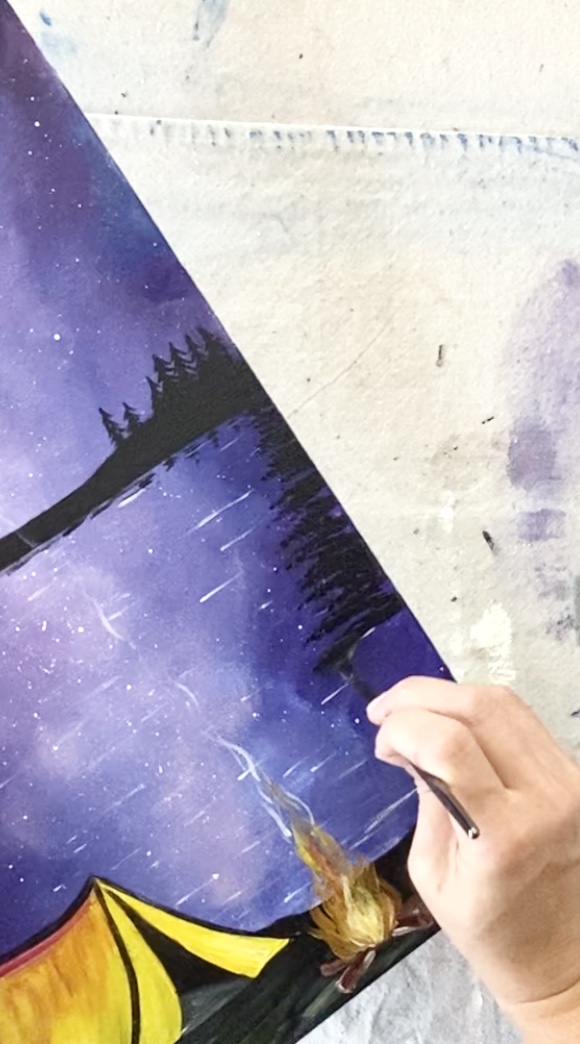
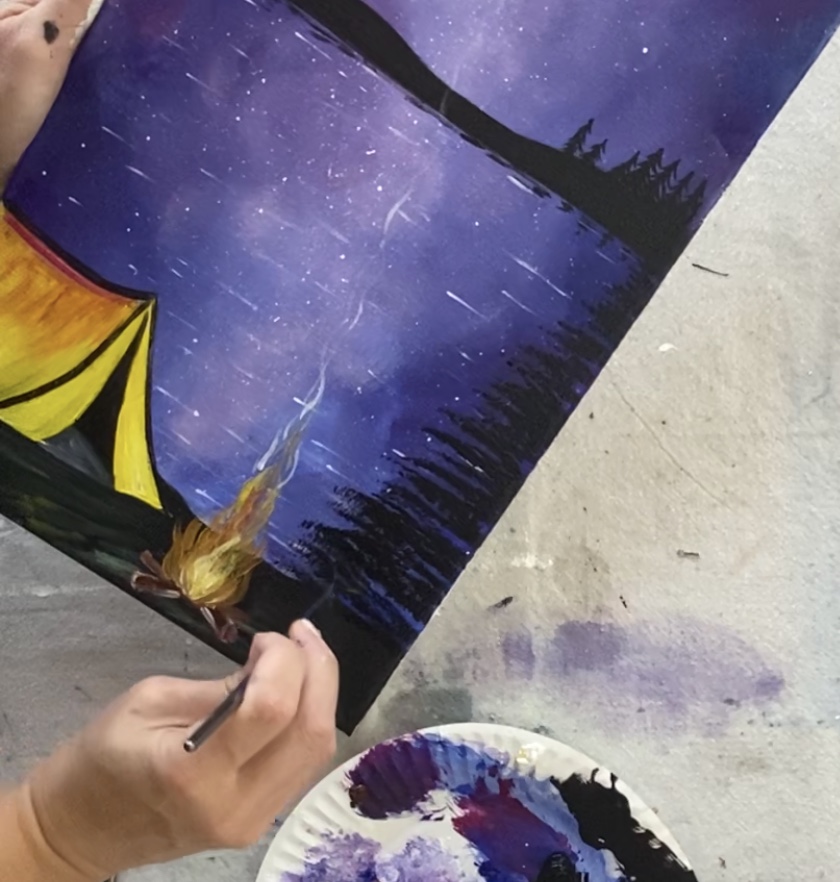
Repeat for the tree behind the tent.
Tip: I have a GREAT tutorial that explains these fan brush trees further! Check it out here.
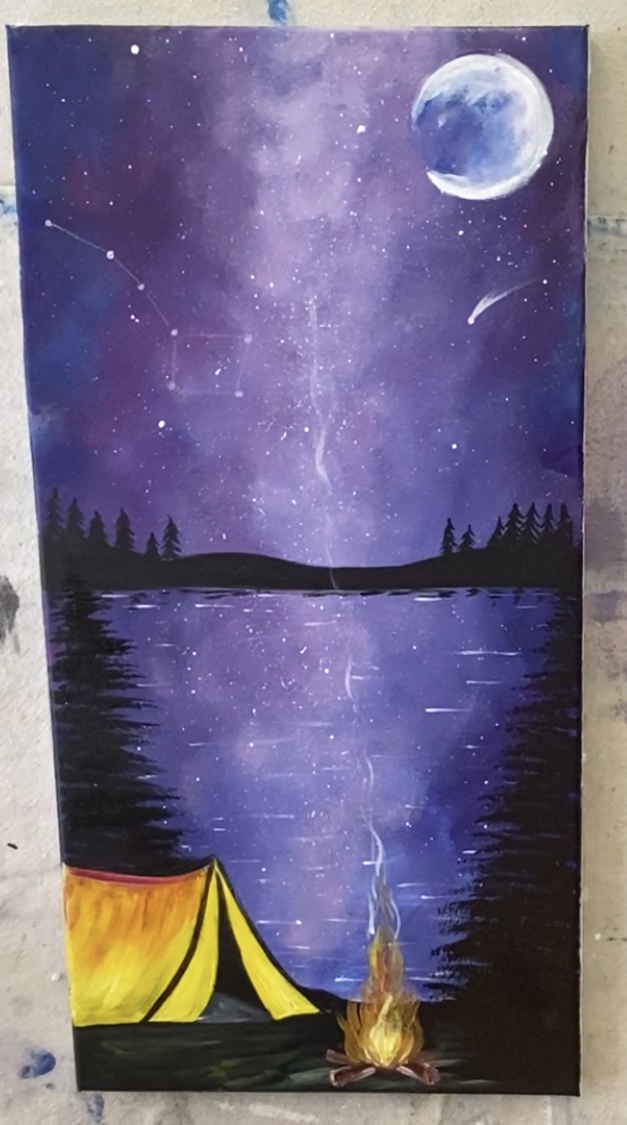
12. Paint a constellation & shooting stars
While the trees are drying, I painted a shooting star in the sky as well as the Big Dipper. Use a round brush for the shooting star and paint a dot. Then do the tail dry brush style. I did this same thing in my Couples Landscape Painting.
For the Big Dipper, I found it helpful to use a white chalk pencil to draw where I wanted the stars to be and connect the lines. I ultimately erased the lines later, however, you can leave them there for a pretty whimsical effect! Paint over the stars and lines with paint after you drew them in.
13. Add green to the tree
Next we will brighten our tree! I used a fan brush again however, this time I loaded it in deep green permanent mixed with a little white. You don’t want too much white because it will look like snow – just a bit to brighten the green up!
Go over your tree again but do not cover all the black. This will give your tree enough highlight to give it some color!
Repeat for the other tree. You can go back and add some variations of that green tint (darker and lighter branches).
Also notice I painted the trunk of the tree! I used burnt umber and a little bit of white for the trunk. I also added some more dry brush yellow to the ground area under the fire.
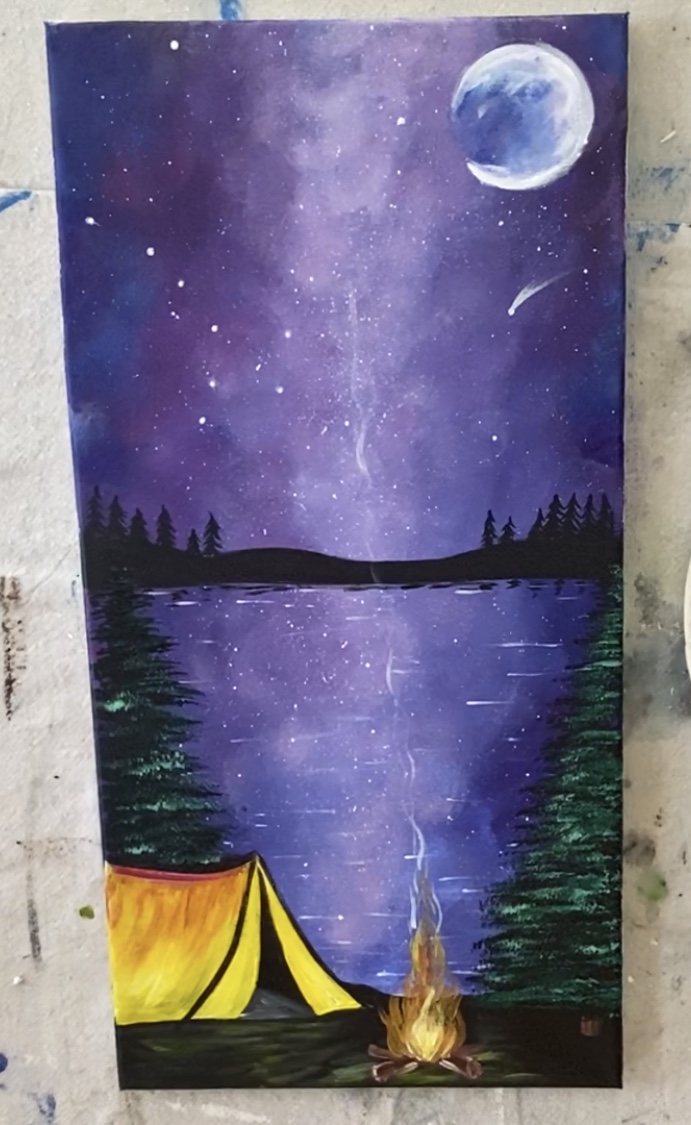
Finished!
That’s it! Sign your name and show it off!
Share your art here!


This is so cool how I do this. It comes out beautiful. Hopefully I will b able 2 do that too. Thank u. Can’