
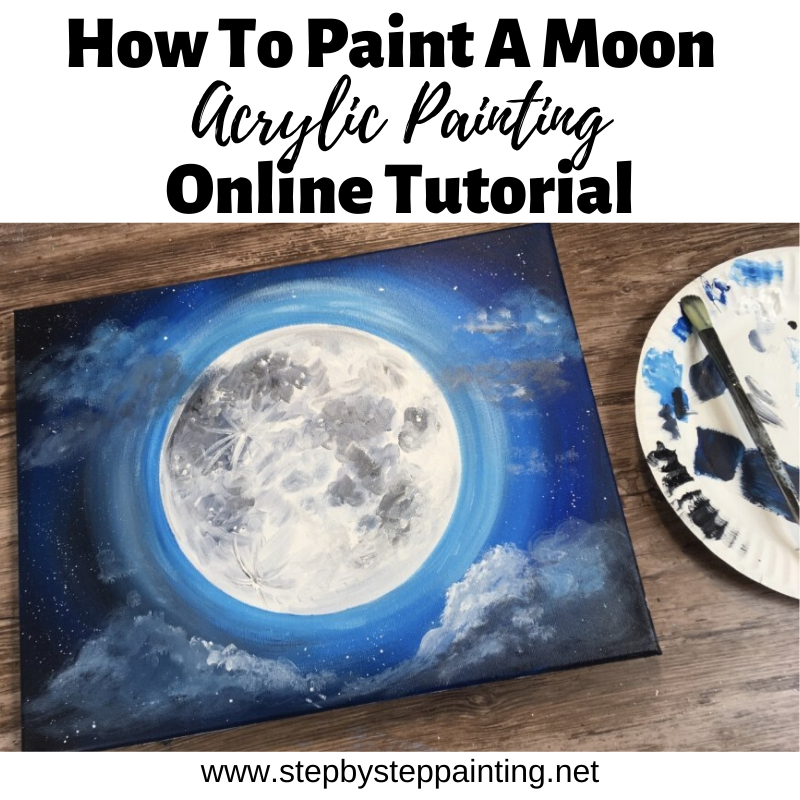
How To Paint The Moon
Learn to create a painting of a full moon with acrylics on canvas. This tutorial will guide you through the steps with picture instructions and video.
Painting a moon can be kind of intimidating. If you observe photographs of moons, you will notice there are various dark and light blotches.
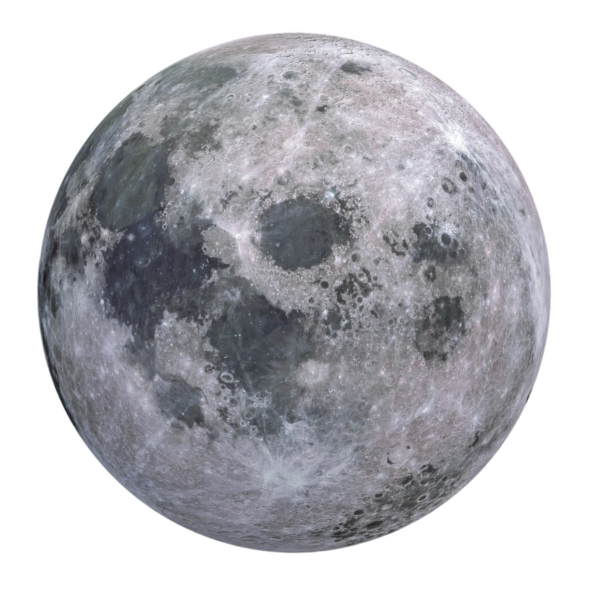
If you look at super close up images of the moon, you can also observe craters, little dots and some lines.
That leads the the difficulty of painting a moon. The dark blotches we observe really aren’t a recognizable shape like a heart or a square. They are organic. And tricky.
The best advice I can give if you are trying to paint a somewhat realistic representation of a moon is to look at a photograph. Really observe where those dark areas are.
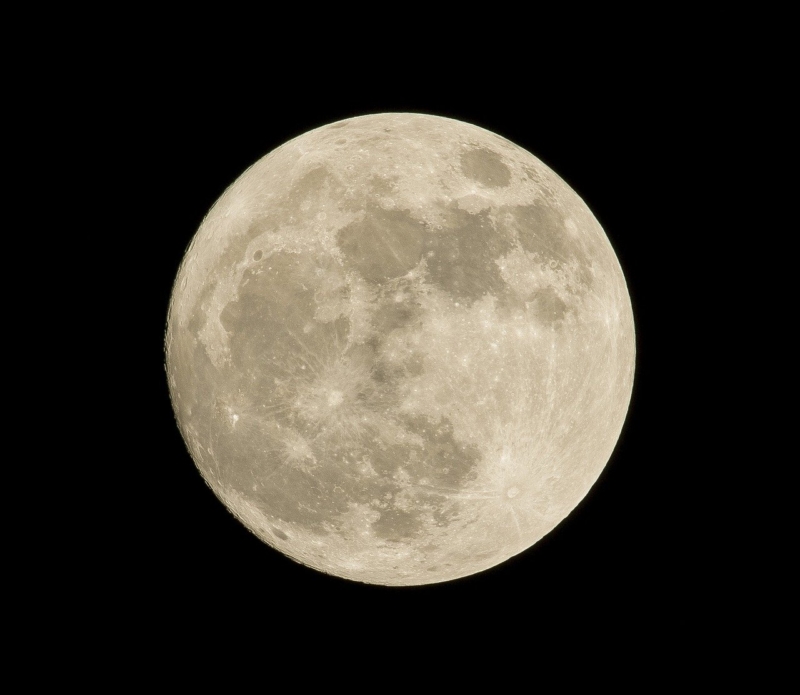
When I paint the moon, I look more at the photo than my painting. It’s a technique that forces you to paint what you see rather than paint what you think you see.
Tip: Look more at your photo when painting the moon. It forces you to paint what you see versus what you think you see.
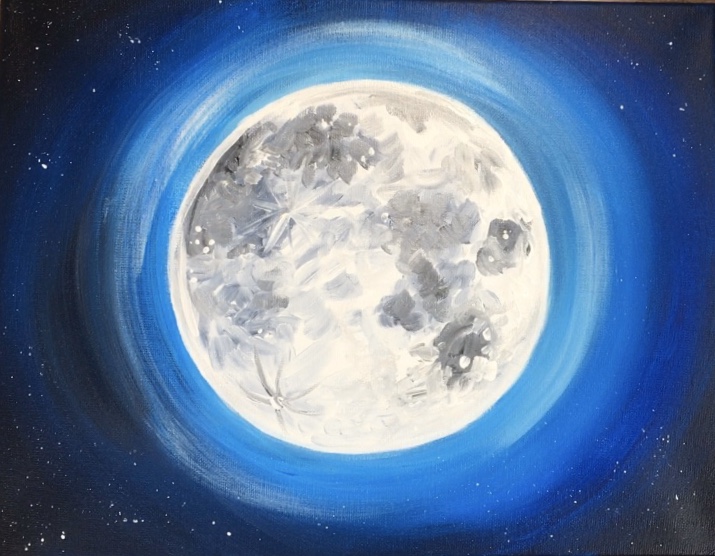
Since this is an online tutorial, I will guide you through the steps of how I did this moon. I’ll show you where I did my dark blotches. It’s not intended to be realism so don’t worry about being perfect!
You can also use the techniques of this moon painting in other painting projects you may have. Perhaps you want to do a full moon in a landscape or over a body of water.
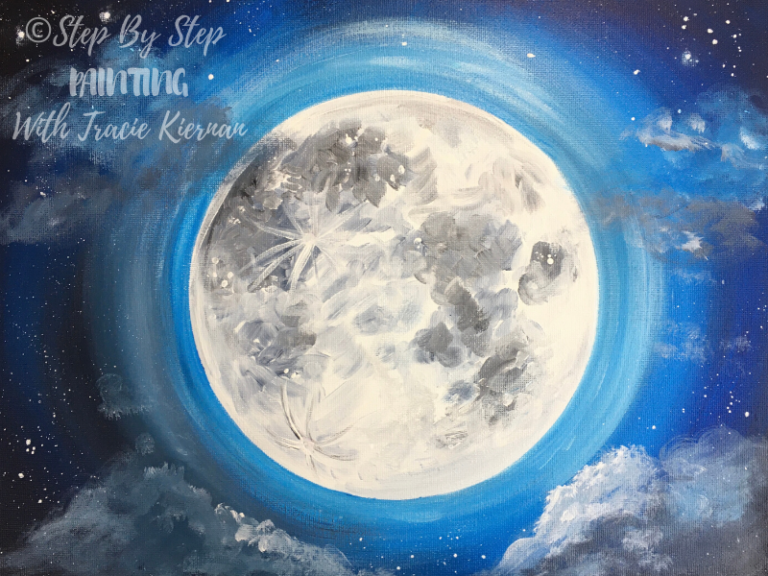
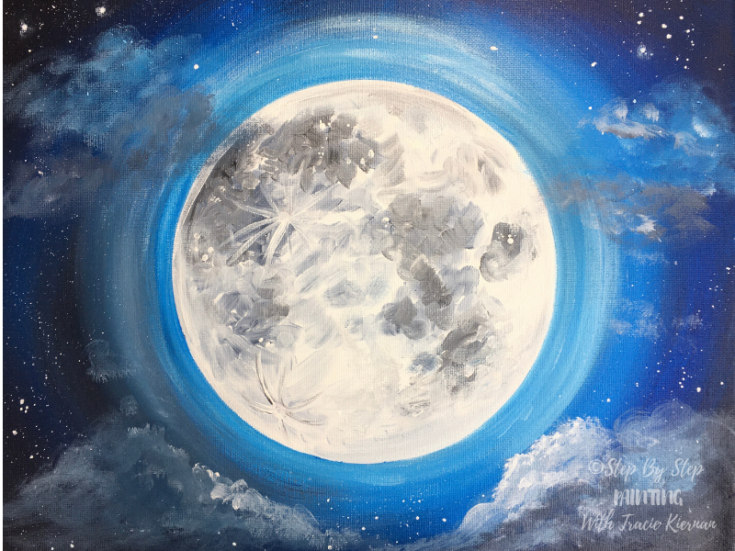
I did a night sky since the moon is the focus of this painting. I also dry brushed a few clouds around the moon. You can leave the moon in a clear sky if you’d like! I know clouds can be kind of intimidating.
Enjoy and happy painting!
Materials:
Moon Painting
Learn how to paint the moon! This step by step tutorial will guide you how to paint a night sky, a few clouds and a glowing full moon.
Materials
- Acrylic Paint
- 11 x 14 Canvas
- Paint Brushes
- Circle To Trace The Moon (7-9 inches)
- Optional White Paint Pen
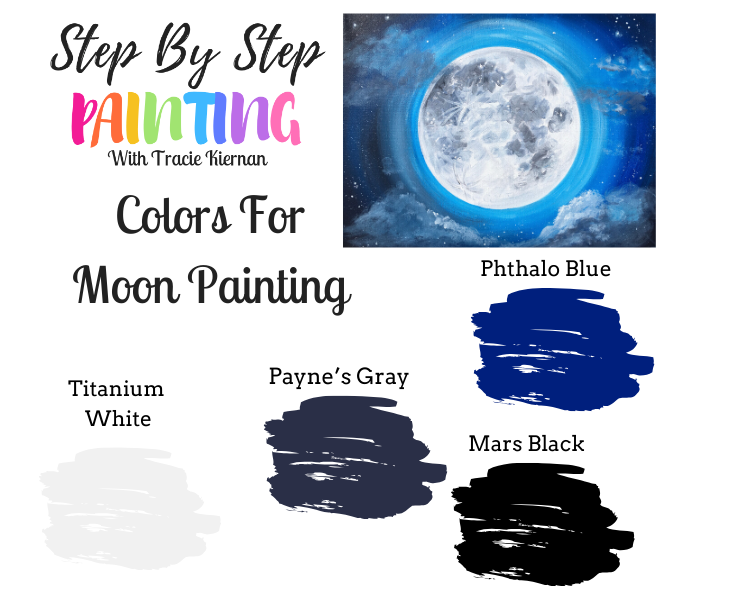
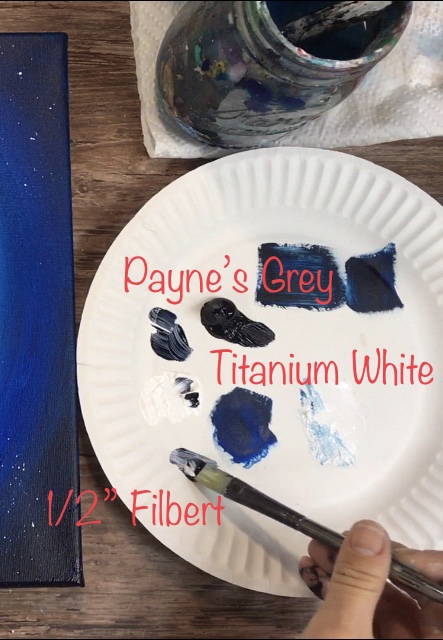
Colors
- Titanium White
- Payne’s Grey
- Mars Black
- Phthalo Blue
Brushes
- 1/2” Filbert (See notes)
- 3/4” Flat Wash
- 4 Round
Instructions
- Use a pencil to trace a large circle (7-9”) on your canvas.
- Use a 3/4 Wash brush to paint a white ring around the moon.
- Lightly blend phthalo blue with the white to create a light blue tone around the moon.
- Gradually blend more phthalo blue in the sky as you work your way to the edges of the canvas.
- Blend Payne’s Grey on the furthest edges and corners of the canvas.
- Go back and blend the colors further if needed.
- Splatter stars on the canvas by tapping a paint brush of titanium white against another paint brush.
- Paint the circle of the moon solid white. Keep that white paint wet because the moon texture will be done with wet on wet blending.
- Use a 1/2” filtert brush to blend Payne’s grey in with the white. Observe how certain areas of the moon have darker markers.
- Add more white to your filbert brush and blend in areas that are lighter.
- Load some mars black onto your palette and mix white with it to make a warm black. Blend in this black in various dark areas of the moon.
- Use a round brush to paint small dots and two large craters on the moon.
- Paint the outer rim of the moon white using the round brush.
- Use the 1/2” filbert brush to dry brush some clouds in the sky using titanium white, Payne’s gray & phthalo blue.
- Splatter more stars in the sky if necessary.
- Touch up the circle by laying the circle you traced over the moon and making sure your circle is uniform.
Notes
The brush I used for this moon, I call it a filbert but it’s actually an oval wash brush. Click the link above to see exactly what brush I used. It’s a 1/2” oval wash brush.
Color Palette:
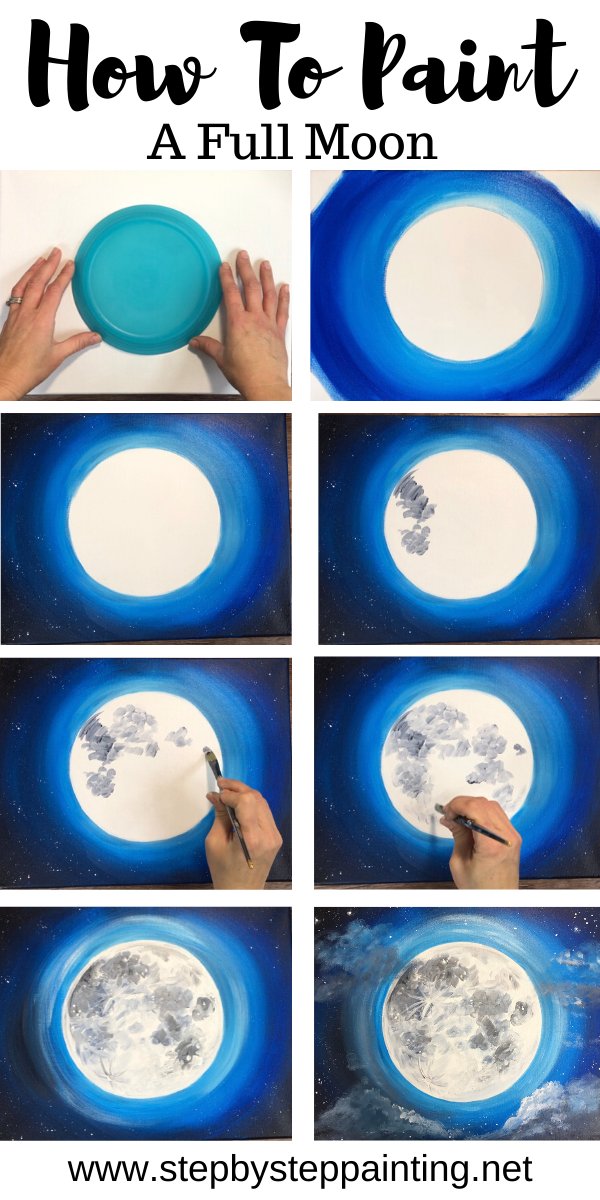
Directions At A Glance:
Traceable:
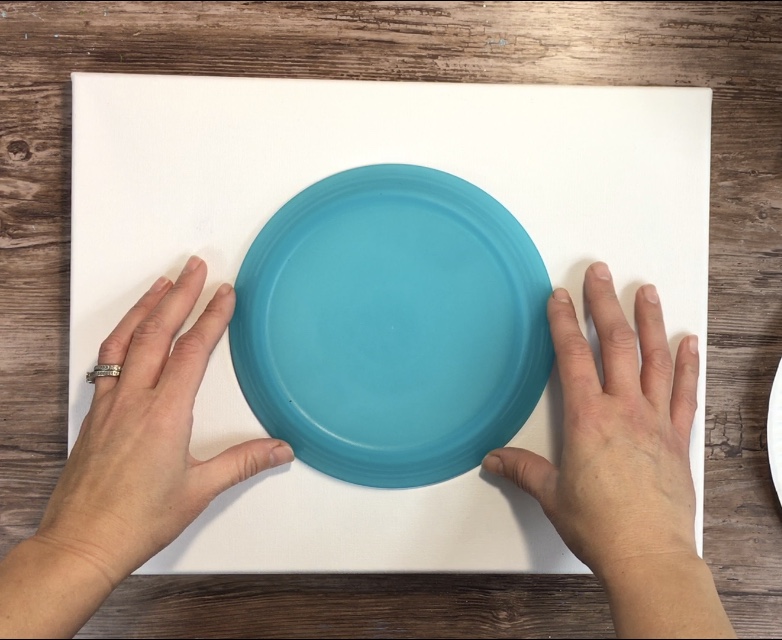
There is no traceable for this one! I traced a plastic plate with a diameter of 7.25”. You can find one that has a 7-9 inch diameter.
Video:
Step By Step Instructions:
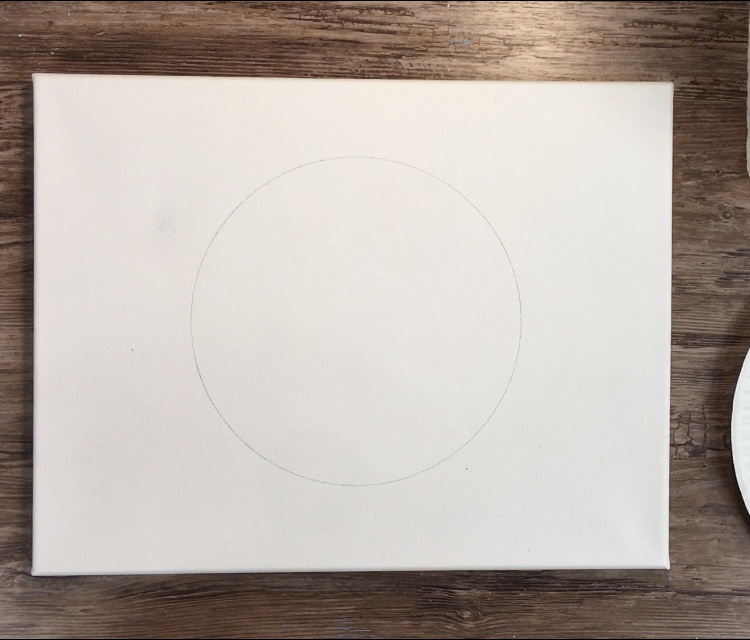
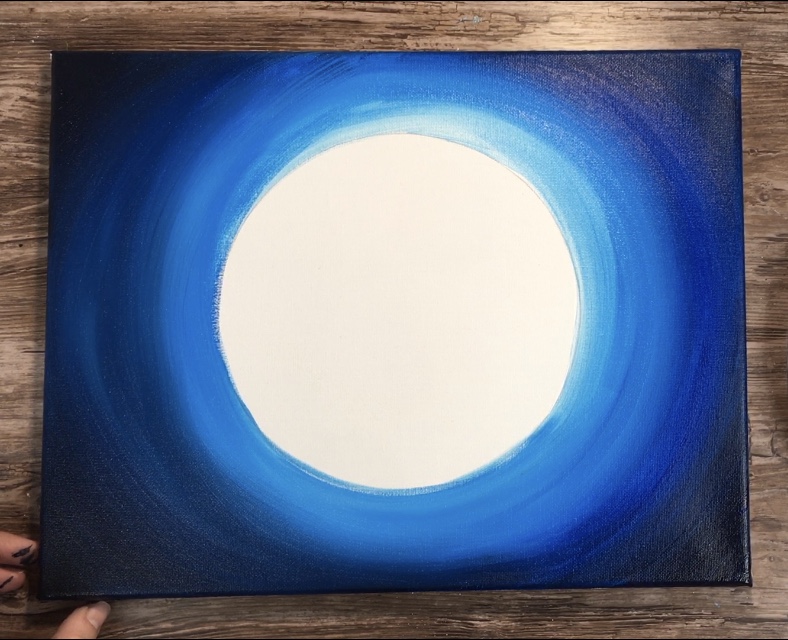
1. Trace a Circle
Position your canvas horizontally (or vertically if you prefer) and trace your circle with a pencil.
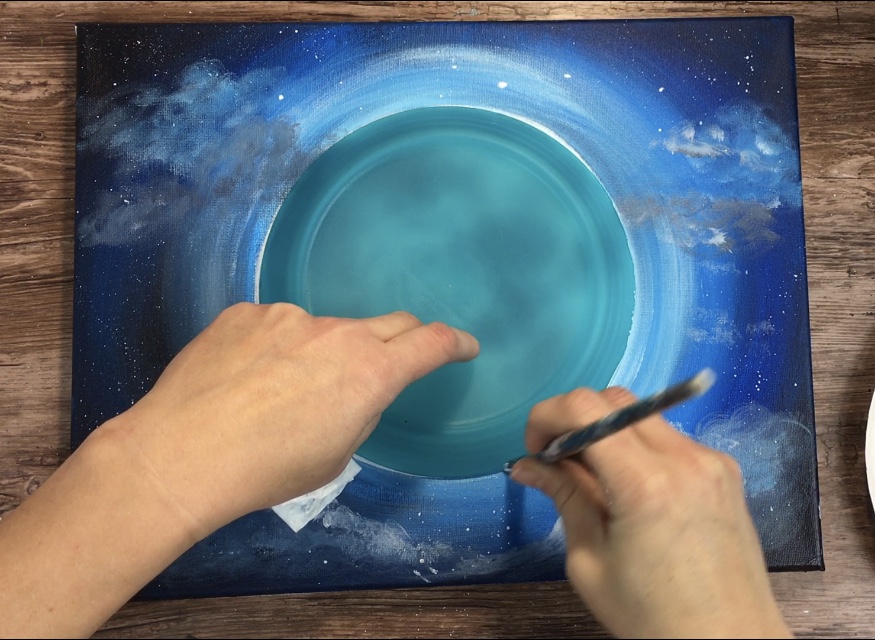
2. Paint The Sky
Use a 3/4” Flat Wash brush to paint a titanium white ring around the moon. 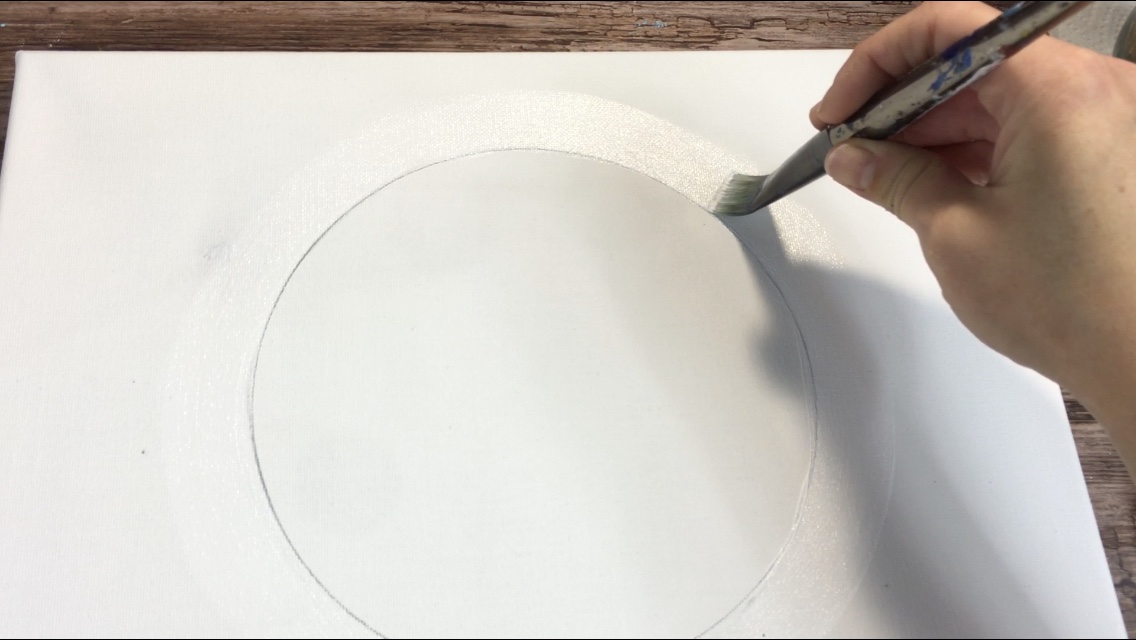
The width of the ring should be the width of the brush (so 3/4”).
Then load a tiny it of phthalo blue onto the corner of your 3/4” wash brush. 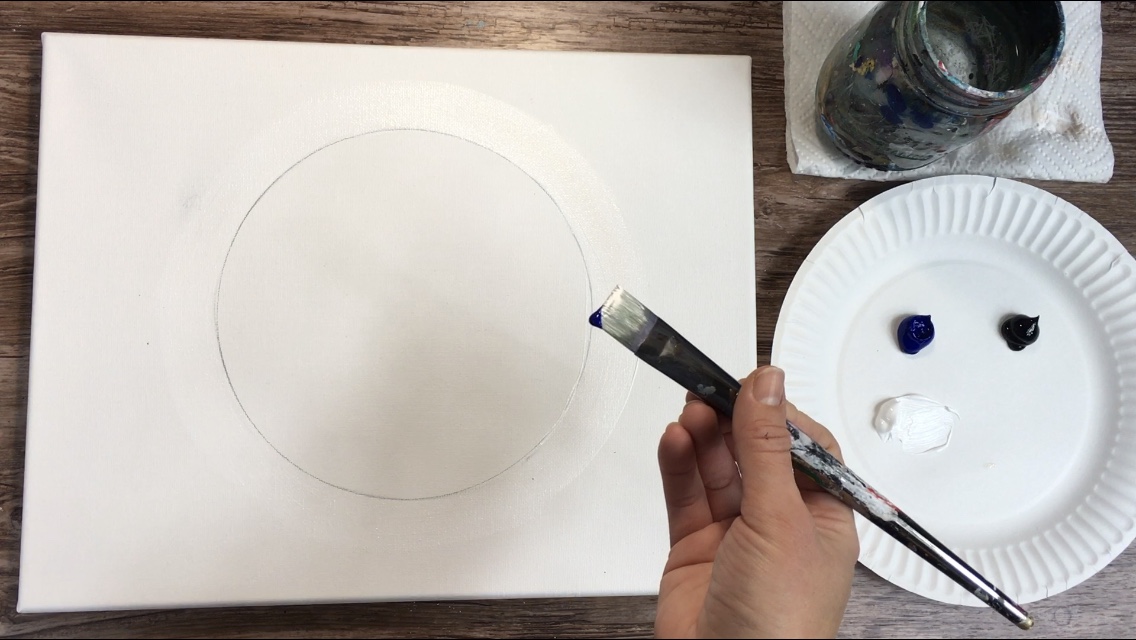
Using the wet on wet blending technique, blend the phthalo blue into the white so that it turns to a lighter blue.
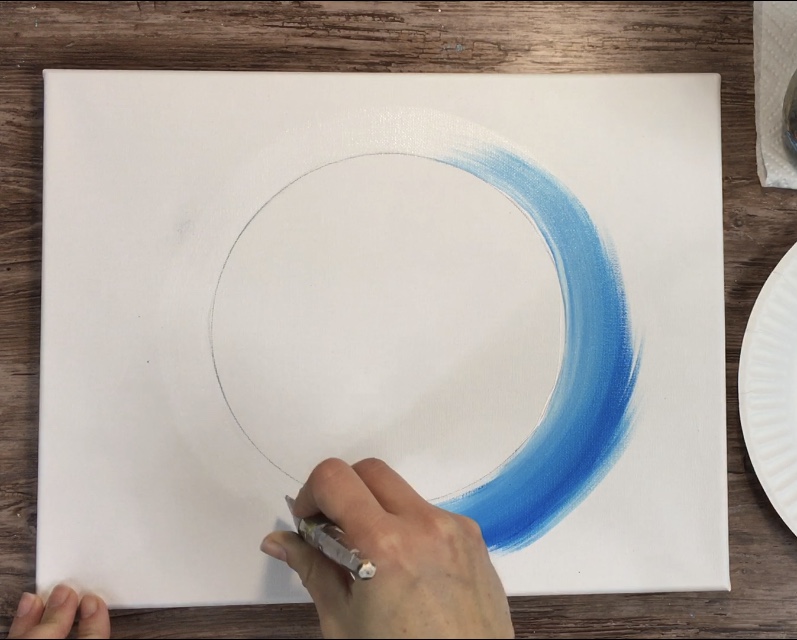
The intent with this technique is to allow a lighter blue to be closest to the circle and for the blue to get darker as it gets to the edge.
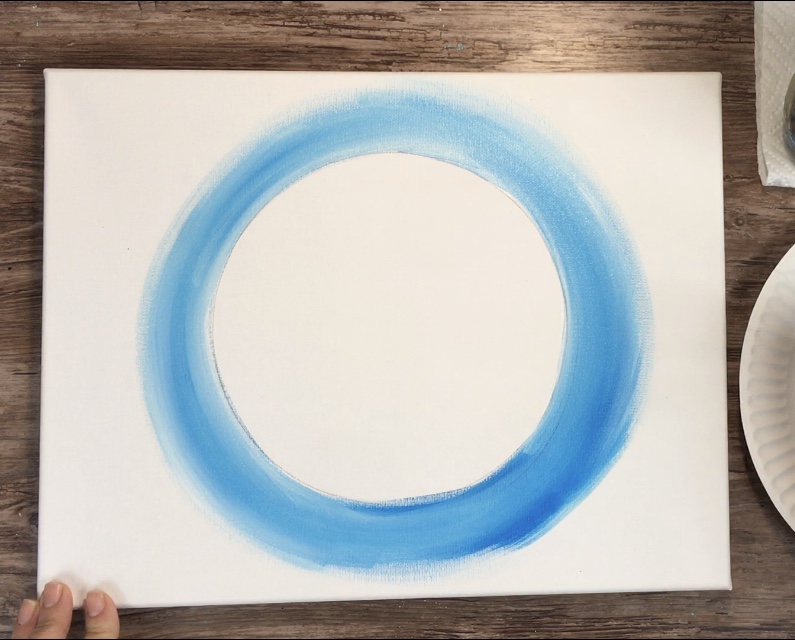
Continue adding more phthalo blue to your brush and paint in circles working your way to the edges of the canvas.
If you need to, add more titanium white to help with the blending transition of the light blue to the pure phthalo blue. Note that I did not rinse by brush anytime while painting this sky.
By the time you get to the edges, you should have pure phthalo blue. (And whatever tiny bit of white is mixed into it because you didn’t rinse your brush).
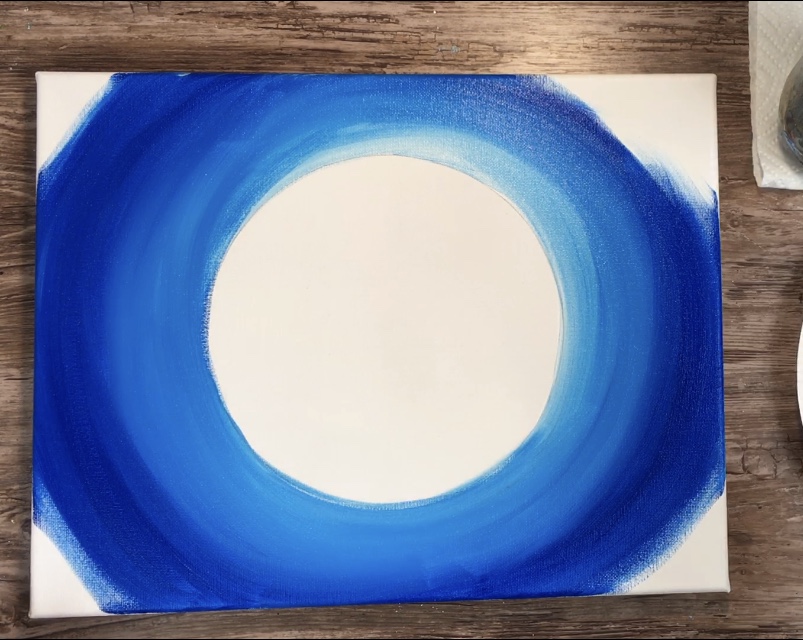
Then load your brush in Payne’s grey (without rinsing it). If you need to, wipe your brush off because it may be overloaded.

Paint just the corner areas with Payne’s grey and blend it in with the phthalo blue by painting over the phthalo blue area.
3. Splatter Those Stars
While I usually use a toothbrush for this step (and you can too), I decided to try a different way this time to splatter my stars.
I loaded one of my brushes in white (my 1/2” filbert) and added a TINY bit of water to that white so it was SLIGHTLY watered down.
Note: you don’t want to water your white down too much because it will drip everywhere and mess your painting up.
Test out an area away from your canvas. Tap your loaded brush against another brush (like tapping drumsticks together) and let the splatters go on the surface.
Then when you feel confident, do so over your painting. Don’t worry about getting white splatters on the moon because that is all white right now any way.
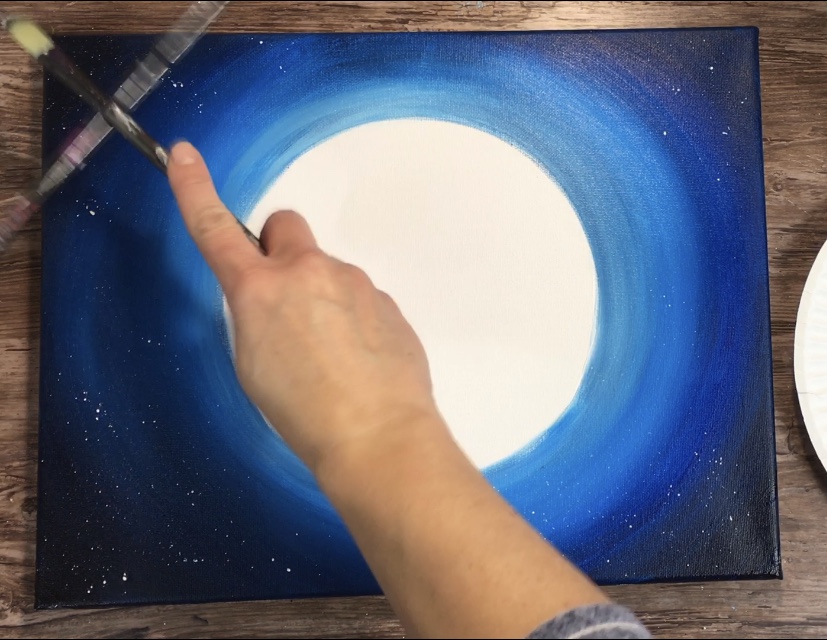
Try to aim for a variety of splatters large and small. If you mess up, keep a baby wipe handy to sweep up and unwanted splatters.
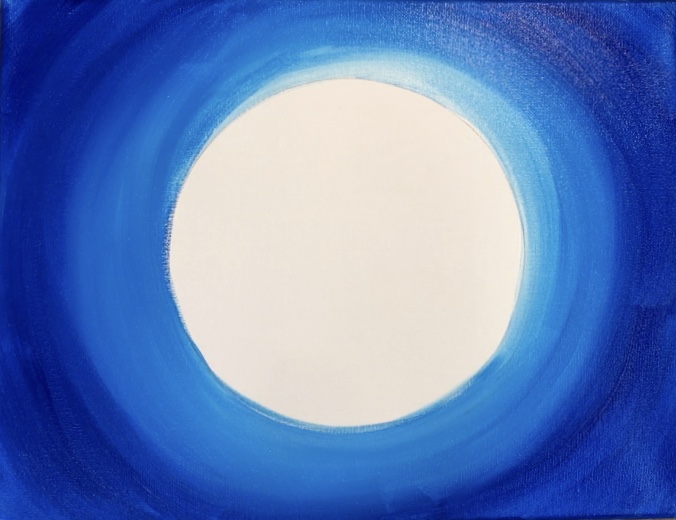
4. Paint the moon white
This is an easy but important step. I do wet on wet blending to paint my moons. In order to do so, you’ll need your entire moon to be wet and white.
Simply use your 3/4” wash brush to paint a thick layer of white on that circle. By thick I don’t mean slap on the paint, rather apply a generous amount to it so it can easily be blended and workable. .
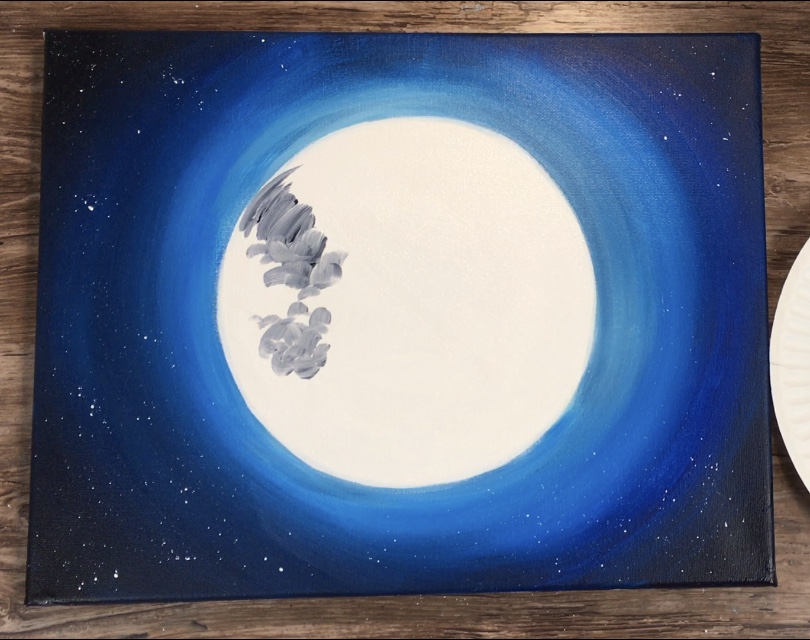
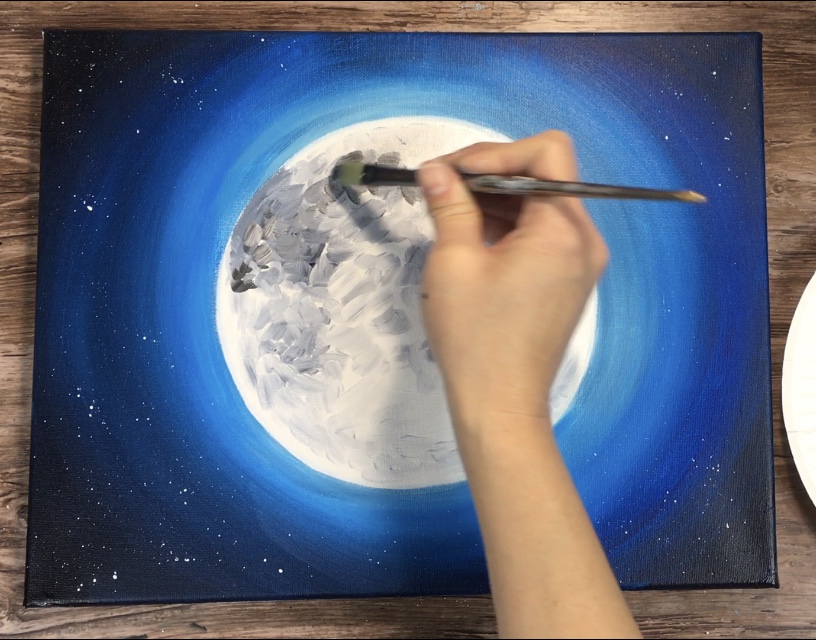
5. Paint your first dark blotches with Payne’s Grey & Titanium White
I used a 1/2” Filbert brush for this. I found that the round tip of the filbert allowed for softer strokes that were easy to blend.
On your palette, double load your filbert in Payne’s grey and titanium white (about equal parts) to create a light cool gray.
Then paint your first set of dark blotches. I did my dark blotches in the upper left area of the moon…

And dabbled down to the middle left area. Do these strokes in little dabs. Your color should blend with the white on the moon as well.
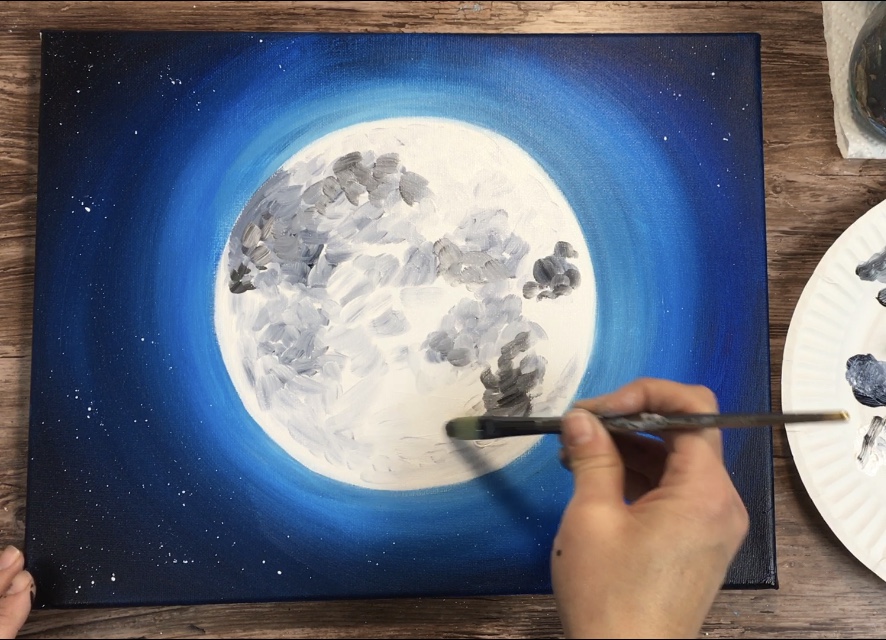
Then dab some more blotches in the upper middle area and on the upper right. I loaded my filbert in a bit more titanium white in this area to get some color variation in these grays.
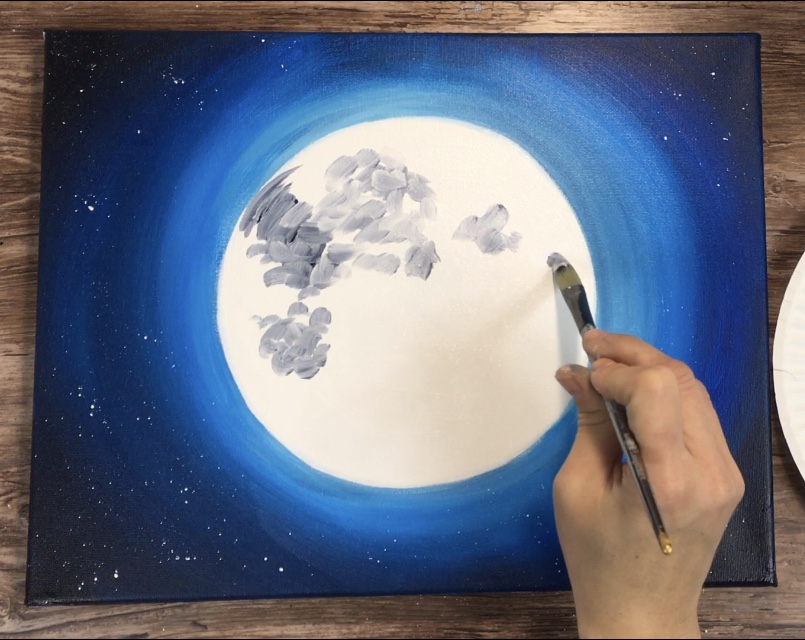
Then continue your way down the moon adding more blotches.
Load your brush in various amounts of titanium white and Payne’s gray to get color variation and remember to allow your strokes to blend with the white layer of the moon.
In some areas on the bottom of the moon I did super light blotches.
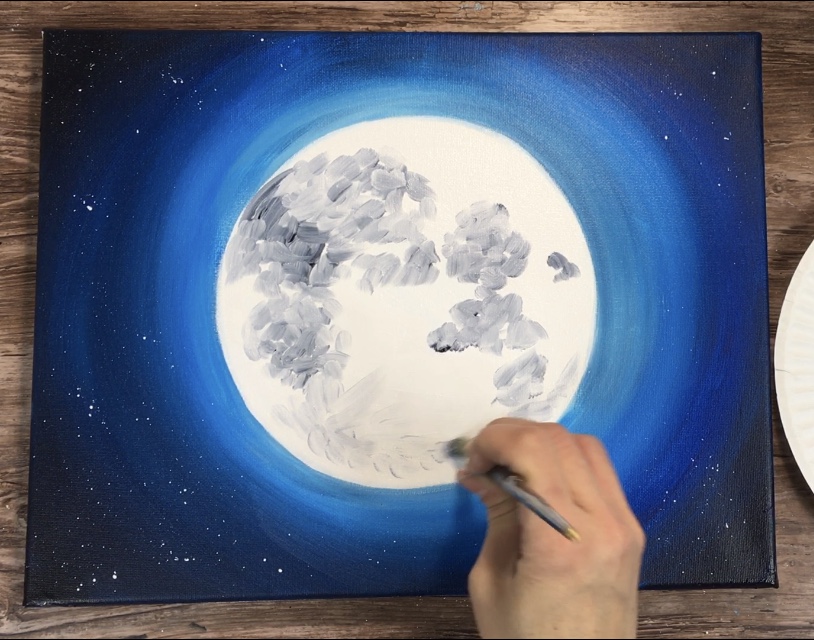
Tip: remember to look at a photograph of the moon and observe where you see the dark blotches.
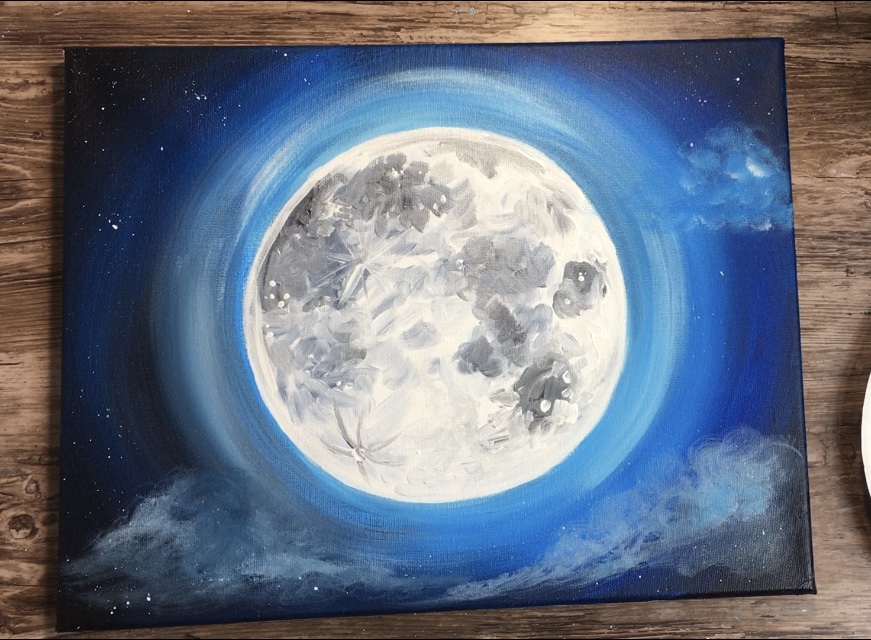
This is what my moon looked like until I introduced a new shade of black.
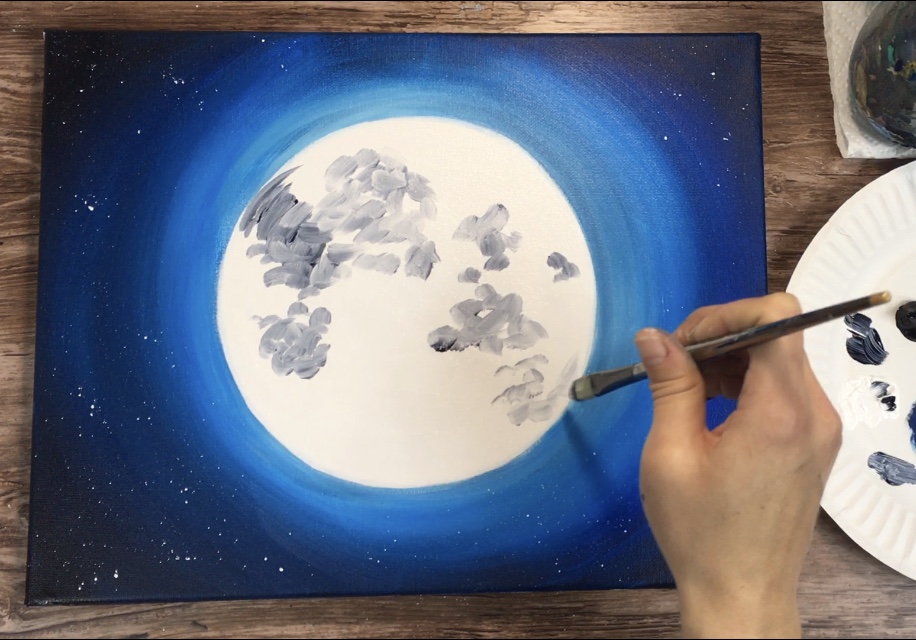
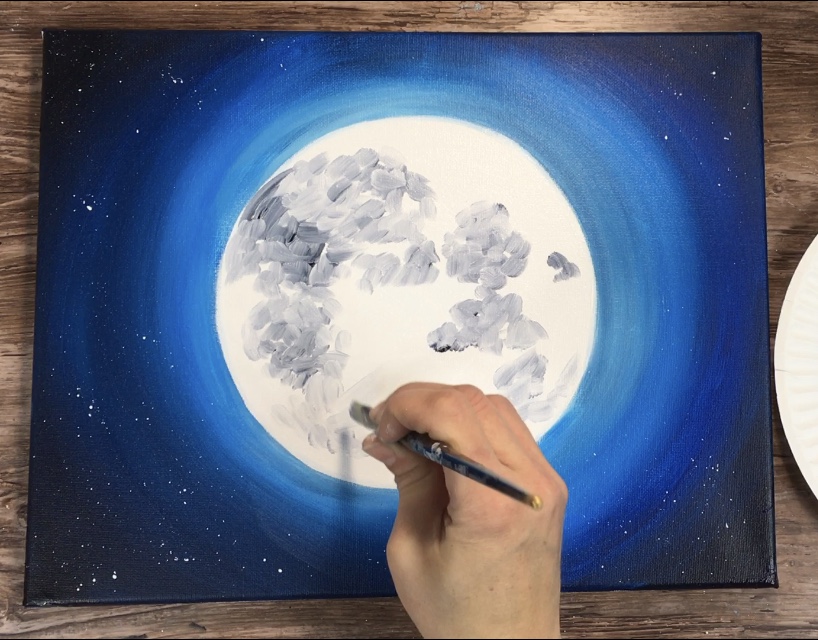
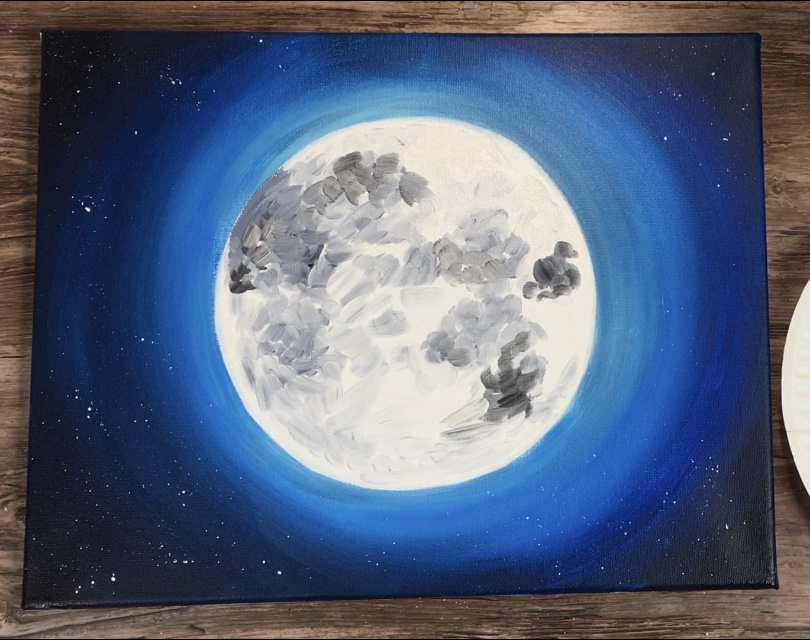
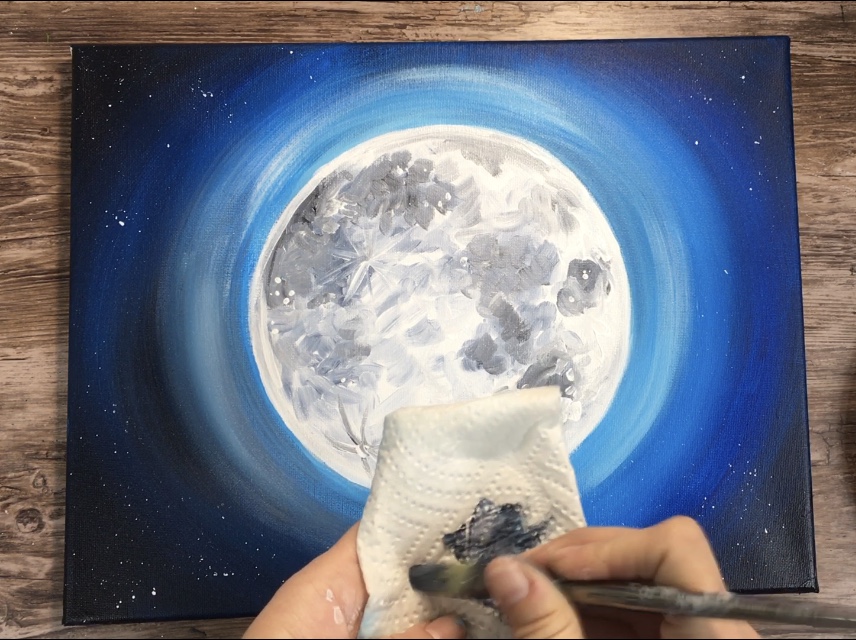
6. Paint your second layer with Mars Black and Titanium White
Mars black is a warmer black color than Payne’s grey (which has blue undertones to it). Adding this new shade of gray to the moon will give it some warmer tones.
Rinse off your 1/2” filbert brush and dry it. Then double load mars black with titanium white (more titanium white than mars black because Mars black is a strong color).
Paint more blotches in the areas that you painted the paynes grey blotches (but don’t over do it).
Let these mars black/ titanium white blotches blend slightly in with the paynes gray ones.
If your mars black blotches are too dark, you can always go back and soften them with more titanium white.
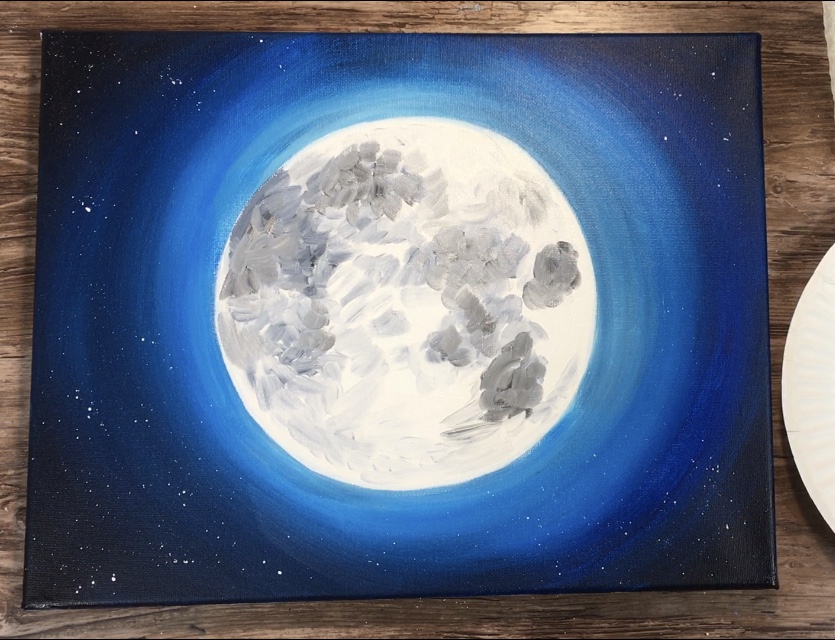
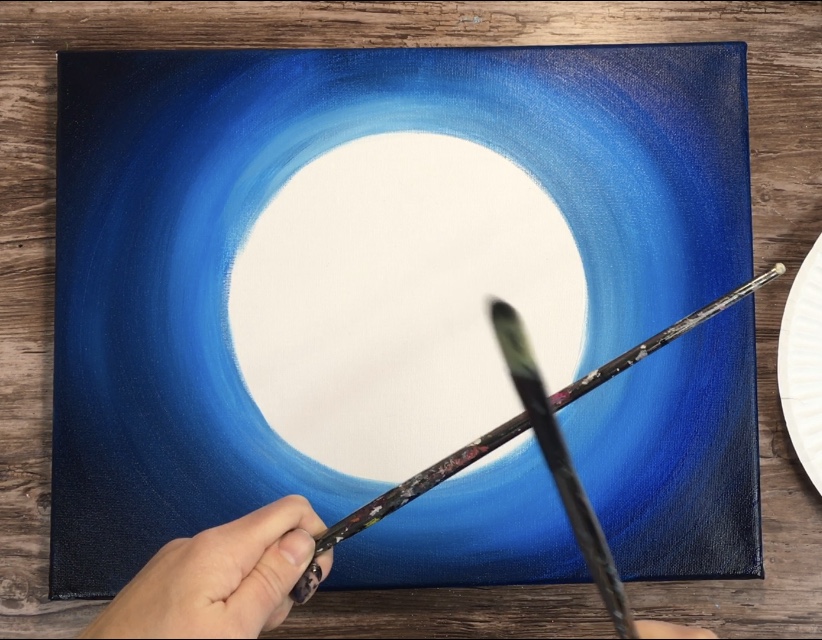
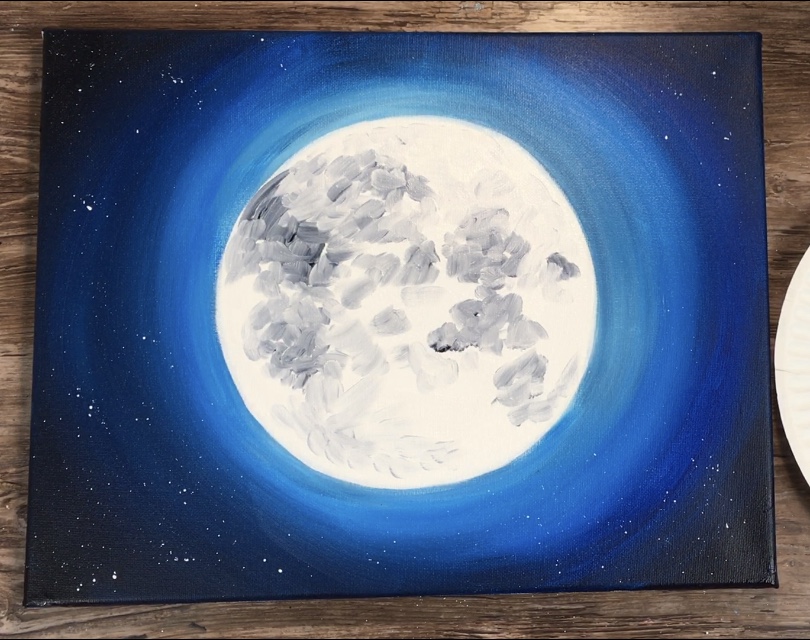
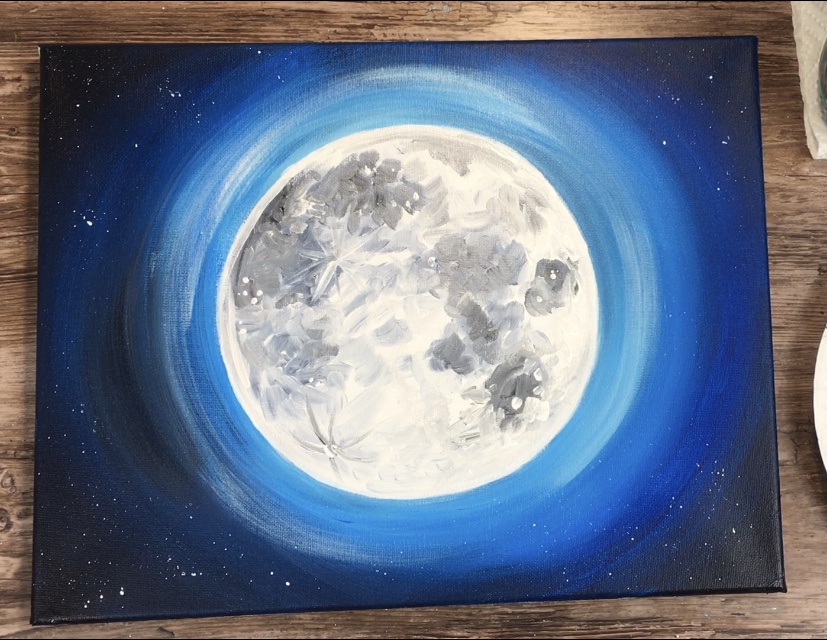
7. Use a round brush to paint little craters, dots and lines
Use a #4 round brush for this step and just titanium white. Paint little dots on the moon, specifically over some of the darker blotches.
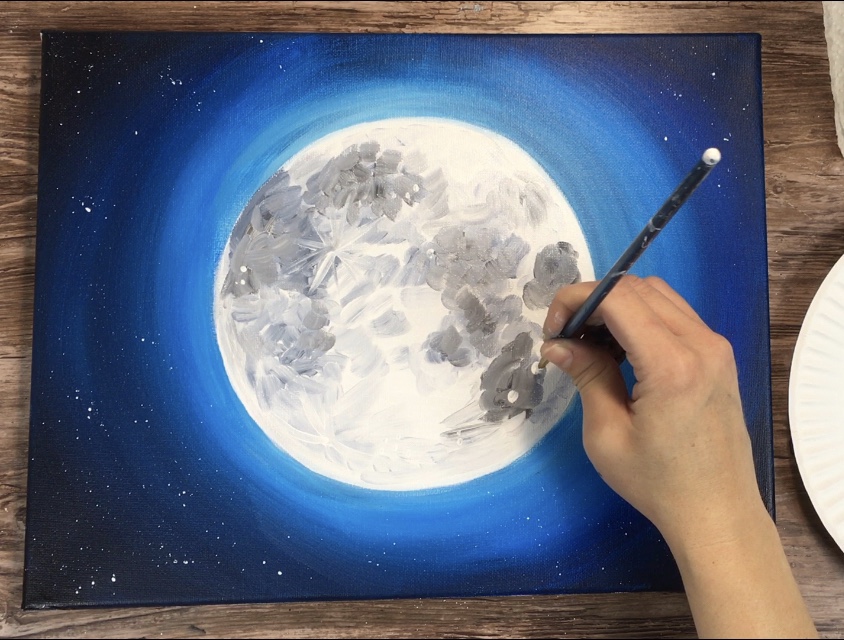
Tp: while you can paint little clusters of dots everywhere and make it look nice, its suggested to look at a real image of the moon and see where these little white dots (aka craters) show up.
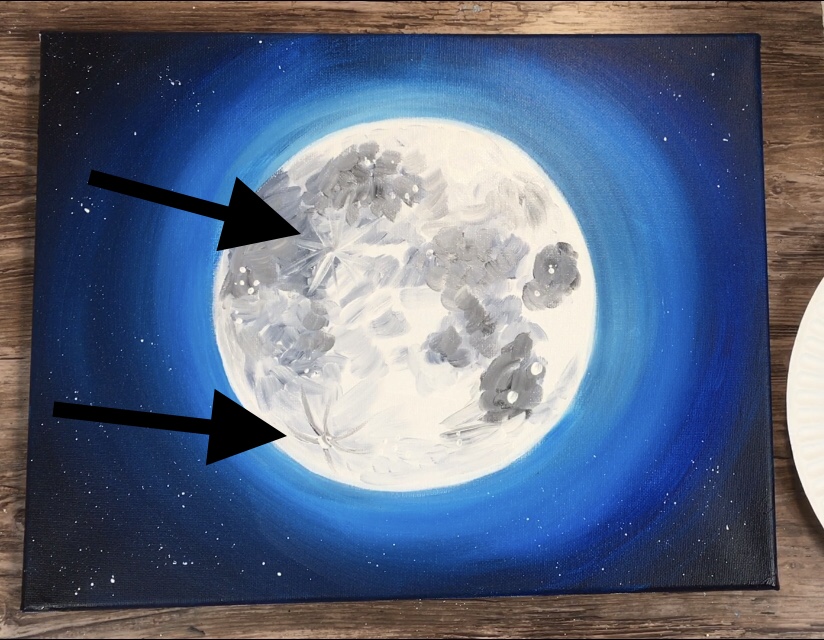
Also with my round brush, I painted these asterisk looking crater things. In the image above, my arrows point to them. There is one in the lower left and one at the top.
To paint these, I used titanium white with a little bit of Payne’s grey so the lines show up agains the white.
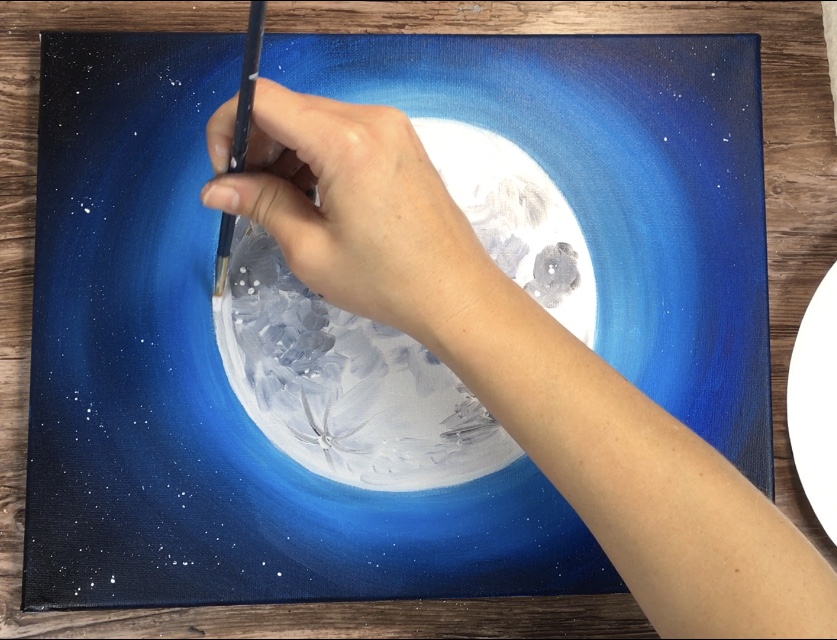
Then I slightly outlined the circle of the moon. Doing this ensures that the perimeter of the circle is nice and bright white.
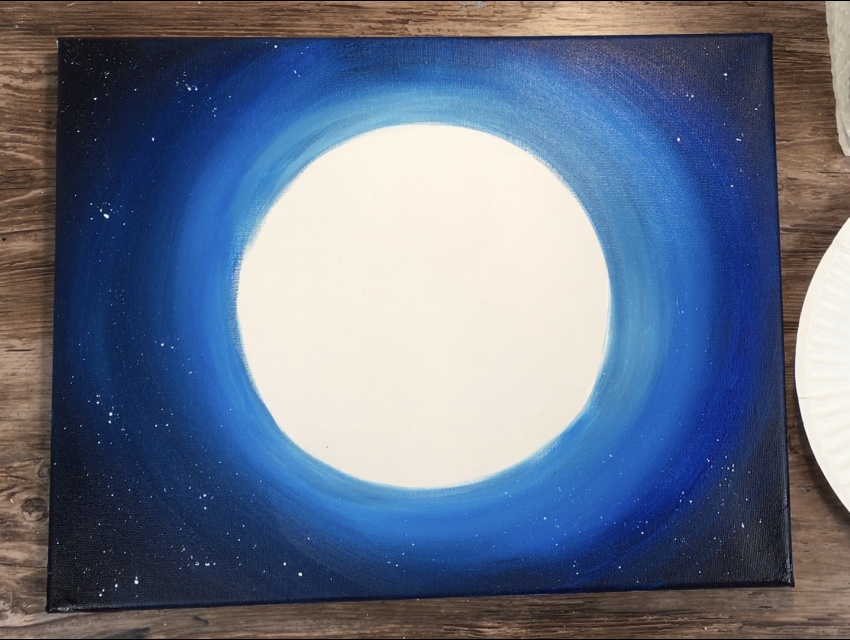
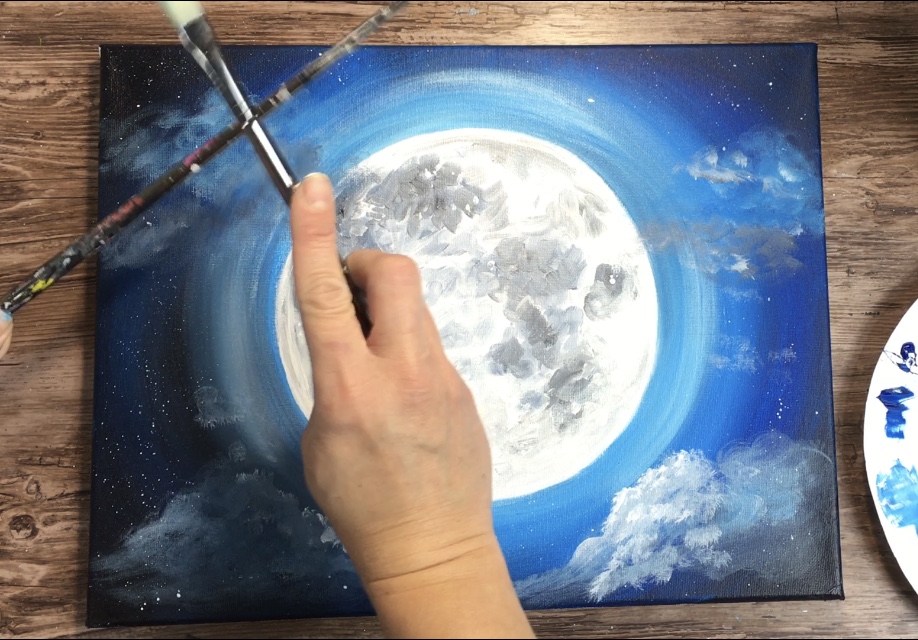
8. Do some touch ups around the moon in the sky
This is optional, but I felt the need to touch up the area around the moon. I used my 3/4 flat to blend in some more phthalo blue and white to make a brighter “moon ring” around the moon.
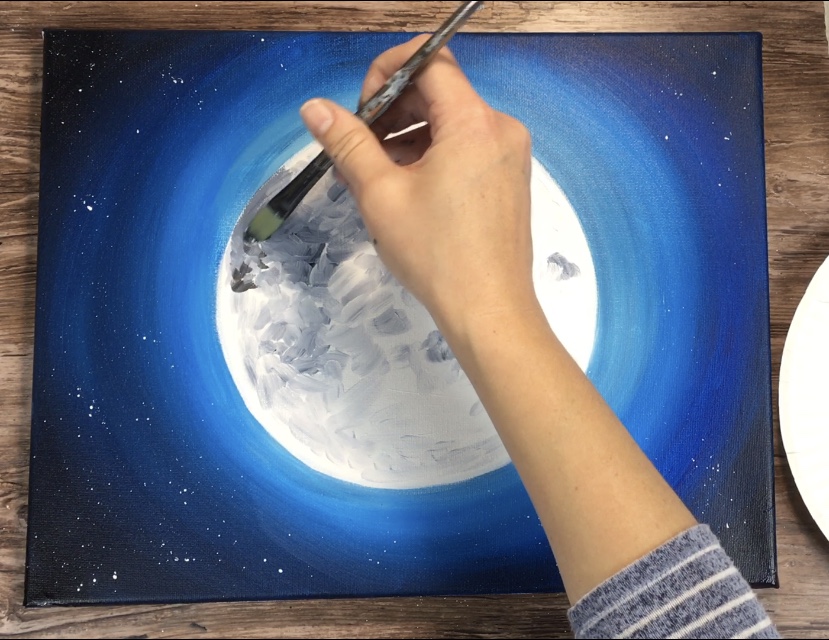
9. Do some dry brush clouds
I used my 1/2” filbert (aka oval wash) for the clouds and I did this dry brush style. This means that I didn’t load my brush in any water and only had a little paint on the tip of the brush.
Also I use a paper towel to wipe my brush after it’s loaded to ensure the paint strokes are nice and dry.
Load your filbert in the white, Payne’s and phthalo but specifically more white so it comes off as a medium gray-blue color.
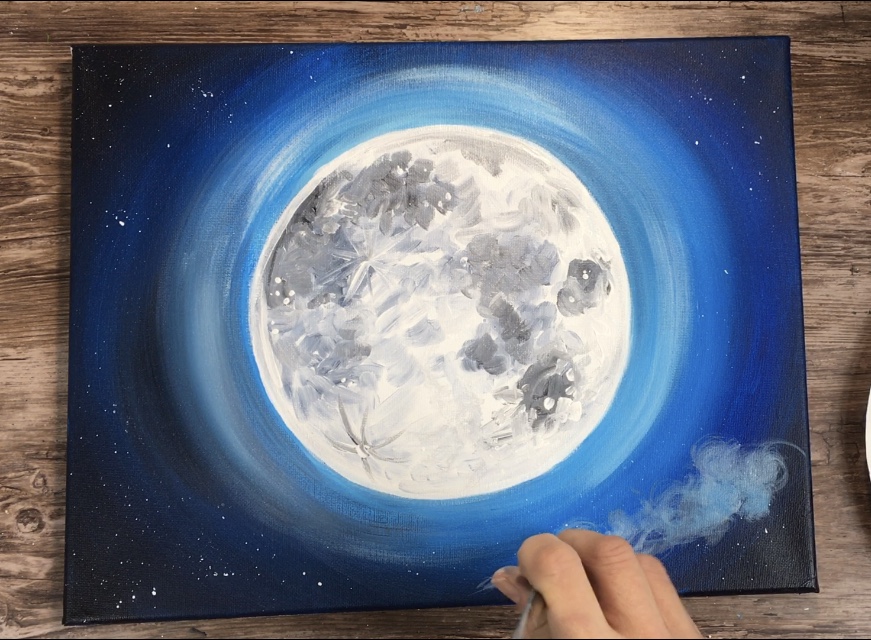
When you do the clouds, work your brush in circular strokes forming the shape of the cloud. Because the brush is dry, you should still see the color of the sky below it.
To create a little depth in the clouds, add some more titanium white to your brush and add a few layers on the top tips of the clouds.
You can also overlap you clouds over the moon a bit.
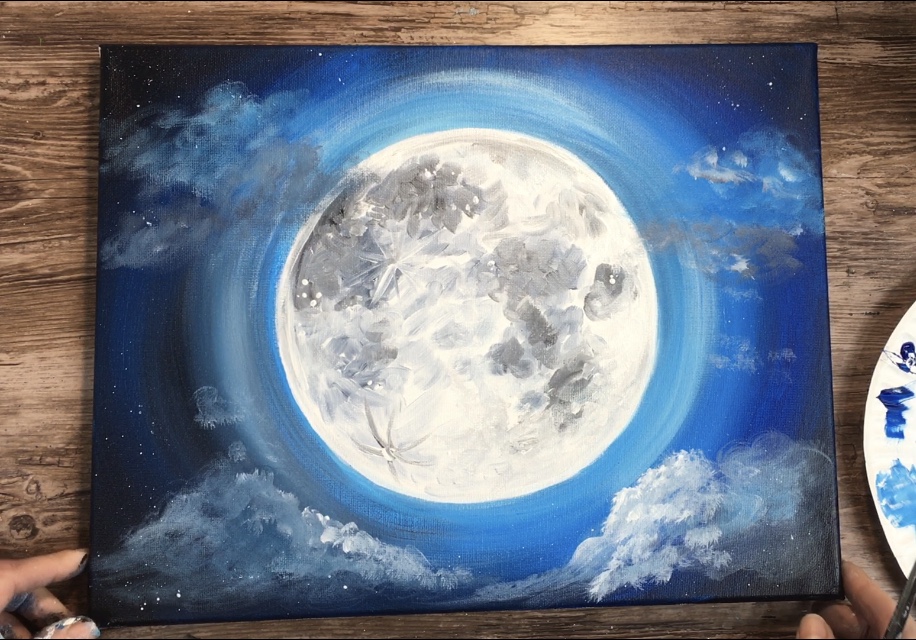
Try to keep it simple! I might have gone too far with the clouds but couldn’t stop myself :-p
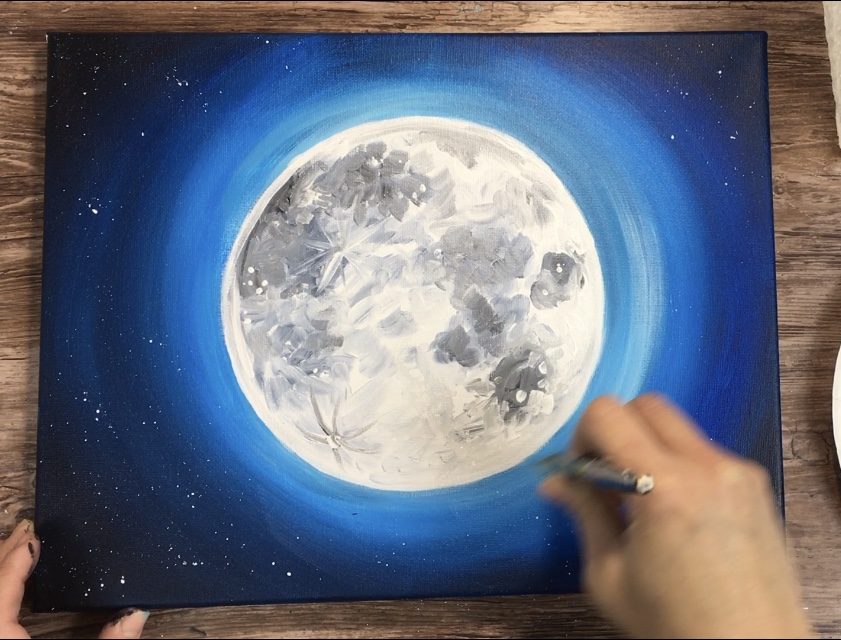
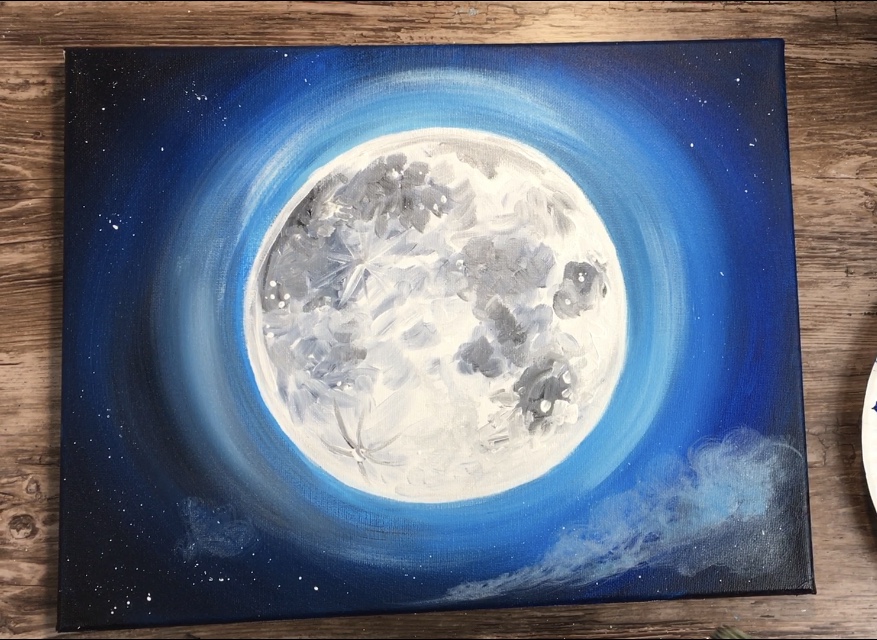
10. Some Final Touches
Go in and tap some more stars! This added a fun dimension to the sky with some stars showing through the clouds and gave it sort of a galaxy look.
I suppose I could have done this three steps ago but I decided to make sure my circle was a perfect circle! I took my plate and then redid the light blue color around the moon so my circle turned out nice and round.
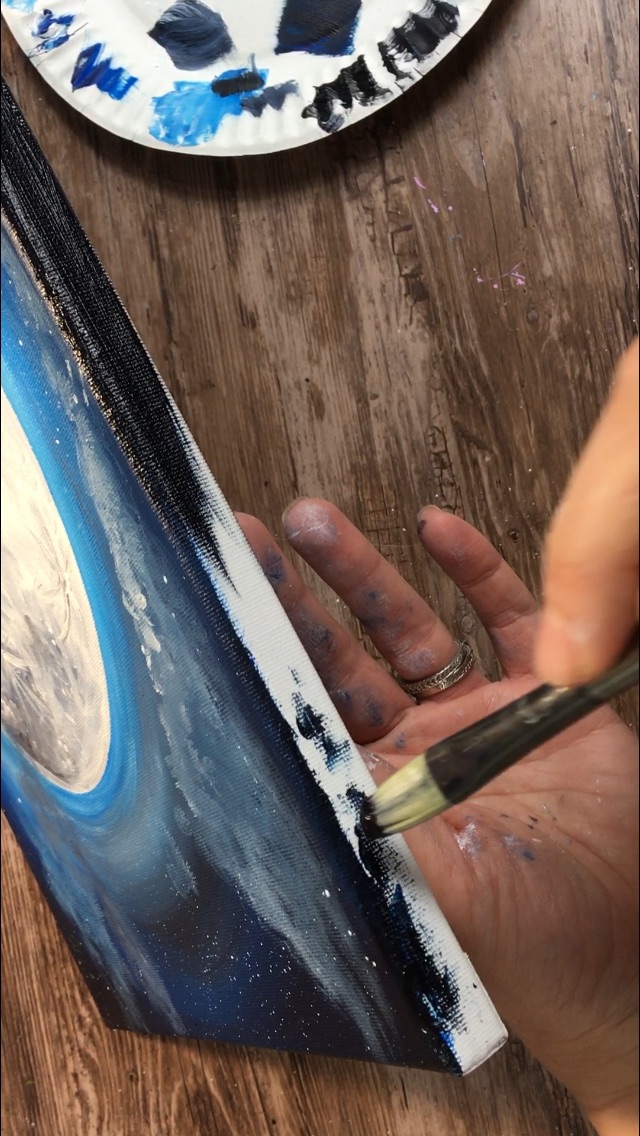
Paint the sides if you have not done so yet! I did my sides with paynes grey.
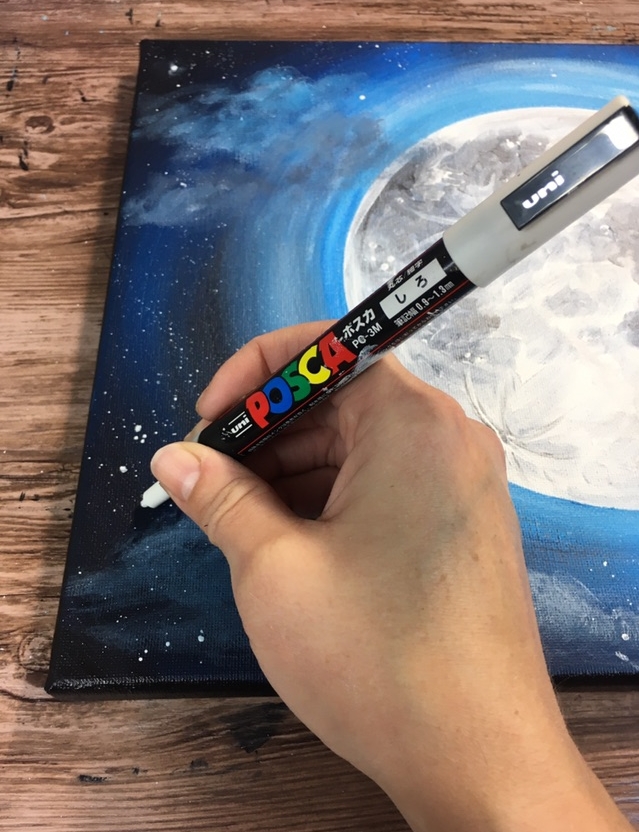
Use a POSCA white paint pen for some larger stars. Simply paint some clusters of smaller circles. You can even make some of them blurry by pressing your finger on the dots and smearing them a bit.
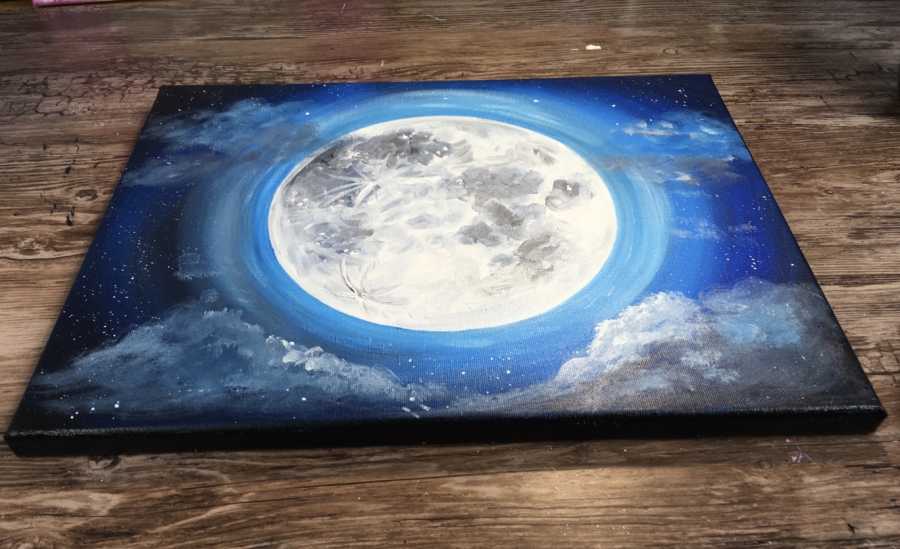
Finished!
This was a fun challenge! I love painting the moon and if you’re one of my active followers you may notice I do the moon A LOT. Thanks for viewing this lesson, I can’t wait to see how your moon turned out!

Share your art here!


It looks really cool and challenging I really hope to try it sometime!!??
Try it! Yes this one is a bit of a challenge ?
I think I will sometime?
I think I will?
It’s beautiful! <3
I tried this just now. I havnt added the clouds yet and I don’t know if I will because I have a smaller canvas… It was very fun though and quite simple!
Awesome Simon! I’m glad you enjoyed painting the moon!
Well mine didn’t quite turn out like yours lol but I did want to shoot for my own peculiar look as well as try to incorporate some purple and blue in as well…at some point I figured I just had to roll w it and make an abstract moon of my very own talent 😉 I have had the wood for weeks too intimidated to start and my little kitten is named Moon Beam so I tried painting her in at the bottom for more sentiment. Lol I really like how outlining can make such a huge difference that and the blending techniques I had never really experimented w so I wish I would have done that or if any suggestions I’ll certainly take them! Otherwise This is the point where I just keep going and going and going and it ends up looking jumbled mess overall I’m happy with my moon though This is the point where I just keep going and going and going and it ends up looking jumbled mess overall I’m happy with my moon though
Used it for my almost 5 year old.. He enjoyed it!