
Underwater Painting Tutorial
Would you like to save this?
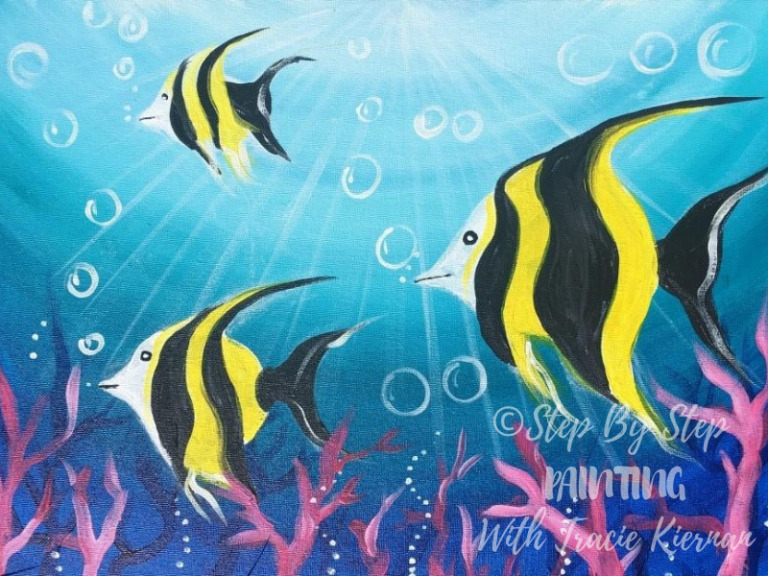
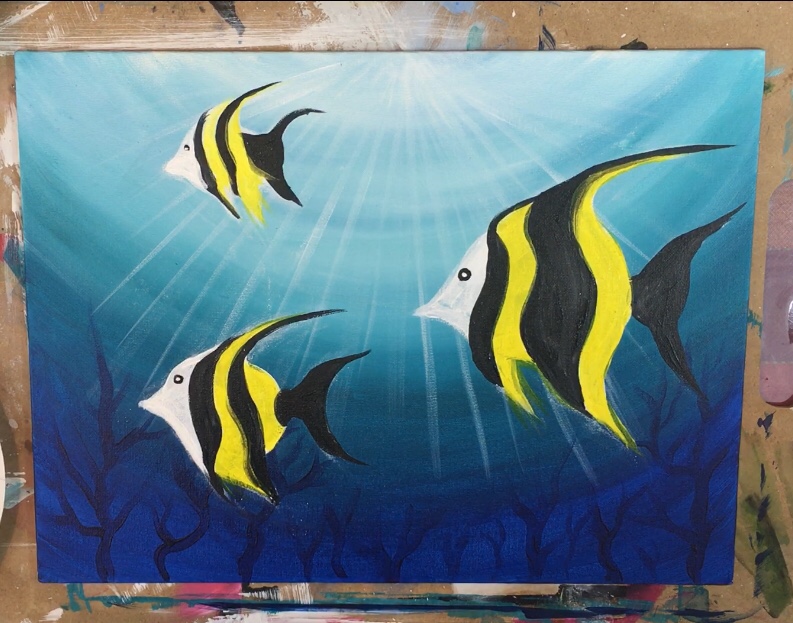
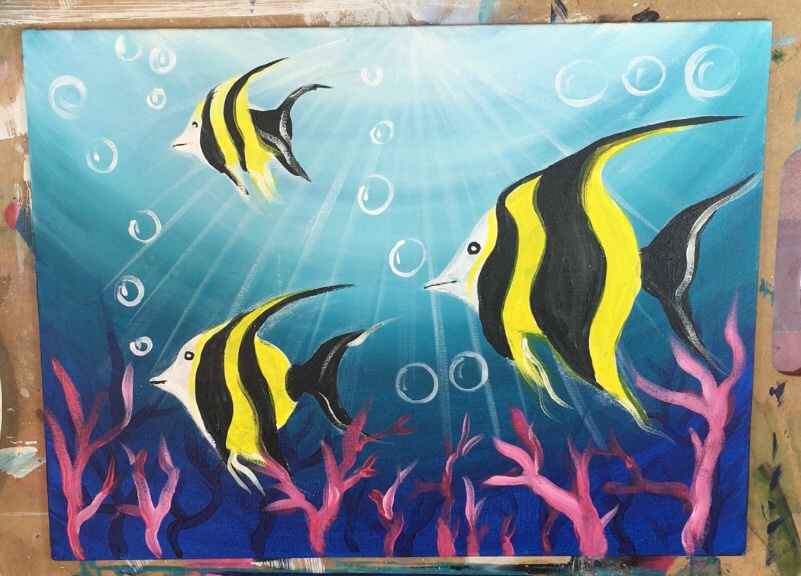
This tutorial will guide you through the steps on how to paint an underwater painting scene with angelfish, seaweed, bubbles and coral.
Use two different shades of blues for the underwater color and white for the light shining through the ocean top.
Then you can add your own sea creatures and coral/ sea weed as well as fun bubbles!
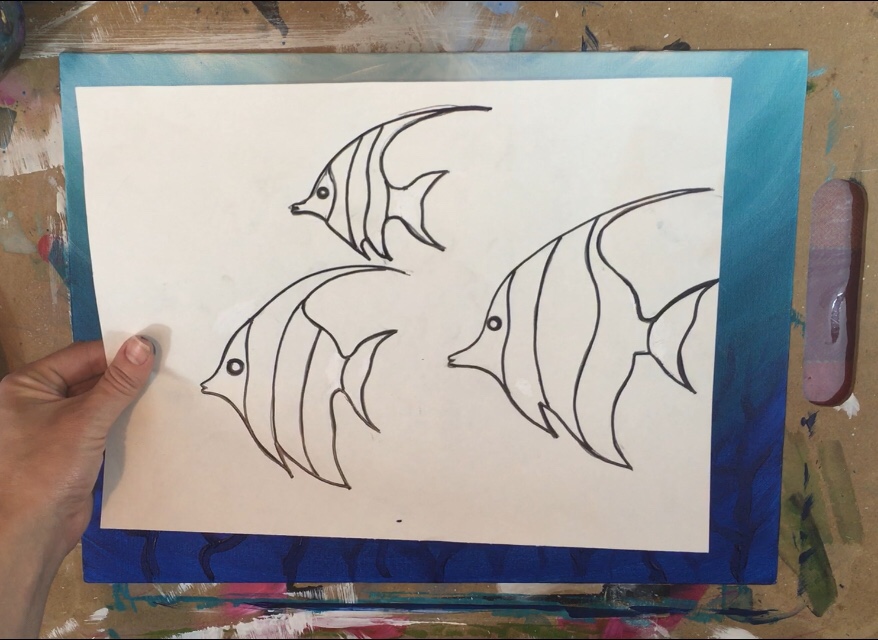
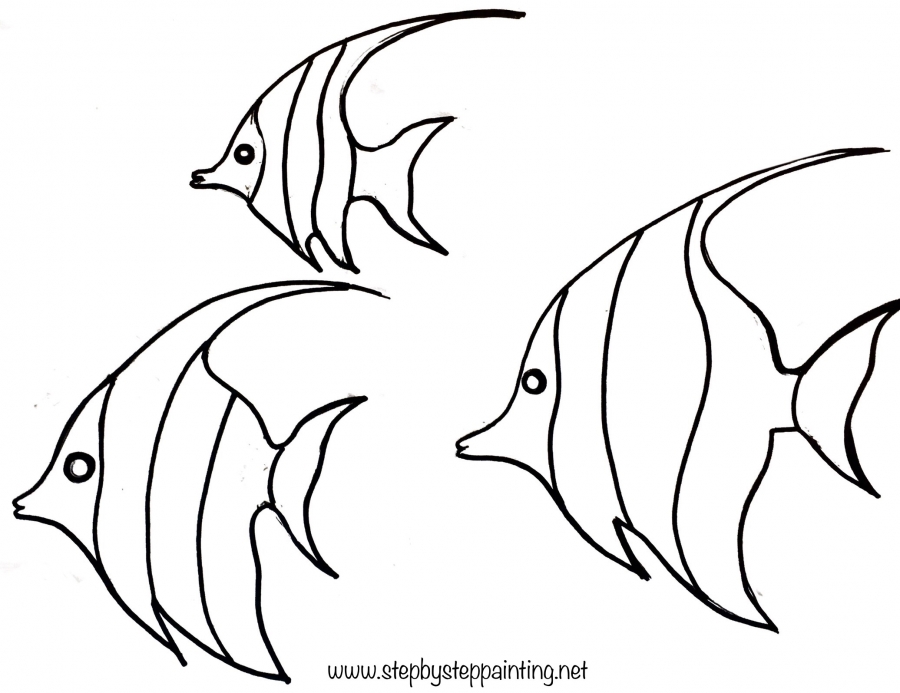
You can draw your own angelfish or use this free traceable to print and transfer onto the canvas with white graphite paper.
This is a very fun and relaxing painting!
It’s a great one you can do with your kids and even learn a little bit about marine biology.
Enjoy and happy painting!
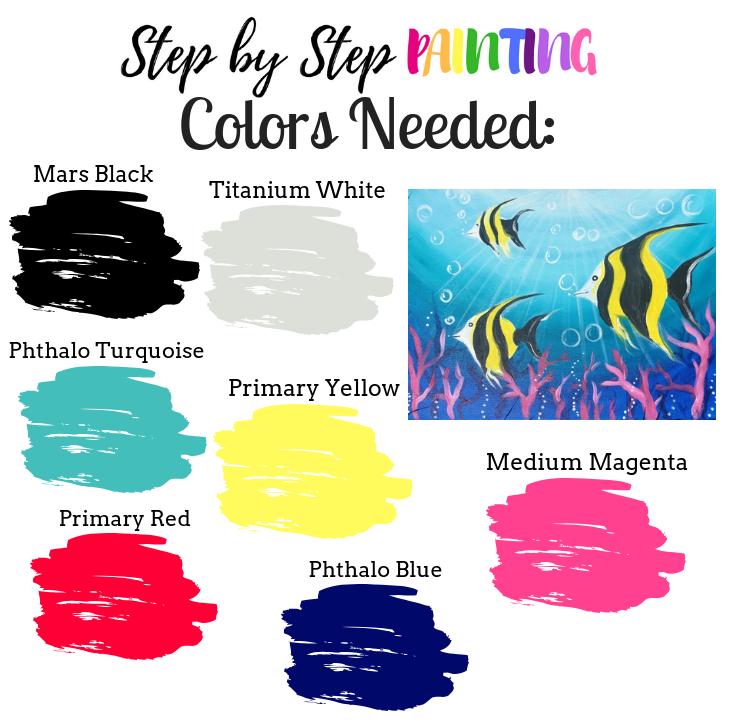
Materials For This Underwater Painting:
How To Paint Under The Sea Angelfish
This acrylic painting tutorial will guide you through the steps on how to paint an underwater ocean scene painting with angelfish.
Materials
Basic Supplies
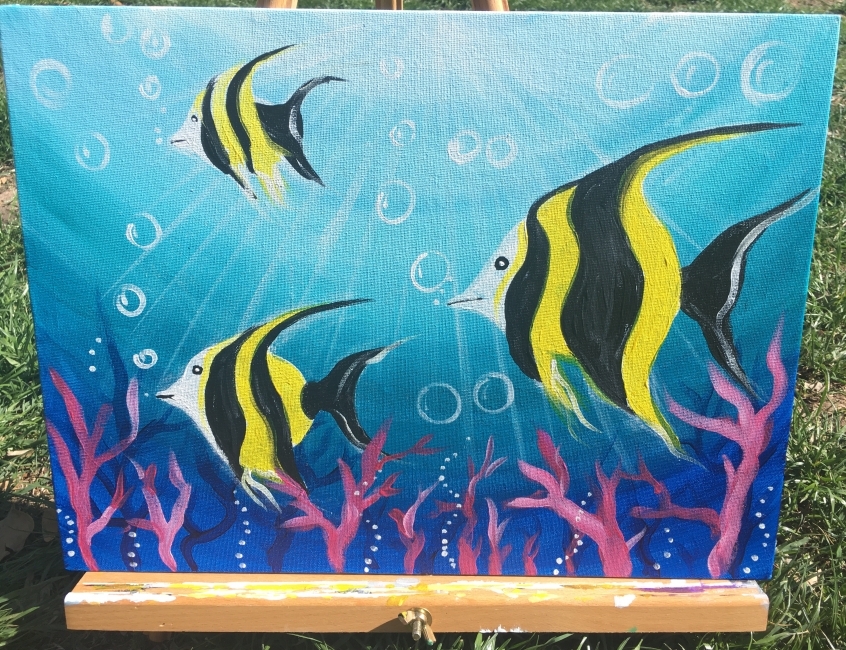
- Any size canvas (I used 12" x 16")
- Acrylic Paint
- Brushes
- Chalk
- Traceable
- Graphite Paper (White Transfer Paper so you can see it over the dark paint colors)
Colors
- Phthalo Blue
- Cobalt Turquoise Hue (Or Turquoise)
- Titanium White
- Mars Black
- Medium Magenta
- Primary Red
- Primary Yellow
Brush Sizes
- 3/4" Flat
- #12 Flat
- #4 Round
Instructions
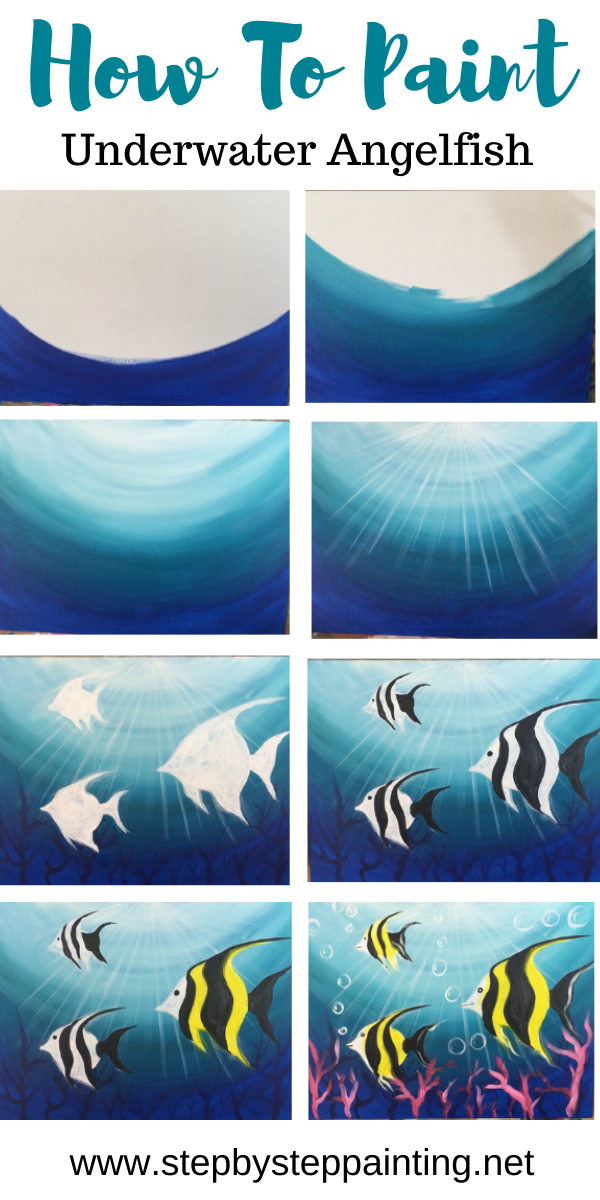
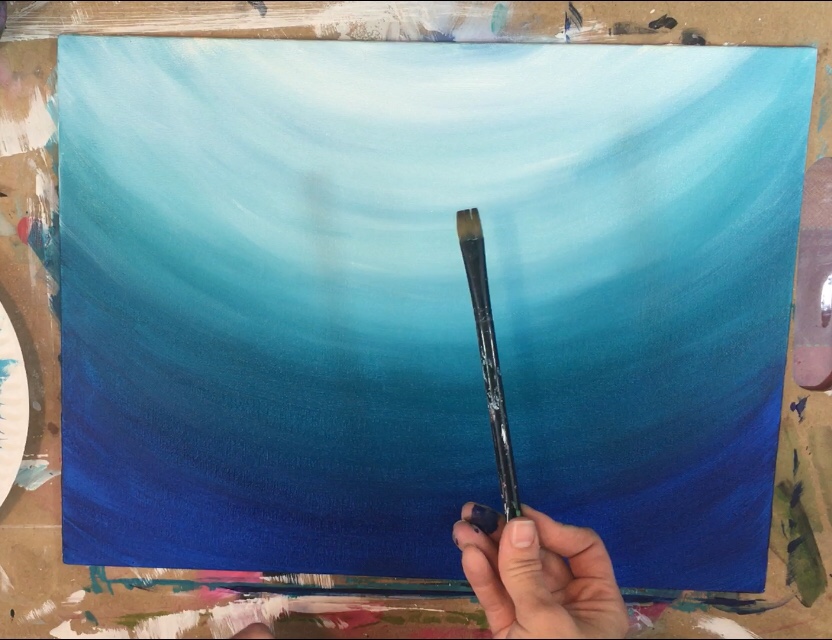
- Paint the under water background by using a combo of turquoise, phthalo blue and white acrylic paint. Start at the bottom with phthalo blue and paint curved strokes.
- Go up about 5 inches with the phthalo blue and then blend turquoise into the blue as you work your way to the top of the canvas.
- Then blend titanium white in with the turquoise. The ocean top will be lightest so keep blending the white until it gets nice and bright at the very top.
- Paint the light rays starting at the top with a 12 bright brush and titanium white. Do this before the blue background drys so the white can blend with the blues. Stroke each ray down starting from the top middle.
- Paint the seaweed and coral. Use phthalo blue and a round brush.
- Wait for the background to dry and then draw or transfer the angelfish using the traceable and a sheet of graphite paper.
- Outline your drawing with a piece of chalk so the fish shapes are more visible.
- Paint the fish shapes a solid titanium white. Use any brush for this step.
- Wait for the white to dry and then paint the black stripes on the angelfish.
- Paint the yellow areas in with a round brush and primary yellow.
- Paint bubbles using a small round brush and titanium white.
- If desired, paint some pink coral using medium magenta, primary red and titanium white.
Color Palette:
For this underwater painting I used two different types of blue: phthalo blue and phthalo turquoise. Use “turquoise” if using Liquitex BASICS.
Traceable for underwater painting:
Directions At A Glance:


Video For Underwater Painting:
Picture Directions For Underwater Painting:
1. Paint the “under water” background with phthalo blue, *phthalo turquoise and titanium white.
*Note: I used DecoArt Cobalt Turquoise Hue which is similar to a phthalo turquoise. Liquitex BASICS now makes a turquoise so I would use that color if you’re using BASICS brand.
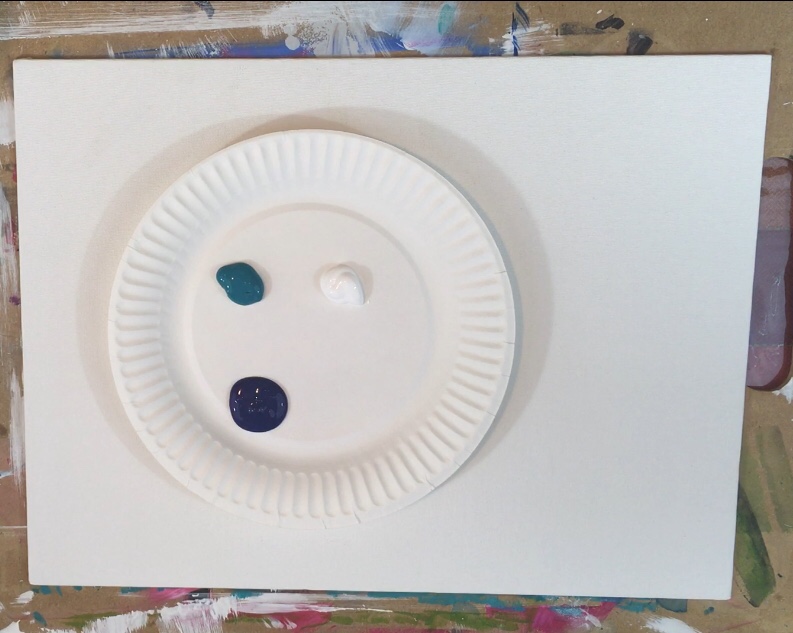
Load your palette with the three colors and get your 3/4″ flat brush damp.
Starting at the bottom and with only phthalo blue, paint in a “curved direction”.
You may add a bit of water to the paint to get it to flow a little bit more. 
Go up about four or five inches. 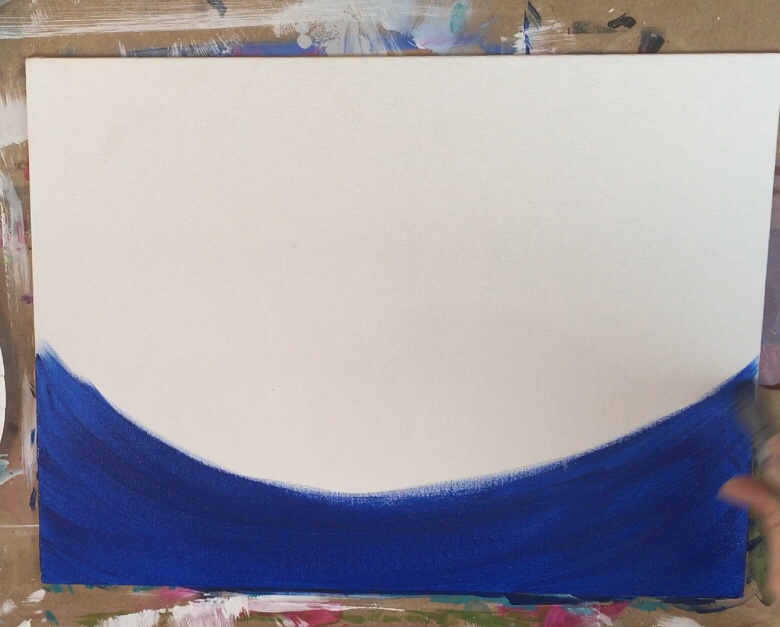
Then dip your brush (no rinsing) in turquoise.
Continue to paint in a curved formation blending the phthalo blue with the turquoise.
To blend, simply paint over the canvas using the wet on wet blending technique (colors mix together on the canvas).
You may also wish to add a bit more phthalo blue to your brush to allow it to blend a bit more.
Continue to paint up as the color turns to a pure turquoise. 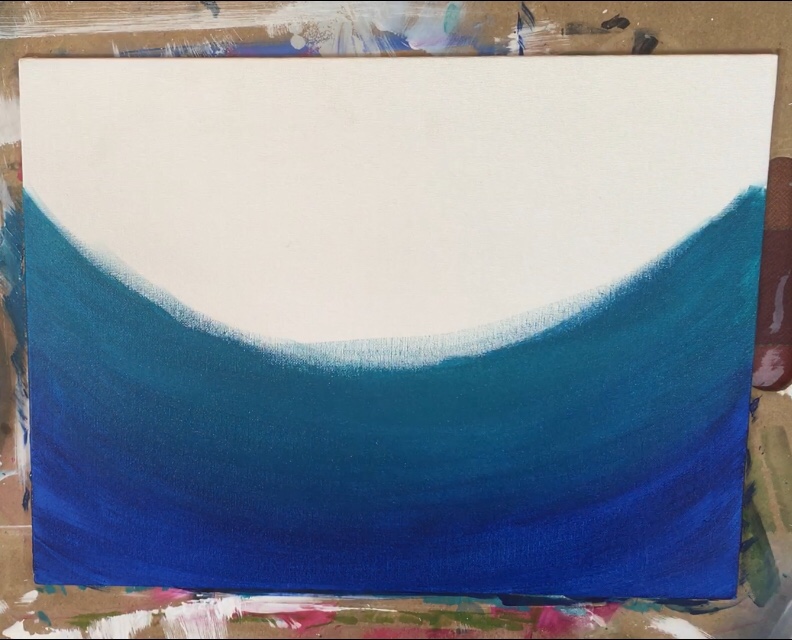
Then add a tiny bit of white to your brush (no rinsing).
This will turn the turquoise to a lighter tint. Continue to paint in a curve formation as you work your way to the top of the canvas.
Continue to add more white as you go up so that the turquoise gradually gets lighter. 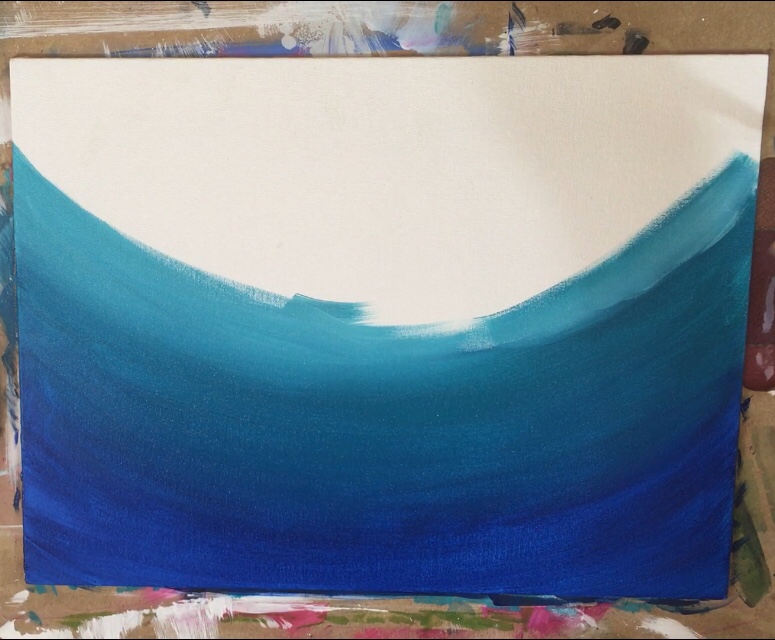
Since the brush has not been rinsed yet, you may see occasional traces of phthalo blue show up in some strokes.
That is okay, it gives it a bit of color variation.
Continue to work your way to the top of the canvas adding more white.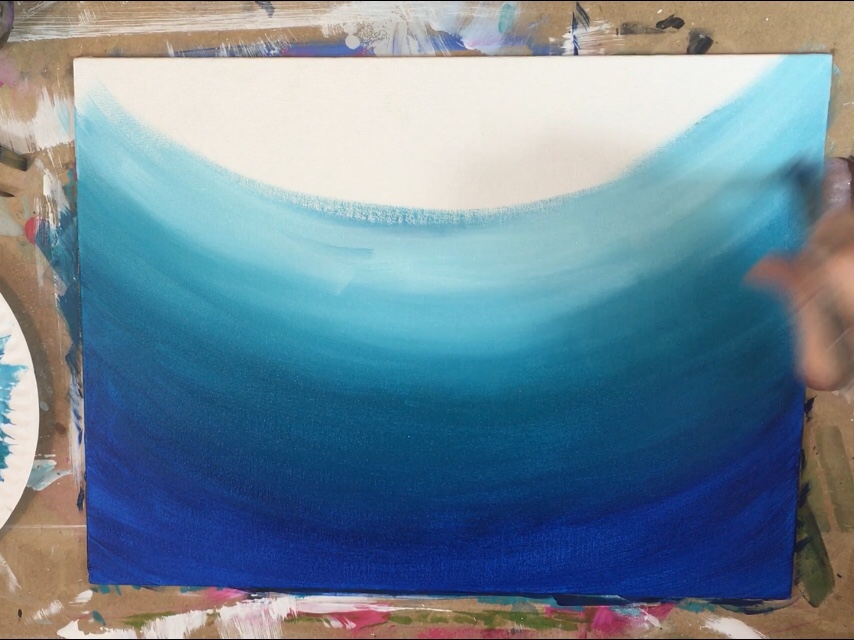
The lightest and brightest part of the ocean is at the top middle part of the curves on the top of the canvas. 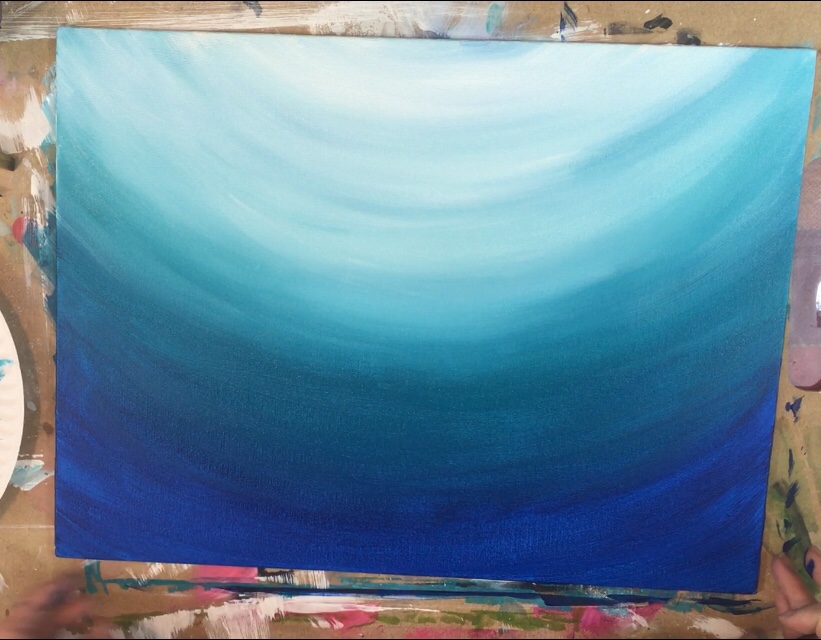
2. Paint the light rays with titanium white and a #12 flat brush
Get your #12 flat brush ready and water down some titanium white so that it is an ink consistency.
You want the titanium white thin – not watery but translucent and thin. 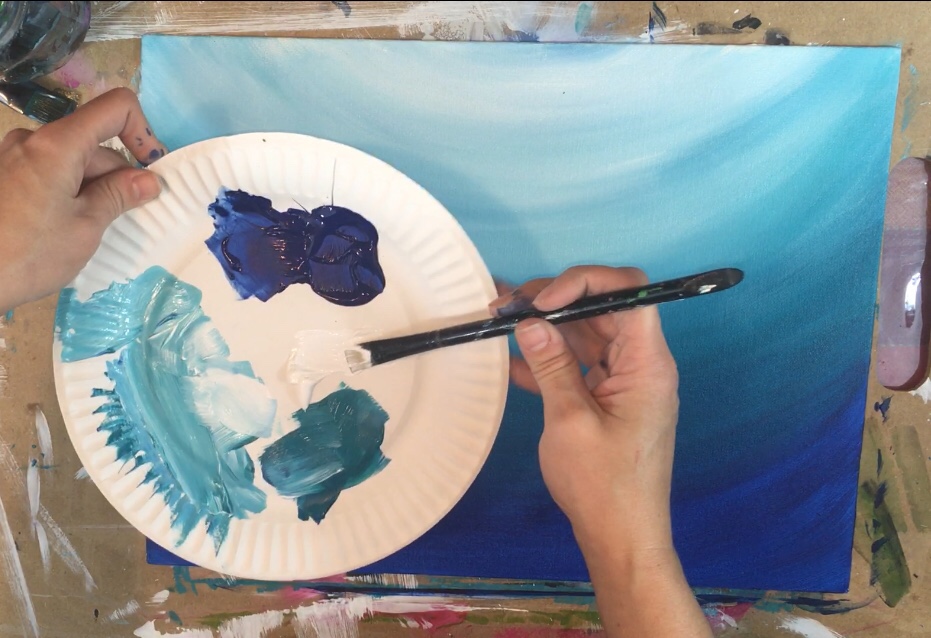
To paint the light rays use the tip of the brush on its side to get a thinner stroke.
Start each stroke at the top middle, press a little firm at first and then loosen up on the brush at the very end so the ray goes to a point. 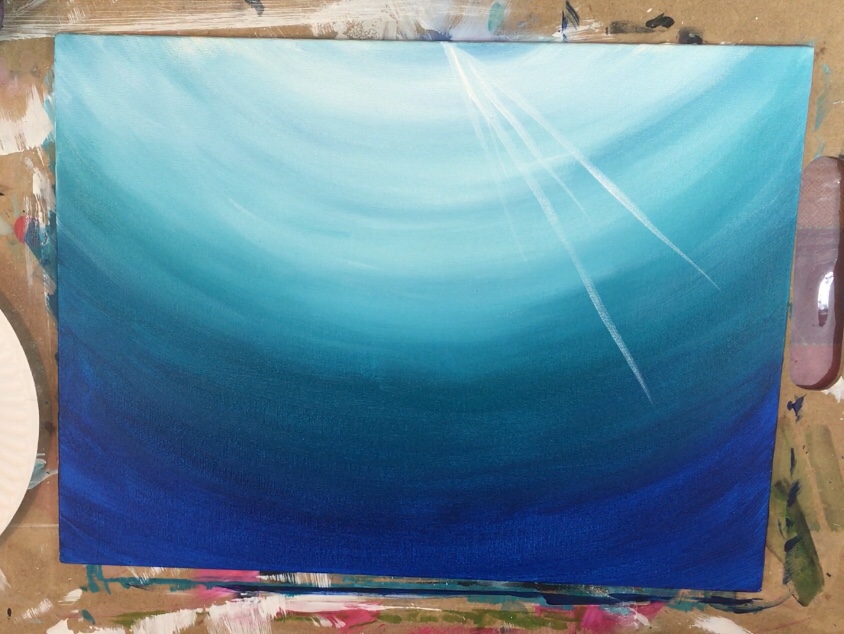
Continue to paint the rays and vary some of the lengths and thickness of the lines.
Keep in mind that this white is slightly watered down so it shouldn’t be bright and bold – more like subtle and somewhat translucent. 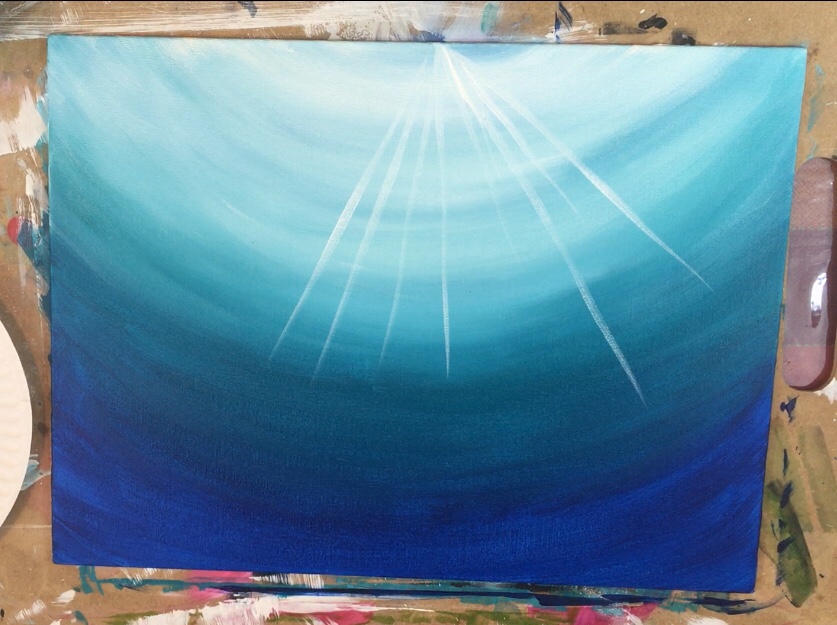
You may wish to use the full width of the brush to make some thicker ray lines. 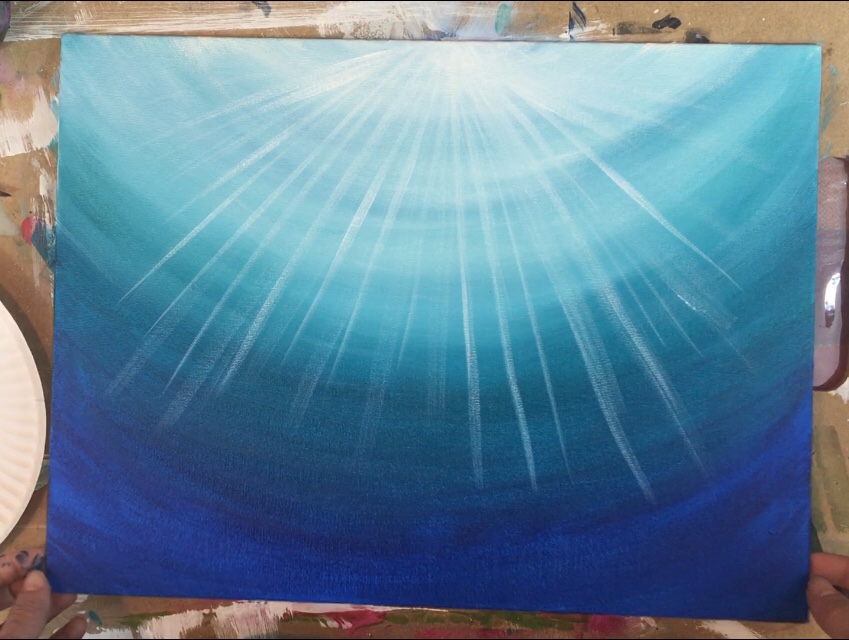
3.Paint come coral/ seaweed with phthalo blue and a #4 round brush
Use a #4 round brush and the color phthalo blue. Paint wavy branching lines to represent coral/ seaweed.
This phthalo blue should still show up on the bottom but if it doesn’t, you can try to add a tiny bit of black into the phthalo blue to make it dark. 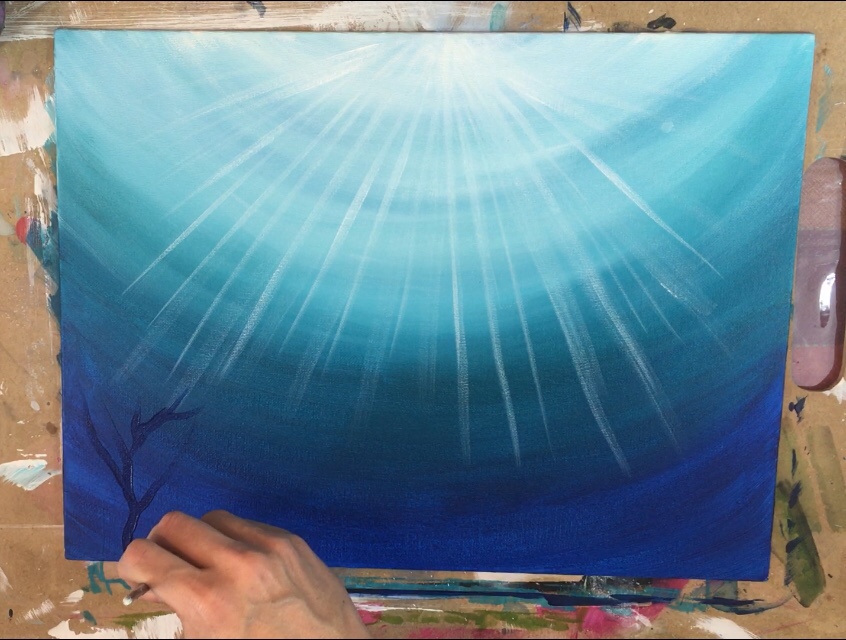
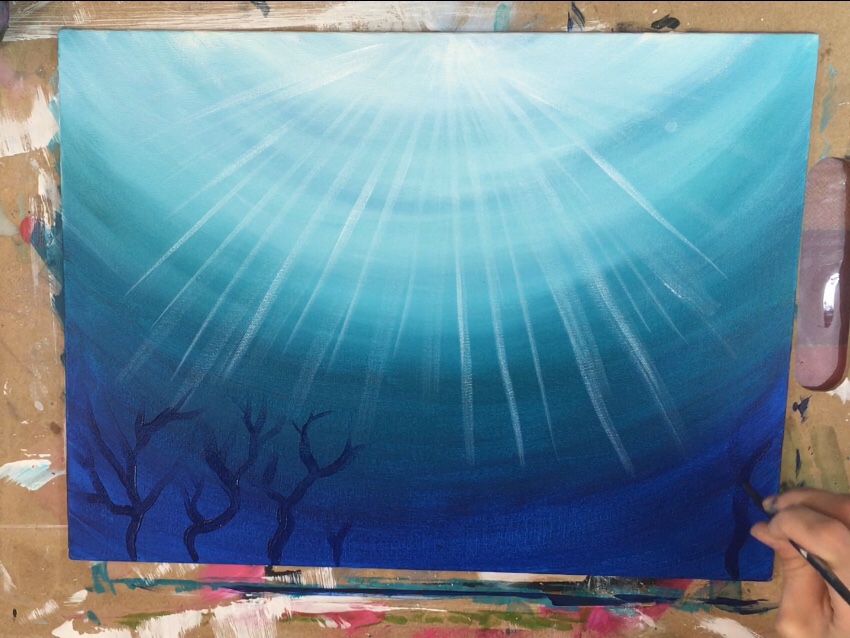
For the blue seaweed, I made it so they were shorter in the middle and taller on the sides. 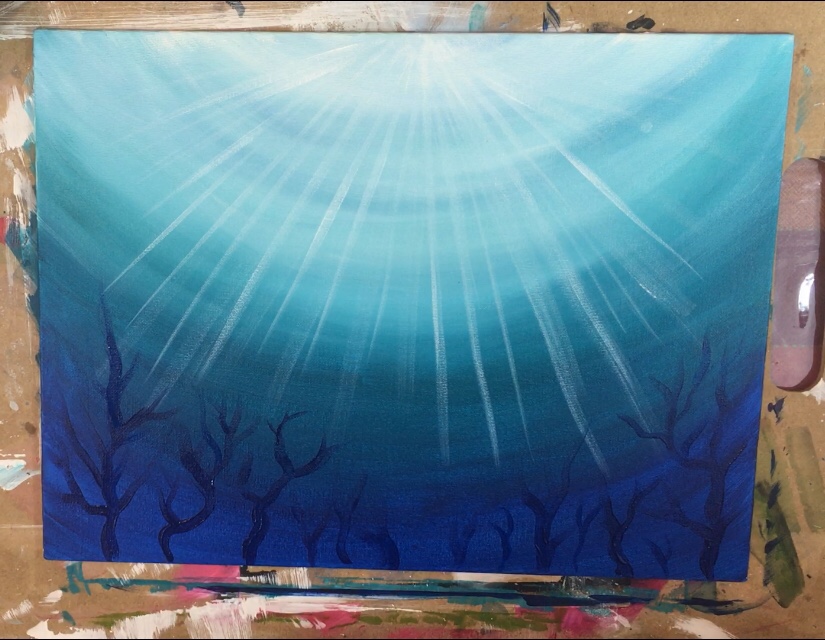
4. Wait for the background to completely dry and then draw the angelfish (and/or other sea creatures) onto the canvas.
This next step requires that you either transfer the angelfish to the canvas using white graphite paper or draw them free handed with chalk or a white color pencil.
You may choose to arrange the fish anyway or do as many fish as you’d like. You can also get very creative with this and paint other sea creatures!
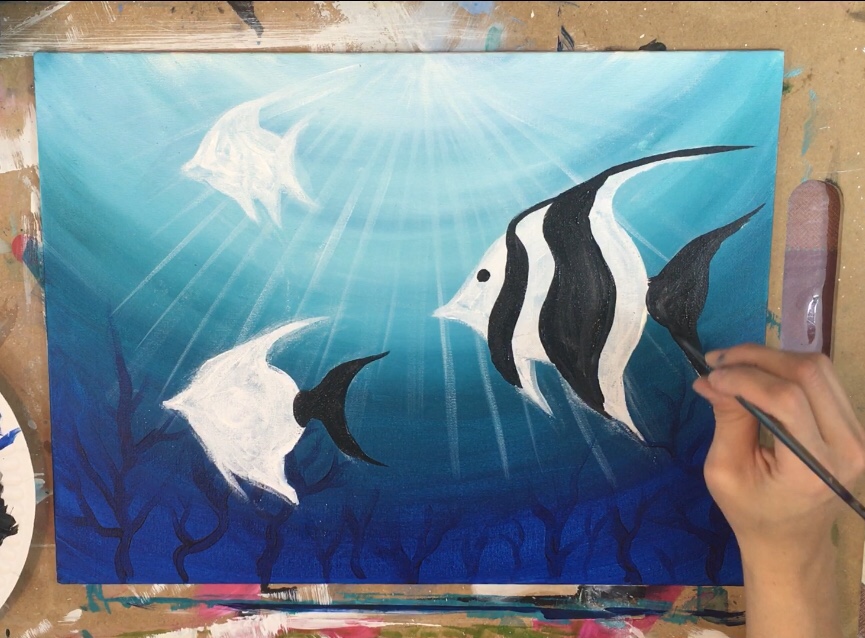
For the demonstration, I used chalk to draw three angelfish. 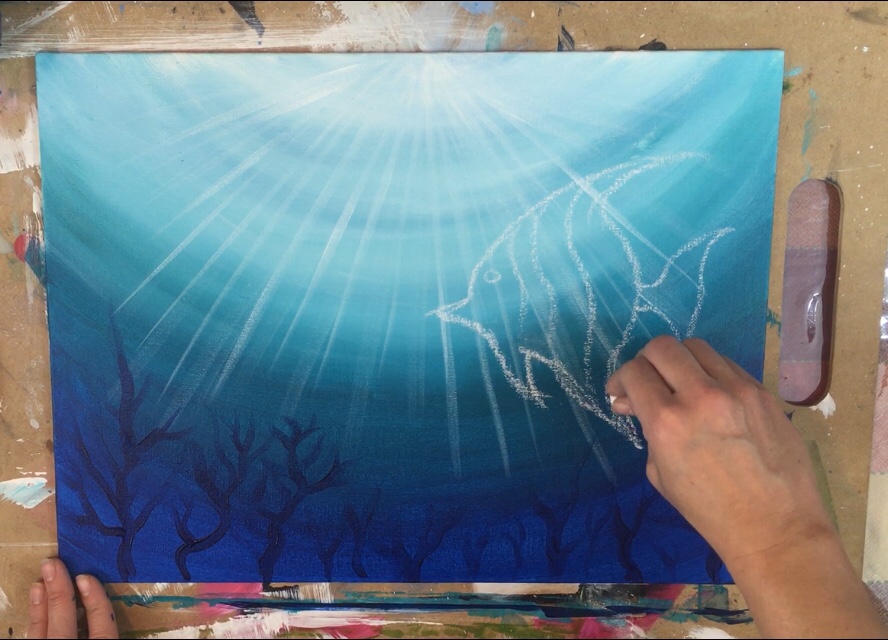
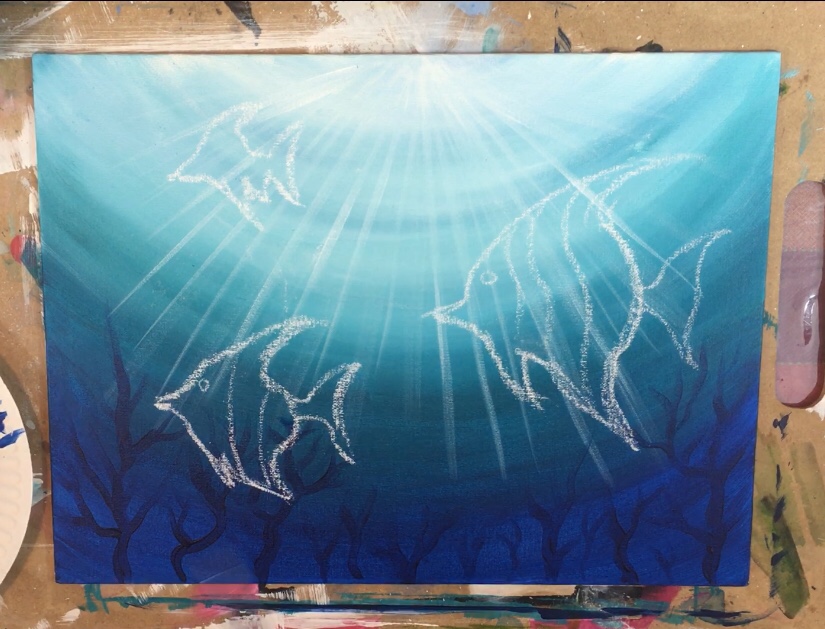
5. White out the angelfish/ sea creatures.
Before painting the angelfish in, it’s best to white out the areas so they are nice and solid and any blue will not be showing through. Do this with a round brush and a flat brush depending on how small or large the area is. 
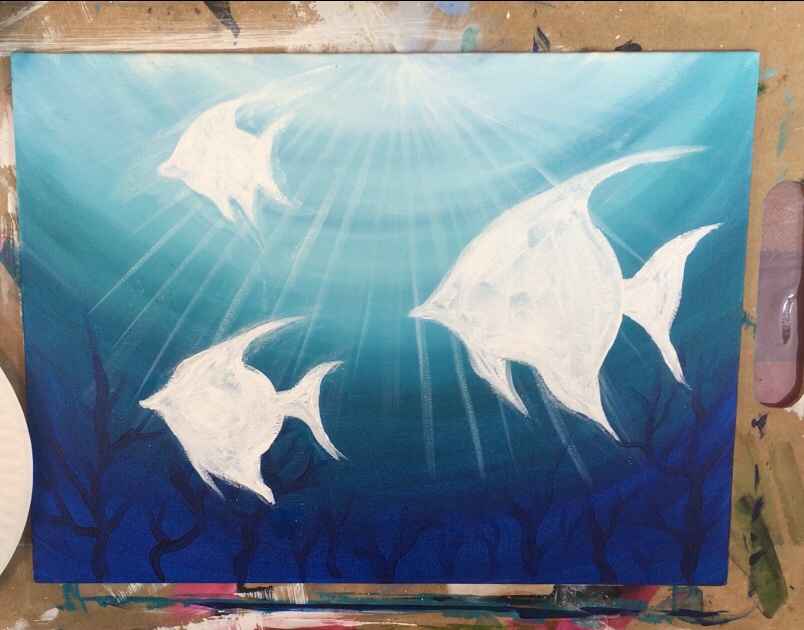
6. Paint the angelfish
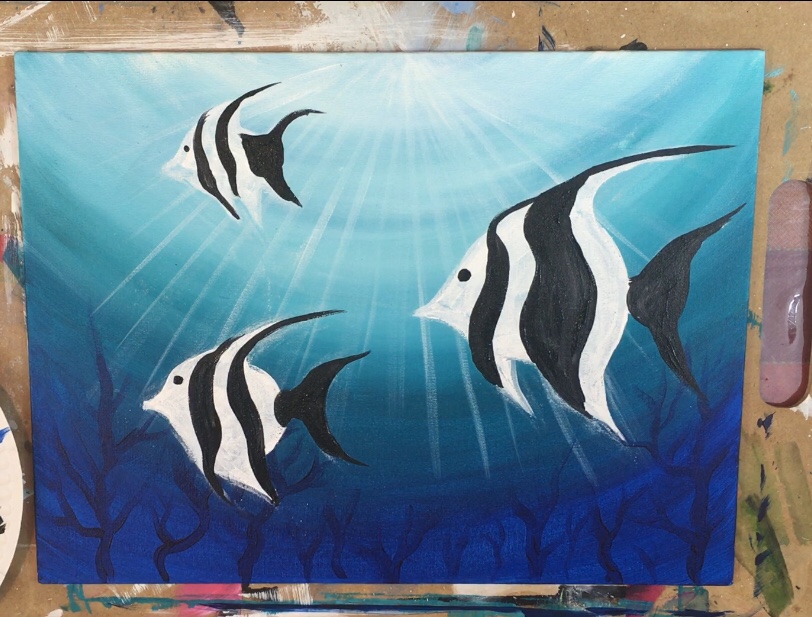
I started with a #4 round brush and mars black. Basically I painted the tails and the stripes as well as the eyes. 
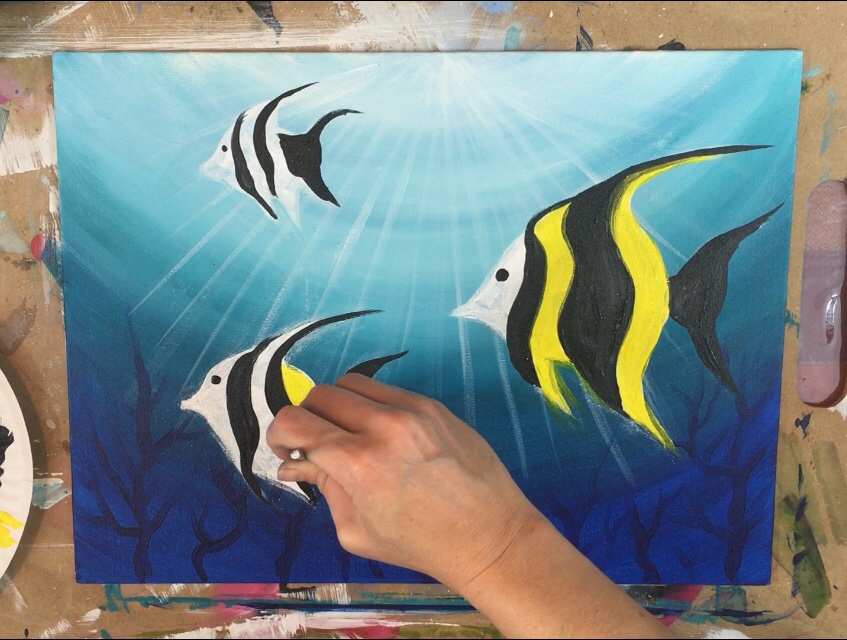
Then I did the yellow areas with the #4 round brush and primary yellow.
A word of caution: allow that black to dry before proceeding with the yellow!
I definitely messed up in some areas where the yellow ran into the black and made it look “muddy”. 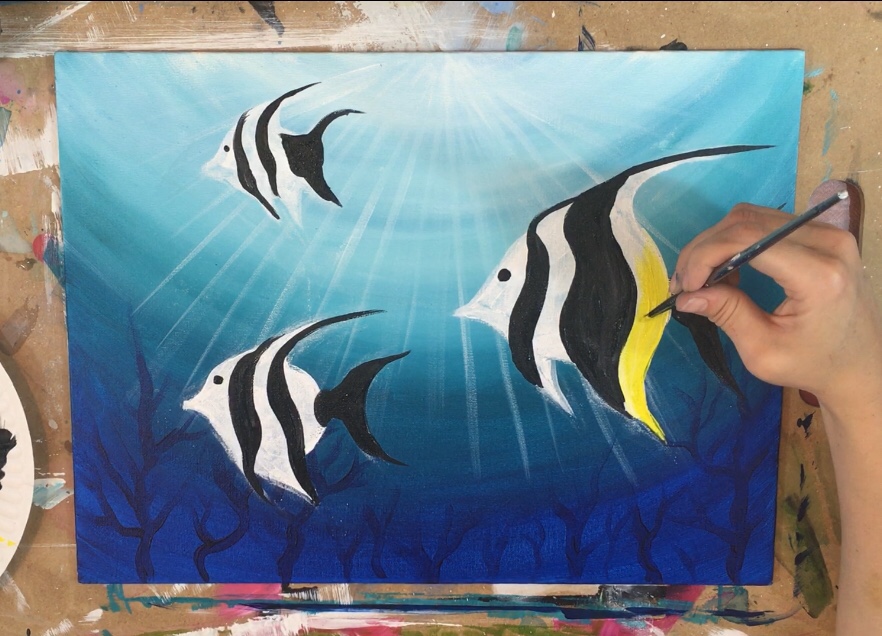
Then do the eyes (a little white dot in the middle of the black dots). And a line for the mouths as well. 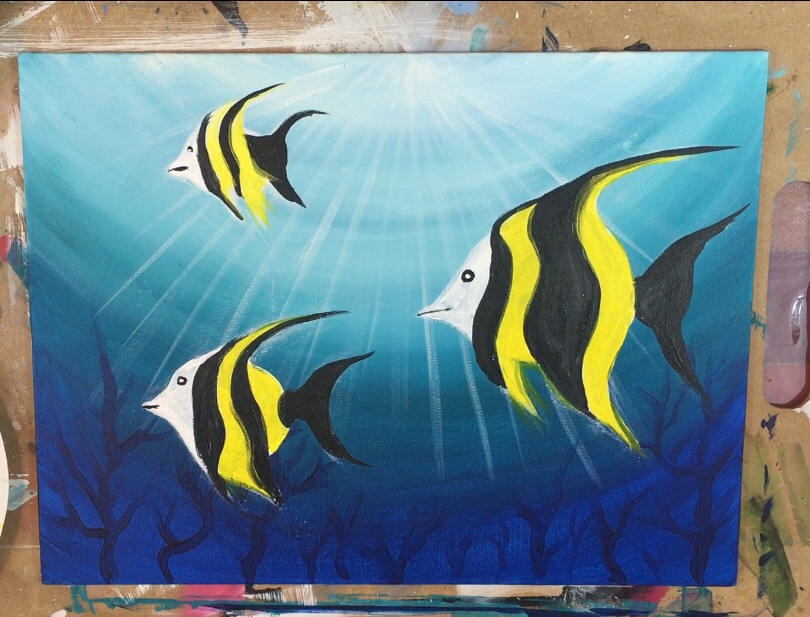
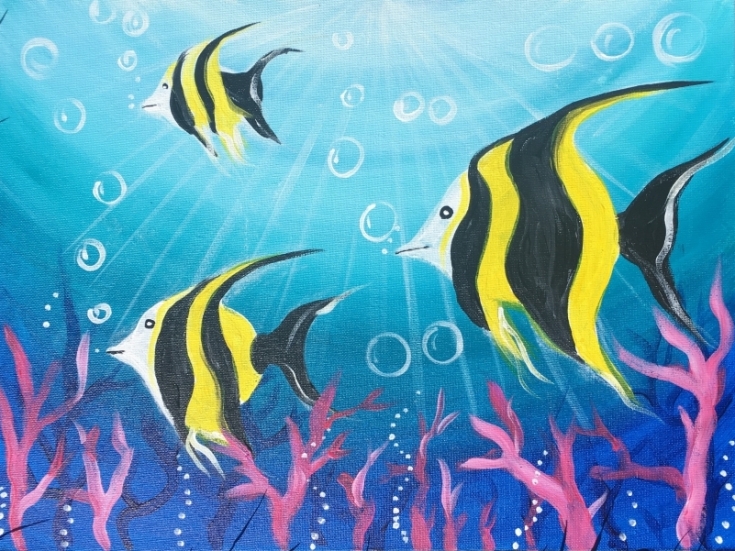
7. Paint bubbles
For the bubbles, I used the #4 round brush and titanium white.
Just paint varied sizes of circles and make a small highlight line in the upper left. 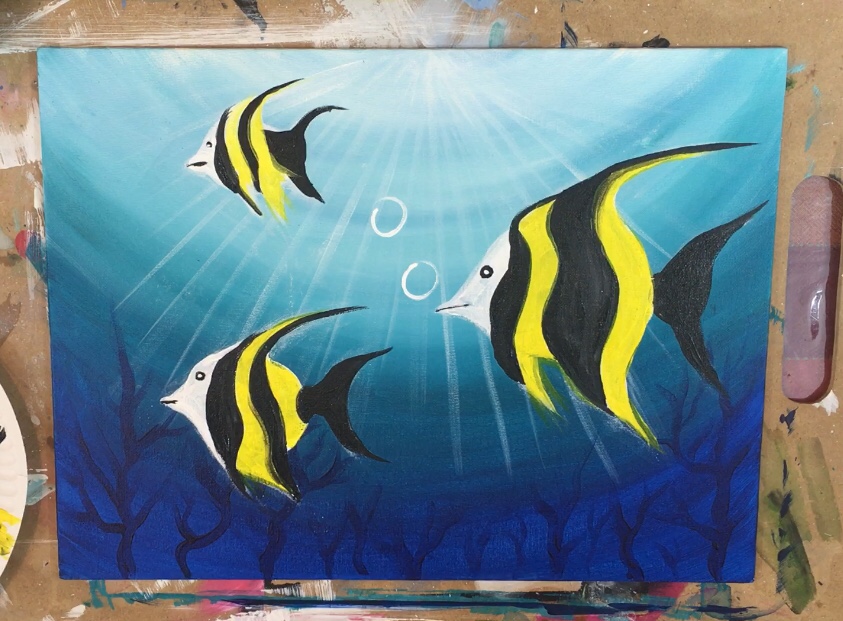
I also added some white wavy lines to the fish tails. 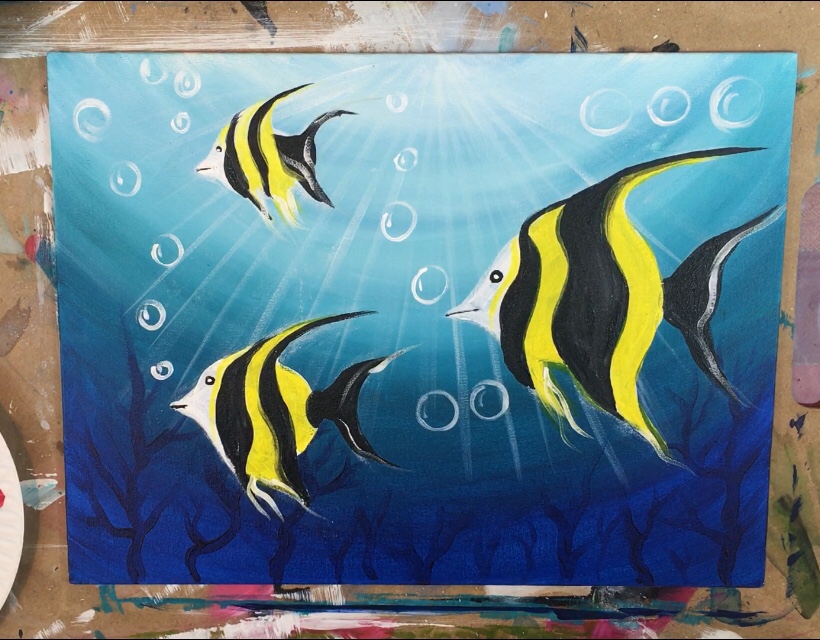
8. Paint the coral
For the coral I used the colors medium magenta, primary red and titanium white.
I also used a #4 round brush.
Basically dip your brush in all three of the colors (about equal amounts) and paint the same kinds of branched lines that you did with the dark blue coral.
The combo of medium magenta and primary red makes this bright hot pink color. 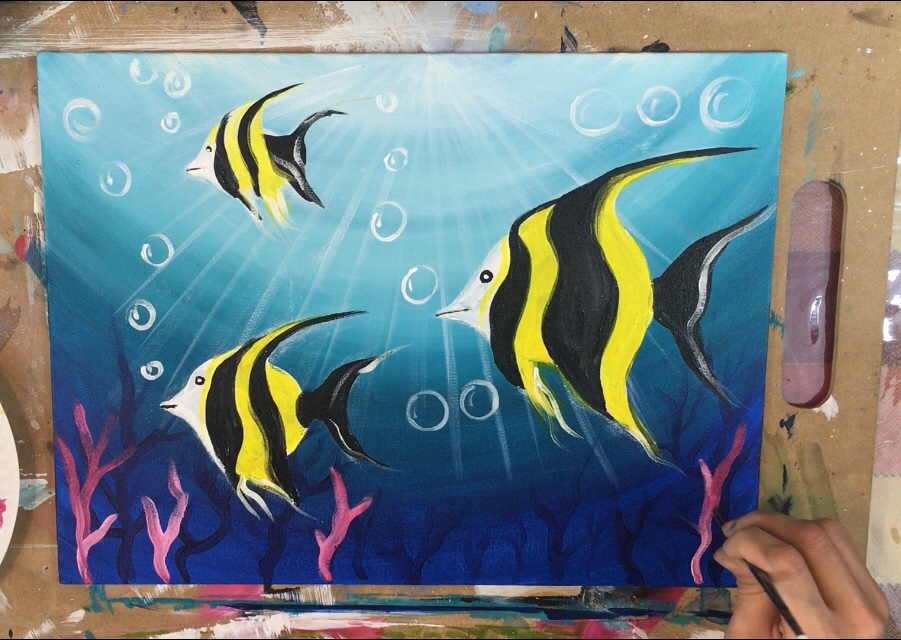
Finally I added some small dots on the bottom of the canvas to represent little bubbles coming up through the coral!
I did this with titanium white and the #4 round brush. 


Love your tutorials, but am finding it hard to get a smooth line on my canvas – it feathers or freys out a bit as it dries. What causes this ? I’ve only used watercolour before and found that more controllable.
Thanks
Dawn
Hi Dawn! Try adding a tad bit of water to the paint to increase the flow (simply by swirling your brush in water and then the color on your palette). Acrylic is a water based medium that has a lot of similarities to watercolor. Sometimes if the paint is too thick and the brush is dry, it will come off feathery. Also, I like to make sure my brush is dipped in the water first before applying to color to it. Hope this helps!
Thank you so much, can’t wait to give it a try on the next of your tutorials I do. ?
This is a fantastic tutorial….best I have ever viewed.
Thank you Tracy
Thanks Jim!
That is very helpful for beginners.
Thanks for sharing this amazing trick..