Would you like to save this?
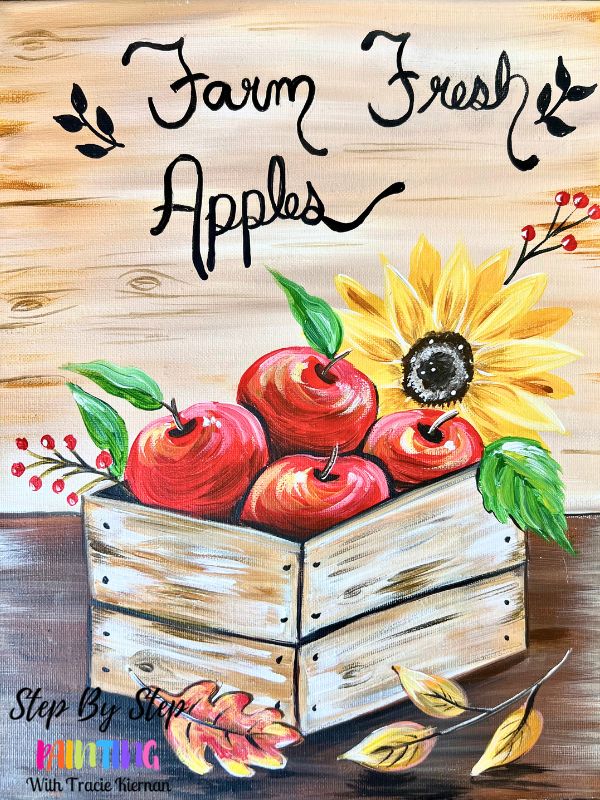
This is a rustic, cheerful farmhouse-style acrylic painting centered around the feeling of a fresh apple harvest! We will be painting a wooden crate adorned with a sunflower and fall leaves.
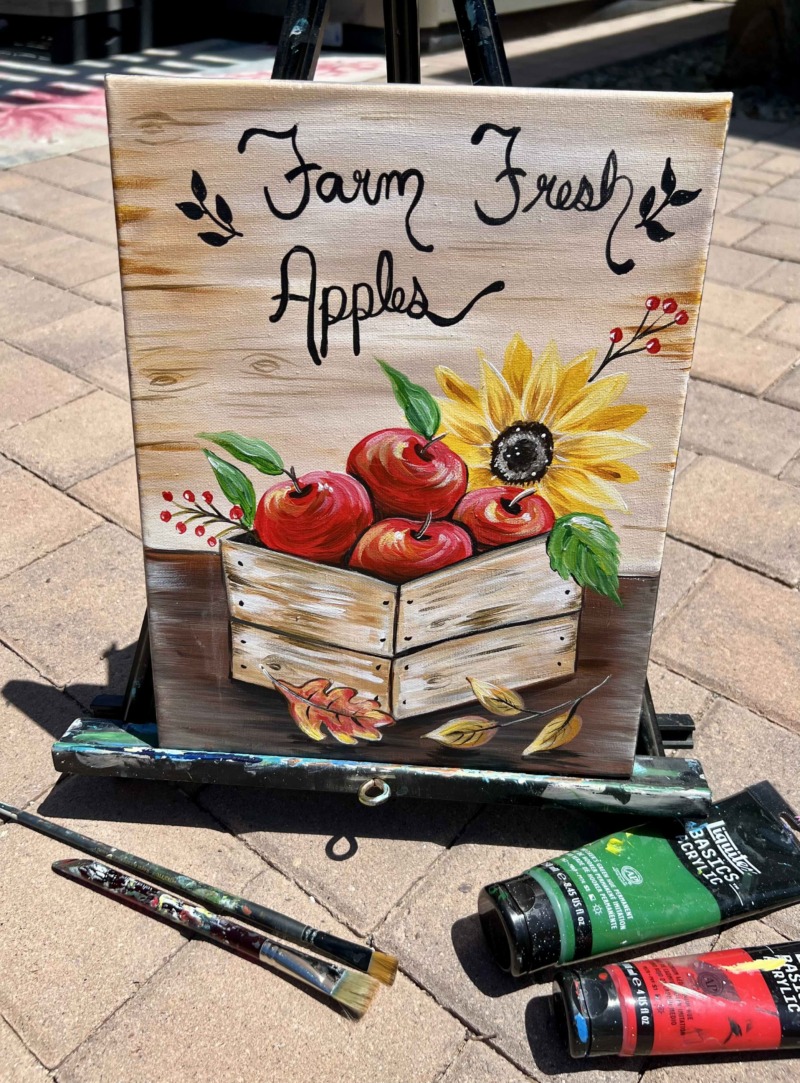
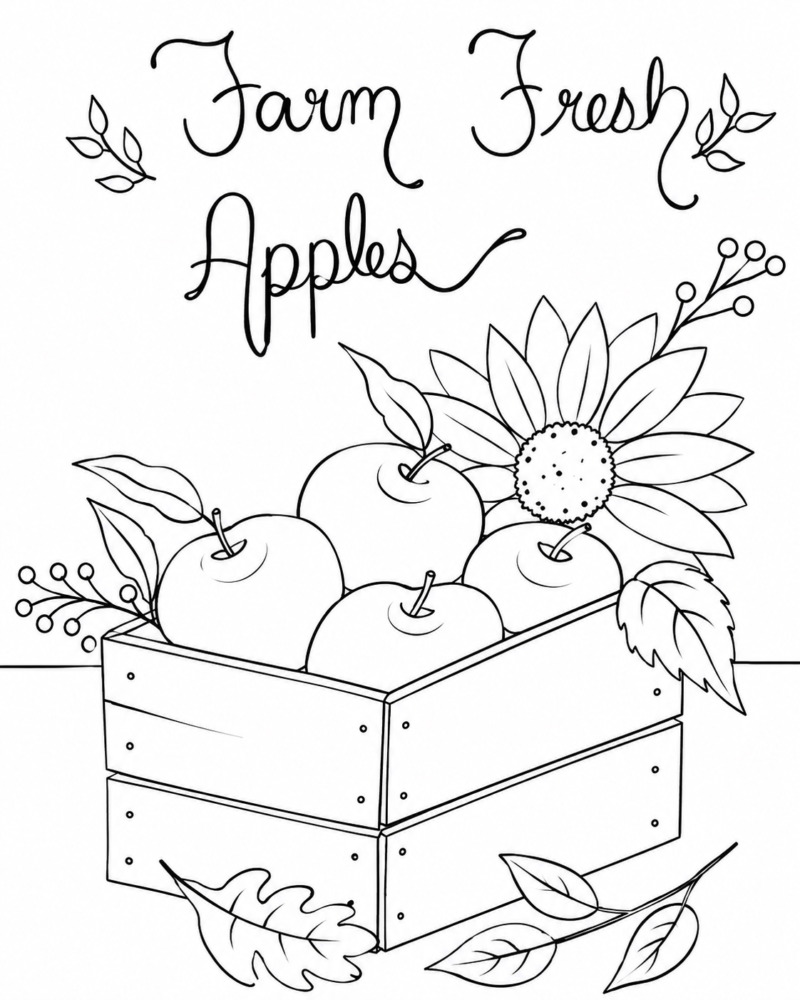
Optional traceable templates are in this tutorial!
Enjoy and happy painting!
Materials Needed:
- 11×14 Canvas
- Acrylic Paints
- Brushes
- Ruler
- Pencil
- White Chalk (optional)
- Traceable (optional)
- Black Paint Pen (or sharpie)
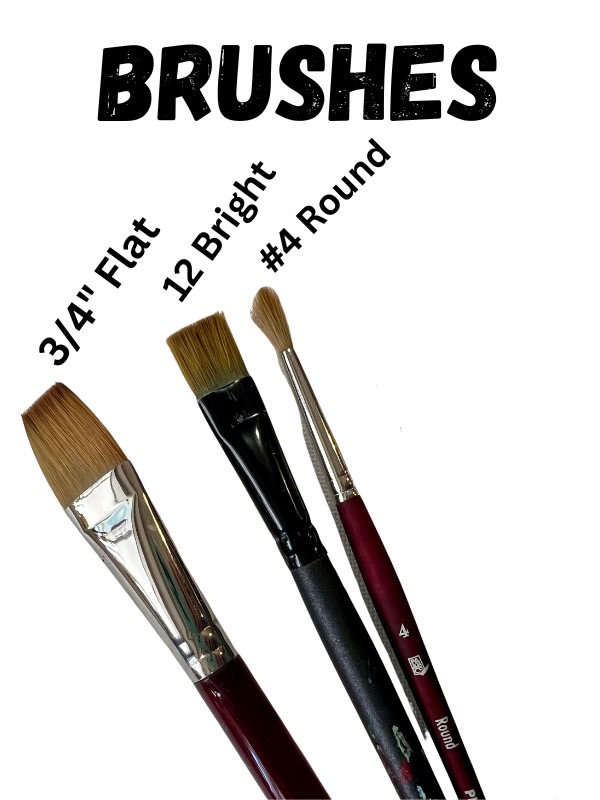
Brushes:
- 3/4 Flat
- #12 Bright
- #4 Round
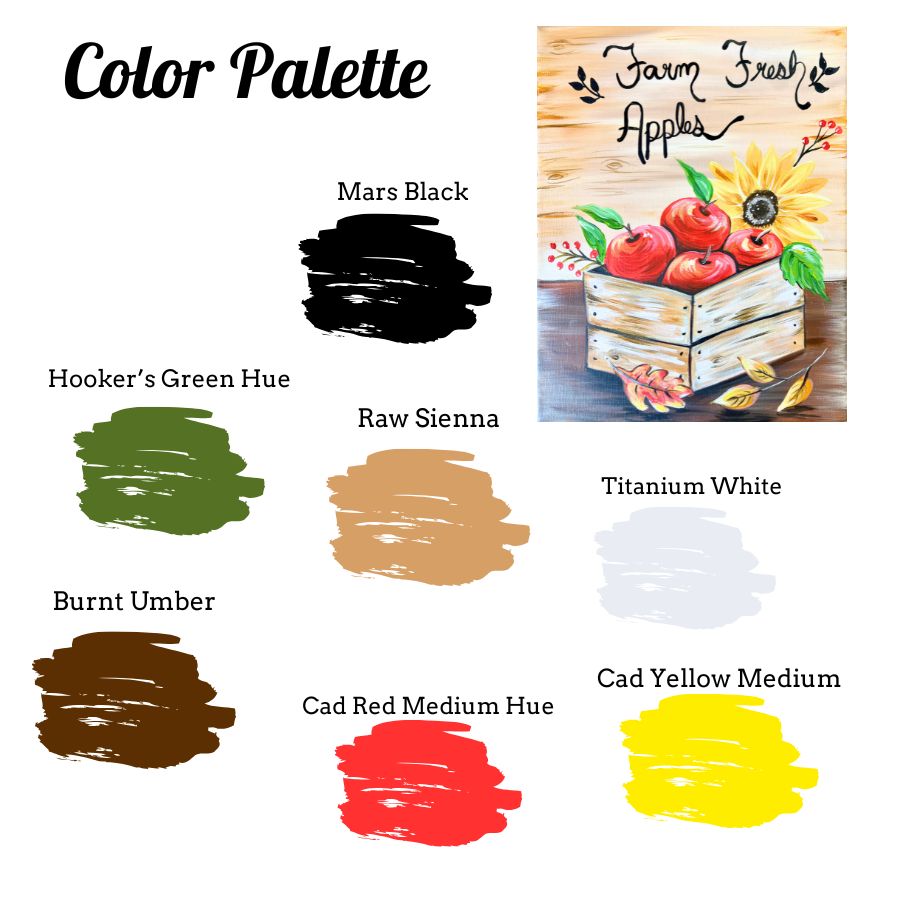
Colors:
- Titanium White
- Mars Black
- Raw Sienna
- Burnt Umber
- Cadmium Yellow Medium Hue
- Cadmium Red Medium Hue
- Hooker’s Green Hue
Traceable (optional)
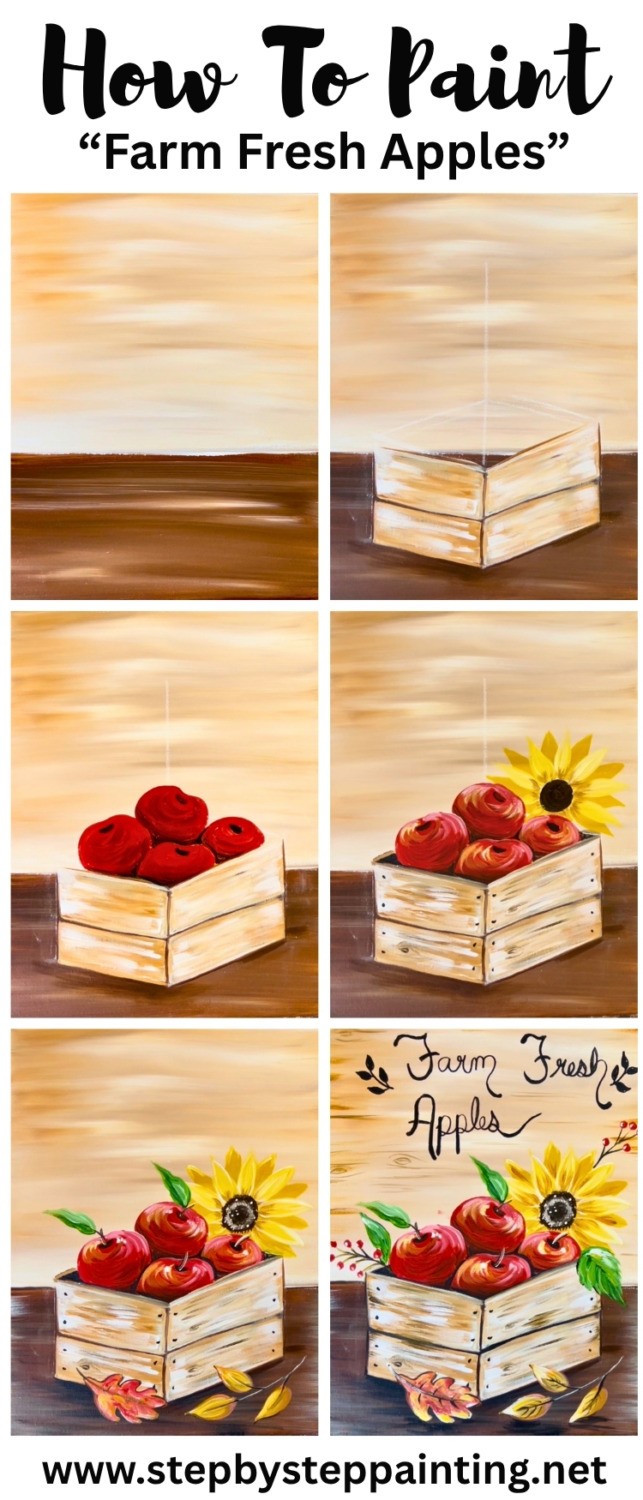
Directions At A Glance
Video
Step By Step Instructions
1. Paint Background
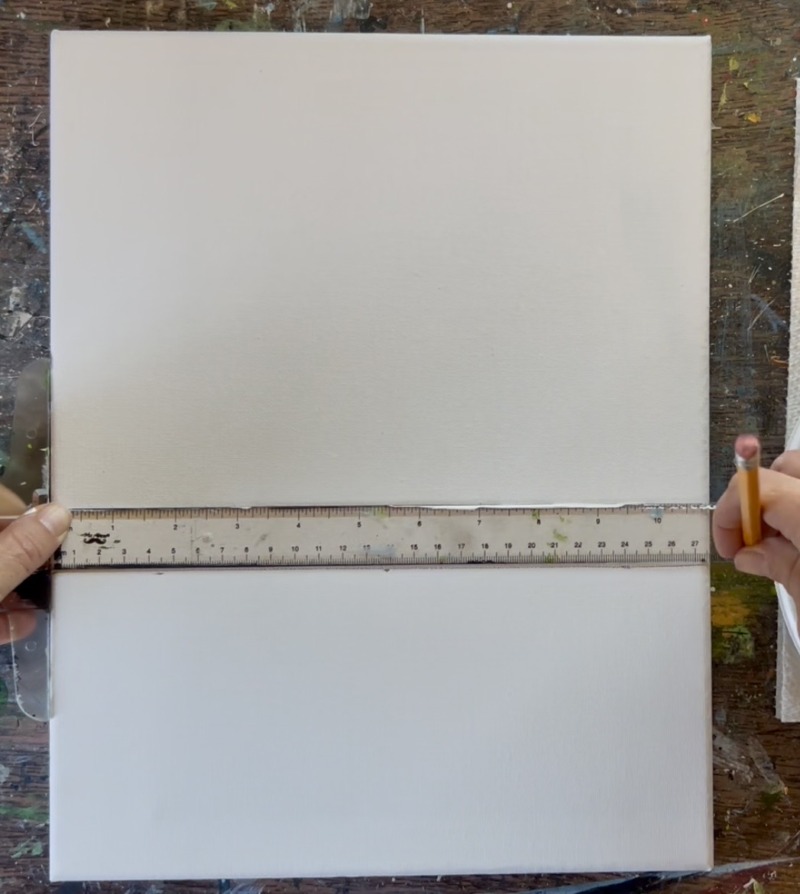
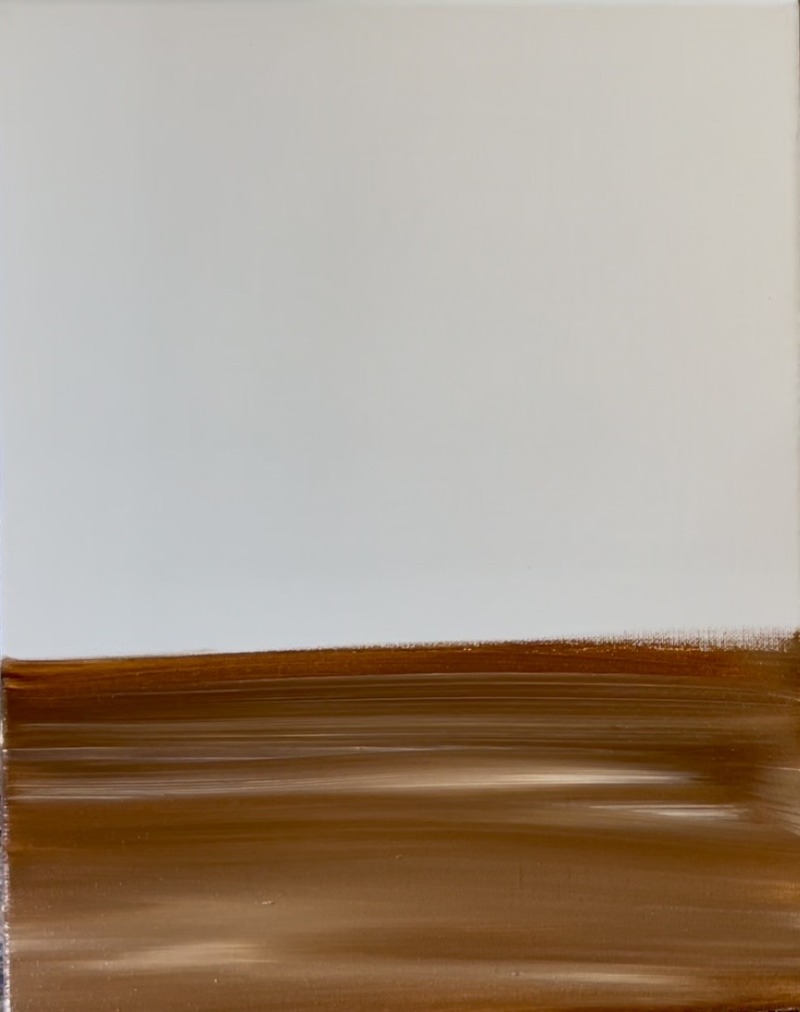
Draw a “table line” with the canvas positioned vertically. Measure about 1/3 the height of the canvas and that is the “table line” (I did my line at 5″ for an 11×14 canvas).
Next, load your paint palette with the colors: burnt umber (dark brown), raw sienna (light brown) and titanium white (white). Double load the 3/4″ flat wash brush into dark brown and load the corners of the brush into white. Paint the table area dark brown and allow the white to gently blend with the brown but not all the way (so you have streaks of light brown). Fill the entire table area with this.
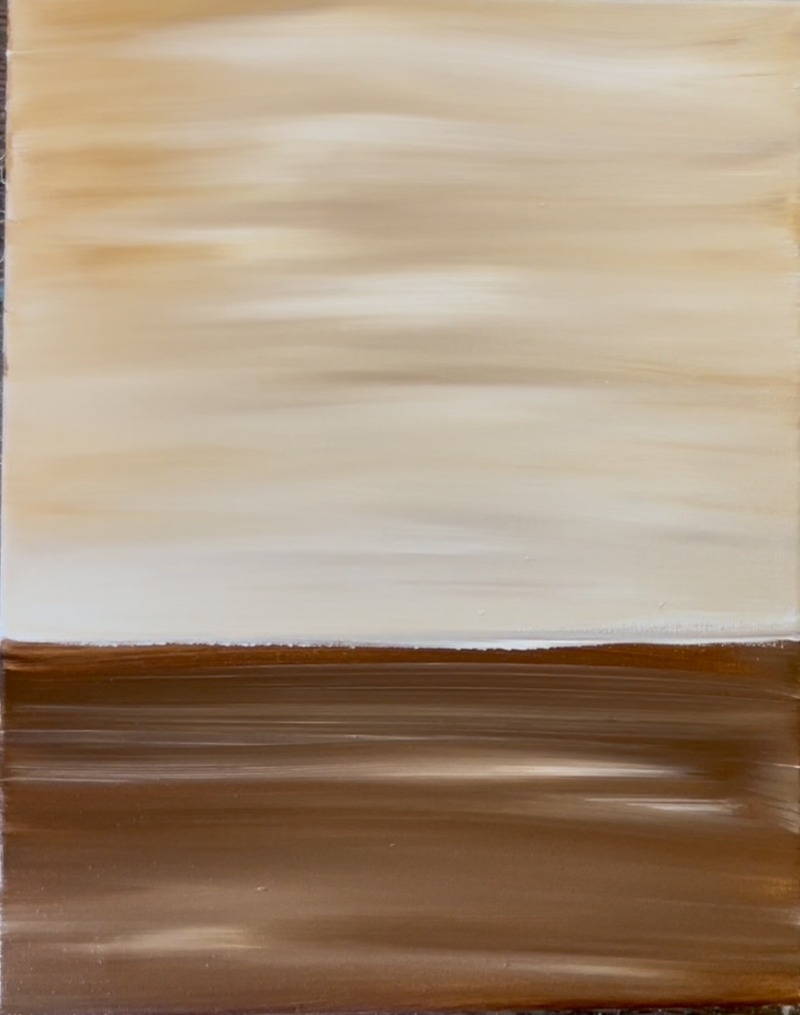
Next, paint the background area above the table. Wipe the brush but do not rinse. Then load the full width of the brush with white and load the corners of the brush with light brown. Then paint horizontal brush strokes to fill the entire background area. It should look like a light golden brown color (much lighter than the dark table area).
2. Draw Wooden Crate
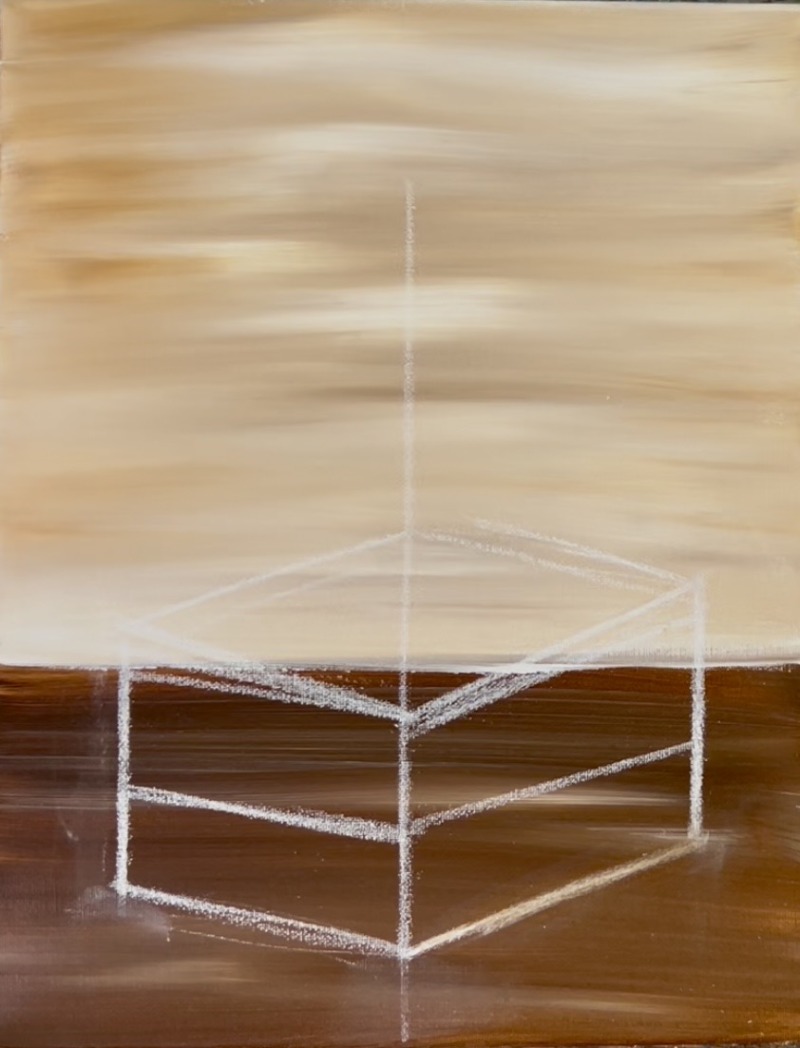
You can use the traceable for this step to transfer the design to the canvas or you can hand draw the wooden crate with chalk (I won’t draw the apples or other things in this painting).
Start by drawing a vertical line with the chalk. This line will be the corner of the crate.
Then draw a set of parallel diagonal lines on the right side for the side wood panels of the wooden crate.
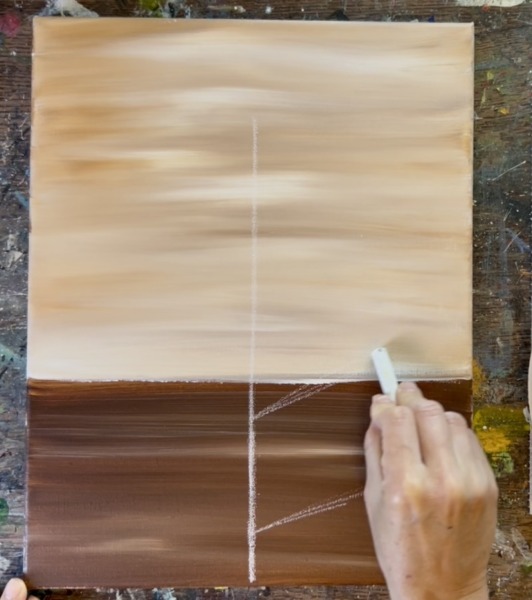
Then draw another set of diagonal lines on the left side of the crate. Draw a vertical line on the left and right side of the crate to create the edges.
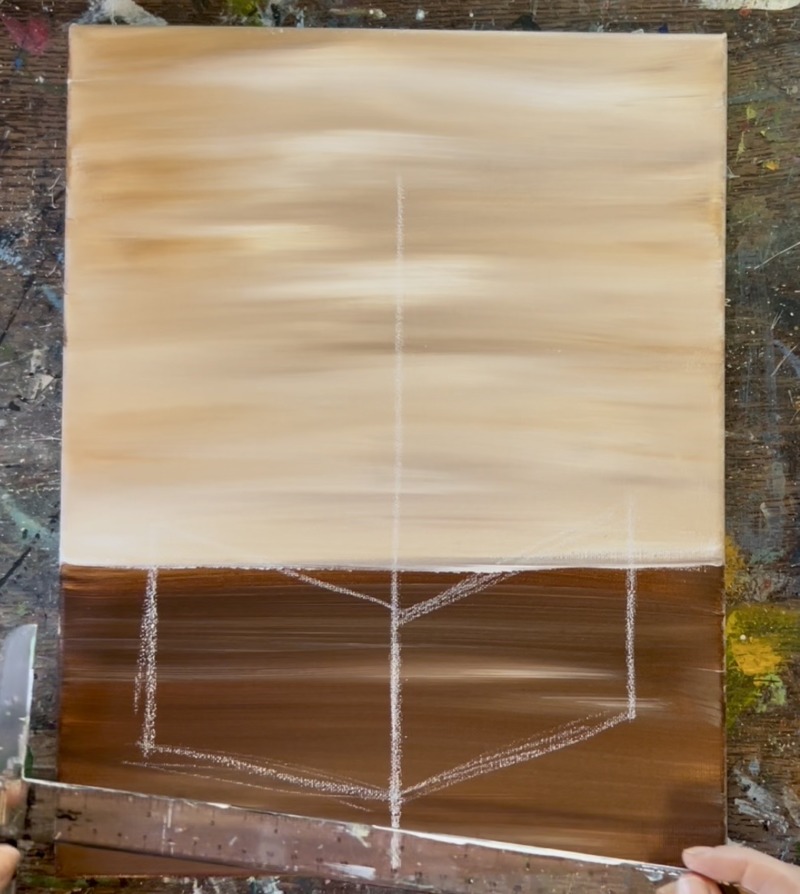
Draw a diamond shape on the top of the crate. Then draw another parallel diagonal line in the middle of each of the side rectangular shapes.
3. Paint Wooden Crate
Use a #12 bright brush to paint the crate a light wooden color. Load the brush into white and load the corners of the brush into light brown. Use the full width of the brush to paint the individual wood boards going in the direction of the angle. Leave a gap between the top and bottom wood panels.
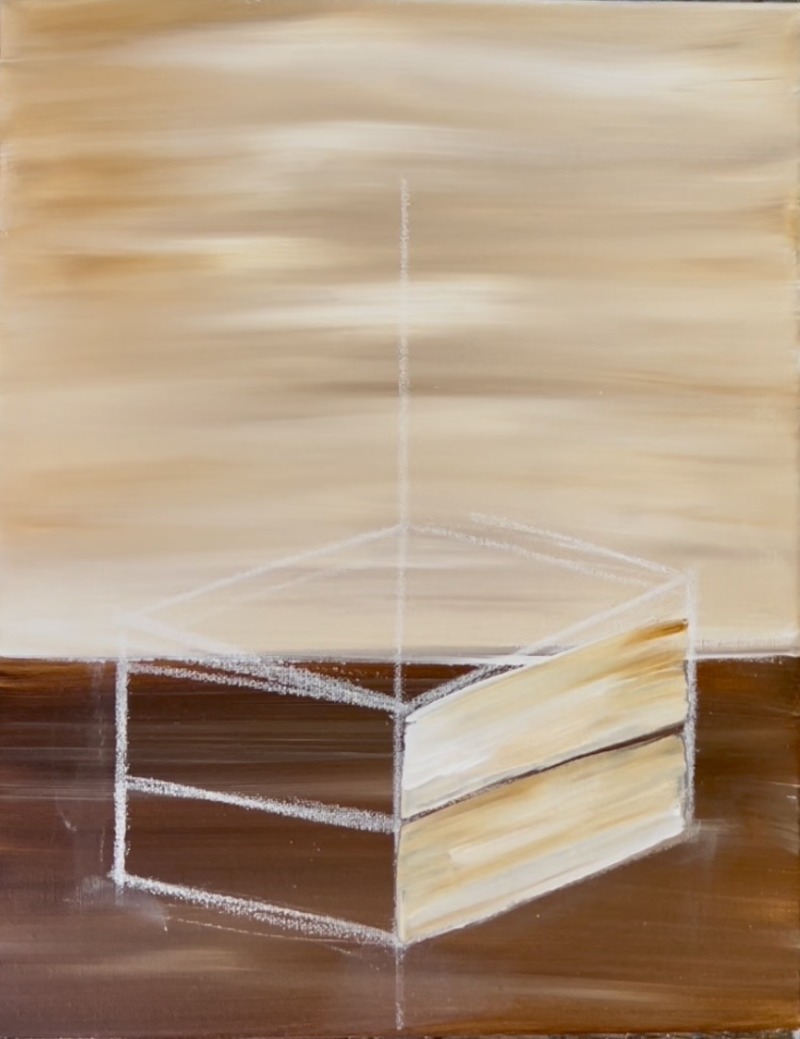
Repeat this on the other side.
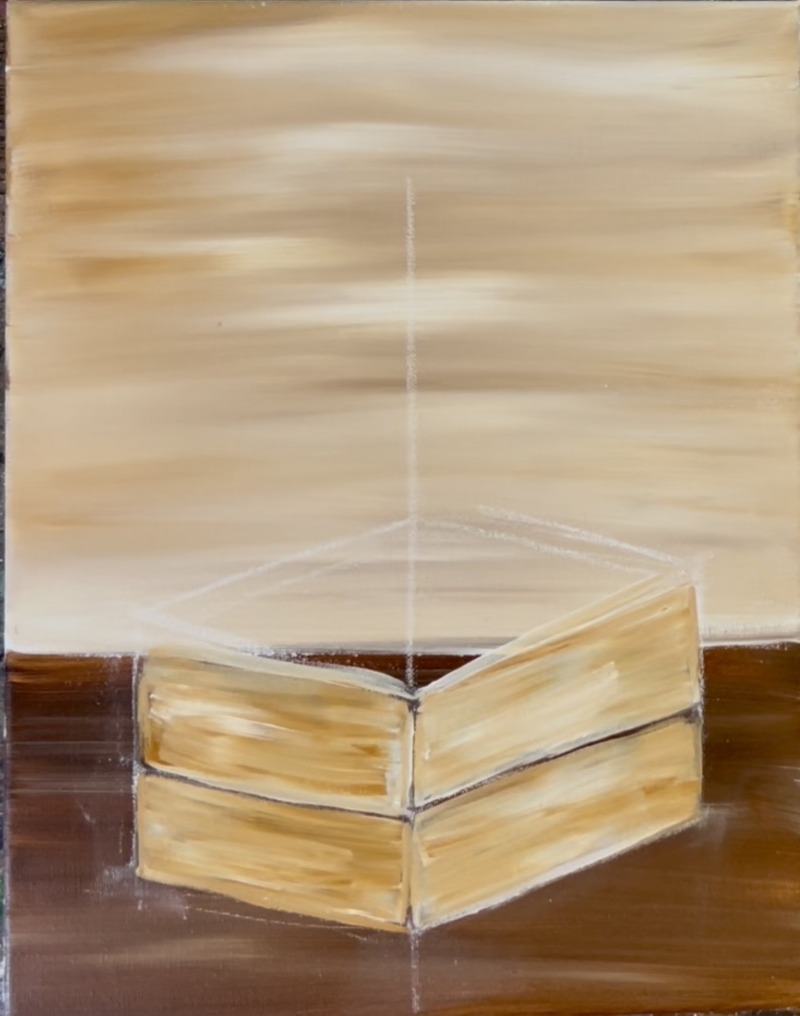
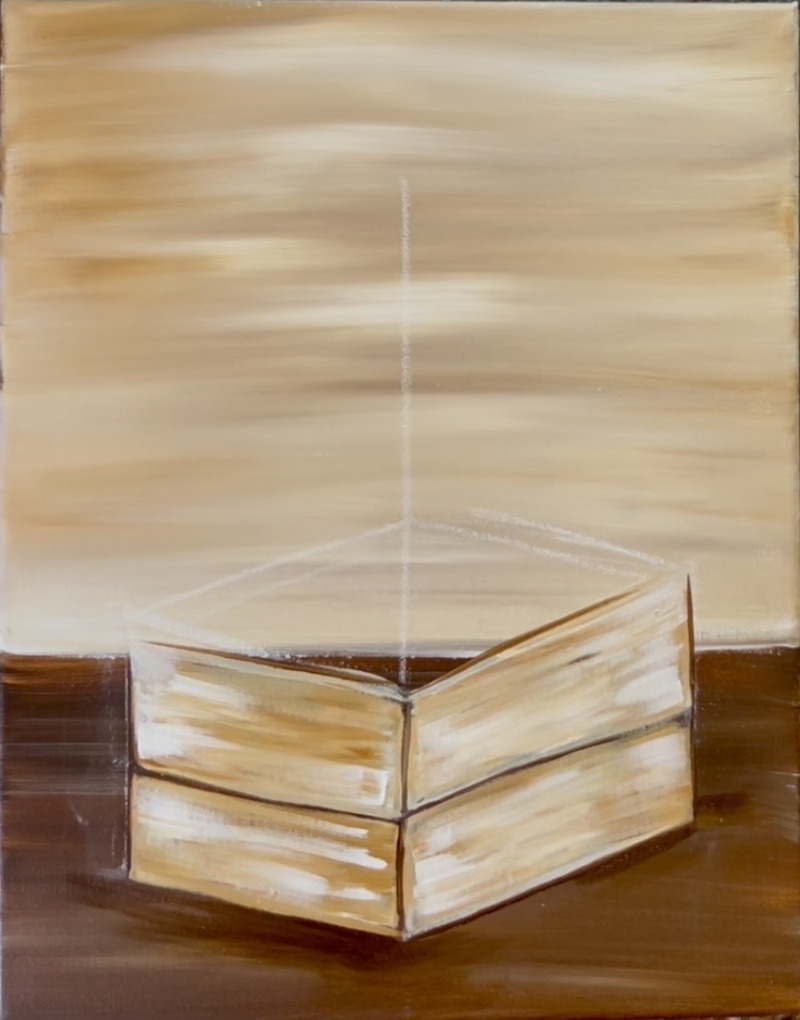
Then use the edge of the brush to outline with dark brown the shape of each of the wood boards and in between the boards.
4. Paint Apples
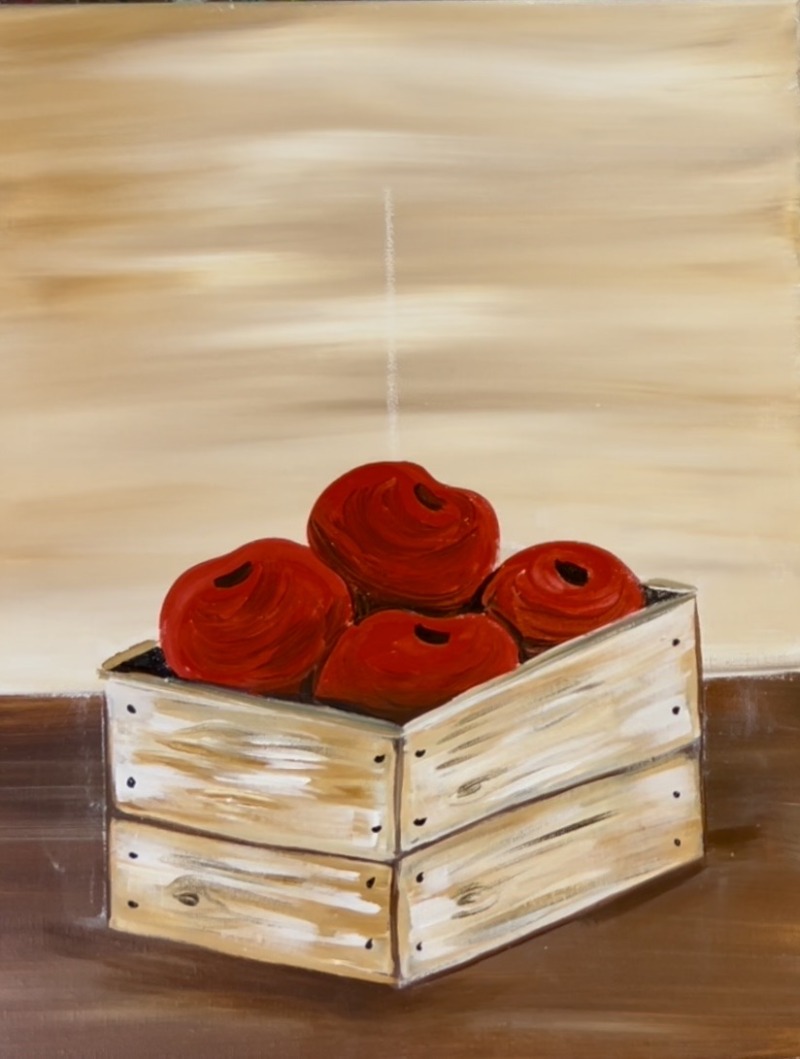
Use a #4 round brush and the color “cadmium red medium hue” (red) to paint the first apple shape. This first apple is tucked inside of the crate just behind the top corner. Paint the shape to have two lumps on the top on each side (almost like a heart shape).
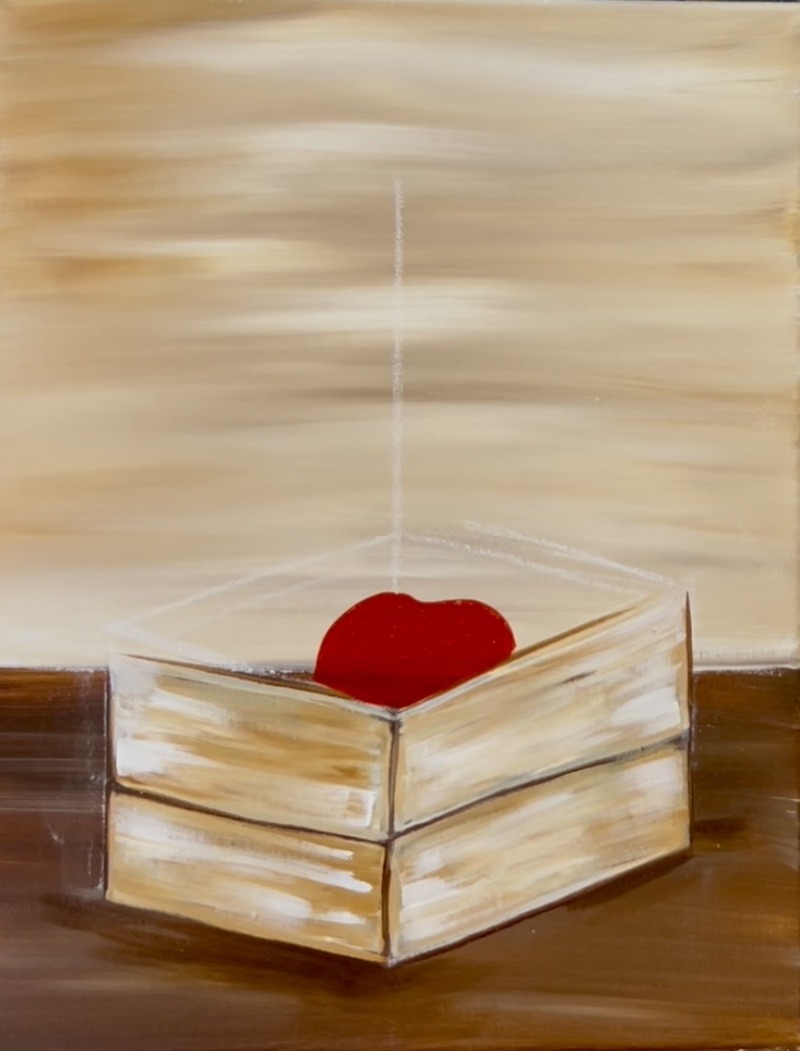
Then mix a dark red on your paint palette by mixing 1 part green and 2 parts red (this will make a dark red that we can use to shade the apple). Apply this dark red color on the bottom of the apple and blend with the rest of the red. Then use black to paint a little curve mark on the top of the apple (this will be where the stem is). Use the black to also outline the very bottom of the apple and blend it up just slightly.
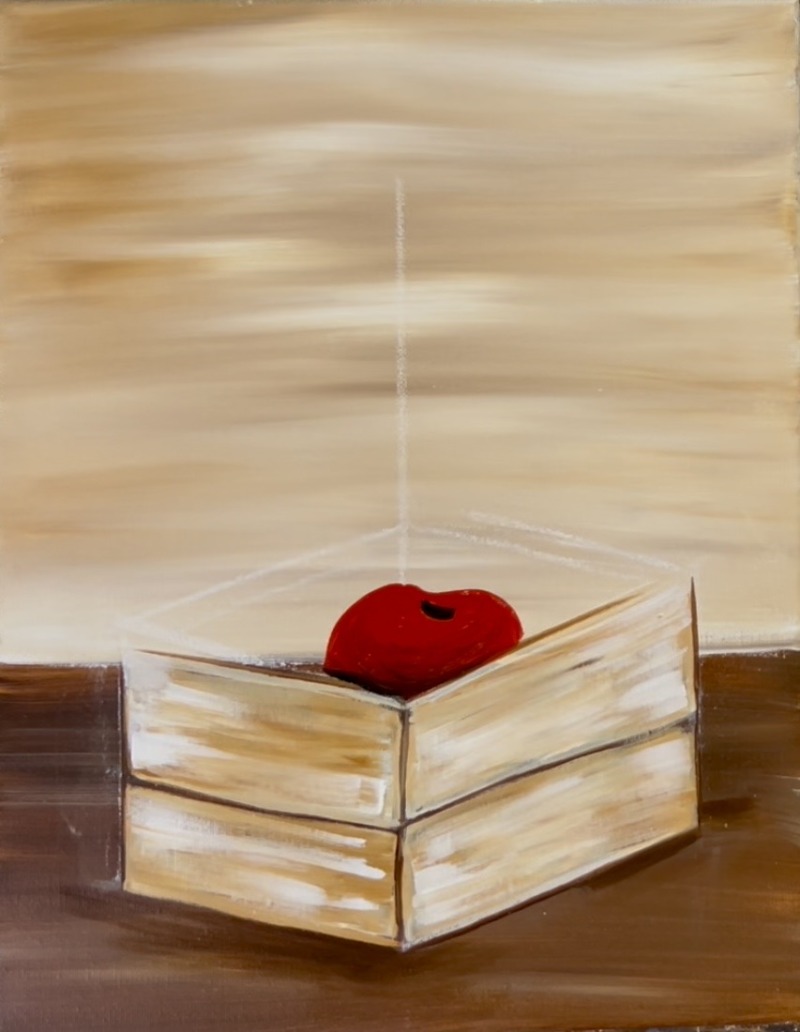
Repeat this for another apple on the left. This time, add the shadow (the green mixed with red) on the side of the apple that is directly behind the apple on the right. Add your darkest shadow (the black) on the very bottom and lower right crack between the two apples. Be sure to also paint a little curved mark at the top where the stem will be.
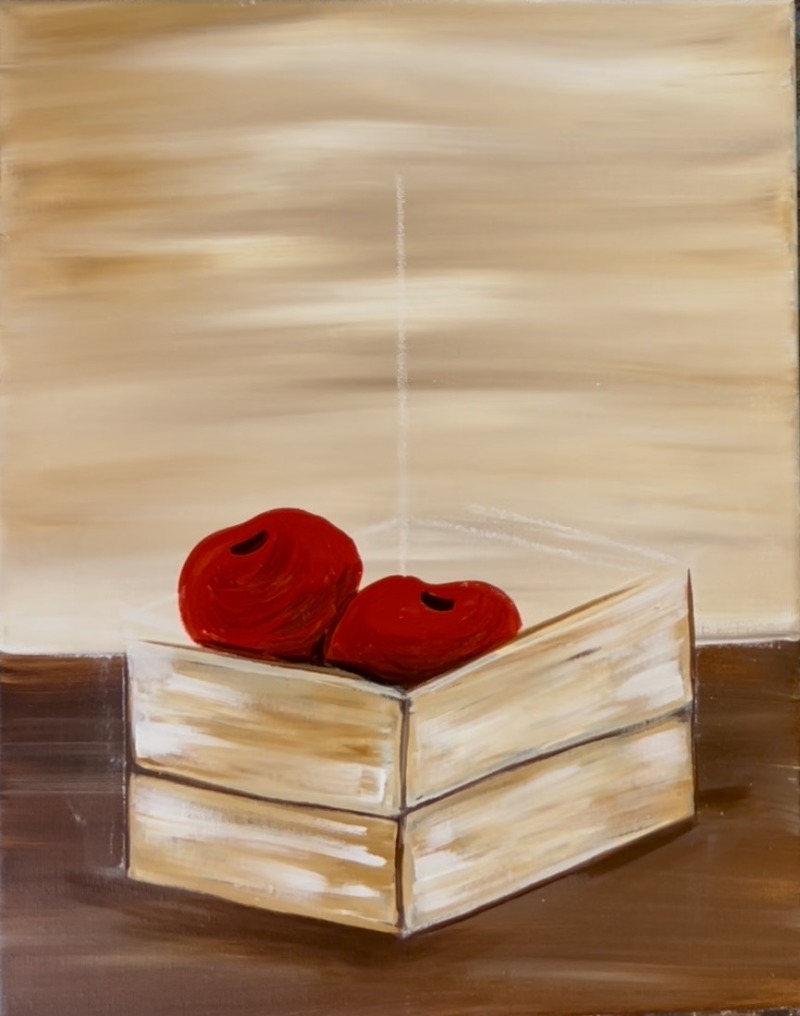
Repeat this technique for a third apple positioned on the top/ behind the bottom two apples. Make sure your shadows are in the areas where the other two apples are overlapping.
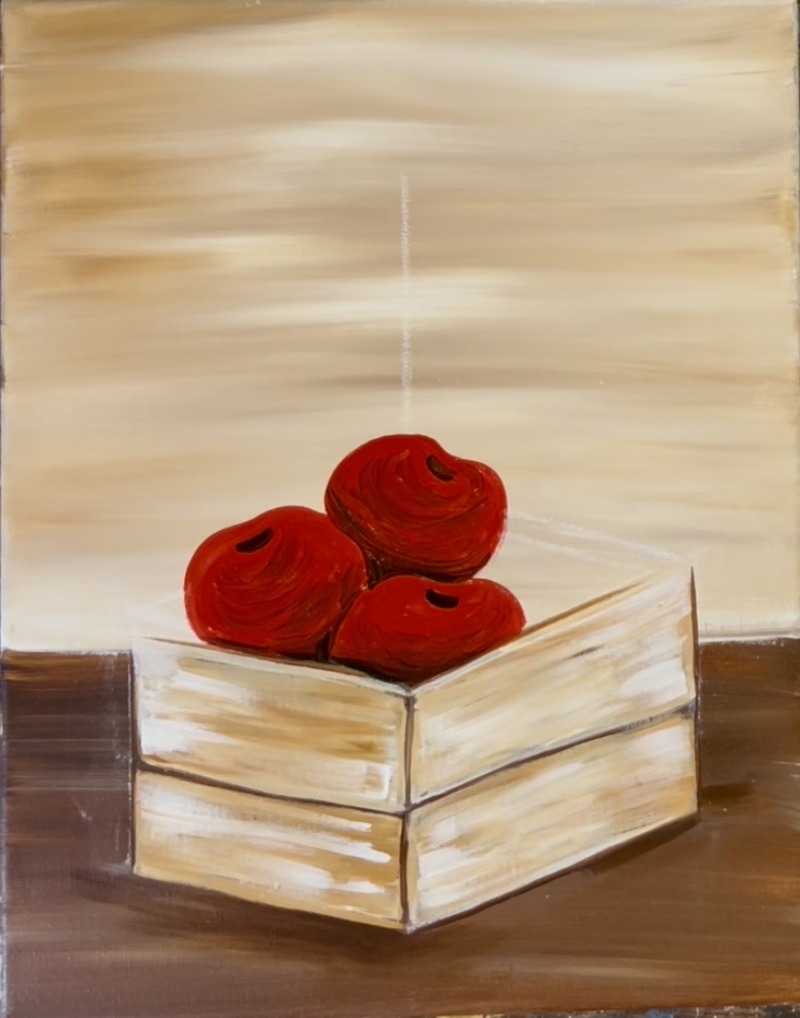
Paint a fourth final apple on the far right. Add the shadowing and dark edging.
5. Add Detail To The Crate
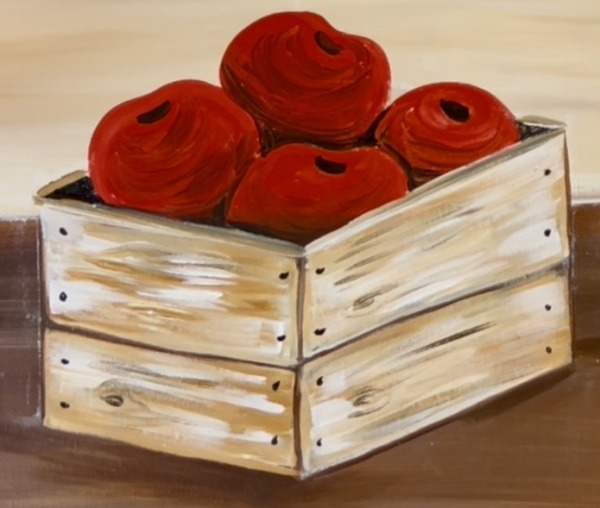
Use black to paint a set of two nails on each side of the wooden boards. Then use the round brush and a combination of dark brown, light brown and white to paint wood grain texturing on the boards. Make sure the lines from the wood texture go parallel with the direction of each of the boards. You can also paint little wooden “knots”.
6. Paint Sunflower (back petals)
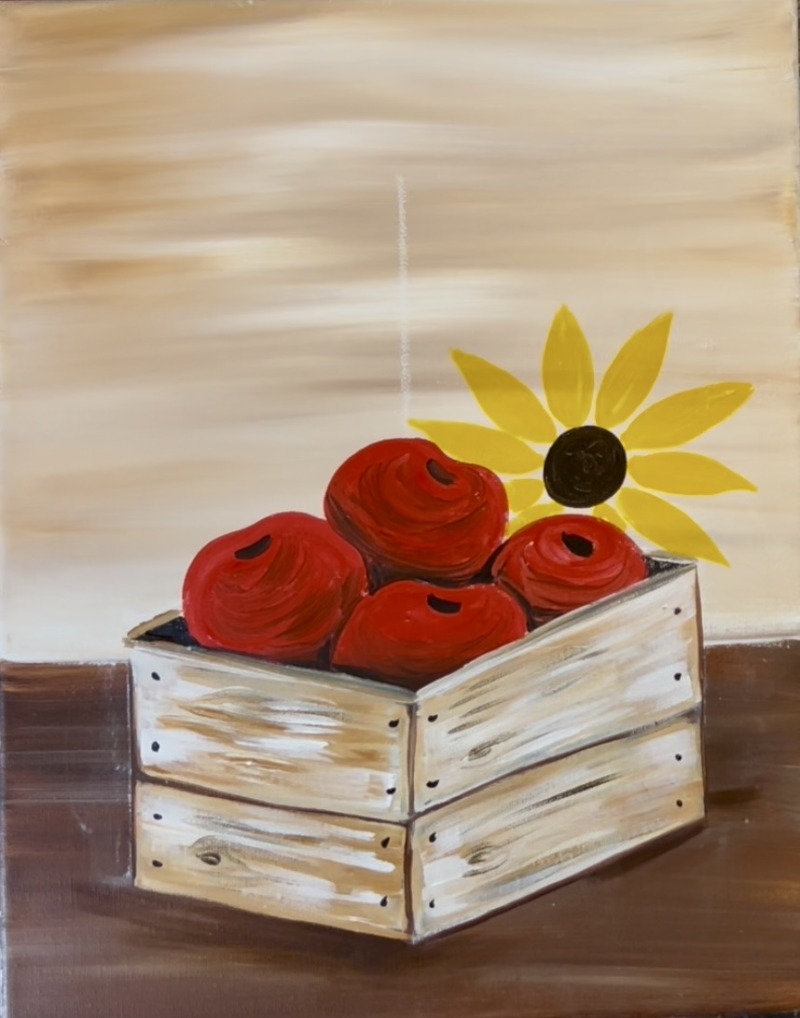
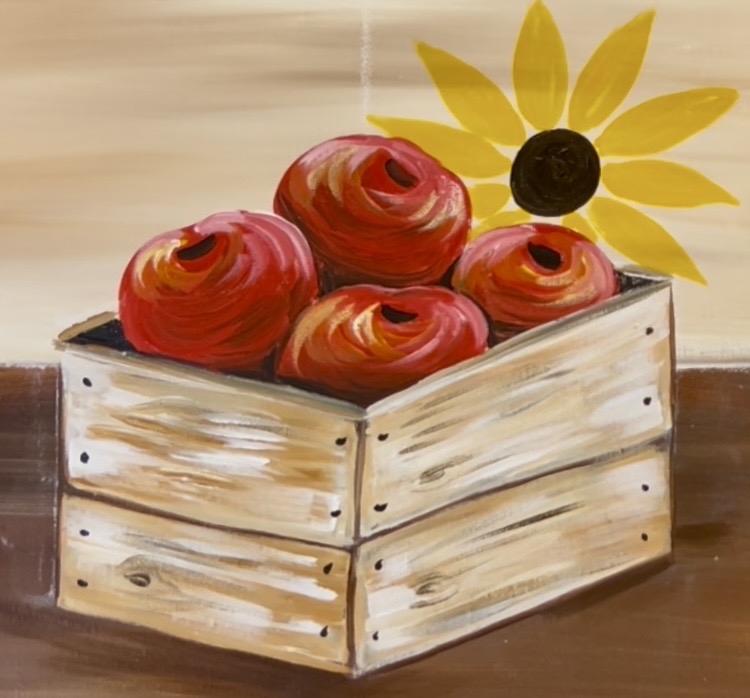
Mix equal amounts of black and brown together. Use the round brush to paint a small to medium size circle in the upper right of the crate. Then use yellow (just yellow not mixed with anything) to paint each of the sunflower petals. Paint each petal so it starts out as a narrow edge that touches the dark circle then becomes wide and elongated and then goes to almost a point on the tip. Repeat this for each petal and make them relatively the same length. Leave a tiny gap between each of the petals.
7. Highlight Apples
Highlight the apples gradually starting with an “orange” color. Mix equal amounts of red and yellow together. Use the round brush to brush on curved paint strokes that seem to go around the top black curve/indent on the top of the apple.
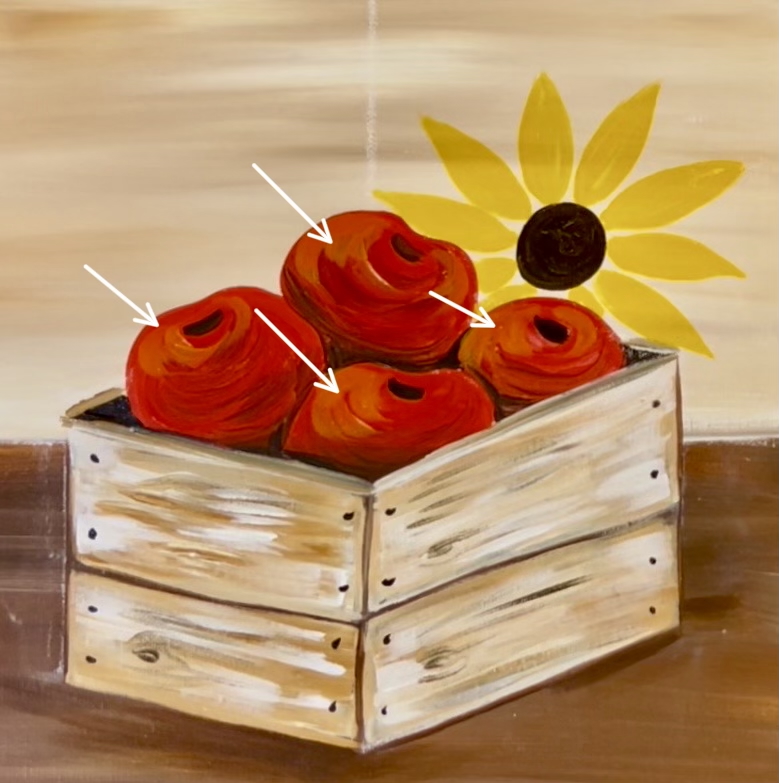
Then lighten the highlights even further. Mix red and white together and create more curved strokes going around the top oval mark of the apple. You can also add little bits of yellow in there to give the apples some more color.
8. Paint Sunflower Front Petals & Details On Center
Mix white and yellow together. Create another round of petals that overlap and go between each of the dark yellow back petals.
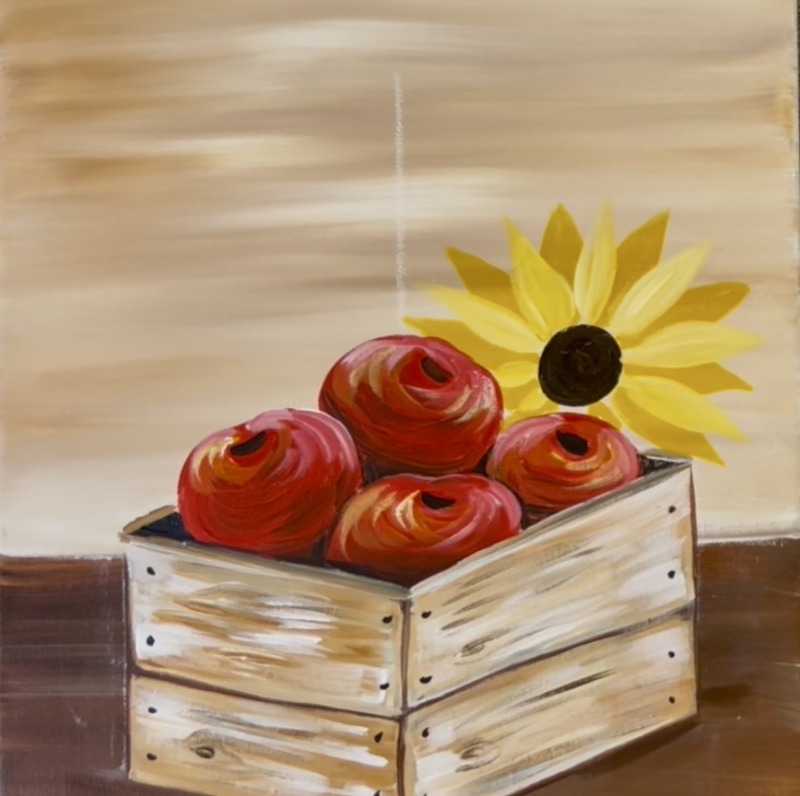
Mix light brown and yellow together. Use a round brush to make little tic marks at the base of each of the sunflower petals.
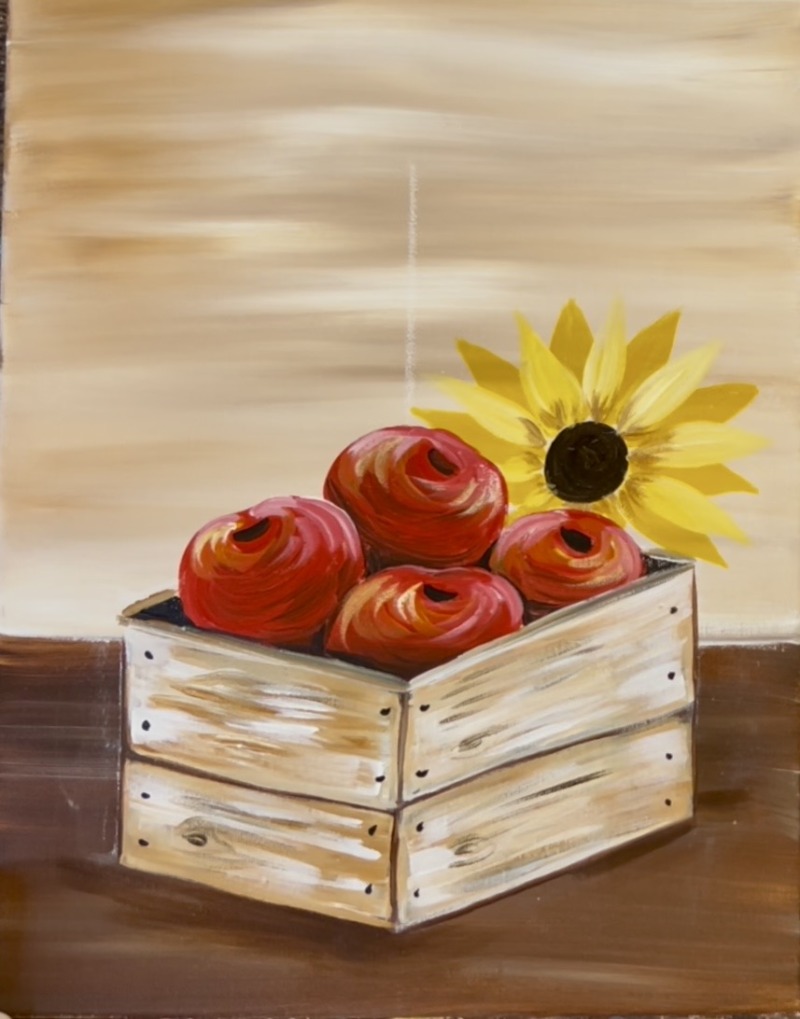
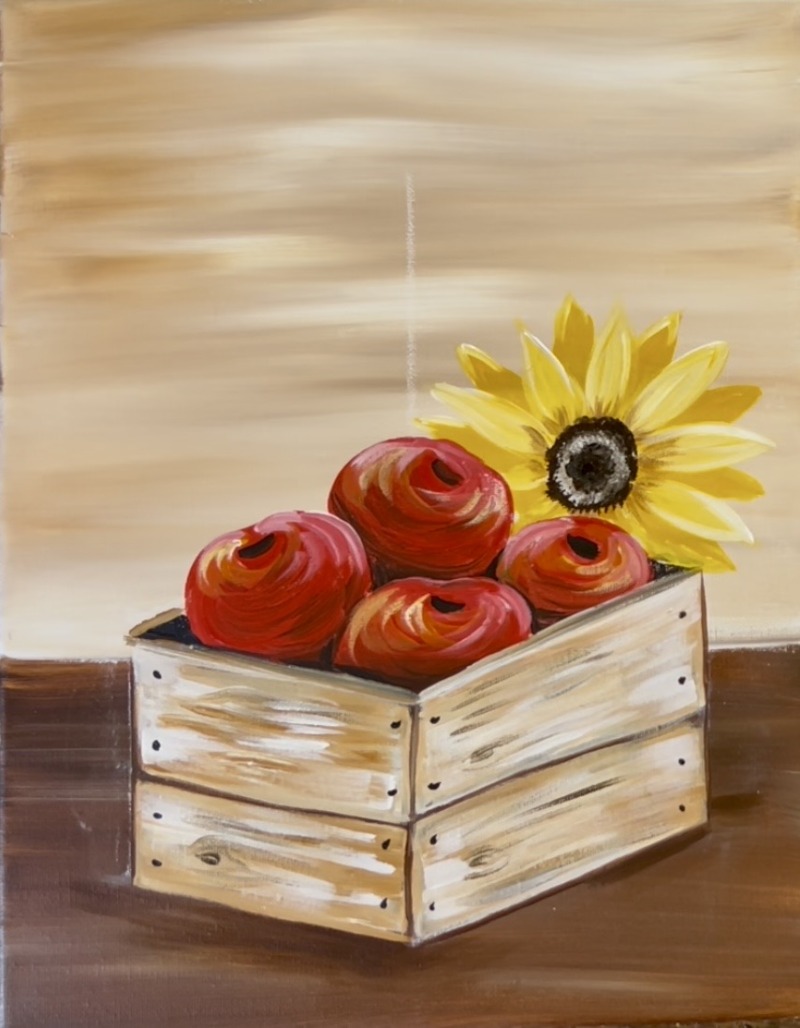
Then create texture in the middle circle of the sunflower. Use a round brush and dark brown to paint little dots of texture all over the brown circle (and even outside the lines of the circumference of the circle). Then, without rinsing the brush, load it into white and paint another circle inside of the large circle to form a doughnut shape.
9. Paint Apple Stems & Leaves
Use the round brush and titanium white to paint little apple stems that come out of the top black markings on the apples.
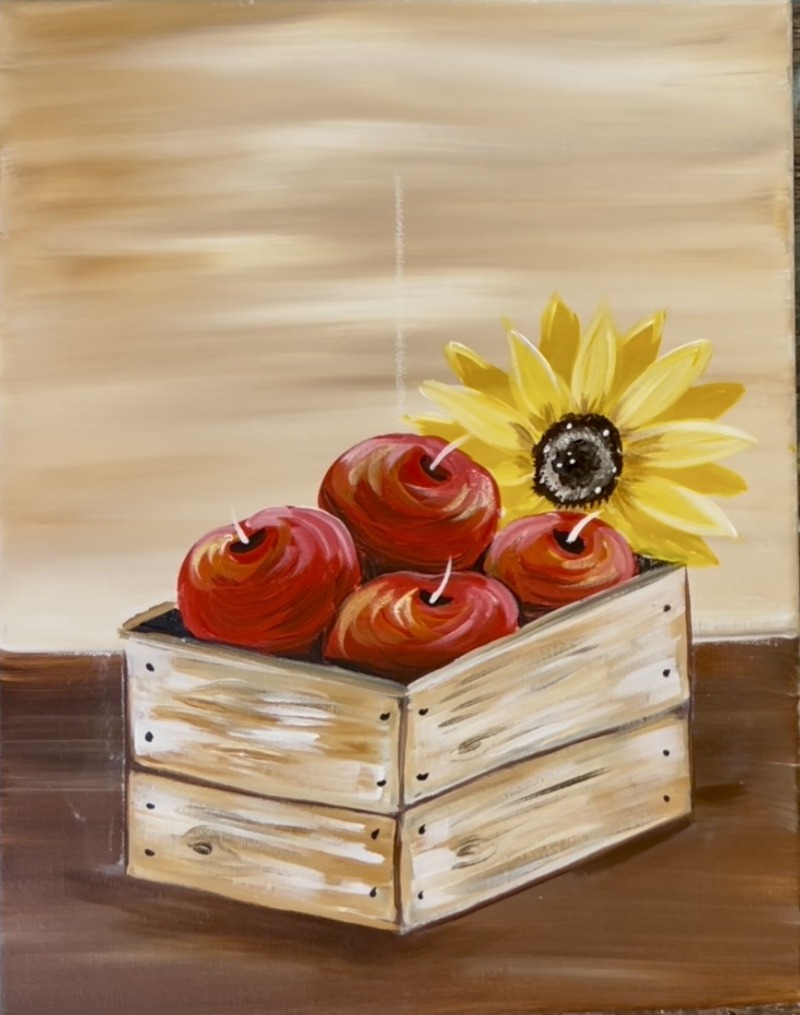
Then paint one side of each of the white stems with dark brown.
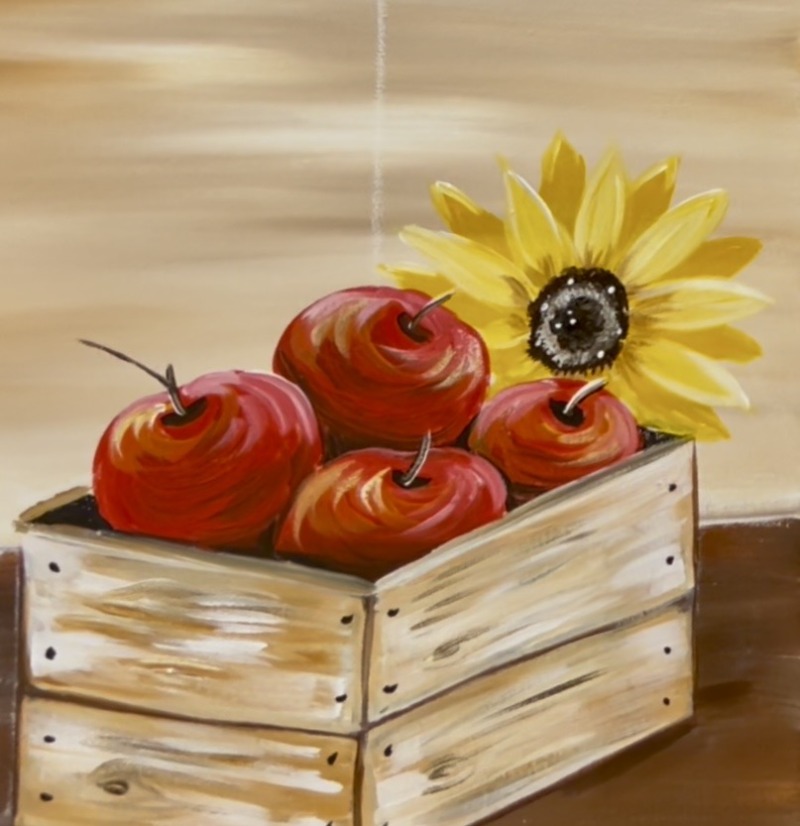
Use green to paint apple leaves on a few of the apples. Blend white on one side of the leaf. You can make these leaves resemble actual apple leaves by wiggling the brush to create wavy edges of leaves.
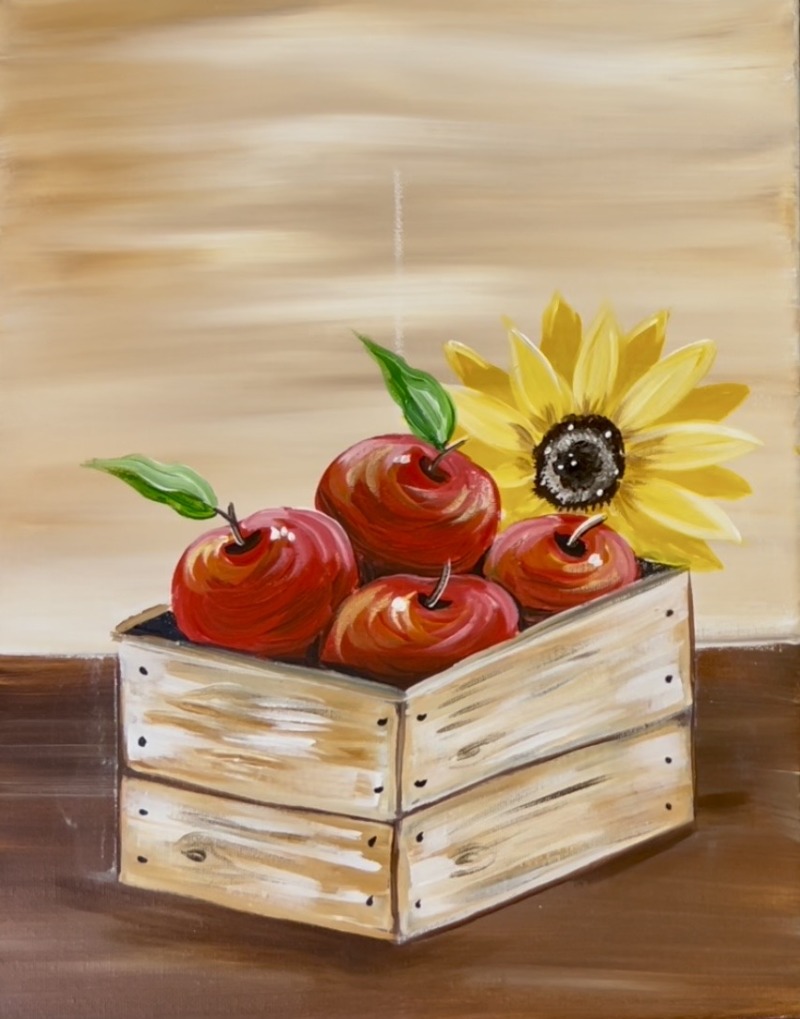
10. Paint Fall Leaves On Table
Use a mixture of red, yellow and white to paint an oak leaf resting on the bottom left side of the crate. You can sketch the shape of the leaf out first with pencil or chalk if that helps. Then paint a brown stem line down the center of the leaf.
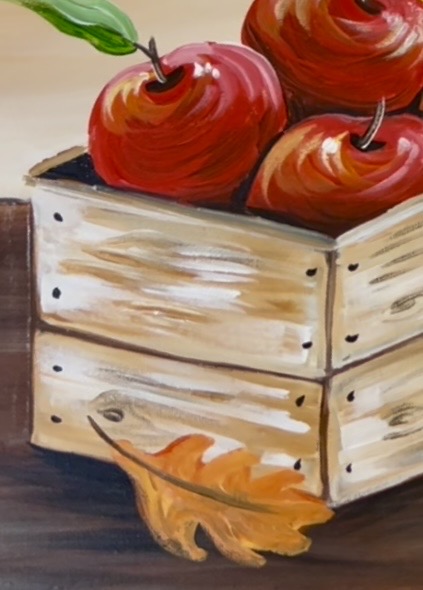
Repeat this on the right to create a stem with three oval/pointed shaped leaves attached. Use the same color combination.
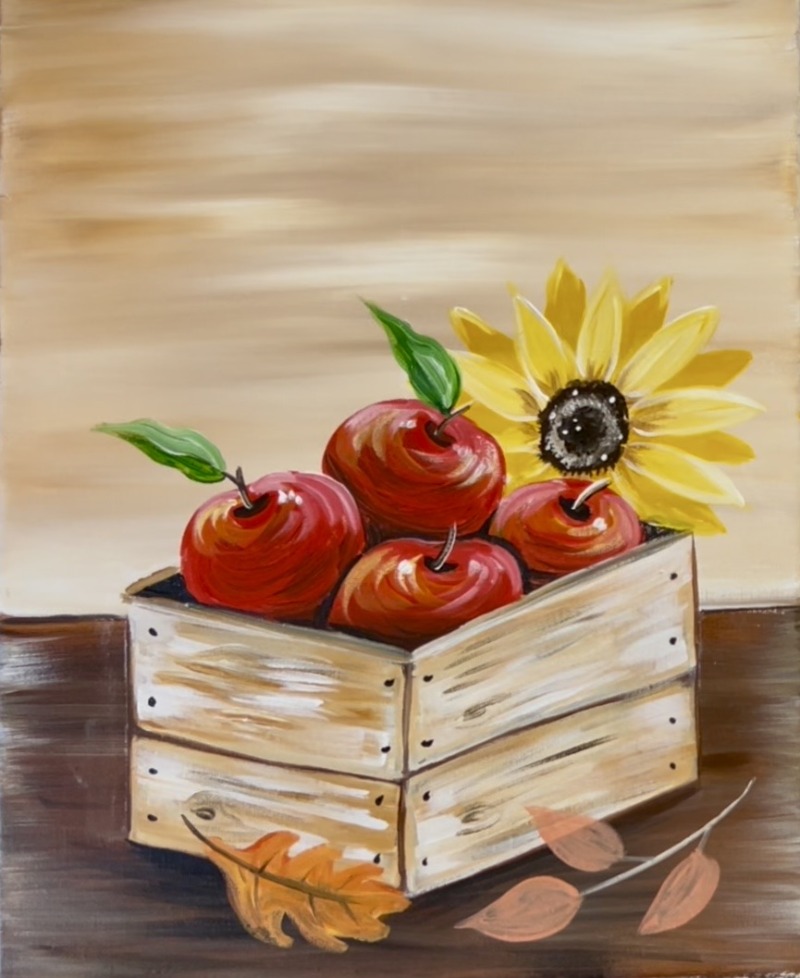
Paint a second or third coat of paint with yellow, orange and white mixed with yellow to create brightness on the leaves (and so the background doesn’t show through). Use black/ dark brown to paint a line down the center of the leaves and veins on the leaves.
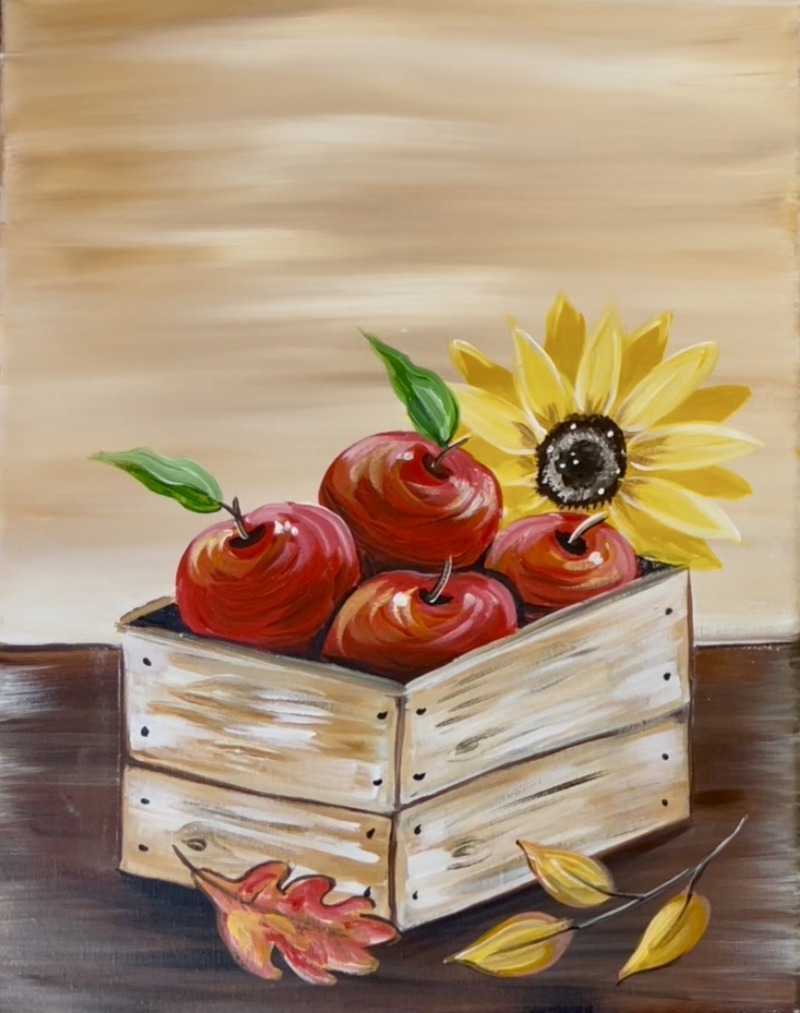
11. Draw & Paint Lettering
Use a pencil to sketch out the lettering first. Then use a paint pen to draw over the letters.
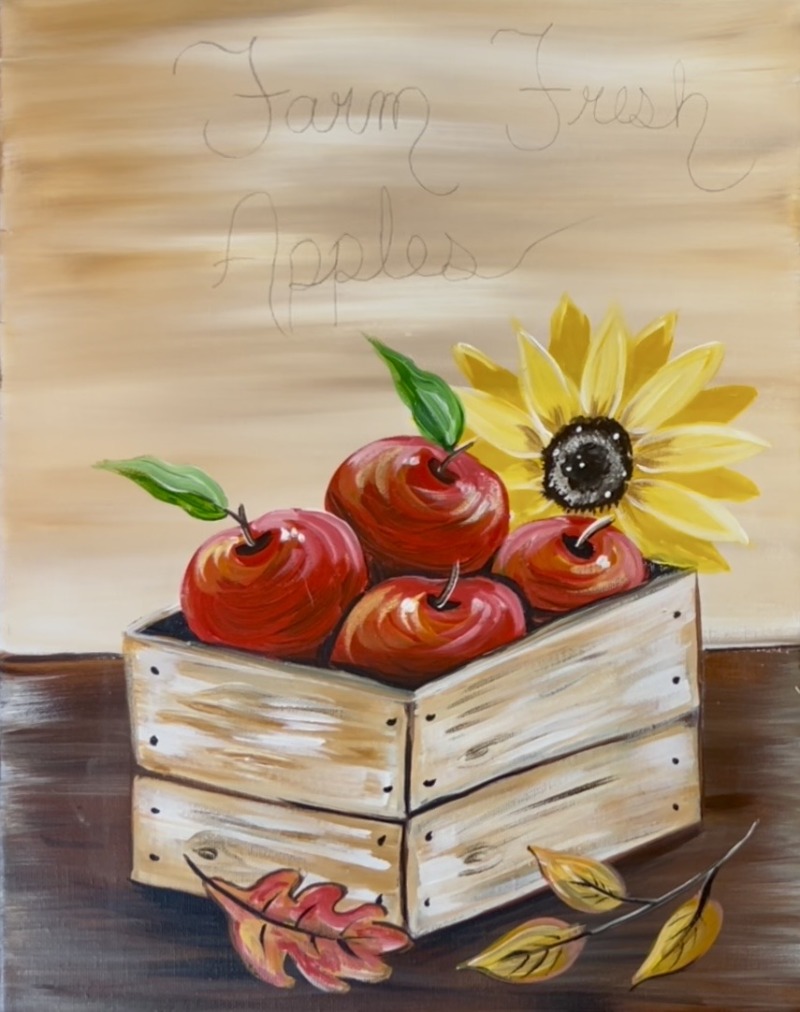
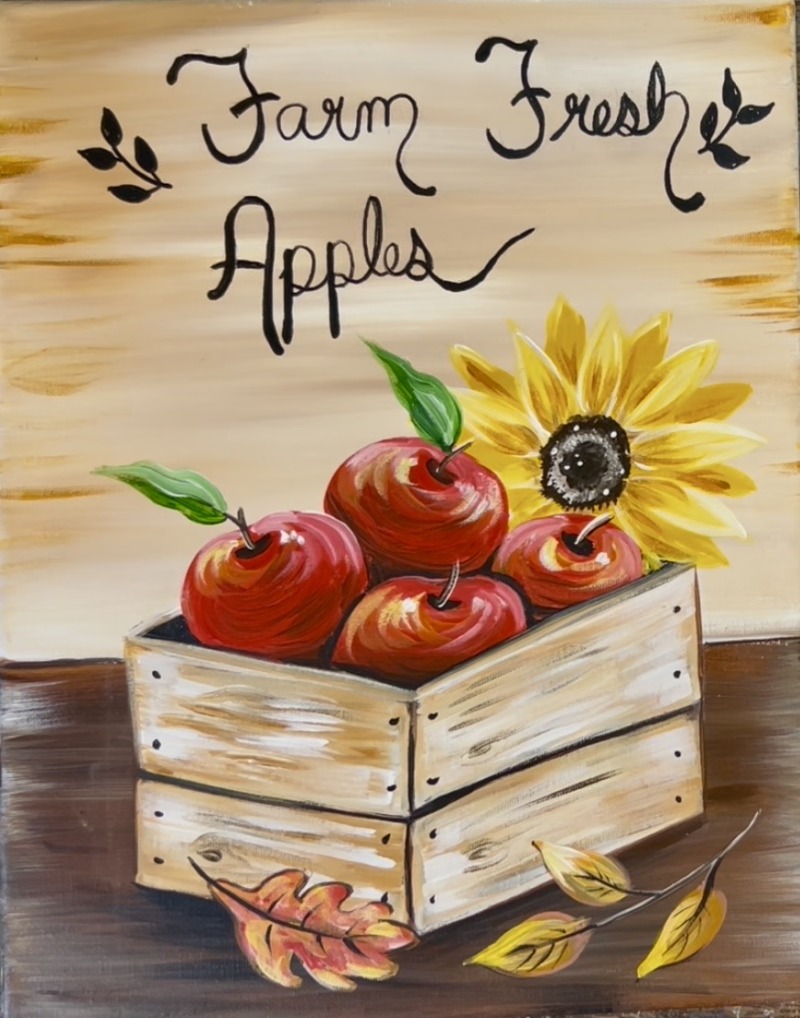
12. Final Details
Final details are what bring the whole painting together! Paint berry stems on each side of the crate (one behind the sunflower on the upper right and one sticking out of the crate on the lower left). To do the berries, use dark brown for the stems and paint little red circles with white highlight.
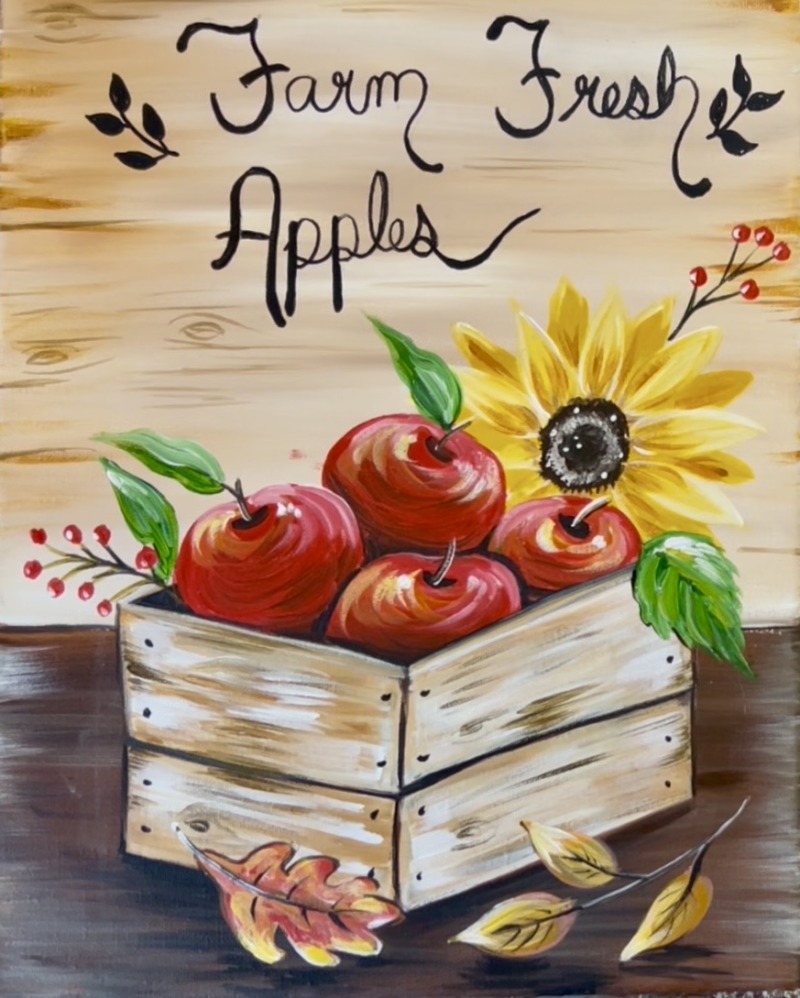
Add another coat of paint to the sunflower petals for added contrast. Use dark yellow (yellow mixed with light brown) to paint lines extending from the bottom of the petals towards the ends of the petals. Then use white mixed with yellow (or just white) to lightly outline the tips/ edges of the petals. In addition to that, paint a leaf hanging out of the crate on the right. I made this leaf look more like a sunflower leaf with jagged edging on the sides.
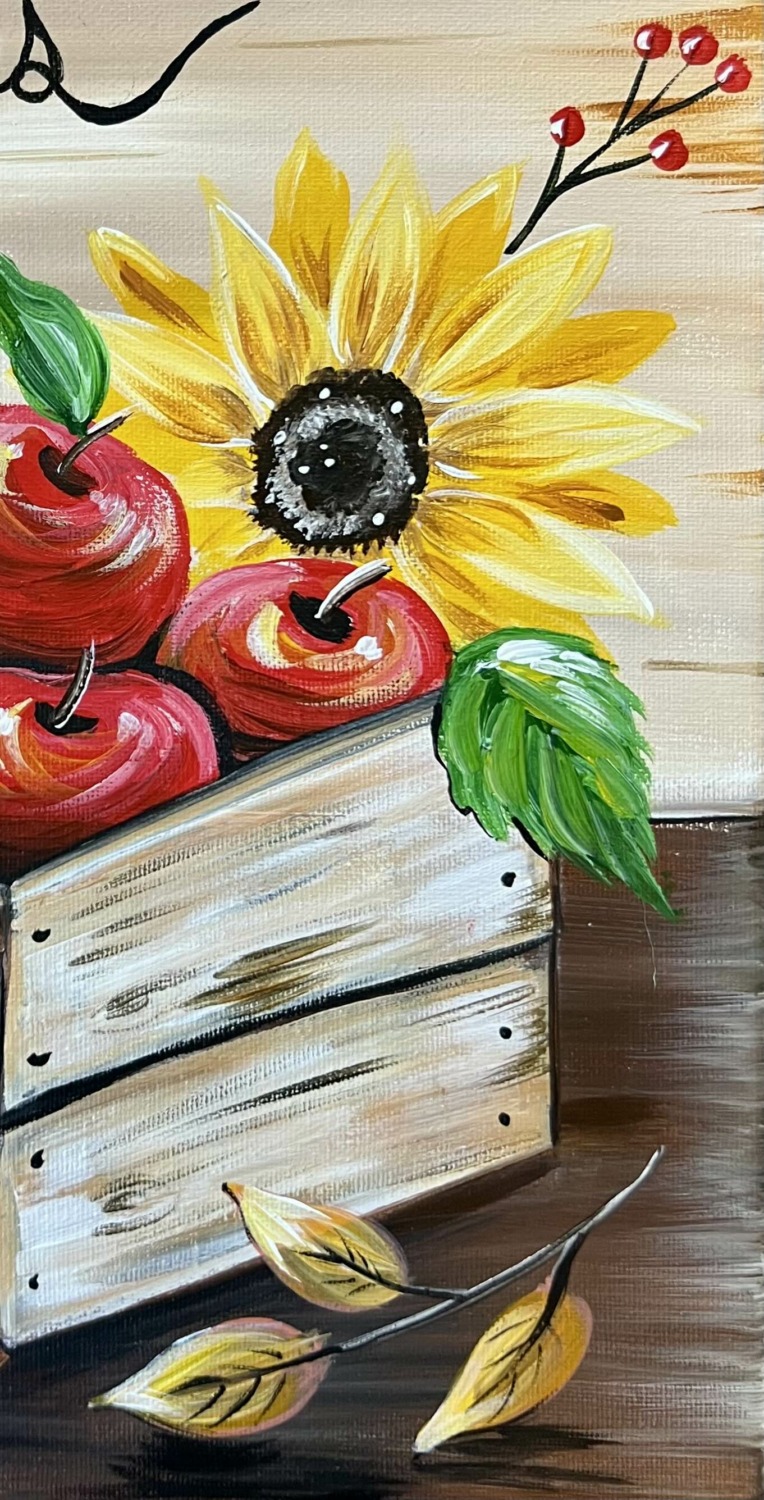
Another detail you can add is wood texturing in the background. Use a combination of dark brown mixed with light brown and the round brush to paint wood texture lines and wood knots. I only did this to the right and left edges of the canvas to ensure the background around the lettering remains light and bright (otherwise the lettering would get lost in the business of the wood lines).
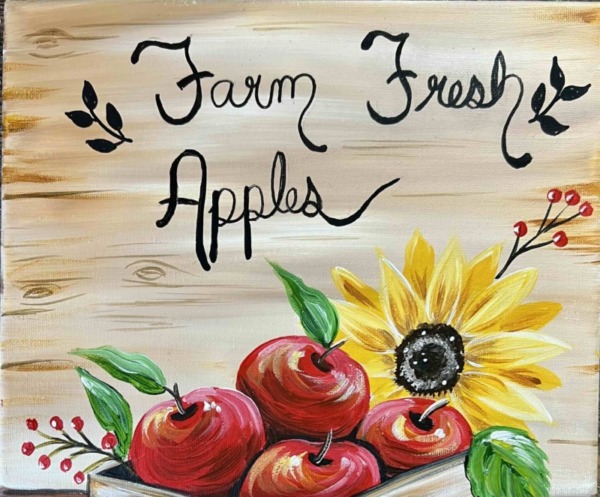
Finished!