Would you like to save this?
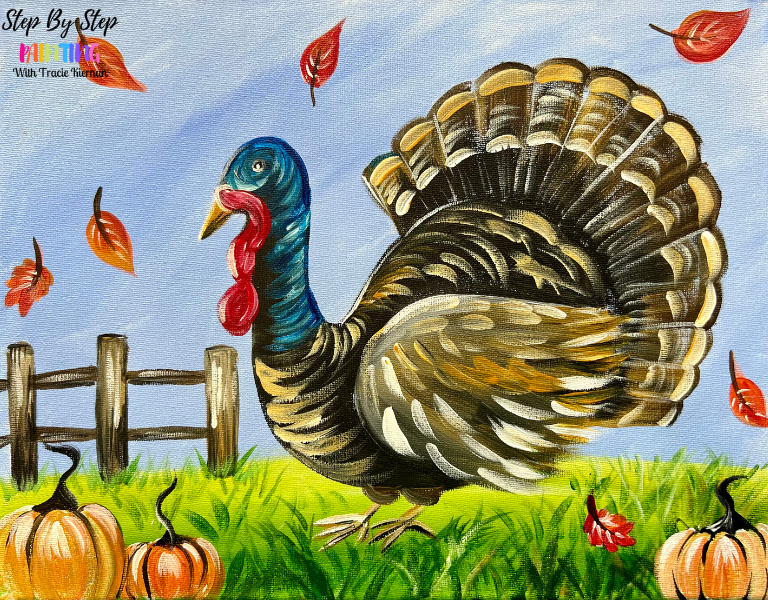
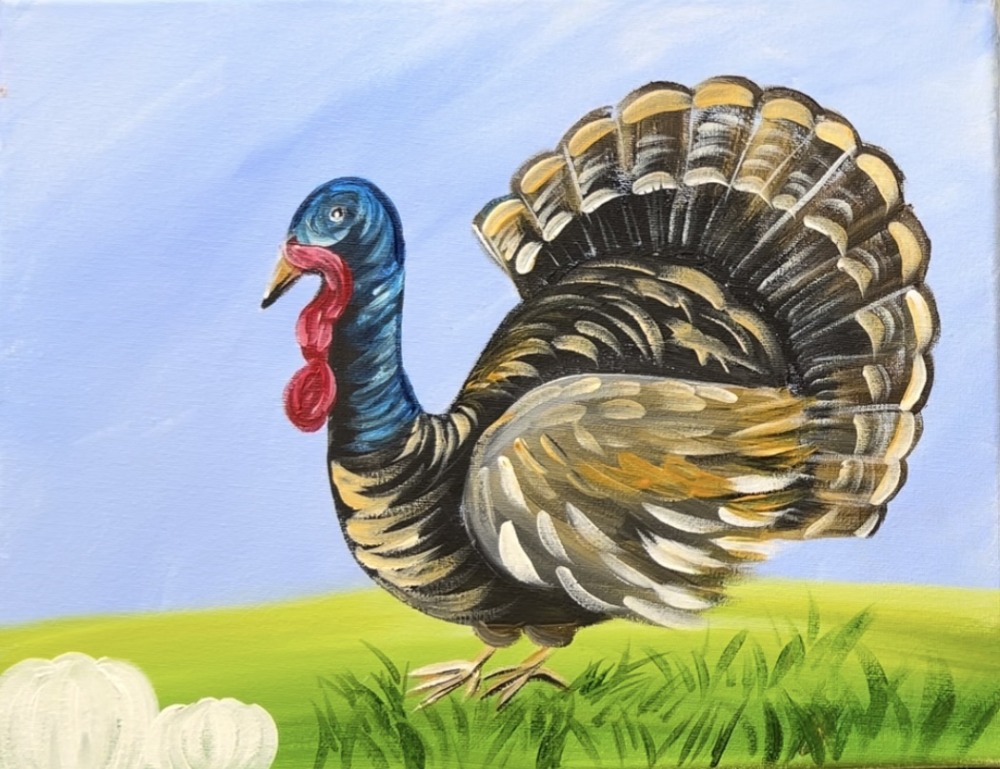
Gobble gobble! 🦃🍂 This Thanksgiving-themed painting captures the essence of fall with a turkey in a pumpkin patch!

This painting is a medium level painting. I don’t think it is too hard. However, it is a little bit more advanced than the cartoon-like turkey painting tutorial I created back in 2017. You can see that one here!
Enjoy and happy painting!
Materials Needed:
Turkey At A Pumpkin Patch
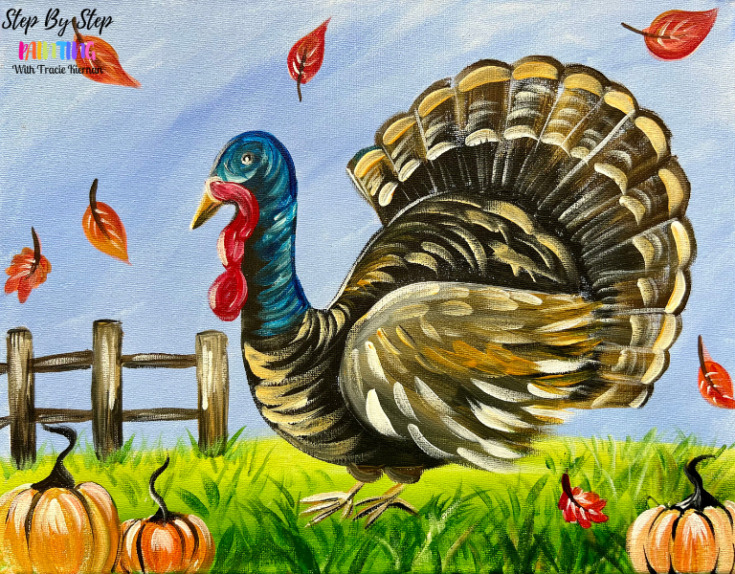
Gobble gobble! 🦃🍂 This Thanksgiving-themed painting captures the essence of fall with a turkey in a pumpkin patch.
Materials
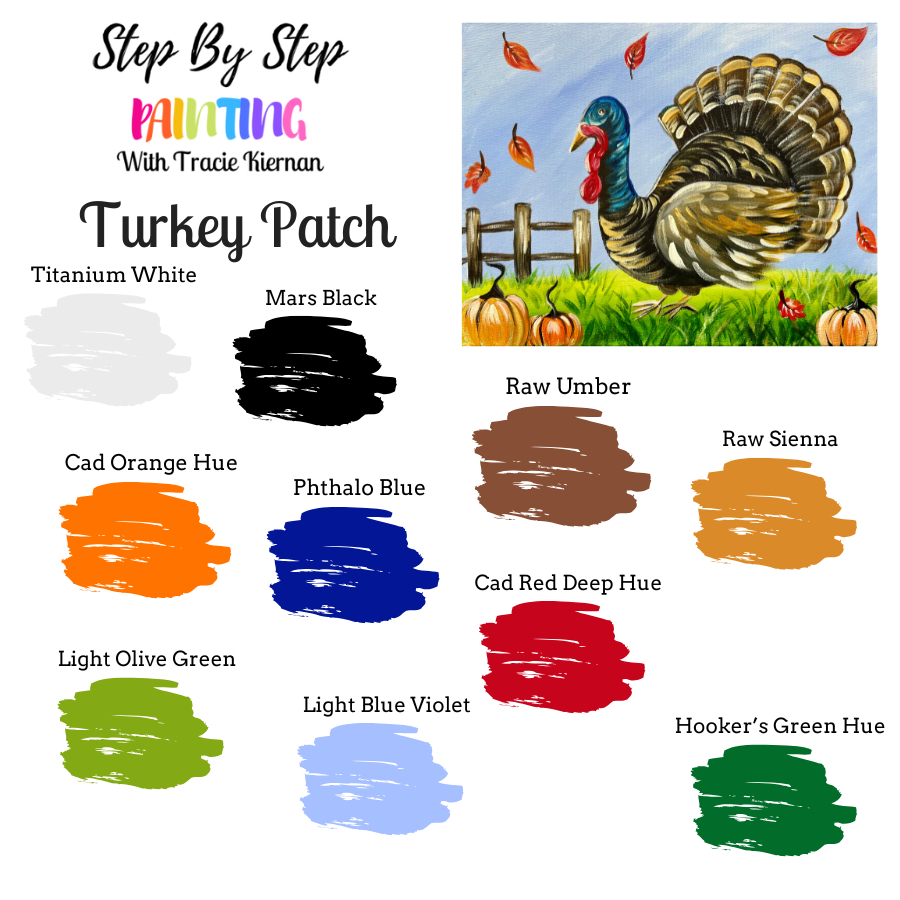
Colors
- Titanium White
- Mars Black
- Cad Red Deep Hue
- Cad Orange Hue
- Raw Sienna
- Hooker's Green Hue
- Light Olive Green (optional)
- Phthalo Blue
- Light Blue Violet
- Raw Umber
Brushes
Color Palette
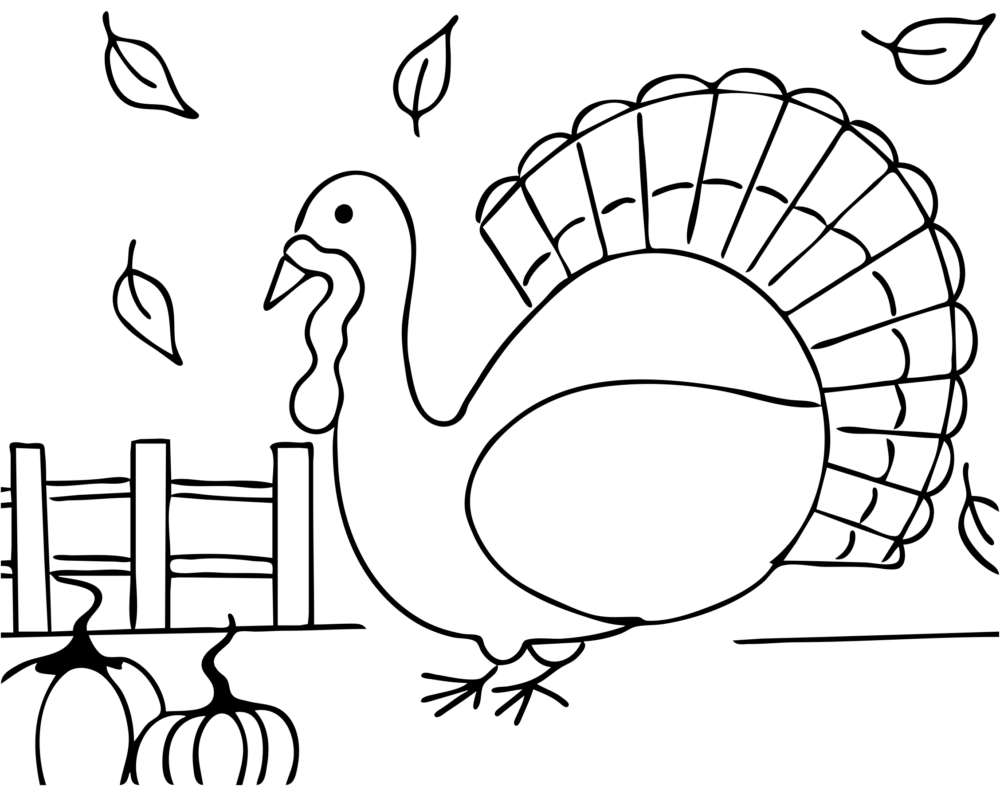
Traceable (optional)
Directions At A Glance
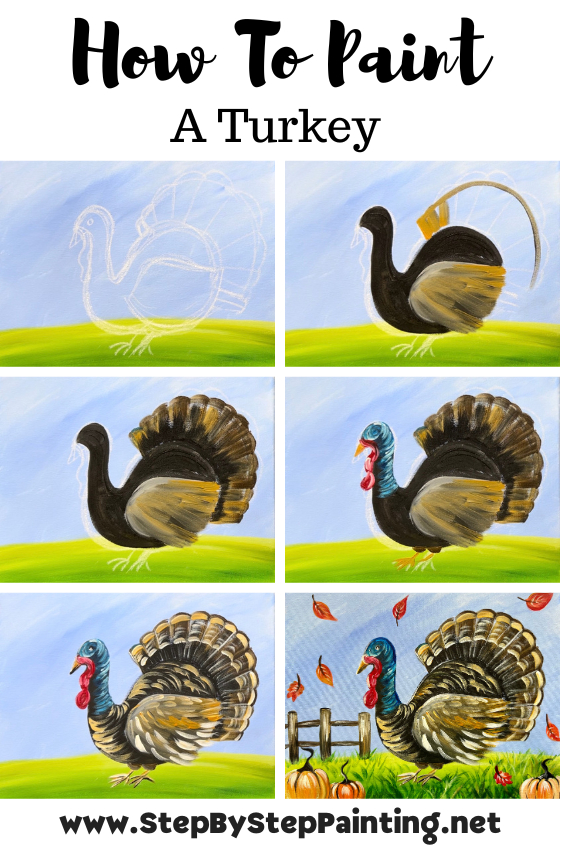
Video
Step By Step Instructions
1. Paint Sky
Position your canvas horizontally.
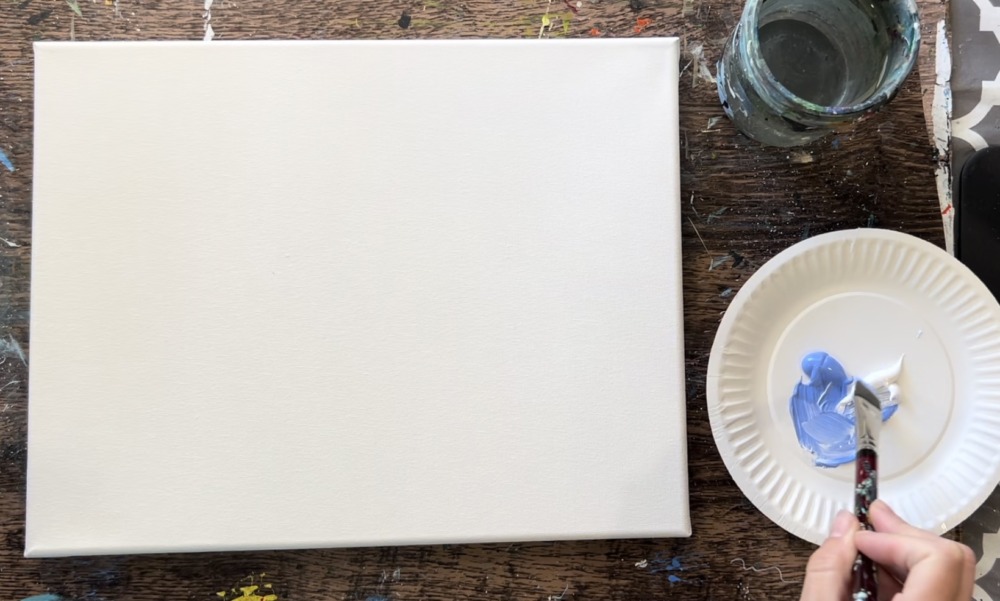
Load your paint palette with the two colors: “light blue violet” and “titanium white”. Use a 3/4″ flat wash brush. Mix equal amounts of the blue and white together (but don’t mix all the way).
Paint angle paint strokes using the full width of the brush. You will create a very light blue. By painting different angles, you allow the two colors to mix and blend but don’t blend them all the way. This creates texture and color variation.
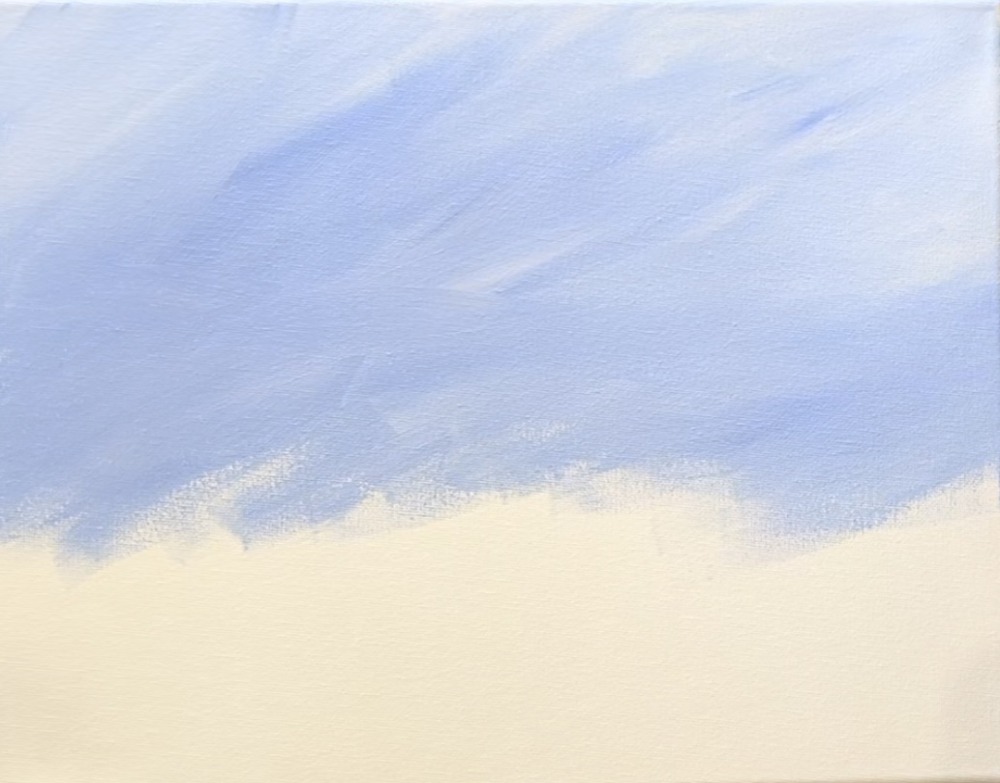
Go all the way down but leave about a 1″ gap on the bottom of the canvas.
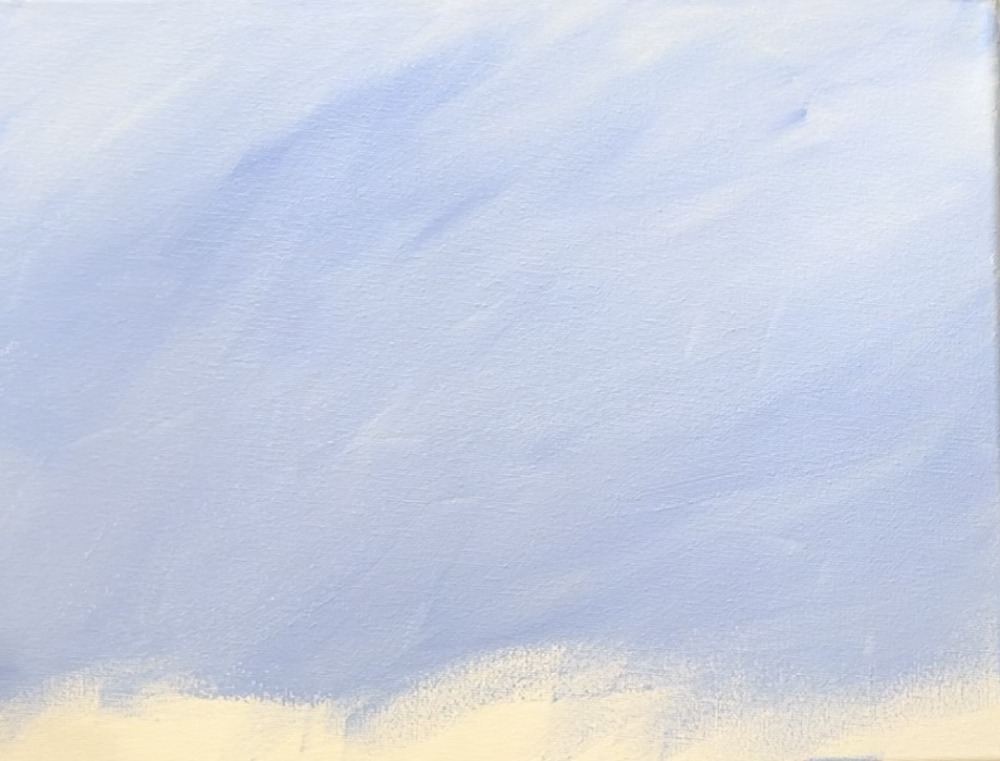
2. Paint Grass (first layer)
Load your paint palette with “light olive green”, “hooker’s green hue” and “titanium white”. Note: you can do this without the light olive green and just use the dark green for this step!
Mix the “light olive green” with a small amount of “titanium white”. Use the 3/4 wash brush and paint a horizontal area about 2″ to 2.5″ from the bottom edge of the canvas.
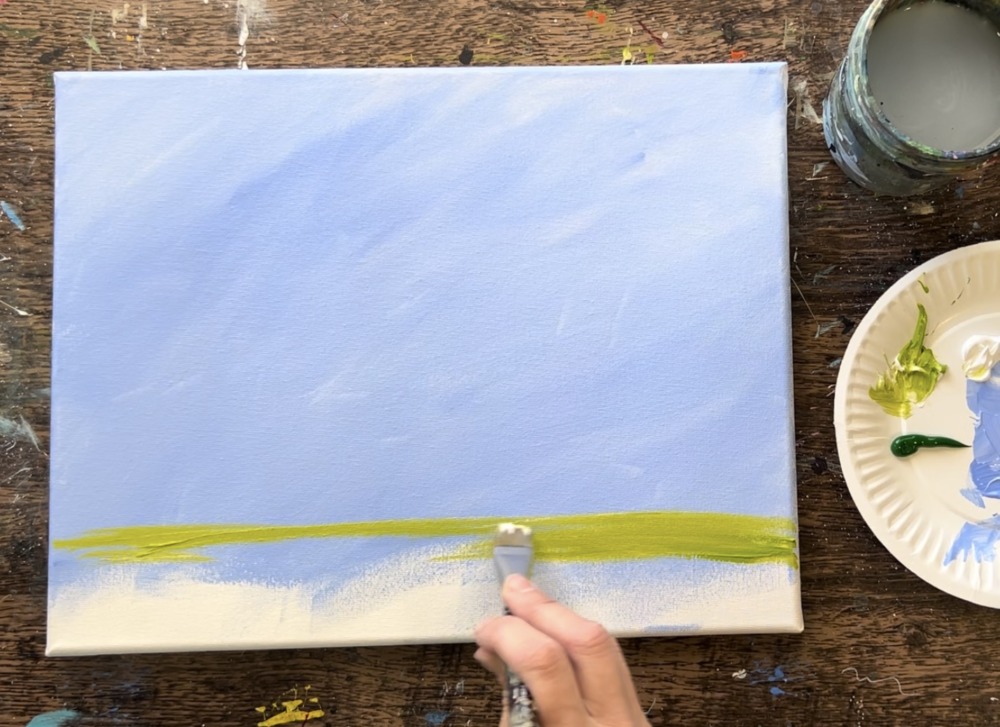
Paint left and right paint strokes. As you work your way down to the bottom edge of the canvas, add a little bit of “hooker’s green hue” to your brush. Blend it with the lighter green.
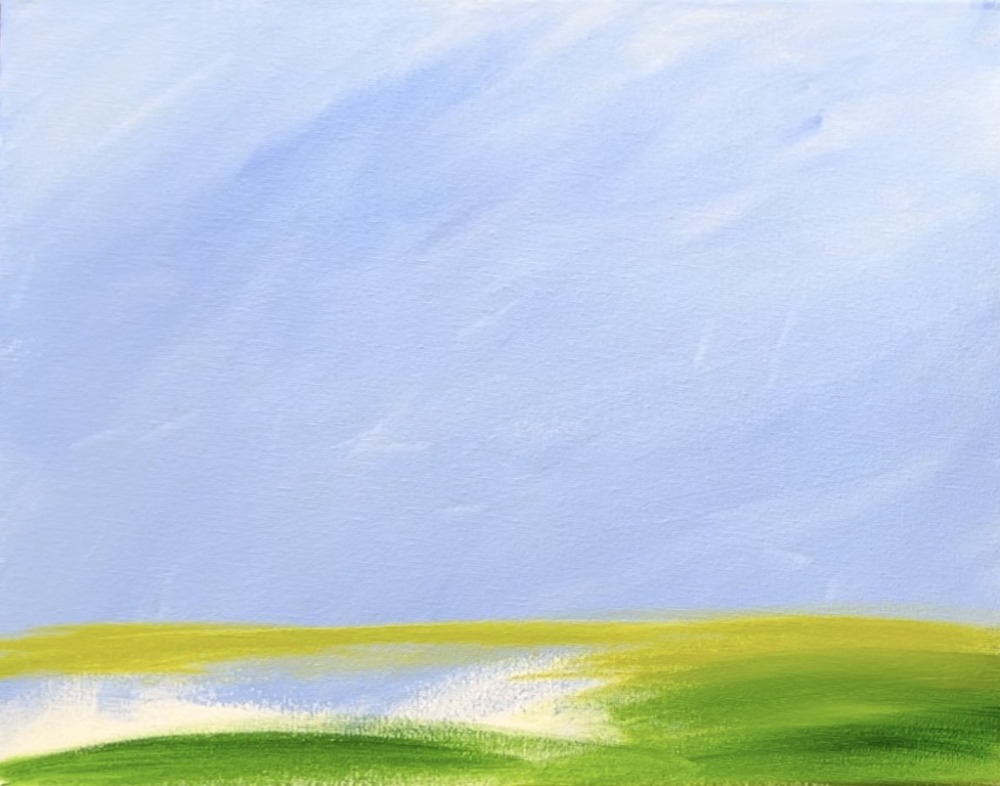
Create a gently blended gradient of light green on the top and dark green on the bottom. This creates “perspective” in this area.
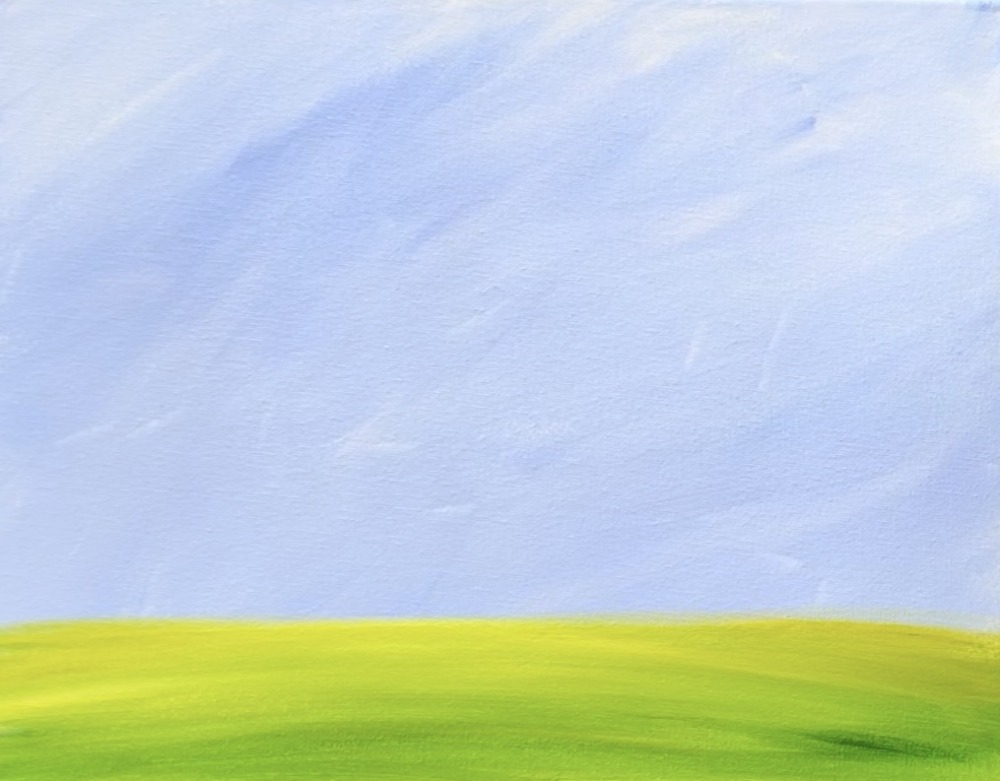
Wait for this to dry before going onto the next step.
3. Draw Turkey

Use a piece of chalk to draw the turkey. The lines below are darkened for visibility purposes.
Start by drawing a curved “hook” line on the upper left area of the canvas. Curve down and then back up for the side of the body.
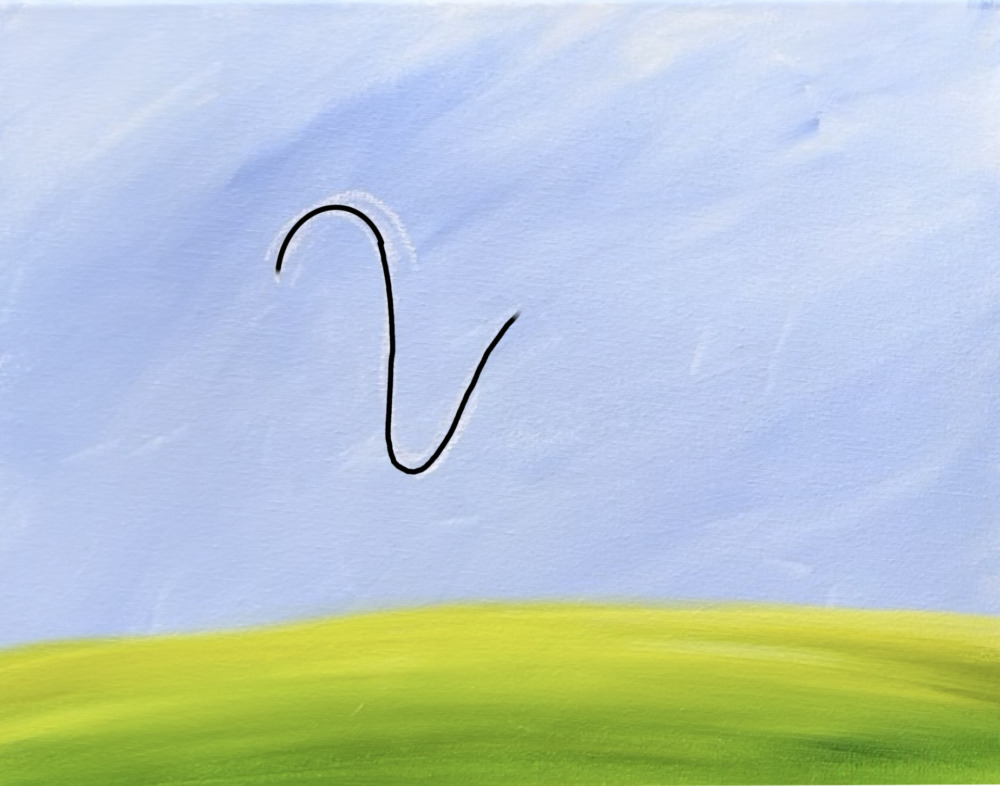
Next, draw a beak and “wattle”. The beak is slanted downwards.
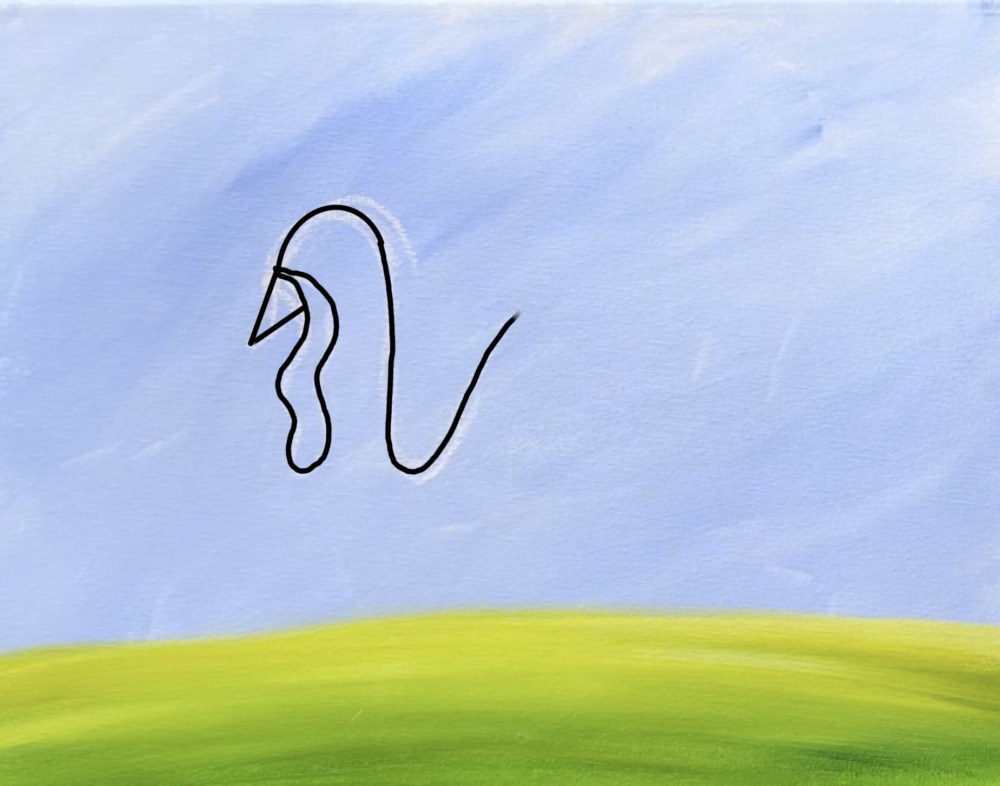
Extend the line on the right to create a large curve for the turkey’s back. Extend the line down under the “wattle” for the front lower part of the turkey’s chest.
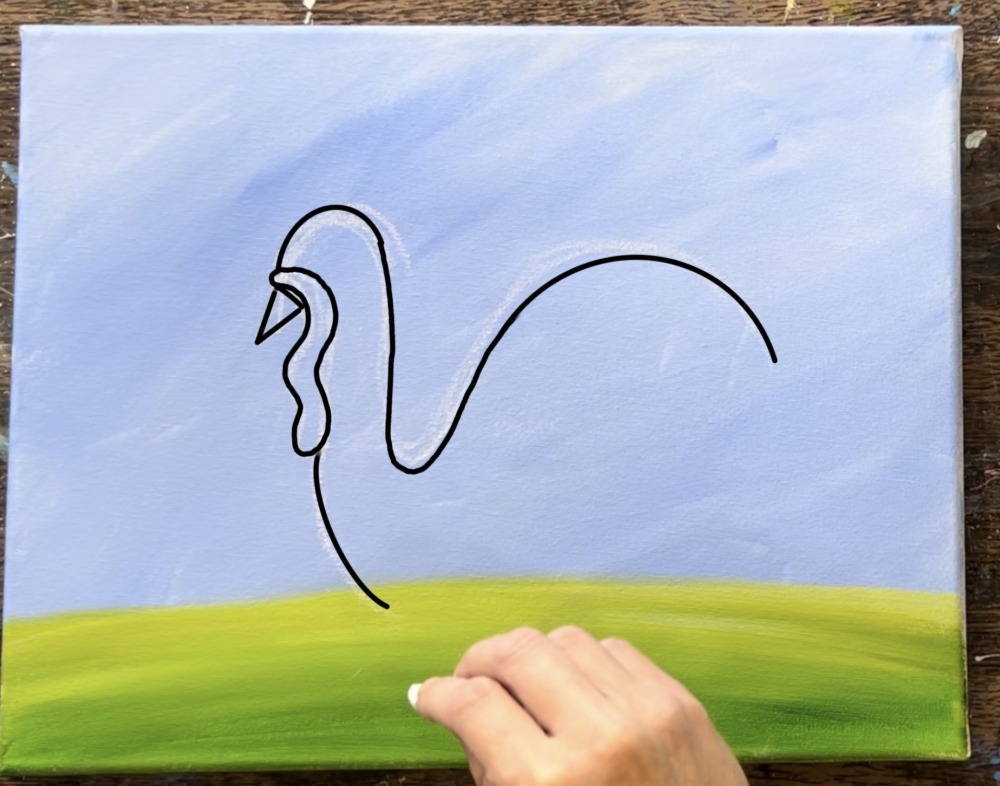
Then sketch the side wing. This is kind of a teardrop shape.
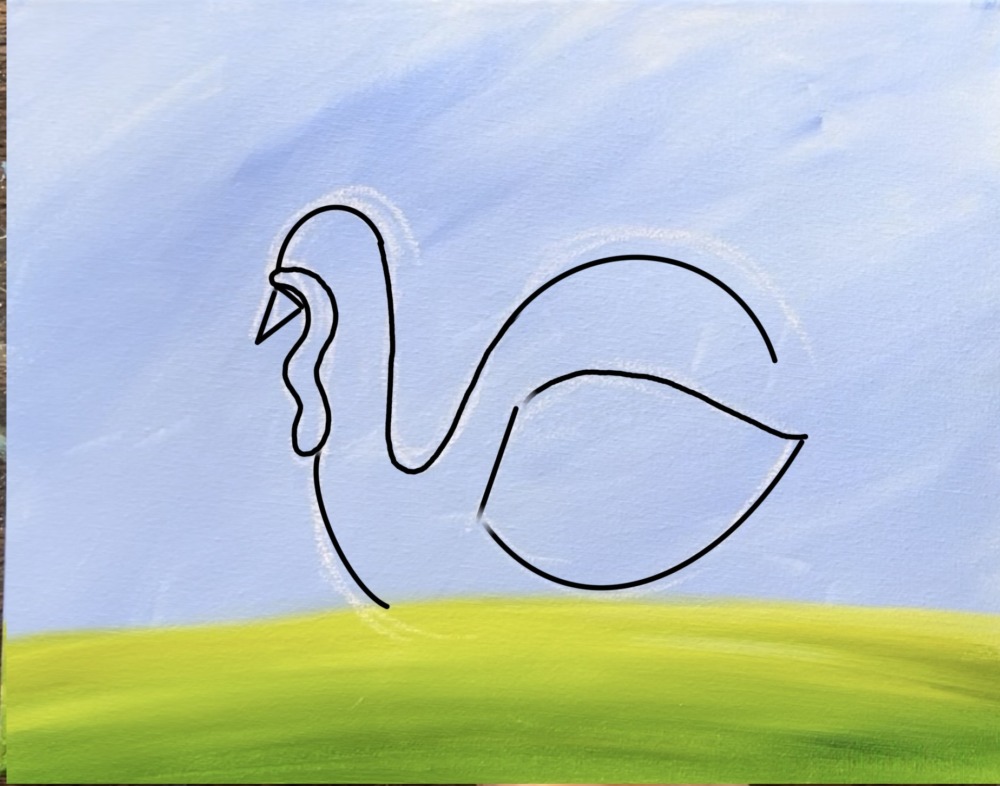
Next, draw the turkey’s tail feathers. Draw a large curve to create a shape that resembles a fan.
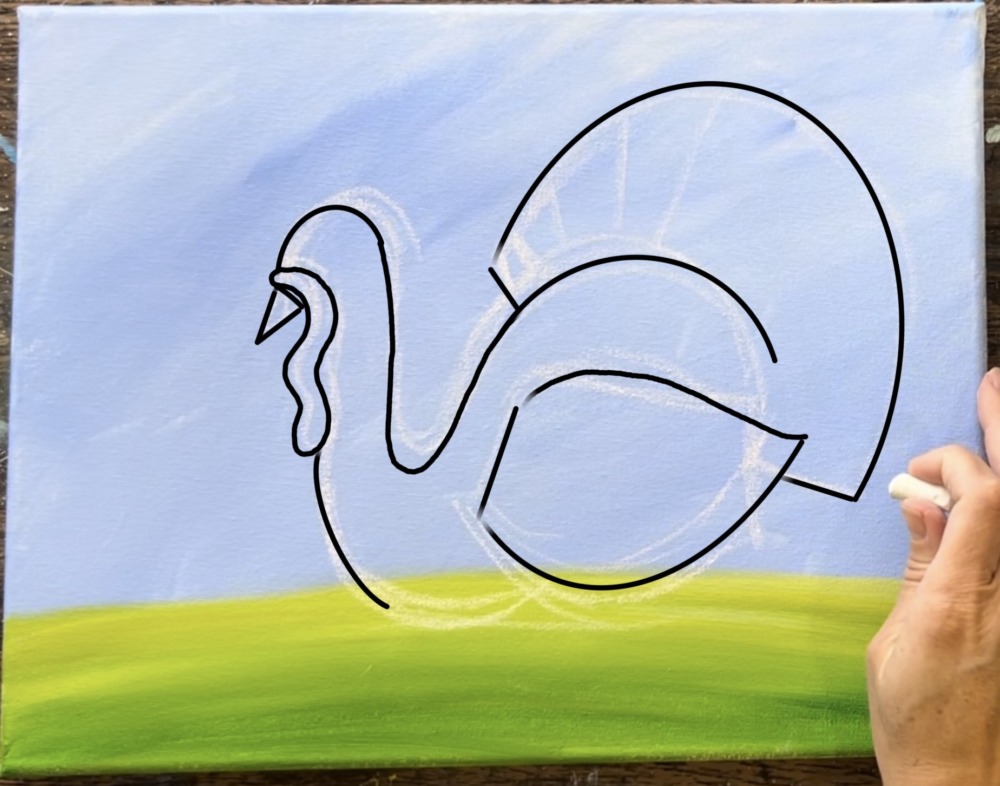
Inside of this “fan shape”, draw diagonal lines that go outwards and “spread out” like a “fan”. The angle of the lines change.
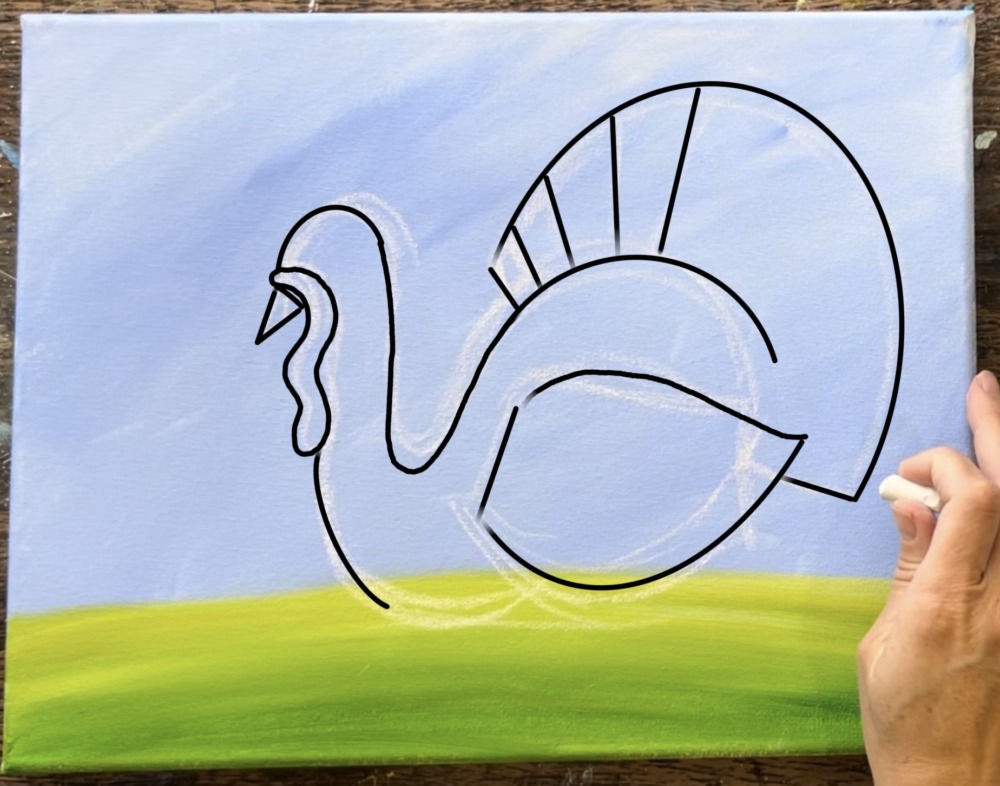
After drawing each of those diagonal lines, draw a curve/ arc line on the edge of each of the tail feathers.
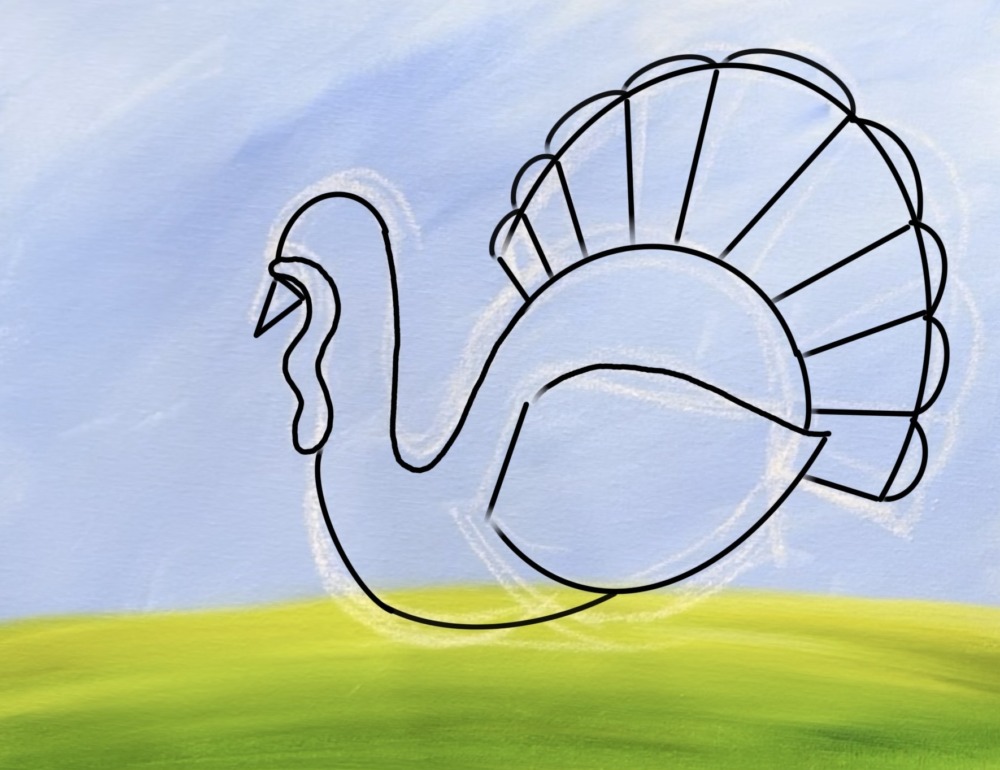
Next, draw a small circle for the eye. Draw two simple legs and two “bumps” for the legs to attach to. The legs are going diagonally. Note: I also adjusted the side wing to be larger and extend a little further downwards on the bottom right.
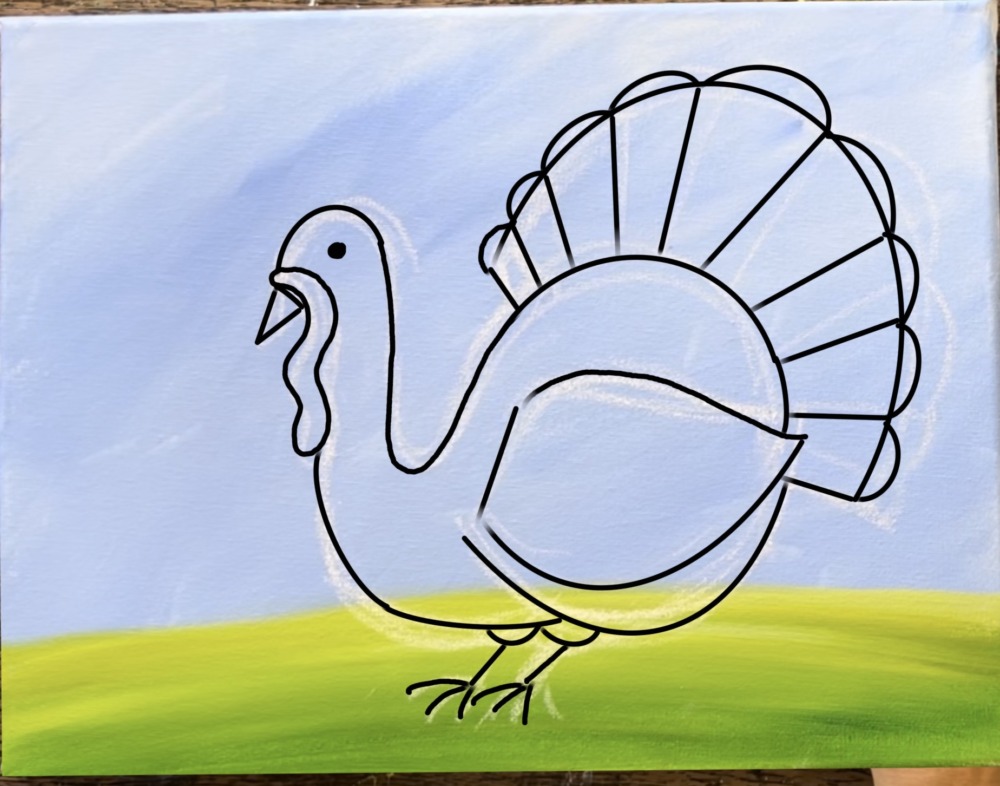
Here is a picture of my chalk drawing without the dark lines. Note that the drawing looks sketch like and that is okay! We can adjust our drawing when we paint this in.
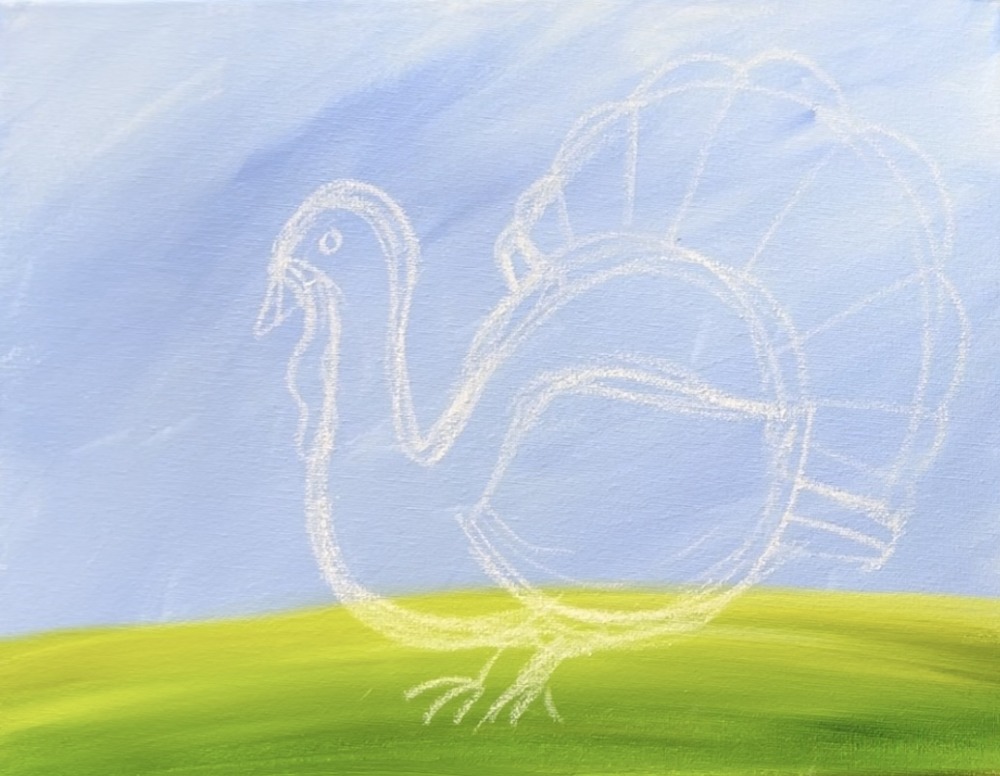
4. Paint Turkey Base Dark Color & Side Wing
Load your paint palette with “mars black” and “raw umber”. Use a #12 bright brush (1/2″ flat brush) to paint the body and neck of the turkey. You are basically painting all of this shape except for the side wing and tail feathers.
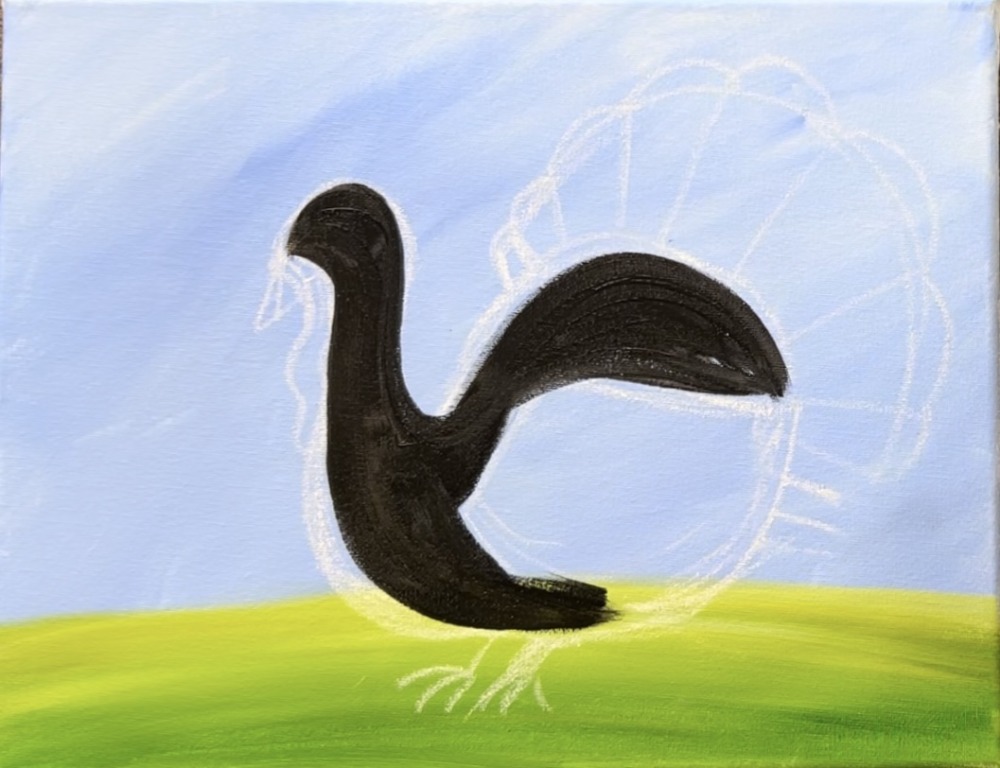
Next, load your palette with the color “raw sienna” (light brown). Load your brush in the light brown, white and a little bit of black/black. You will make a light brown/gray color. Paint the side wing of the turkey.
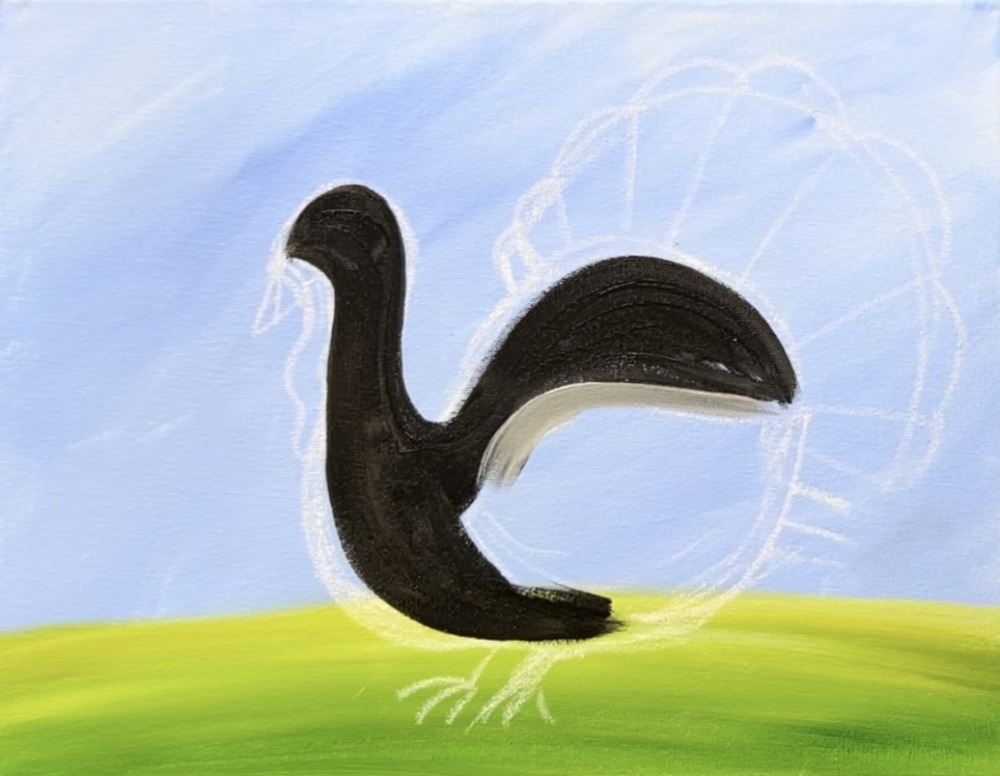
As you paint this shape in/ drag your brush downwards at an angle to create some texture in this wing. Create variations of the light brown that gently blend with some of the darker color (black/brown).
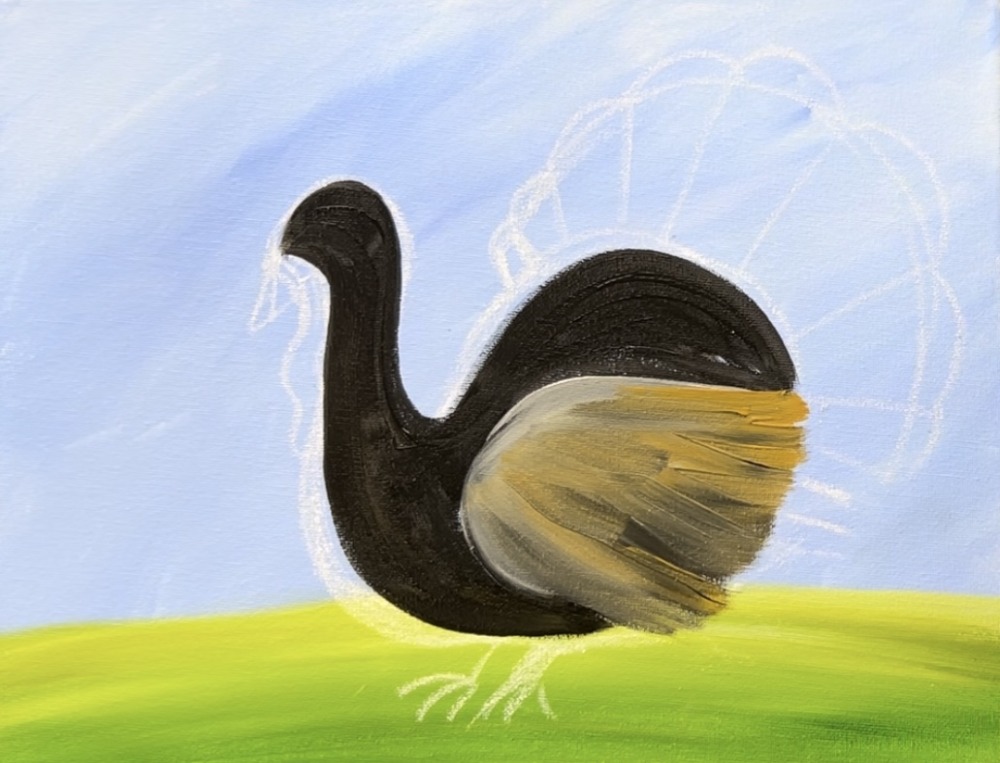
5. Paint Tail Feathers
Next, paint the tail feathers. Use the #12 bright brush and the same colors on your brush as you used for the side wing. Outline the large arc first. Then paint diagonal paint stroke starting from the bottom and going to the arc edge.
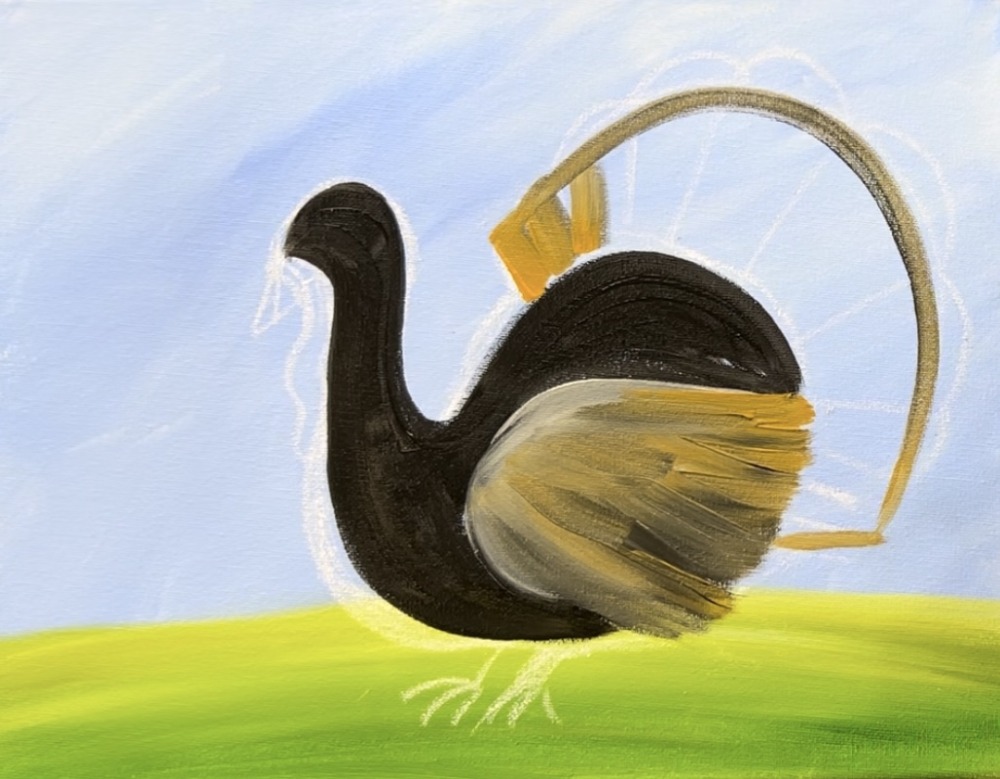
Use the full width of the brush to paint each of these strokes/ individual tail feathers. The color will be light brown and some darker streaks will blend in. If you aren’t getting the darker streaks, you can make sure to double load your brush in both the light brown and dark brown. You don’t need to cover all of the background right now.
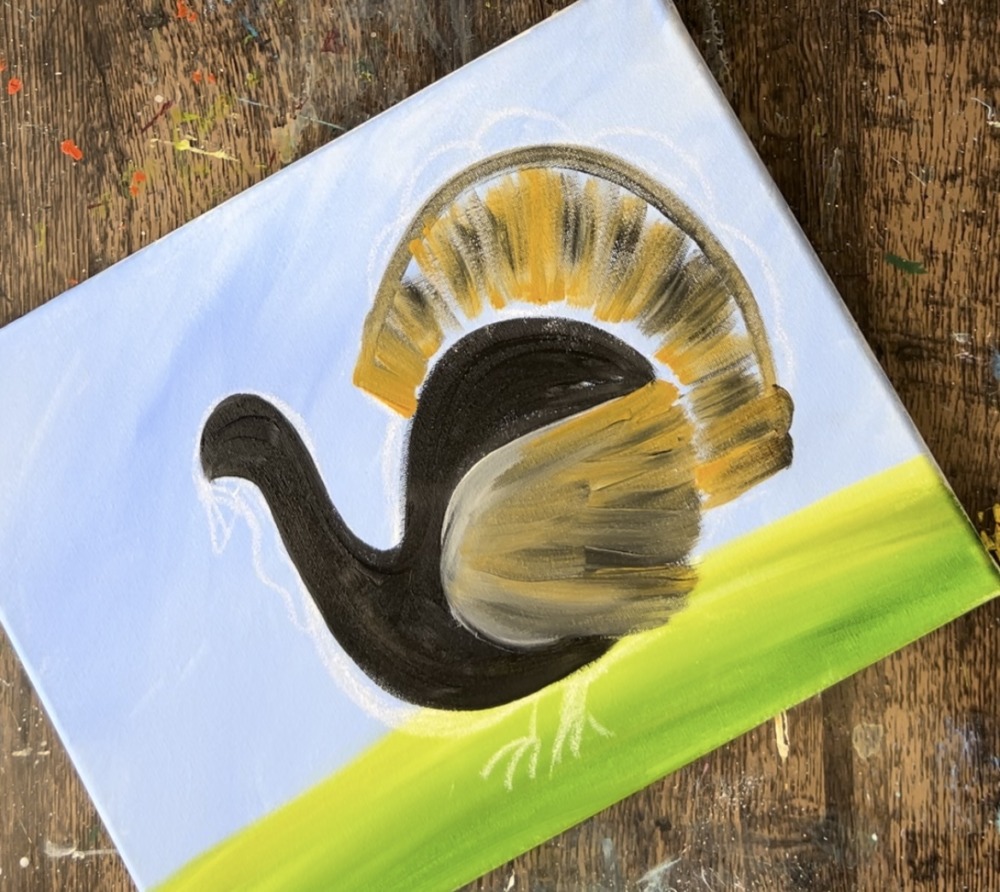
Next, load your brush into “dark brown” without rinsing the brush. Paint small “arc” lines on the edges of each of the tail feathers.

Then go back and add brown/black on the base of the feathers. Drag this pain up and into the rest of each of the tail feathers so that they become dark on the bottom and lighter towards the top.
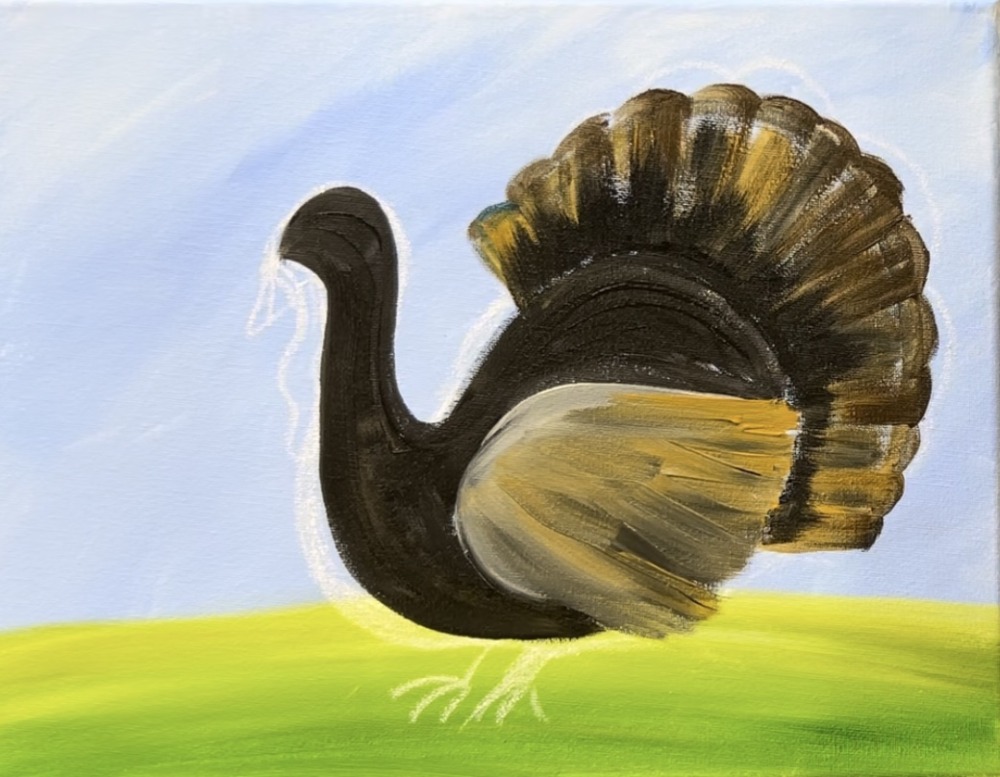
6. Paint Blue On Turkey’s Head & Wattle
Rinse the #12 bright brush and set aside. Load your paint palette with “phthalo blue” and “titanium white”. Use the #4 round brush and double load it into both of those colors. Paint the top part of the turkey’s head and part of its neck. Paint these paint strokes in a “curved” direction to form the shape of the head/ neck. Leave the far left side of the neck dark and shadowy/ don’t paint the blue all the way to the left.
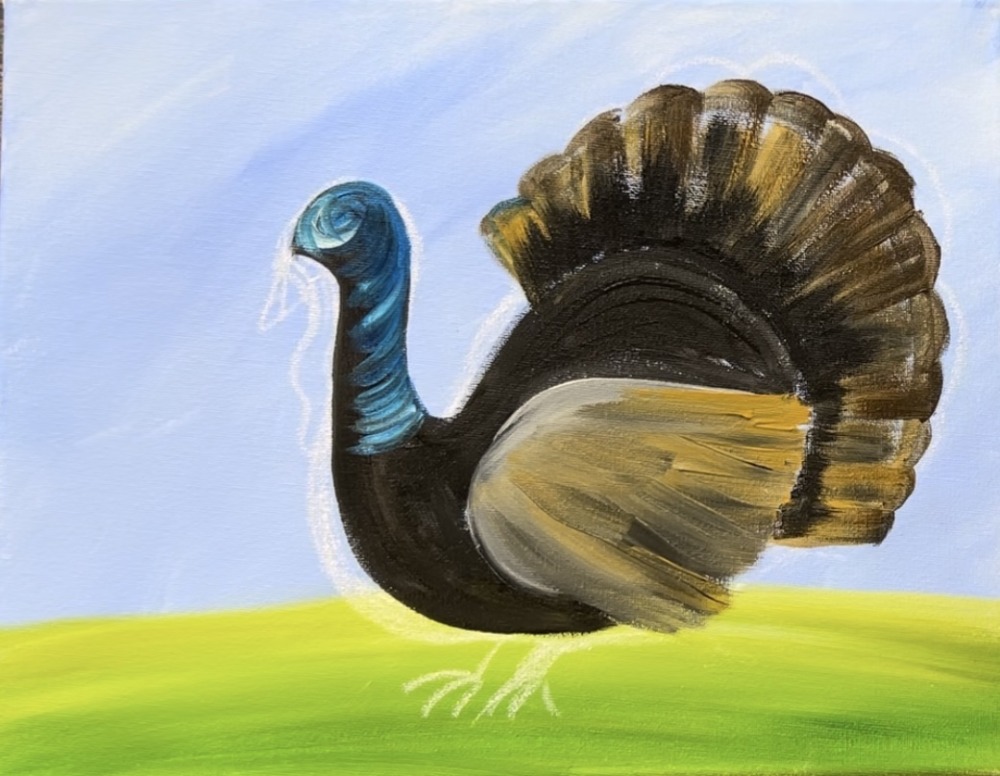
Rinse the brush. Load it into “cadmium red deep”. Paint the “wattle”.
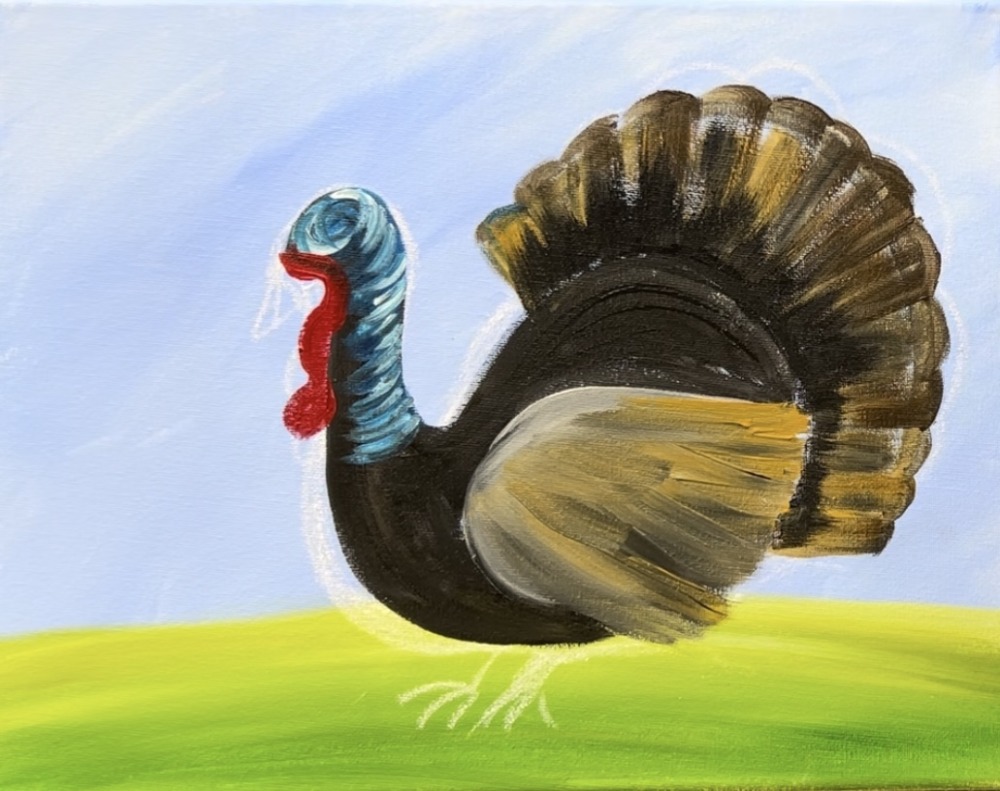
7. Paint Beak & Legs
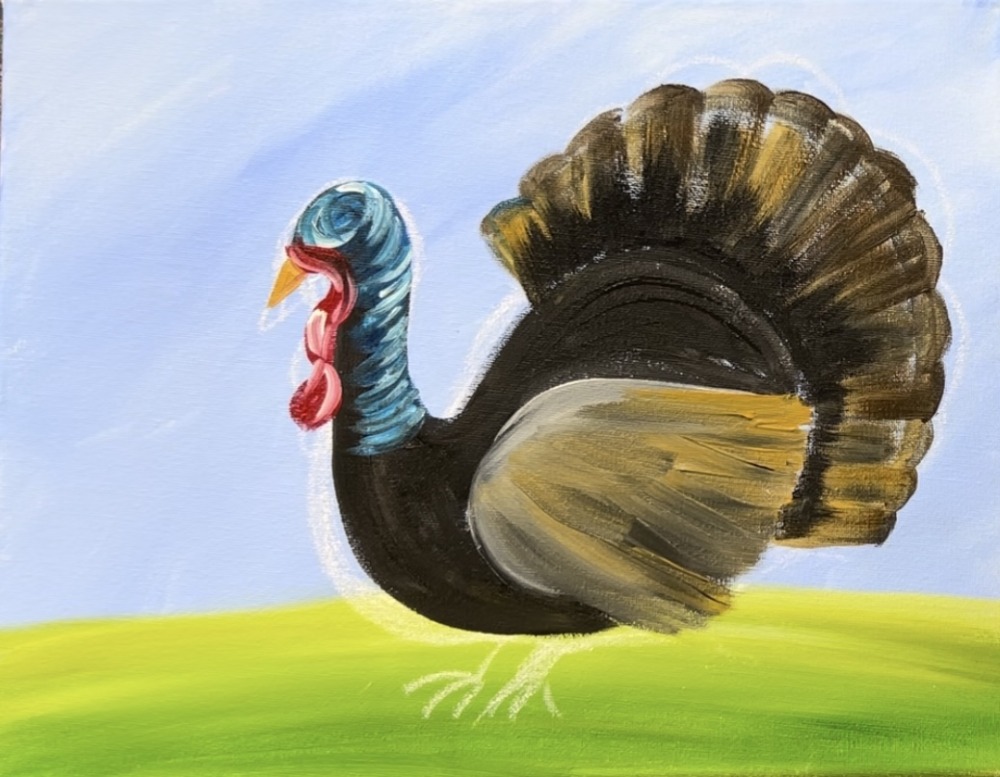
Add a little bit of “titanium white” to your brush and paint curved paint strokes on the red area to blend gently and create some highlights. Then paint the beak using “raw sienna”. Alternatively, you can use “cadmium orange hue” for the beak or mix the orange with the brown. Paint the legs using “raw sienna” and “titanium white” double loaded on your brush.
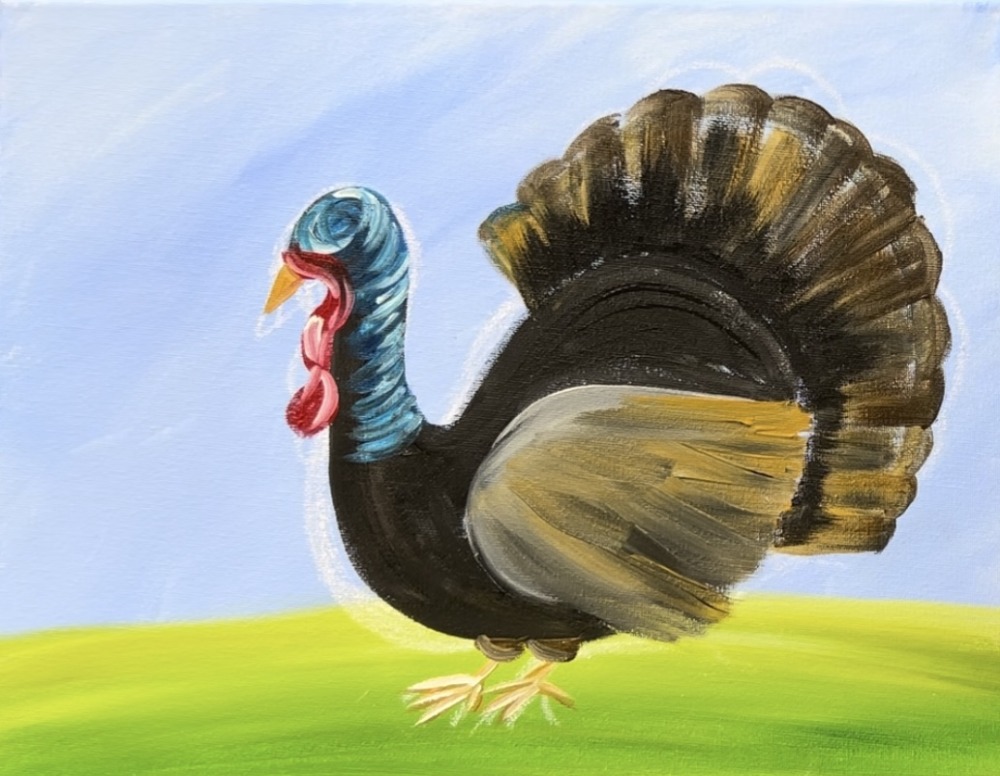
8. Paint Feather Texture & Patterns On Tail Feathers
Next, paint light colored “feather texture” on the turkeys back and front chest area. Double load the #4 round brush in “raw sienna” and “titanium white”. This light color will create nice contrast against the dark first layer. Paint curved strokes on the front edge of the chest. Paint curved strokes along the back.
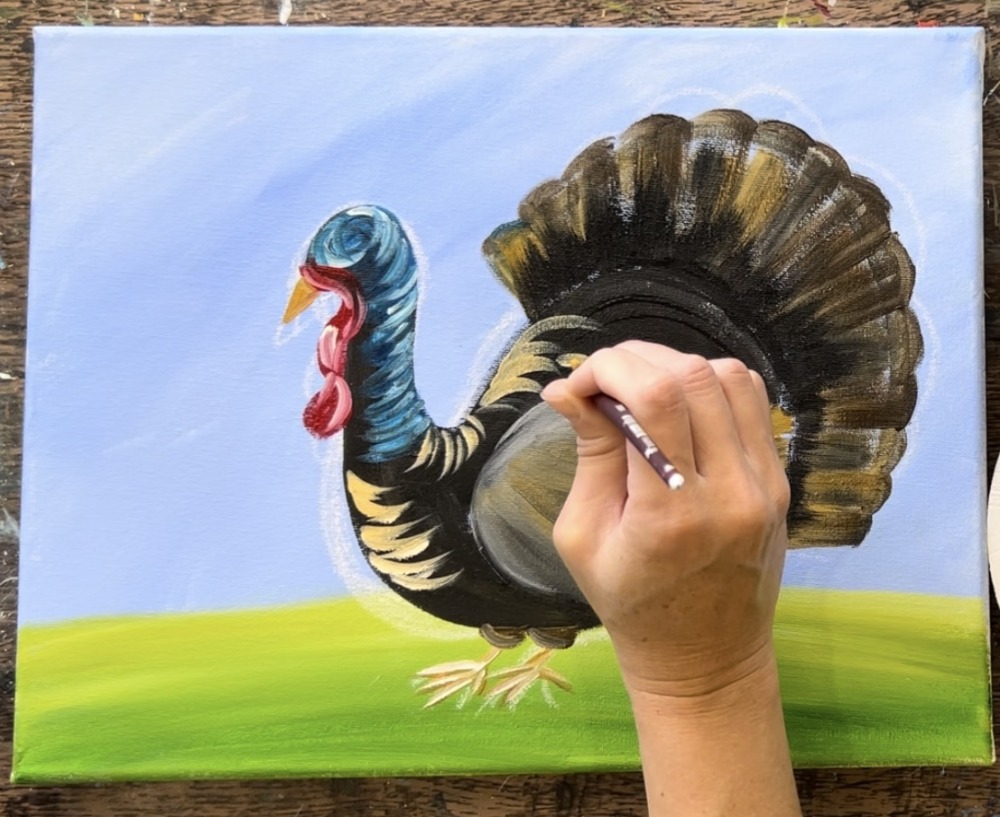
Paint more curved strokes along the back area going in a curved direction. Leave a lot of the dark layer still showing through.
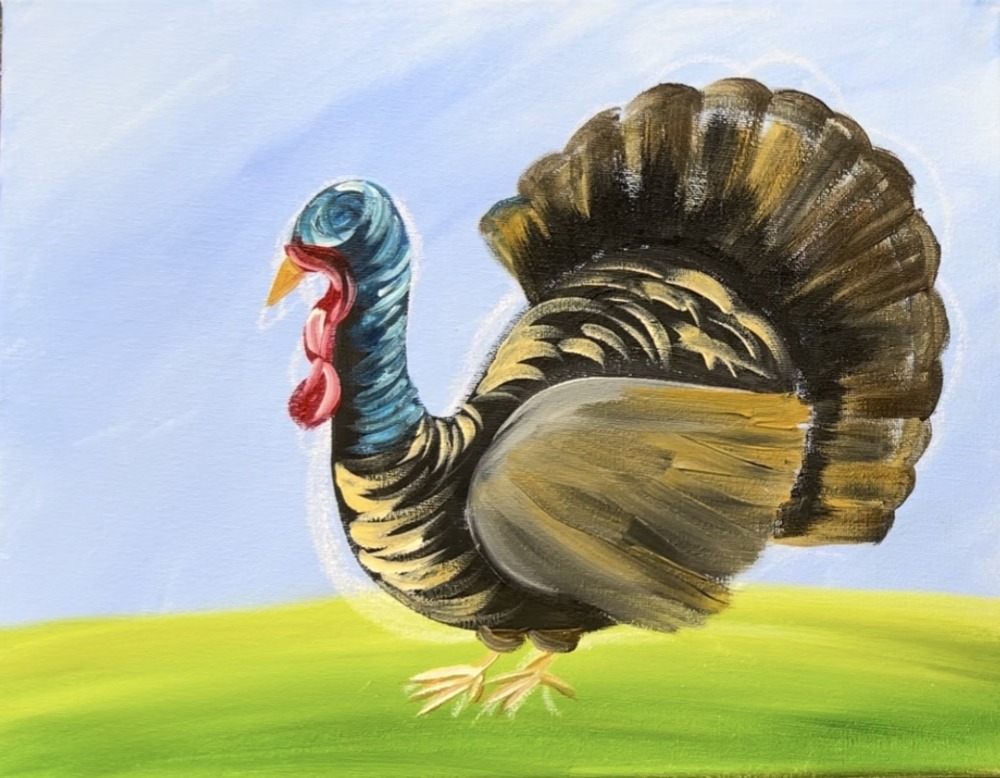
Next, add curved “arc” strokes along the top edges of the turkey’s tail feathers. Do this with the “raw sienna” and “titanium white” both loaded on the brush.
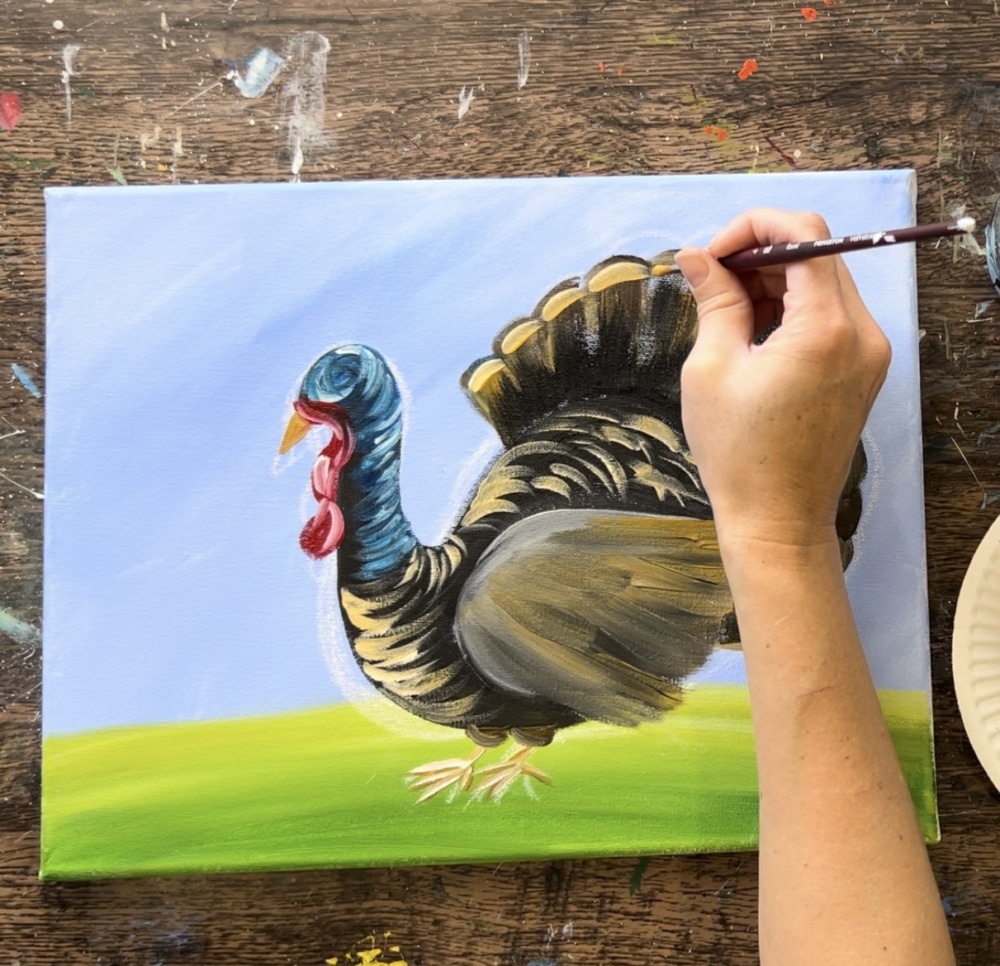
Do this curve mark on the end of each of the tail feathers and leave a little bit of the dark brown still showing on the end.
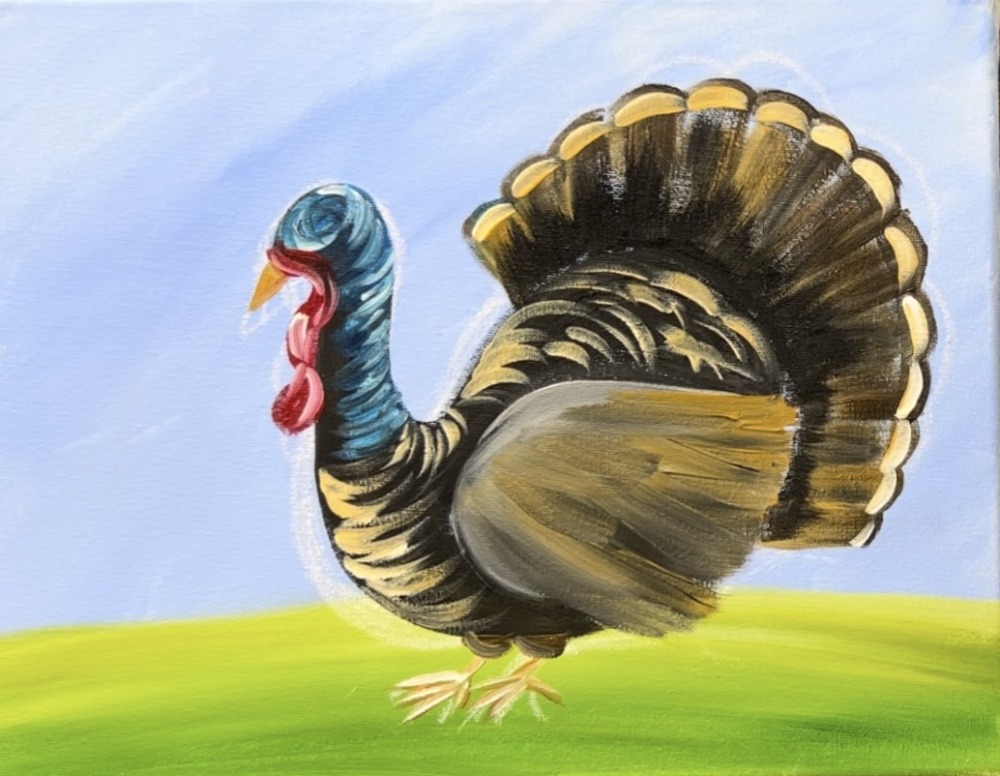
Then paint another set of curved lines in the middle of each of the tail feathers. Do this with a little more white on your brush.
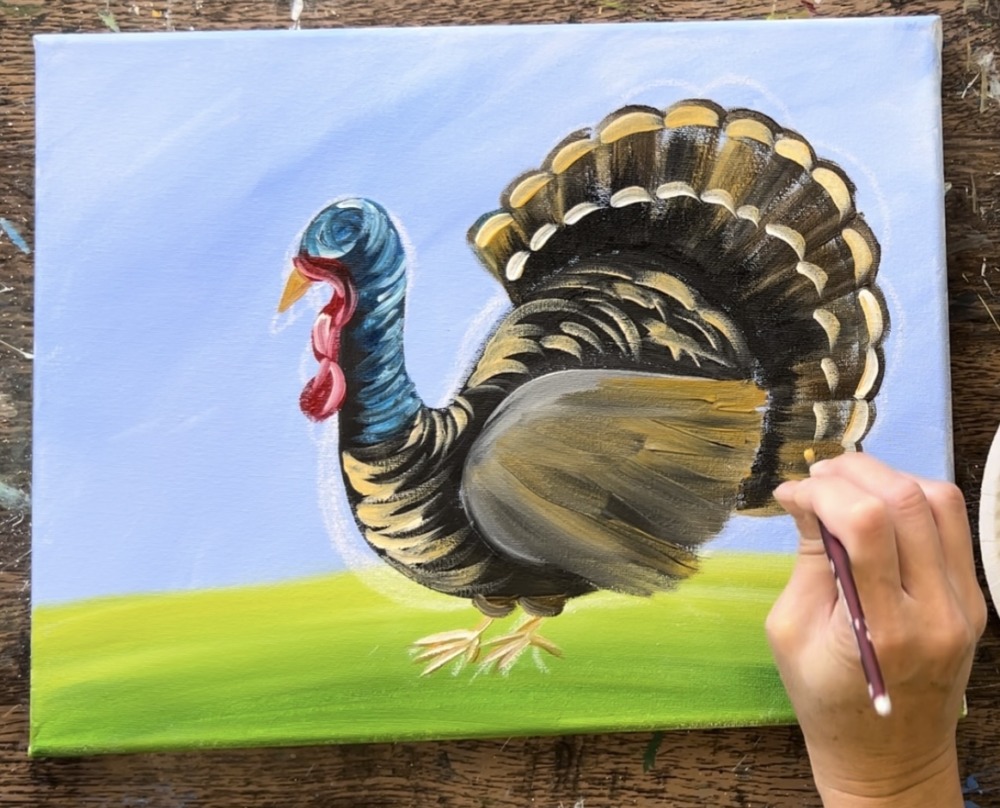
Then “dry brush” little curved marks in between the top and middle lines. These are thinner and lighter.
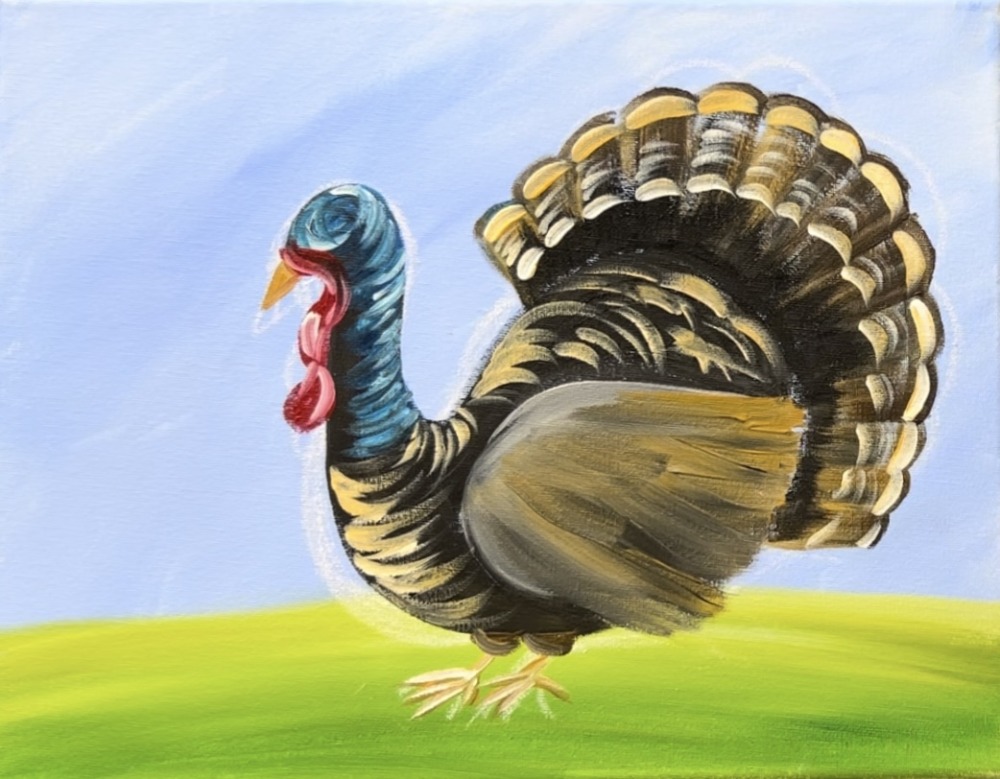
Paint “dry brush” diagonal lines on the bottom of each of the tail feathers. Do this under the curved marks and white “titanium white”. These lines are very light! If needed, add a little black or brown to the brush so this color is a little more muted and not super bright.
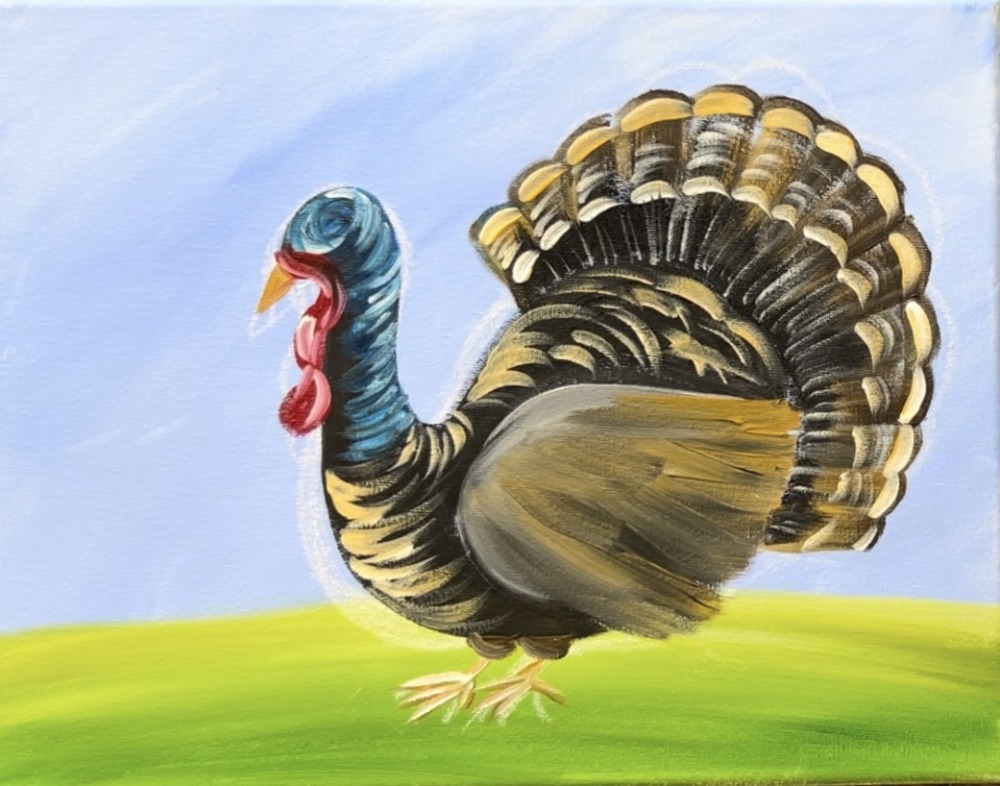
9. Paint Side Wing Feather Texture
Next we will be painting feather texture on the turkey’s side wing. Use “titanium white” mixed with “raw sienna”. Paint curved marks going in a downward direction.
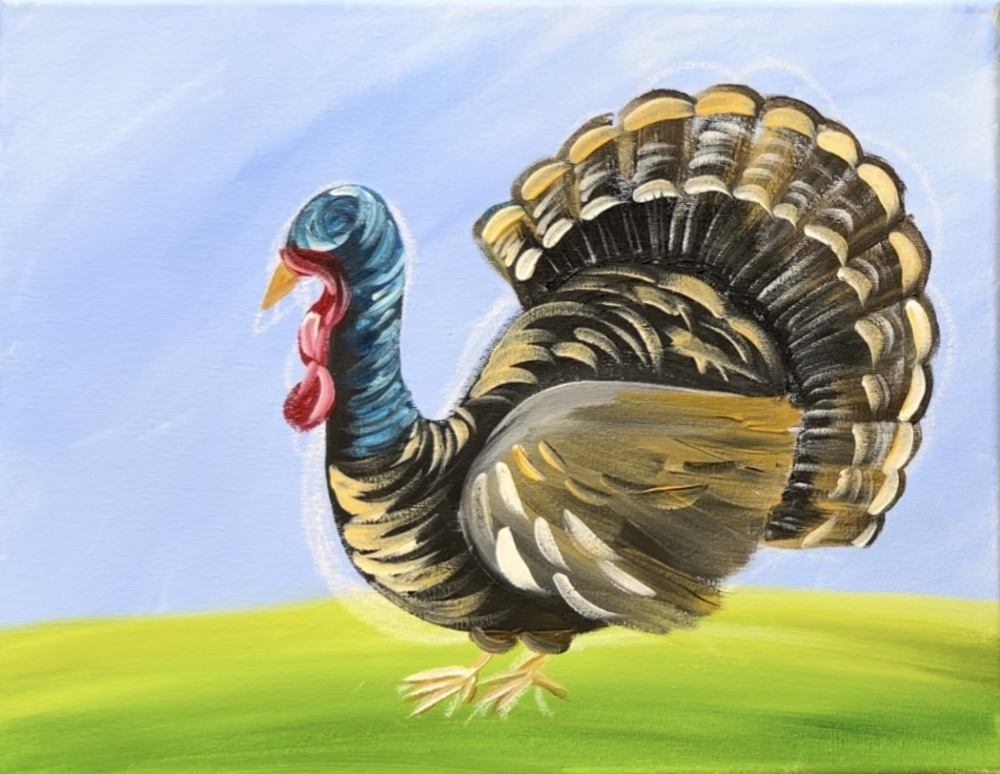
These curved marks can go outside the initial shape of the side wing on the edges. Vary the color of the raw sienna so that it shows up as different variations of light and some that are darker.
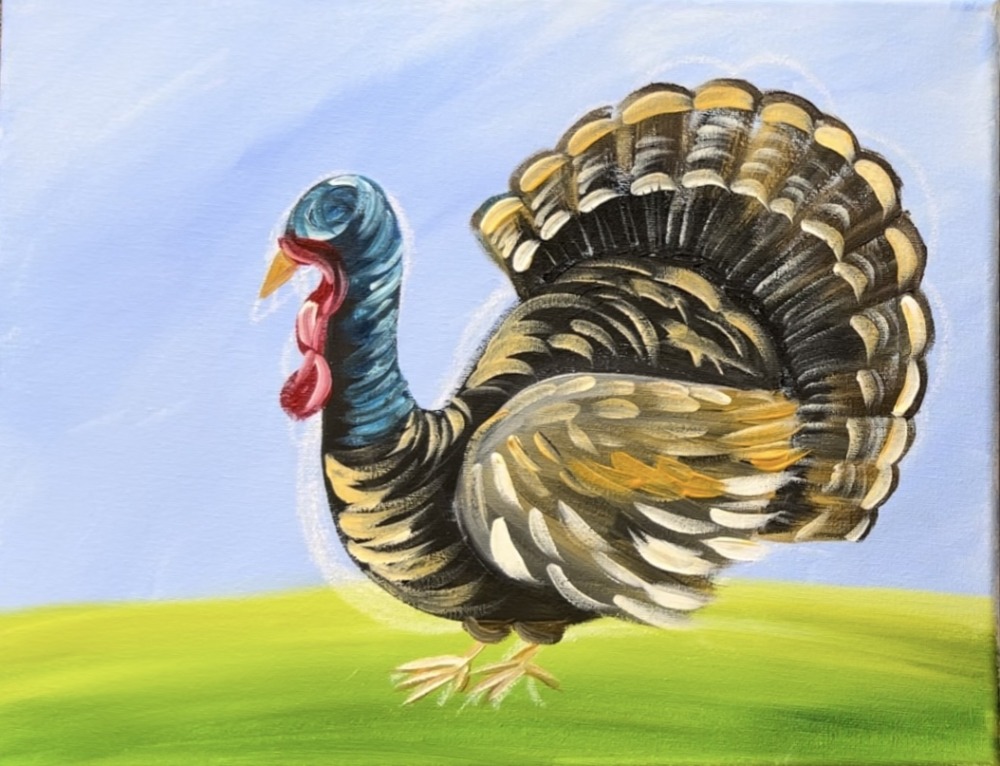
10. Paint Eye
Use the #4 round brush and “mars black” to paint a small circle in the center part of the turkey’s head.
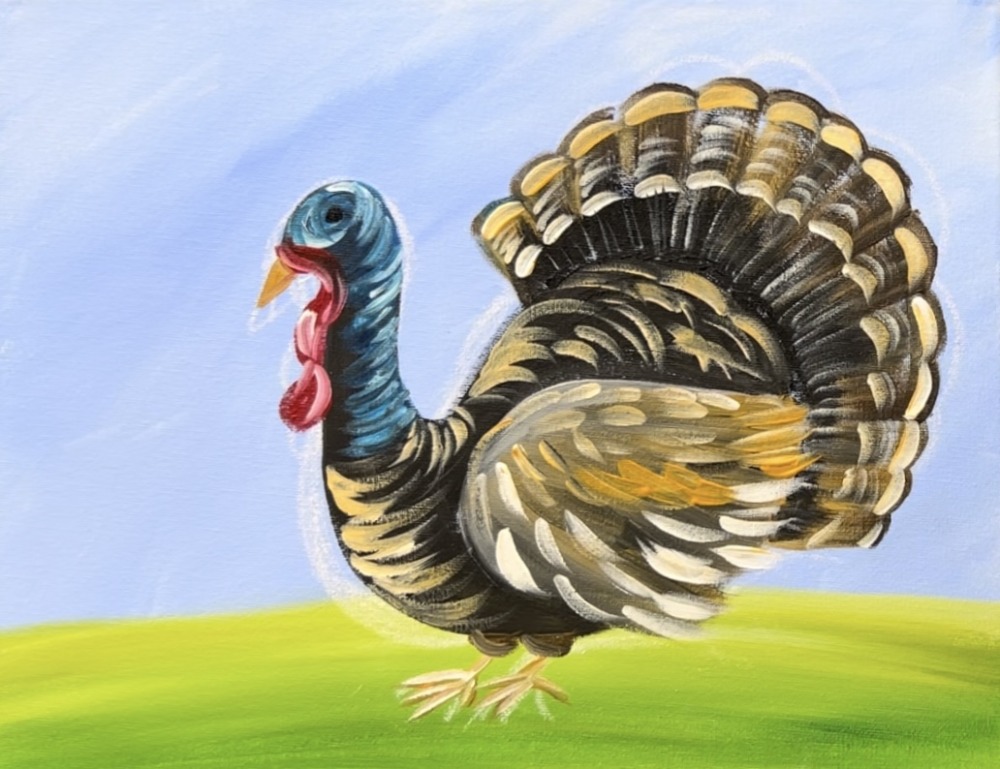
Wait for this white to dry. Then paint a white dot in the middle of the black circle.
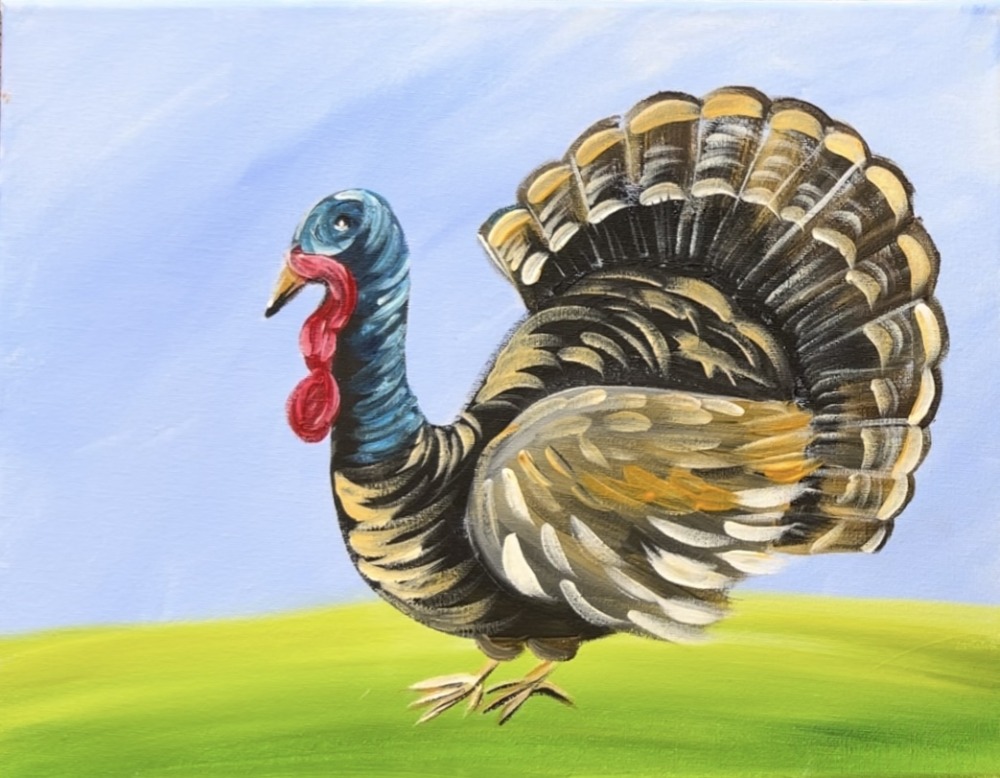
Then paint a very thin white outline around the black circle.
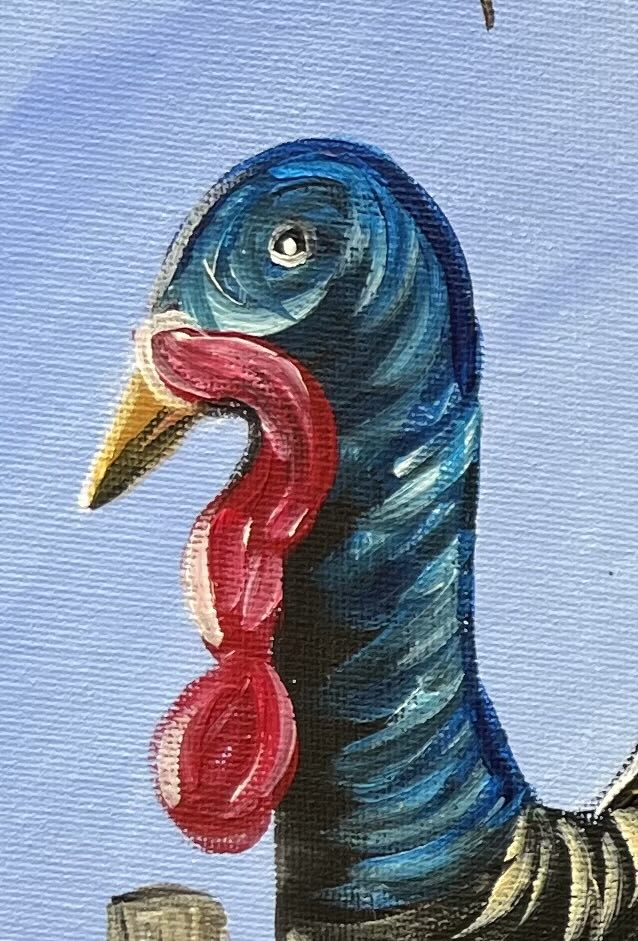
11. Paint Pumpkins & Grass
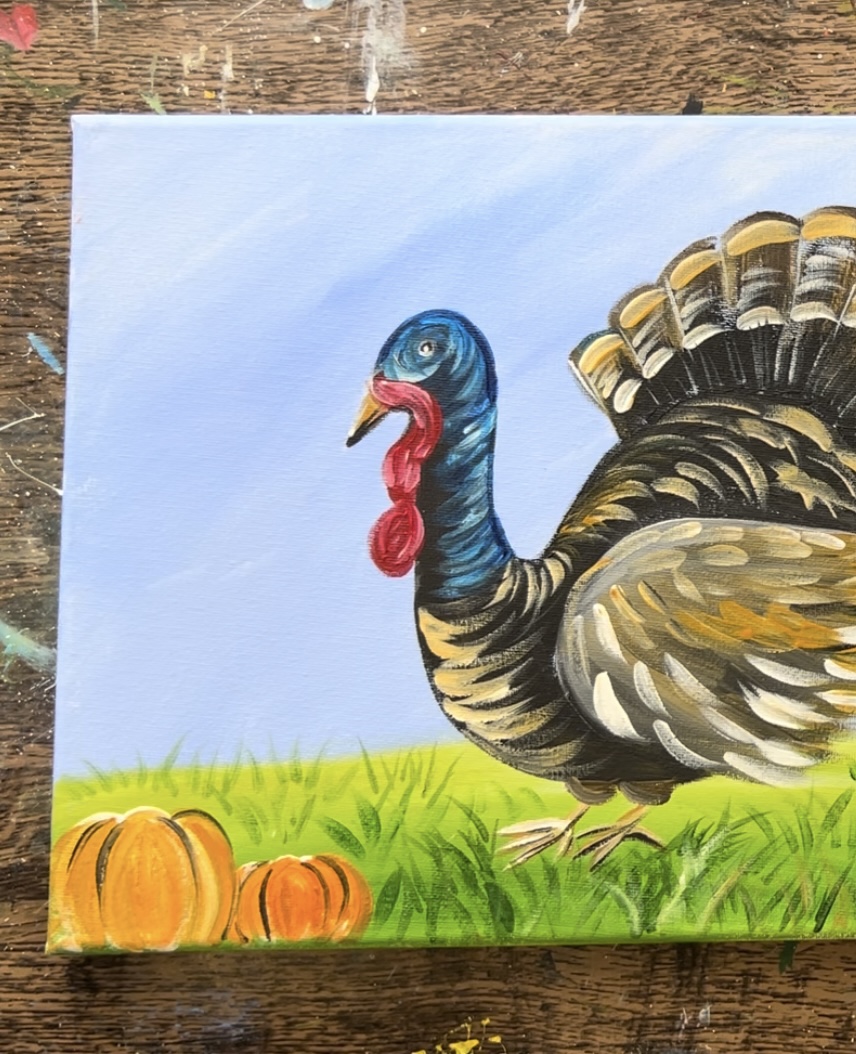
Use a #4 round brush and “titanium white” to paint two pumpkins white. Start by painting an “oval” and then 2-3 more curved shapes on each side of the oval. We need to paint the pumpkins white first so that the color shows up bright and opaque.
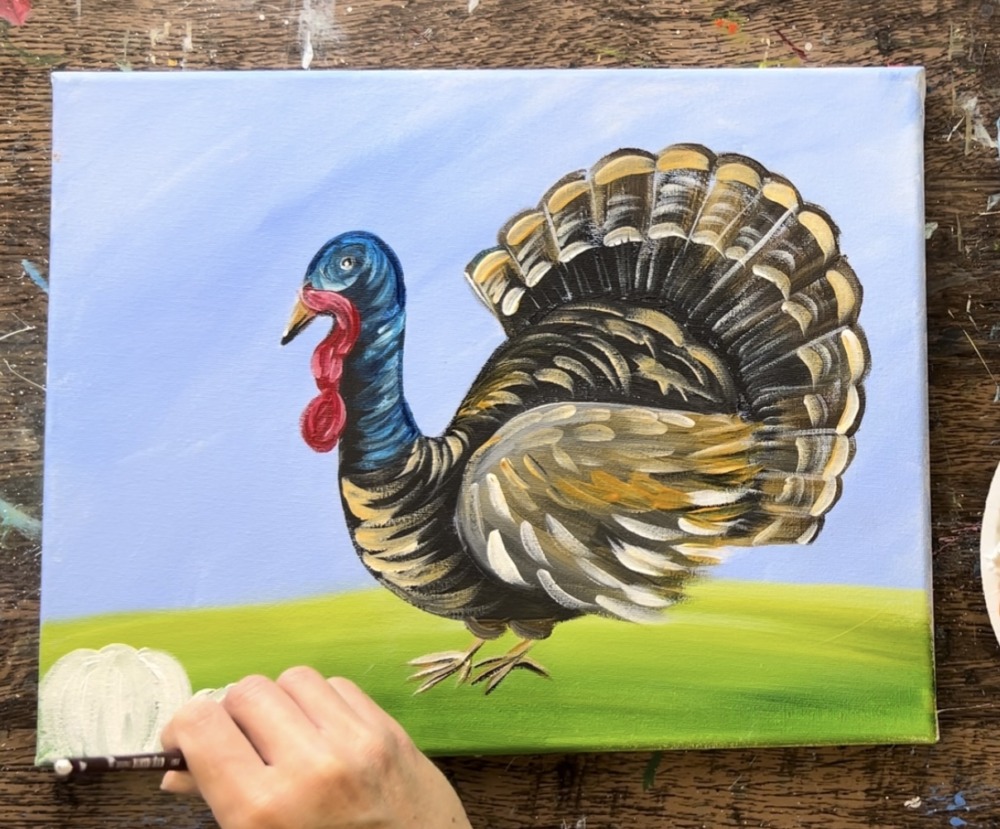
I did two pumpkins on the left. Later I decided to do another pumpkin on the lower right. You can do more pumpkins if you want!
While the pumpkins are drying, paint grass. Use the #4 round brush and “hooker’s green hue”. You can mix the green with a little black to make it darker. Loosen the paint with a little water so that it is easier to paint thin lines.

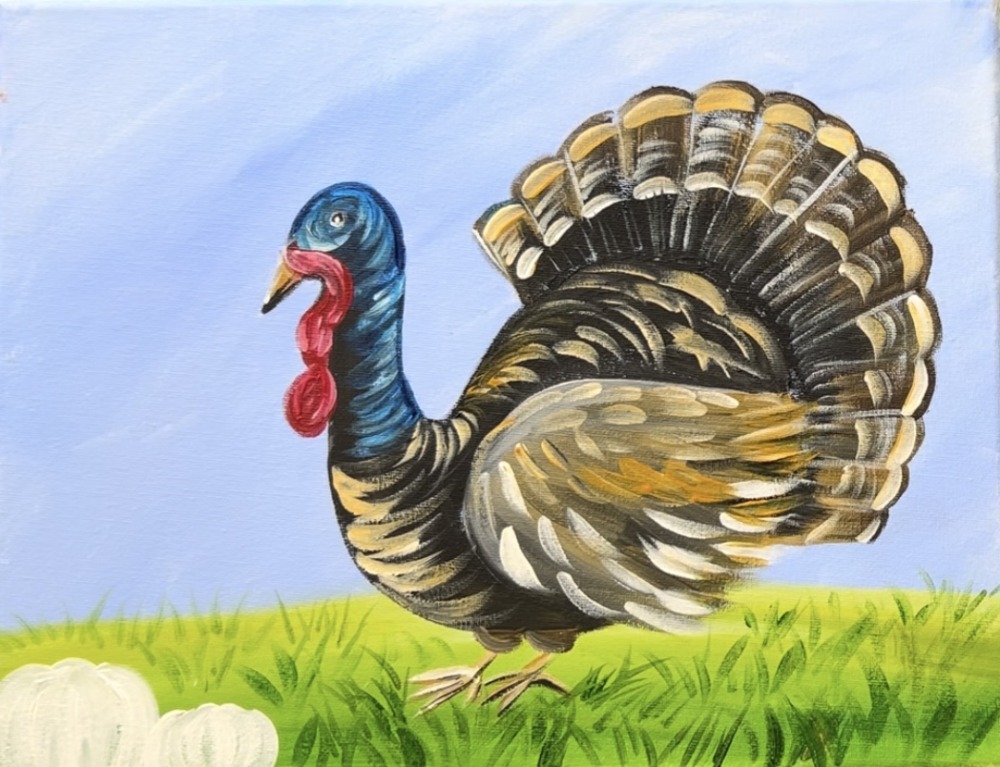
Paint little patches of grass all over the landscape. Paint larger grass blades on the bottom of the canvas and smaller blades in the distance. You can also add other colors to the grass such as brown and white to create some variations in color.
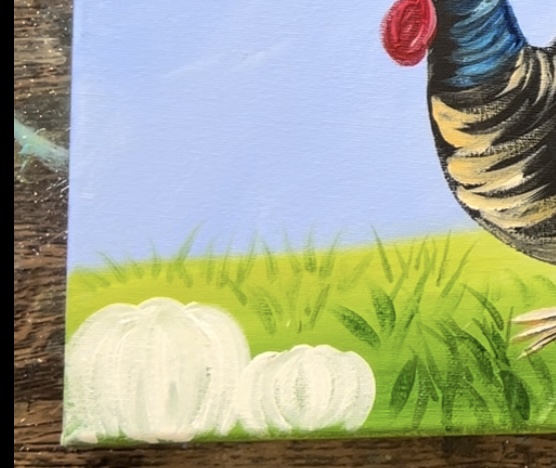
When the pumpkins are dry, use the #4 round brush to paint the pumpkins orange. Start with the oval in the middle and then paint the curved shapes on each side of the oval. Paint your round brush stroke starting from the top and going downwards. You don’t need to cover all of the white layer. Also, mix a little “raw sienna” into the orange or even a little red to create some variation in color.
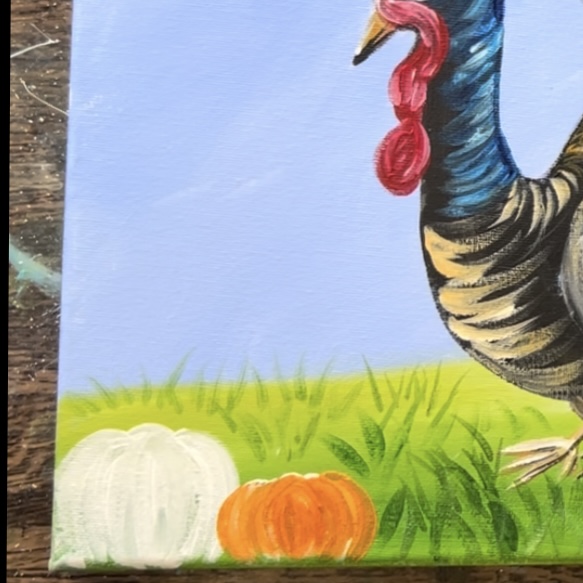
Paint both of the pumpkins.
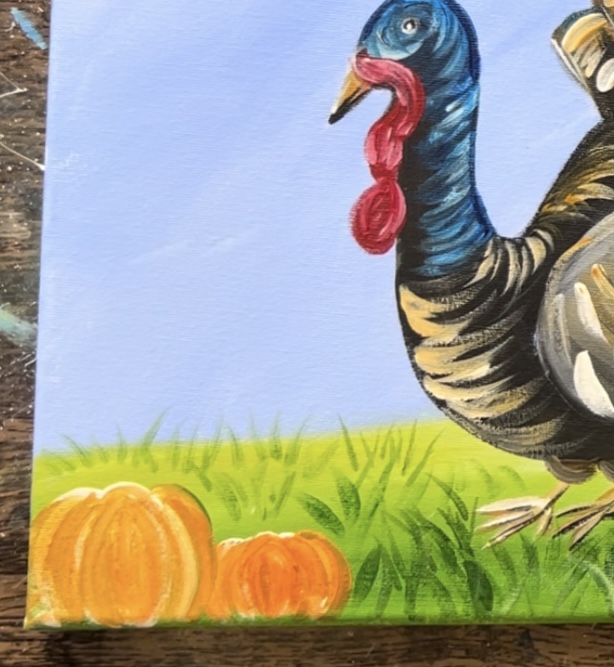
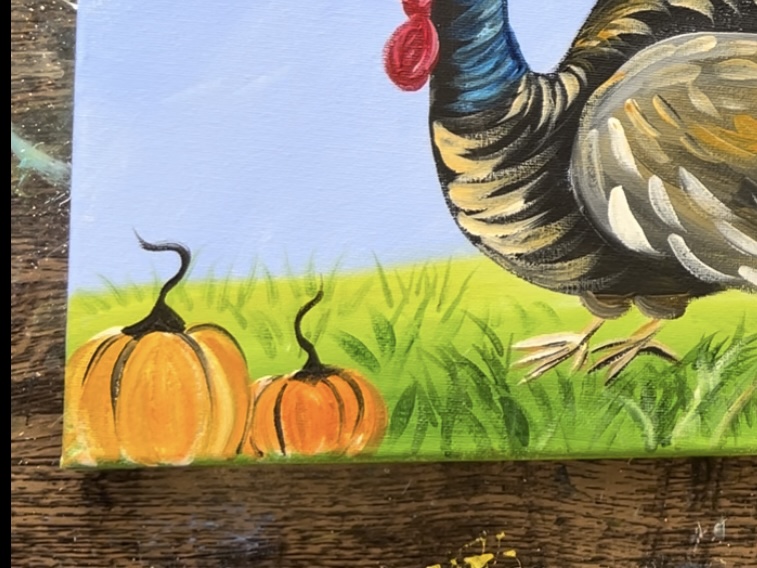
Then rinse the #4 round brush and use mars black to lightly outline the pumpkins. Start on the top and stroke downwards but don’t paint these lines all the way. These lines help define the shape of the pumpkins.
Paint a stem on the top of each of the pumpkins using black or brown.
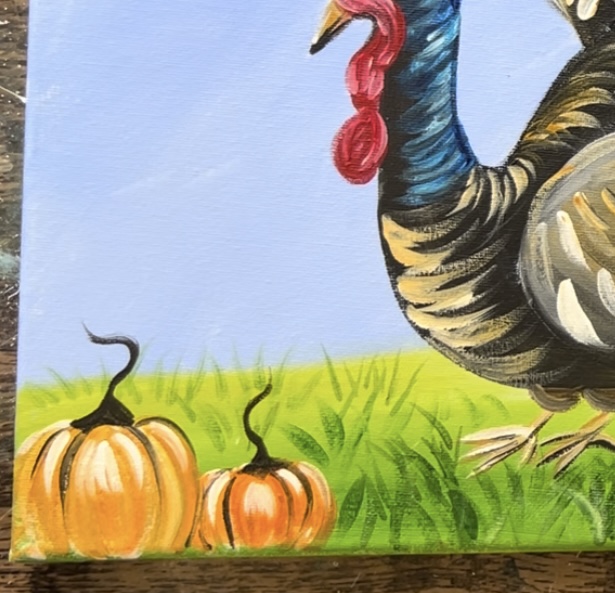
Then use “titanium white” to highlight to tops of the pumpkins.
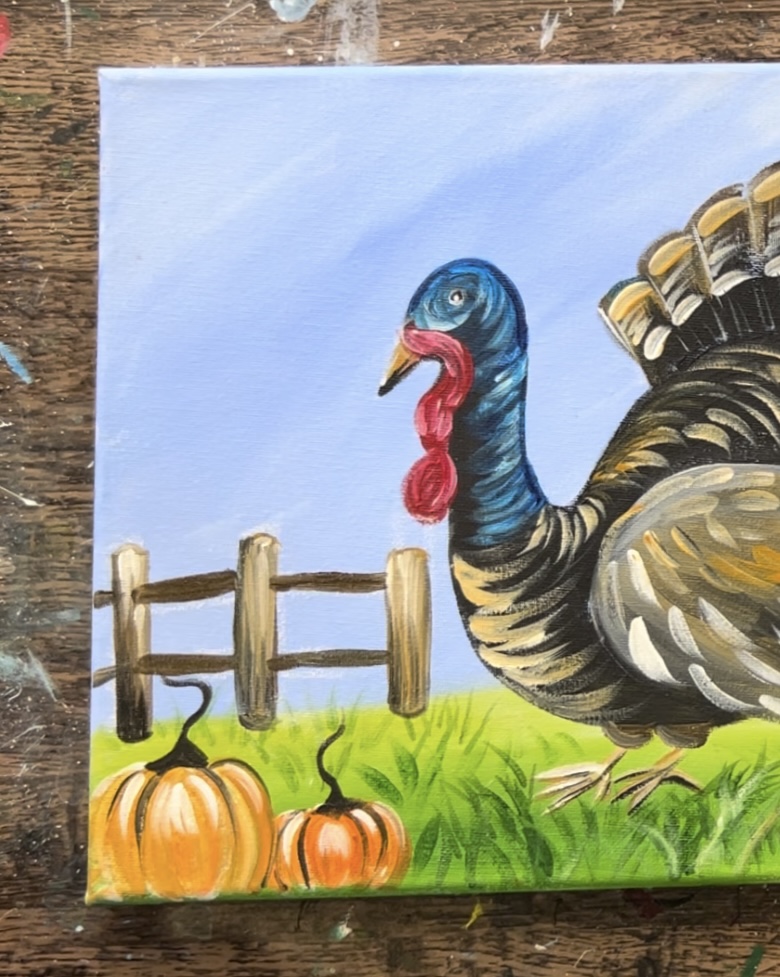
12. Paint Fence
Use the chalk to draw the fence. I did three simple rectangular posts and a set of two thinner horizontal beams.
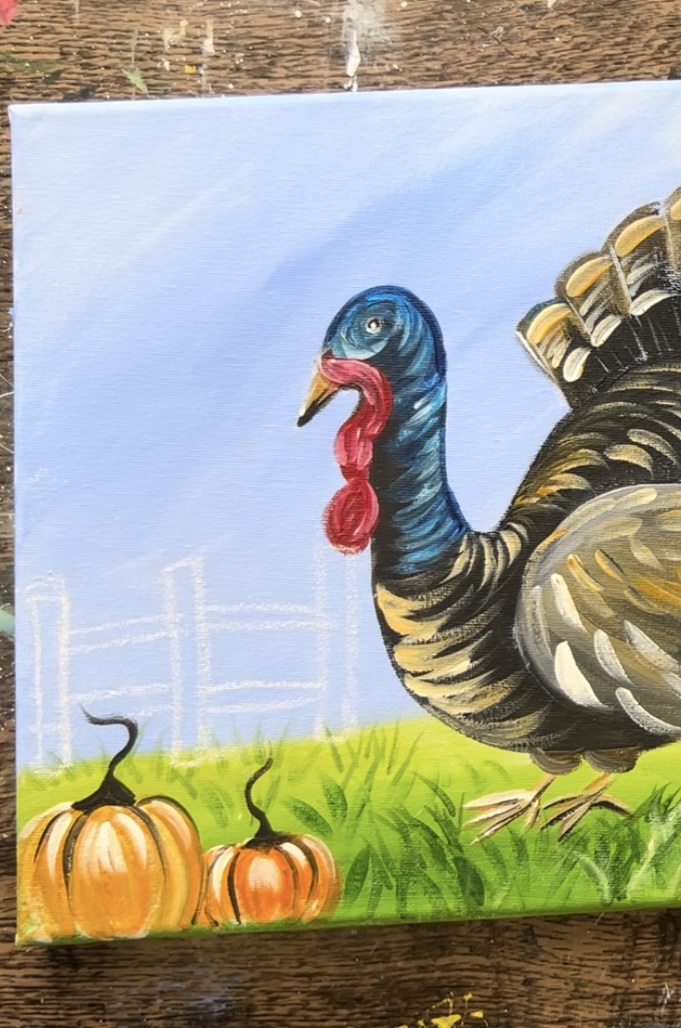
Then use the #4 round brush and both the dark and light browns to paint the fence.
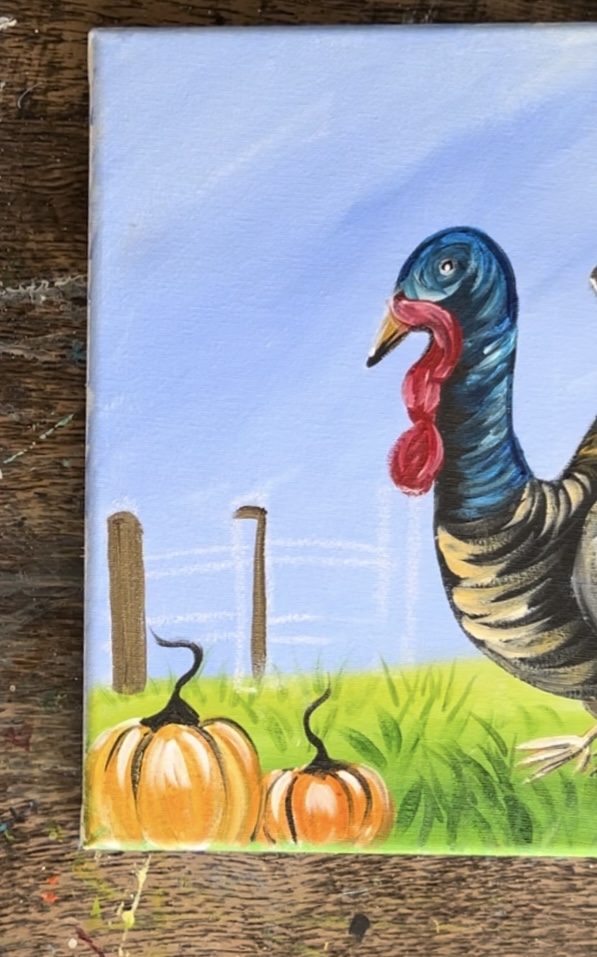
To give it more of a “faux wood look”, mix white into the brown towards the top of the posts and then mix black into the wood towards the bottom. Blend the brown to create streaks of multi-colors that blend together but not all the way.
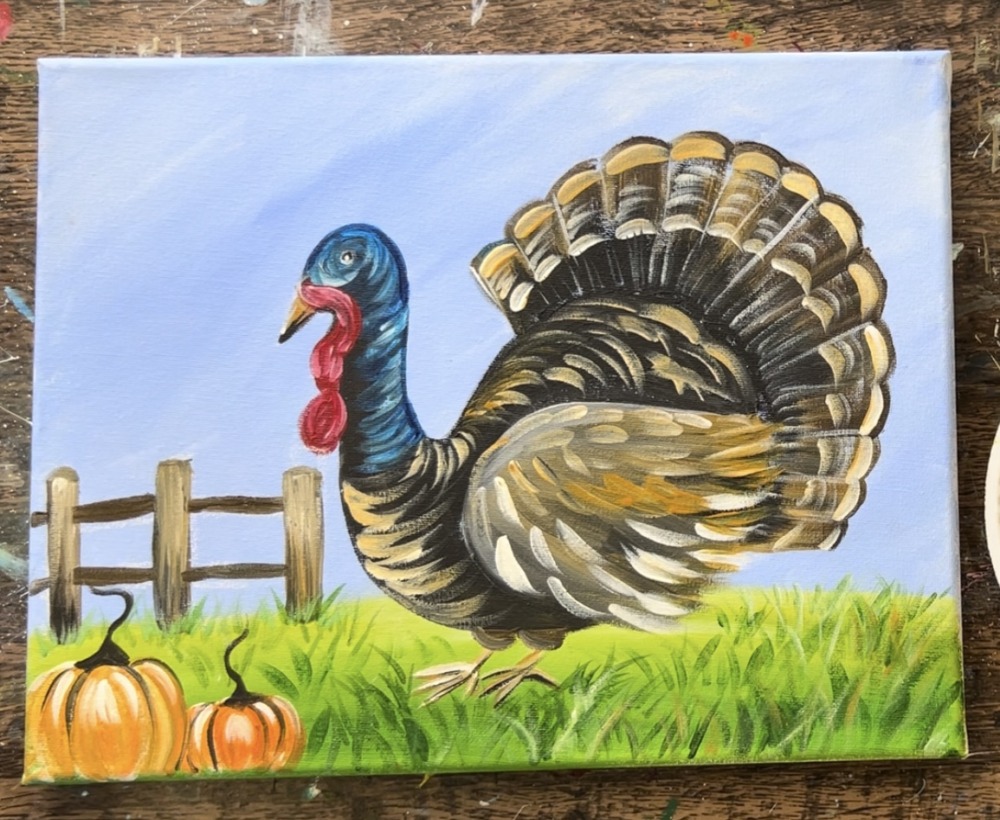
13. Paint Leaves
For the leaves, I recommend painting the first layer with white or white mixed with orange. This allows the leaves to be opaque and show up against the dark background.
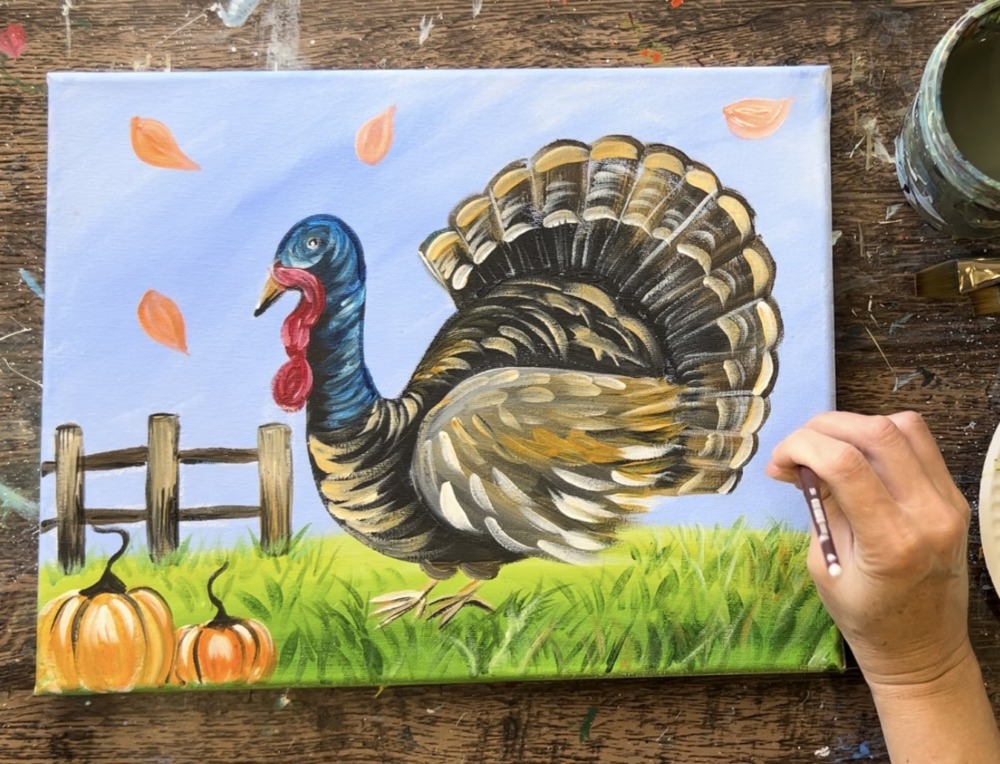
I did a variety of simple leaves flying in different directions in the sky. Some leaves look more like an oak leaf style. You can also paint leaves on the ground!
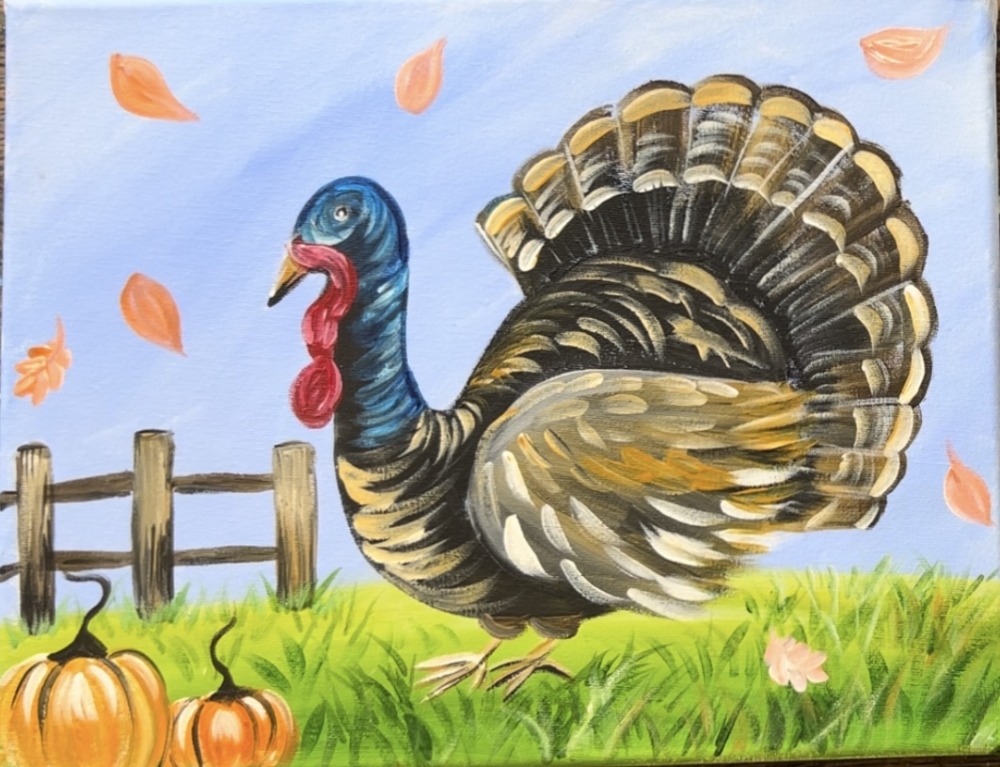
When the first layer dries, you can add brighter colors over the leaves such as red, more orange and some brown.
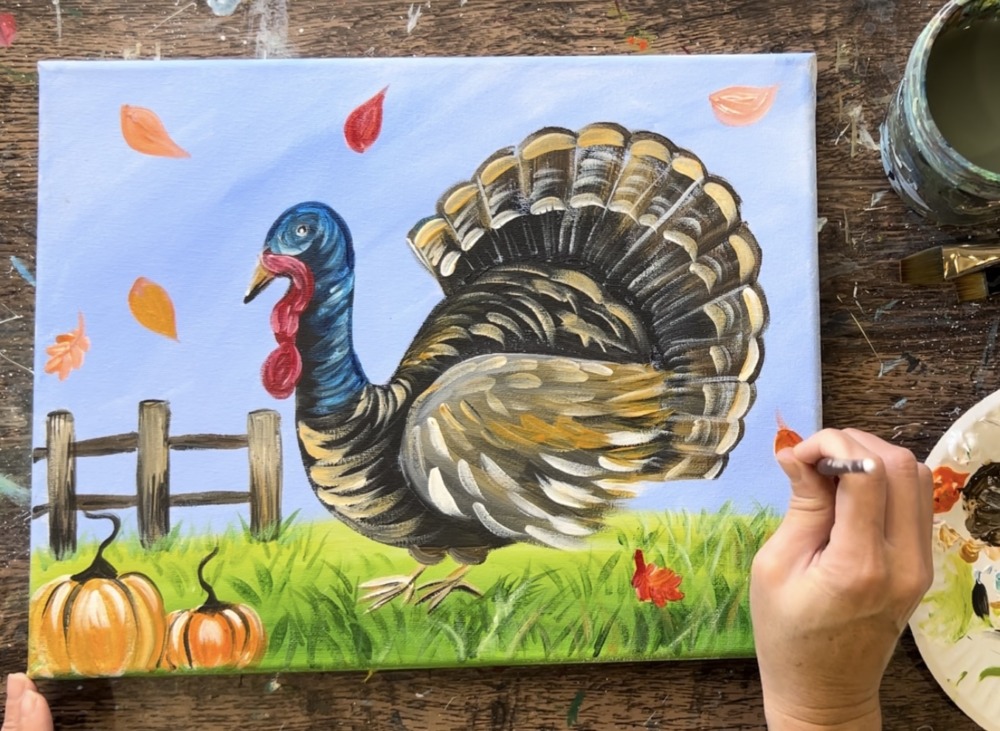
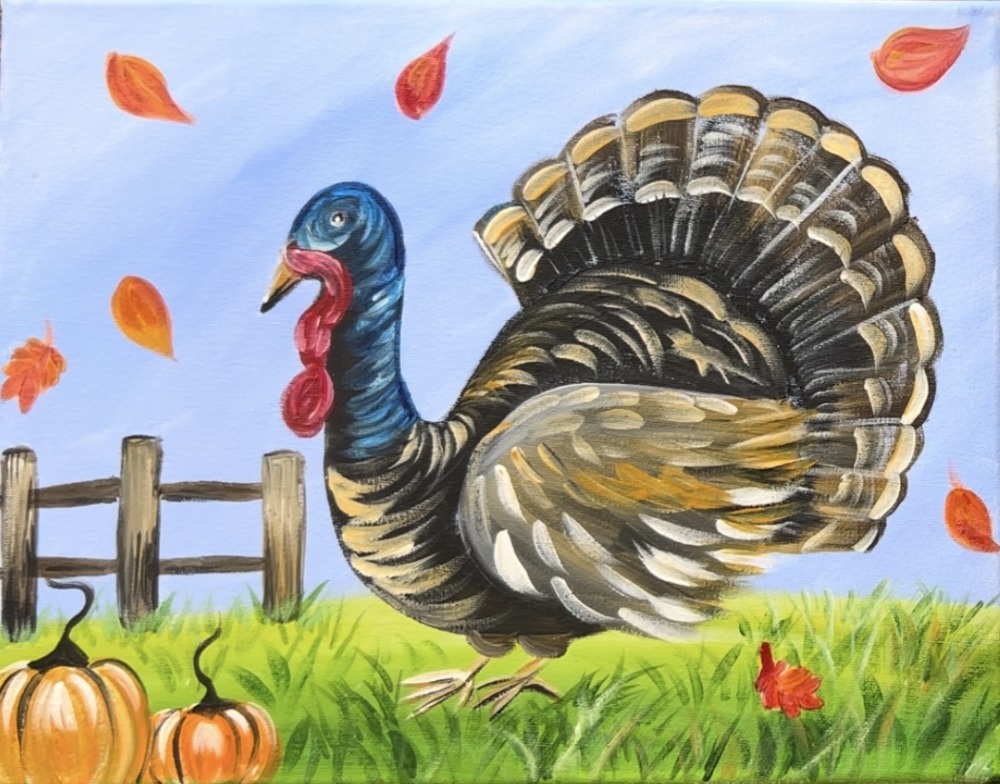
Then use the #4 round brush and brown to paint very thin stems and lines that go down the middle of each of the leaves.
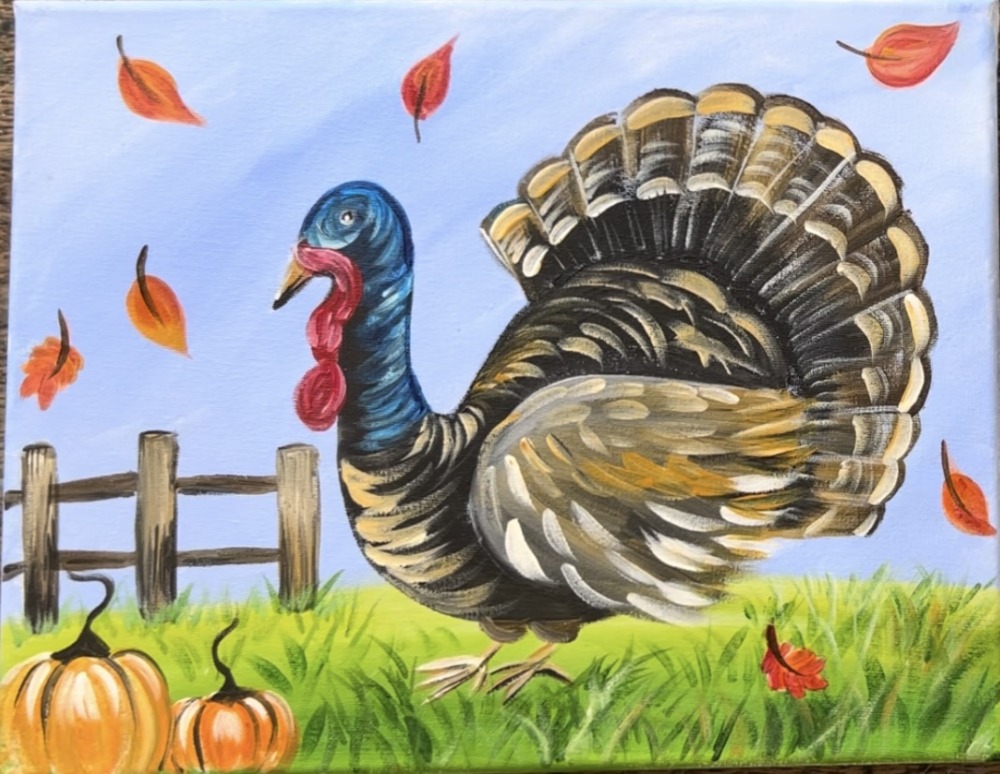
Optional: use titanium white to paint vein lines on the leaves.
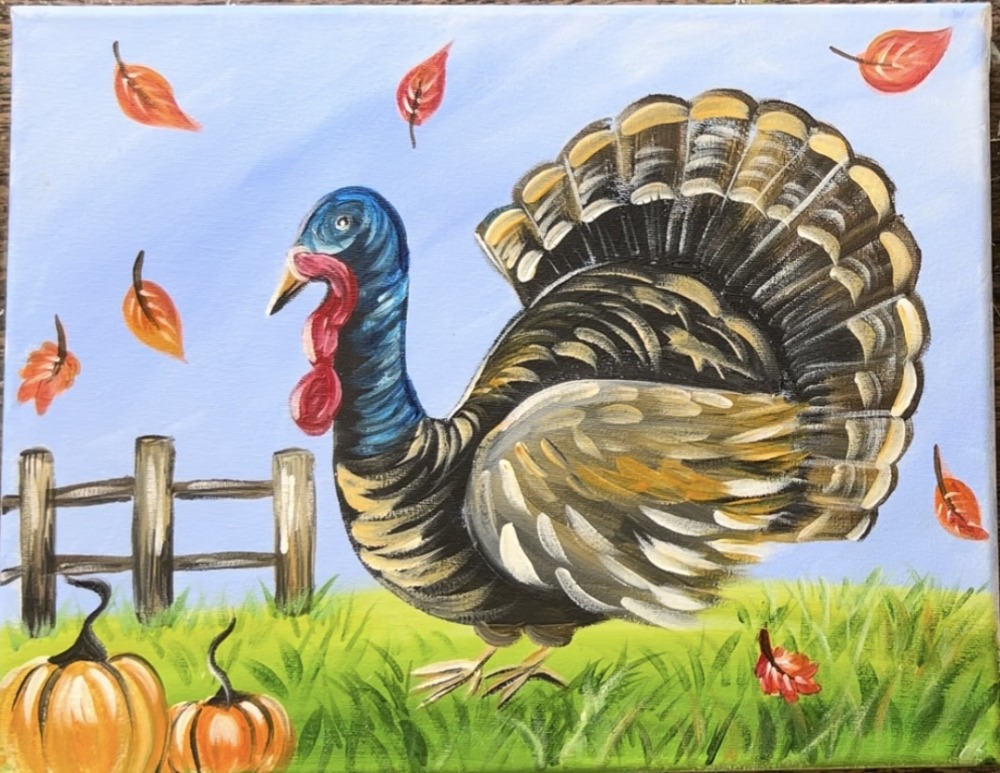
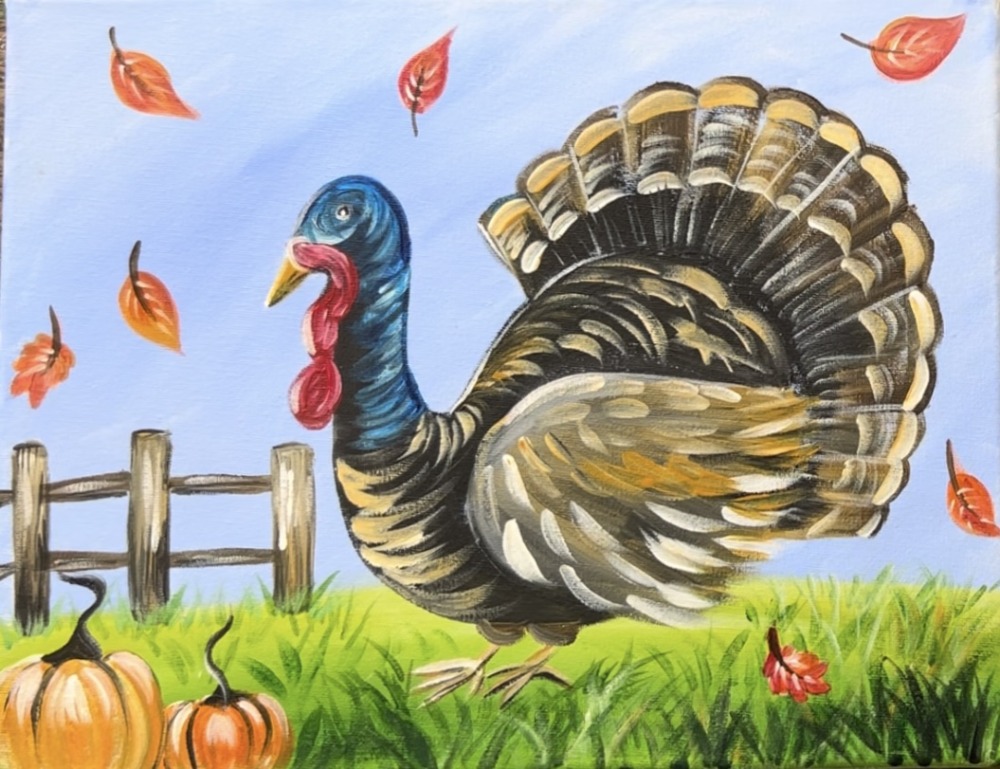
Finished!
As a final touch up, I added another pumpkin on the lower right of the painting!

