
Would you like to save this?
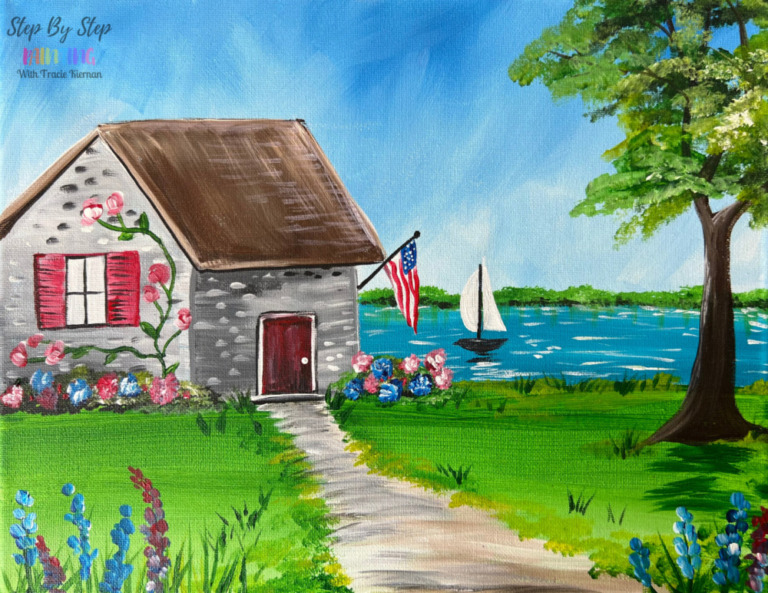
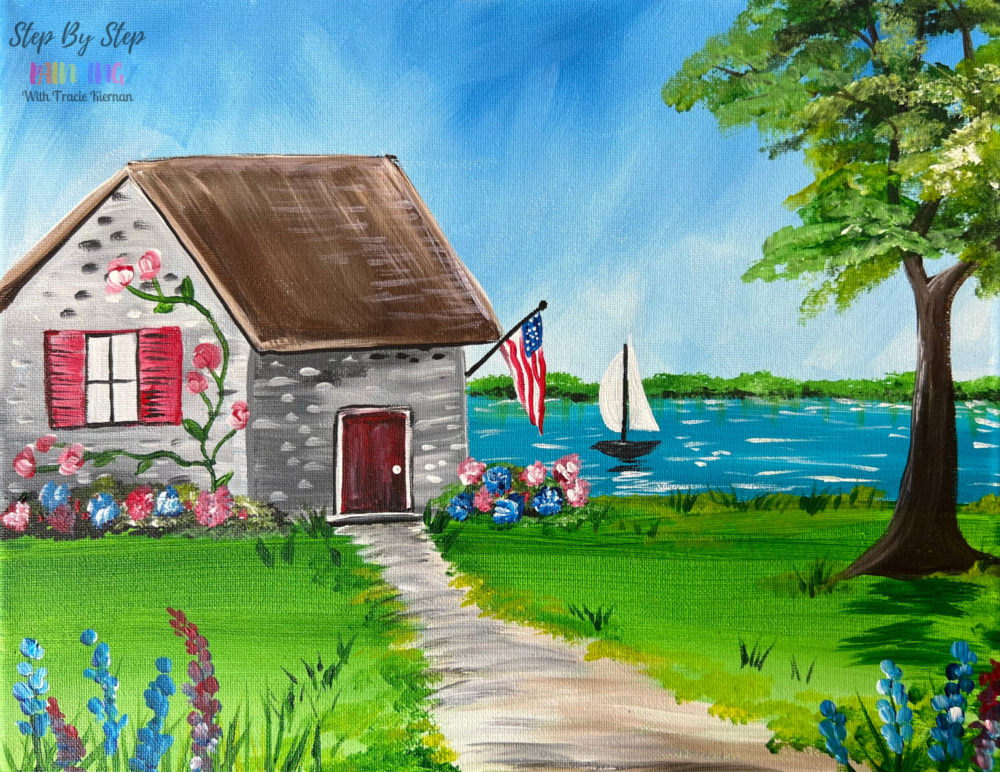
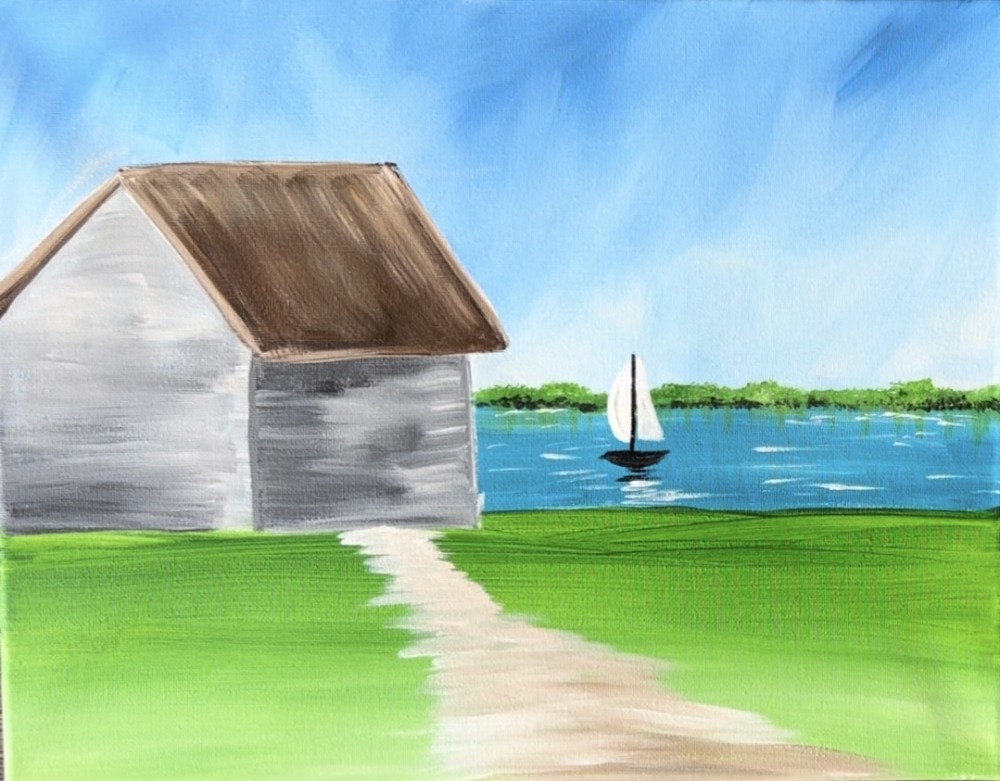
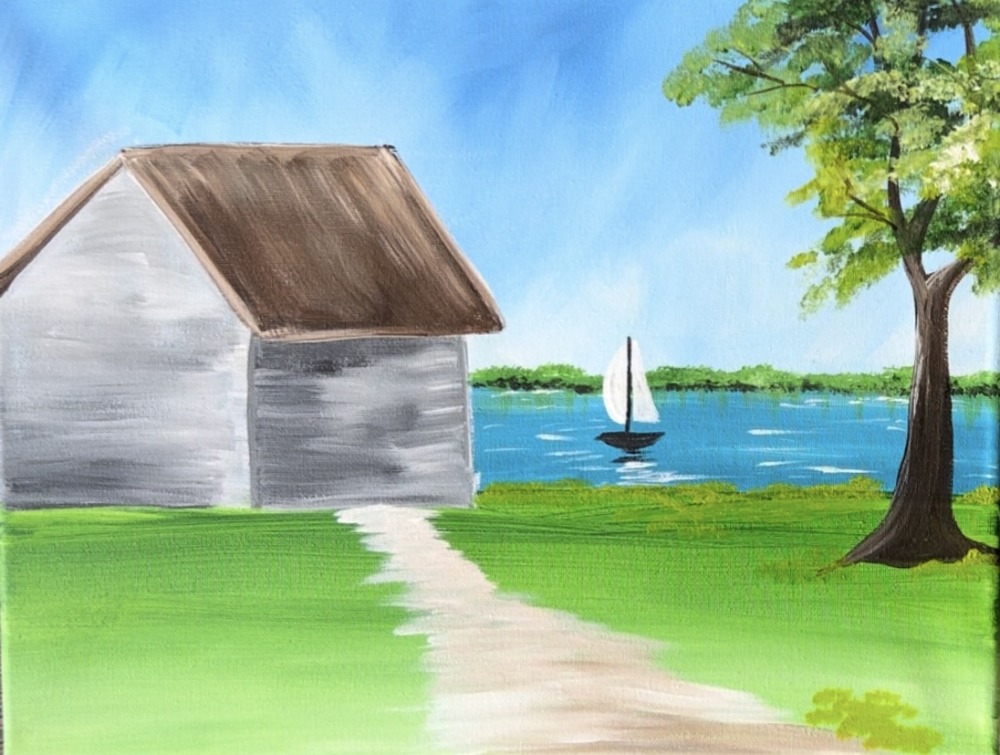
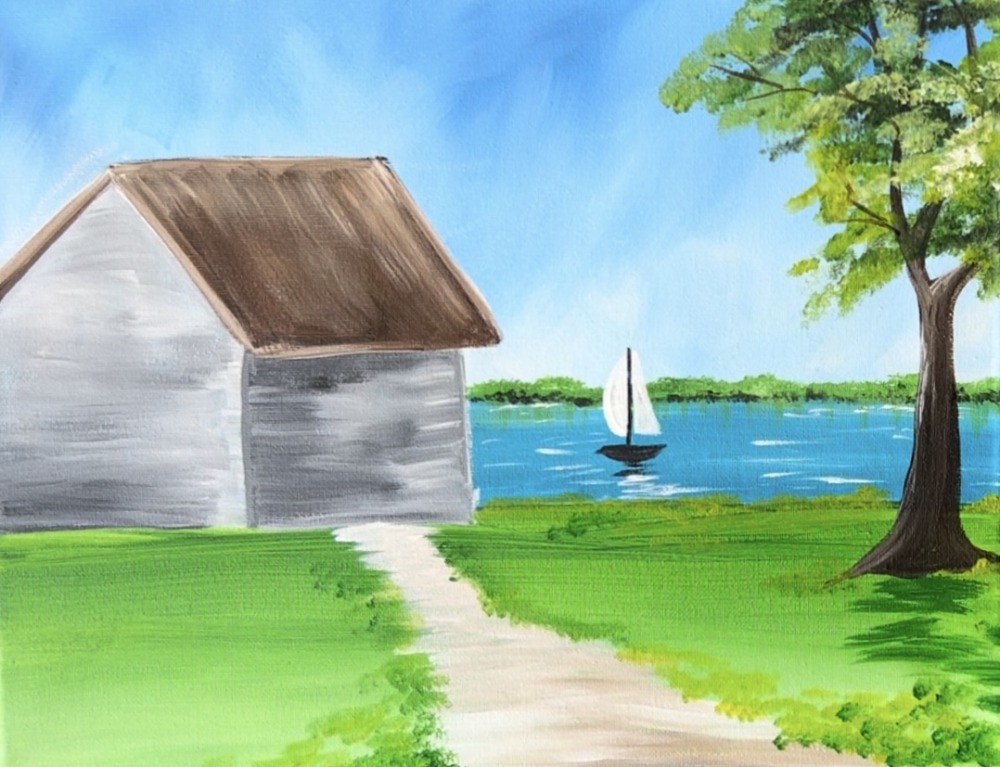
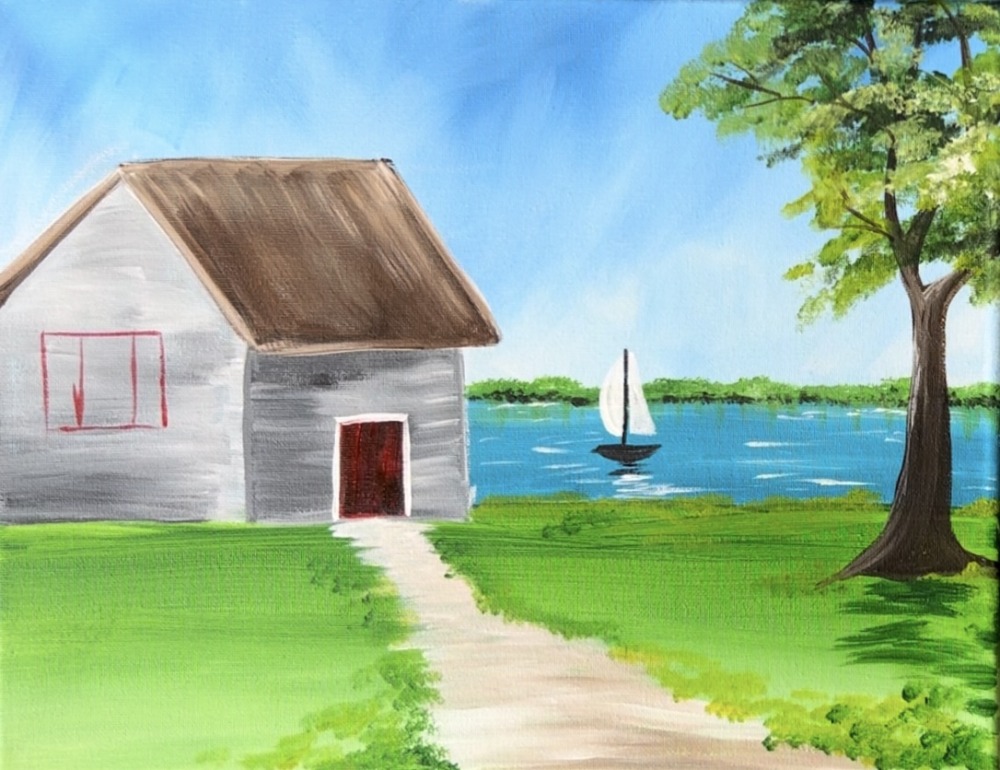
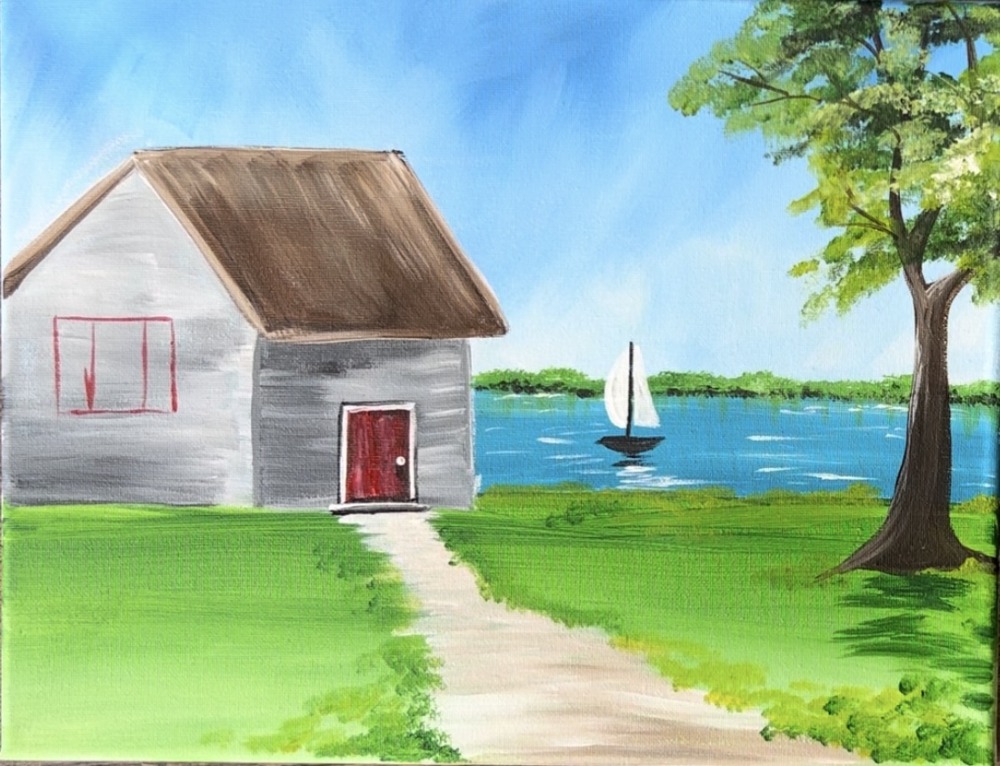
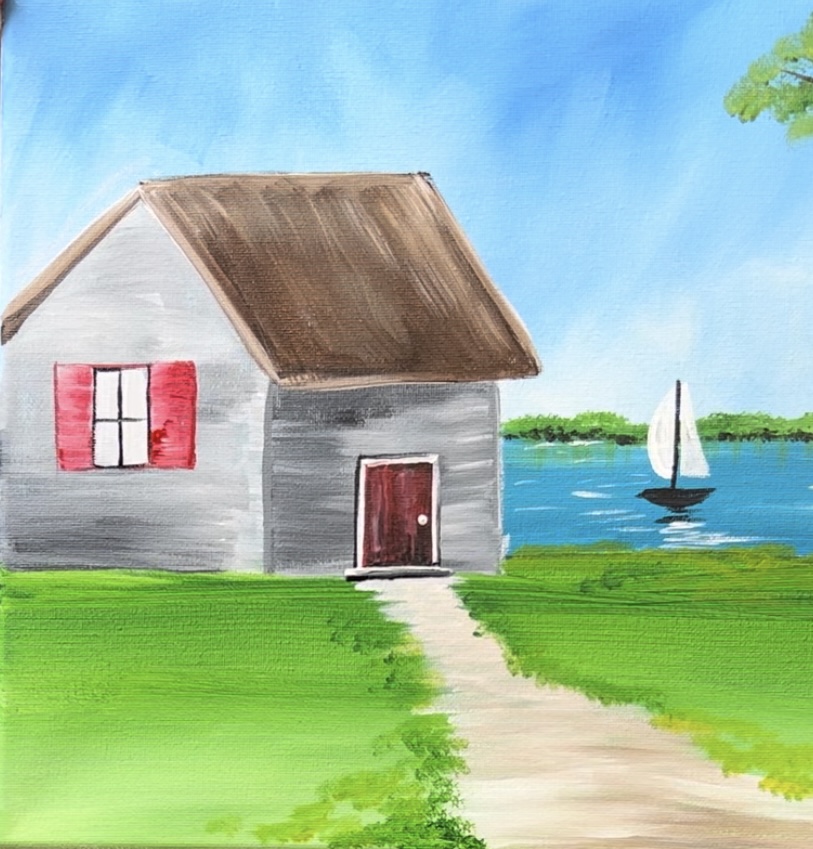
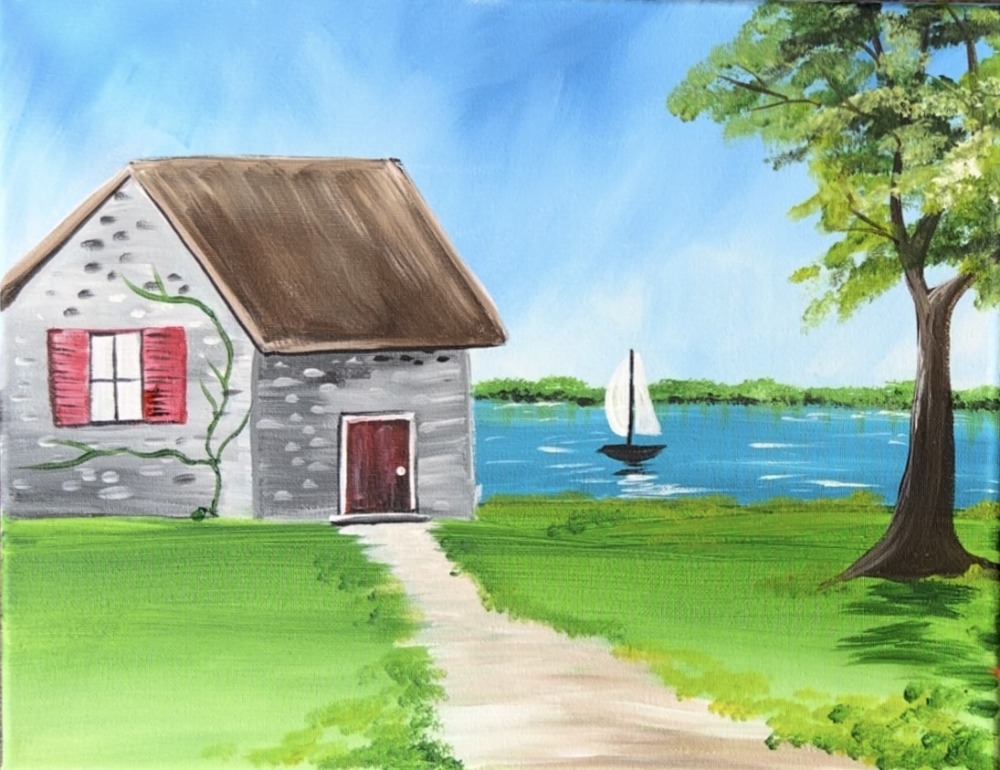
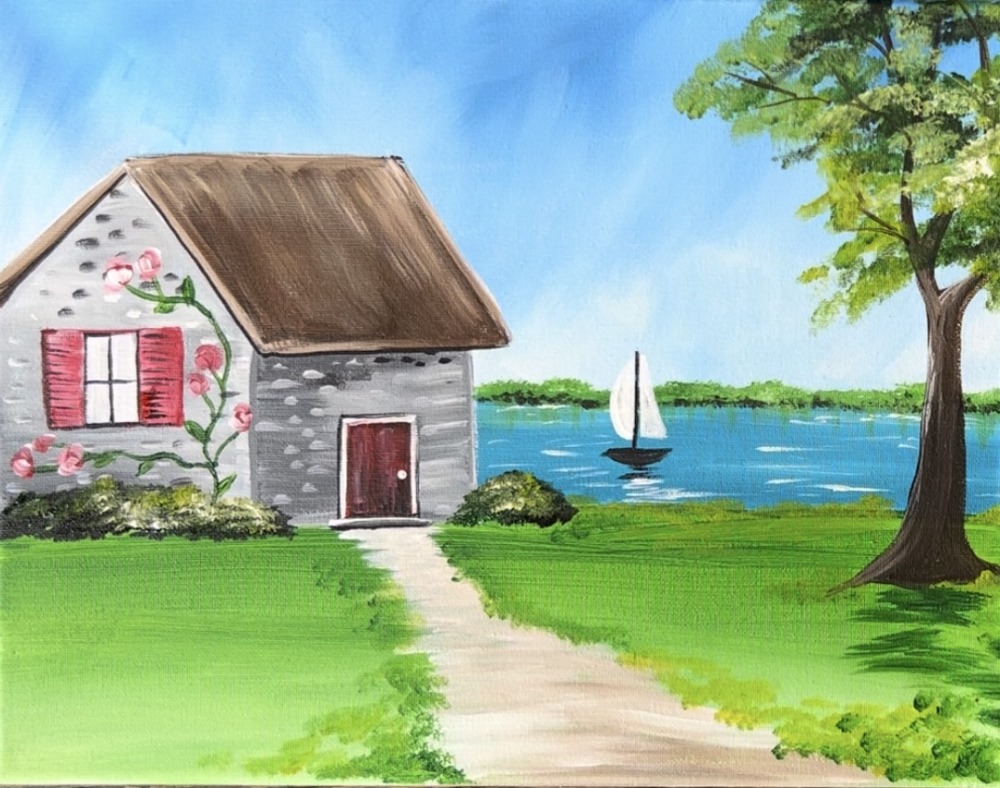
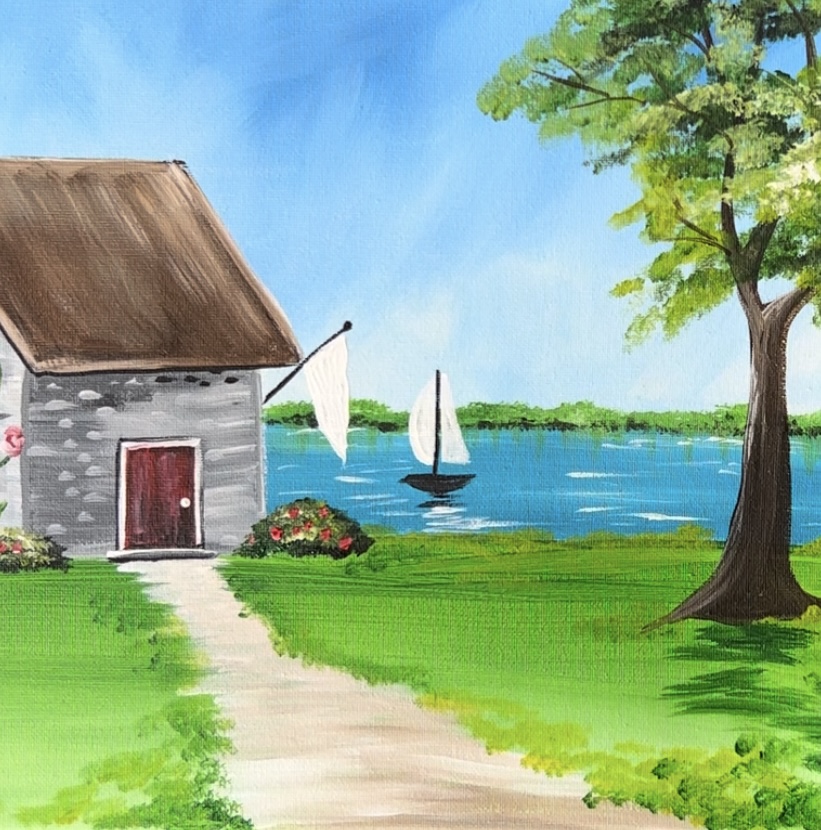
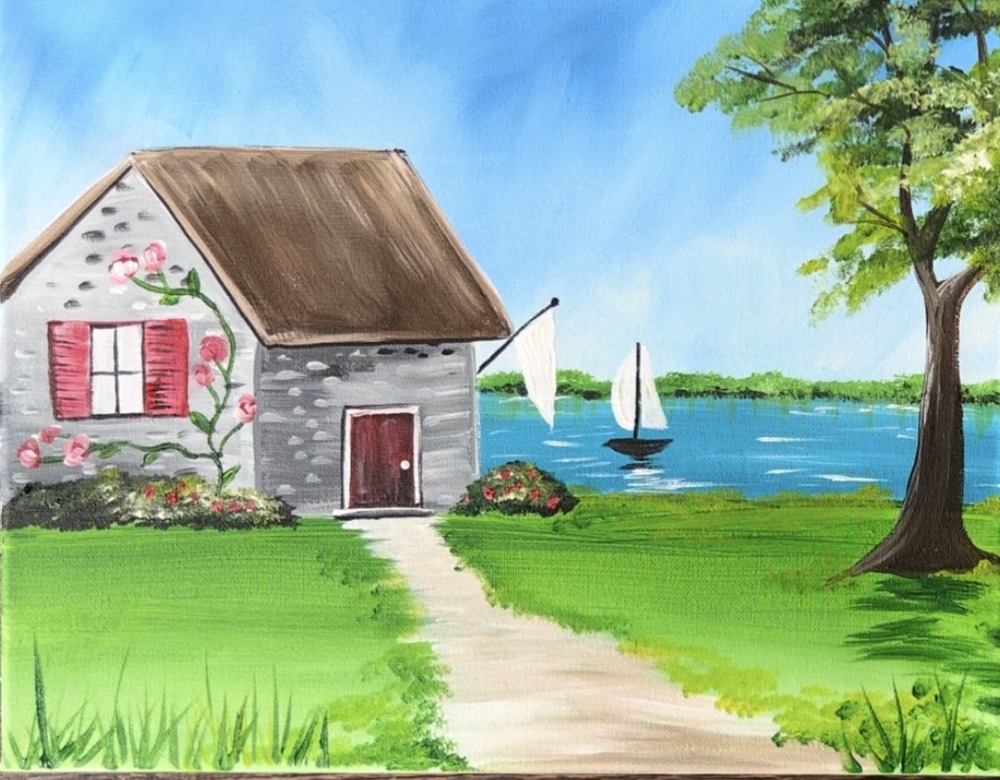
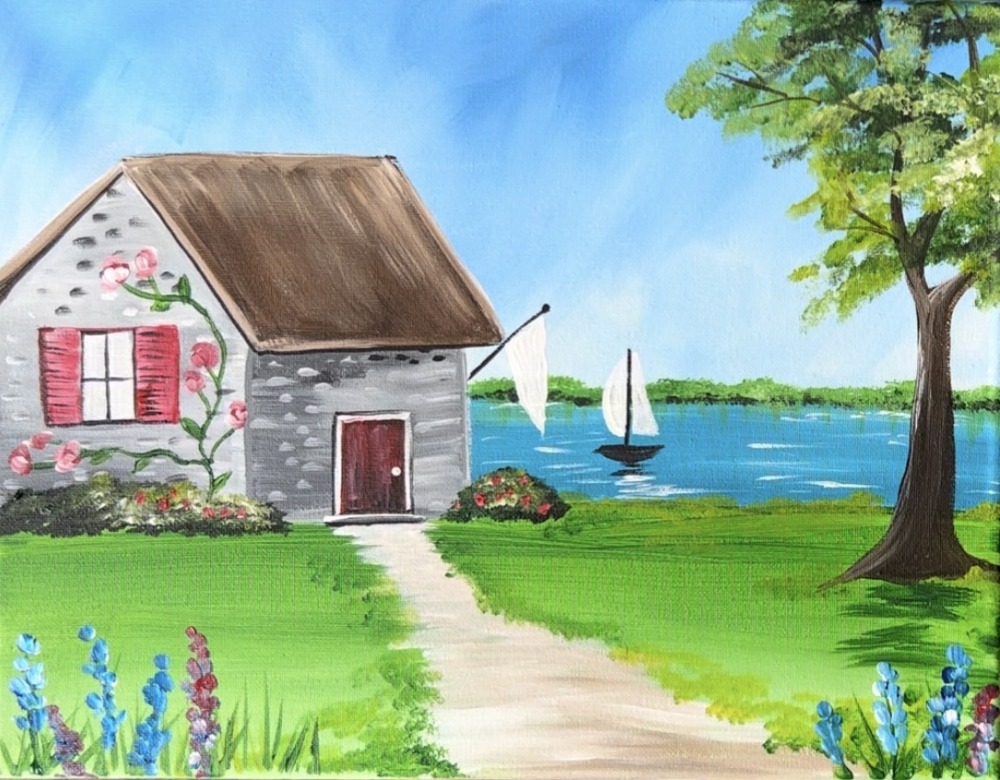
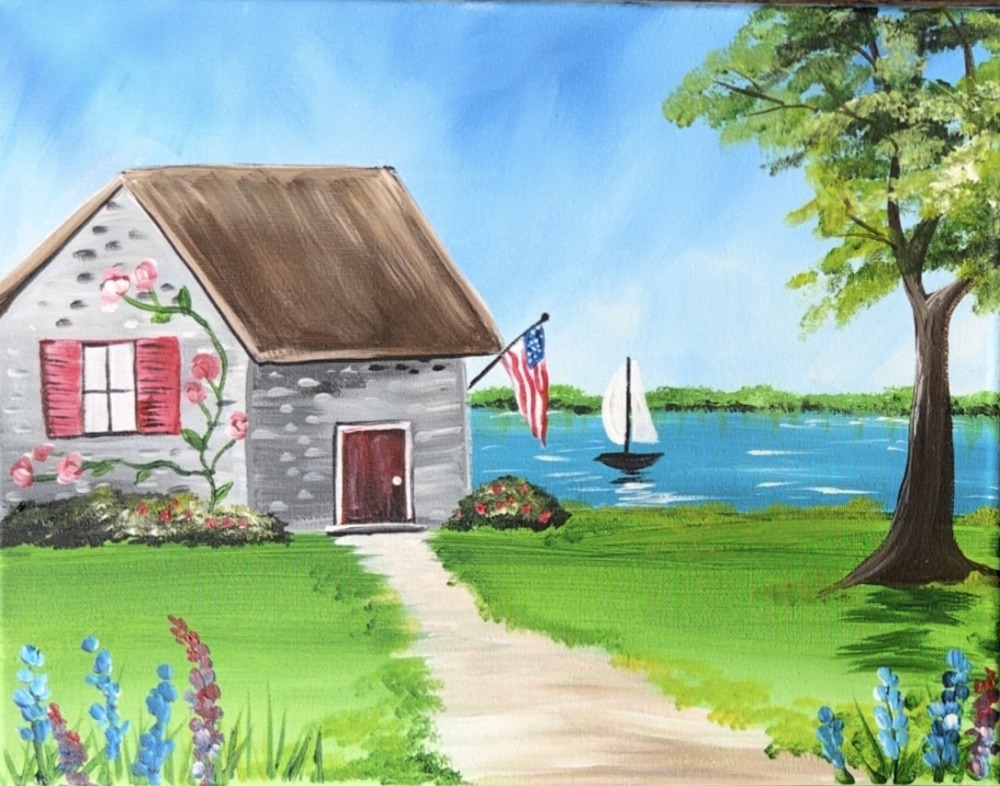
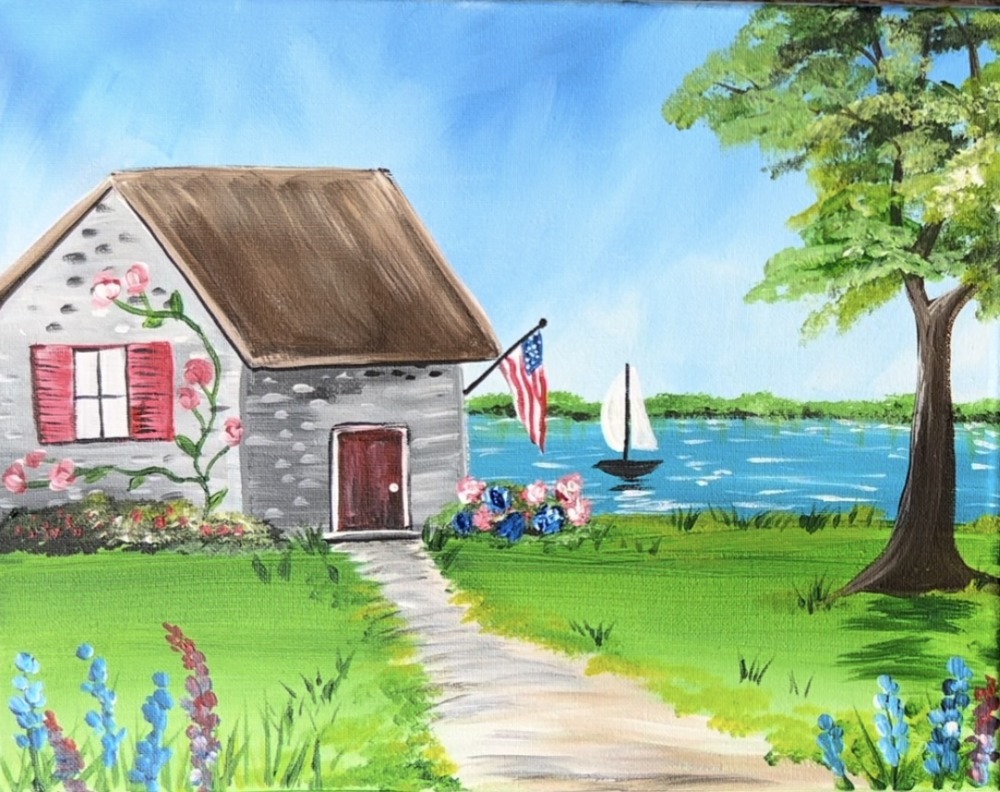
This acrylic painting tutorial will teach you how to paint a summer landscape with a house, American flag and sailboat. The rustic “summer home” is adorned with hydrangeas and a climbing rose vine.
This is one of those paintings where you can really go into a lot more detail than what is shown! Add a wreath to the door, tire swing to the tree, sunflowers, a cat, a bird!
Enjoy and happy painting !
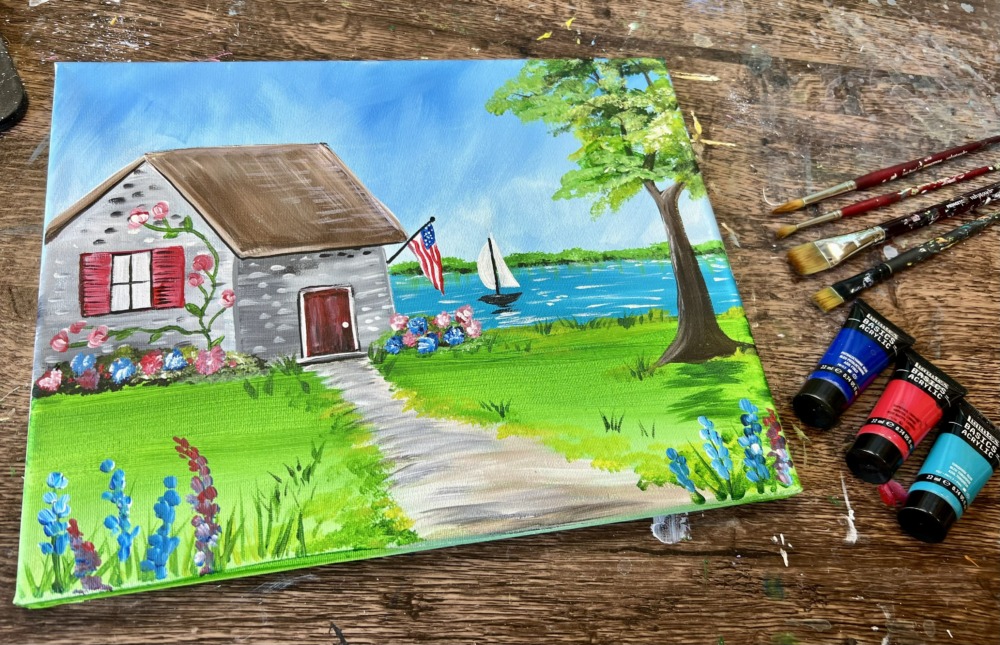
Materials Needed
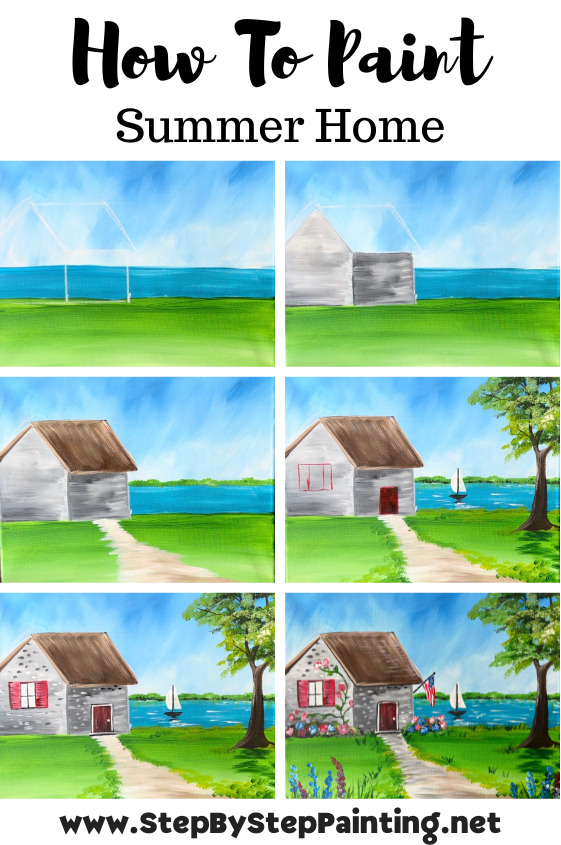
How To Paint "Summer Home" - Acrylic Painting Tutorial

Tools
- 11 x 14 Canvas
- Acrylic Paint
- Brushes
- T-Square Ruler (or straight edge)
- Pencil
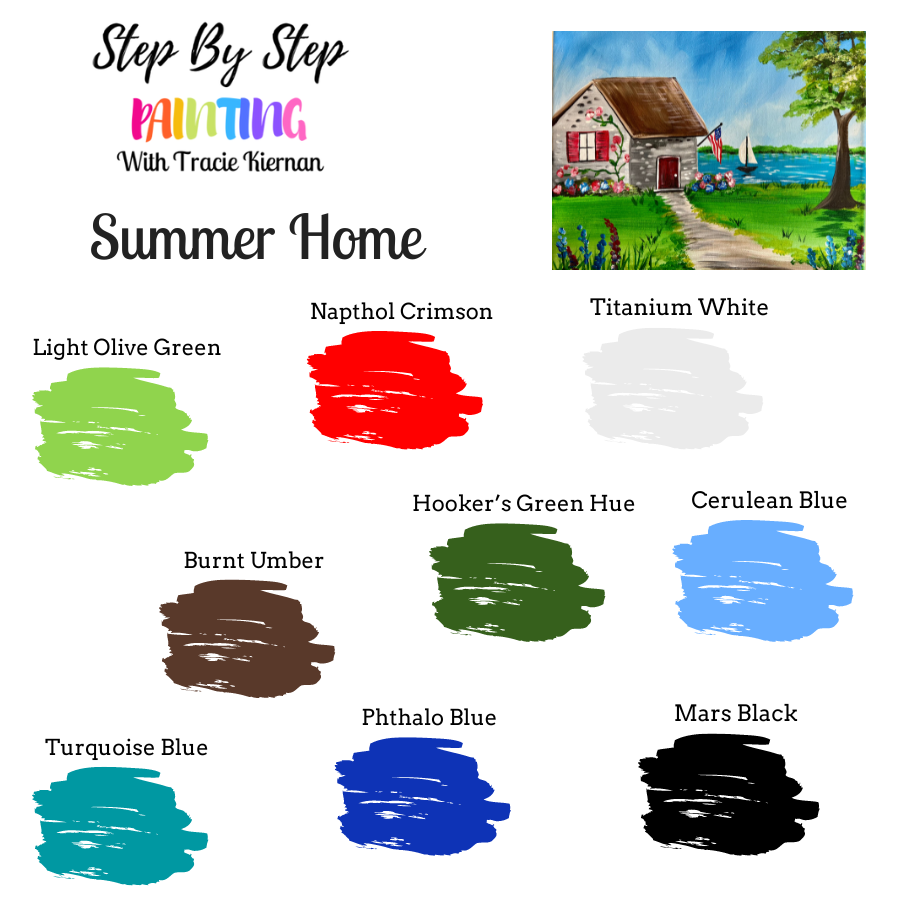
Colors
- Titanium White
- Mars Black
- Burnt Umber
- Phthalo Blue
- Cerulean Blue
- Napthol Crimson
- Turquoise Blue
- Hooker's Green Hue Permanent
- Light Olive Green
Brushes
- 3/4" Flat Wash
- #12 Bright Brush
- #8 Round Brush
- #4 Round Brush
Color Palette
Directions At A Glance
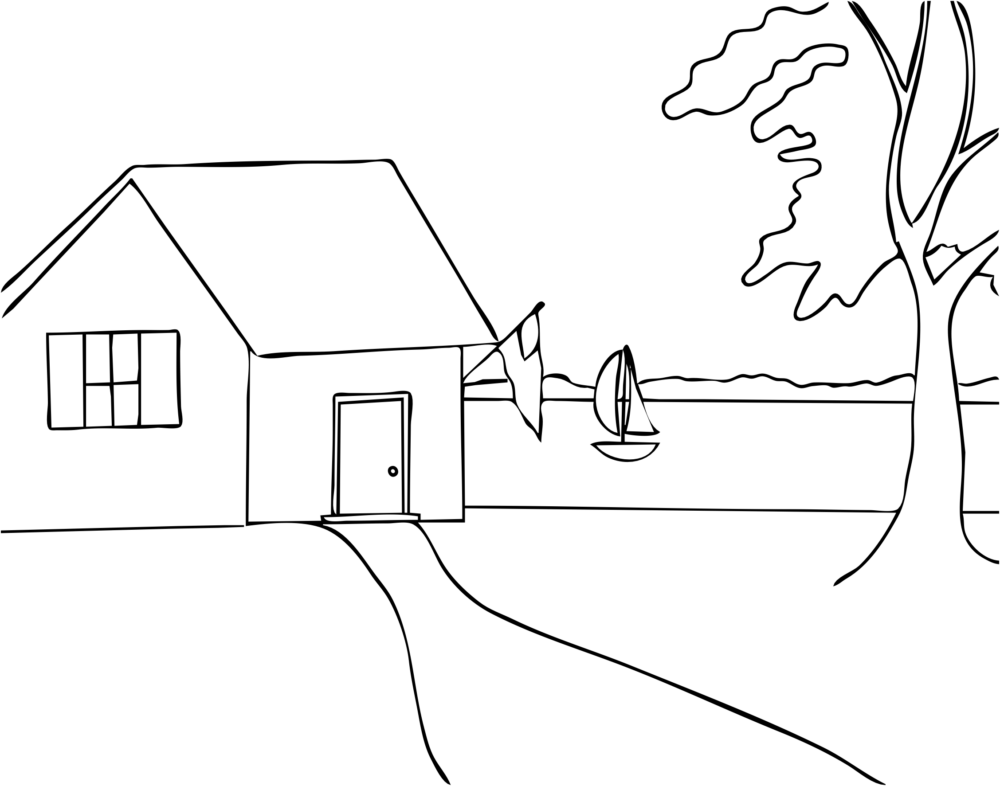
Optional Traceable
This is optional. I do not use the tracer in the tutorial, however, you are welcome to print this and use it as a template to help guide your painting!
Video
Step By Step Directions
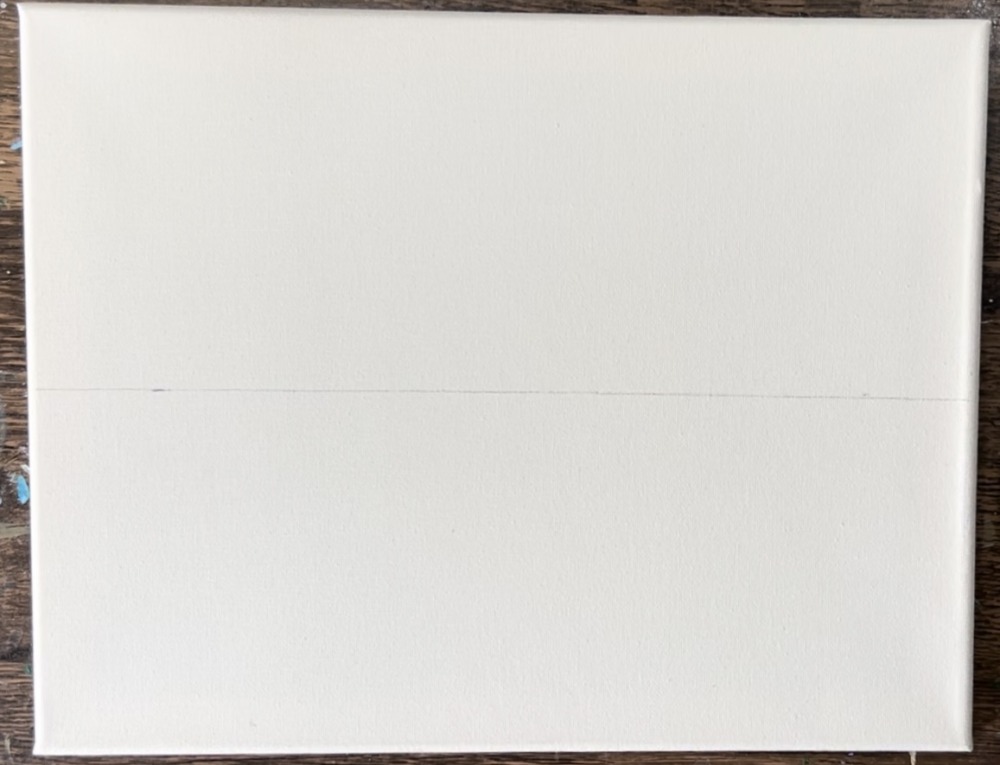
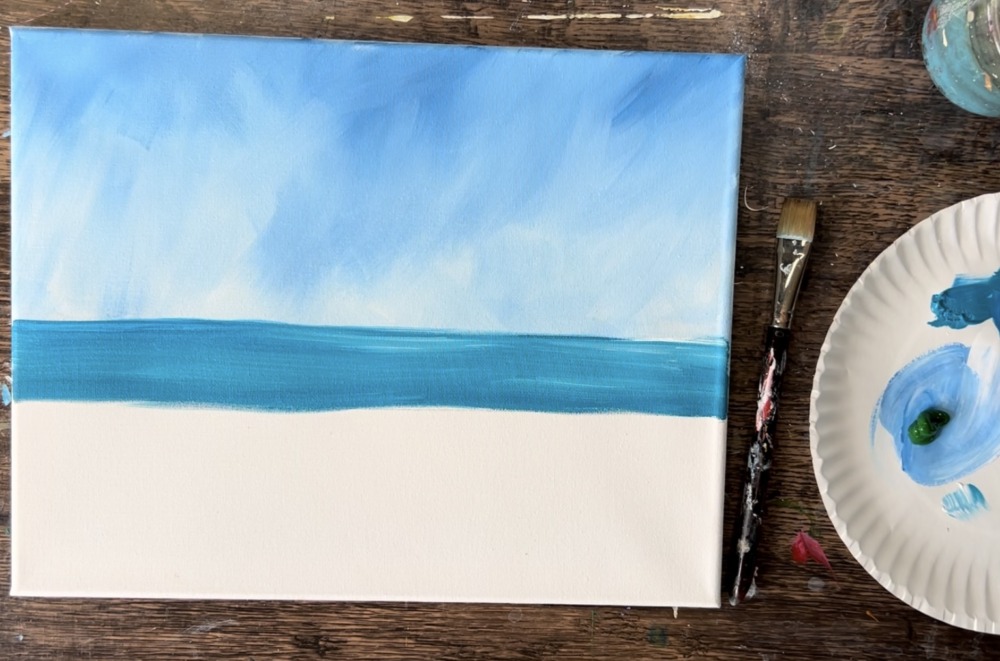
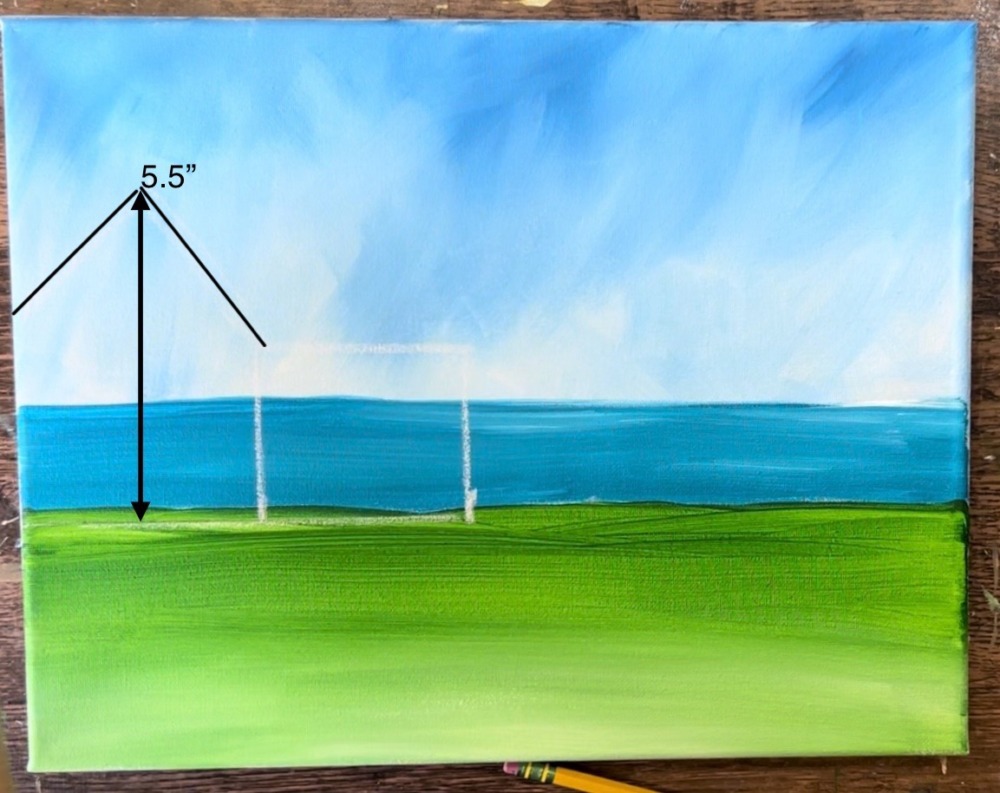
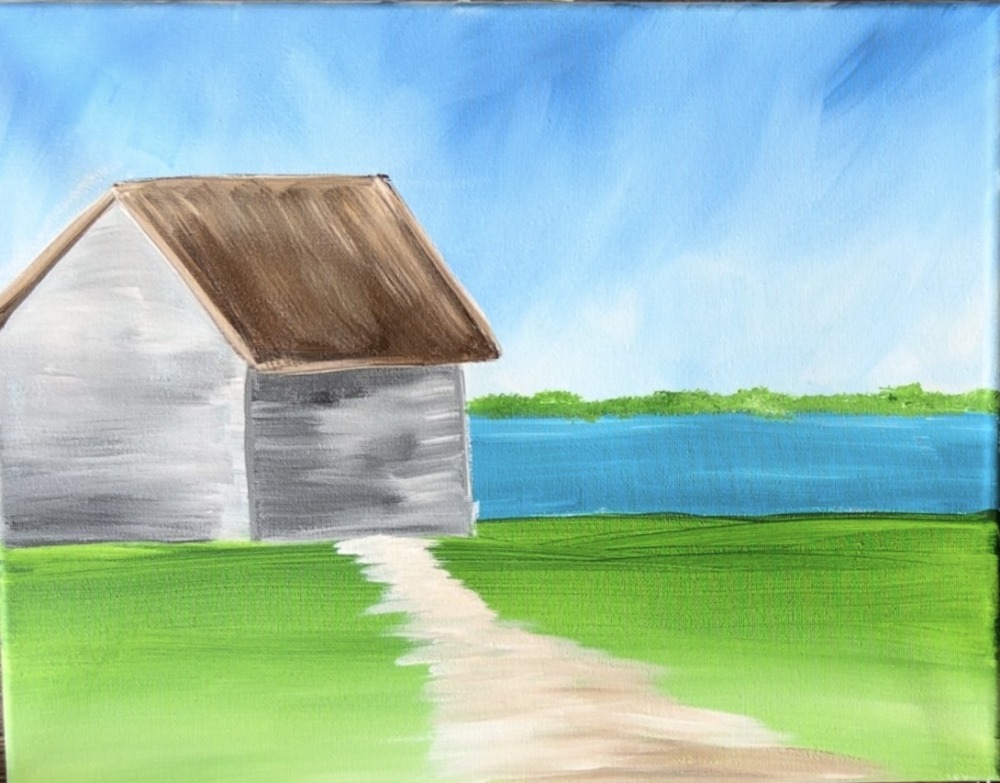
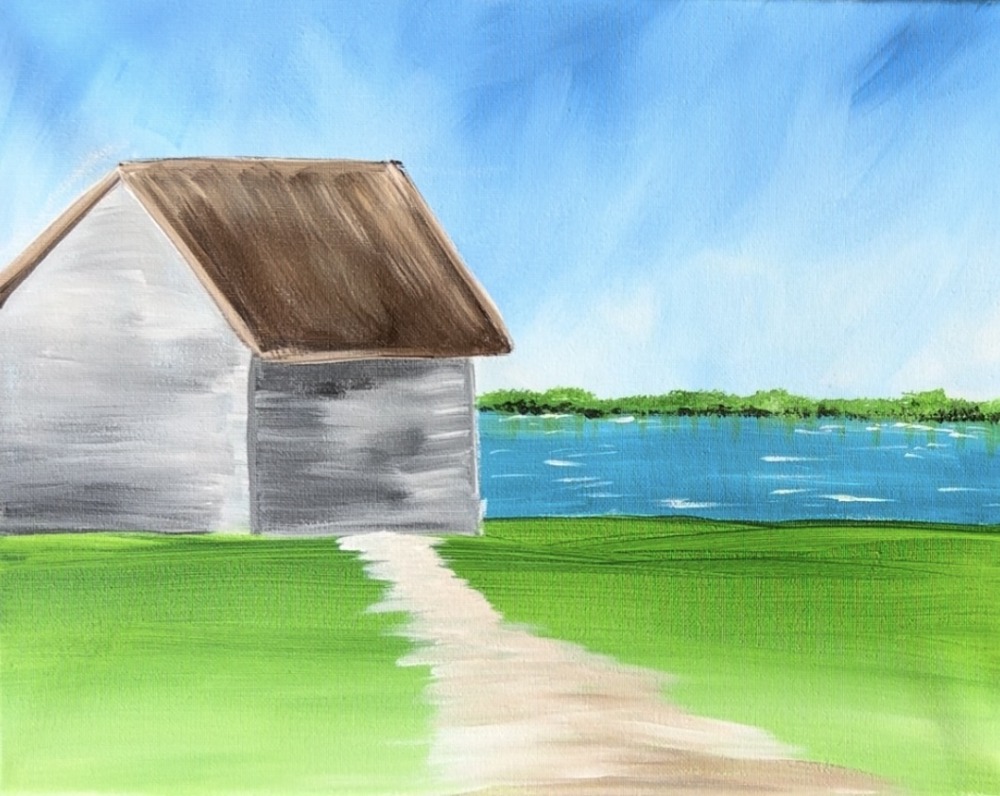
1. Paint sky
Position your canvas horizontally. Measure 5.5″ from the top (or bottom) of the canvas. Use a t-square ruler or straightedge to draw a horizontal line across the canvas. If you are working on a different size canvas, locate the center of the canvas and draw this line.
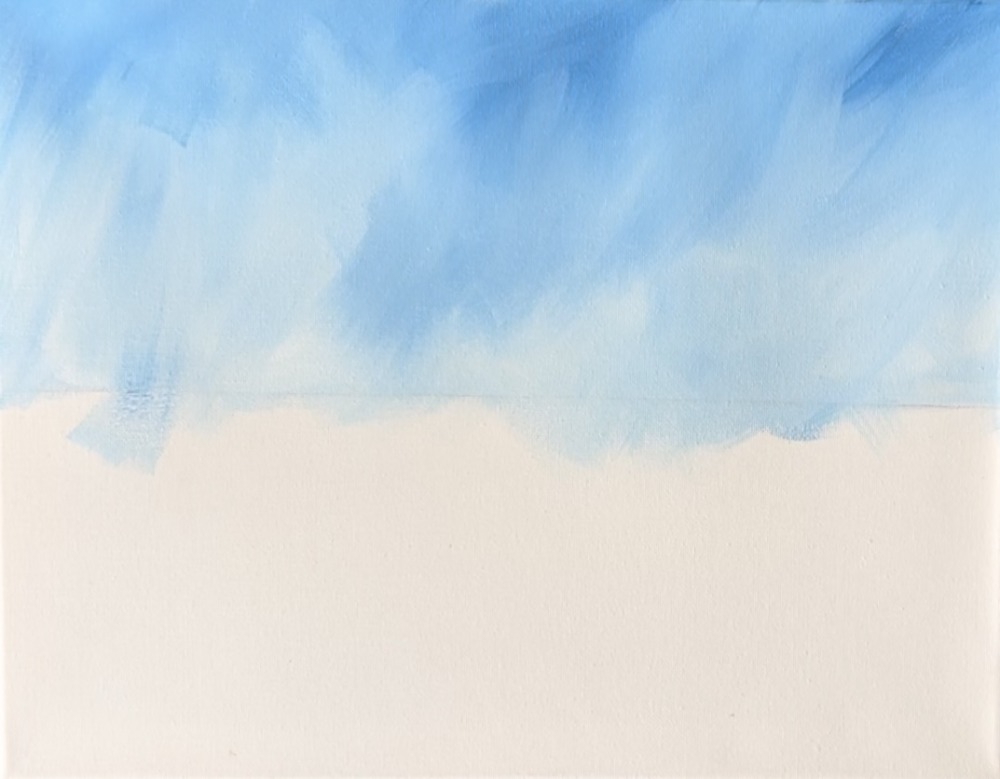
Load your paint palette with the two colors: cerulean blue and titanium white. Use a 3/4″ flat wash brush. Mix about equal parts white and blue together. Start on the top edge of the canvas and paint “full width”, “angle” paint strokes. This will create a texture in the sky. The paint should be relatively thin but still cover all the canvas.
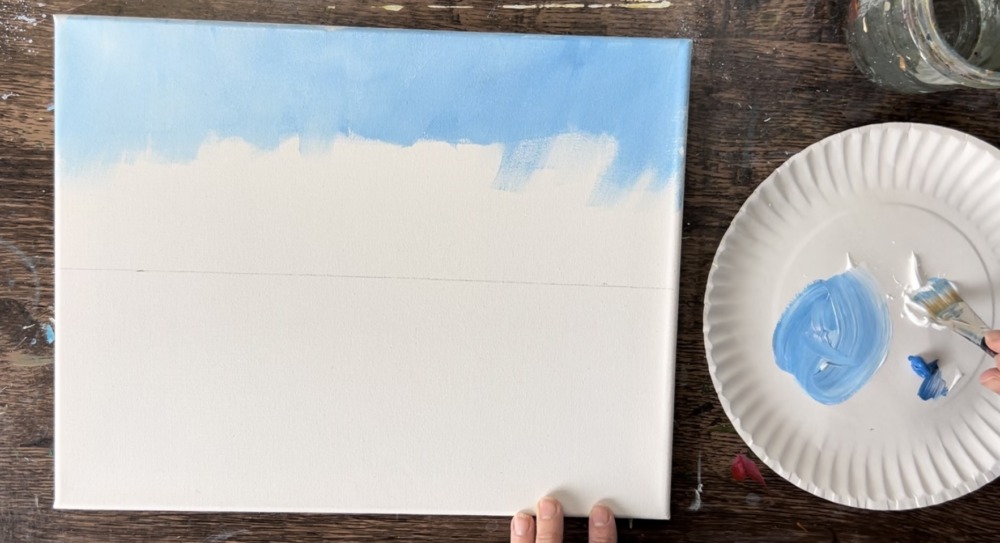
As you work your way down, add a little more white to your paint brush and allow some of that white to blend with the darker blue. Make your sky get lighter and lighter as you work your way to the “horizon line”. Let your blue gently blend together with the white but try not to blend it all the way.
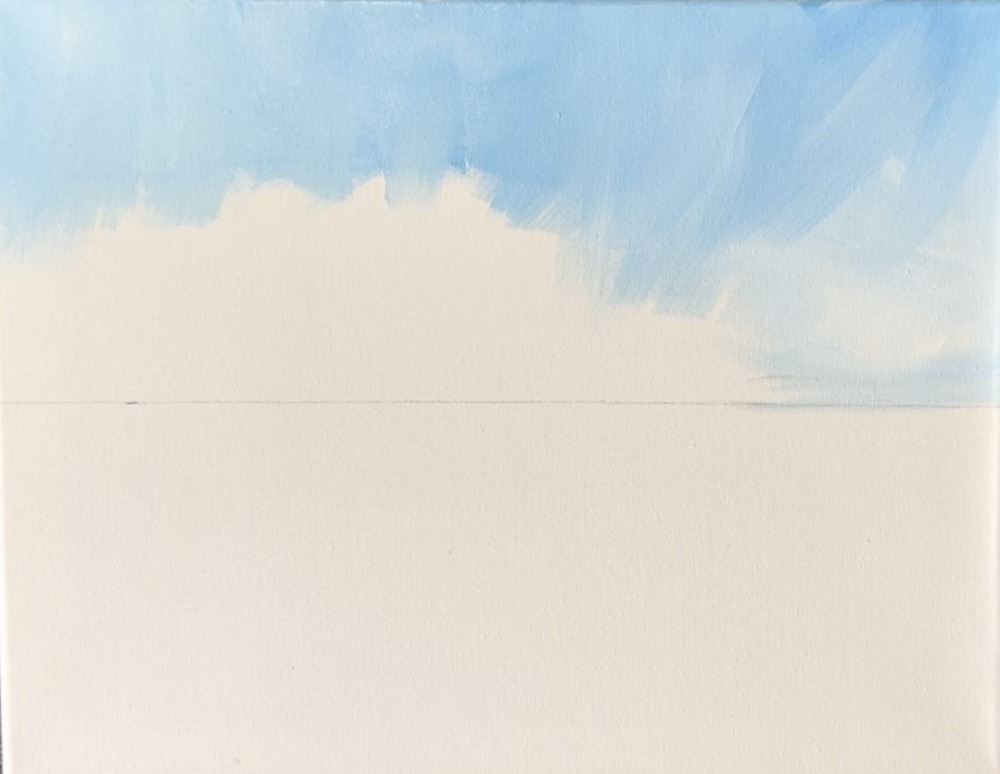
Go all the way to the horizon line. It’s okay if you go a little below the line.
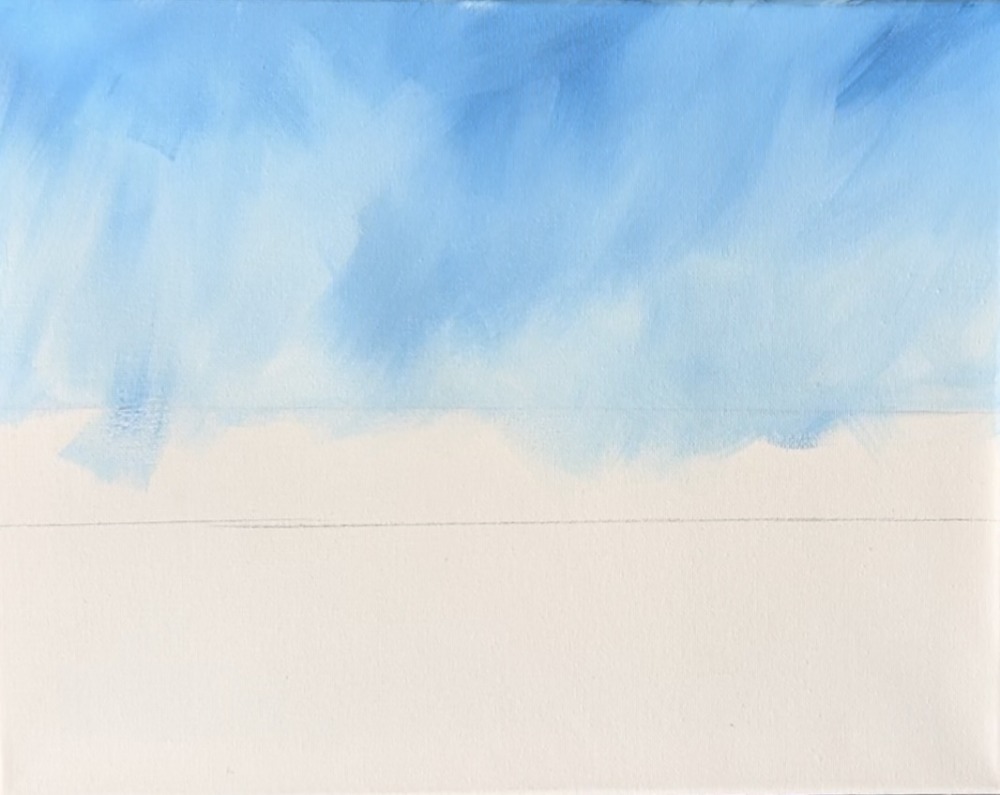
2. Paint Water
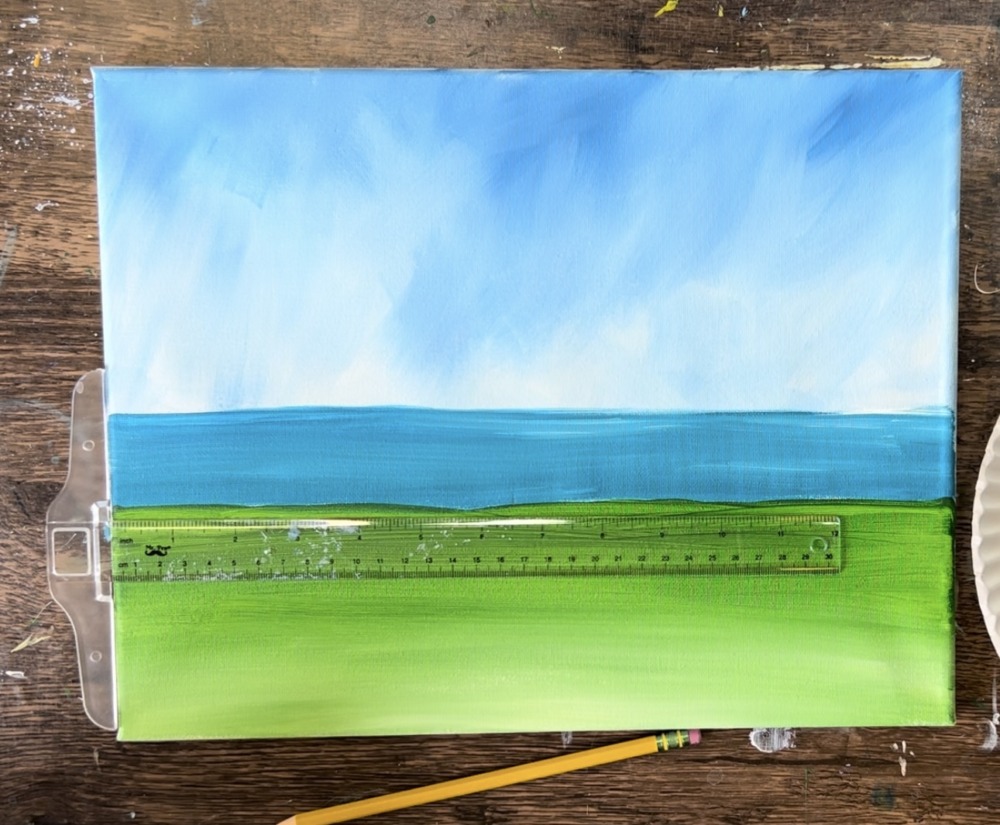
Measure and draw a second line at about 1.5″ down from the horizon line. This will create the lake area of the painting.
Load your paint palette with “turquoise blue”. Use the 3/4″ flat wash brush to paint the lake area a solid coat of turquoise. Paint this using left and right, horizontal paint strokes.
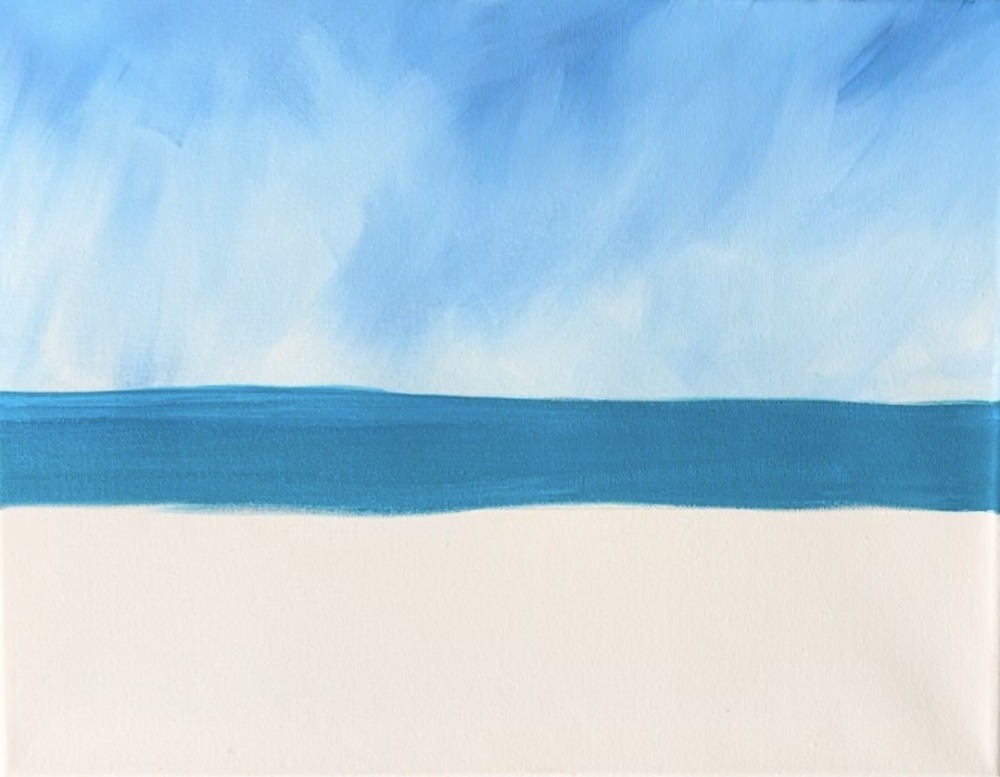
Then, before this turquoise dries, load a small amount of white onto your brush. Gentle blend a little white into the turquoise, mostly just above the horizon line. This will give your water some “color variation”.
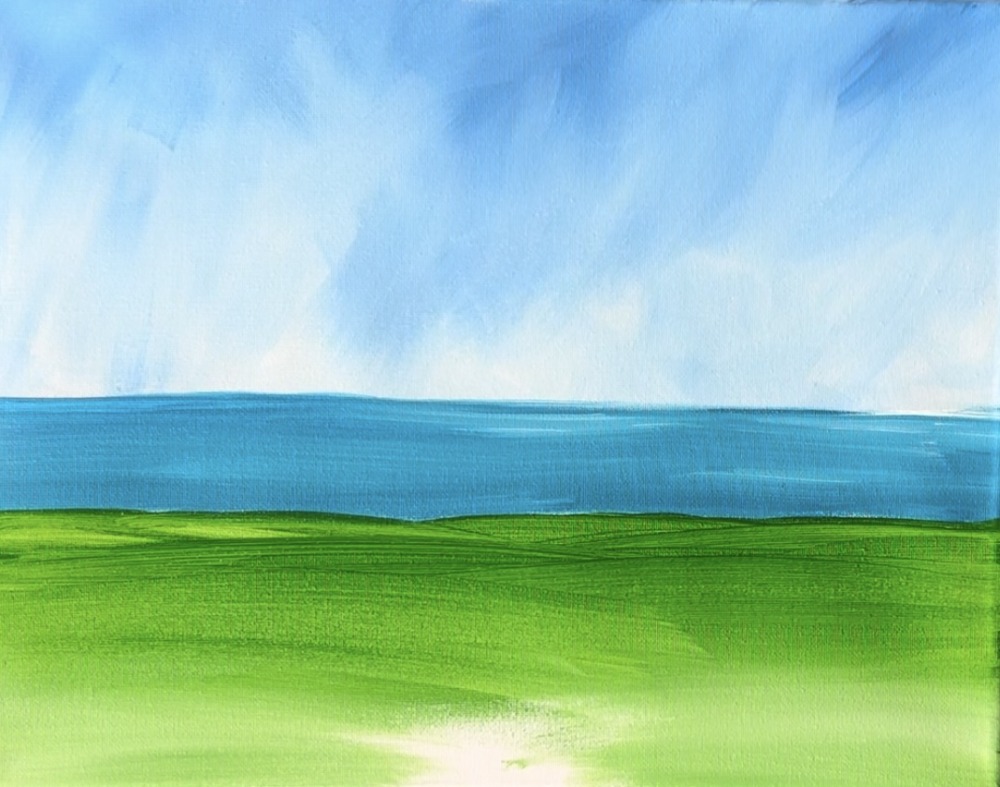
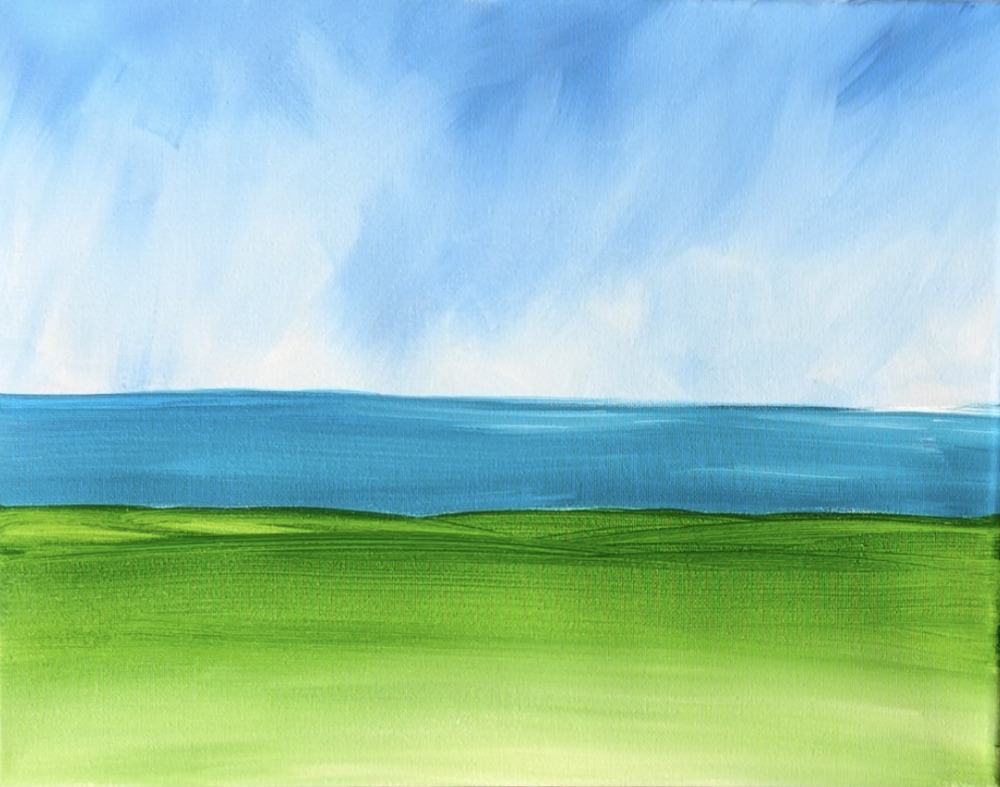
3. Paint Grassy Land
Load your paint palette with “hooker’s green hue”. Use the 3/4″ flat wash brush. Paint left and right paint strokes and fill the entire area from below the lake all the way to the bottom of the canvas.
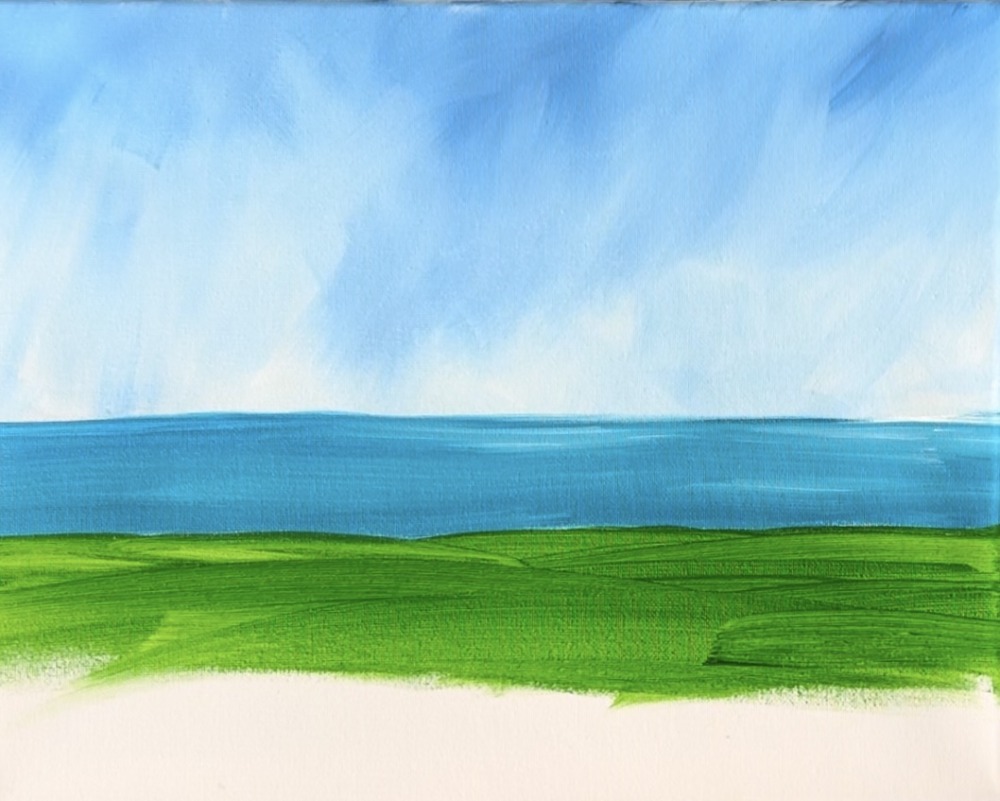
As you approach the bottom few inches of the canvas, load a small amount of “titanium white” onto the bottom of the green area and blend it in. This will allow your land area to be lighter on the bottom of the canvas and darker towards the lake area.
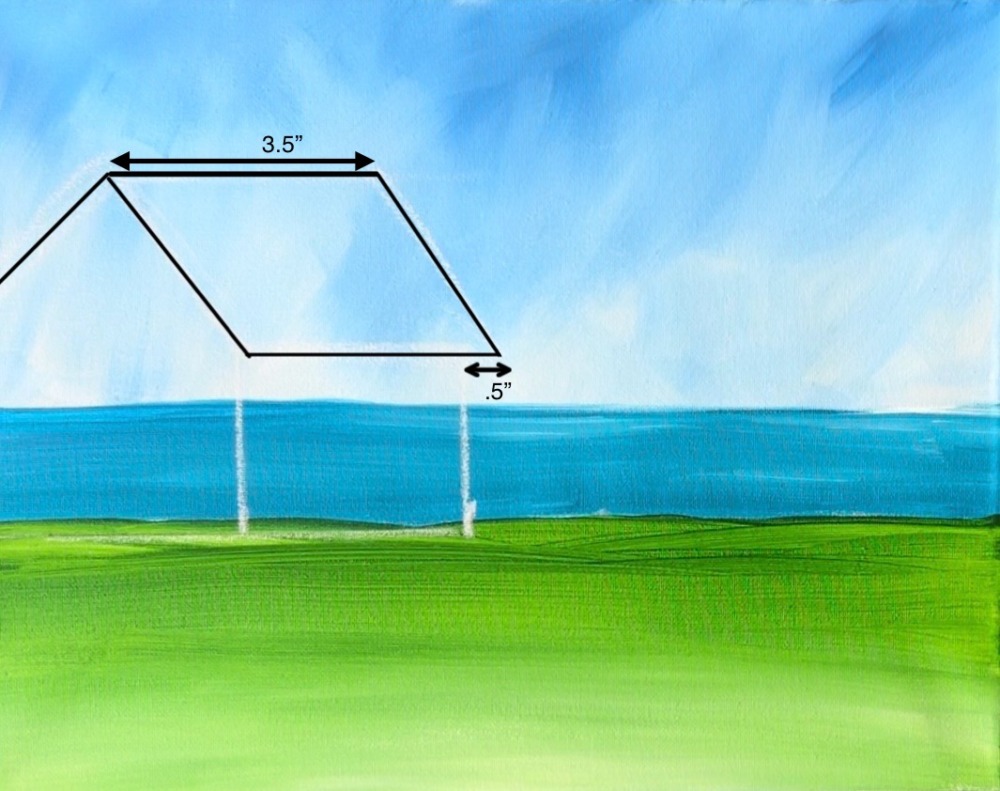
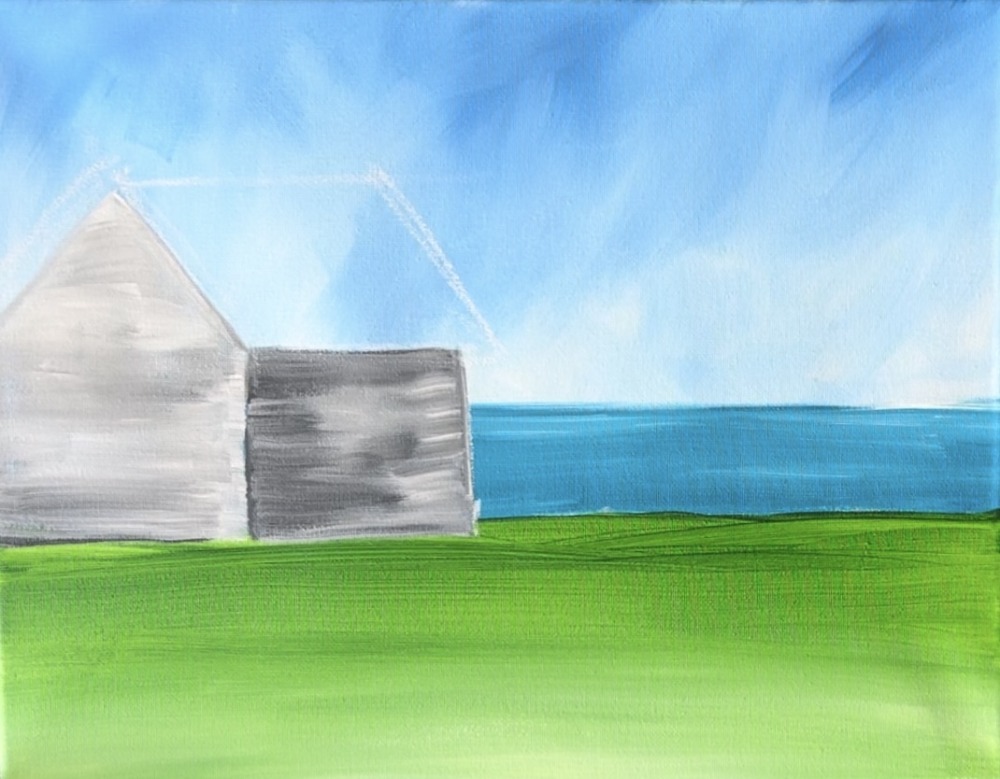
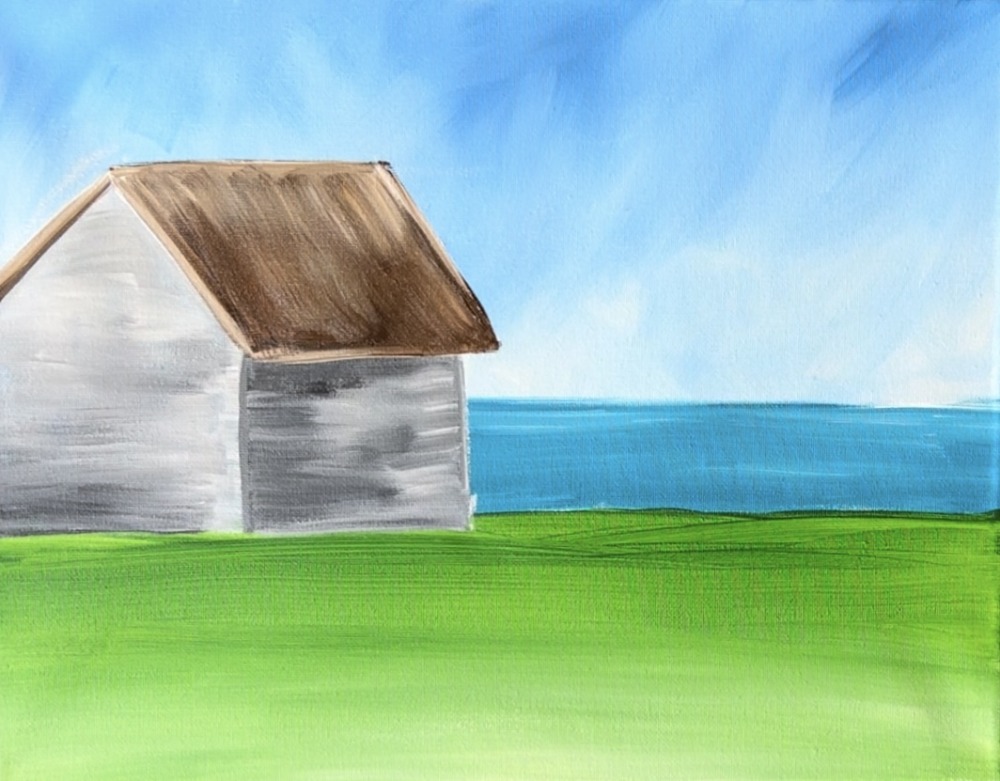
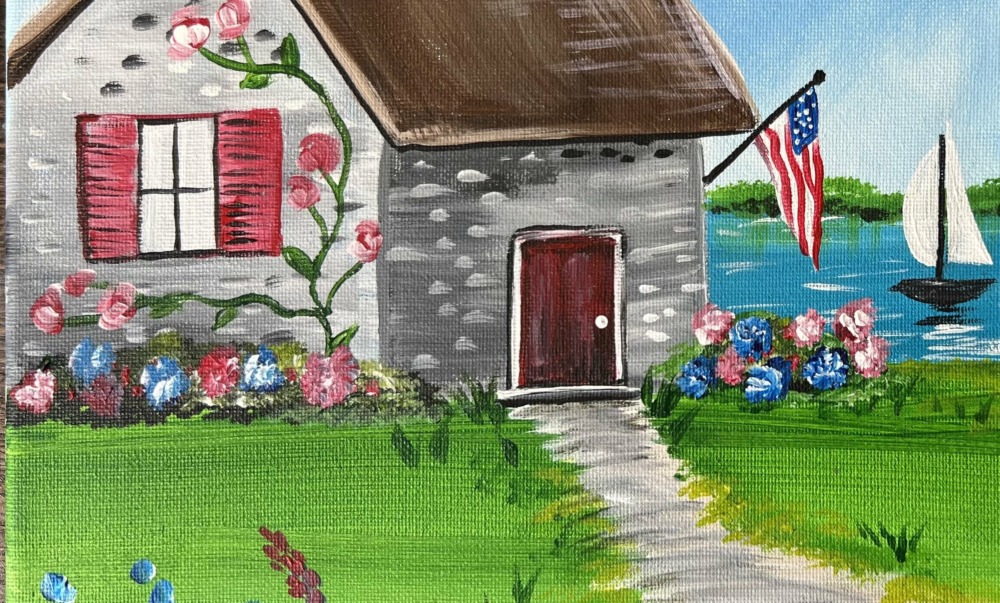
4. Draw House
Below I have measurements for the house on an 11 x 14 canvas. If you are doing this on a different size, you’ll need to estimate the size of the house. Also, these measurements do not have to be exact. You can change the style and size of the home.
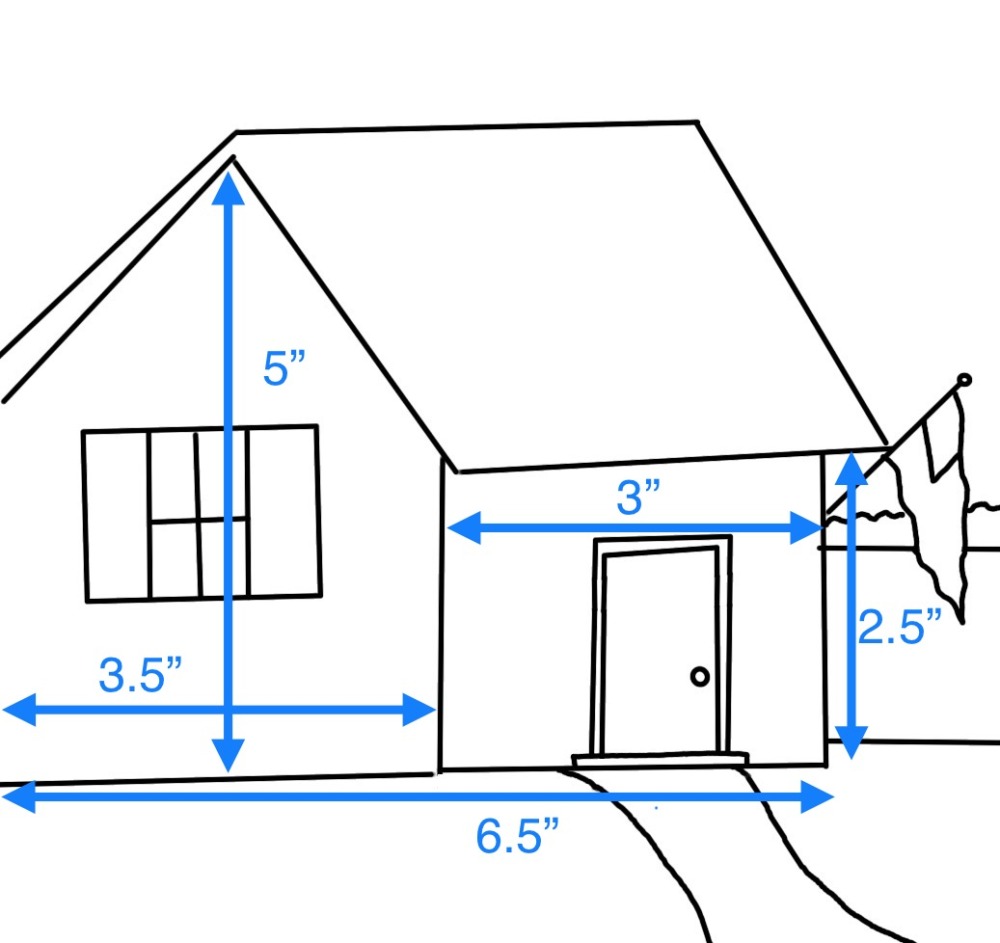
Use a t-square ruler and a pencil or white chalk to draw the house.
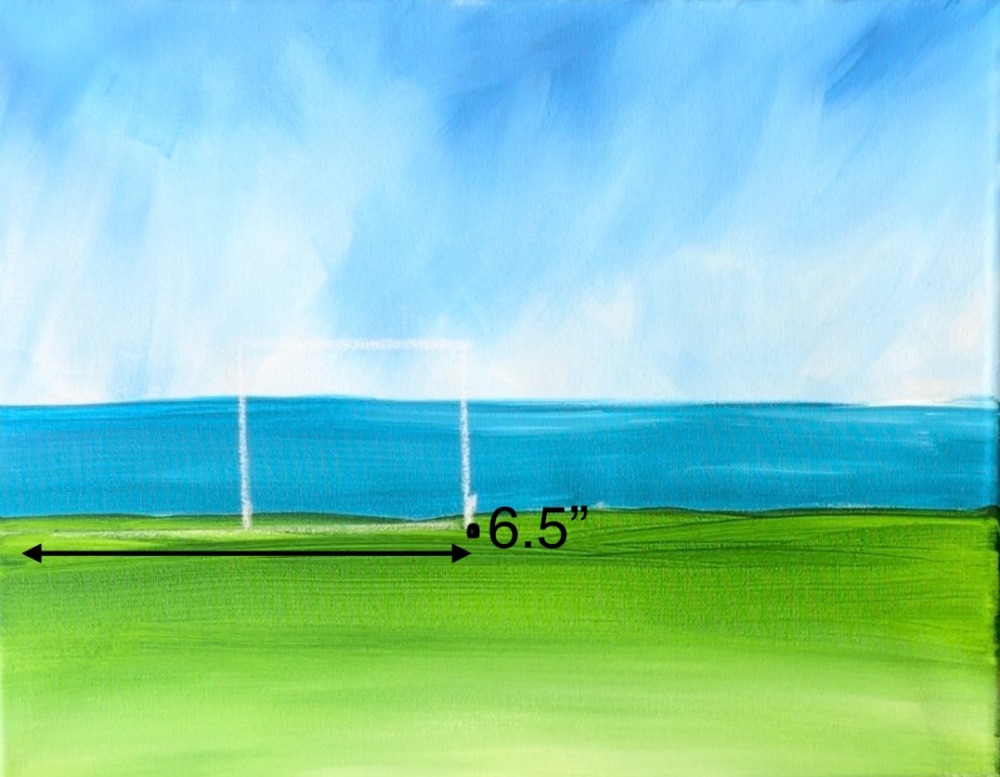
Start by measuring 6.5″ and making a mark on the line just a slither below the edge of the green where it meets the lake.
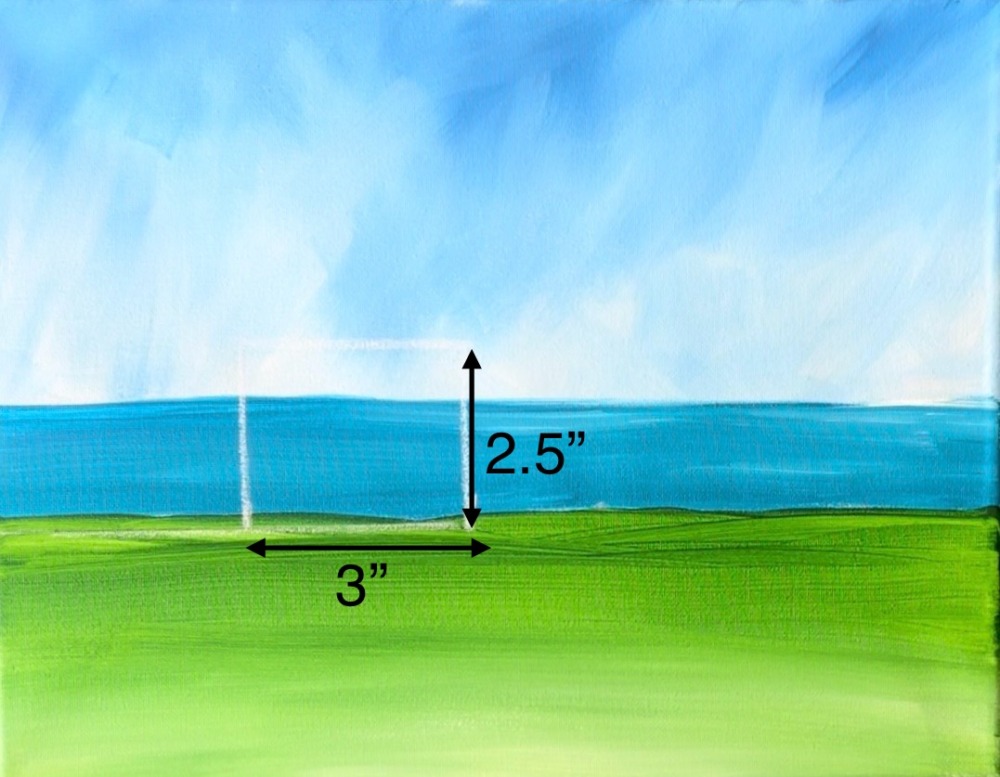
Then draw a rectangle (the side of the house that will have the door). This rectangle is about 2.5″ high by 3″ wide.
Measure the peak of the roof by making a mark at 5.5″ high on the left center of the house. Then draw two diagonal lines for the roof.
Draw two parallel lines going horizontally about 3.75″ across. Then draw another angle line parallel to the angle on the left. Note: the roof extends outwards about a half inch from the far right vertical line.
5. Paint House
Use a #12 bright brush to paint the house. Start by loading the brush in “titanium white” and a small amount of “mars black”. Use the full width of the brush to drag your paint strokes left and right. It will create a medium gray color. Try not to “over blend” the color so that you get different variations of the gray. This also helps create a “rustic” look to the house.
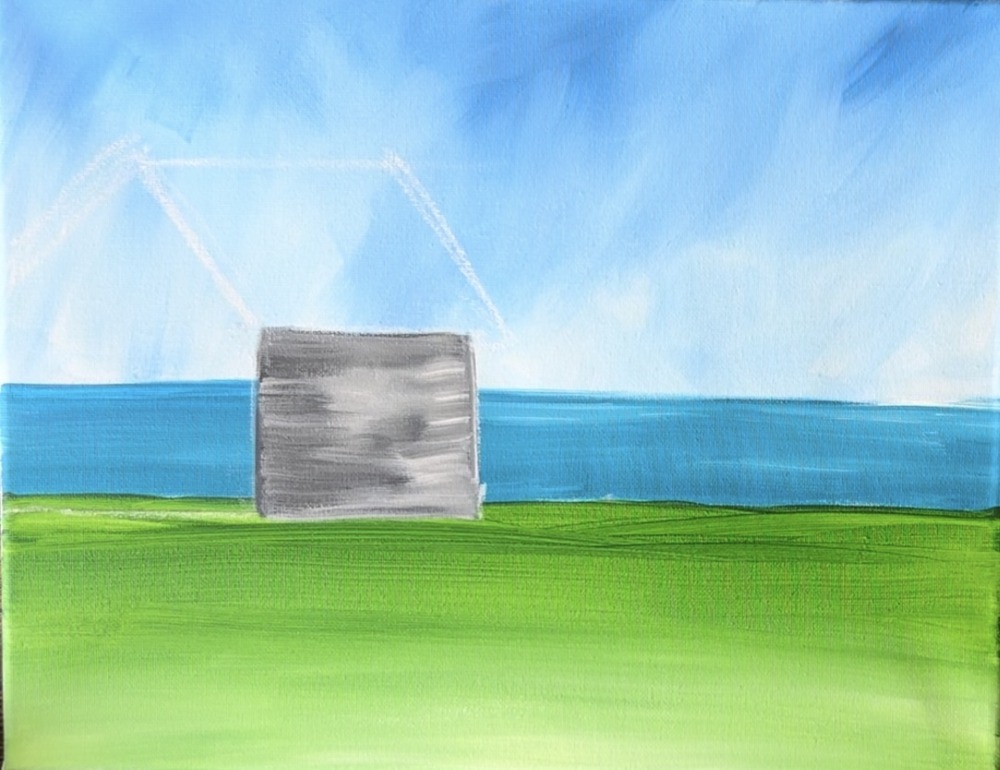
Paint the left side of the house. This time, create a lighter gray by adding a little more titanium white to your brush. By making this side of the house lighter, it helps it to stand out from the right side of the house. Paint left and right paint strokes and vary the gray a little bit.
Tip: it may help to use the end of the paint brush to outline the edges of the shape first before filling it in.
Next, paint the roof. Load your paint palette with “raw umber”. Double load the #12 bright brush with “raw umber” and a small amount of “titanium white”.
Start by outlining the shape of the roof.
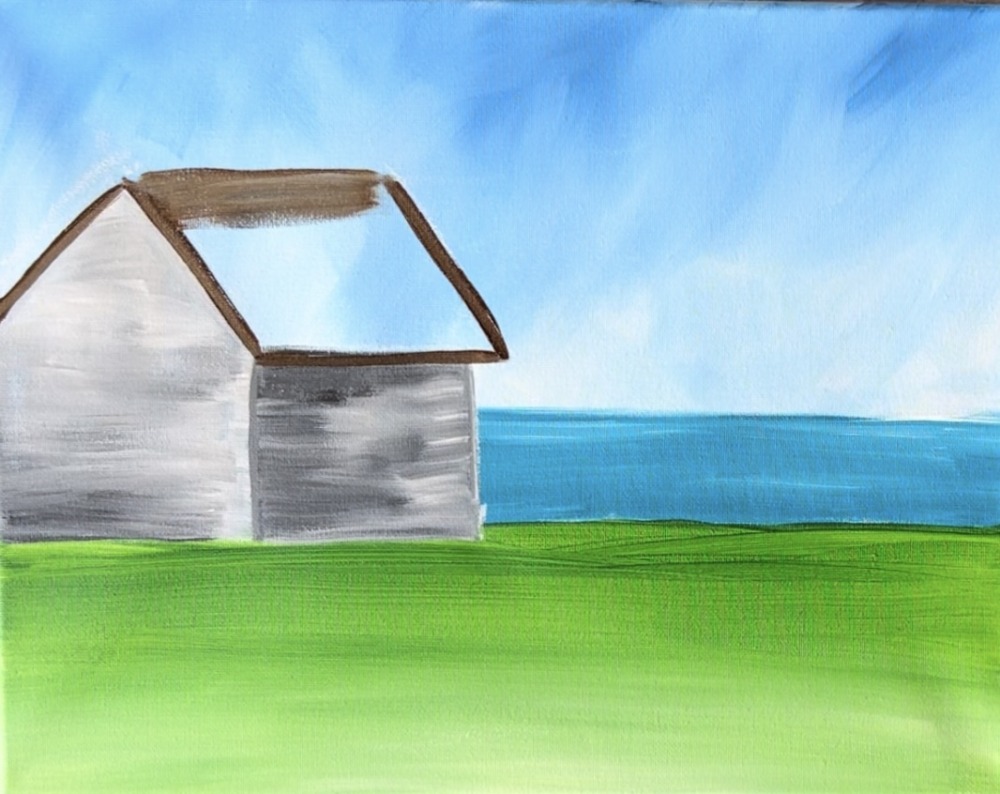
Then fill it in using diagonal paint strokes. Add a small amount of titanium white to the brush and blend it on the top of the roof. Allow the bottom to be darker brown.
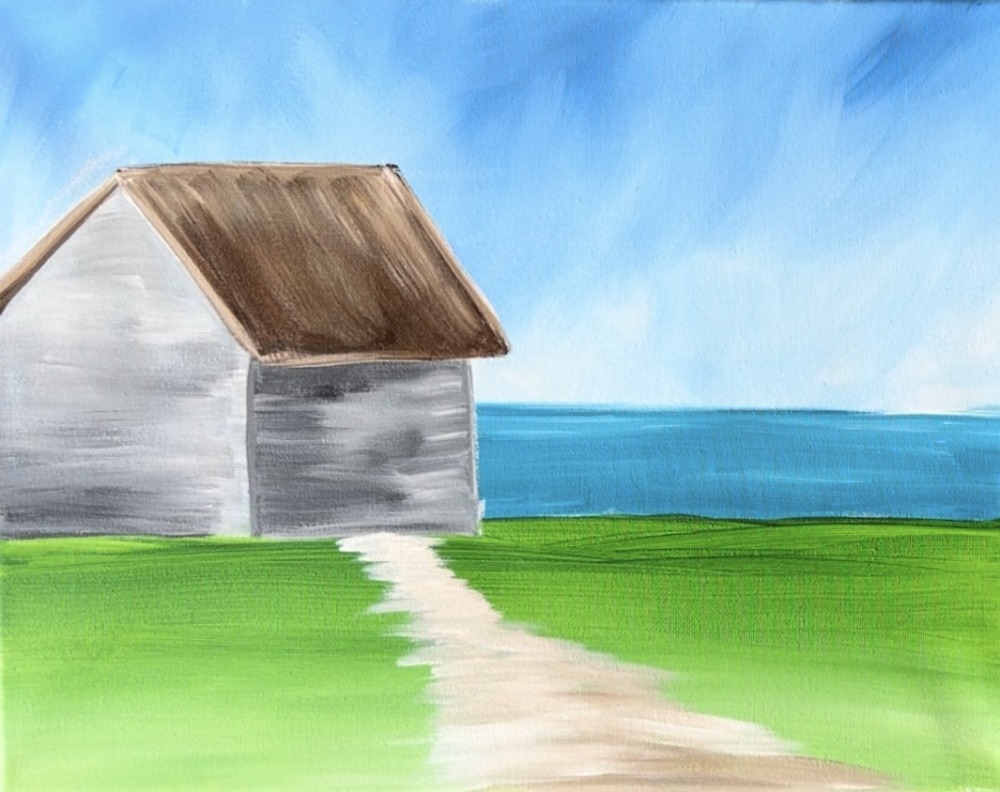
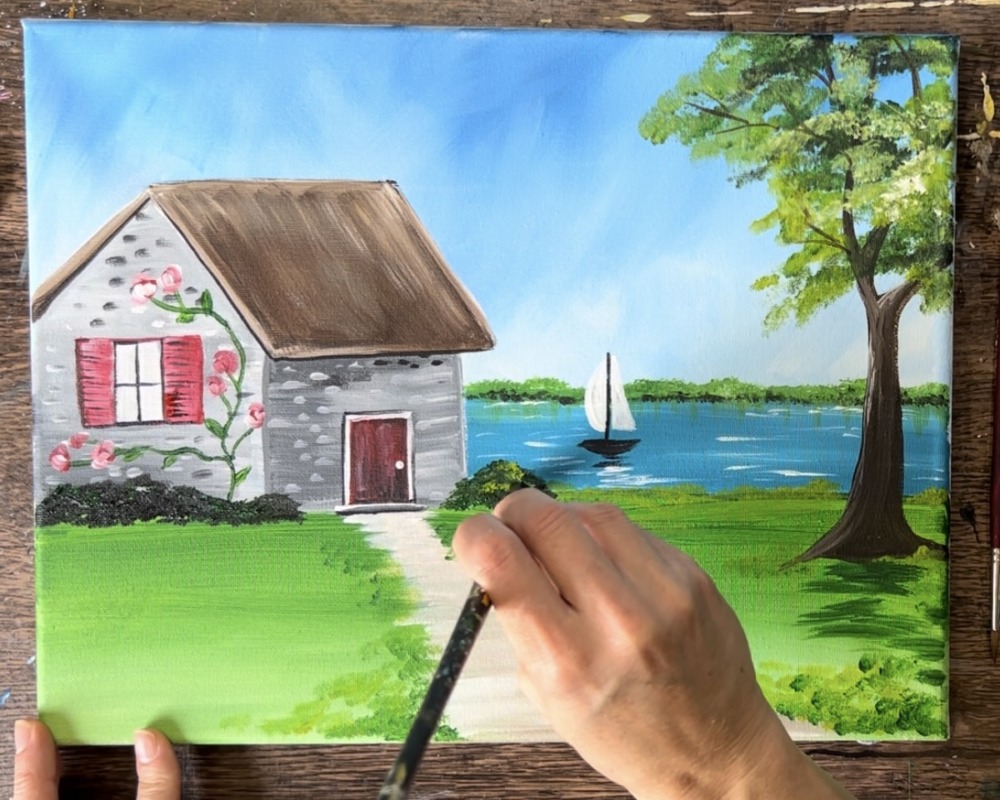
6. Paint Path
Use the #12 bright brush to paint the path. Mix about 3 parts titanium white with 1 part raw umber to create a light brown. Loosely paint left and right paint strokes to create a path that is narrow at the home (where the door will be) and wide on the bottom right of the canvas.
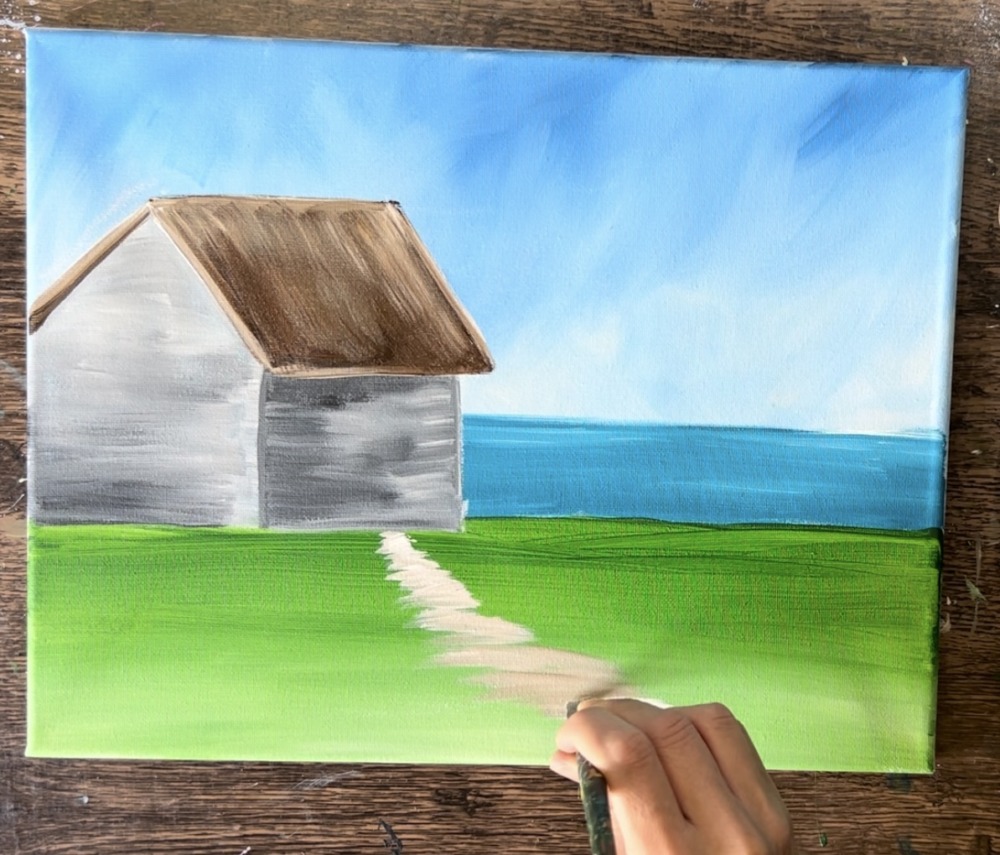
Let the edges of this path show some of the green. It’s sore of a “rugged” path and is not smooth on the edges.
7. Paint Bushes, Reflection & Water Lines
Paint the bushes that are behind the lake area (above the horizon line). Use the end of the #12 bright brush to “stamp” this texture along the horizon line. Add “hooker’s green hue” and a small amount of “titanium white” to the brush. Create different heights of greenery.
Wipe the brush off (but don’t rinse it). Use the full width of the brush to “drag” paint downwards in a vertical direction in the water area. This will create reflection in the water. It should be thin and translucent. Then use the #8 round brush and titanium white to paint horizontal reflection lines in the lake
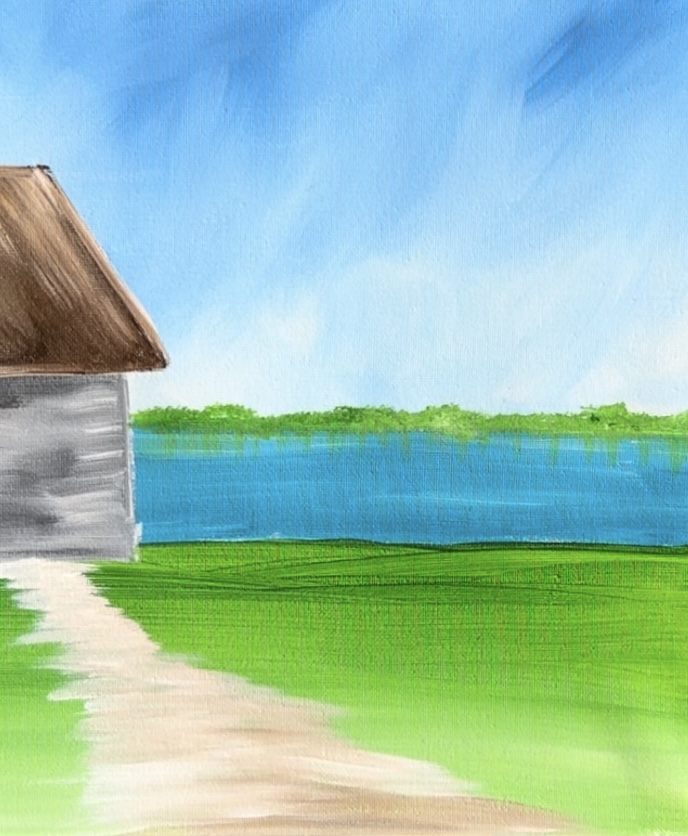
Then use the #8 round brush for paint thin, loose white horizontal lines in the water area. Use the very end point of the brush to make these thin white lines. Note: if you don’t have this particular brush, use any small round brush that has a point to it.
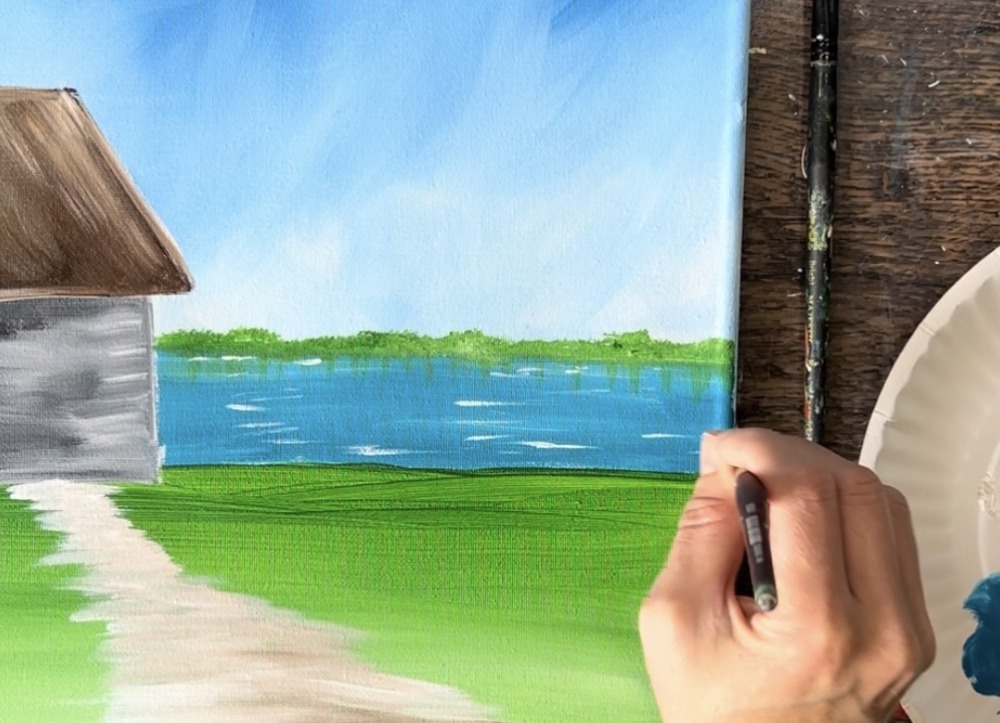

Add another darker layer of bushes just along the horizon line. Use the #8 round brush and “hooker’s green hue” mixed with “mars black”. Then stipple this dark green layer along the base of your bushes along the horizon line.
8. Paint Sailboat
Use the #8 round brush (or a small round brush) to paint the sailboat. Start by painting the two sails with titanium white.
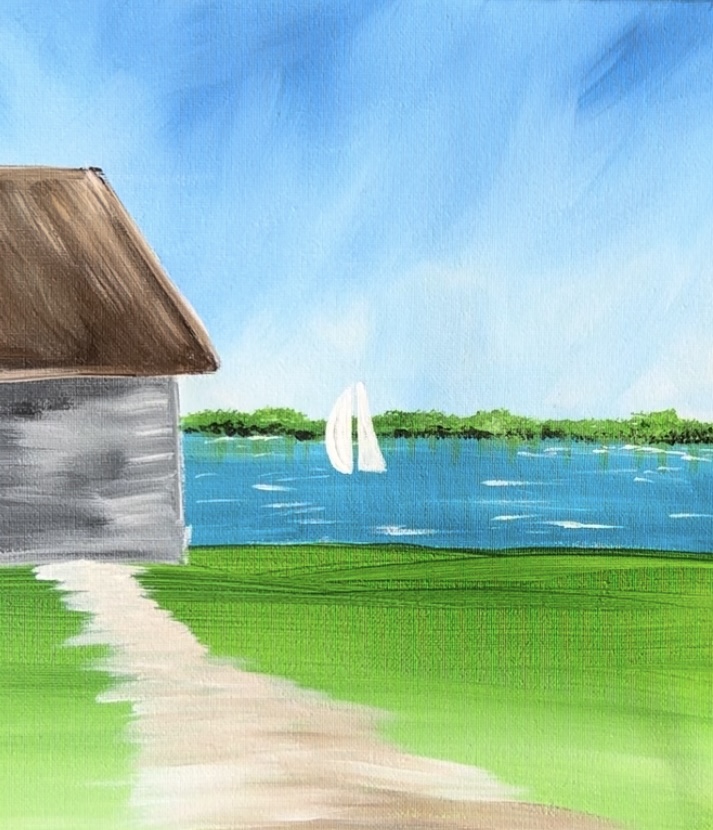
Then paint a vertical line for the mast and a small half circle for the boat.
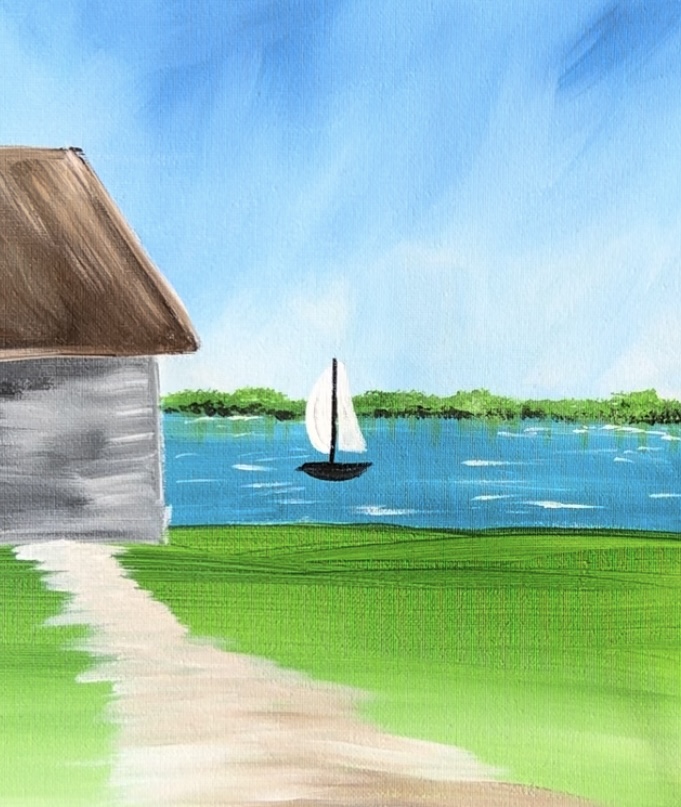
Additionally, paint loose reflection lines with black and white just below the boat.
9. Paint Tree
Use mars black and raw umber mixed together to paint the trunk of the tree a very dark brown. Use the #8 round brush to sketch the trunk of the tree so that it flutes outwards.
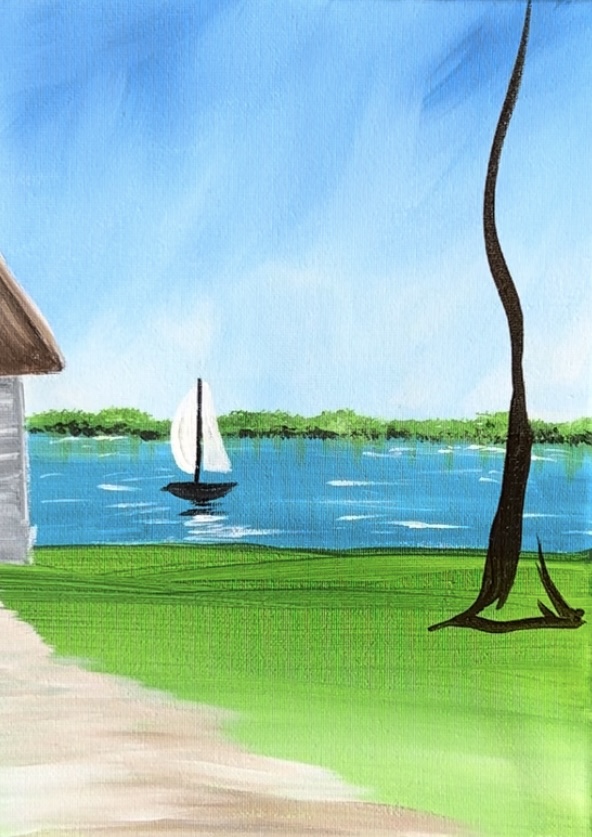
Fill it in solid with this dark brown.
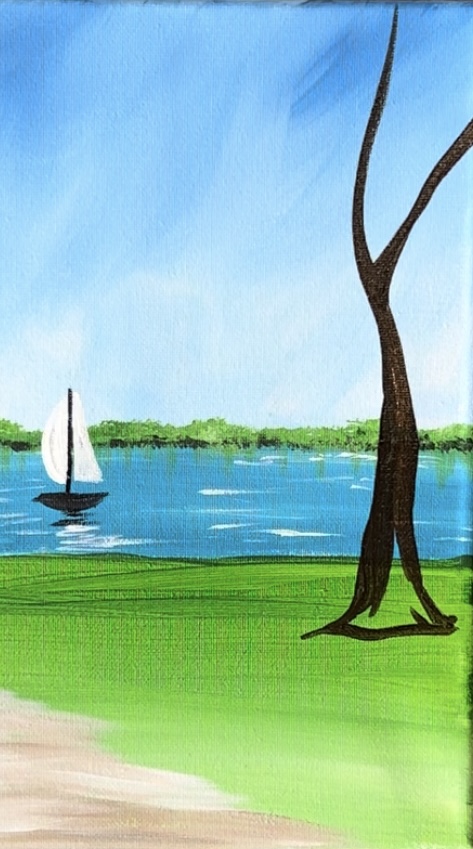
Allow the branches to split off and then sway to the left and off the edge of the canvas. Note: to get the branches to be thin, apply light pressure on the brush so you paint strokes are thinner.
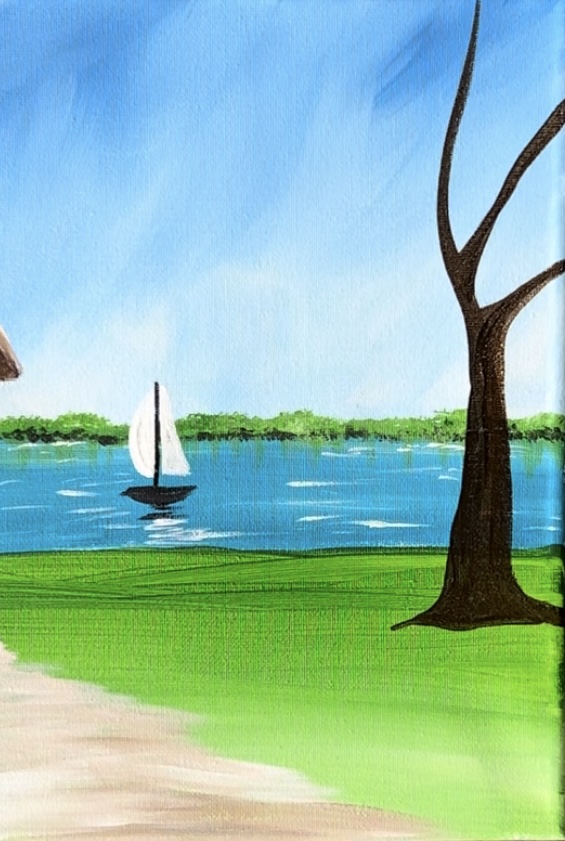
Next, lightly highlight the left side of the tree with a small amount of white mixed with burnt umber. Loosely blend this lighter color just on the left side of the tree and leave the right side dark and shadowy.


Paint the tree leaves next using the #12 bright brush. Mix a small amount of “mars black” into “hooker’s green hue” to make a very dark green. Stamp the end of the brush to create little bundles of leaves going in a horizontal direction.
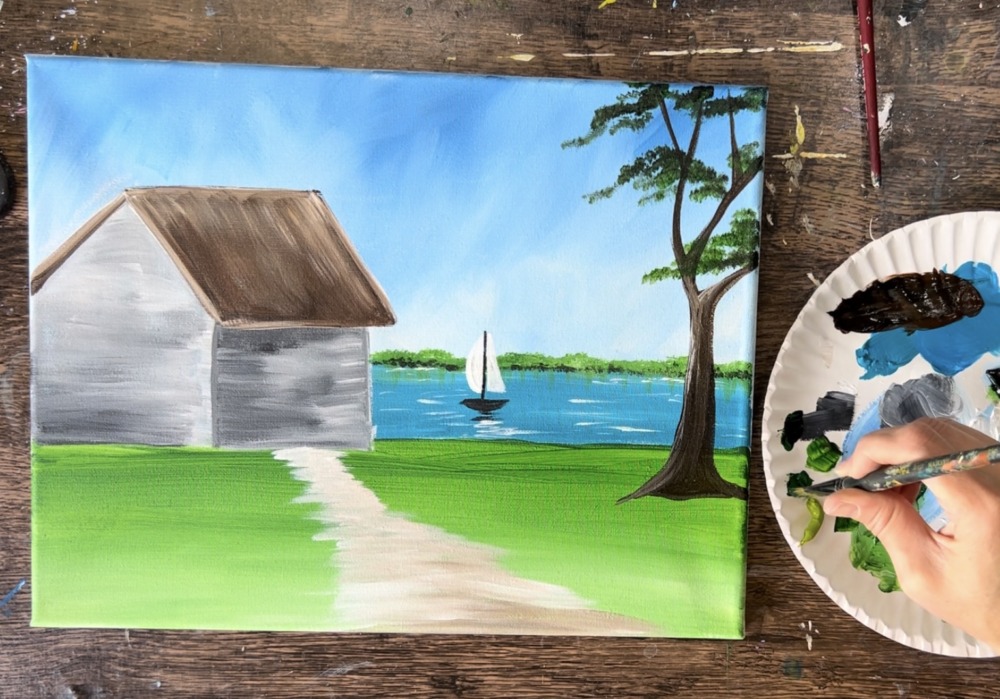
Layer on lighter tints of green. Load “light olive green” onto your paint palette and paint this lighter layer over the green. Then mix a little bit of white into the green to create an even lighter layer.
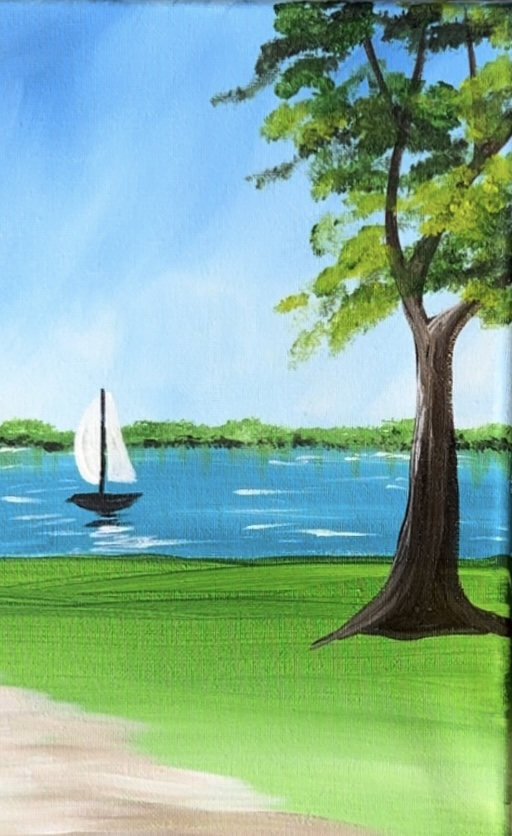
Optional: go back with the #8 round brush and paint thin branches within the tree that show up over the green that you just painted.
Next, add some green shrubbery texture throughout the landscape. Use the #12 bright brush to stamp “light olive green” and “hooker’s green hue” bunches of paint. Do this just along the bank (where the green meets the water area). Also, add texture along the path and next to the tree.
Paint a little shadowing under the tree. Use the #12 bright brush and “hooker’s green hue” and loosely paint left and right paint strokes just under the tree.
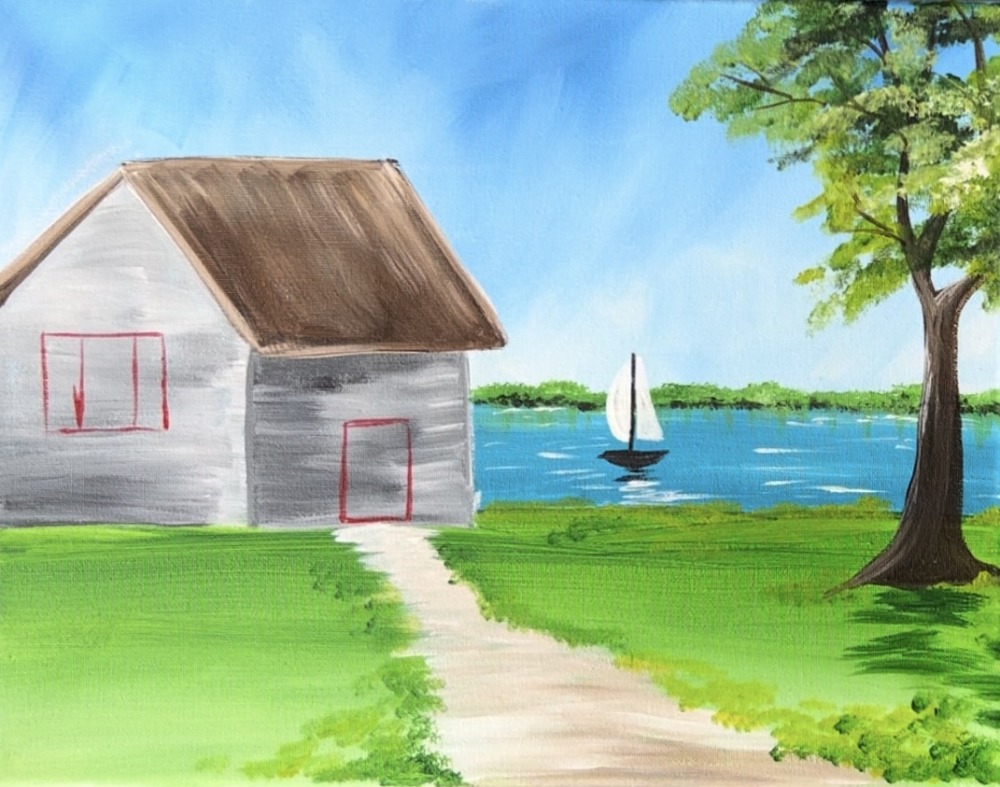
10. Paint Door & Window
Use the end of one of your round brushes to sketch out the door and window with “naphthol crimson”. I used the #8 round brush for this. Paint a rectangular door on the right and then a window with shutters on the left.
Then use the #12 bright brush to paint the door in. Add a small amount of “mars black” into “naphthol crimson” to create a deep red color. Paint the door using vertical paint strokes.
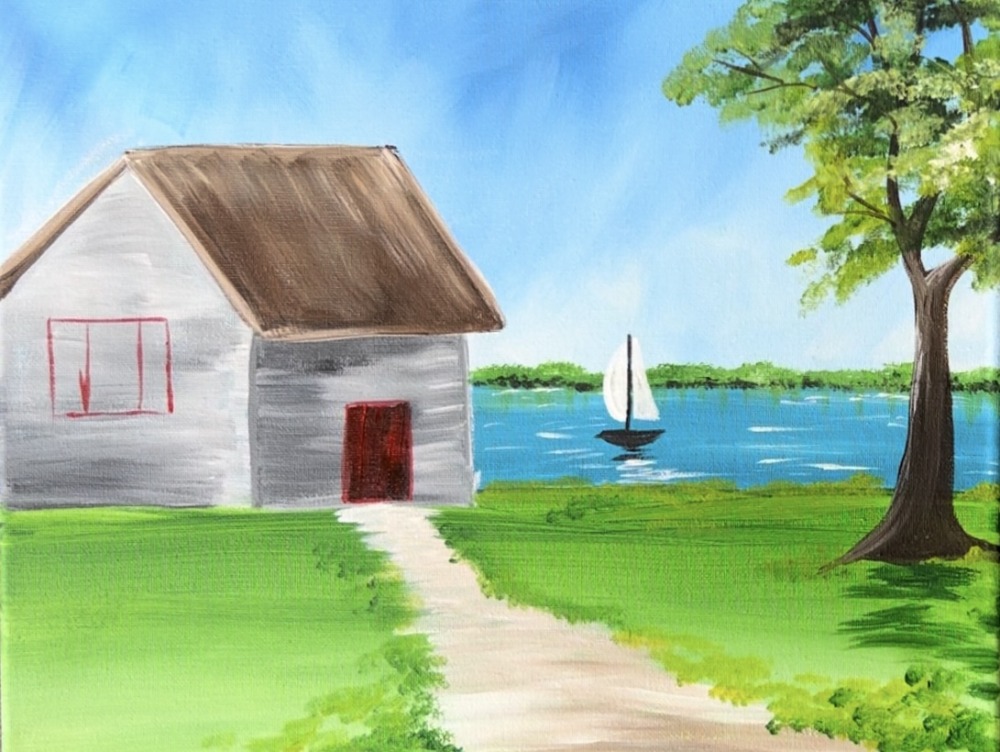
Use the #8 round brush (or a brush with a small point) to paint a frame around the door with “titanium white”.
Then paint another outline around the white with a very thin line of “mars black”. Paint a horizontal door step using both black and white. Also, paint a small white circle for the doorknob.
Then paint the window. First paint the rectangle window with titanium white (using the #12 bright brush or a round brush). Then outline the window with black and paint the window pane lines using a round brush. Next, paint the shutters. Use the #12 bright brush and “naphthol crimson” mixed with a small amount of “titanium white” to paint each of the shutters. Paint horizontal paint strokes in each of the rectangular areas.
Add more texture detail to the shutters by painting thin, horizontal black lines.
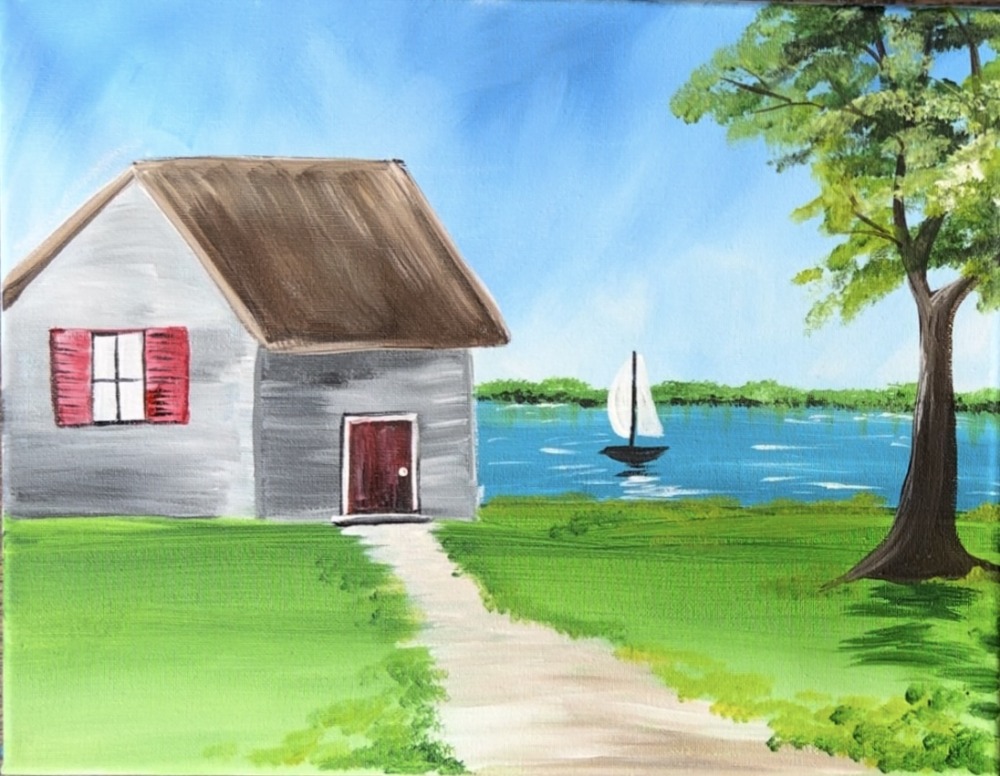
11. Paint Bricks
Use the #4 round brush for this step. Double load the brush in black and white. Paint small horizontal marks to create brick texture on the sides of the home.
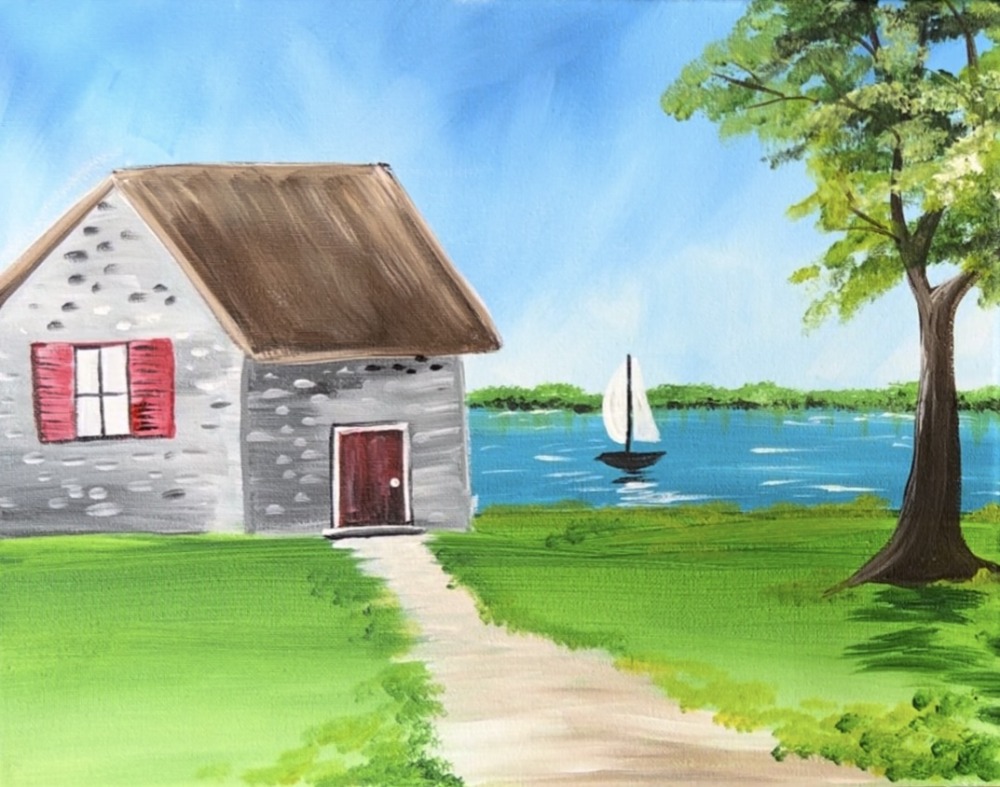
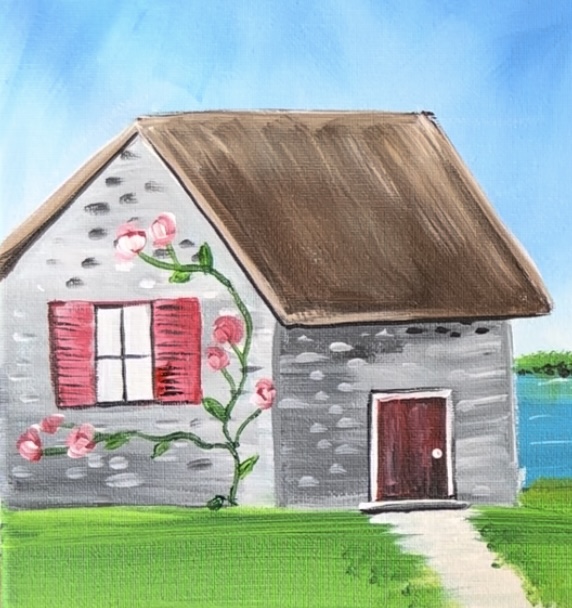
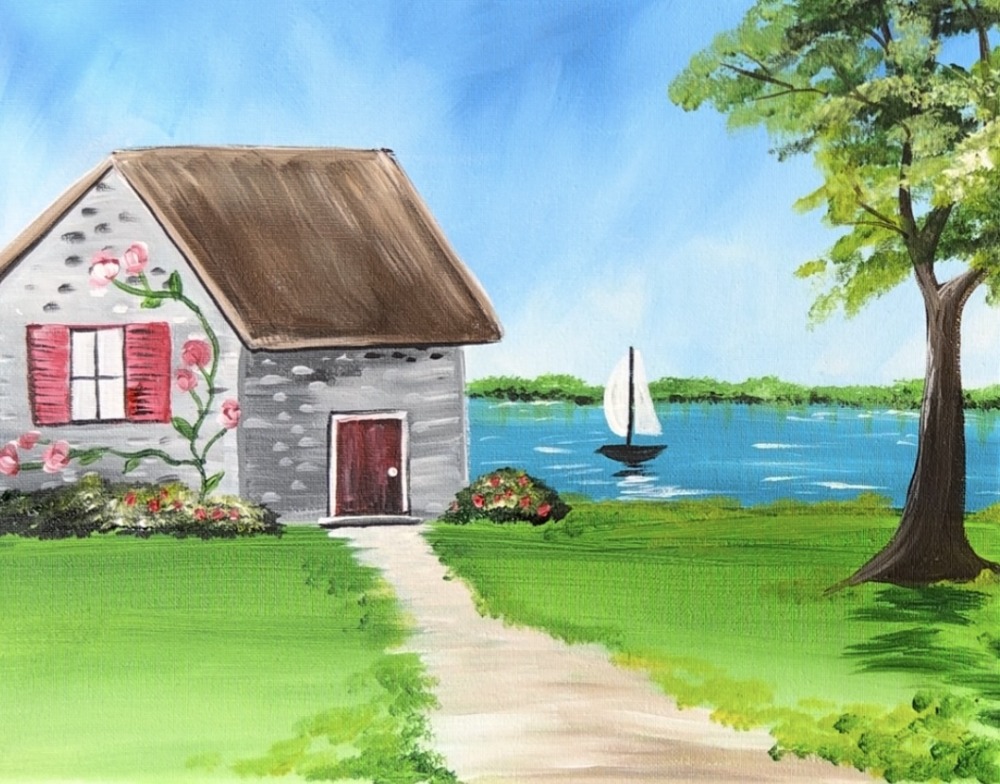
12. Paint Rose Vines (optional)
You are welcome to change up the details in this painting! You can do a different type of vine or not do any vine. You can also add things to the home such as a wreath, cat in the window, etc.!
To do the vine, I used the tip of the #8 round brush to paint a very loose green line that curves up and around the right side of the window.
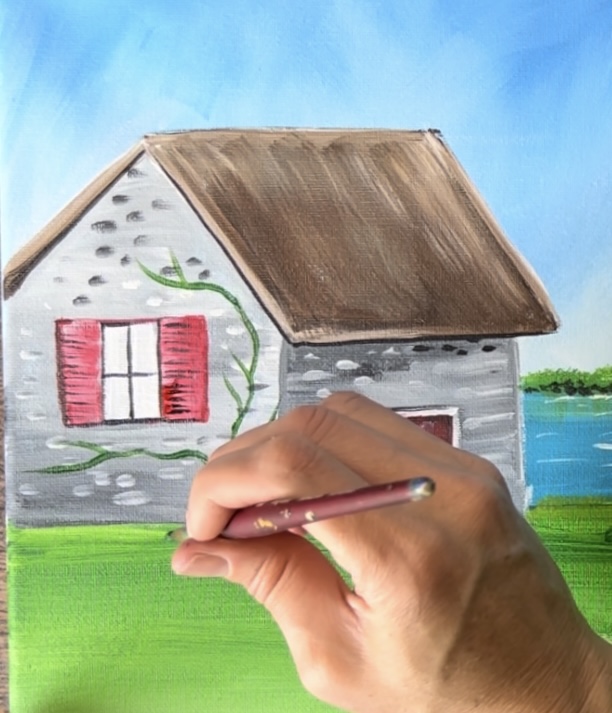
Then add roses to the vine. Use the #4 round brush to paint small “naphthol crimson” circles. Then add small amounts of titanium white inside of the circles. Paint little curved strokes. Since this is further away, you don’t need to make these roses super detailed!
14. Paint More Bushes
Use the end of the #12 bright brush to “stamp” bushes on the left and right sides of the home. Start with a layer of dark green (just like the tree) then layer on lighter layers of green.
Optional: add little red dots on the bushes for flowers/ berries. We will also paint hydrangeas laters so you can skip that if you prefer to add the hydrangeas instead!
15. Paint Flag
Use any of the round brushes to paint a black diagonal line extending from the side of the house. Paint a small circle on the end of the pole.
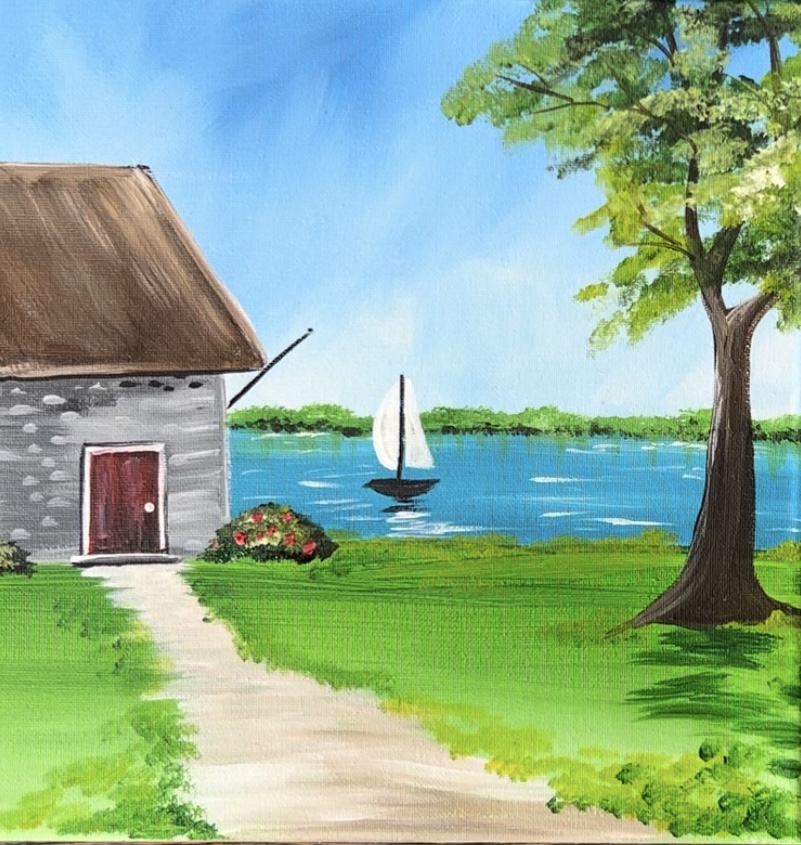
Then paint a flag. Since this flag is hanging downwards, it would not be a rectangle shape. It would be more of a triangular shape with wavy edges. Paint this first layer titanium white and then wait for it to dry before painting stars and stripes.
16. Paint Flowers On Bottom Of Painting
Use the #8 round brush to paint little grass lines on the bottom edge of the canvas. Use different variations of “hooker’s green hue” and “light olive green”.
Then paint various vertical column flowers. Load “phthalo blue” onto your paint palette. Double load the #4 round brush in blue and white. Paint little dots of vertical columns and allow the colors to vary slightly with the blue and white. Use the “naphthol crimson” to paint red flowers as well.

17. Finish Flag
Use the #8 round brush to paint a little “phthalo blue” rectangular area in the top right of the flag. Then paint “naphthol crimson” stripes. When you do these stripes, paint them loosely and make the lines go wavy/ run into each other.

Then paint tiny white dots on the blue area of the flag for the stars.
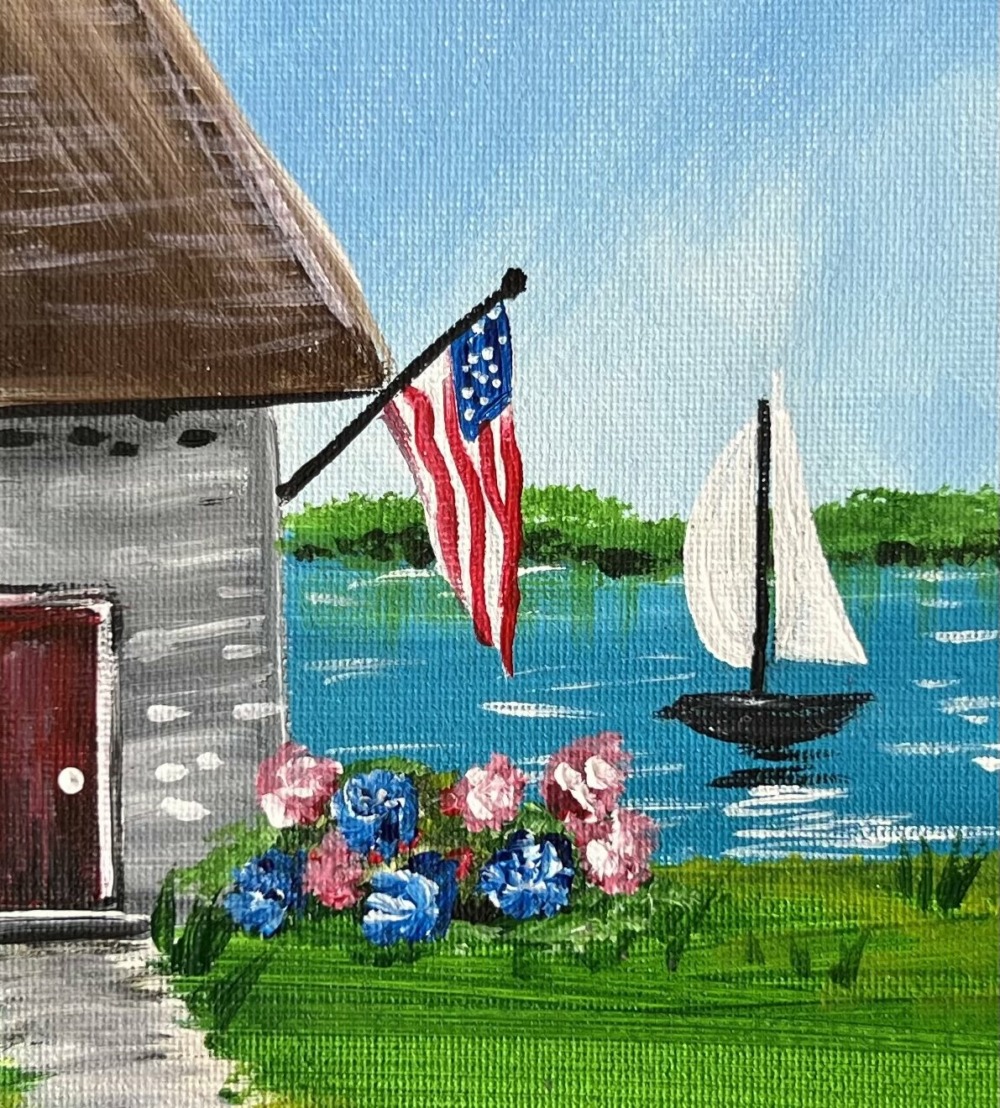
18. Paint Hydrangeas (optional)
These hydrangeas are very simple and add such a nice touch to the painting! To do the hydrangeas, use the #4 round brush. Paint little dots that form a circle. Use both the “naphthol crimson”
Then use titanium white to paint little dots. The white will blend gently with the first color of dots creating different color variations. Paint a variety of these hydrangeas along the left and right of the home.
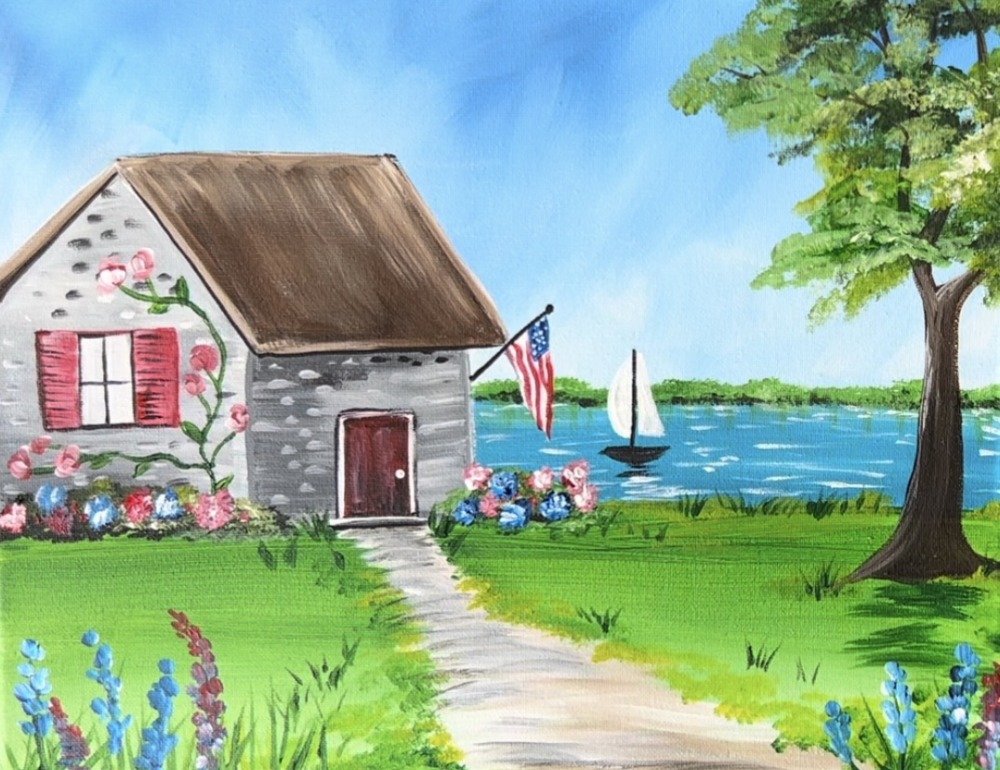
19. Final Details
Some final details you can add to this painting include patches of grass throughout the landscape (using the round brush and darker green). You can also add a little texture to the roof by “dry brushing” horizontal strokes of titanium white mixed with brown (light brown) paint on the right side of the roof.