

Would you like to save this?
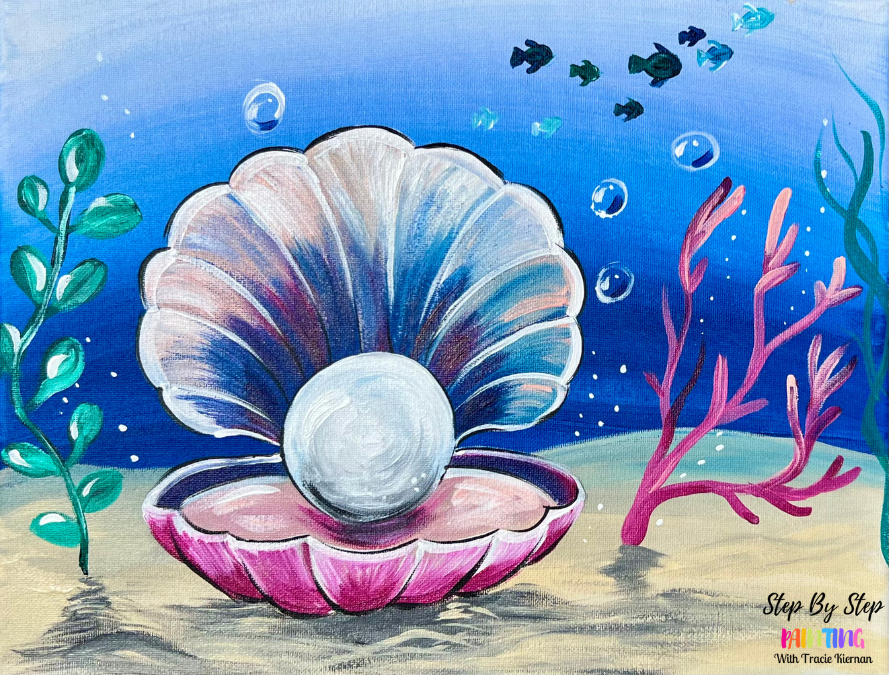
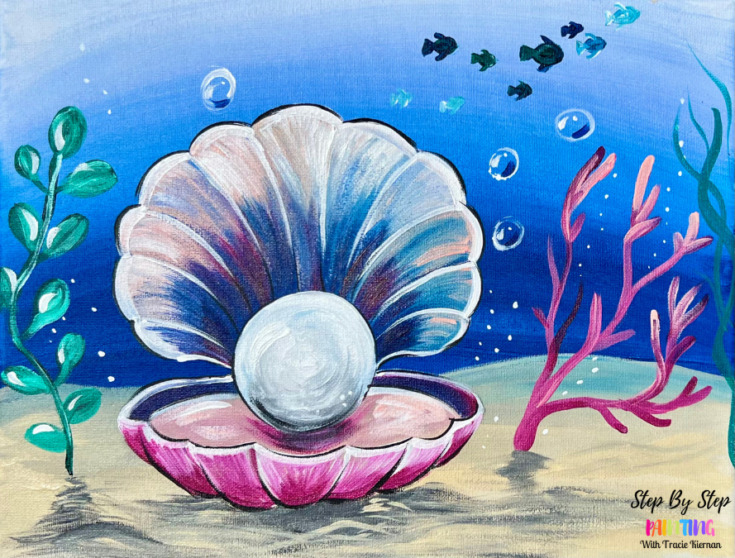
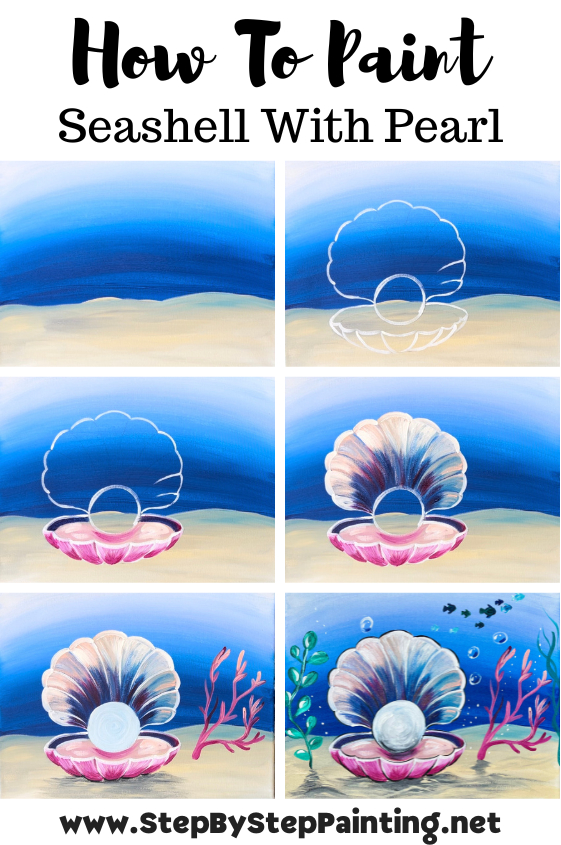
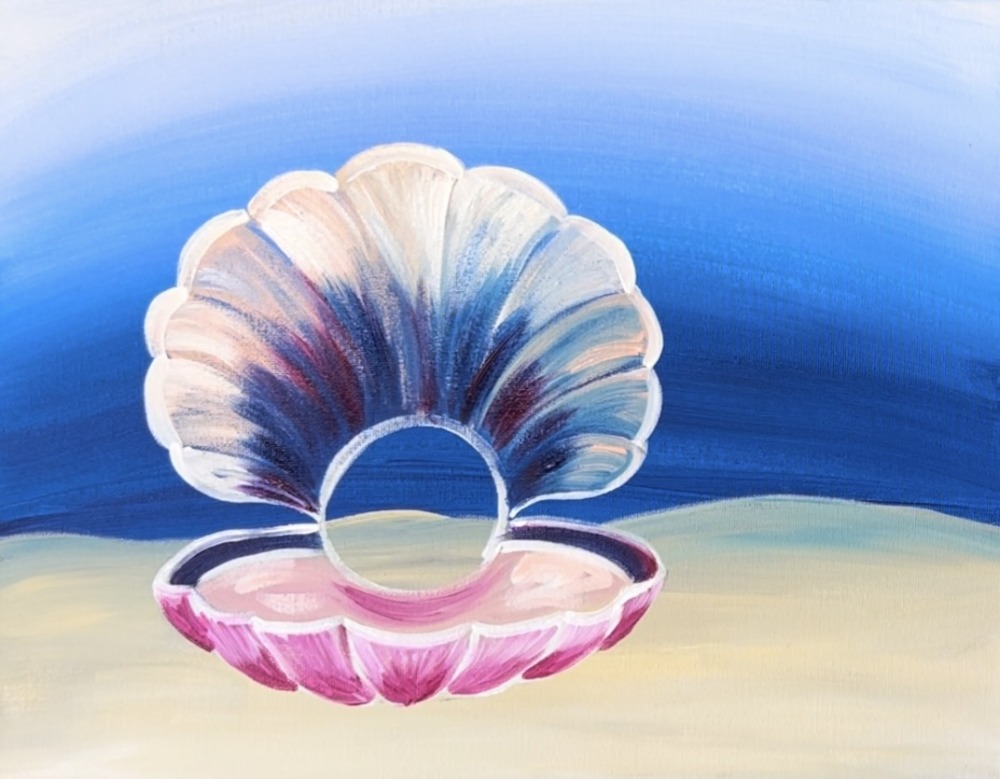
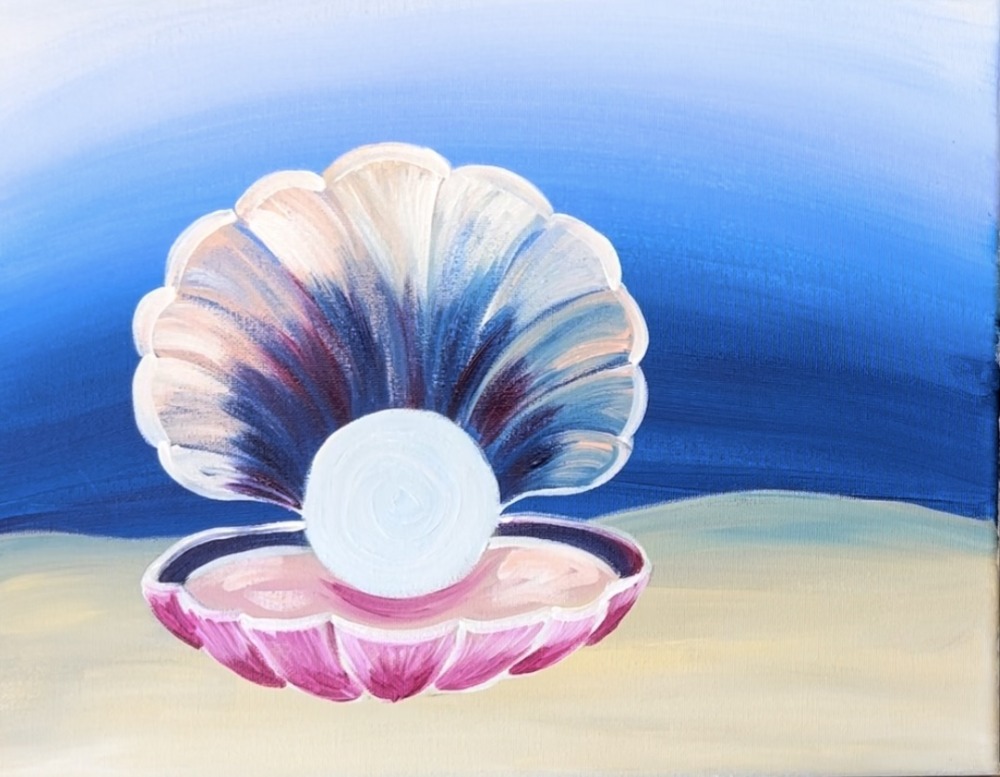
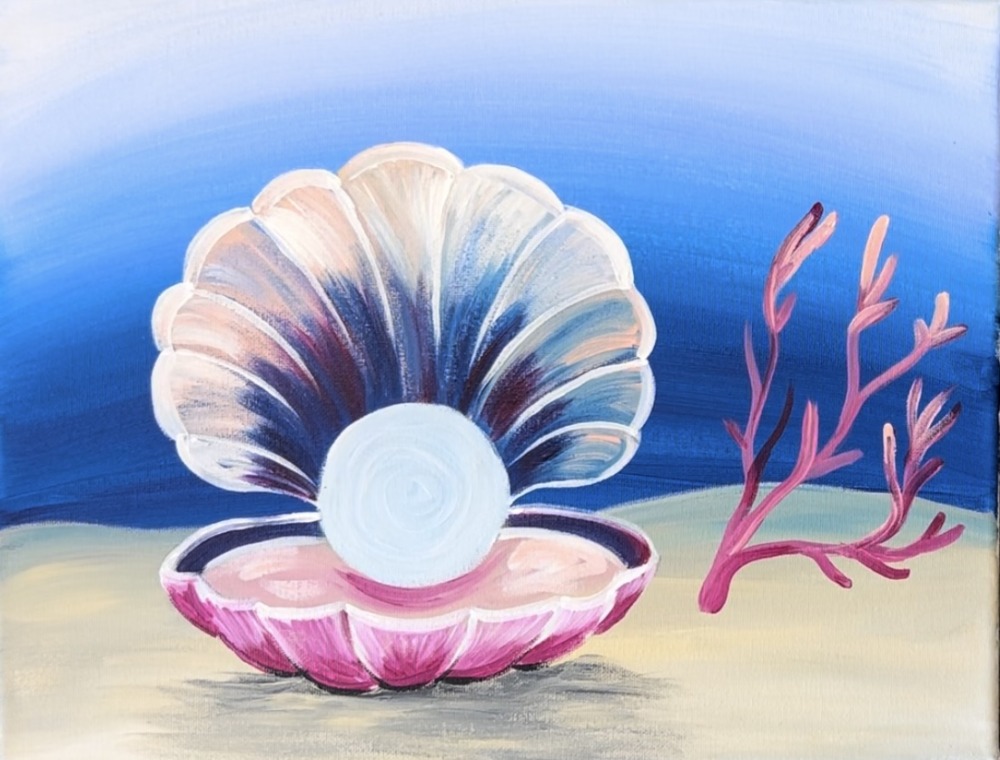
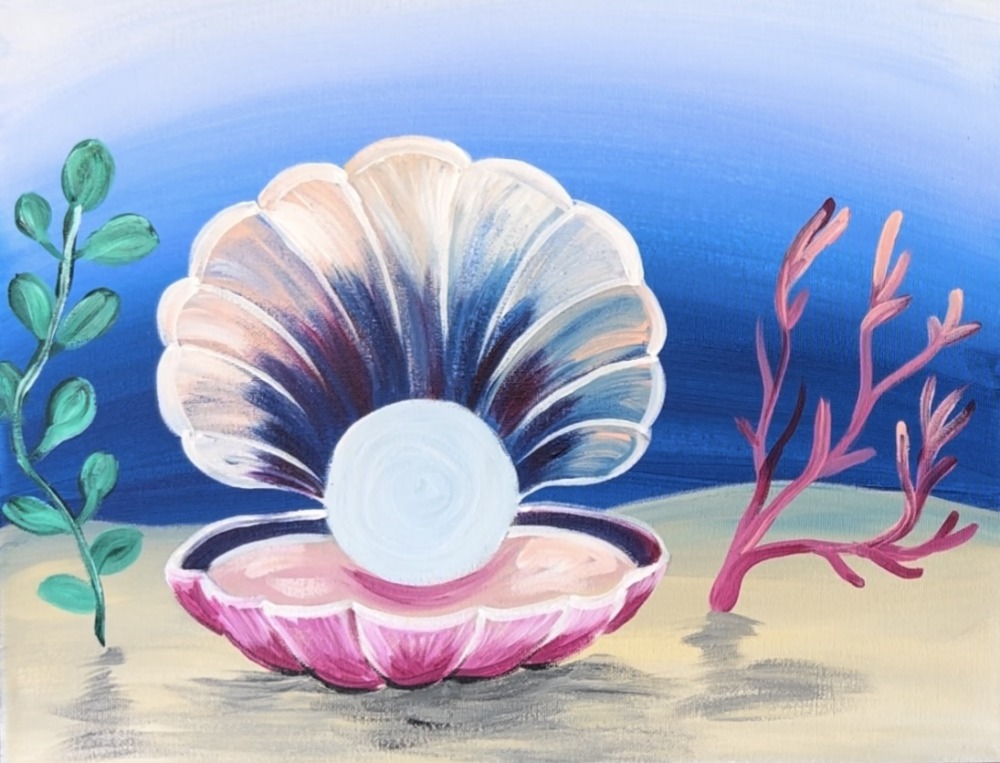
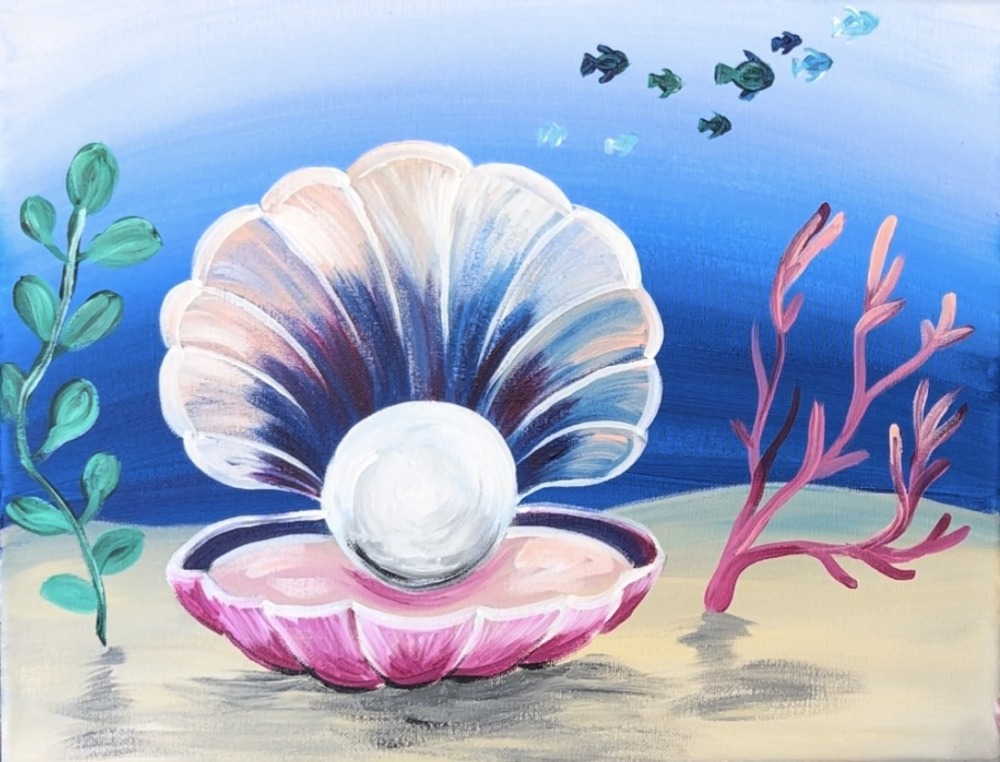
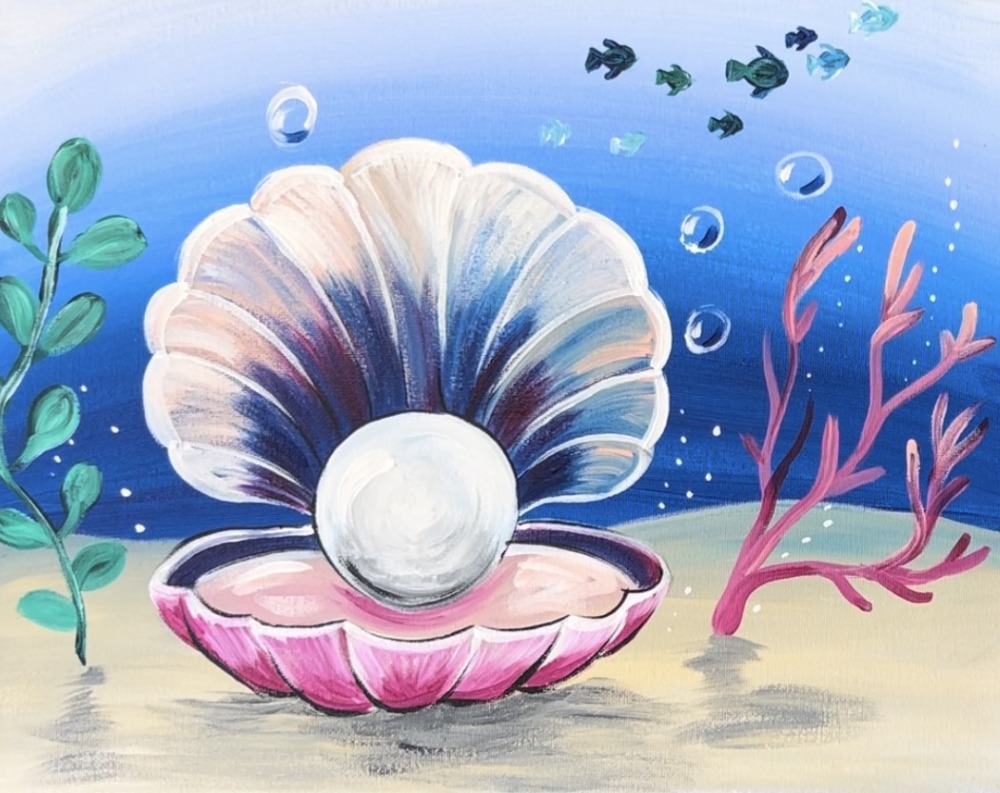
Learn how to paint a seashell clam with pearl in this under the sea themed painting. This tutorial is demonstrated on an 11 x 14 canvas. You are welcome to add more details to it such as different fish and seaweed.
Enjoy and happy painting!
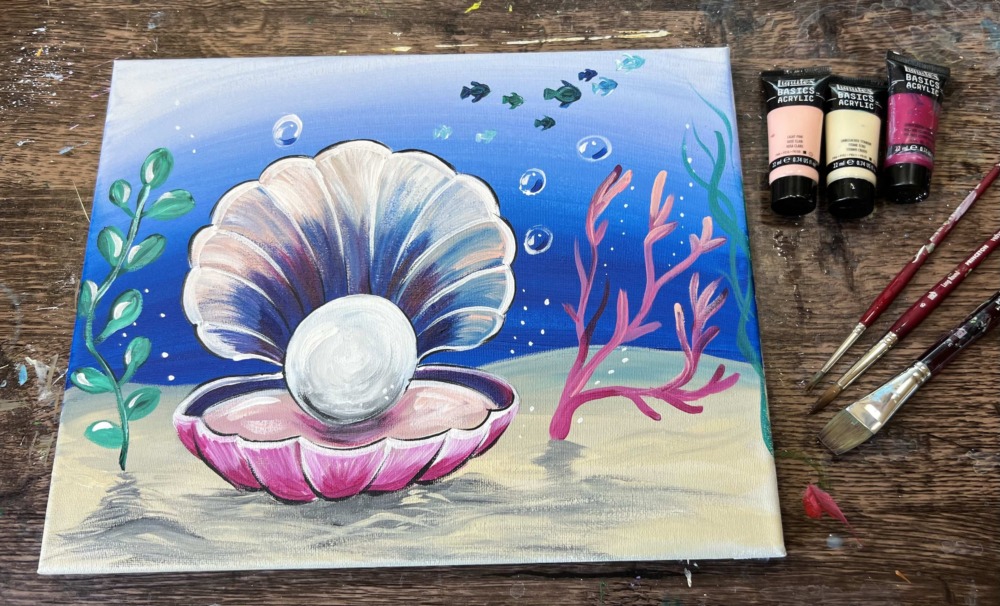
Materials Needed
How To Paint A "Seashell With Pearl" - Acrylic Tutorial
Materials
- 11 x 14 Canvas
- Acrylic Paint
- Brushes
- Traceable Template
- Graphite Paper
- Pencil
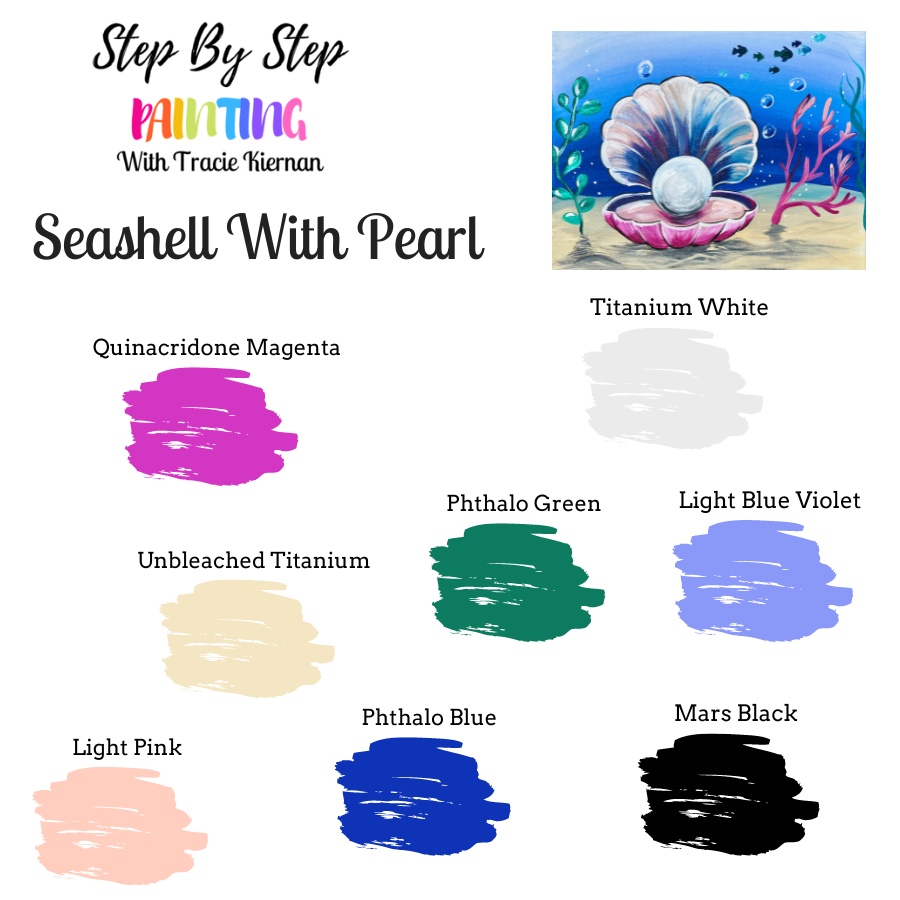
Colors
- Titanium White
- Mars Black
- Phthalo Blue
- Light Pink
- Quinacridone Magenta
- Phthalo Green
- Unbleached Titanium
- Light Blue Violet
Brushes
- 3/4" Flat or 1" Flat
- #4 Round
- #8 Round
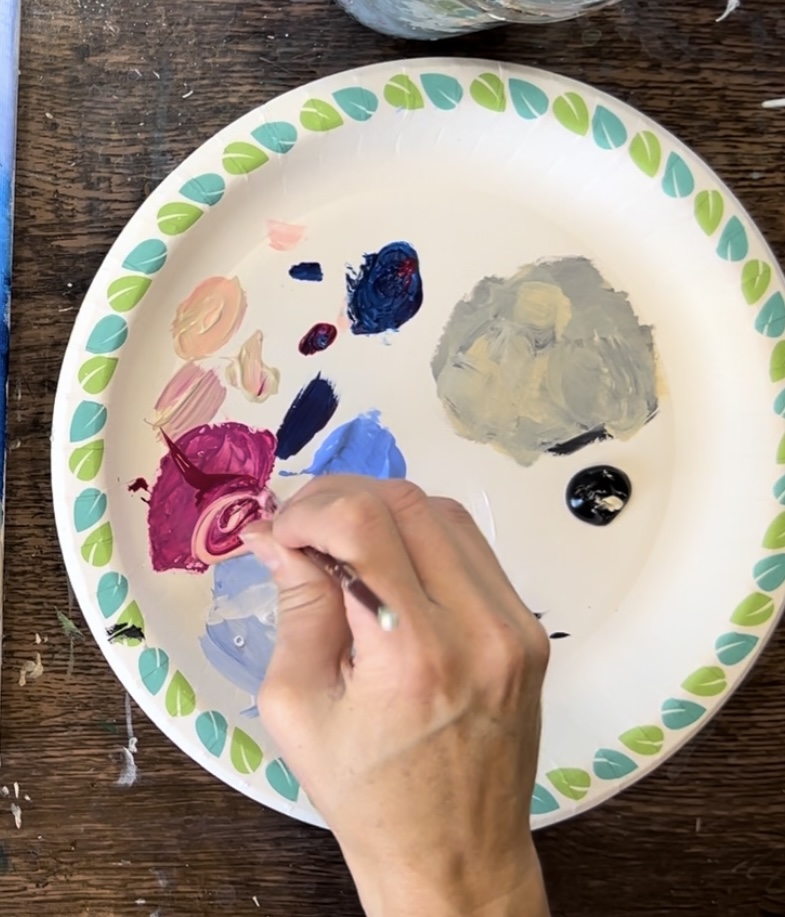
Color Palette
I use Liquitex BASICS for this painting. If you are using a different brand, you can use the color chart below to help you match your colors.
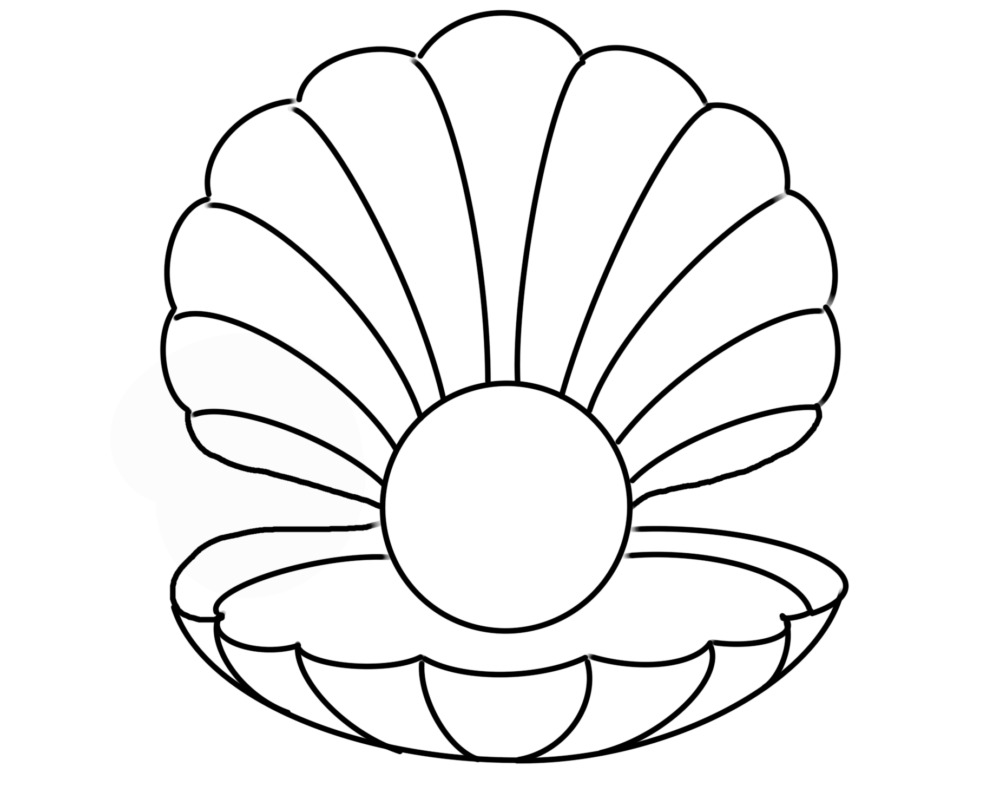
Traceable
Directions At A Glance
Video
Step By Step Directions:
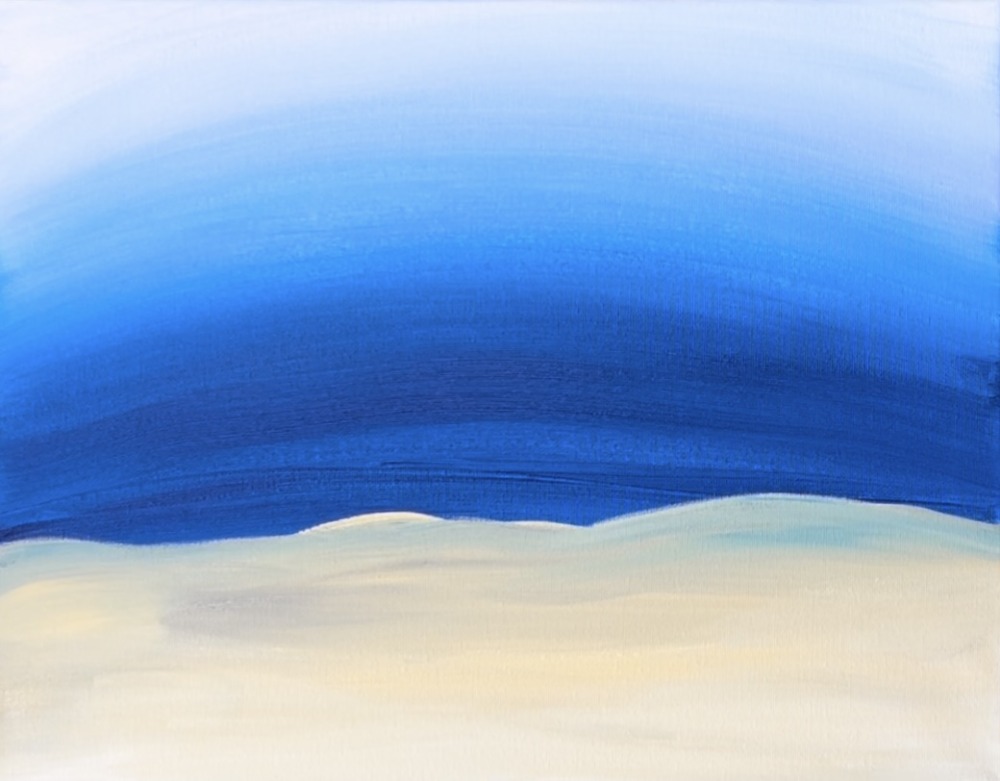
1. Paint The Water Background
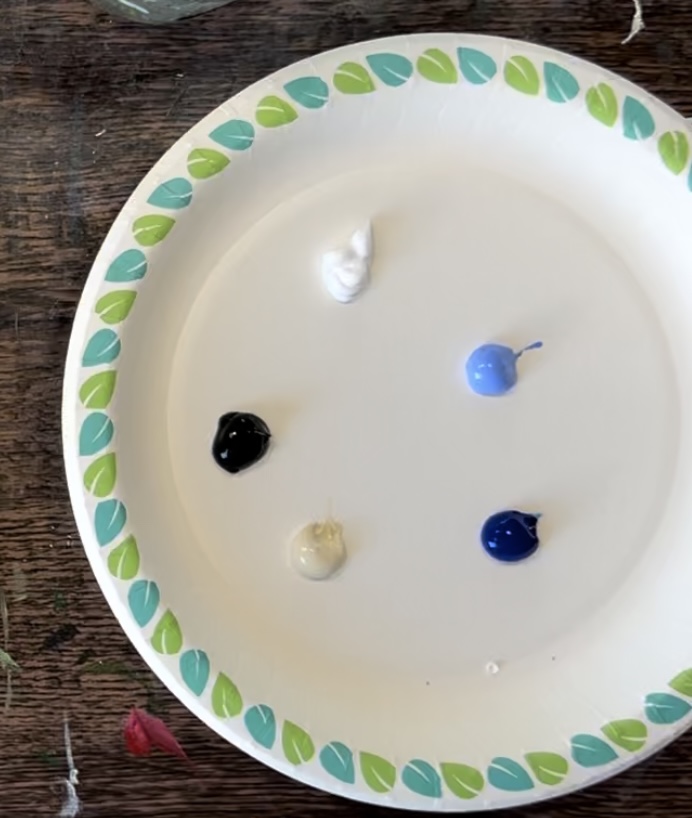
Load your paint palette with the colors: light blue violet, phthalo blue, titanium white, unbleached titanium and mars black.
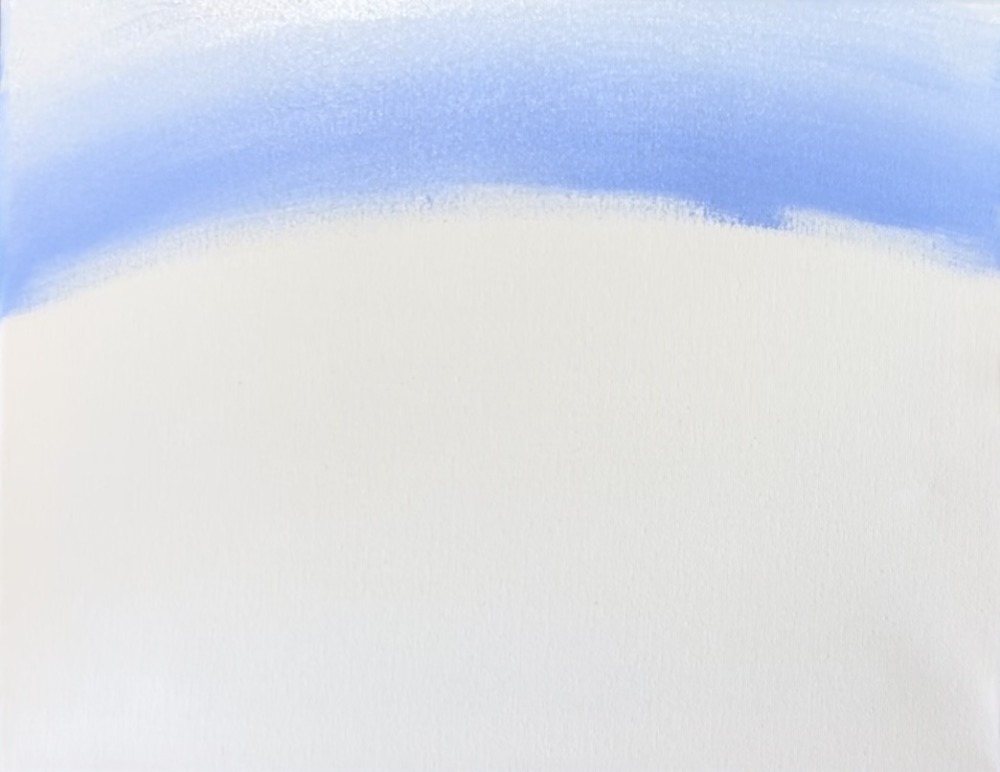
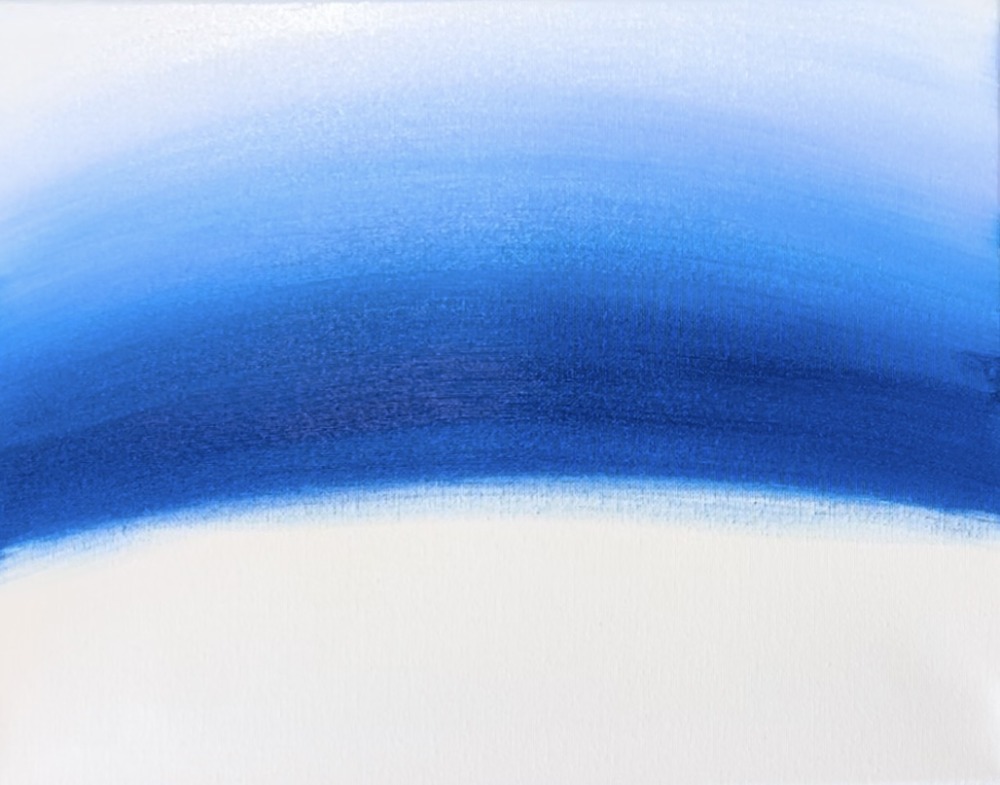
Use your 1″ flat brush (or 3/4″ flat brush). Mix equal parts titanium white and light blue violet to make a light “pastel blue”. Start on the top of the canvas. Use the full width of the brush and paint long arc paint strokes that go all the way across the canvas.
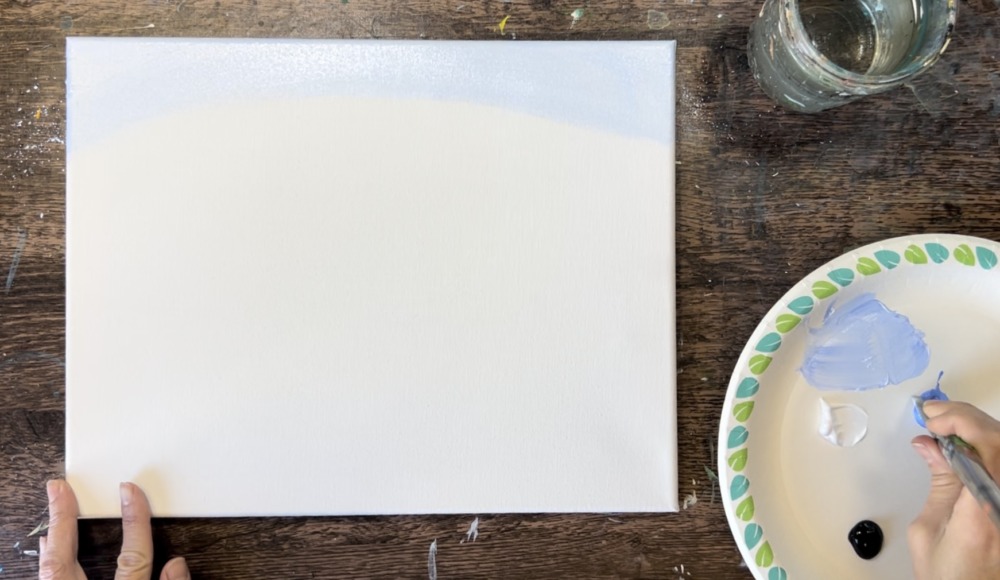
Go a few inches down with this light blue color. Then load just the “light blue violet” on your brush. Blend this with the light blue color so the water gets slightly darker. Continue to paint in an arc direction.
Go down a few more inches and then load a small amount of “phthalo blue” onto your brush without rinsing it. Blend this phthalo blue with the lighter blue. Continue to paint in the same “arc” direction as you are creating this gradient.
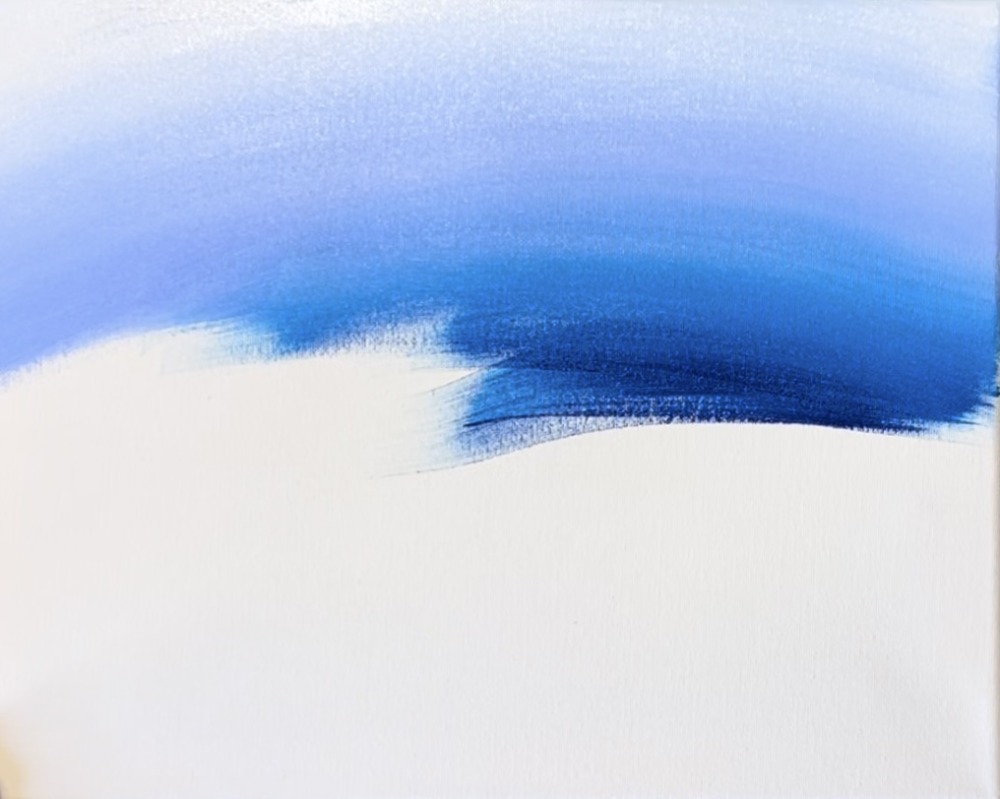
Leave a gap on the bottom about 3.5″ of space. This is where we will start to add the sand.
2. Paint The Sand
Rinse and dry your brush. Then load it into “unbleached titanium”. Start on the bottom of the canvas and paint left and right paint strokes. Go up almost all the way.
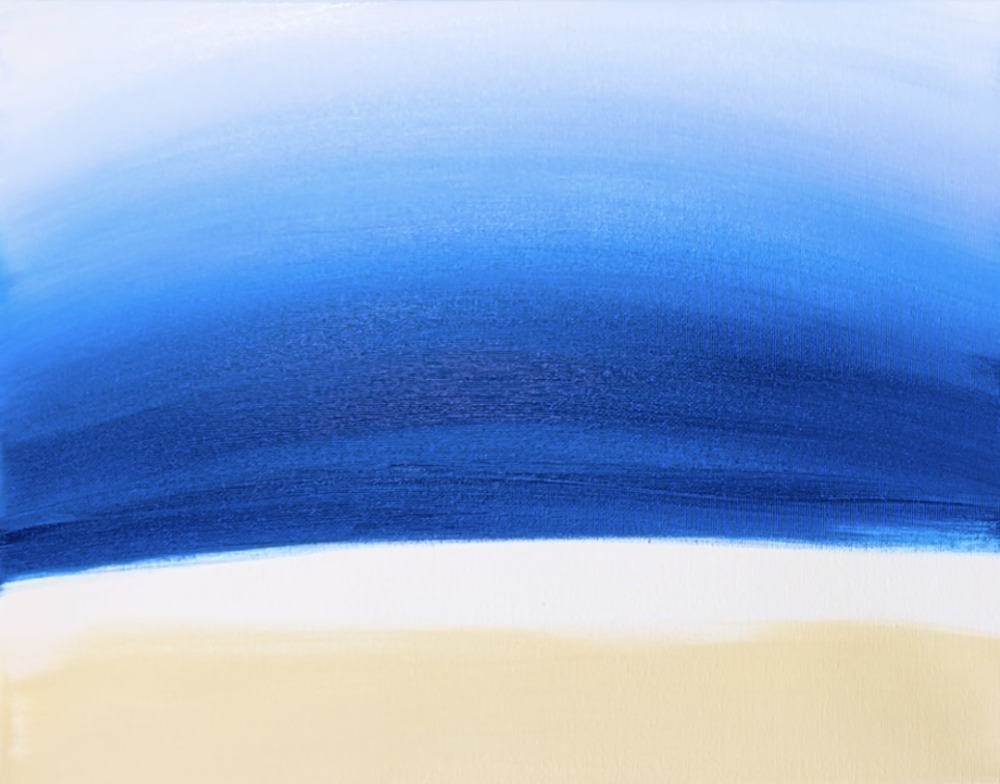
Then mix a very small amount of “mars black” into your “unbleached titanium”. This will make a “gray/ dark beige” color. Blend this darker sand color on the top of the sand area. It is okay if some of the blue blends with some of the sand color.

Make the top edge of the sand a little wavy.
Wait for this to dry before going onto the next step.
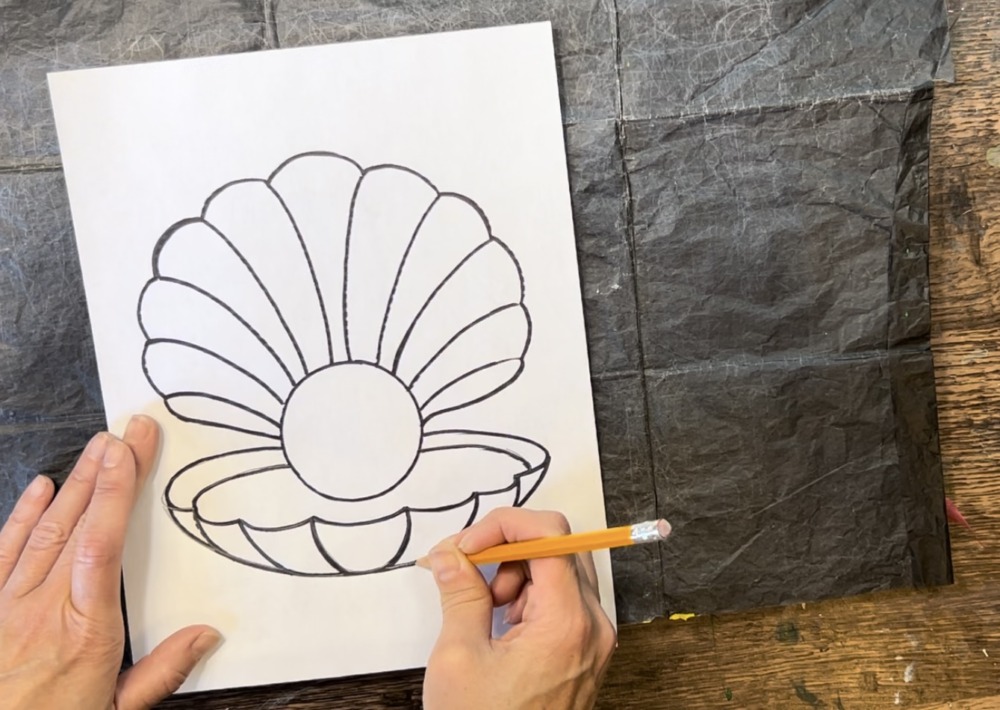
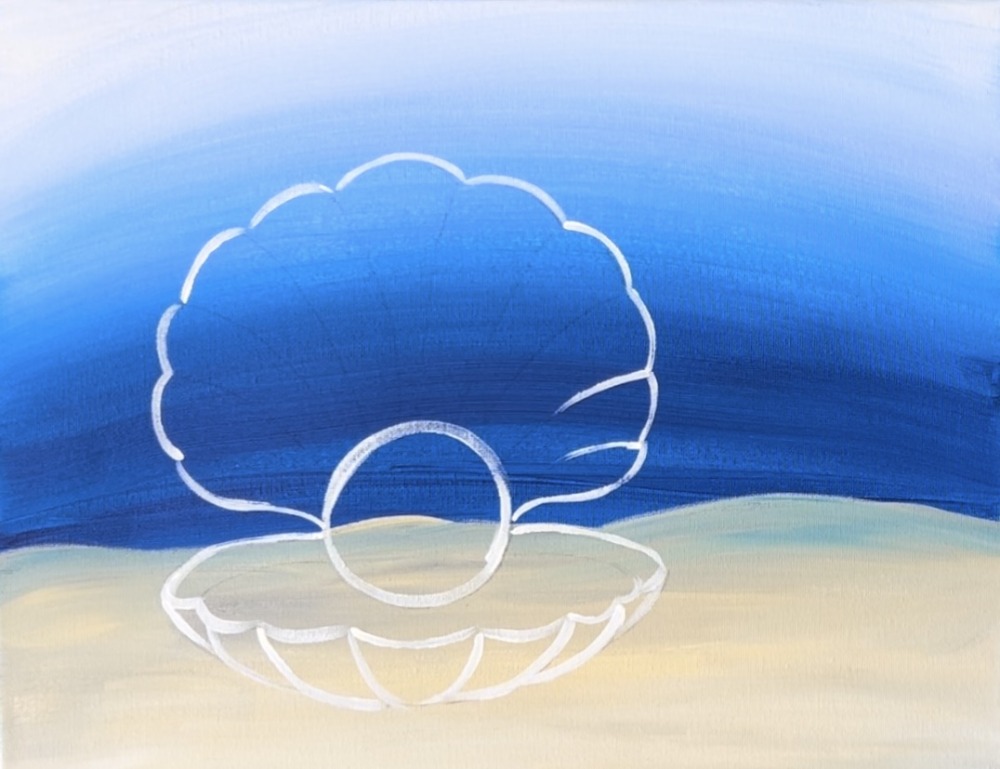
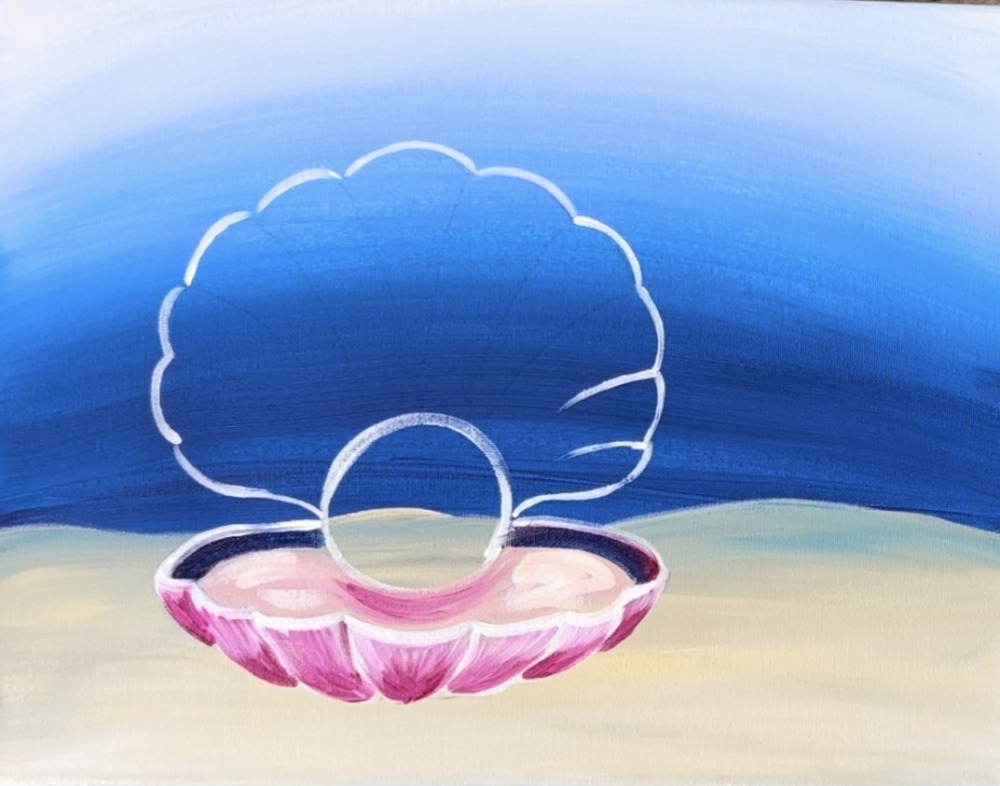
3. Transfer Shell Design To Canvas (or hand draw)
Position the shell in the lower left area of the canvas. There is about an inch of space below the bottom edge of the shell and about 2.25″ from the left of the canvas. These measurements, however, do not have to be exact.
Use a sheet of graphite paper and place it under the print out of the shell. Use a pencil to trace the lines. This will transfer to the canvas.
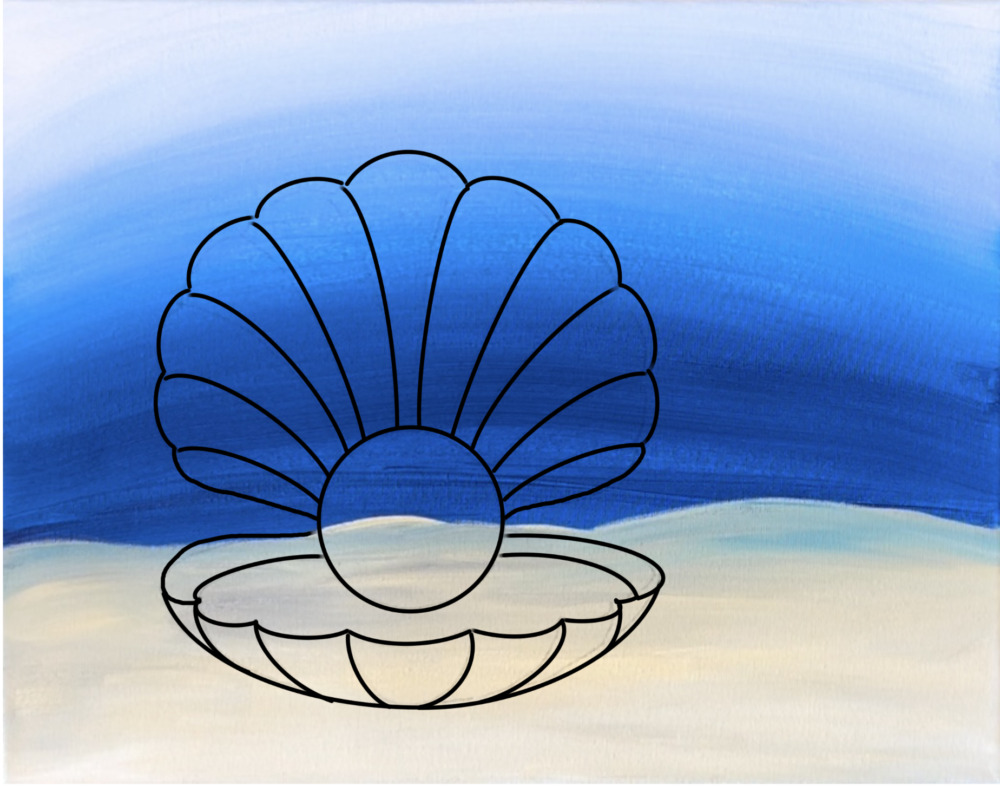
4. Outline Shell
Use a #4 round brush and titanium white to outline the lines of the shell (what you just traced with the traceable).
It is optional to outline the lines on the inside of the shell.
5. Paint Shell Bottom Exterior & Interior Under Pearl
Add “quinacridone magenta” to your paint palette. Double load your #4 round brush in both the magenta and the white. Start on the right bottom of the shell and paint the inner triangular area.
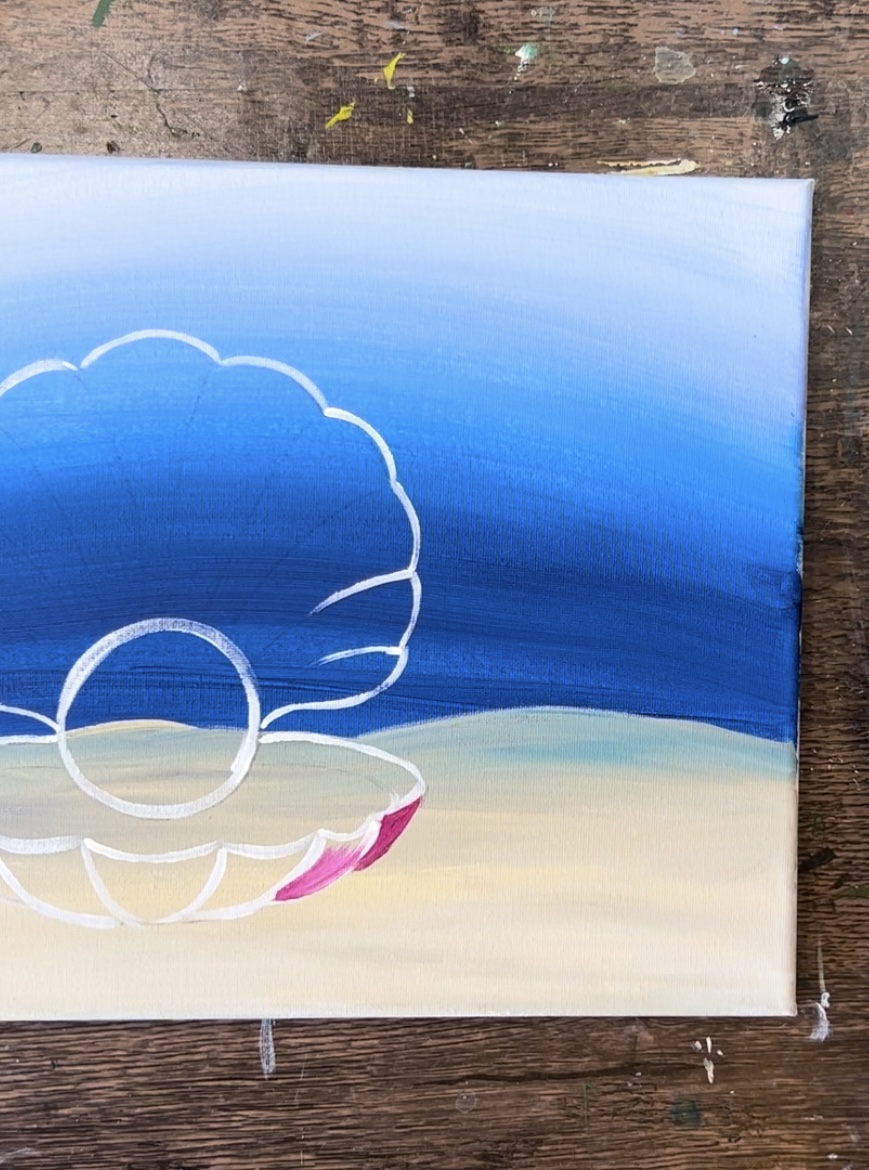
On the top of these triangular areas, blend titanium white so that it is lighter on the top. Allow the magenta to be darker on the bottom. Do this to each of the curved areas on the bottom outside of the shell.
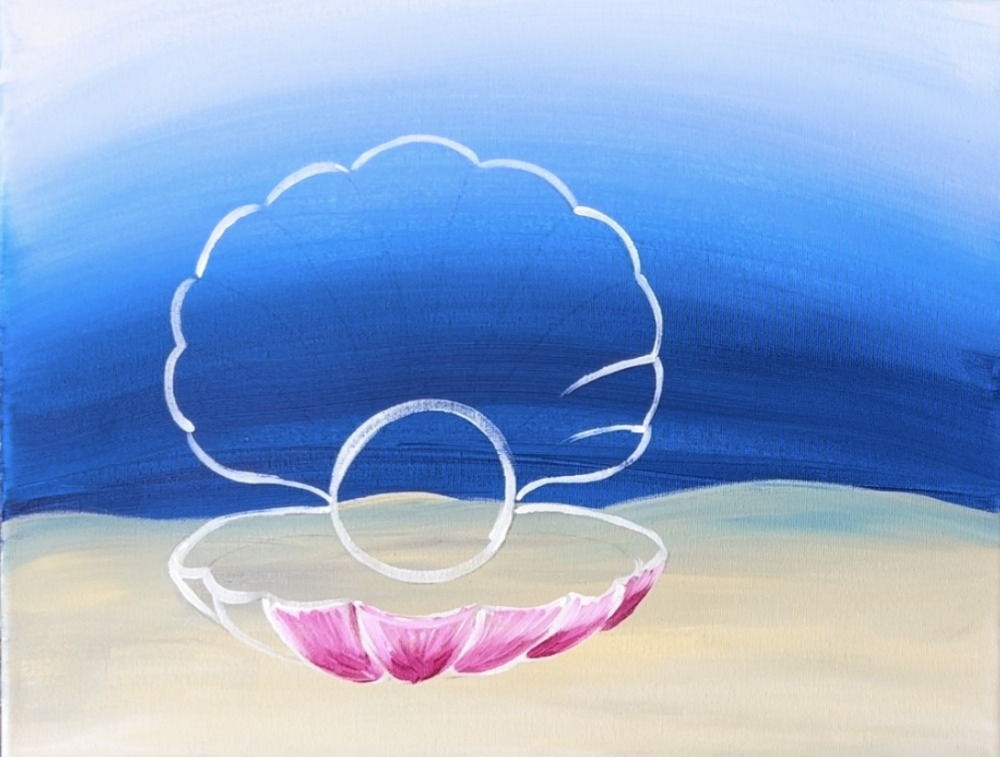
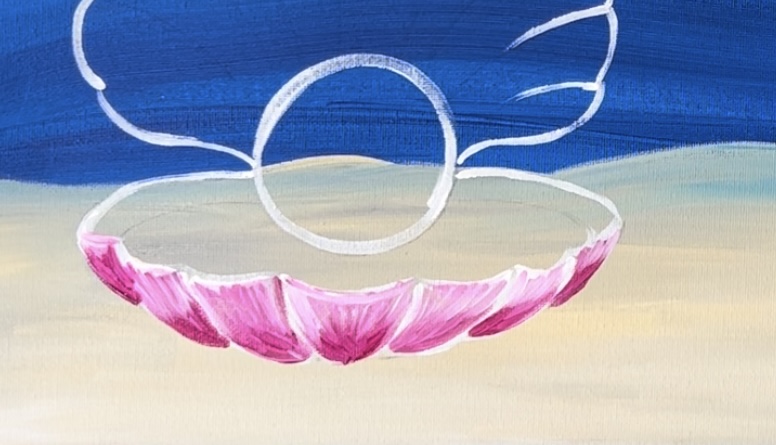
Rinse the brush. Double load the brush in “quinacridone magenta” and “unbleached titanium”. Paint the inside of the shell under the pearl. This should be a light coral color on the inside. Try to make it lighter than the outside shell area so it stands out. If needed, mix a little white into it to lighten it up. Then, under the pearl, paint a little extra “quinacridone magenta” so this area shows up a little darker.

Paint the interior wall of the clam/ shell a dark blue/purple color. Use the #4 round brush to mix equal amounts “phthalo blue” and “quinacridone” magenta.
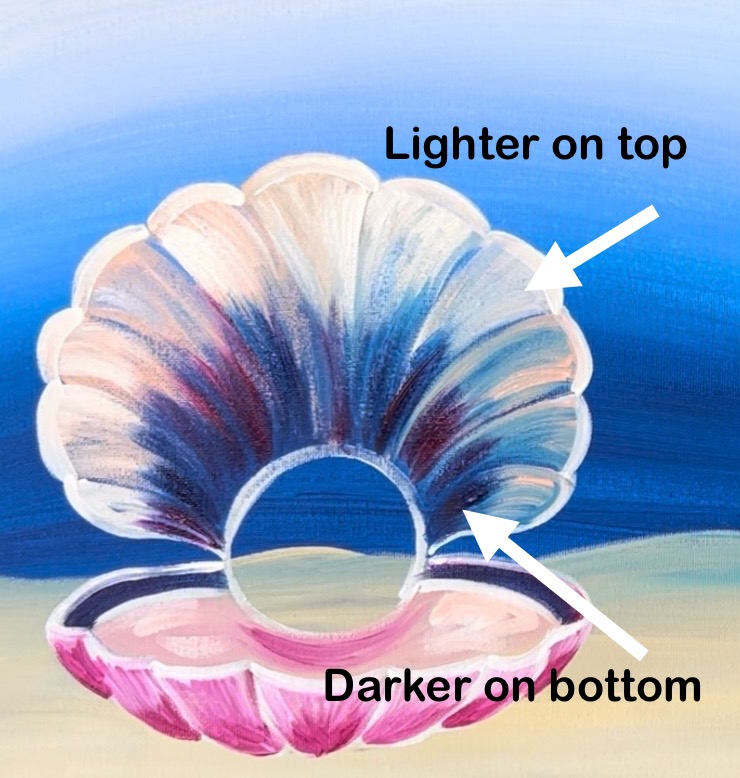
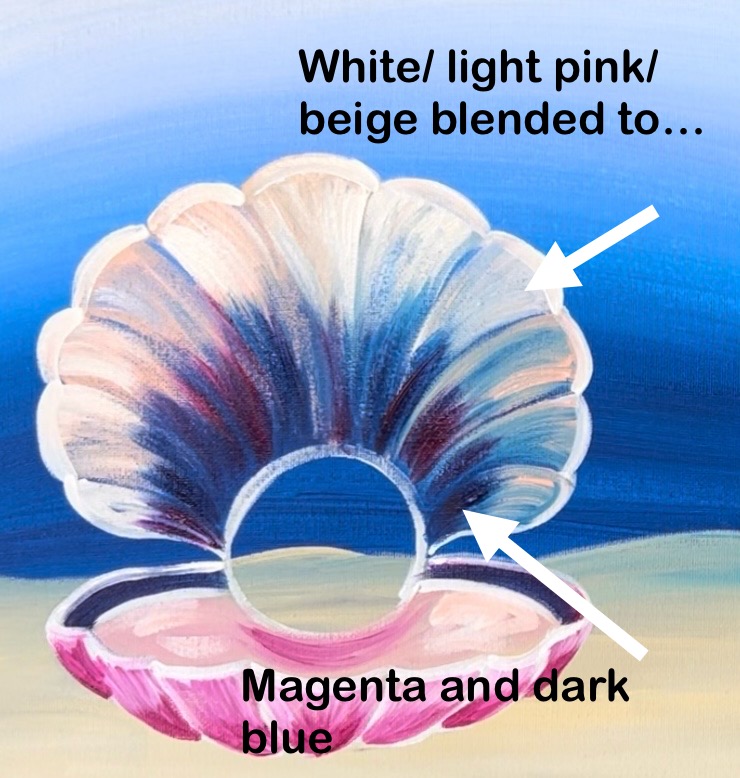
6. Paint Shell Top Interior
Paint each section of the interior of the shell one at a time. The top edge of this is lighter and the bottom edge (the part behind the pearl) is darker.
Use the #4 round brush and load “light pink” and “titanium white” onto the brush. Paint curved paint strokes and drag your brush down to the bottom edge. Then load “phthalo blue” and “quinacridone magenta” on your brush and blend this darker color on the bottom.
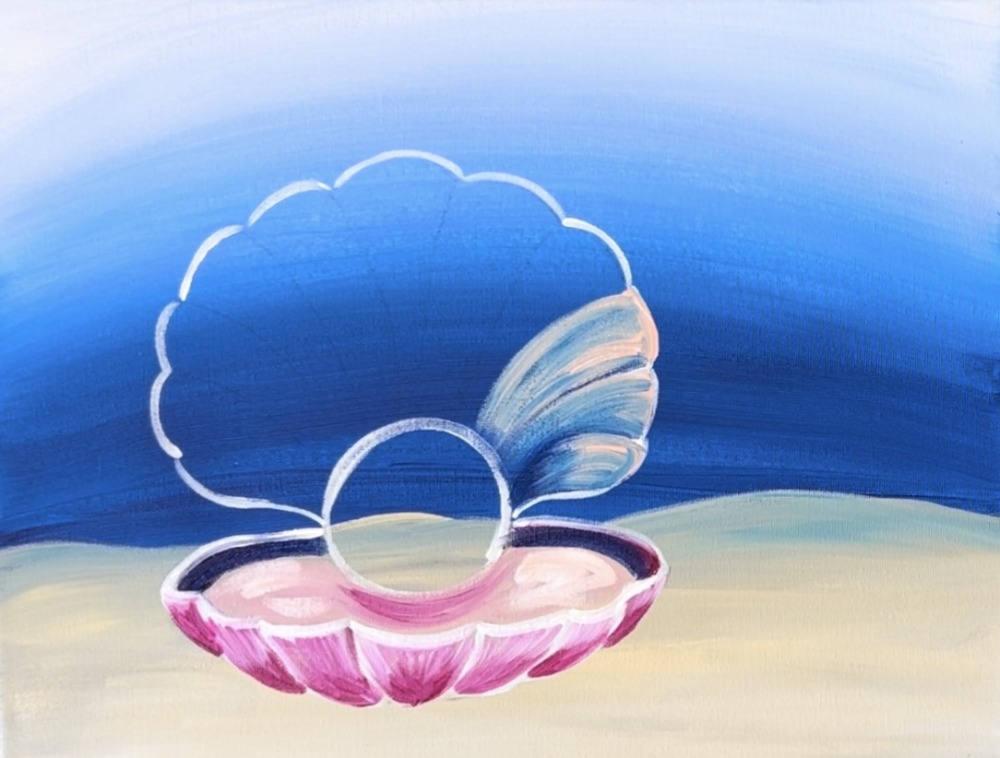
Do this for each section of the shell. Create some “color variation” by adding some “unbleached titanium” on the top edges of the shell. Load different amounts of this beige, pink and white and blend them together. Then create color variation on the bottom by blending different amounts of the dark blue and dark magenta on the bottom. Drag your darker colors into the lighter colors but try not to over blend the colors.
Repeat this for each section of the shell. Leave a little “slither” of dark blue from the background showing through for the lines of this shell so those lines don’t disappear. We will outline those lines later.
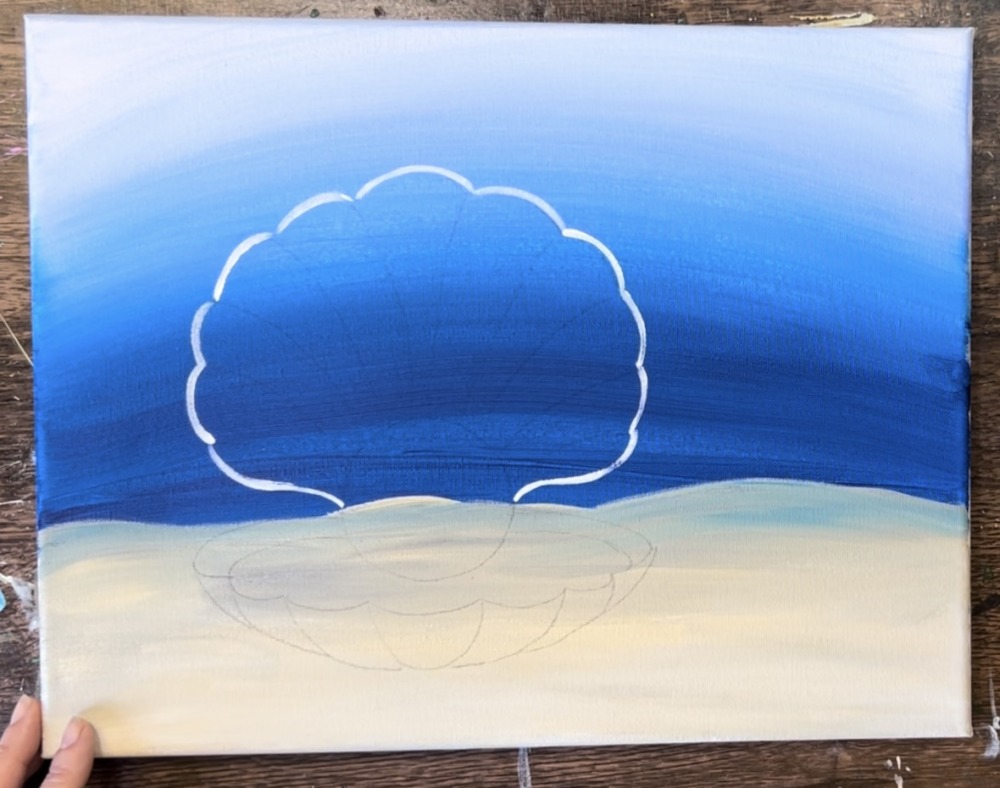
After painting each section of the shell, use the #4 round brush and “titanium white” to outline the top curves of the shell.
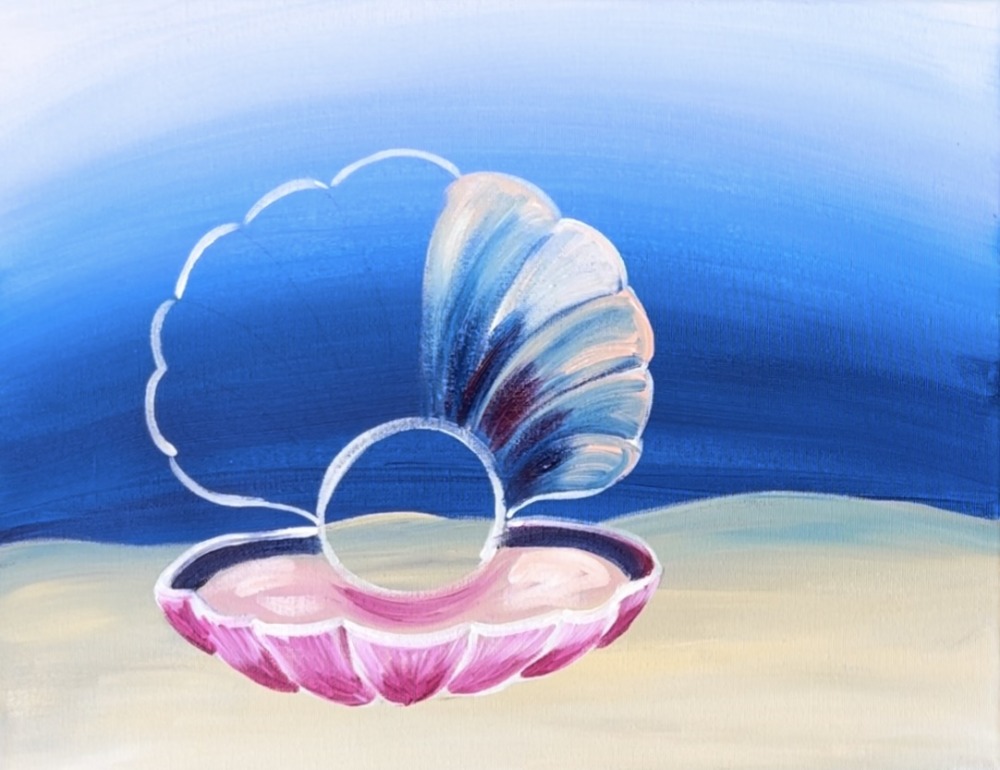
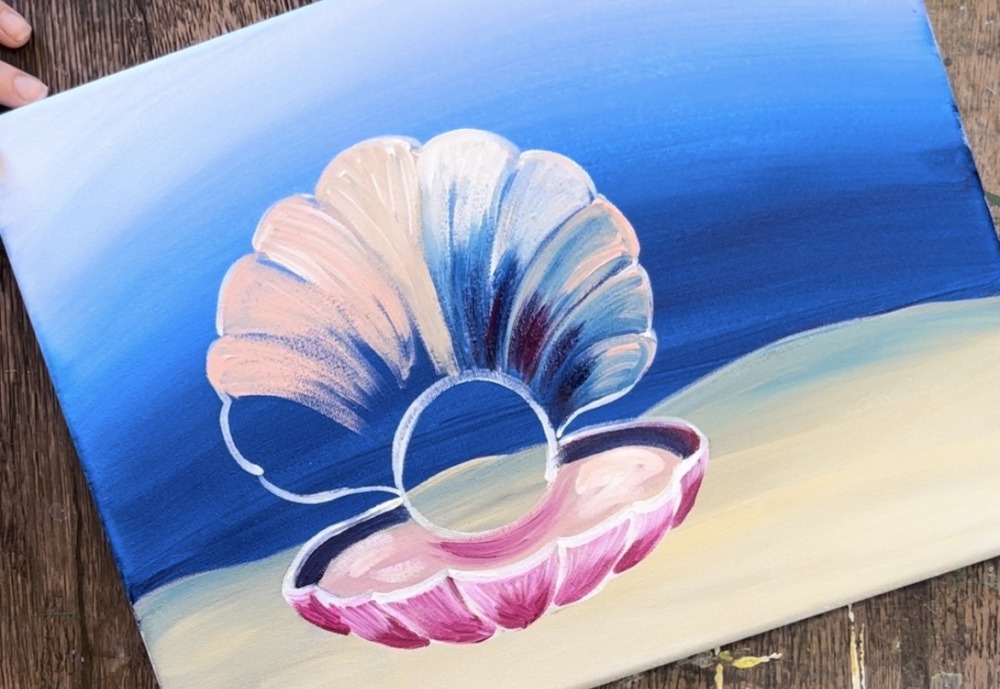
7. Paint Pearl (First Coat)
Use the #4 round brush and “titanium white” to paint the circle a solid coat of white. Let this dry before adding shading to the circle.
8. Outline Lines On Shell Top
Use titanium white and the #4 round brush to paint the lines on the interior of the shell. Note that the lines don’t go all the way down/ they do not touch the pearl. Let the lines fade away.
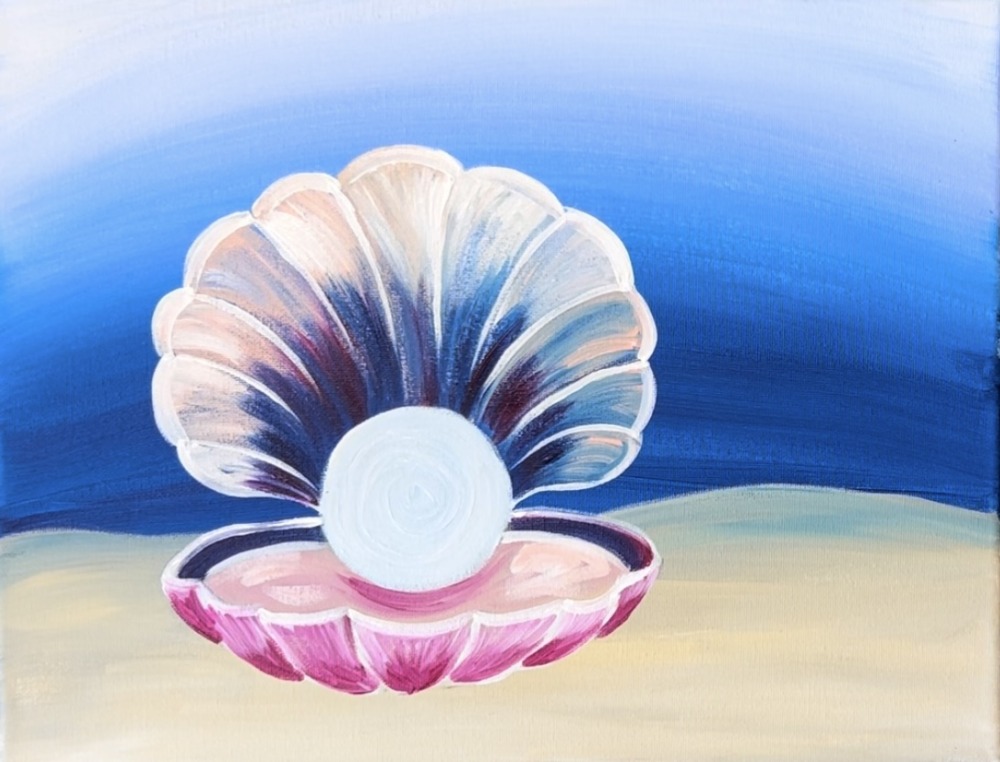
9. Paint Shadow Under Shell
Mix a dark beige on your palette by mixing a little bit of “mars black” into a lot of “unbleached titanium” (the beige color). This will make a slightly gray/beige color. Use any of the round brushes (I used the #8 round) to paint a shadowy area underneath the shell.
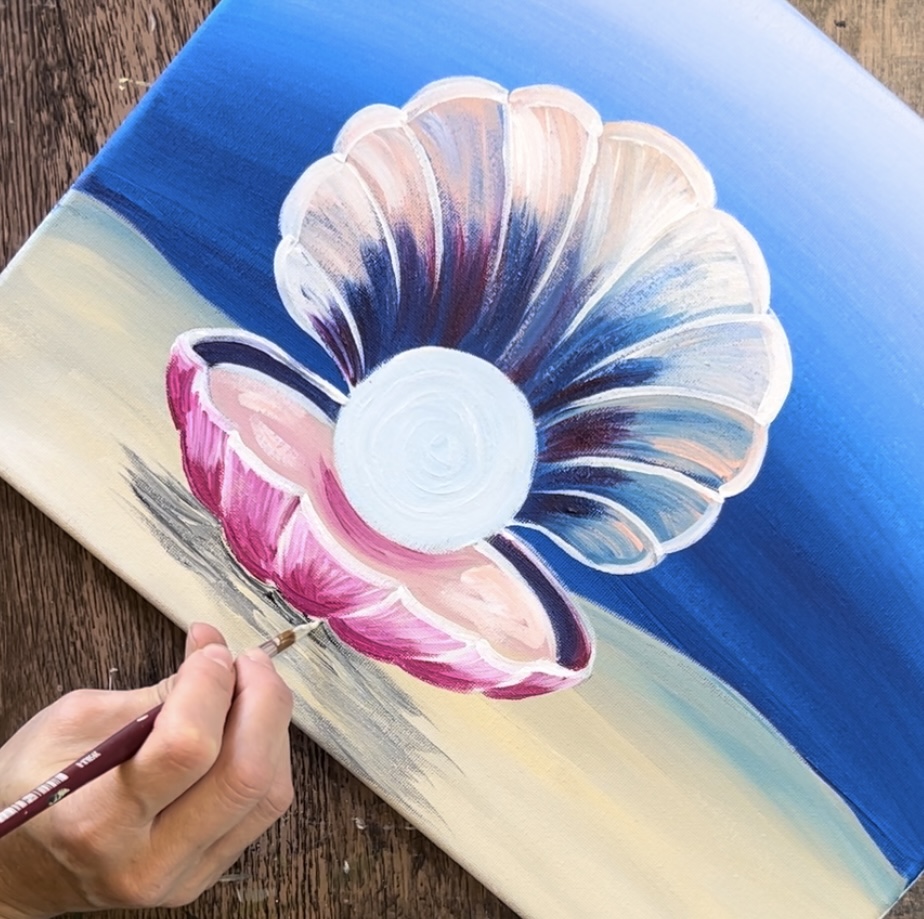
Paint loose, left and right brush strokes to create the shadowy area. Add a bit more black to the top of the shadow just under the shell. Then use the #8 round (the tip of the brush) to outline the very bottom edge of the shell.

10. Paint Coral
Mix “quinacridone magenta” with “light pink” on your paint palette. Slightly loosen this paint with a little bit of water.
Use this color to paint the coral on the right side of the shell. Start with a single “trunk” that branches off several ways. Painting coral is similar to painting a tree with branches but the ends of these “branches” are flat/rounded instead of pointed.
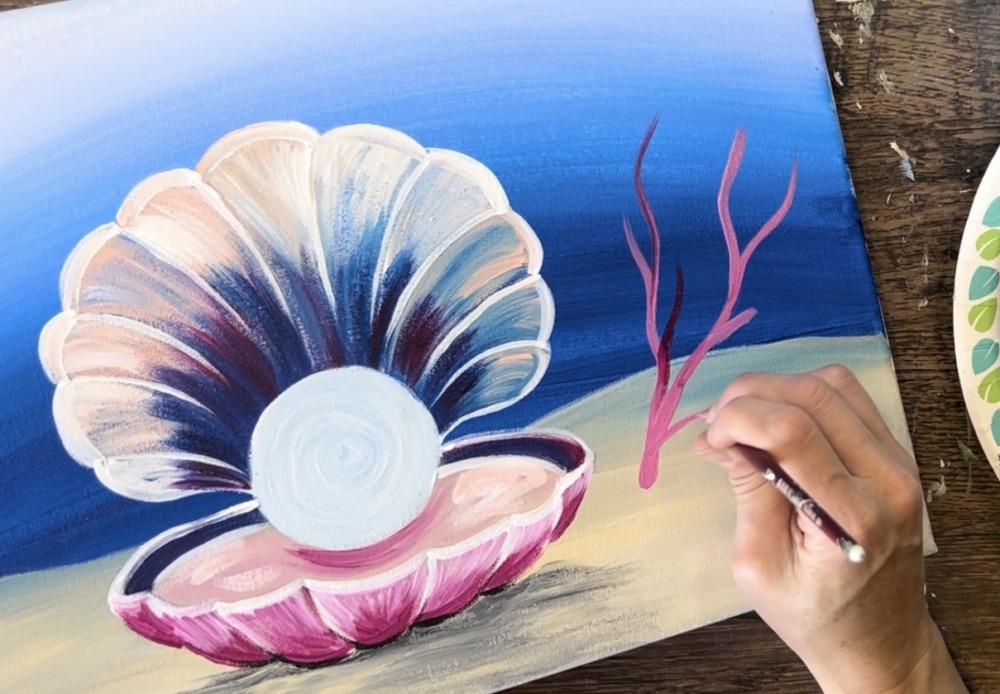
Paint several branches that seem to flow mostly to the right in the painting. Add some “color variation” by loading your paint brush into different amounts of the “quinacridone magenta” and the “light pink”.
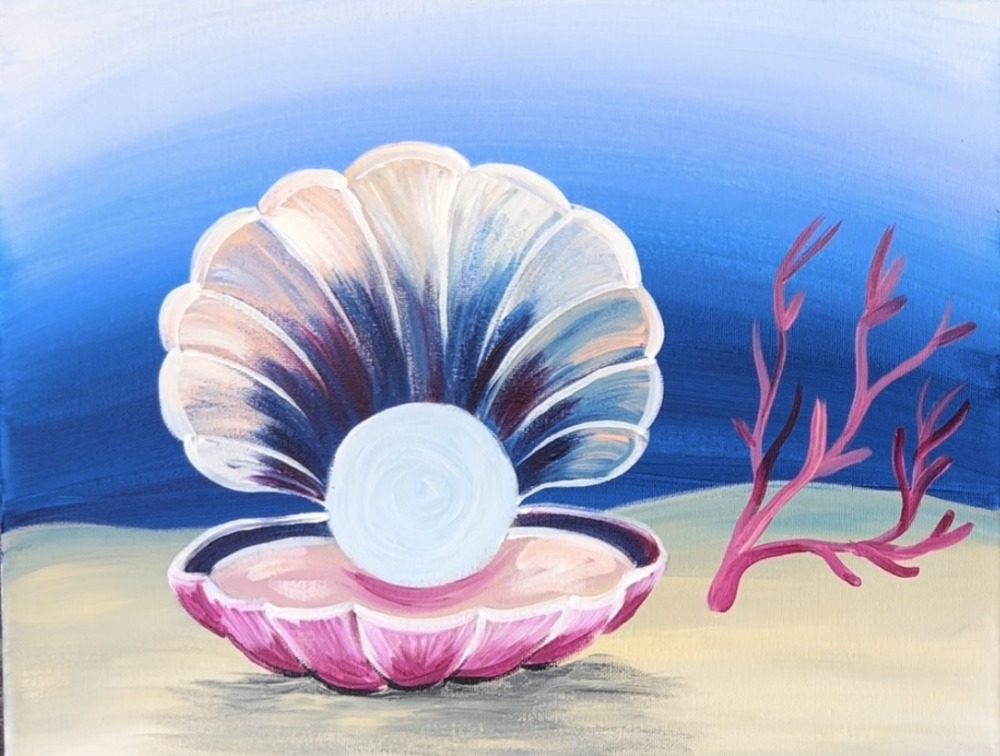
Then use just the “light pink” to paint some of the tips with this lighter color.
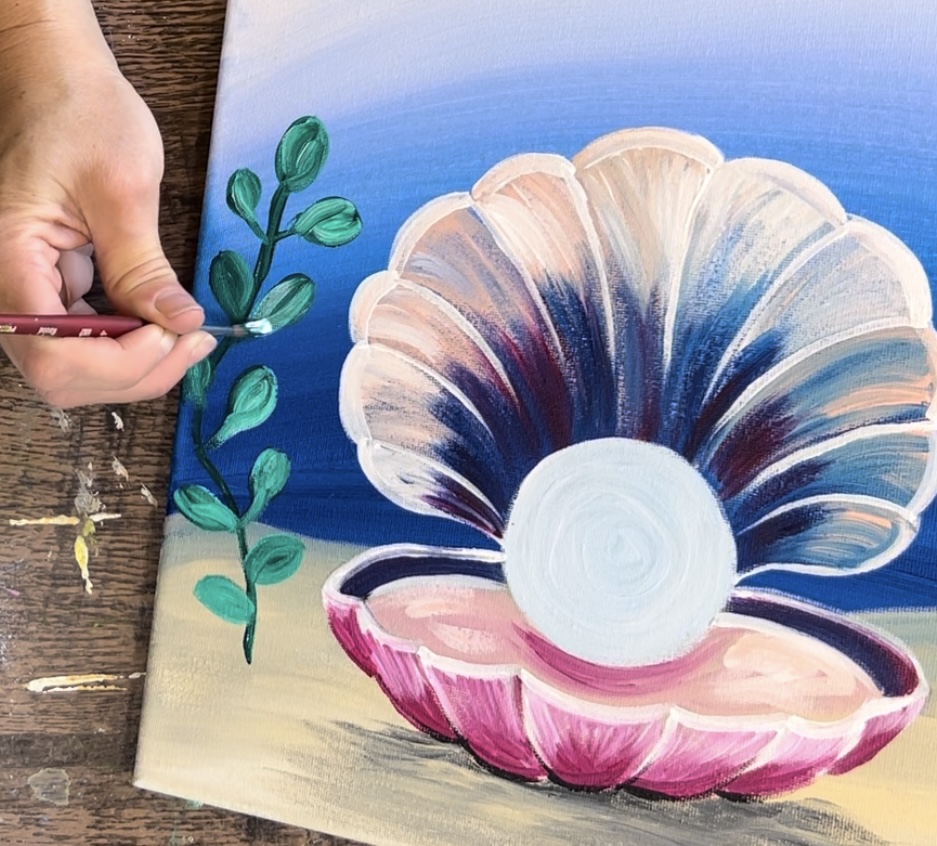
11. Paint Seaweed
Use the #8 round brush to paint a center stem using the color “phthalo green”. Then use the #4 round brush to paint oval shaped leaves attached to the stem.
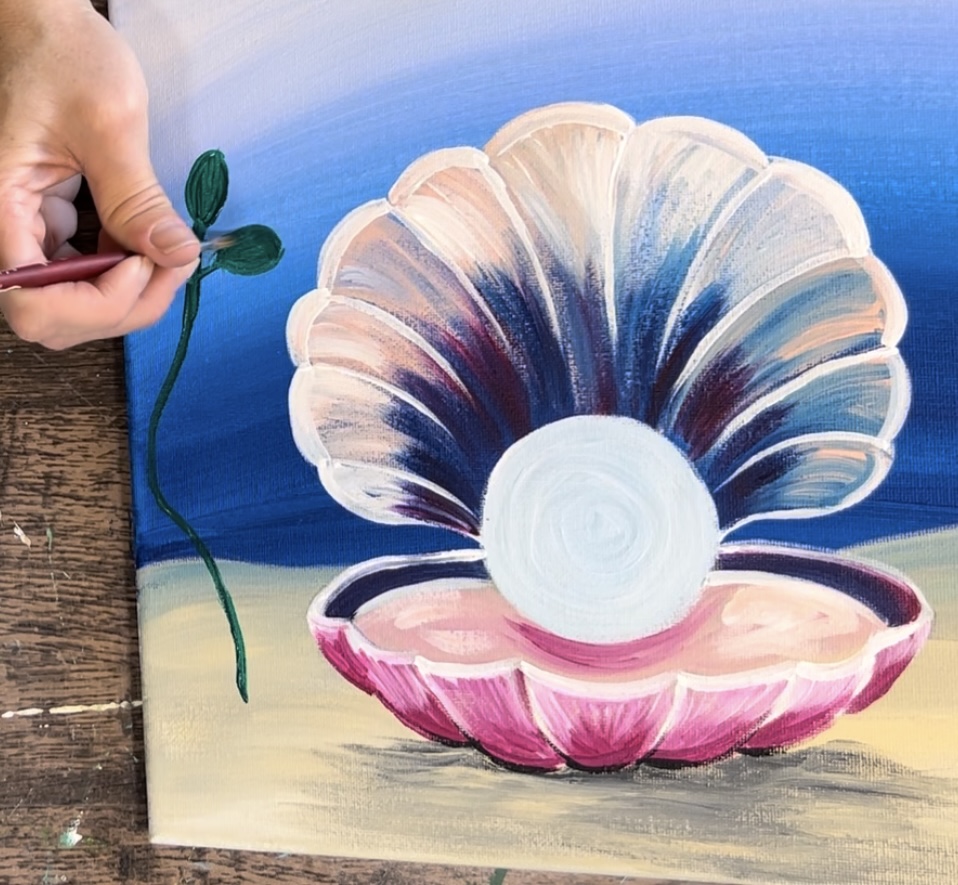
Add a layer of “titanium white” over your green to allow it to lighten/ create color variation on the green.
Use the same color and brush you used for the shadow under the clam to create shadow under the seaweed and coral.
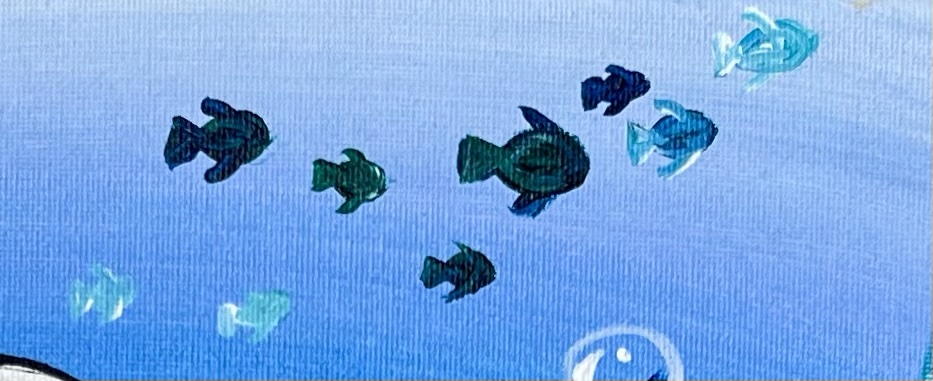
12. Paint Fish
Use a #4 round and “phthalo blue” mixed with “phthalo green” to paint little fish in a school. To paint the fish, first paint a small oval. Then paint a triangle on the left for the fin. Then paint two pointed fins on the top and bottom of the fish.

Paint a variety of sizes with these fish.
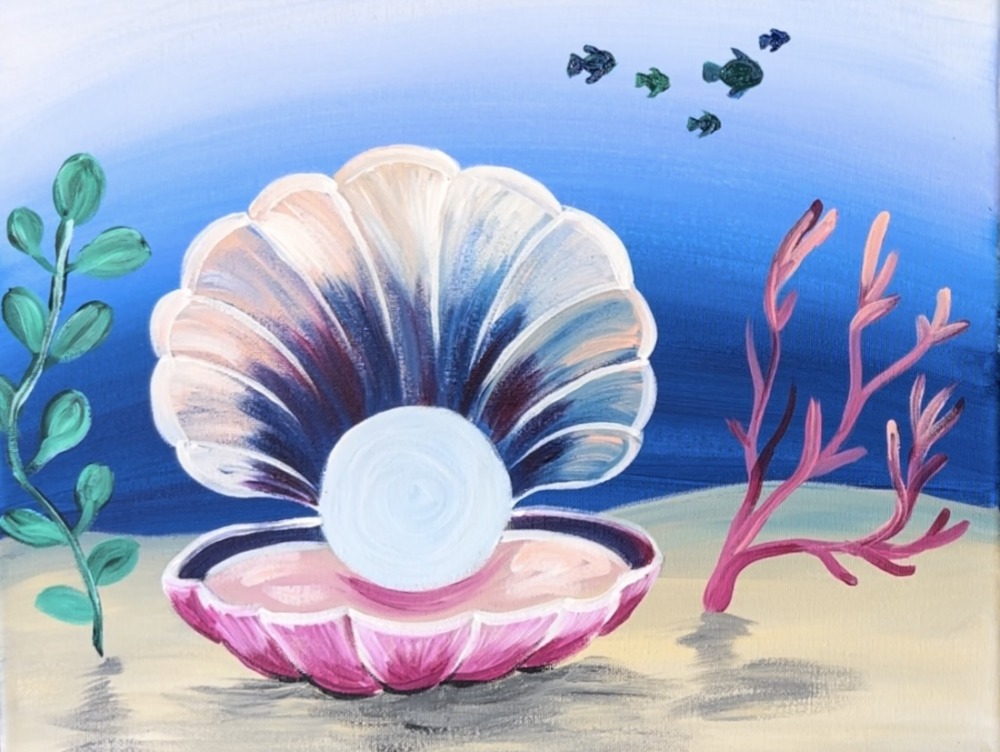
Mix some titanium white into some of the fish to make lighter colored fish.
13. Paint Pearl
Use the #4 round brush to paint a gray shadow area on the bottom edge of the pearl.

Blend that gray with white by adding more white in the center of the circle. I used my finger to help blend this!
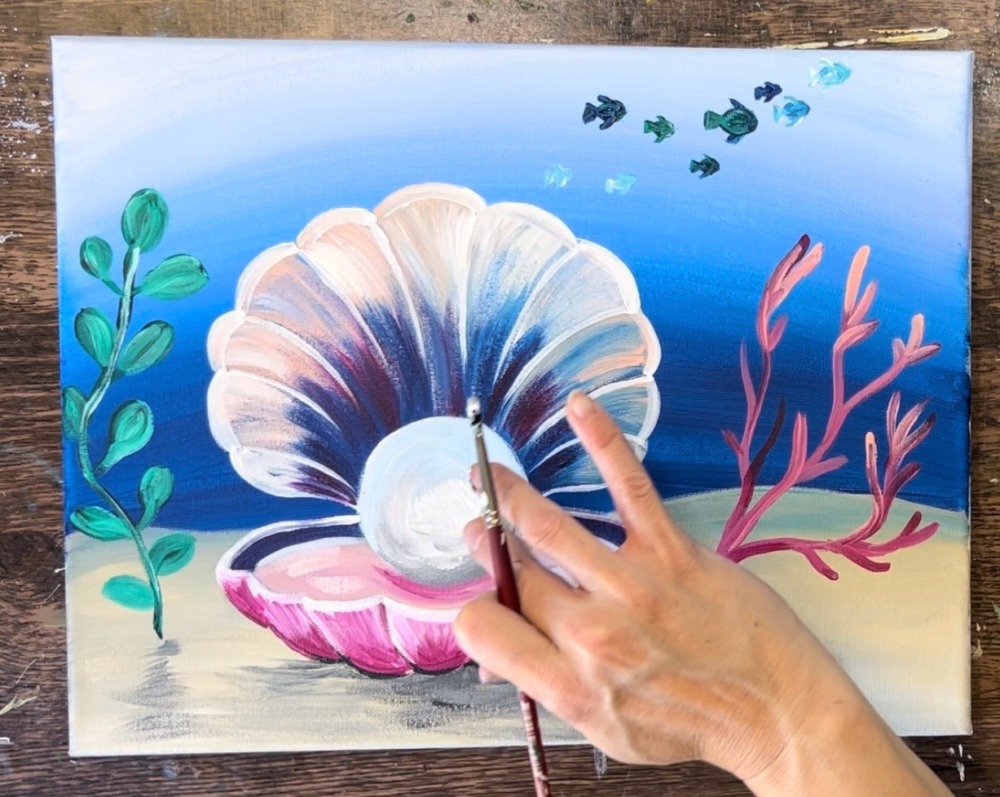
Make sure to add extra white in the center of the pearl to make it extra light. Try not to over blend the gray.
14. Paint Bubbles
Use a round brush (4 round or 8 round) to paint little white circles and little streams of dots throughout the under water area.
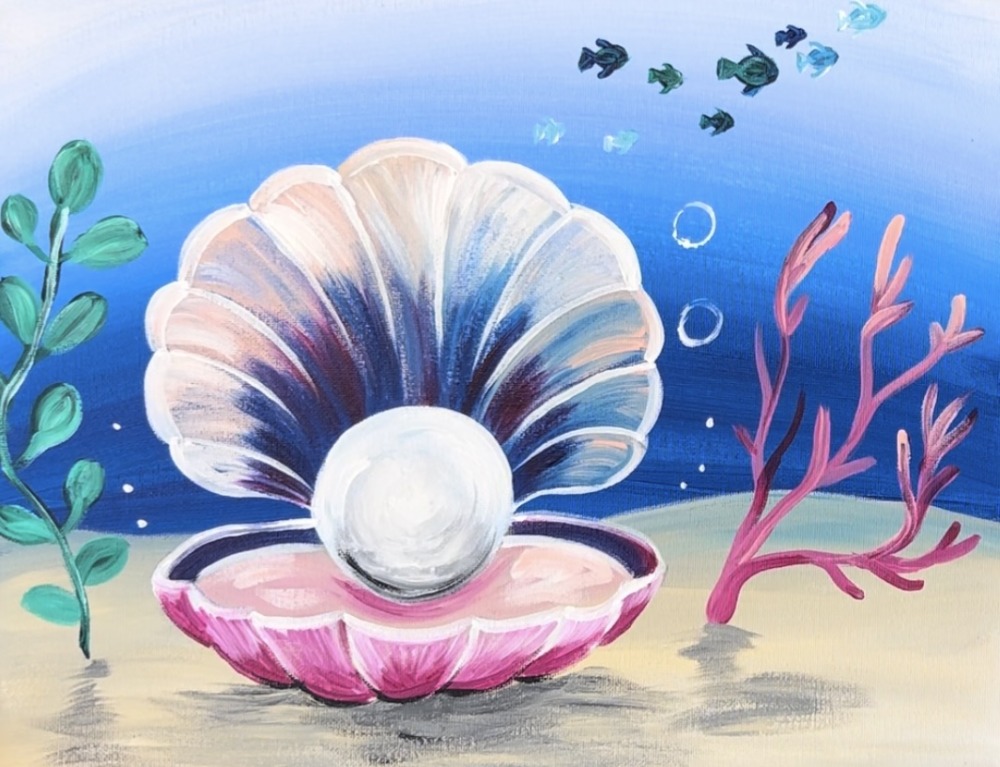
Next, paint a little white curved line on the upper left of each circle for the highlight. Then paint a little “phthalo blue” curved line on the bottom right of each circle for the shadow.
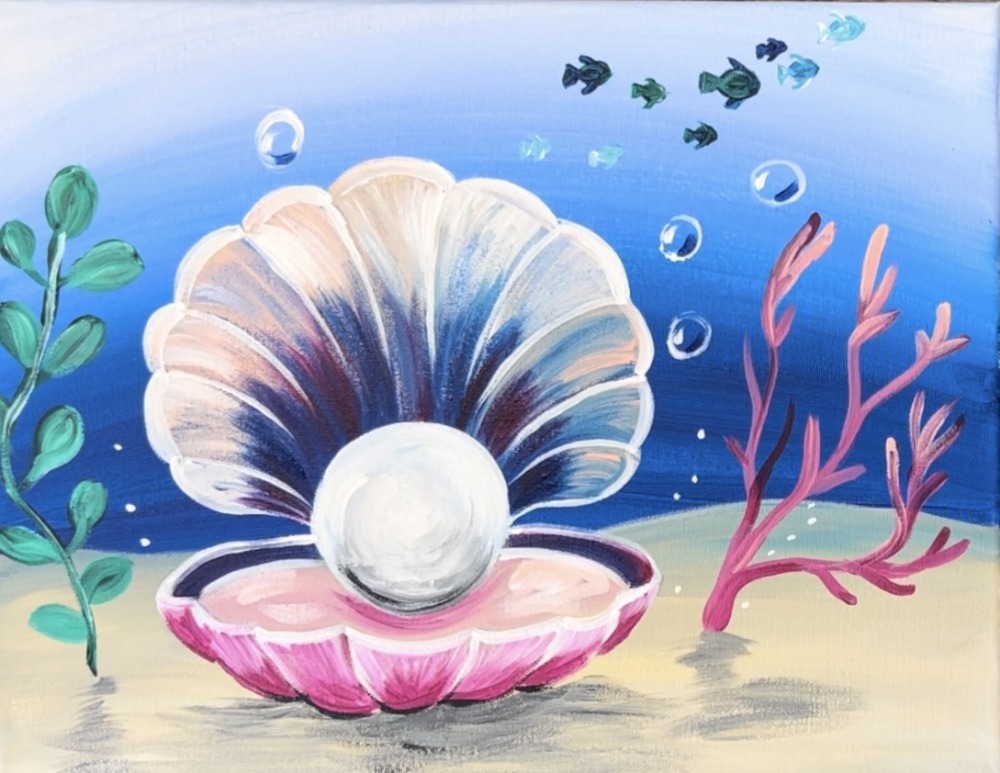
15. Outline Parts Of The Shell/ Final Touchups
Use the tip of the #8 round brush (or a tiny liner/ detail paint brush) to very thinly outline the curves on the interior of the shell. Outline the circle of the pearl.
Outline the bottom curves/lines of the shell as well.
Then outline the top curves of the outer edge of the shell.

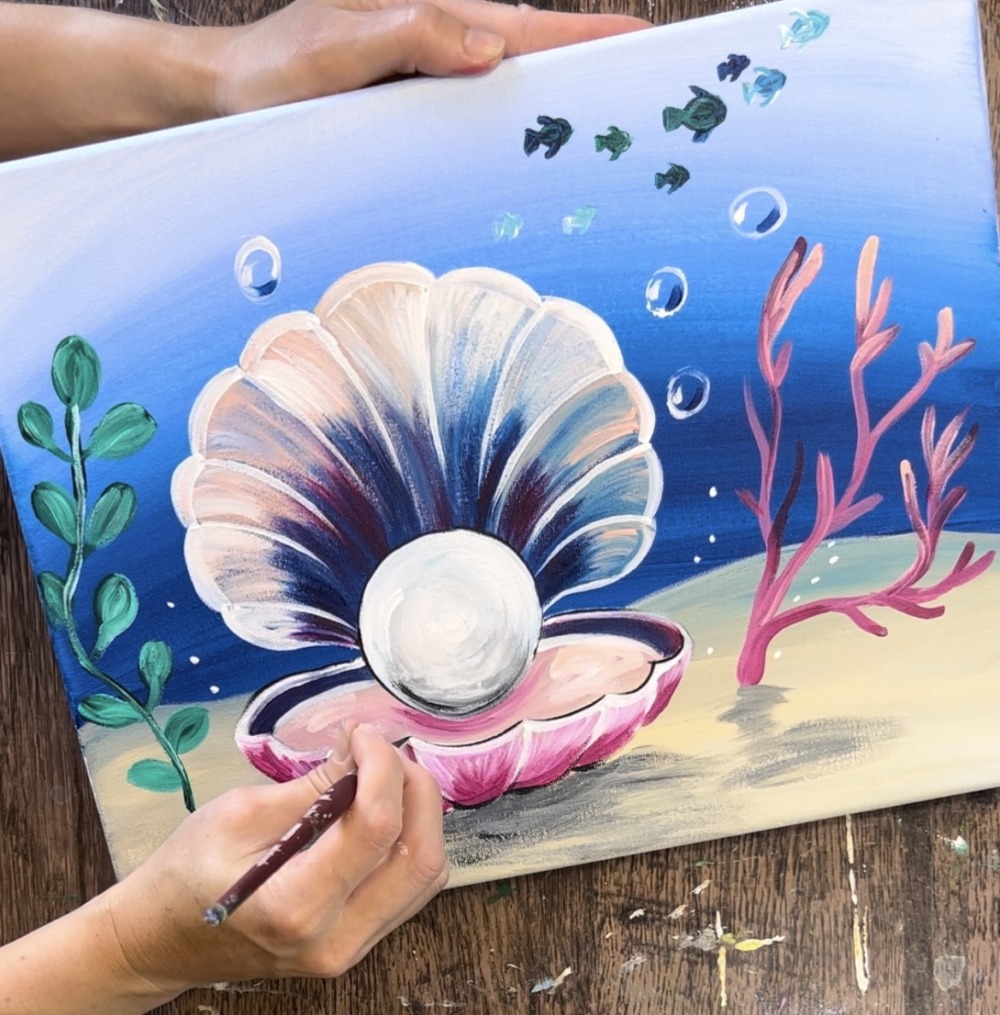
Another final touch up you can do is add more seaweed. I added a loose, wavy seaweed on the far right edge of the canvas with “phthalo green” mixed with “phthalo blue” paint.