Would you like to save this?
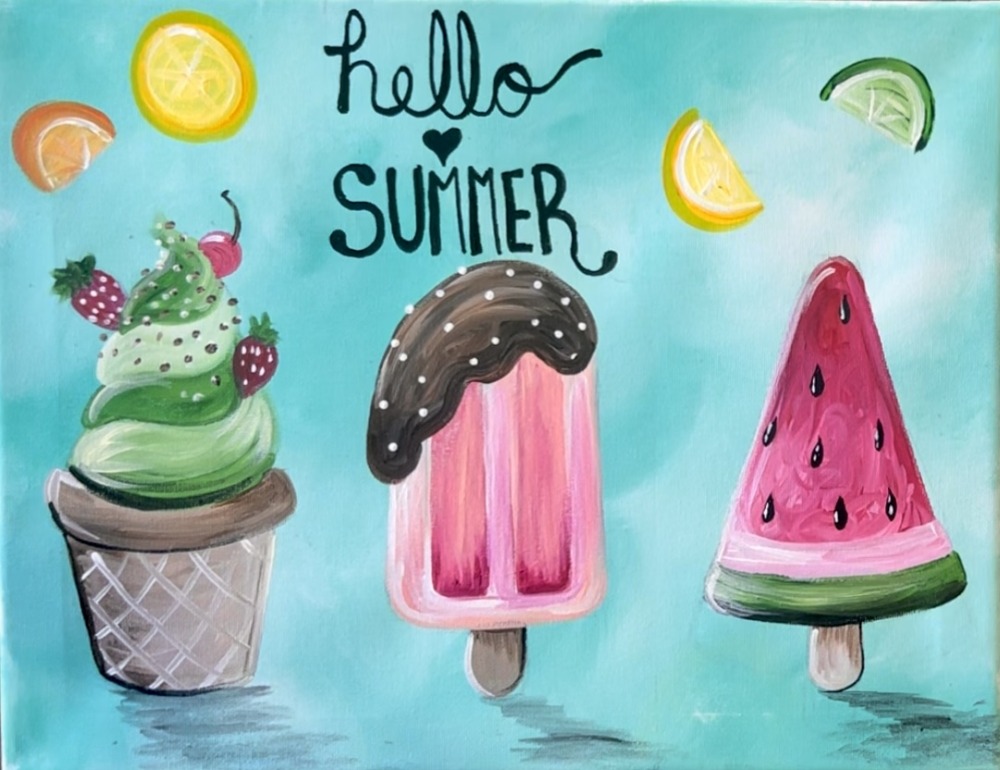
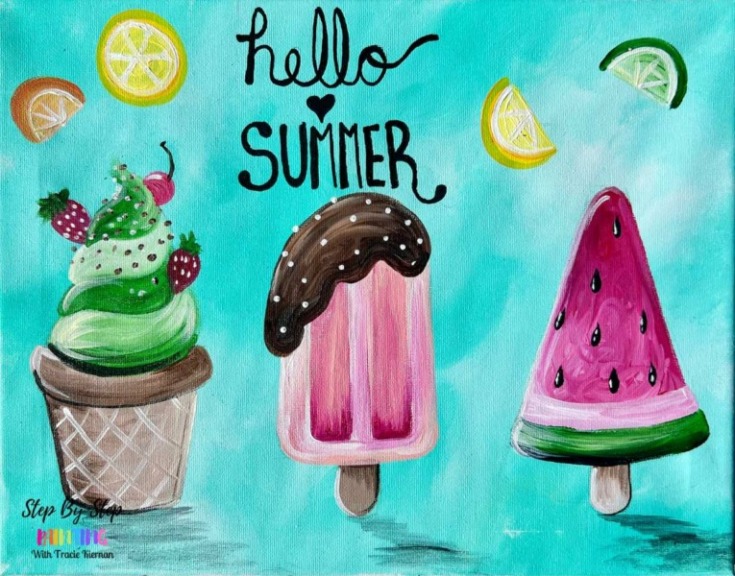
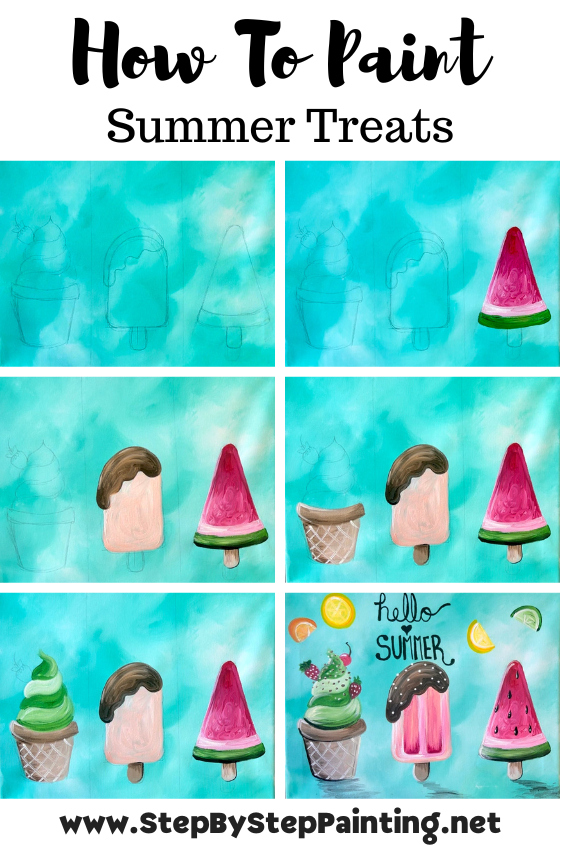
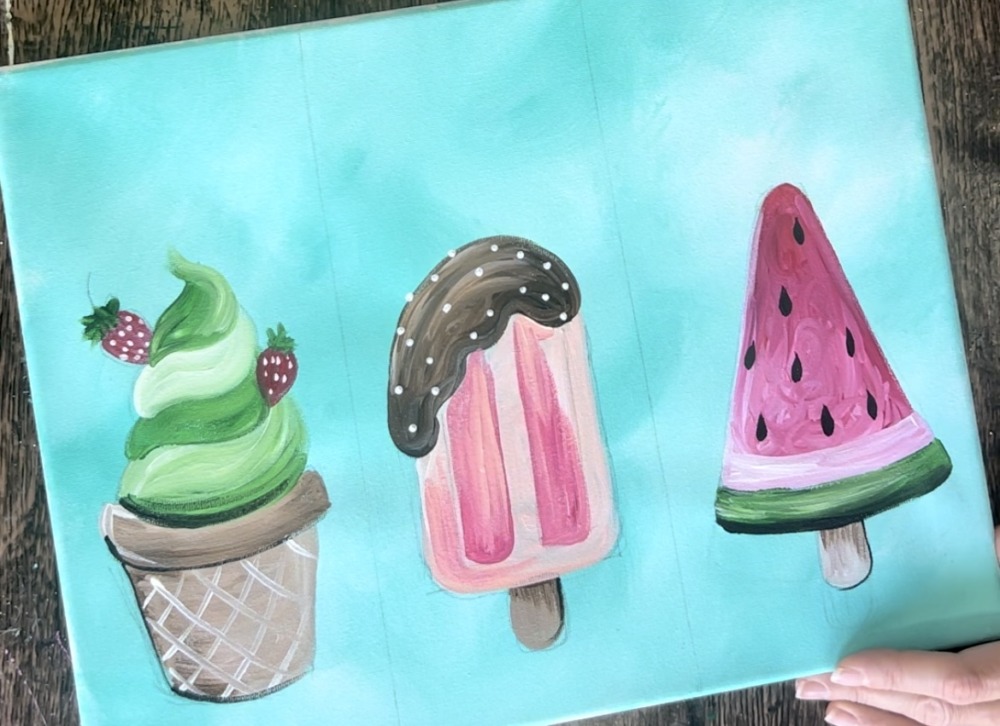
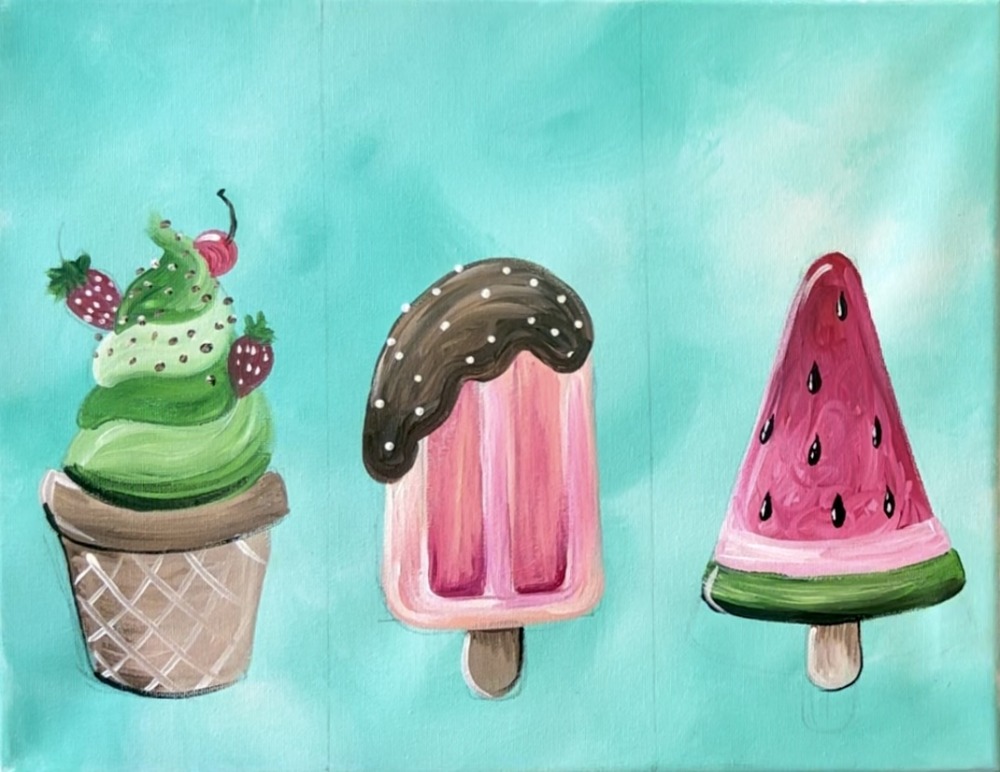
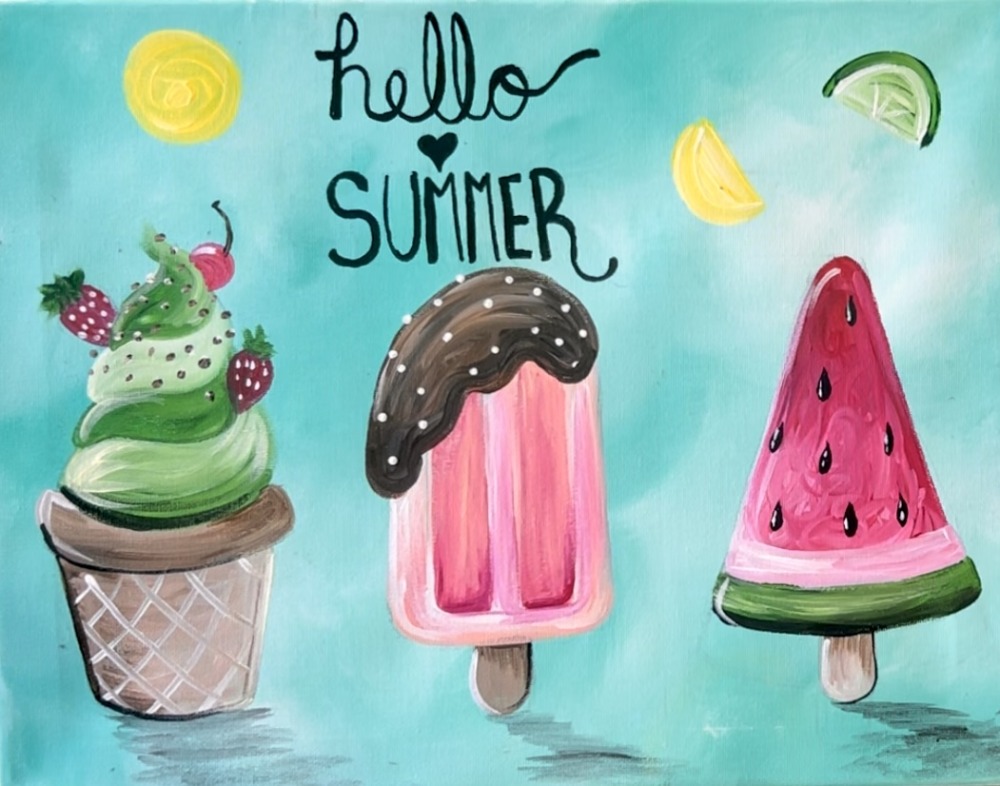
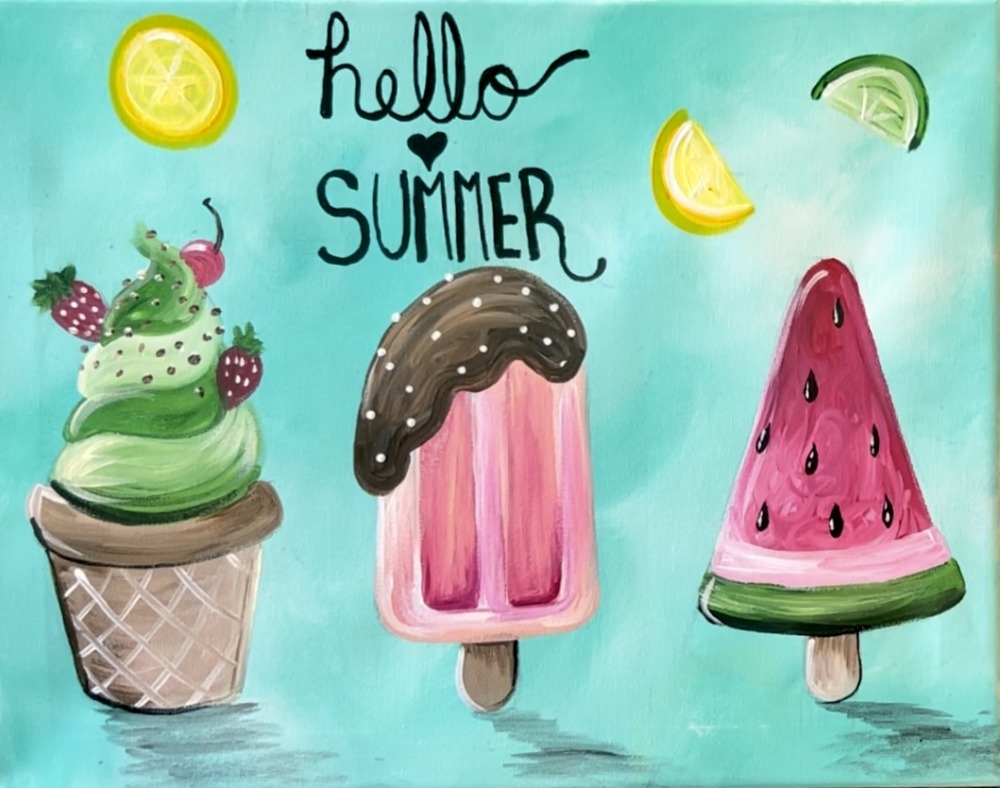
Paint a fun summer themed “ice cream/popsicle” painting! This tutorial will show you how to paint detailed summer treats. The painting can also be simplified and customized!
Enjoy and happy painting!
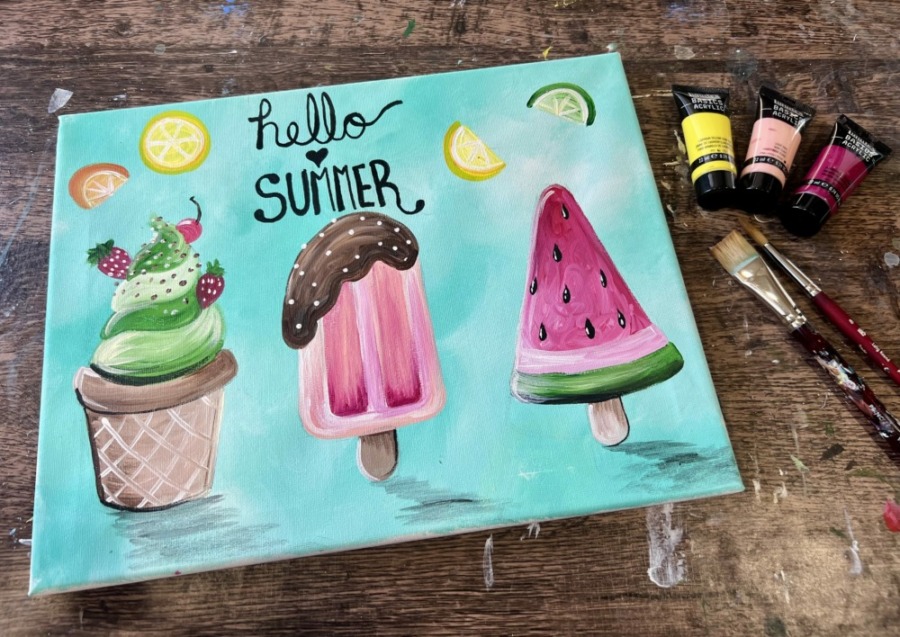
Materials Needed
Summer Treats - Acrylic Painting Tutorial
Materials
- 11 x 14 Canvas
- Acrylic Paint
- Brushes
- Pencil
- Ruler
- Optional Tracer
- Optional Graphite Paper (if using tracer)
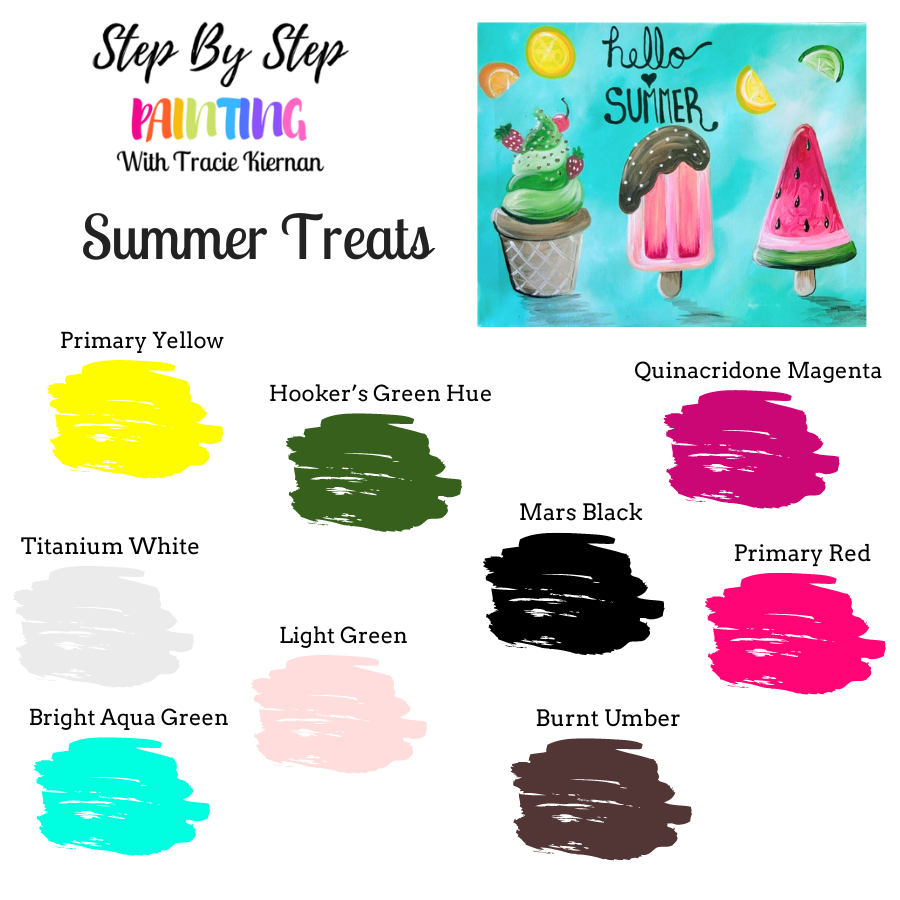
Colors
- Bright Aqua Green
- Titanium White
- Mars Black
- Light Pink
- Primary Red
- Quinacridone Magenta
- Primary Yellow
- Hooker's Green Hue
- Burnt Umber
Brushes
Color Palette
Directions At A Glance
Tracer (optional)

Video
Step By Step Instructions
1. Paint background
Tip: you can paint your background a different color! I recommend a cool color to contrast against the warm colors in the ice cream pieces. You can also do this as a black canvas painting.
You also don’t have to use the “blender” brush for this. You can use a 3/4″ flat brush to blend the two colors in the background instead!
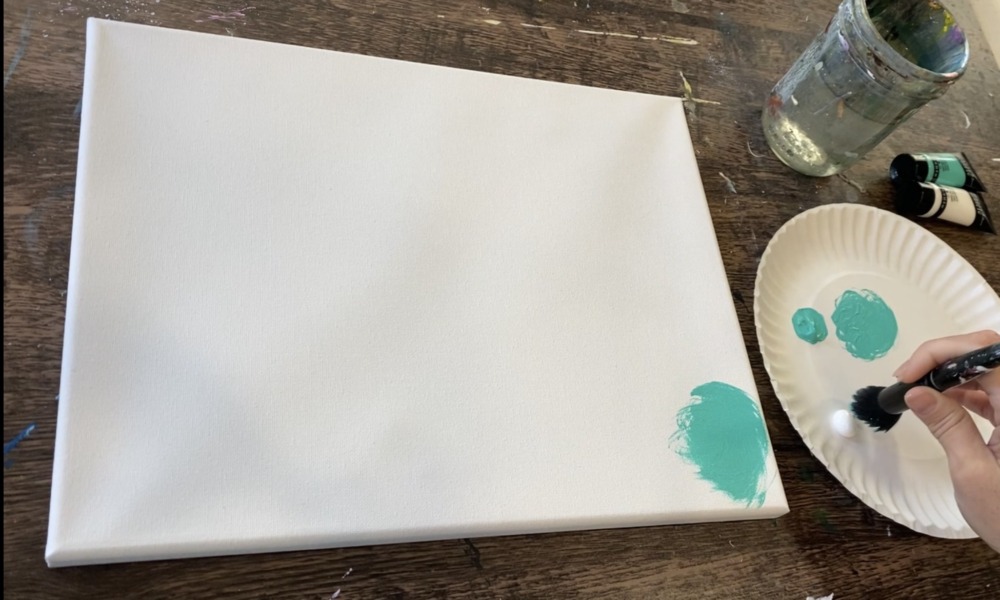
Load your paint palette with the two colors: “bright aqua green” and “titanium white”. Use a “blender brush”. Do not dip it into the water as this brush holds too much water and it will make the paint too “runny”.
Dip the blender brush in both the aqua and the white. Paint “swirl” and “circular” paint strokes to create a blended background of aqua and white.
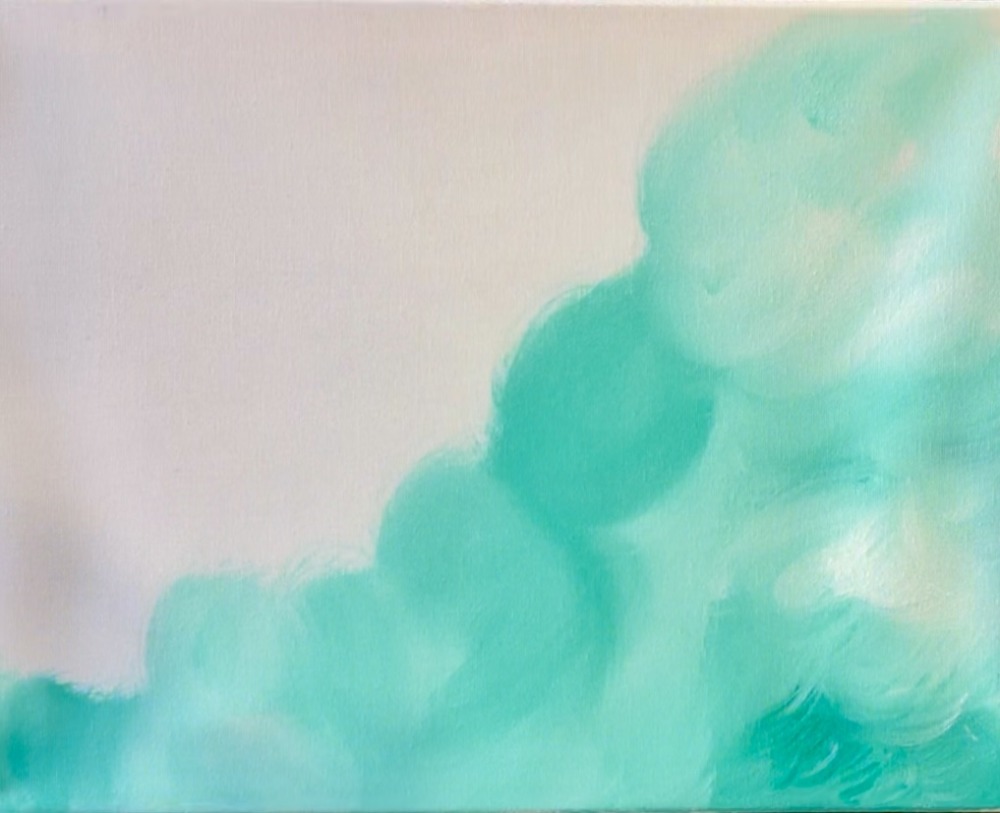
The trick is to not over blend the colors. You want a nice variation in the background. This will make the background look more interesting rather than a solid color.


Wait for this to dry before going onto the next step.
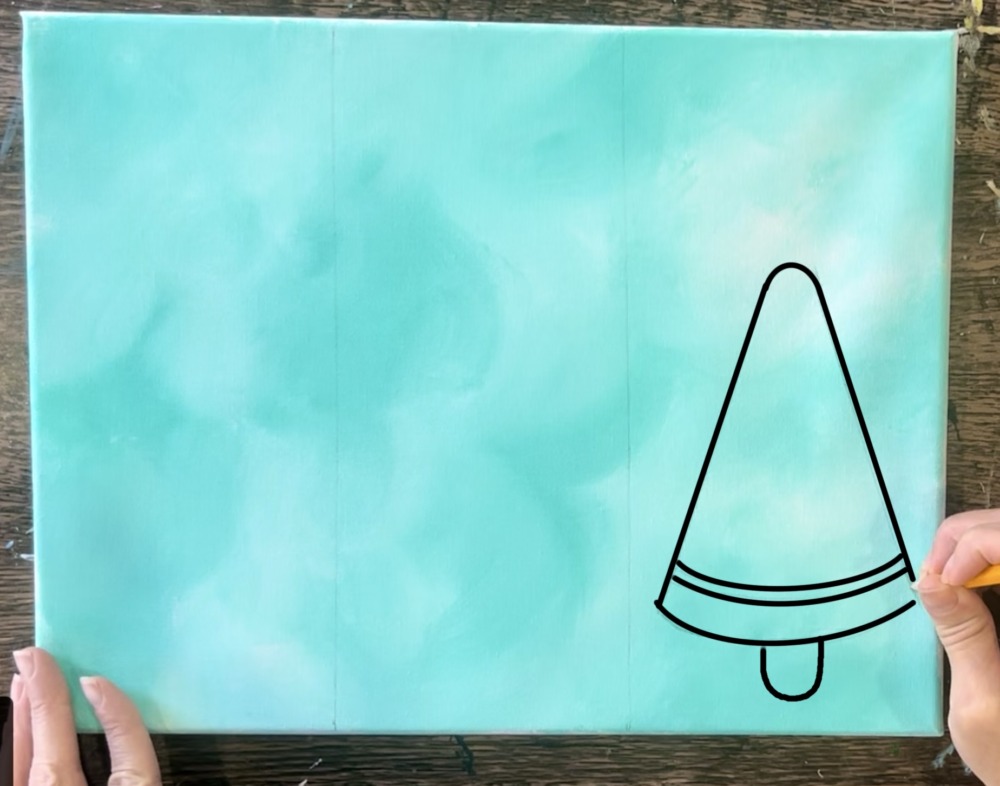
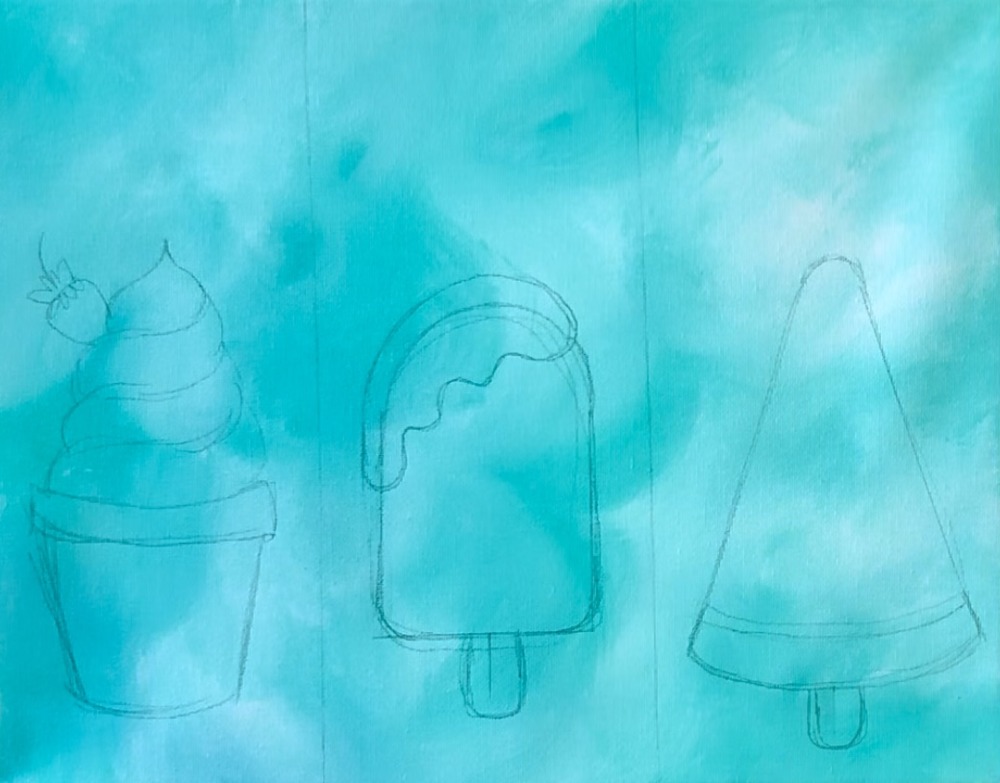
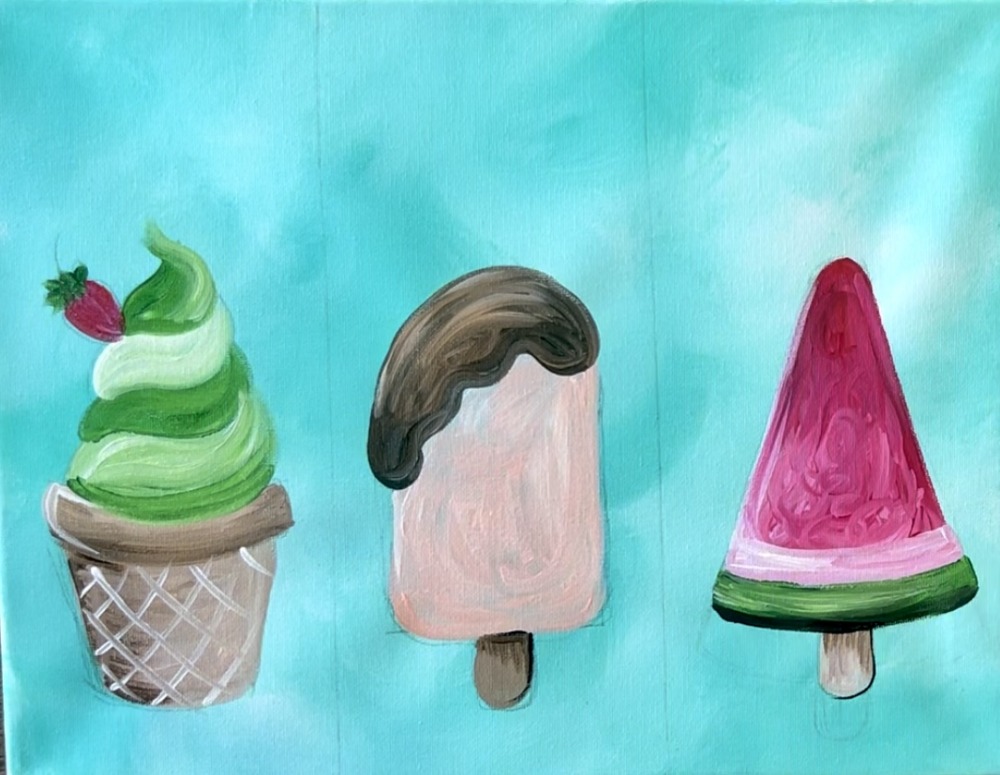
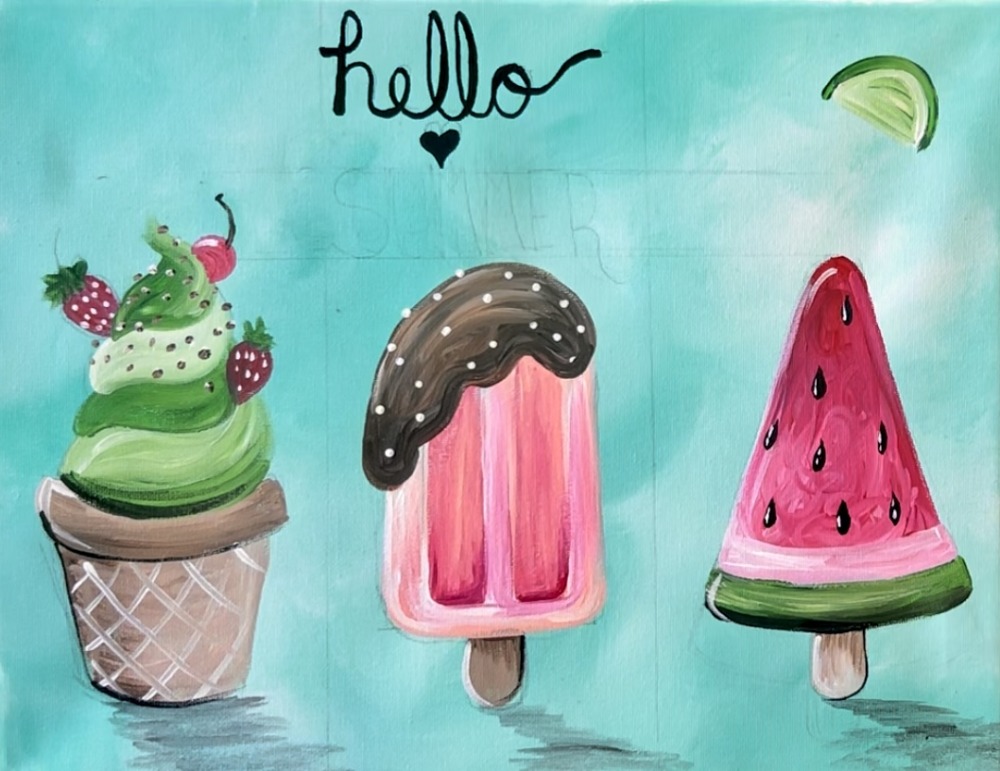
2. Draw Popsicles/ Ice Cream
You’re welcome to print out the template and use that instead of doing the drawing portion! Simply print. Place the template over a sheet of “graphite paper”. Then trace the design.
To draw this…
- Divide your canvas into three sections. Estimate about 1/3 for each of the lines and lightly draw the lines using a ruler and a pencil. Note: lines below are darker so you can see them. I also mare my section on the far right slightly wider than the other two because the watermelon popsicle is slightly wider than the others.

2. Next, draw your watermelon popsicle. Use a ruler to draw the diagonal lines that form a triangle. Make the top point of the triangle curved at the top. Then segment the triangle on the bottom to form an area for the skin and rind. Then draw a small curved shape on the bottom for the popsicle stick.
3. Next, sketch the popsicle in the middle. This one is more of a rectangular shaped popsicle. I recommend sketching it first and then using the ruler to make your lines on the edges straight.
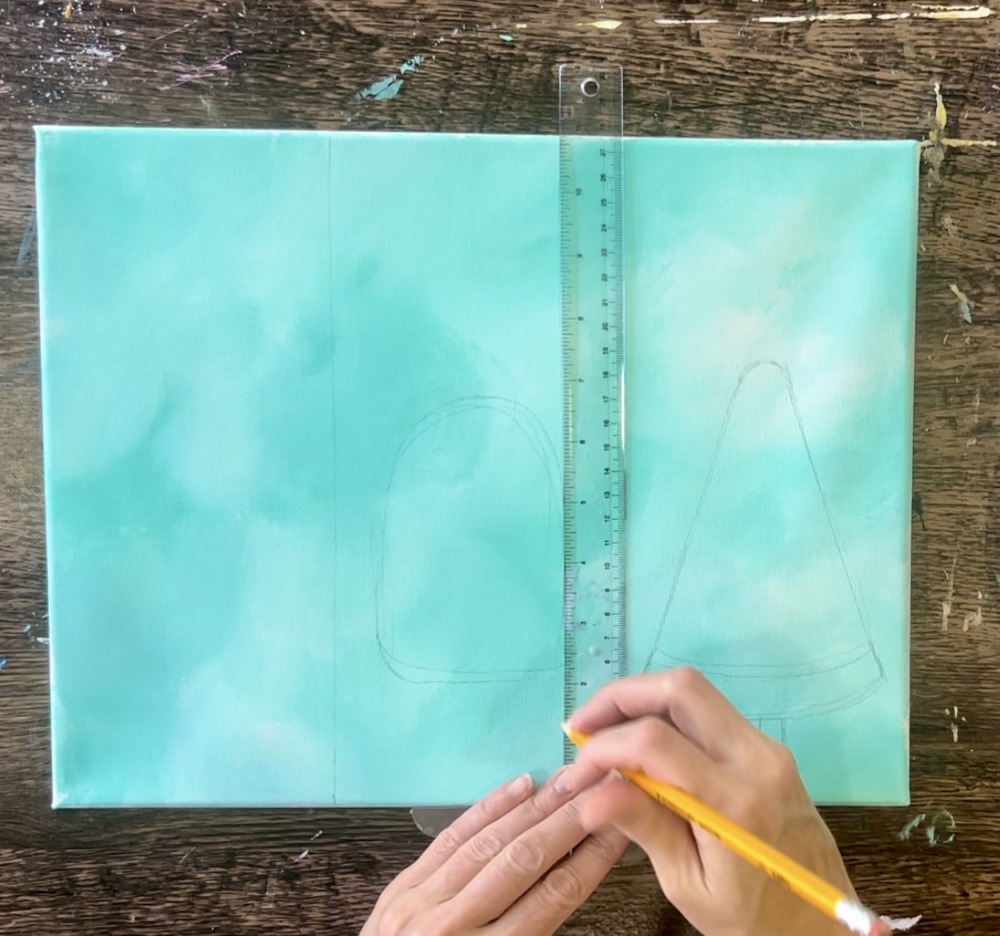
4. Form an arc at the top. Then make the bottom left and right corners curved.

5. Then draw the popsicle stick.

6. Draw chocolate draped over the top of the popsicle.
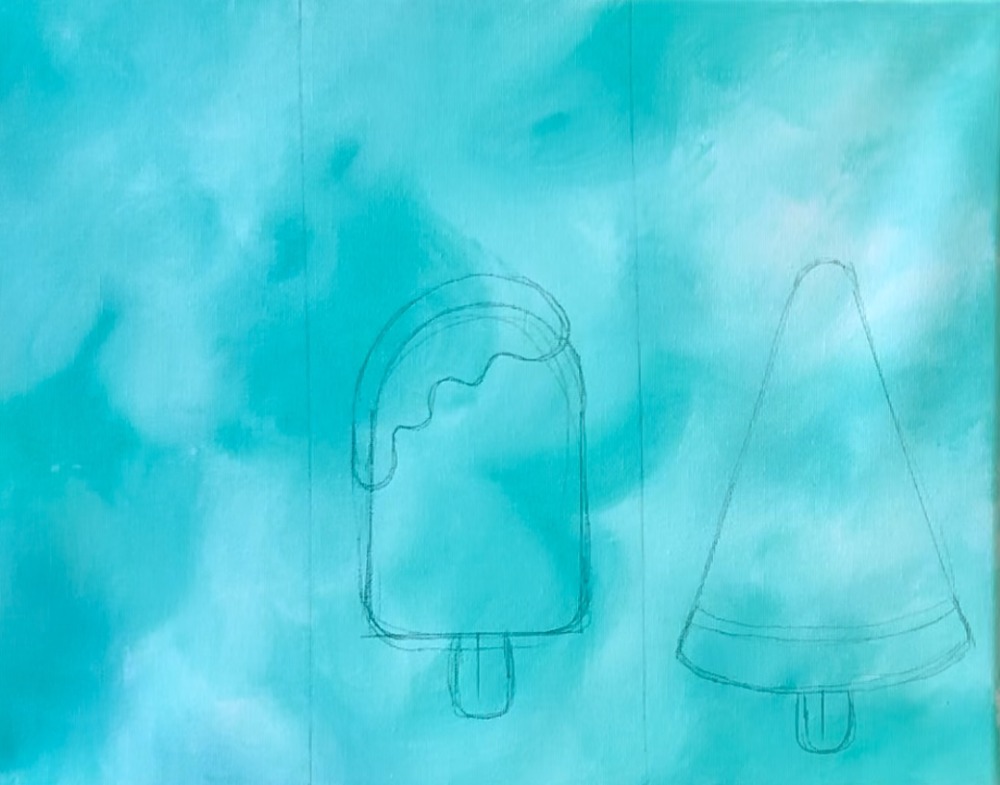
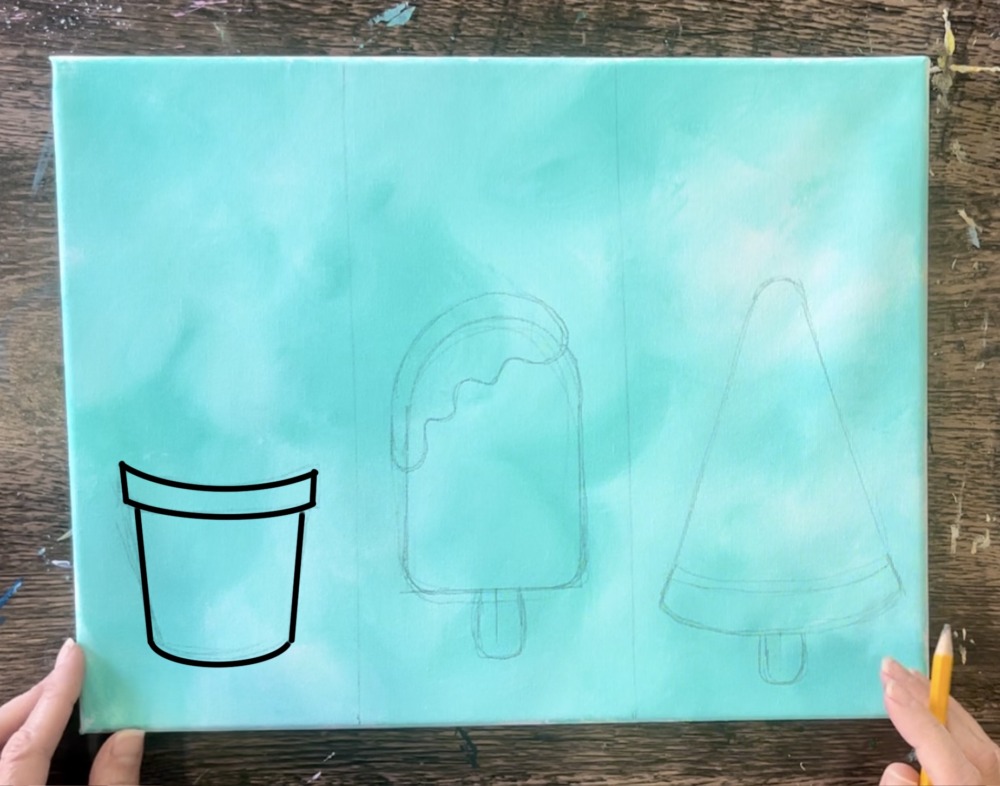
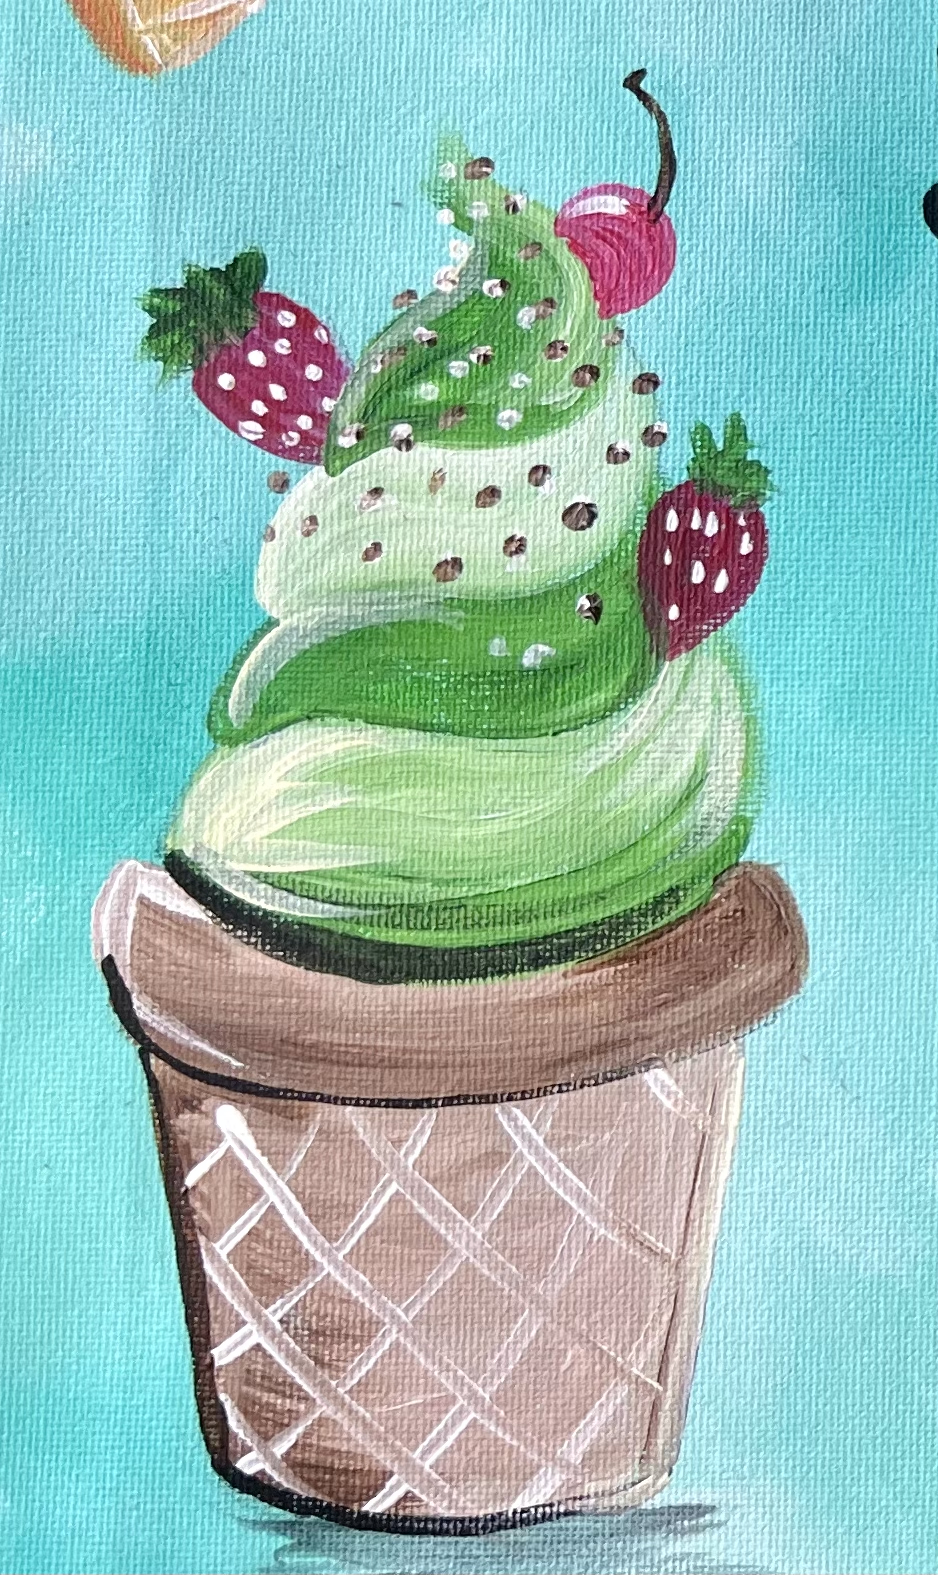
7. Next, on the far left draw the ice cream. This one is in a waffle cone cup. Start by drawing something that resemble a small bot with a rim.
8. Next, draw the ice cream. I started on the bottom (just above the top of the cup). Draw a swirl shape that goes to a point on the right.

9. Repeat these shapes and make them gradually smaller as they stack up.
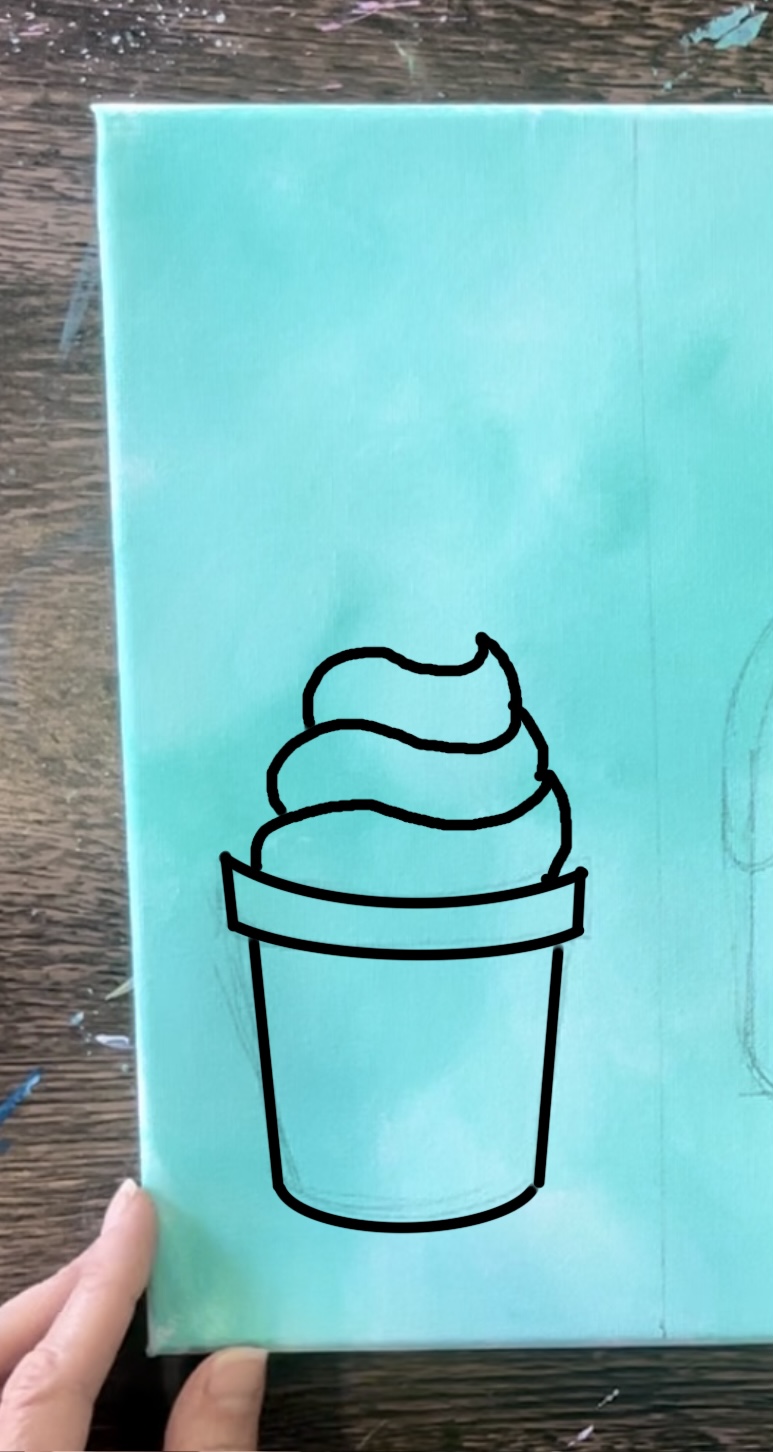
10. Then draw the top “dollop” shape.

11. Add a strawberry and/or cherry. I don’t recommend, however, making your drawing too detailed because we will be painting over a lot of this any way. Also, too much pencil may make it harder to erase later.
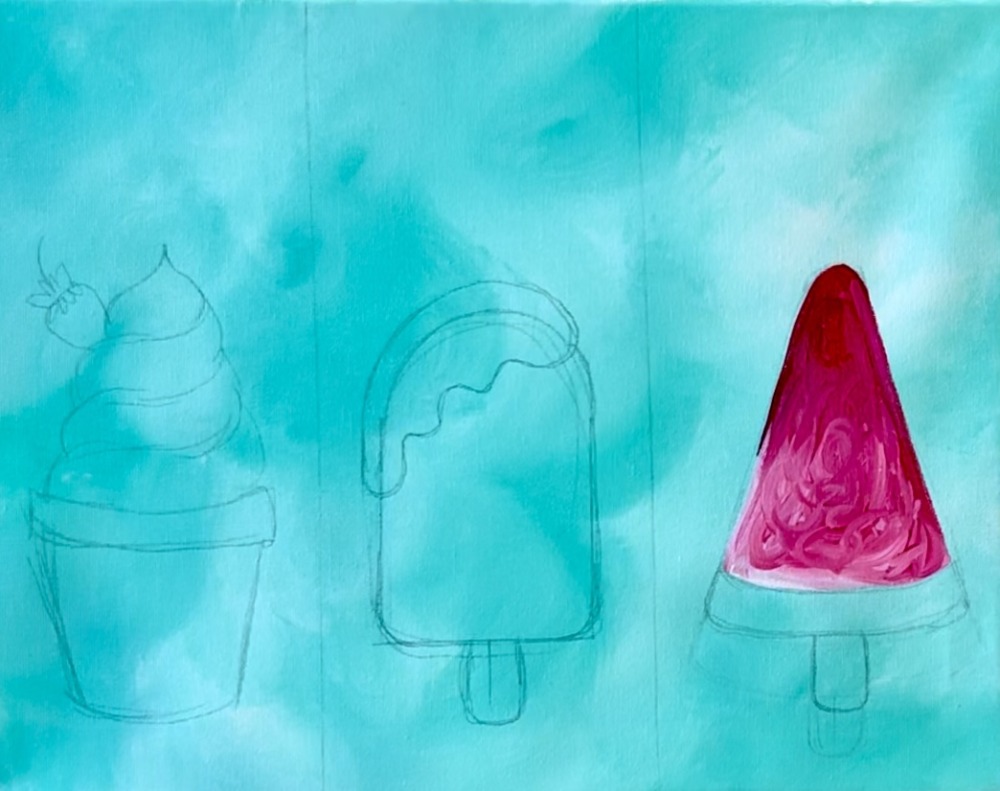
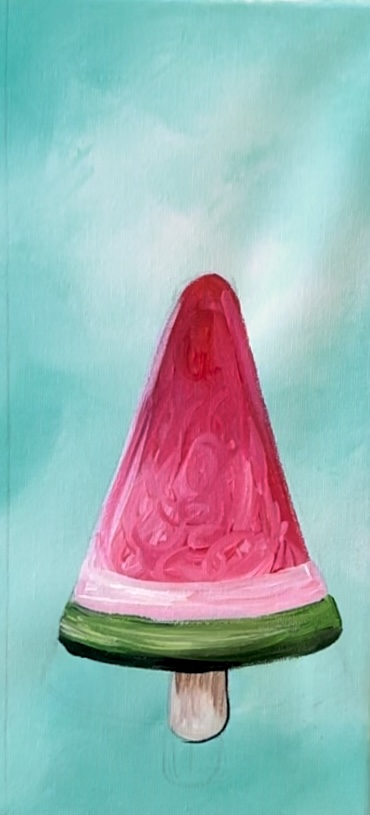
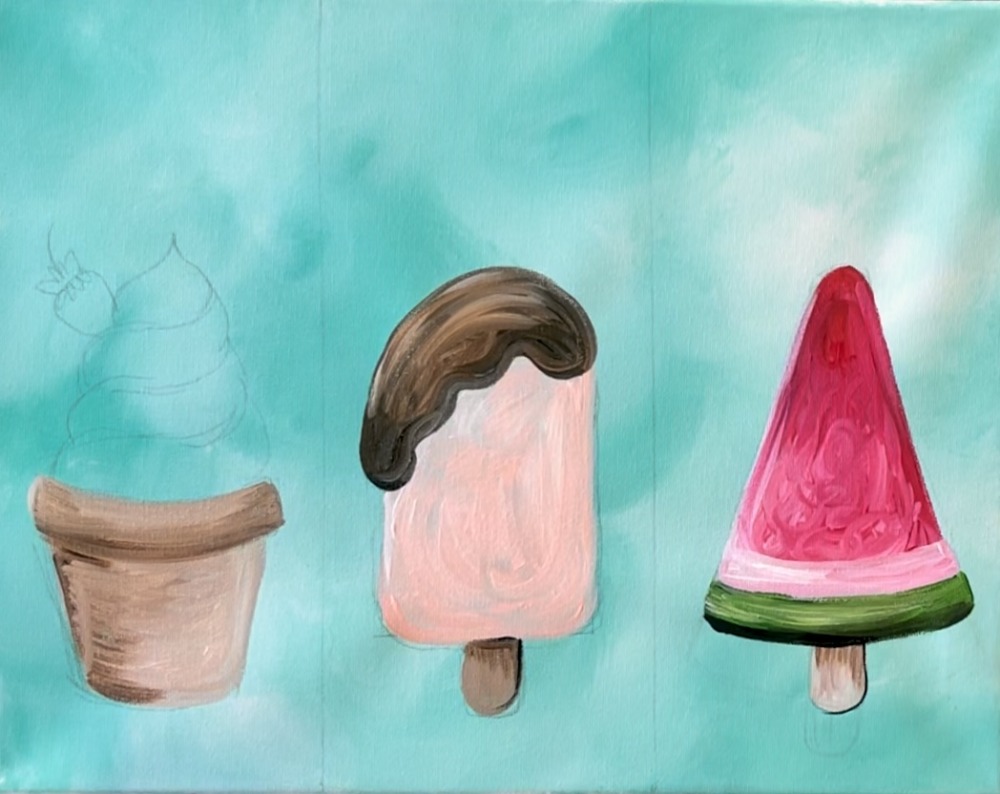
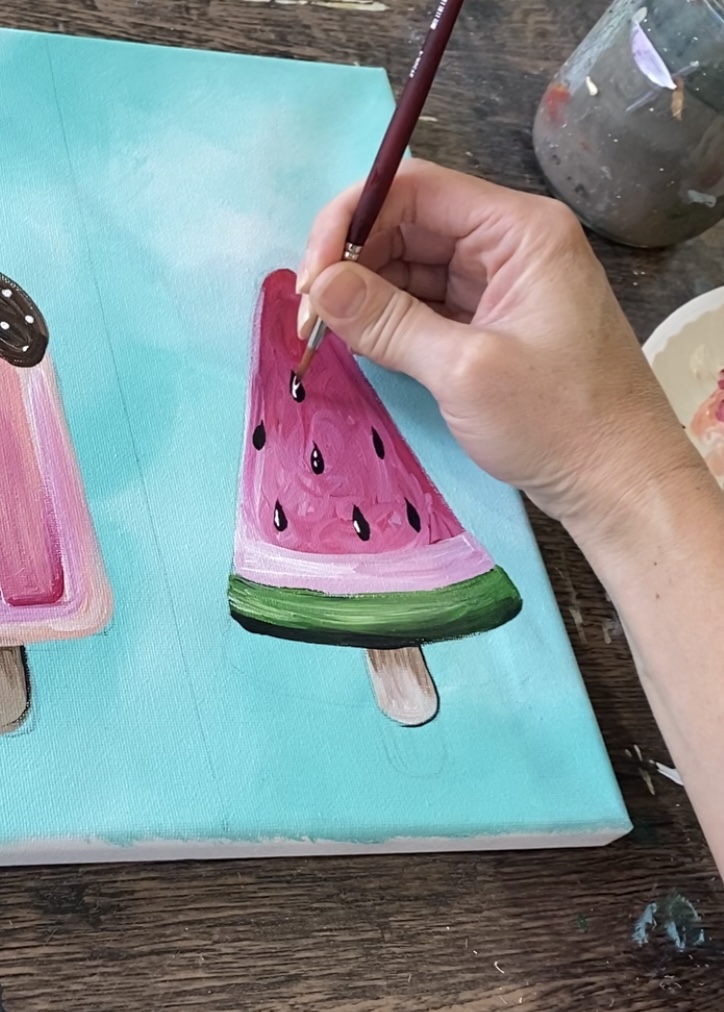
3. Paint Watermelon Pop
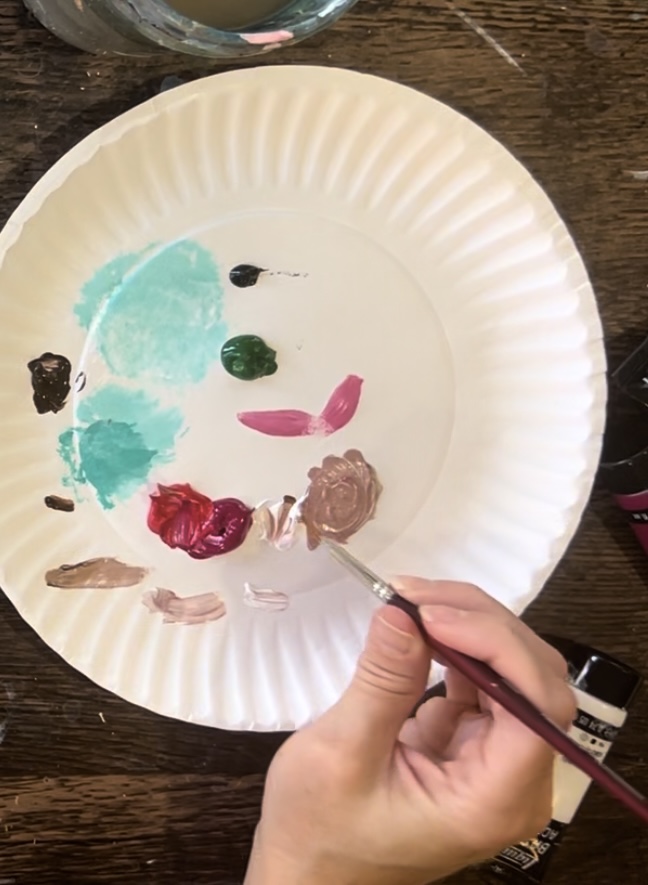
Load your paint palette with: “primary red”, “quinacridone magenta” and “titanium white”. Use the #4 round brush and double load it into the red and magenta. Paint the top edge of the watermelon. We will be doing blending and making this watermelon lighter towards the bottom/ darker at the top.
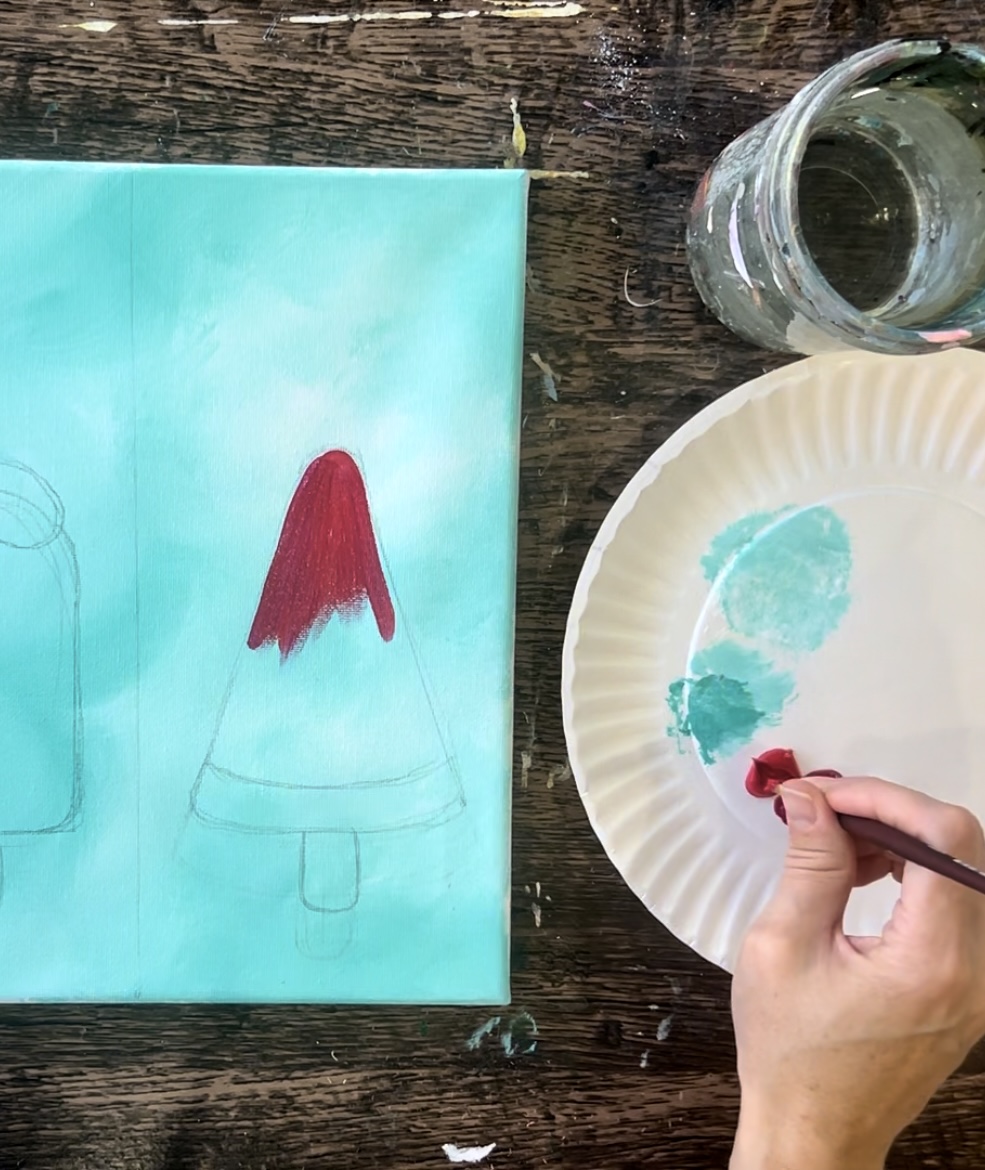
I started by making my paint strokes go downwards.
Then, as you approach the middle of the watermelon, loosely blend “titanium white” into your reds. Start to make your paint strokes go in more of a “circular” and “swirly” direction. Allow your paint colors to blend on the canvas.
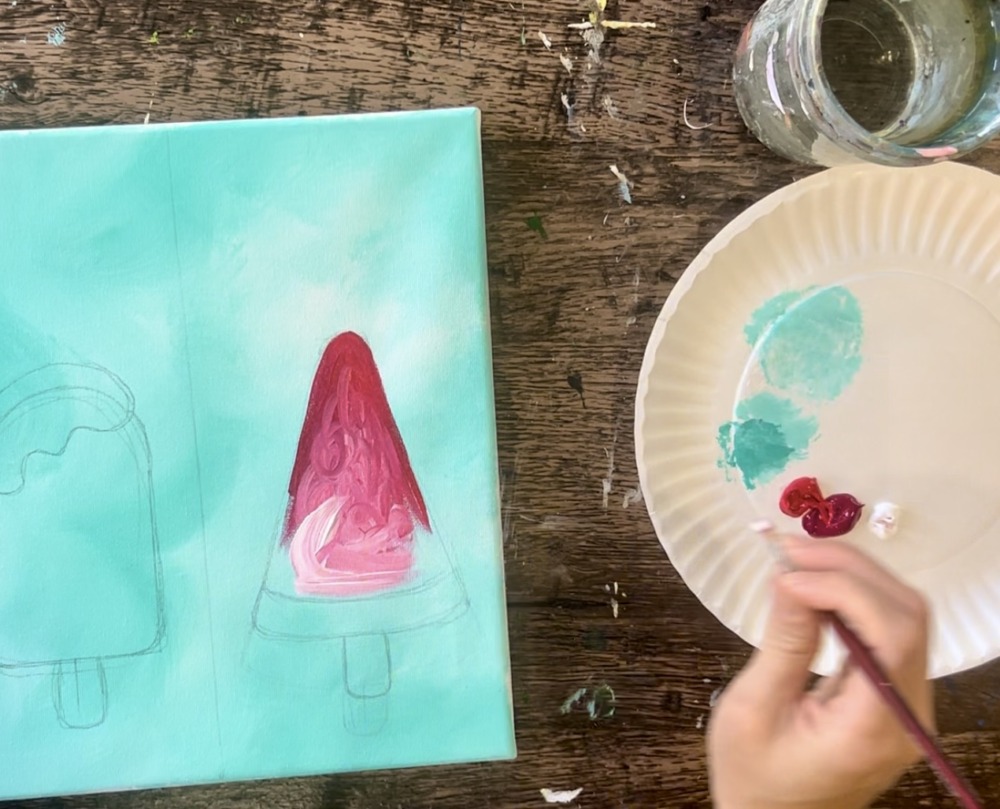
Fill the triangular area with this magenta.
Then add a layer of white for the “rind” of the watermelon. Note: mine turned kind of a light pink because I didn’t rinse the brush off when transitioning to the white. Then load your paint palette with the color “hooker’s green hue”. Paint the “skin” of the watermelon.
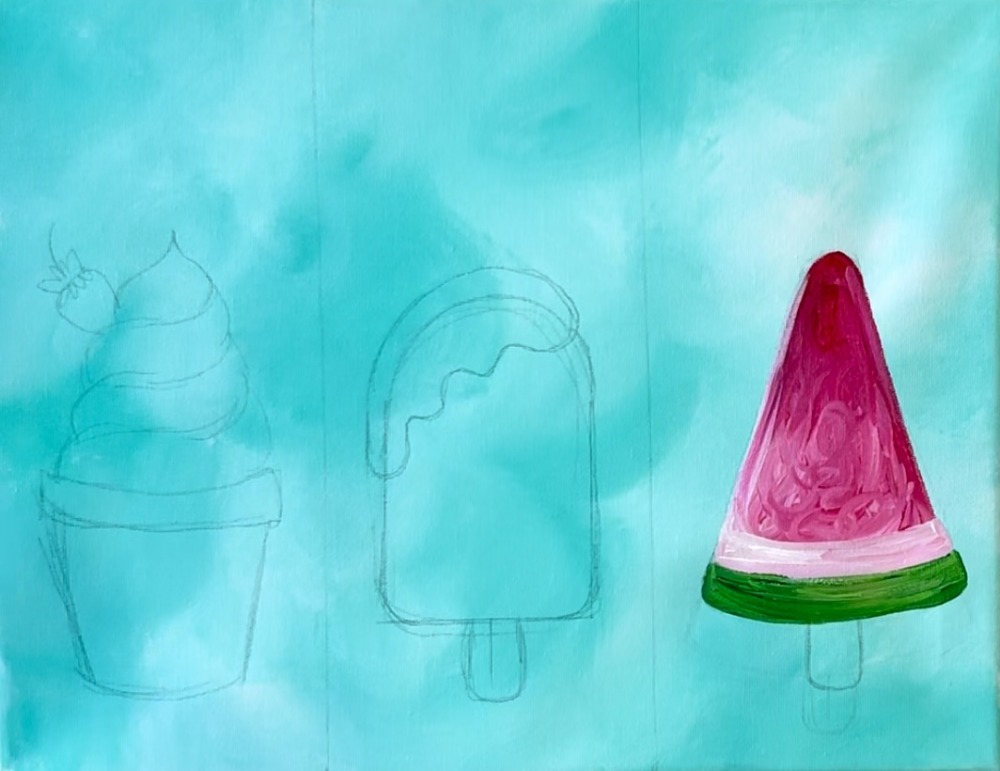
Next, load a small amount of “mars black” onto your paint palette. Double load your round brush in black and green. Then paint a very thin area of black on the very bottom of the “skin” of the watermelon. Blend it into the reset of the green.
Mix the popsicle stick color on your paint palette. Make a very light brown by mixing 1 part “raw umber”, 3 parts “titanium white” and 1 part “primary red”.
Paint the stick using vertical paint strokes. Then blend a little extra dark brown at the very top of the stick so it looks like there is some shadow in that area.
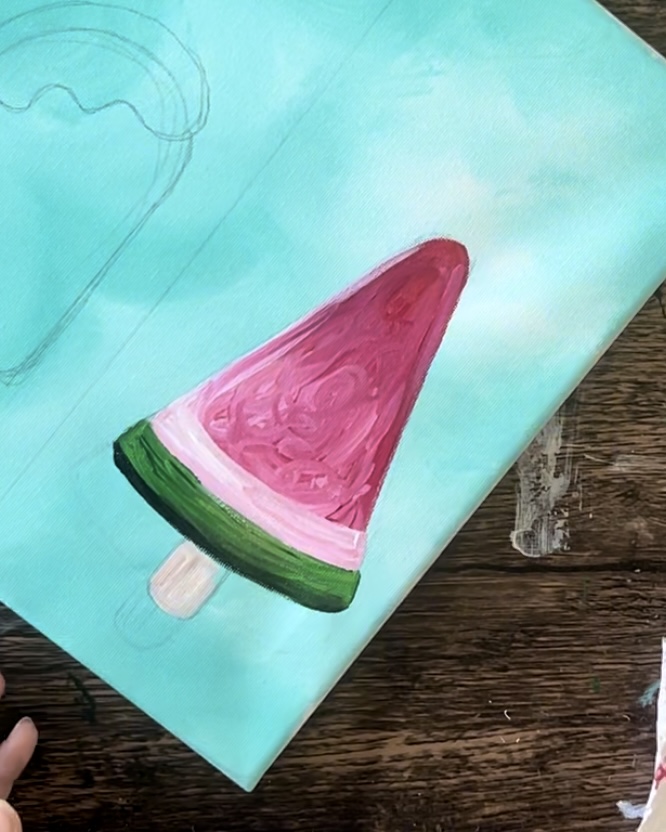
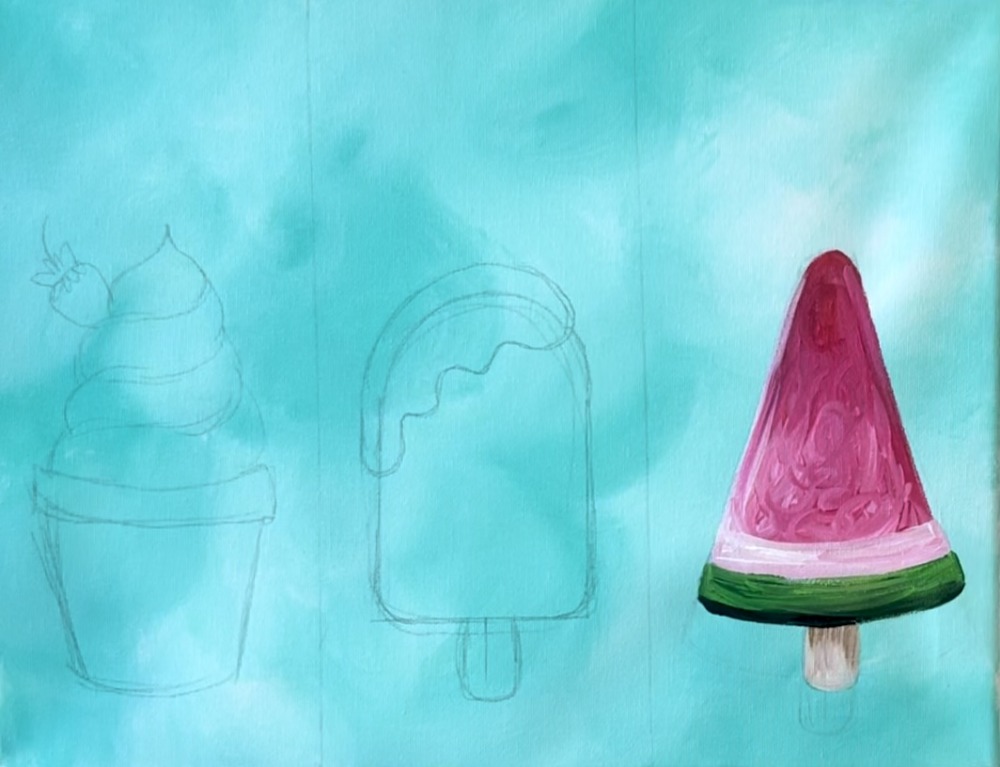
Next, outline the far right edge of the popsicle stick with mars black.
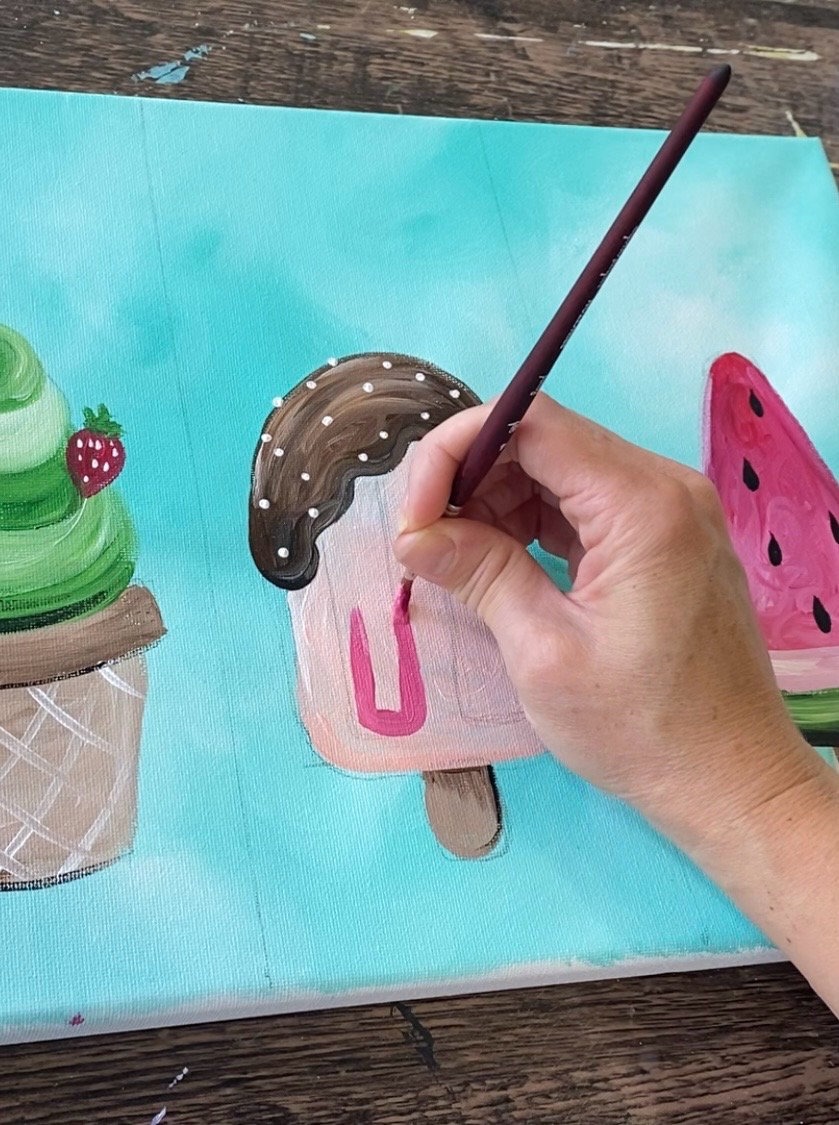
4. Paint Pink/ Chocolate Middle Pop
Load your paint palette with “light pink”. Use the #4 round brush to paint the middle pop with a mixture of the light pink and the white. Fill the entire shape and don’t worry about the shading of the rectangular parts of the popsicle. We will paint those after this first layer dries.
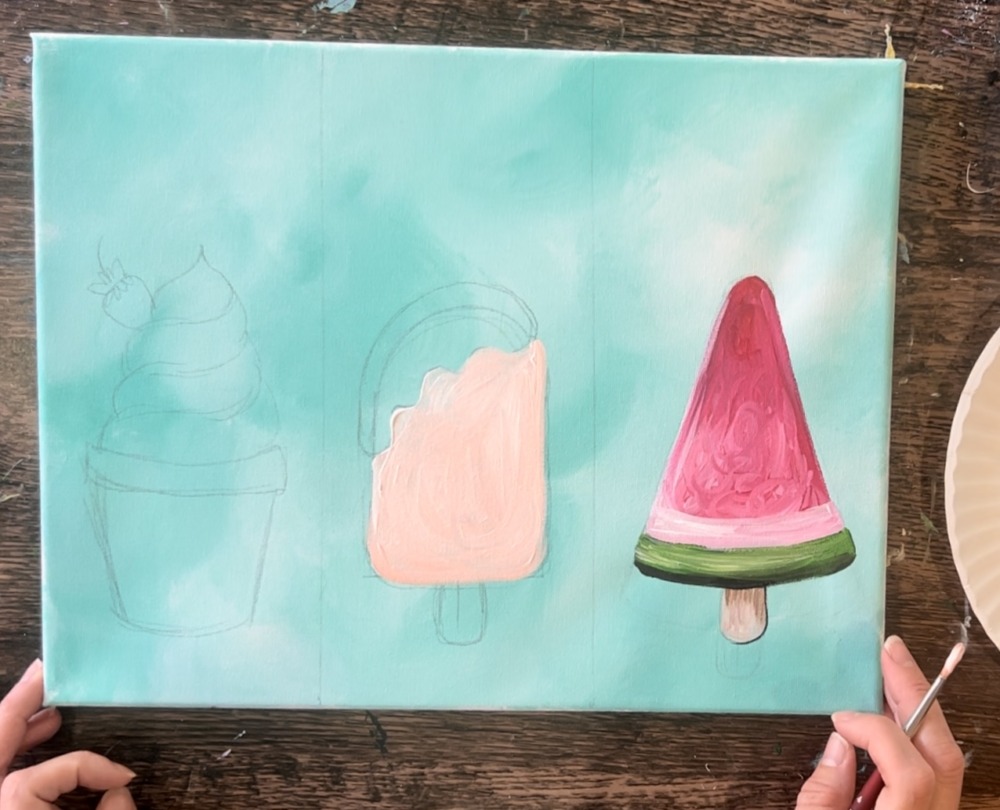
Use “burnt umber” to paint the top chocolate part. Lightly blend in some of the “titanium white” on the top so that it is highlighted and lighter on the top.
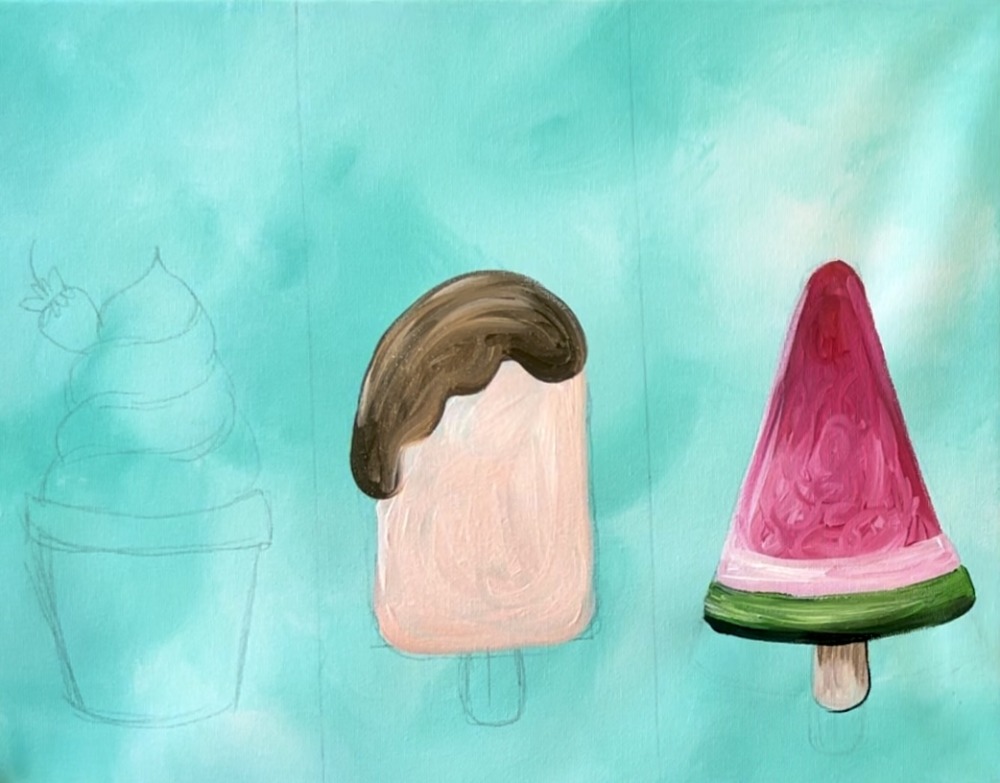
Lightly blend a little black on the bottom for shadowing. Then paint the popsicle stick using the same technique as you did on the other popsicle stick.
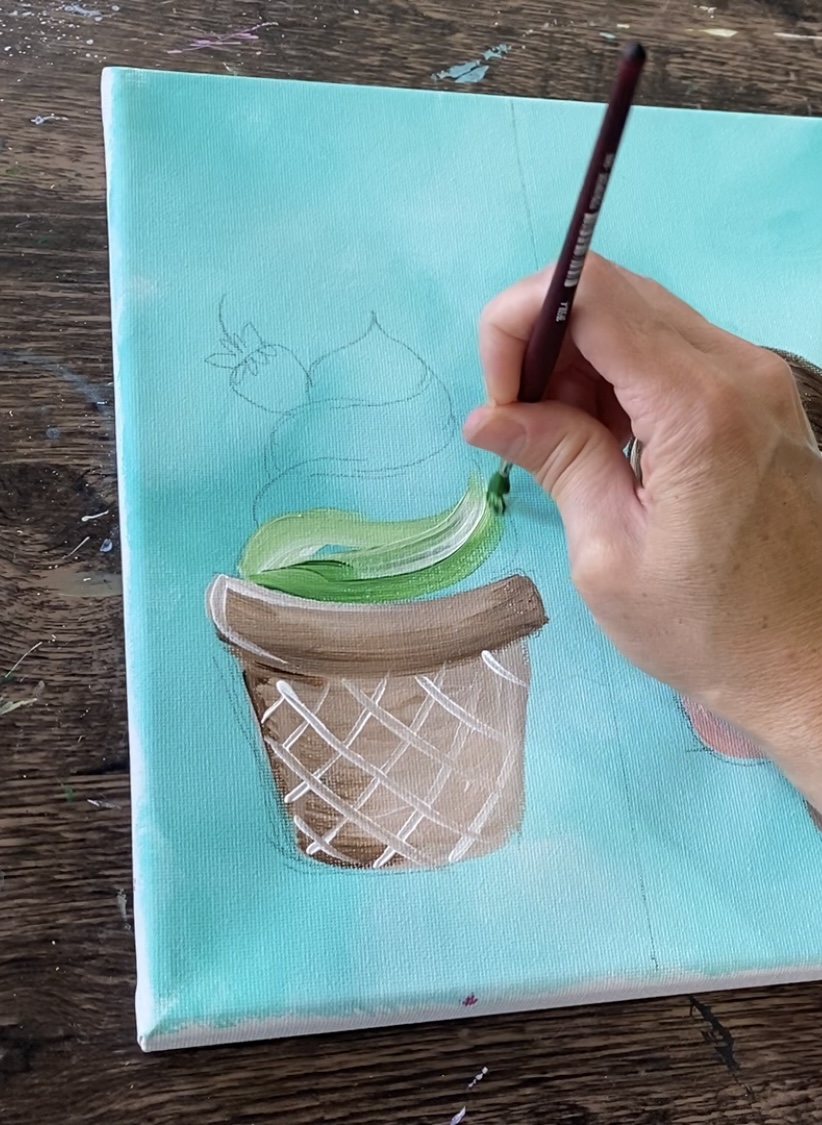
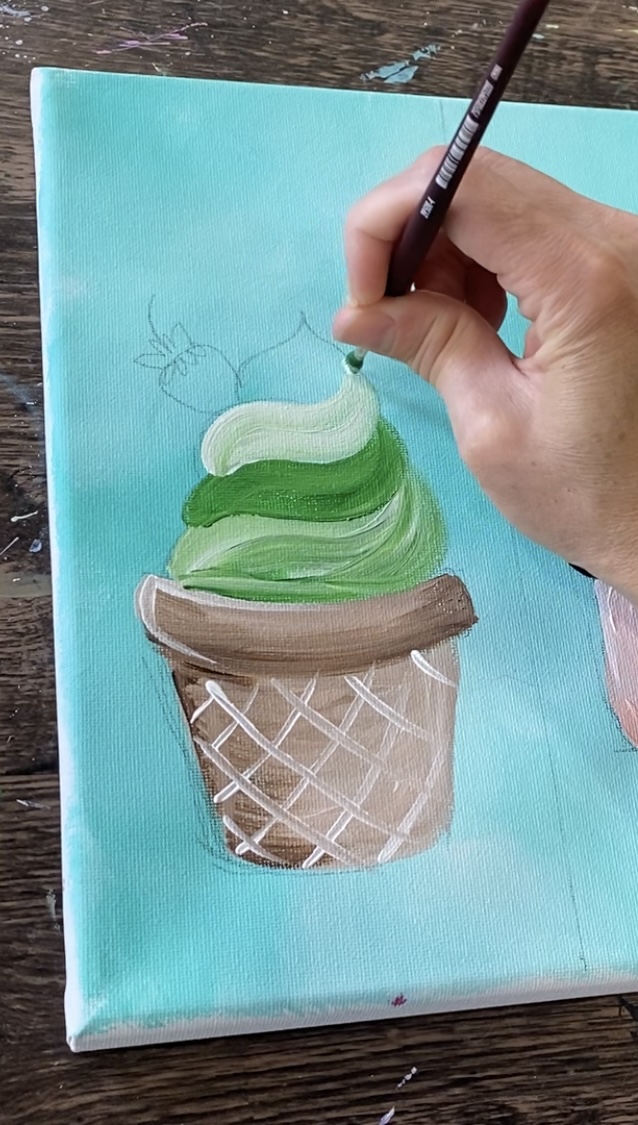
5. Paint Ice Cream
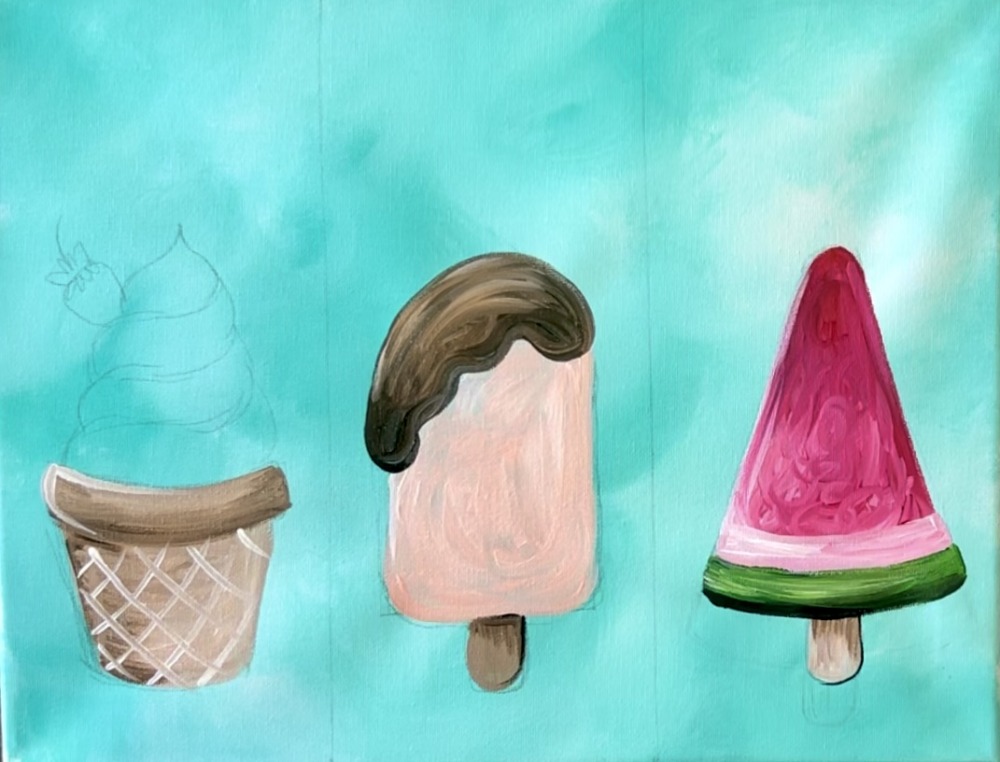
Paint the waffle cup on the far left. Use the same color you used to paint the popsicle stick (white, burnt umber and a little bit of primary red).
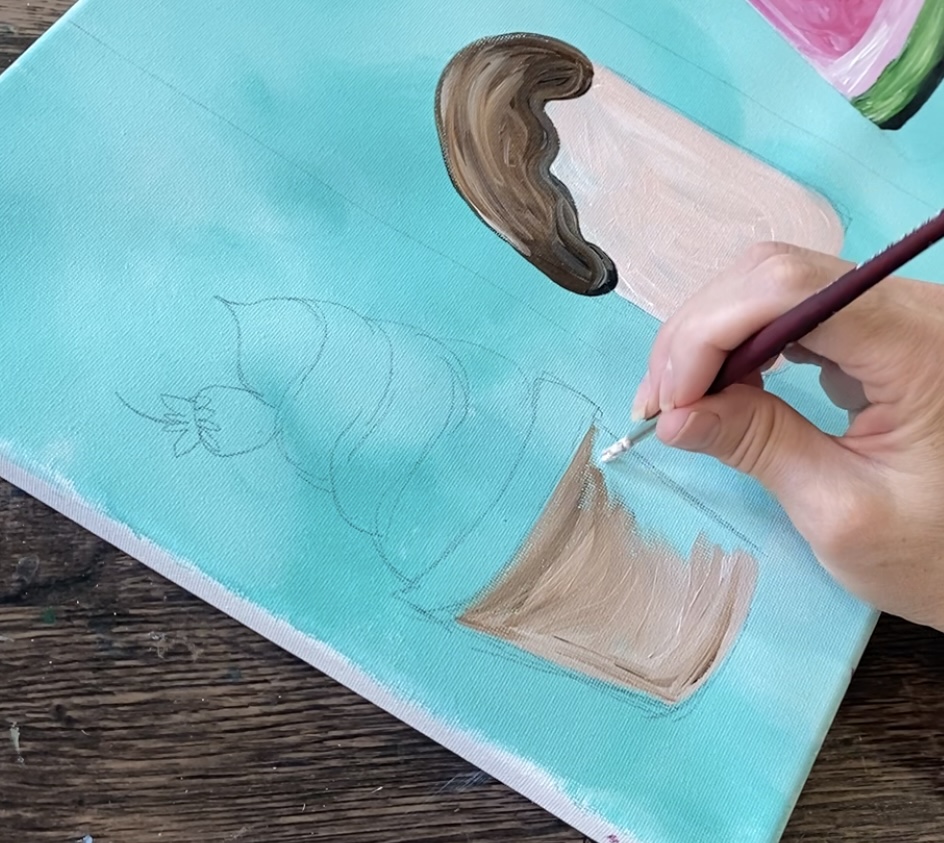
Make some of the areas of the cup darker and more “shadowy” by adding more “burnt umber” to those areas. This includes the top rim of the cup and the edges on the far left. Also, make your paint strokes go in a curved direction to create form with this cup.
Then rinse the #4 round brush and load it into just “titanium white”. Paint the curved lines for the waffle cup. Start at the top left corner and paint curved lines all parallel to each other.
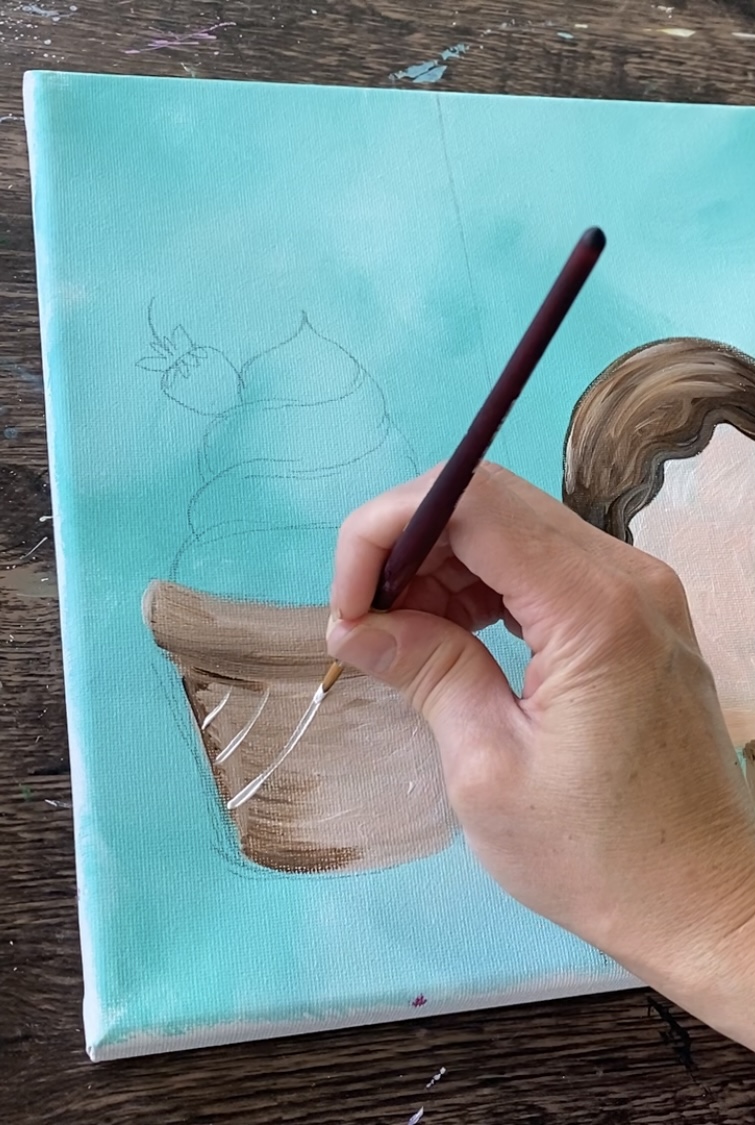
Then paint another set of lines going the opposite direction.
Next, paint the ice cream. You can change the color of this ice cream if you want! I chose green for “pistachio”.
Double load your #4 round brush in both “hooker’s green hue” and “titanium white”. Start on the bottom “swirl” of the ice cream. Use the round brush to paint the bottom curve and allow the green and white to slightly blend together.
When you paint the next swirl, make it slightly darker so that it stands out from the others.
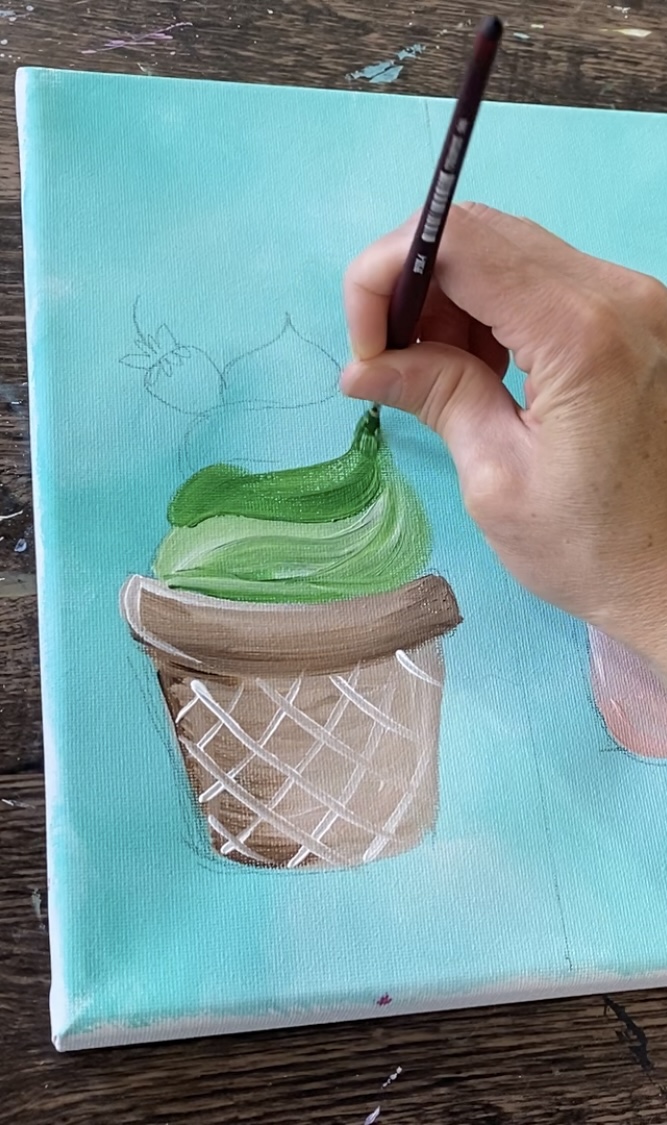
Then repeat this pattern by making the next one lighter and the very top one darker.
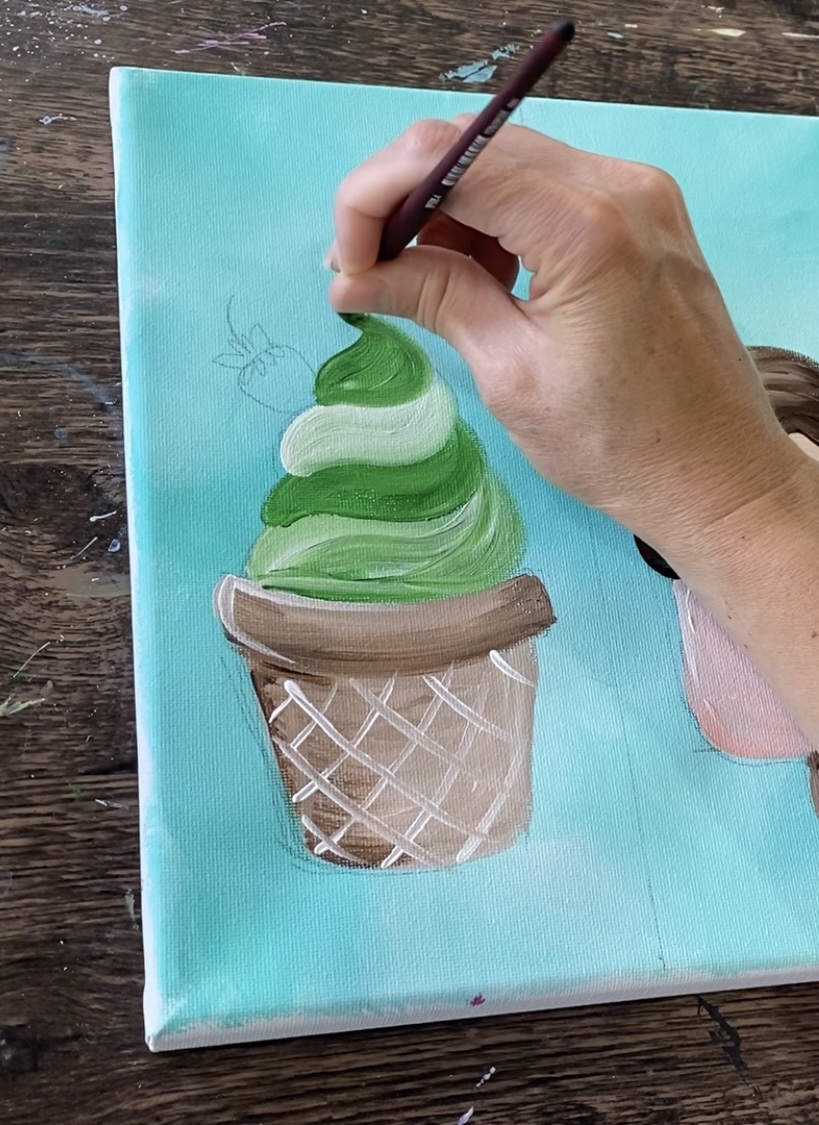
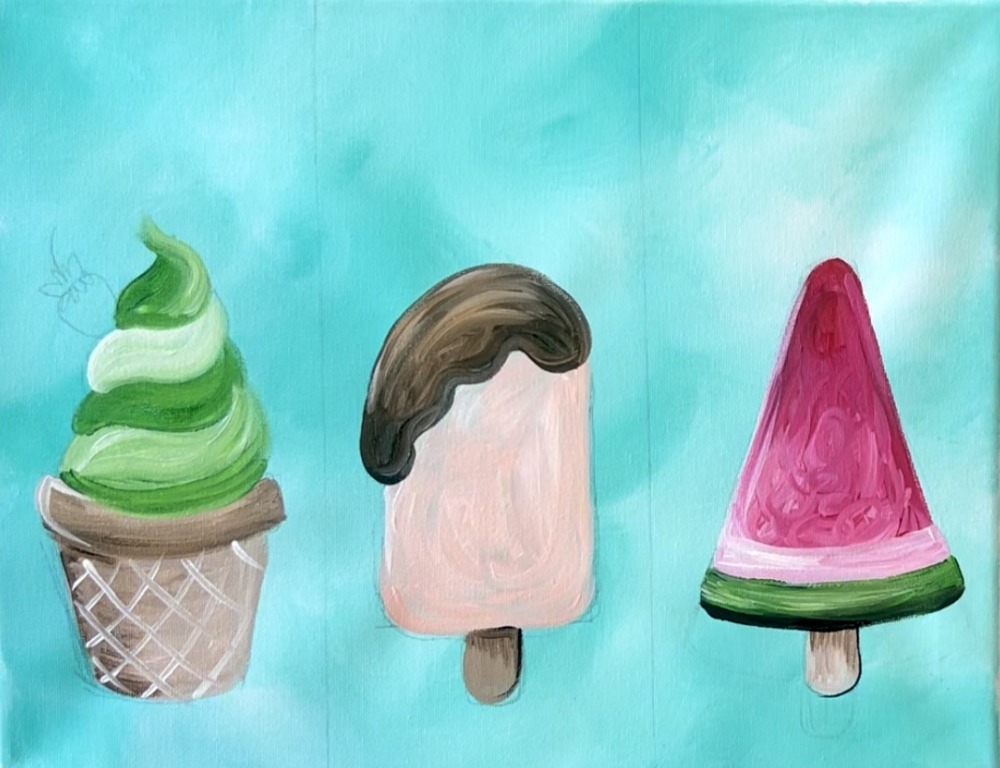
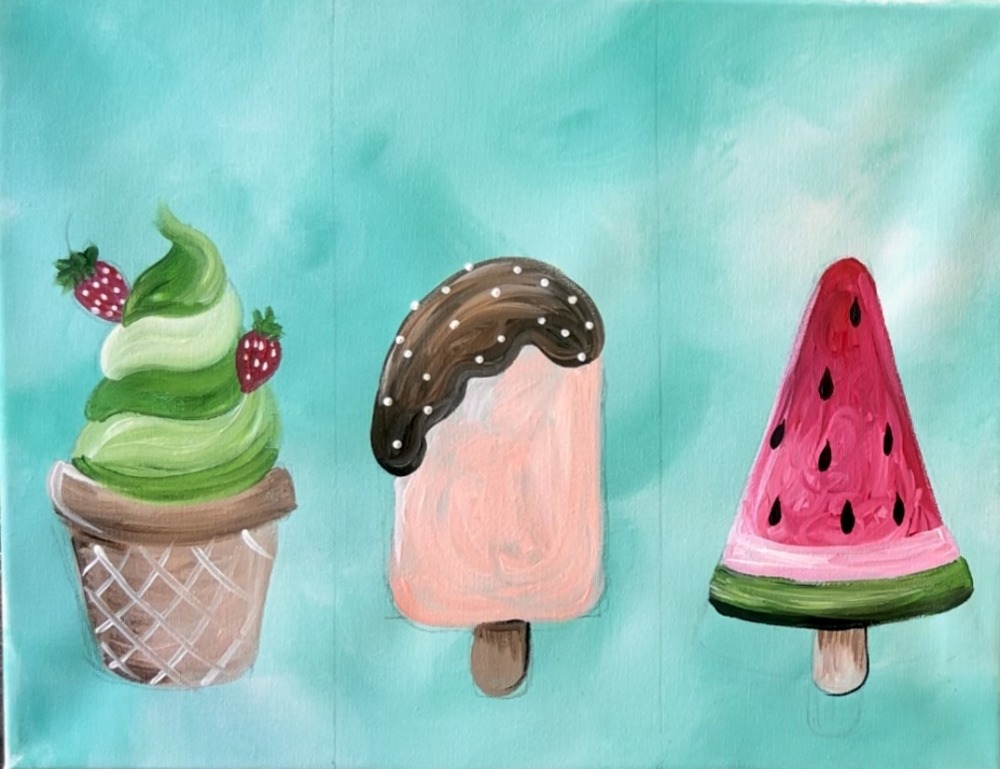
6. Add Details To Pops/ Ice Cream
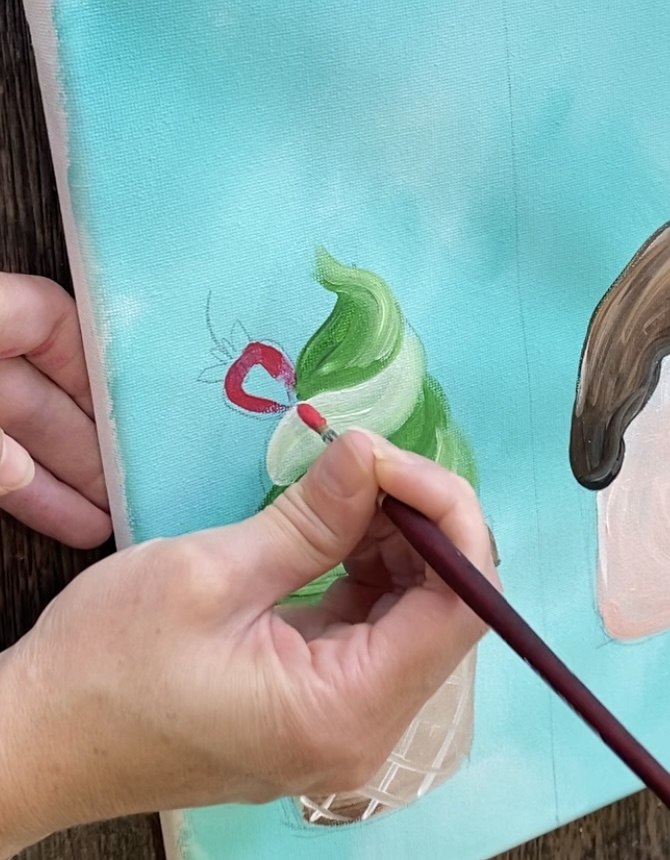
Start by painting the strawberry (or strawberries) on top of the ice cream. I used “primary red” for the red part and the “hooker’s green hue” for the green leaf part.
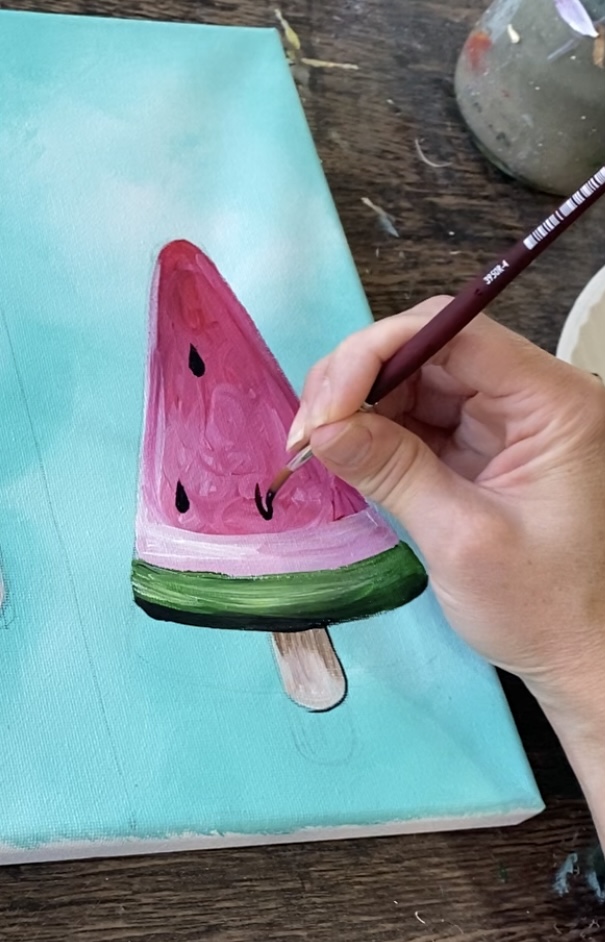
Then paint the seeds on the watermelon. These are little teardrop shapes with the point going upwards. Do this with “mars black” and the “#4 round brush”. Alternatively, you can paint the seeds with a black paint pen.
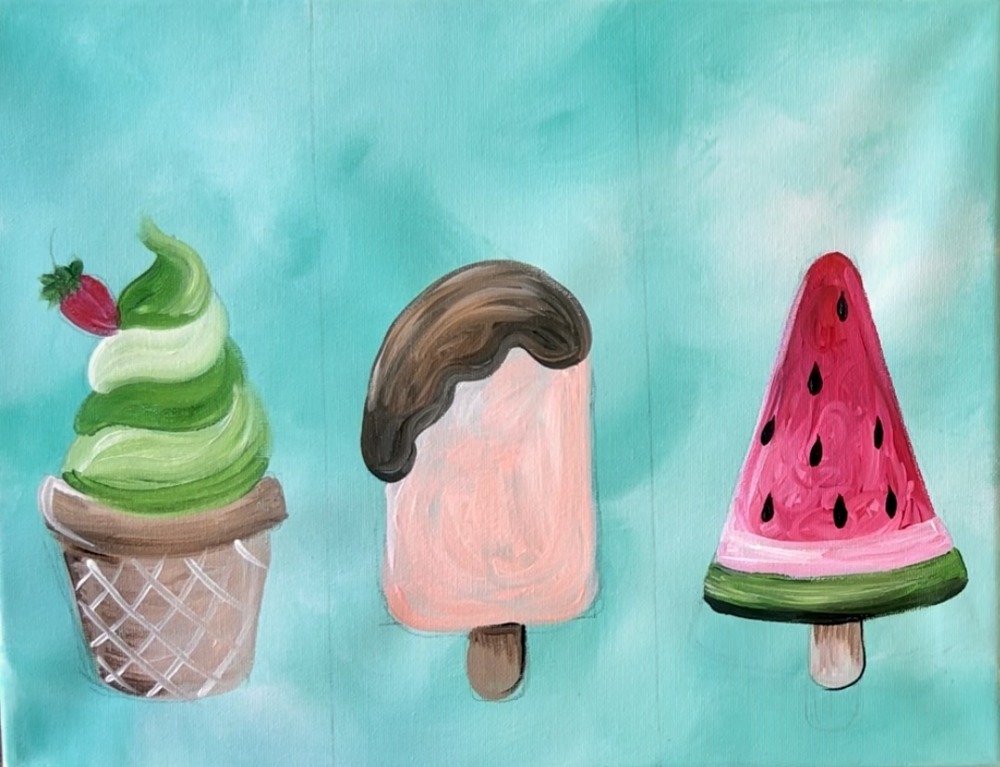
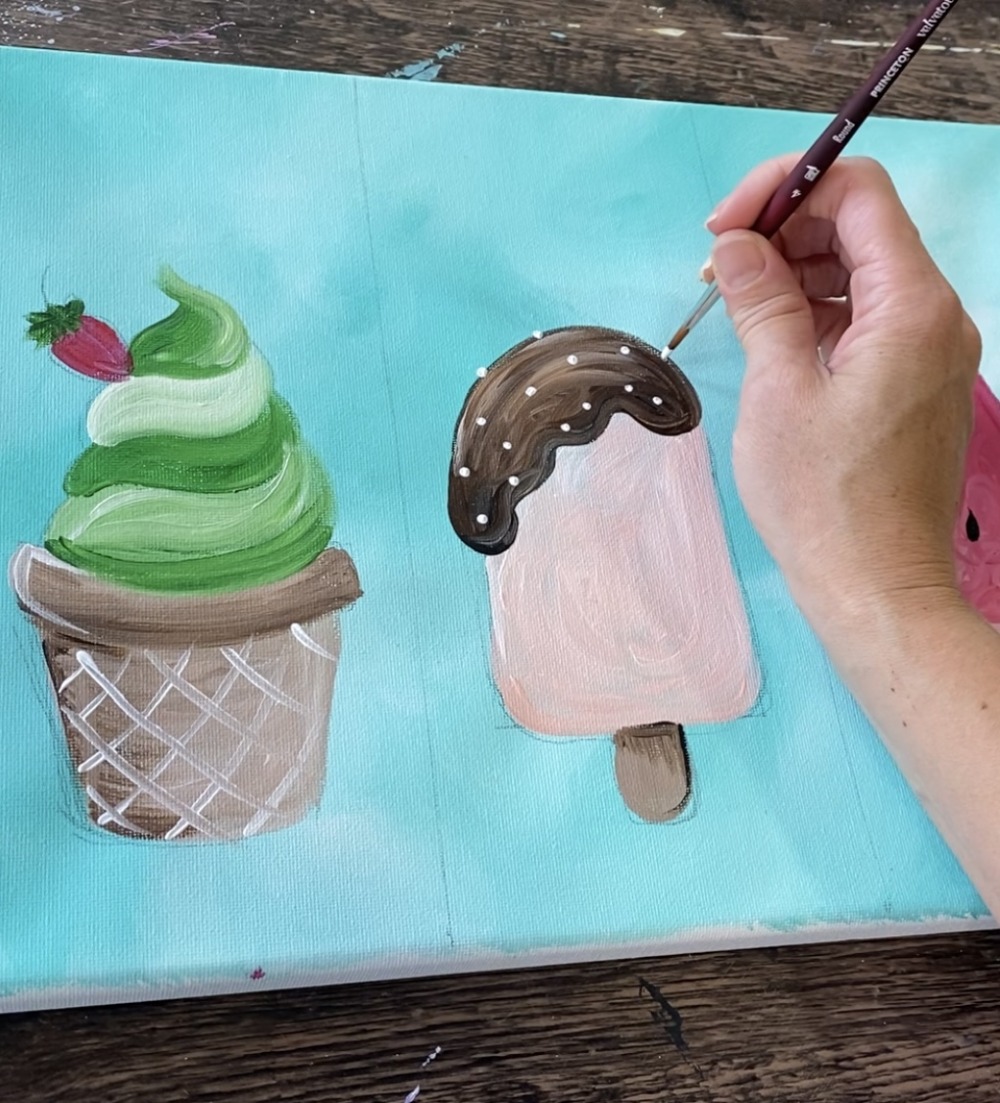
Then use “titanium white” to paint the sprinkles on the middle popsicle.
Use the white to paint tiny seeds on the strawberries. I also decided to paint another strawberry on the ice cream on the left.

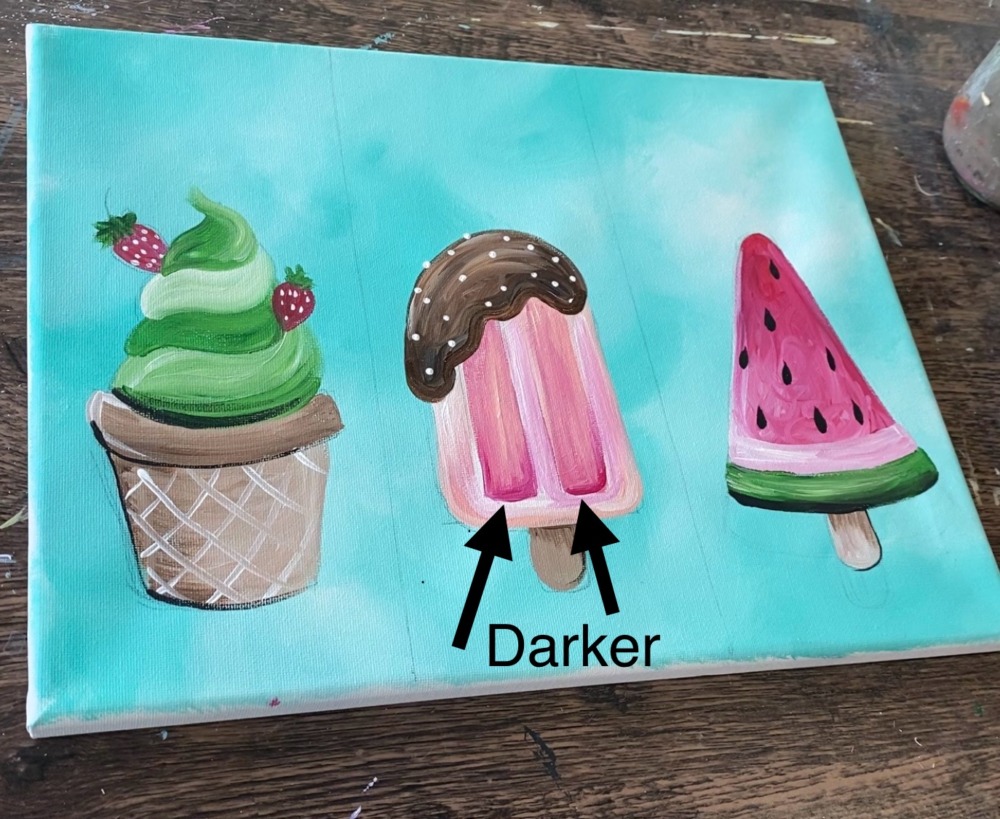
Then paint the “shading” on the popsicle in the middle. This is where we make it look three dimensional!
I found it helpful to draw two rectangles on the popsicle first lightly with a pencil. (Picture below has darkened lines so you can see them better)
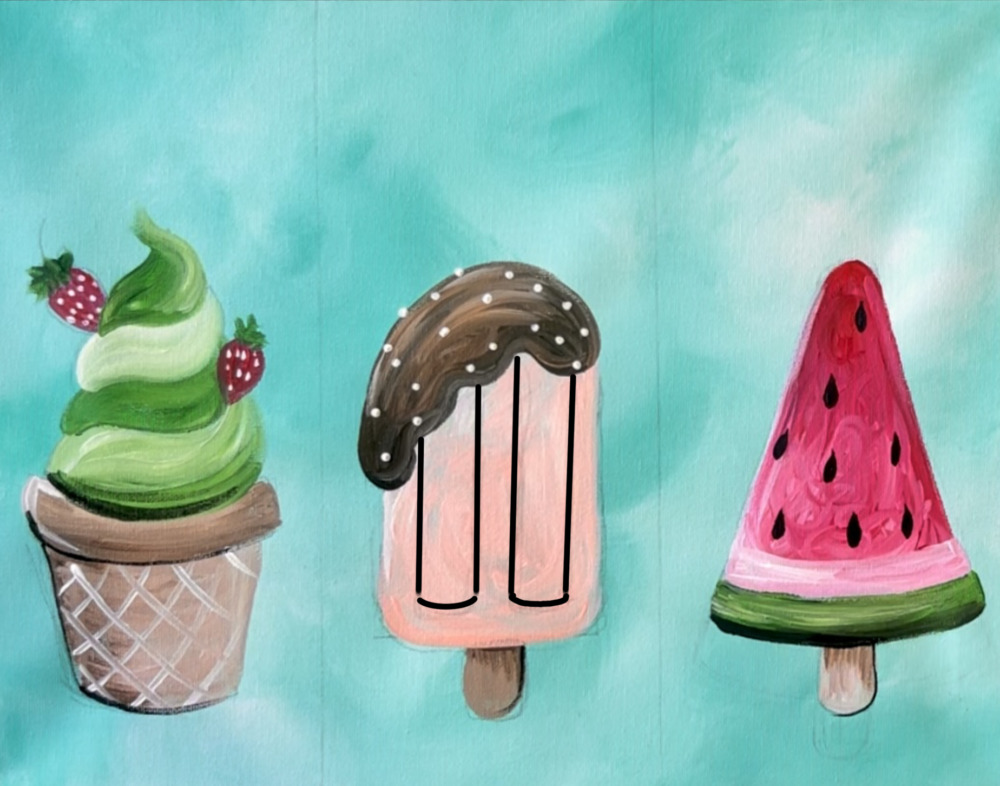
Next, mix “light pink” with “primary red” (about equal amounts). Then use the #4 round brush to paint each of the rectangles with this darkened pink color. Add bits of “light pink” onto your brush and blend that in with the darkened pink color to sort of vary this color.
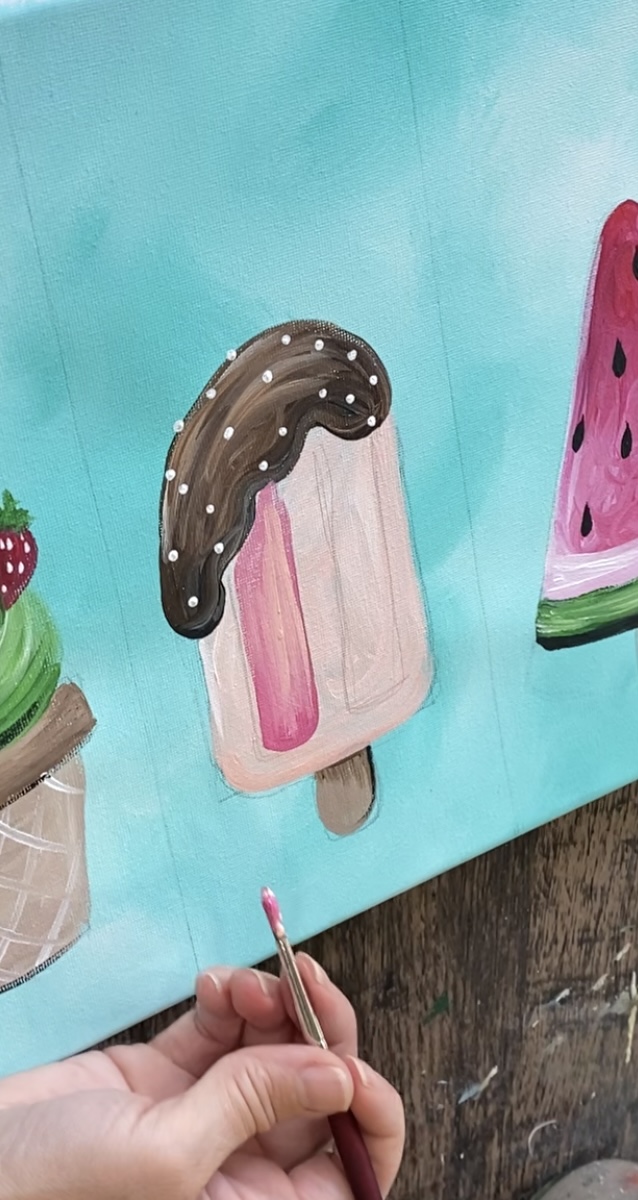
Paint both interior rectangle areas with this darker color. Then add a small amount of this darker color on the lower left corner area. Blend a little more light pink into it. Make sure the two interior rectangles stay dark compared to the outer parts.
Then double load your brush in “titanium white” and “light pink”. Repaint the center part of the popsicle and a little around the outer edges of the inner rectangles. This is to ensure the edging and center are nice and light in color.
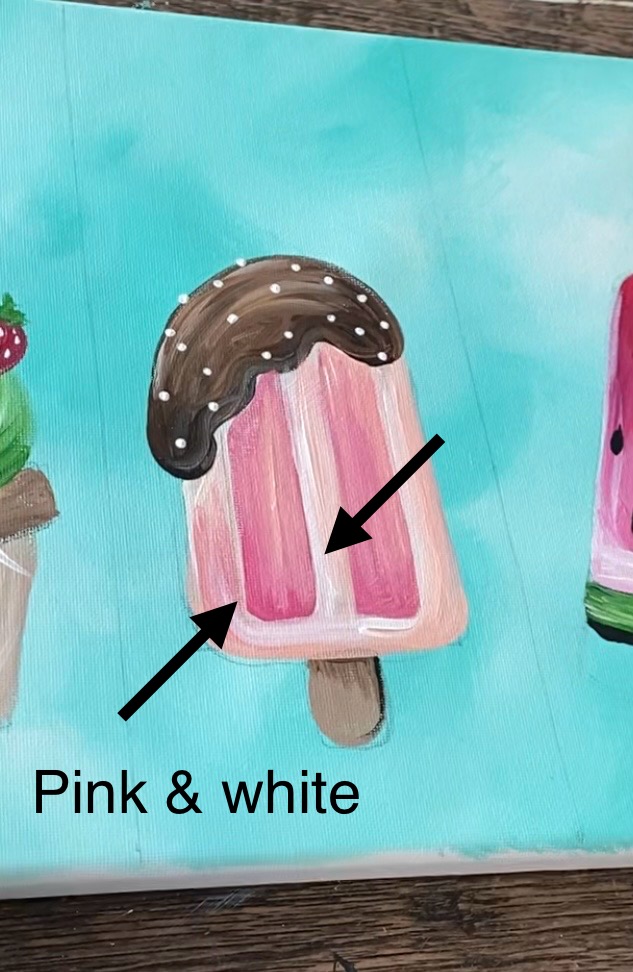
Finally, add just a little bit of “quinacridone magenta” on the bottom edges of each of the rectangles to ensure that area is much darker.
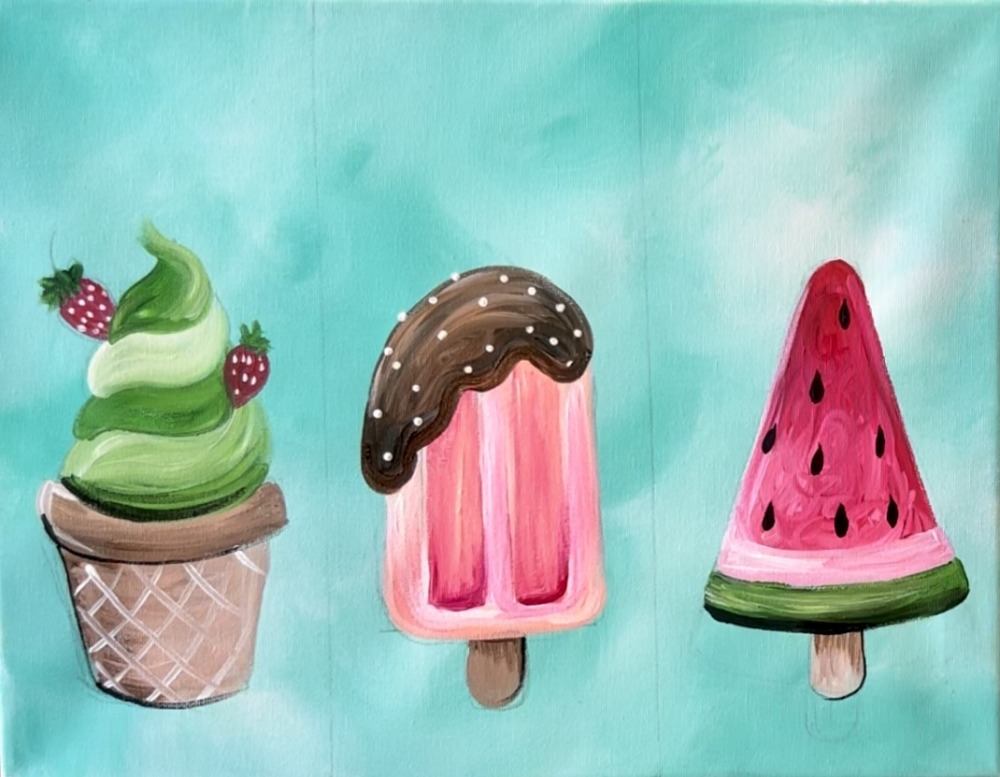
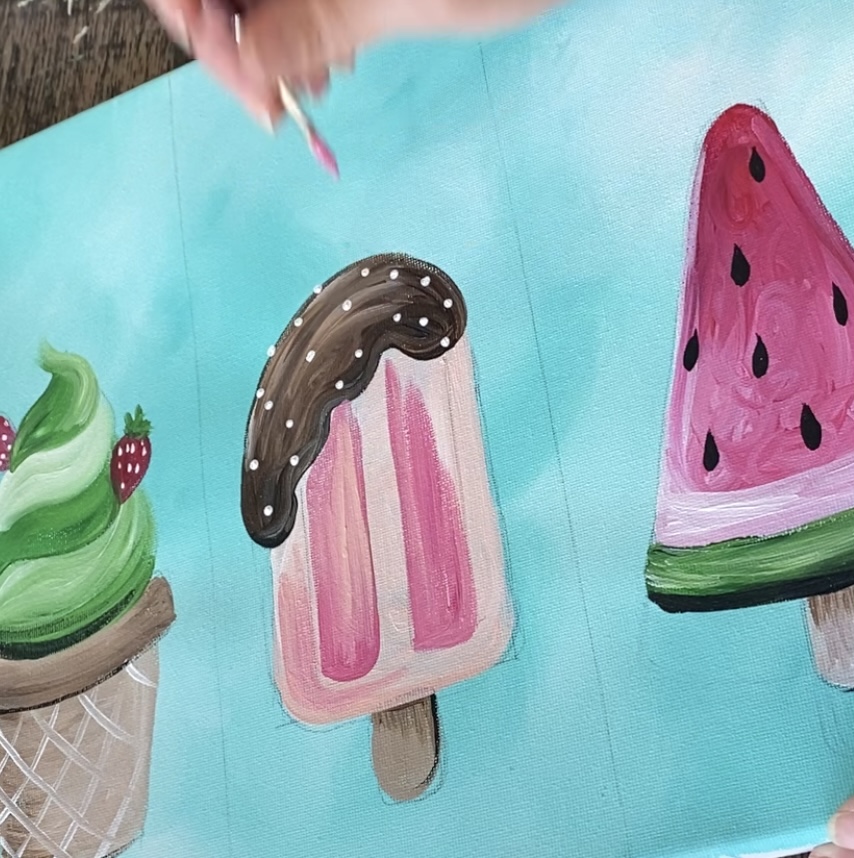
Some other details for the other ice cream pieces include…
Highlight the watermelon seeds with “titanium white”. Make a little white mark on the left side of each of the seeds.
Then add sprinkles to the top of the green ice cream. I did this with “titanium white” and “burnt umber” Also, paint a cherry on top! I used titanium white and primary red for the circle part of the cherry and burnt umber for the stem.
7. Paint Shadows
Make a very watered down “mars black” on your paint palette by scooping up water with your #4 round brush and adding it to the black paint. The consistency should be water color consistency. Then paint the shadows by painting loose left and right paint strokes going in a diagonal direction under each of the popsicles down to the bottom edge of the canvas.
8. Paint Citrus Slices & “Hello Summer”
To do the lime wedge, use the #4 round brush to paint an arc line. Then add “titanium white” to your green to make a light green color. Paint the half circle shape inside of the lime wedge with this light green. Wait for this to dry before doing the white lines on the lime.
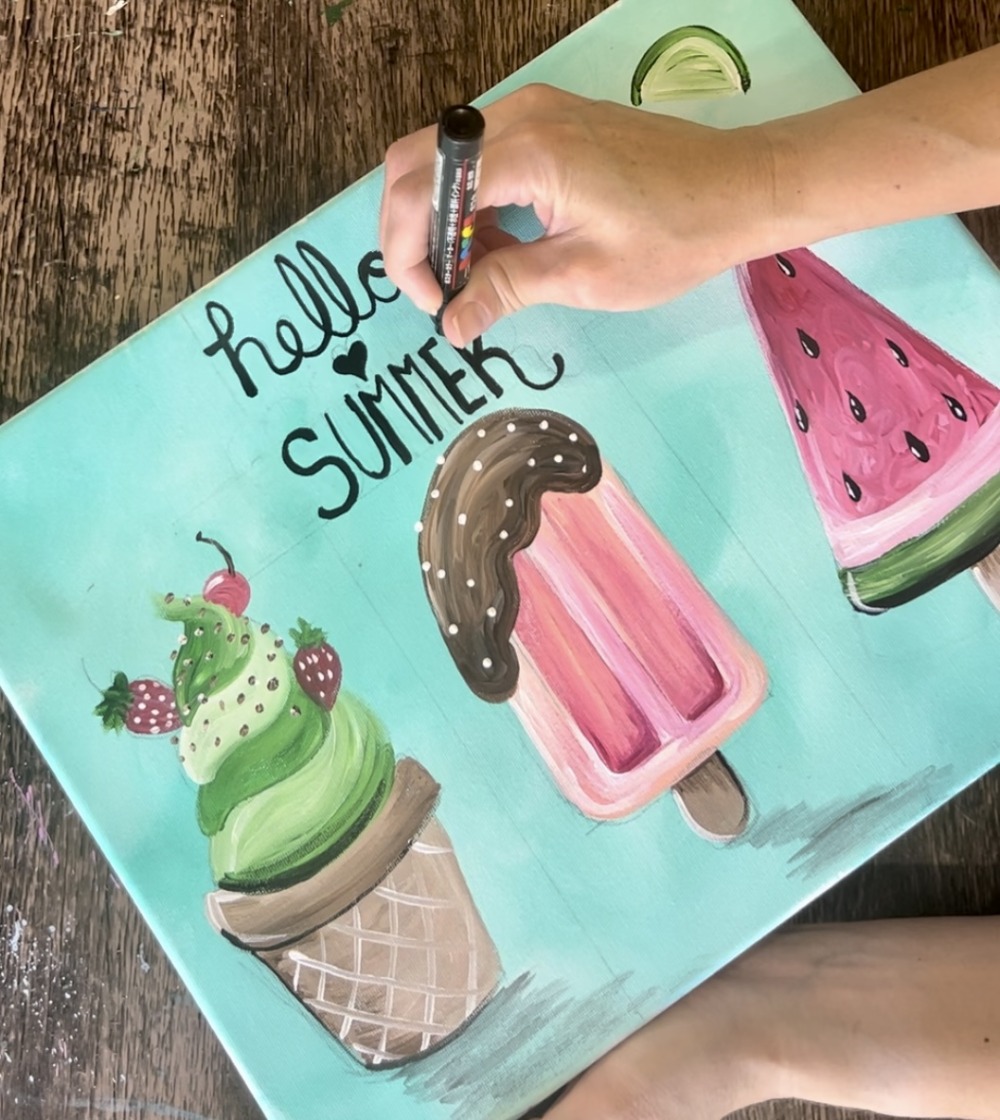
Next, do the lettering. Use a ruler to help line up your letter lines. Use a pencil to lightly draw the letters. I highly recommend doing this in pencil first so you can get the positioning right and erase if needed. I did “hello” in cursive lettering. Then I did a little heart below it. Outline your lettering with a black POSCA paint pen.
Next, “SUMMER” was written with all capitalized letters.
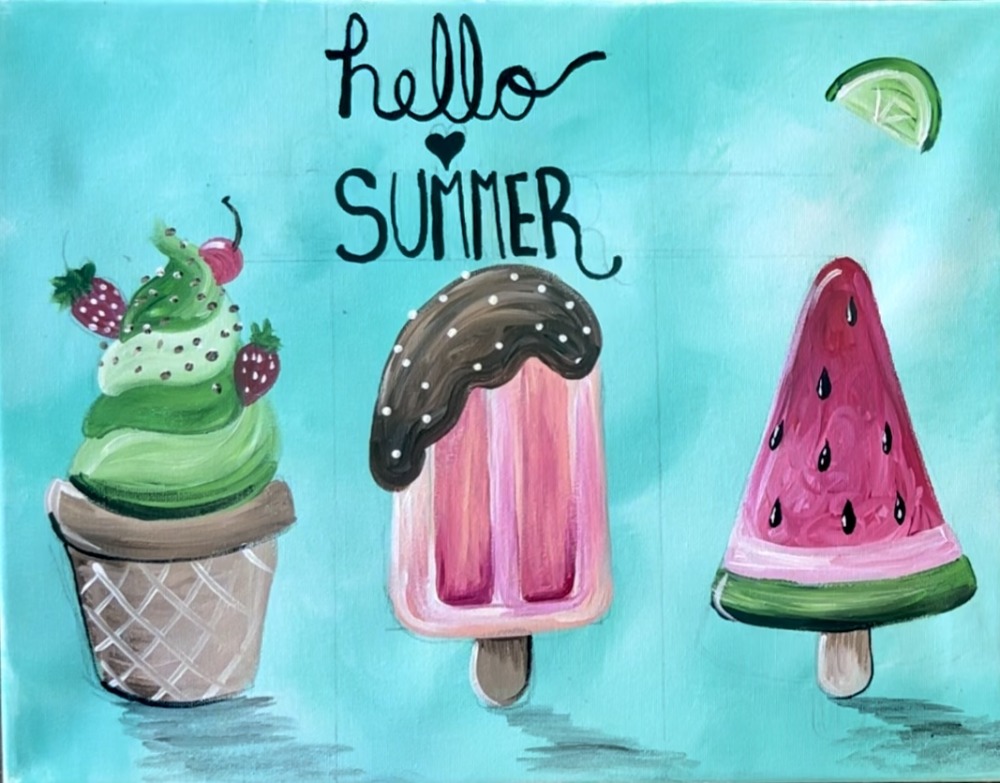
You are welcome to change the font and words on this to anything you want! After doing the letters, I like to go back and make some of the lines a little thicker in some areas of the letters.
Next, paint some more citrus slices. For the lemon, I mixed “primary yellow” with “titanium white”. This ensures the yellow shows up light in color against the darker background. Paint a half circle.
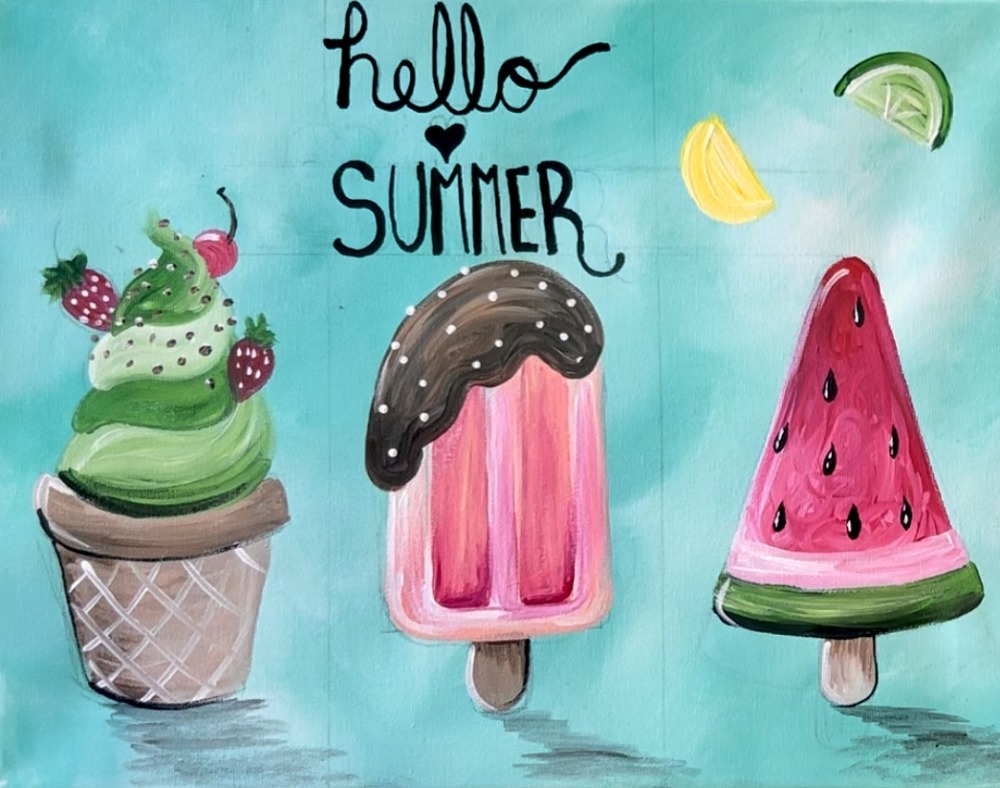
Then I did a full circle citrus slice in the upper left.
To make the peel of the citrus darker, add a tiny bit of “primary red” into your yellow. Then paint the peel of the lemons. After this dries, use titanium white to paint the “pith” white. This is the white part under the outer rind.
As a last step, I did an orange slice. You can make orange on your palette by mixing “primary red” with “primary yellow”. Use “titanium white” to create the lighter orange parts of the orange.