
Let’s paint a peaceful and serene Spring landscape with acrylics! This is an easy level painting tutorial.
Would you like to save this?
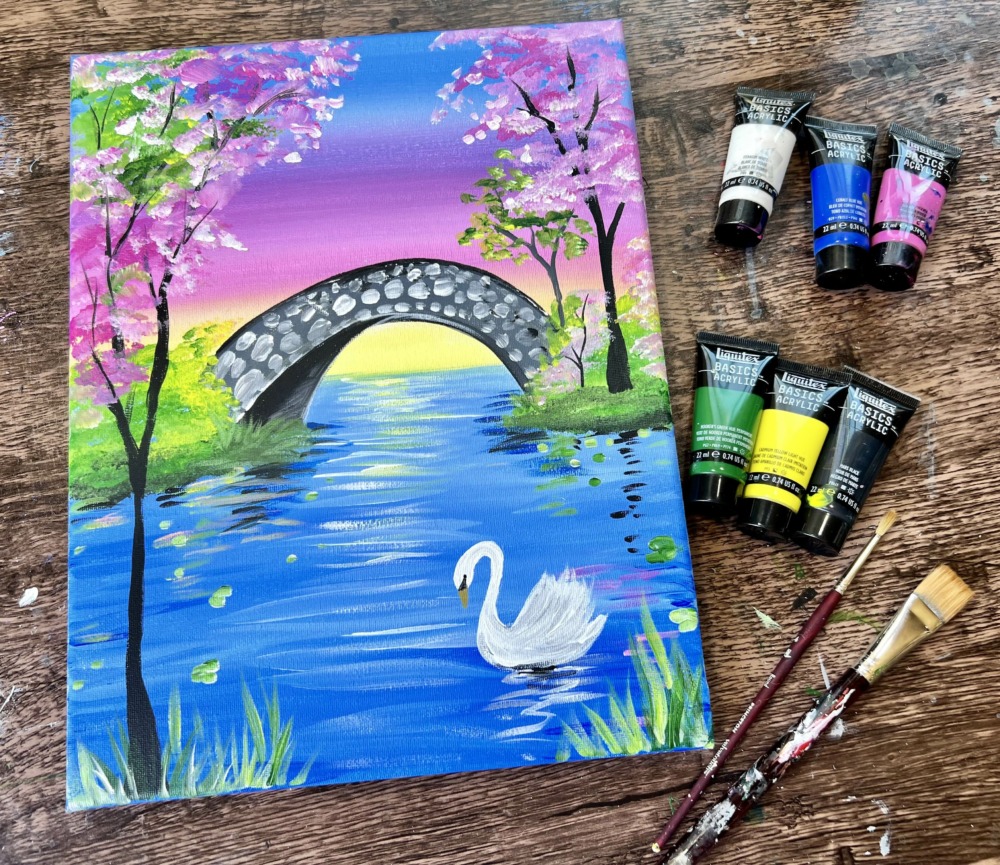
This painting is done on an 11 x 14 canvas with only 6 colors and two brushes.
Enjoy and happy painting!
Materials
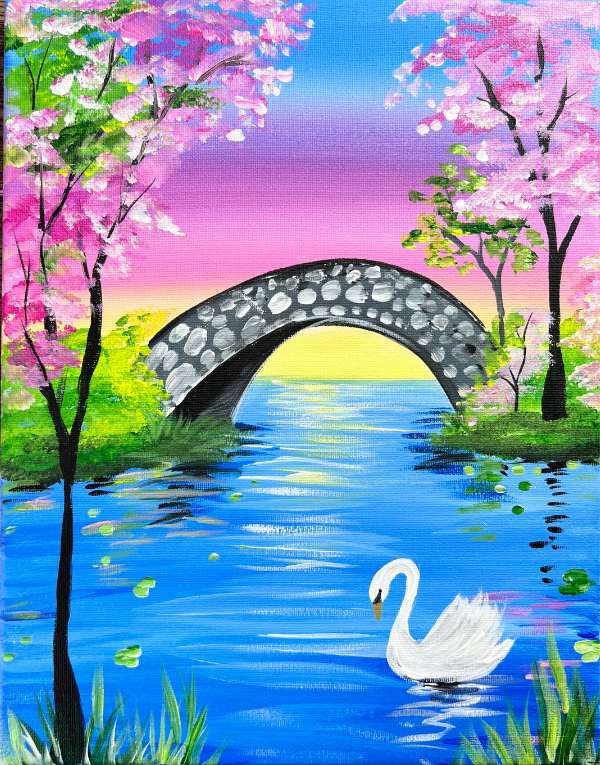
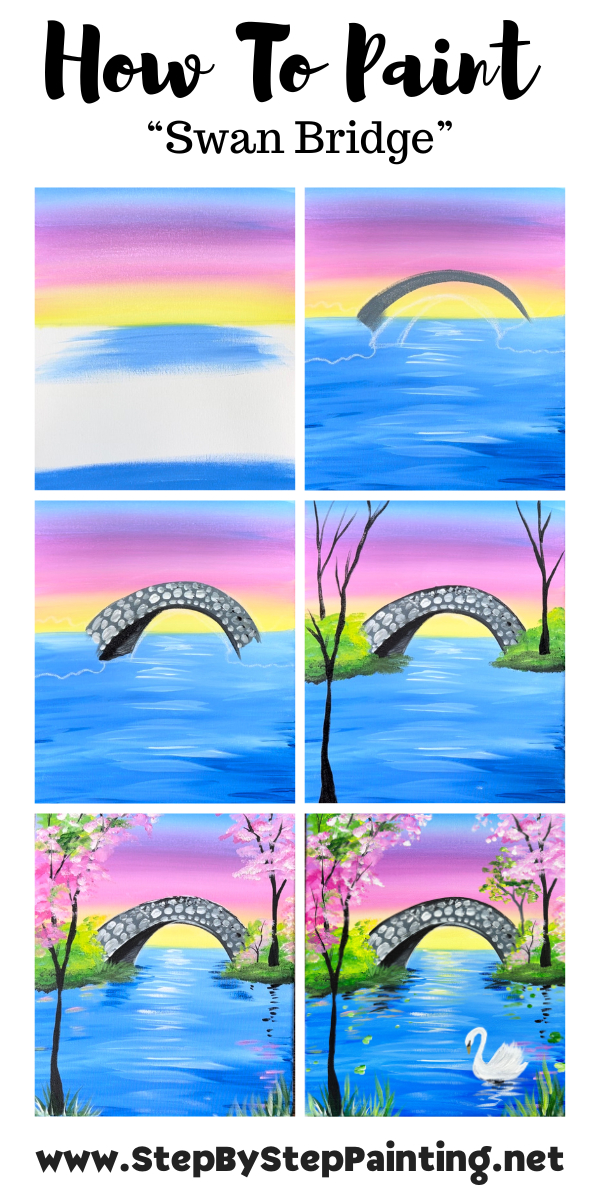
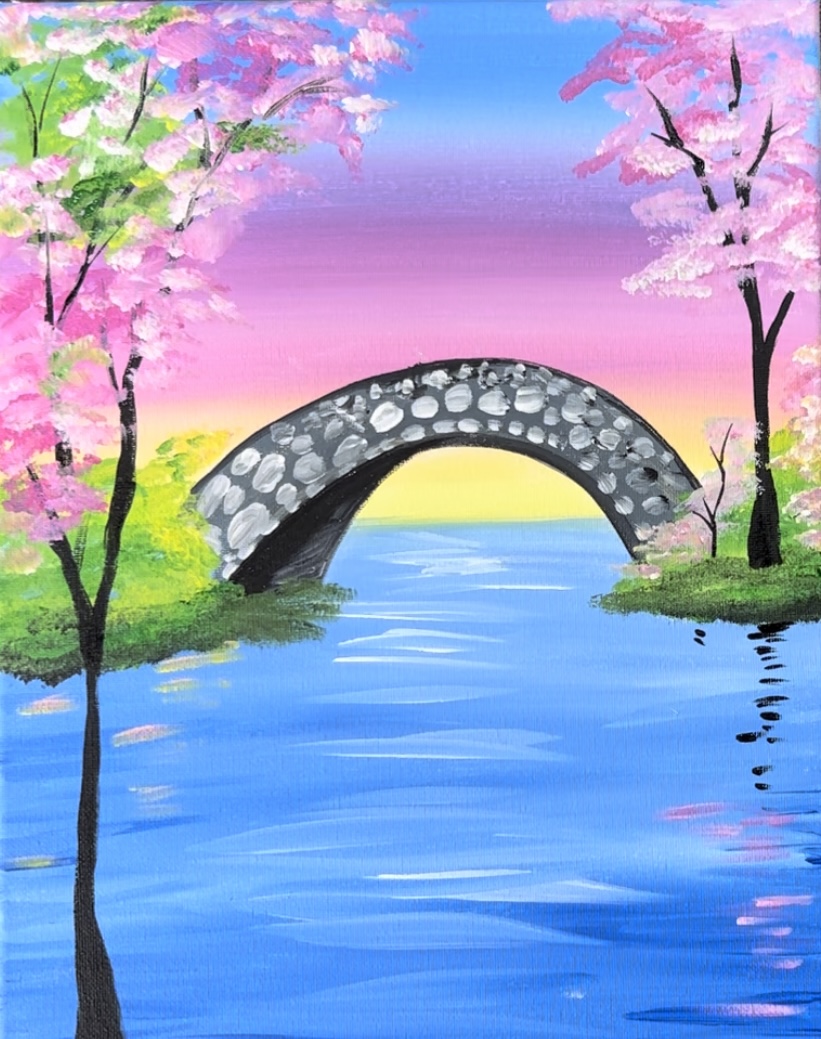
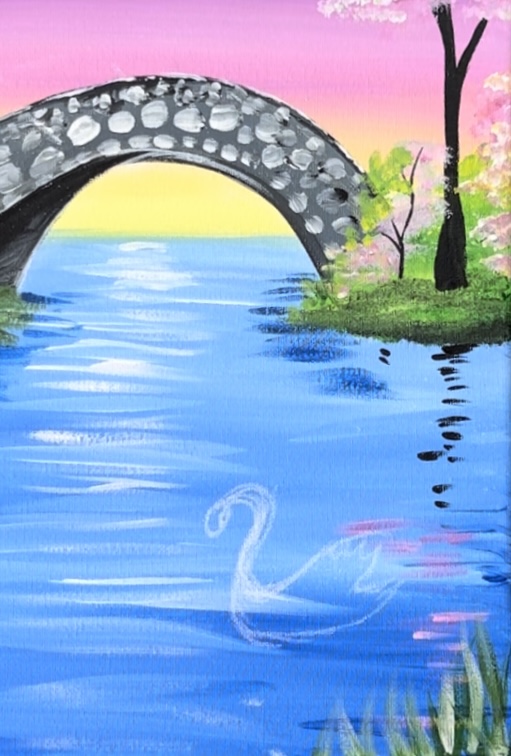
Swan Bridge
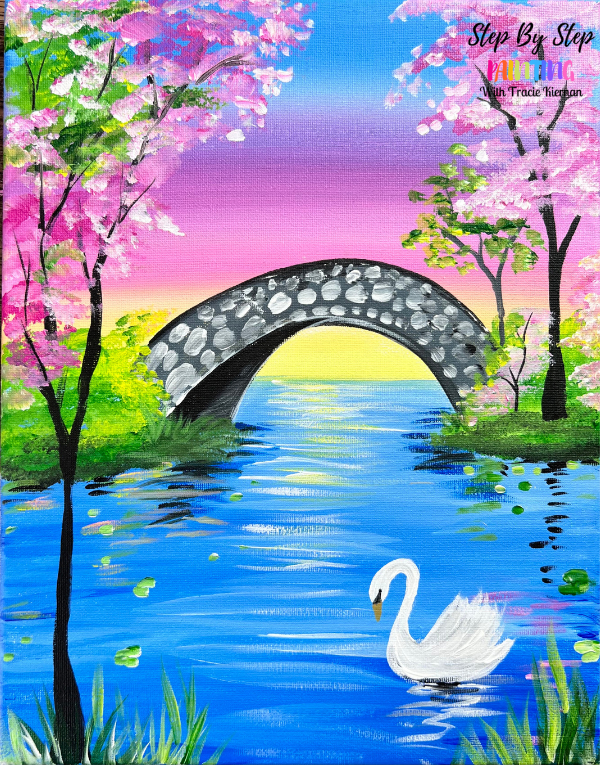
Let's paint a beautiful serene landscape painting of a bridge with spring trees and a swan.
Materials
- 11 x 14 Canvas
- Acrylic Paints (I use Liquitex BASICS)
- Brushes (I used Princeton Velvetouch)
- White Chalk (for drawing bridge)
- White Chalk Pencil (for drawing swan)
- Ruler
- Pencil
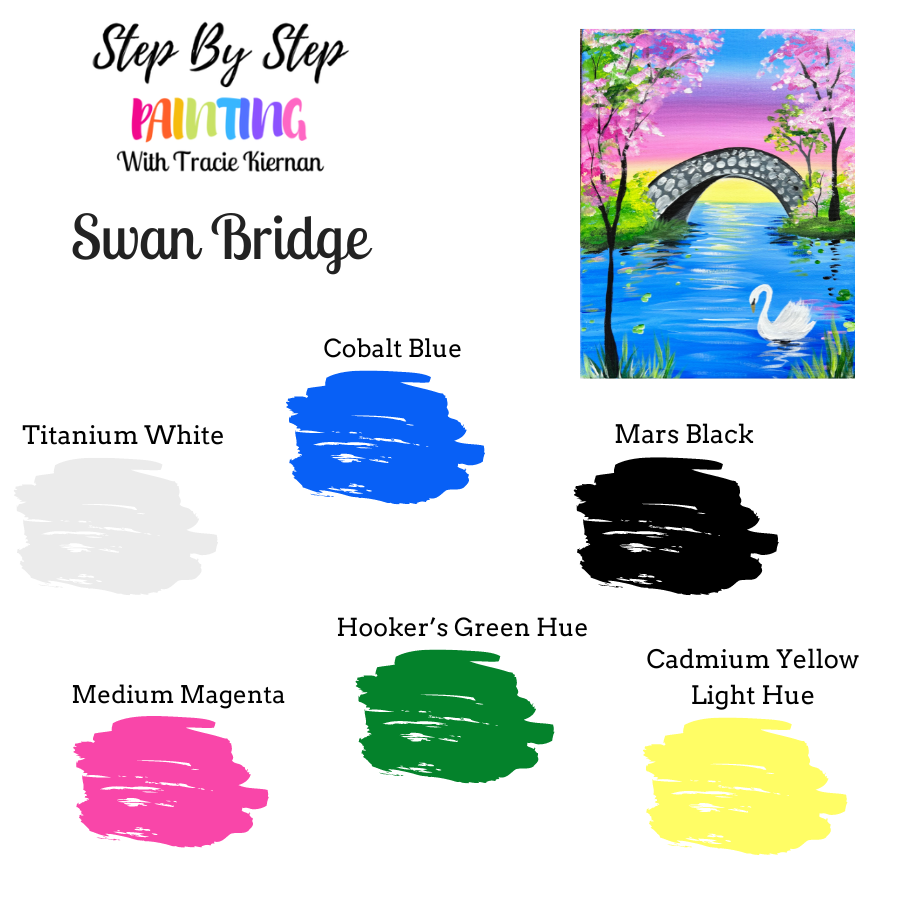
Colors
- Titanium White
- Mars Black
- Medium Magenta
- Hooker's Green Hue
- Cobalt Blue
- Cadmium Yellow Light Hue
Brushes
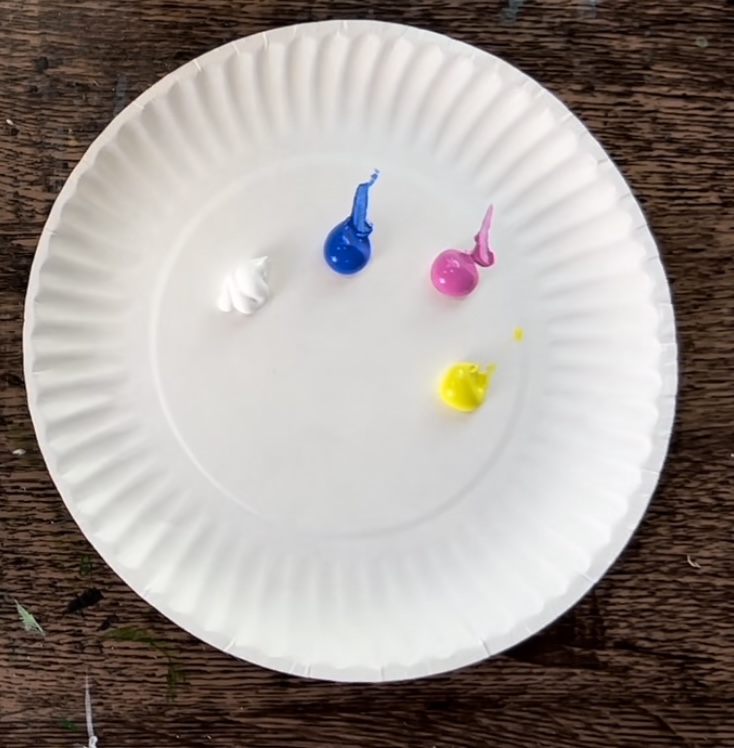
Color Palette
Directions At A Glance
Video
Step By Step Directions
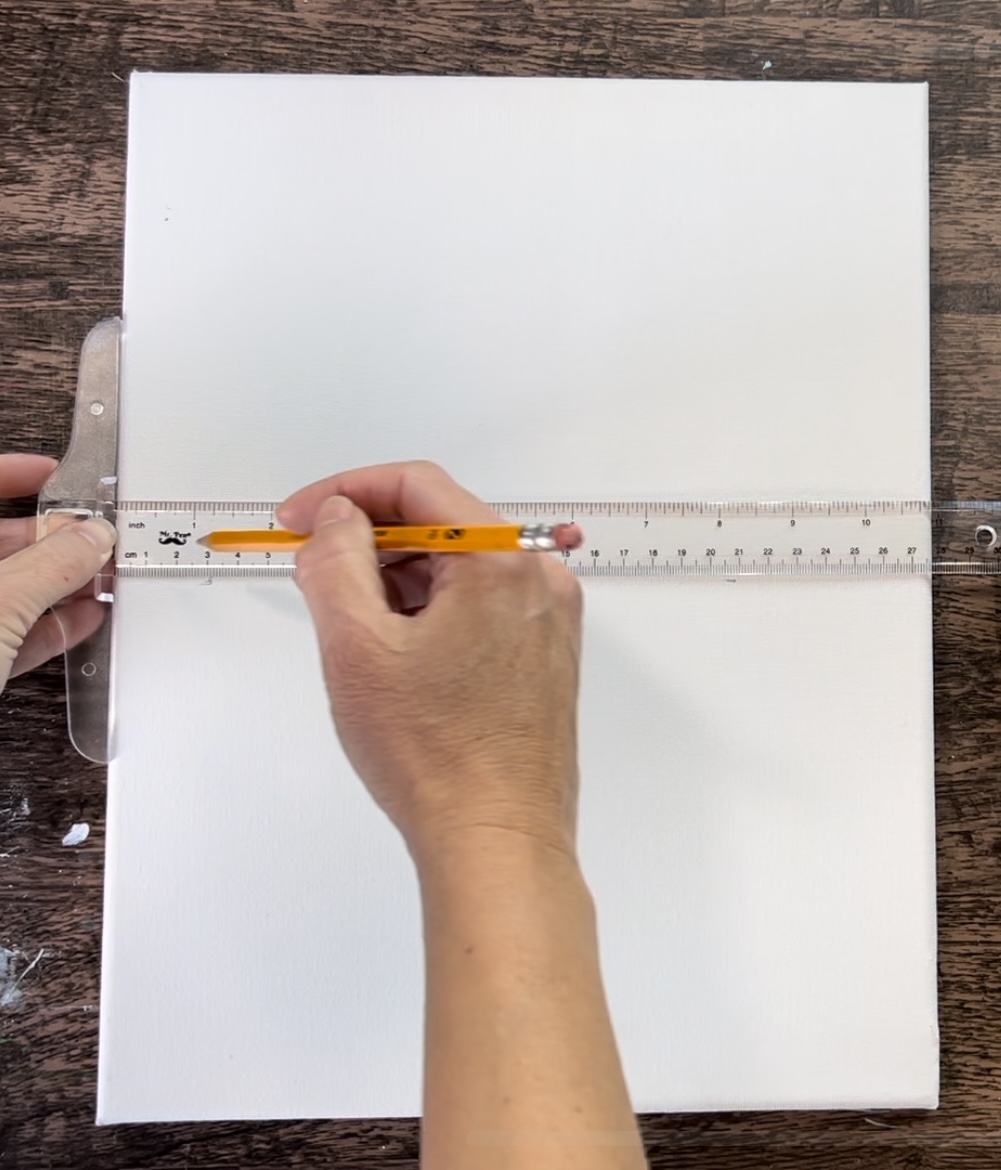
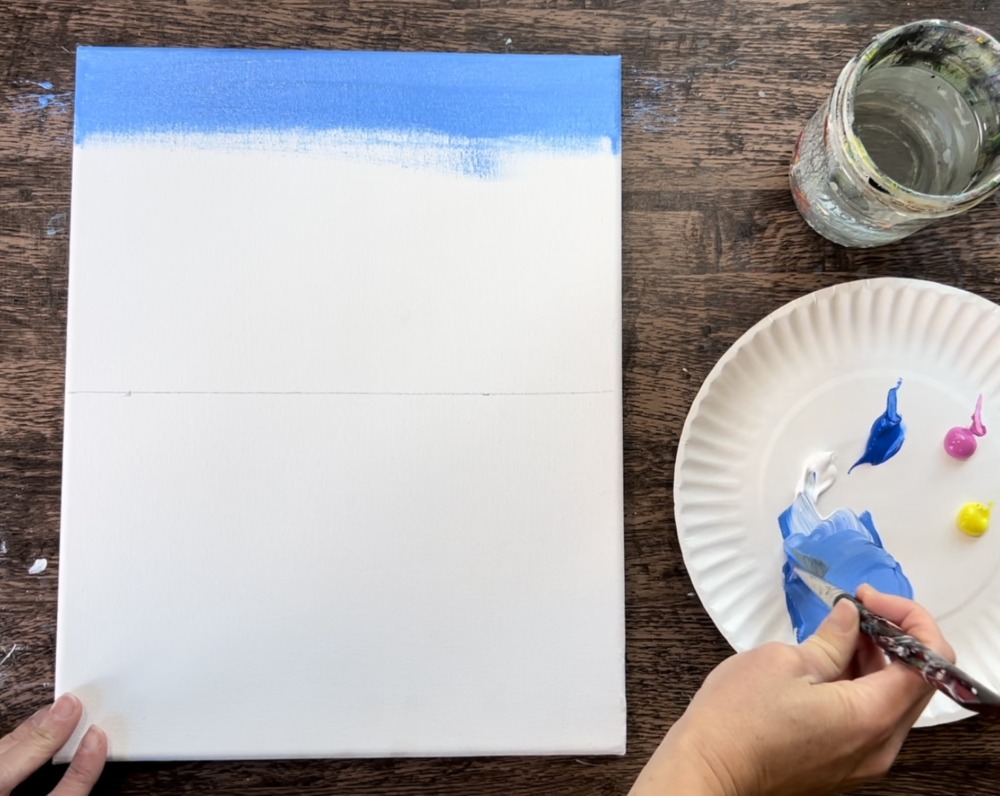
1. Draw “Horizon Line”
Position your canvas so it is vertical.
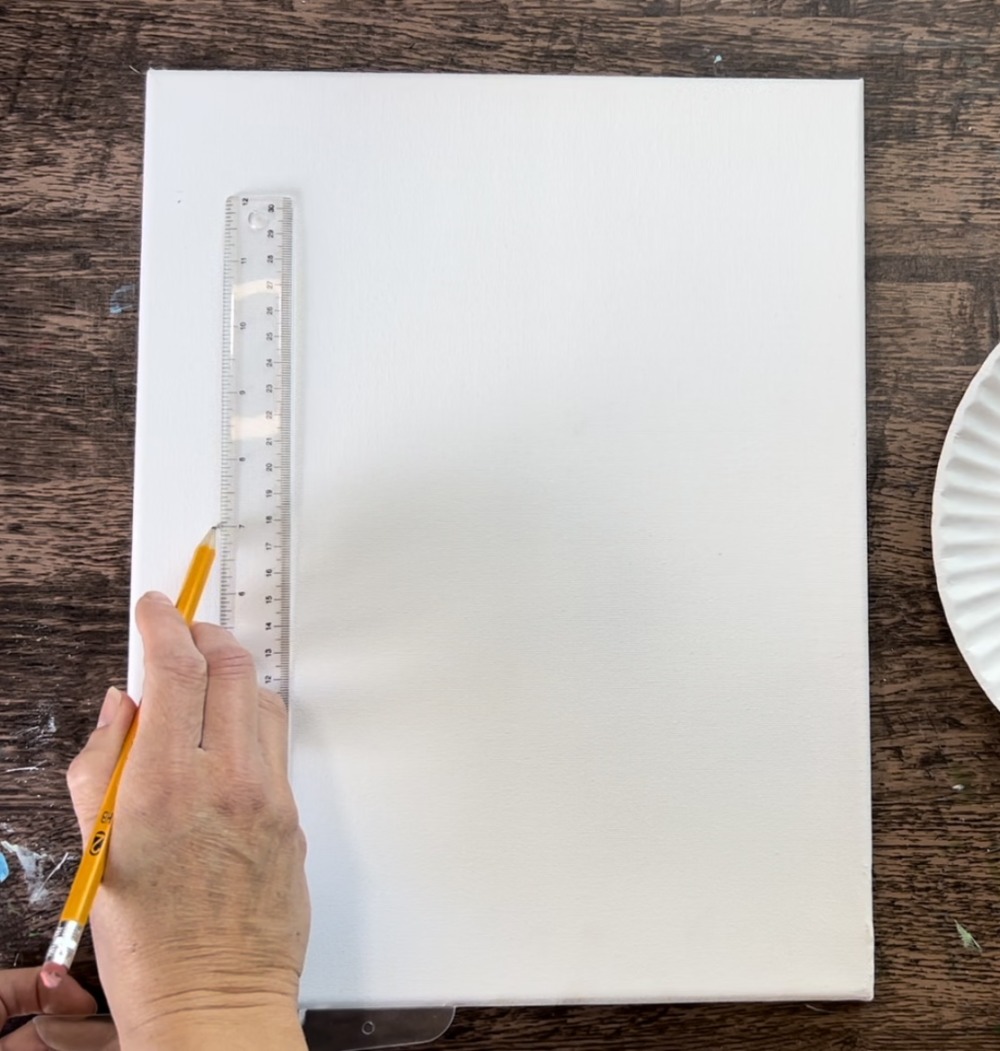
Measure the center of the canvas. Then draw a horizontal line using a pencil and a t-square ruler (or straight edge) all the way across the canvas.
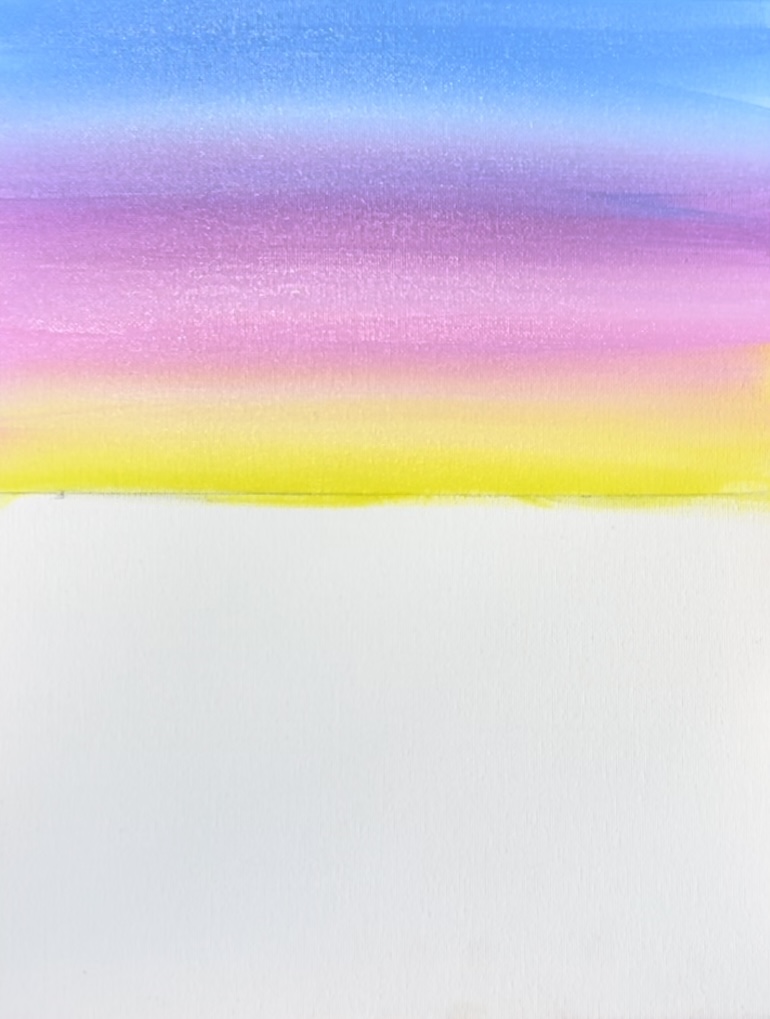
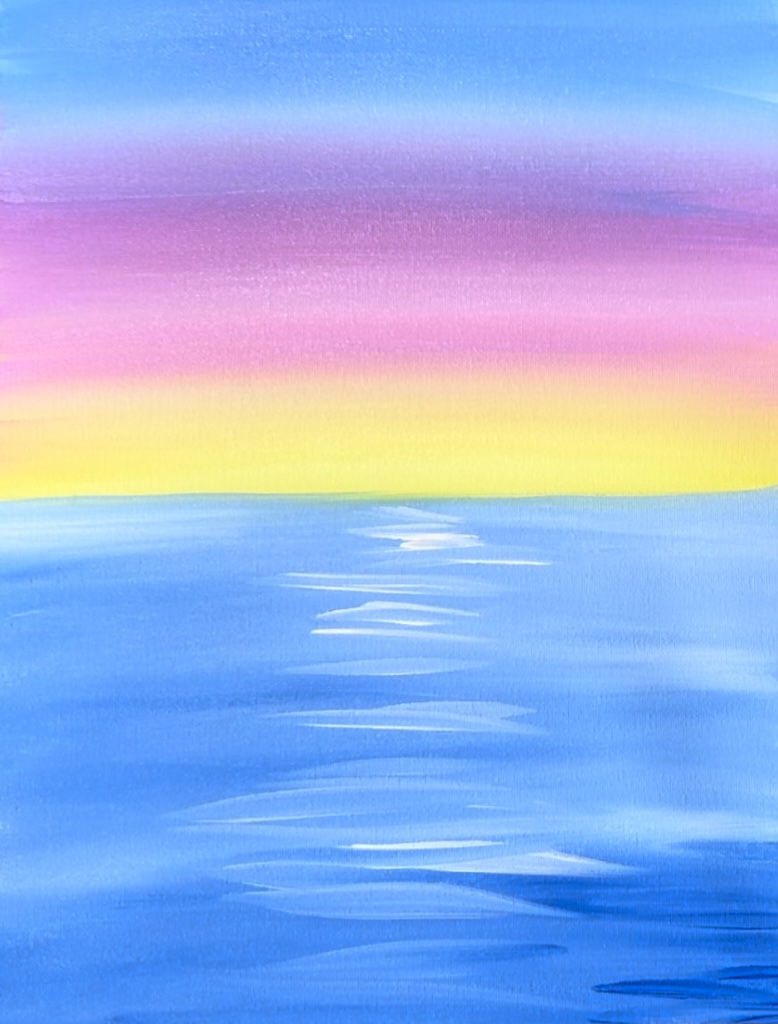
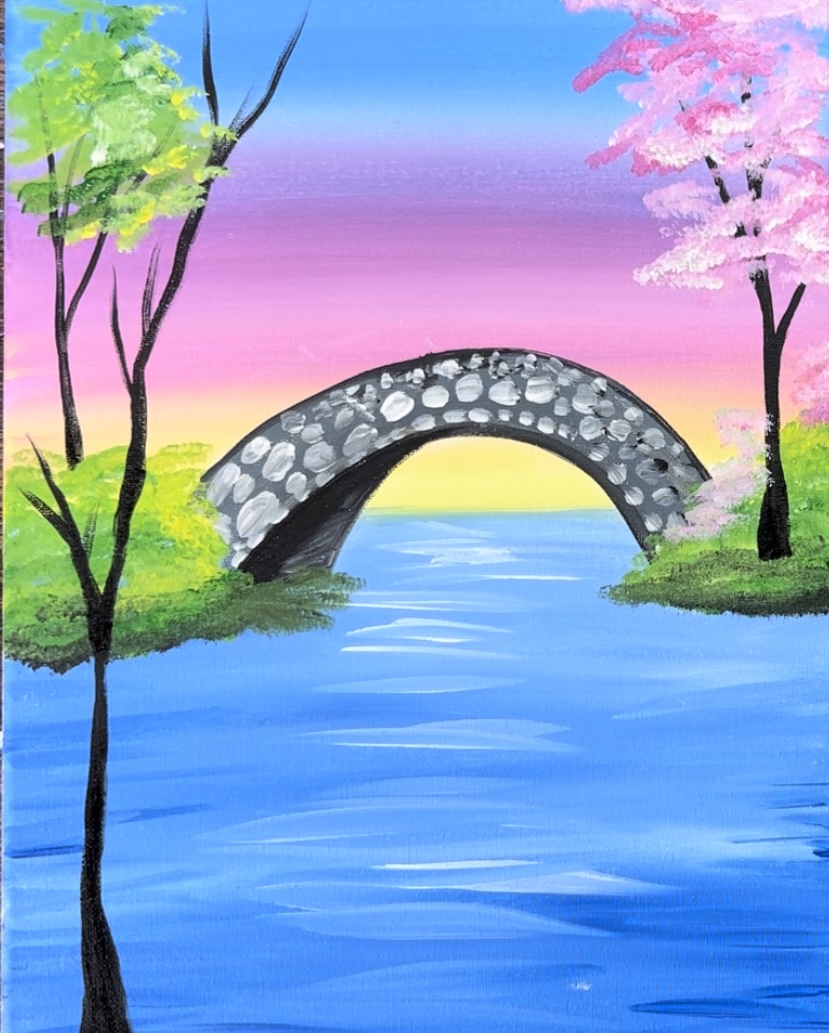
2. Paint Sunset Sky
The sky is a gradient blend of blue to pink to yellow. We will be blending these three colors to create a basic sunset sky. Titanium white will be used to help us blend these colors together!
Load your paint palette with the four colors: titanium white, cobalt blue, medium magenta and cadmium yellow light hue.
Mix equal amounts of “cobalt blue” with “titanium white”. Use your 3/4″ flat wash brush to paint left and right paint strokes at the very top of the canvas. If needed, add a small amount of water into the paint to thin it down a bit. Go down about 2″ with this blue.
Wipe the brush off. Then add “titanium white” to your brush. Blend white below the blue. It will turn a light “hazy blue” color. Then, on your palette, mix “medium magenta” and “titanium white” together. Gently blend this light pink color below your white. Go down a few more inches with this pink. It will turn purple.
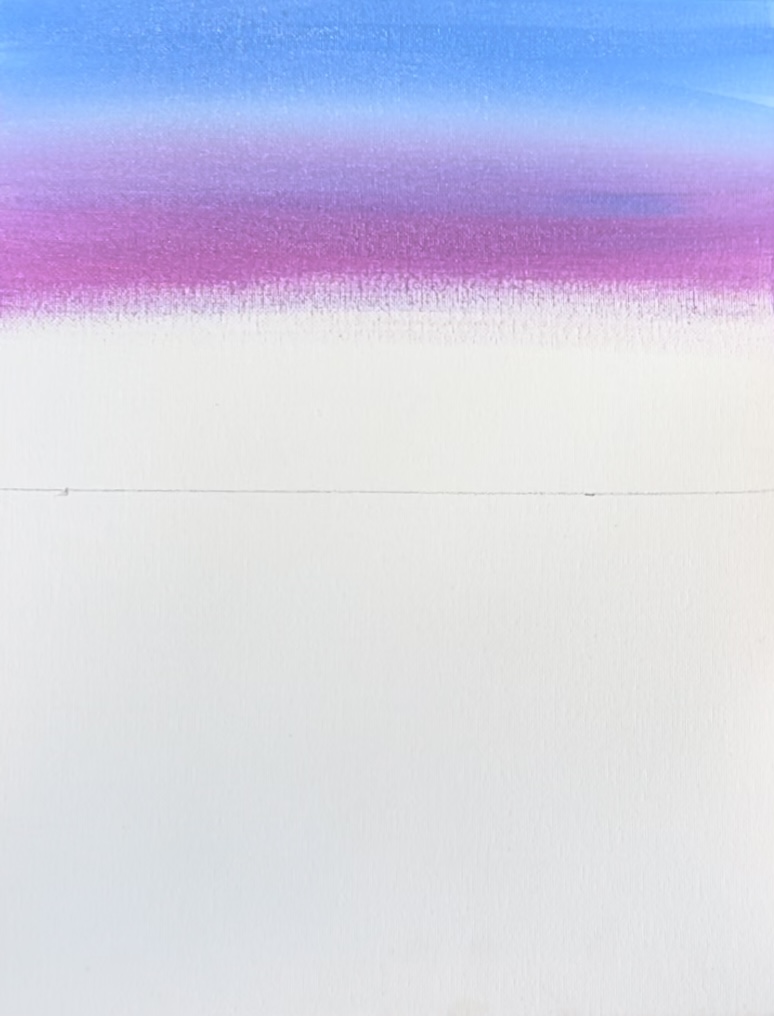
If needed, rinse the brush off and add just pink to your brush to allow it to turn more of a pure pink color.
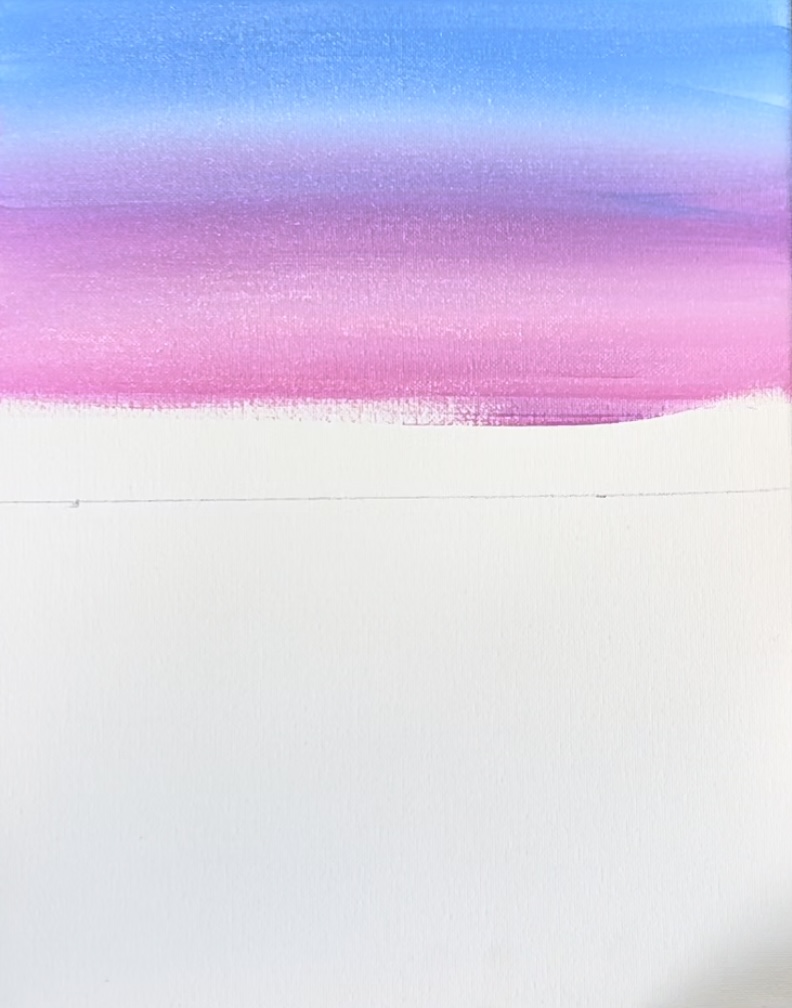
Rinse the brush. Then add “titanium white” to the brush. Blend this white below the pink and go almost all the way down to the horizon line. This will turn a very light pink color and will help us transition to yellow.
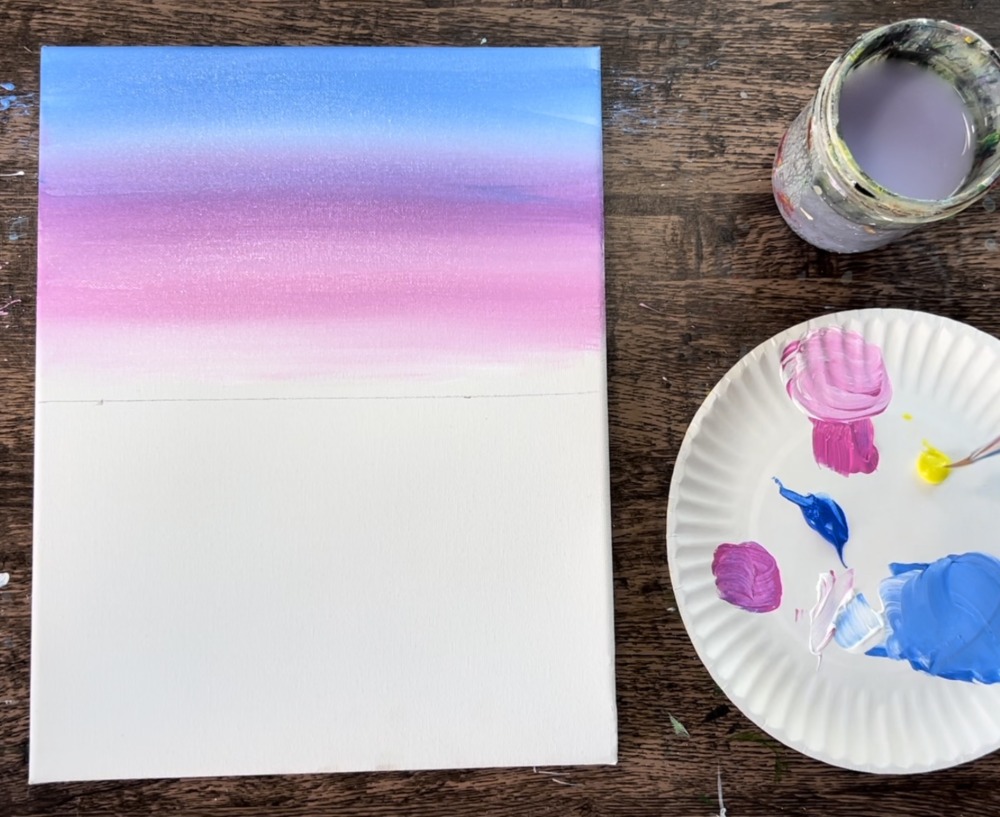
Rinse the brush. Then load it into “cadmium yellow light hue”. Blend this below the white and go all the way down to the horizon line. If needed, add more white to your brush to help the yellow to blend.
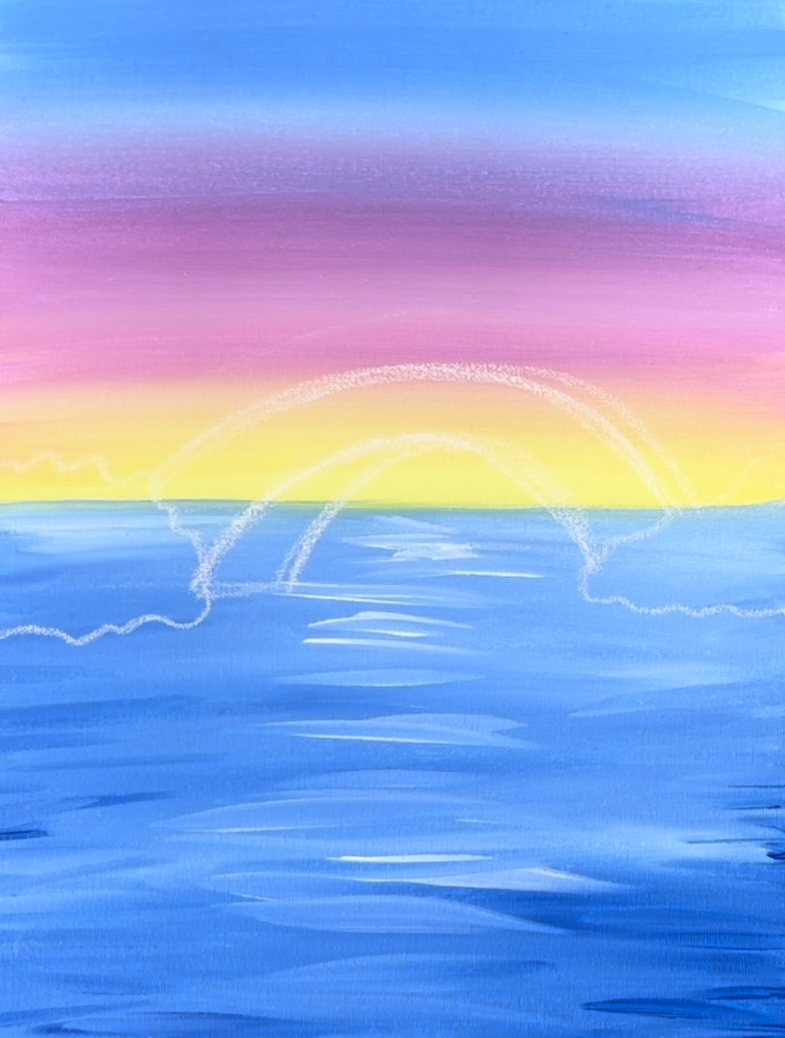
3. Paint Water Area
Completely rinse your brush. Mix “cobalt blue” with “titanium white” (the same color you started with for the top of the sky). Use the 3/4″ flat brush to paint left and right paint strokes. Start below the horizon line.
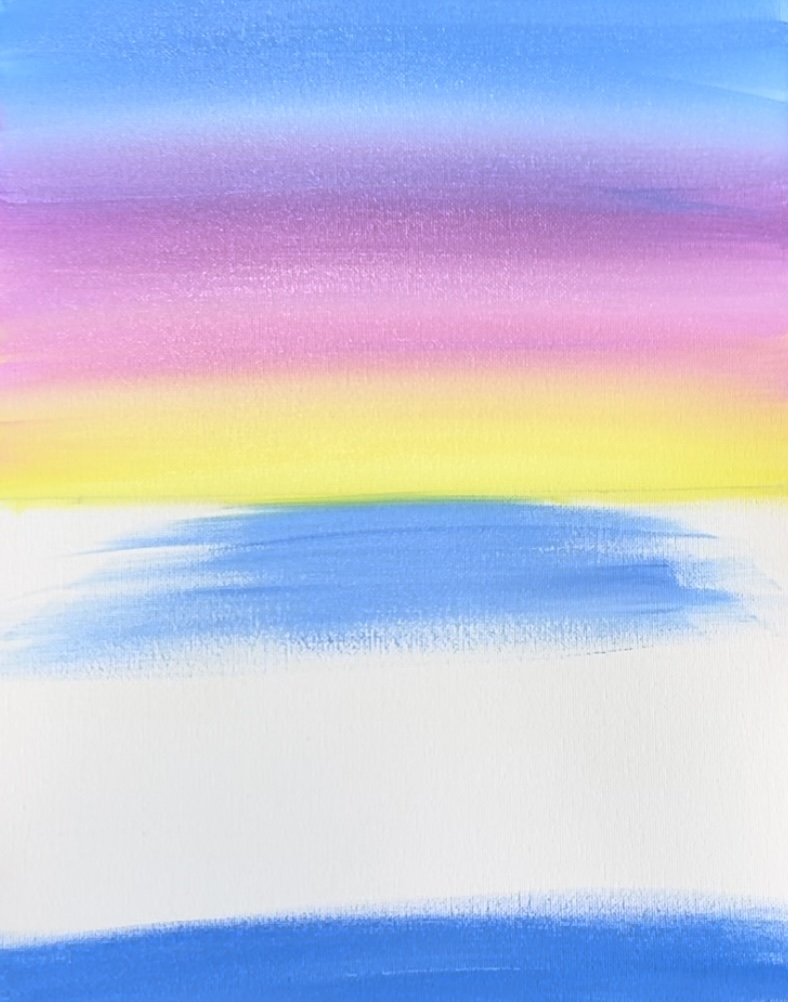
Then add just “cobalt blue” on the bottom. Essentially we want the water area to be slightly darker on the bottom and blend to lighter tints of blue at the top under the horizon line. To do this, blend white with the blue at the top but don’t blend it in all the way. Leave streaks of light blue in that area.
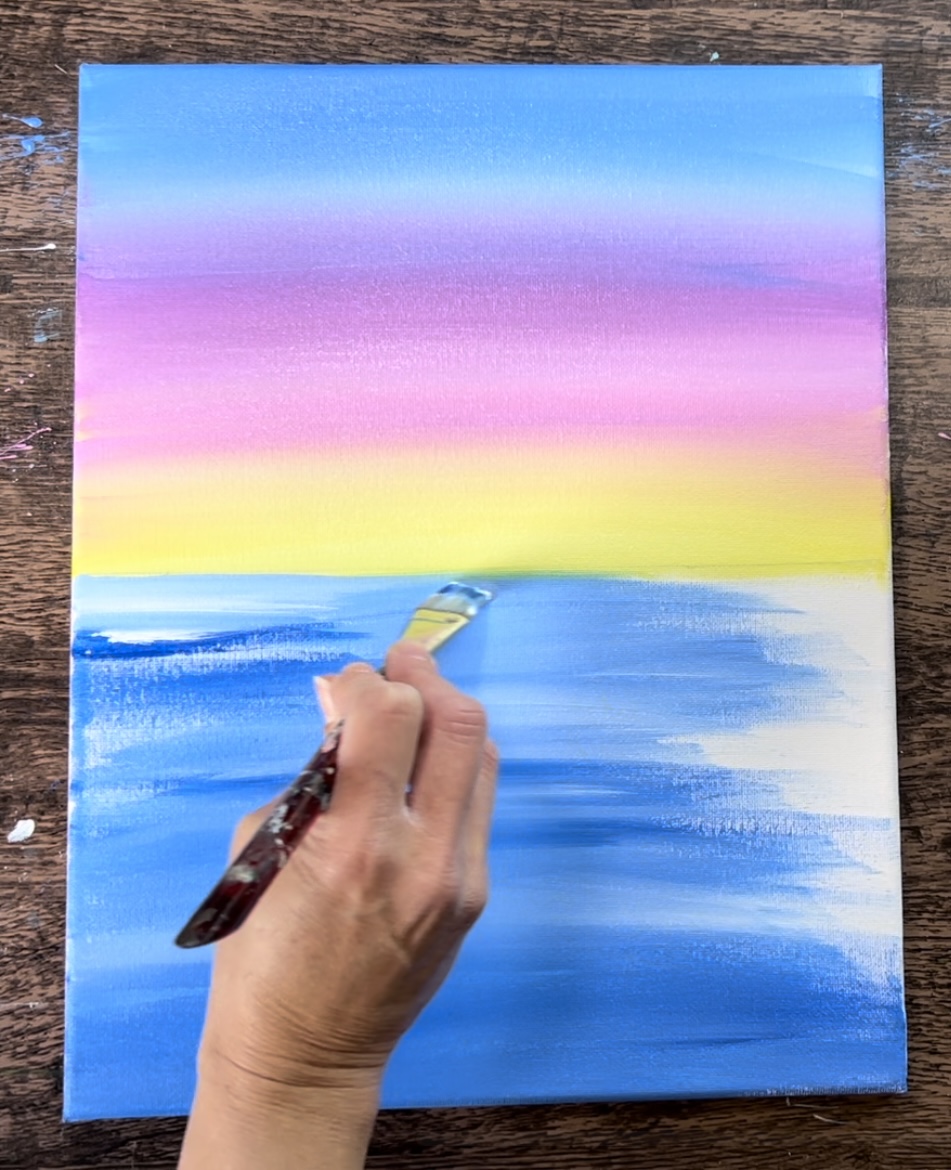
Leave steaks of darker blue towards the bottom (just the cobalt blue unmixed).
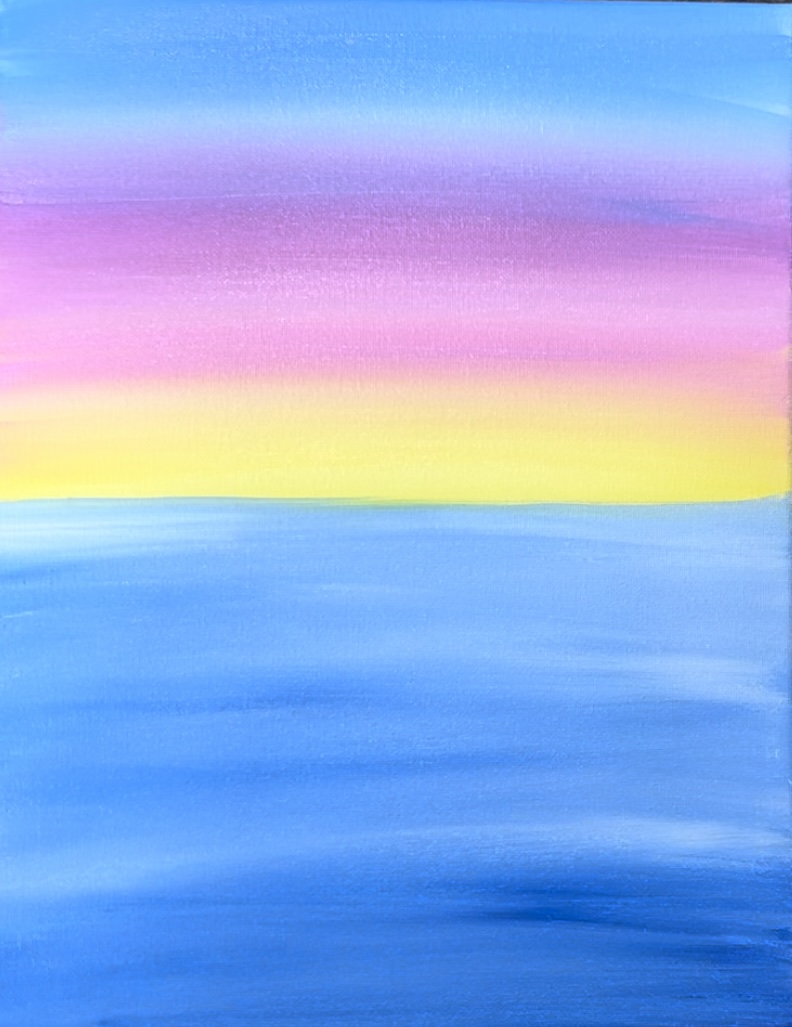
Rinse the brush and load it into just “titanium white”. Use the end of your 3/4″ flat wash brush to paint white water lines down the center. Make your lines closer/ smaller towards the horizon line and further/ larger as you approach the bottom edge of the canvas.
Then rinse the brush. Add just “cobalt blue” to your brush. Add more water lines on the left and right sides of the white lines. These are darker water lines.
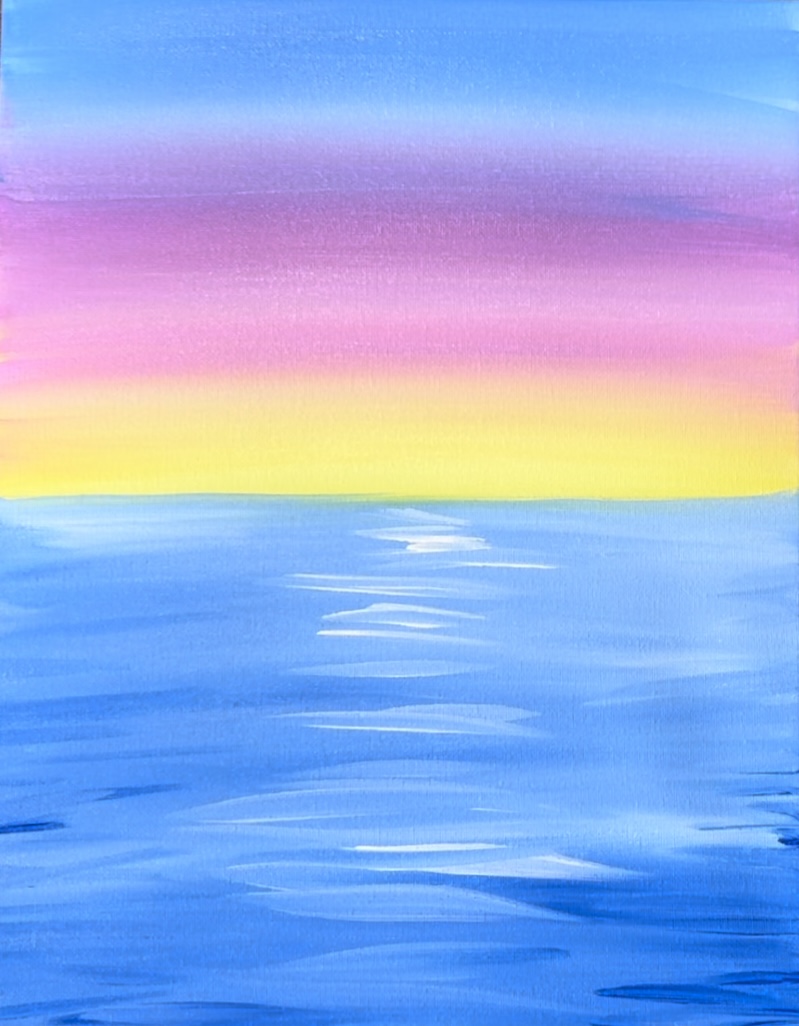
Wait for this to dry before going onto the next step.
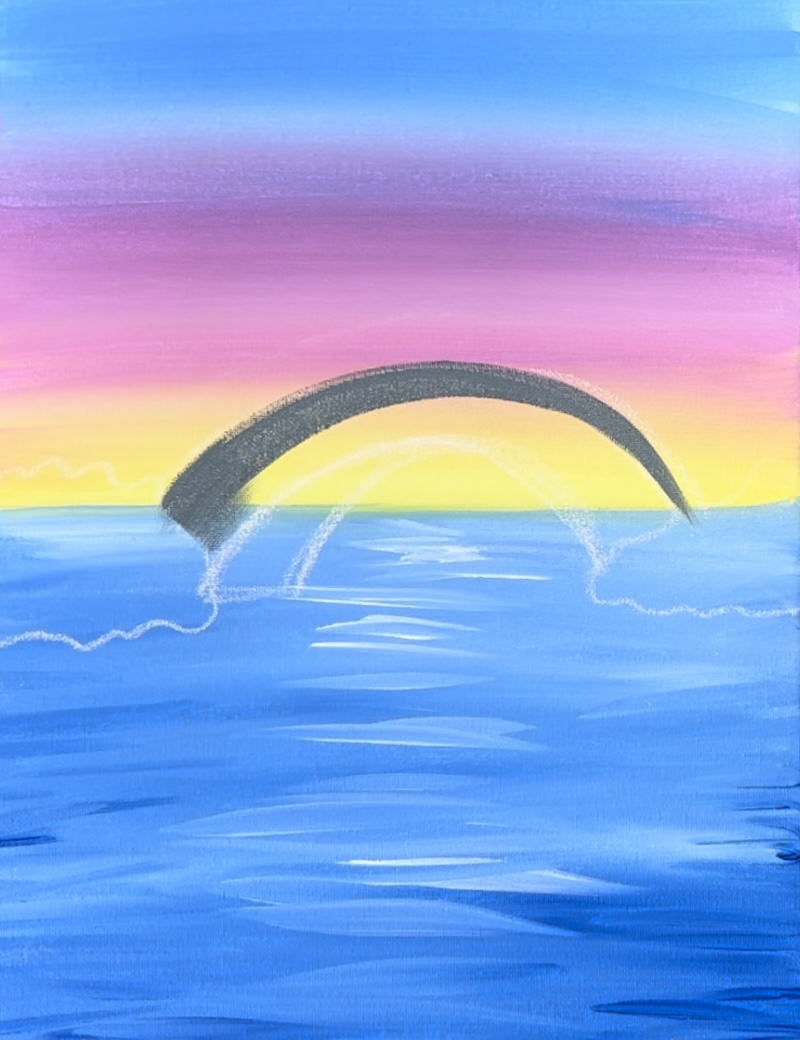
4. Draw Bridge & Bushes
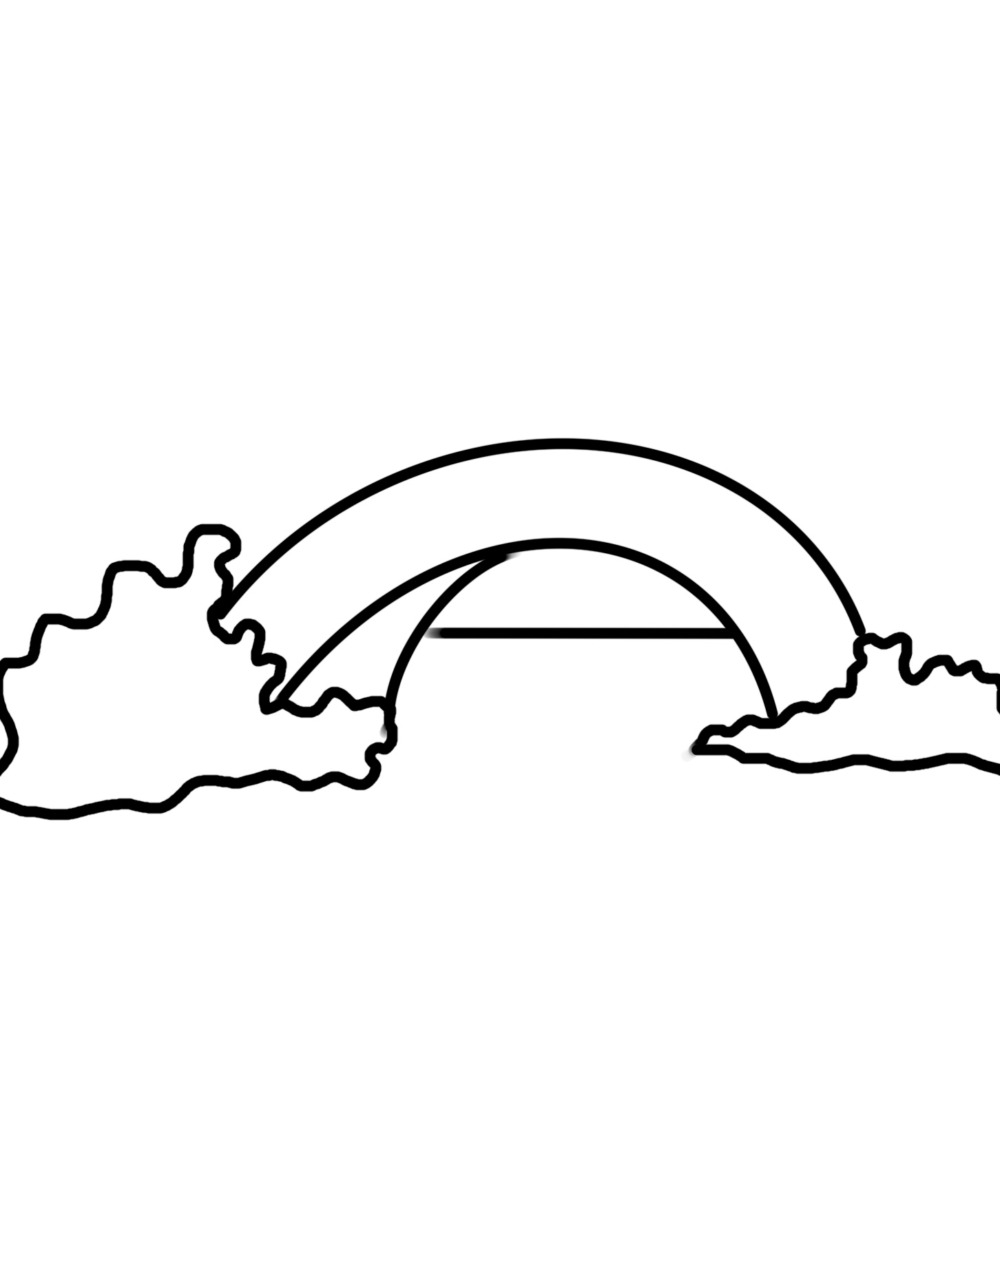
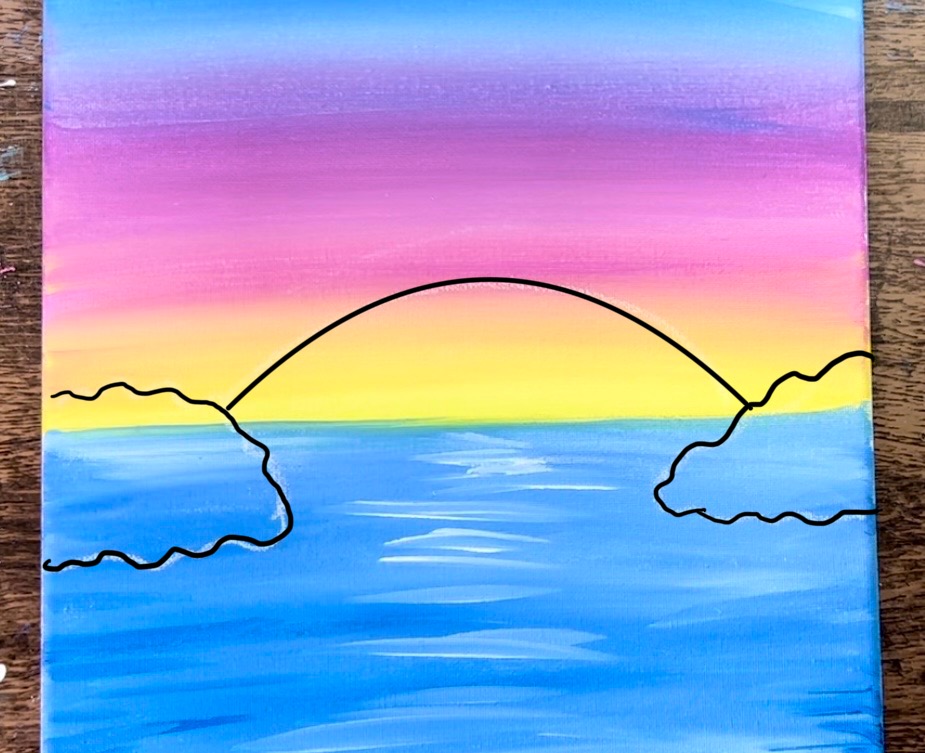
Use a piece of chalk to draw the bridge. Start by drawing two “bushy areas” on the left and right of the canvas. Make sure you start below the “horizon line” (about 1.5″). Note: lines are darkened in the photos. I recommend drawing this with chalk because it will erase as you paint it in.
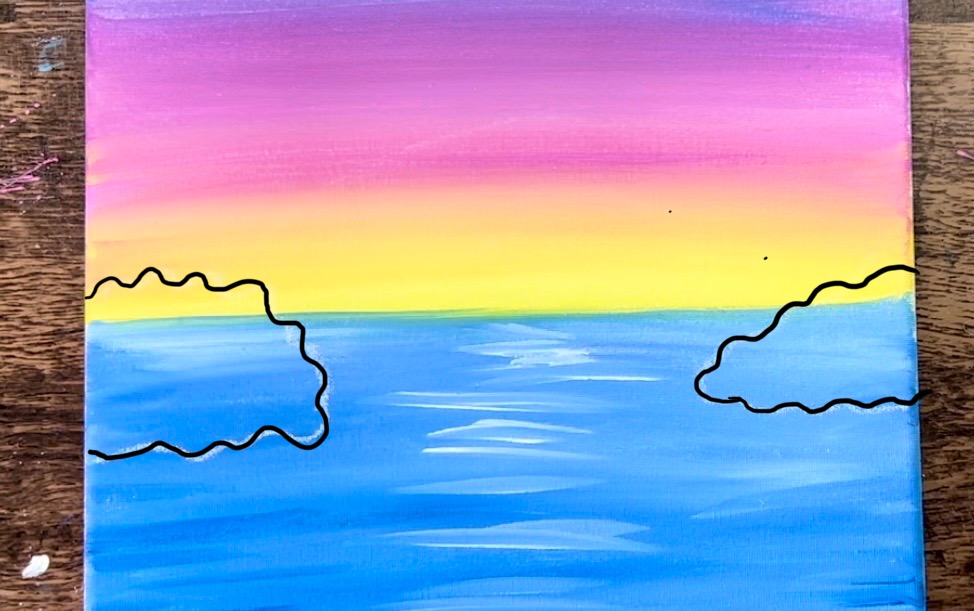
Next, draw an arc connecting both bushes together. This will be the top of the bridge.
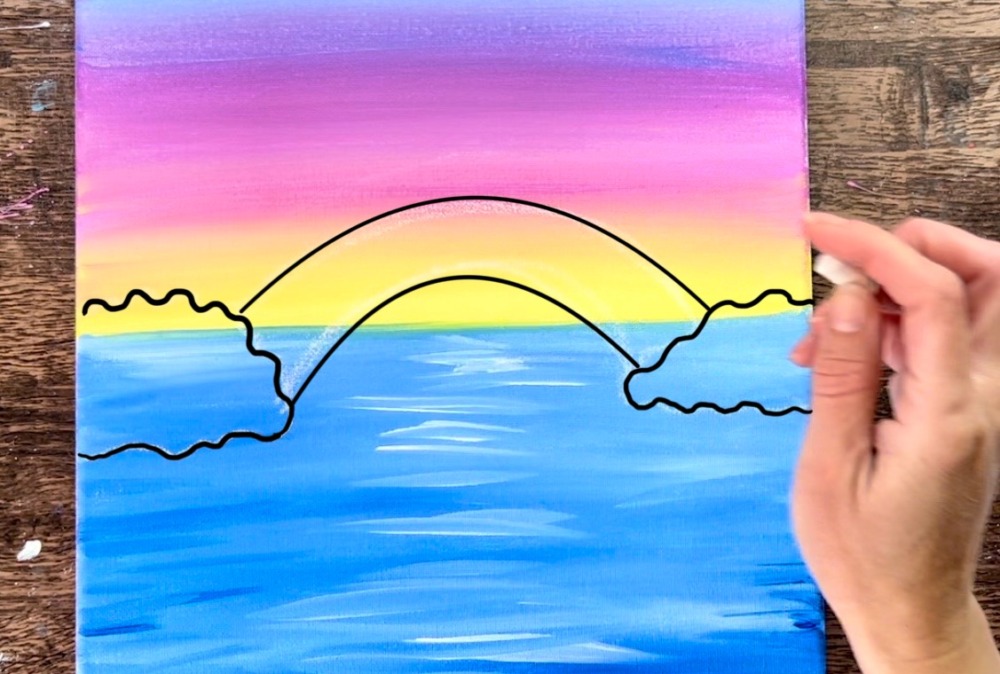
Draw a second arc below the first arc. It should be relatively parallel to the first, top arc.
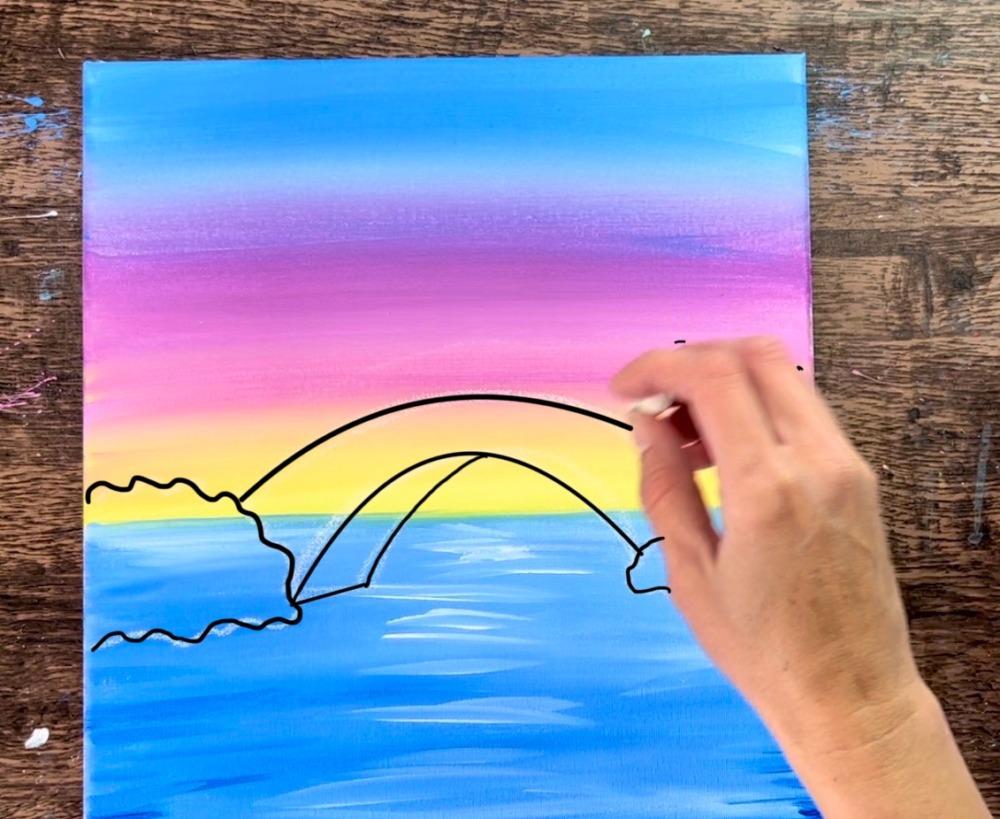
Next, draw the under part of the bridge that is visible on the left. Draw a slightly diagonal line for the bottom edge and then draw a curve that meets in the center top of the bridge.
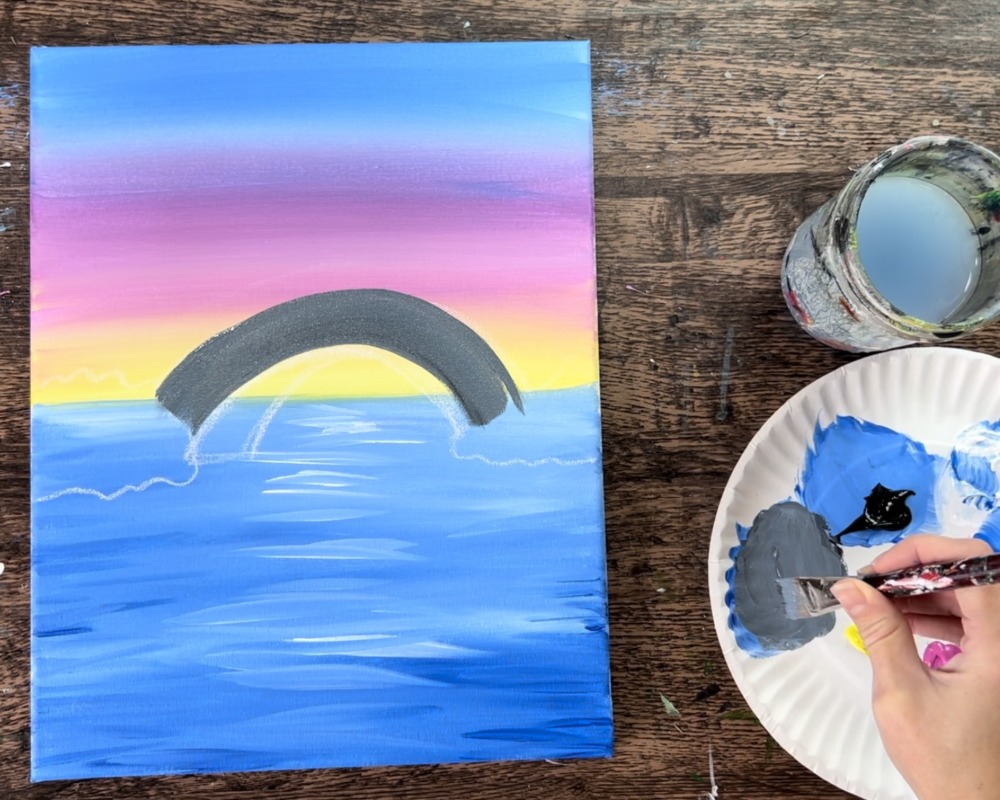
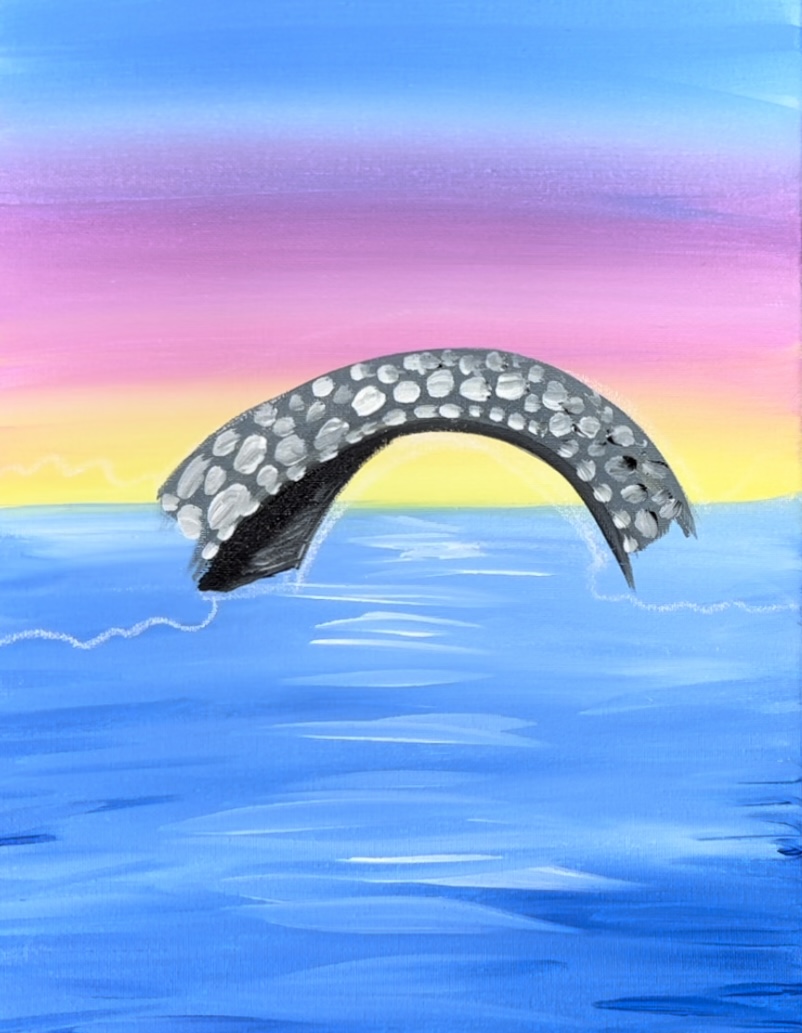
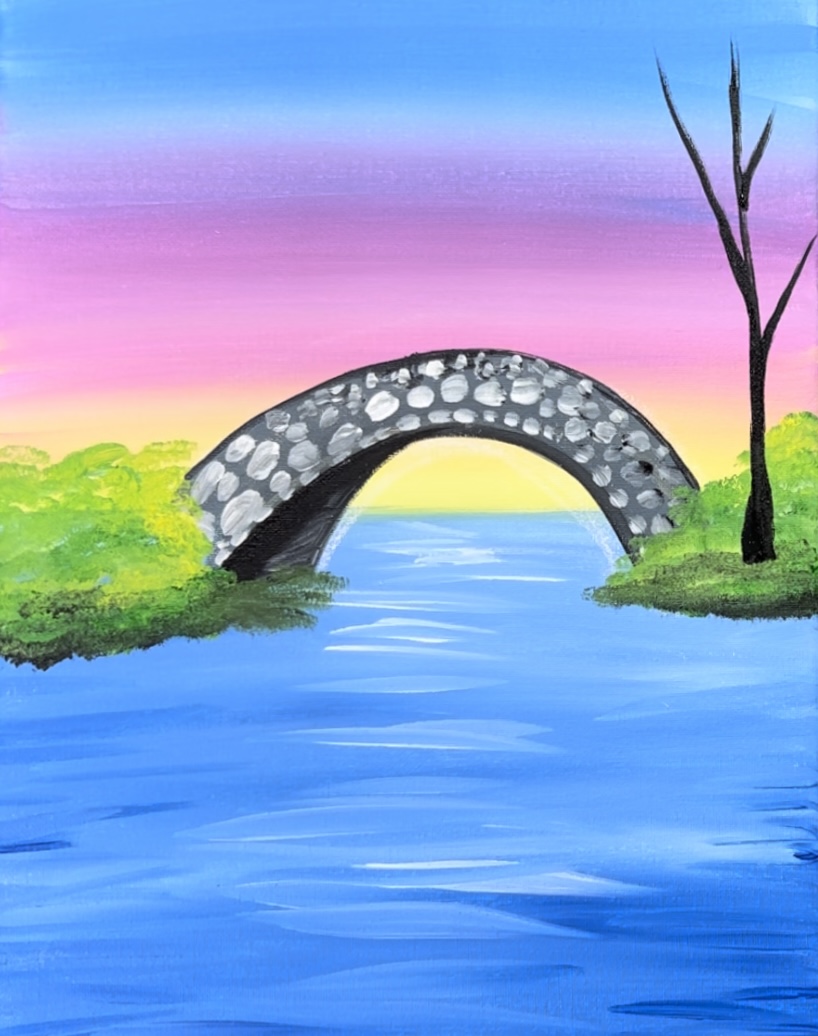
5. Paint Bridge
Load your paint palette with “mars black” & “titanium white”. Use a 3/4″ flat wash brush and mix equal amounts of black and white together. You will make a dark gray color.
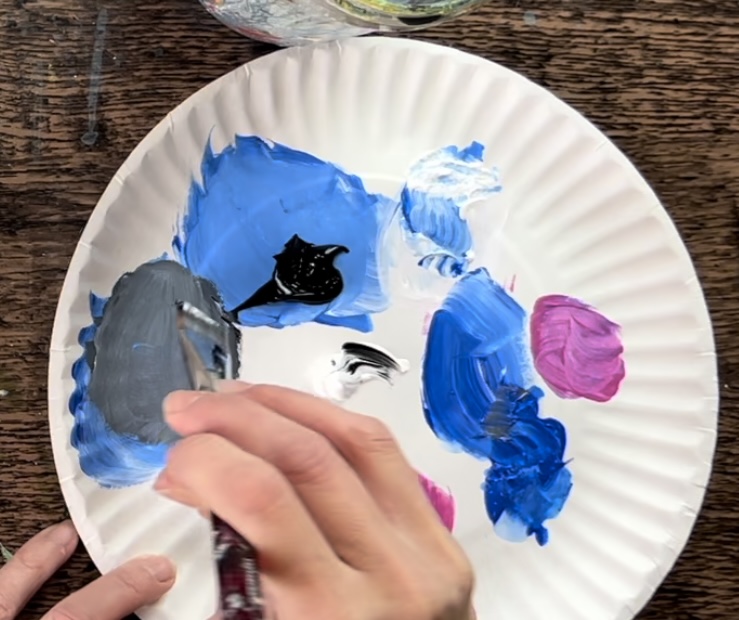
Use this dark gray and the 3/4″ flat brush to paint the top arc part of the bridge.
Fill this in solid. If needed, you can adjust your bridge drawing.
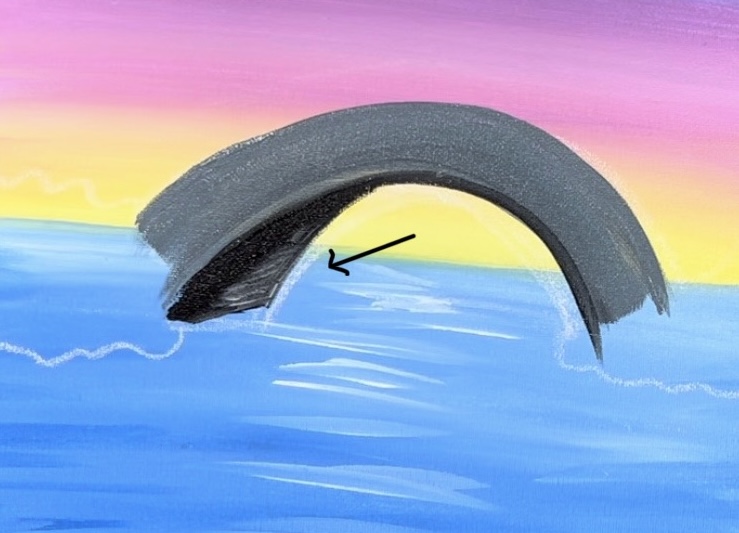
Load your 3/4″ flat brush in just “mars black”. Paint a black outline on the very bottom of that arc.
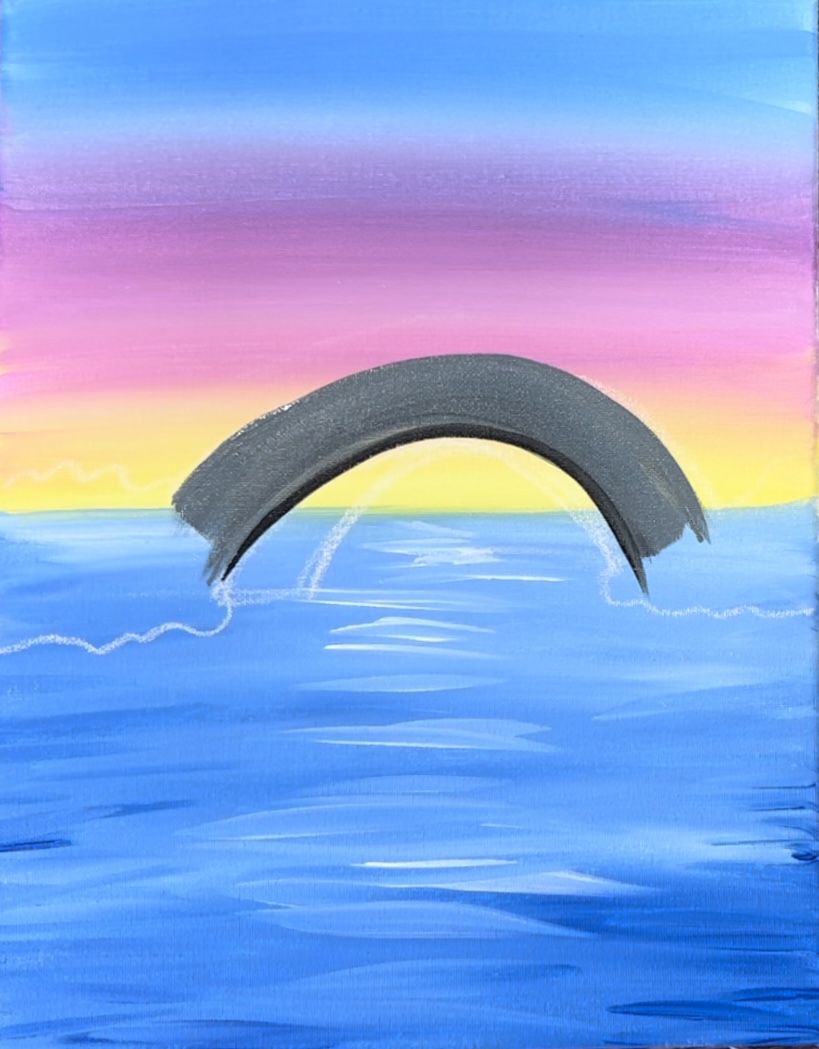
Next, switch to a #4 round brush. Paint the “under opening” part of the bridge with this solid black color.
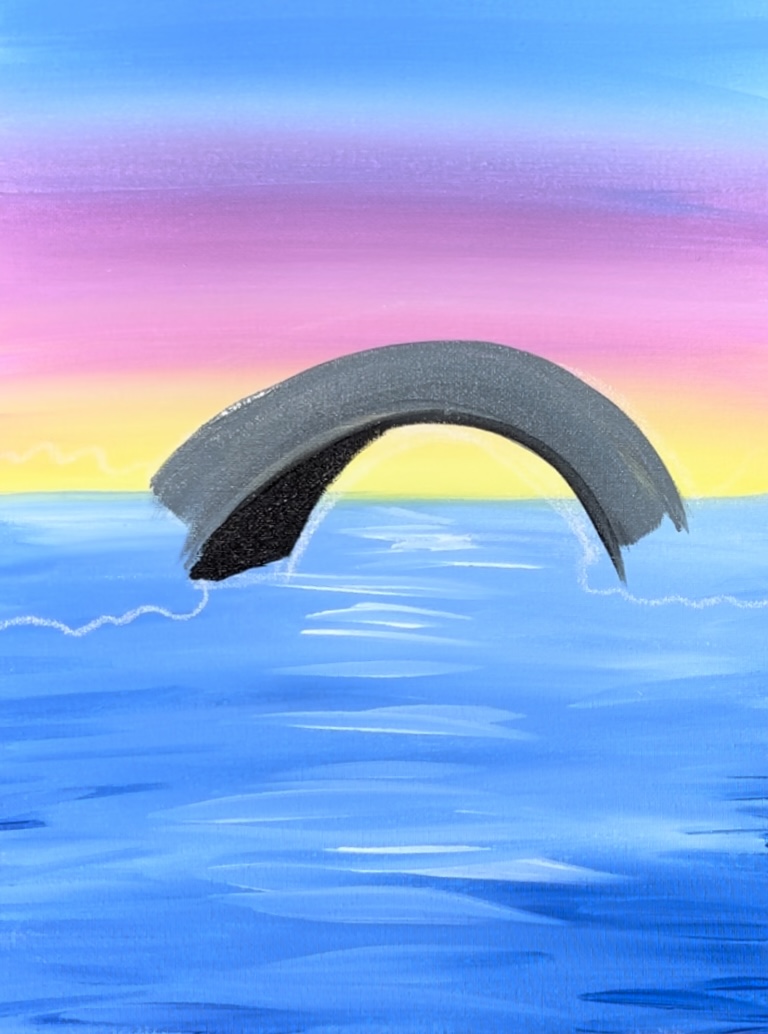
Using your #4 round brush, load a small amount of titanium white onto the brush. Blend a little bit of this light color on the right opening part of the bridge to give it a little bit of “highlight”.
Then paint the “cobblestones”. Use your #4 round brush to make a light gray on your paint palette. Mix white with a very small amount of black to make this light gray. Use your round brush to paint various sized stones throughout the bridge.
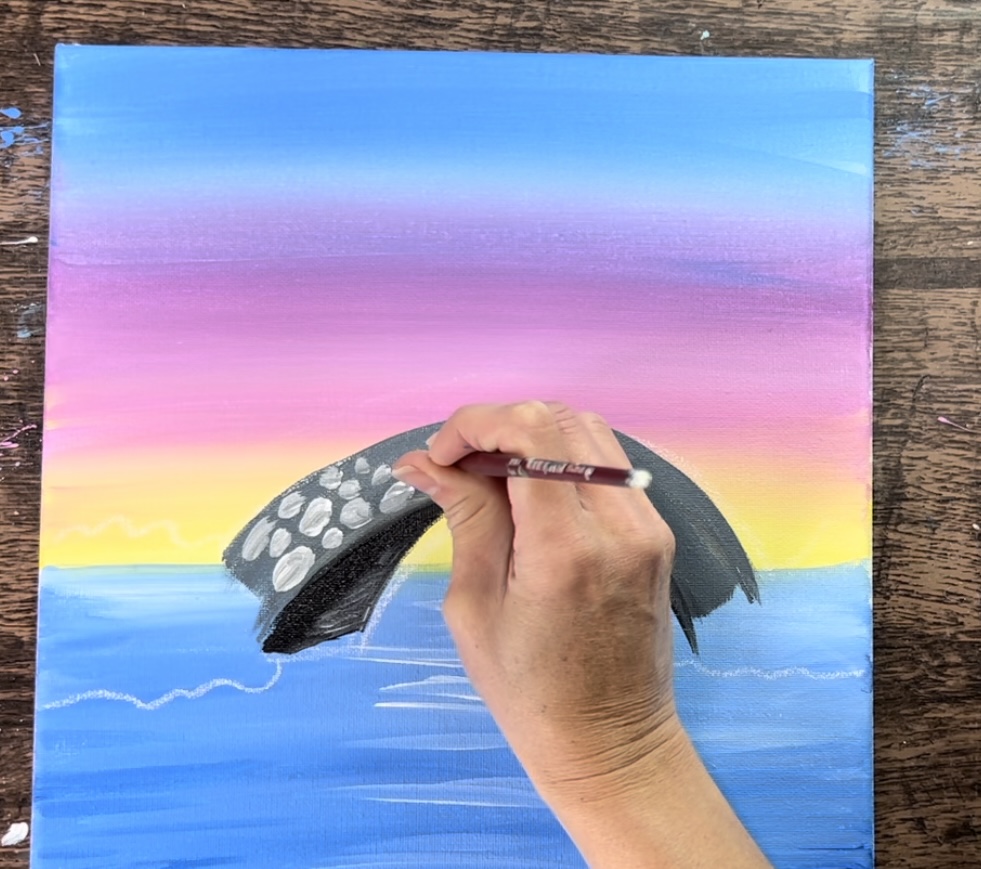
Along the bottom of the arc, paint smaller sized oval stones.
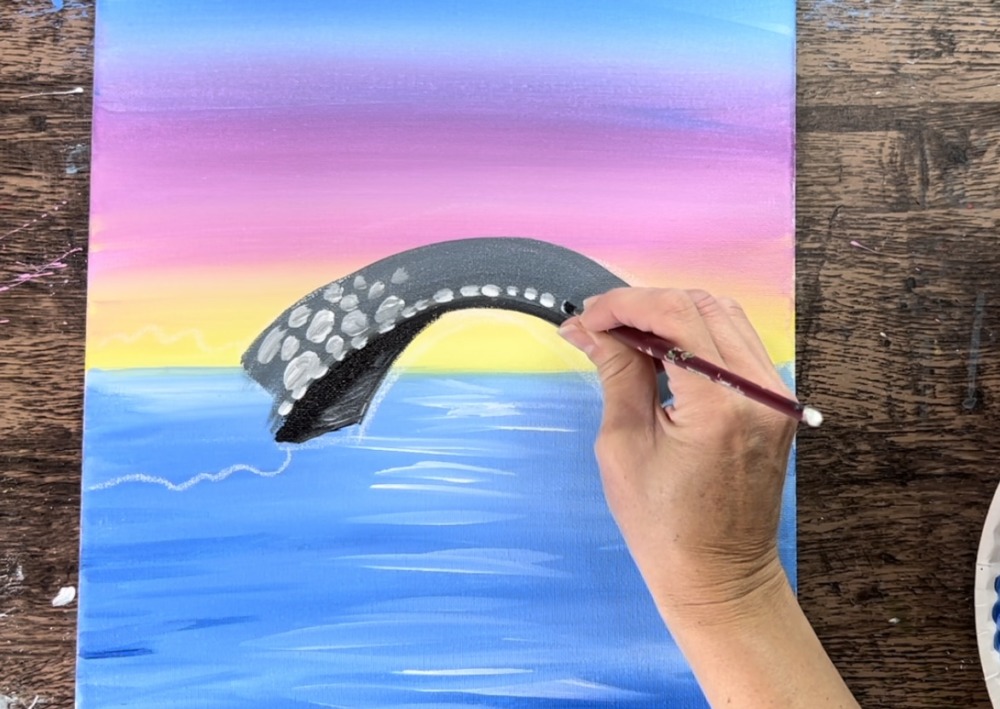
Fill the whole bridge area with various sized stones. It’s okay if the gray in the stones are all different shades of light gray.
6. Paint Bushes
We will be using the end of our 3/4″ flat wash brush to “stamp/ stipple” the texture in the bushes. This is done simply by tapping only the end of the bristles to create a “sponge like” texture. You will also be varying the color green by adding different amounts of yellow and white to it.

Form a large bushy area that overlaps the bottom of the bridge. Add bits of darker green to it and bits of lighter color. Try to add a little bit more darker green on the bottom of the bush.
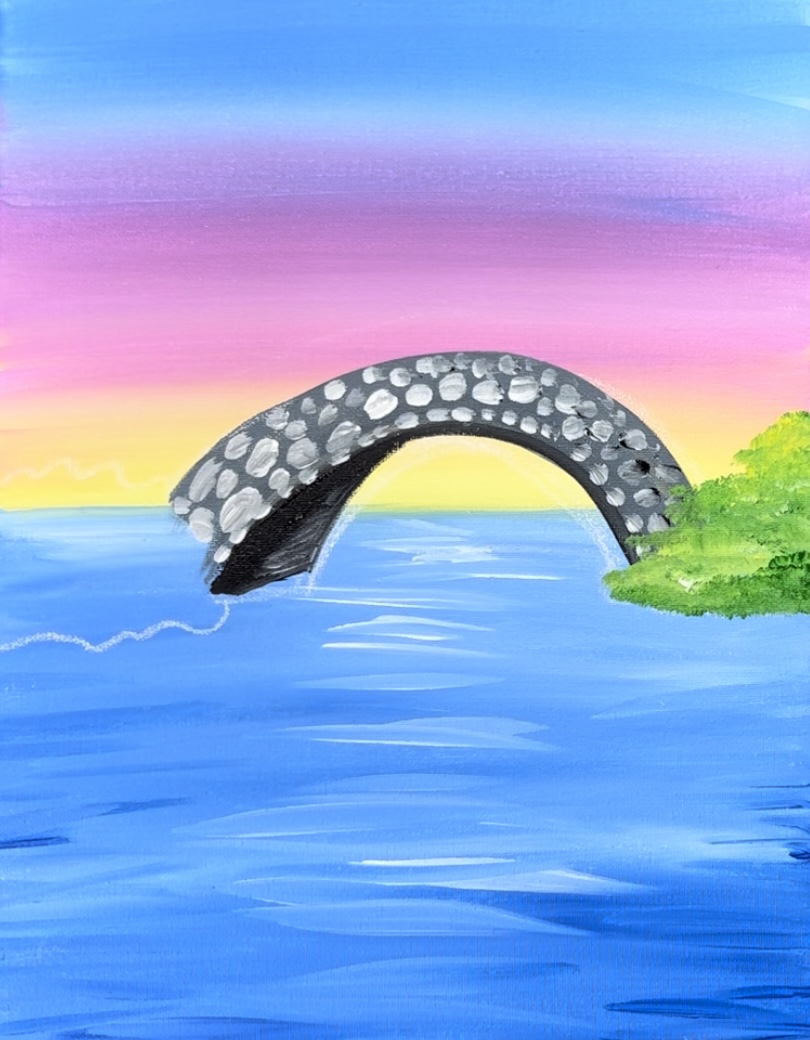
Do the same thing for the bush on the left. Add more darker green towards the bottom and lighter yellow/ white mixed in towards the top. Also, the bush on the left does not have to be symmetrical. You can make it higher or lower than the bush on the right.
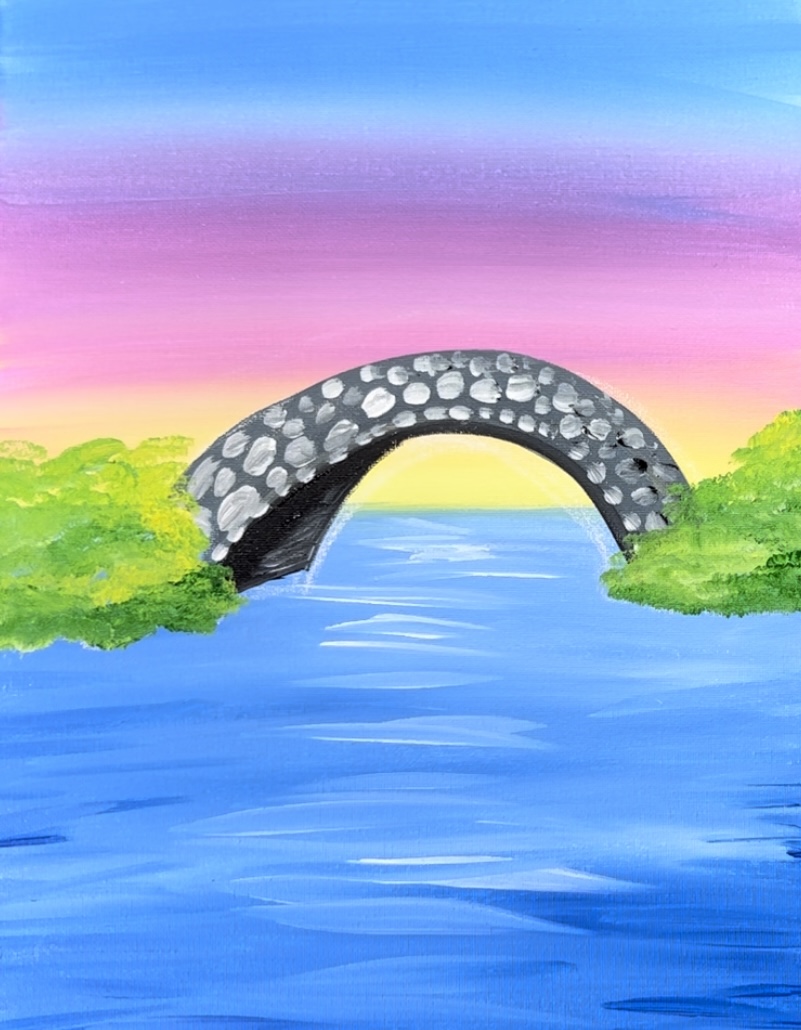
Add a small amount of “mars black” into the green to make a very dark green. Stamp this darker green on the bottom of the bush area just along where it meets the water.
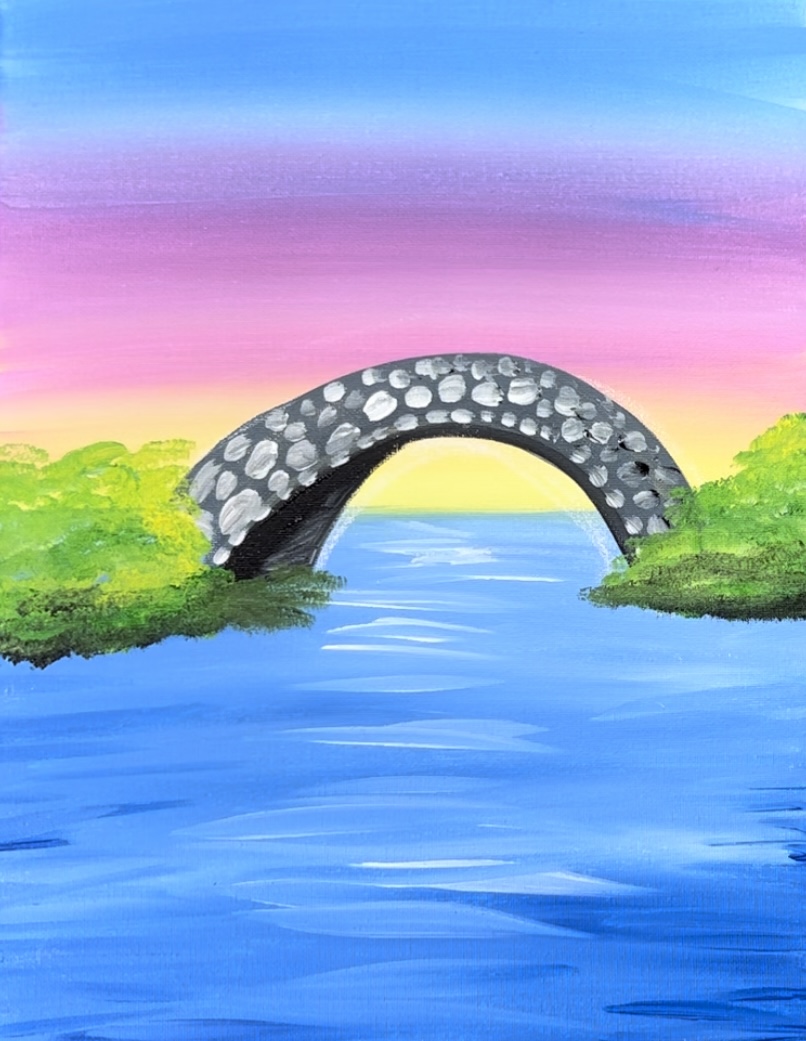
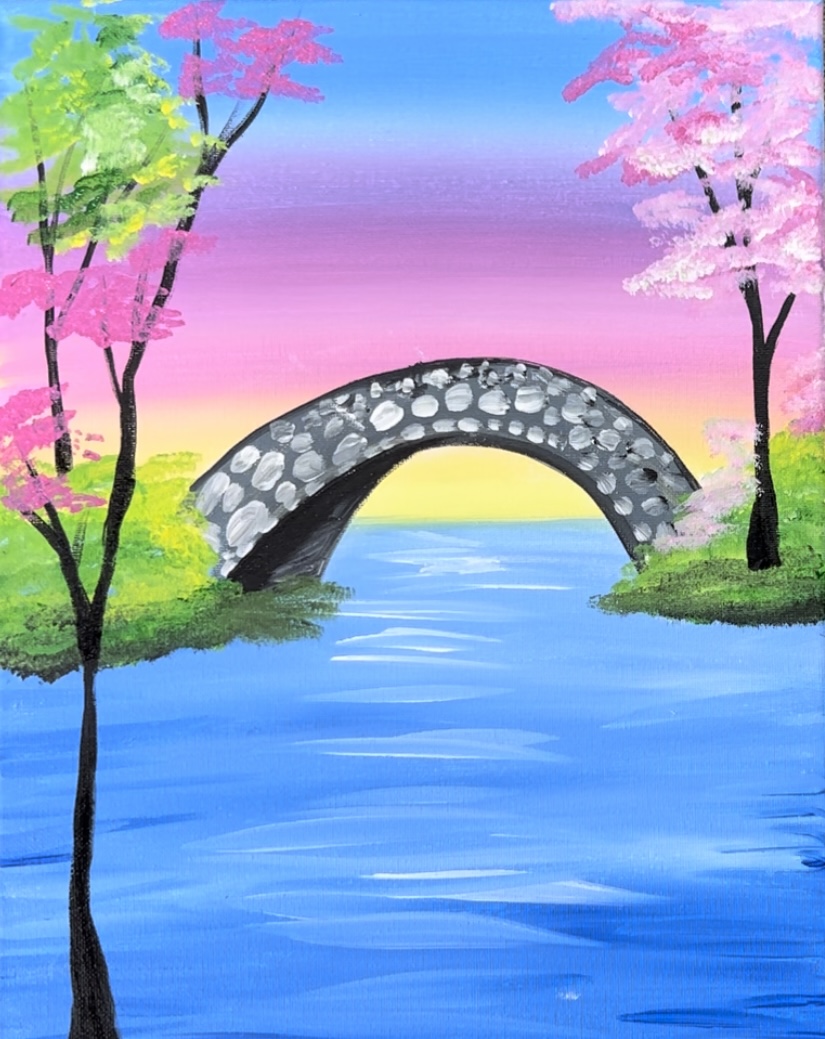
6. Paint Trees
Use a #4 round brush to paint trees with the color “mars black”. I recommend slightly watering the black down a little bit to help with the flow of the paint.
Start by painting a tree on the right. Make the base of the tree trunk slightly wide and then allow it to go narrow towards the top. Paint a few loose branches angling upwards. Allow your branches to go thinner and to a point.
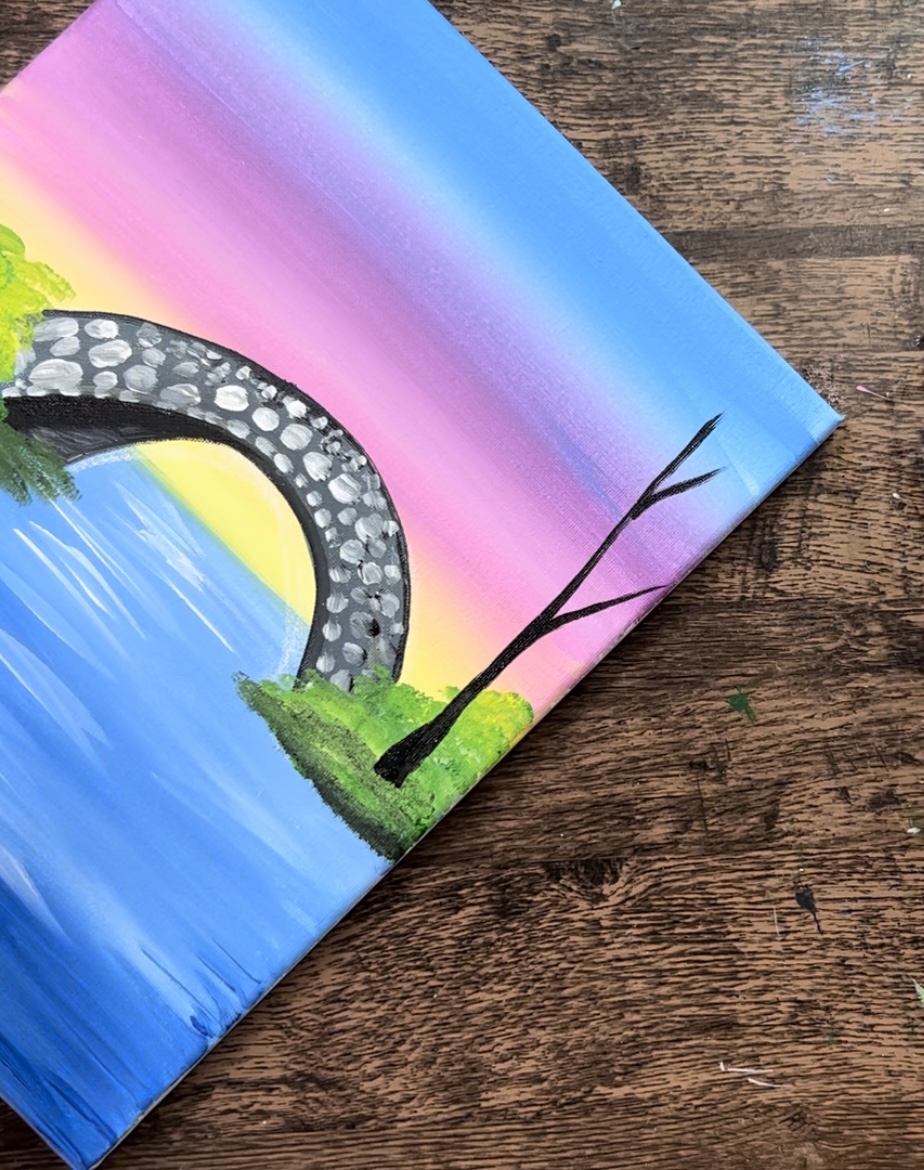
Your branches will go almost all the way to the top edge of the canvas and stop. You only need to paint a few branches because much of this will be covered with foliage in a later step.
Paint a second and third tree. Paint a second tree on the far left that is a similar size. Then paint a large tree that starts on the bottom left of the canvas and goes all the way to the top edge.
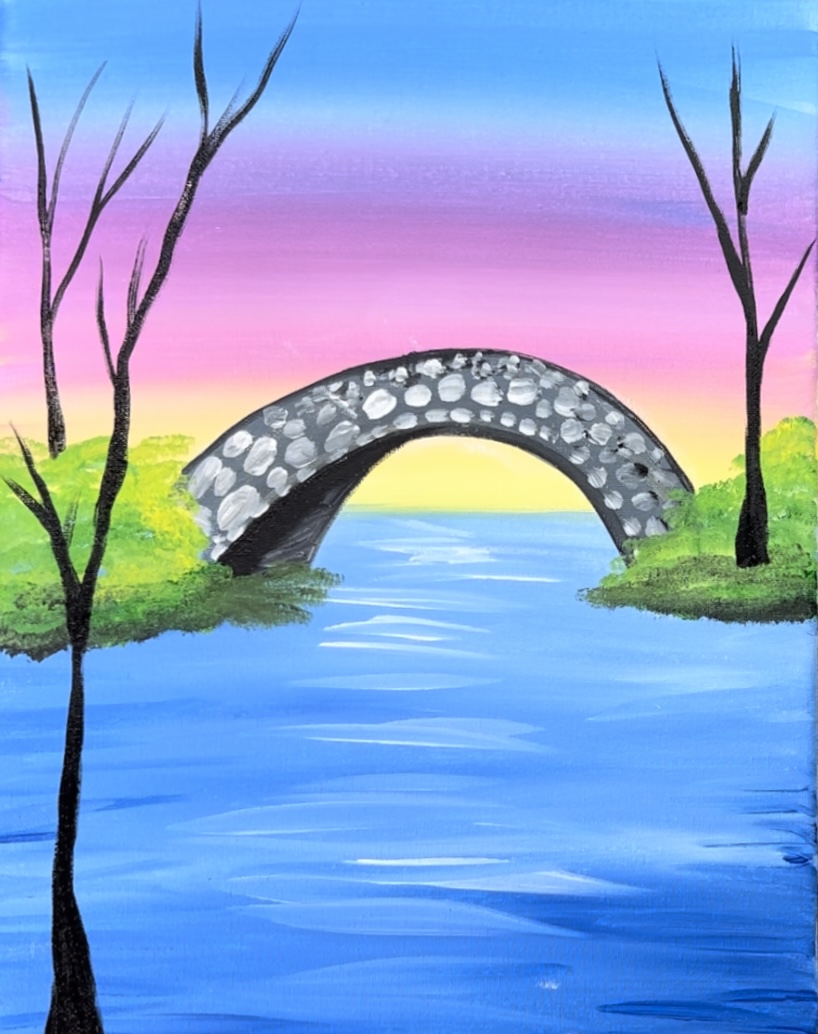
Next, we will stamp the foliage on the trees! The technique for this is the same technique as the bushes. We will use different variations of the color and stamp the brush to create texture.
To do the pink tree, load “medium magenta” and “titanium white” onto your paint palette. Use the end of your 3/4″ wash brush and double load it into the pink and the white. Stamp the brush to create bunches of leaves on the ends of the branches.

Fill the tree with more of this texture/ stamping. Use a variation of dark pink (just the pink and no white) and light pink (more white). You can also create some blossoms in the bottom area around the bush.
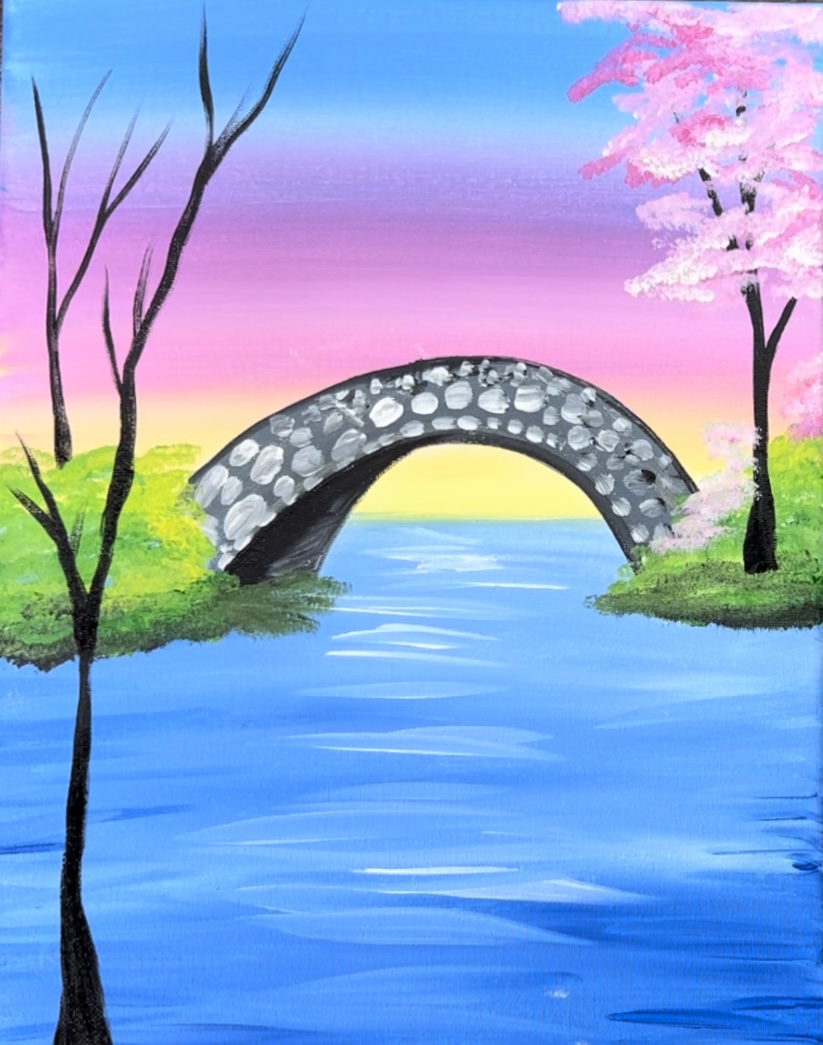
Rinse the brush. Do a green tree on the left. Do the same technique that you just did, only use the “hooker’s green hue”, “cadmium yellow light” and “titanium white” to create your color variations.
Next, do another pink tree. This is the larger tree on the front left of the painting. Try to make the leaves go around the green tree leaves so it still shows through. Also, if that green is still wet, try not to have too much of the pink mix with it.
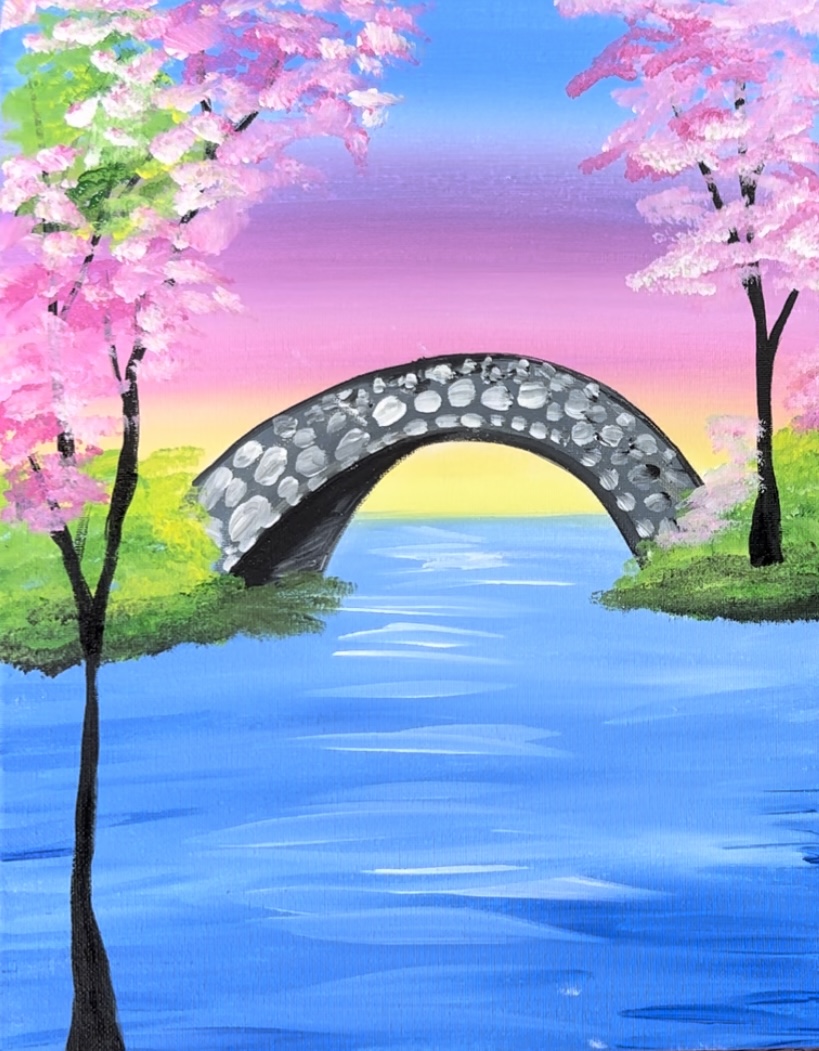
Go back and add more black branches in your trees using the #4 round brush and mars black. These are branches that are visible/ overlap the foliage. I also painted another small tree on the right side of the bridge and added pink foliage onto it.
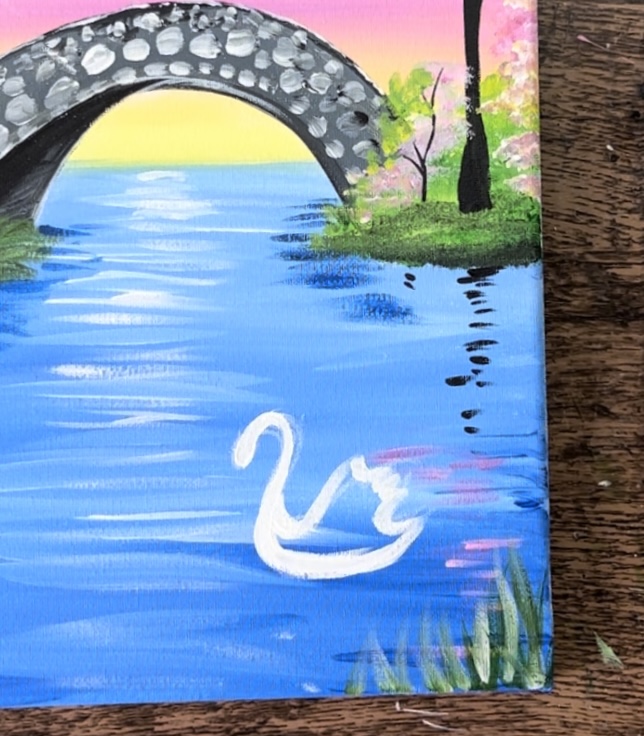
7. Paint Reflections
Use a #4 round brush and mars black to paint reflection under the tree trunk on the right. Paint loose, left and right paint strokes of just horizontal lines forming a vertical area under the tree.
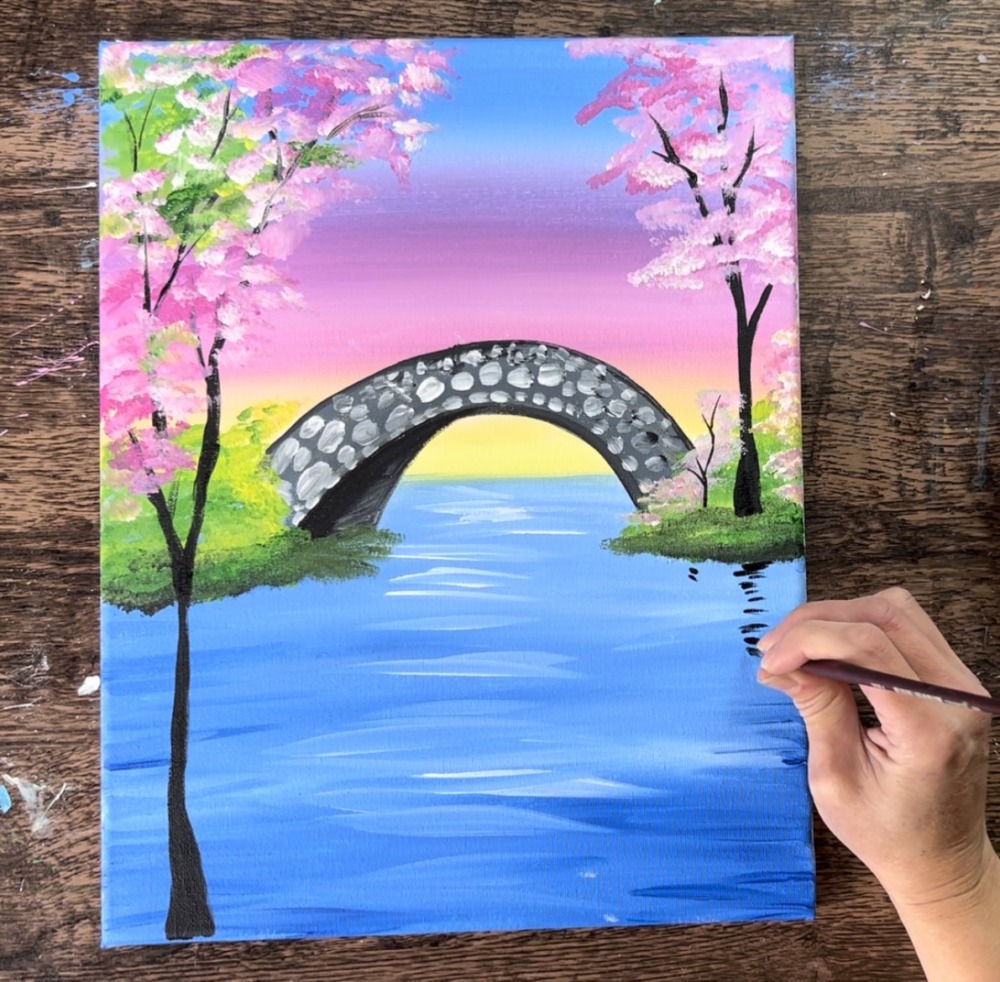
Stop about halfway down the water area and rinse the brush. Add “medium magenta” to the brush and add small magenta reflection lines in the water.
Do the same thing on the left side of the water. You can also add a few green/yellow reflection lines. Also, you can add dark blue reflection Iines in the water under the left and right parts of the bridge (but not in the center).
8. Paint Grass
Use “hooker’s green hue”, “titanium white” and “cadmium yellow light hue” to paint grass blades with the #4 round brush. I did grass on the lower left and lower right of the painting. Some of the grass overlaps the bottom of the tree trunk.

You can also paint some grass lines on the base of the bridge/ under area.
9. Draw and Paint Swan
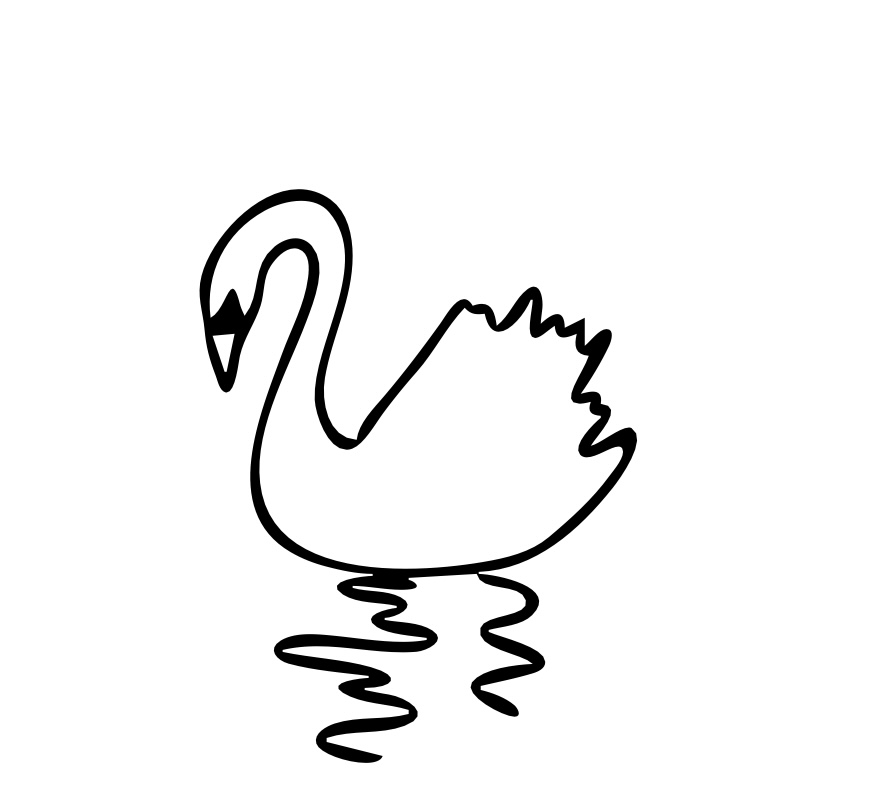
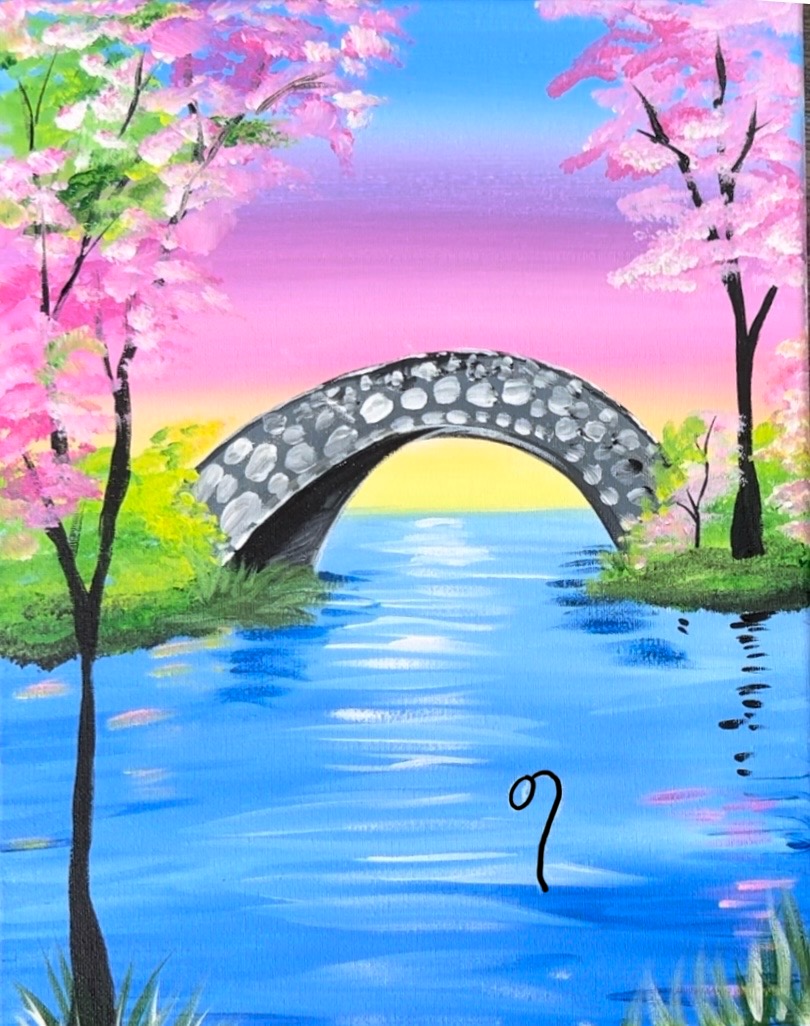
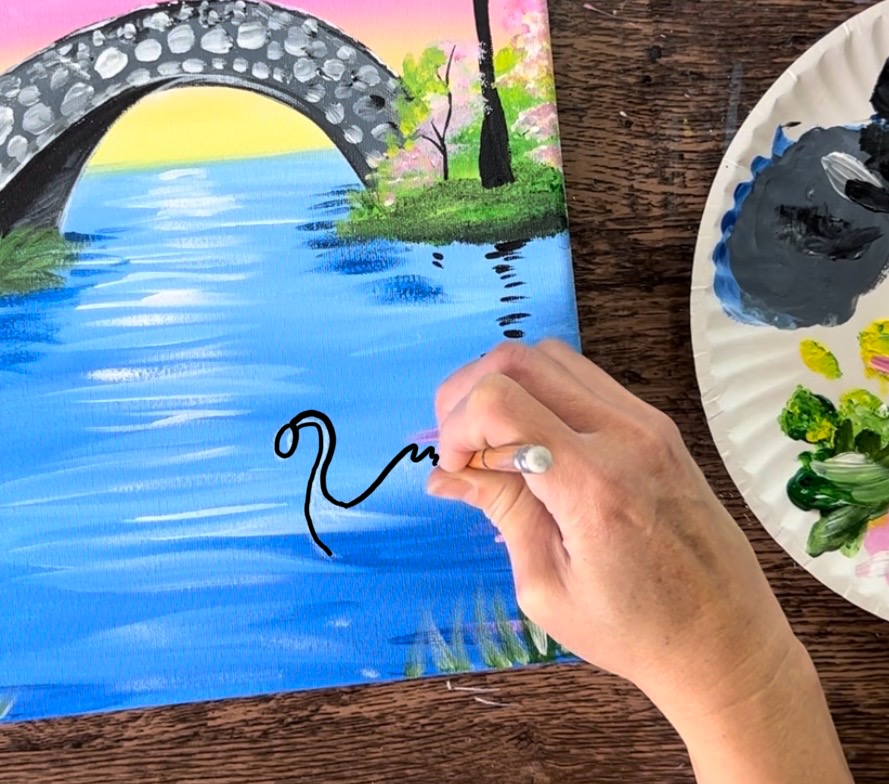
Make sure the water area is dry before going onto this step. Use the white chalk pencil to draw the shape of the swan. Start by drawing a small oval for the head. Then attach it to a “candy cane like” curved line.
Then turn the single line into a double line to form the swan’s neck. Then start to sketch its back tail feathers.
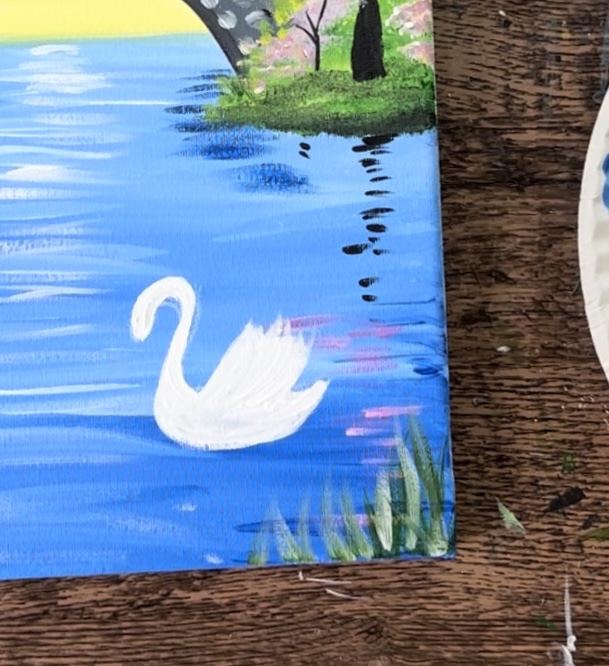
Next, use your #4 round brush and “titanium white” to paint the swan. Start by painting the head and neck area.
Outline the entire inner part of the swan to define the shape.
Fill it in solid. For the back tail feathers, make your paint strokes go outwards in an angle direction.
Next, paint a little black triangle on the bottom of the head and a little black dot on the top point of the triangle.
Mix orange on your palette by mixing yellow and magenta together. Use the #4 round brush to paint a tiny triangle under the head for the beak.
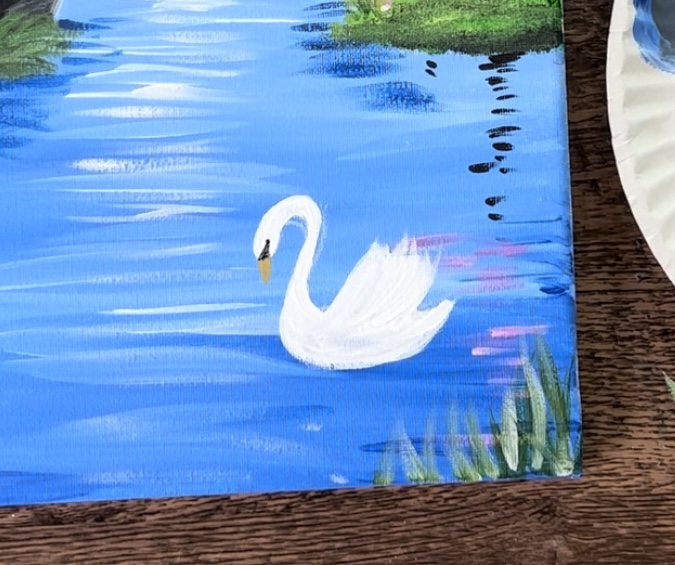
Next, add a little bit of “shadowing” on the feathers. (This can also be optional if you are simplifying the painting). Mix a light gray on your palette by mixing white with a small amount of black. Paint loose, very thin paint strokes curving/ angling upwards on the swan’s back tail feathers. Then add a little bit of gray on the bottom edge of the swan.
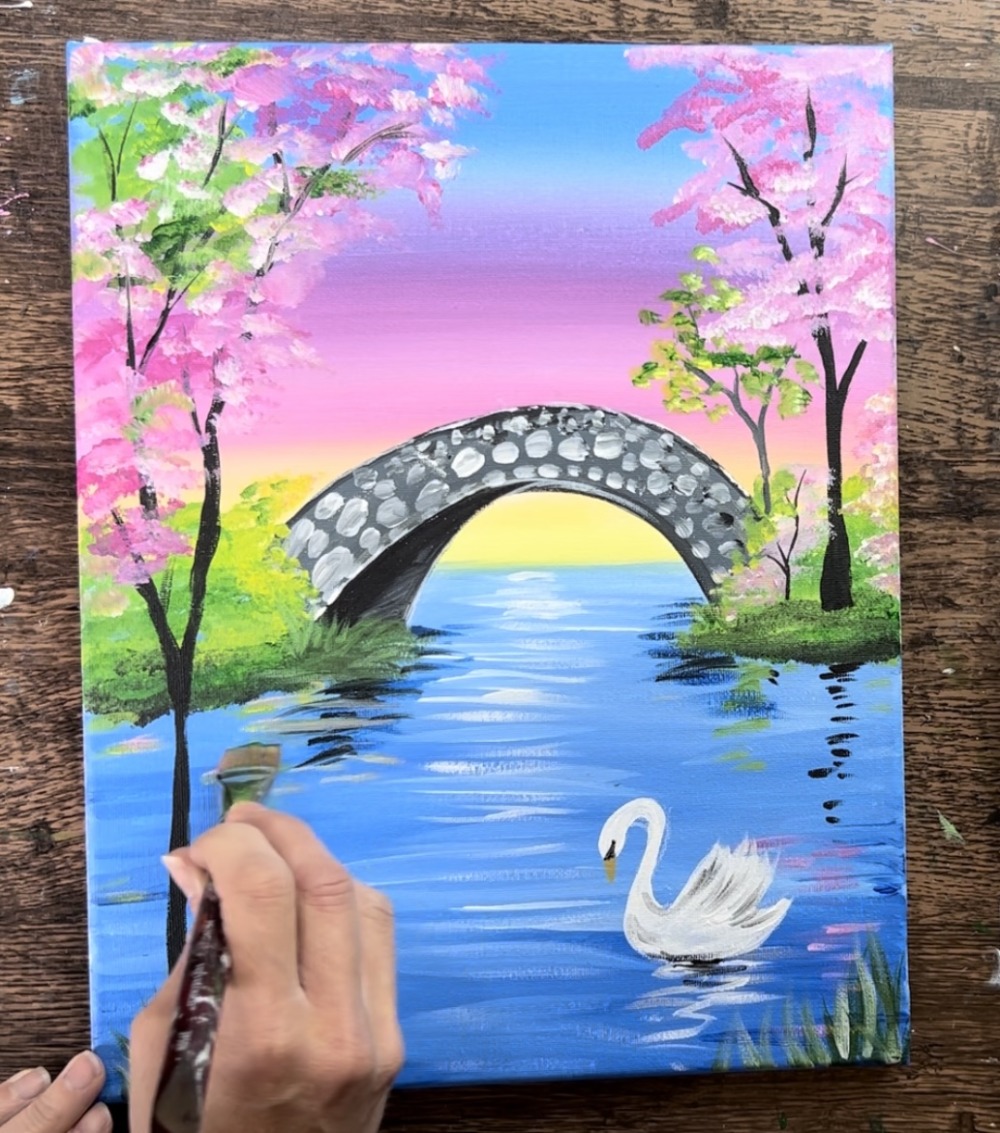
Paint reflection in the water by using the titanium white and the #4 round brush. Paint loose water lines just under the swan for the reflection.
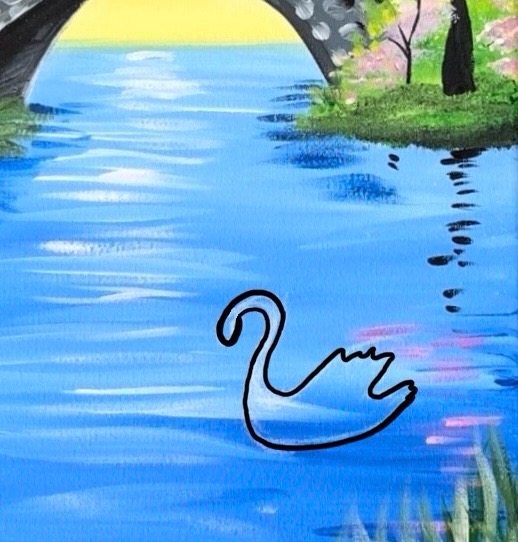
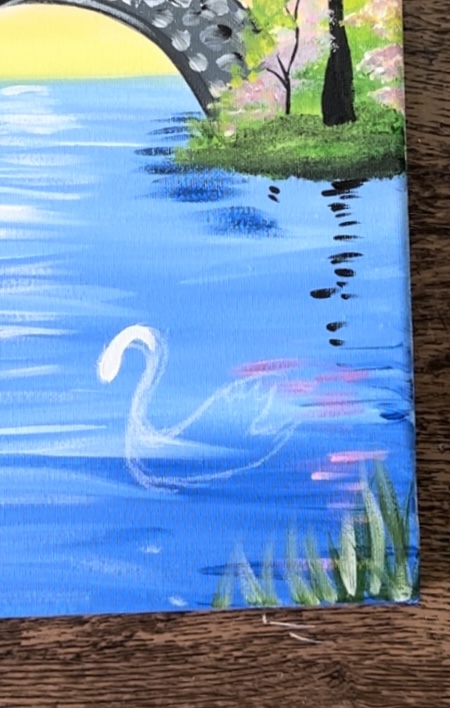
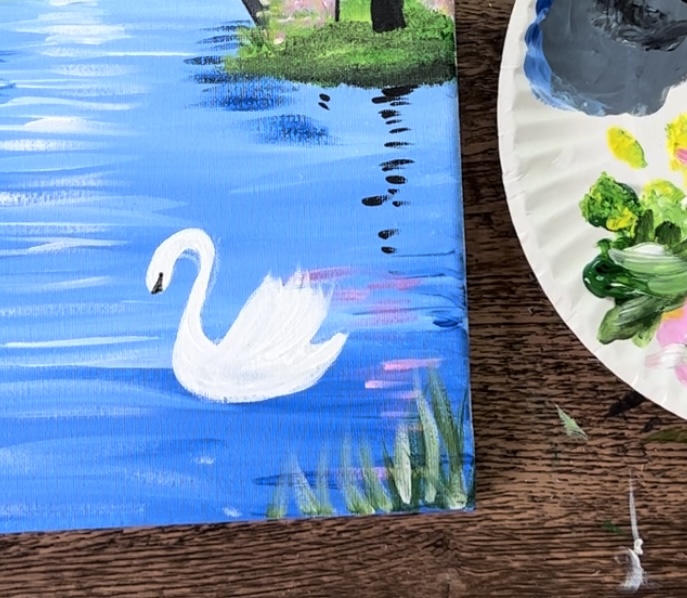
Below is a detailed closeup of the swan when the painting is finished. You can erase any leftover chalk lines after the swan dries.

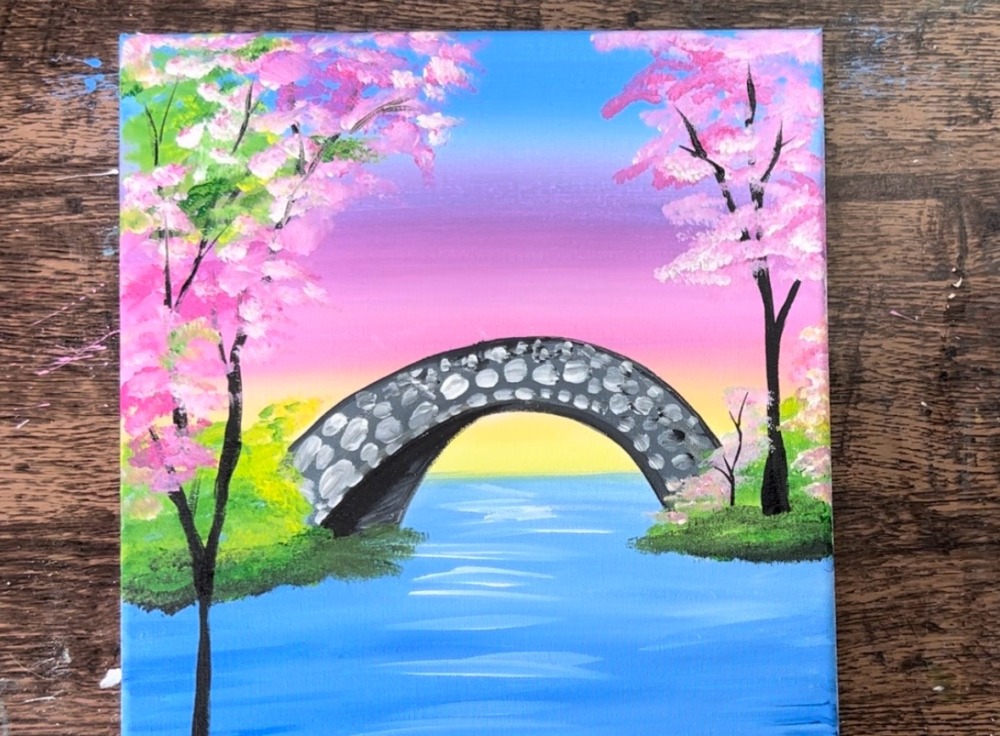
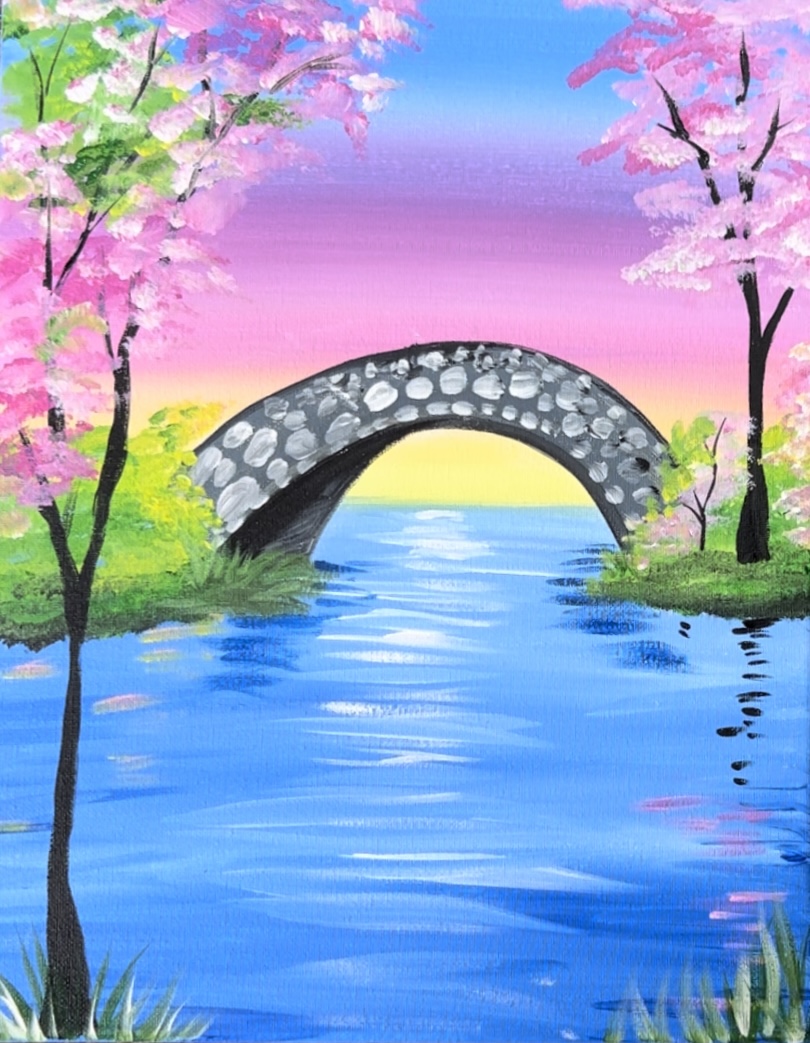
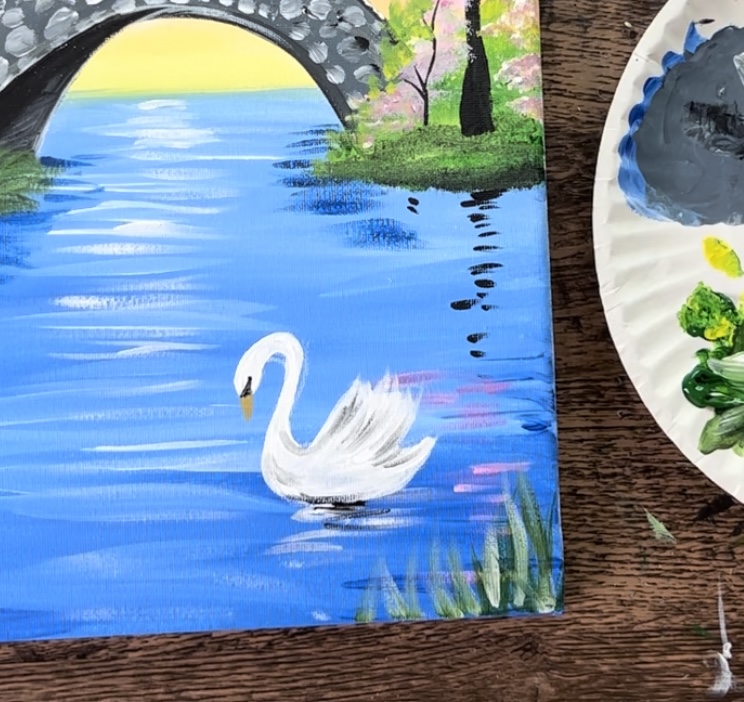
10. Final Details
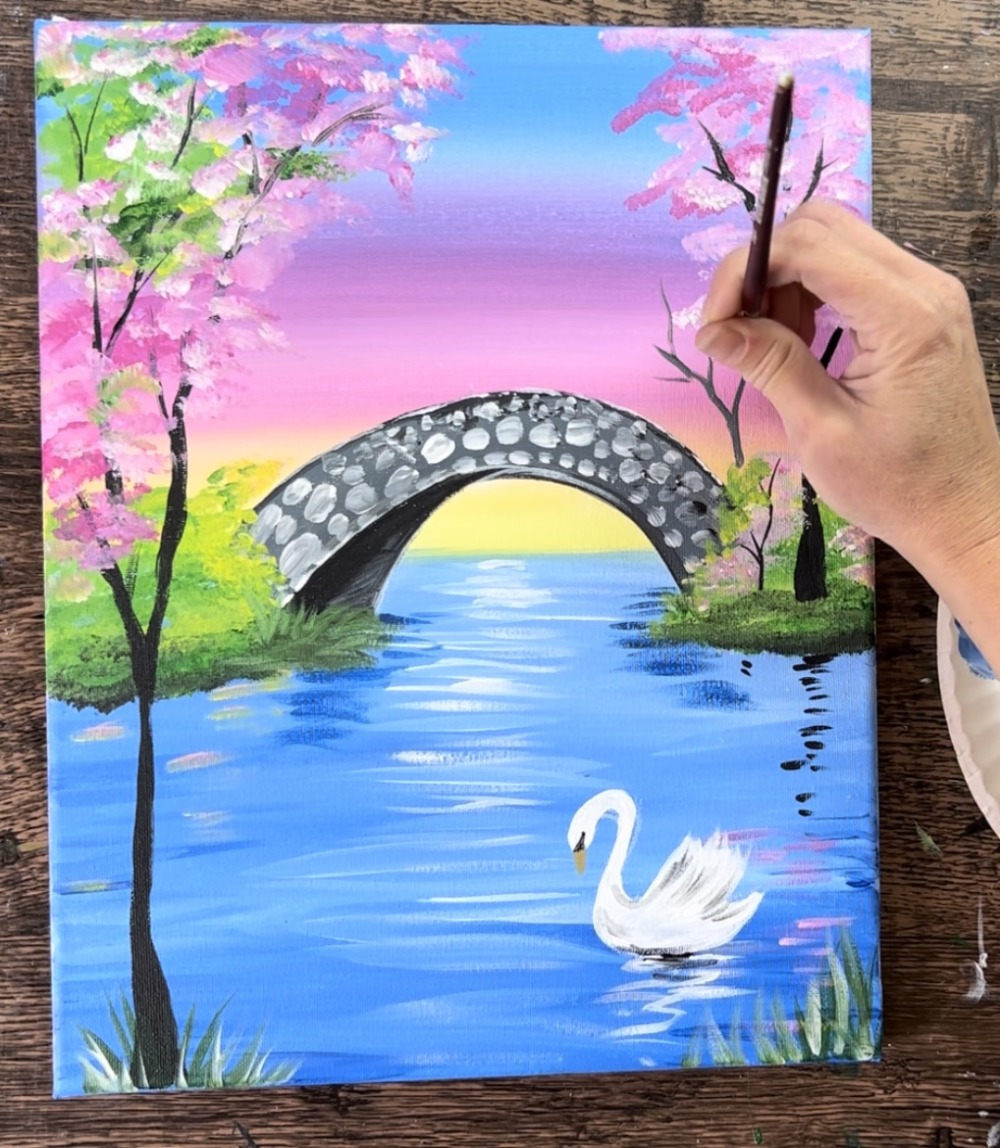
Final details in this painting include: more reflection lines in the water under the green bush area. I used my 3/4 flat and green to paint loose, horizontal lines. It’s important to not do too many reflection lines! The majority of the water should still be blue.
Then I painted another tree on the right side of the bridge and added green leaves to that tree using the same techniques as earlier.
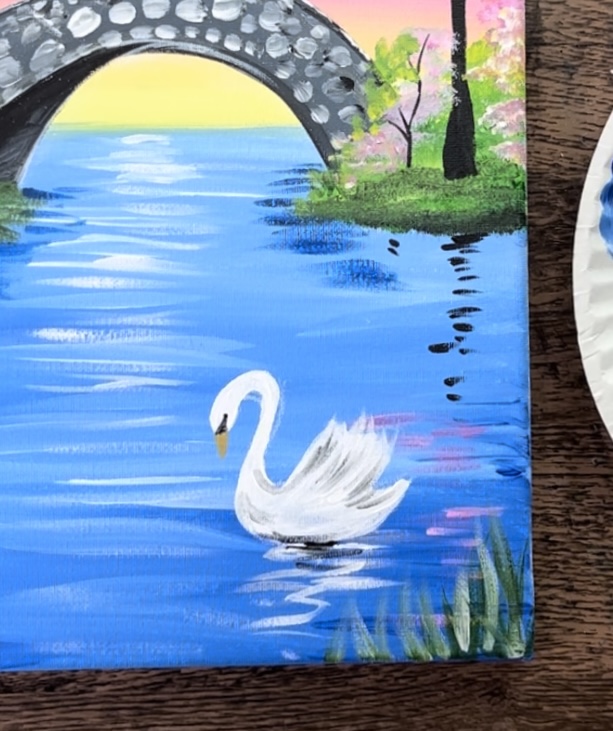
You can also paint lily pads in the water. Use the #4 round brush and a combination of the green, yellow and white. Paint very loose little “C” marks in the water. Lily pads that are further away may only just be one little oval stroke of paint.

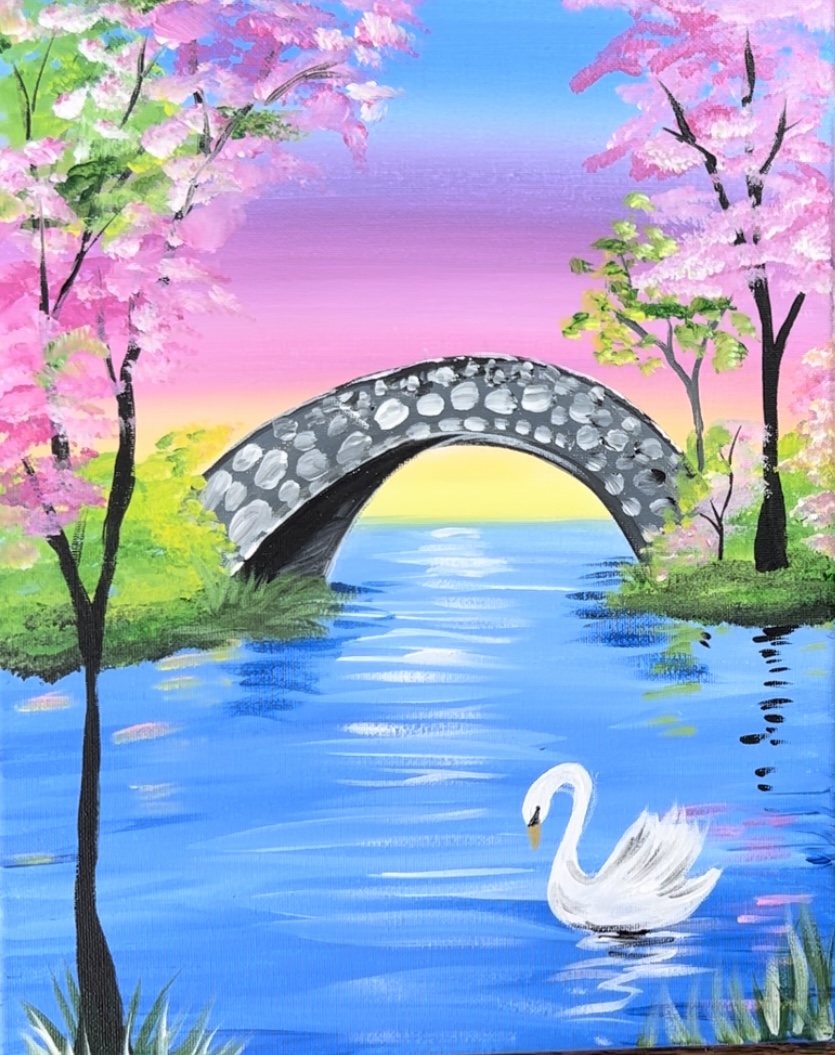
As a final touch, you can add a little bit of bright yellow reflection in the water down the center of the bridge.
And you are finished!