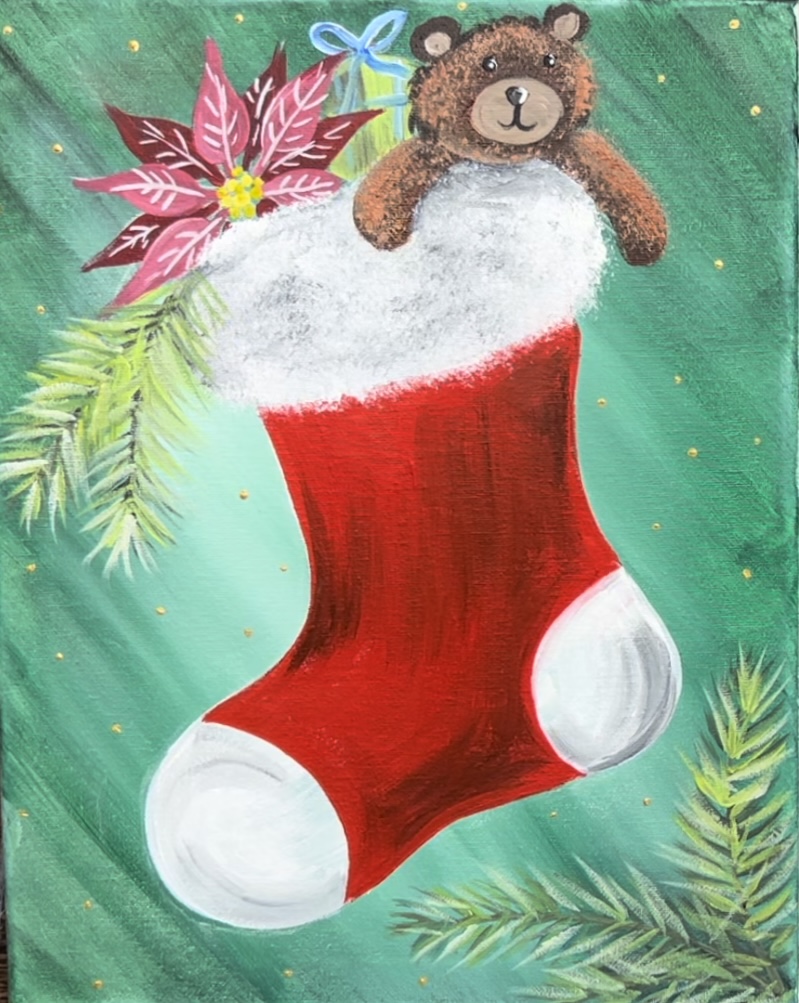
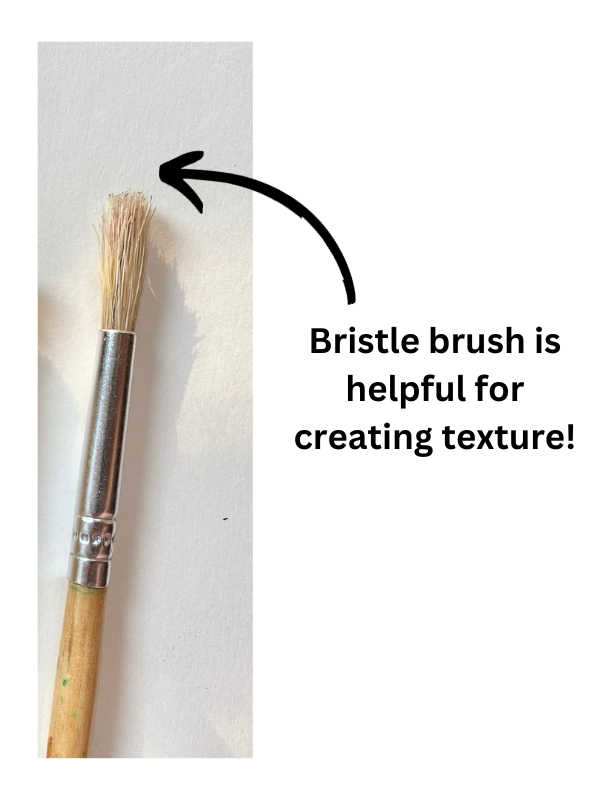
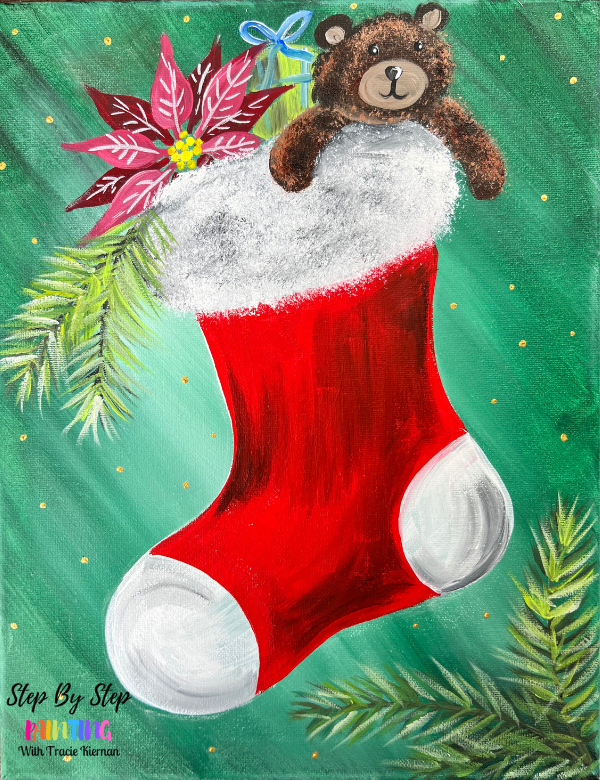
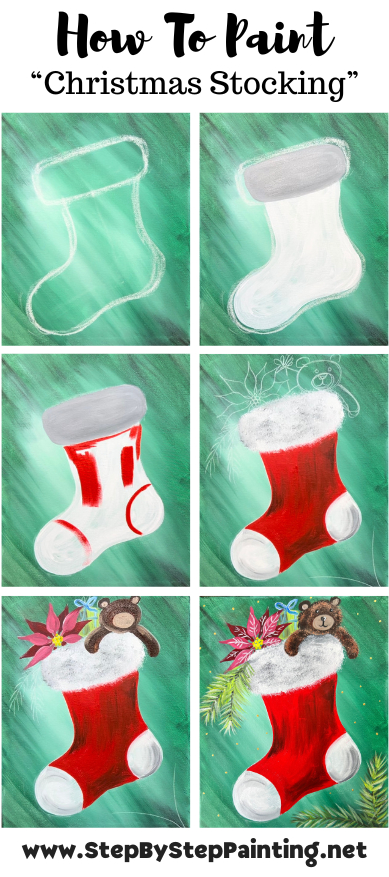
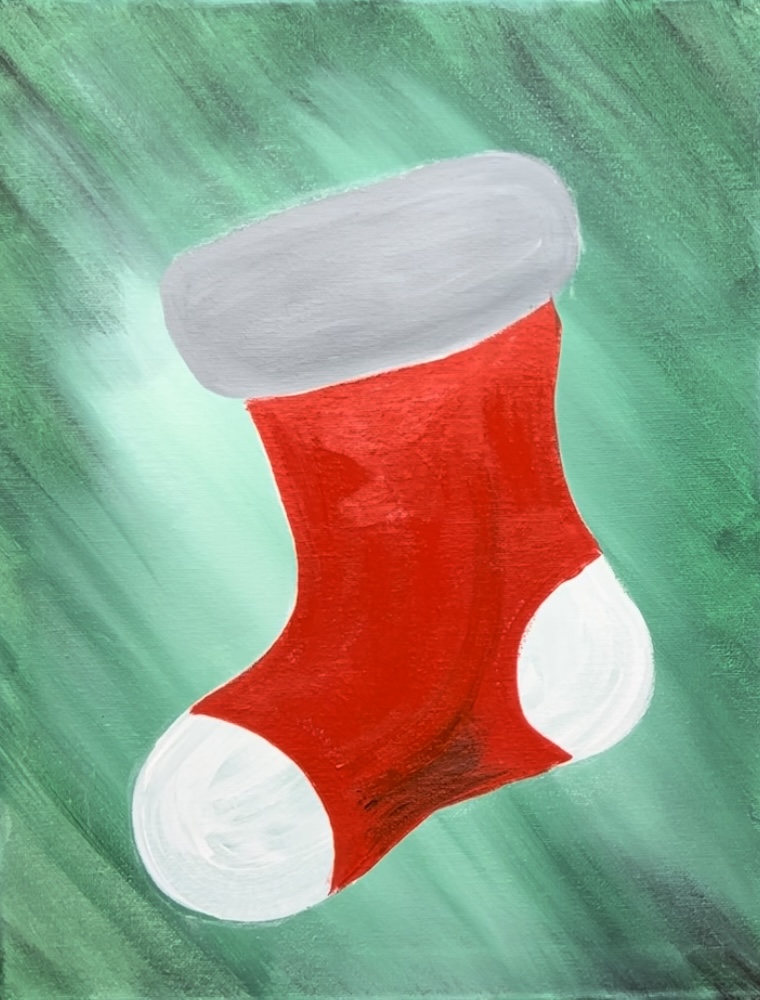
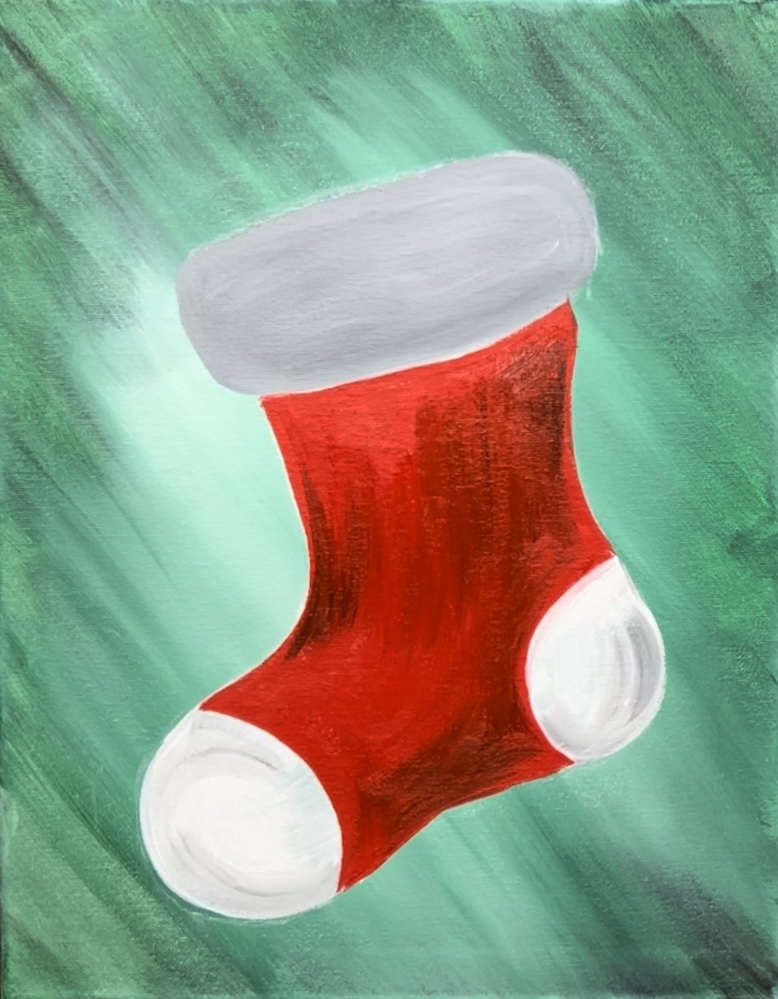
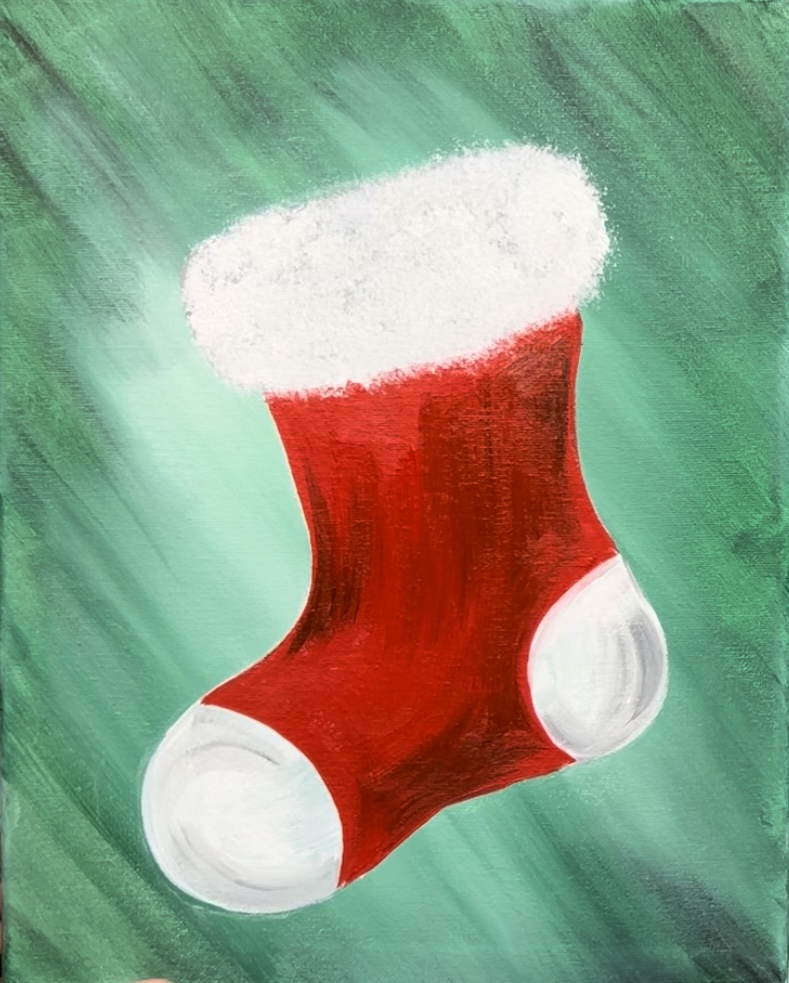
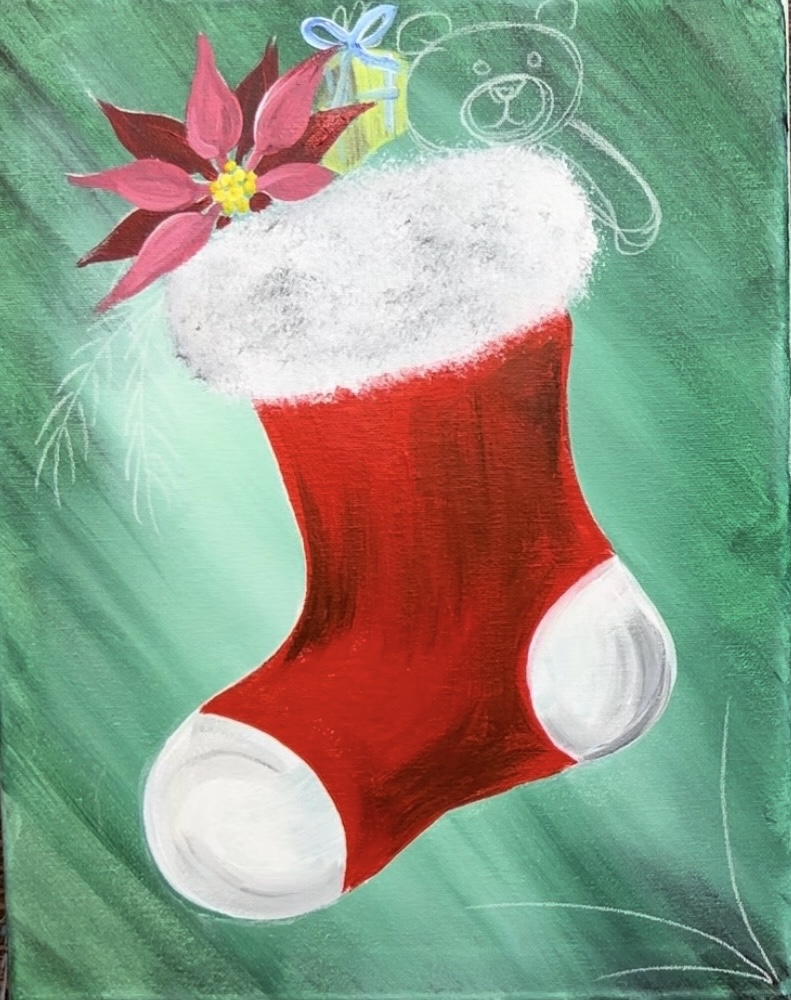
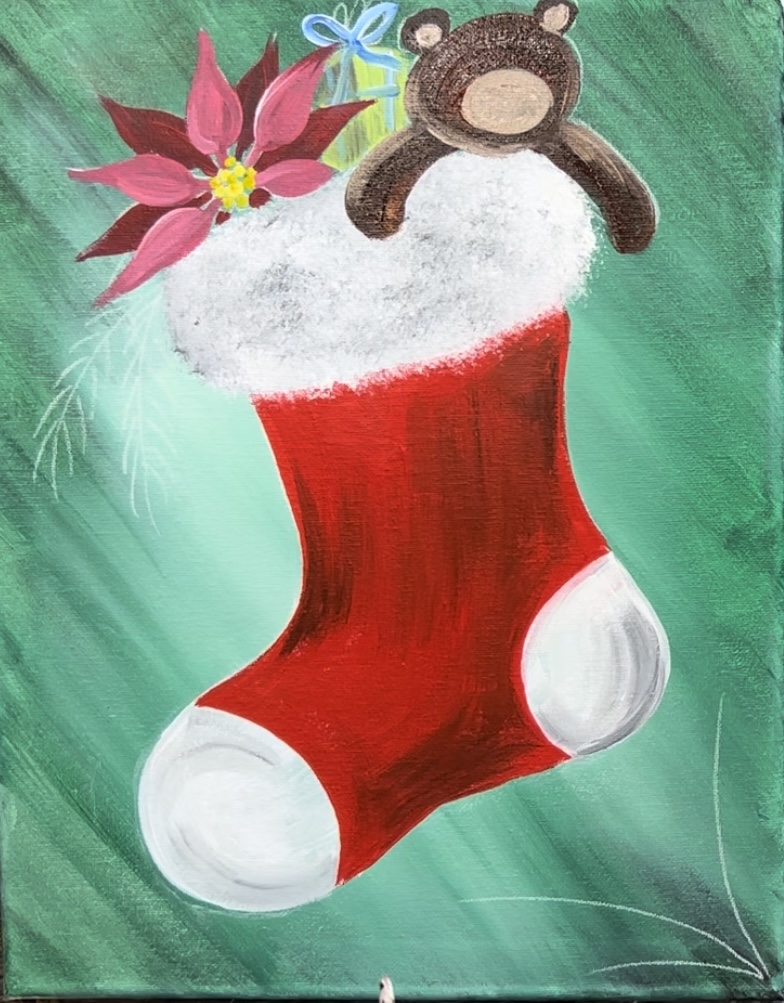
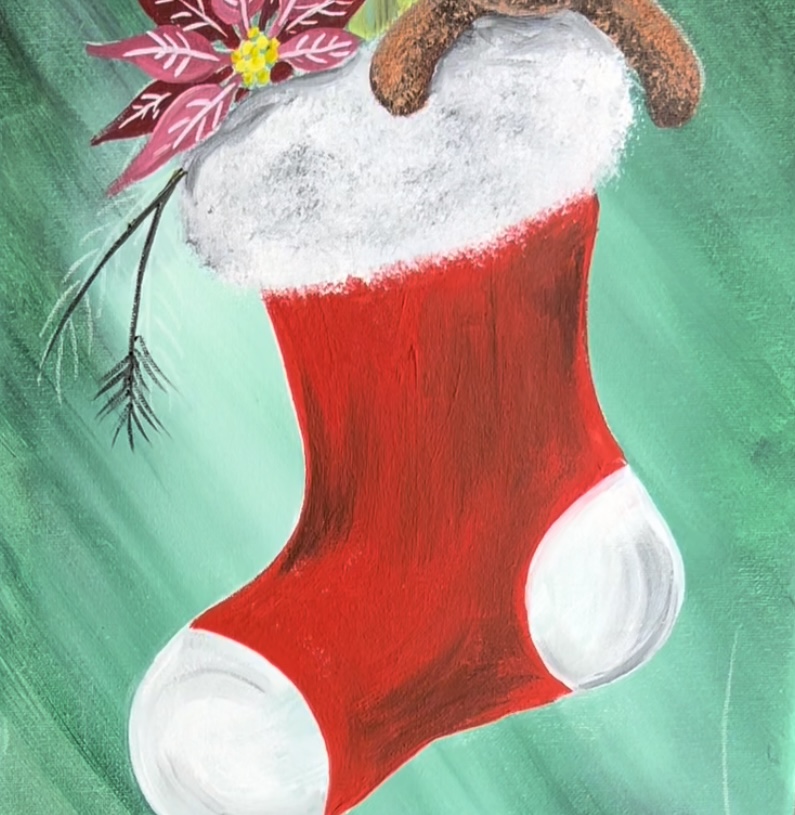
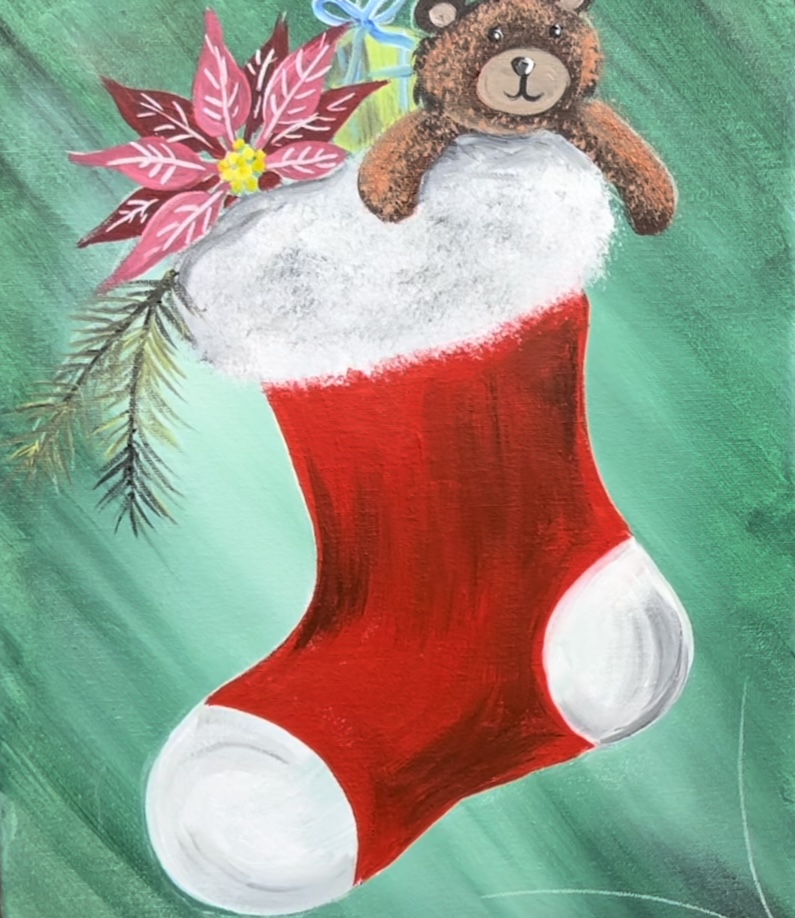
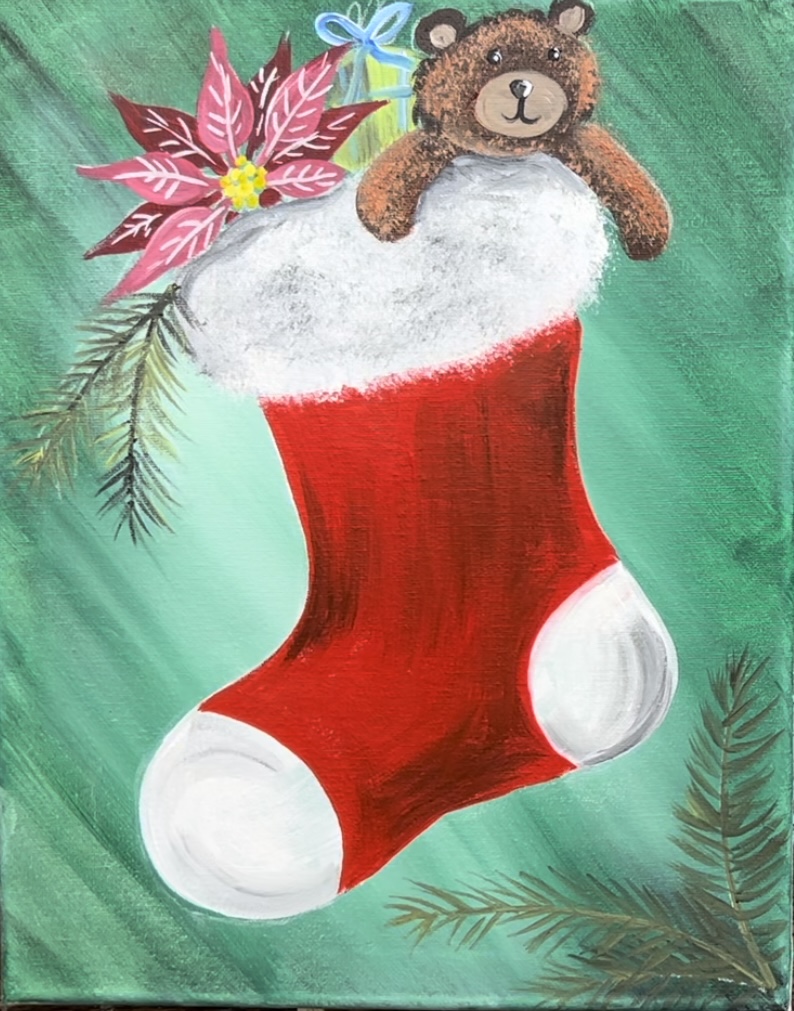
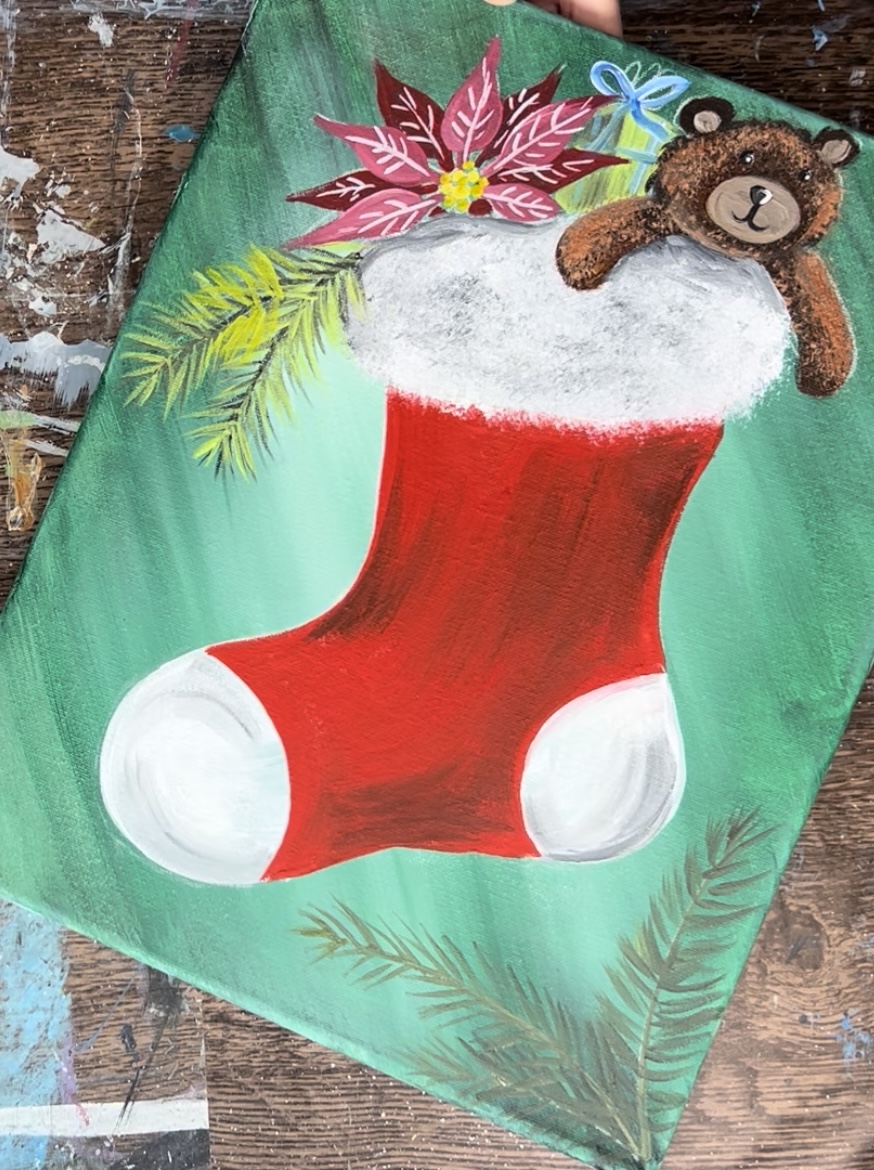
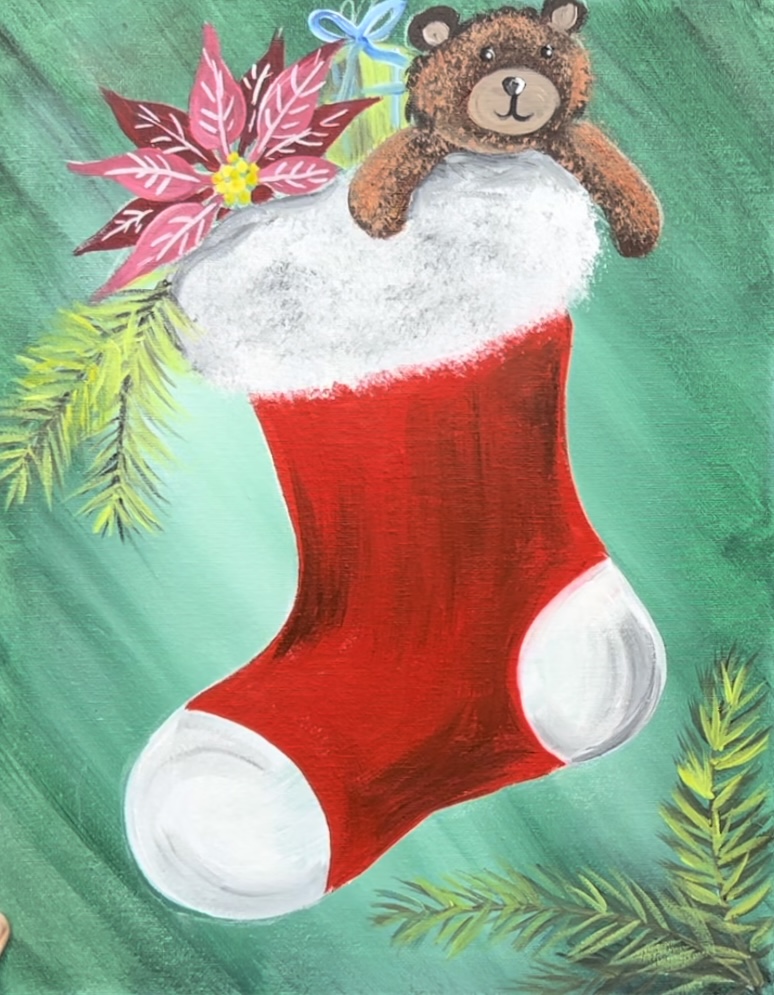
Learn how to paint a Christmas stocking with acrylics on canvas. This painting tutorial shows you how you can use a “bristle brush” to create texture on the stocking and stuffed bear.
Would you like to save this?
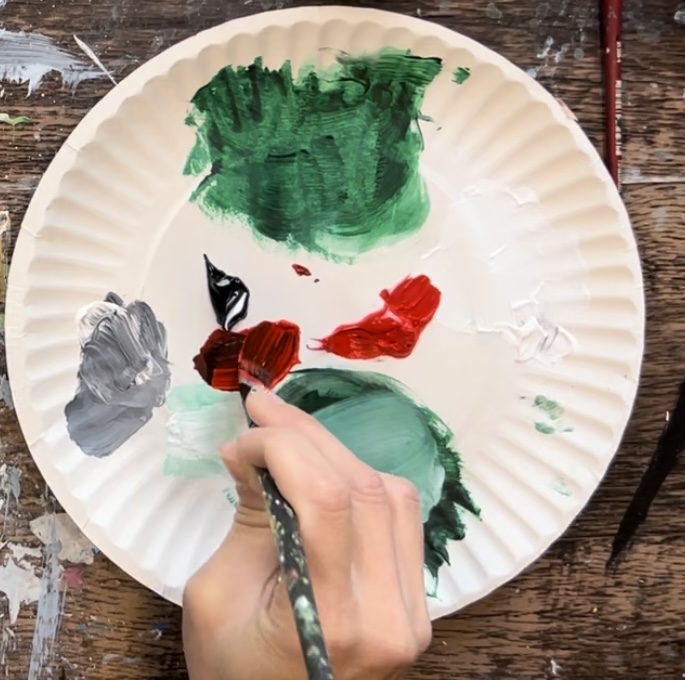
I use a round bristle brush with natural bristles. It has the scratchy texture and it is great for creating texture work in paintings.
You can also customize colors and items in the stocking.
Enjoy and happy painting!
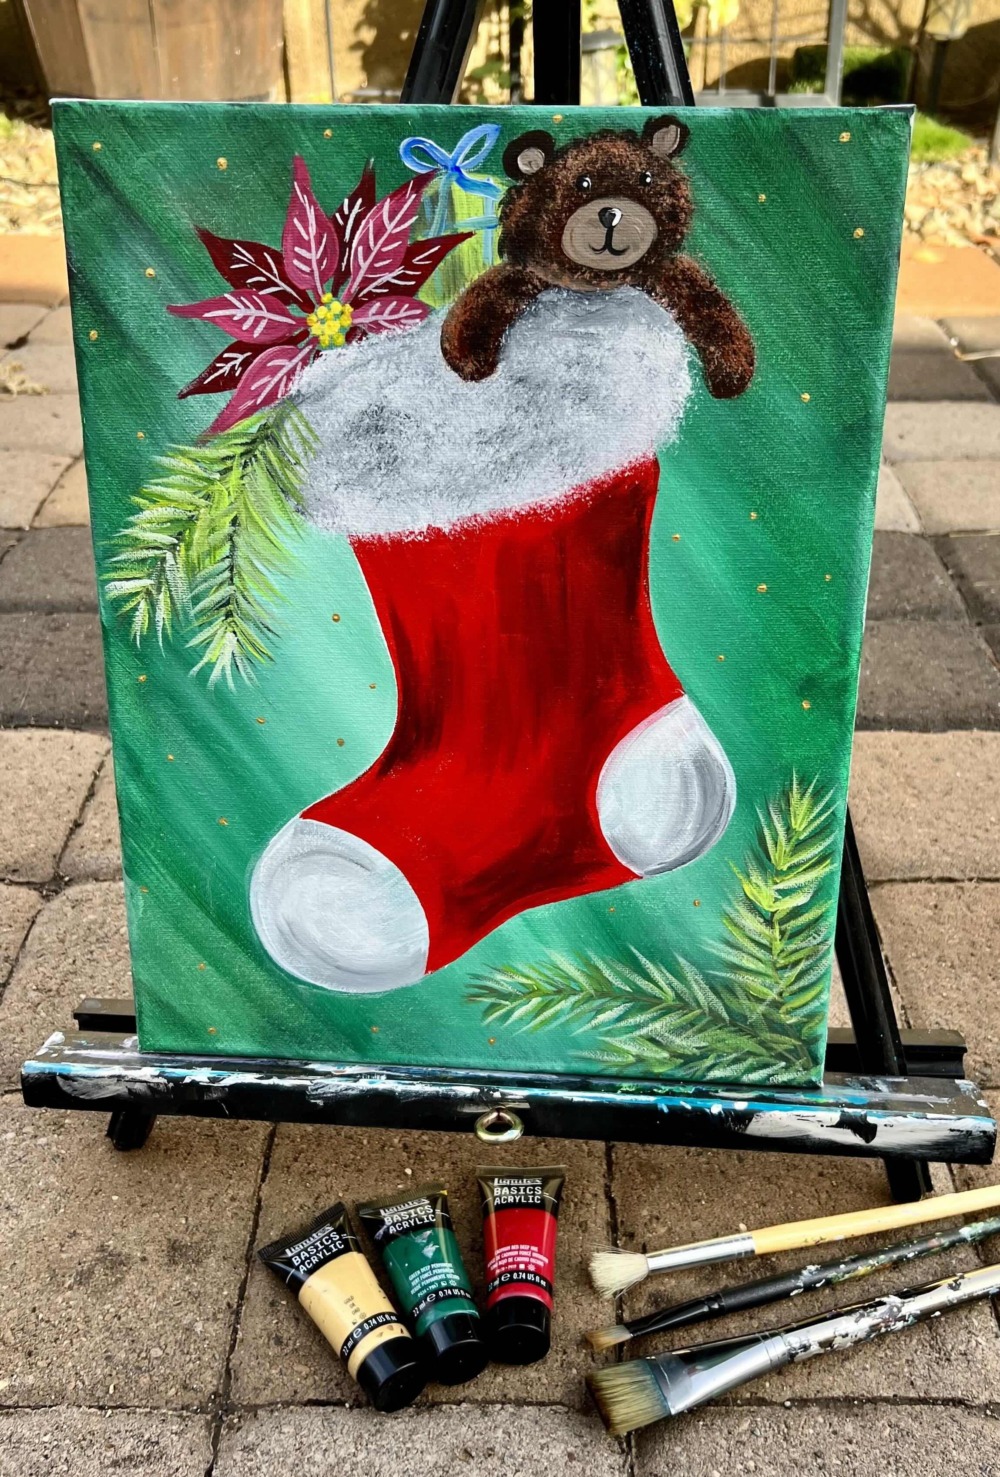
Materials Needed
How To Paint A Christmas Stocking - Acrylic Painting Tutorial
Learn how to paint a Christmas stocking with acrylics on canvas. This painting tutorial utilizes different brushes to create different textures in the stocking and bear.
Materials
- 11 x 14 Canvas
- Acrylic Paint
- Brushes
- Chalk and/or chalk pencil for drawing
- Optional White Paint Pen
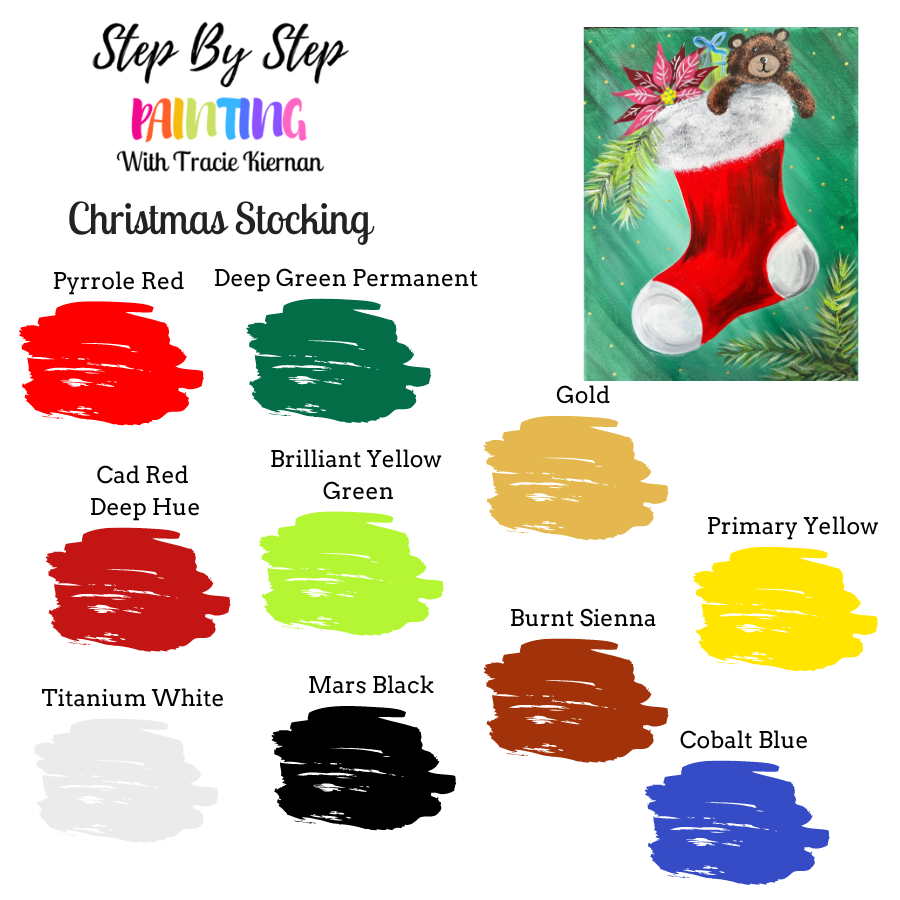
Colors
- Titanium White
- Mars Black
- Pyrrole Red
- Cadmium Red Deep Hue
- Burnt Sienna
- Brilliant Yellow Green
- Green Deep Permanent
- Cobalt Blue (only a tiny bit in the present)
- Gold (only a tiny bit in the background)
- Primary Yellow (only a tiny bit in the middle of poinsettia)
Brushes
- 1" Flat
- 12 Bright
- 4 Round
- 3/8" angle brush
- Round Bristle Brush (used for texturing)
Color Palette
I used Liquitex BASICS acrylics for this painting. If you are using a different brand, you can use the color chart below to help you match colors. Note: gold, yellow and cobalt blue were used very sparingly. You don’t need a lot of those colors.
Directions At A Glance
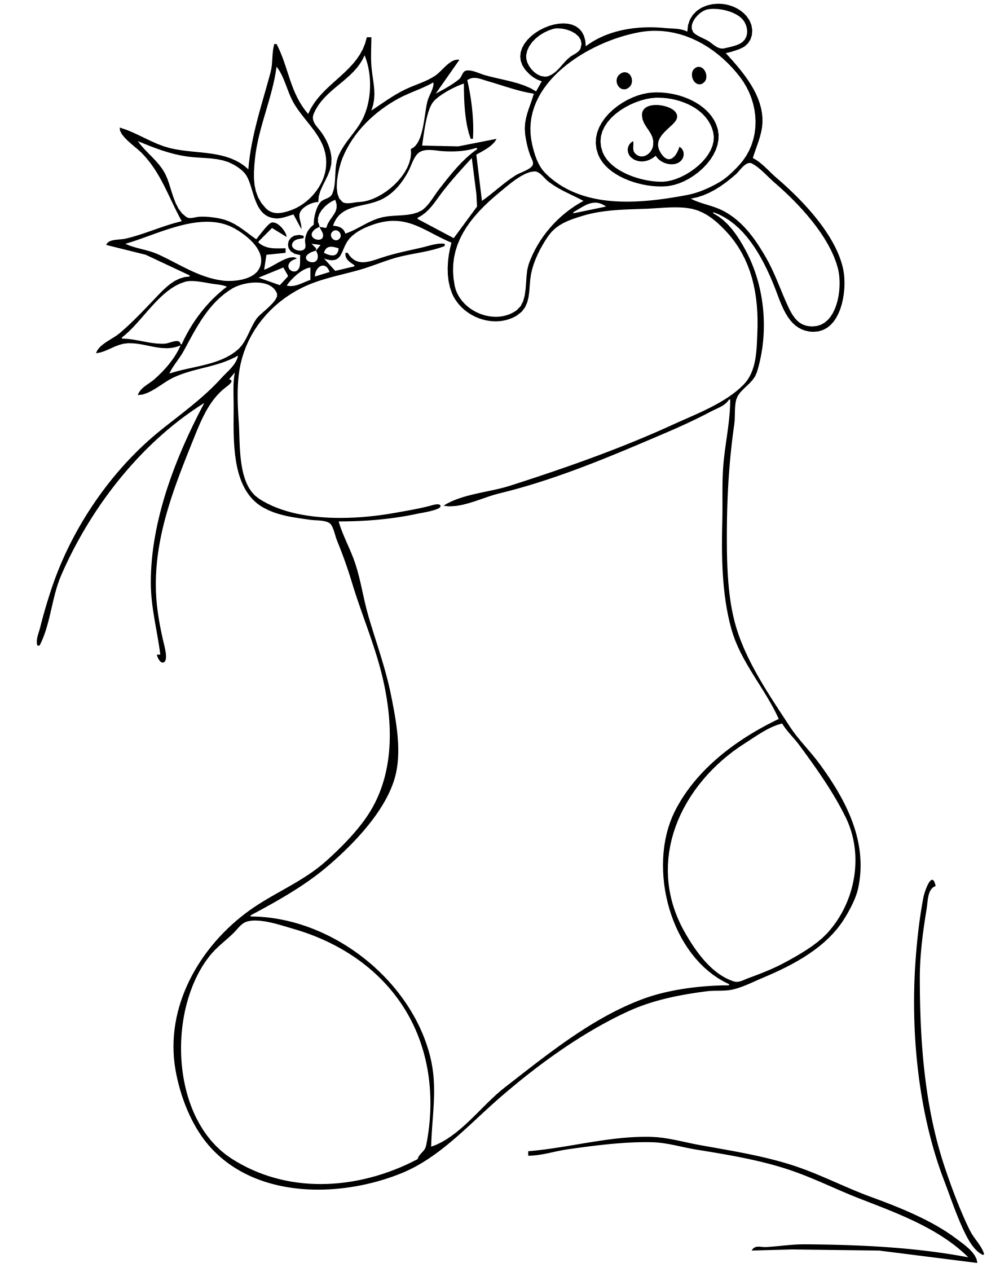
Optional Traceable
Video
Step By Step Instructions
1. Paint Background
Load your paint palette with the colors: deep green permanent, mars black and titanium white.
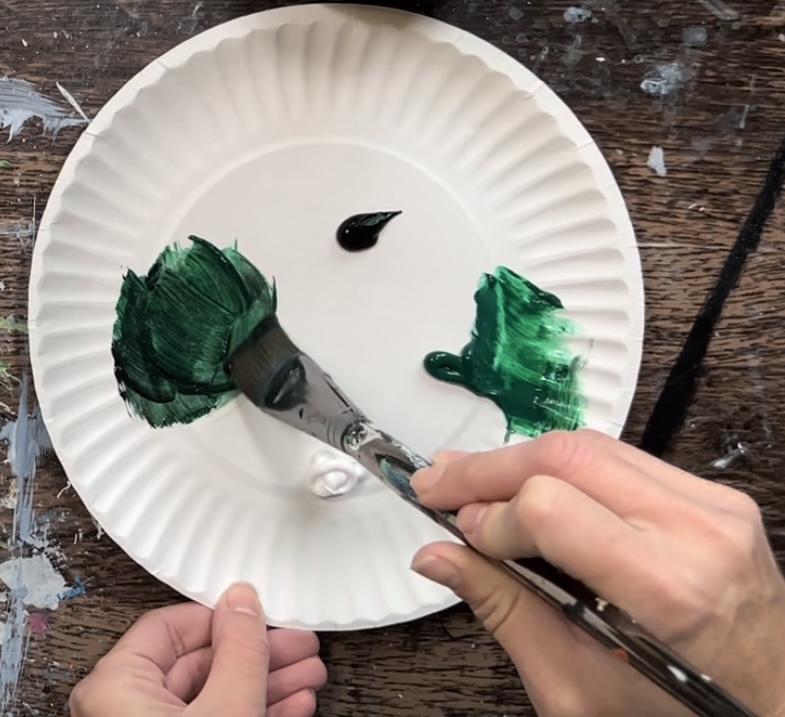
Use a 1″ flat brush. Mix a small amount of mars black paint into the deep green permanent color.
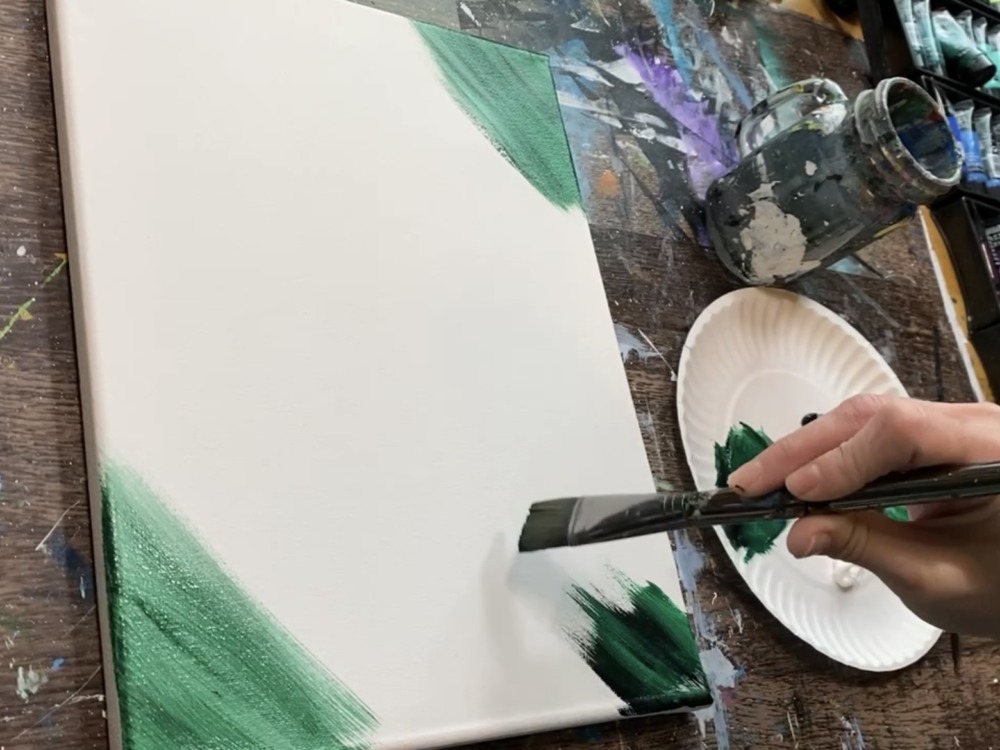
Then paint diagonal strokes of color on the corners and edges of the canvas. Basically paint just the perimeter with this dark green color. We will blend a lighter green in the center so the center is bright and the edges are darker.
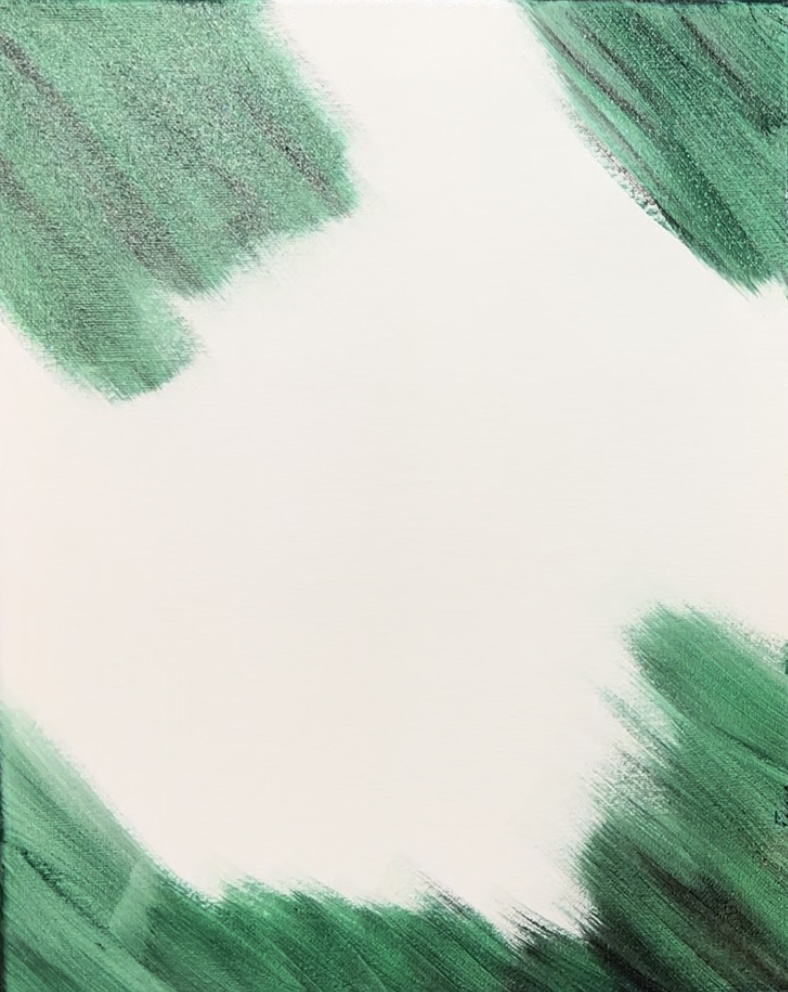
Leave the center blank.
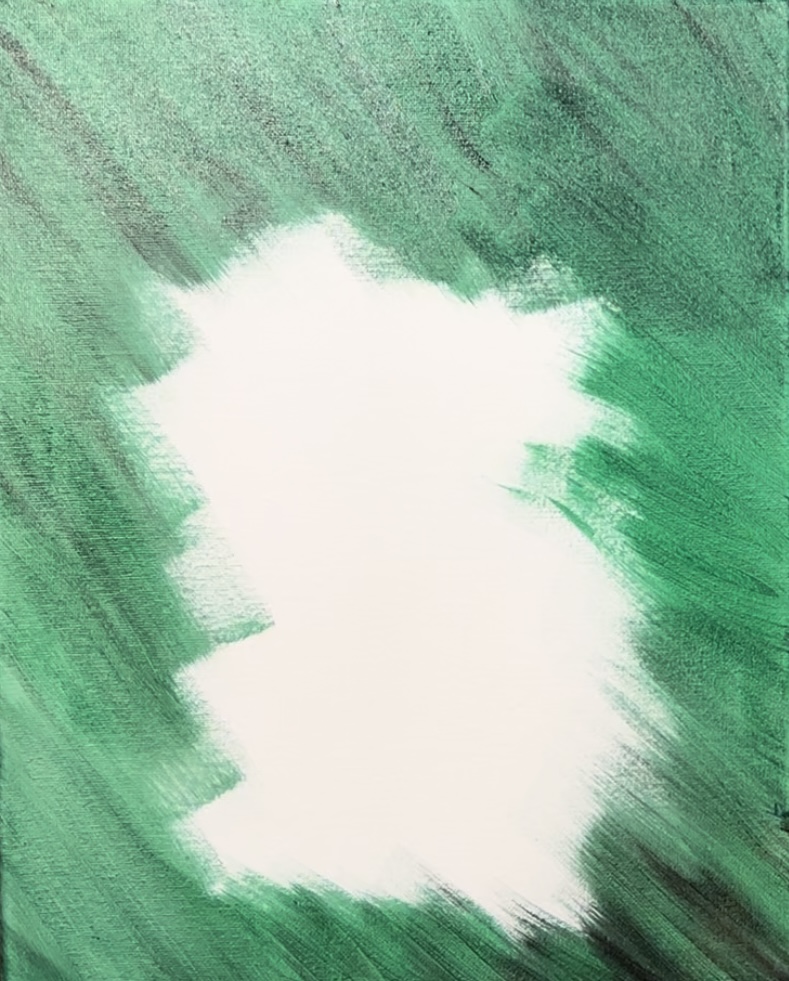
Then add titanium white to your brush without rinsing the brush. You only need a small amount of titanium white for this. Blend the color with diagonal strokes so that the center of the canvas is a lighter green.
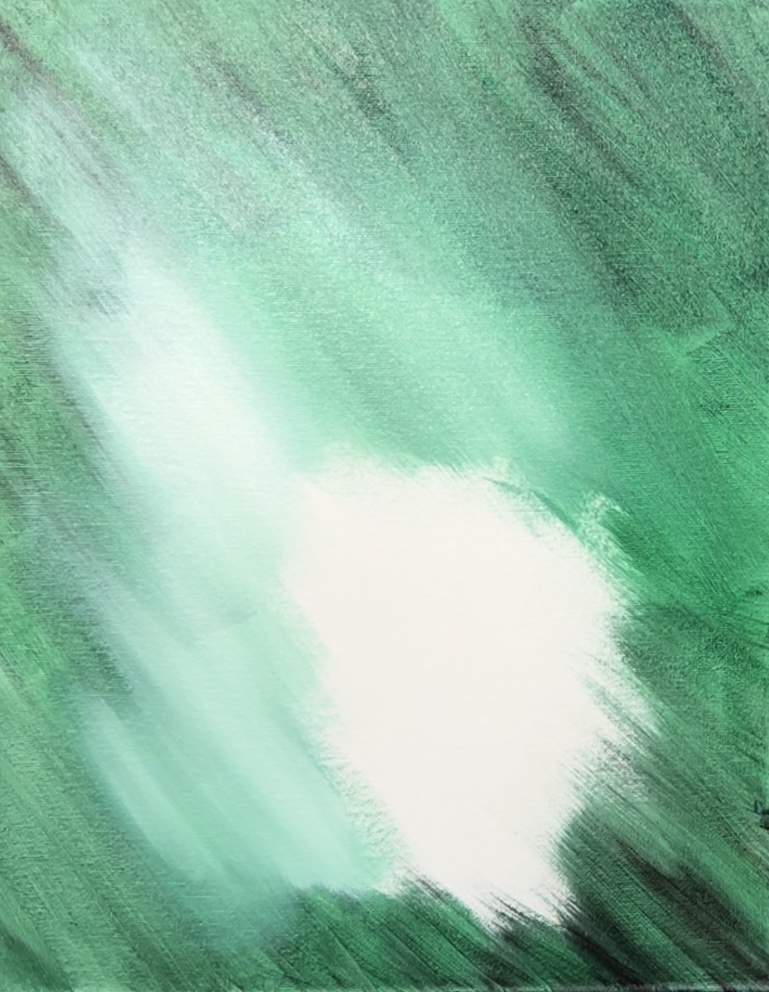
Try not to “over blend” the color. Also, if needed, go back and blend more of the darker green along the edges. Do this until the entire canvas is full.
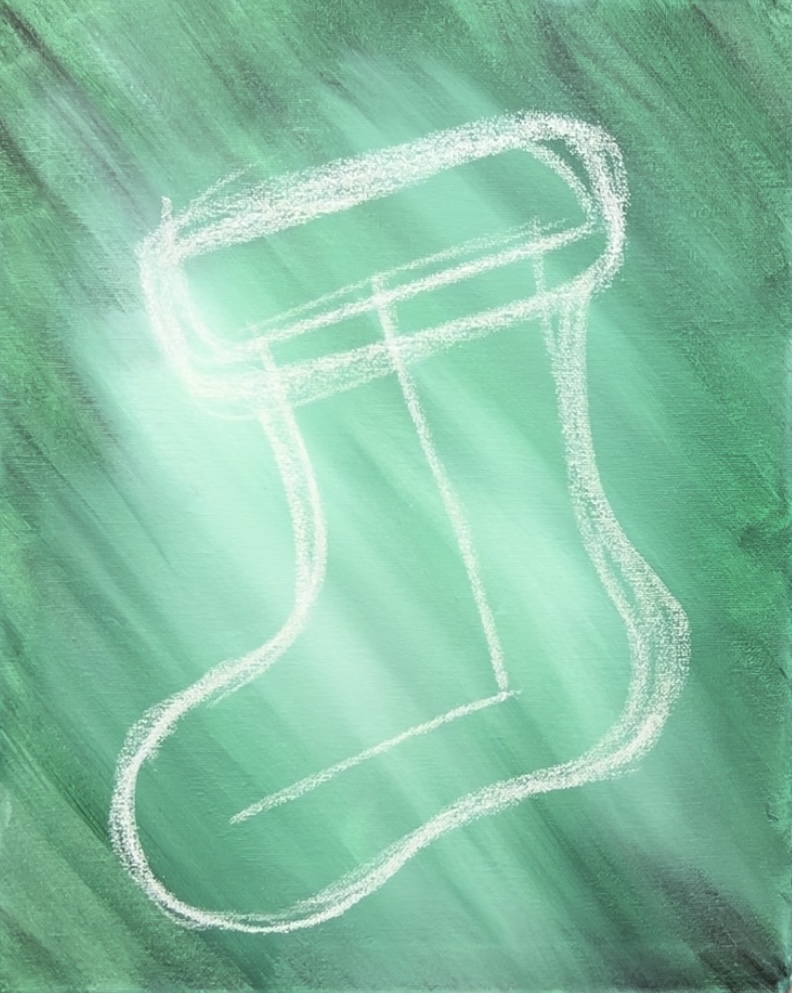
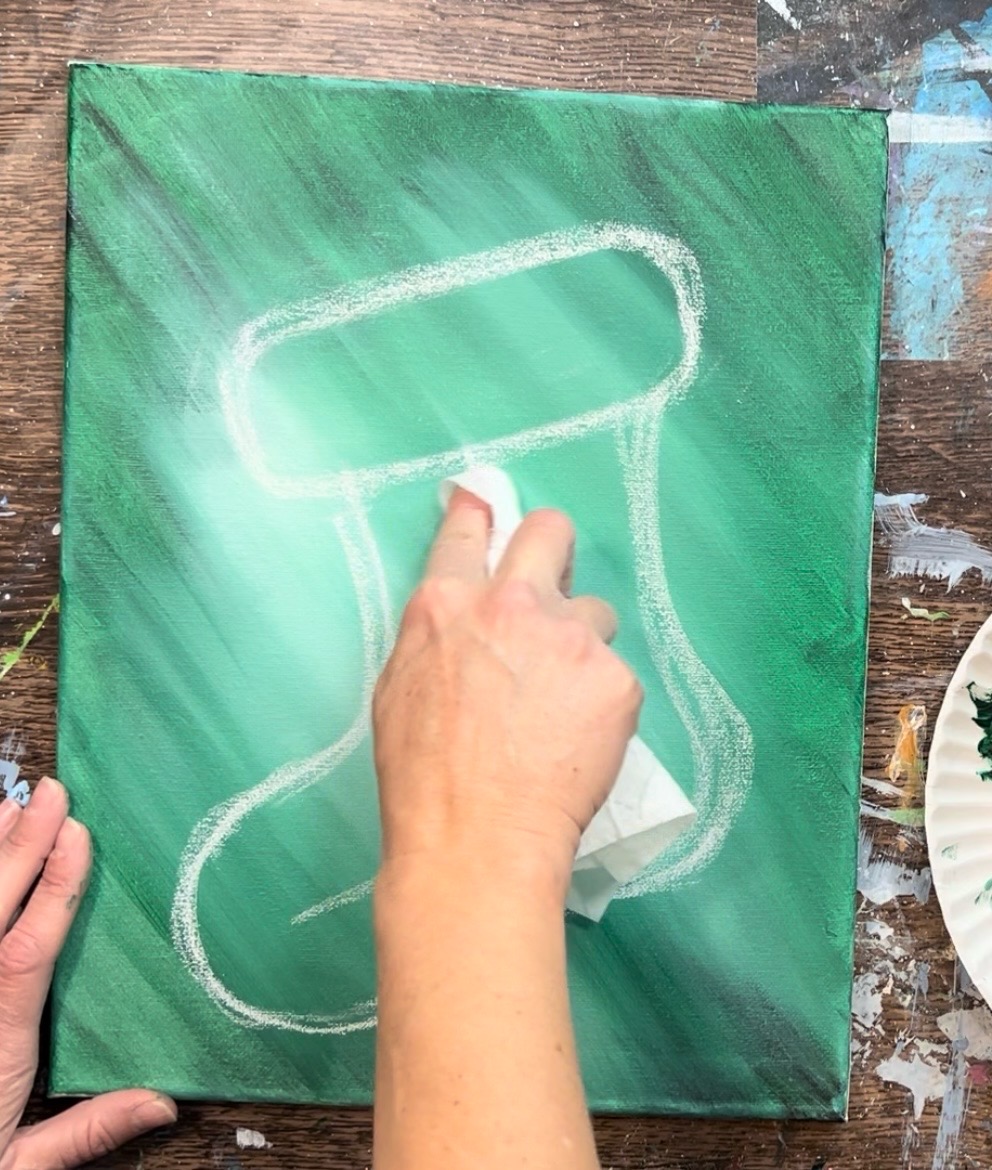
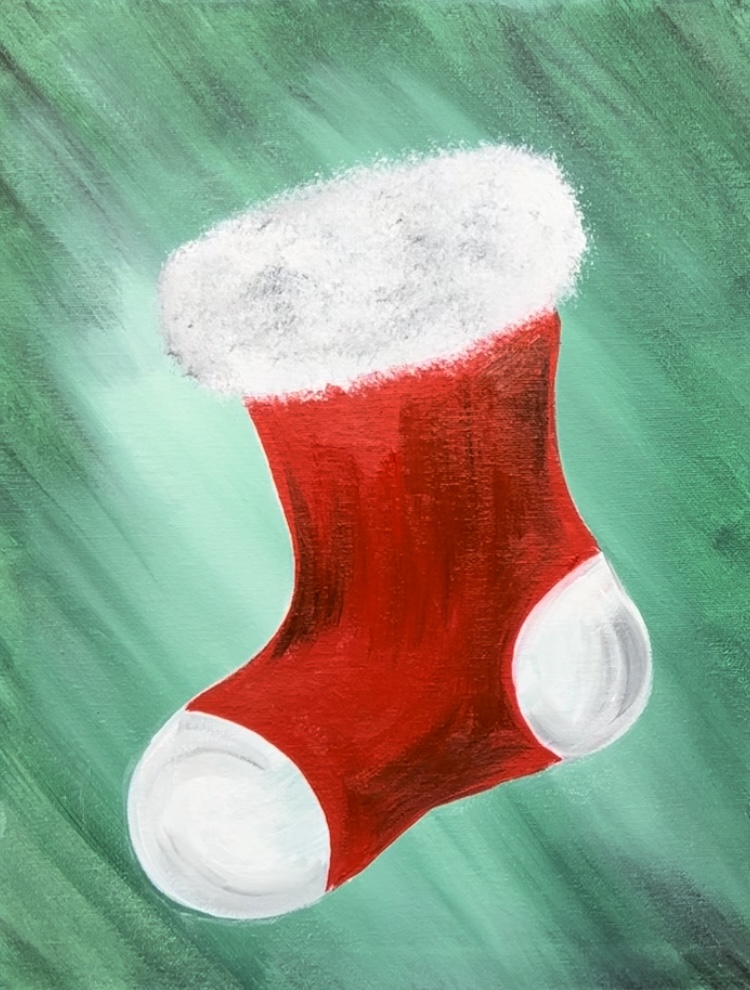
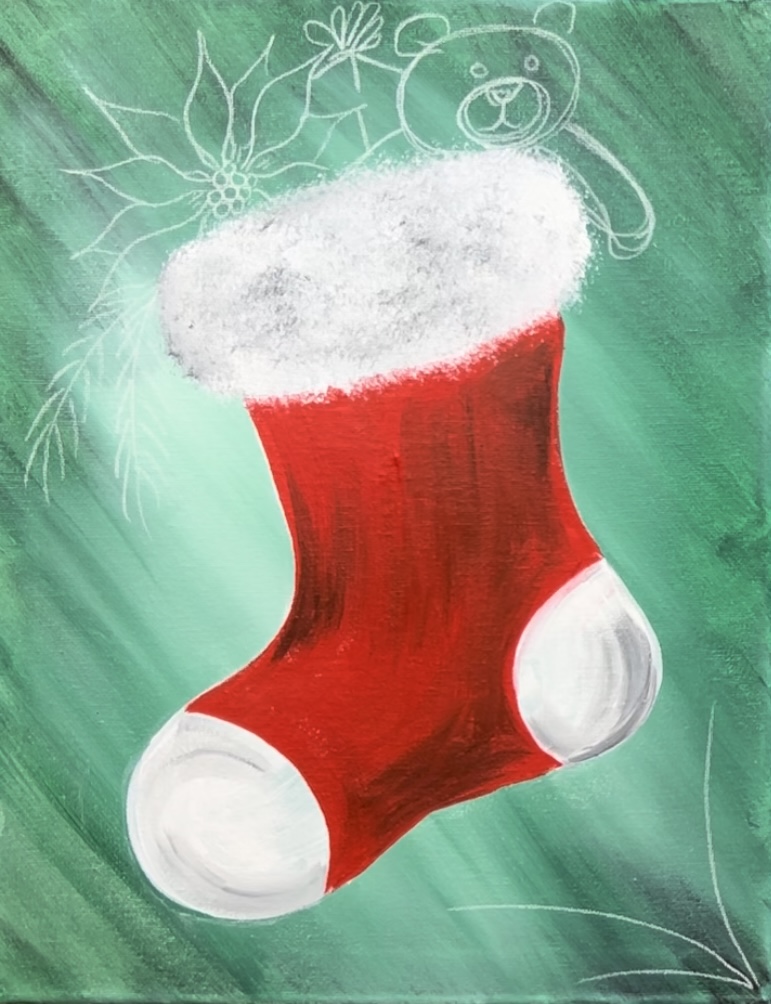
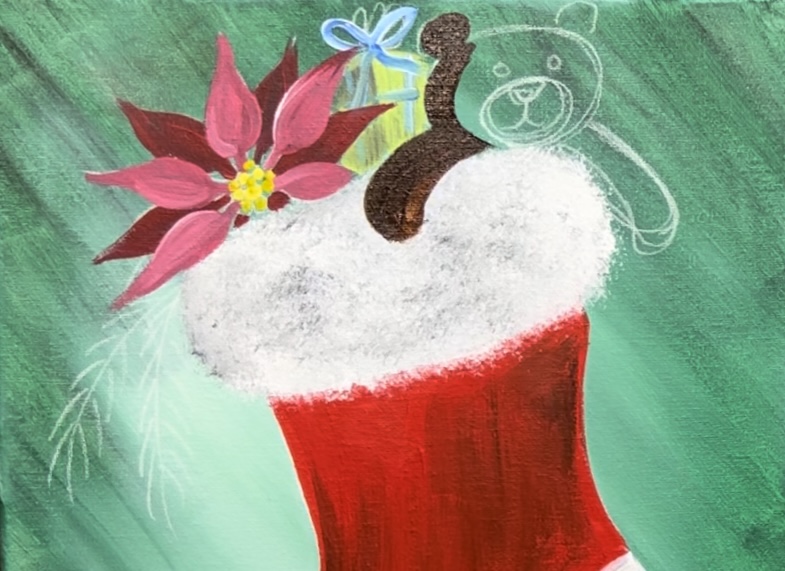
2. Draw Stocking
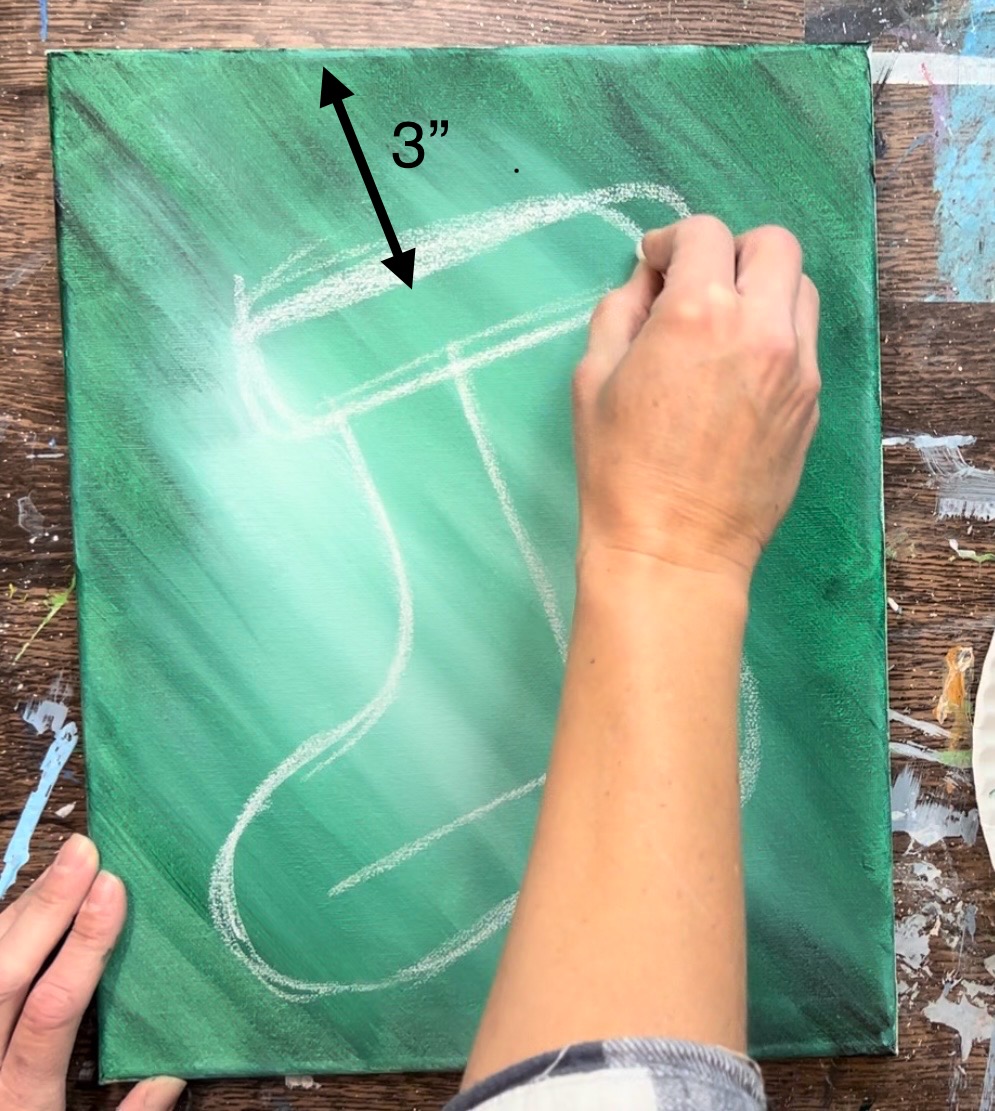
Wait for the background to dry before drawing the stocking. Use a white piece of chalk to draw a backwards L. The lines are going diagonally. The larger line on the top is about 5″ and the second line is about 4″. Do this in the center of the painting.
Next, sketch the stocking shape around the “L”. Start by sketching the toe area so that it curves around the line.
Draw the arch so that it curves slightly upwards and then draw the heel so that it curves outwards. Be sure to draw in short, sketch-like lines.
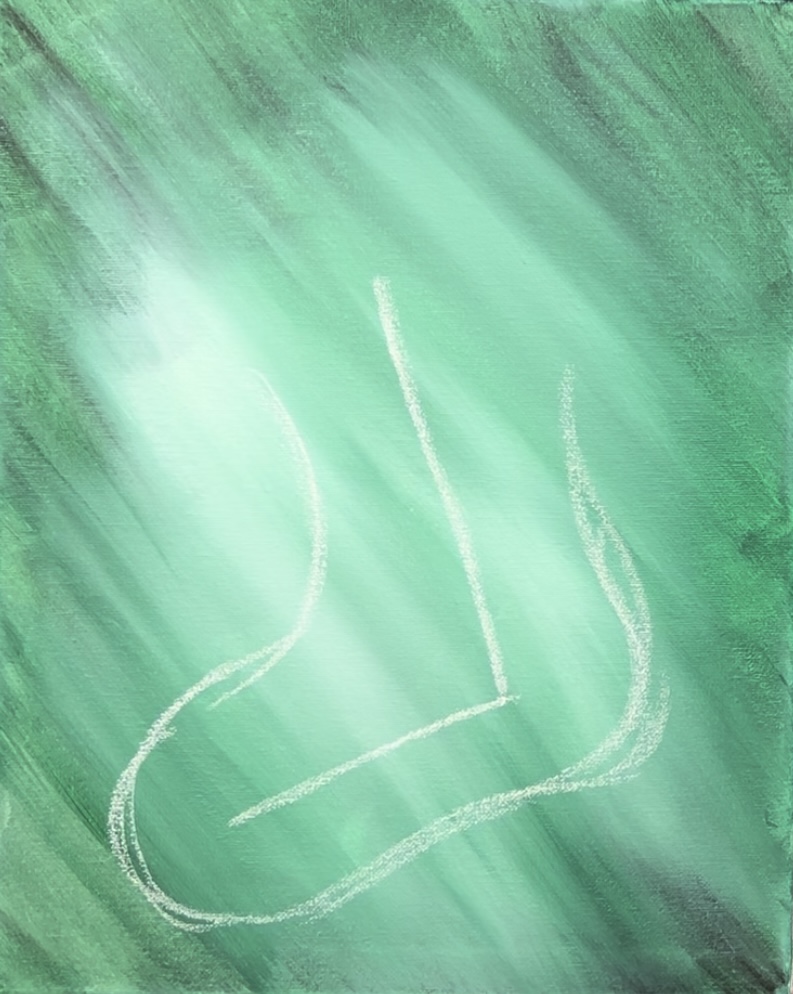
Then draw a diagonal line for the bottom of the fuzzy opening of the stocking.
Use a ruler to measure to make sure you have at least 3″ of space above the top of the opening (going diagonally). This will ensure you have enough room to draw and paint the items in the stocking.
Draw the fuzzy opening as a rectangular shape with curved corners.
Then gently erase your chalk lines that are leftover with a soft baby wipe.
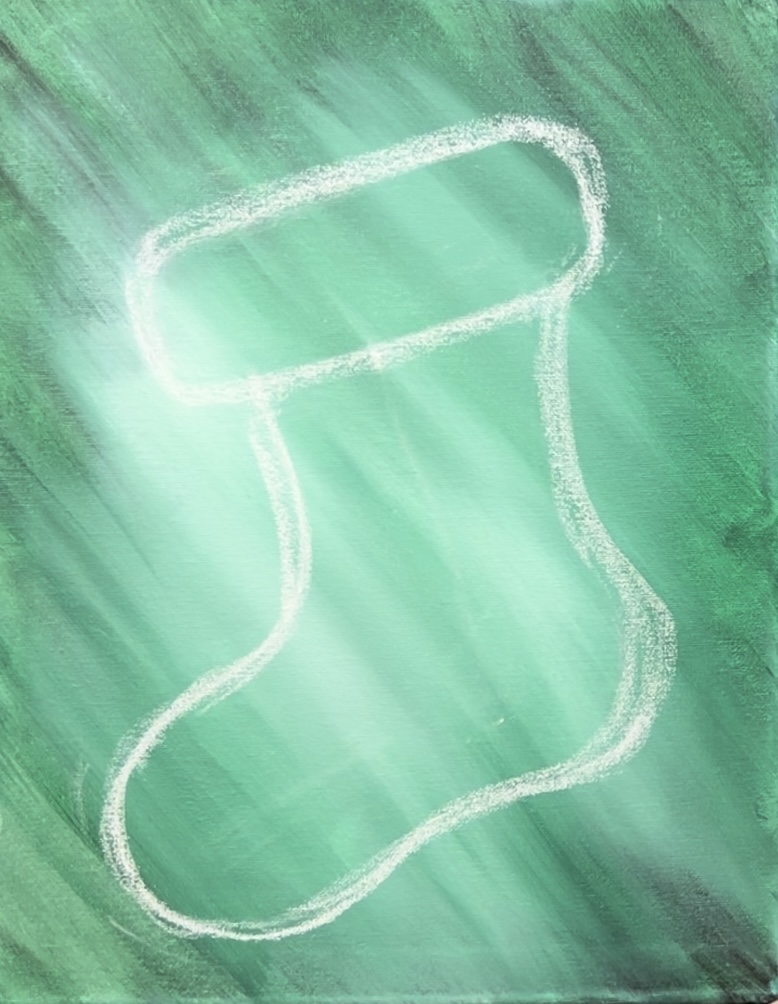
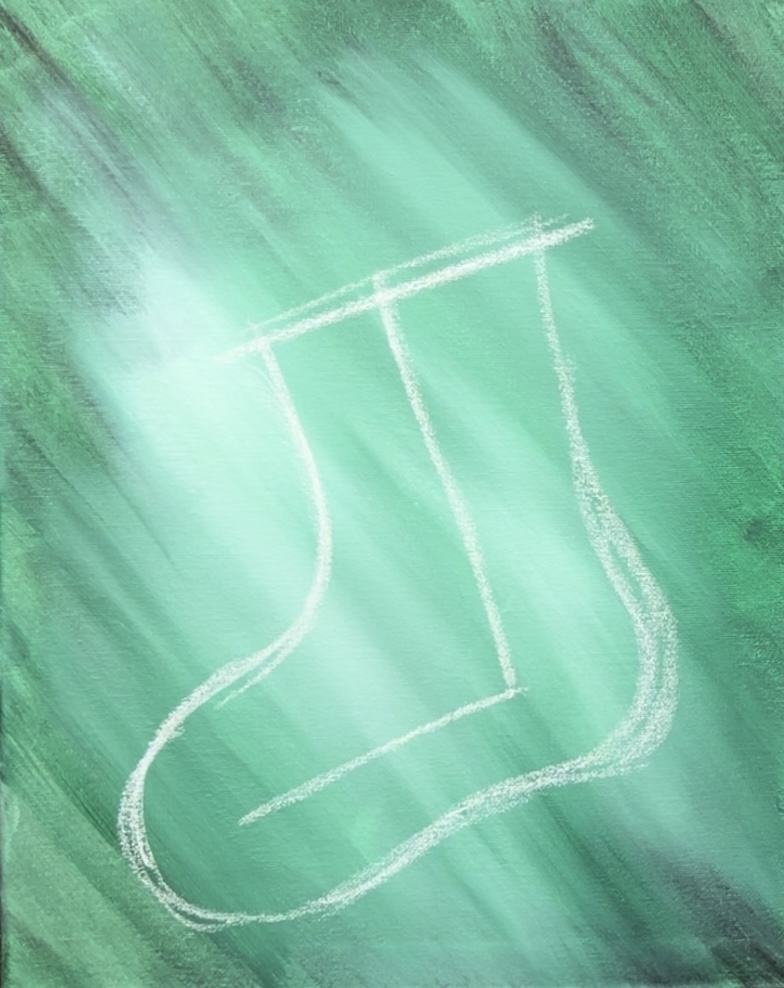
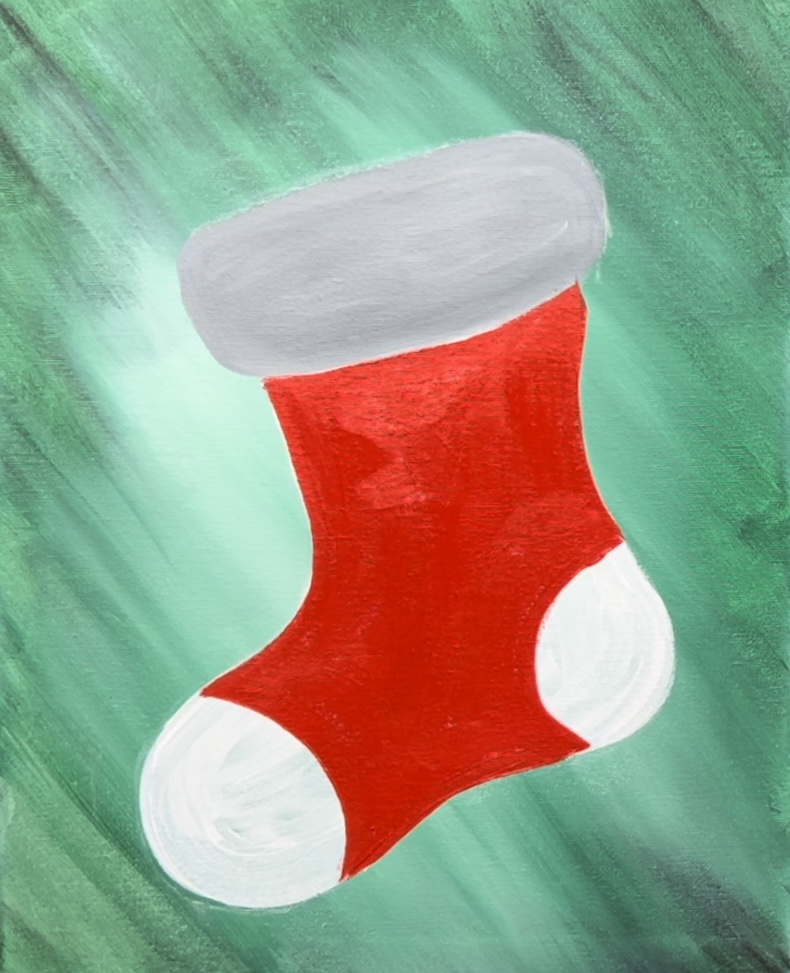
3. Paint Stocking White (Top Gray)
Use a #12 bright brush and titanium white to paint the stocking white. This will ensure that your red coat of paint will show up bright and give good coverage over the background.
Use the full width of the brush to paint the entire stocking using contouring strokes. This means you are painting your strokes in the direction of the shape.
Next, mix a gray on your palette. Mix about equal amounts of black and white together. Use the 12 bright brush to paint the top opening lining of the stocking (that rectangular shape). It is a solid coat of gray.
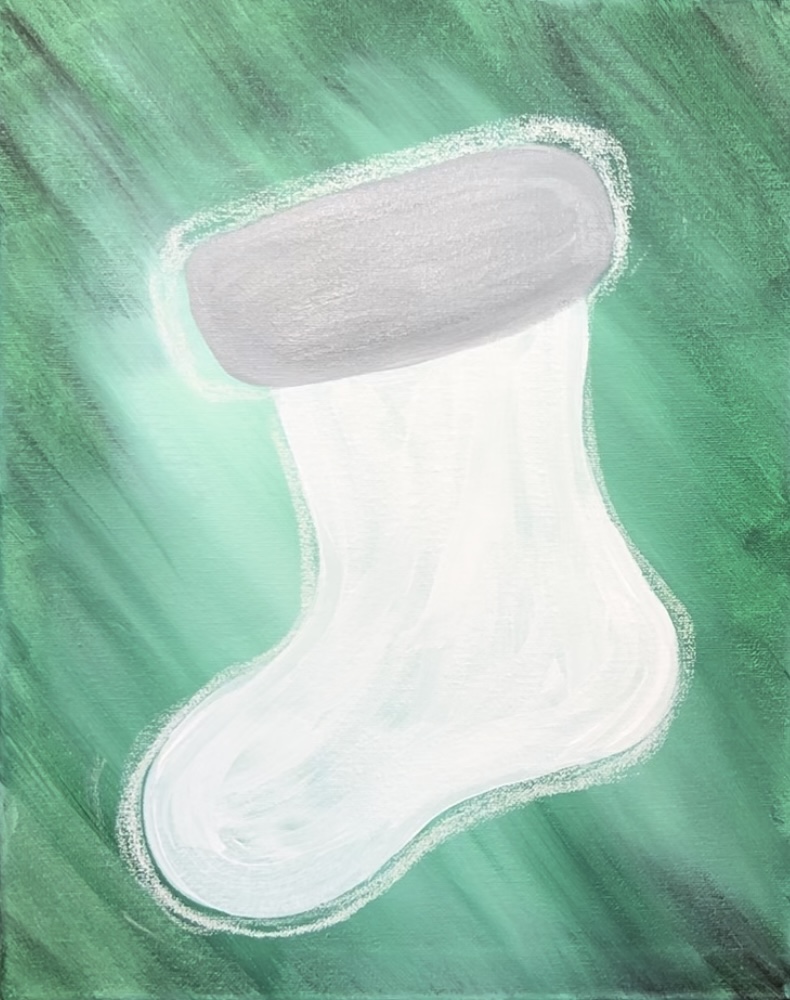
Wait for this to dry and then gently erase the chalk lines using a soft baby wipe.

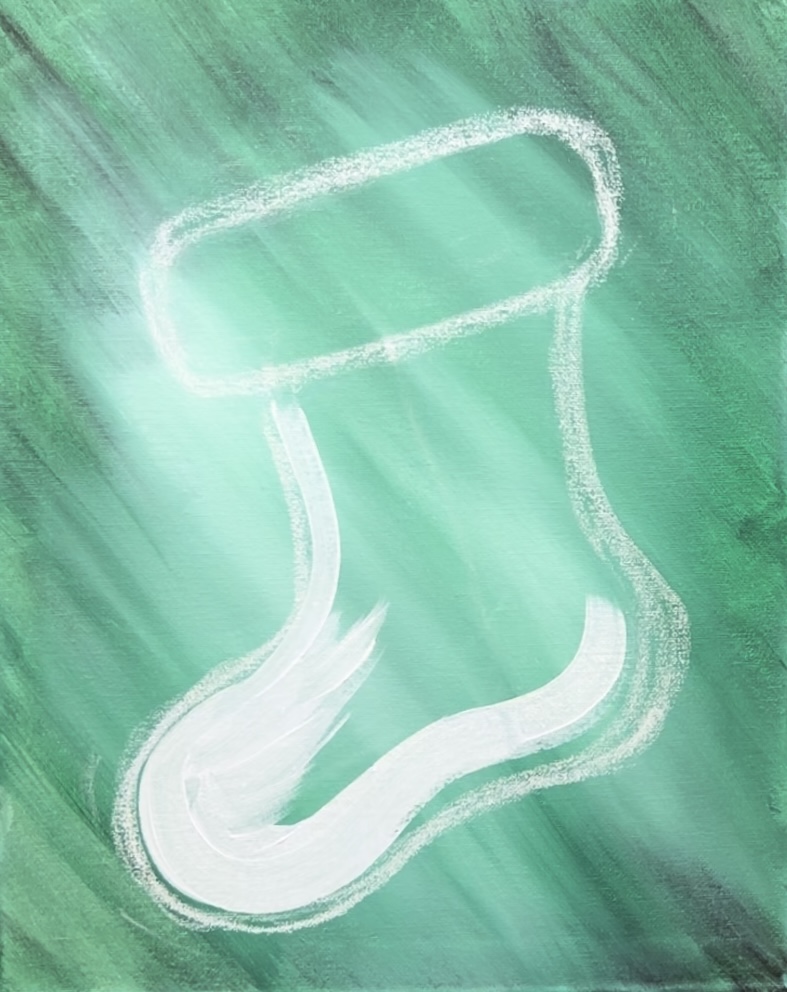
4. Paint Stocking Red
Next, paint the stocking red. Load your paint palette with the color “pyrrole red”. Use a 12 bright brush to paint the stocking the same way you painted it white (paint strokes going in the same direction).
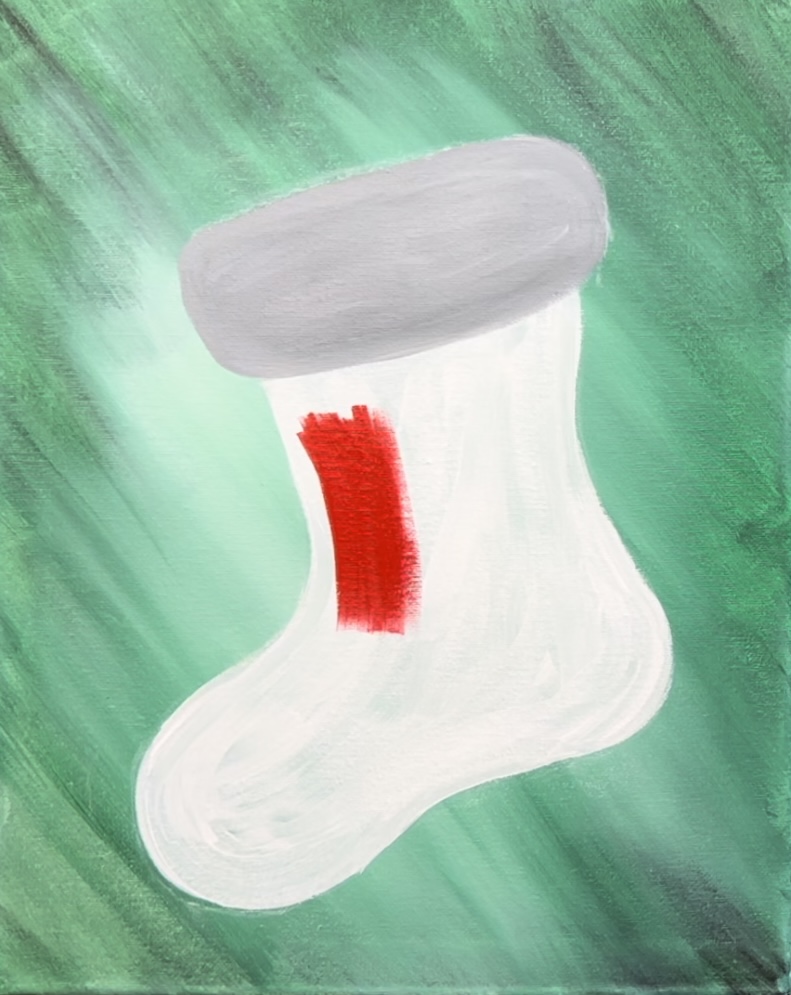
Use the tip of the paint brush to outline the toe and the heel of the stocking.
Paint the rest of the stocking red but don’t paint the toe tip and the heel.
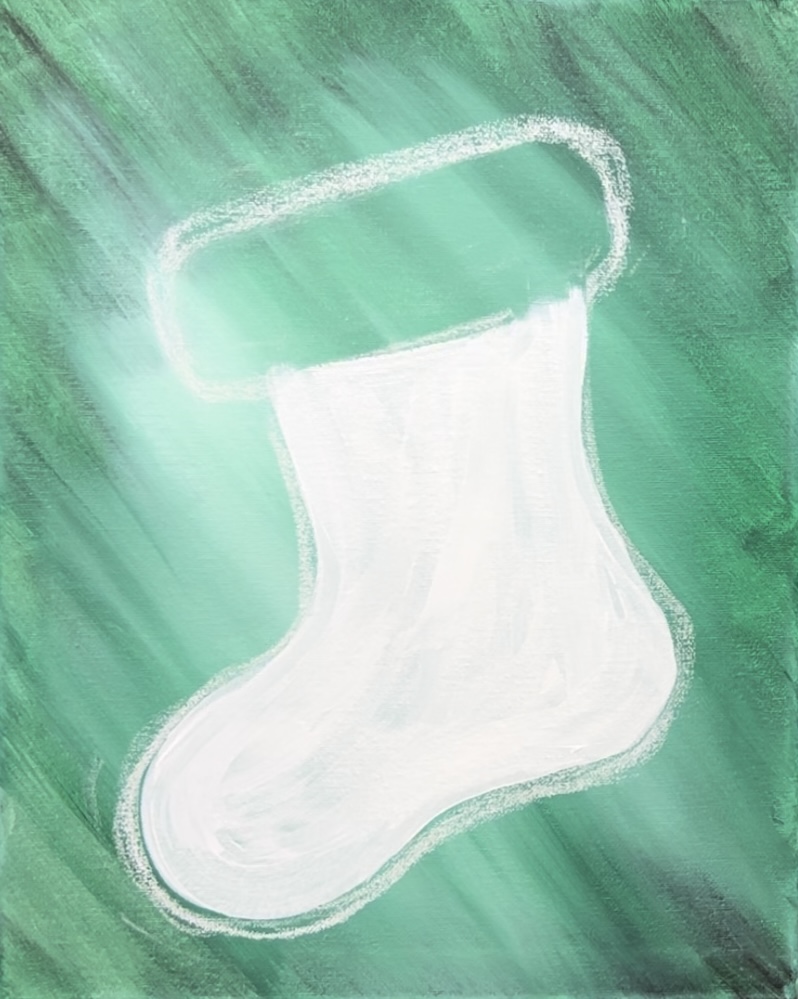
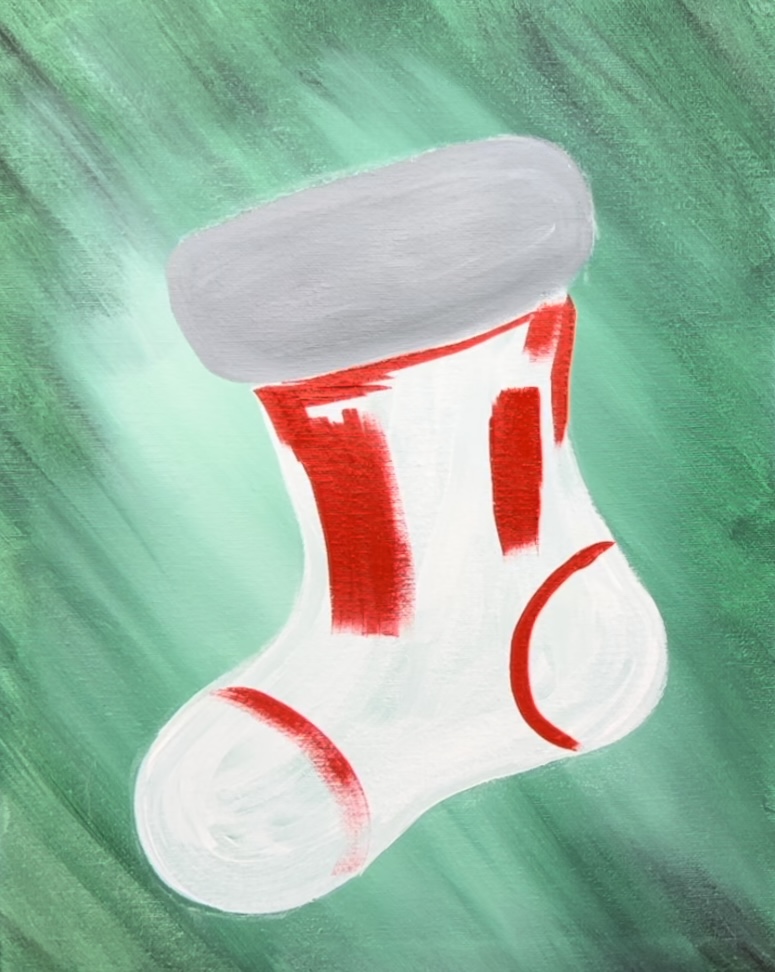
5. Paint Shadowing On Stocking
On your palette, mix a small amount of mars black paint into the red to darken the red. Use this shade of red to paint shadowing sparingly throughout the stocking and blend more pure red back into it.
Start by painting the dark red on the bottom arch area of the stocking.
Then add some vertical strokes with the dark red. If it looks like it is too dark then wipe the dark red off the brush and add just red to the brush and blend that into the rest of the red.
Next, rinse the brush. Then add gray to the 12 bright brush. Paint gray on the curves of the toe and the heel.
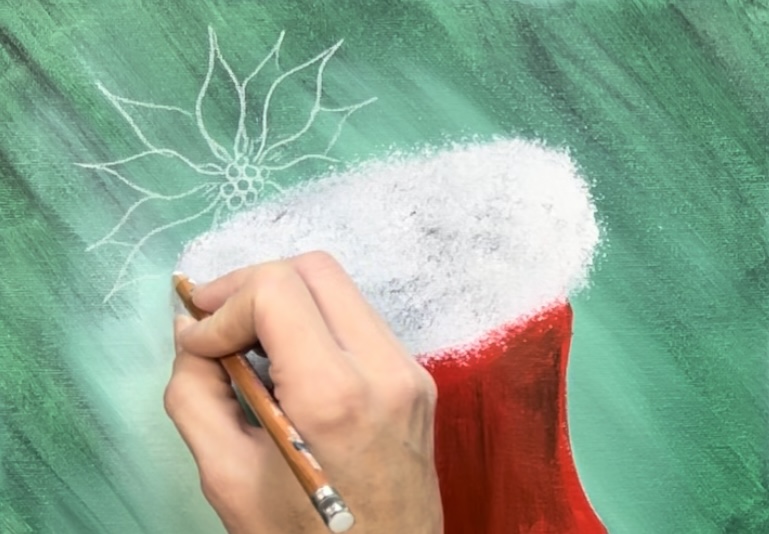
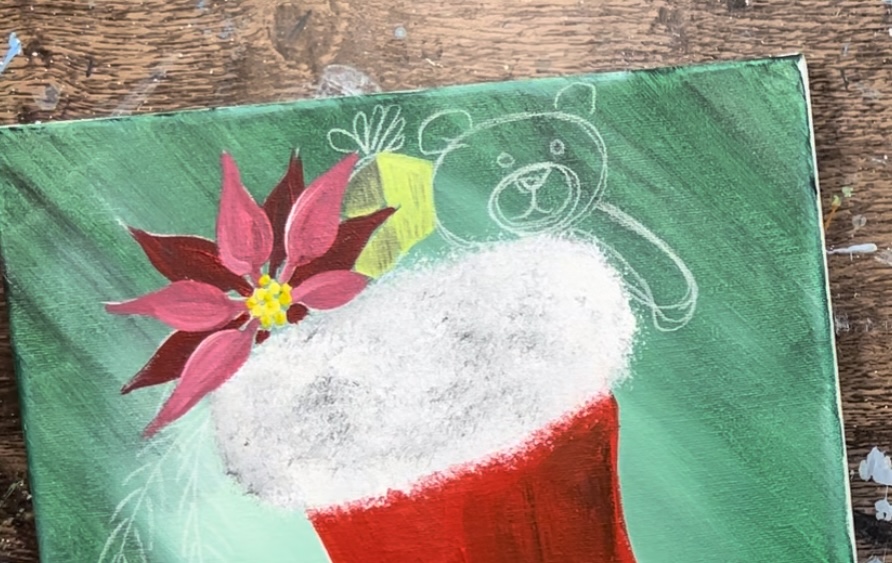
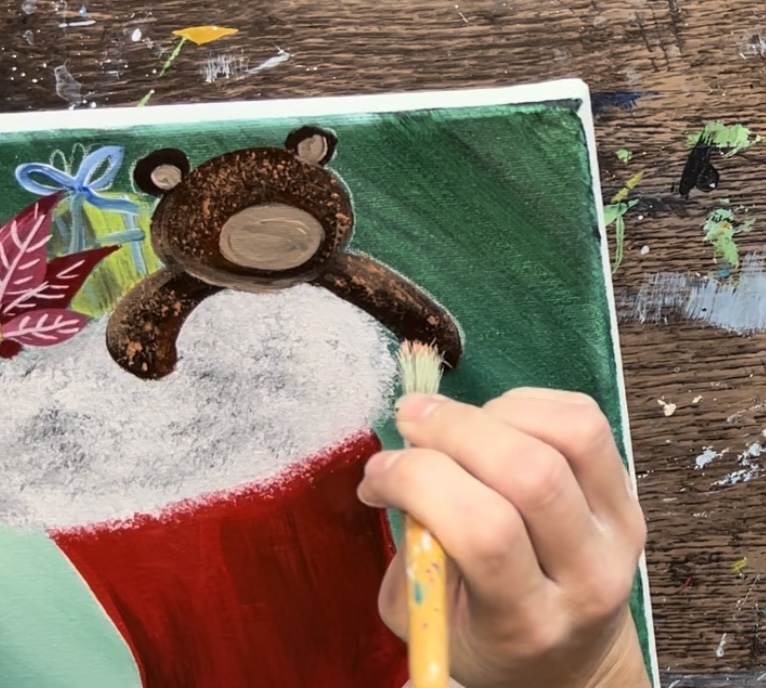
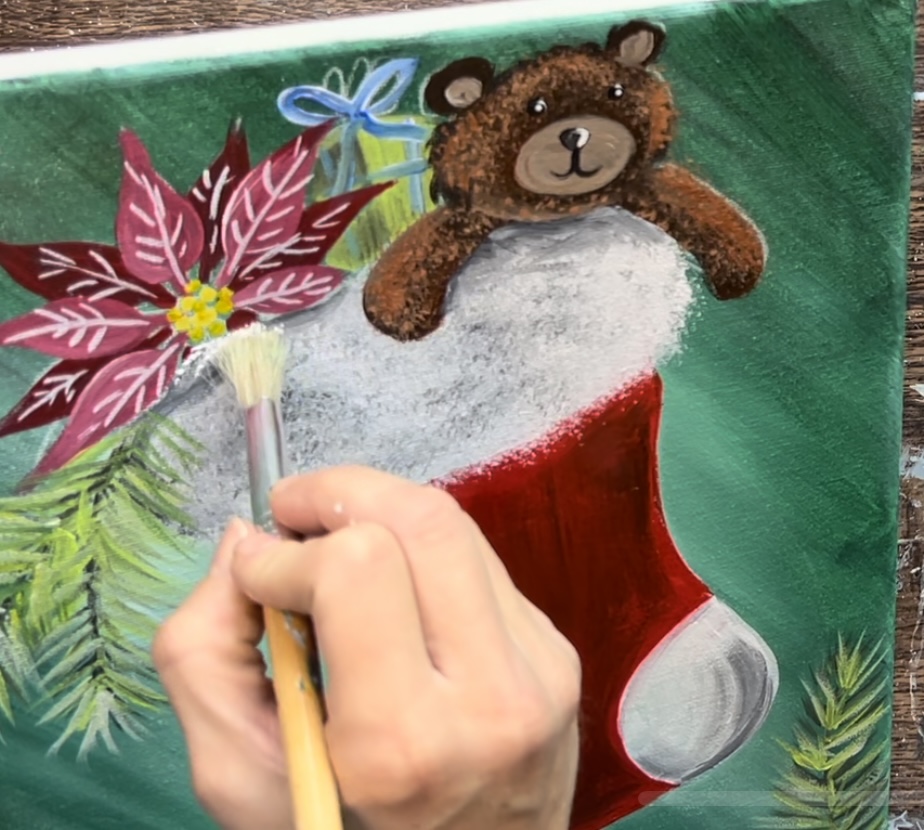
6. Paint Texture On Top Of Stocking
Use a round bristle brush to create this texture. Load the brush into titanium white. Then stamp the brush to create the texture. Leave some of the gray layer still showing through. This helps to create shadow in the texture.
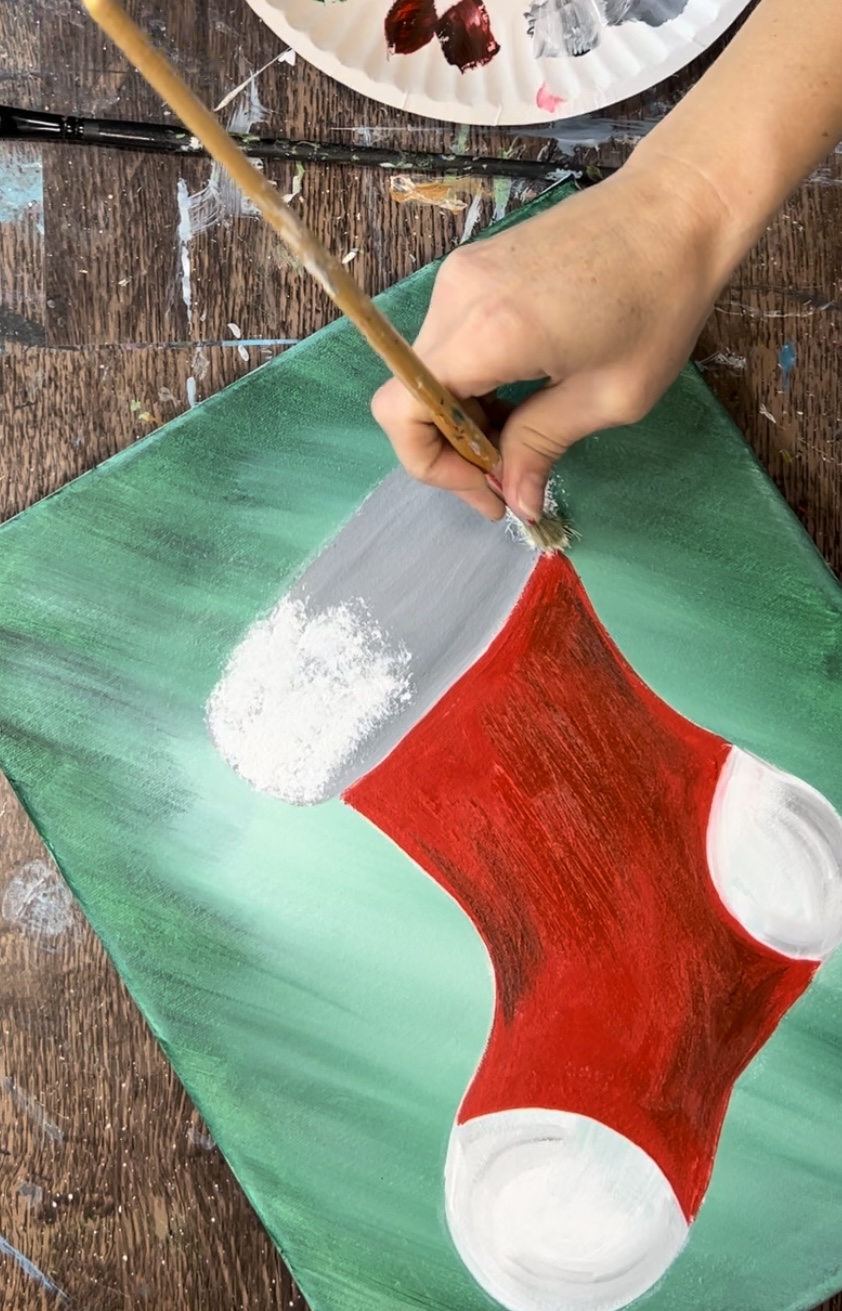
You are basically just stippling the brush in this entire area. Go outside the lines a little too.
Then go back and add a little bit of gray to the brush and stipple a little bit of gray sparingly on the fuzzy part of the stocking.
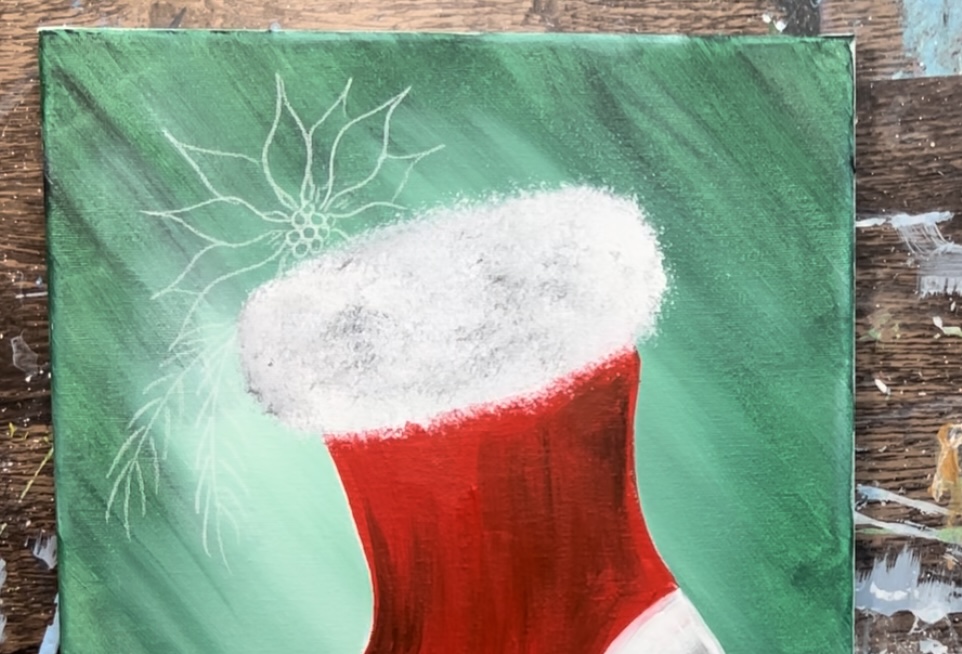
7. Draw Items Inside Stocking
Use a white chalk pencil (or a regular pencil) to draw the poinsettia. Start by drawing small circles for the center of the poinsettia.
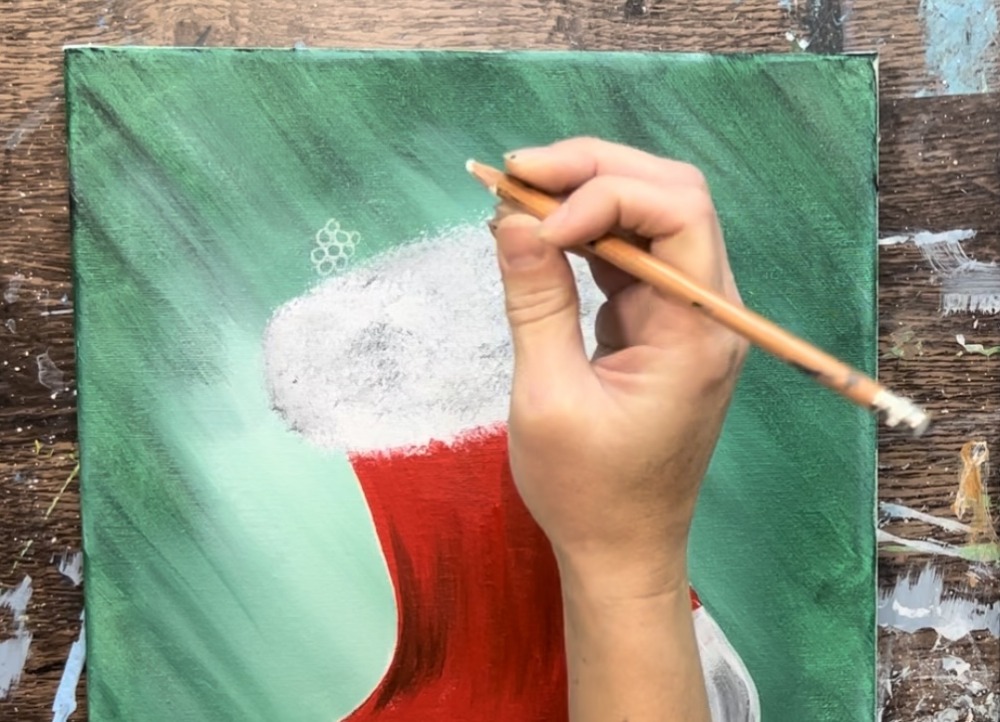
Then draw the petals. These are little tear drop shapes with a very narrow base that attaches to the circles in the center.
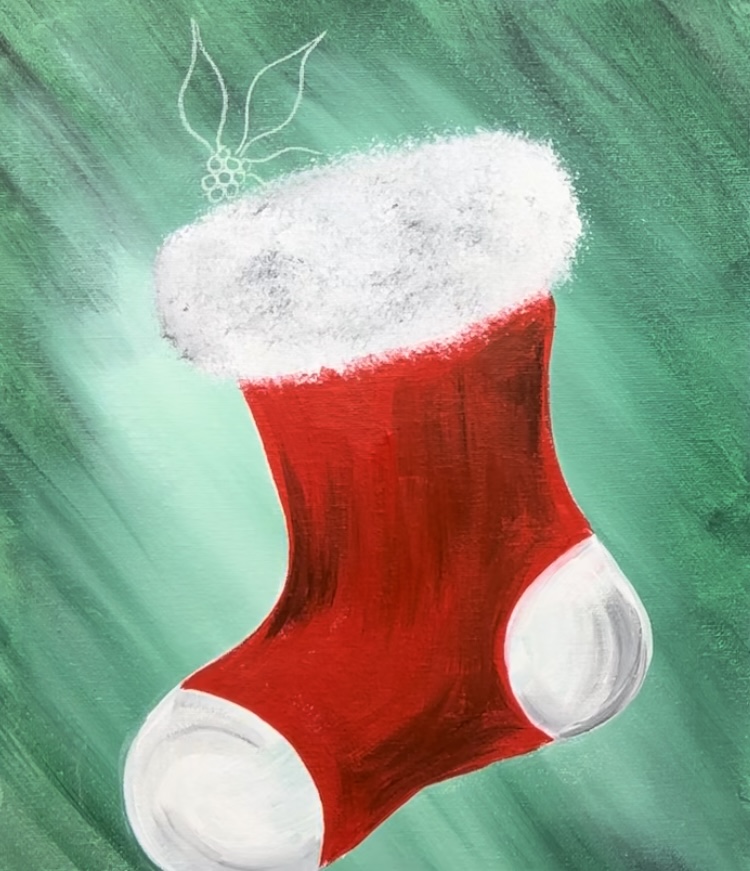
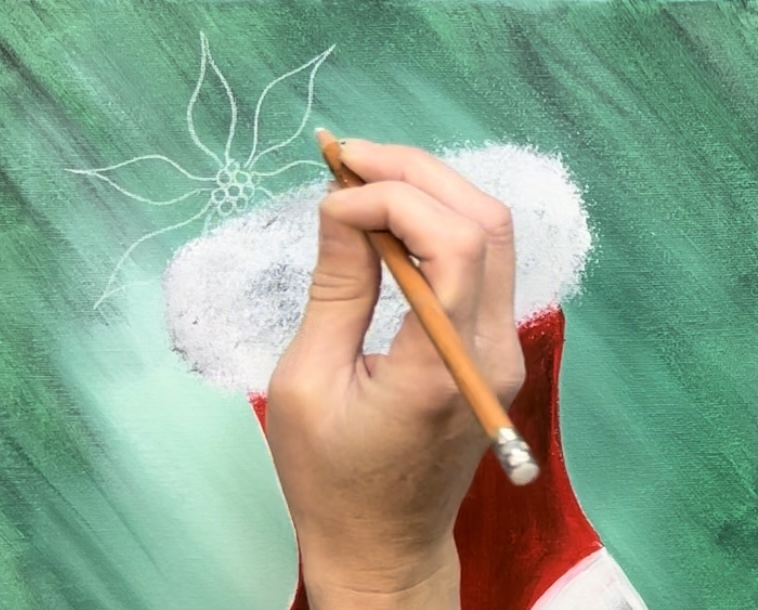
First draw one set of petals and leave a gap between each petal. Then draw a second set of petals in between the first set that go behind each front petal.
Next, draw the pine needles that are hanging down the side of the poinsettia. Draw two diagonal lines and little diagonal lines attached.
Then draw the bear. Start by drawing an oval for the head.
Draw the arms, ears, nose and eyes.
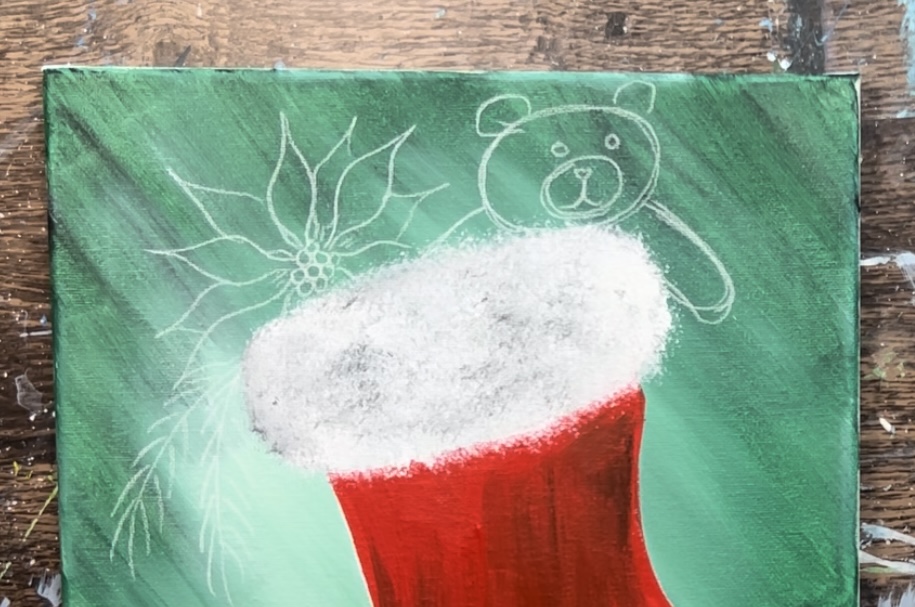
Then, if you have enough room, draw a present box behind the bear and poinsettia. Draw a vertical line and two diagonal lines with a bow on top.
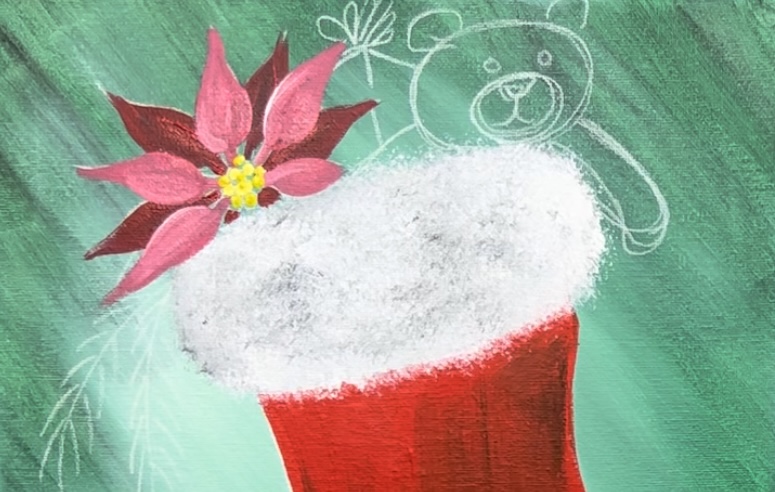
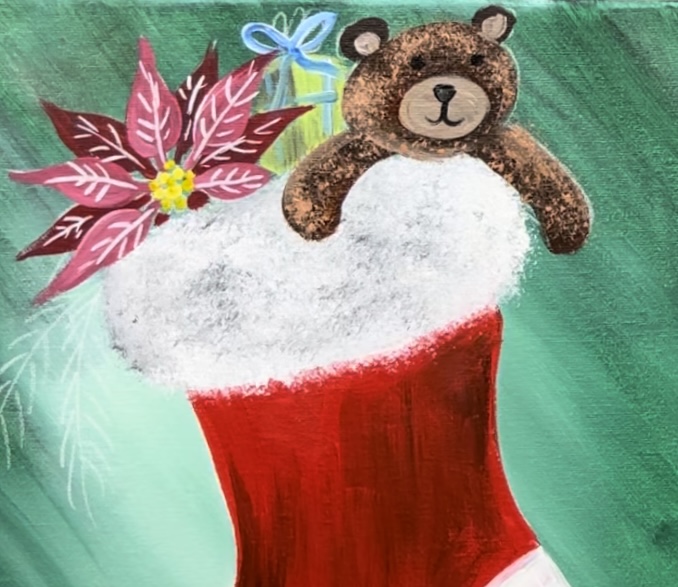
8. Paint Poinsettia
Load your palette with cadmium red deep. Use the #4 round brush to paint the back petals first. These will be darker petals than the front petals.
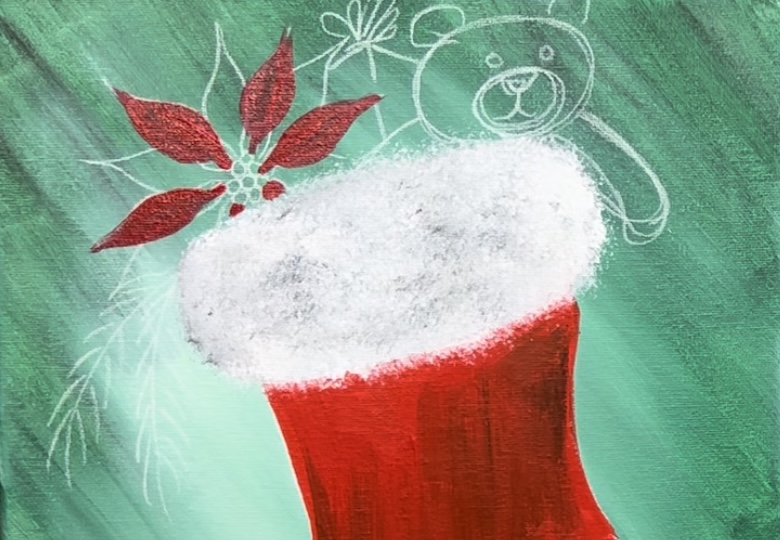
Then mix titanium white into the cadmium red deep color. Paint the next set of petals with this light red color. This will overlap the back petals,
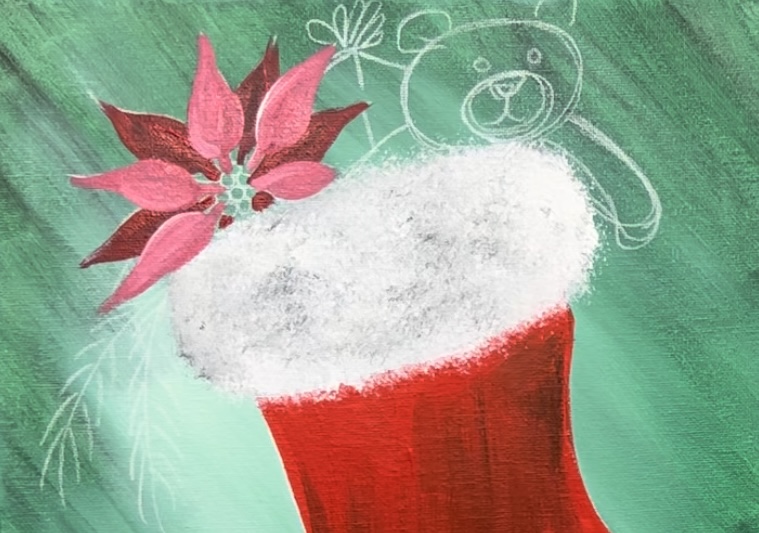
Then load your palette with primary yellow. Use the #4 round brush to paint small yellow circles in the center of the flower.
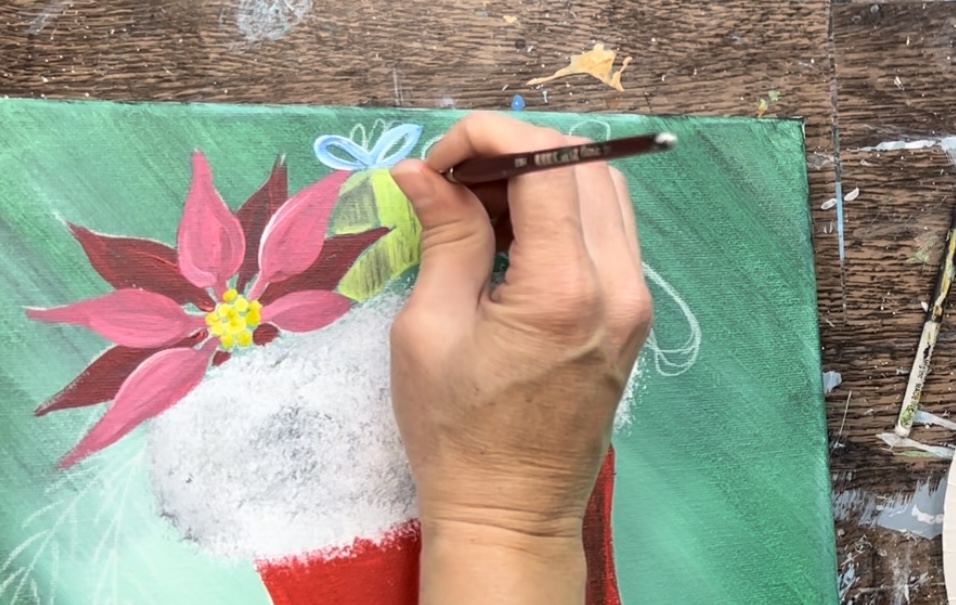
9. Paint Present
Load your palette with brilliant yellow green. Use the #4 round brush to paint the right side of the present.
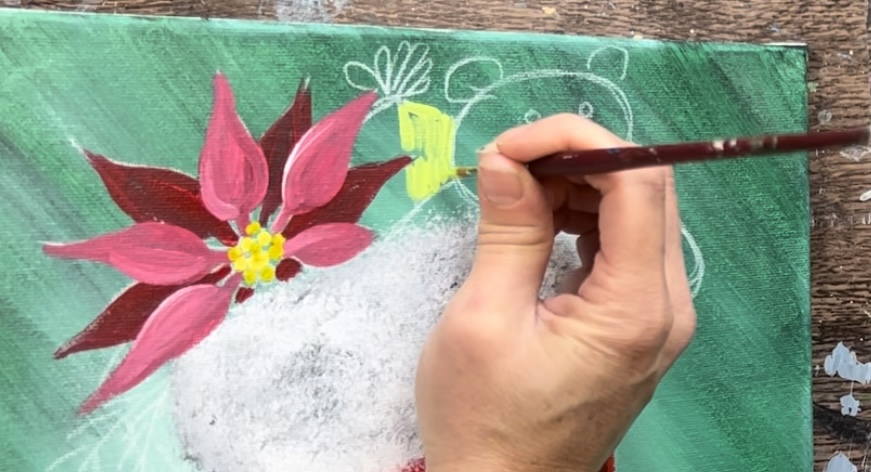
Then add a little bit of black into the brilliant yellow green so that you make a darker shade of it. Paint the left side of the present with this darker green.
Use cobalt blue mixed with titanium white to make a light blue color. Paint the bow on top of the present. (Note: you can change the colors of this present if you want)
10. Paint Bear
On your palette, mix burnt Sienna with a small amount of mars black. This will make a dark brown. Use the #4 round brush to paint the bear including the head, arms and ears. Leave the muzzle (oval mouth area) blank.


Then mix a lighter brown on your palette by mixing titanium white into the dark brown. Paint the muzzle and inside of the ears. Let this dry before adding texture to the bear.
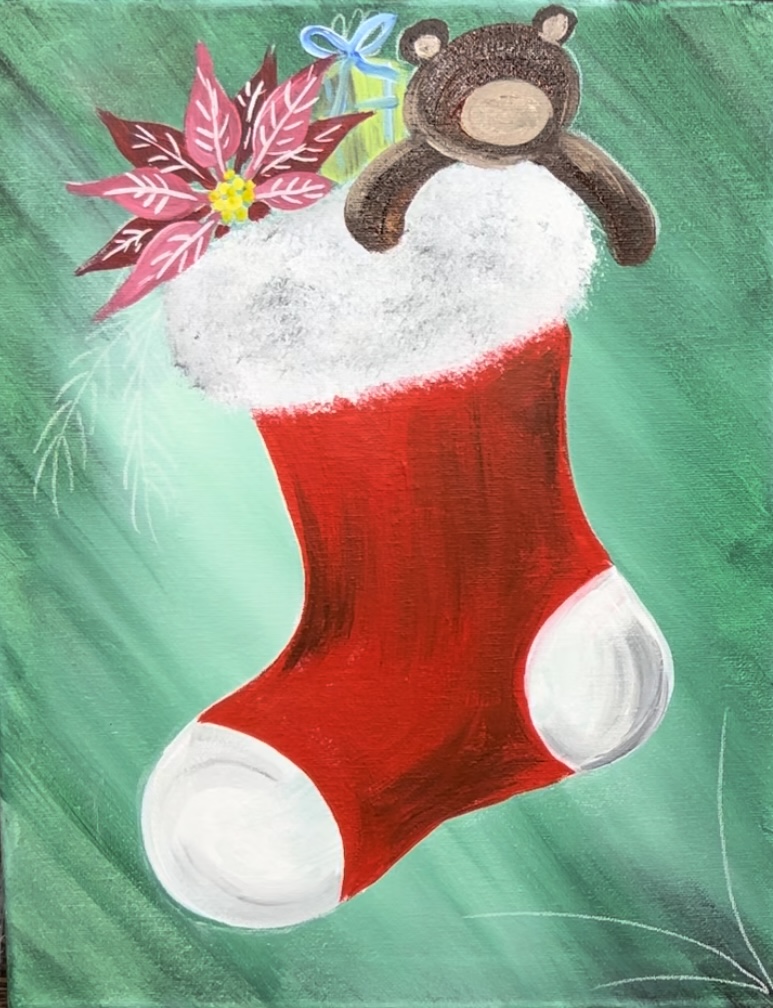
11. Paint Vein Details On Poinsettia (optional)
This is an optional step, but to add “vein lines” to the poinsettia flower, I used a white paint pen. Draw the center line on each of the petals and then draw the diagonal lines.
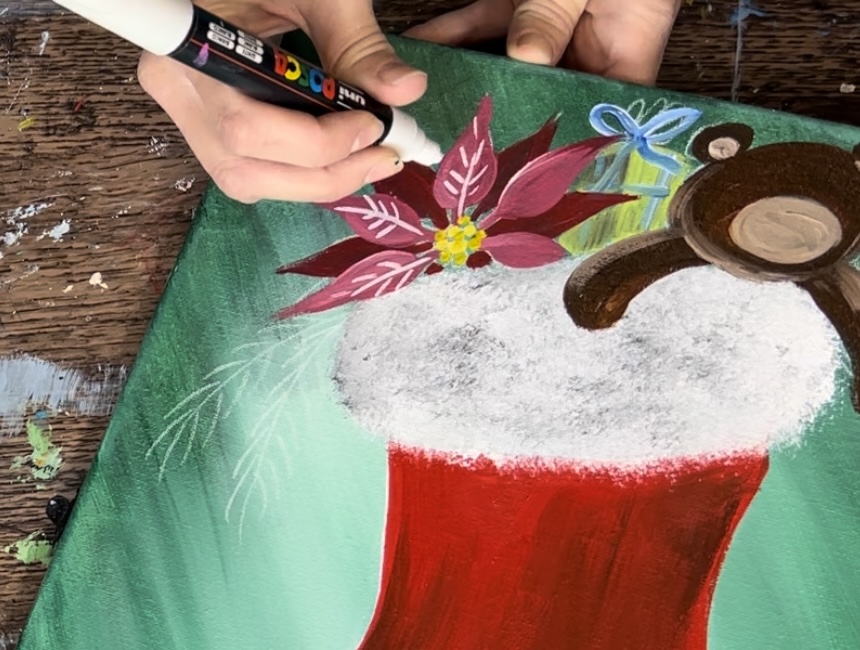
Do this on each of the petals.
12. Paint Texture On Bear & Paint Face Details
Then use the round bristle brush to texture the bear. Load just the tip of the brush into the lighter brown color and “dab” the brush over the dark areas of the bear to give it texture.
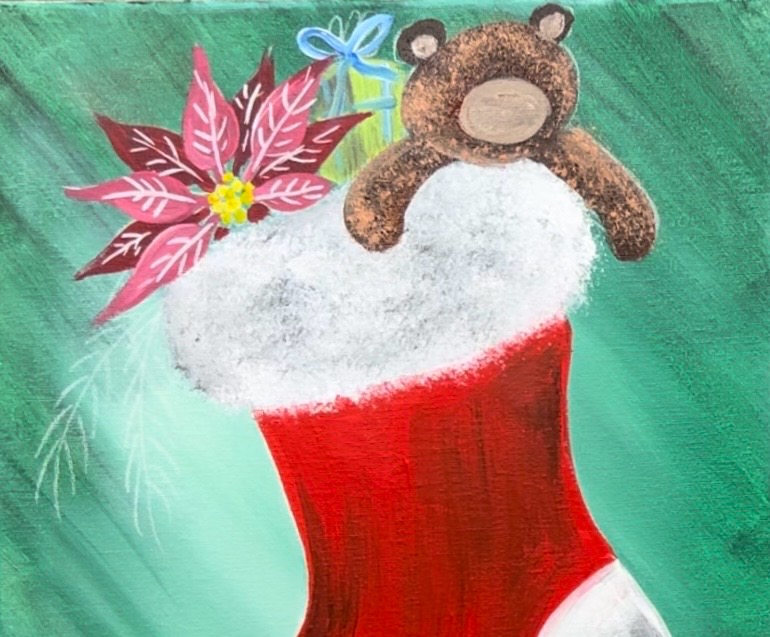
Use a #4 round brush to paint the eyes, nose and mouth. I did this with “mars black” paint.
Use titanium white to paint a small highlight on the right side of the nose and two small white dots on the eyes.
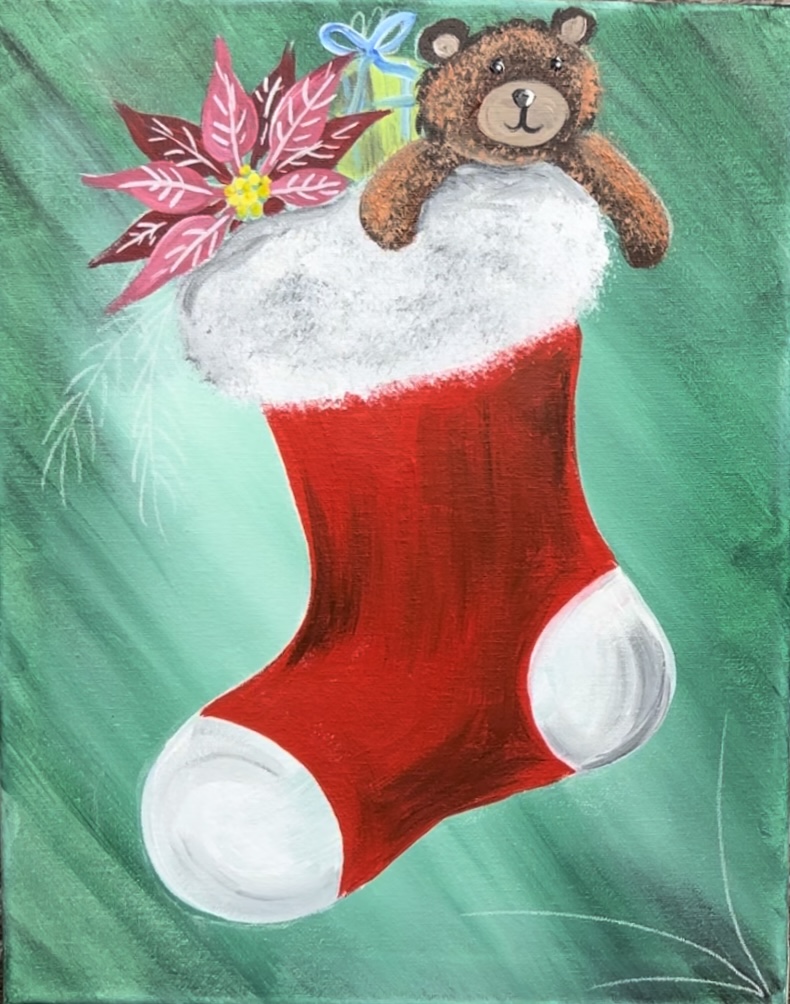
13. Paint Pine Needles
Use a 3/8″ angle brush to paint pine needles. Do this in “layers” starting with the darkest layer first. Mix a dark green on your palette by mixing black with the “brilliant yellow green”.
Then use the 3/8″ angle brush to paint two branch lines. To do the pine needles, start on the far end of the branch line and paint diagonal lines pointing downwards.
Fill each branch with pine needles.
Then do the pine needles branches on the lower right of the canvas.
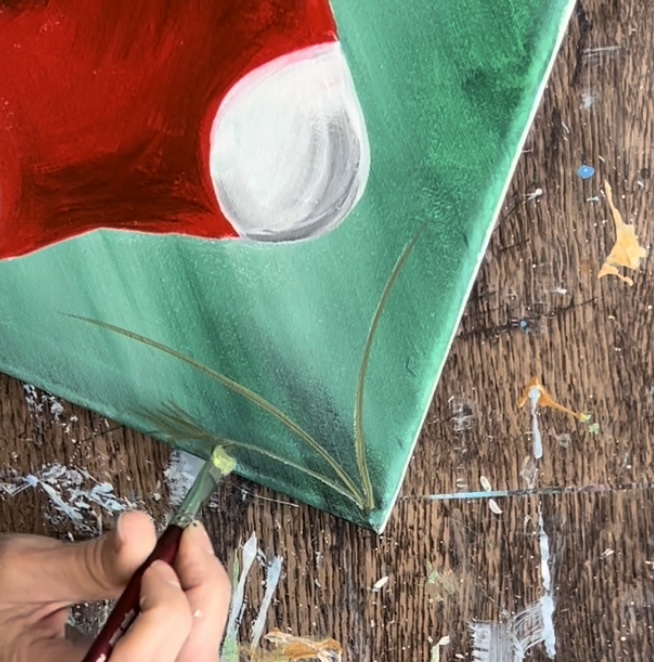
Let the dark layer dry. Then use just the brilliant yellow green to paint a second layer over your dark layer. Do this with the 3/8″ angle brush. Start at the end of the branch and paint individual pine needles by stroking downwards at an angle. Work your way from the left to the right.
Then paint the lighter layer on the pine needles in the lower right.
Do a final light layer over your pine needles by loading your brush in titanium white. Add the white layer over your other layers but try not to cover up all of the previous layers. I didn’t do as much white on this third layer as I did the other colors.

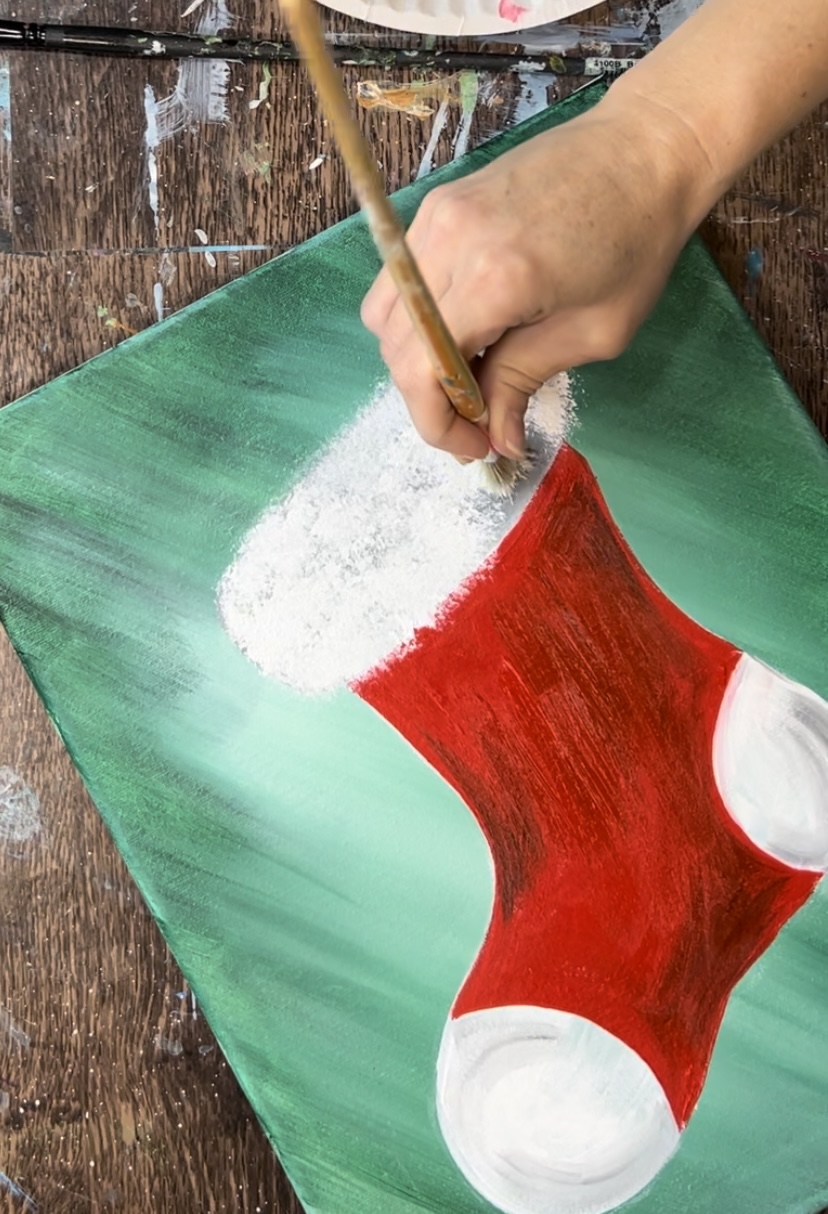
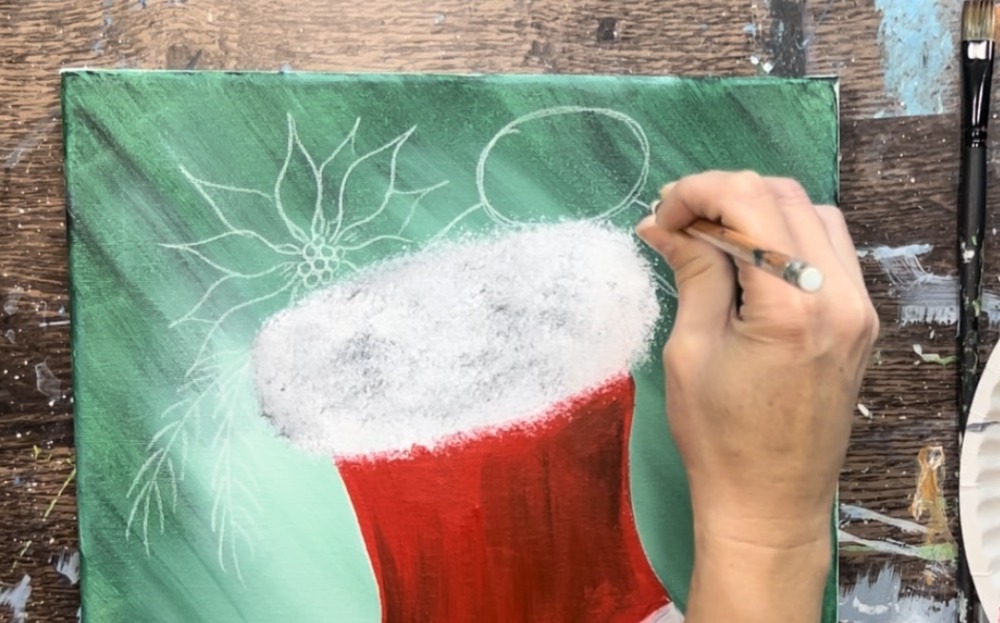
14. Touch Up White Fuzzy Part Of Stocking (if needed)
Use the round bristle brush to paint white texture and touch up areas that are towards the top of the stocking.
15. Paint Gold Dots In Background
As a final touch, use the #4 round brush and gold paint to paint tiny dots all throughout the background of the painting.