Would you like to save this?
As we transition into the New Year, I wanted to do at least one more winter painting design! This week we have a simple and relaxing painting.
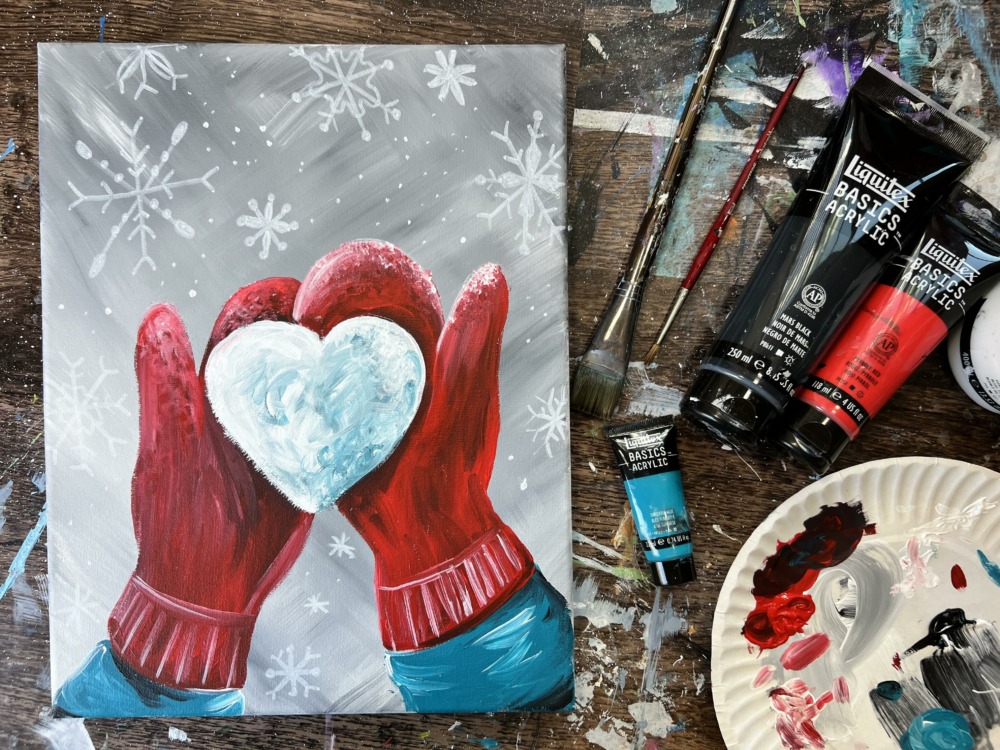
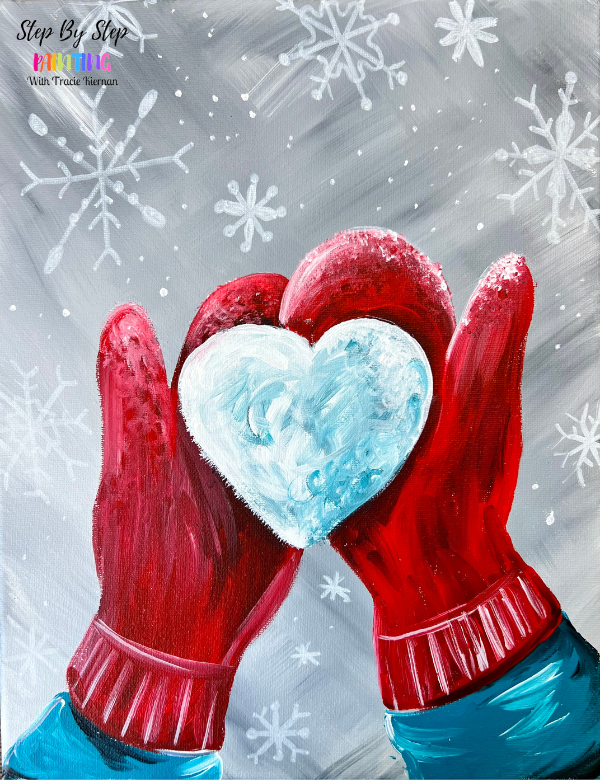
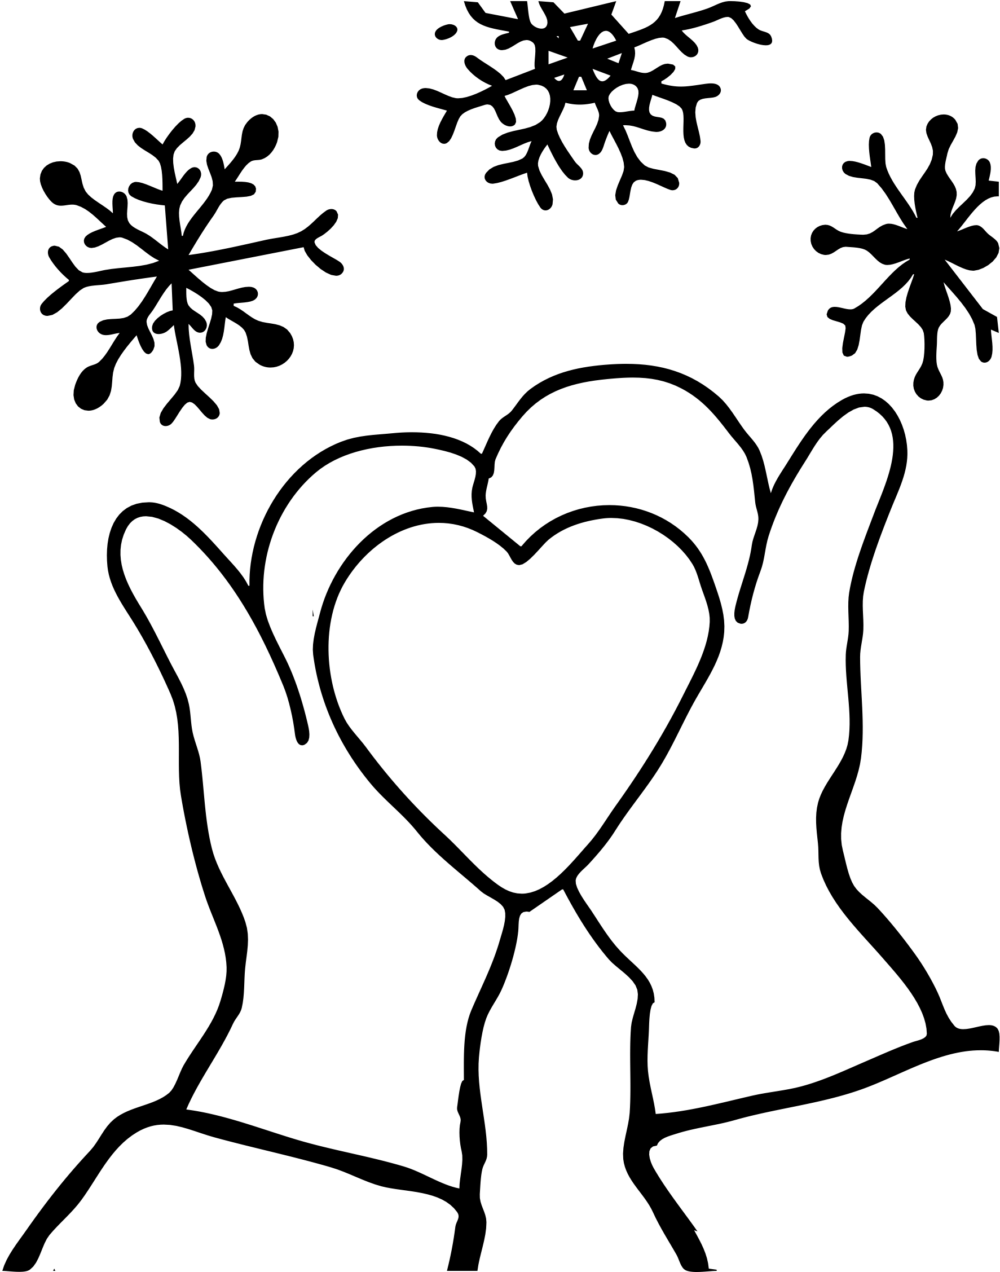
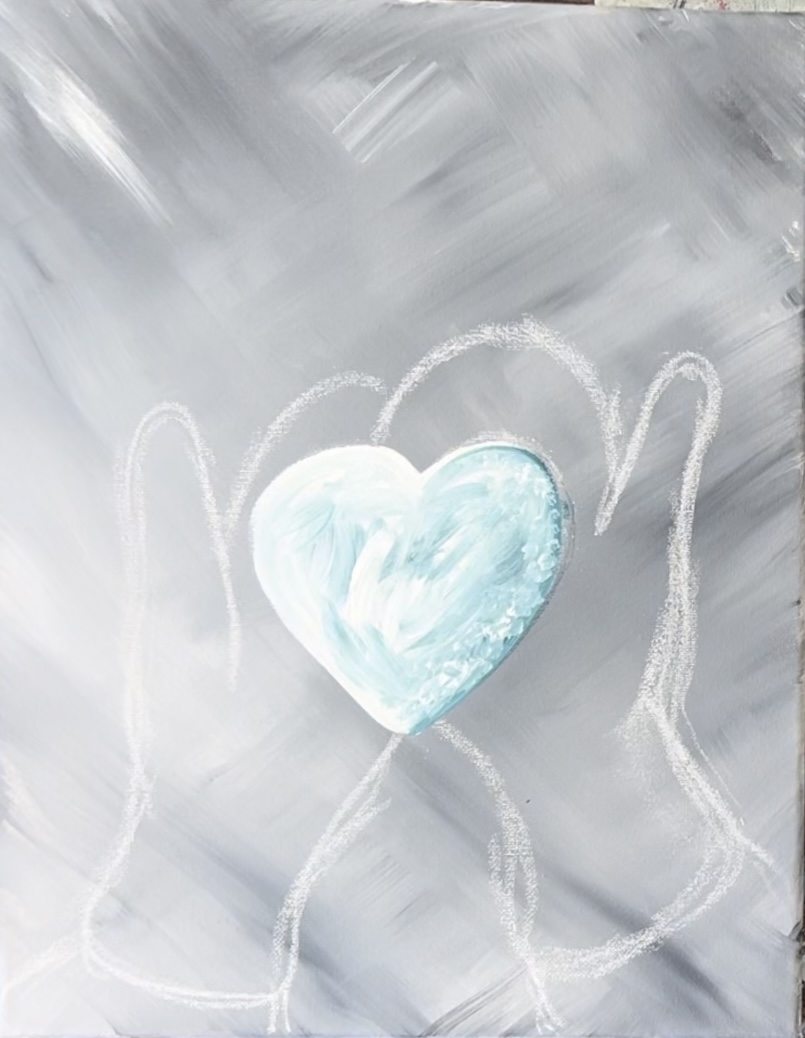
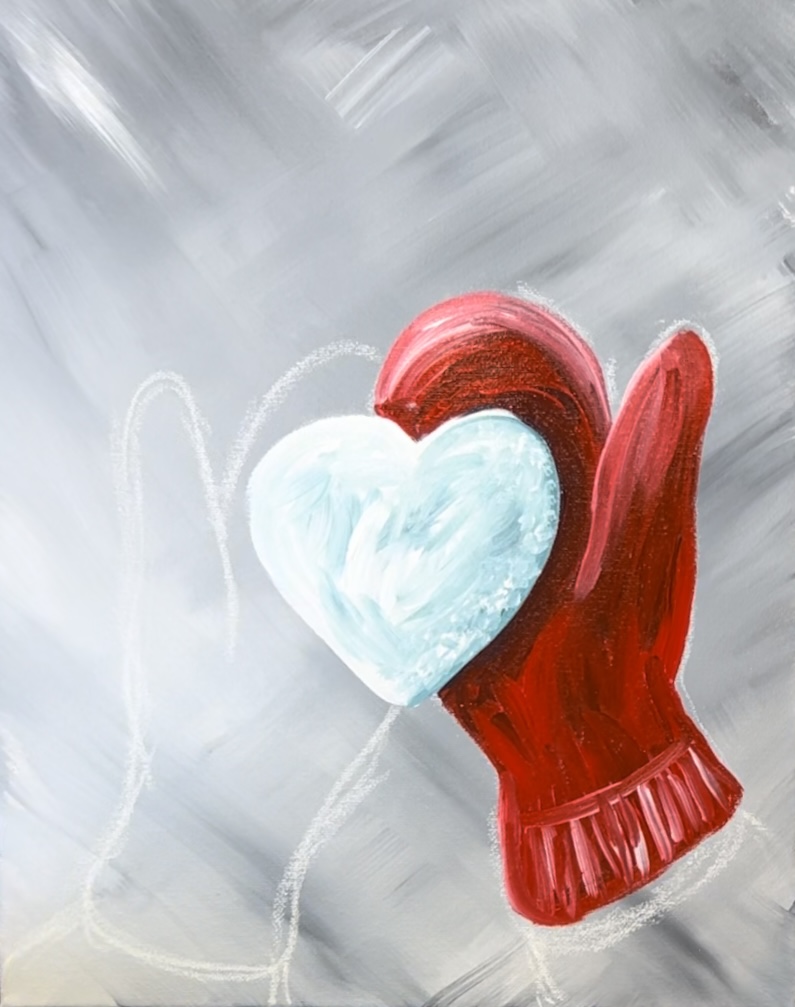
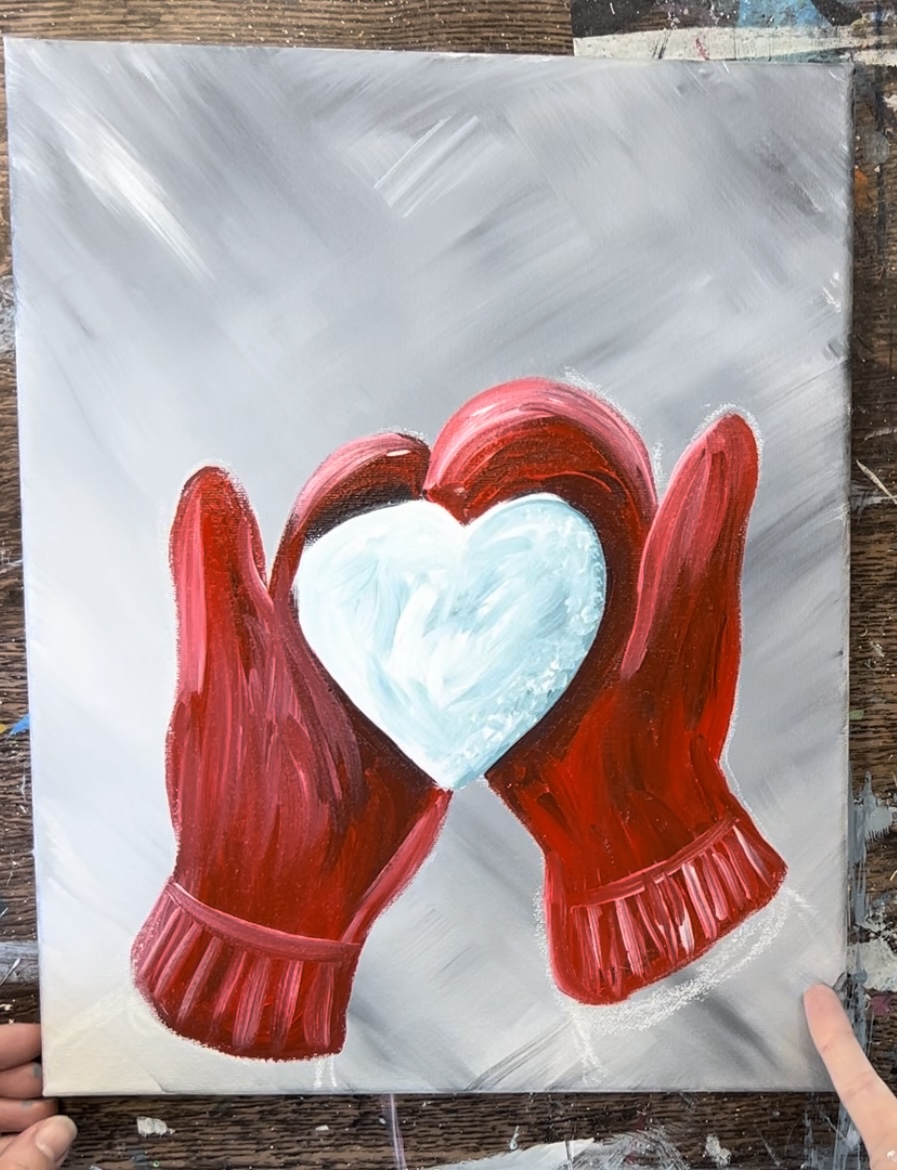
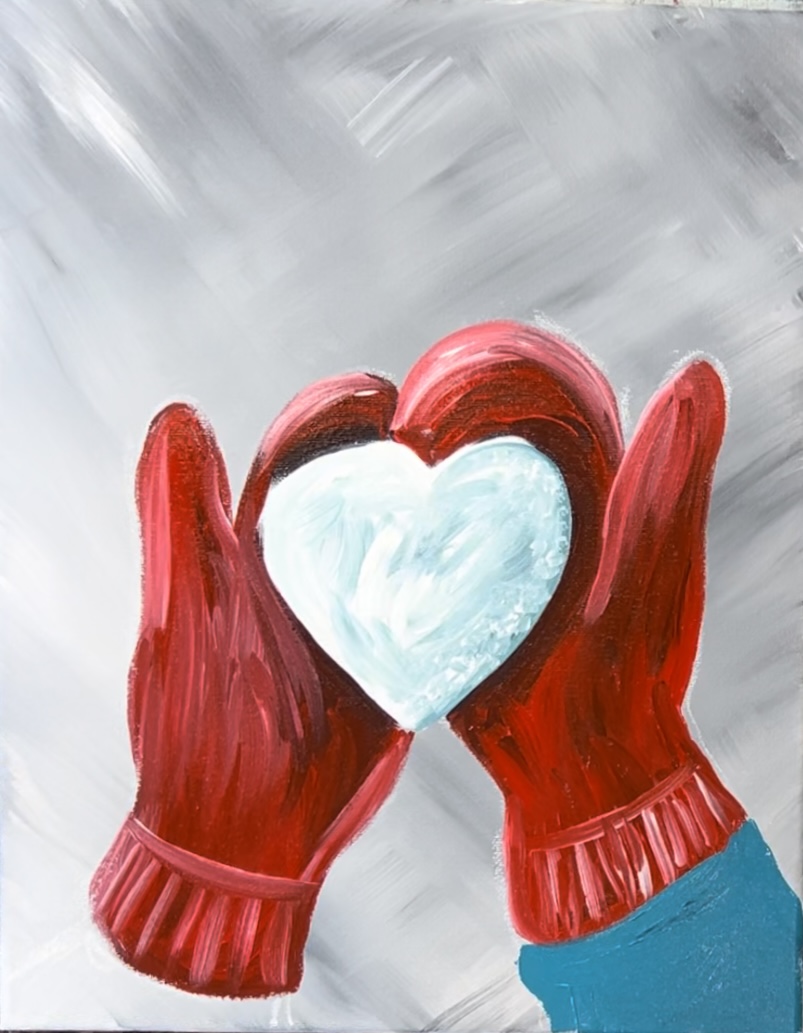
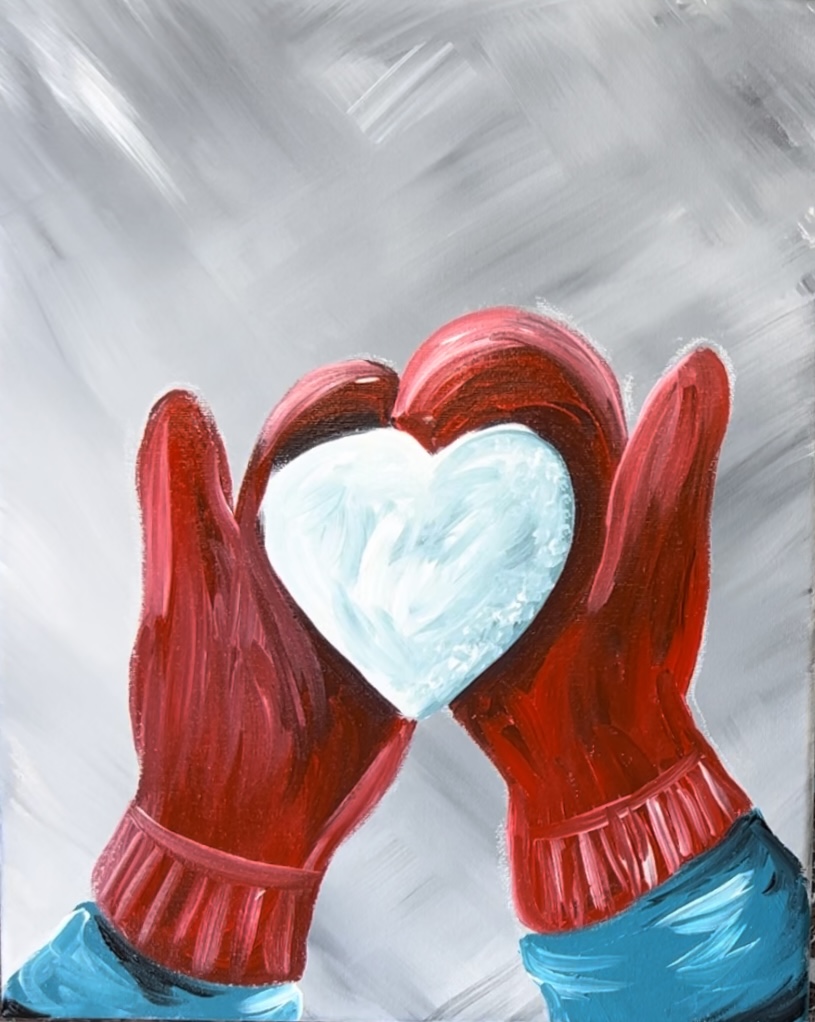
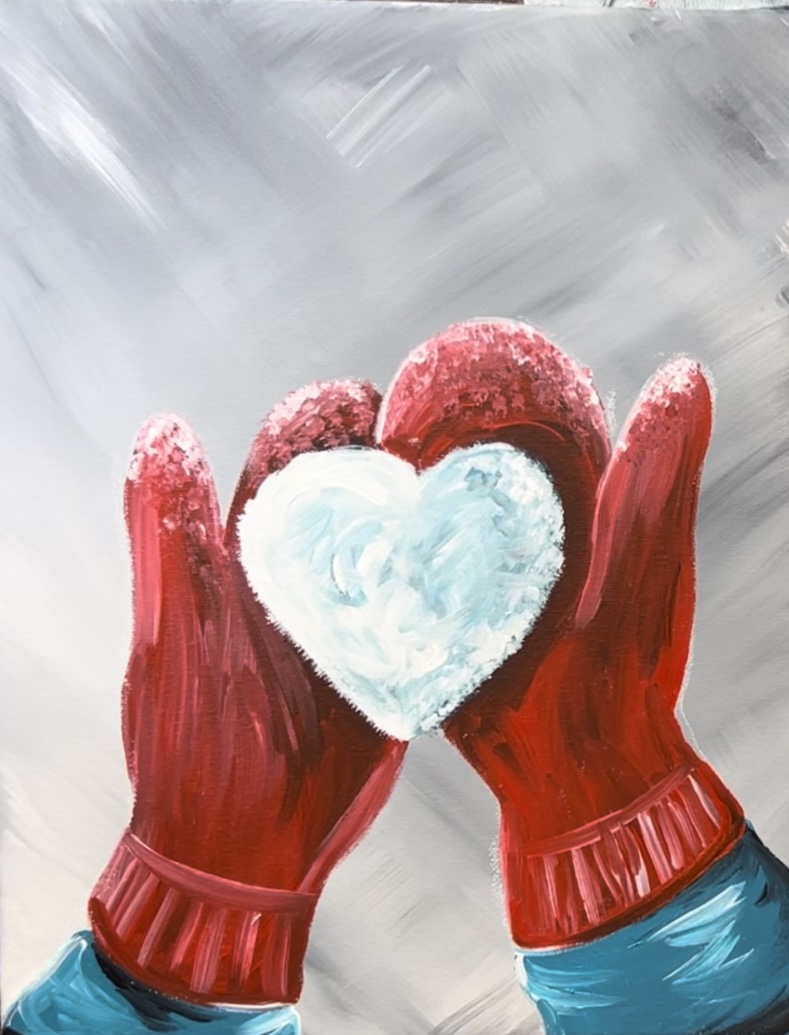
“Mittens Love” is an easy and quick winter themed painting of two red mittens holding a heart shaped snowball. In the background there are different sized snowflakes.
If you want to make this painting more complex, you can add designs to the mittens, a quote in the background or even a second, third or fourth set of hands holding one snowball (or more) as a family painting!
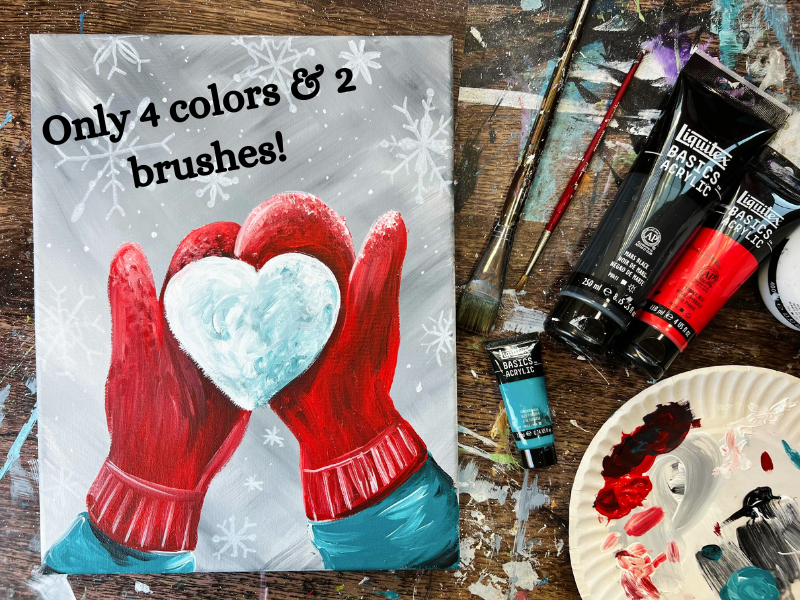
Only two brushes and four colors are used in this painting! I also used a White POSCA paint pen to draw the snowflakes. You can, however, use a round brush and white paint to paint the snowflakes.
I also created an optional template for this. It is a very easy design to draw as you can use your own hands to help you with the placement of the mitten shapes.
Enjoy and happy painting!
Materials
How To Paint "Mittens Love"
Learn how to paint a simple painting of two red mittens holding a heart shaped snowball with a gray snowflake background.
Materials
- 11 x 14 Canvas
- Acrylic Paints
- Chalk and/or Drawing pencil
- White POSCA Paint Pen (can also use a paint brush and white paint)
Brushes
- 1" Flat Brush
- #4 Round Brush
Colors
- Titanium White
- Mars Black
- Pyrrole Red
- Turquoise Blue
Color Palette
If you don’t have “pyrrole red”, you can use a “cadmium red medium”, “naphthol crimson” or any bright red color.

Directions At A Glance
Traceable
This is optional! The drawing portion of this is very easy and you can use your own hand to help you draw the mittens.
Video
Step By Step Instructions
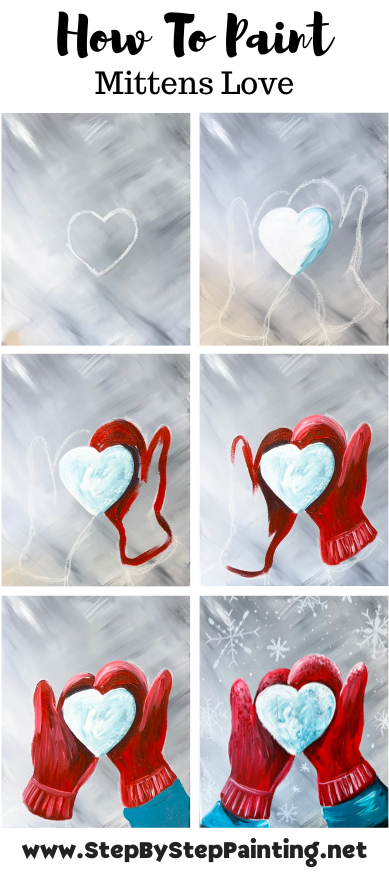
1. Paint Background
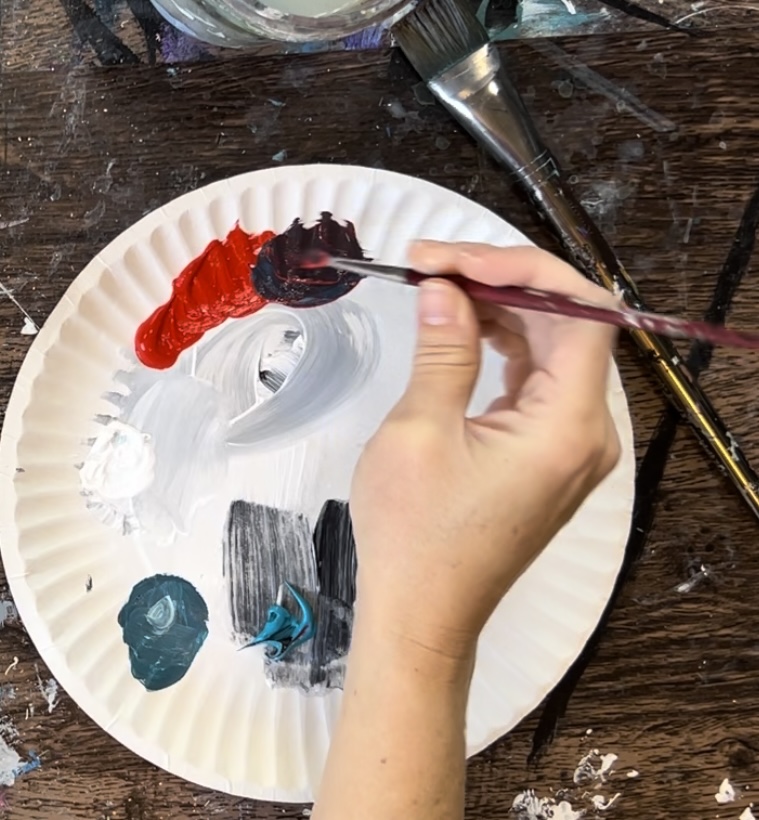
Load your paint palette with the two colors: “titanium white” and “mars black”.
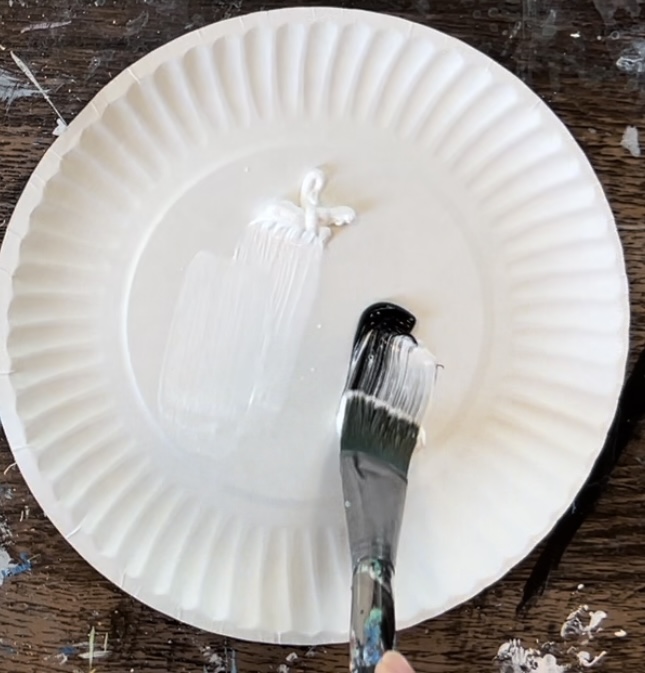
Use your 1″ flat brush and “double load” the brush in both black and white. You can do about equal amounts of both colors to start out with.
Paint a big “X” in the lower left of the canvas and let the black and white blend. This entire background is a blend of black and white going in “X” directions.
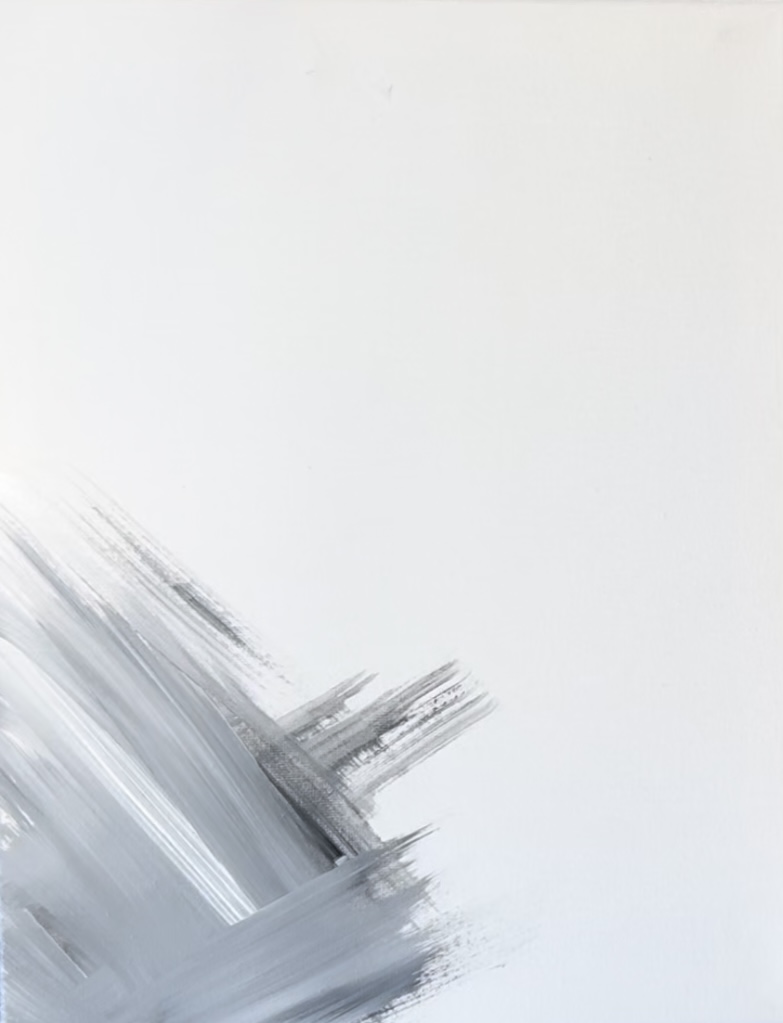
Load your brush into more “titanium white”. Continue to paint and blend diagonal strokes that cross each other. Fill up the entire canvas. Try not to blend the colors all the way. You want a variety of medium grays and light grays to make your background look interesting.
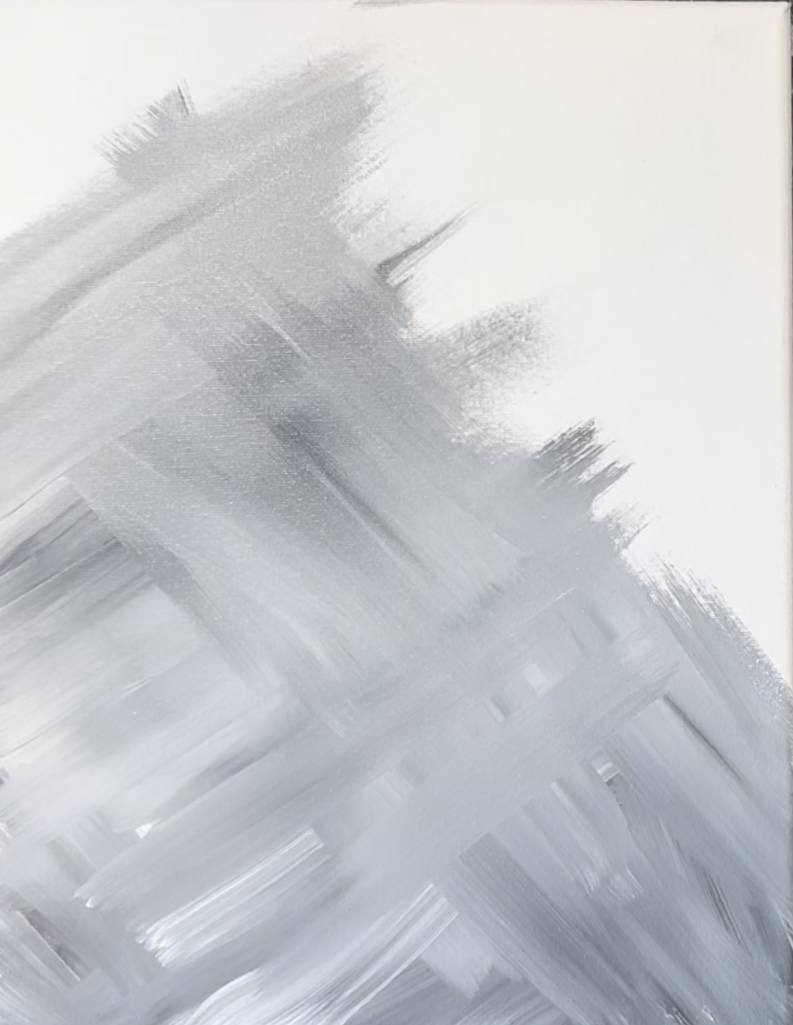
Fill the entire canvas and then let this dry before going onto the next step.
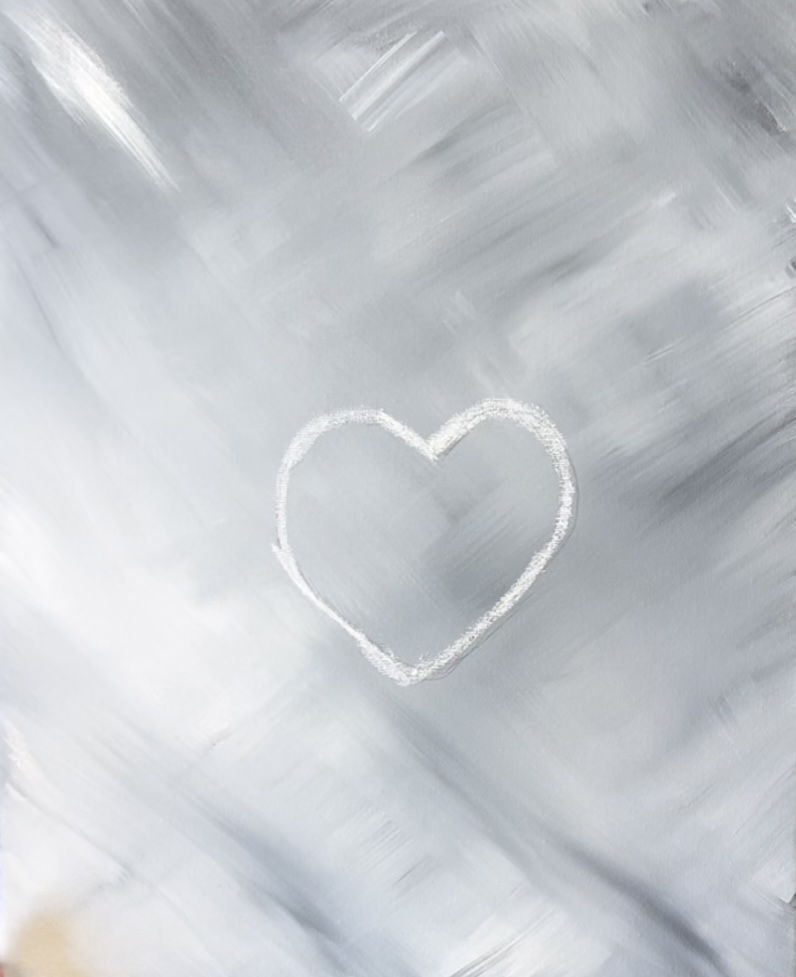
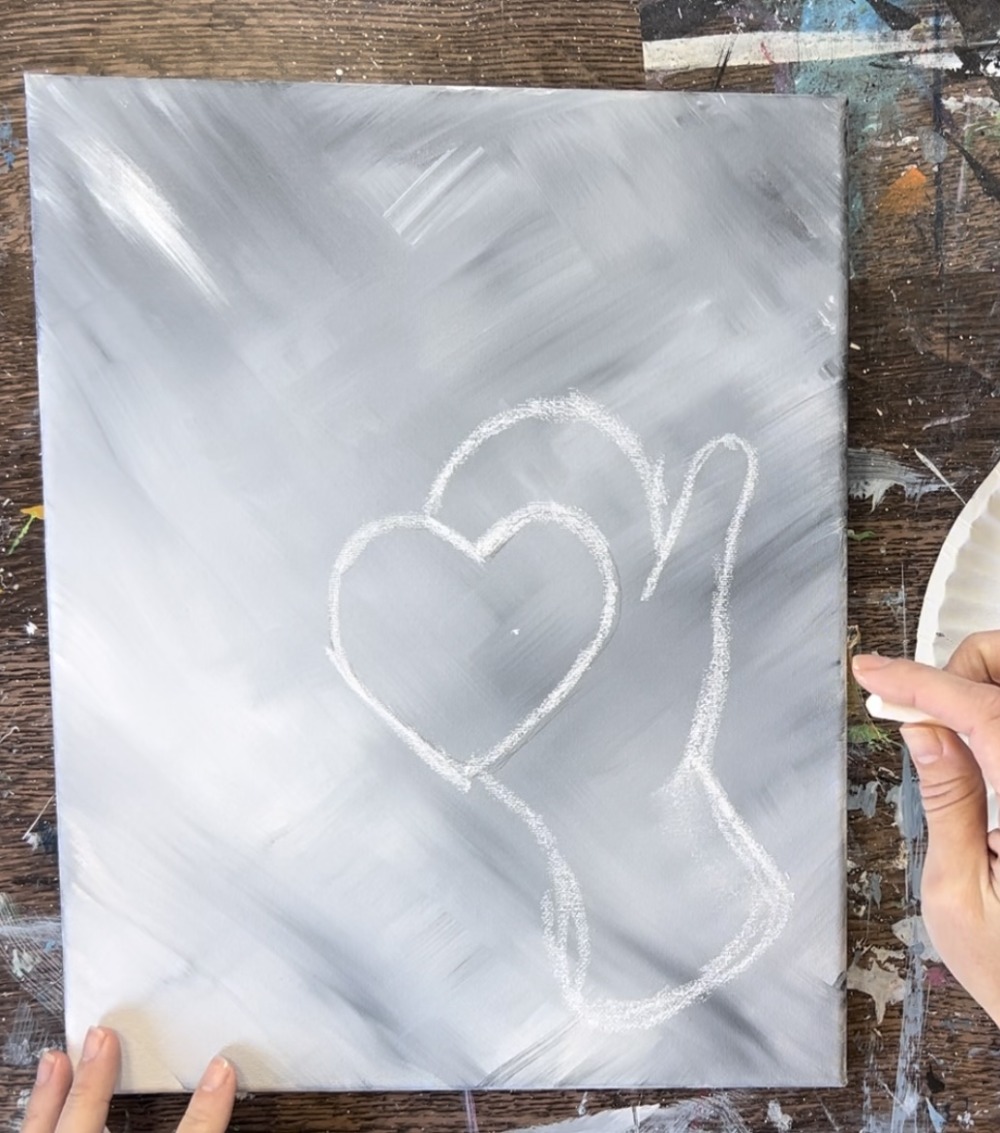
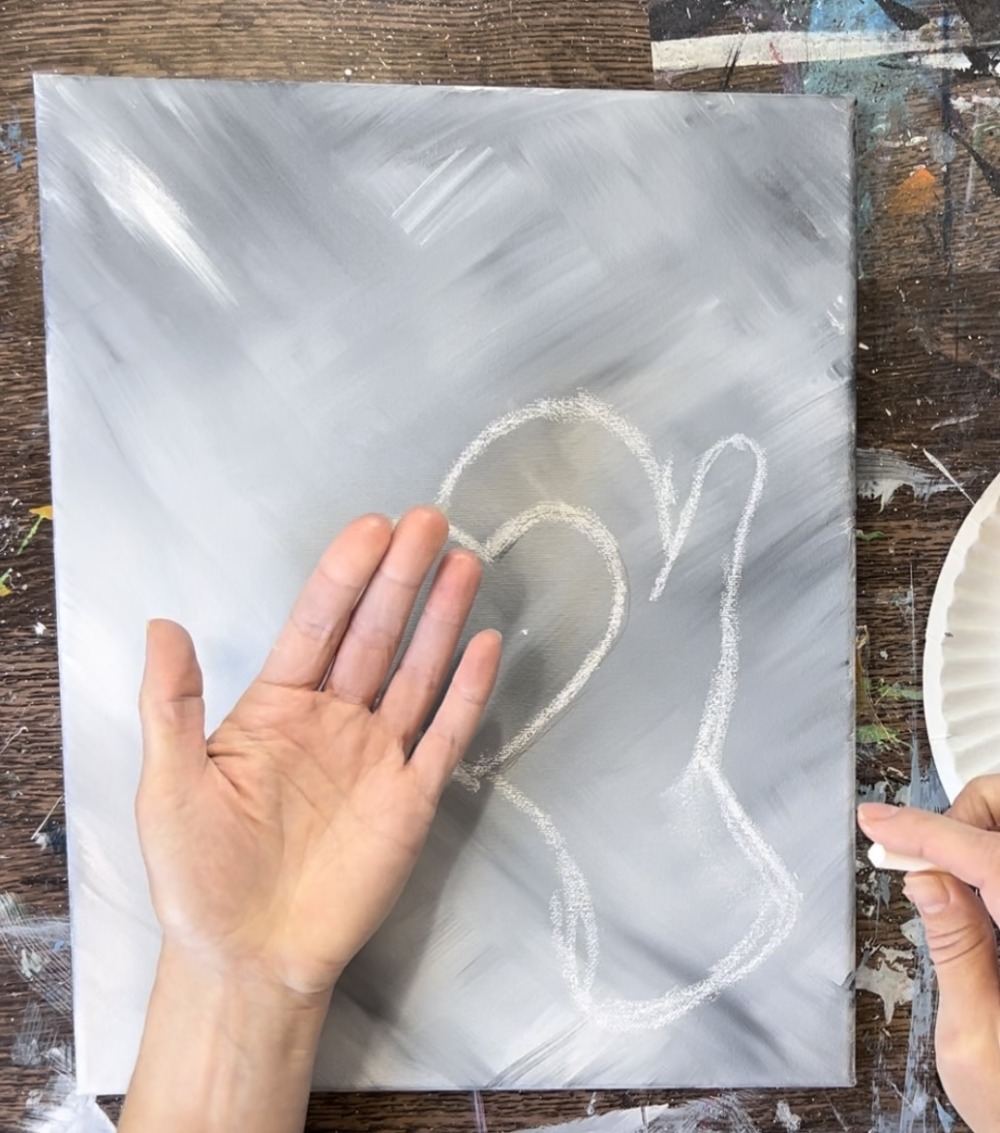
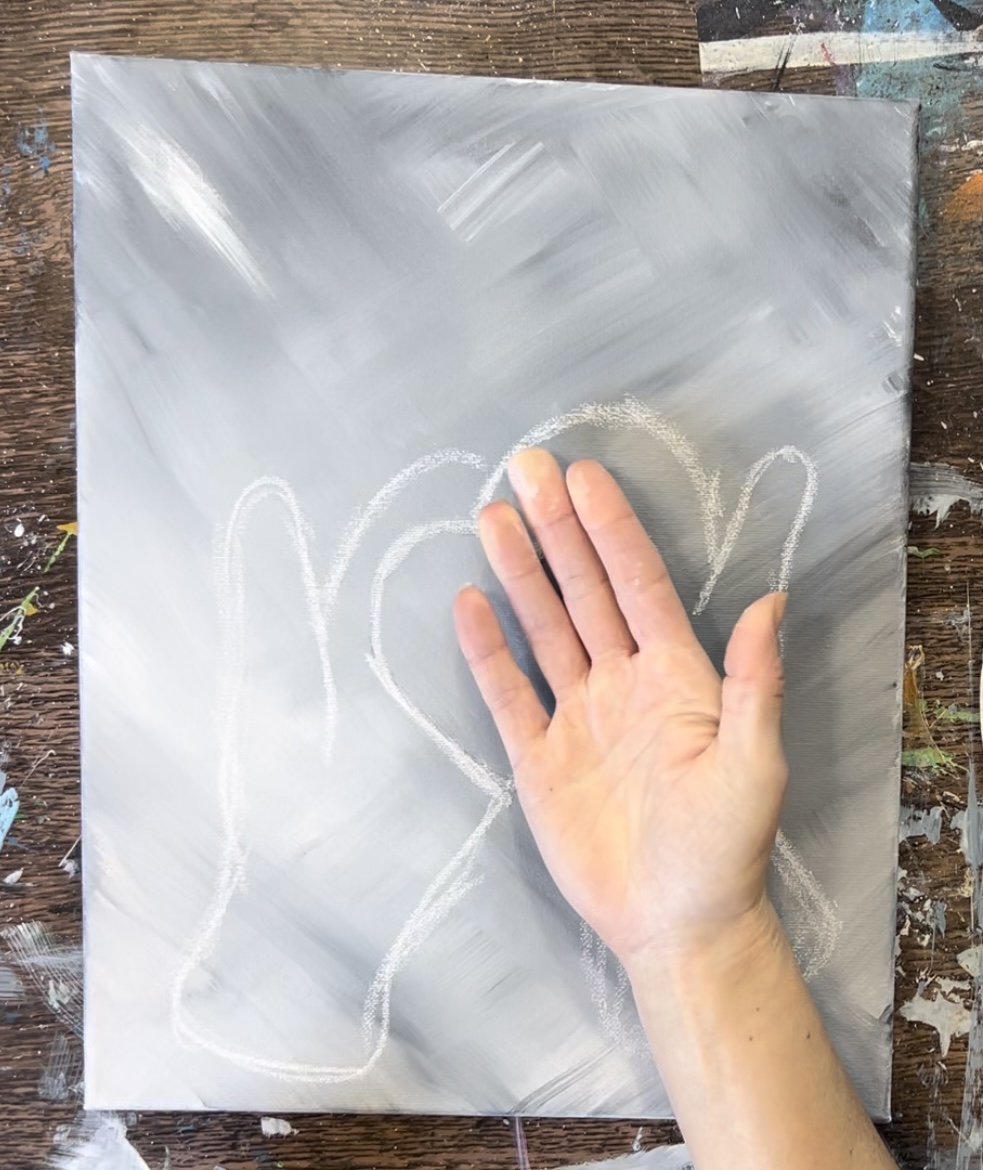
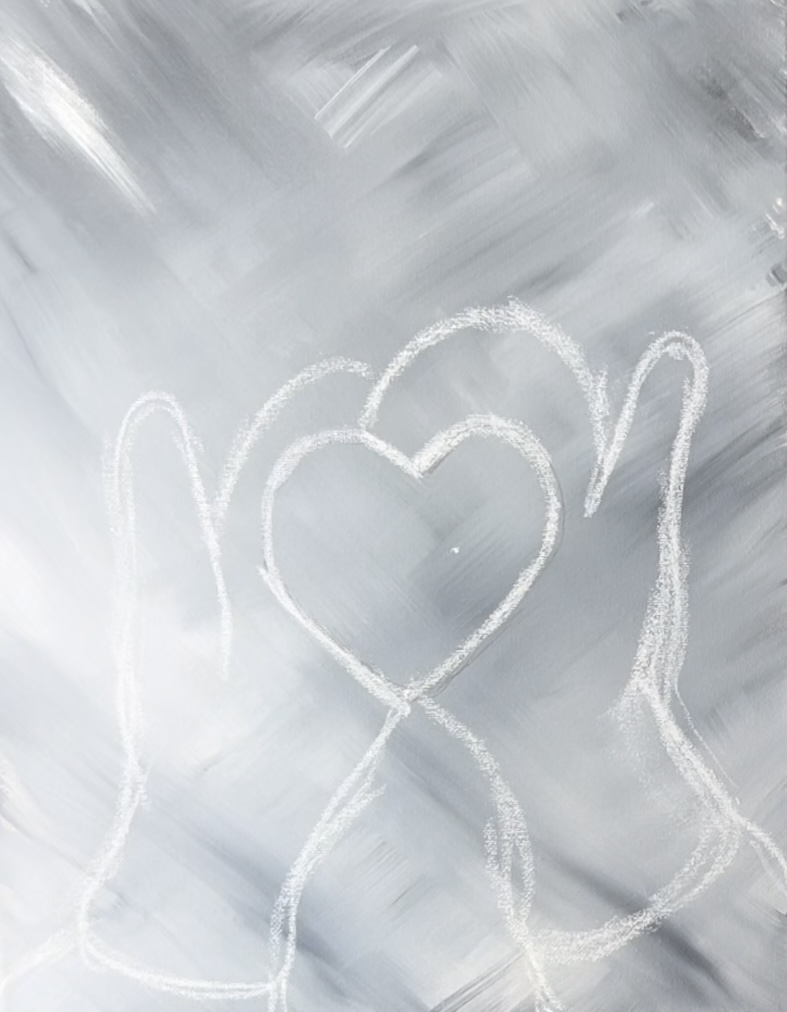
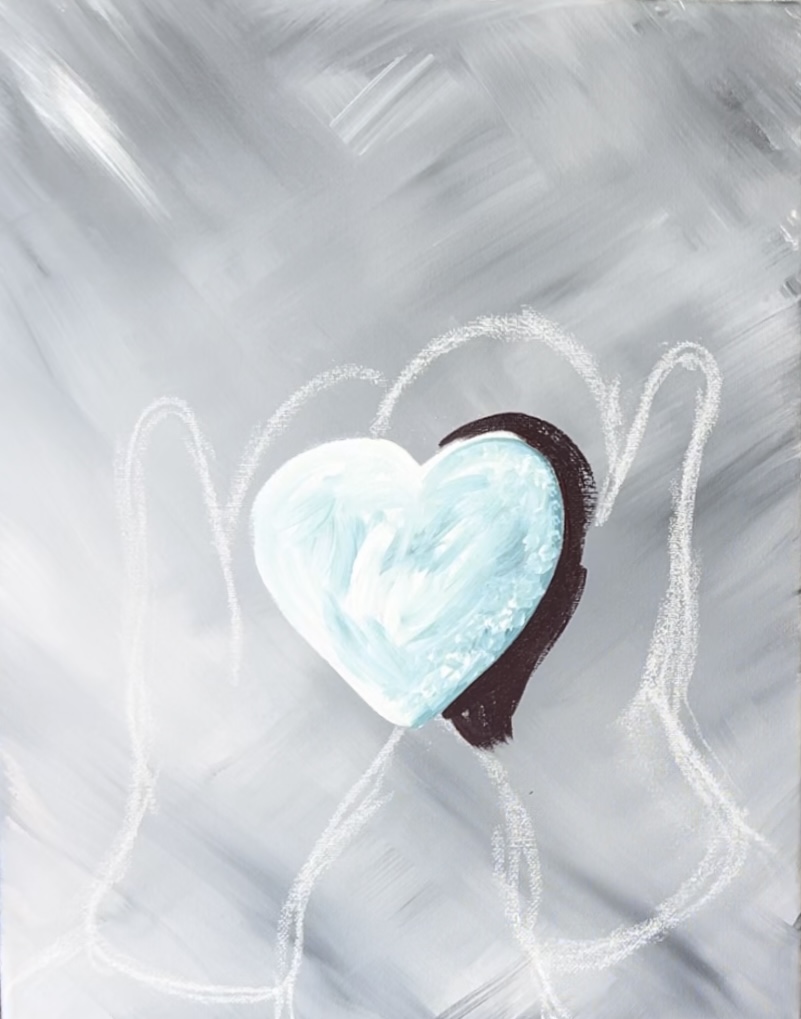
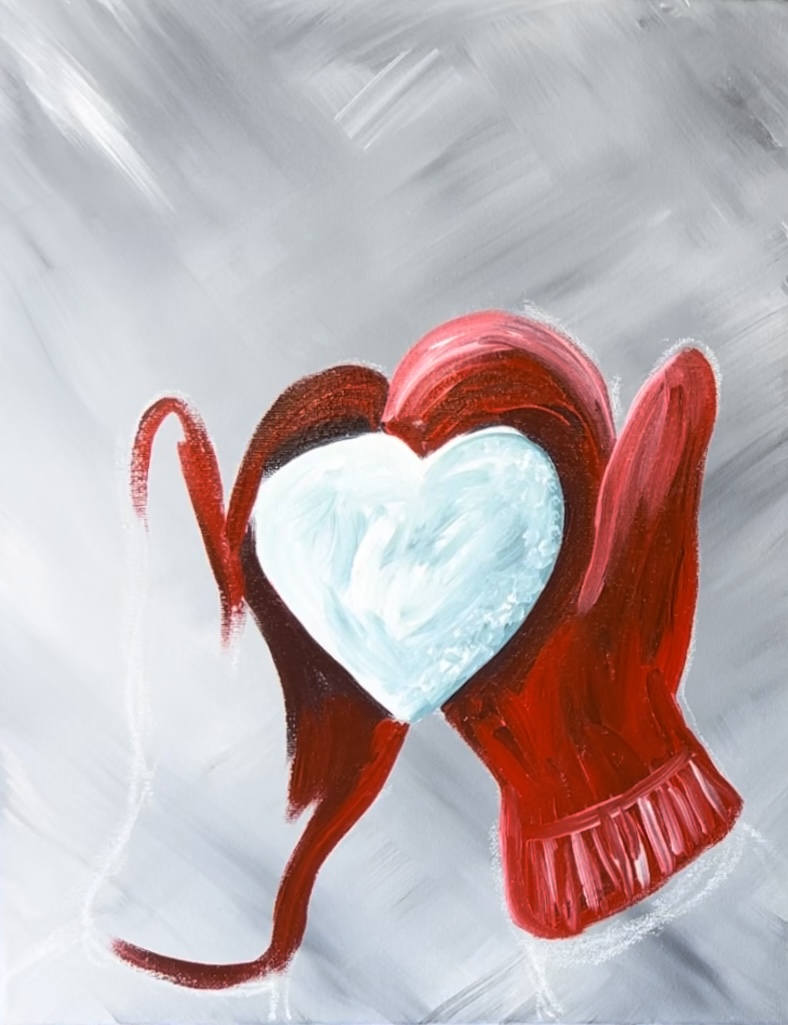
2. Draw Heart & Mittens
I found it helpful to use a piece of chalk to draw the hearts and the mittens! The chalk will show up against the medium gray background.
Start in the center and draw a medium sized heart. Make sure to make this heart a little more “rounded” especially on the corners. This will give it more of a snowball look.
Next, sketch the mittens. You can use your own hand placed on the canvas to help guide the shape of the mitten and thumb part.
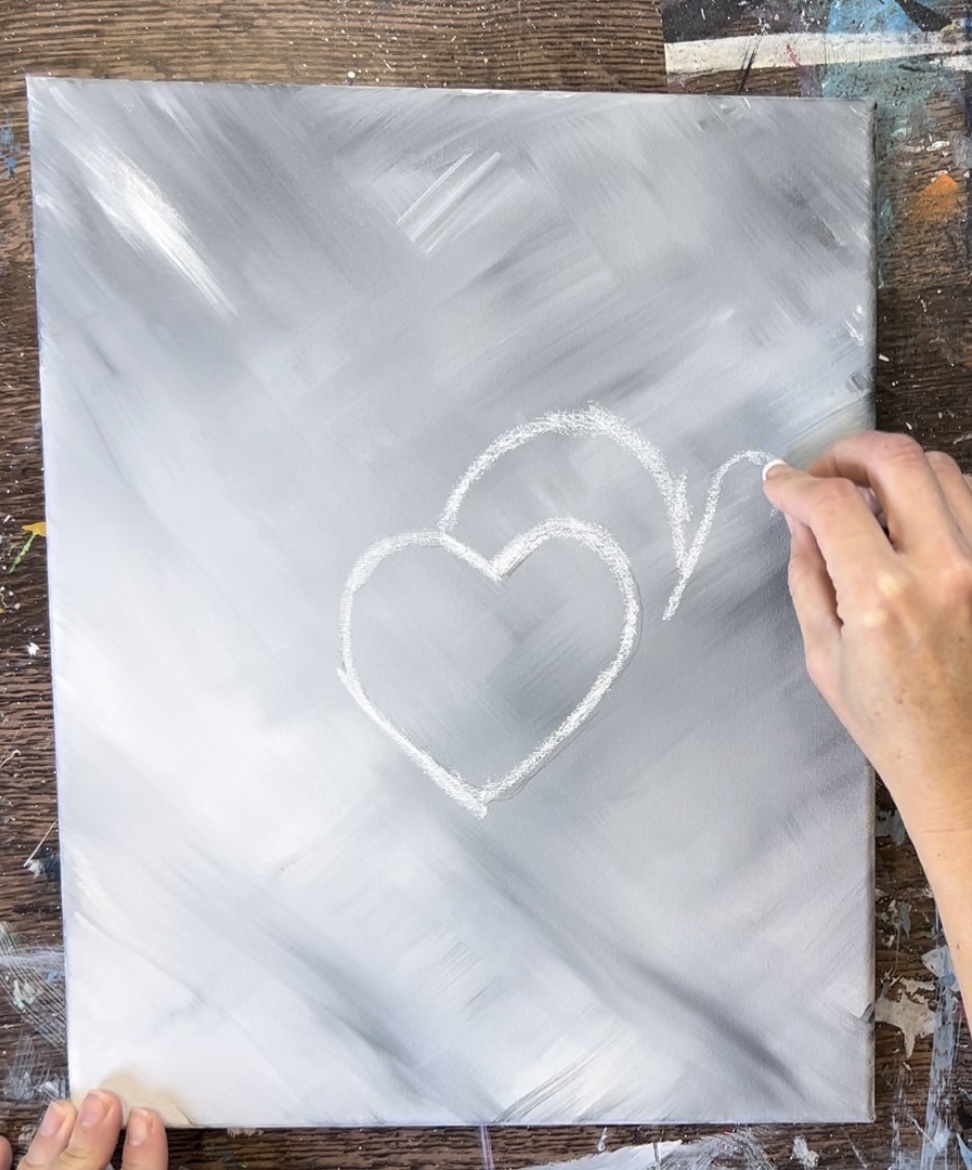
Draw two mittens under the heart snowball that slightly overlap each other.
3. Paint Heart Snowball
This snowball is painted with three colors: “titanium white”, “turquoise blue” and “mars black”. The blue and the black are going to be used for the shadow.
Load your paint palette with those three colors.
Use the #4 round brush to paint the heart snowball shape a solid coat of titanium white.
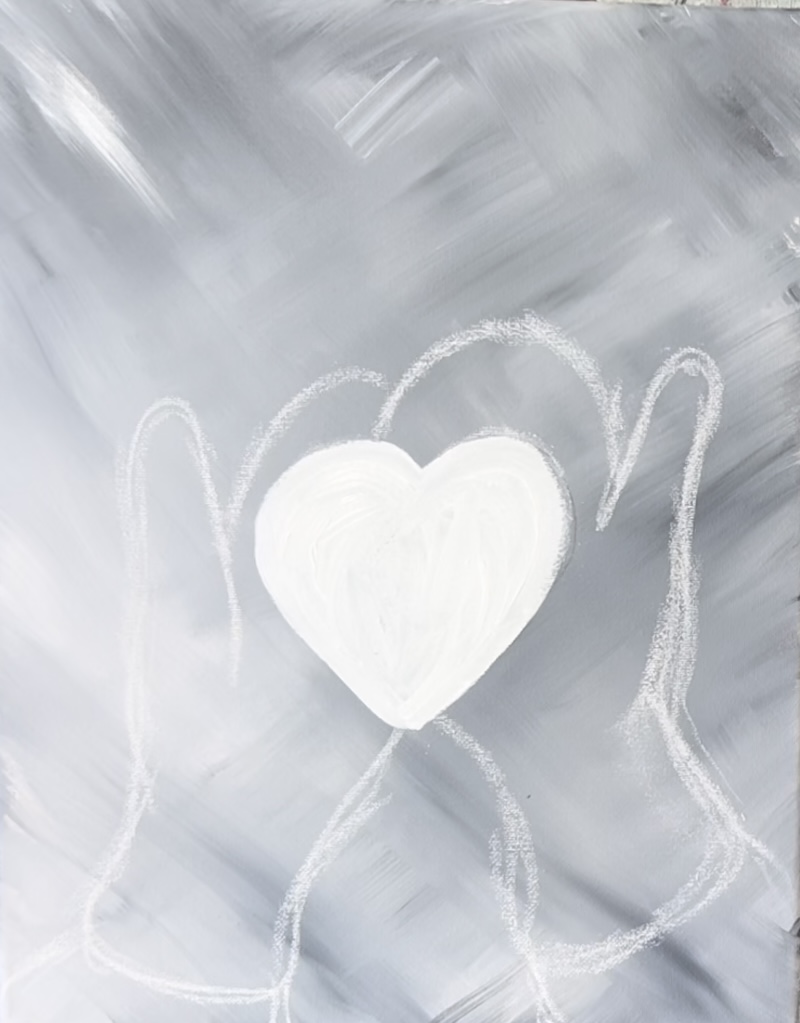
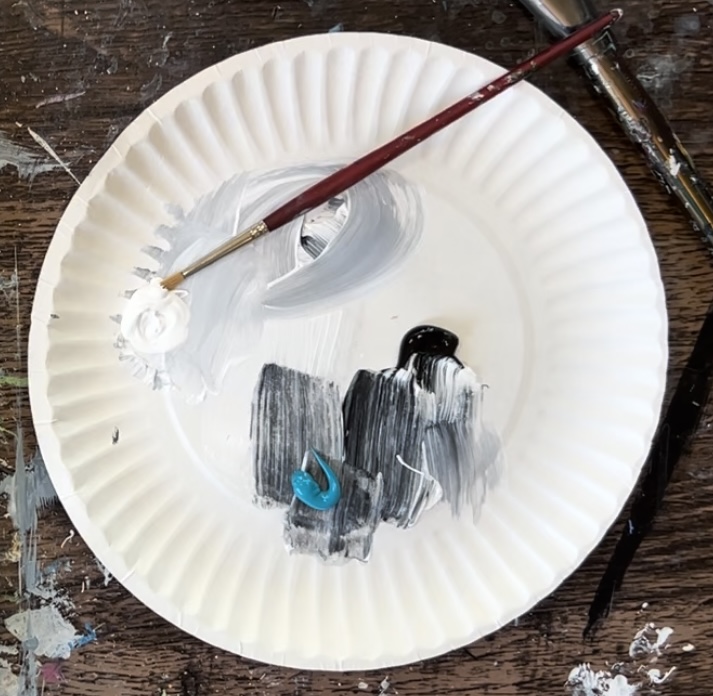
Then, without rinsing the brush, load a small amount of turquoise and black onto the brush.
Blend this dark turquoise color on the right side of the heart snowball so that it looks shadowy on the right side. If needed, add more white to your brush. You want to blend the right side so there is some shadow on the edge.
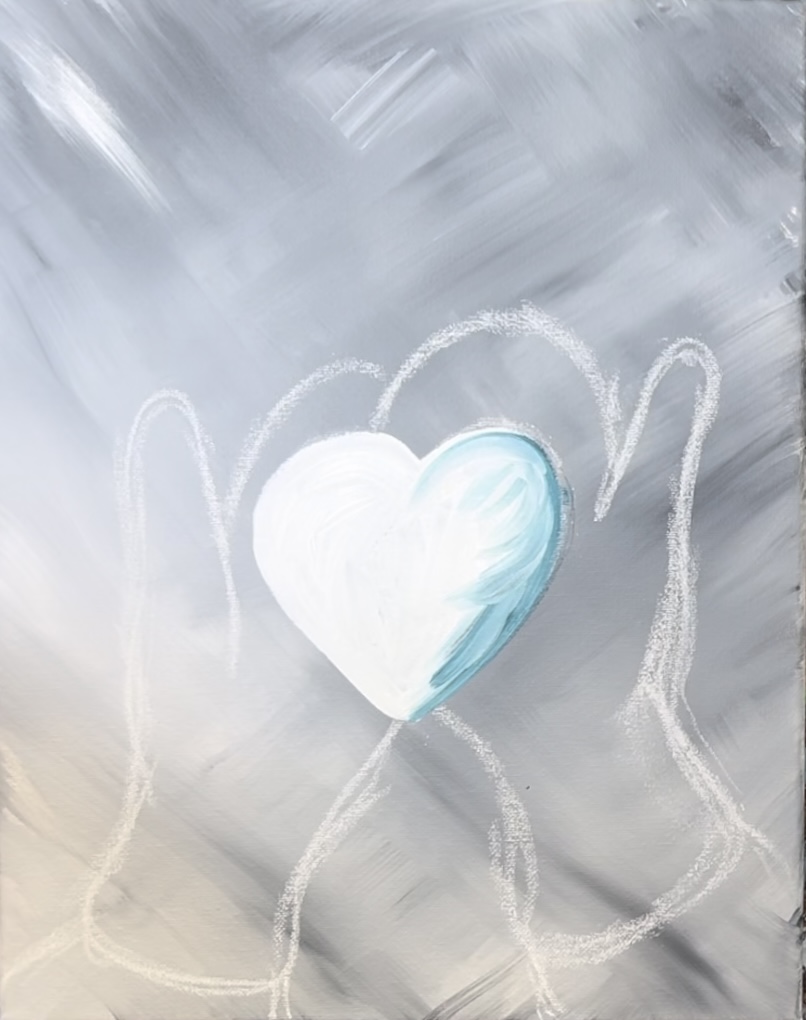
Add a little more of this dark turquoise color throughout the snowball. Blend more white into it by using “expressive strokes”. This is almost like scrubbing the brush and letting it blend with the colors on the canvas. You can also add a little “texture” to the snowball by painting little white dots on the edge. We will add more texture later after painting the mittens in.
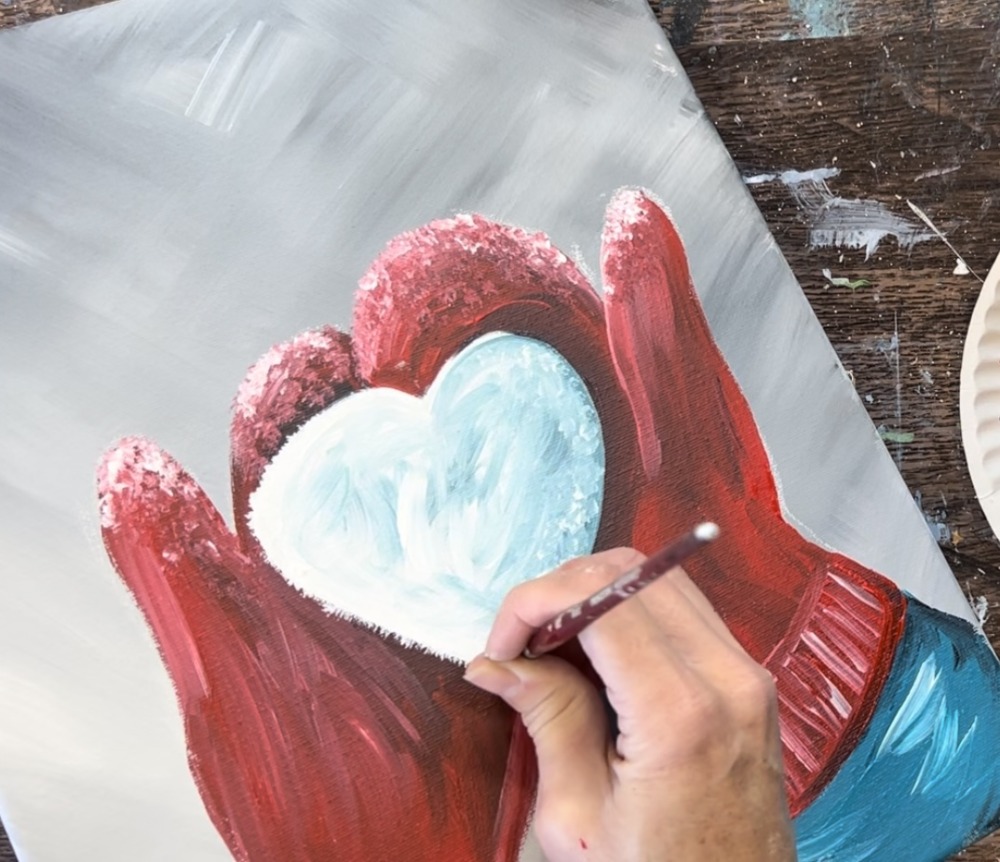
4. Paint Mittens
I recommend painting the shadow part of the mittens first. This is around the snowball. Use a #4 round brush to mix your “shadow color” on your palette. Load the color “pyrrole red” onto your palette. Then mix about equal parts turquoise into it. This will make the red look more “brownish”. Add a very small amount of black into it. The color should look like a very dark maroon red color but not black.
Use the #4 round brush to paint your “shadow color” around the snowball outer edge but don’t paint all of the mitten this color.
Then wipe the brush off. Load it into just the “pyrrole red” color. Paint the rest of the mitten using “contouring” or “curving” paint strokes. This will blend with the darker shadowy area. You want the color of the mitten to be more bright red away from the shadow.
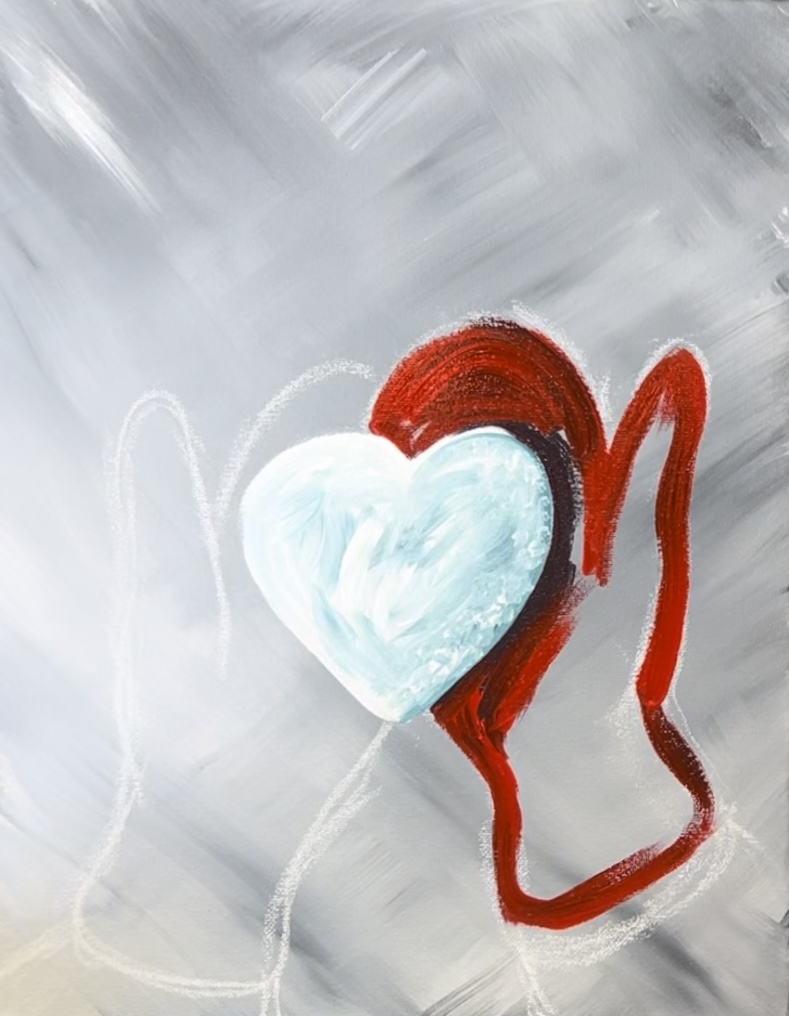
Let some of the shadow color blend in the thumb area. Try not to blend it all the way.
Next, rinse the brush. Mix red and white (equal amounts) on your paint palette to make a lighter red. Use this lighter red color to blend a lighter area on the top rounded part of the mitten and on the left side of the thumb area. Then use the light red color to paint the sleeve/ end of the mitten. You can create a “sweater like” texture in this area by painting loose, vertical lines on the end sleeve piece. This will blend with the existing red layer.
Repeat this technique with the mitten on the left. Start with the shadow color going around the snowball and then blend your pure red color around that for the rest of the mitten. Then add your highlight color.
Tip: if you paint over parts of the snowball, you can always touch this back up after the red mittens dry.
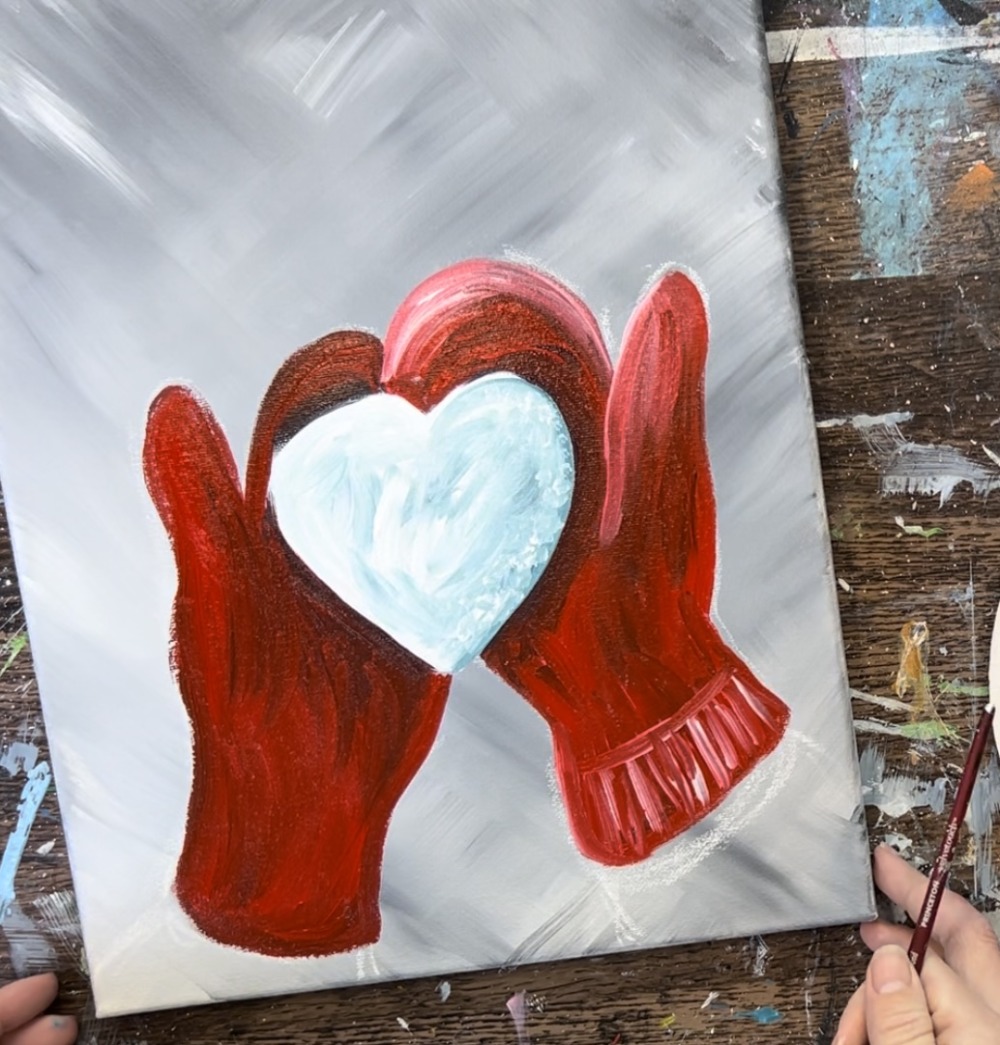
Add your highlight light red color on the edges of the mitten and use that color to help highlight the thumb area.
Then paint the sweater texture area.
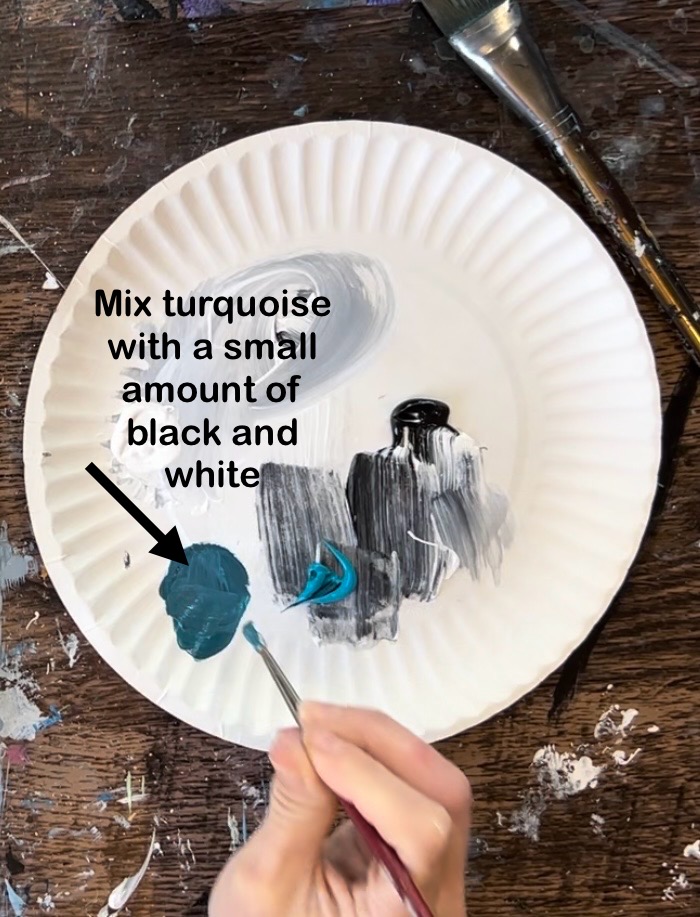
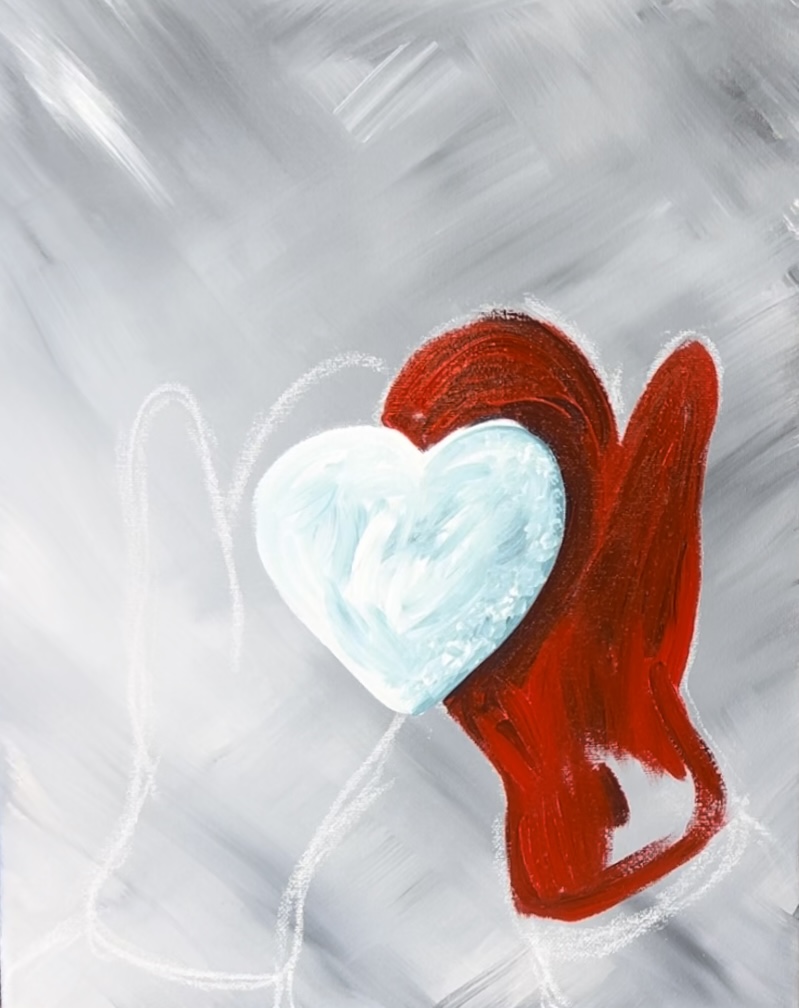
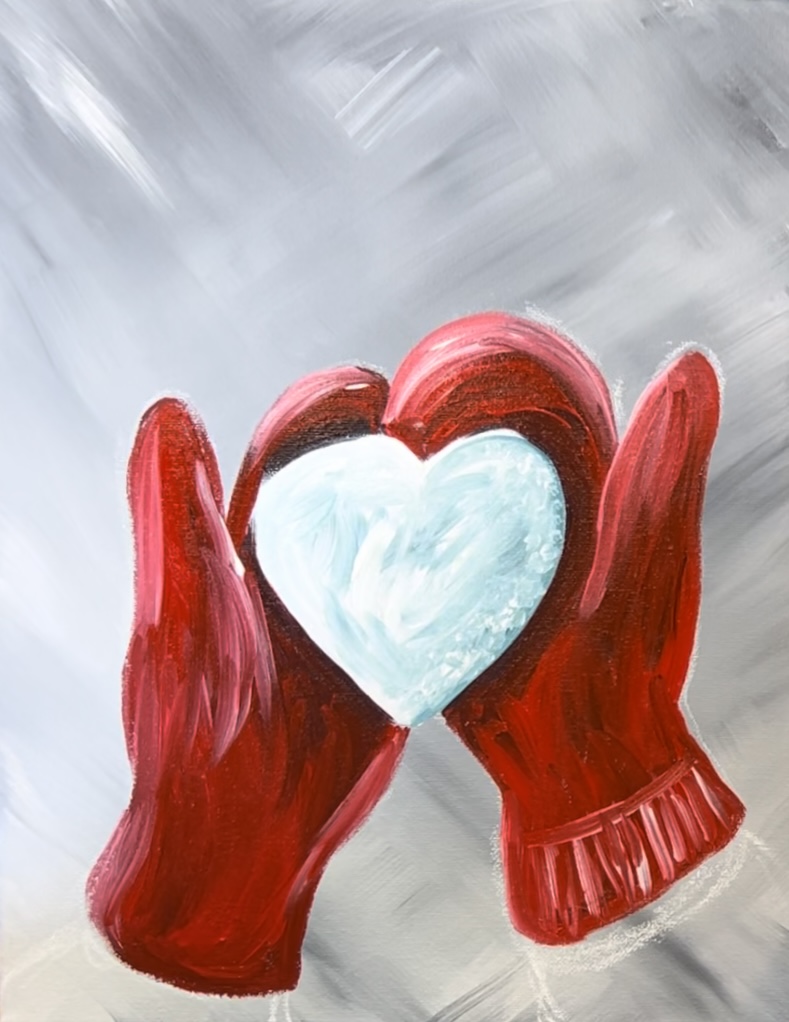
5. Paint Sleeves
Rinse the #4 round brush. Then use pure turquoise blue to paint the sleeves. You can do a solid coat of this color before adding your shadows and highlights.
To do the “highlights”, load your #4 round brush in a small amount of titanium white. Then gently blend a few “wrinkles” on the sleeve before the turquoise layer dries. You can do this by painting zig-zag strokes.

Do this on both sleeves. Then rinse the brush and mix a tiny amount of “mars black” paint into the “turquoise” paint color to make a dark turquoise color. Paint a few “shadow lines” in the turquoise so that it blends. Do this also with “zig-zag” paint strokes that blend with the turquoise.
6. Add Texture On Mittens & Snow
This is an optional step. If you want to add a little “fuzzy texture” or “snow dust” on the mittens, use the #4 round brush to “stipple” little white and red/white dots on the mittens. When you “stipple” the brush, you are simply using the tip of the paint brush to paint small white textured dots.
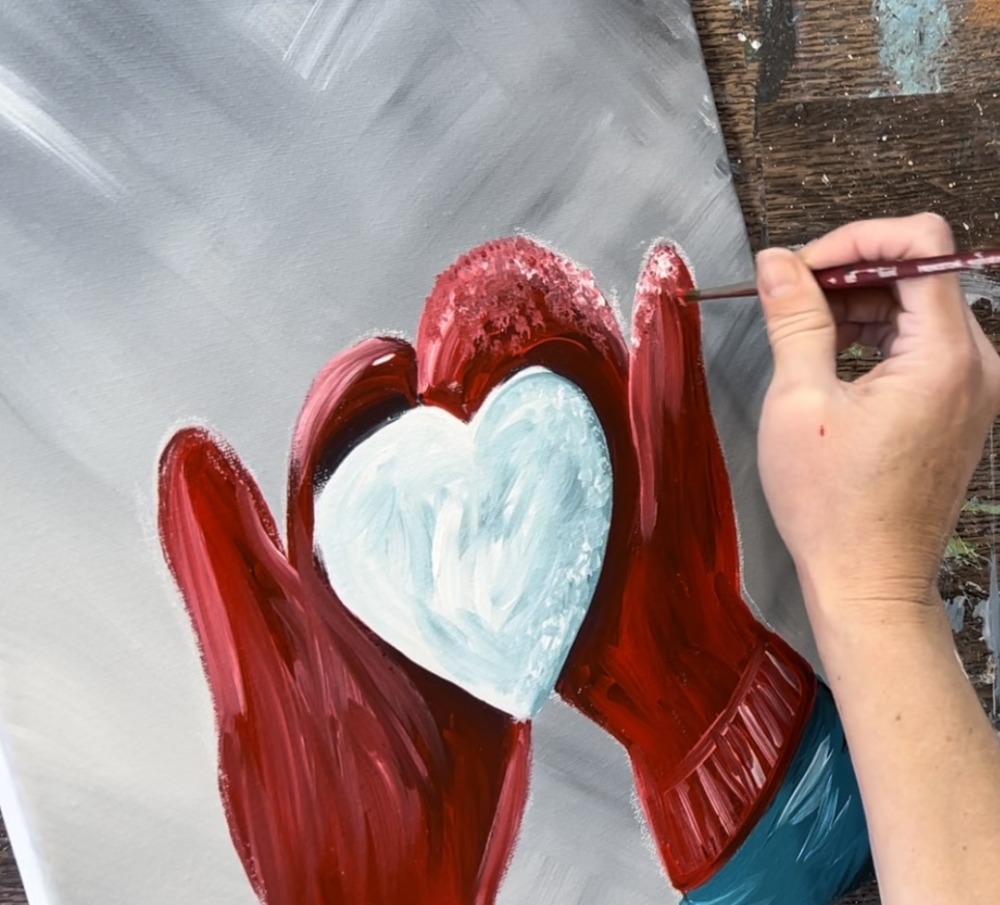
I did this just on the top edges of the mittens and not throughout the entire set of mittens.

You can also do this to the snowball. First, touchup the snowball if any part of the mittens overlapped it. Go back over the heart shape and “re-define” it. Then add texture along the edge of the snowball using titanium white and a little bit of the “shadow turquoise color”. When you add the texture on the edges, it can overlap part of the mittens slightly.
7. Paint Snowflakes
For this step, I used a White POSCA paint pen to draw snowflakes. Because these are large snowflakes, you can really go into detail with them! Start by drawing an “X” with a vertical and horizontal line (like an asterisk * shape). Then on all of the lines, you can add little diagonal angle lines, little circles, ovals, etc. You can look at images of snowflakes to help you get different ideas.
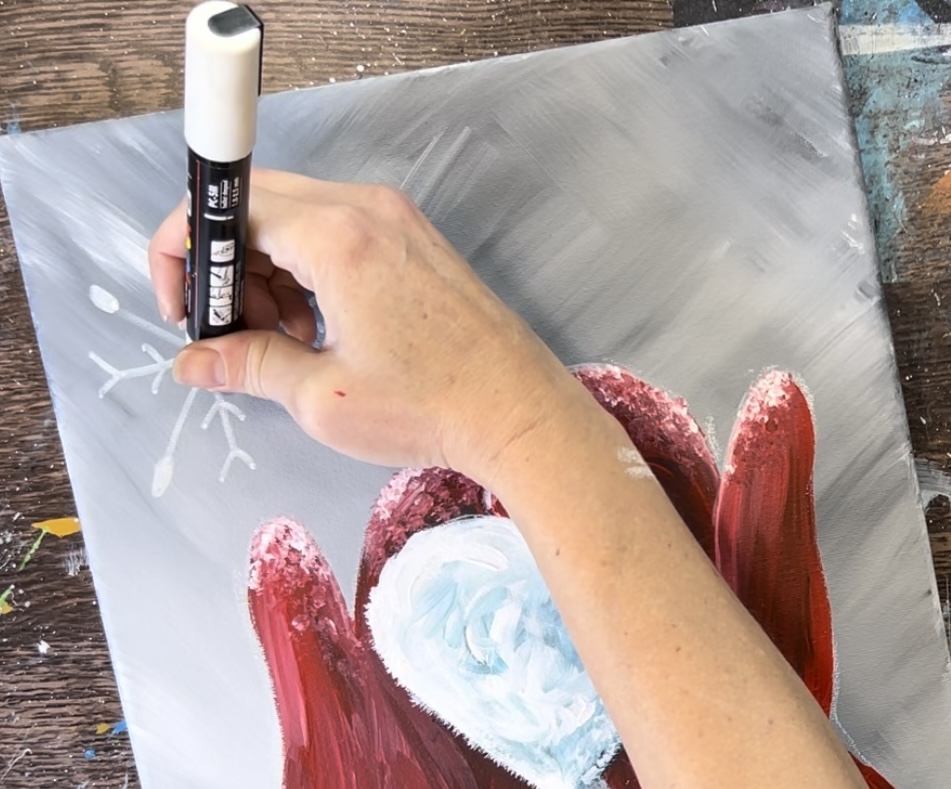
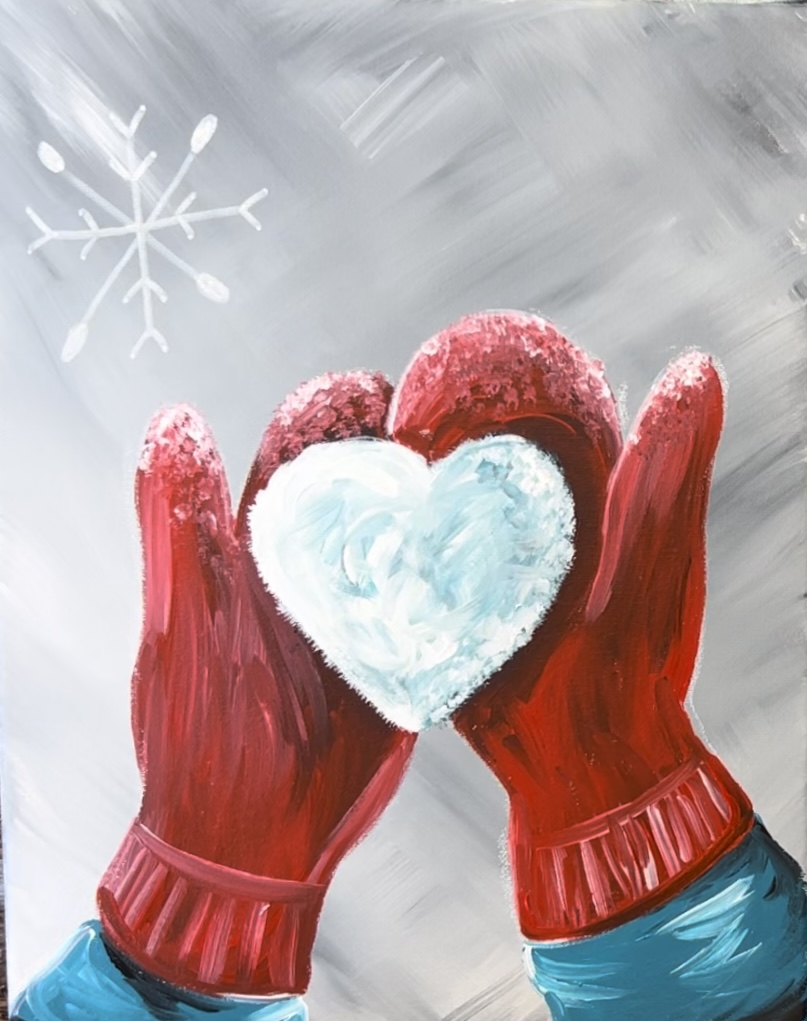
You can change the size and direction of each of the snowflakes.
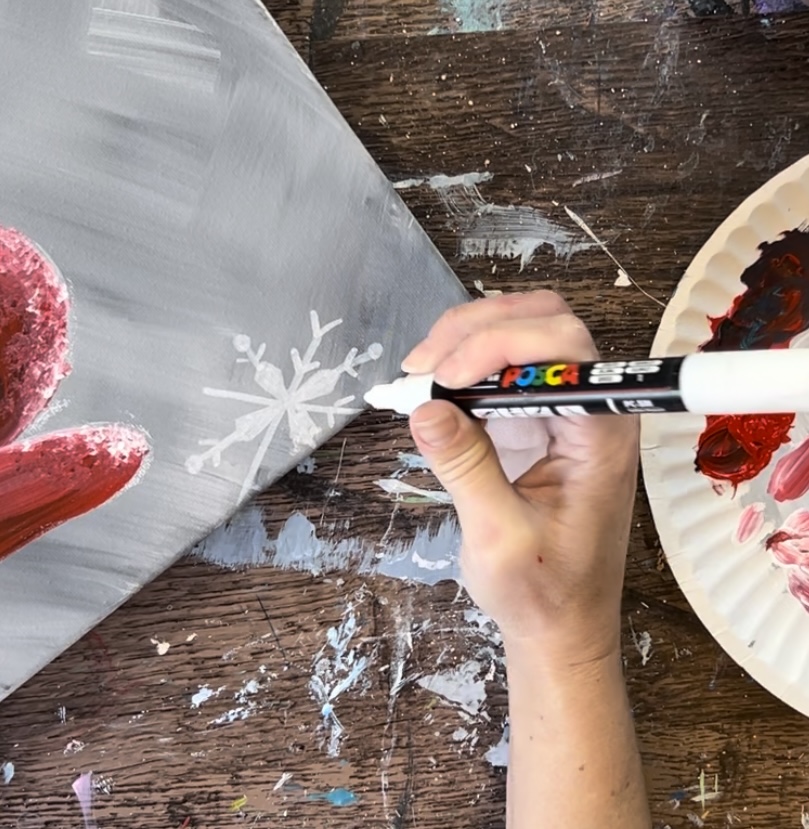
Make some tiny ones and snowflakes that go over the edge of the canvas.
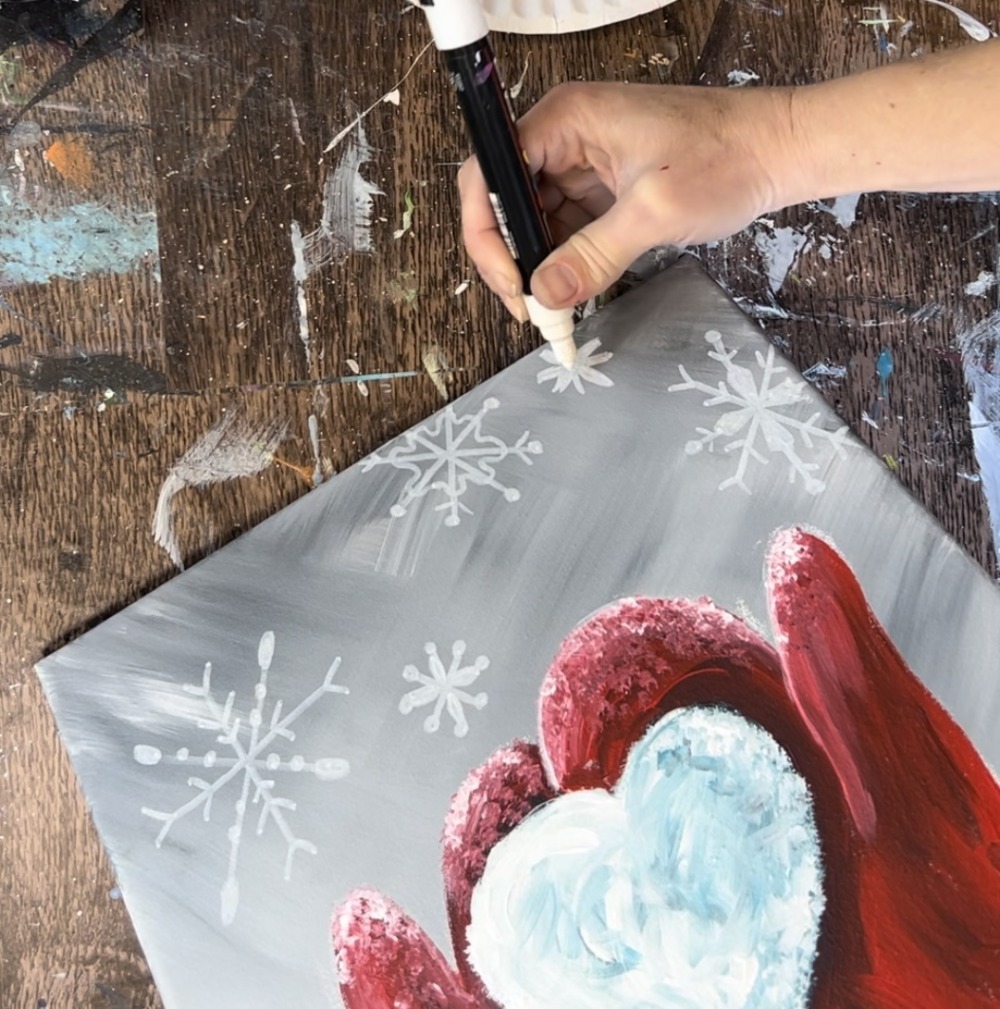
You can also paint little white snow dots throughout the background.
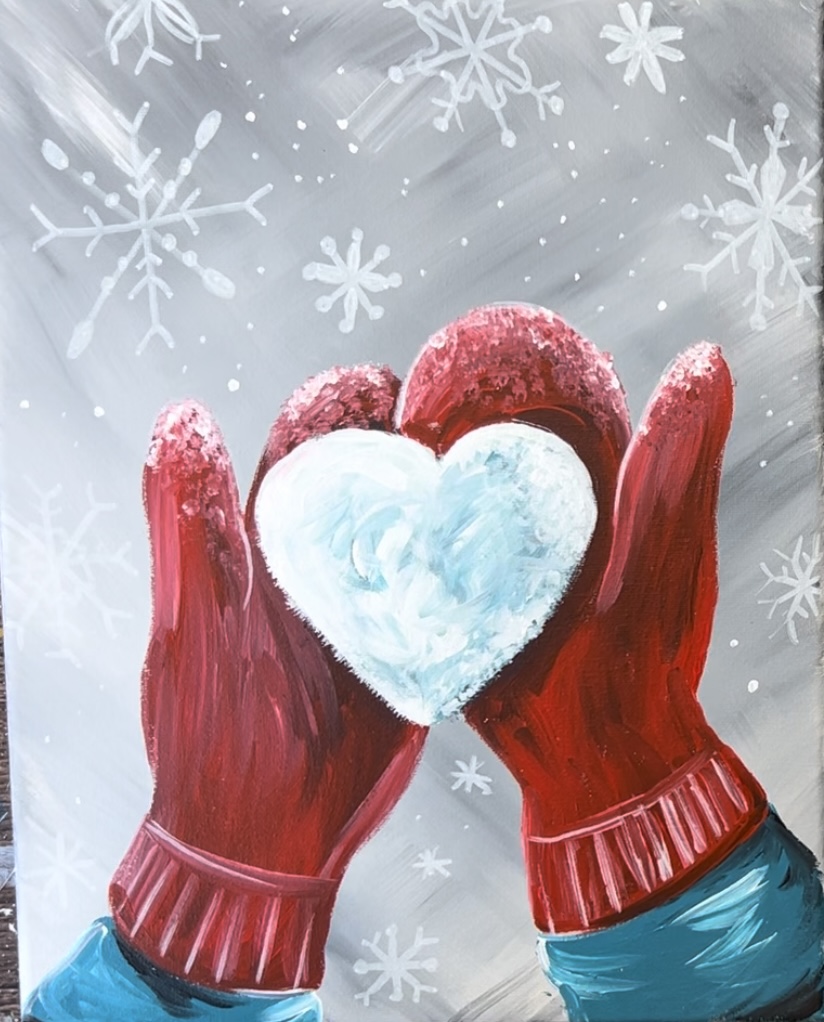
Finished!