

Would you like to save this?
Hi everyone! It’s been awhile since I’ve done a detailed sunflower tutorial such as this one: “How To Paint A Sunflower”! This one is a little more advanced than that one!
Sunflowers are one of my favorite flowers and I love growing them in my garden! They make me so happy to paint!
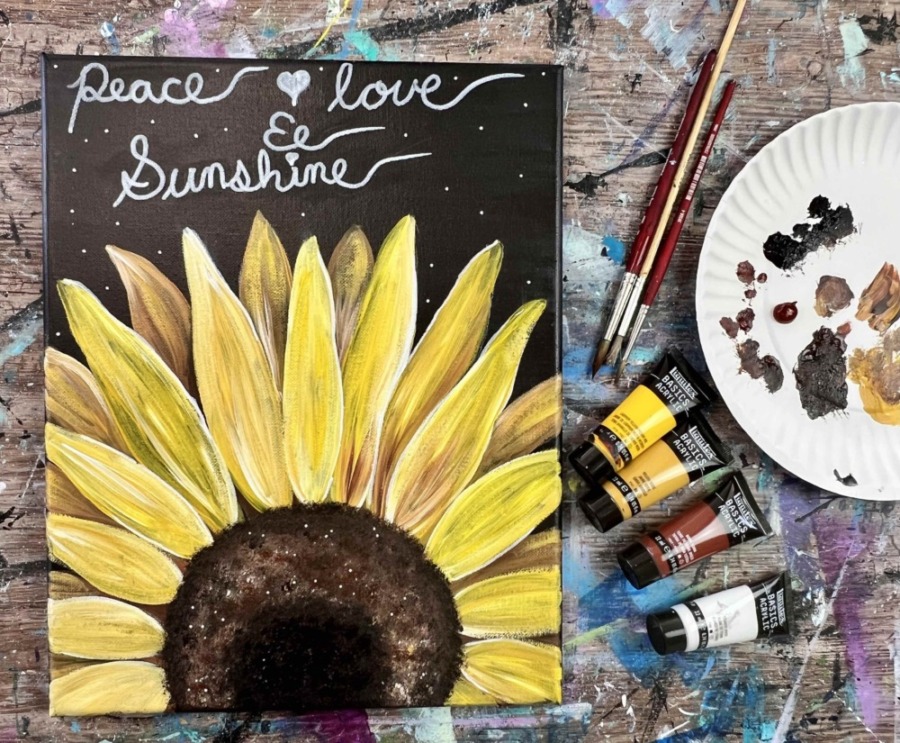
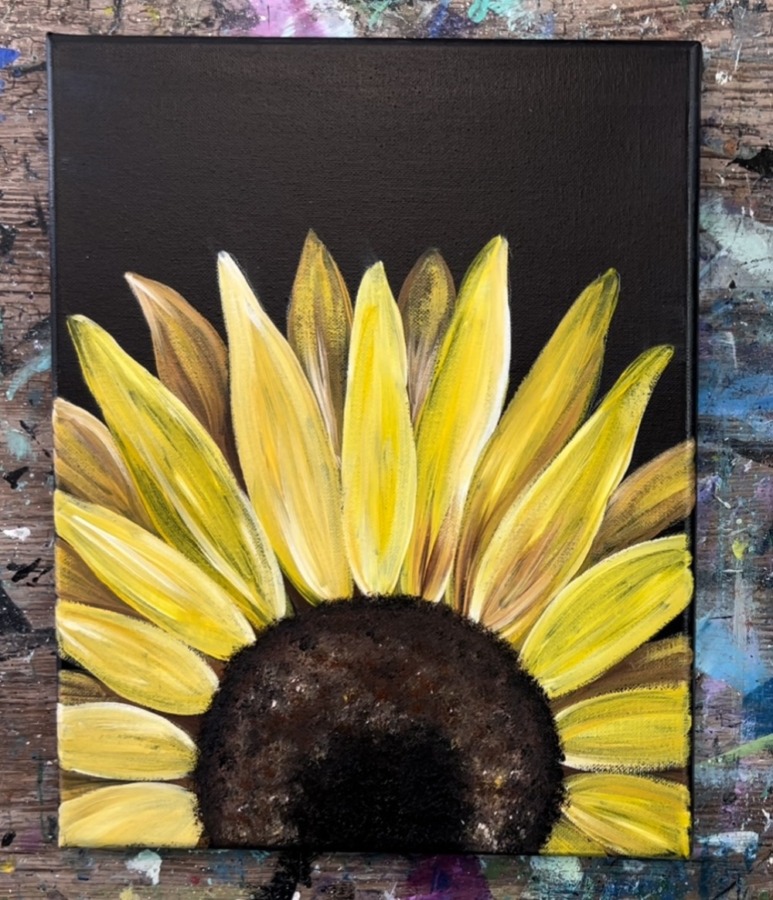
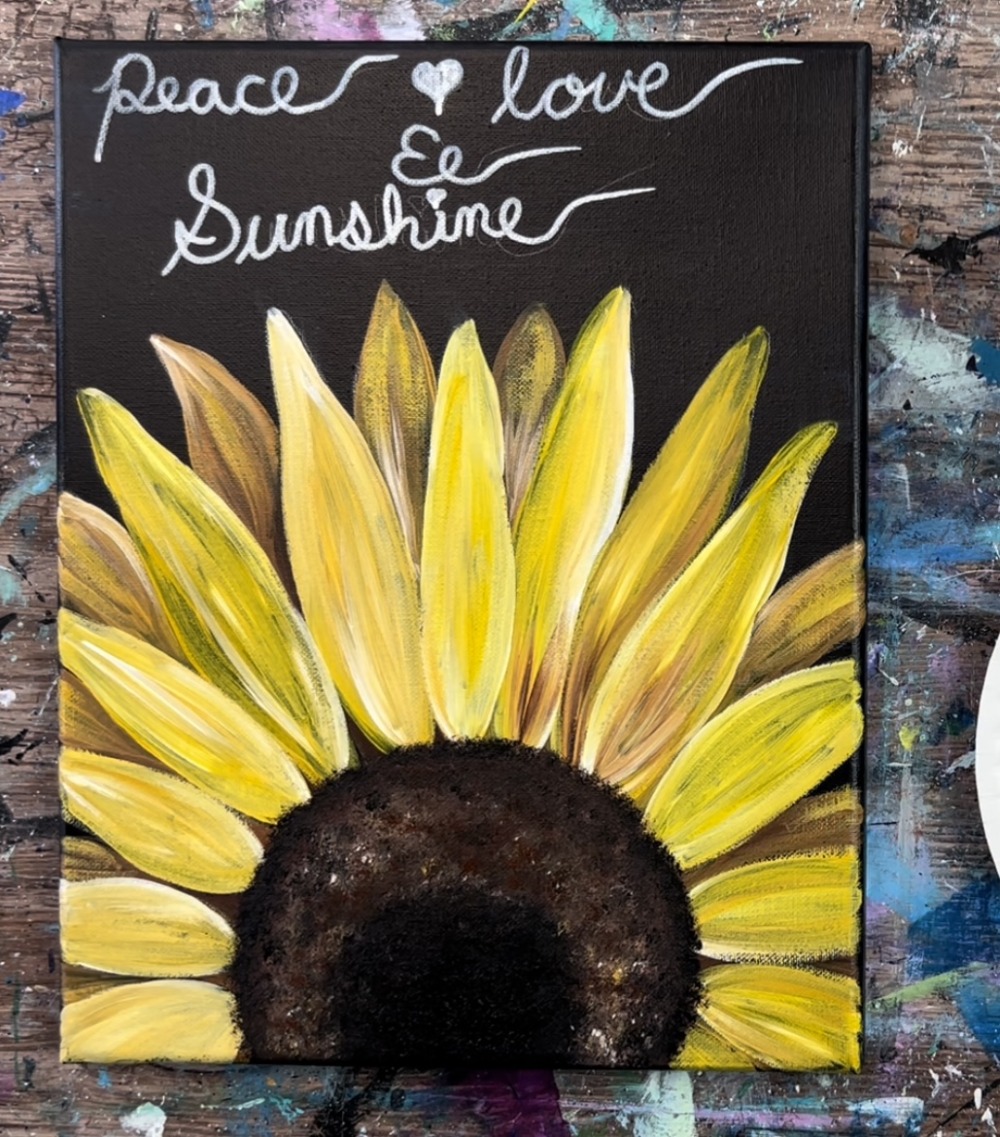
This acrylic tutorial is demonstrated on a dark “Payne’s Grey” background and it reminds me of a chalkboard style. It’s a great painting to do if you want to paint over a mess up painting! Simply paint a single layer of that dark color over your painting and it will cover it up.
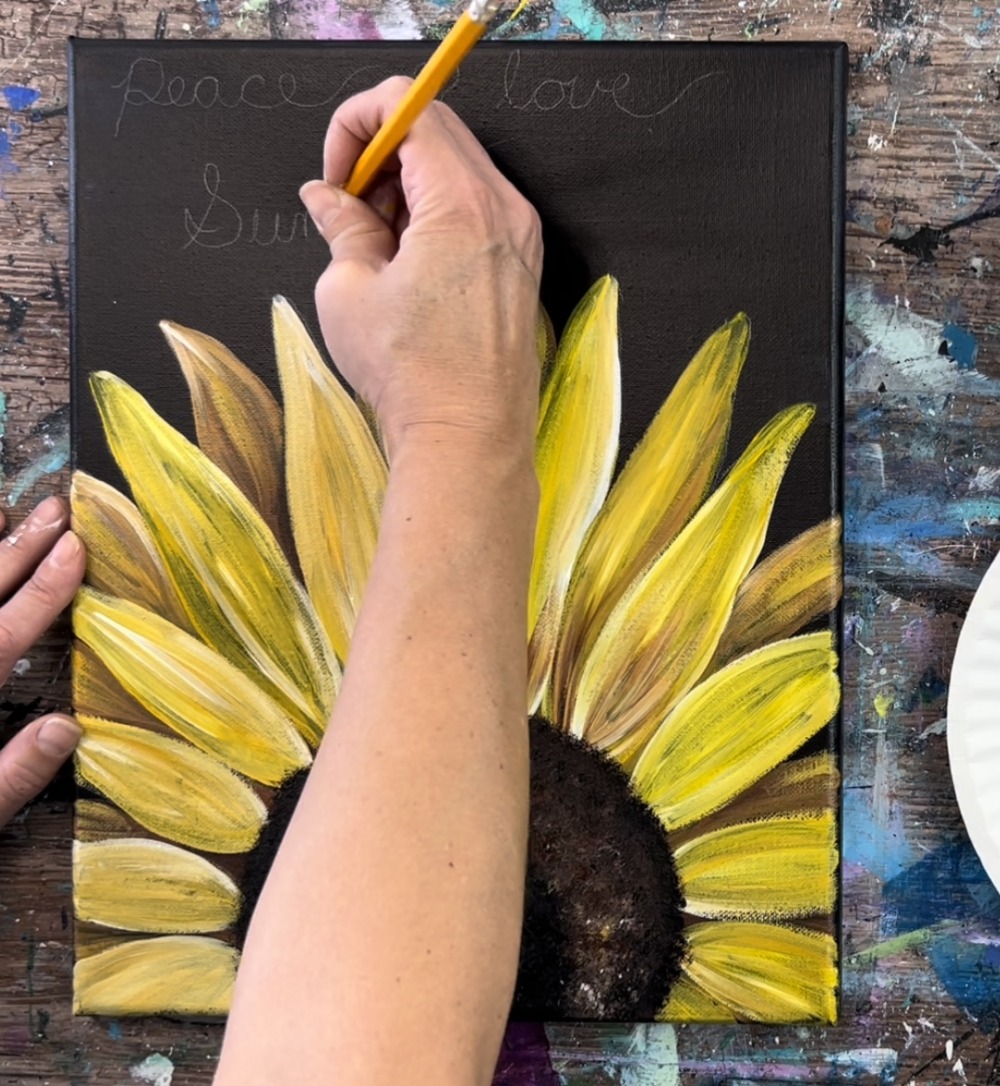
Also, the design for this painting leaves room at the top for a quote. I wrote “peace, love and sunshine!” You can customize this, do a bible quote or even a name!
I will be showing you how to draw the sunflower. If you are interested in a traceable for this, you can find it in my PDF shop.
Enjoy and happy painting!
Materials Needed:
How To Paint A Sunflower With Quote
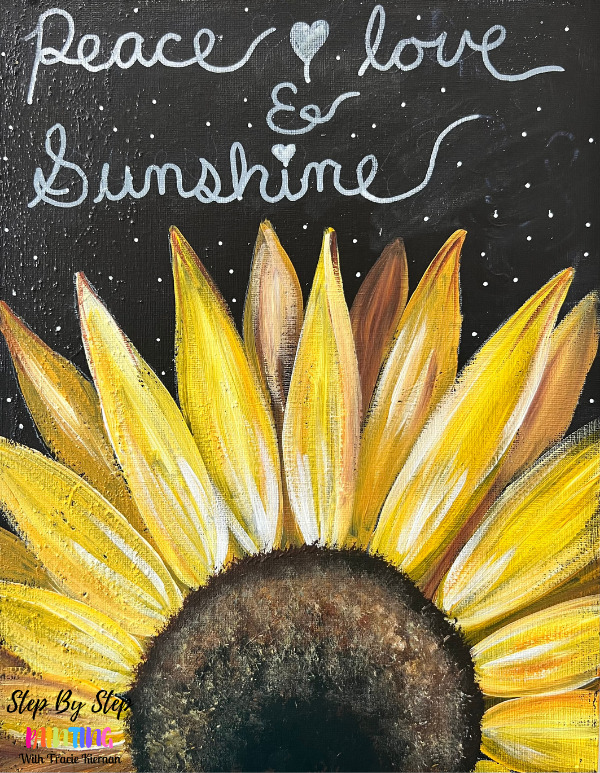
Learn how to paint a sunflower on a dark canvas with acrylics. Add a customizeable quote at the top!
Materials
- 11 x 14 Canvas Painted Payne's Grey
- Acrylic Paints
- Brushes
- 6" Circle To Trace
- White Chalk Pencil
- White POSCA Paint Pen
- Ruler
Brushes
- 3/4" Flat Wash Brush
- #4 Round Brush
- Round Bristle Brush or Stencil Brush
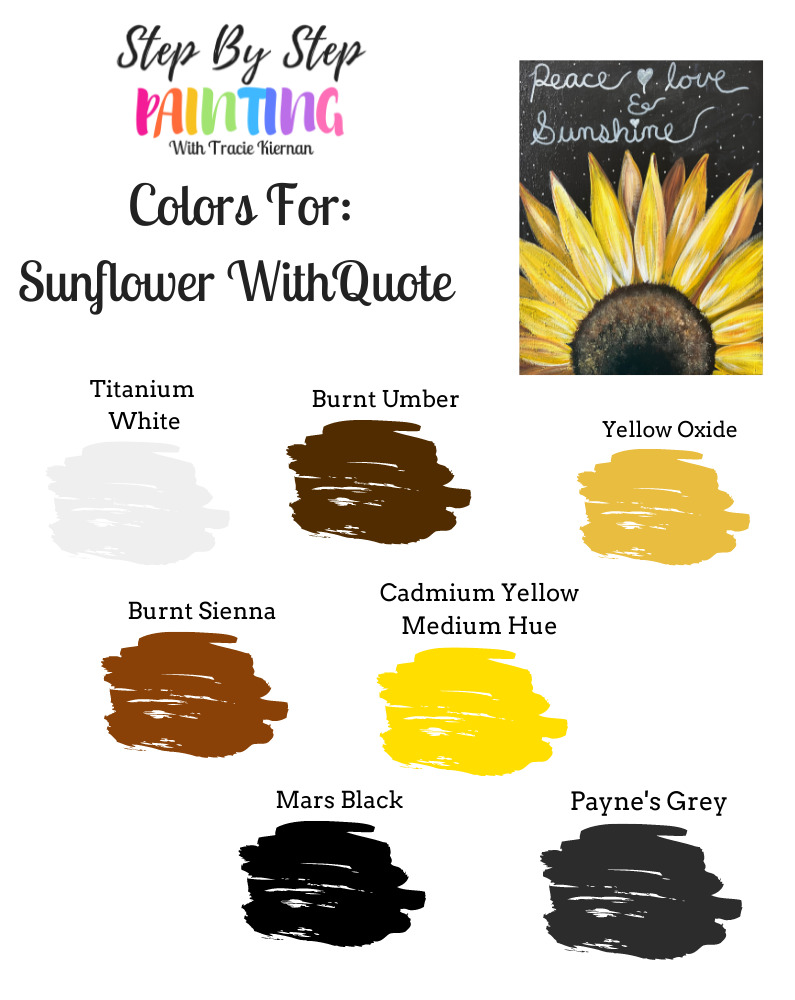
Colors
- Titanium White
- Mars Black
- Payne's Grey
- Cadmium Yellow Medium Hue
- Yellow Oxide
- Burnt Umber
- Burnt Sienna
Color Palette:
I used Liquitex BASICS acrylic paints for this! You can use any brand of paint you have on hand. Use the color chart below to help you match the colors.
Notes: Burnt Sienna is optional. I used very little of it in this painting and it can be omitted without changing the outcome of the sunflower. Payne’s Grey can be substituted to Mars Black.
Using Craft Paints?
If you are using craft paints such as the Apple Barrel Craft Paints, I would recommend substituting for these colors:
- White
- Black
- Nutmeg Brown
- Melted Chocolate
- Pewter Gray (add a little black into it if it is too light)
- Bright Yellow (add a little brown into it if it is too light)
- Yellow Flame
Directions At A Glance:
Video:
Step By Step Instructions:
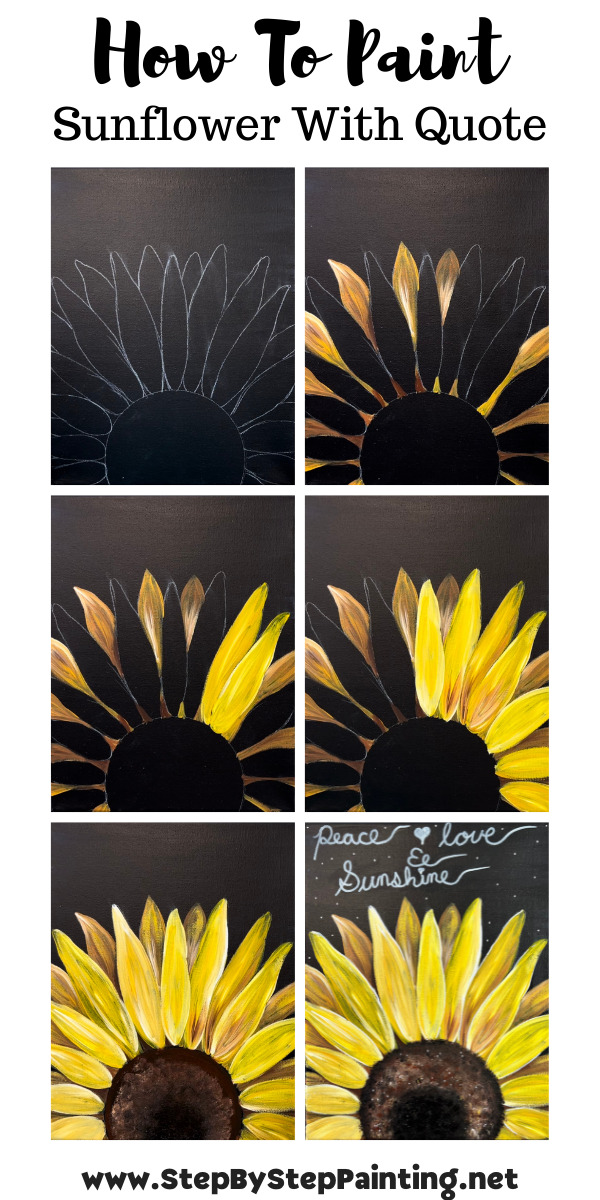
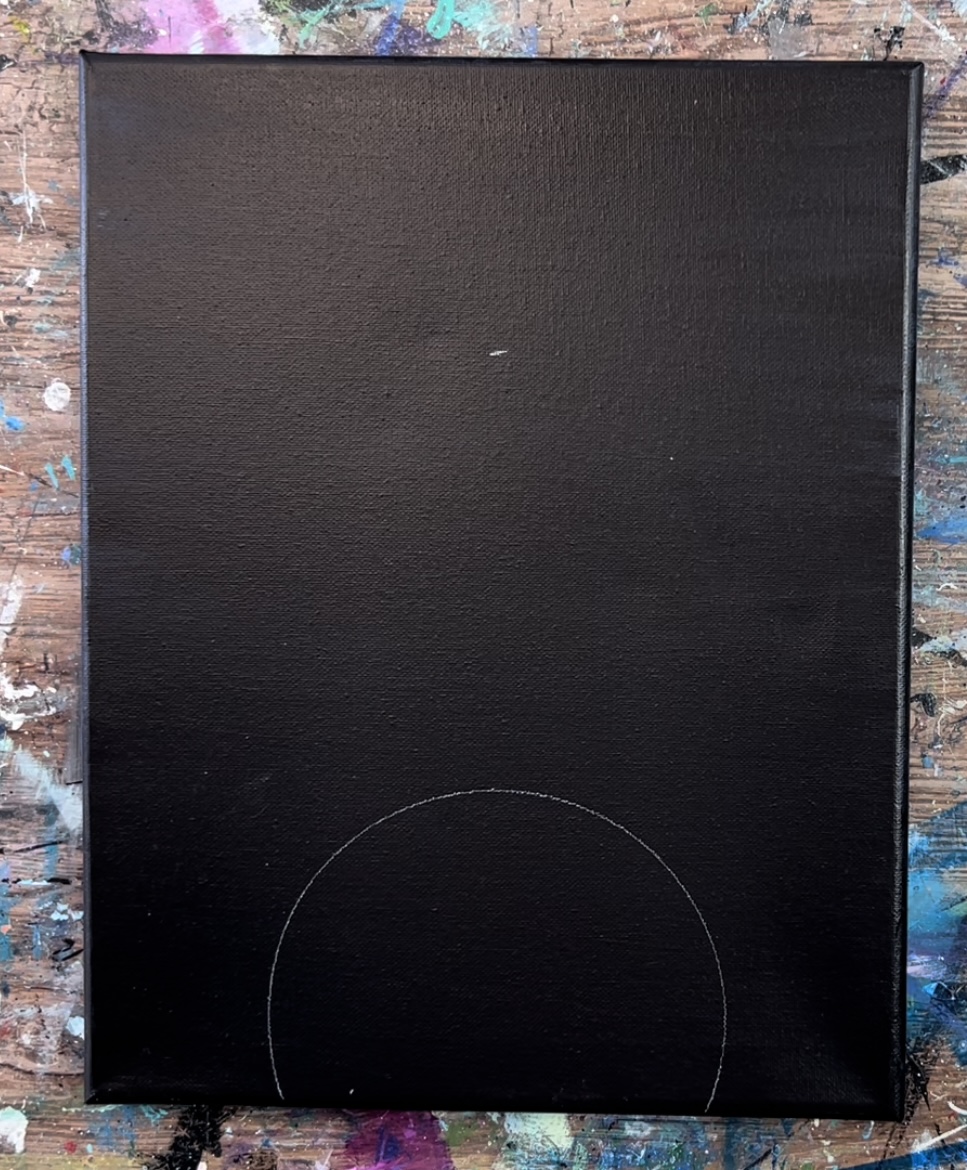
1. Paint a canvas Payne’s Grey
Use a 3/4″ flat wash brush and paint the entire canvas on solid coat of Payne’s Grey. This is a great way to recycle a mess up painting! The paint will cover anything on the canvas. If you don’t have the color Payne’s Grey, you can paint it Mars Black. If you want more of a chalkboard/ dark grey color, you can add some white into the black.

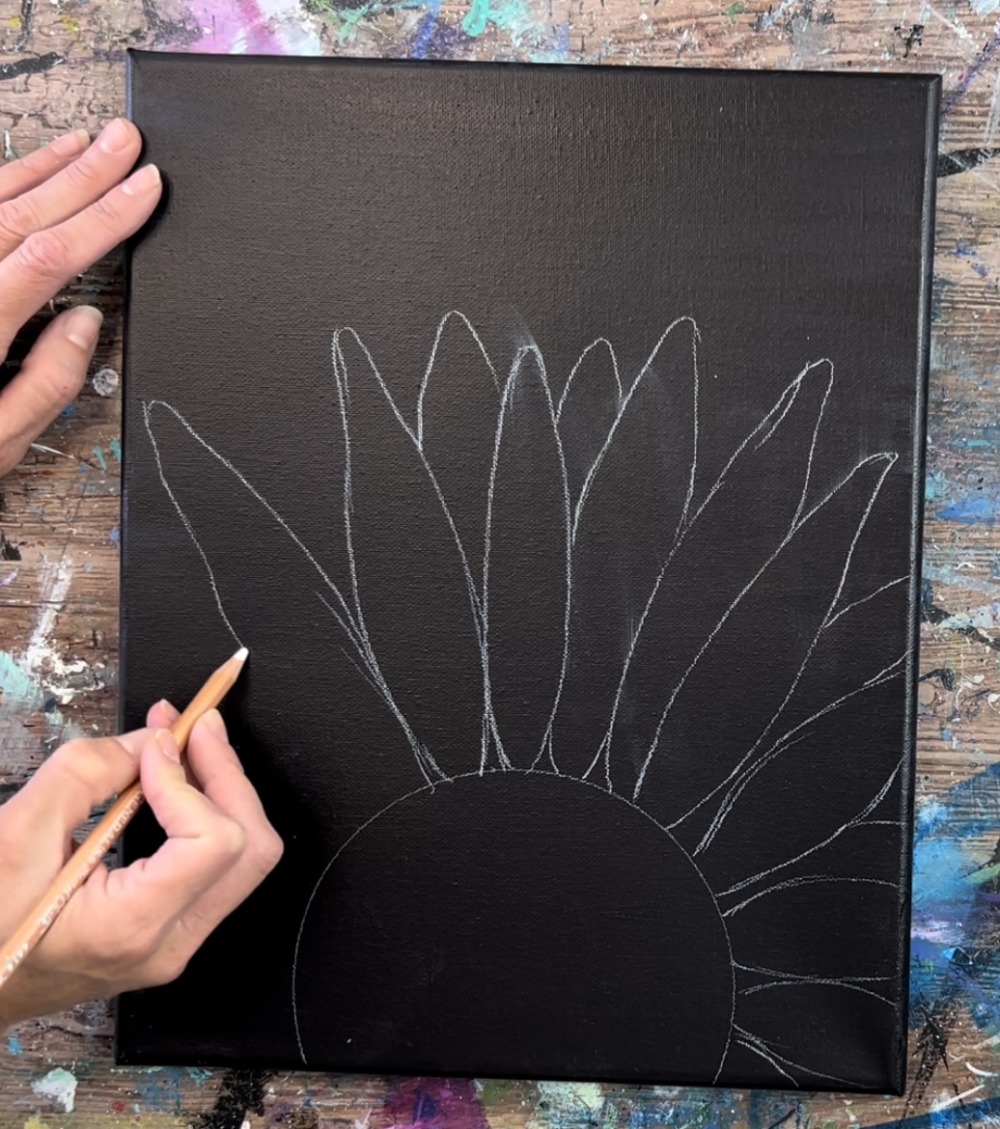
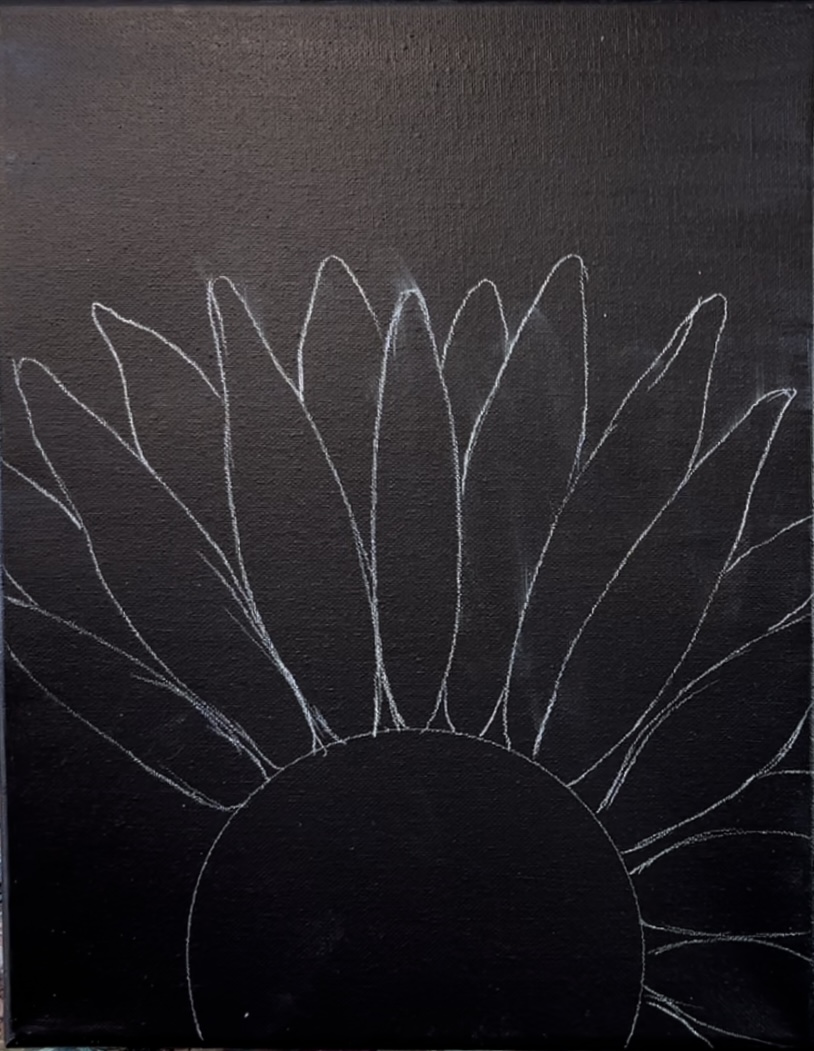
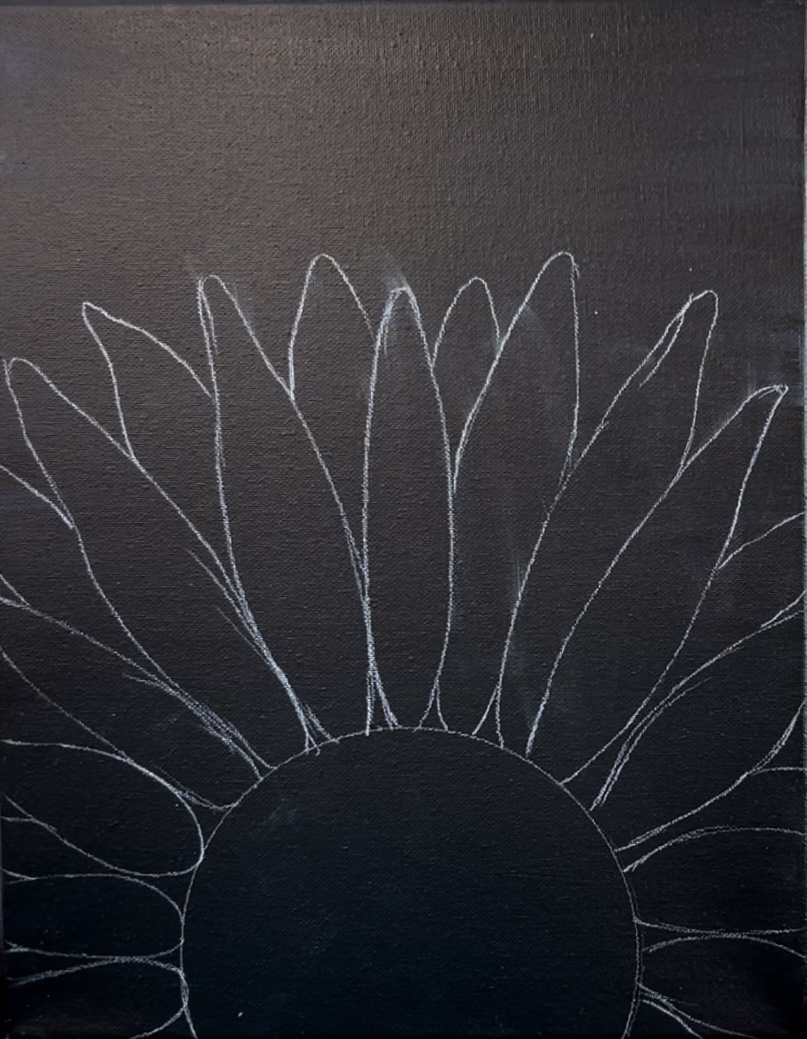
2. Draw The Sunflower
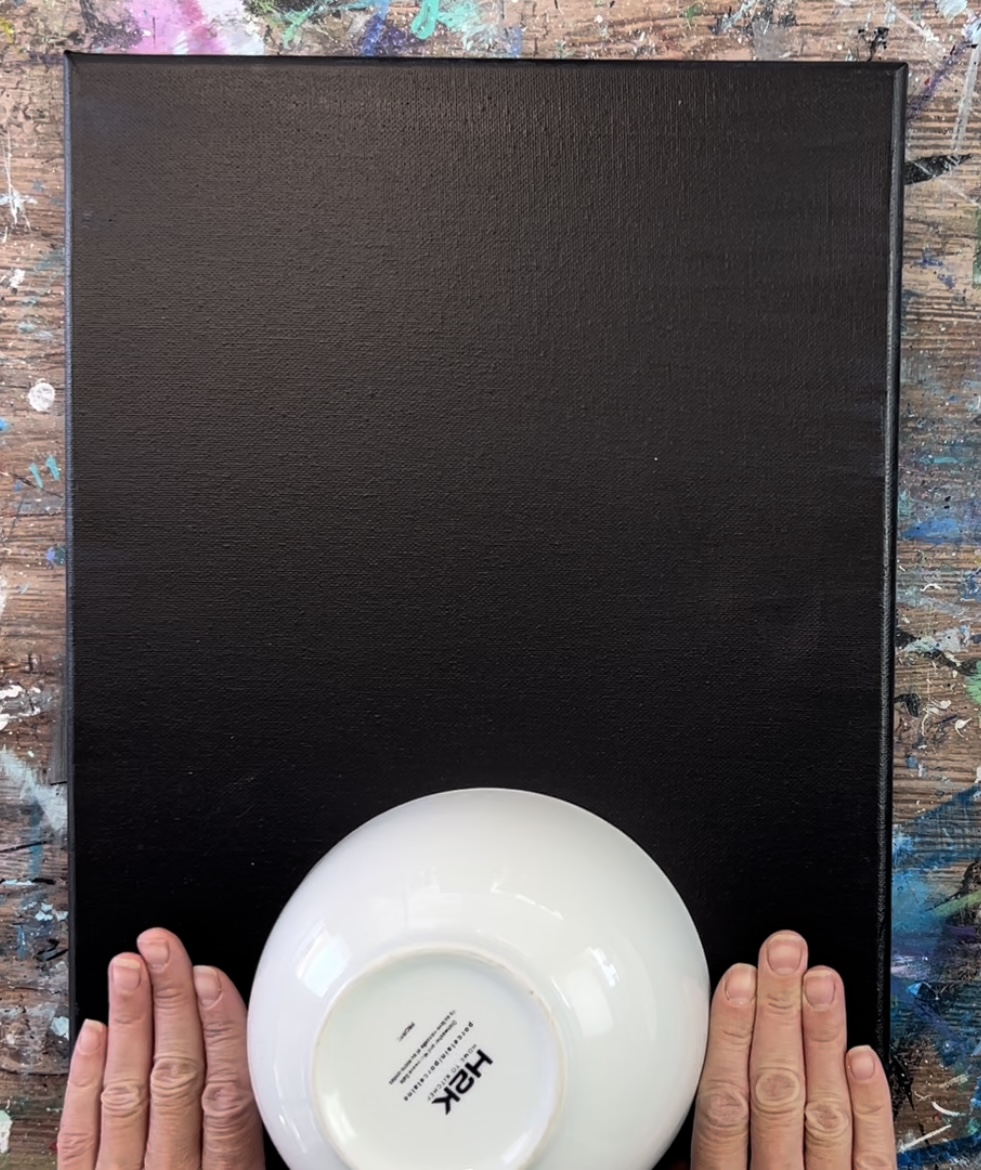
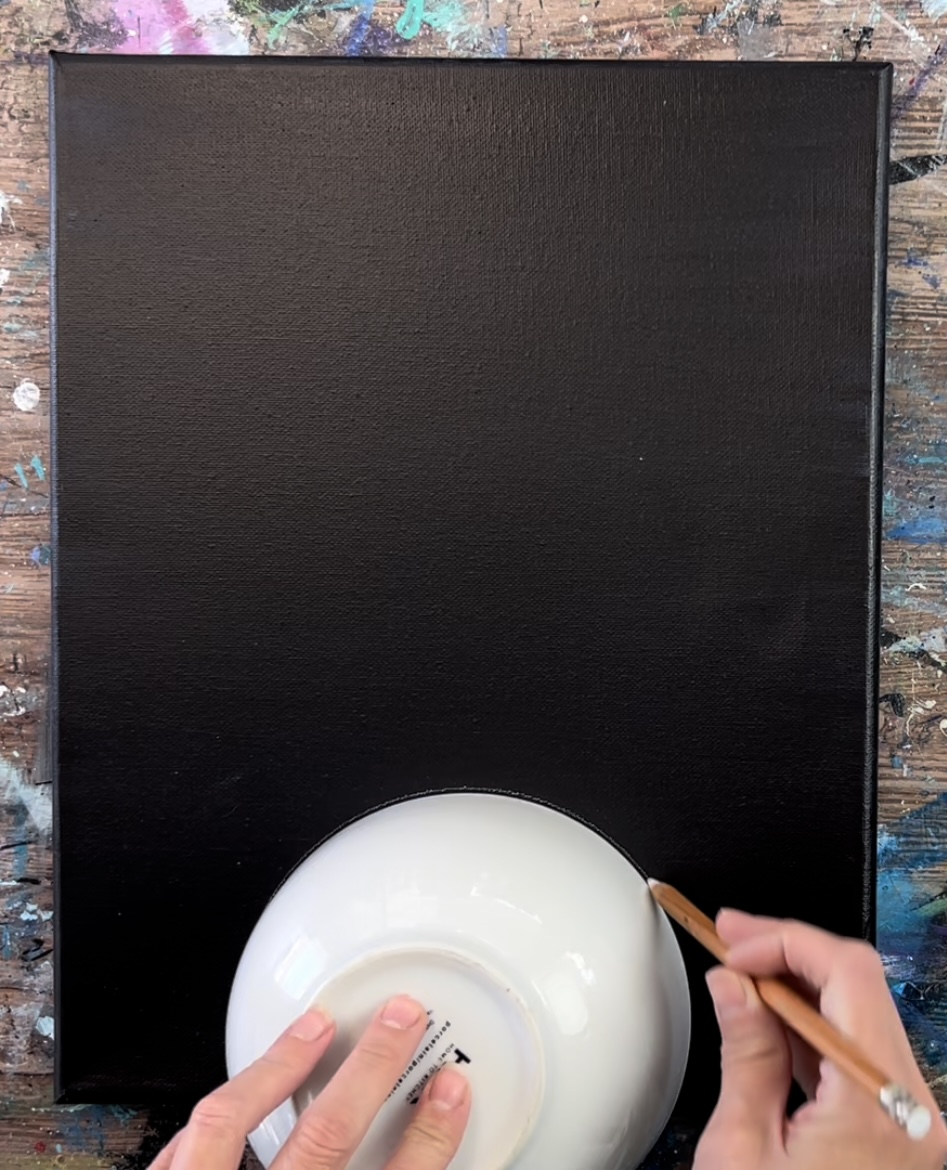
For the center of the sunflower, I traced a 6″ circle. You can use a bowl, a plate or anything round. You can also use a compass.
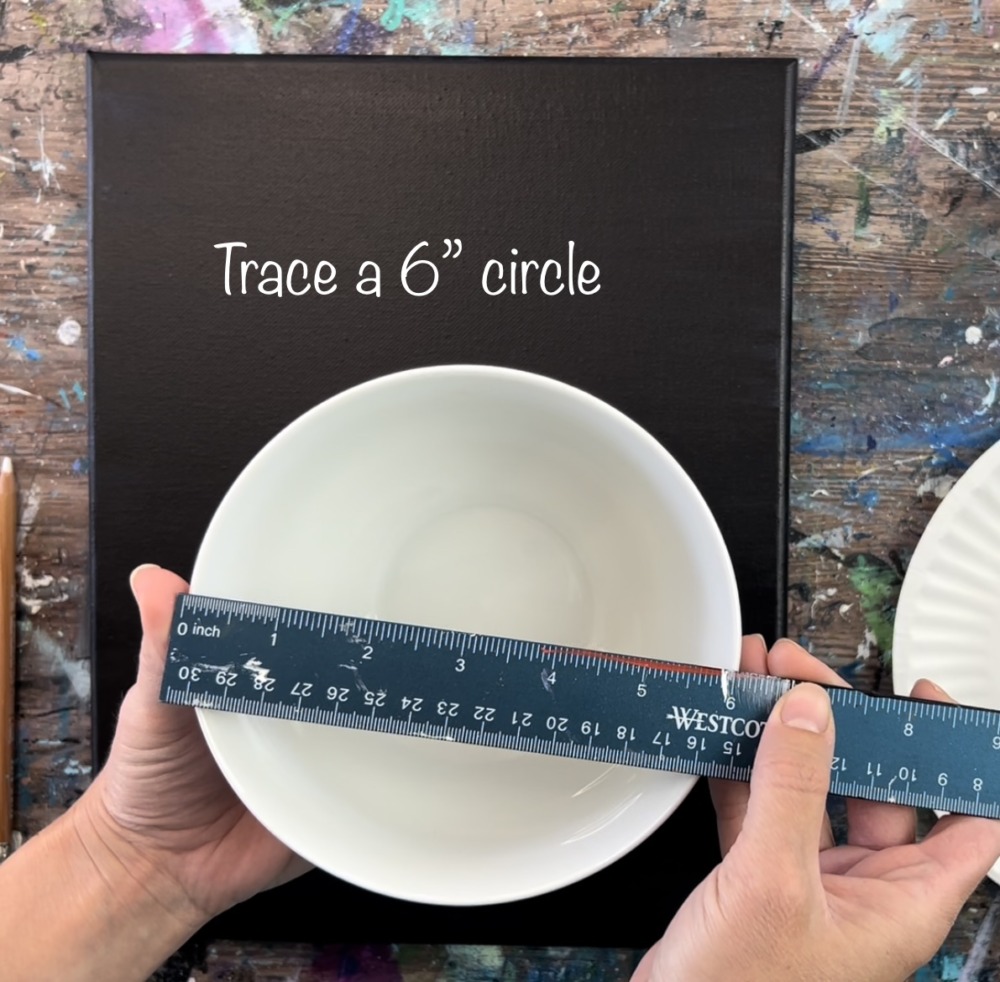
Position the circle so that it is going off the bottom park of the canvas. It is also a little higher than half of the circle. Position it so it is center on the bottom.
Then use a chalk pencil to trace. Alternatively, you can use a regular piece of chalk.
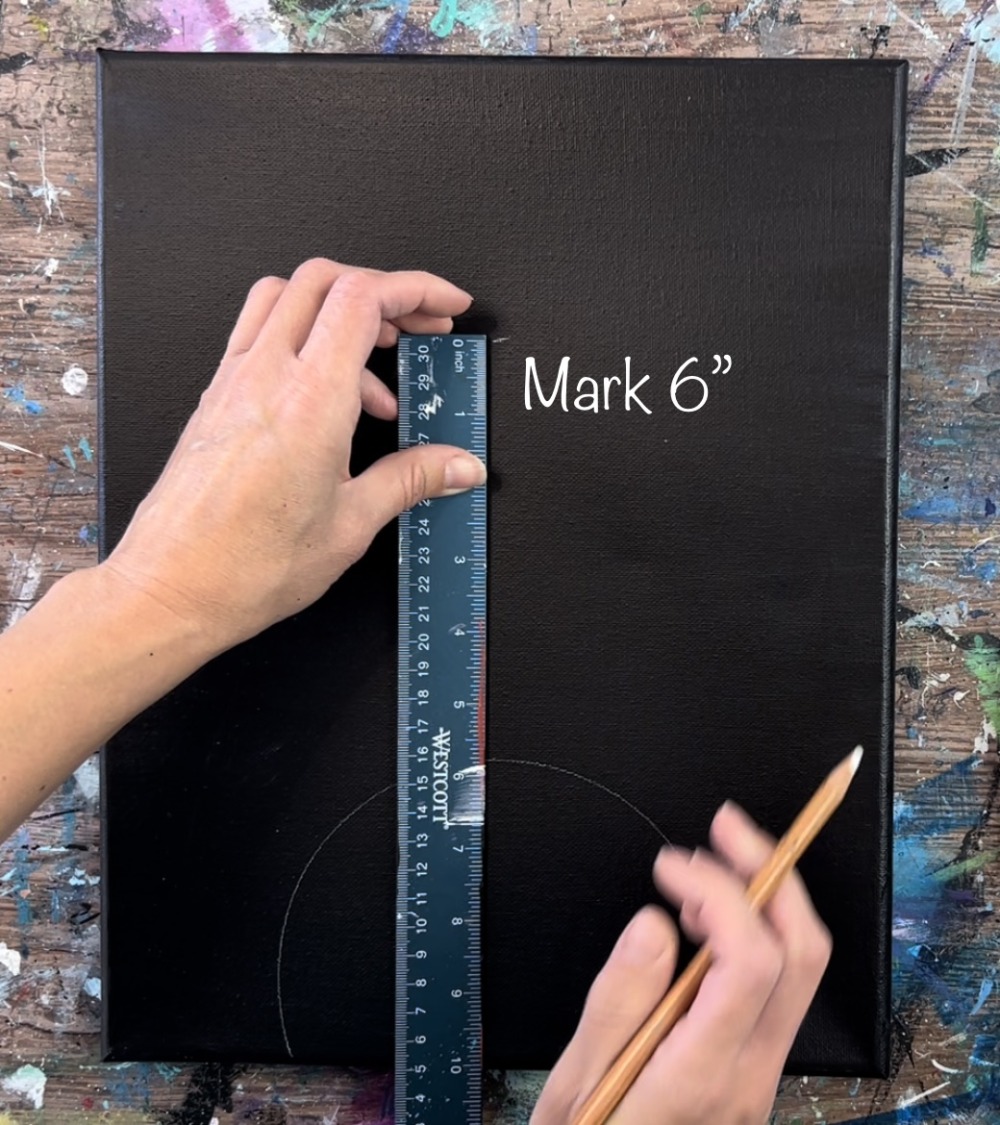
Since each petal is relatively 6″ long, mark about 6″ above the circle to help you draw your first petal.
Draw your first petal. The base of the petal should be flat against the circle. It extends out a little wide in the middle and then goes narrow to the tip but does not go to a point.

Then draw a second petal going diagonally.
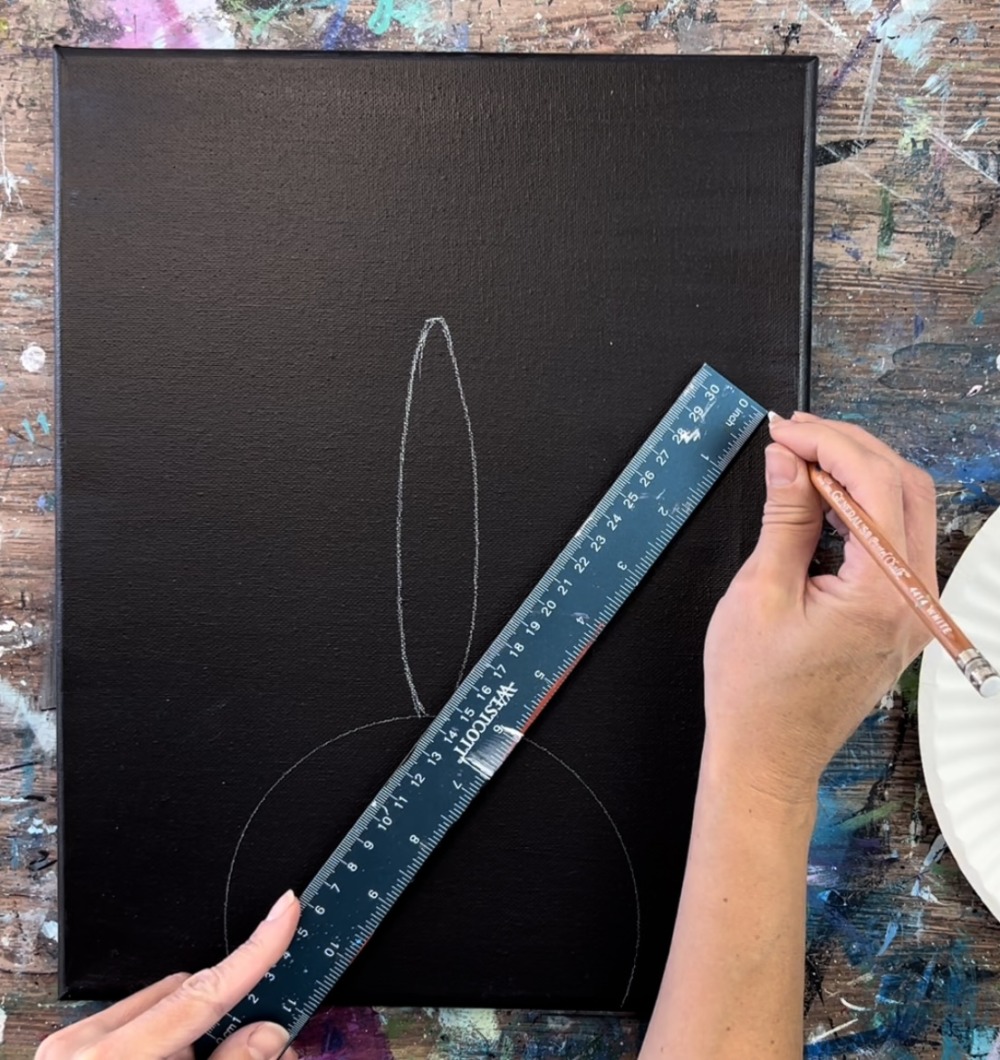
The tips of your sunflower petals do not have to all look the same. They can curve differently and sway different directions.
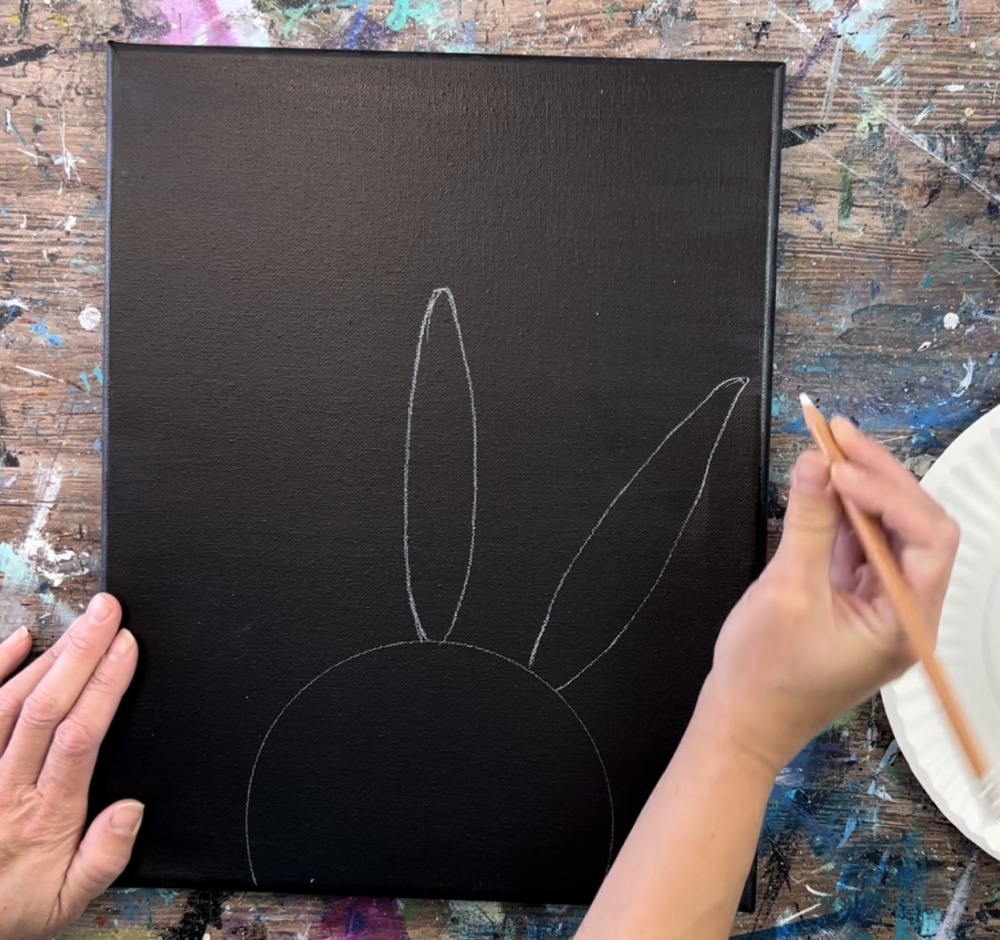
Draw petals that overlap each other.
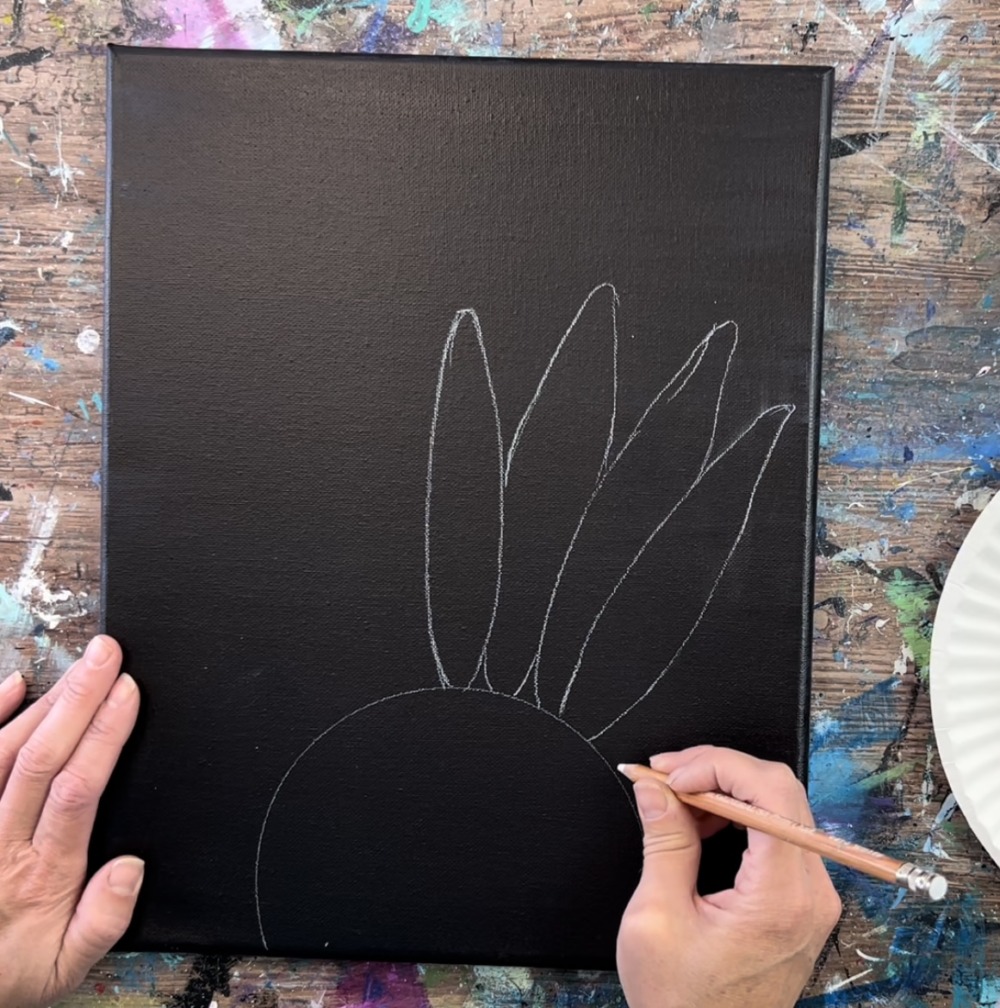
Draw petals that go off the canvas on the lower right and left corners.
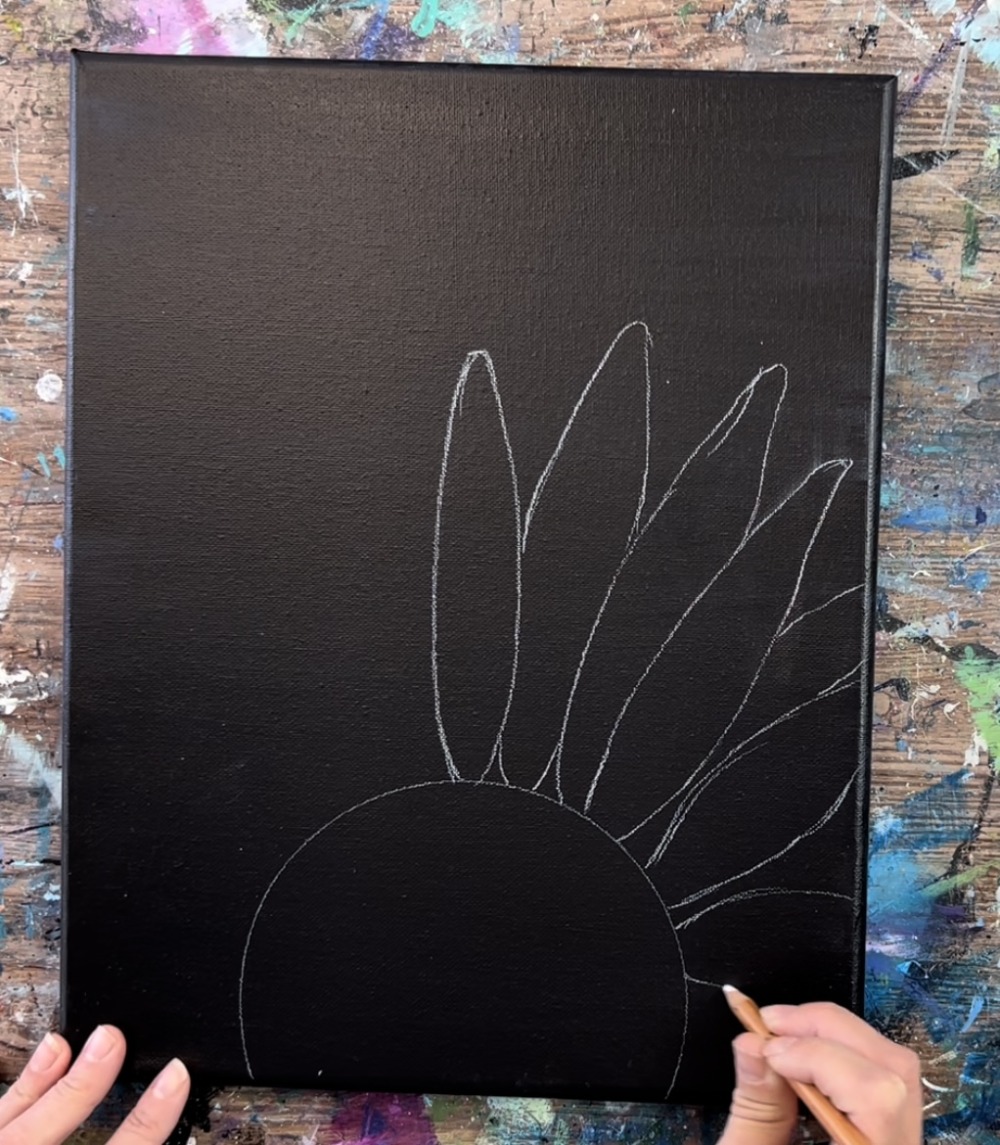
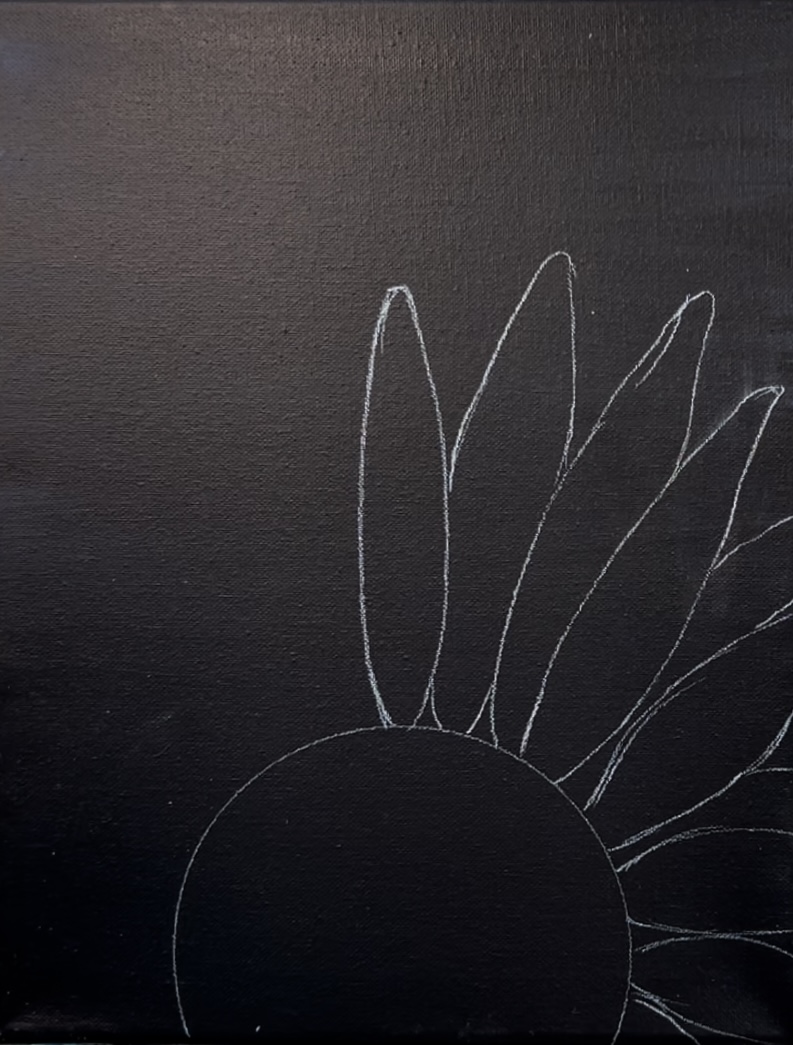
Continue draw an array of petals all of similar lengths. Make sure you draw petals that are behind the front petals and petals that overlap each other.
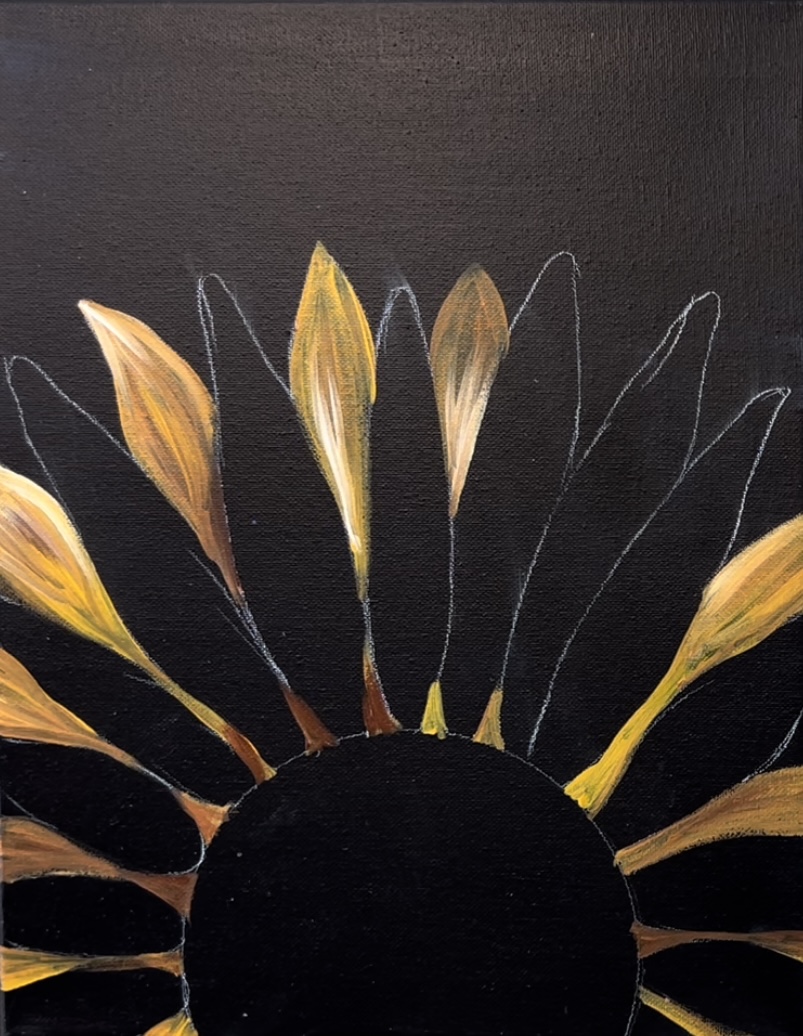
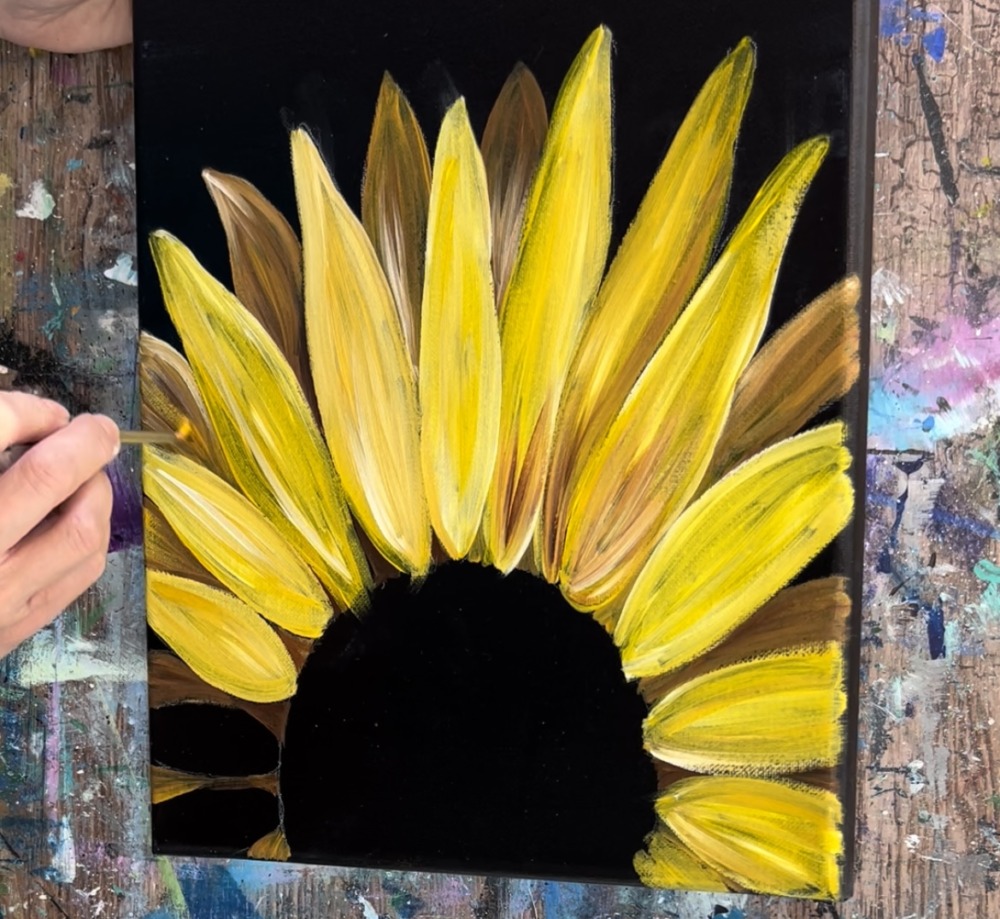
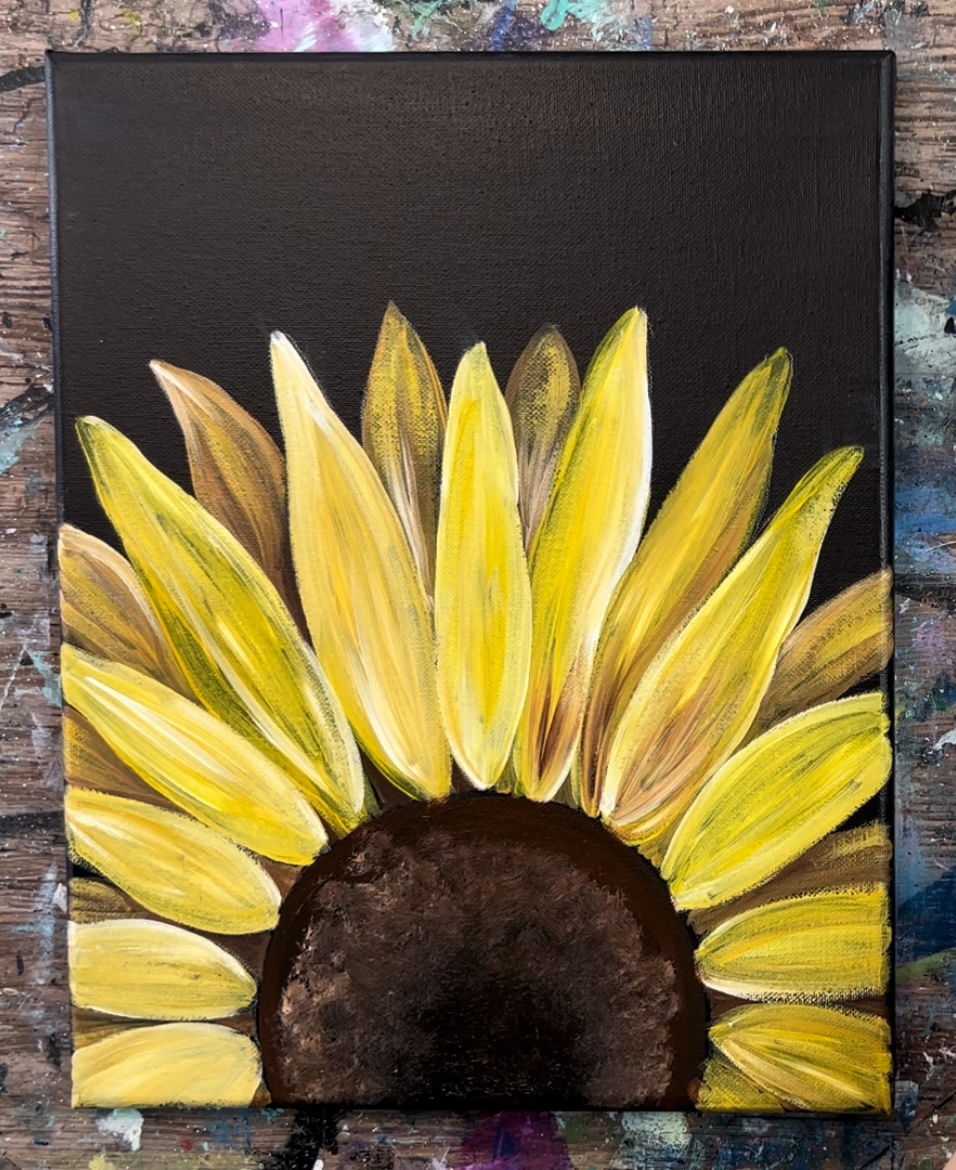
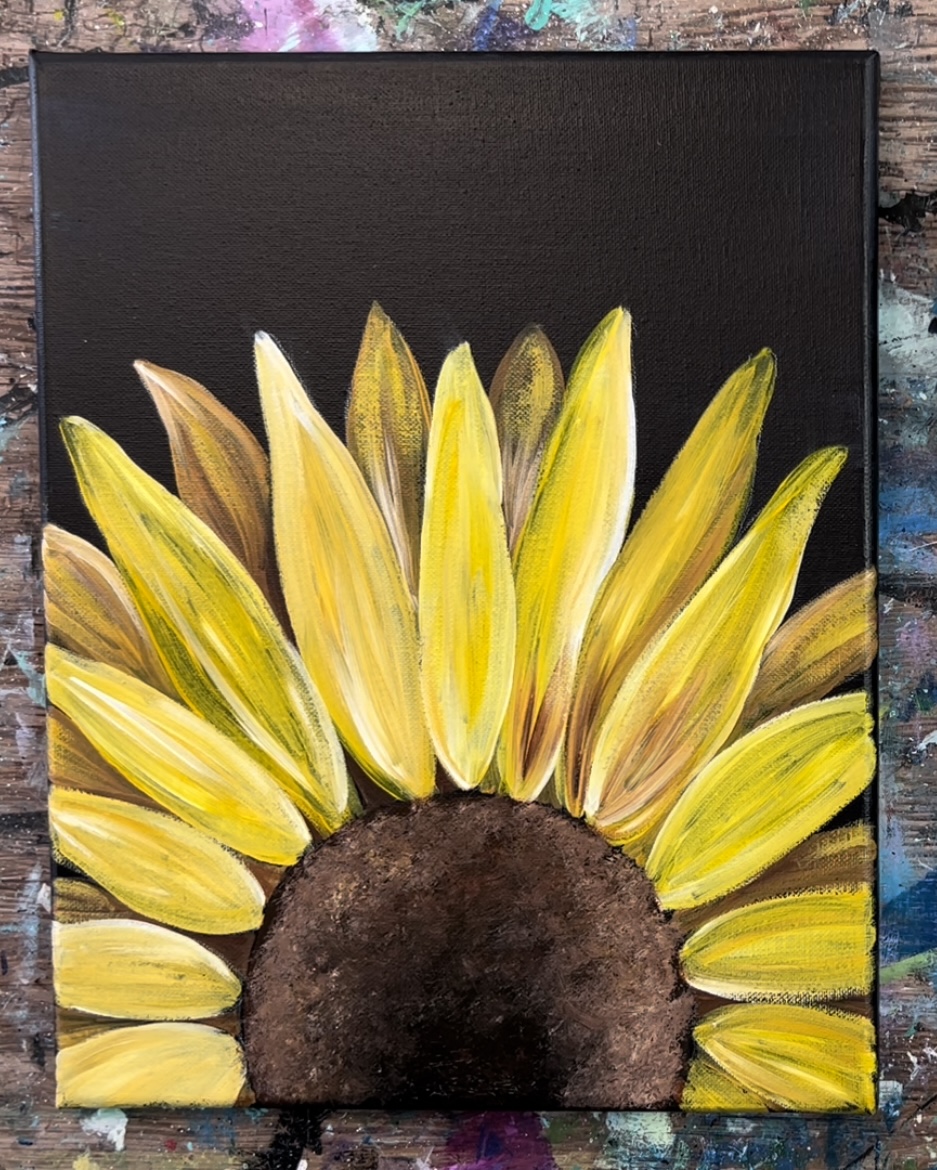
3. Paint Back Petals
It is my recommendation that you paint the back petals first so that the brighter front petals can overlap them easier when you paint the front ones.
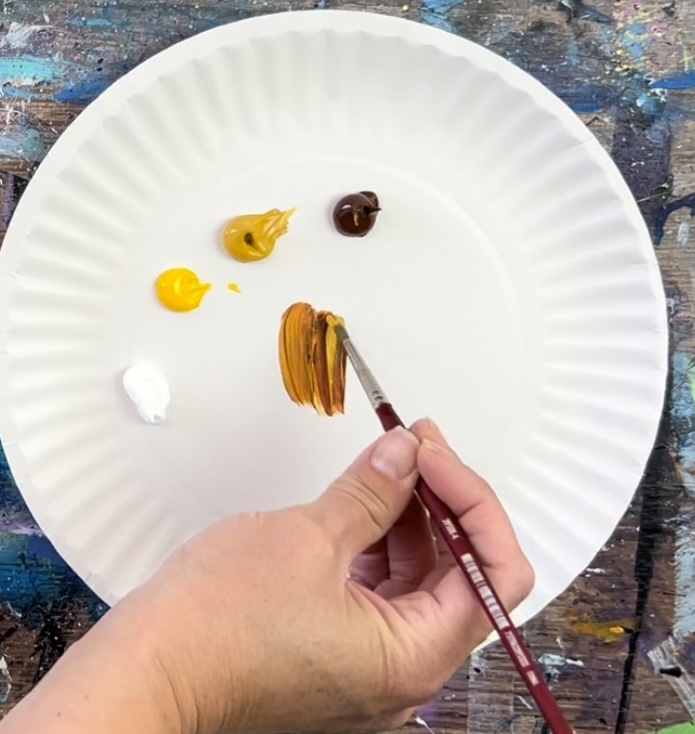
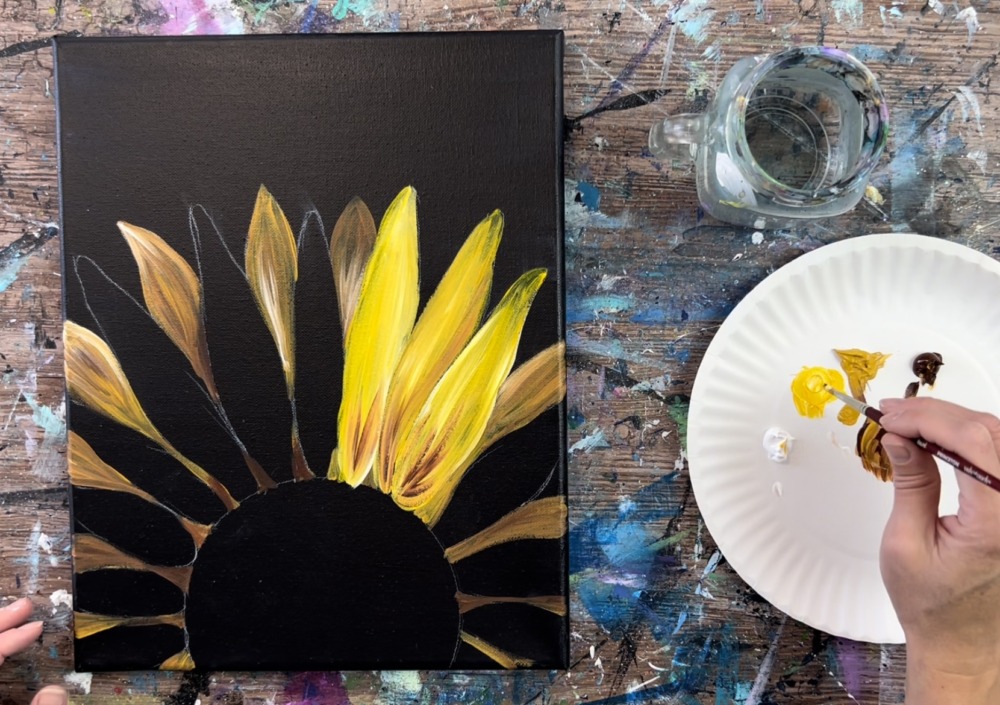
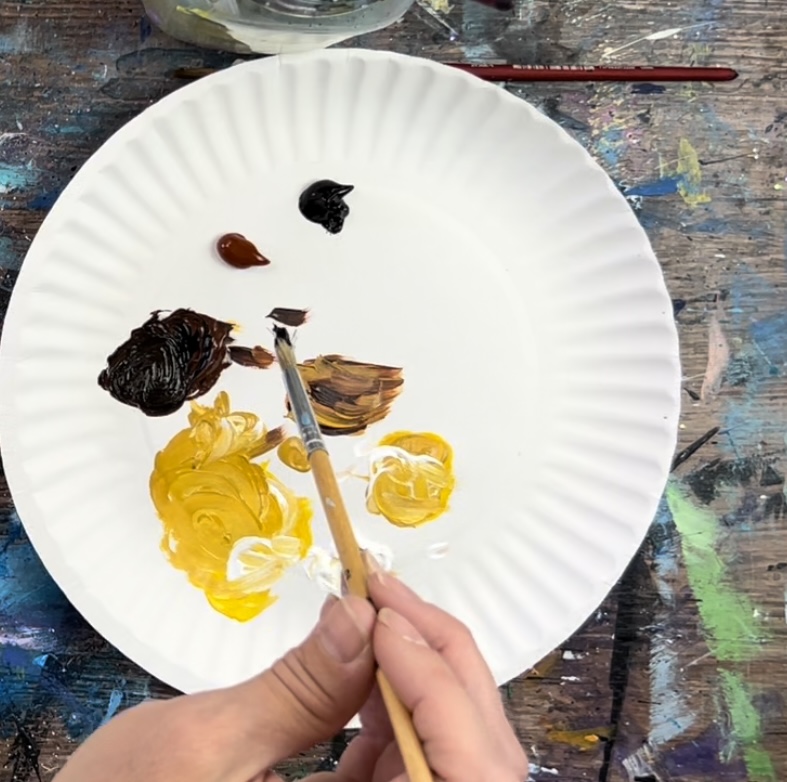
Load your palette with: titanium white, yellow oxide, burnt umber and cadmium yellow medium hue. Use a #4 round brush for painting the petals.
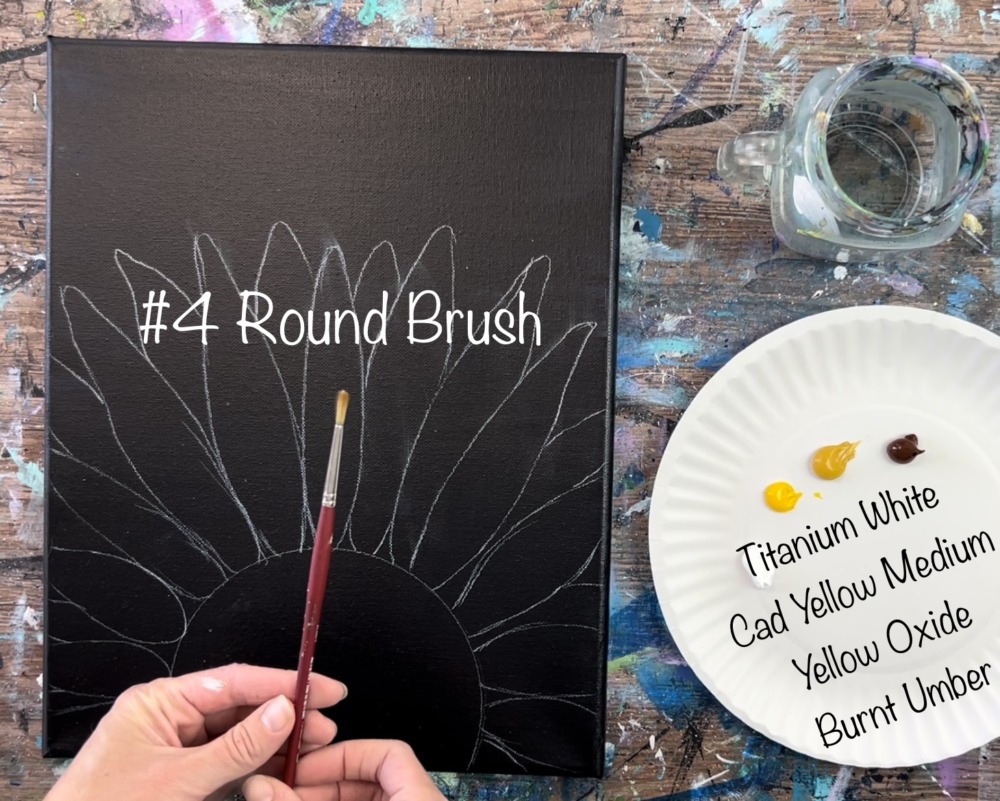
Start by mixing yellow oxide with burnt umber (about 3 parts yellow to 1-2 parts brown). This will darken your yellow.
Paint each of the back petals.
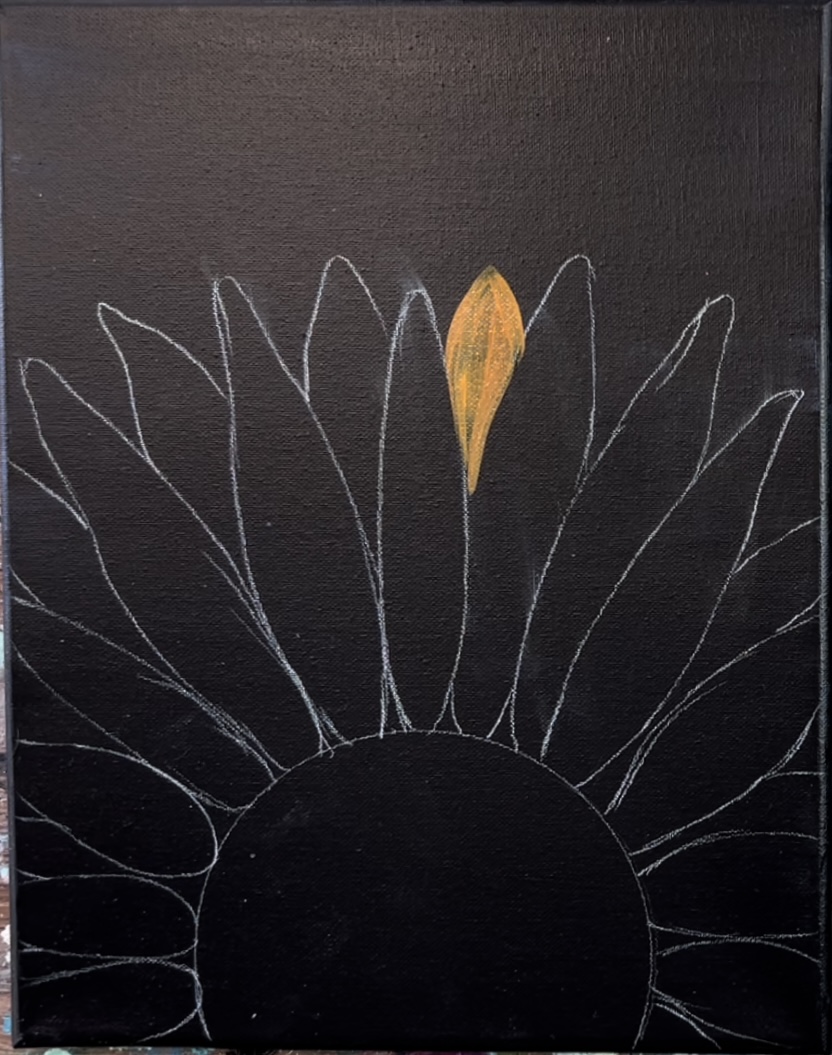
Vary the colors of these petals but mixing different amounts of the yellow oxide into it. You can also add the cadmium yellow medium color and titanium white. Just keep in mind that these back petals need to stay relatively dark yellow so that the front petals can be brighter.
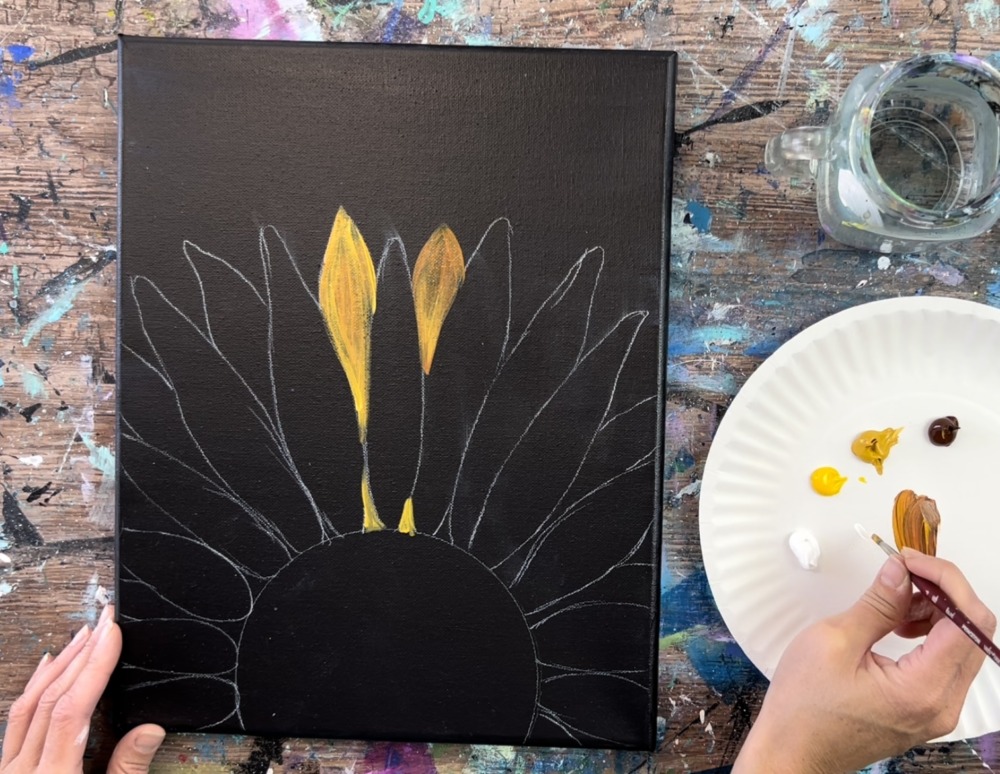
You can blend some strokes of white onto your petals. Try not to overblend the colors.
You can add more brown in some of the colors. The trick is to play around with the colors on your palette to make a variation of that dark yellow.
Make sure to fill in the base of the petals (above the center circle). I recommend adding more brown in that area.
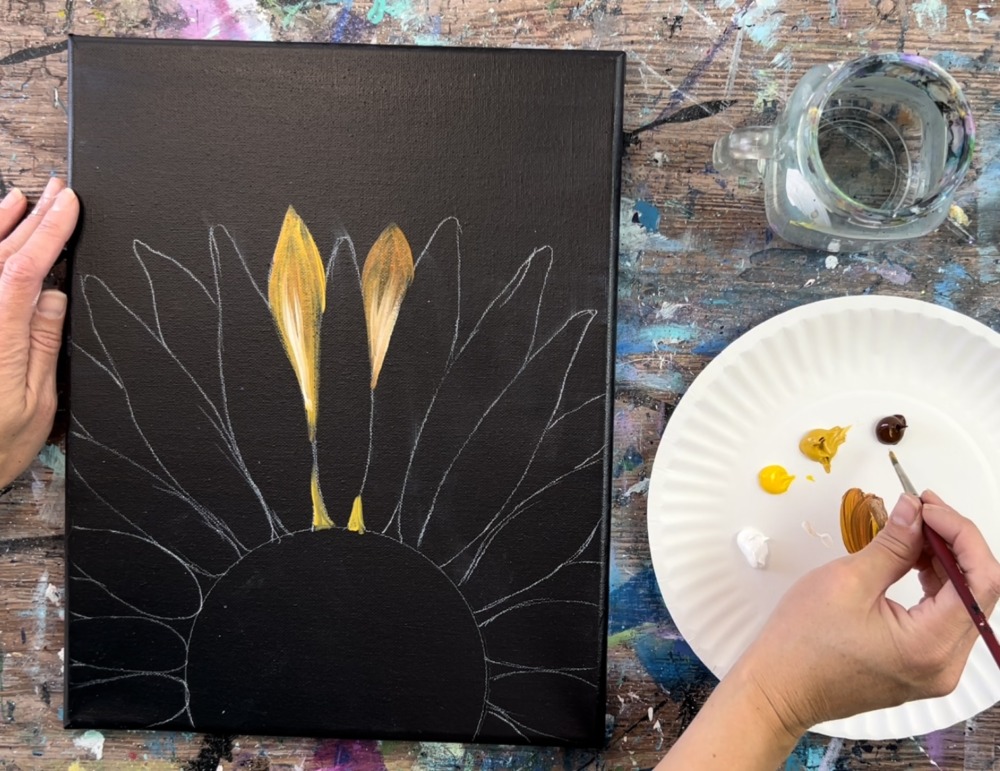
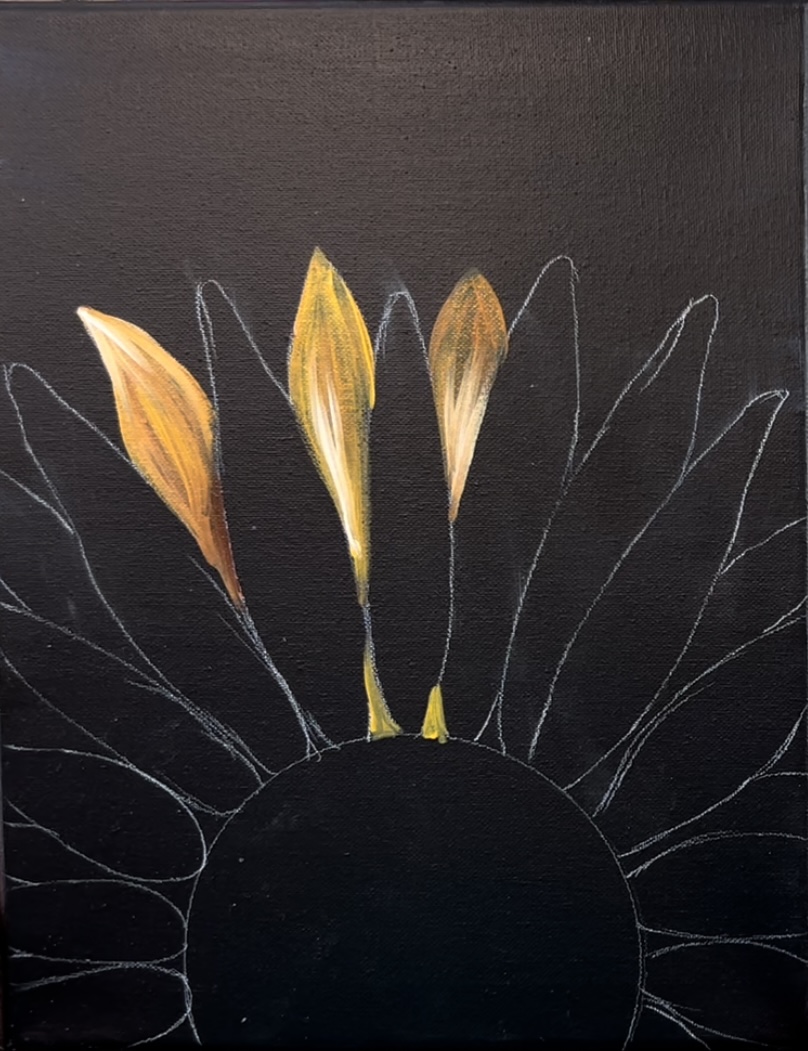
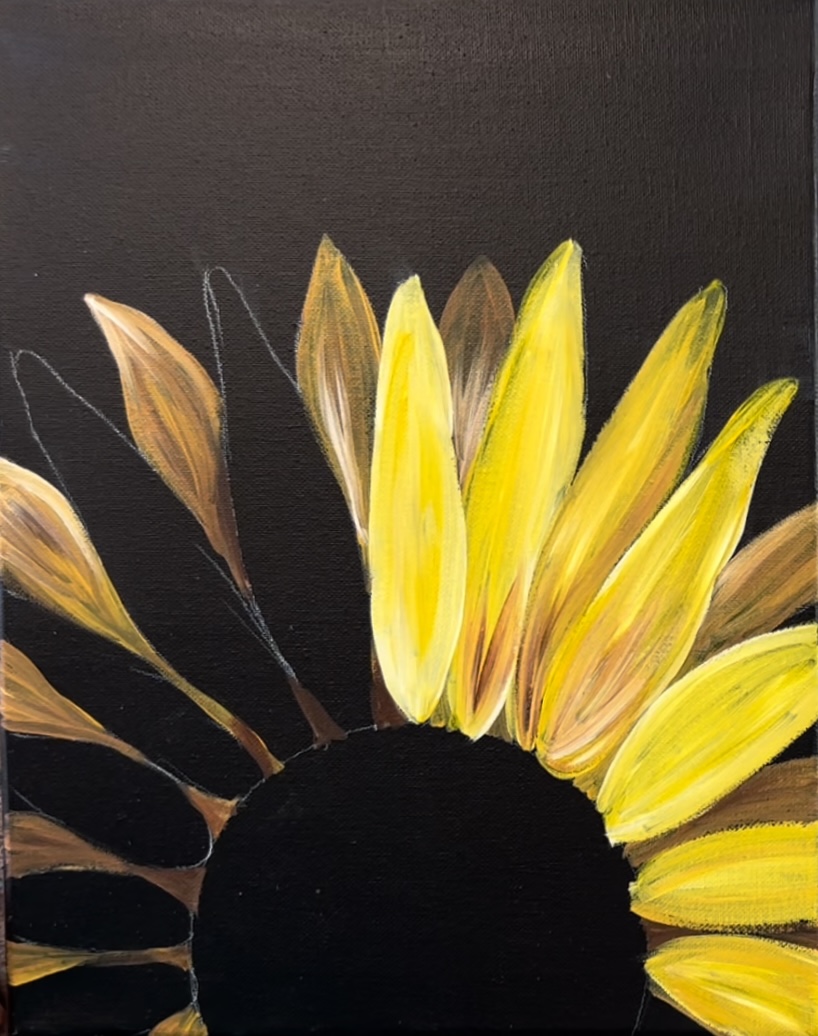
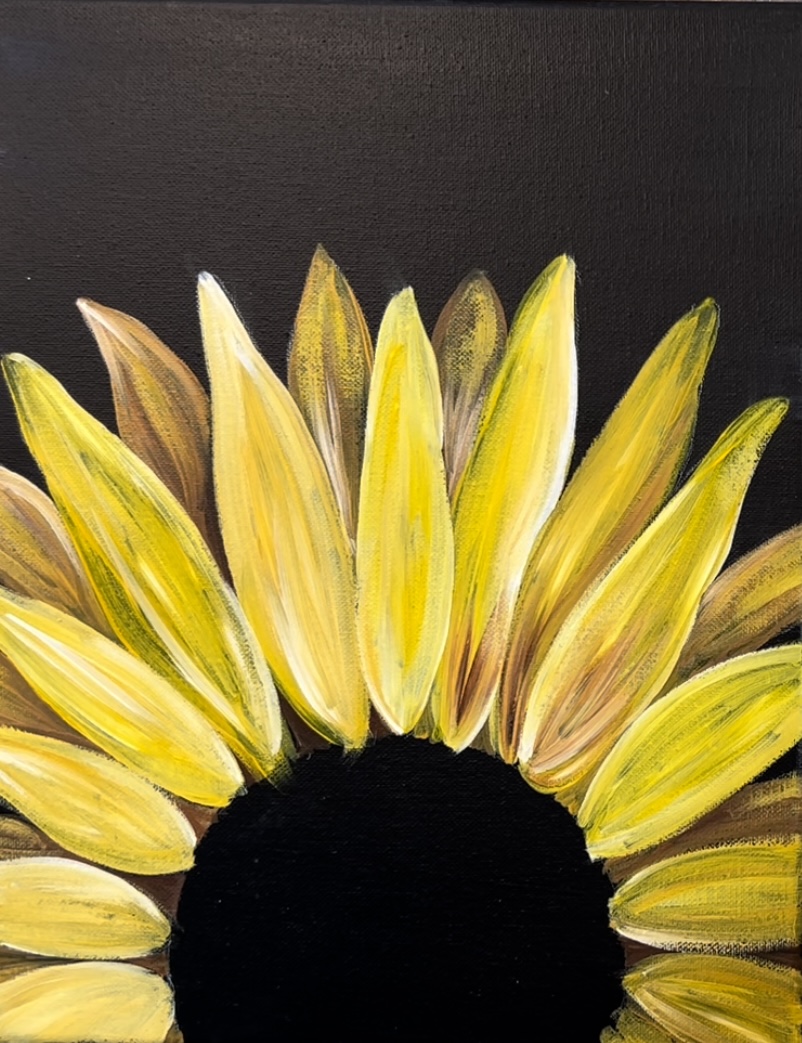
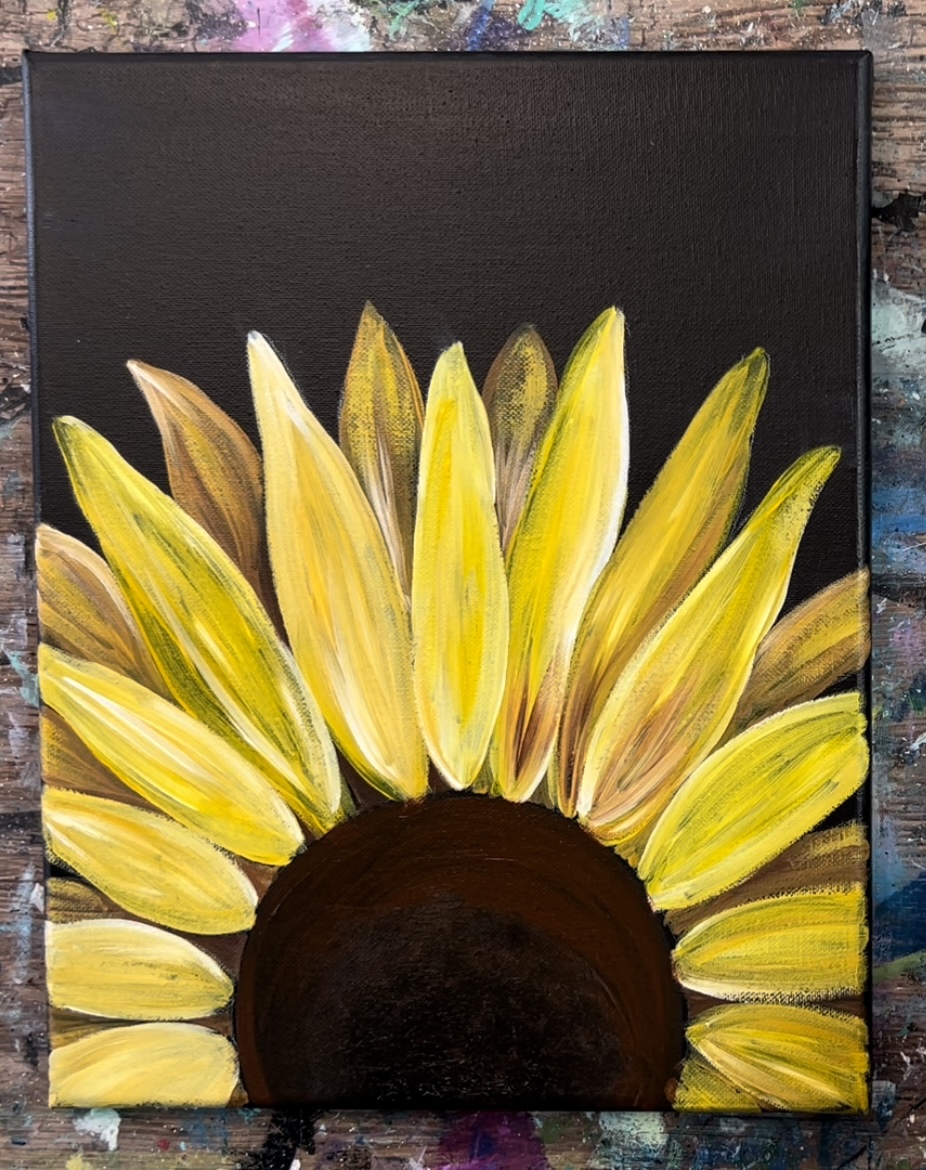
4. Paint Front Petals
For the front petals, the technique is the same but the goal is to make these appear brighter and lighter than the front petals. Rinse and dry your #4 round brush. Use mostly the cadmium yellow medium and the white to paint these petals.

Add streaks of white on the petals to create texture. If a petal is next to another petal, create contrast by adding more dark yellow next to the petal.
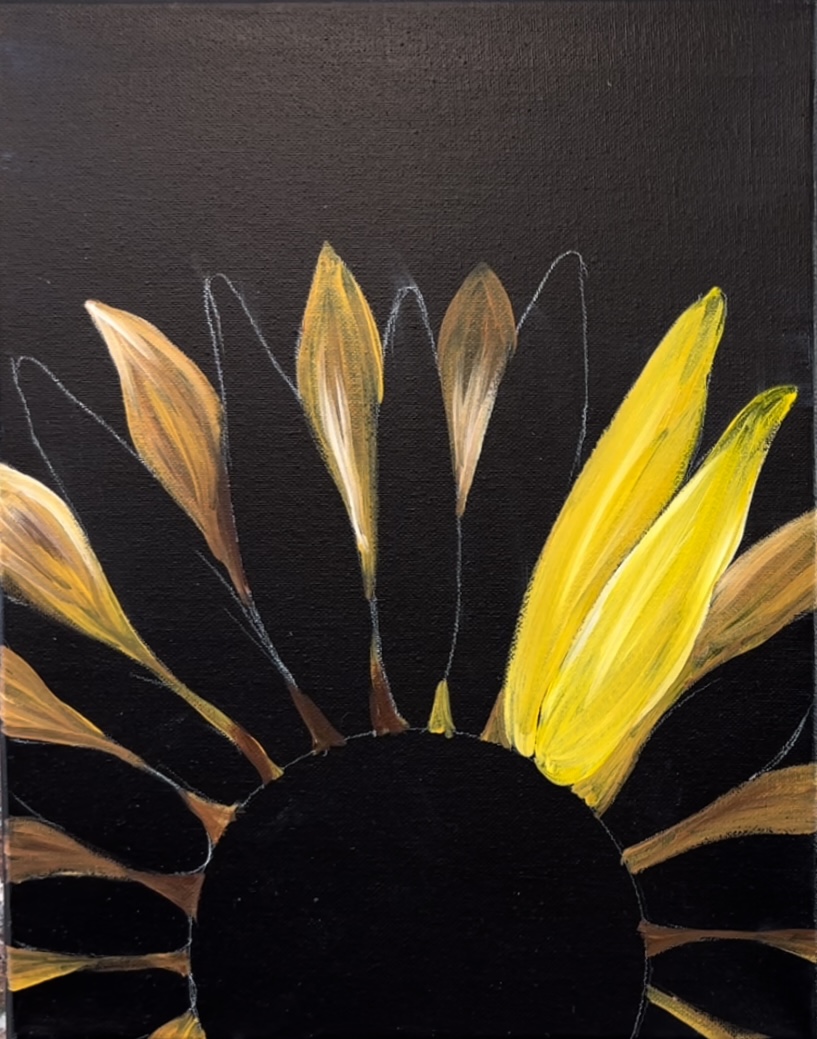
Optional: blend some streaks of burnt umber on the base of some of the petals. Blend it into the yellow.
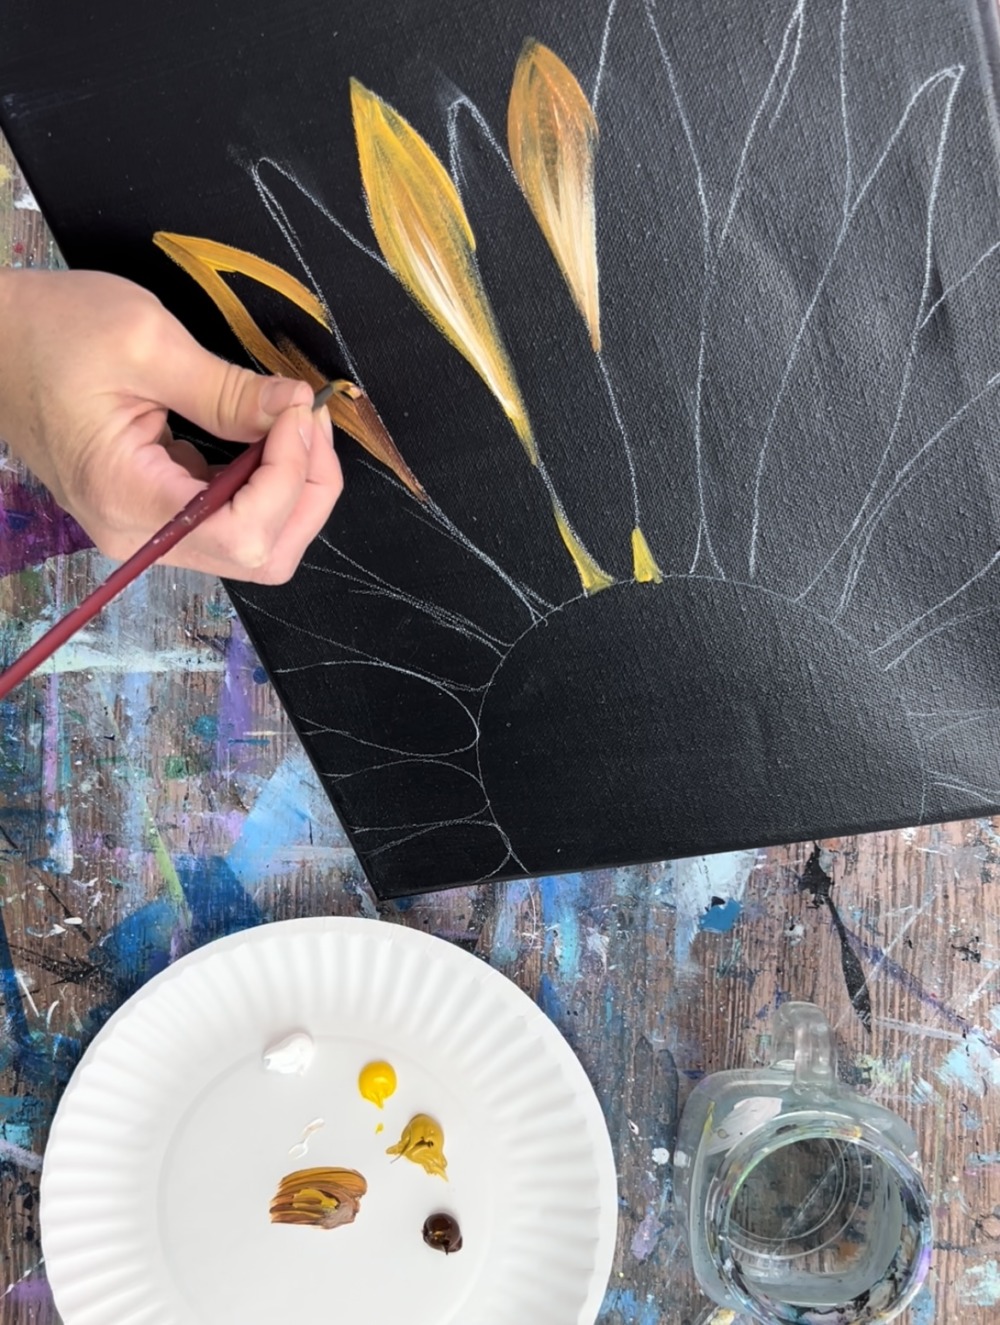
Continue to paint each of the petals. Pay attention to where each petal is overlapping. You want to make sure to add more white on the edge or dark yellow on the petal that is beneath the one next to it to create contrast in order for each petal to stand out.
The base of each petal can overlap the center circle a little bit. In a later step, we will paint that center circle so that it overlaps the base of the petals.
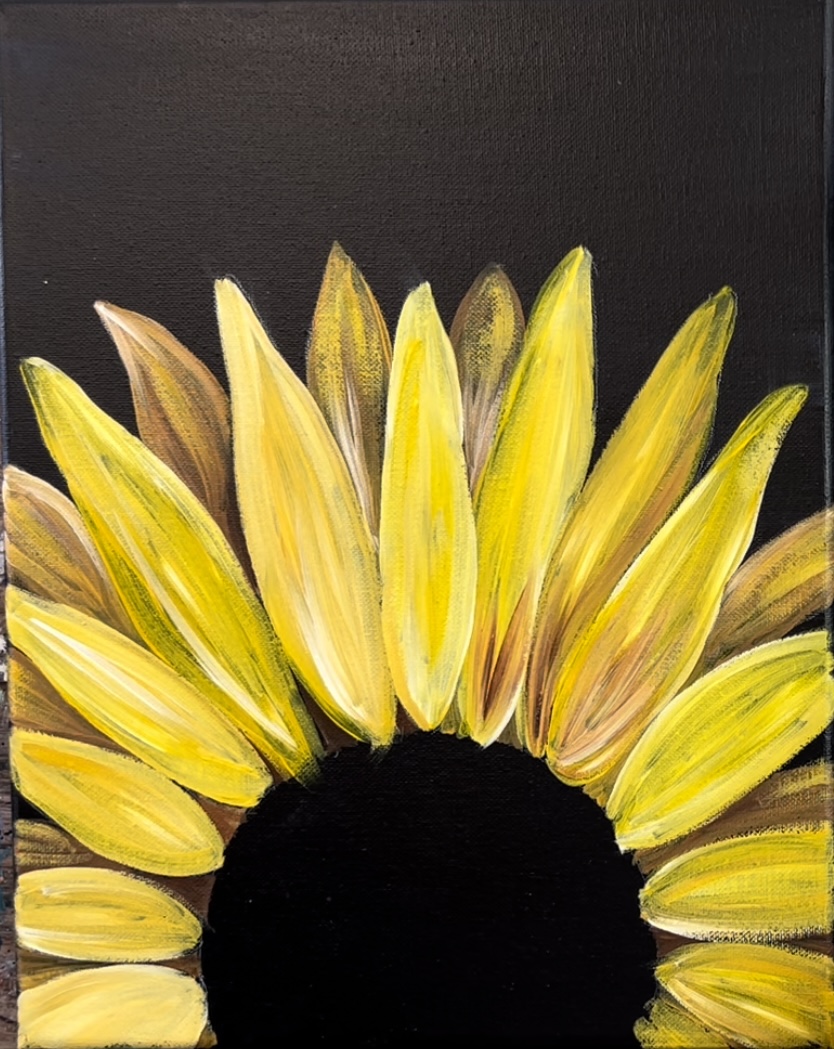
Blend some more white on some of the edges of the front petals to give them highlight.
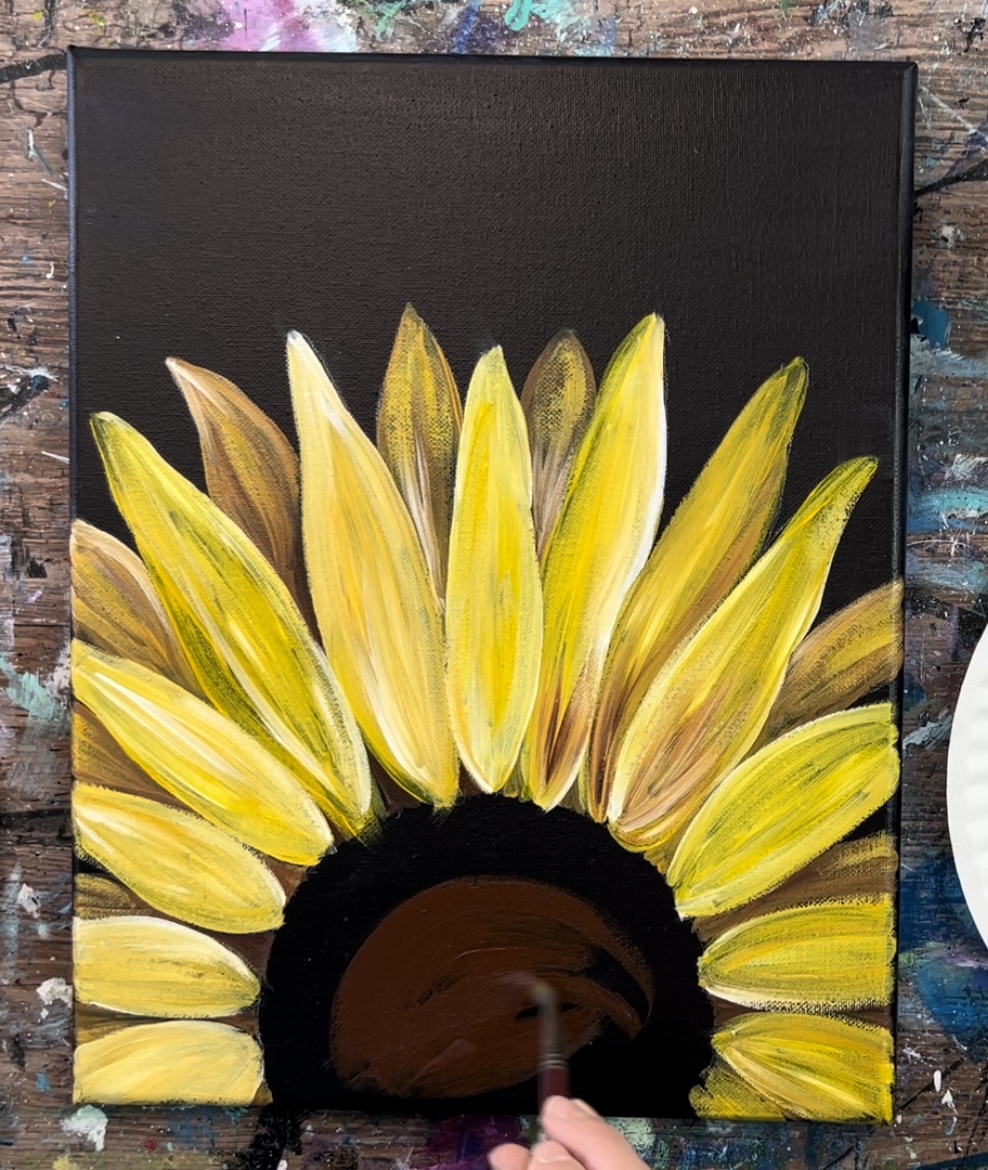
5. Paint the center circle
Use a #8 round brush (or your #4 round) to paint the entire circle a solid coat of burnt umber. This is the first “under layer” color of the circle. We will paint the texture in the next step. It is okay if you paint your circle and it overlaps the base of some of the petals.

6. Paint the texture of the center of the circle
For the center texture, I used a round bristle brush. These brushes are often found in variety packs of brushes and sometimes sold individually. They have bristles that are more course and a natural texture (not soft, synthetic). I use these brushes for “stippling” textures. You can also do this with a “stencil” brush.
Dip the tip of your bristle brush into mars black.
Then tap just the tip of your brush to create the texture inside a defined circular area (in this case, semi-circle) of the bottom of the sunflower (center).
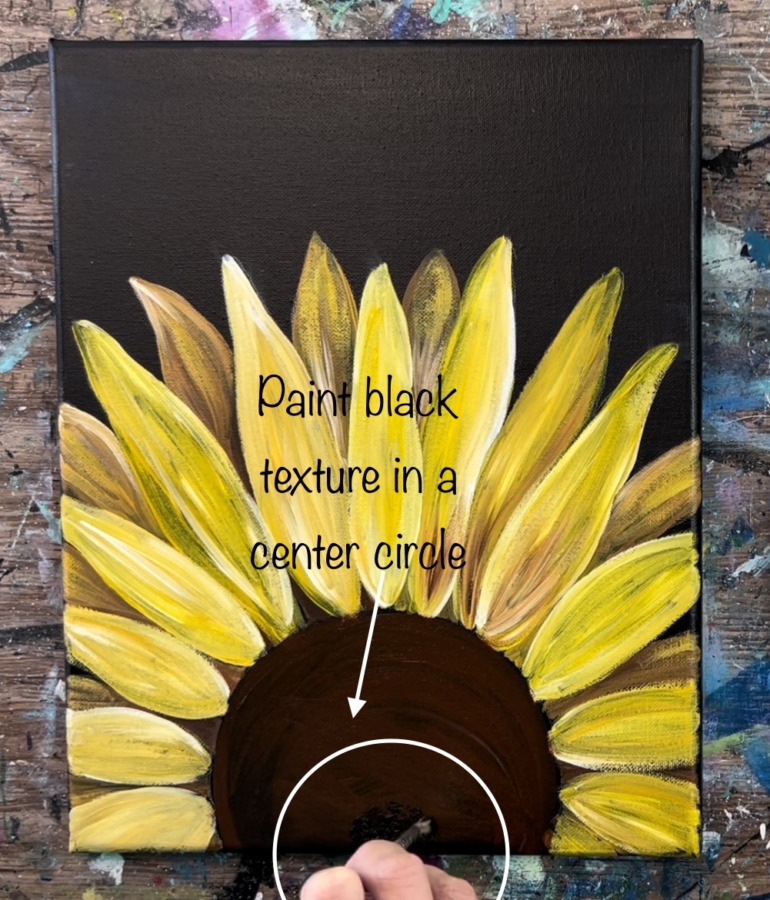

Then on the outer part of that center circle, stipple more brown and yellow oxide. You can also use some white.
Try to blend it so that the outer part of the center circle gets lighter towards the edge and darkest in the middle.
Next, paint a darker edge on your circle with black and burnt umber double loaded on your brush. This edge should slightly overlap the base of all your petals.
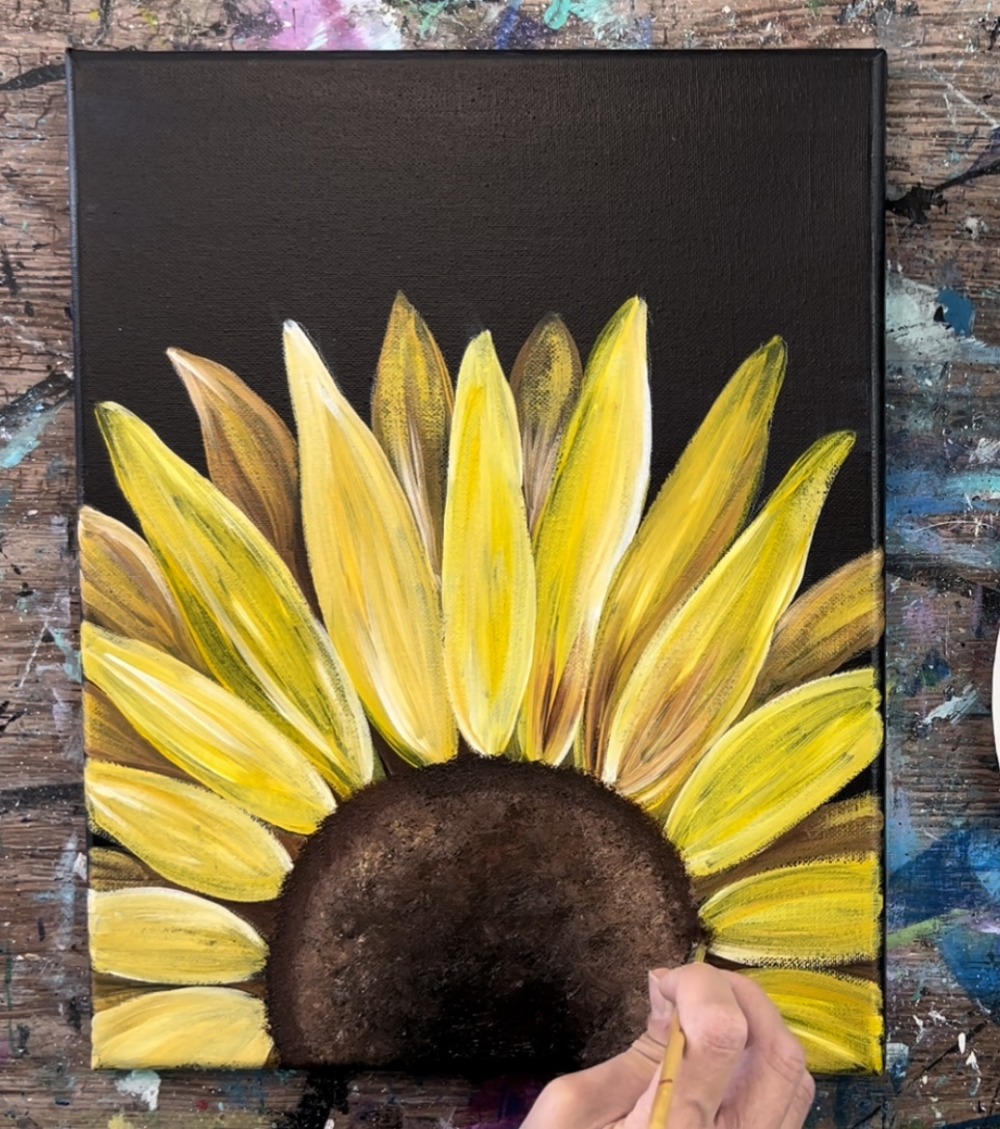
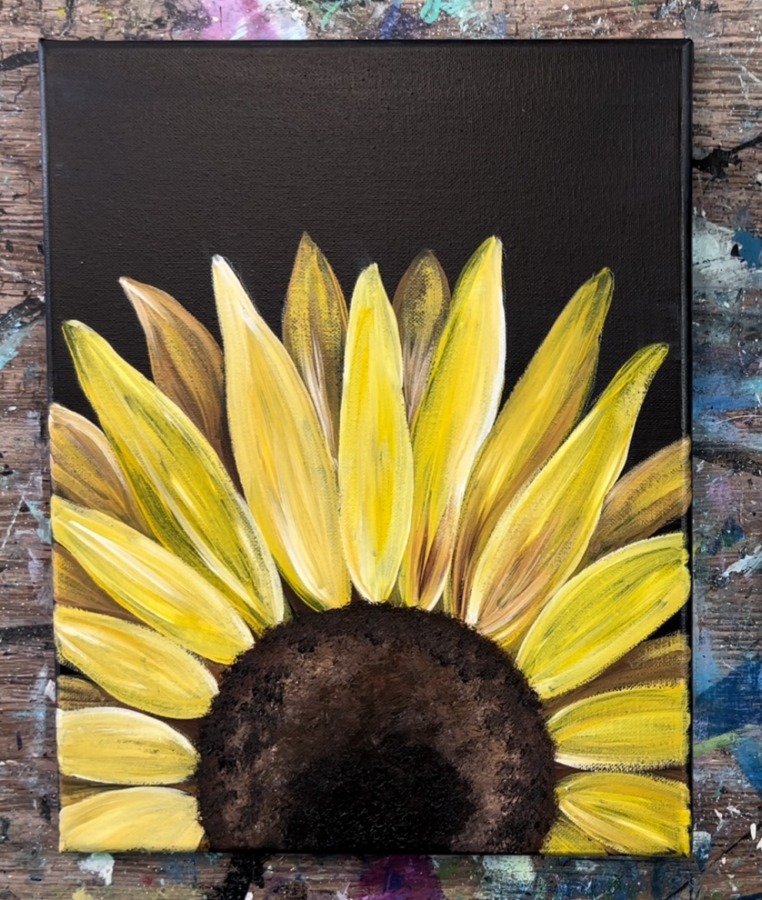
Optional: add bits of white into the center part of the sunflower.

6. Draw Quote
I recommend using a pencil first to write out your words so you get the placement and sizing down.
Then use a white POSCA paint pen to write over your letters.
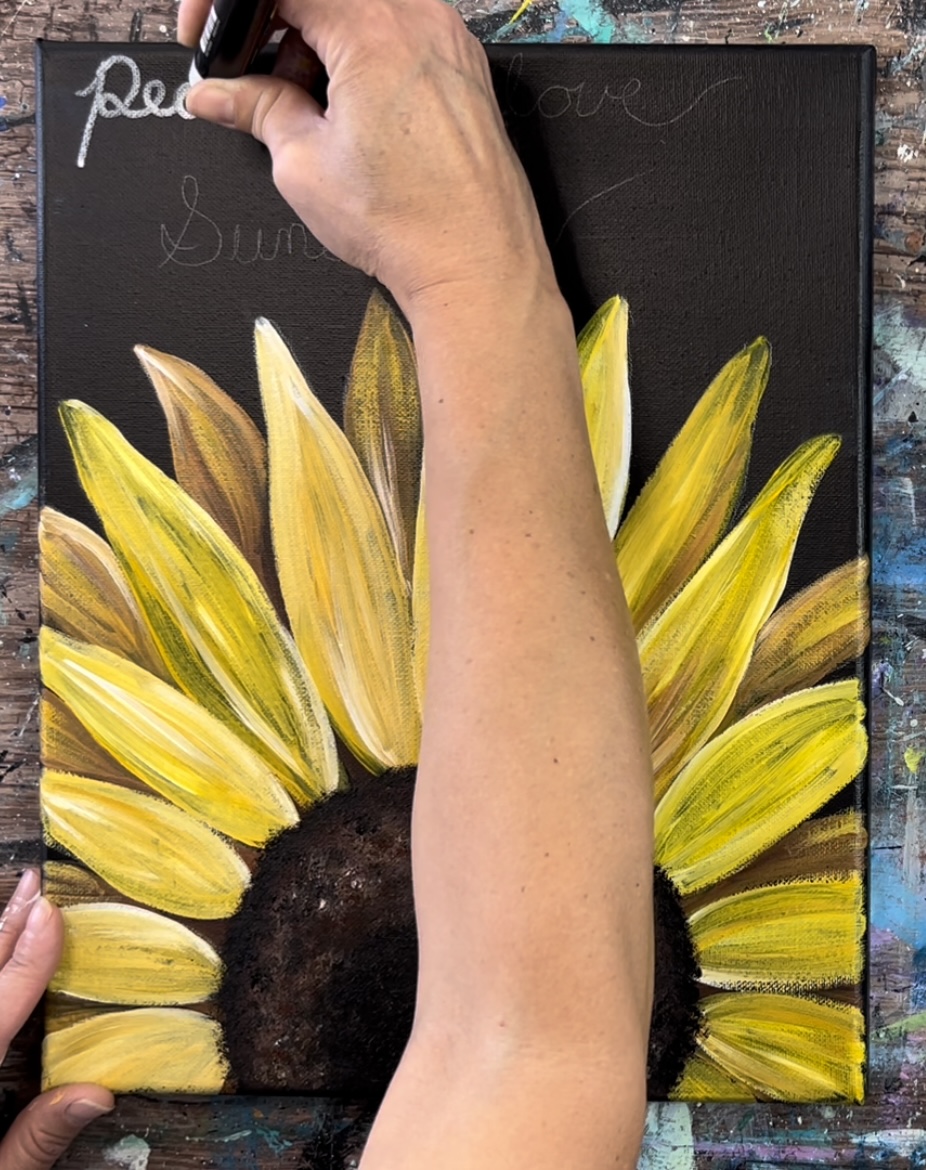
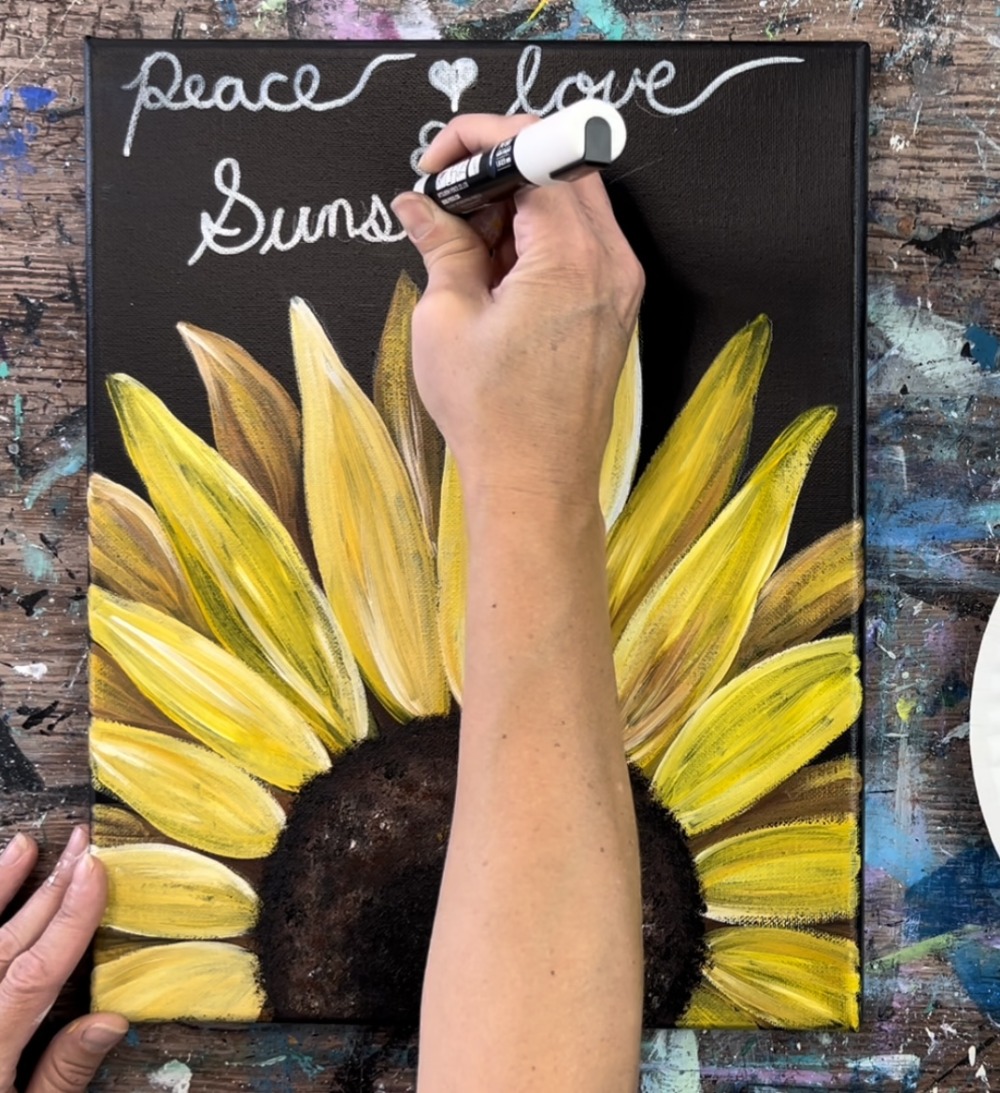
If pencil is still showing through, let the pen dry and then erase remaining lines.
Optional: dry little “pin dots” in the background.
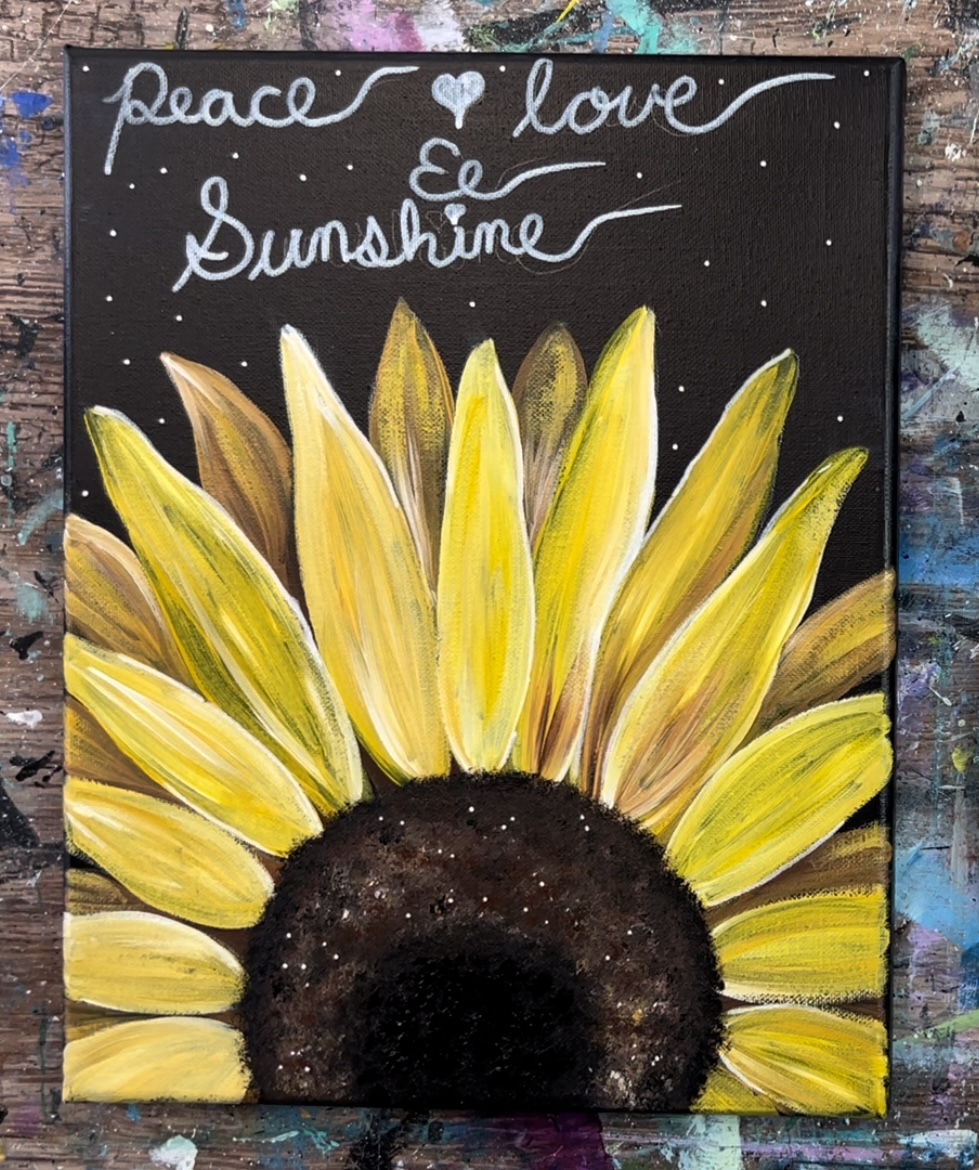
Finished!
Share your art here:


