

Would you like to save this?
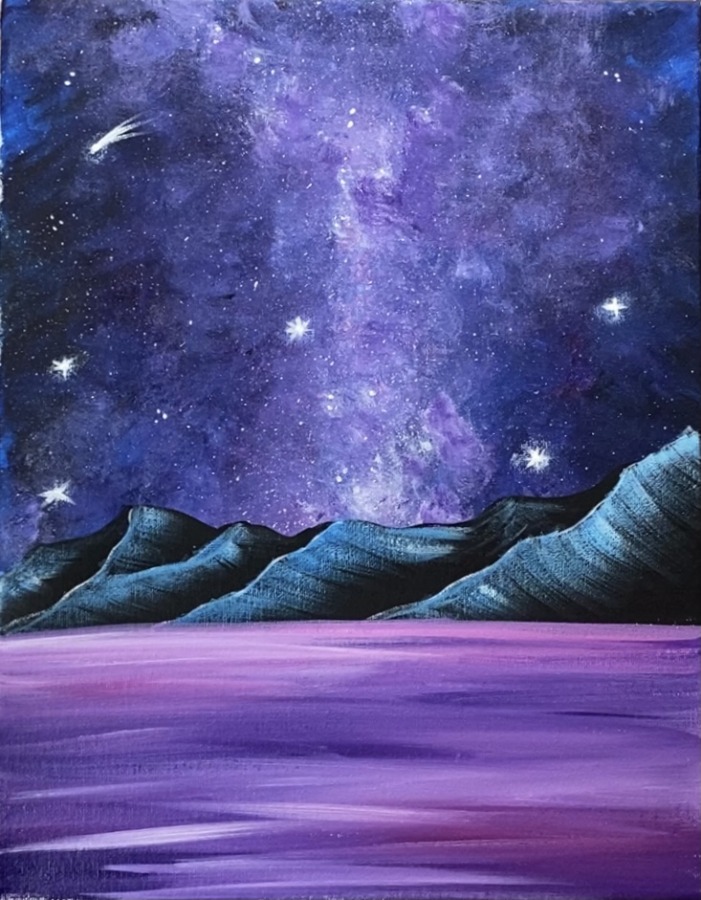
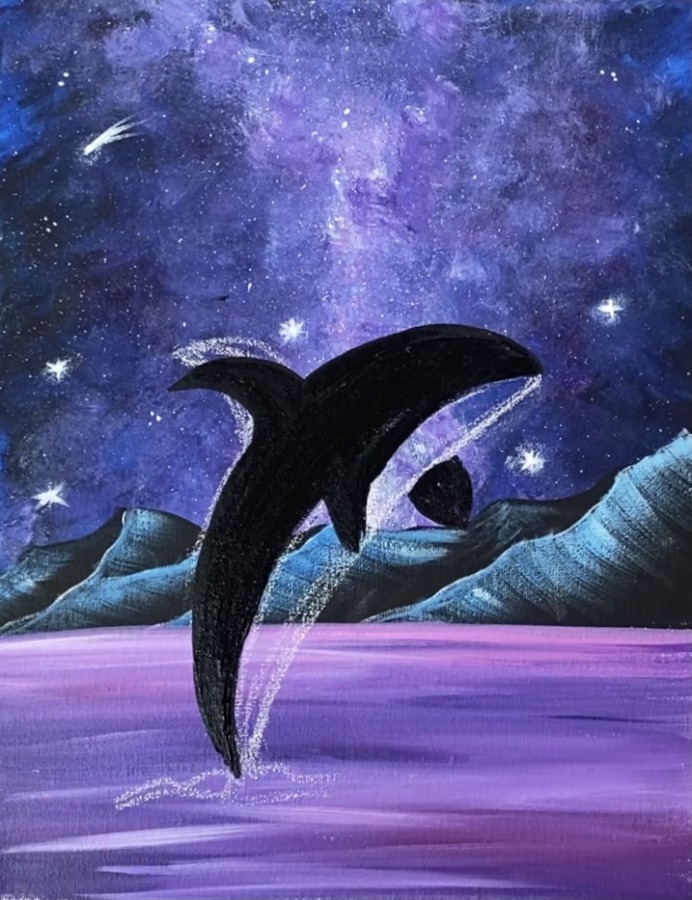
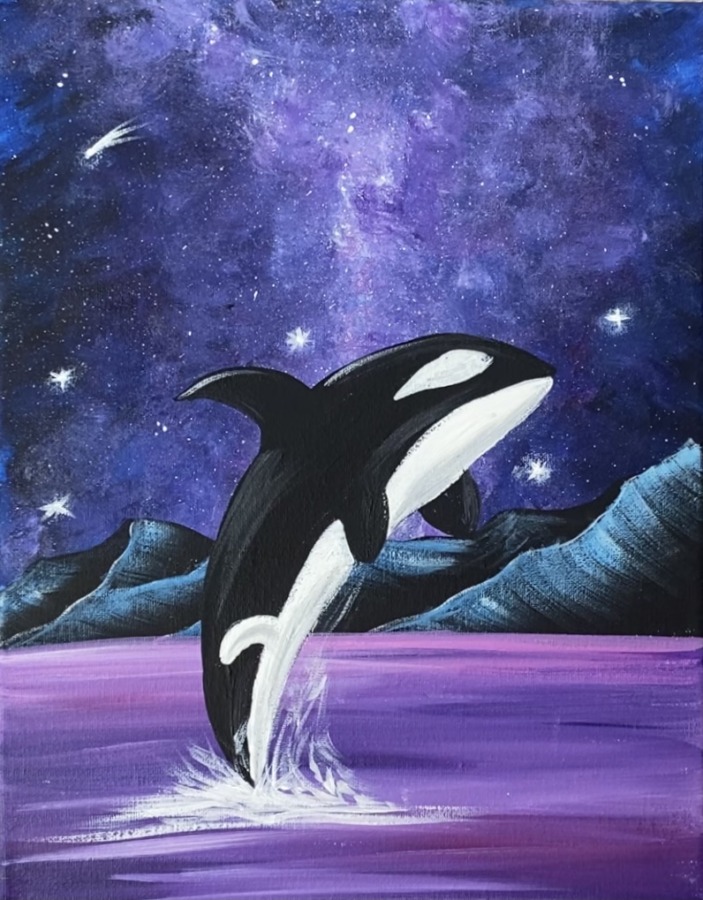
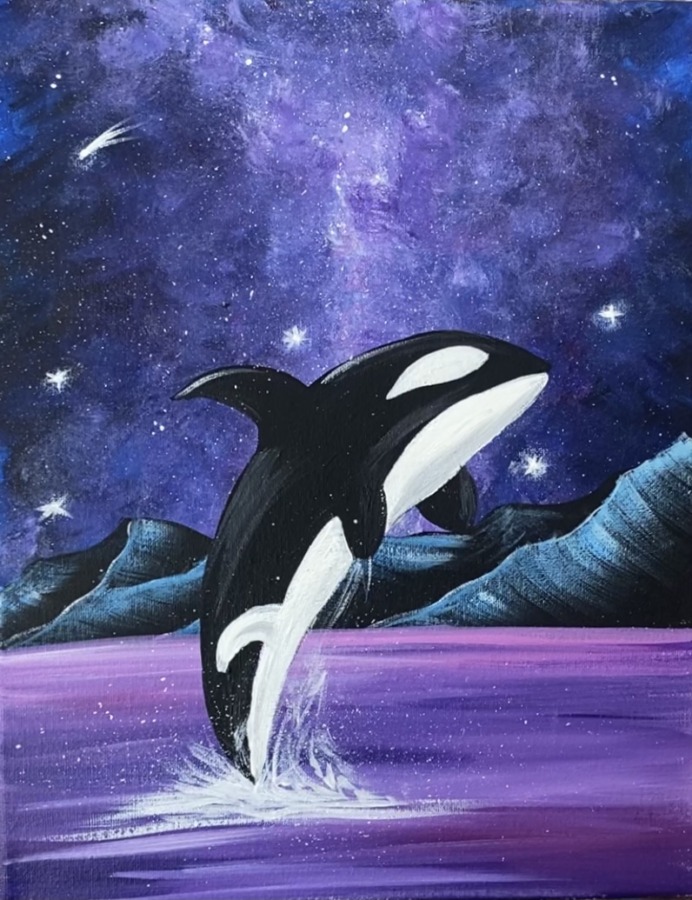
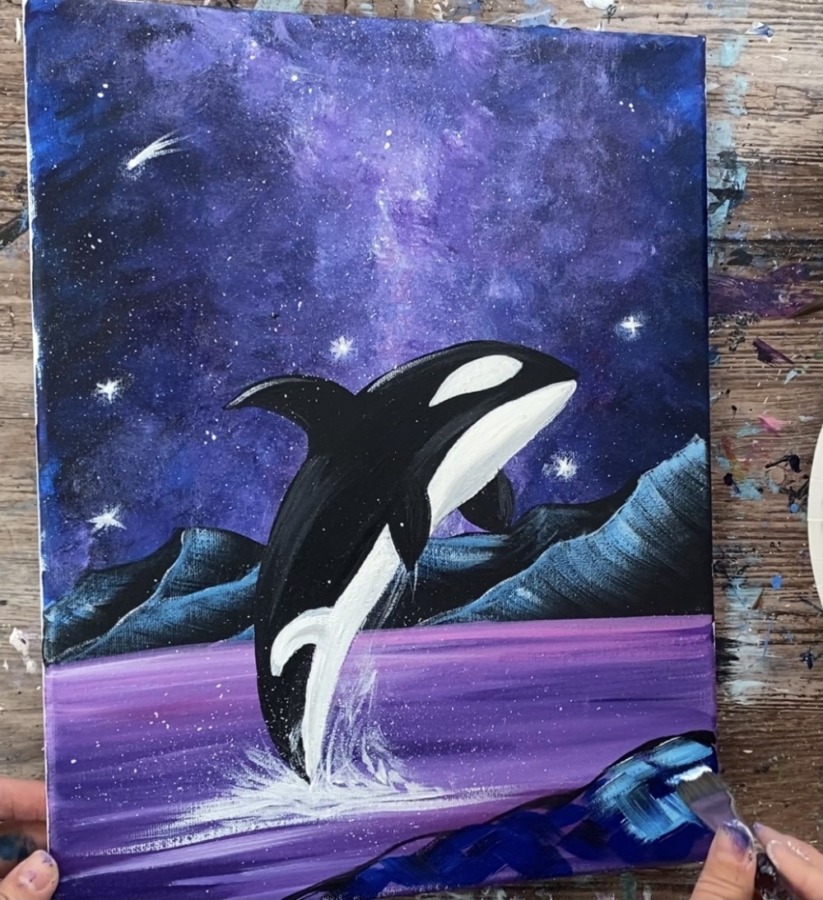
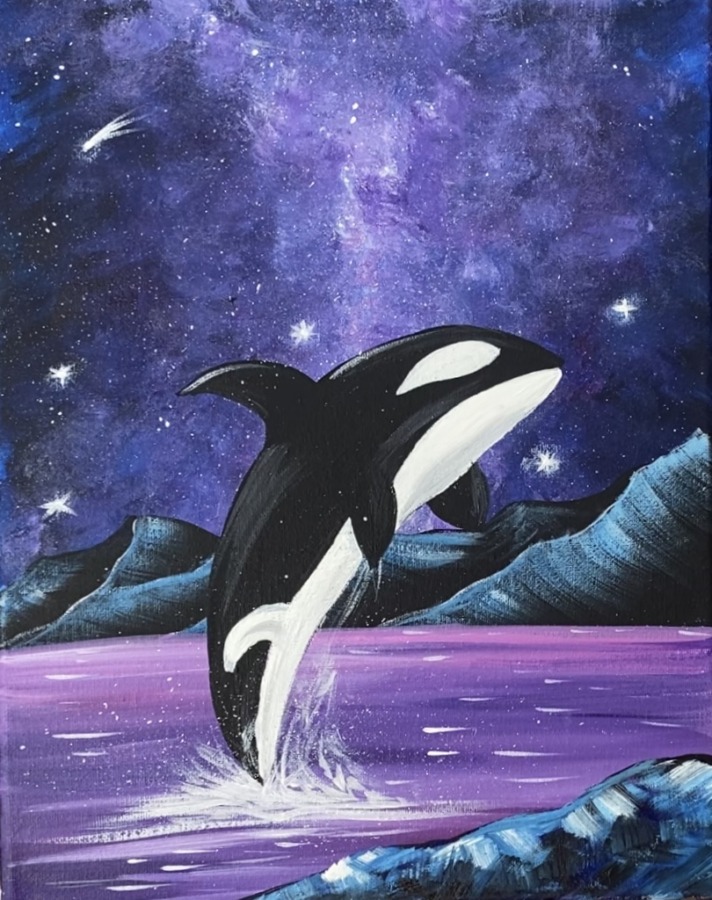
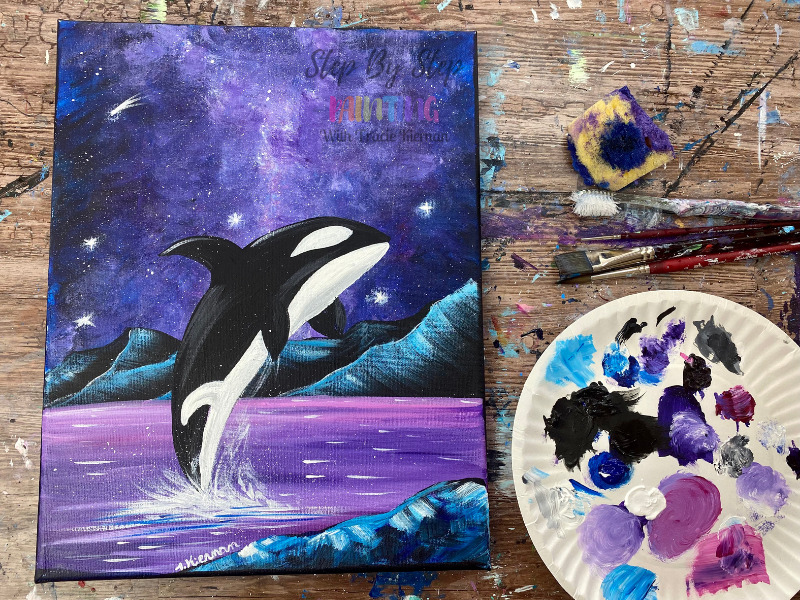
Learn how to paint an orca with a galaxy sky background and surreal ocean scene. This is a full step by step acrylic painting tutorial for beginners.
Painting a galaxy sky is a lot of fun and there are a few different techniques you can do to achieve the effect! I used a sponge and a flat brush for this technique. You can also do this technique with a blender brush like I did in the Galaxy Campsite tutorial.
Enjoy and happy painting!
Looking for more galaxy sky tutorials?
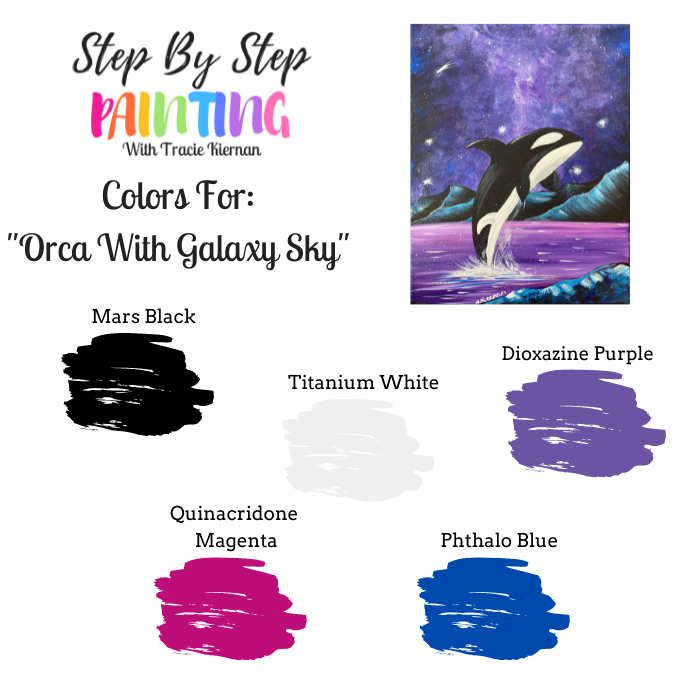
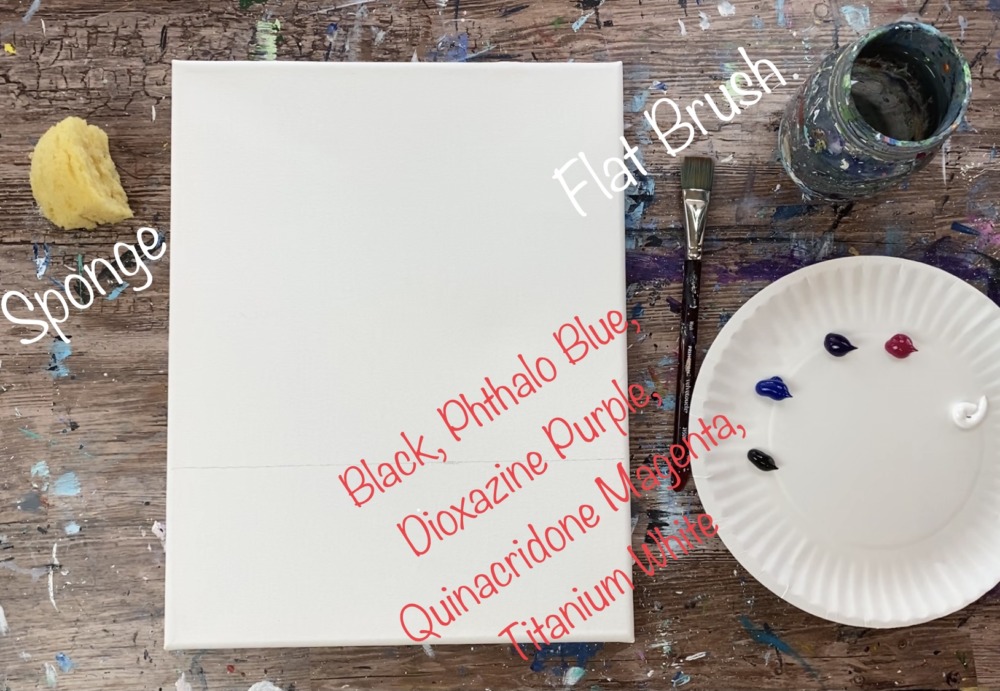
Materials
Orca With Galaxy Background

Learn how to paint a galaxy sky at night with a surreal ocean scene and an orca jumping out of the water.
Materials
- 11 x 14 Canvas
- Brushes
- Acrylic Paint
- White Chalk
- Optional Traceable
- White Transfer Paper If Using Traceable (optional)
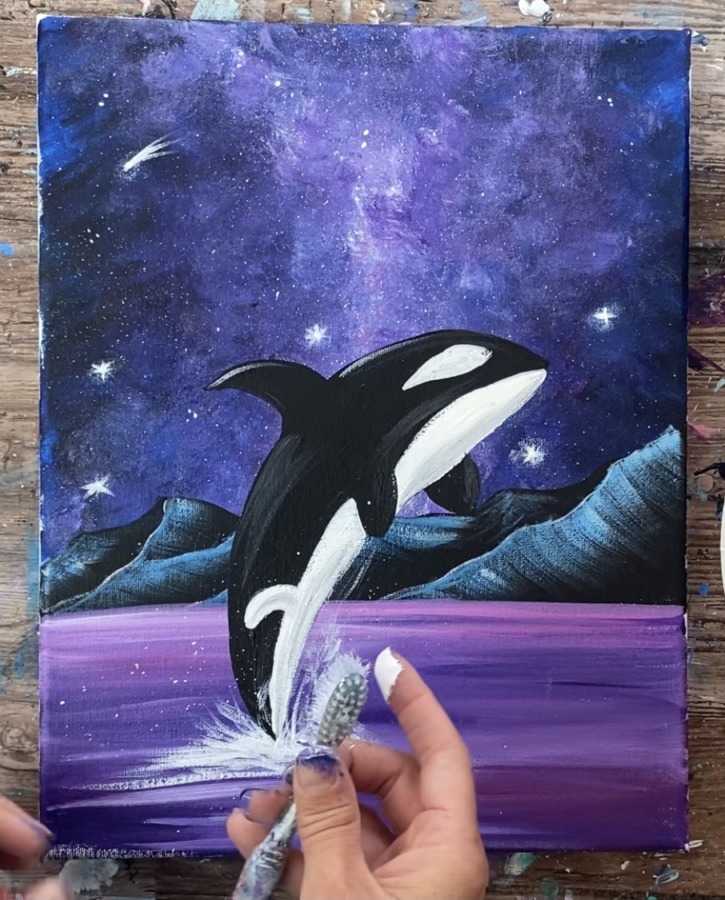
- Toothbrush For Splattering
- Sponge For Galaxy Effect
Brushes
- 3/4" Flat Brush
- #8 Round
- 5/0 Round Brush
- Toothbrush
Instructions
- See tutorial on www.stepbysteppainting.net for full instructions!
Color Palette
Using Craft Paints?
If you are using craft paints such as the Apple Barrels, try substituting with these colors:
- Black
- White
- Purple Iris
- Too Blue
- Bright Magenta
Directions At A Glance
Traceable

Video
Step By Step Directions
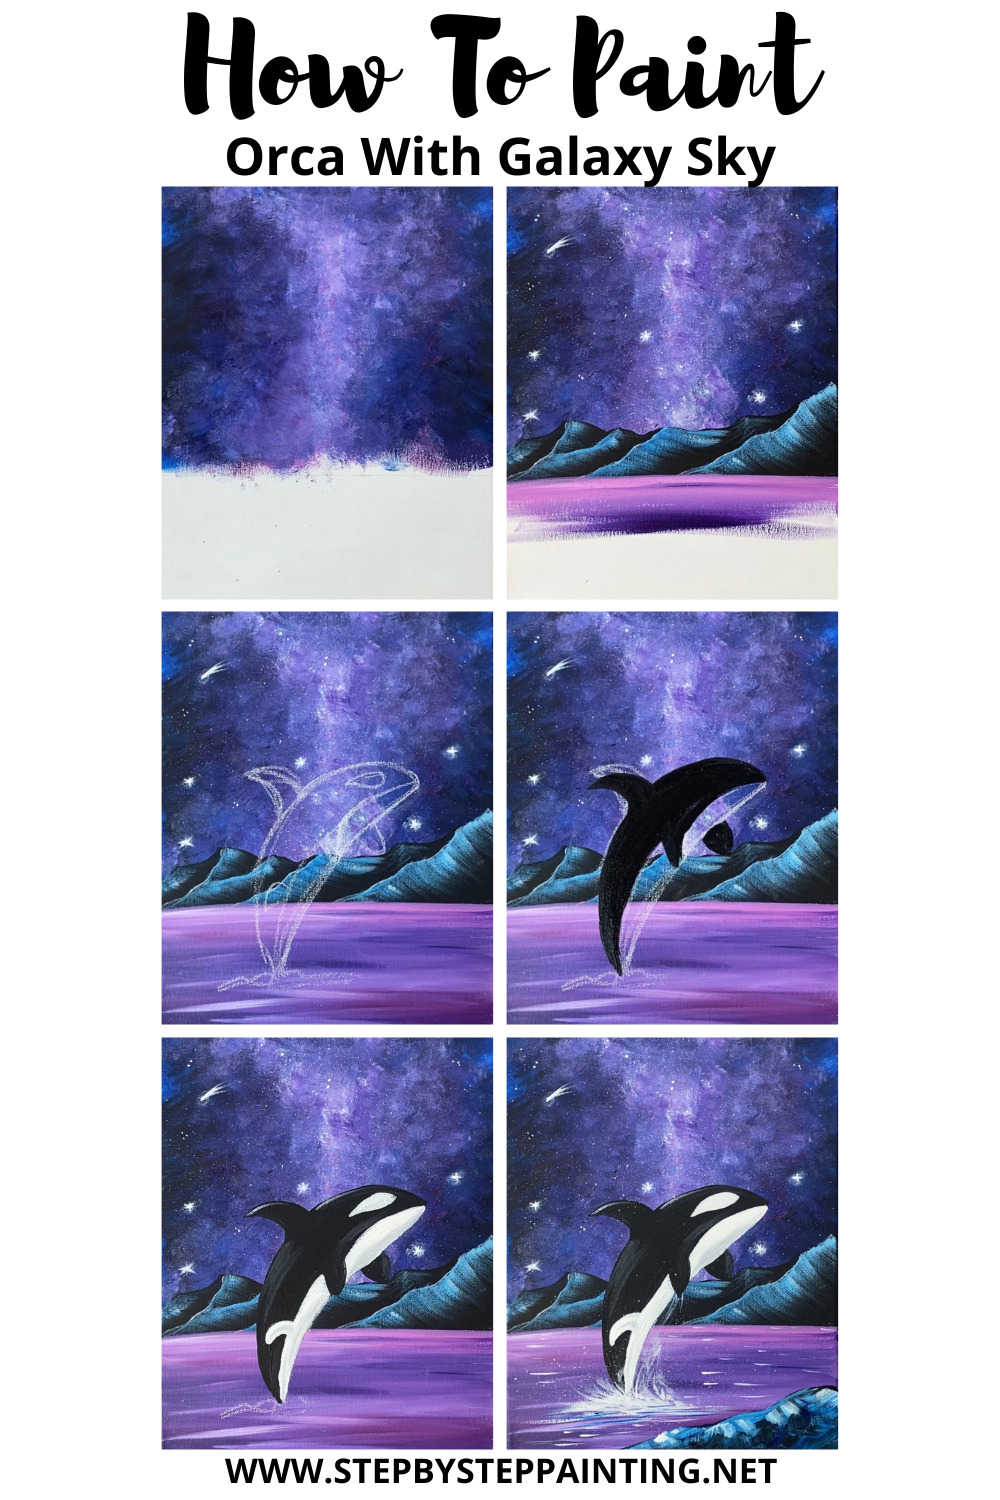
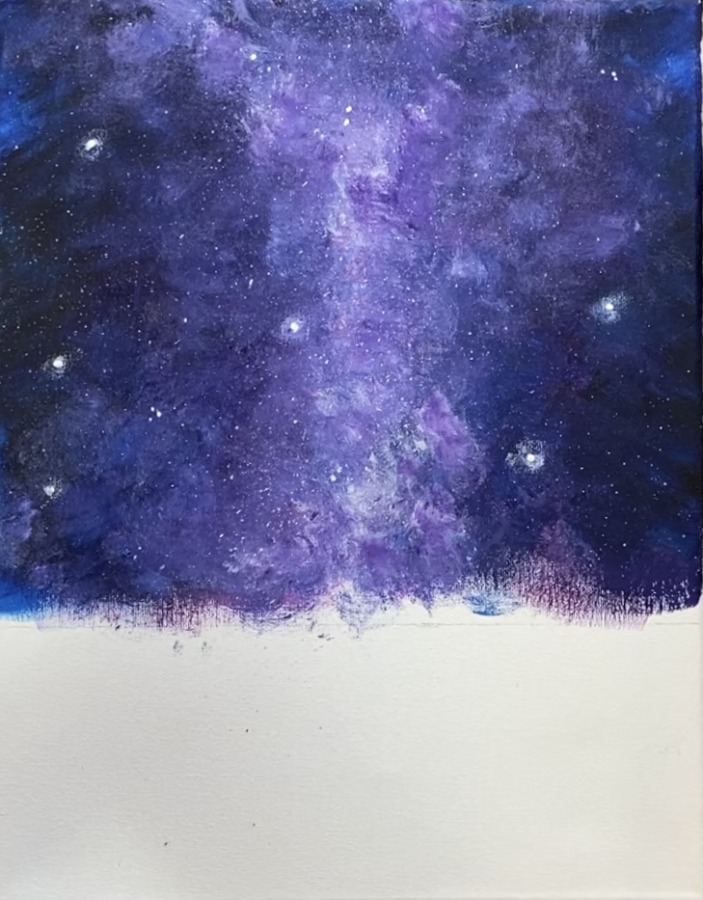
1. Paint Galaxy Sky
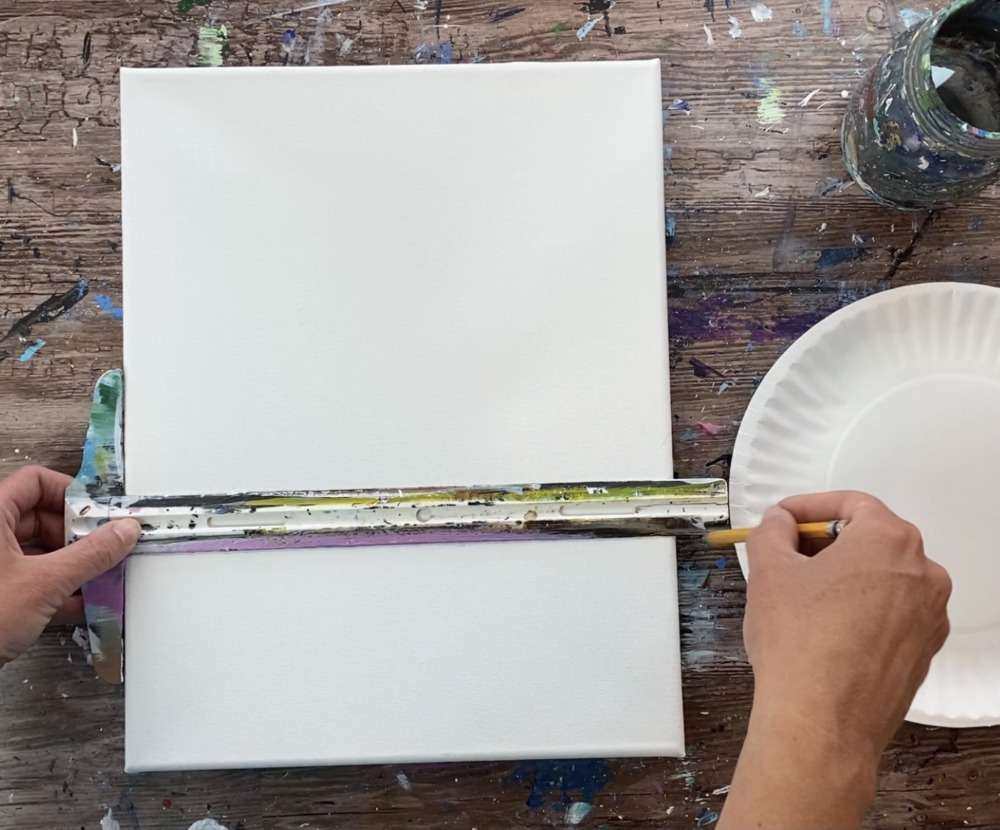
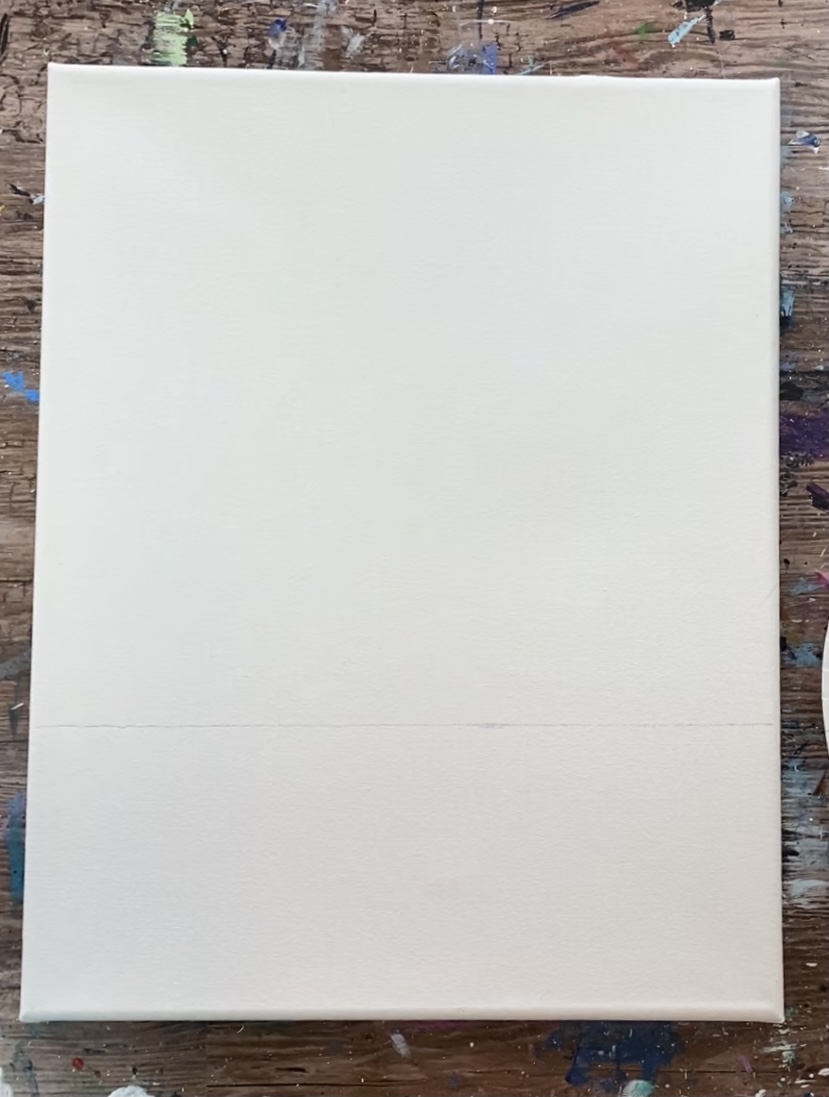
Use a t-square ruler or straight edge to draw the “horizon line” at about 4″ from the bottom edge of the canvas.
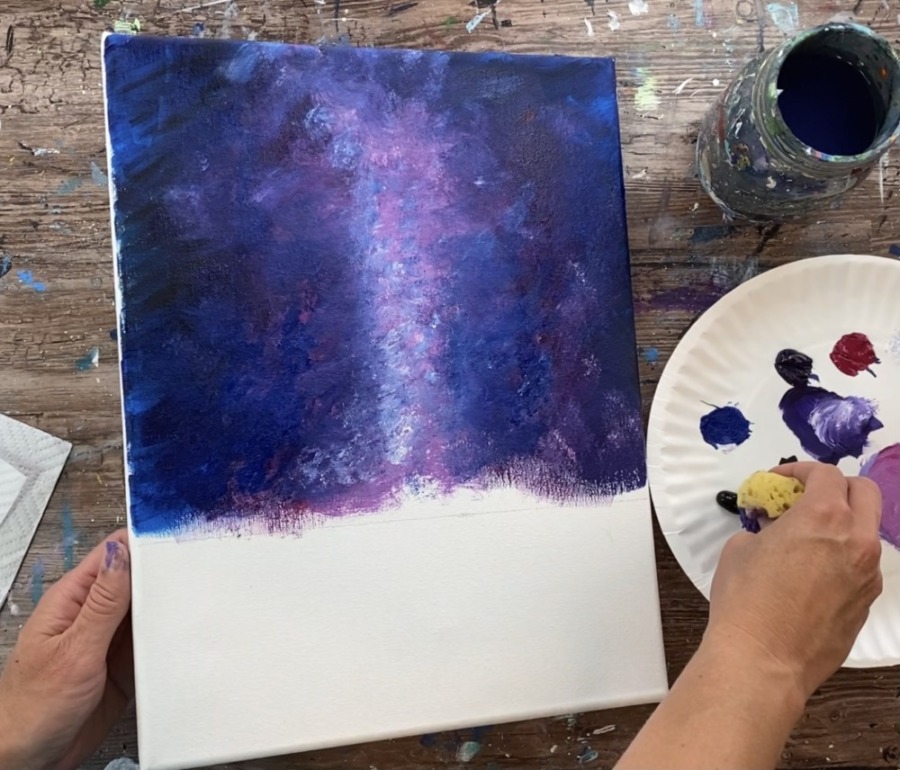
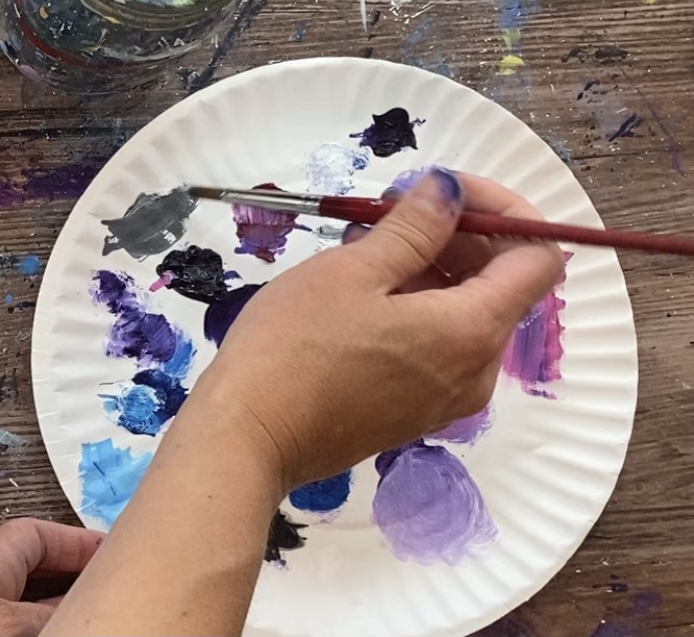
Next get your supplies ready for the galaxy sky technique. You will need a 3/4″ flat brush, a sponge (I use a basic bath sponge and rip it up into pieces) and the colors: mars black, phthalo blue, dioxazine purple, quinacridone magenta and titanium white.
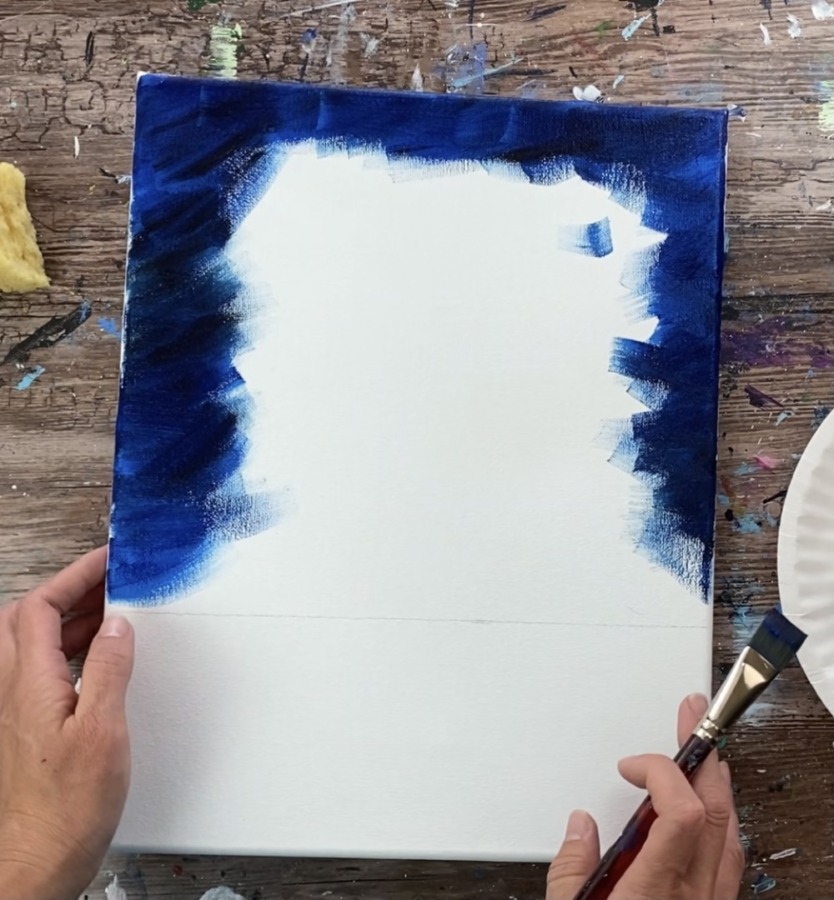
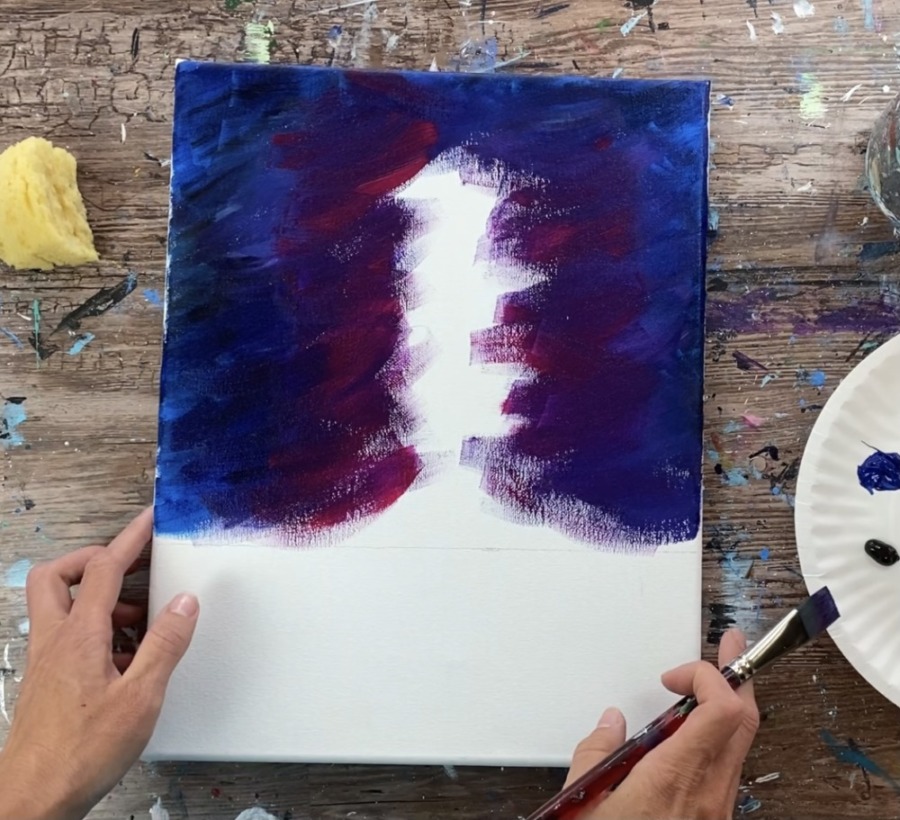
Load your 3/4″ flat brush in phthalo blue and load the corner of the brush in a tiny bit of mars black. Start on the outer edges of the canvas and paint “x style” cross-hatching strokes.

Do this around the top and left & right edges of the canvas. It will create a border of very dark blue. You do not have to mix the black and the blue all the way, you can leave it “unblended” and this will vary the depth of the colors in this area.
Next wipe off your brush and load it into dioxazine purple and the corner of the brush in titanium white. Continue to paint in “cross-hatching” strokes blending that purple with the blue/black combination.
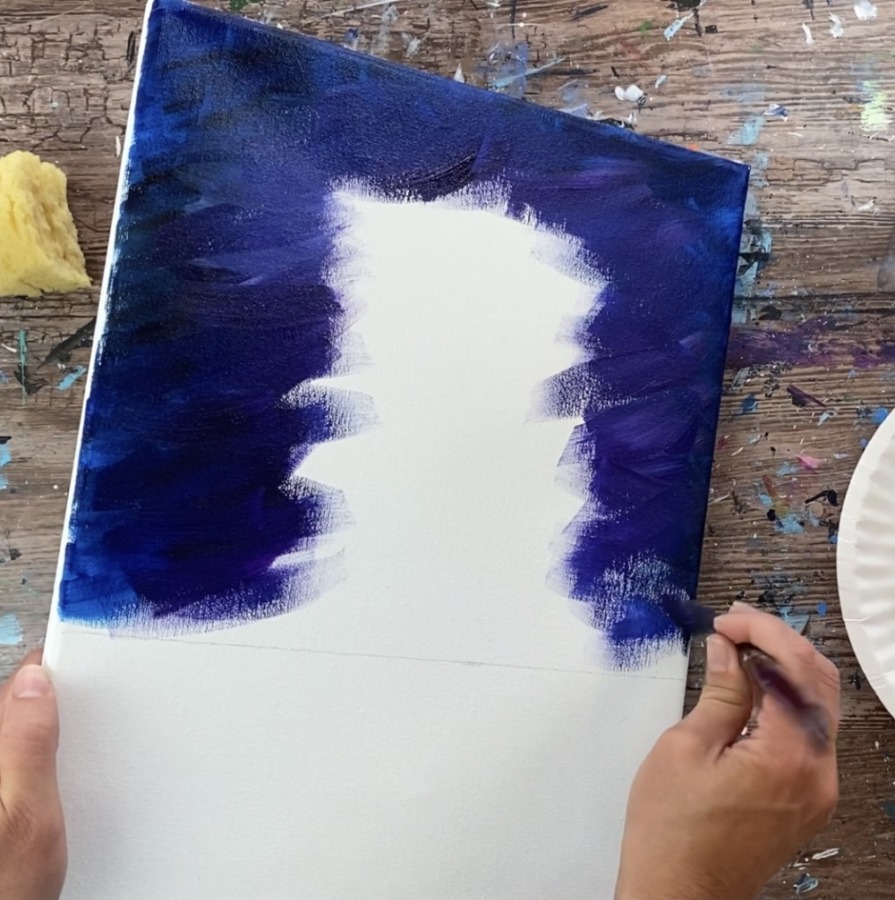
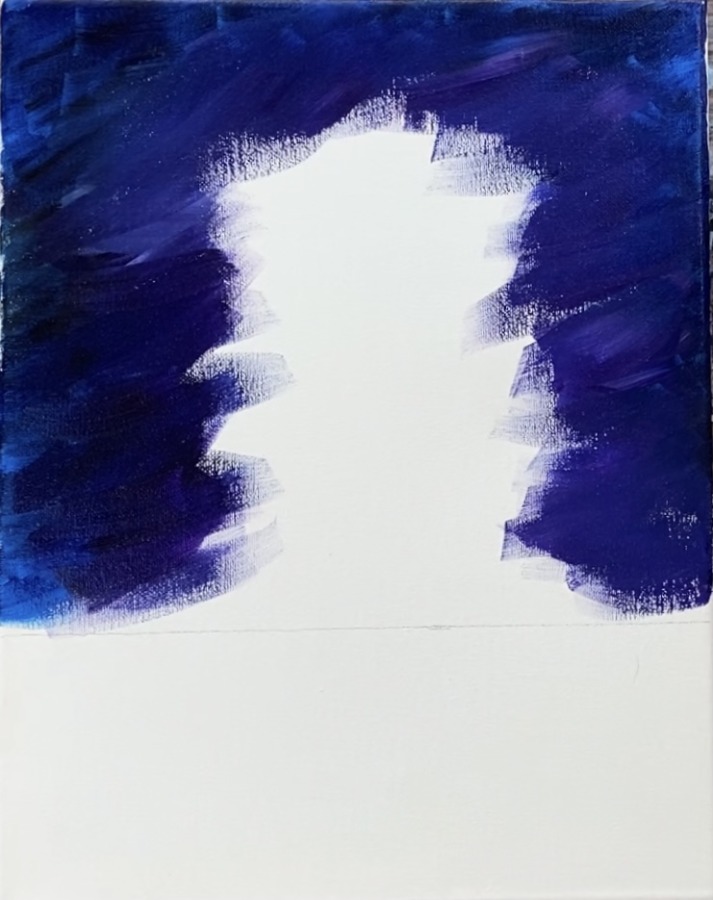
Then wipe off your brush and load it into quinacridone magenta.
Next you are going to use the sponge to blend the galaxy effect into the rest of the sky. Load your sponge into titanium white and a little bit of dioxizine purple.

Sponge the white/purple in the middle of the sky blending it with the rest of the colors in the sky.
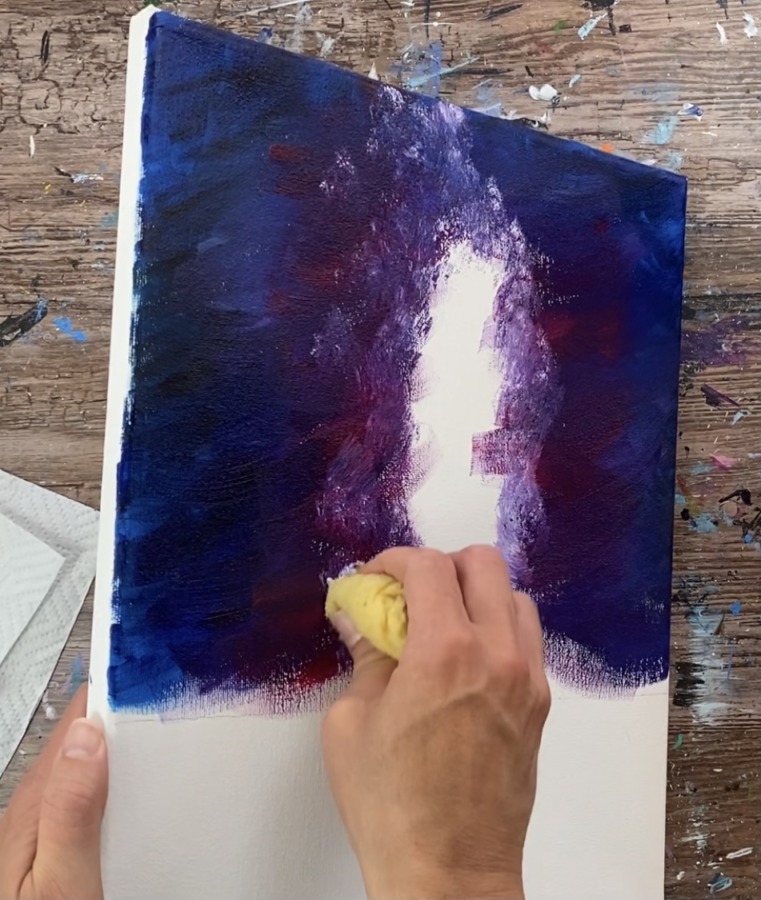
You can dab one area of the sponge or press and turn the sponge to blend the color. I did a combination of both.
Then gradually add more white in the middle area and blend it out with the sponge.
Continue to add more of the white/ purple. You can also add a little quinacridone magenta into it. Keep dabbing the sponge and blending the color.
Tip: only load a small amount of paint on the sponge! Too much and the paint will be much harder to blend. Less is more!

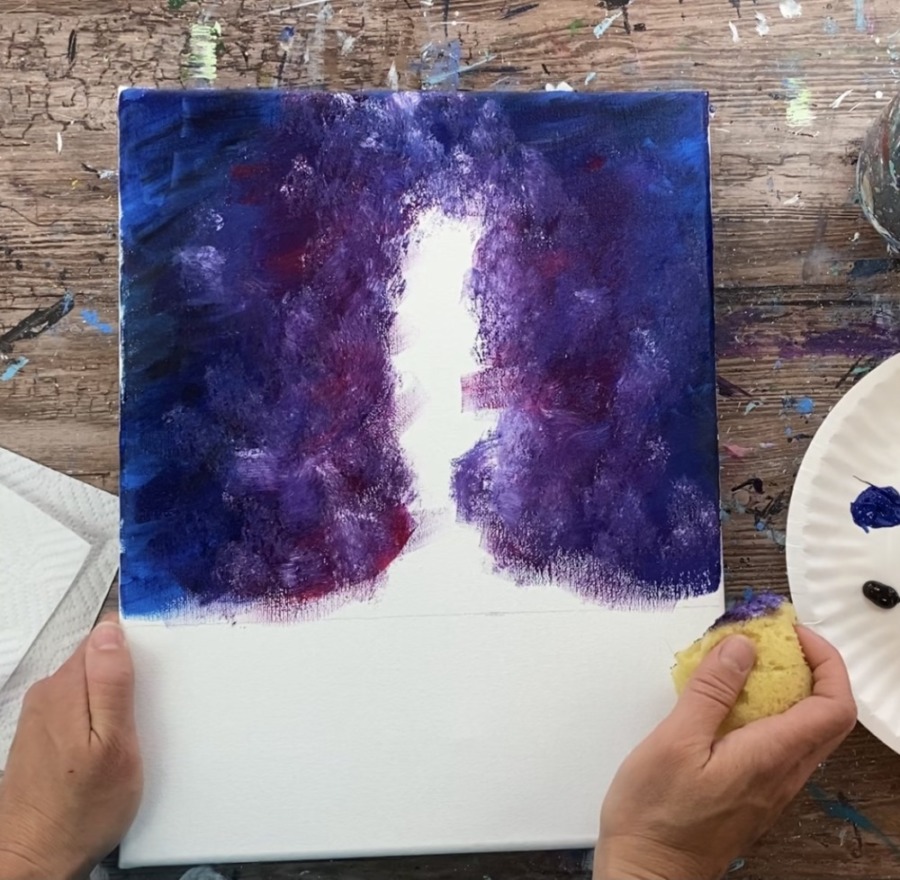
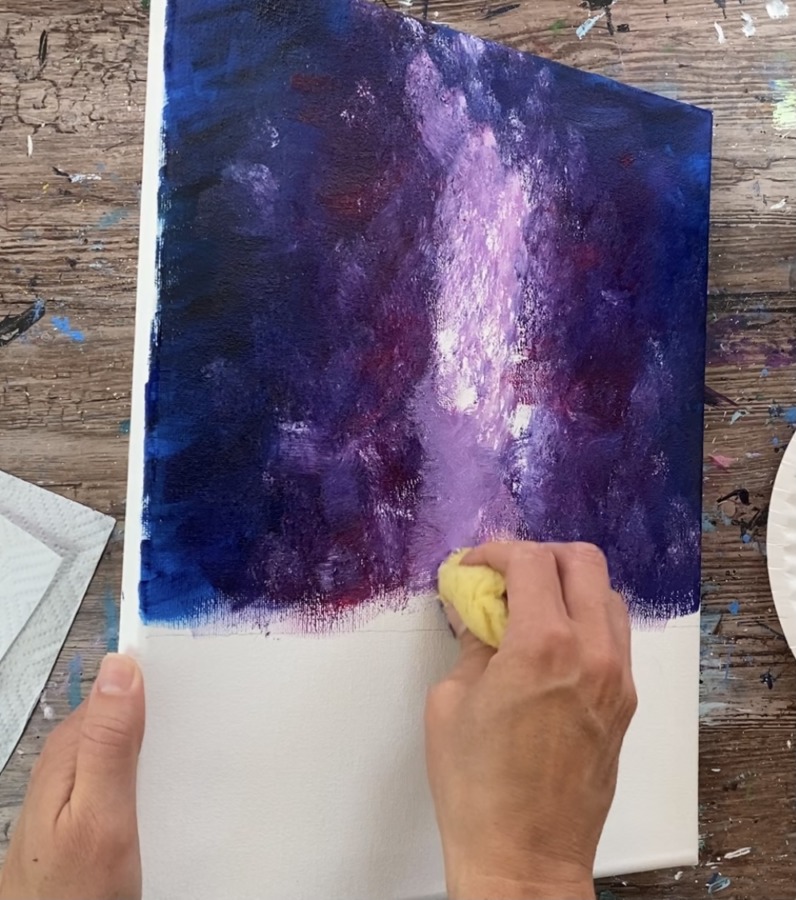
You can add phthalo blue mixed with white to create some light blue color in that area as well. It will create more depth in color.
Tip: when you load new color on your sponge, load it into a different area that doesn’t have paint on it already.
Try to make the center part brightest with more white. Add just white and no other color in the center and blend it outwards.
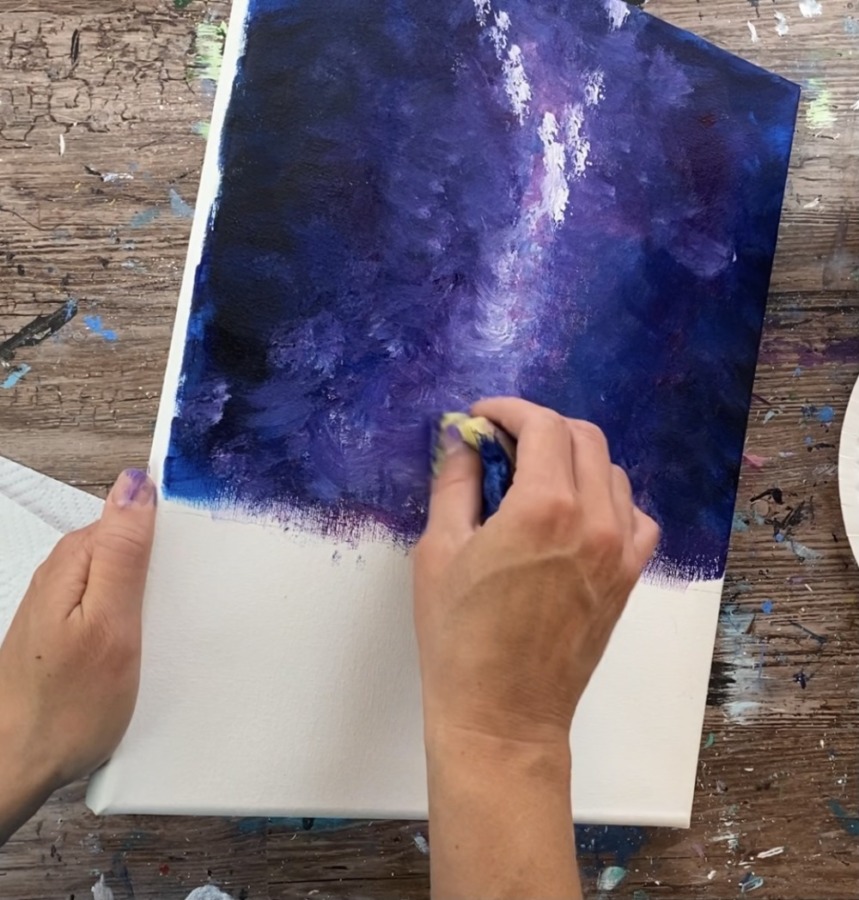
Remember to try to keep the center bright and the outer parts dark.

Next you will do the splatter star effect. Use a toothbrush and load it into titanium white that is slightly watered down. Test out the splatter on a separate surface to make sure it is not too drippy but not too thick.
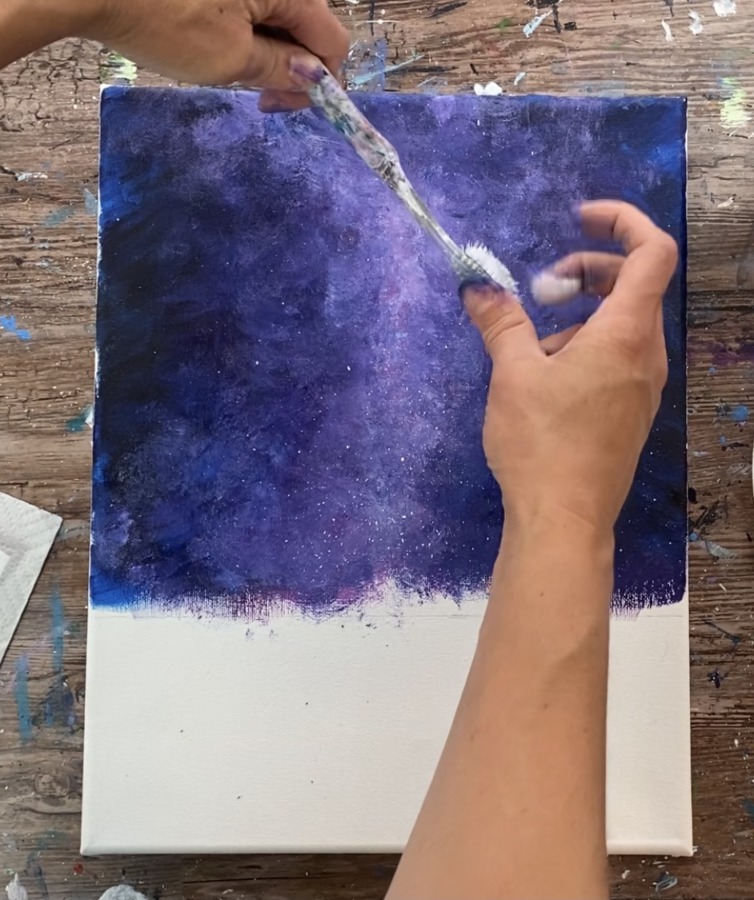
Splatter the stars all over the sky but concentrate more in the center where the bright part of the galaxy is.
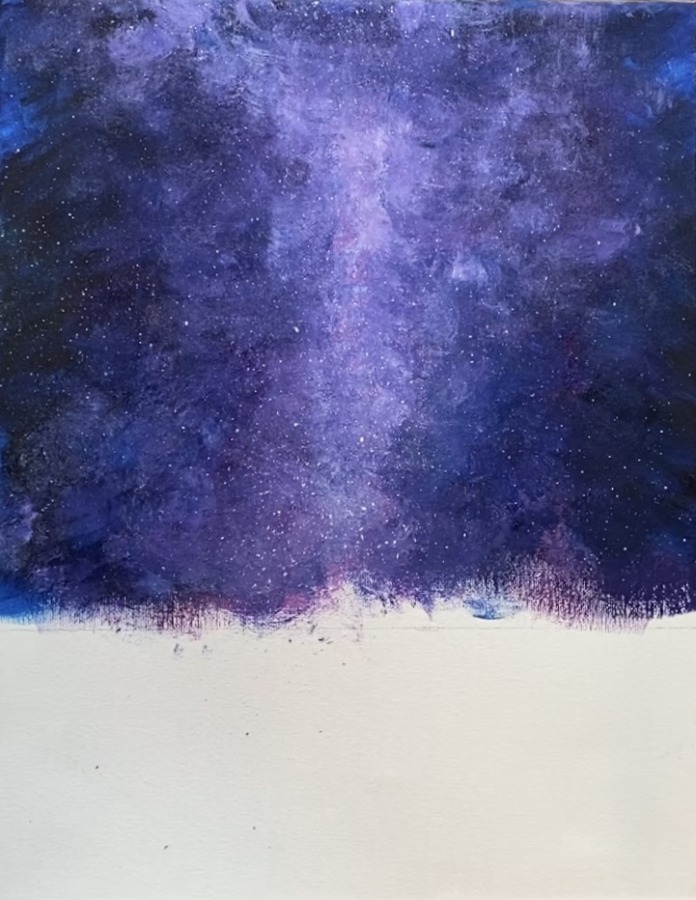
Then create some more brighter stars in the sky. To do this, I painted a small titanium white dot and pressed it with my finger to blur it.

Then go back and make a bright white dot inside the burred circles.

Paint more clusters of dots all throughout the sky.
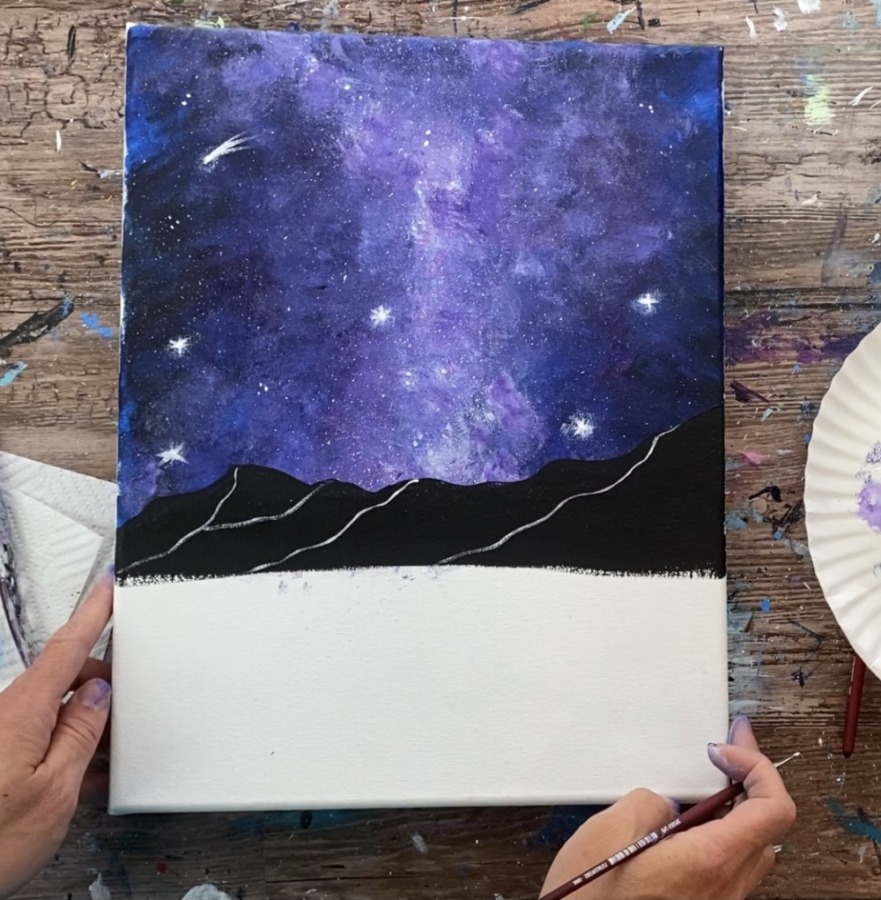
2. Paint Mountains
Use your #8 round brush and mars black to paint the mountain line. Mars black tends to be thick and not flow as well. I alway slightly water it down to an ink consistency.
Start on the right and paint a wavy/ jagged line to define the mountain line.
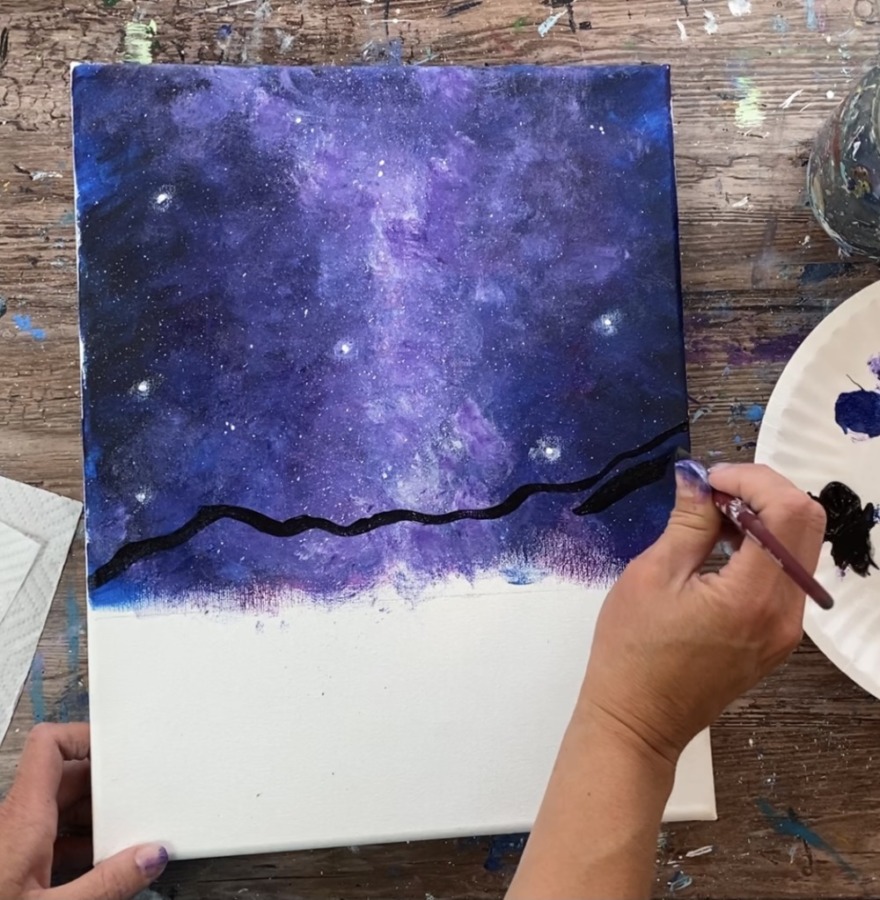
Then fill the mountain in with mars black. Paint it all the way down to the horizon line.

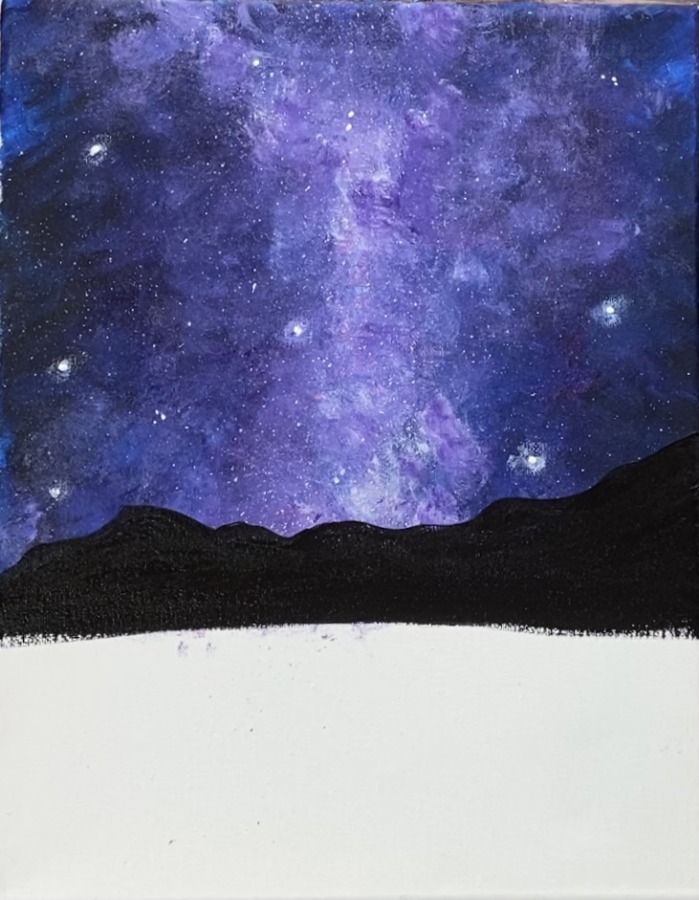
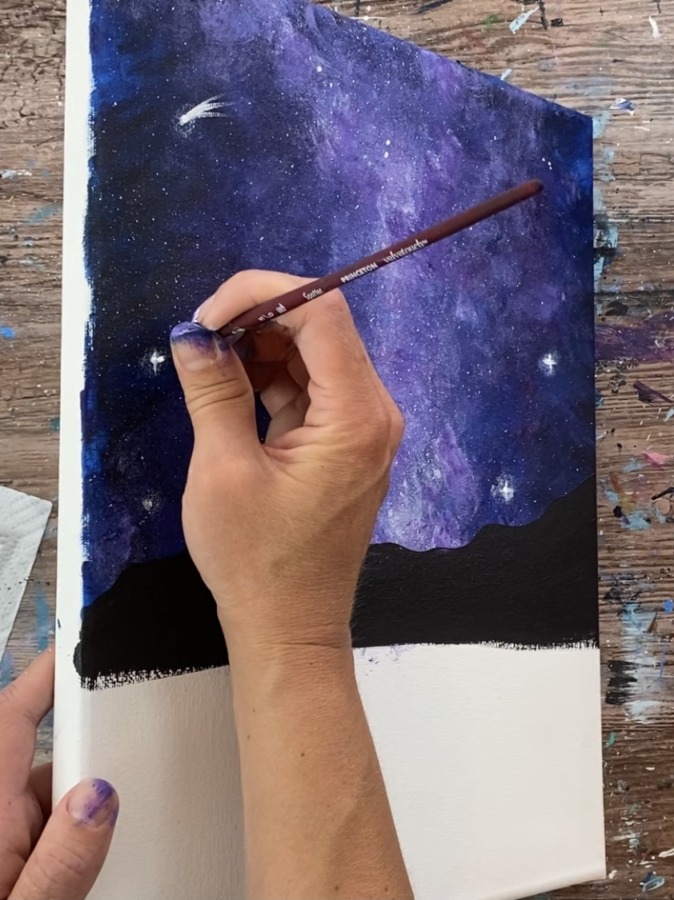
While the black in the mountains was drying, I went back with a 5/0 round brush and added more stars. I painted points on the stars that had the “glow” on them. I also did one shooting star.
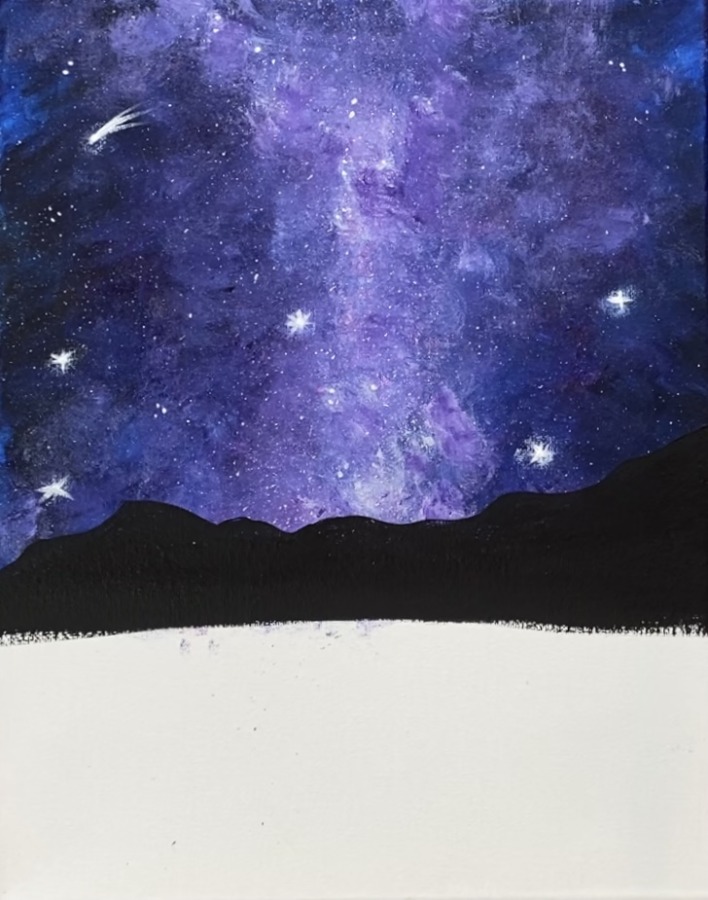
Next divided the mountain. Use a 5/0 round brush and lightly paint a line going from some of the top peaks diagonally down to the horizon line.
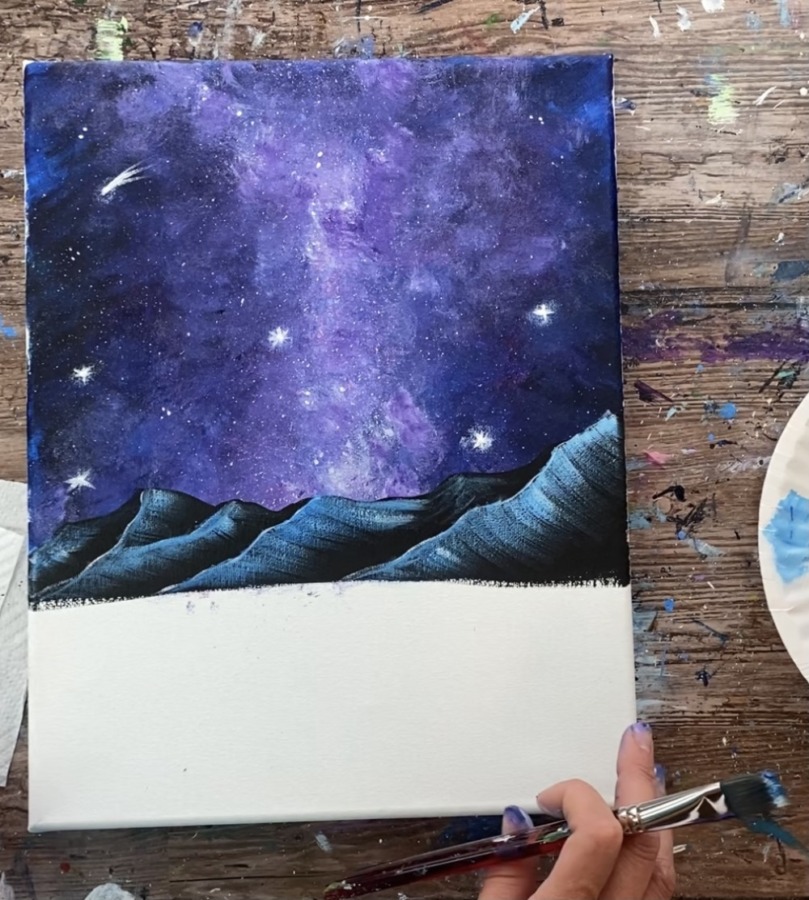
Then paint the highlight on the mountain. Load your 3/4″ flat wash brush in phthalo blue mixed with a little bit of titanium white. Wipe off some of the brush so the stroke will be “dry”.
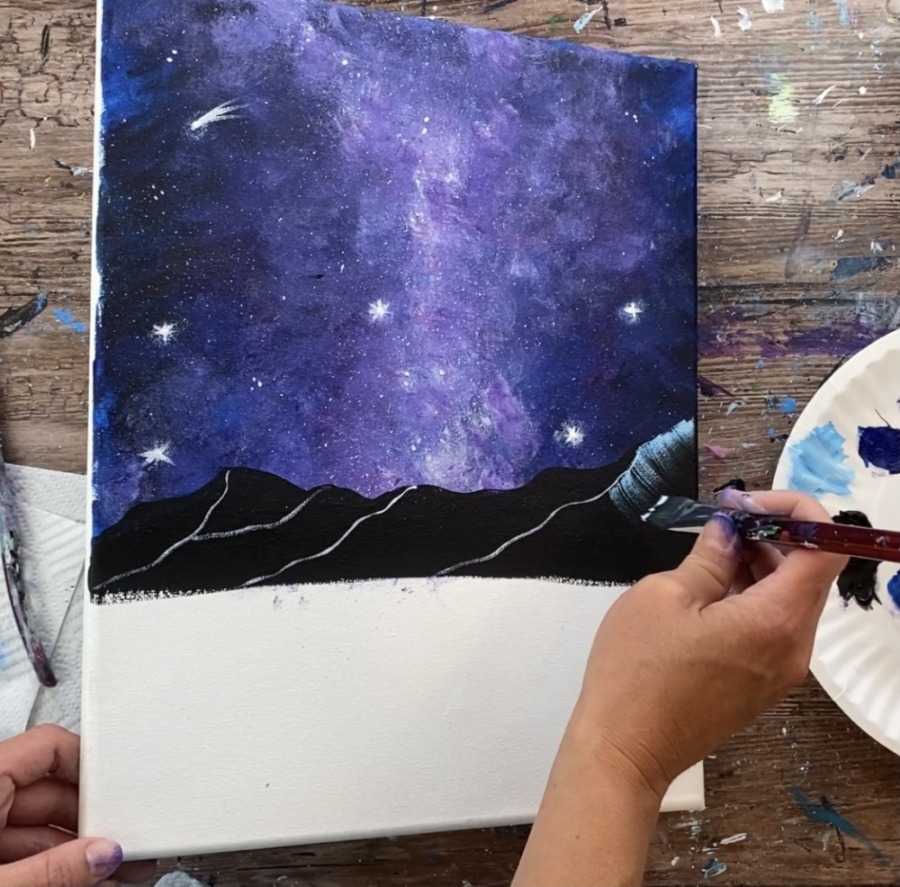
Use the full width of the brush to paint and drag the color in a diagonal angle down. Do this on only the right side of the mountain line.
When you drag the color downwards, let the paint run dry until it fades away into the black.
3. Paint Water
Completely rinse your 3/4″ flat wash brush and dry it. Mix quinacridone magenta with a little titanium white so that it become lighter. Paint left and right strokes starting below the horizon line.

Blend some dioxazine purple into it and work your way to the bottom of the canvas.

Vary the color all throughout the water but don’t blend it all the way. Make sure your strokes stay horizontal.
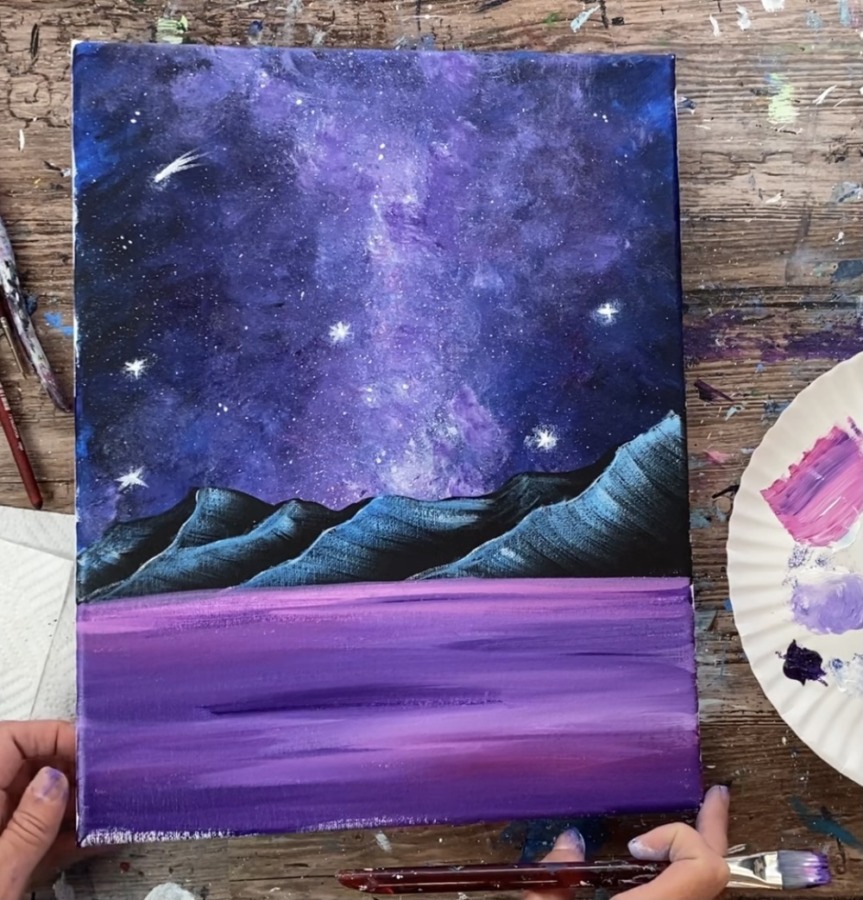
Add a few titanium white strokes in the water as well.
4. Draw Orca
Use a piece of chalk or a chalk pencil to draw the orca. If using the traceable, it is recommended that you use a piece of white graphite paper below the orca.
To draw, start by making an arc line going from above the mountains down to the water.
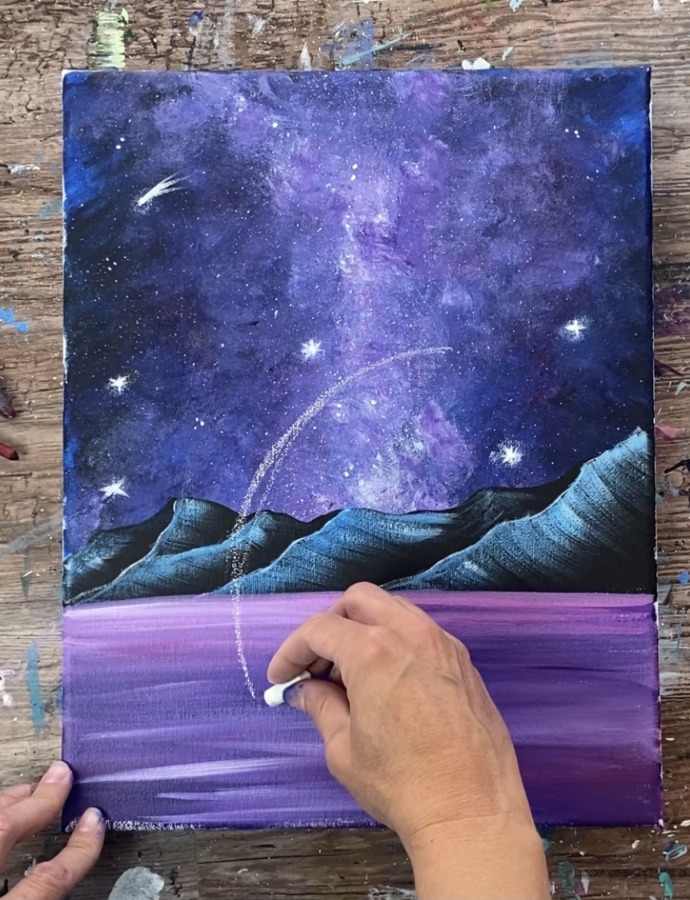
Then form the shape of the orca. It is very much like a banana shape. The tail should go to a point and the head is more wider.
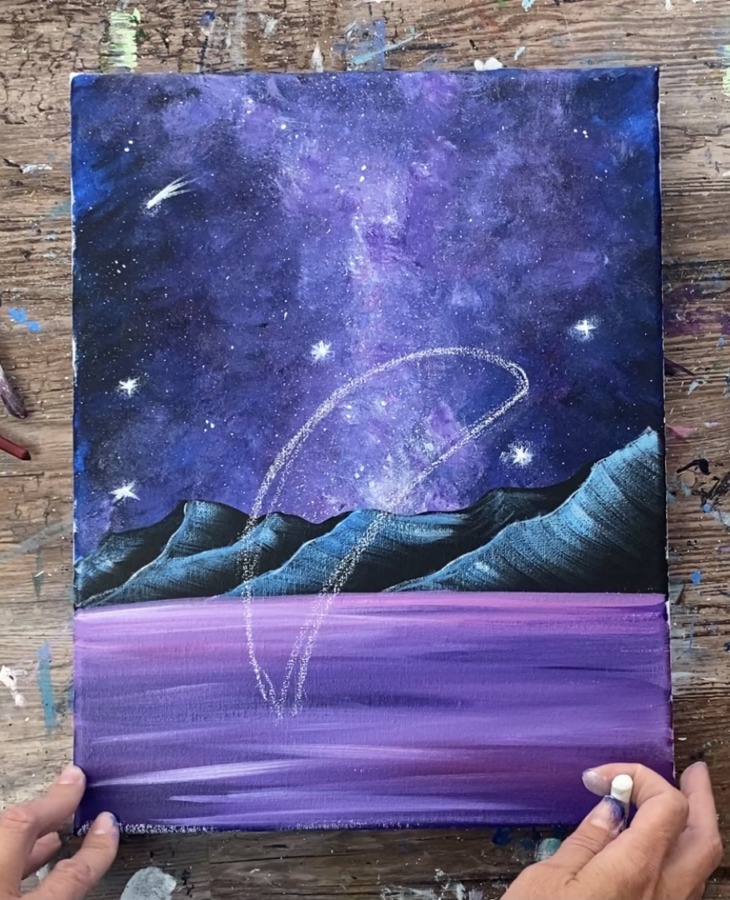
Then draw the dorsal fin and the pectoral flippers.
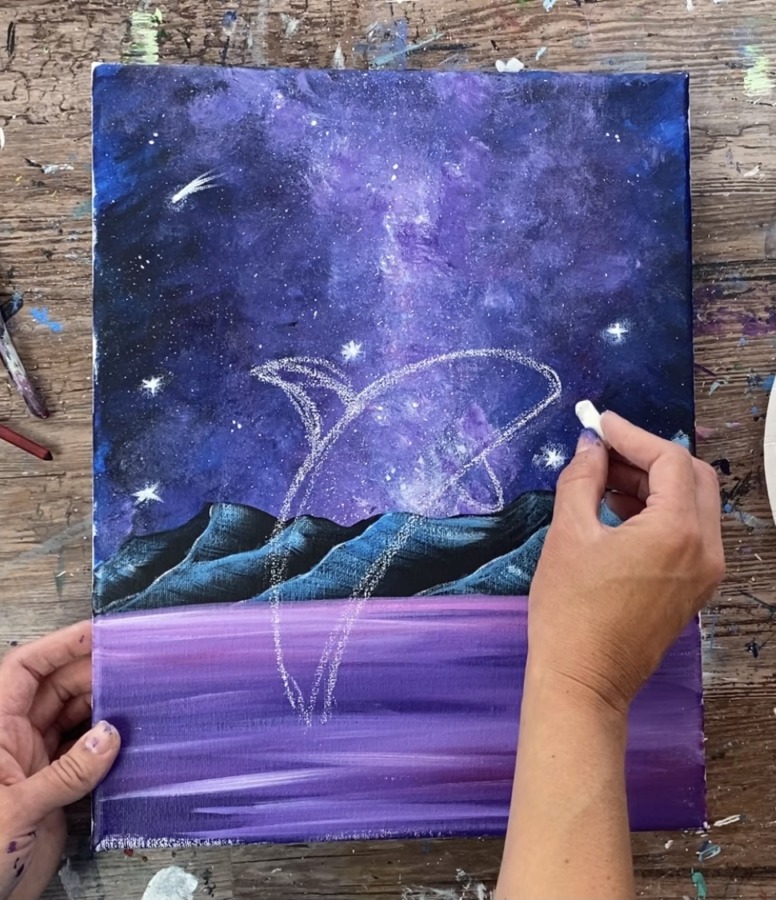
Draw the white eye patch and side patch.
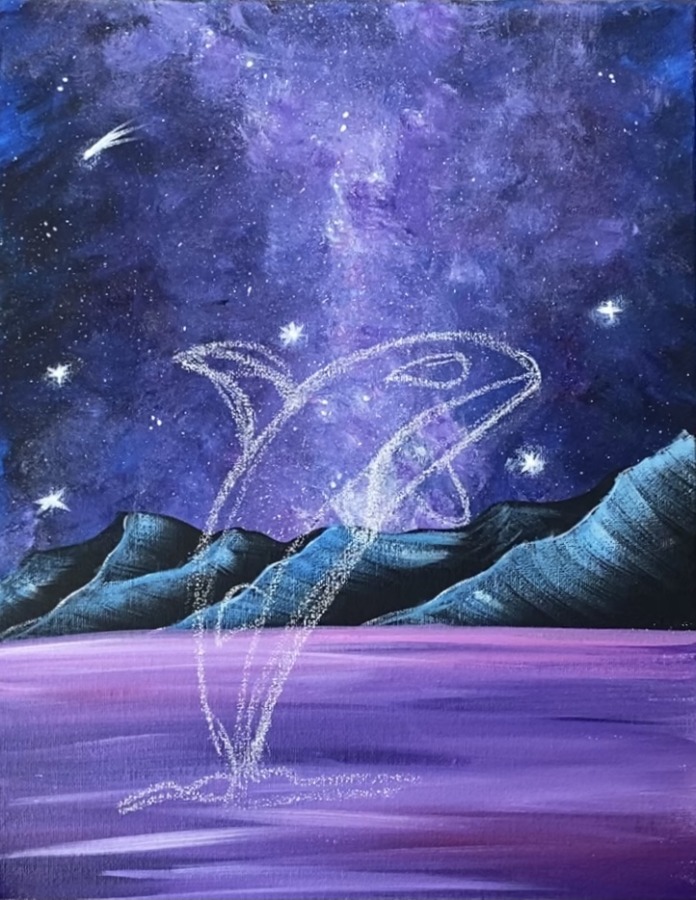
Then draw a small area where the splash would be at the bottom. The orca’s tale is not visible so you don’t have to draw that.
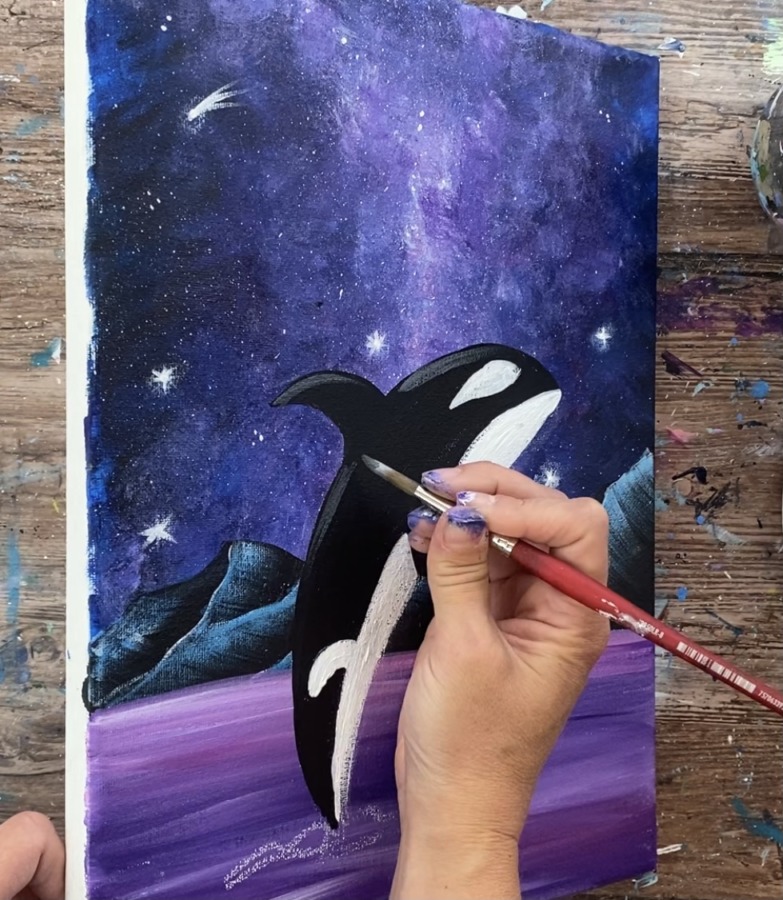
5. Paint Orca
Use a #8 round brush and mars black. Paint the top part of the orca and the dorsal fin.

You can paint around the eye patch or go over it.
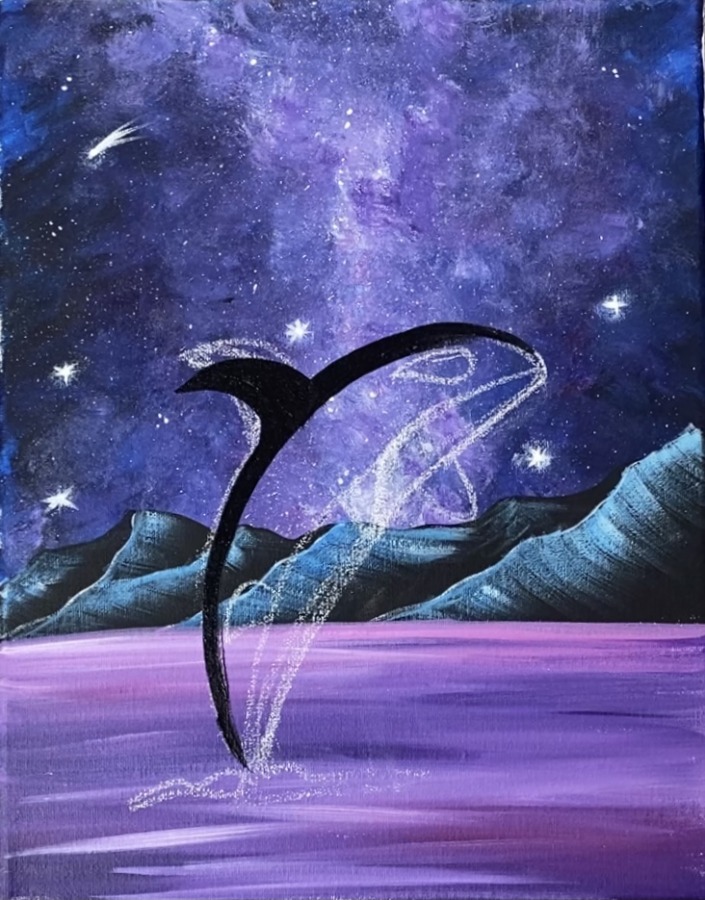
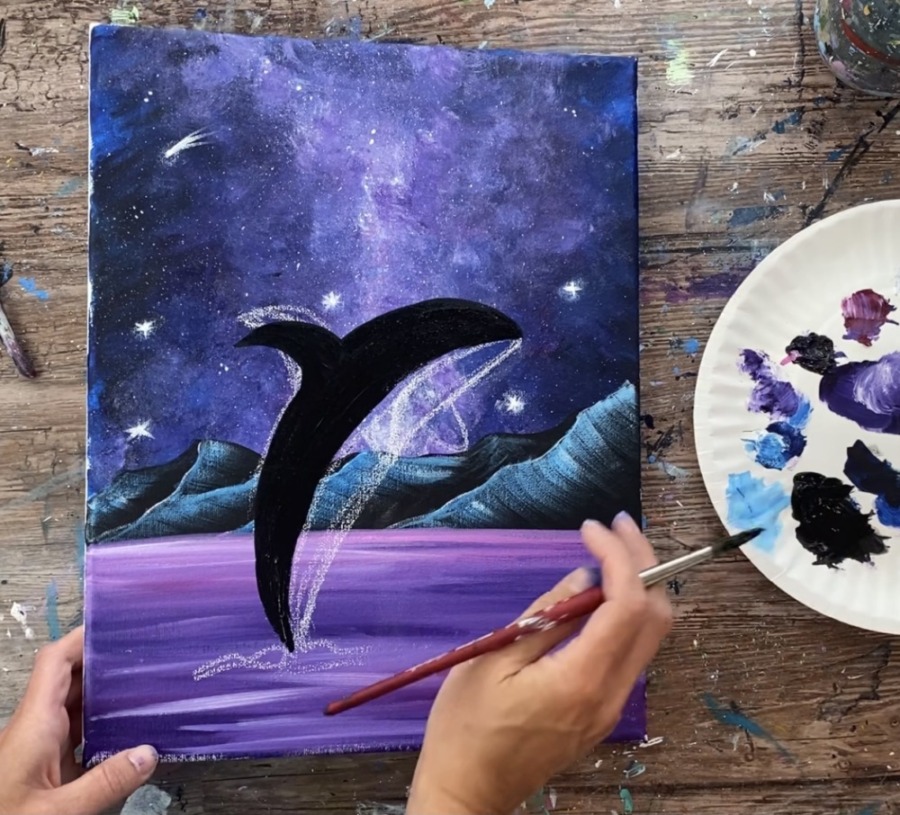
Paint the pectoral flippers.
Then use titanium white & the #8 round brush to paint the white eye patch and the under part of the orca.
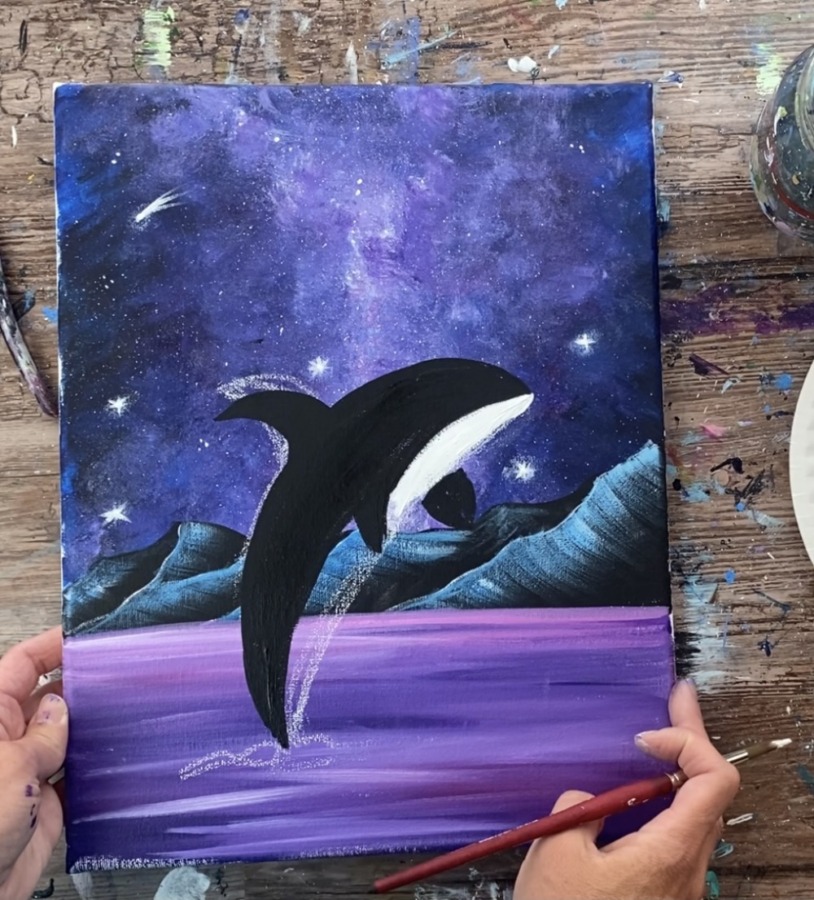
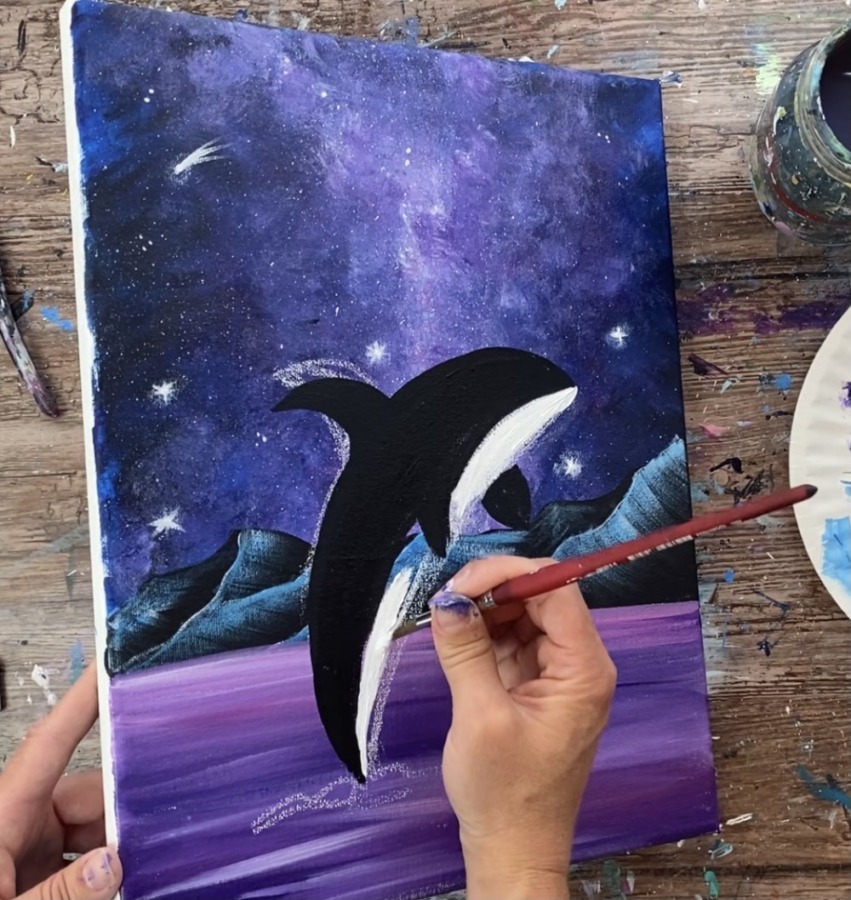
Paint the side patch and the eye patch.

Then use a baby wipe (or damp paper towel) to carefully wipe off the rest of the chalk lines.
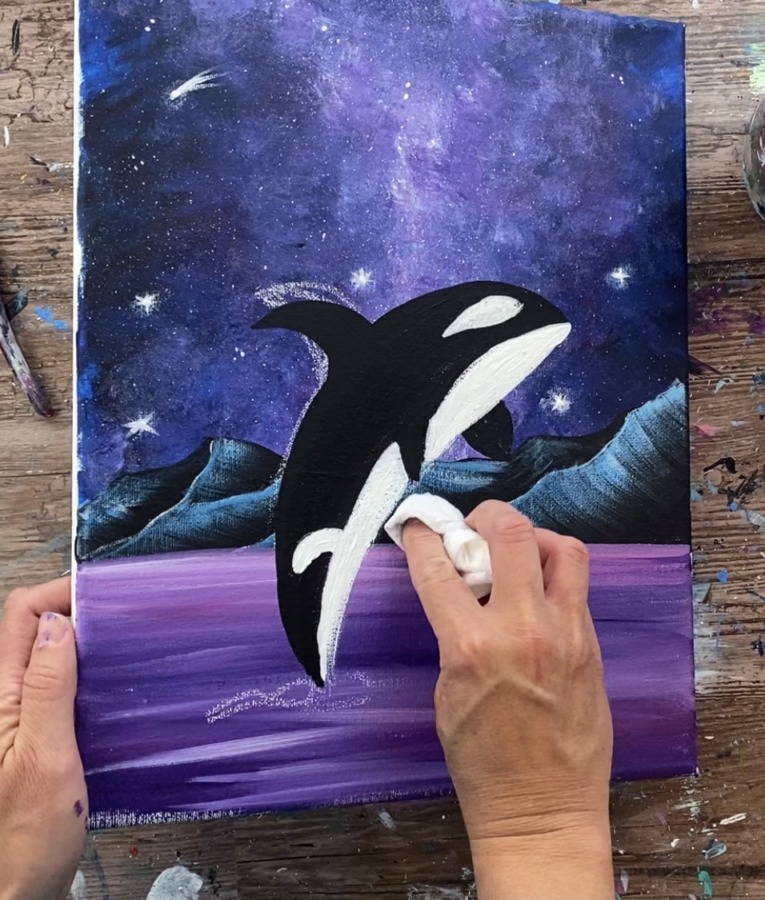
Optional: add some subtle highlighting on the orca using gray paint (mix 1 part black to 4 parts white to make gray).
Paint the light gray just at the top of the dorsal fin and on the top of the orca’s back.
Then add a white streak at the top of the dorsal fin and at the top of the orca’s head.

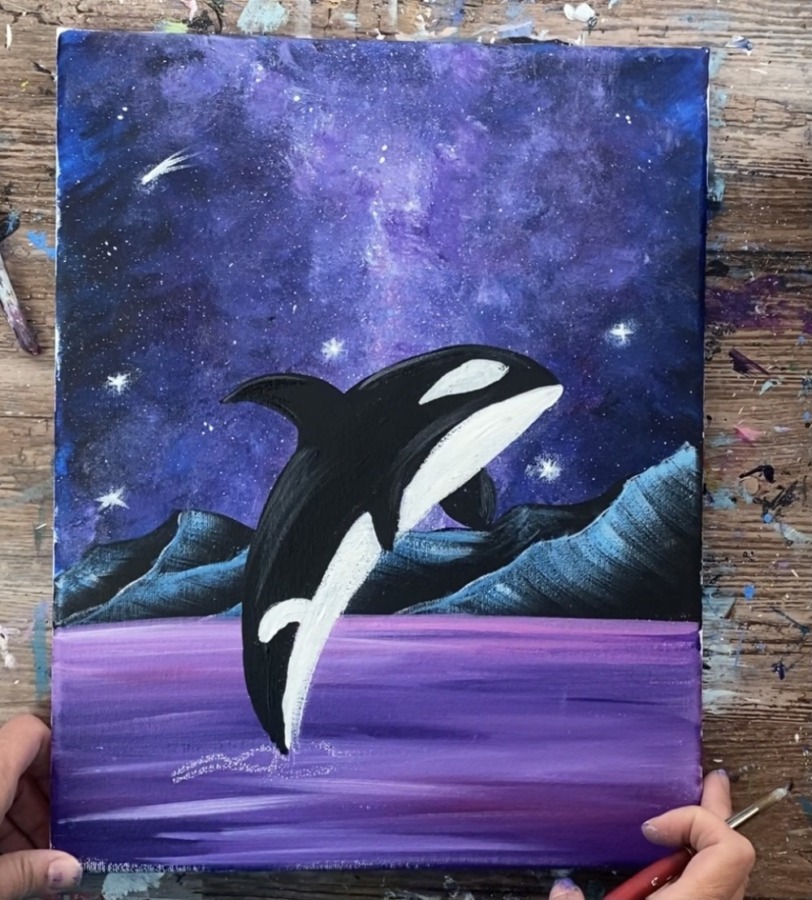
6. Paint Splash
To do the splash use a #8 round brush and titanium white to paint splash marks on the bottom where his tail is along the water.
Dry brush angular strokes to create the water texture.

Then use the toothbrush to do some splatter effect on the bottom around the splash.
7. Paint Bottom Rock Formation
Use either the 3/4″ flat brush or #8 round brush to paint the rock formation on the bottom right of the canvas.
Then load your 3/4″ flat brush in phthalo blue and titanium white. Paint in “x” strokes (flip flopping the brush) to create the texture on the rock formation.
Add a little black into the colors. Try not to over-blend or over mix.

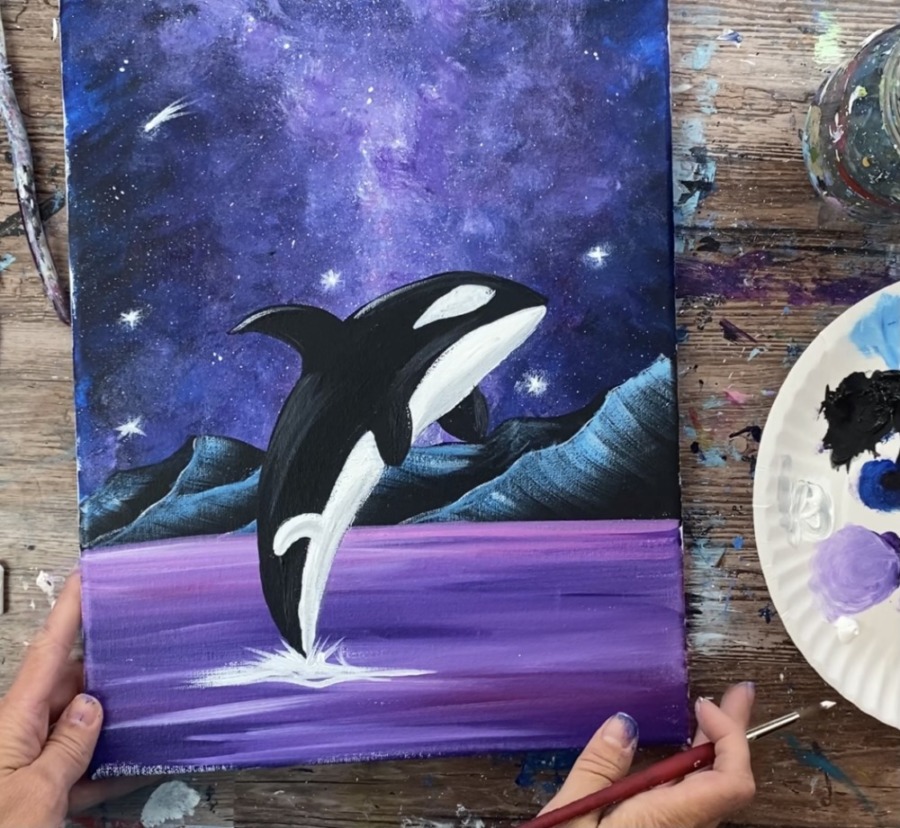
8. Paint Final Water Reflection Lines
Finally, use a round brush (either the 5/0 round or the tip of the #8 round) to paint small horizontal water lines with titanium white paint.
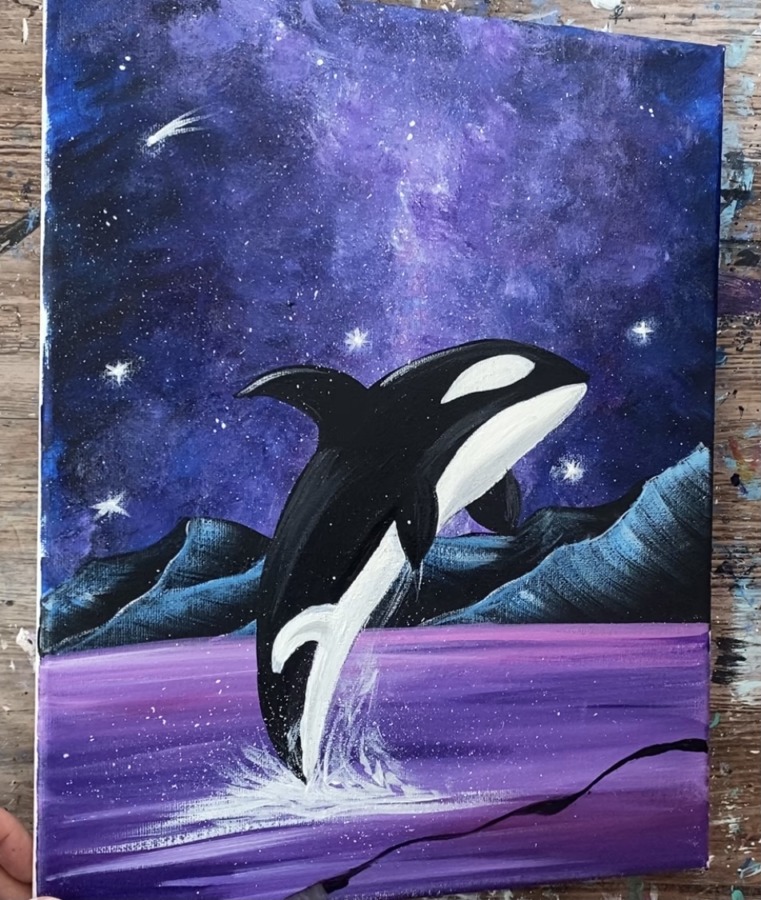
Finished!
Sign your name and show it off!

Share Your Art Here


