
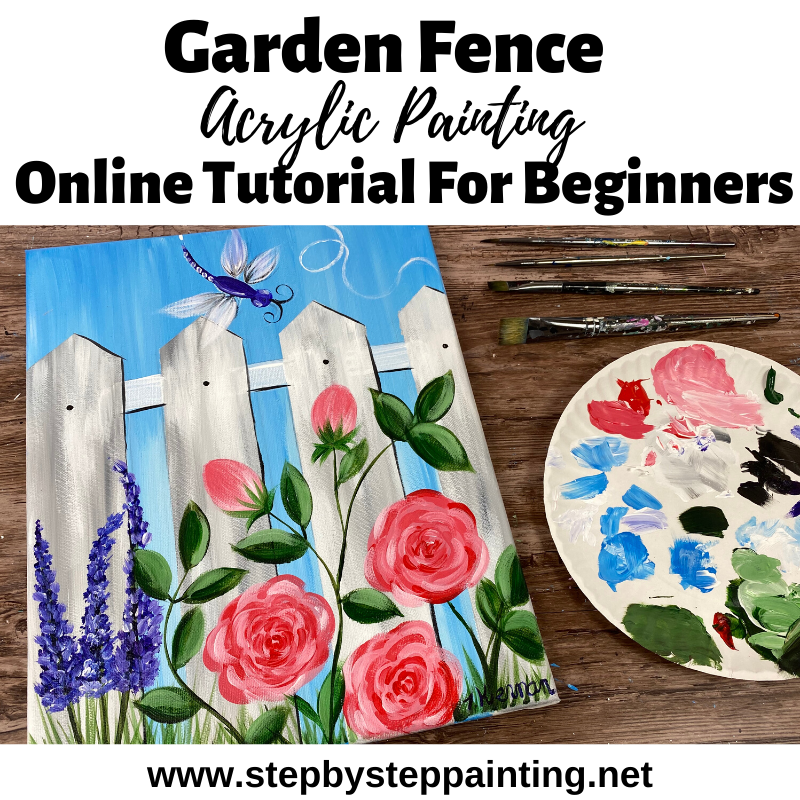
Garden Fence Painting On Canvas – Part One
This is a beginner painting tutorial of a white picket fence with beautiful pink roses and hyacinth (or lavender). And there is a cute dragonfly hanging out above the garden!
I will guide you step by step (in two parts) how to create this acrylic painting!
Would you like to save this?
I am dividing this tutorial into two parts!
The fist part of this painting is the fence & sky. I think the fence is SUPER EASY!
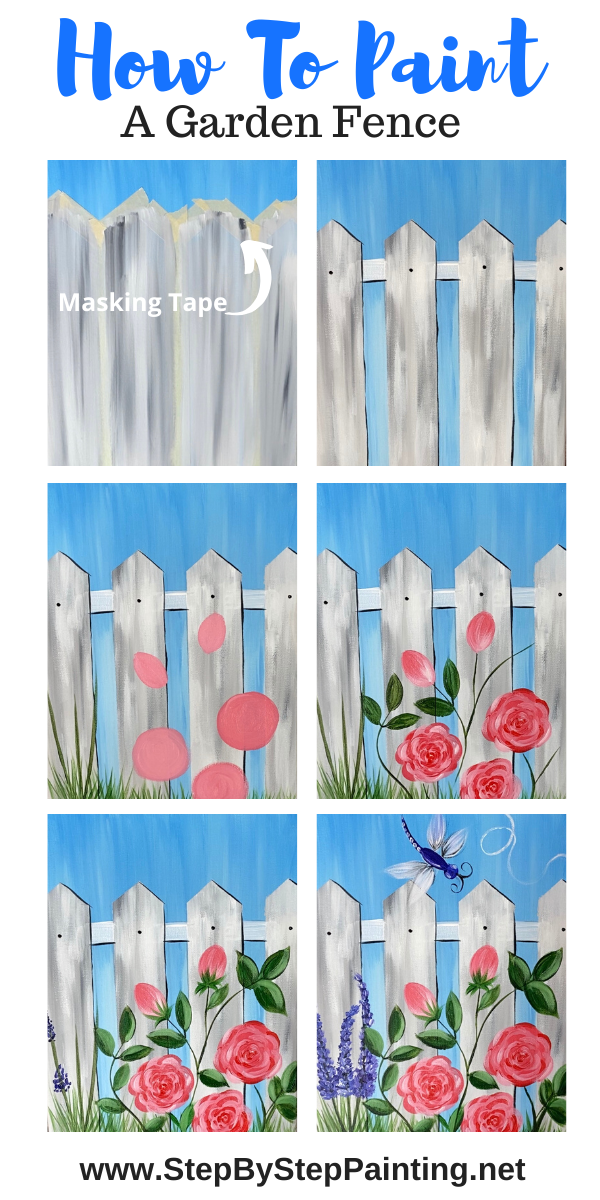
But…there are quite a few details I need to show you for setting up this painting with the fence and the sky. This includes how to use masking tape to block off areas in order to paint nice crisp lines!
I also think this fence painting can be used with a lot of different types of paintings. For example. You can customize the flowers in this too!
In part two of this tutorial…
I will demonstrate a simple technique I like to use to render roses as well as the rest of the steps for rendering the beautiful garden!
Anyhow, here are the directions below for how to do part one of this Garden Fence painting!
Enjoy and happy spring painting artists!!!
Materials (For the entire painting)
Garden Fence Painting
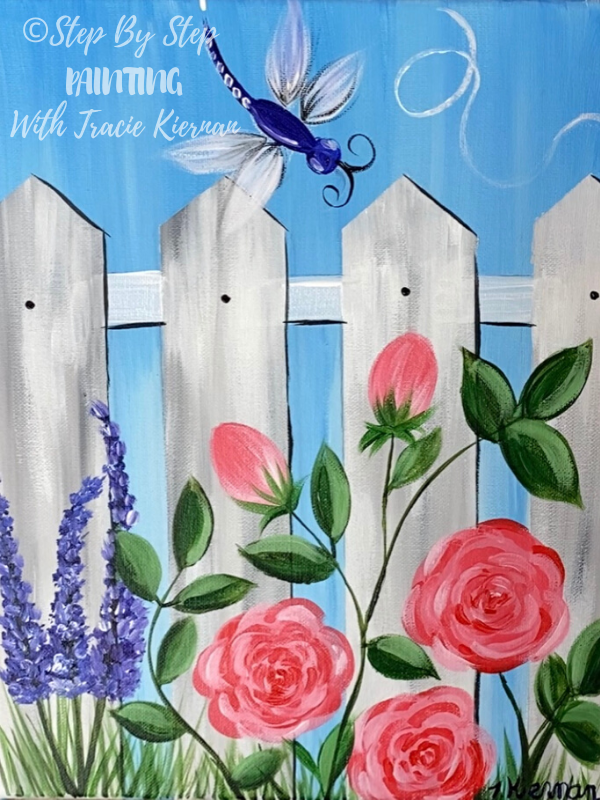
Create a beautiful spring garden painting with a white fence and a dragonfly! This is an easy painting and you will be guided step by step with picture directions and video.
Materials
- Acrylic Paints
- 11 x 14 Canvas
- Paint Brushes
- T-Square Ruler
- Masking Tape
- Pencil
- Chalk for drawing dragonfly
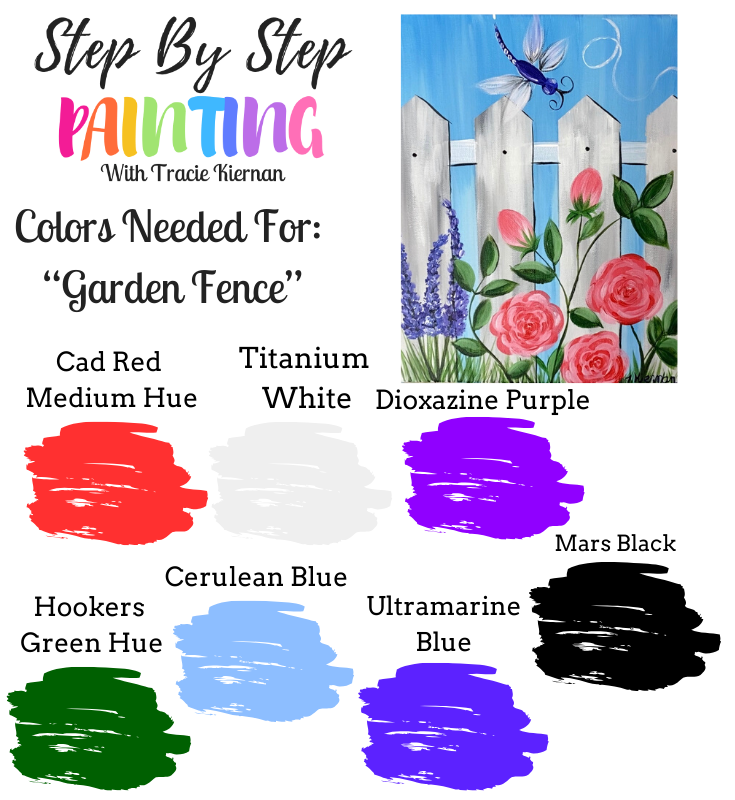
Paint Colors
- Cadmium Red Medium Hue
- Hooker’s Green Hue Permanent
- Cerulean Blue
- Mars Black
- Titanium White
- Dioxazine Purple
- Ultramarine Blue
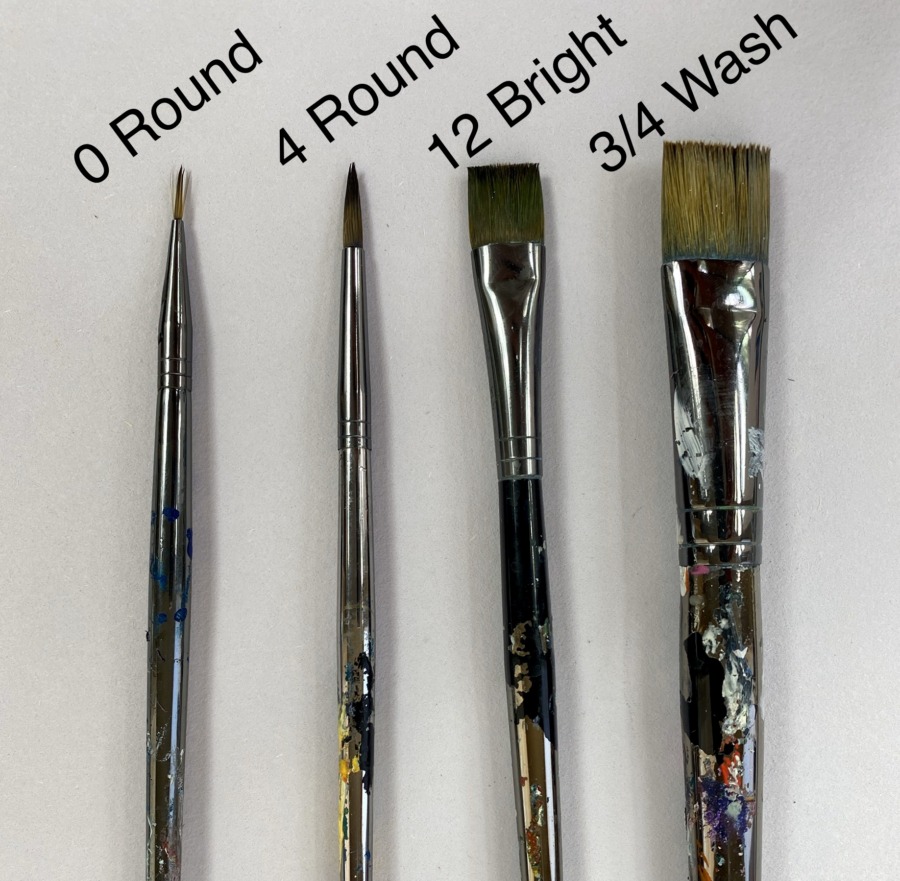
Brushes
Instructions
Scroll down in this post for detailed instructions.
- Draw the layout of the fence with pencil and ruler.
- Paint the sky and entire background with cerulean blue and titanium white while trying to go around the fence drawing as much as possible.
- Wait for blue to dry then mask off the areas around the fence with masking tape.
- Paint the fence with up and down strokes of titanium white blended with a little bit of mars black. Then add some dry brush strokes of white to the fence.
- Wait for the fence to dry then pull the tape off carefully.
- Do any touch ups in the sky if necessary.
- Paint the horizontal beam on the top of the fence.
- Outline the bottom and sides of some of the fence posts.
- Paint a nail dot on each of the fences.
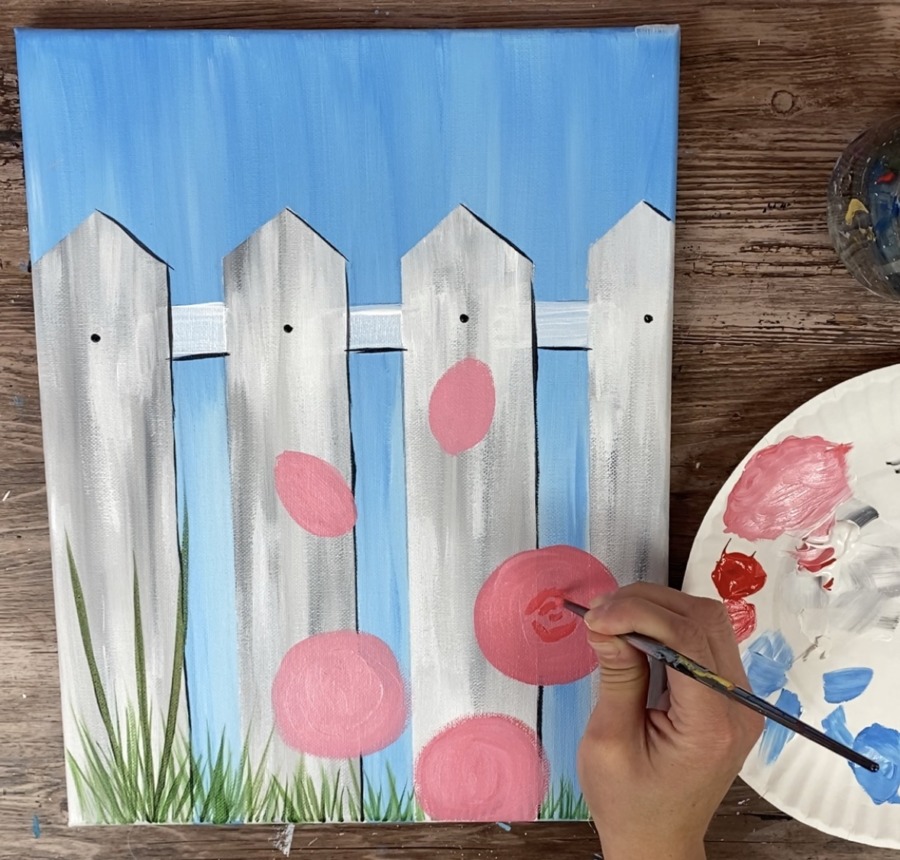
- Paint the roses with cad red medium hugs and titanium white.
- Paint the leaves and stems with hookers green hue and cad red medium hue.
- Paint the hyacinth with dioxazine purple, titanium white and ultramarine blue.
- Draw the dragonfly with a piece of chalk.
- Paint the dragonfly in with dioxazine purple, ultramarine blue and some titanium white. Pain the antennae and some lines on the wings with mars black.
- Paint the dragonfly trail line with titanium white.
Color Palette
Brushes
Links to these size brushes are found in the materials section of this post. You do not have to get these exact size brushes (example: you can use a 1/2” wash, 10 bright, 5 round, etc. and achieve same techniques).
Directions At A Glance (For the entire painting)
Video
Step By Step Directions – How To Paint The Fence
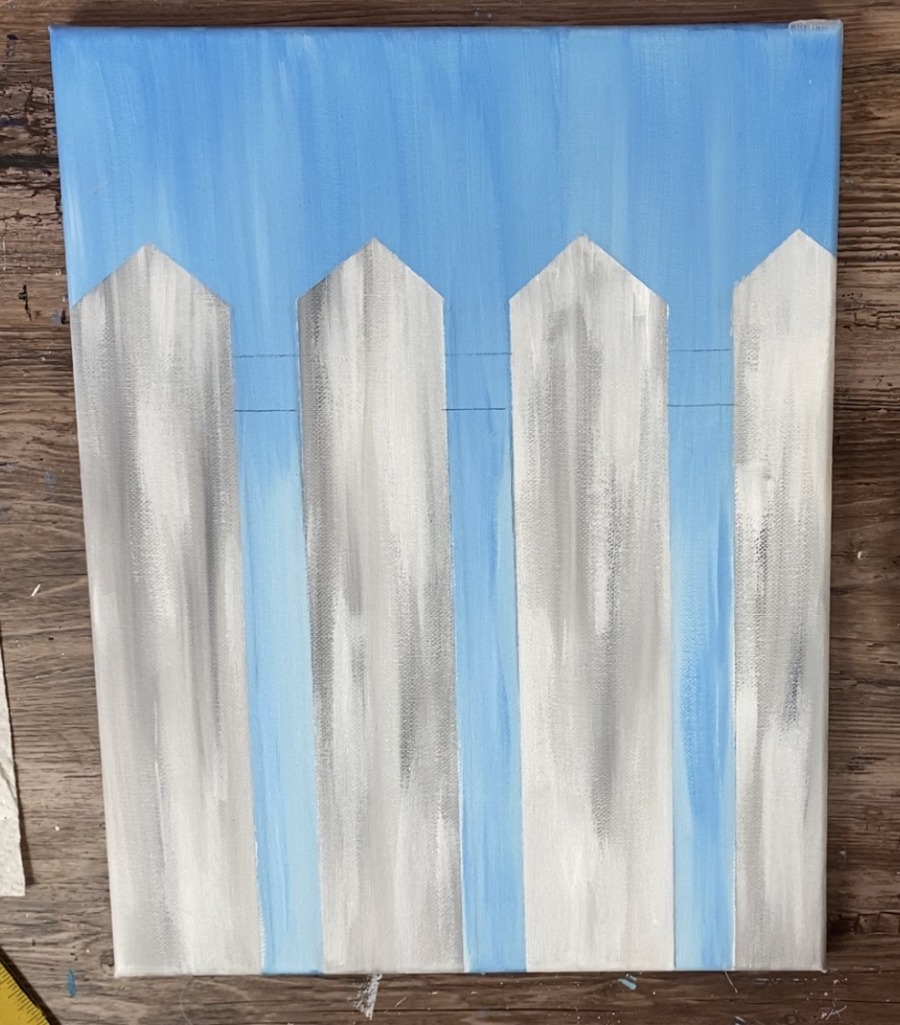
1. Draw The Fence Posts
There are probably 50 different ways you can do this fence painting! You can paint the background first, then lay the masking tape. You can paint the background then draw the fence and not use masking tape. You can paint the fence first and then paint the sky, etc!
I found it easier to draw the fence posts first and then paint the background. It’s just how my mind works – I like to visualize the layout before I get to painting!
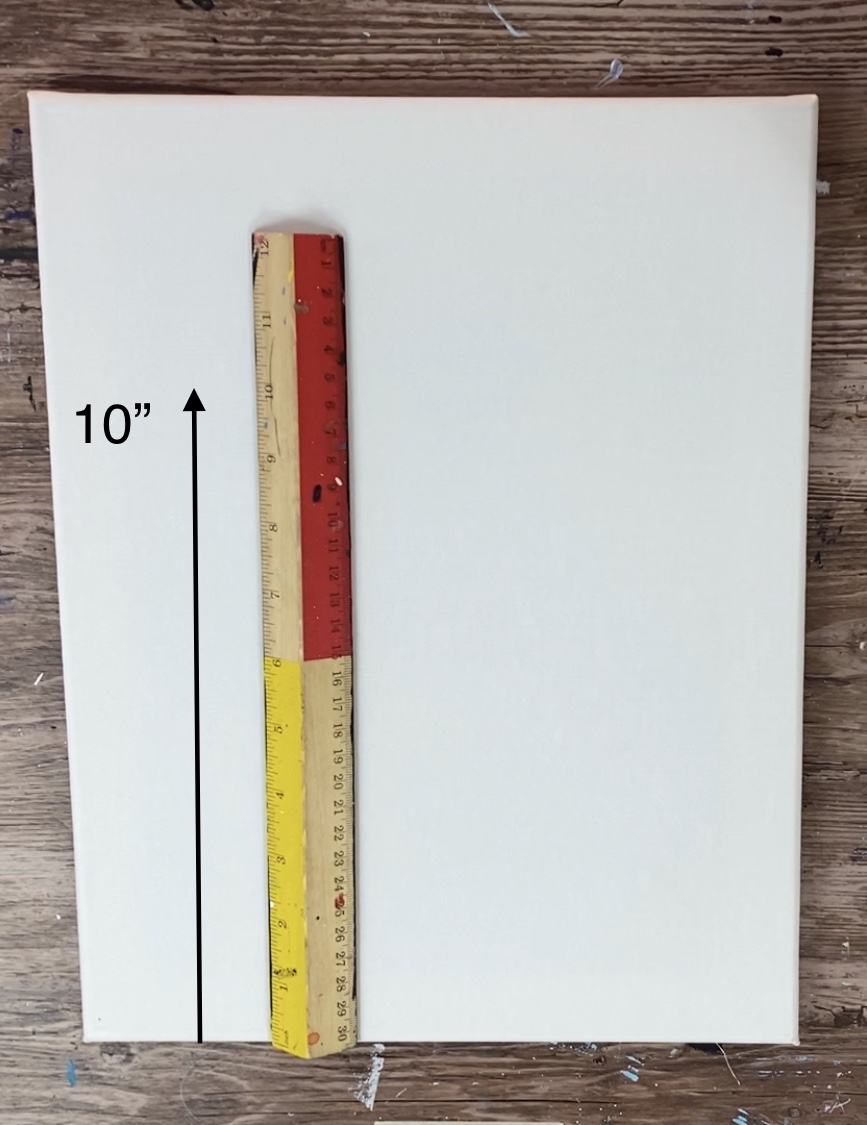
To draw the fence, first lay your 11 x 14 canvas vertically and measure 10” up.
Note: If you are doing this on a different size canvas, you will need to estimate. The fence does not have to be these exact measurements.
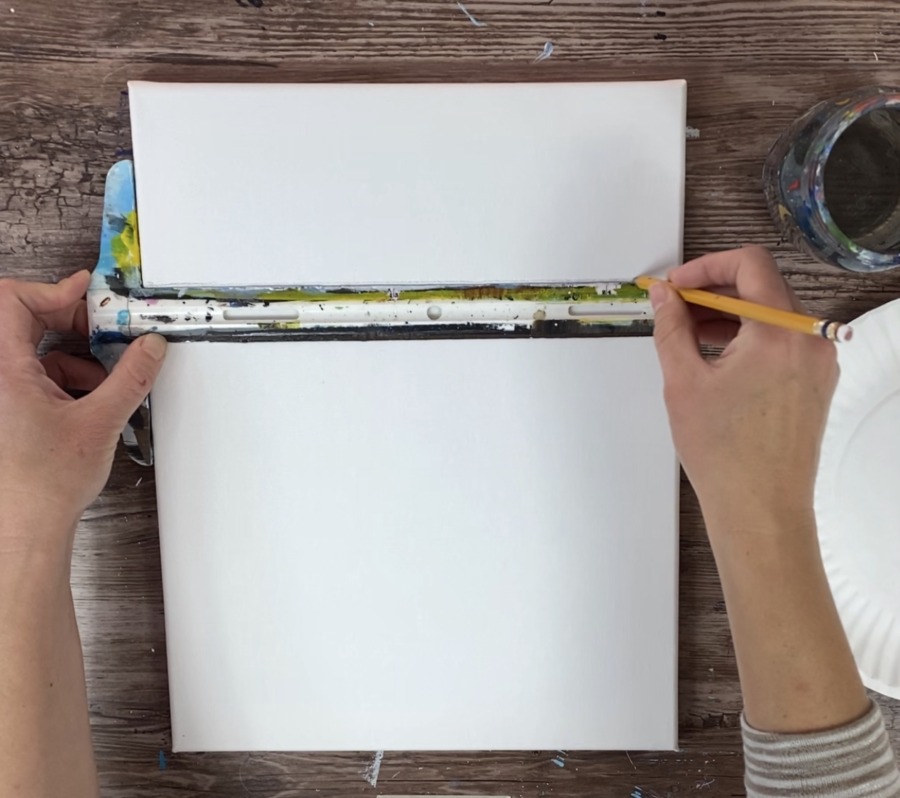
Then draw a horizontal line across the canvas. Using a T-Square ruler really helps with this step.
Next draw the vertical fence lines using the T-Square. I made my fence posts about 2.25” wide with a .75” width between posts.
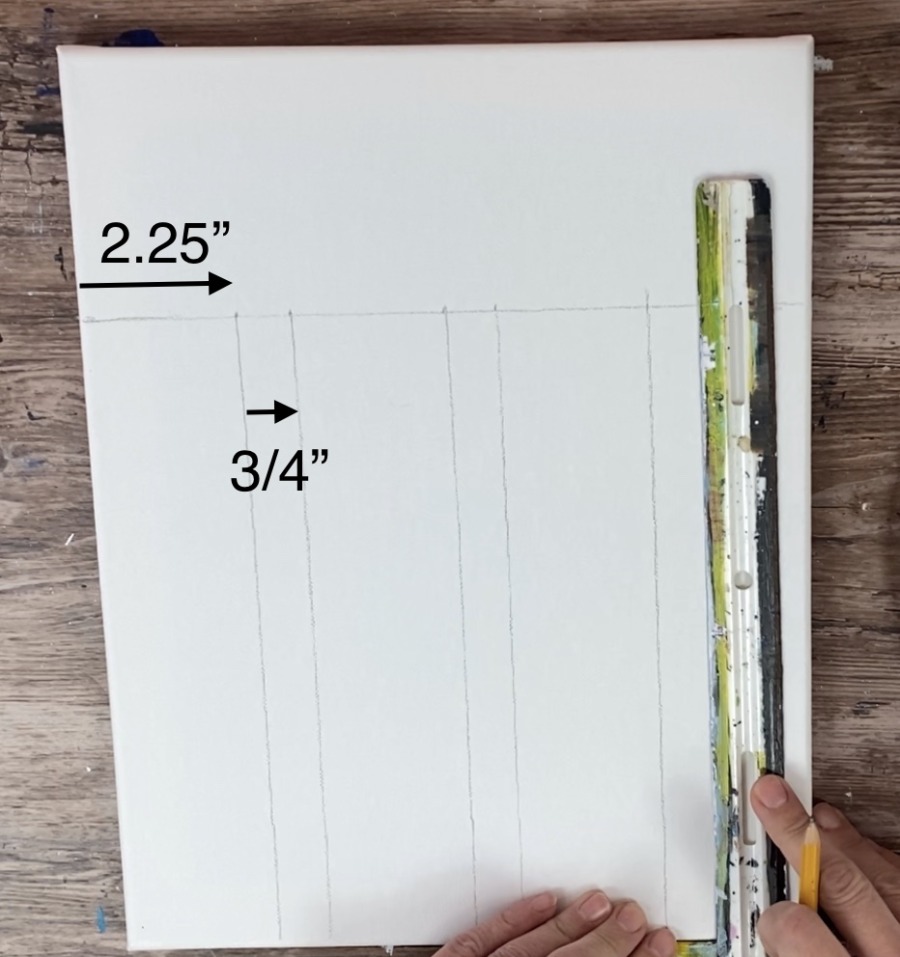
Again, you do not have to use these exact measurements! I personally think it gives the fence more character if each post is not perfect.
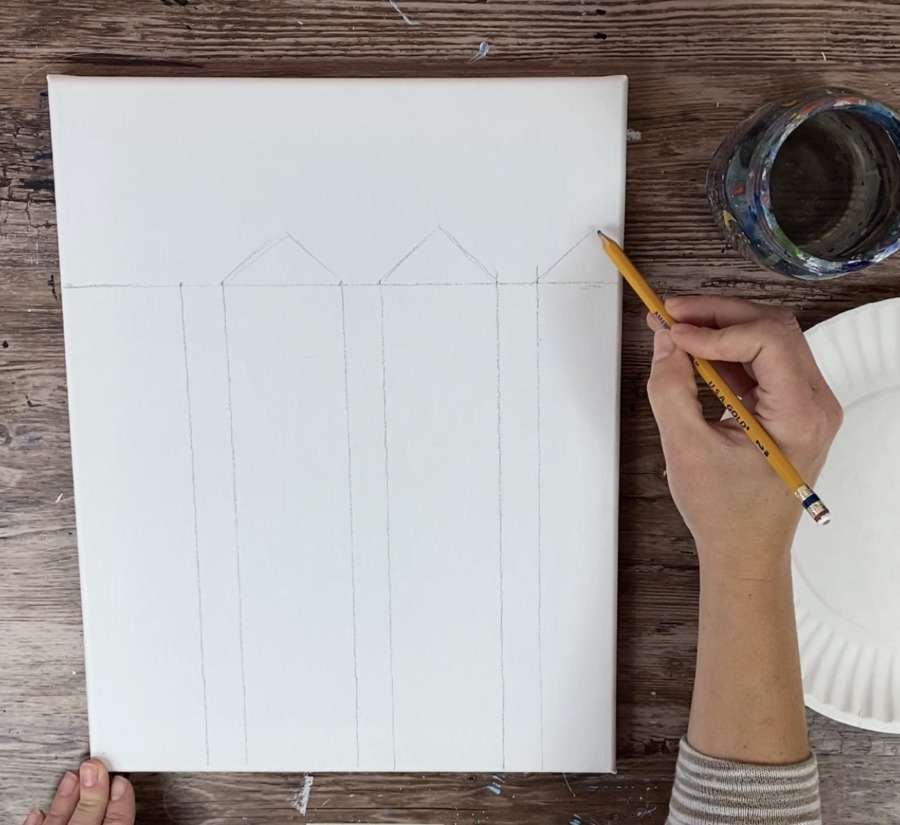
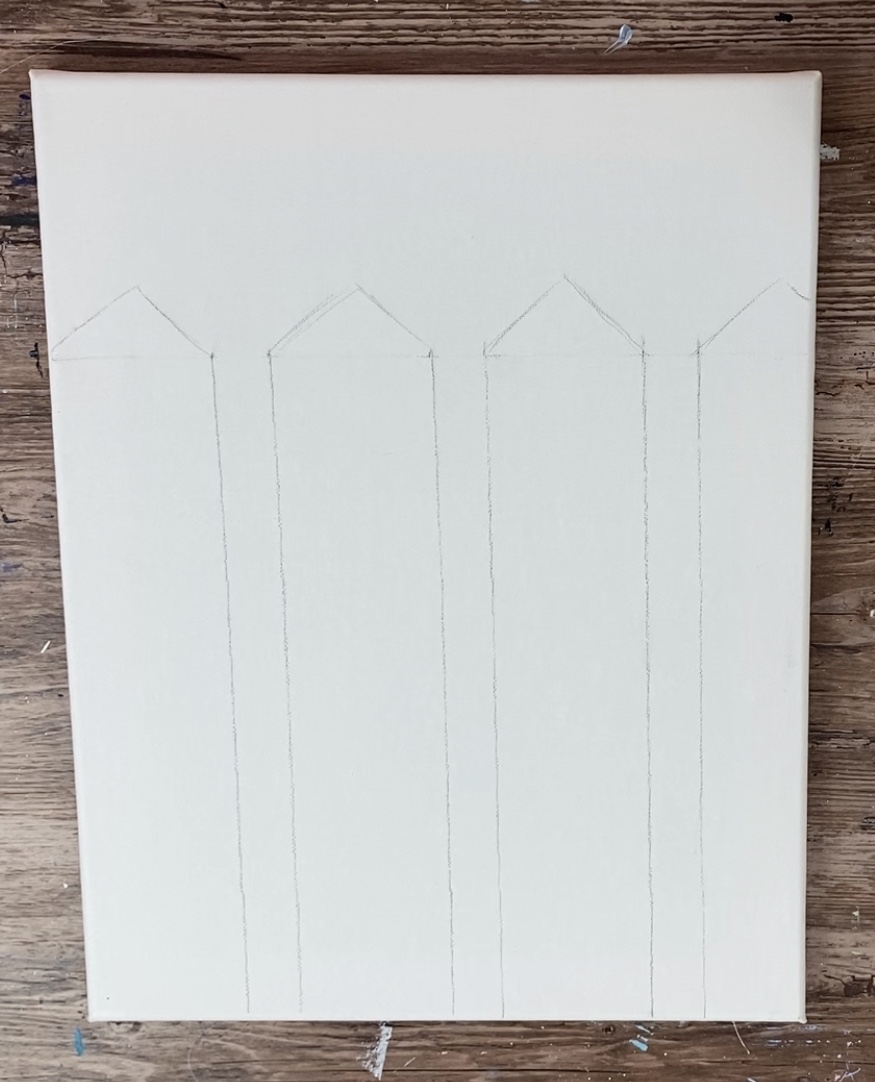
Then draw triangular tops to each post and erase the horizontal line you originally drew.
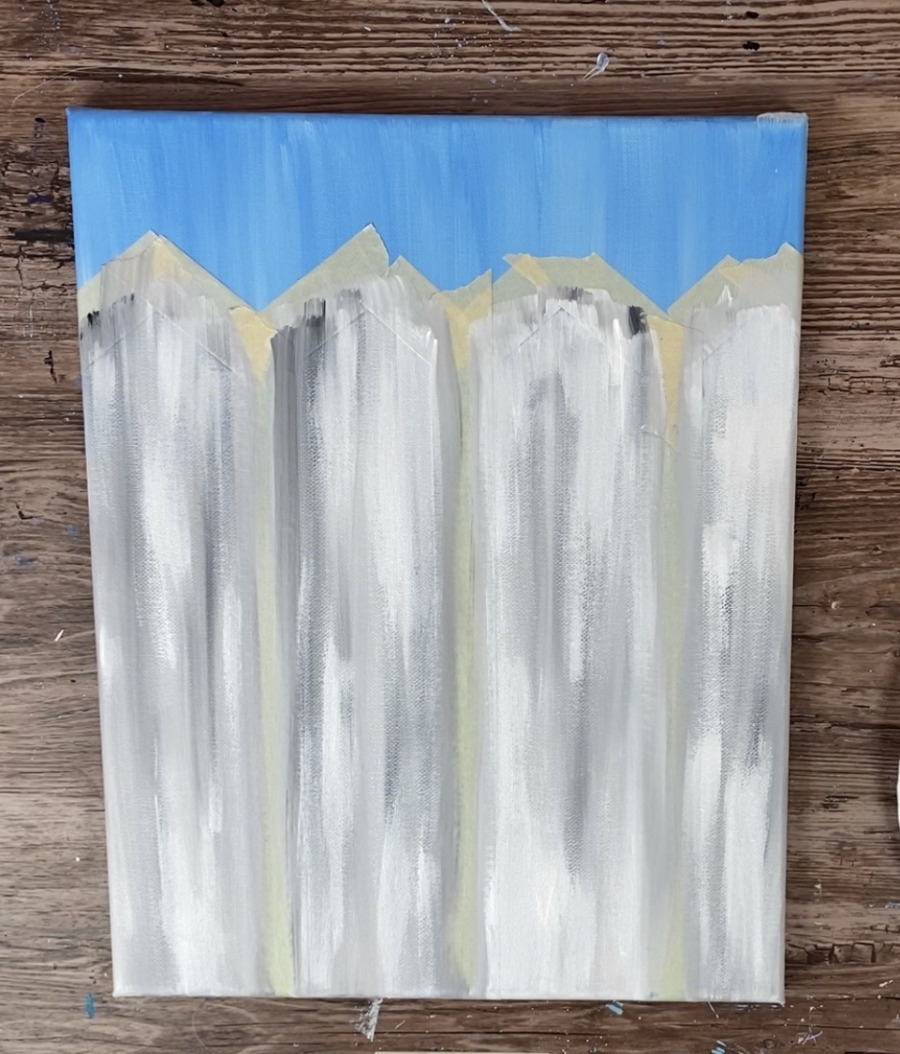
2. Paint The Sky
Next paint the sky. You can do your best to go around the posts as much as possible. OR you can still paint over some of the posts like I did.
Tip: to get the paint flowing on the canvas at first, add a little bit of water to the top area in the sky (not dripping wet, just a little thin layer).

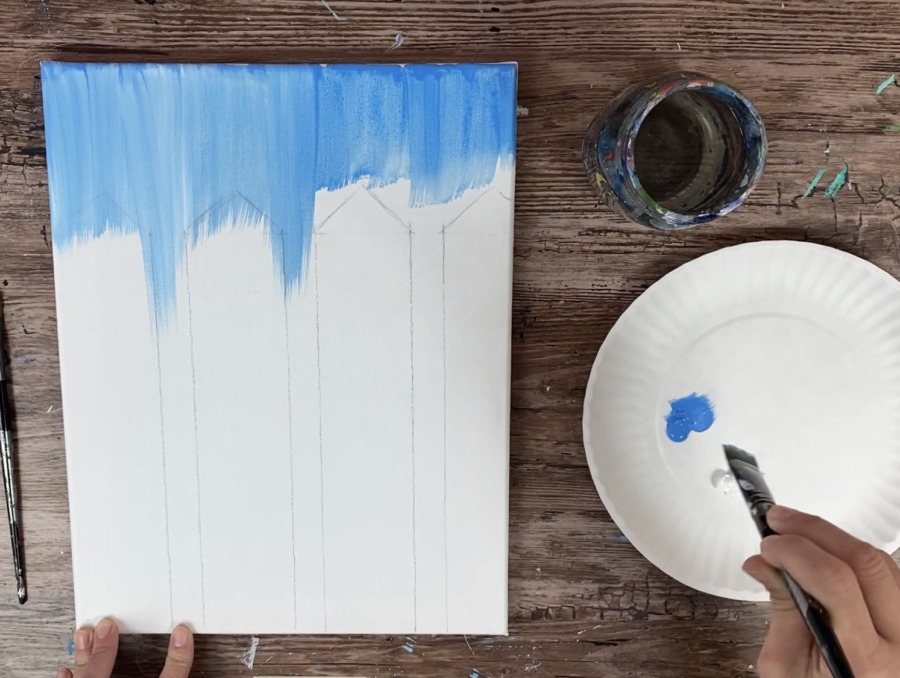
The colors I used for the background were: cerulean blue and titanium white. I also used a 3/4 Wash brush for this.
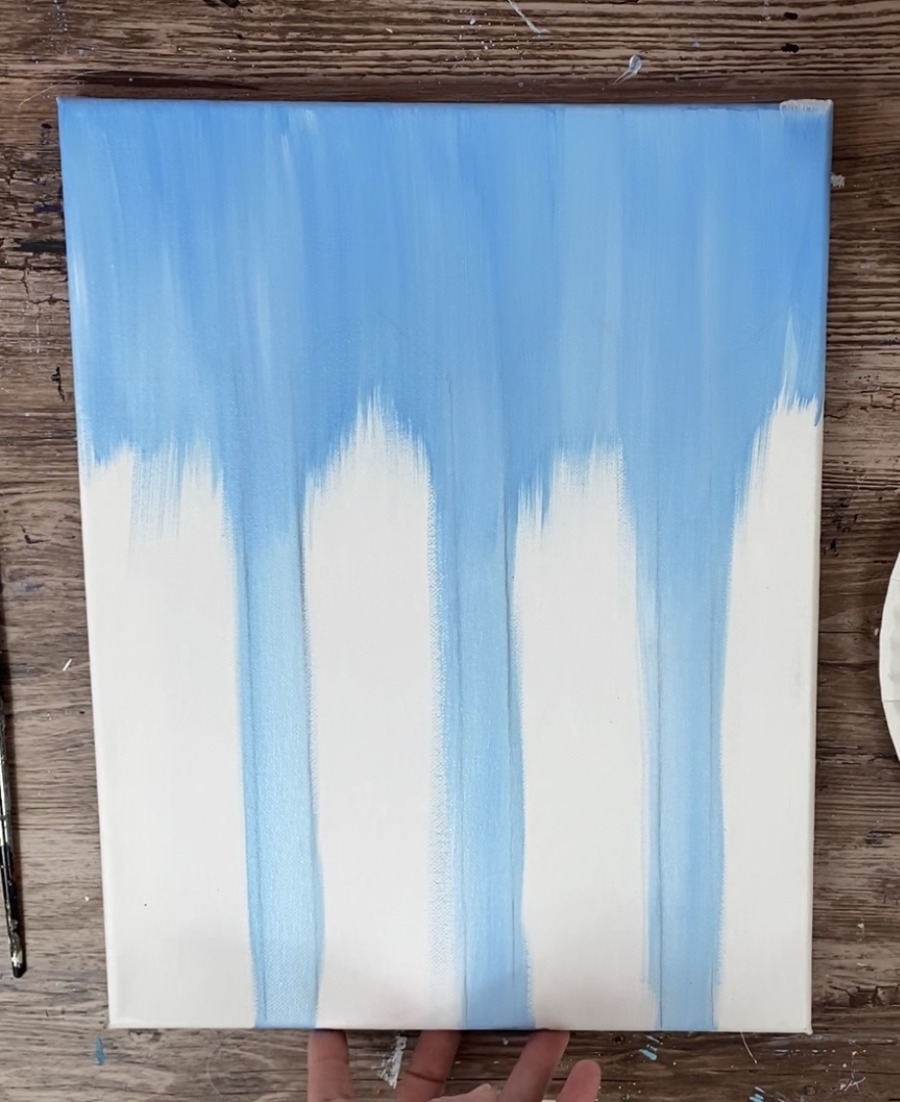
I double loaded my 3/4 flat brush in cerulean and titanium white. At the top there is slightly more blue then white making it slightly darker on the top.
On the bottom there is more white making it slightly more lighter on the bottom. Fill the entire canvas, going around the posts or slightly painting over them.
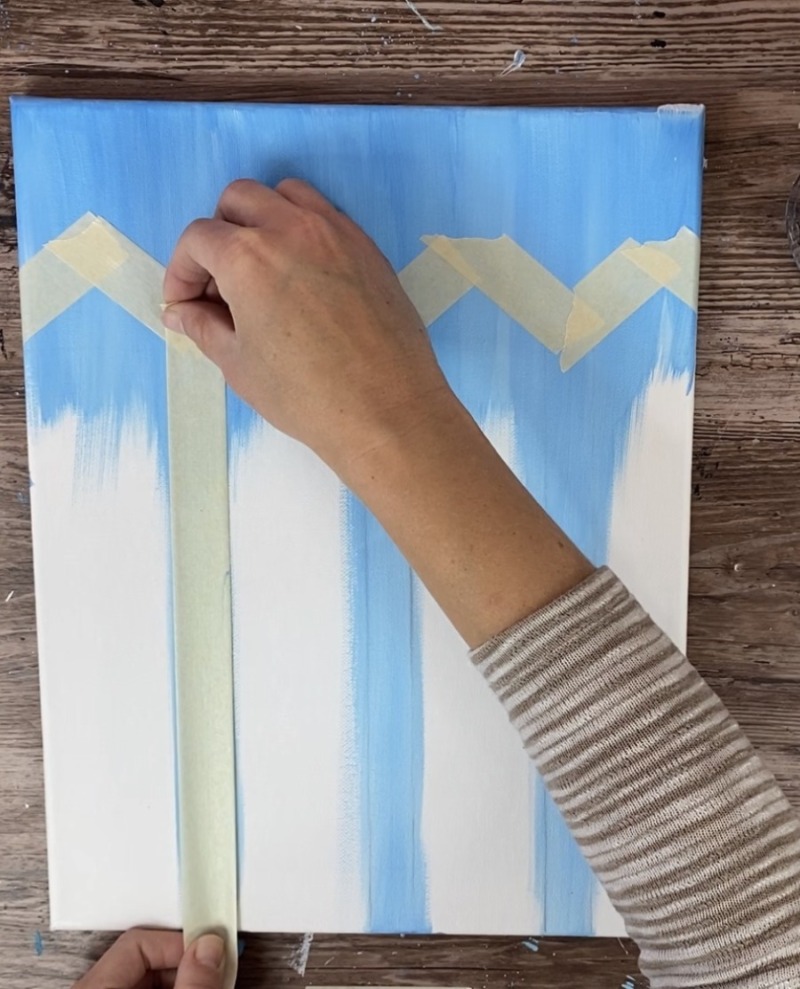
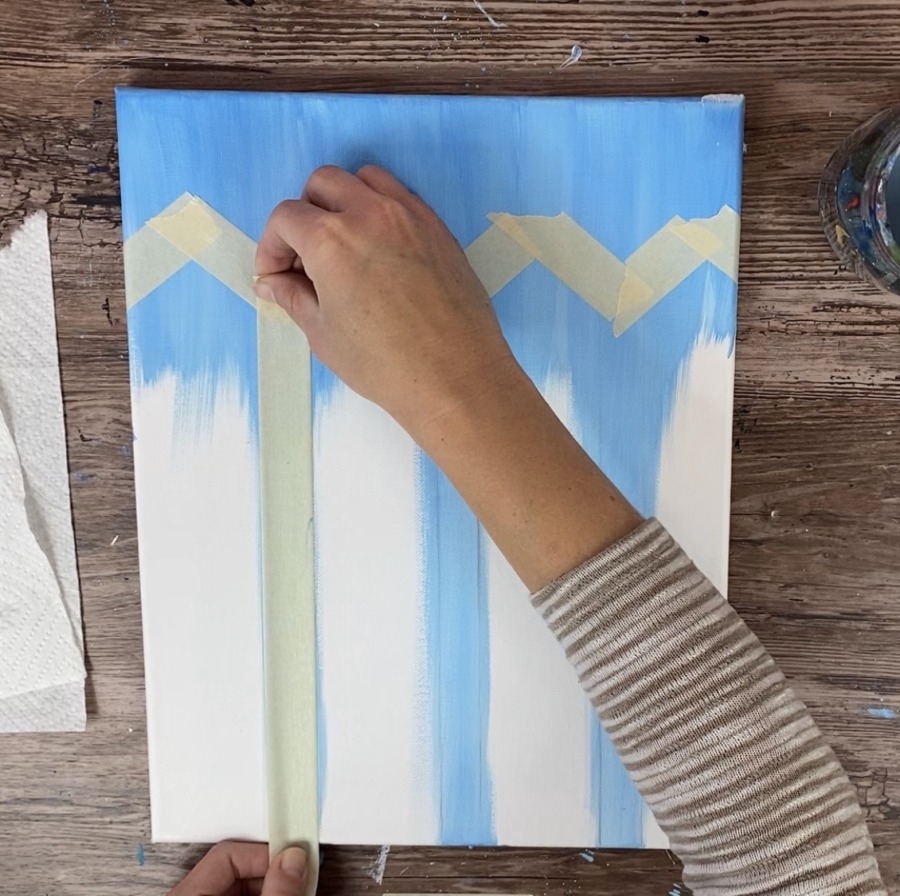
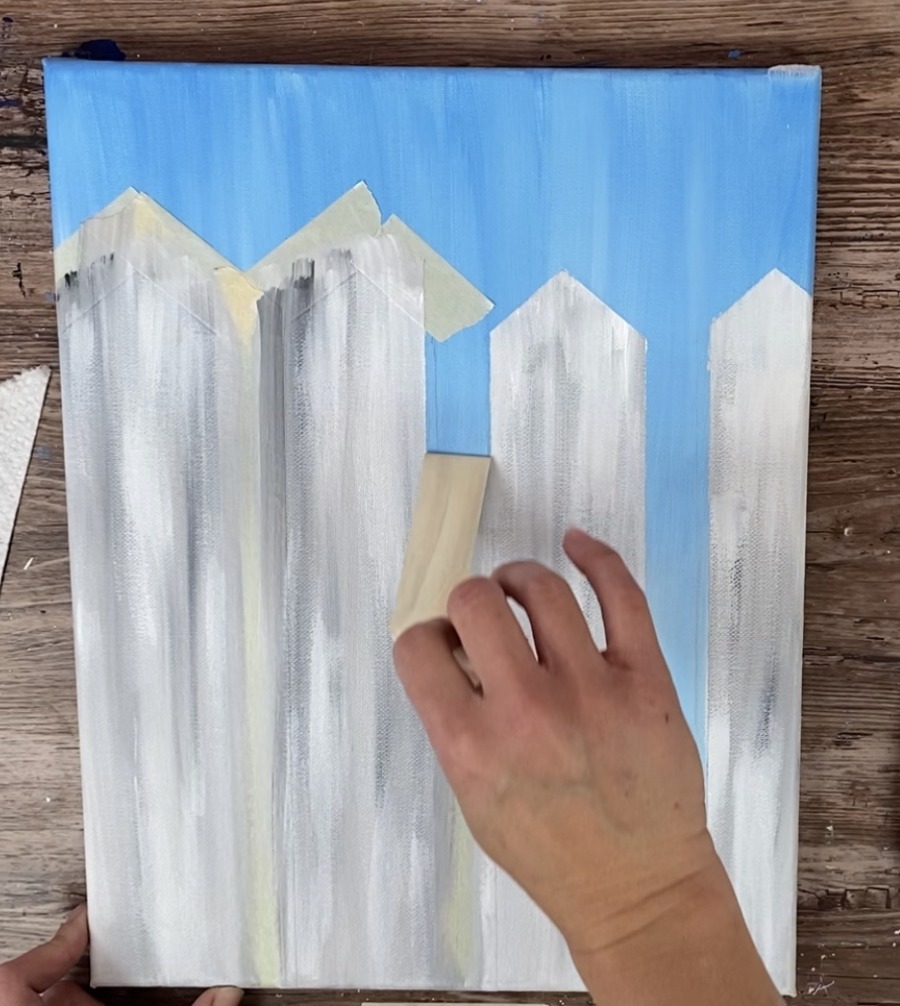
3. Use Masking Tape To Block Off The Sky Around The Fence
It is very doable to do this without the masking tape and just paint your fence in using a flat brush for the edges.
However, I found the masking tape extremely effective for this next step!
First I blocked off the triangular tops of the fence posts.
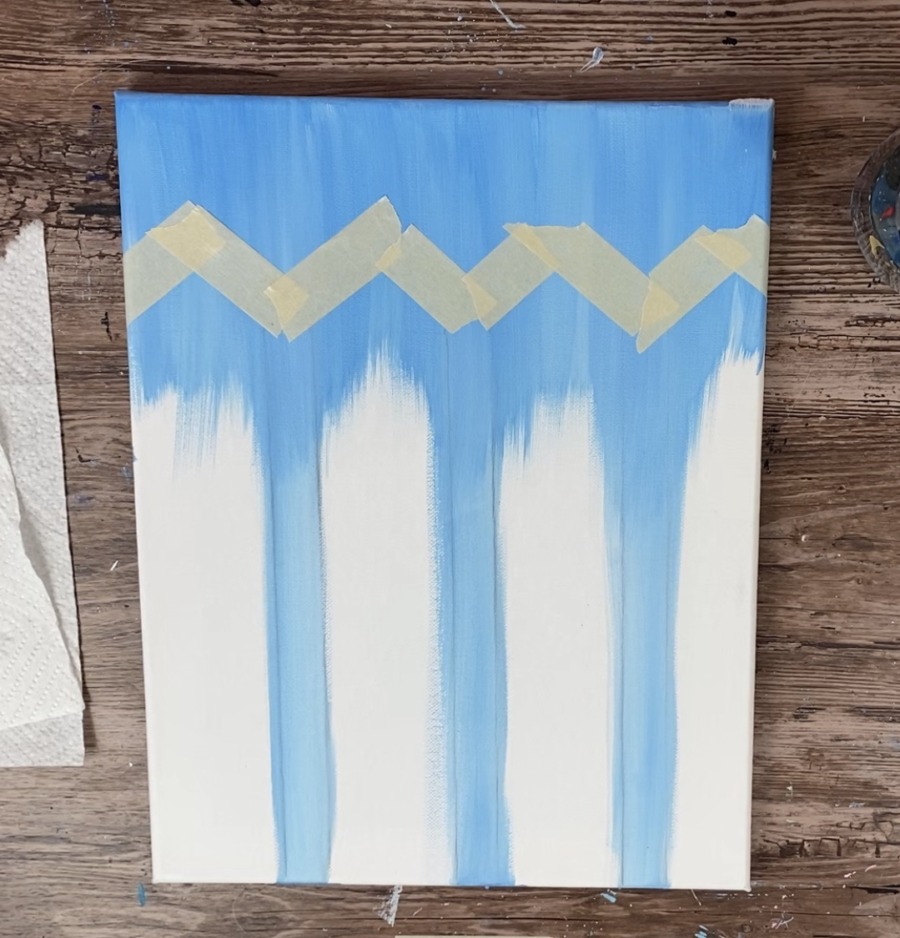
Then I placed the tape vertically between the fence posts.
Note: the masking tape I used was slightly thicker than 3/4”. At that point, I pretty much decided it would still be worth it to use the masking tape here between the fence posts and it turned out fine!
If you want, you can cut your masking tape to a thinner width to fit…

4. Paint the fence posts
For this next step, I loaded my 3/4 flat brush with titanium white and loaded one corner with mars black.
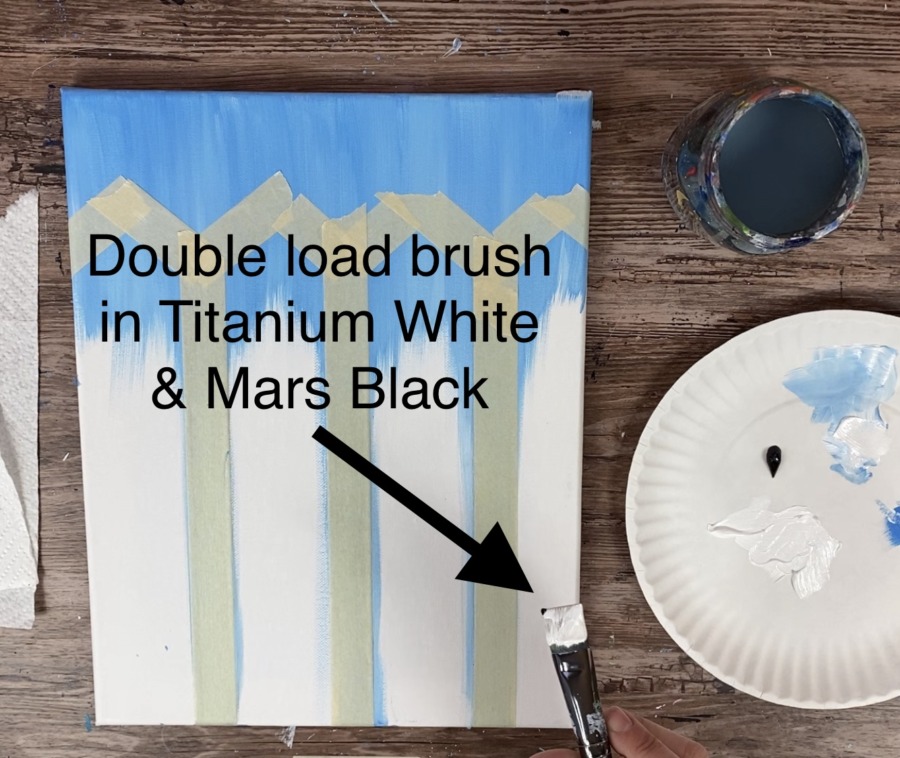
Then I painted up and down strokes.
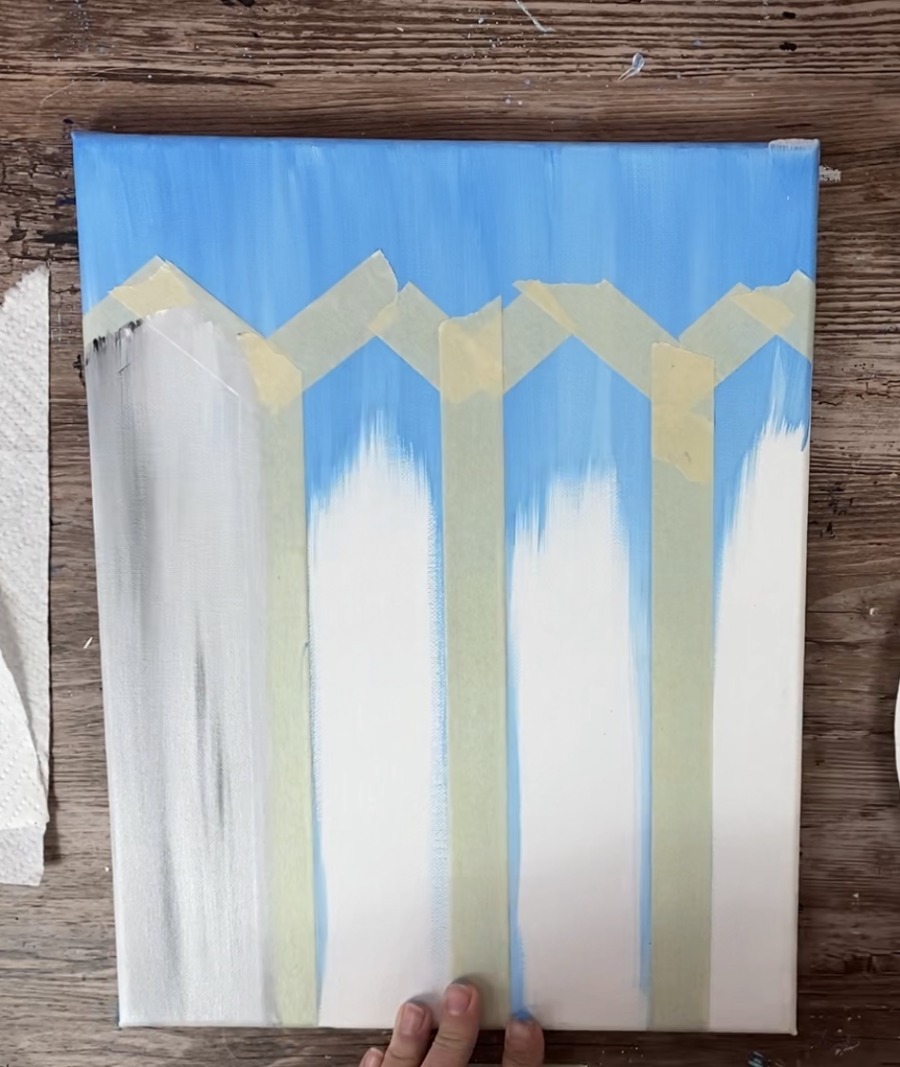
When you paint, the black will blend slightly with the white creating a white / grey blended look. Do this with all the fence posts.
Then I waited for the painting to dry a little.
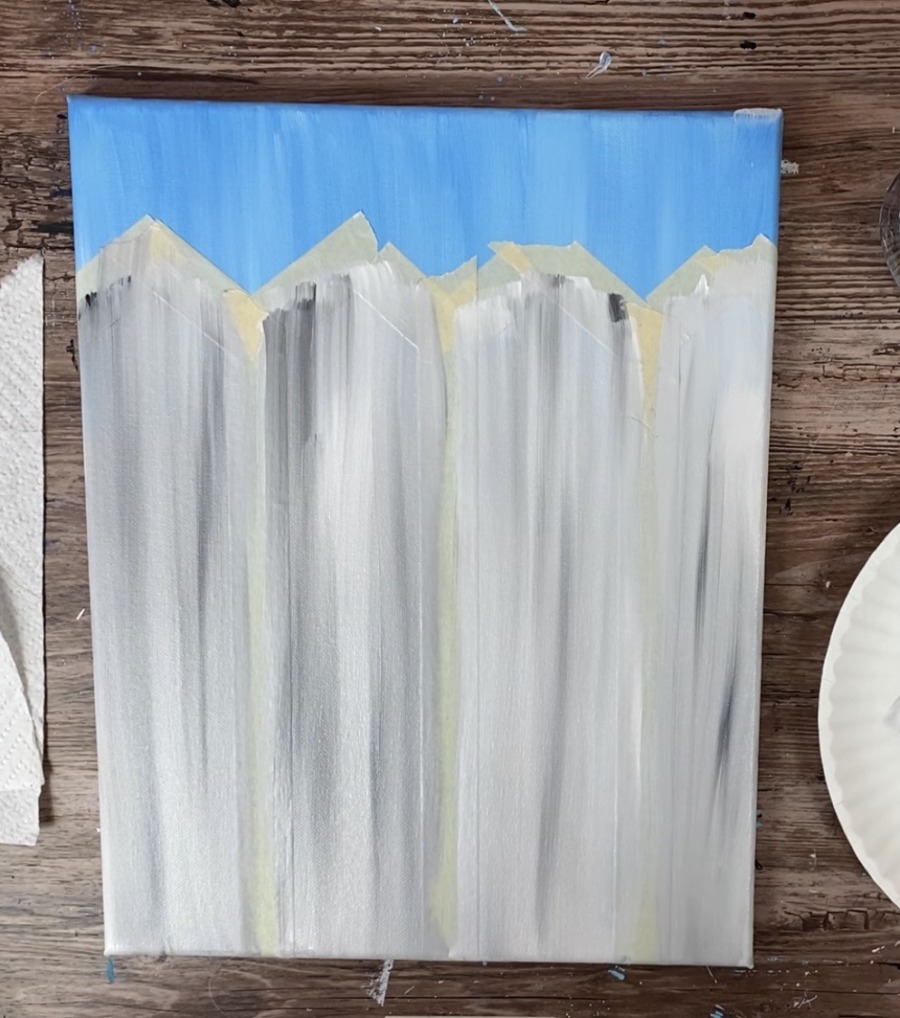
Next I used just white on my 12 bright brush (you can also do this with the 3/4 brush).

I painted up and down dry brush white strokes on the fence. This gave it a really cool “rustic” look.
Dry brush means there is not a lot of paint on the brush and the brush was never dipped in the water.
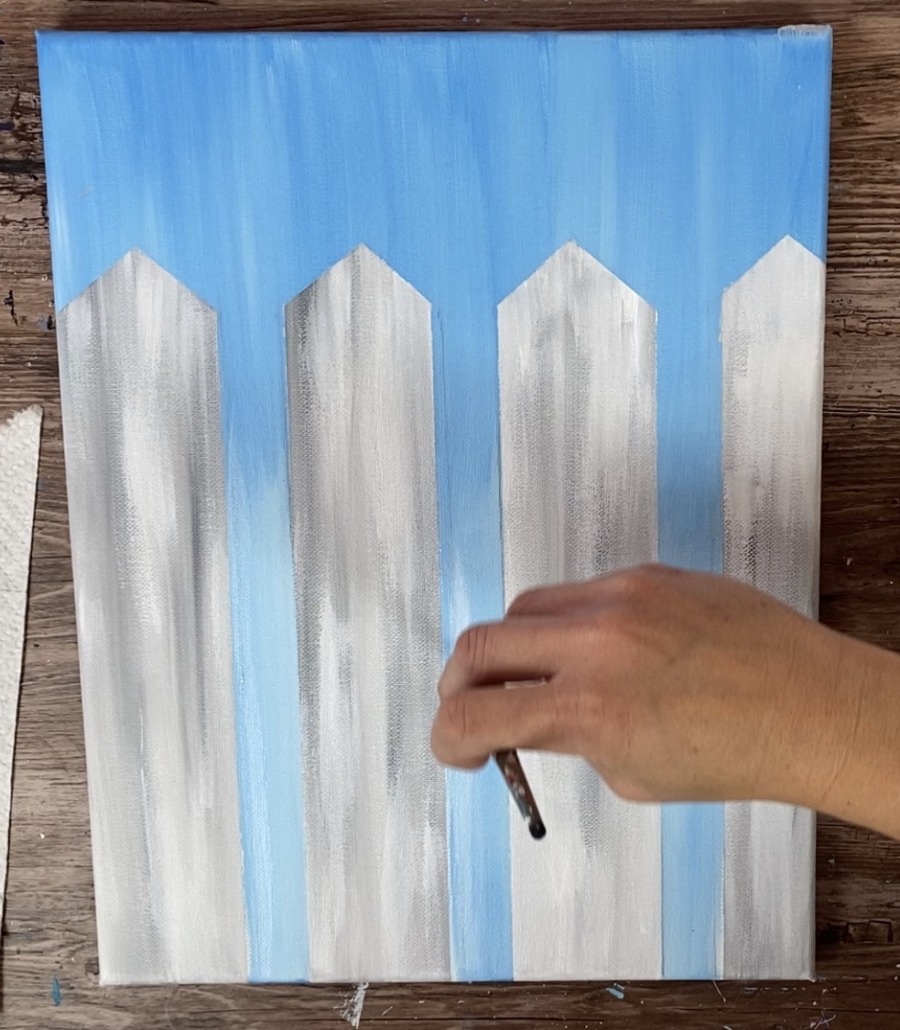
5. Pull the tape off and do some touch ups
Let your painting dry a bit. Then carefully pull off the masking tape.
Remember when I mentioned the masking tape wasn’t exactly 3/4” wide? There were lines showing from my original drawing but I was easily able to paint over them with some white and cerulean blue.

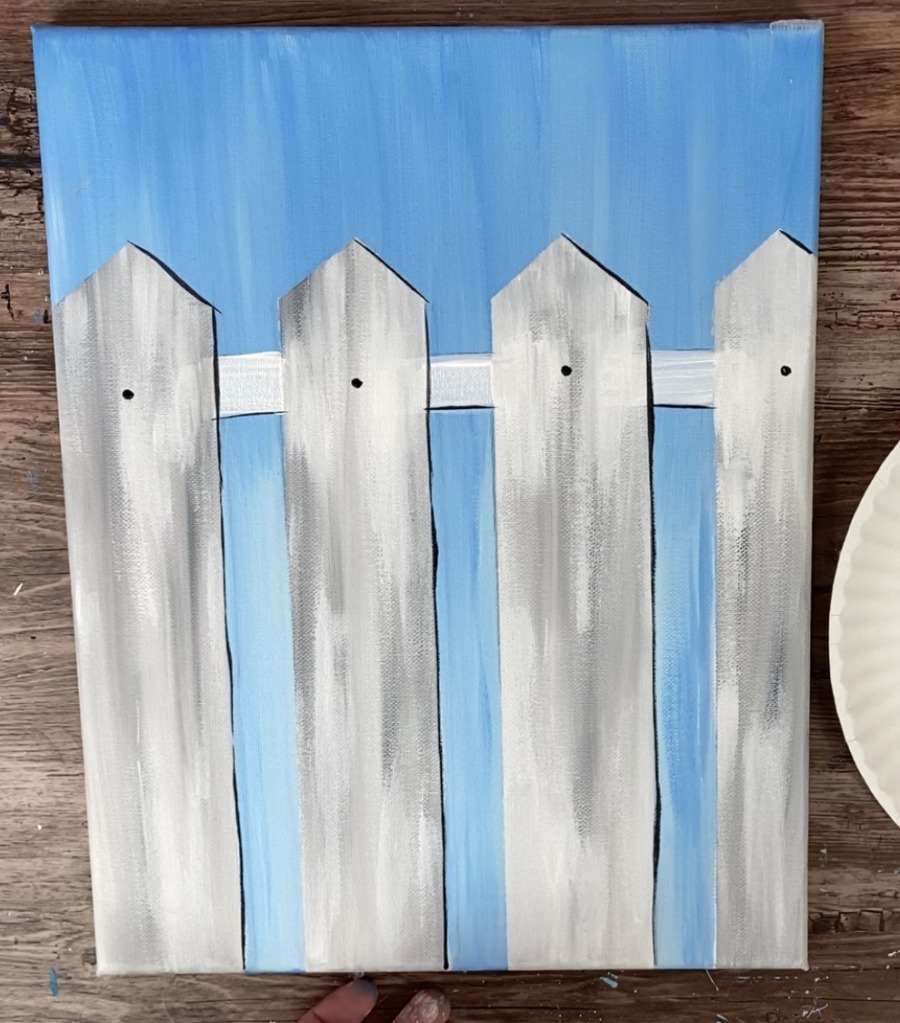
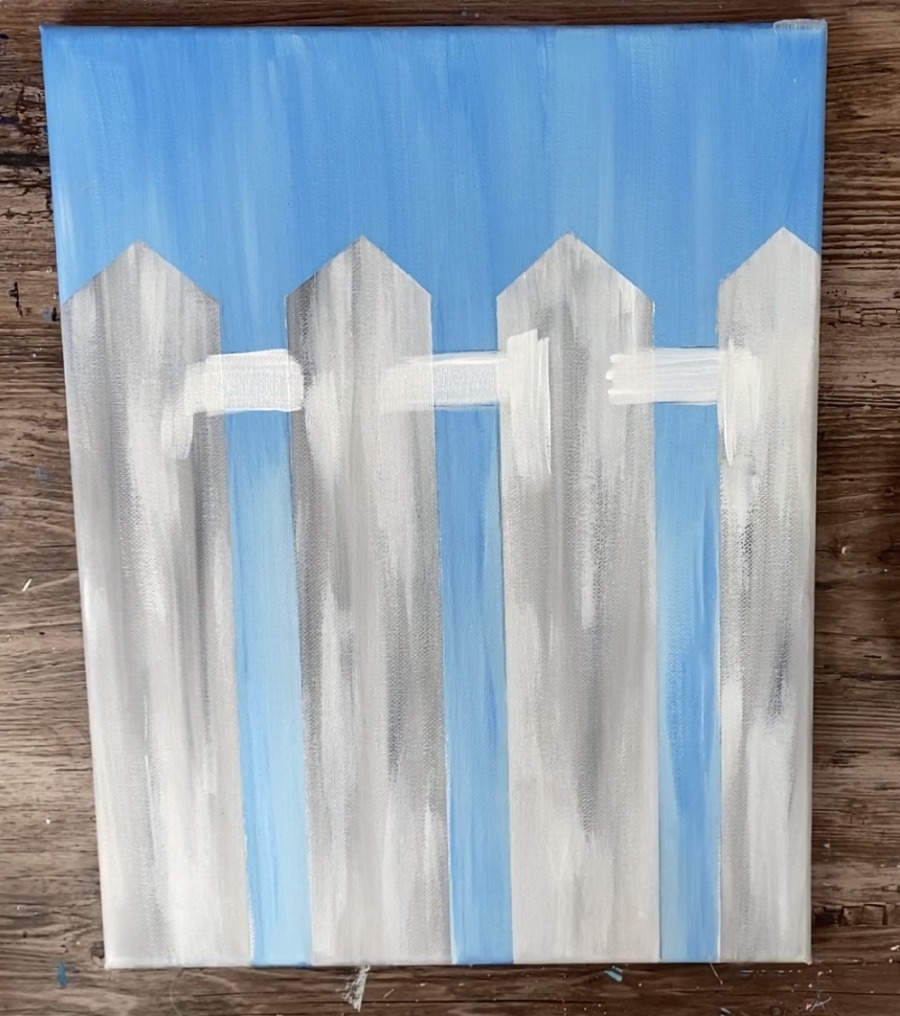
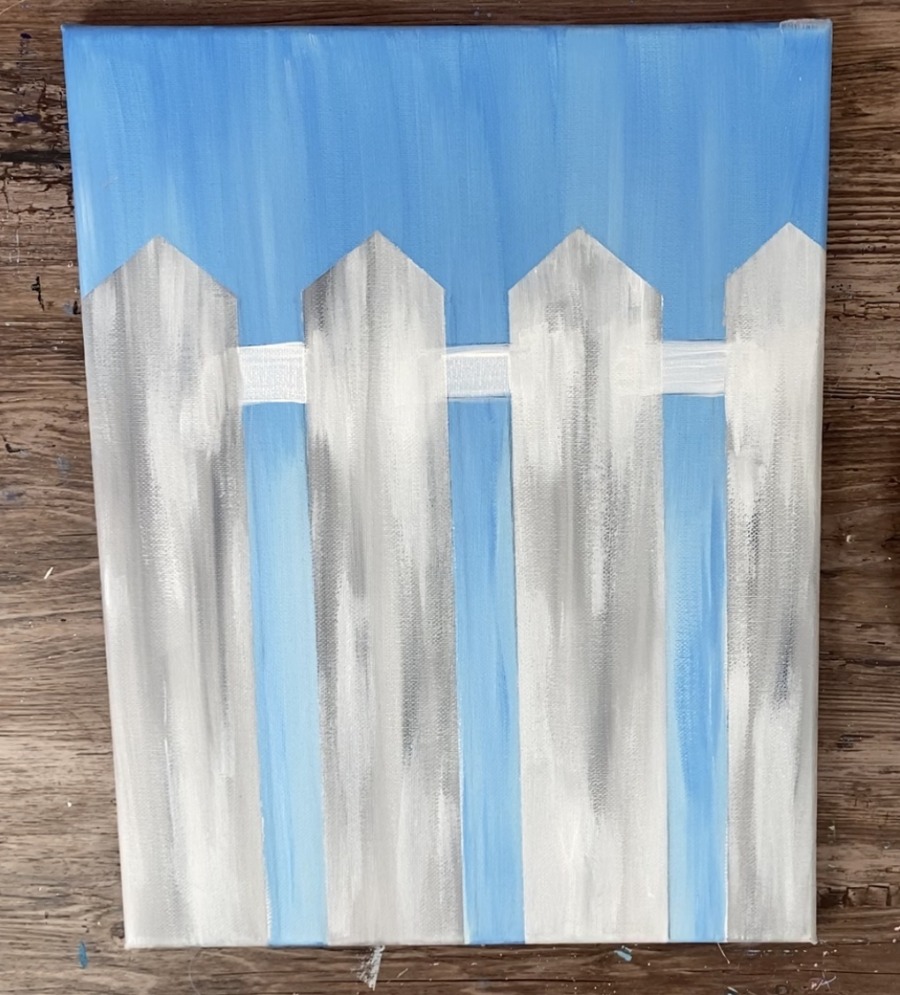
6. Paint the horizontal beam
Next use your T-Square ruler to draw a horizontal line. I estimated about 3/4” down from the tip of the posts. However, this doesn’t have to be exact.
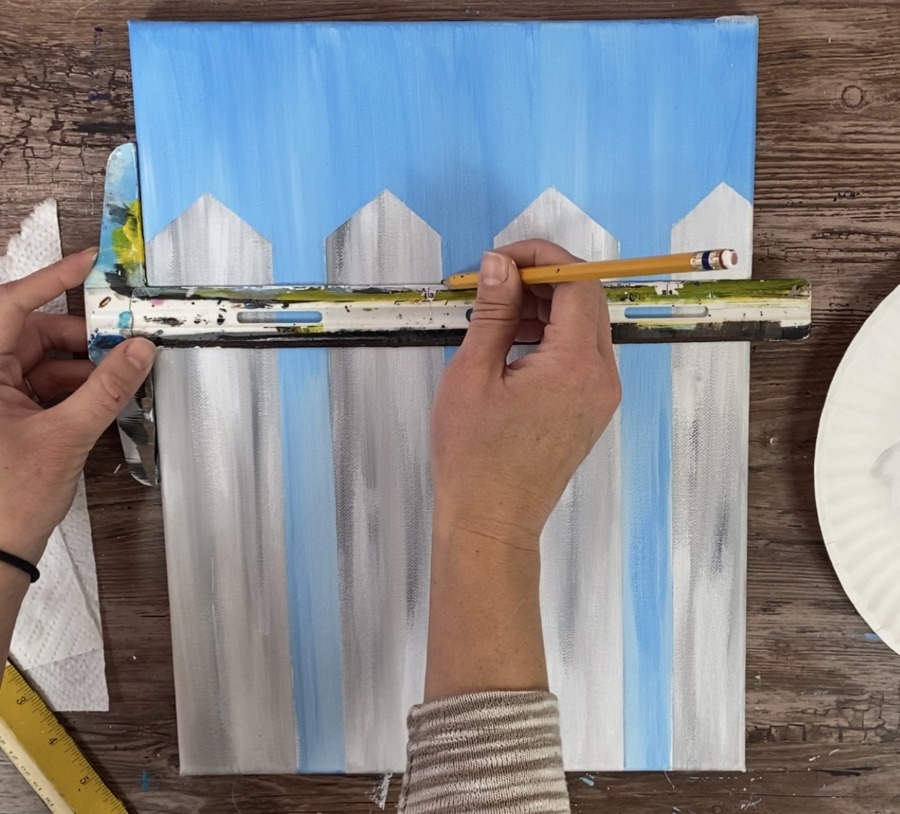
The thickness of this horizontal beam was about 3/4”. Again, this doesn’t have to be exact.
Then I painted it in using my 12 bright brush. Of course I went over the lines a little but that can easily be fixed by vertical strokes so it doesn’t look bad!

7. Paint the nails and some outlining
To do the nails, I simply used the back of my paint brush to stamp a dot between each post along where the horizontal beam is.
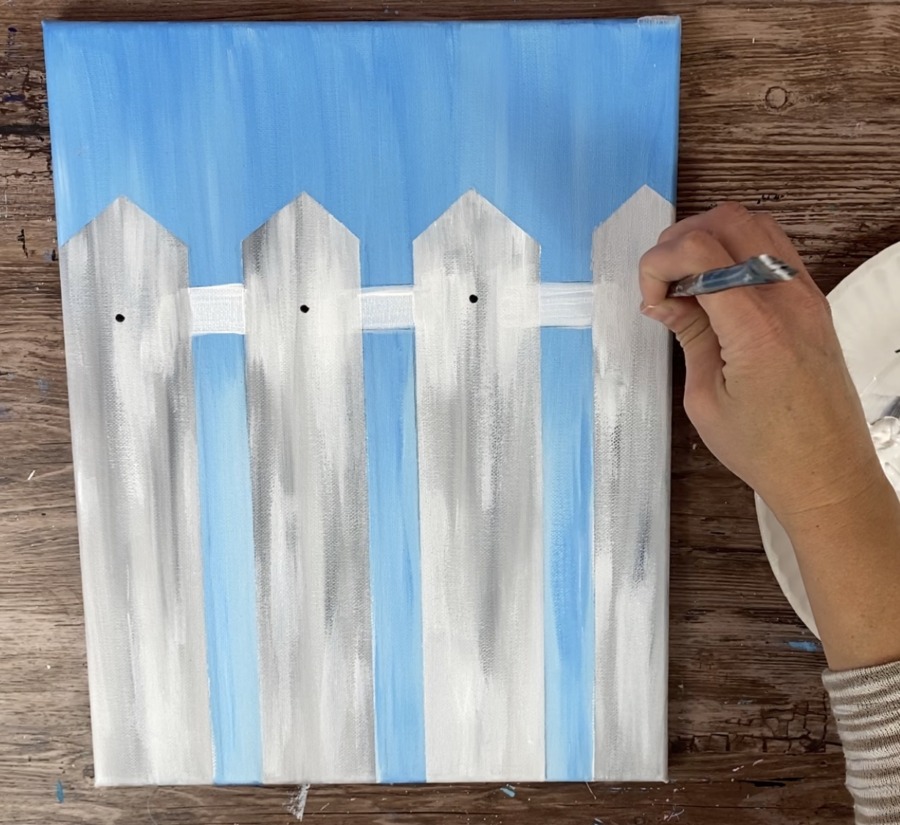
To do the outlining, I used the tip of my 12 bright brush to get that crisp straight line.
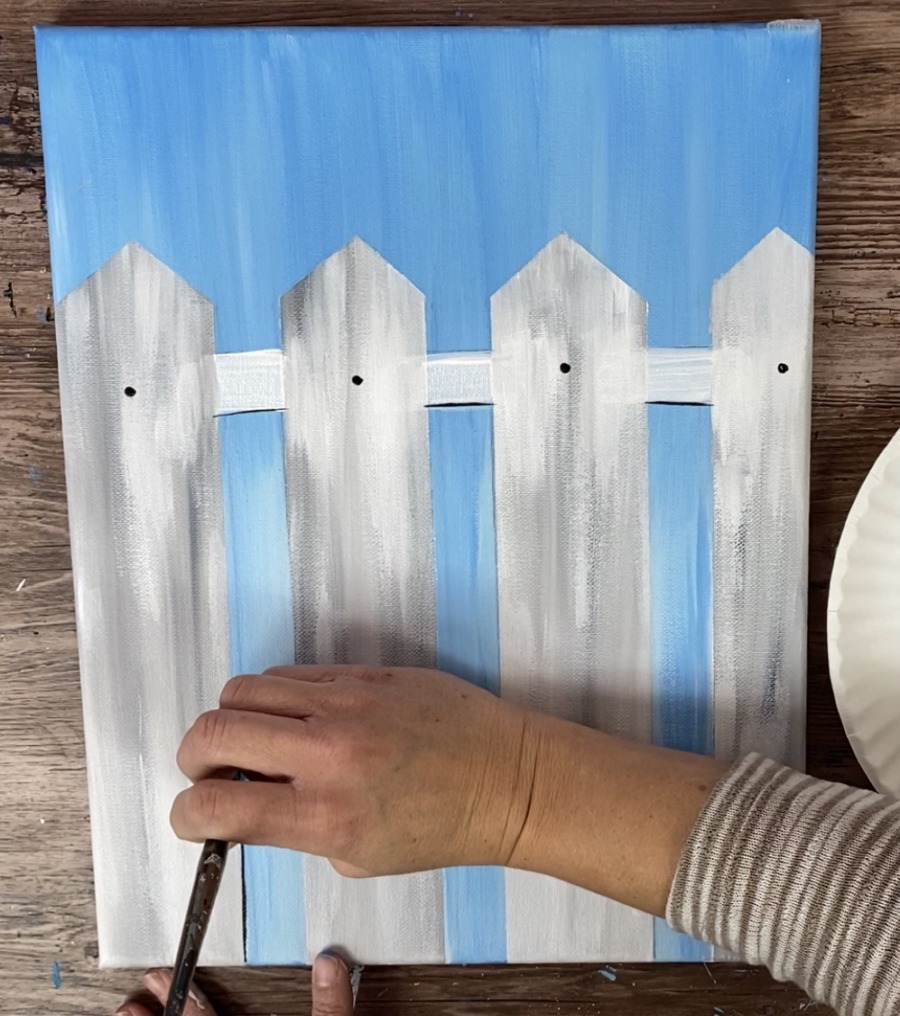
You can also use a tiny round to do the outlining, a sharpie or a paint pen!
Outline only the bottom of the horizontal beam, the right sides of the triangle tops and the right side of the vertical beams.
If you like the outlined look, I suppose you can outline all of the fence posts. But I think it gives it a little bit of a 3D look when you only outline these areas.

And we have a pretty rustic garden fence ready for all the details! Let this painting dry and then go on to part two of this tutorial!
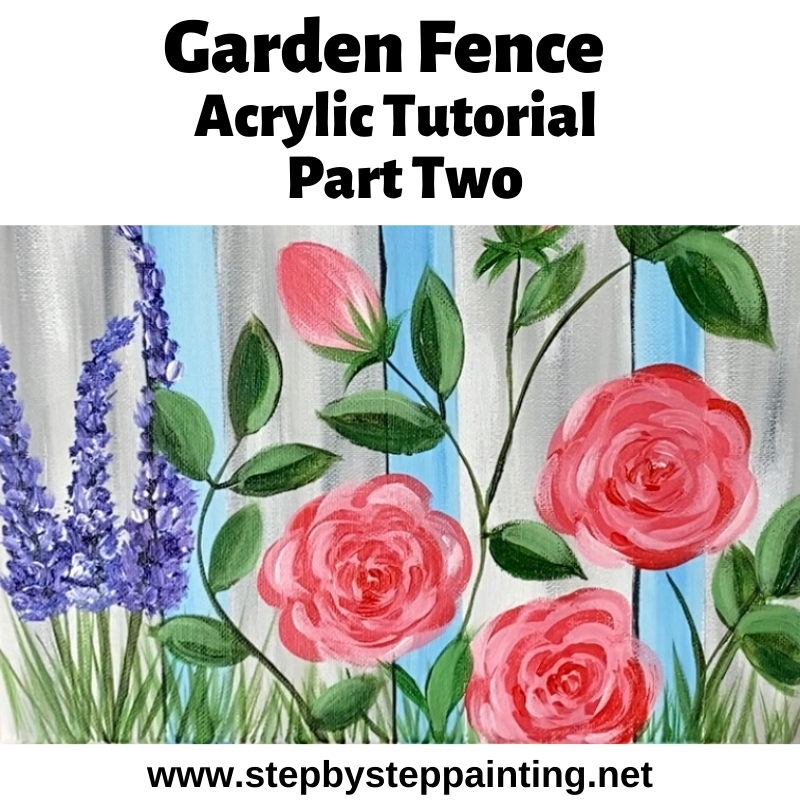
Part two – The Flowers, Grass & Dragonfly
Hey Tracie,
Thanks for sharing this great tips and ideas on how to paint fences and make them stand out from the rest. Really inspiring and very modern.
can you please paints in apple barrel paint because I don’t have liqutitex basic paint that would be wonderful thank you!