

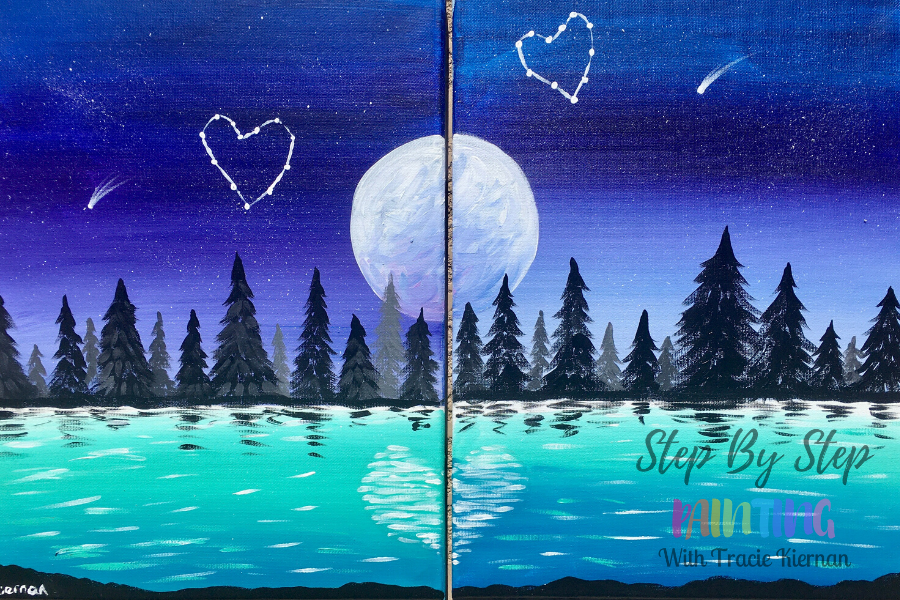
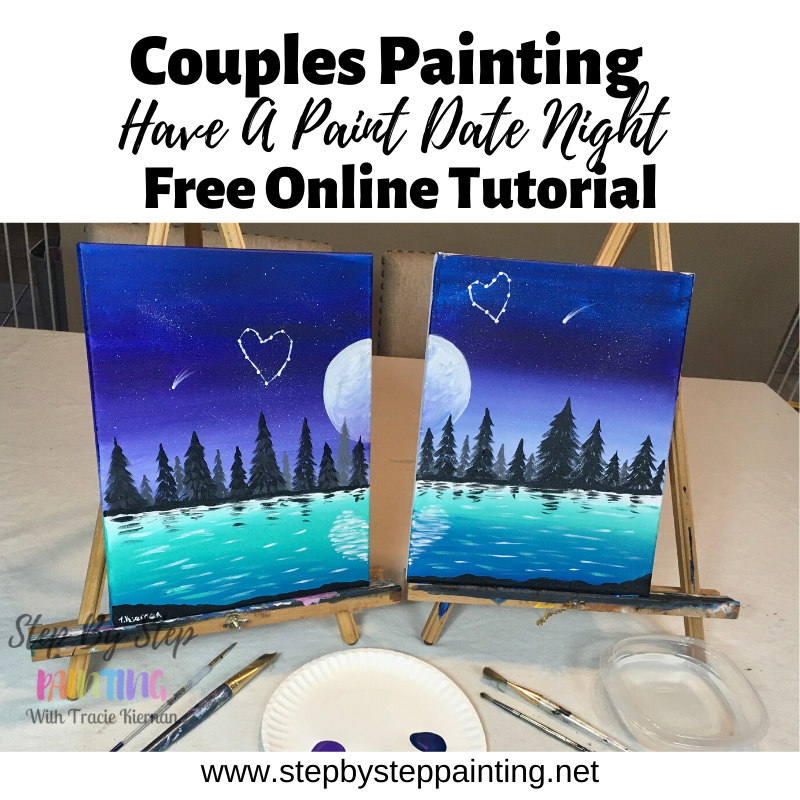
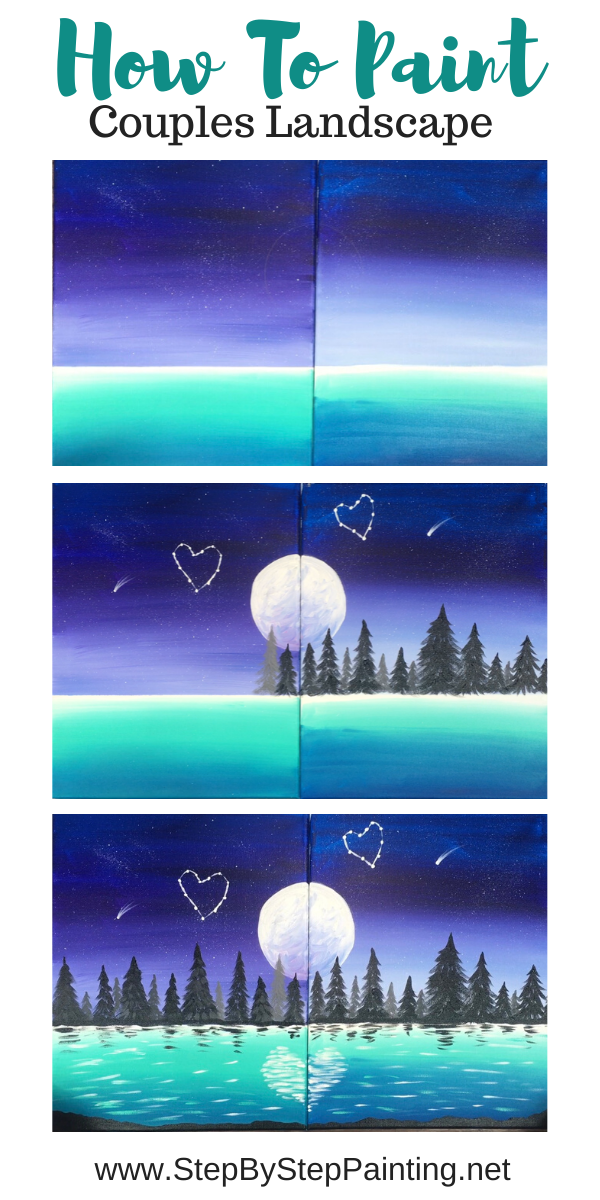
Couples Painting – How To Paint A Landscape With Moon & Trees
This is a couples acrylic painting lesson for the absolute beginner painter!
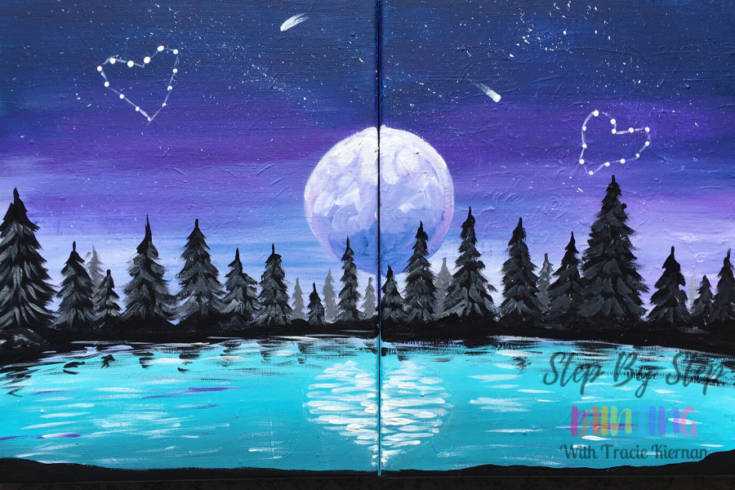
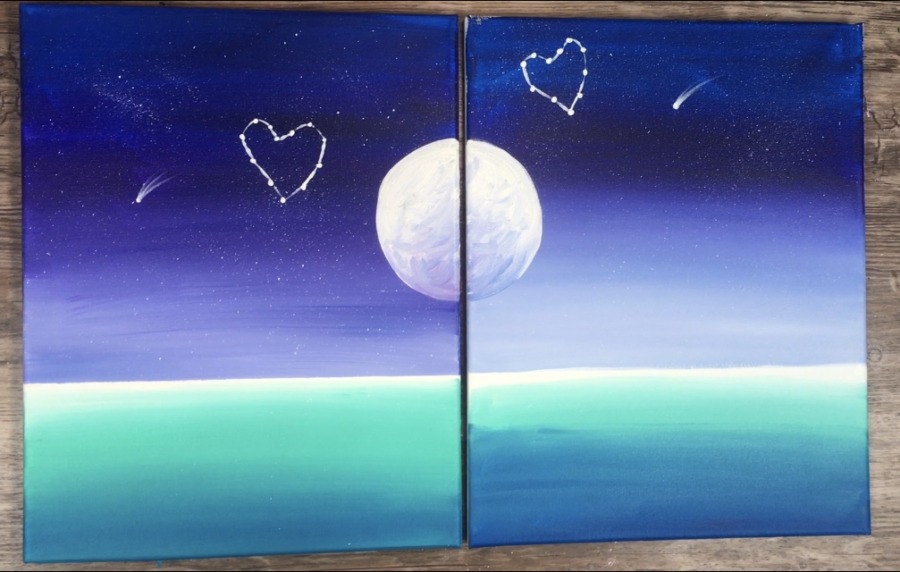
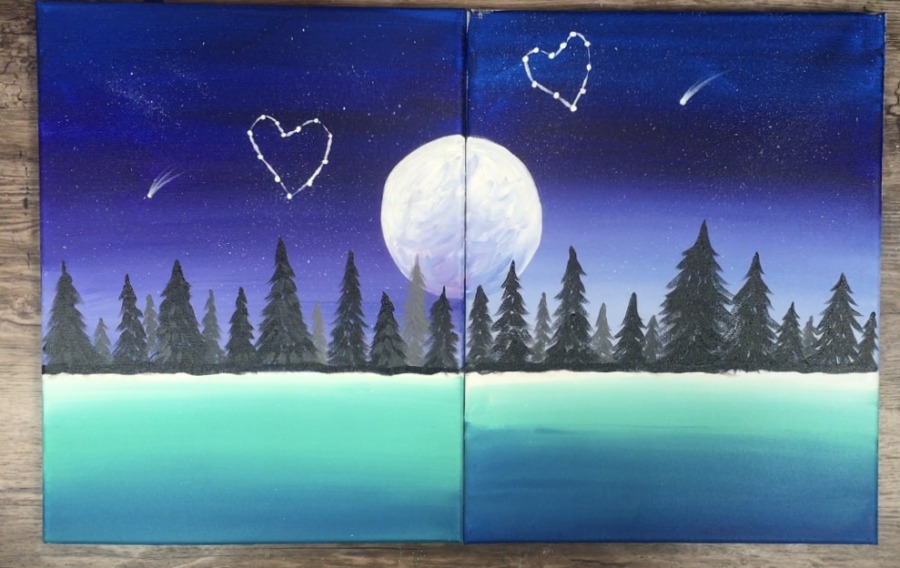
You and your partner can paint the same painting of this landscape and have the paintings meet in the middle so that two paintings become one!
Set up a date night with you and your other half. This tutorial is PERFECT for a DIY Paint Date AT HOME!
You can read more about how to set up a paint date night at home in this guest post I wrote for Our Kind Of Crazy Blog.
It’s so easy to have this type of date night and all you need to do is go out and buy the supplies at your local craft store or on Amazon.
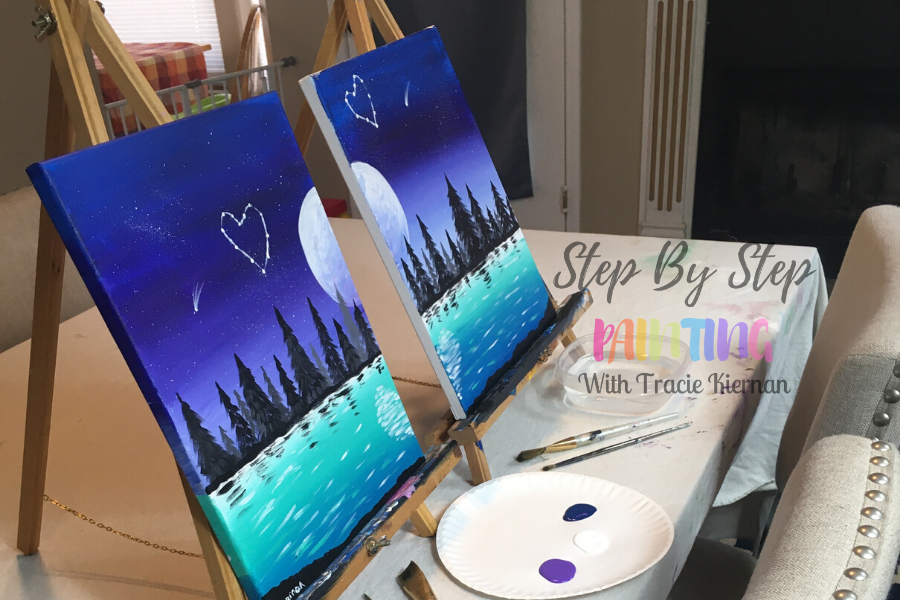
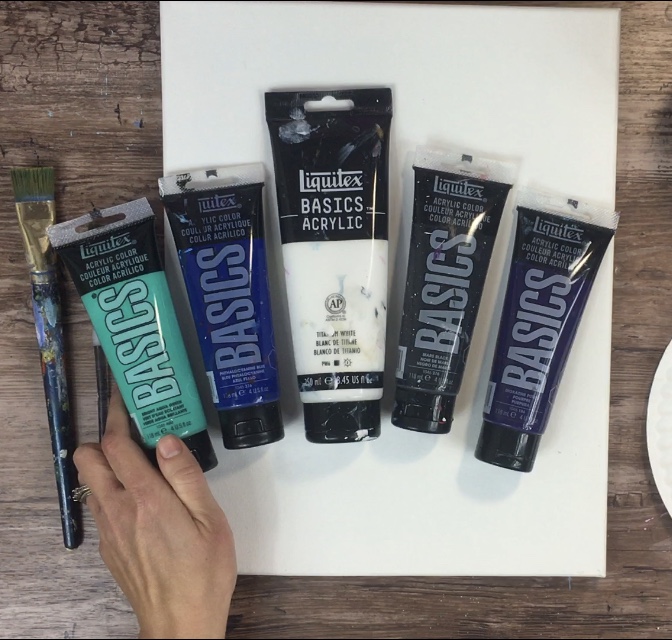
I used two 11 x 14 canvases, five colors and two different size brushes. This tutorial is geared towards the absolute beginner painter which means neither you or your partner need to have any painting experience!
I just love purple and turquoise together in any painting! I think they make a lovely sort of whimsical color combo.
Enjoy and happy painting!
Materials
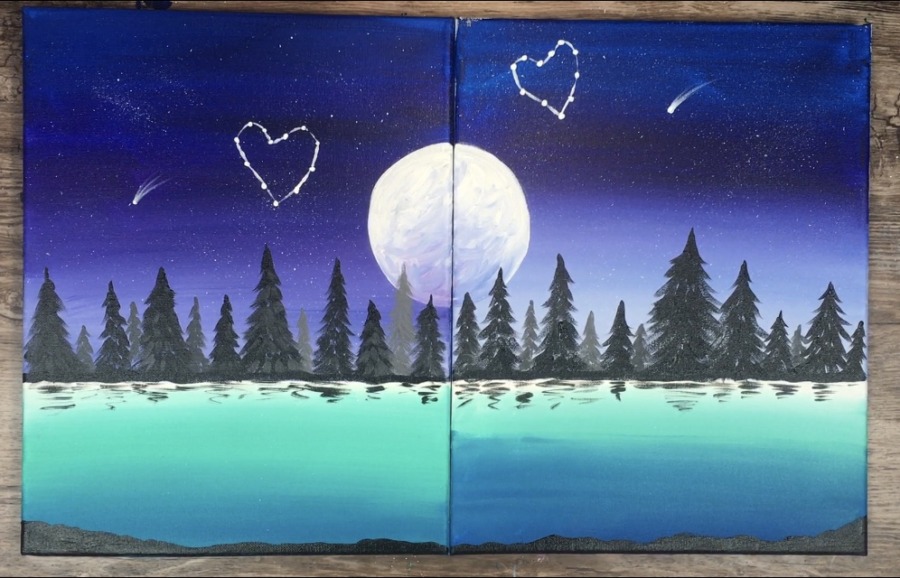
Couples Painting - Night Landscape
Have a paint date AT HOME with your significant other! This tutorial is a demonstration on how to do a couples painting of a landscape with a moon, water and trees!
Materials
- Two 11 x 14 Canvases
- Acrylic Paint
- Paint Brushes
- Easels
- Painters Tape
- Ruler
Colors
Brushes
- 3/4 Flat Wash
- 4 Round
- Old Toothbrush If You Want To Splatter Stars
Notes
You can also do this with budget friendly craft paint! Use: purple iris, black, white, Bimini blue, Tuscan teal & navy.
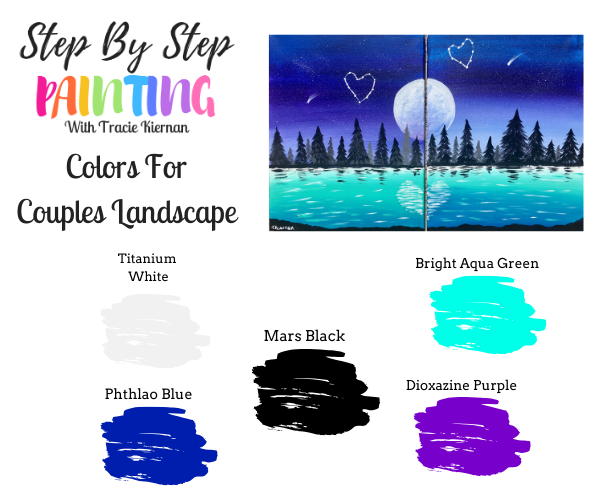
Color Palette
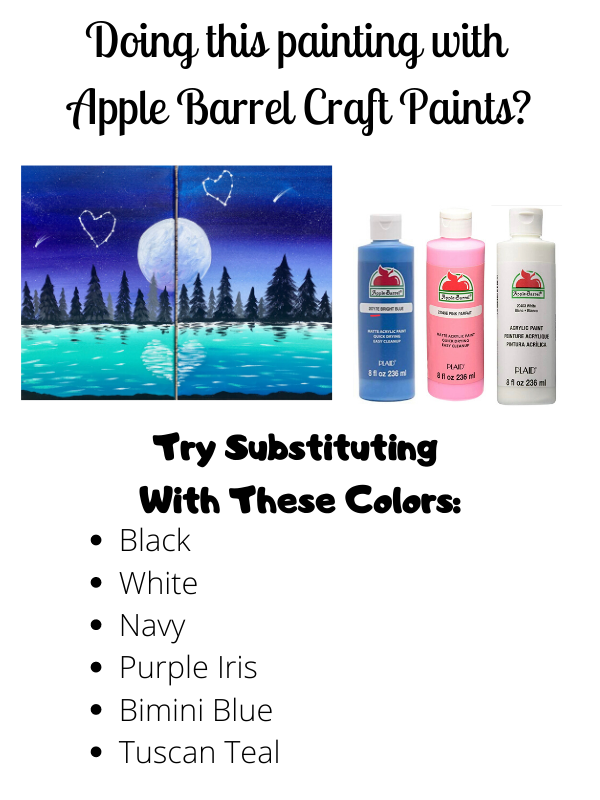
Using Apple Barrel Paints?
You can use budget friendly paints! Apple Barrel Craft paints are readily available at Walmart, Amazon and other craft stores.
I recommend the colors: navy, white, black, Tuscan teal, purple iris and Bimini blue. 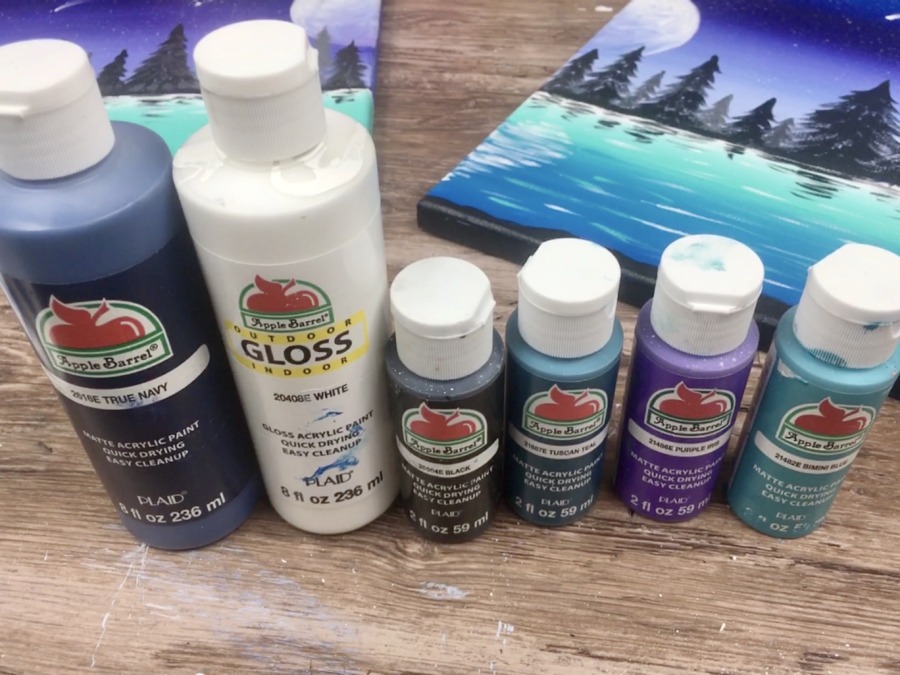
Brushes:
I only used two brushes in this painting (three if you count the old toothbrush for splatter stars).
- 3/4 Flat
- 4 Round
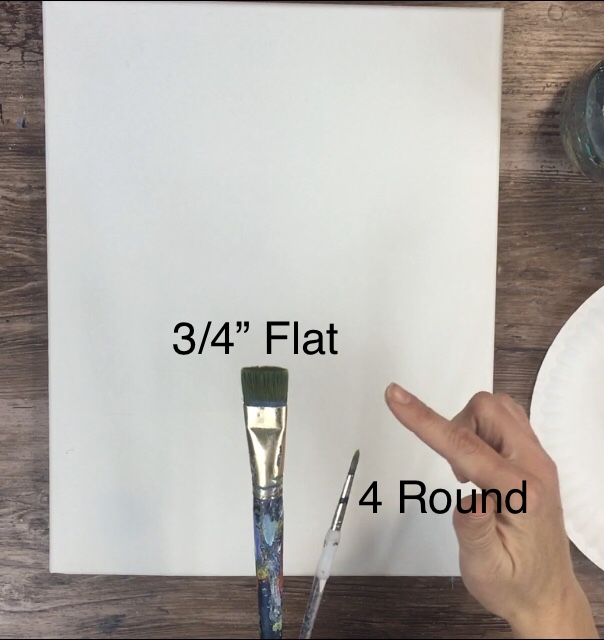
If your brush isn’t exactly a 3/4” flat or a #4 round, that’s okay! You can use similar size brushes and still do this painting.
Directions At A Glance:
Traceable:
This tutorial does not need a traceable. Use painters tape to define your horizon line and a circle to trace the moon. Everything else can be done free handed. You CAN do this!!
Video:
Step By Step Directions:
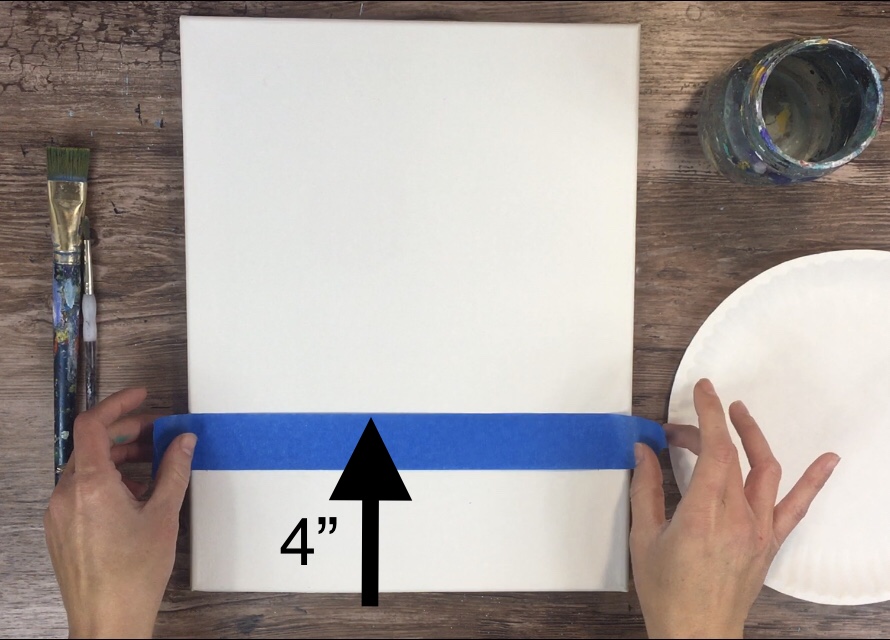
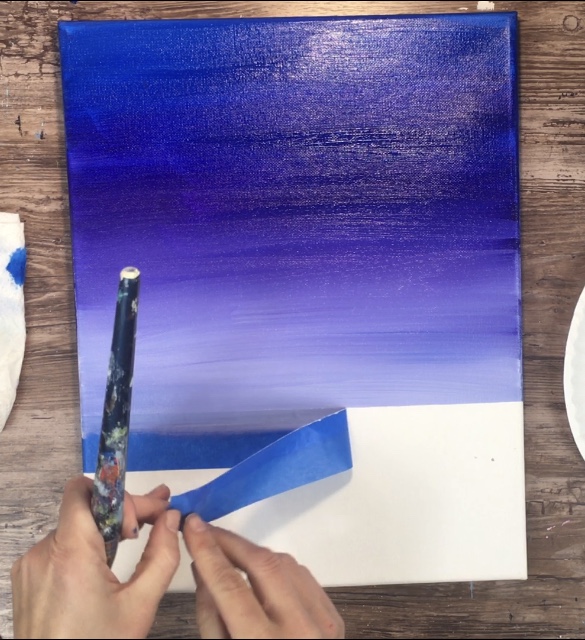
1. Lay your canvases vertically then apply painters tape.
These directions are the same for both of your paintings. The only thing you will do different is put your paintings together so the moon and reflection match up.
Your line should be approximately 4” up. This line that you are blocking off will be our “horizon line”.
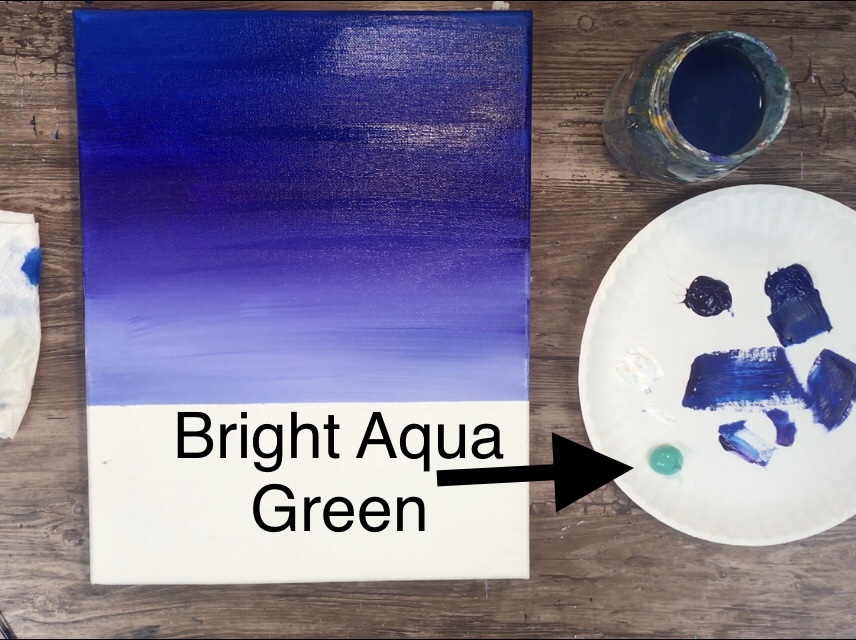
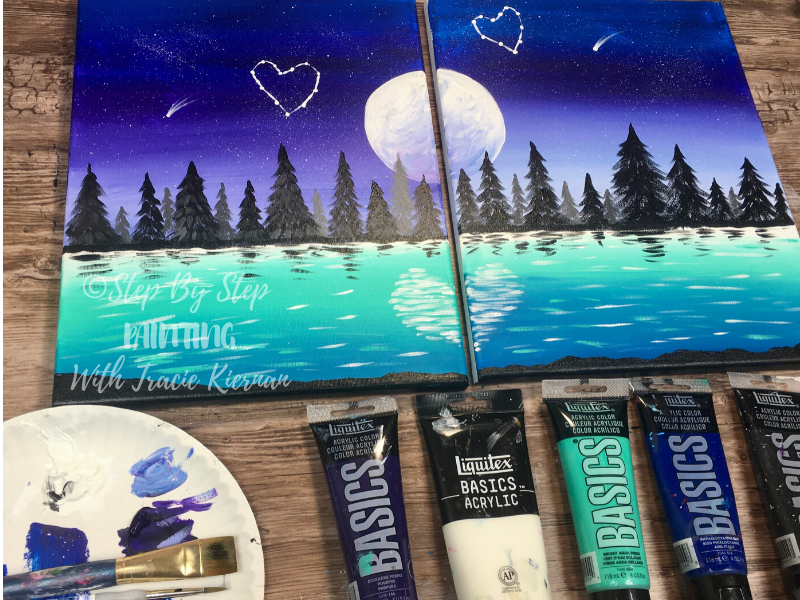
2. Get Your Colors Ready!
There are only 5 colors in this painting! You’ll need: bright aqua green, phthalo blue, titanium white, mars black and dioxazine purple.
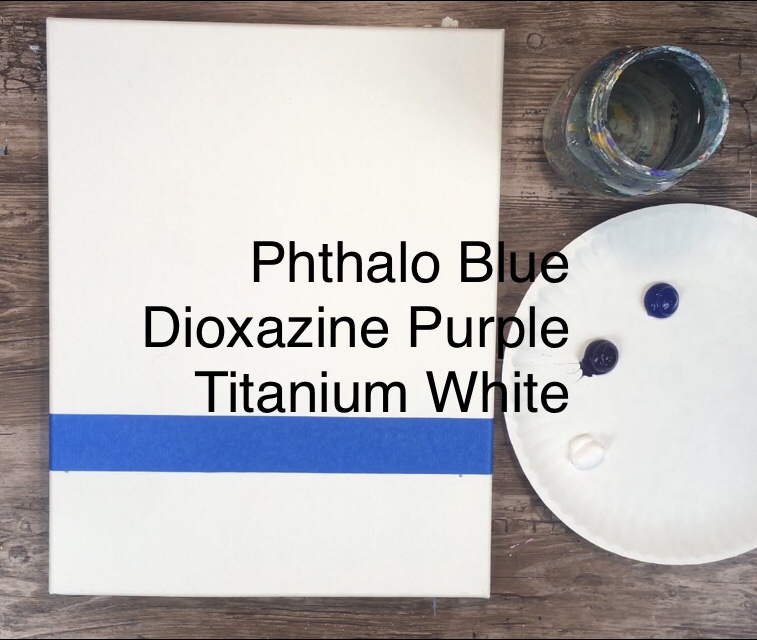
Load your palette with only Phthalo Blue, Dioxazine Purple and Titanium White. If you’re using apple barrel, load it with navy, purple iris and white.
3. Paint the very top of your sky phthalo blue (or Navy if you’re doing this with apple barrel)!
You will need your 3/4” wash brush.
Start at the top of your canvas and paint about 3-4 inches down. When you paint, use left and right strokes using the FULL WIDTH of the brush.
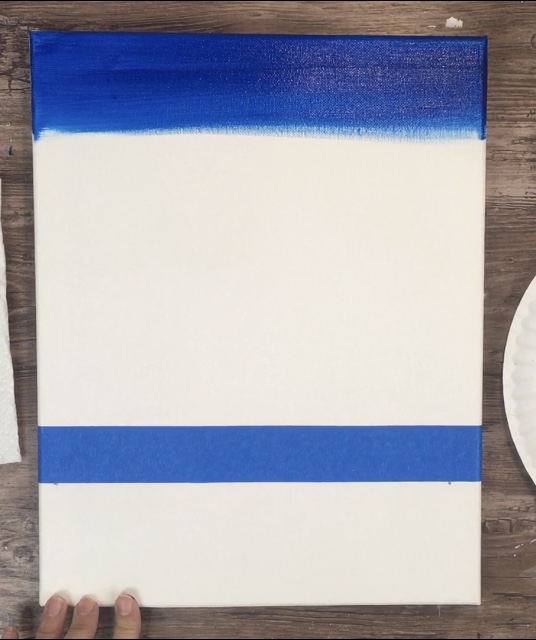
Apply a nice even layer leaving no white spots showing through from the canvas.
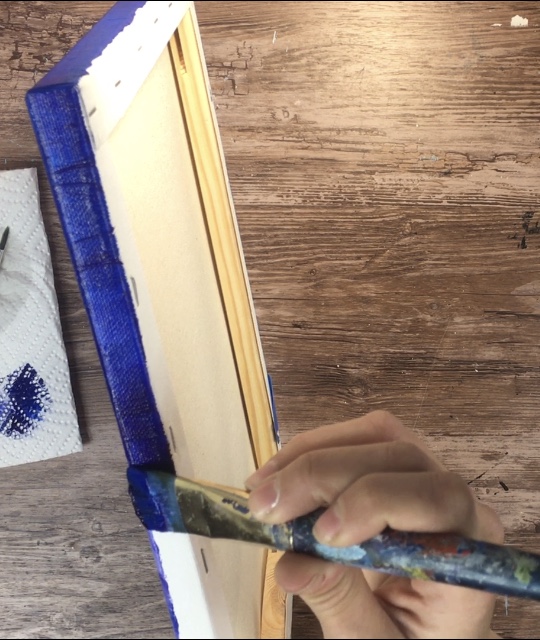
You may also paint the sides of your canvas.
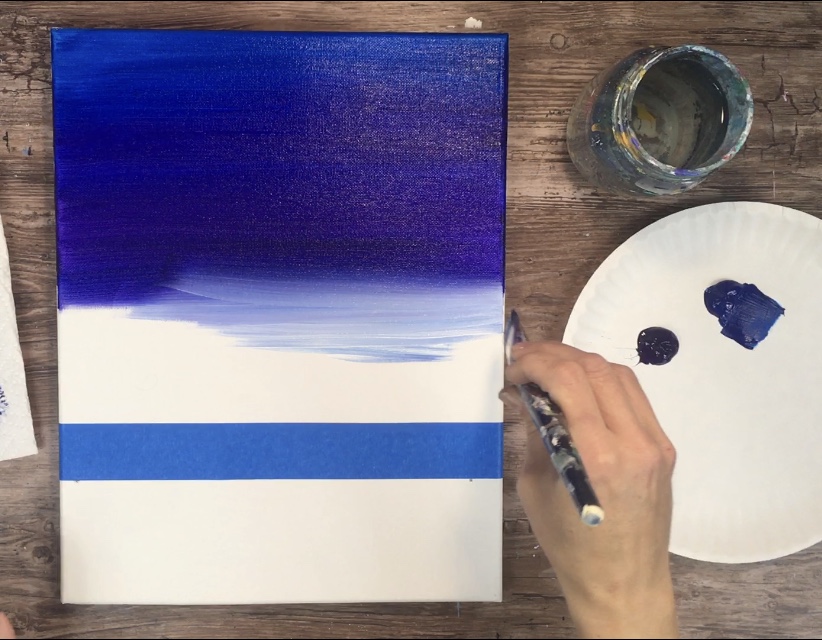
4. Blend Dioxazine Purple (or purple iris)
Do not rinse the blue off your brush. In this next step we will be doing “wet on wet blending”. That means we will blend the colors on the canvas.
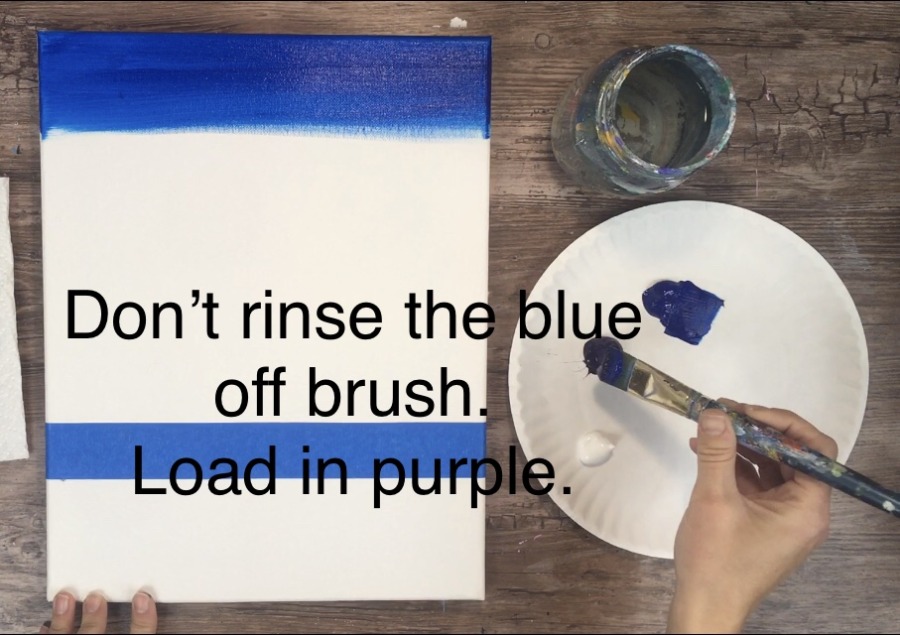
Apply the purple so it overlaps the blue slightly. Brush over the colors on the canvas until they start to blend together.

The goal is to get the blue to blend to purple. This may take some time brushing over the colors until they blend. You may wish to load your brush in more blue to get it to blend more.
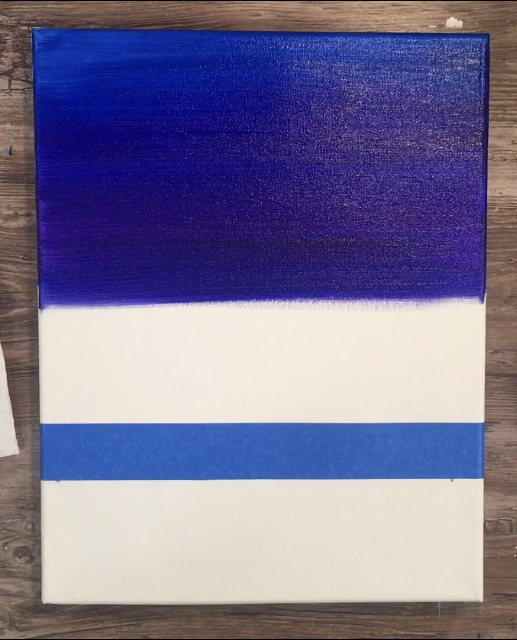
Go pretty far down with the purple but leave about a 4” gap of white above the horizon line.
5. Blend White All The Way To The Horizon
Wipe off the colors of your brush but don’t rinse. This will get excess blue and purple off.
Load it into the white.
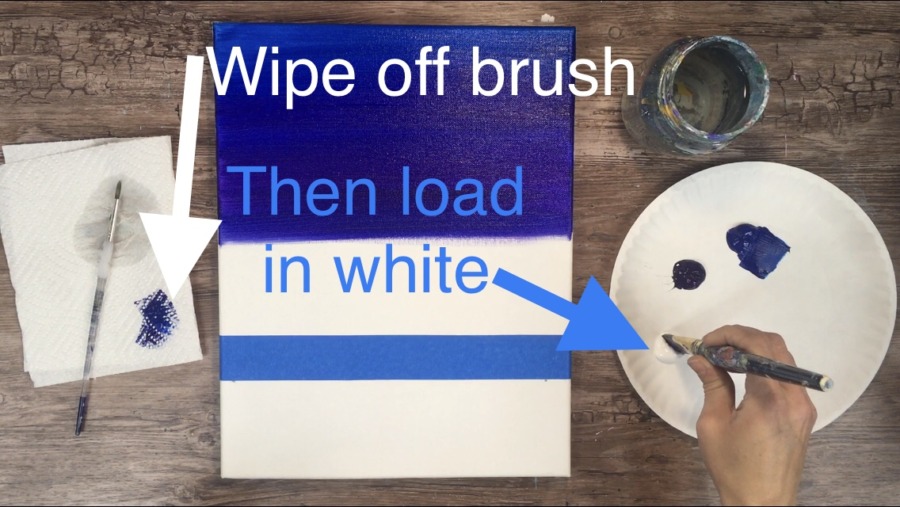
Blend the white with the purple and go all the way to the horizon. The idea is to get the white to get lighter as you work your way down.
Your white will turn into a light purple.
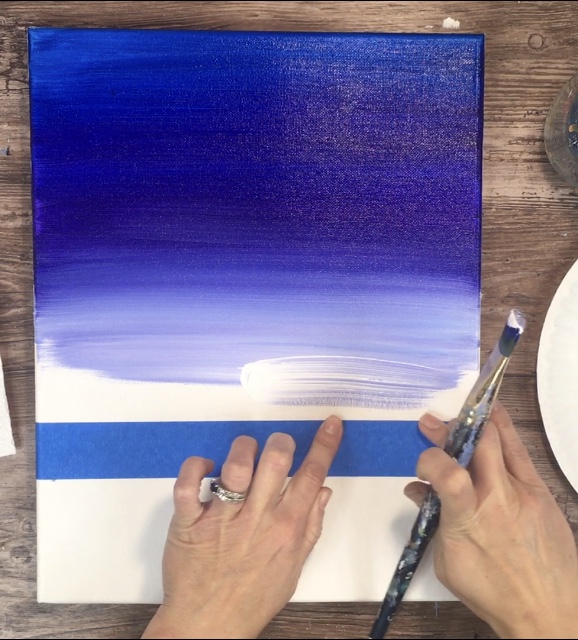
Keep adding more white to your brush and keep painting and blending until you get to the tape line.
You may also paint the sides of your canvas! You can paint it all the same color or use the colors that match on the top of the canvas.
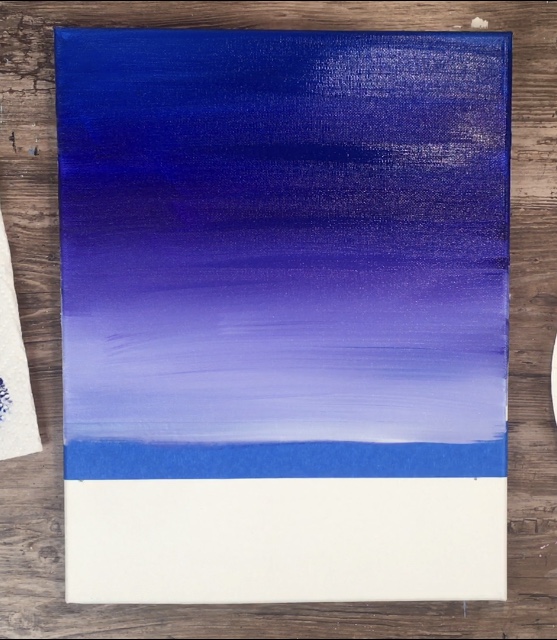
6. Remove The Tape Line
Gently remove the tape line.
7. Paint the water
For the water, you’ll need bright aqua green and some fresh white on your palette. If you’re using Apple Barrel, use “Bimini blue”.
Completely rinse off the 3/4 wash brush until it’s nice and clean.
With your 3/4” flat, start with titanium white. Using the tip of your brush, paint as close as possible to the horizon line.
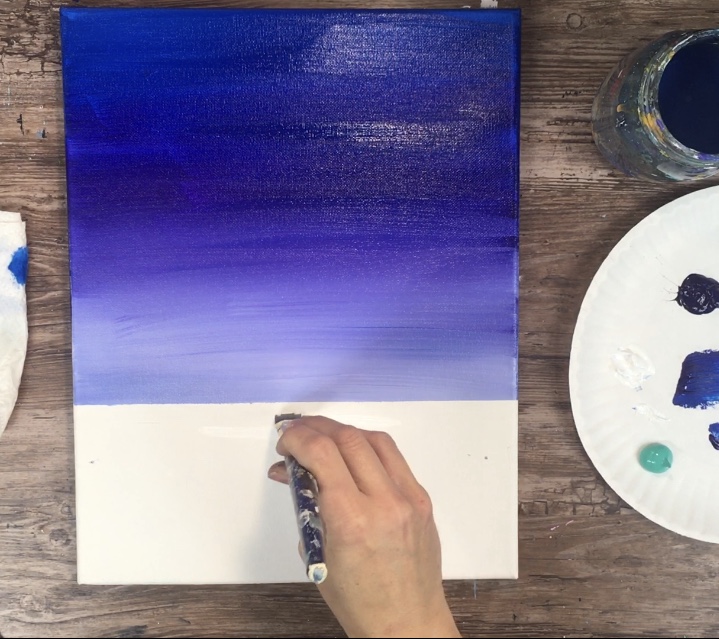
Then load your brush in the aqua color. Blend it down using wet on wet blending the same way you did the sky.
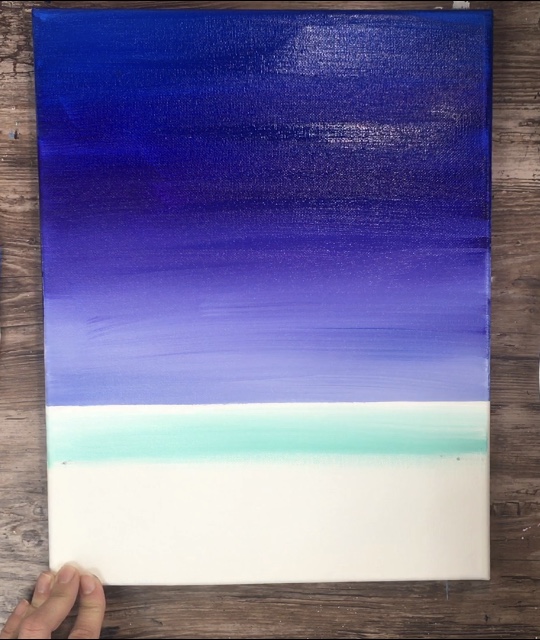
Your aqua will start out very light but eventually turn to a more pure form of that aqua.
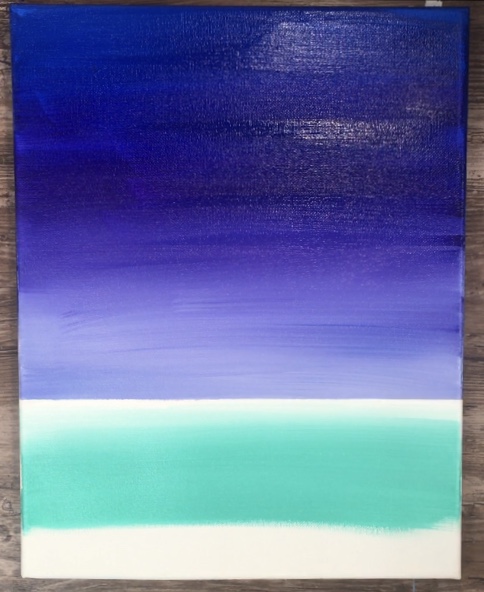
Go almost all the way down but leave about a two inch gap at the bottom.
Next blend phthalo blue with the aqua green at the bottom.
If you are using apple barrel, use “Tuscan teal” for this step instead of “phthalo blue”.
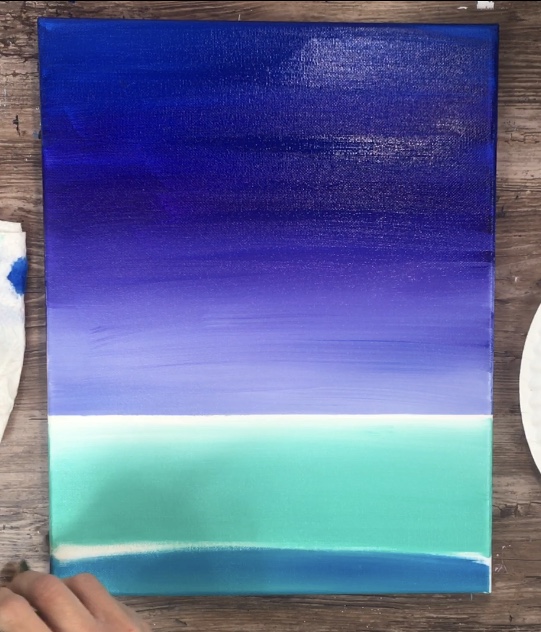
This color is a little harder to blend because its so dark in comparison to the aqua. Start out very slowly and blend upwards.
Add more aqua to your brush if needed to help with the blending. You can also try mixing the phthalo and aqua on your palette and then apply it to the canvas.
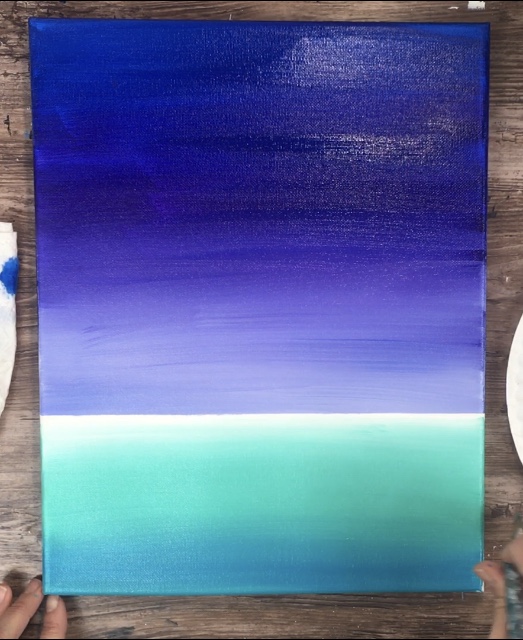
Your final result of the water should look like a very light aqua at the horizon line and blend to a darker teal looking color at the bottom.
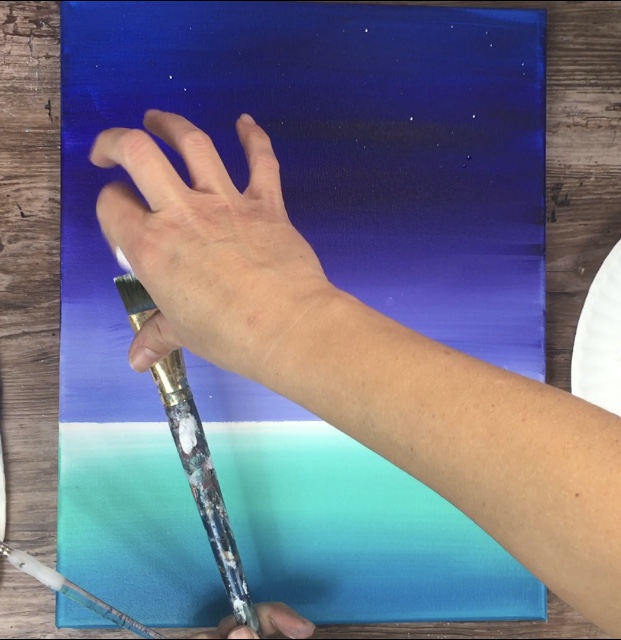
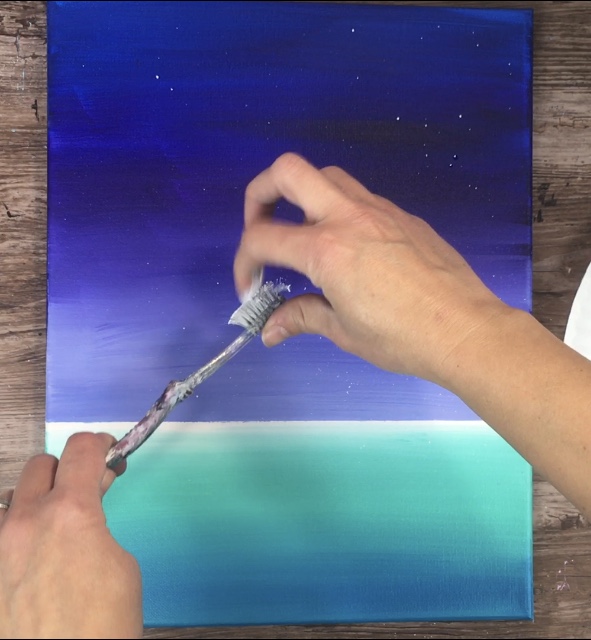
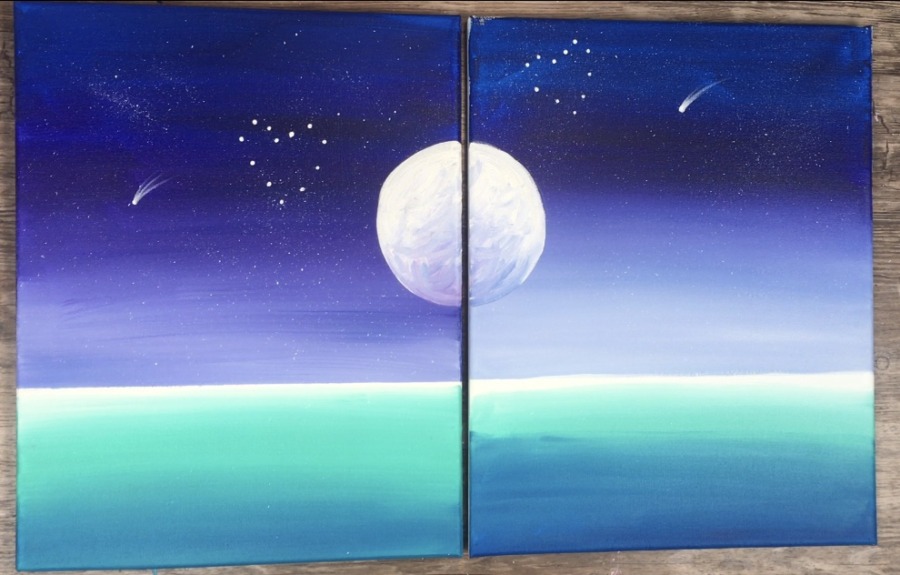
8. Paint The Stars
For this step, you can either flick your flat brush or use an old toothbrush to splatter the stars.
Practice somewhere off of your canvas first until you get the right consistency of white. If it isn’t splattering for you, try adding a very tiny bit of water to your brush.
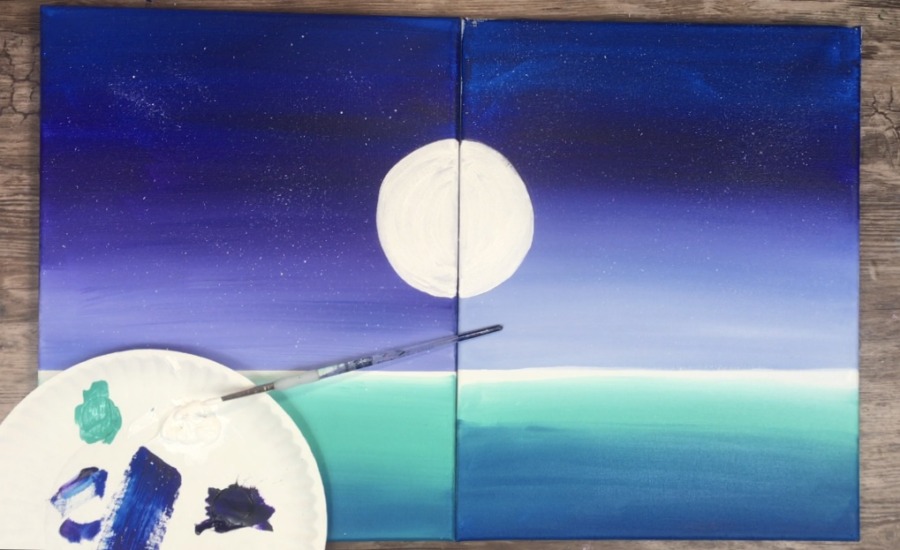
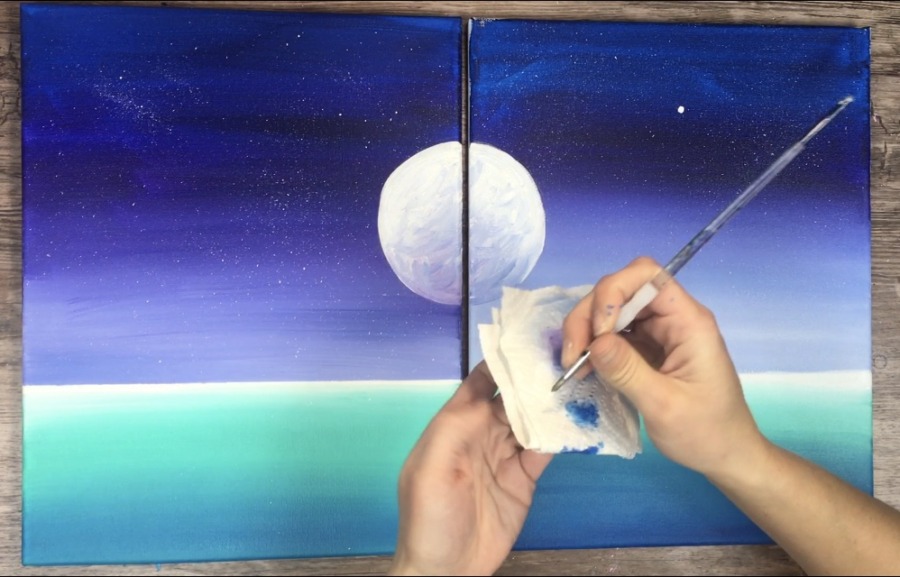
9. Paint Your Moon
This step requires you to place both of your canvases side by side to create your moon.
First trace a circle with a pencil. I used my painters tape roll for this but you can find any circle that’s relatively 5-6” in diameter. You can even use a compass if you have one.
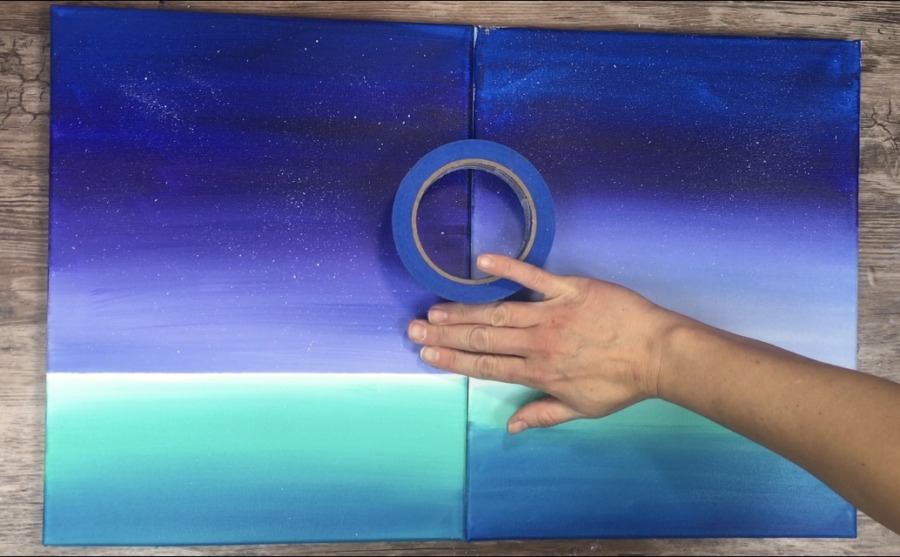
Place this circle about three fingers above your horizon line.
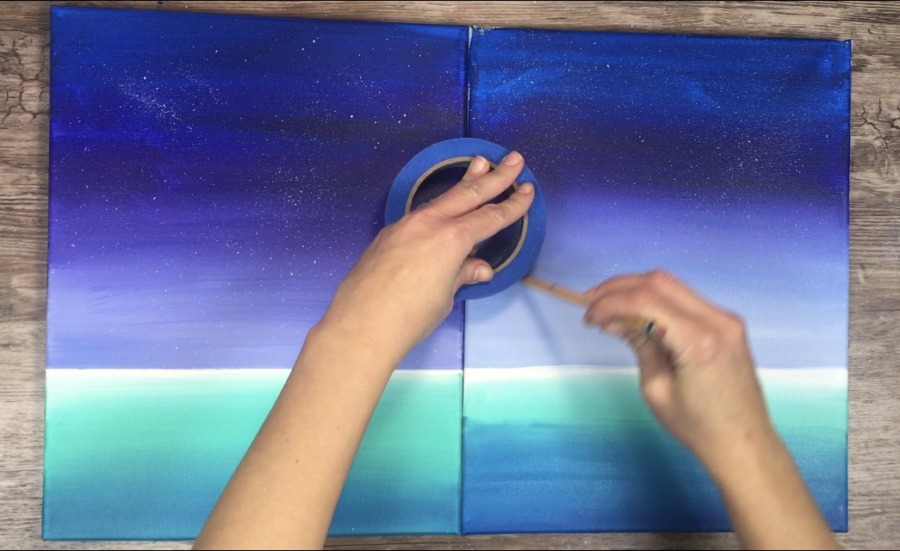
Trace with a pencil.
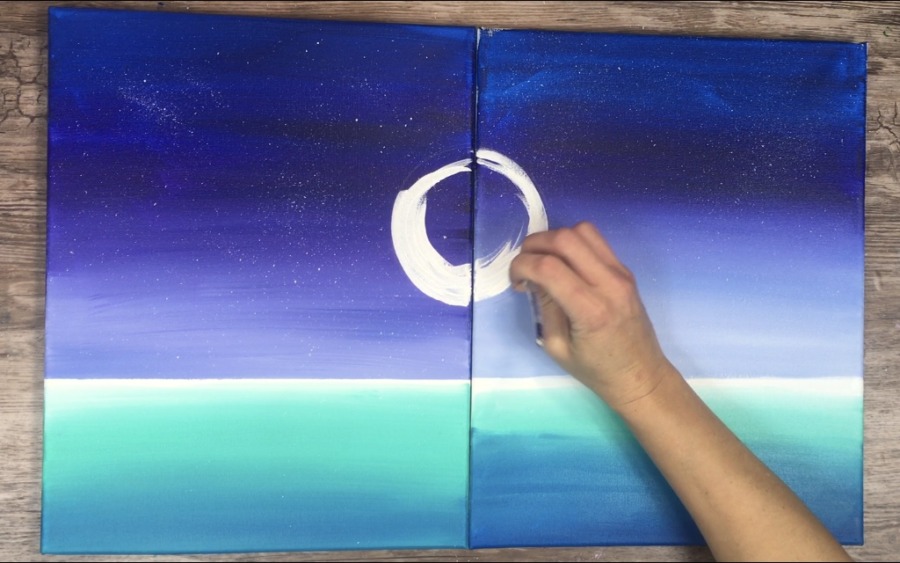
Then use your 4 round brush and titanium white to paint the entire circle white.
Next we will add color to the bottom area of the moon to make it look like it has shading/ craters.
Load your brush in some purple without rinsing the white off the brush. Then make some strokes on the bottom of your moon so the purple blends with the white.

Add some blue to the bottom are of the moon as well and blend.
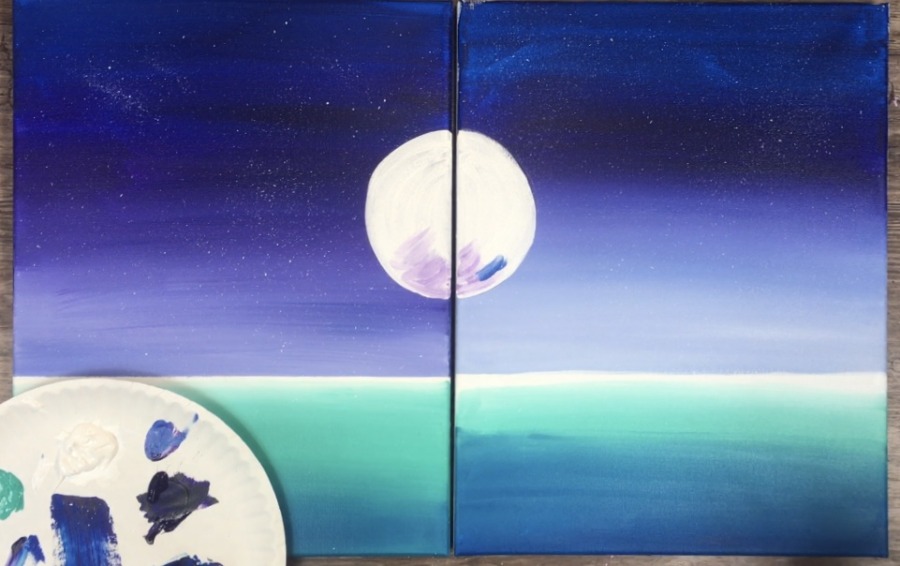
Paint little cross hatching “x” strokes so the bottom area of the moon is purple-blue. It will be a very similar color to this area of the sky.
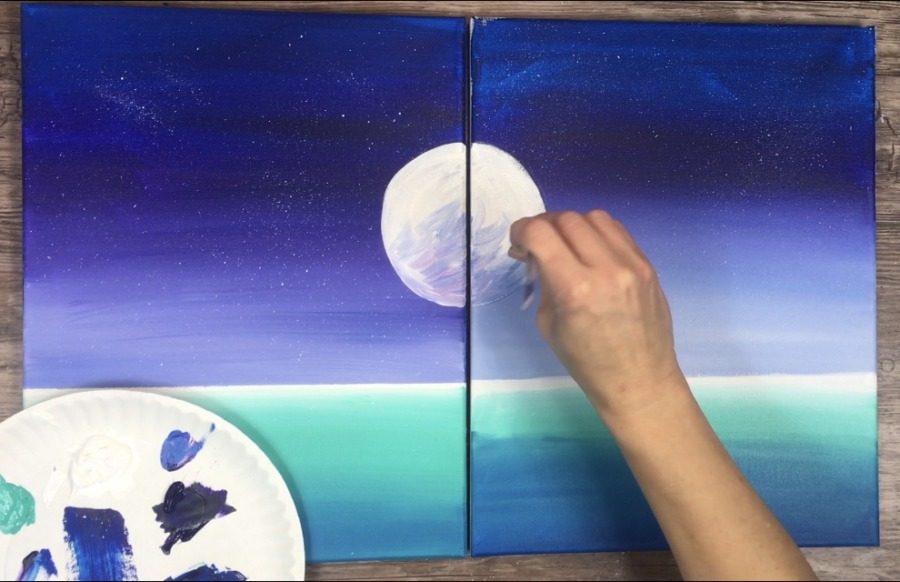
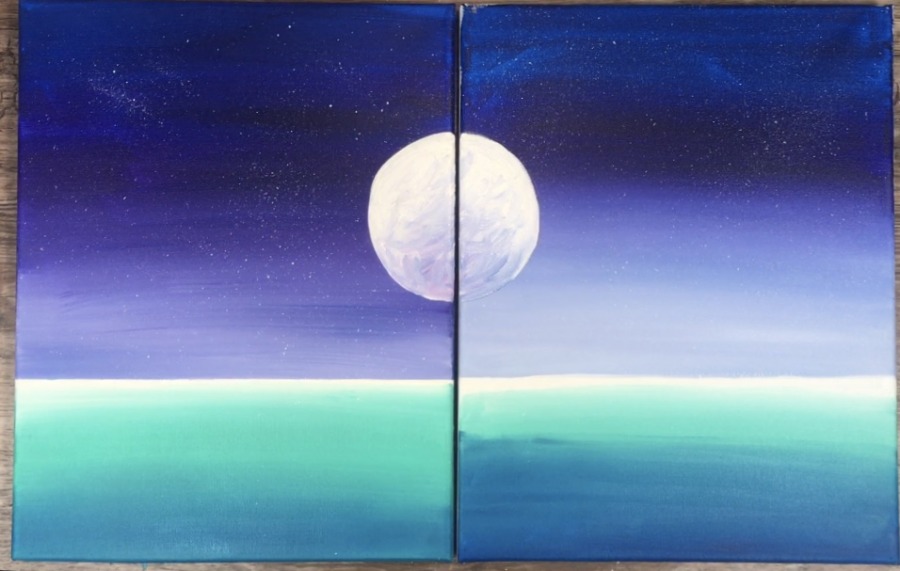
You can add some more white to the moon as well. Essentially the moon should be lightest at the top and have the blue and purple shading on the bottom.
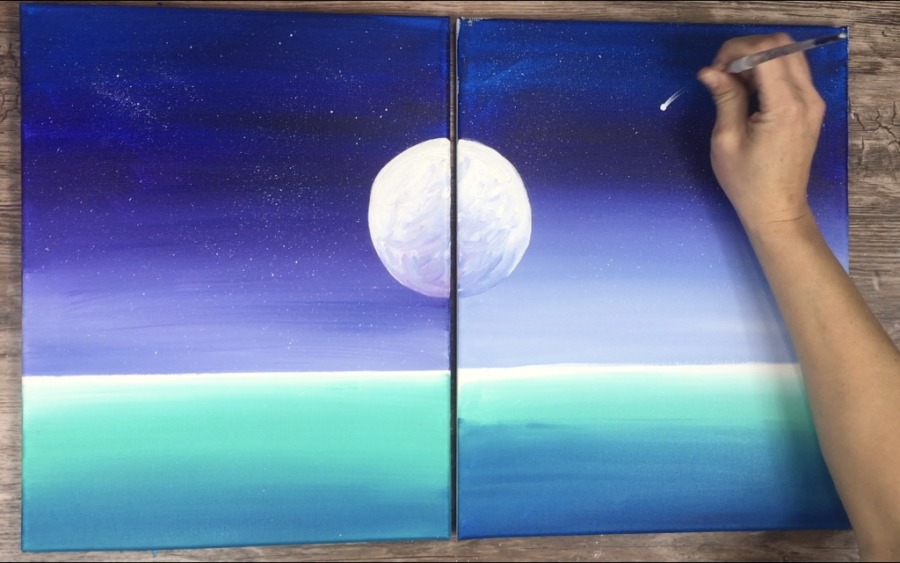
10. Paint shooting stars and heart constellations
To do a shooting star, use your round brush to paint a dot in the sky. Then wipe off the paint.
Paint the trail. Because you wiped off your brush, you will get a “dry brush” stroke making it look like a trail of a shooting star.
Then paint the heart constellations. Make little dots in the sky forming a heart shape.
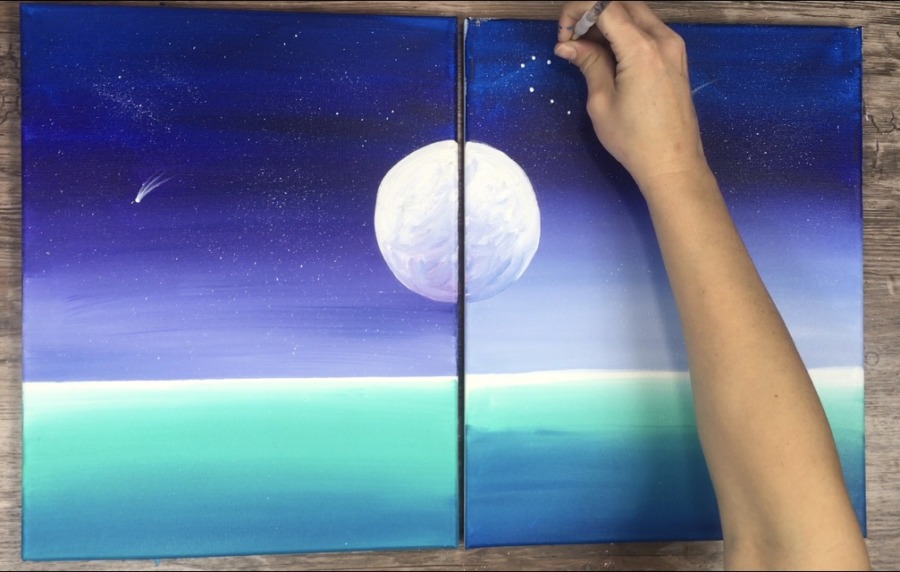
If you want, you can connect the heart shapes.
11. Paint The Trees
To do the trees, use your 4 round brush and black.
Start at the top forming the top tip of the tree and stroke down.
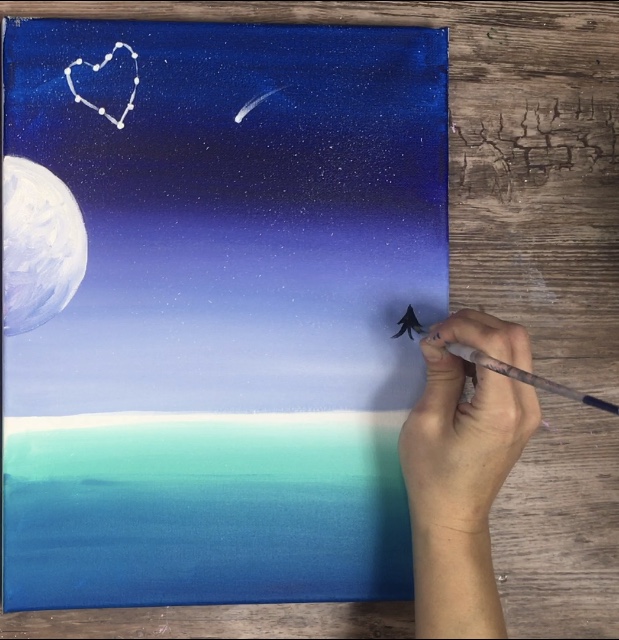
Stroke each tree branch down forming a triangular shape of this pine tree.
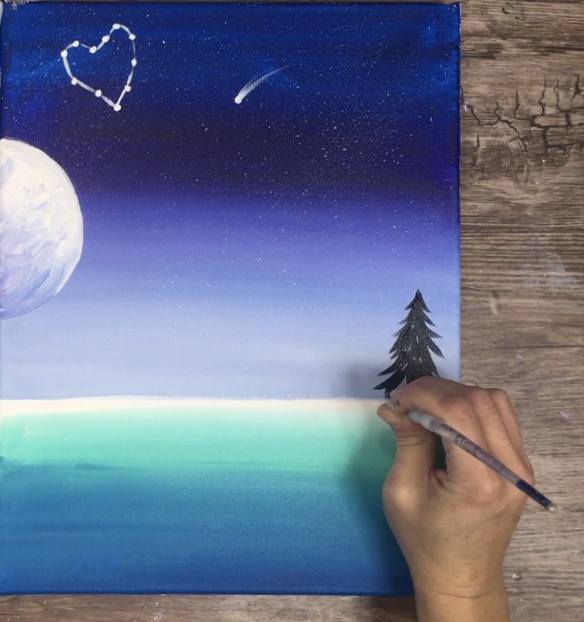
Each tree is varied in heights and widths. Some of them start up higher in the sky and some lower.

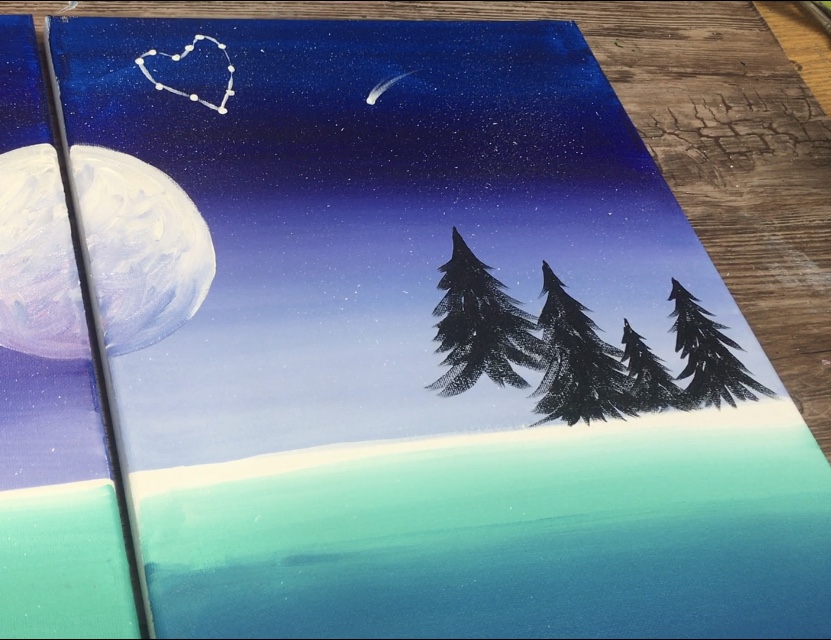
Then, optional, you can mix a gray on your canvas by blending black and white together.

Painting gray trees makes it look like some of the trees are further away.
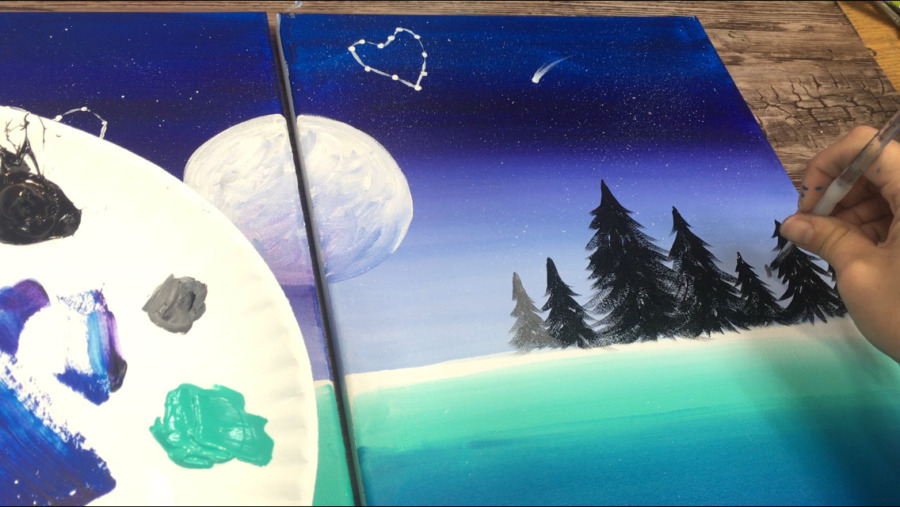
Paint these trees all across your horizon line and make sure some of them overlap that moon. 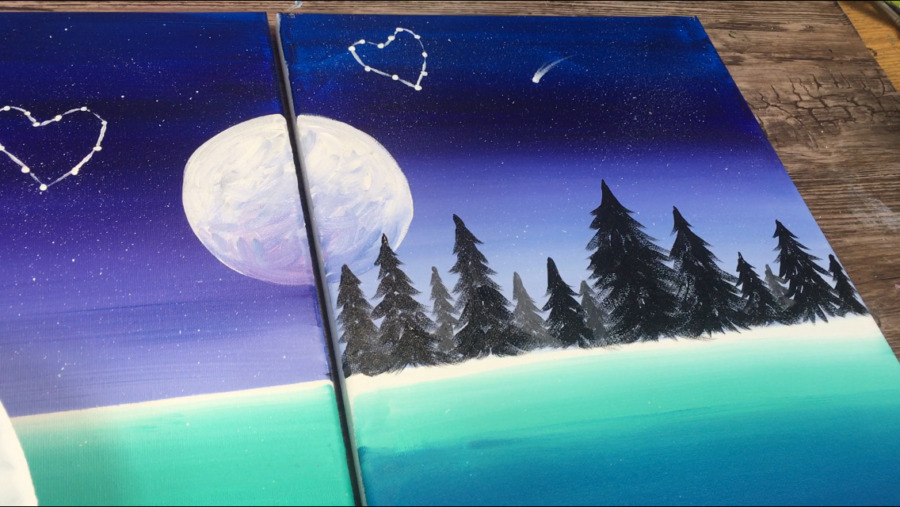
Then, if you look really closely, on the base of all the trees, there is a black line. Paint that line all across on the bottom of the trees. The represents the land so it doesn’t look like the trees are floating on water.
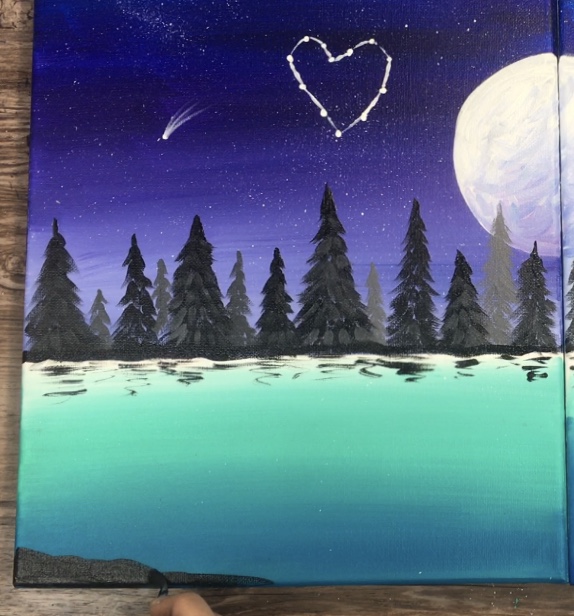
12. Paint The Tree Reflections & Bottom Land Line
To do the reflections of the trees in the water, paint little black horizontal lines just under each of the trees.

I only went a little bit down with these reflection lines.
Then paint the land line with the black on the very bottom. Make sure your land line matches up in the middle. This area was really only a half inch high.
13. Paint The Heart Reflection
Clear off your round brush and load it in just water. Use the watered brush to paint a heart that meets in the middle. 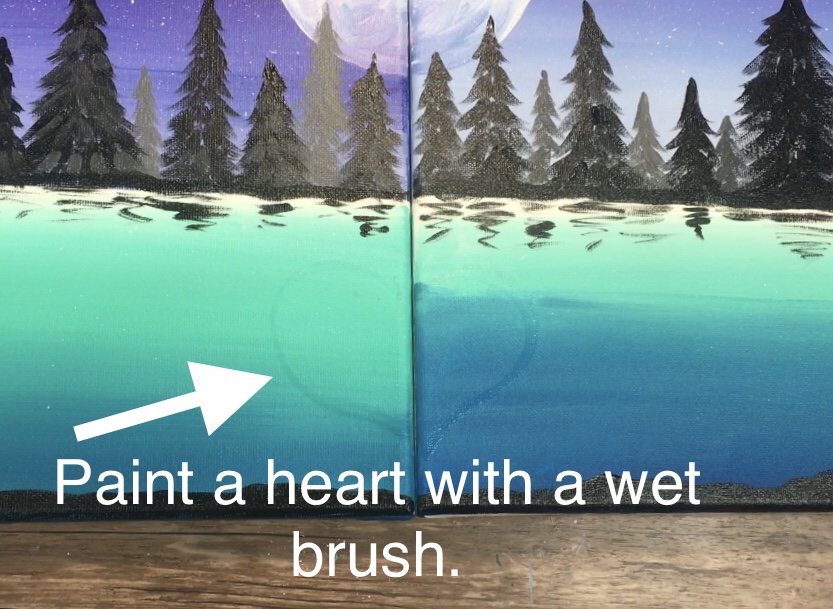
Then fill your heart with little white horizontal lines.
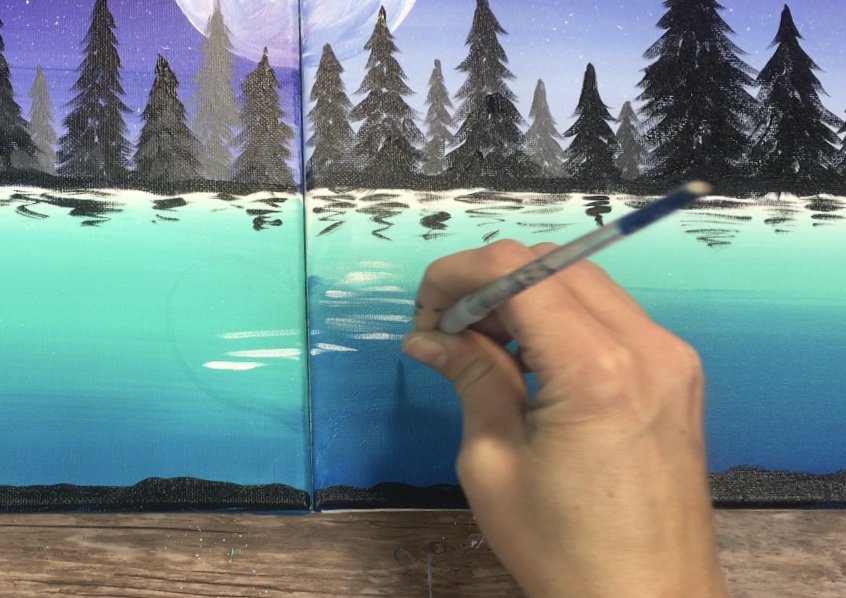
These little white horizontal lines will form the heart reflection in the water.
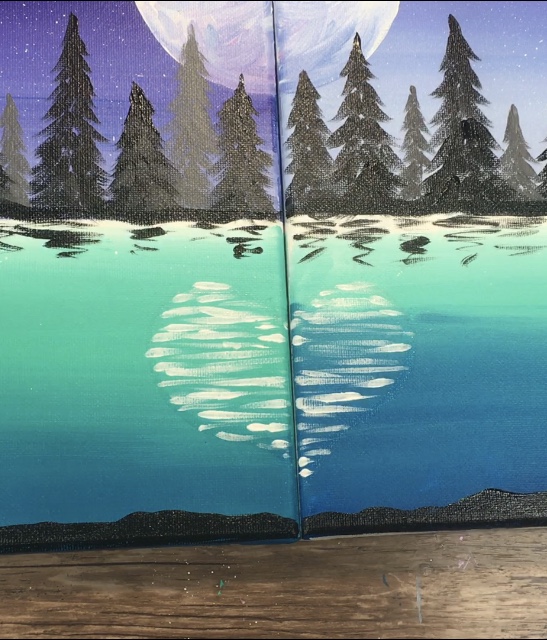
Next paint little white horizontal lines throughout your water.
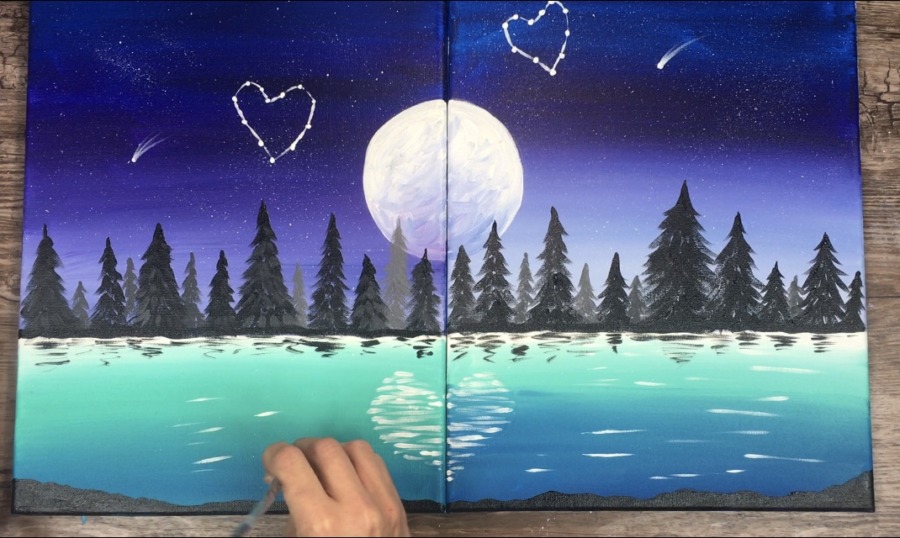
You can do other colors in your little water lines such as aqua or a little bit of purple.
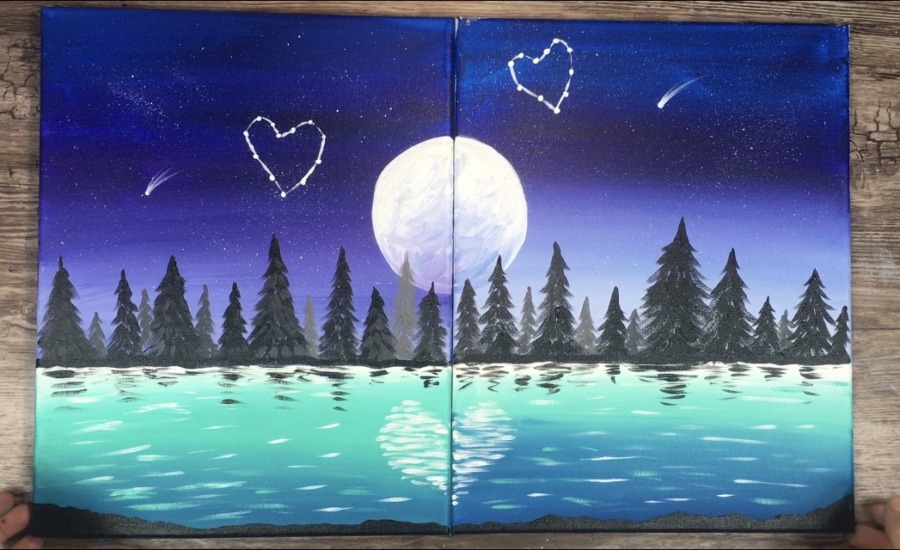
Finished!
Hope you enjoyed this lovely painting!
Hi Tracie! I commented on another post that you had asking about couples options. I hadn’t looked further through your site as I didn’t know to look! Well here I am! This is absolutely perfect! Thank you for what you do here! I am so excited to learn more and have a fun painting couples painting party!
You’re welcome Debbie! Enjoy your painting party!!
Hi! I love this painting and want to do it soon. Would 2oz of those paints be enough for 3 couples?
It should be! Especially if you are doing this on 11×14 canvases.
Actually…you may want to get an extra 2oz bottle of some of the common colors in this painting.
Hi!
I came across this tutorial when looking for a fun at home option for my wife’s birthday. We just did it tonight and it was great! Thanks for sharing this and if you do any other couples ones we will jump on that as well! Thank you!
You’re welcome Howard! I’ll definitely be doing more couples paintings! Thanks!
Hi Tracie
I have been following your step be step painting tutorials for beginners and came across couples painting. Love it. I have been using folk art and craft smart acrylic paints. What acrylic paints do you prefer to use.
My husband and I did this today for our 30th year anniversary. It was so fun! Thank you for doing these on line for us to do especially during stay at home orders cause of virus.
Happy 30th Anniversary!!! Glad you enjoyed this one! ?
Hi,
Is this possible on 16×20?
I want to try with my boyfriend but just want to do it a little bigger for our wall.
Yes! Definitely you can do this on a 16×20. Enjoy!
Thank you so much! My husband and I did this tonight for our seventh anniversary (while in quarantine) and had a great time. They came out beautiful and we can’t wait to hang them up. We’ve been wanting to do a paint night for years and never got around to it but your tutorial was perfect. Thank you again!!
Happy Anniversary Debra! Glad you enjoyed painting this together!