
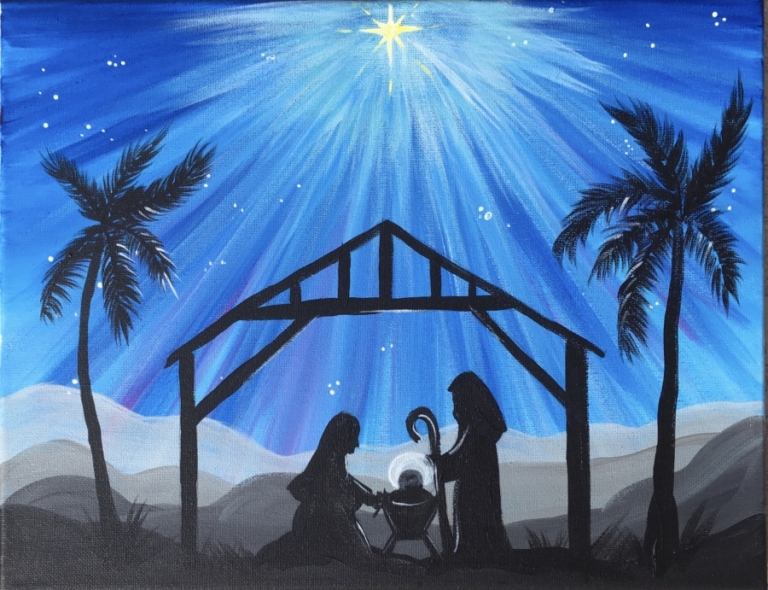
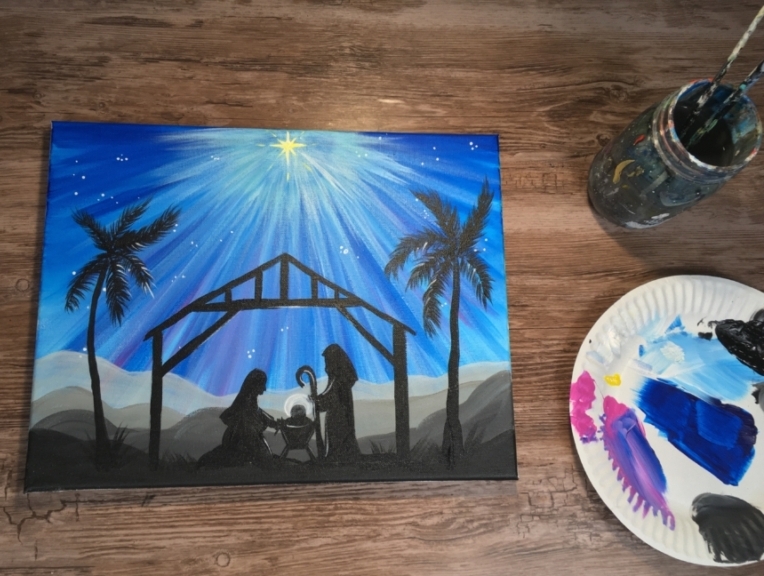
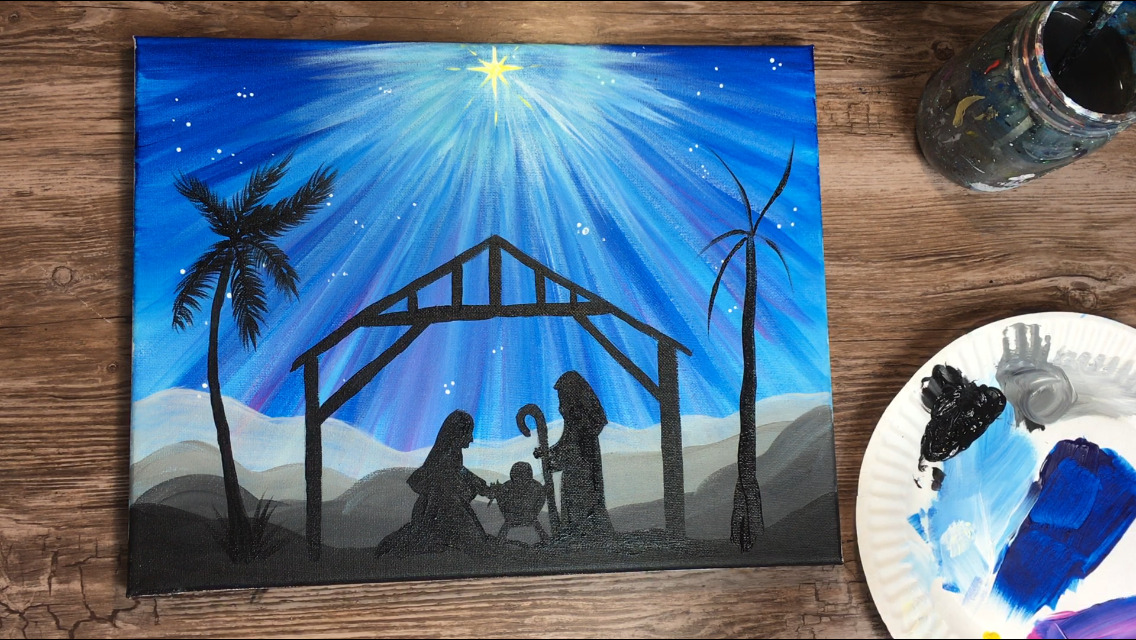
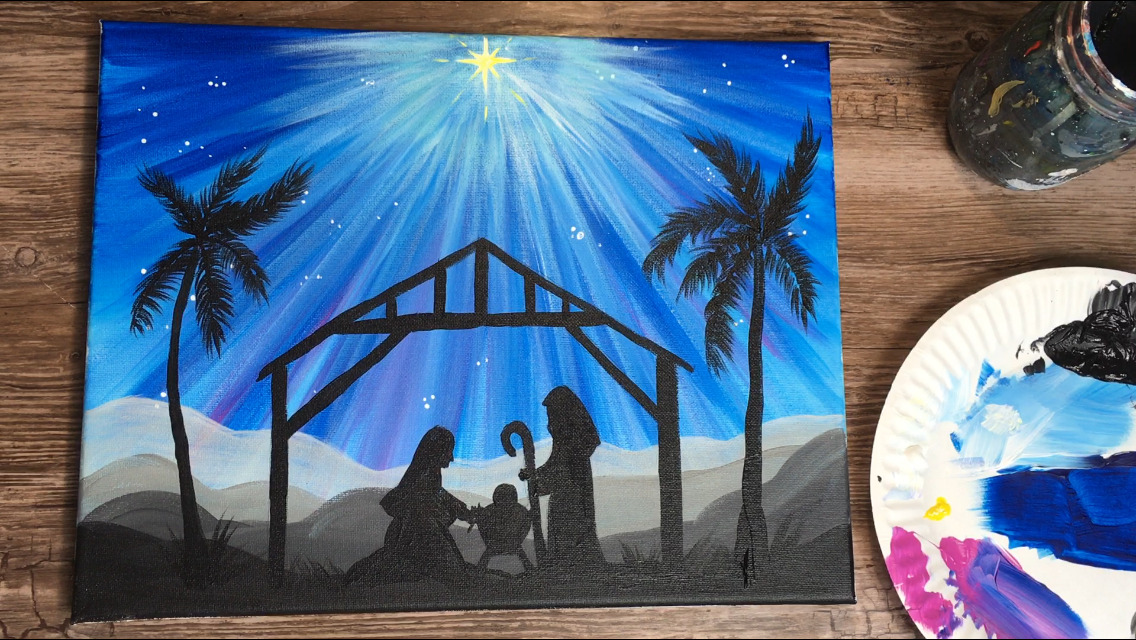
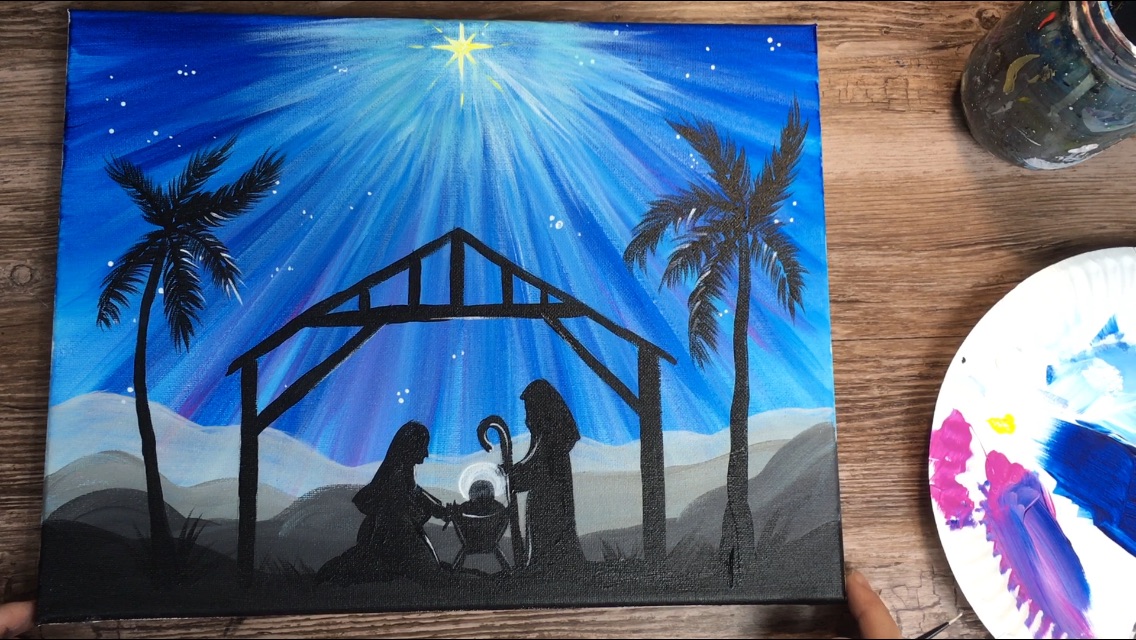
Nativity Silhouette Painting
Would you like to save this?
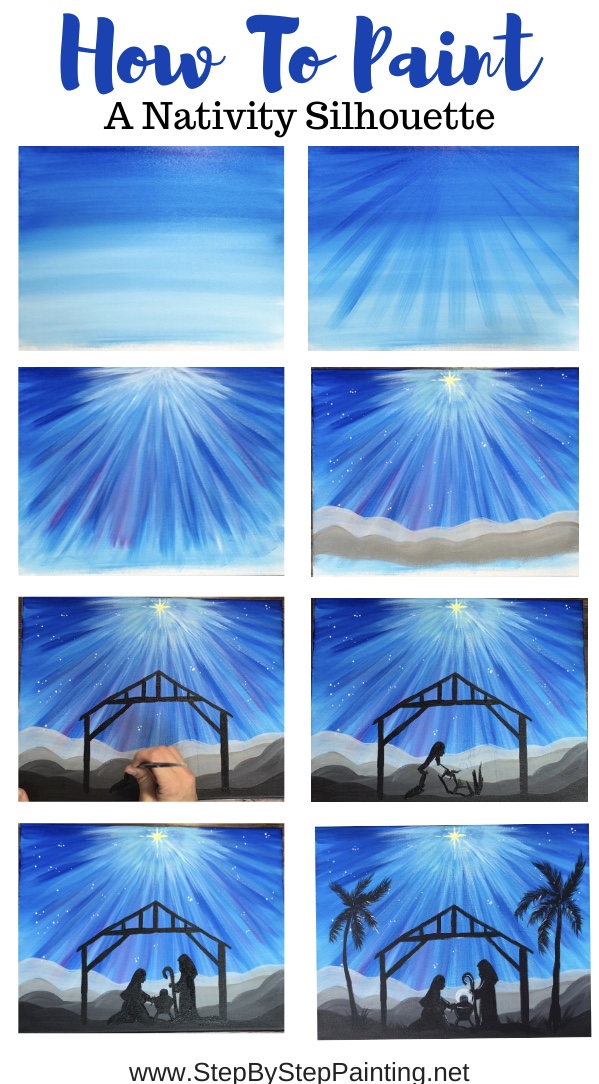
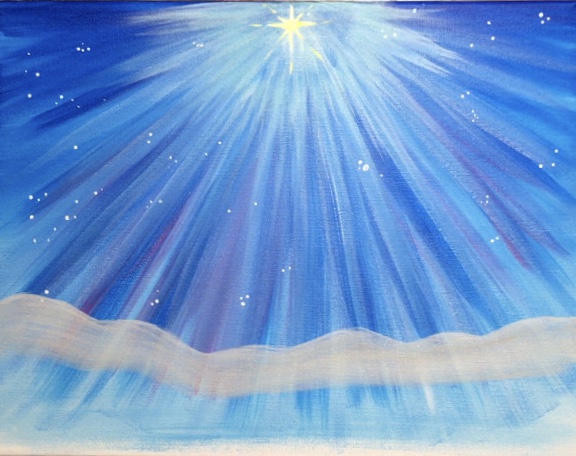
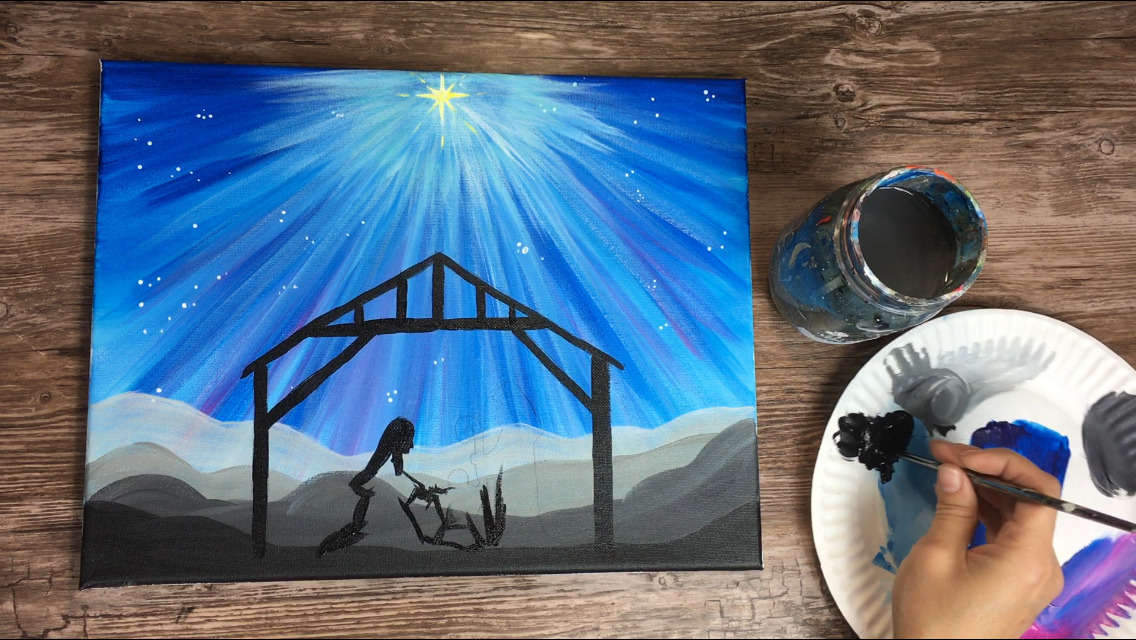
Learn how to paint a nativity silhouette painting step by step on an 11 x 14 canvas with acrylics!
This beginner friendly tutorial will guide you though each step on how I did the sky, mountains and the silhouette foreground.
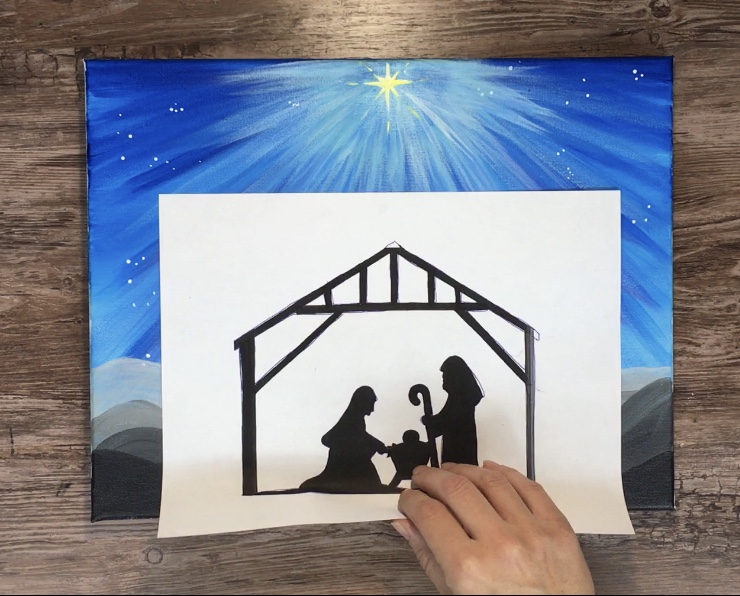
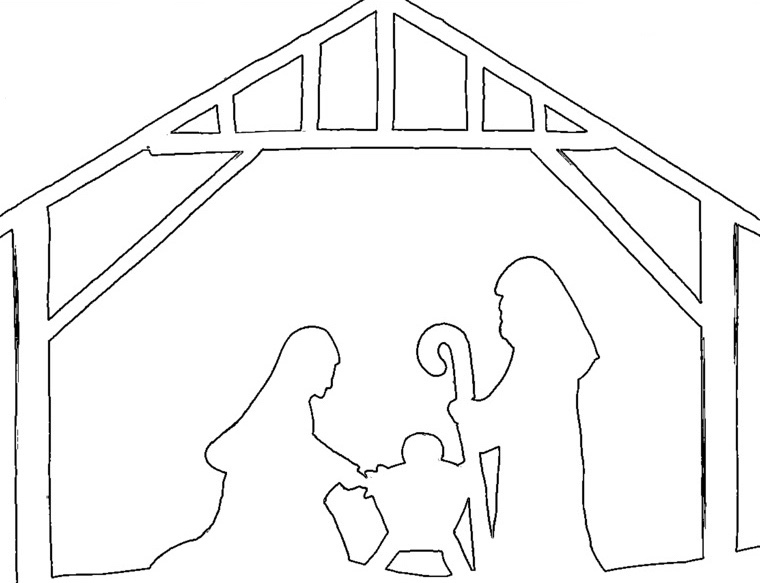
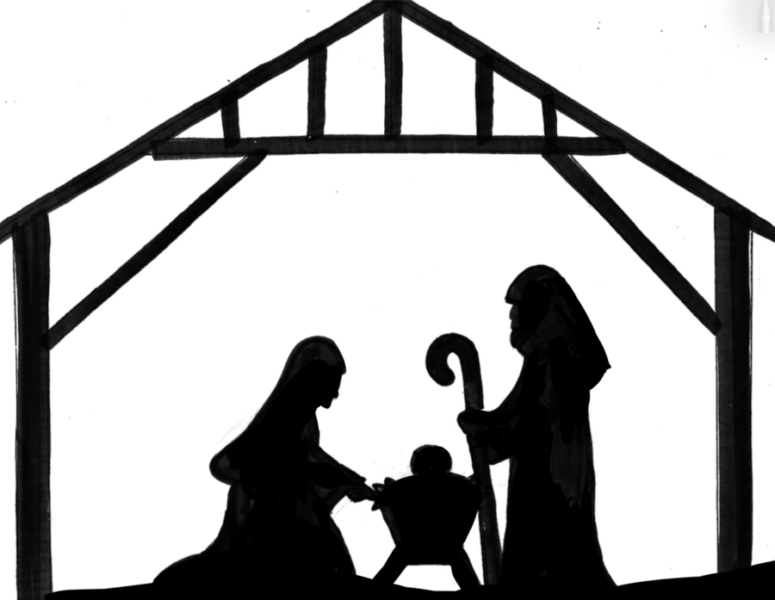
Included in this tutorial is a silhouette of Mary, Joseph and Baby Jesus in a manger. You are welcome to print it out and use it for this painting.
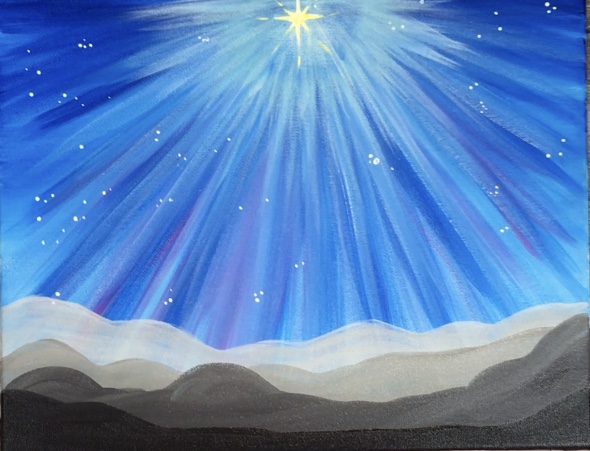
I’ve gotten numerous requests for a Nativity scene painting. I knew that a silhouette would be easiest to depict so I went with that.
I wanted to portray something bright in the background so the silhouette would show up which is where the idea for the bright rays came from!
The rays coming down from the Star of Bethlehem were a lot of fun to paint and the brightness of these rays help the silhouette to stand out.
Anyhow I hope that you enjoy and find tutorial helpful if you’ve been itching to do a Nativity painting too!

Enjoy and Happy painting!
Materials
Nativity Silhouette Painting

Learn to paint a Nativity silhouette Painting step by step. Paint a bright blue night sky with the star of Bethlehem. Then use the traceable to transfer the silhouette outline to the painting. .
Materials
- Acrylic Paints
- 11 x 14 canvas
- Brushes
- Water
- Traceable
- Graphite Transfer Paper
- Pen
Colors
Brushes
- 3/4 Flat
- 4 Round
- 10/0 Liner
Instructions
- Paint a thin layer of water onto the canvas
- Add a coat of Phthalo Blue over the water with a 3/4 Flat brush. Paint left and right half way down the canvas.
- Blend in titanium white with the Phthalo blue and go the rest of the way down.
- Let the painting dry.
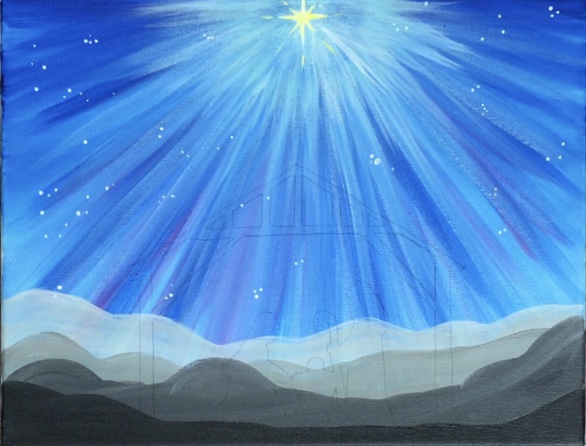
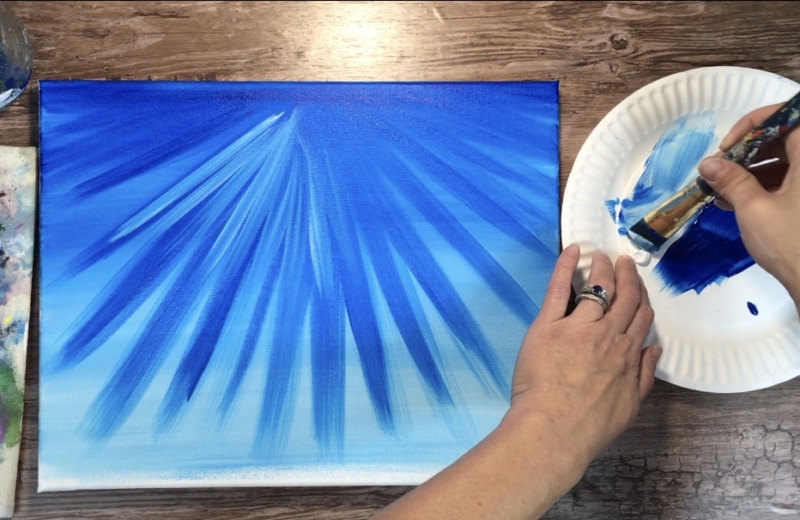
- Paint the rays in the sky starting with phthalo blue and gradually getting lighter to white.
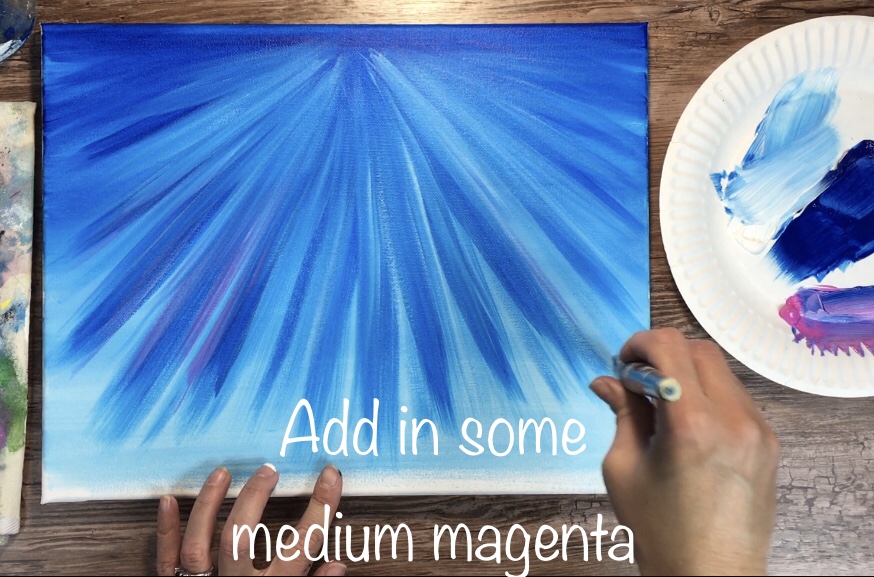
- Add a few strokes of medium magenta to the rays.
- Paint little dots of stars.
- Paint the star of Bethlehem at the top middle with titanium white and primary yellow.
- Paint the mountains starting from the furthest mountain and using neutral gray mixed with titanium white to make a light gray color. Then paint the darker shades of mountains with the darkest on the bottom being mars black.
- Let the painting dry.
- Transfer the silhouette to the painting using a sheet of graphite paper.
- Paint the silhouette with slightly watered down mars black.
- Paint palm trees on the left and right.
- Paint a white glow around baby Jesus and some highlight lines on Mary and Joseph as well as the trees and Inn.
Color Palette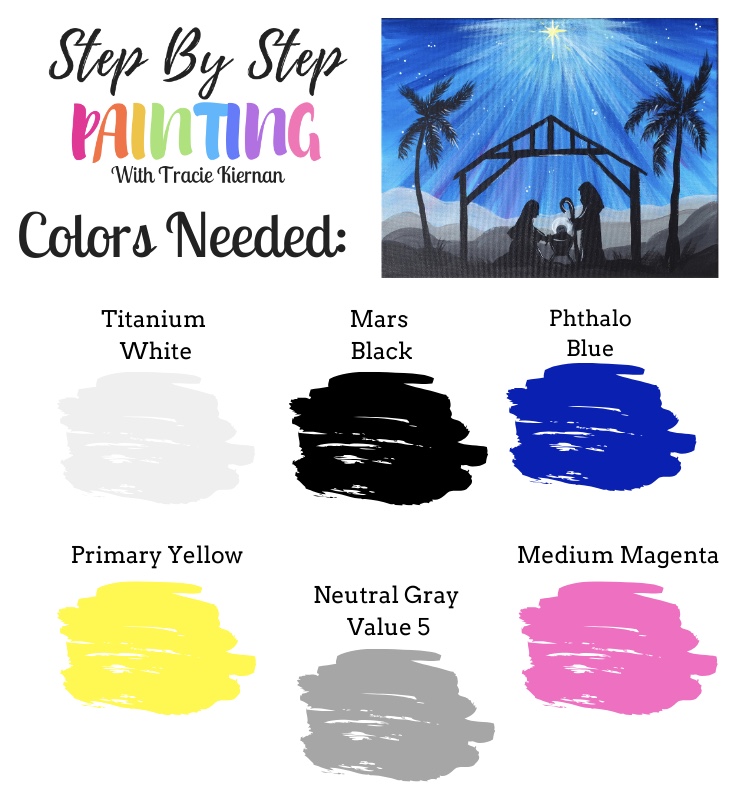

Directions At A Glance
Traceable For Nativity Painting
I have a silhouette version of this as well as an outline of the silhouette (if you want to save some printer ink).
Nativity Silhouette Outline PDF
Video
Directions
1. Paint The Base Of The Sky
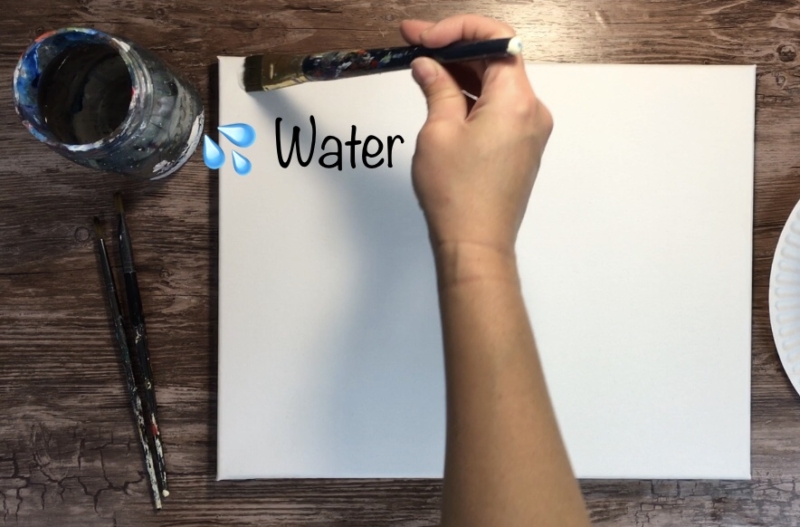
First you will need to add a thin layer of water to the canvas to help the blue to flow. Use your 3/4 flat brush dipped in water and paint left and right to wet the entire canvas.
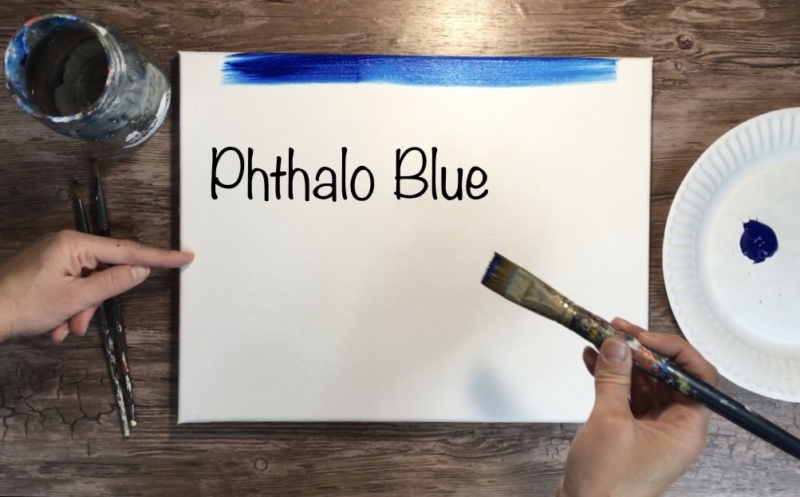
Then load your 3/4 flat in phthalo blue. Paint left and right strokes of the phthalo blue and go to half way down the canvas.
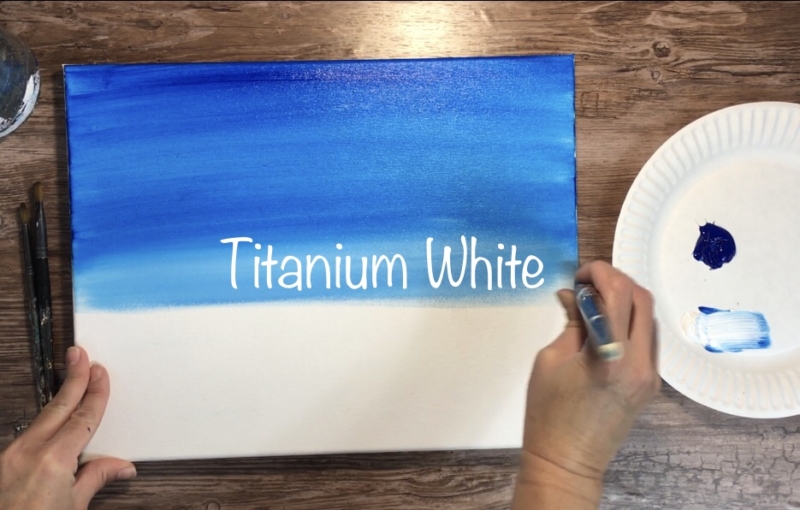
Next load your brush in titanium white but don’t rinse the blue off. If there is too much blue on the brush, wipe some of it off. Keeping the blue on the brush helps with the blending.
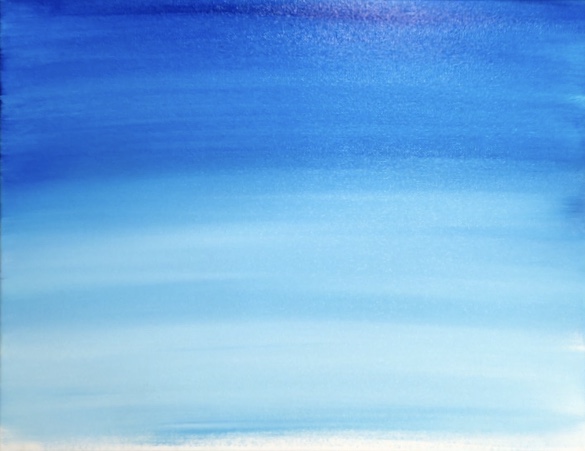
Blend the titanium white into the blue and go there rest of the way down. The blue should turn to a bright light blue. Basically the top of the sky will be darkest and the bottom lightest.
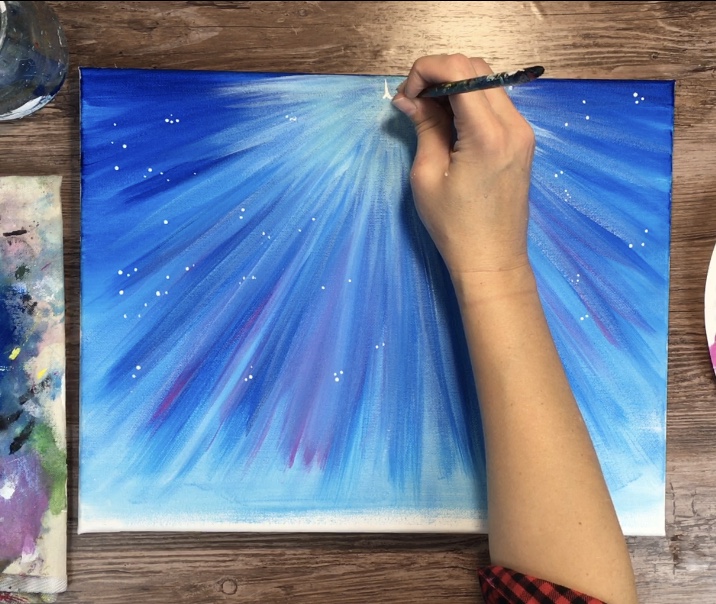
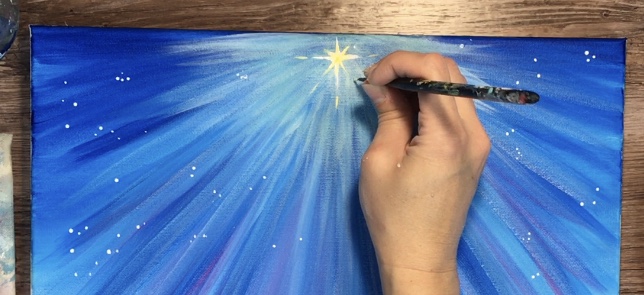
2. Paint The Rays
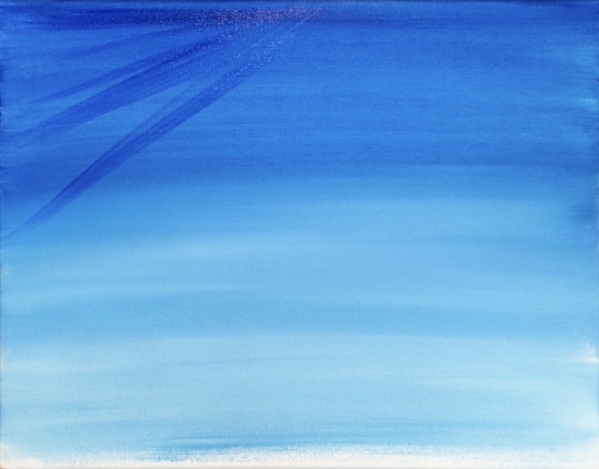
To do the rays, I started with the dark first. You cant have the light rays without the darkness! Basically use your 3/4 flat brush and dip it in just phthalo blue (no white).
Find the middle top of your canvas and make a little mark (if necessary) or an invisible mark. Each ray will be meeting to that point. Paint the first rays on the canvas with just the phthalo blue.
Note: You don’t need a lot of paint on your brush, just a little bit at the tip!
Next paint another coat of the phthalo blue rays so they become even darker.
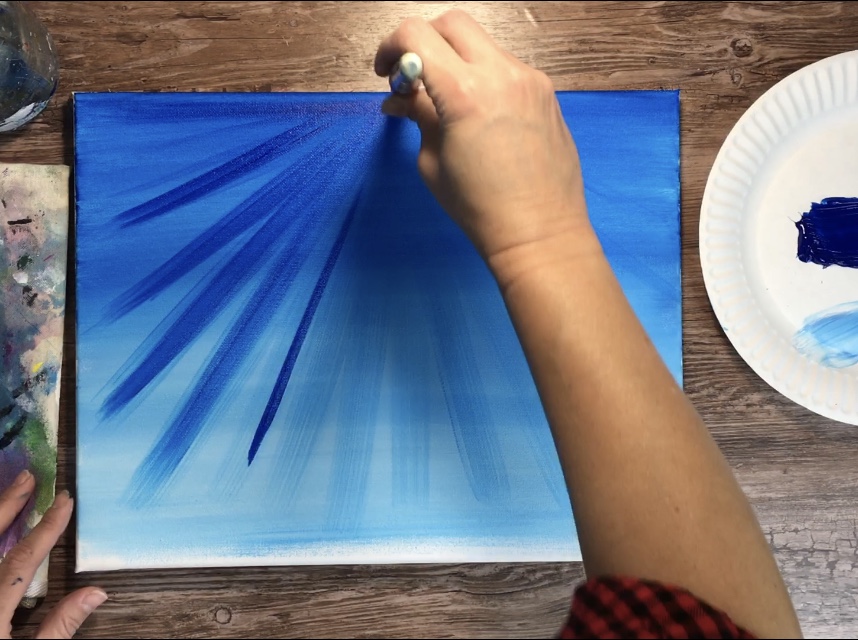
Note: the rays are not going all the way down, they stop at about where the mountain area will be.
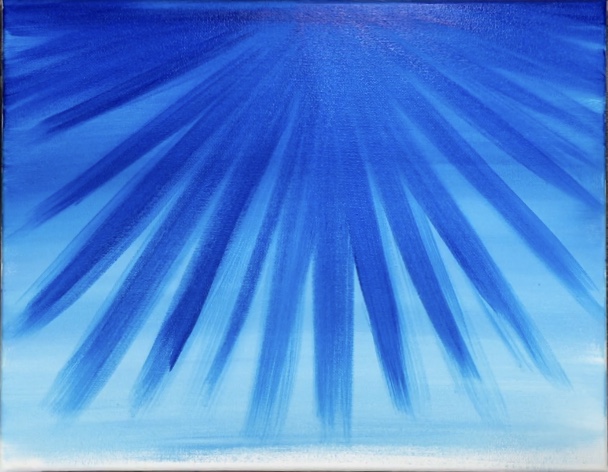
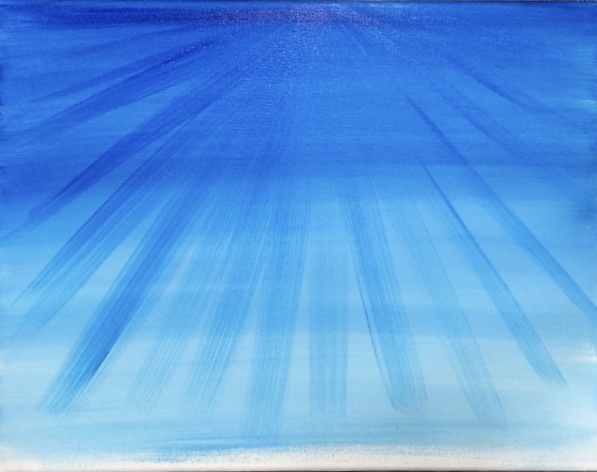
Then wipe off some excess phthalo blue from your brush and load it in titanium white.

Paint the white rays gently in the same way you did the phthalo. You can paint over them or have them make a new line in between the darker ones. The white should turn into a light blue and not white at this point.
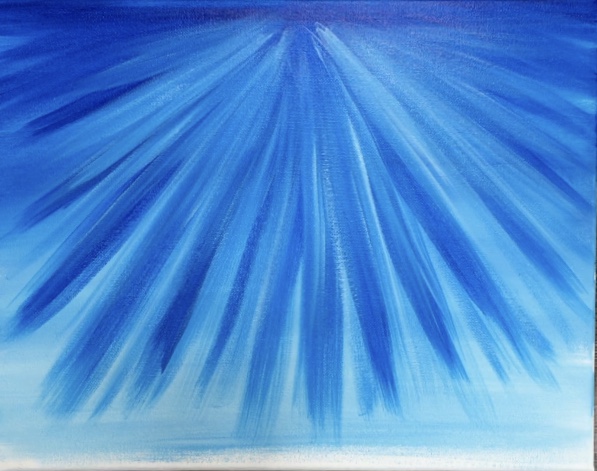
Next add a tiny bit fo medium magenta to your brush. Then lightly paint some medium magenta rays. Thee magenta gives the sky a bit more color variation.
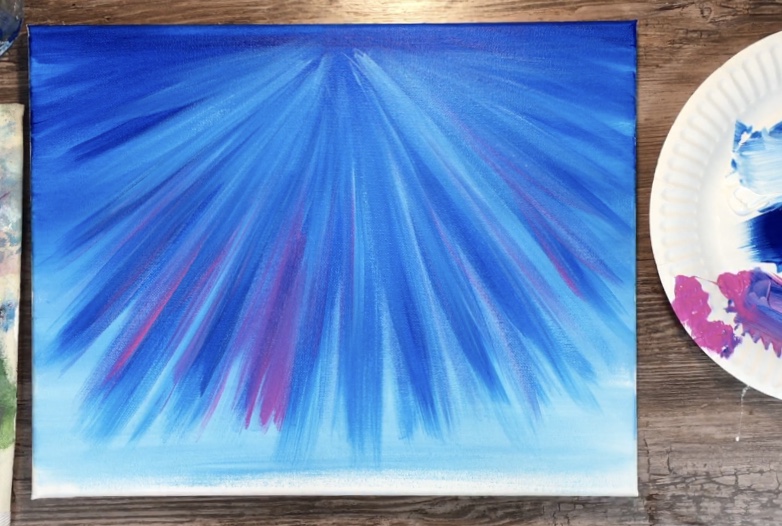
Next we want these rays to get brighter especially in the area of the top middle where the star of Bethlehem will be. Wipe off excess paint from your brush (or completely rinse it). Then load it in titanium white.

Paint the rays starting from the middle but only paint these rays so they go about half way down and fade out to the other rays.
You can add a few more layers to make that top middle extra bright. Keep in mind that you don’t want to lose the dark area of the sky. The top right and top left corners should be very dark still.
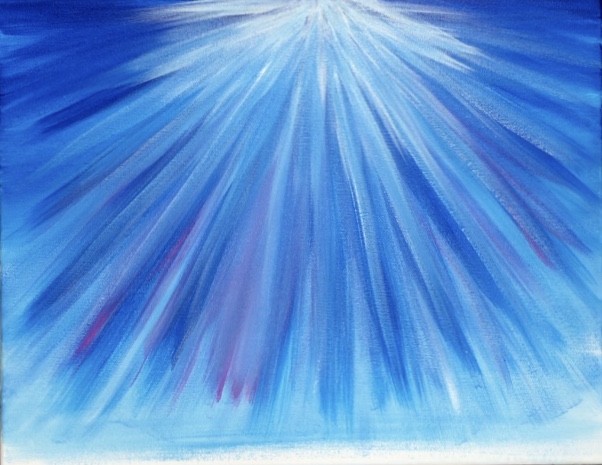
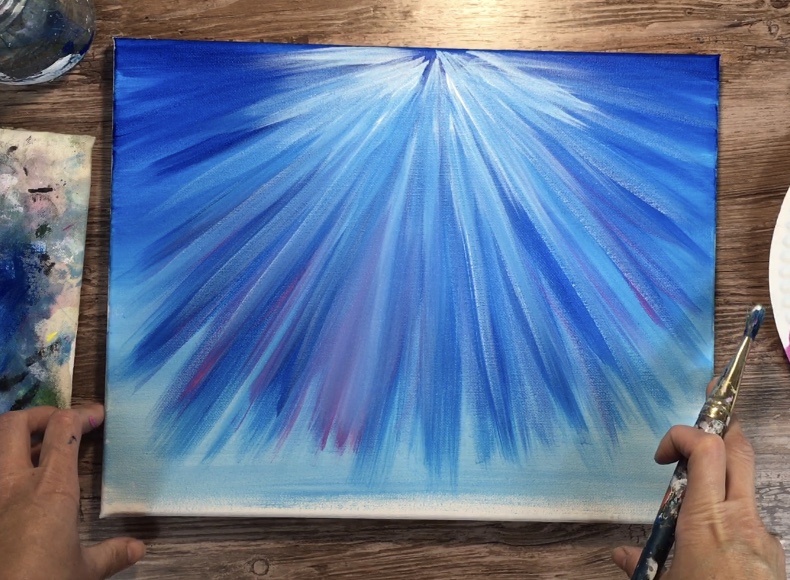
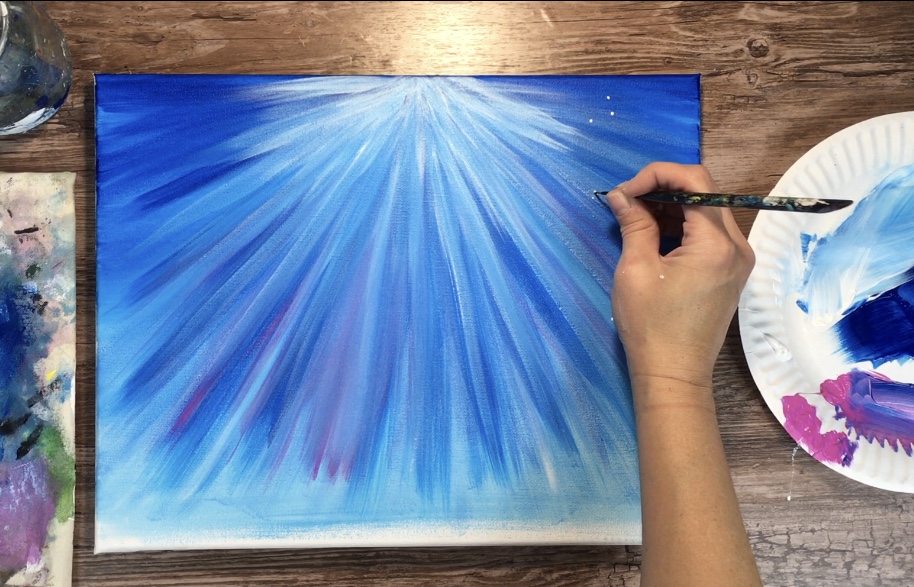
3. Paint The Stars & Star Of Bethlehem
To do the white stars, use a 10/0 liner brush and titanium white. Paint little clusters of white dots throughout the sky.
To do the star of Bethlehem, use the 10/0 and titanium white to paint a diamond with four long points.

Then add some primary yellow to the middle area and drag it out to the points.
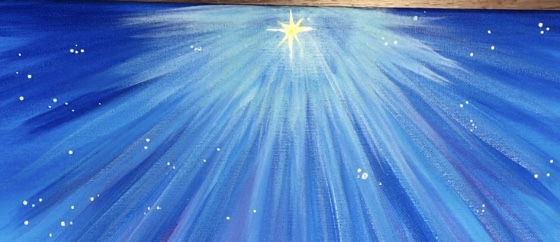
Then I added four more points forming “X” . And a few more lines stemming out from the points.
Tip: if you mess up on this star, you can easily wipe it with baby wipes and start over again! As long as the paint is still wet, a baby wipe acts as a nice eraser to a painting.
4. Layers Of Mountains
To do the mountains, use a 3/4 flat brush. Start with the lightest gray colors. To make the light gray, mix titanium white and neutral gray value 5 (about equal amounts).
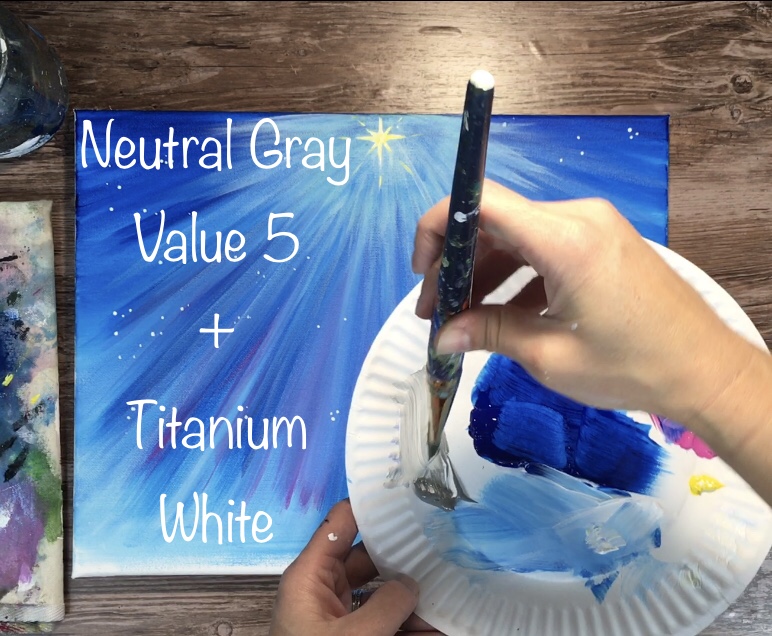
Then paint a wavy line. This line starts at about 1/3 of the way up the canvas.
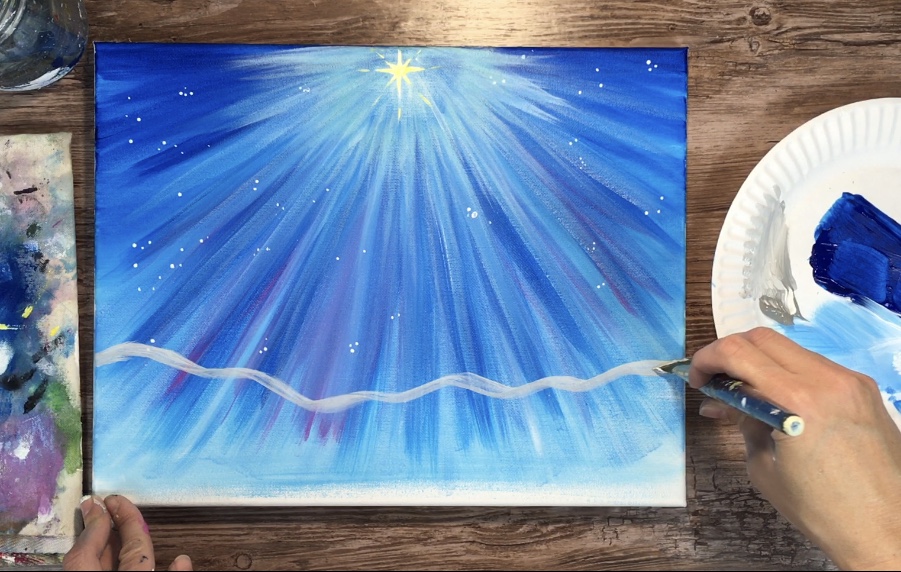
Paint a solid area in under the wavy line. Go pretty far down and know that the next mountain layer will overlap it.
Then wipe off your brush and load it with just neutral gray (no white). Paint the next layer of mountain under the lighter layer. Make the wavy line different from the other one.

Then wipe off your brush again and mix a tiny bit of black in with neutral gray to make a dark gray. Paint the third payer mountain line.
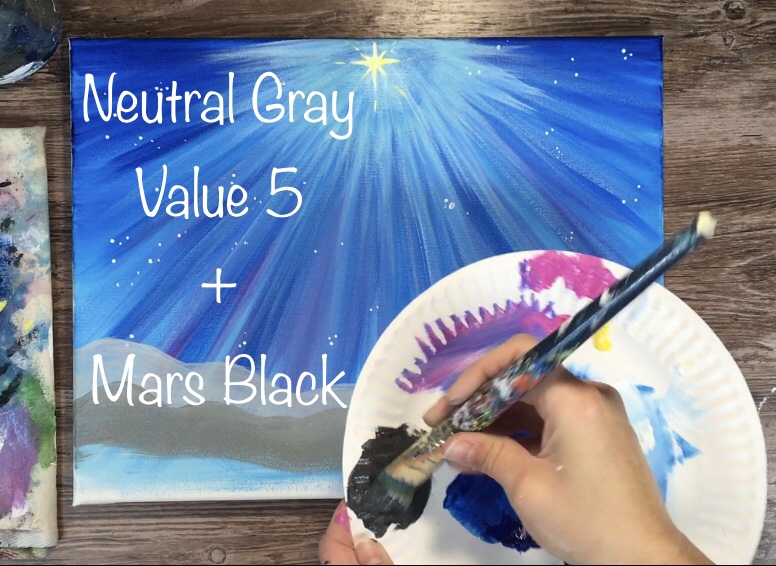
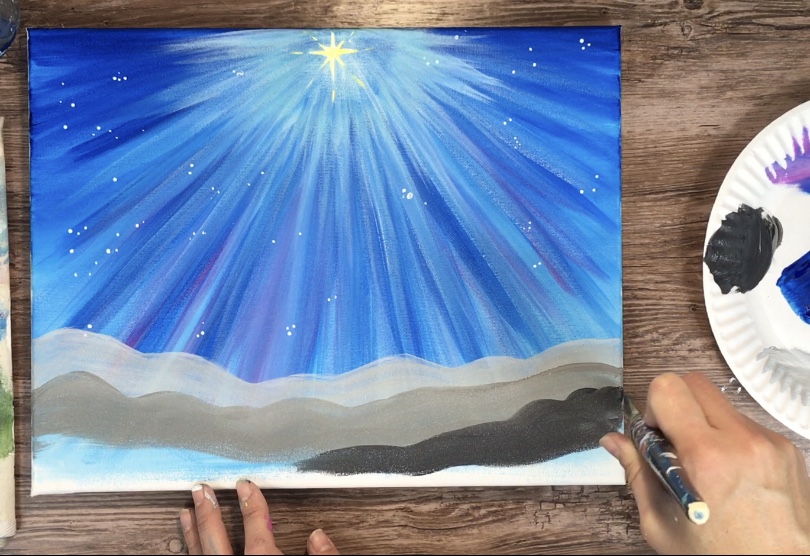

Finally paint the last layer on the bottom with mars black. This final layer should be relatively flat.
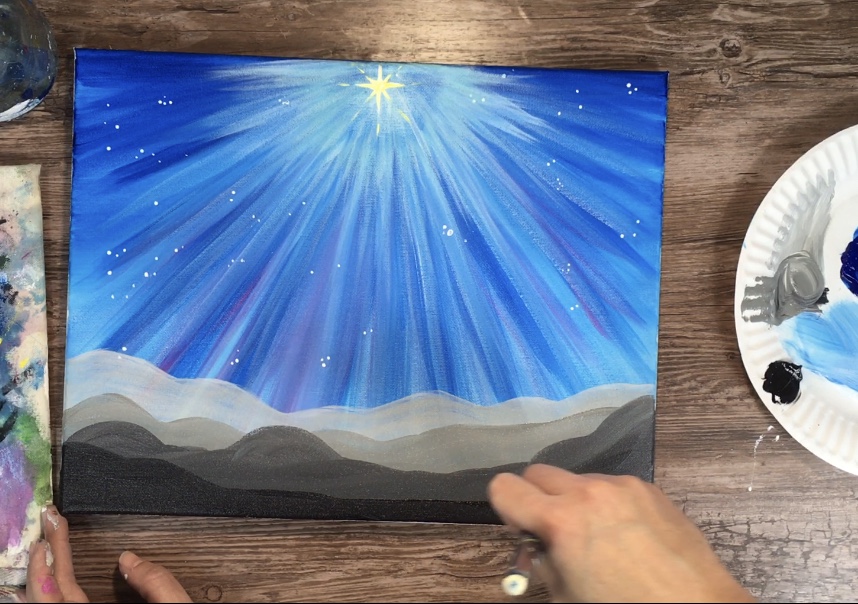
5. Dry the painting then transfer the silhouette
Print out the silhouette pattern on standard size computer paper. Then place a sheet of graphite paper below.
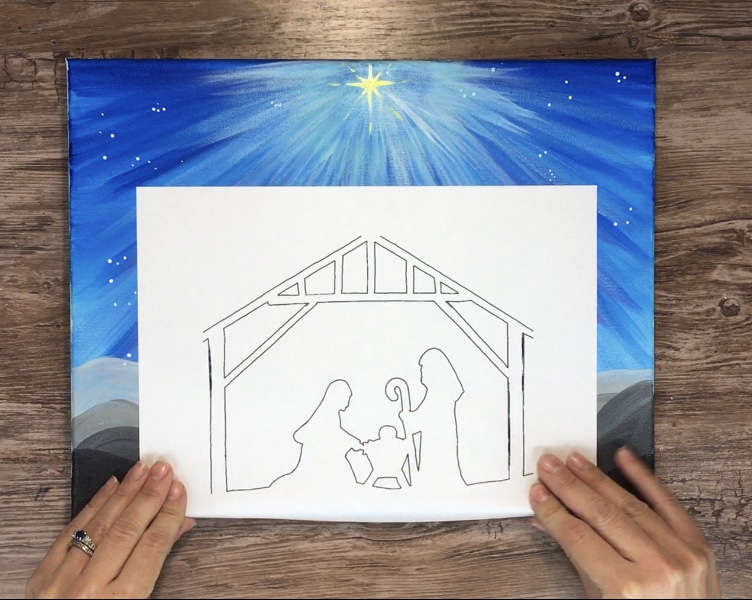
Line the silhouette so the bottom is just a little bit above the bottom black area you painted. In other words you want the bottom of the silhouette pattern to line up with the top of where your black is.
Trace the silhouette very carefully being sure to get all the detailed lines.
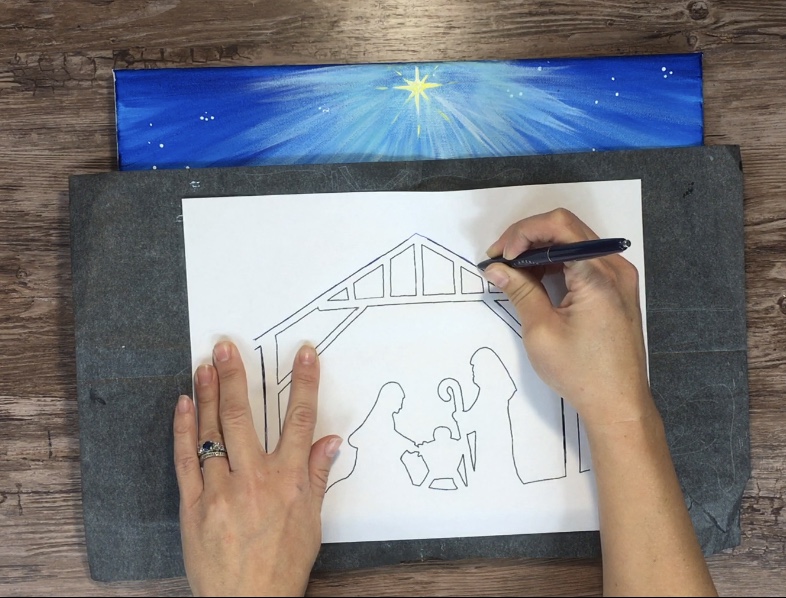
Tip: I HIGHLY recommend tracing this with a ball point pen to get a more uniform thin line because this silhouette is very detailed! Press very firm so the pattern will transfer nice and dark.
6. Paint The Silhouette
To paint the silhouette, I used a combo of the 4 round for large areas and 10/0 round for the tiny areas. I used all mars black for this but watered it down slightly by swirling water on my brush and mixing it in with the paint.
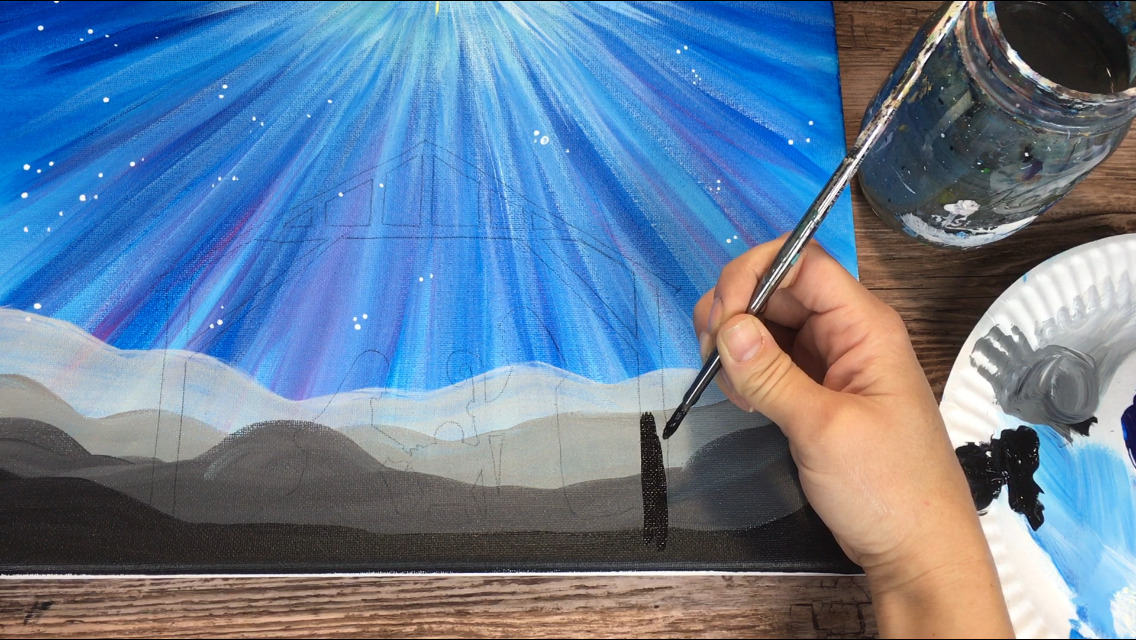
Work slowly and take your time!
Make sure you use that 10/0 round for the smaller areas especially for Mary and Joseph’s face and baby Jesus! You can use the 4 round for filling in the larger areas.
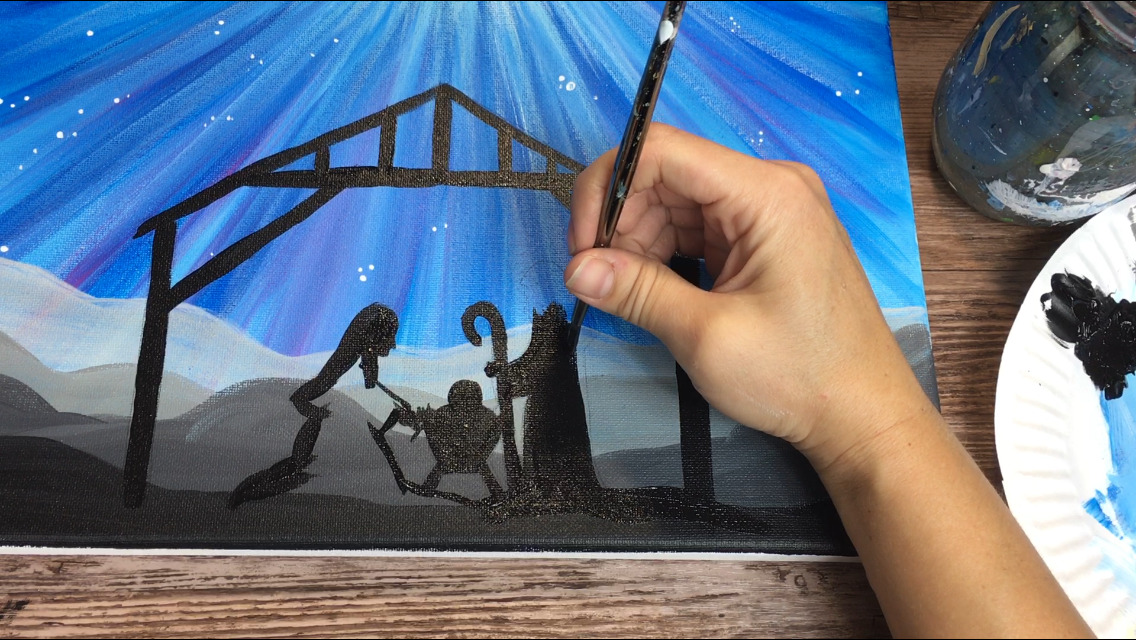
Also it might help to outline everything first and then fill it in solid.
The bottom of this silhouette should line up with your bottom black land line. If there is any space showing through, you can always paint more black below it.
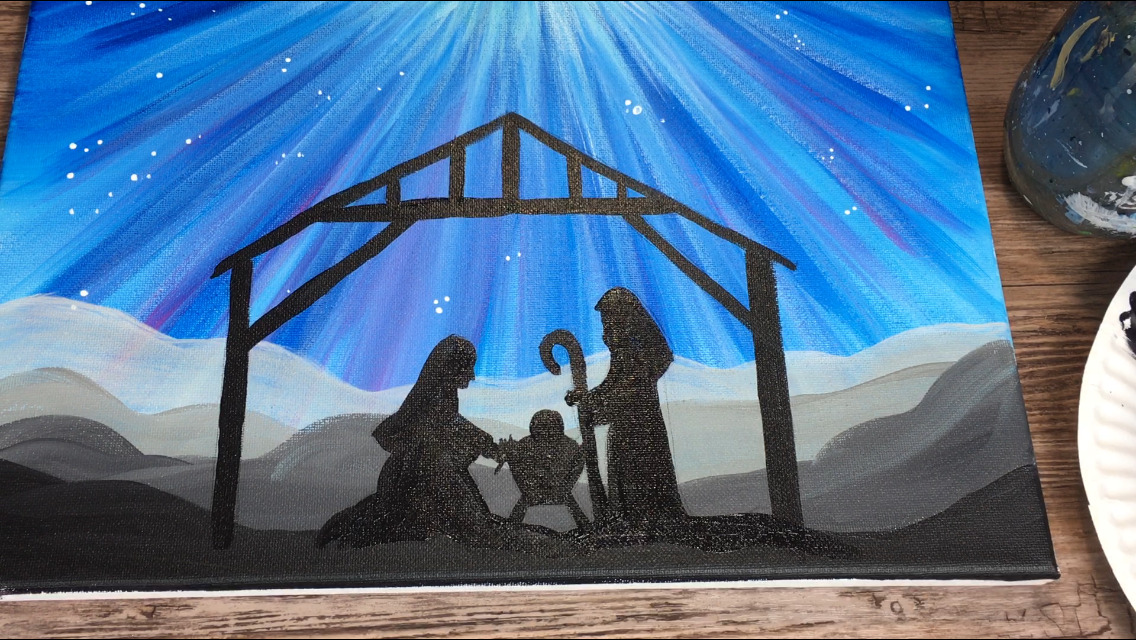
7. Paint the palm trees
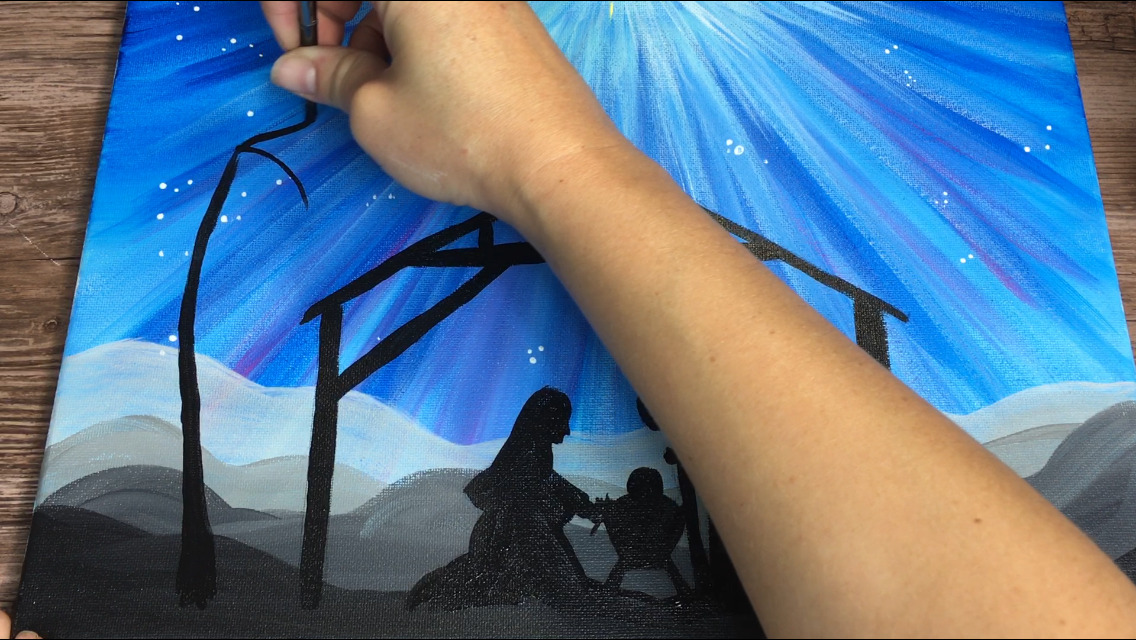
To do the palm trees, use a 4 round brush and mars black. Start at the bottom and paint a kind of thick base that gets thin as it goes up. If you want your palm tree to be curved, paint the line curved.
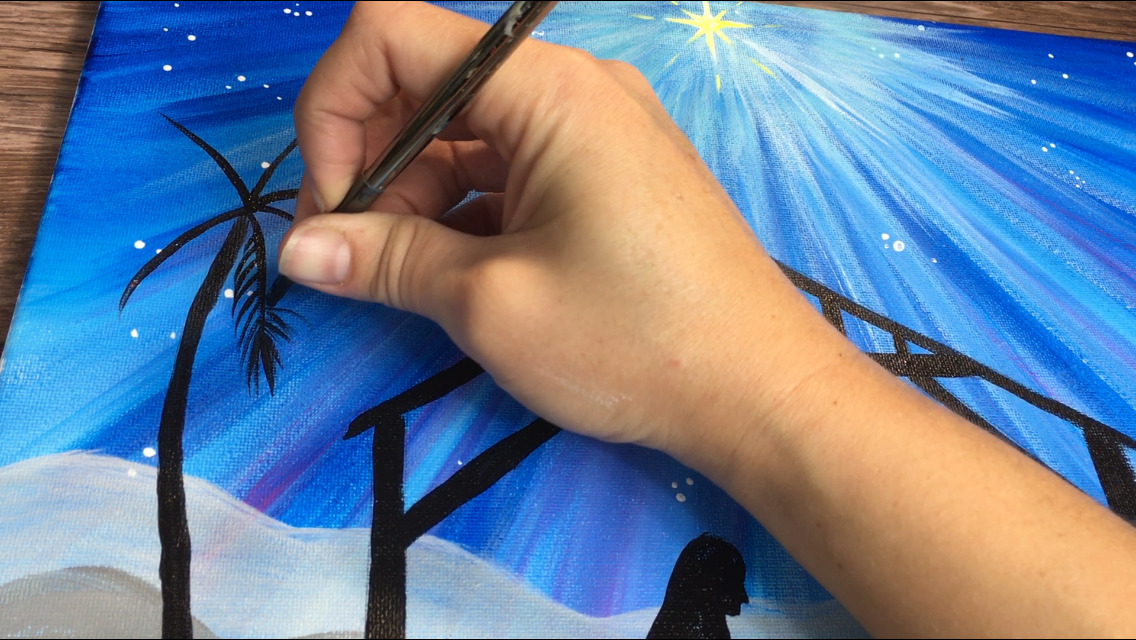
Then paint the palms starting with the line in the middle. Stroke each palm leaf out starting from the middle line.
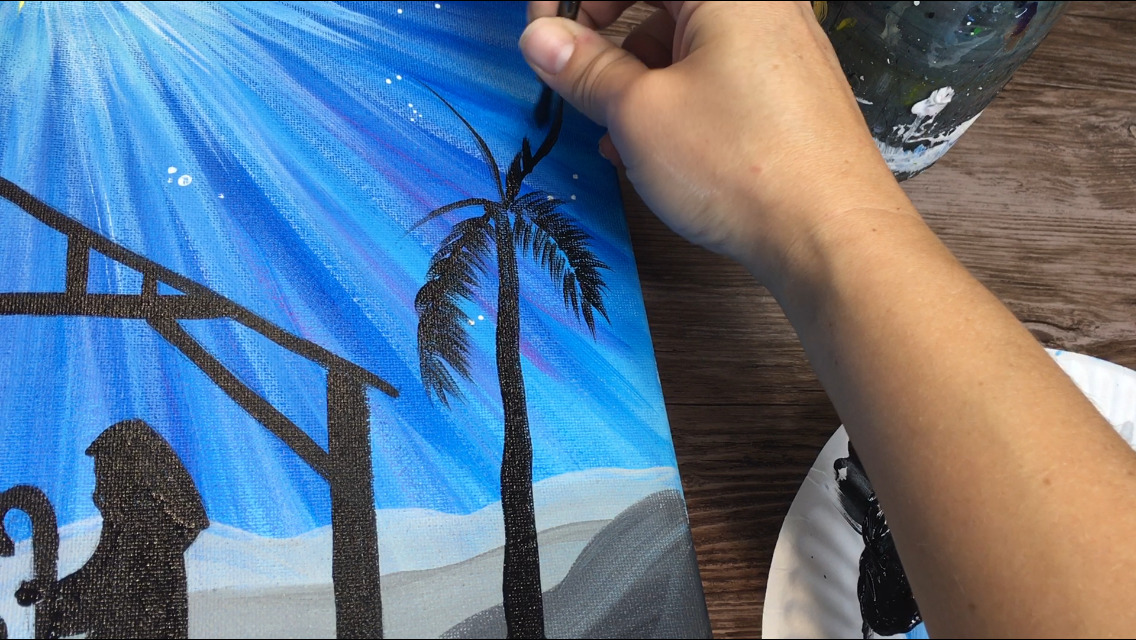
Then you can paint some few strokes of grass or shrubbery sticking up at the bottom.
7. Paint a bright area above Baby Jesus and some highlight lines throughout
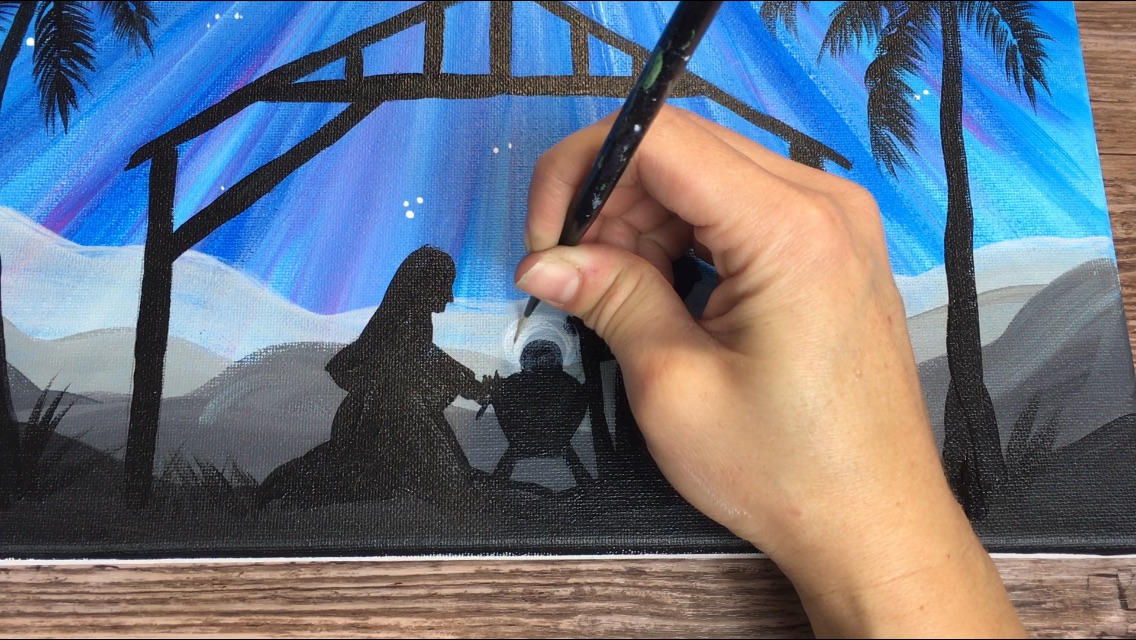
Next I used a 10/0 liner and watered down some titanium white. I painted a white halo circle around Baby Jesus’s head. This should be very translucent. Too much white might take the silhouette over so don’t do a solid white.

Then I painted some subtle highlight lines on Mary and Joseph as well as a few lines on the Inn and palm trees.
Finished!
Thank you so very much for making this tutorial!!! Given the age we live in…… anyhoo. I’ve been out of canvases for about 2 months (so I haven’t been painting) and I received 10 for Christmas! I’m definitely doing this one first!
You’re welcome! Merry Christmas and enjoy those canvases!!
Thank you for the tutorial. I really want to try this. The brushes and paints as well as your instructions make it easy enough to try. Many thanks for your tutorial
Do you have any recommendations for if I can’t get my hands on transfer paper?
Absolutely! So what you can do is run pencil on the back of the traceable and then trace in the front of the traceable. It will transfer that way.
Thanks, Traci. Mine turned out well. Thanks so much for the instruction.