Cacti Acrylic Painting Tutorial
Would you like to save this?
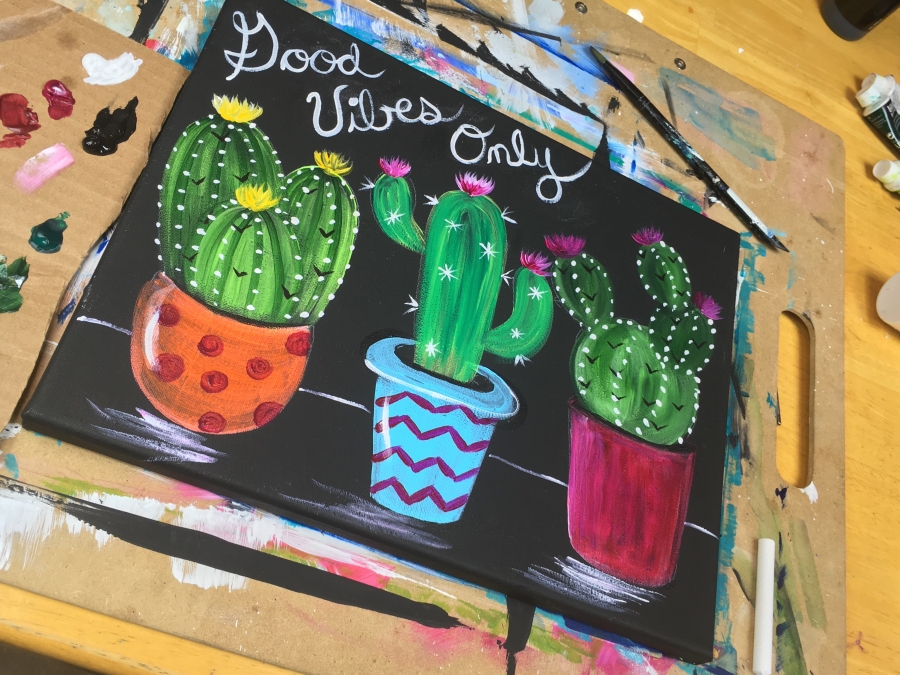
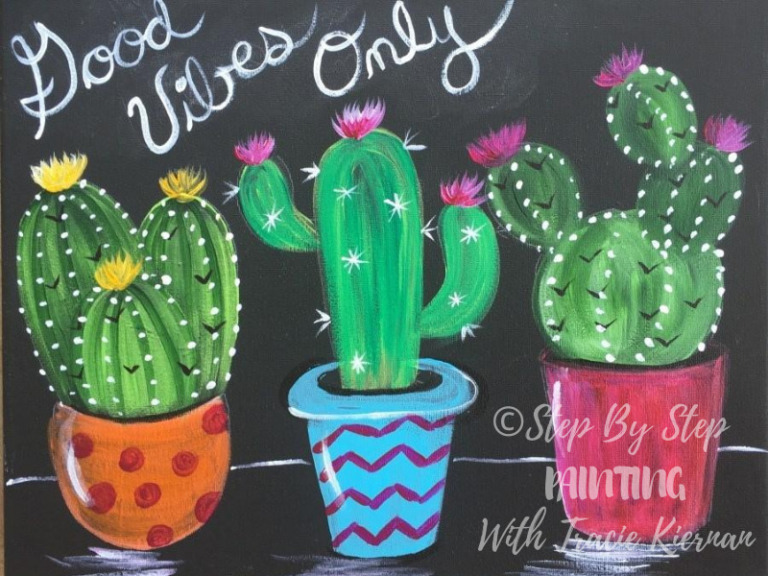
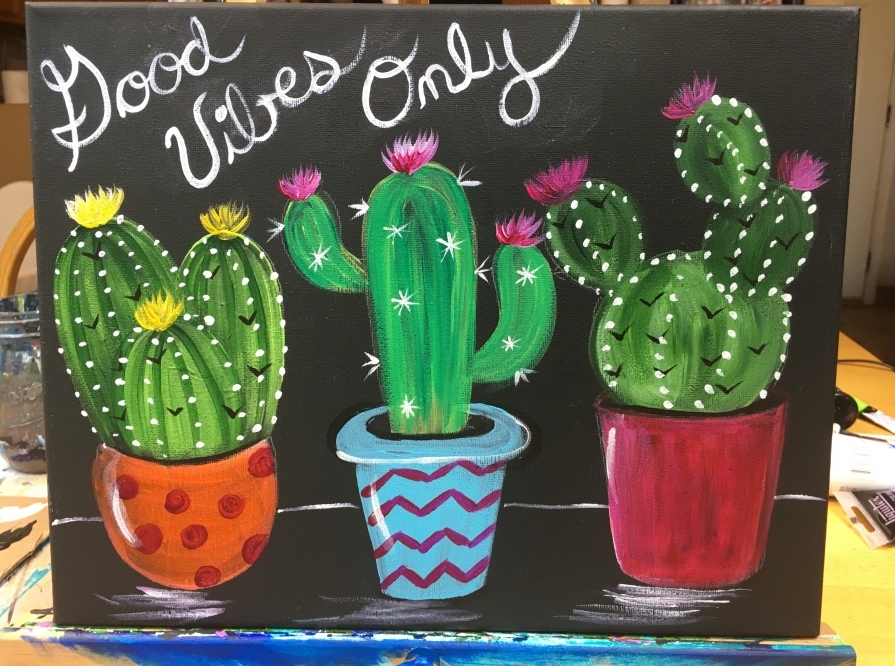
This is an adorable painting of three different cacti in decorative pots. Paint this for yourself or the cactus lover in your life! You may also wish to customize the quote and decorate the pots with different colors and designs. I actually searched awhile for a quote to add to this painting. There were some good contenders, however when I saw “Good Vibes Only” I thought it was perfect! My husband jokes about the irony of having “Good Vibes Only” on painting of three very sharp plants. I don’t see it that way because cacti and succulents are beautiful and bring me joy!
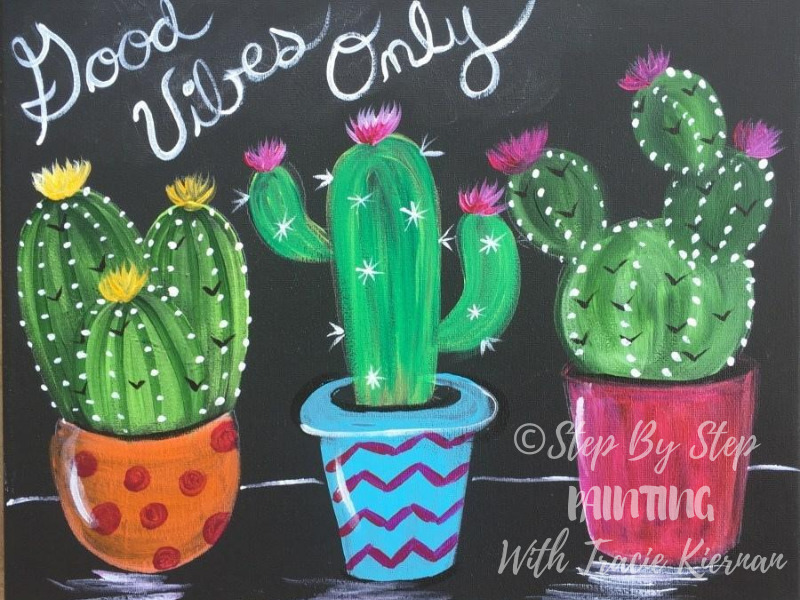
This acrylic painting was done on a black 11″ x 14″ canvas that I painted black. I’ve discovered that painting a white canvas black is actually a little more cost effective than purchasing a black canvas. You can certainly purchase a set of black canvases if you’d like! I also discovered that it looks best when the black is painted in a matte sheen rather than a satin sheen that most acrylic paint finishes dry in (ahem mars black dries in a satin finish). I actually used Apple Barrel Matte Black to paint the canvas black. This is a craft quality paint but I like the almost chalk board effect this gives the canvas. Simply use a 3/4″ flat brush or larger to paint at least two coats of the black making sure it dries completely in between coats.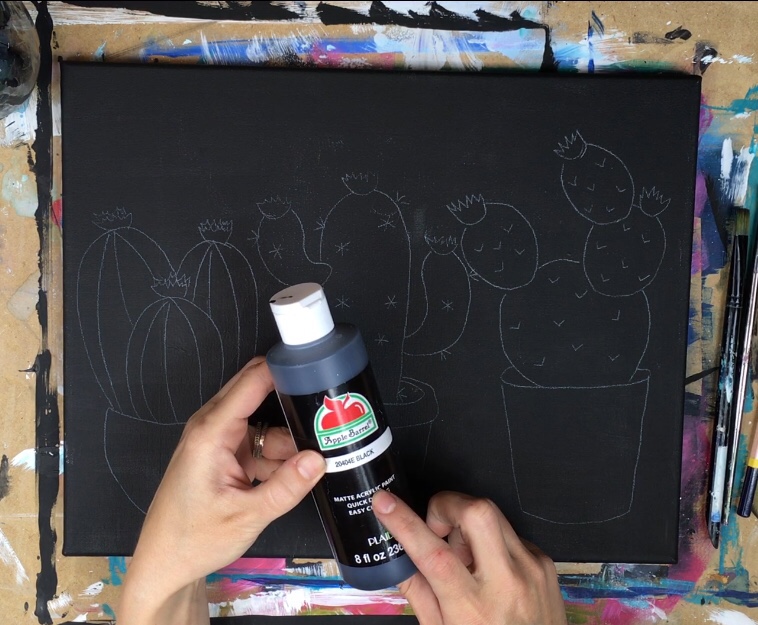
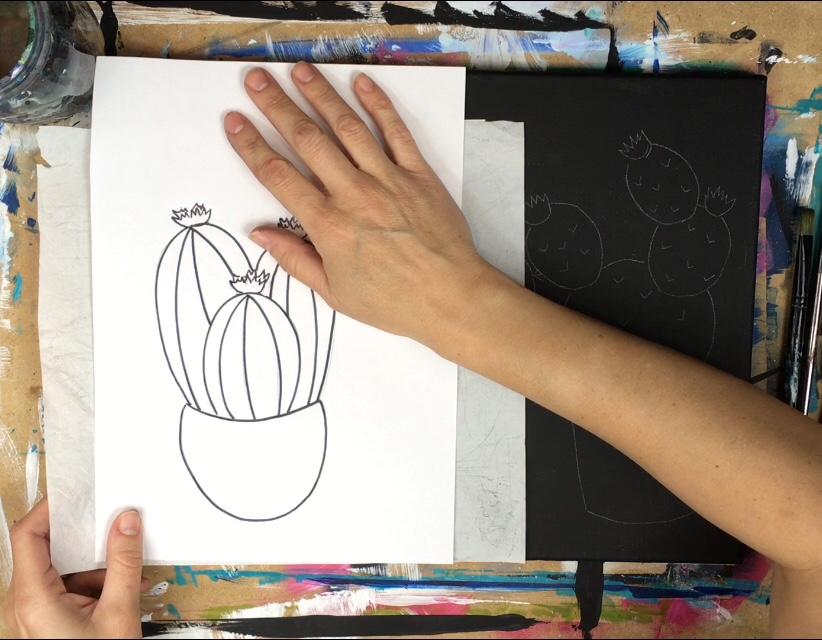
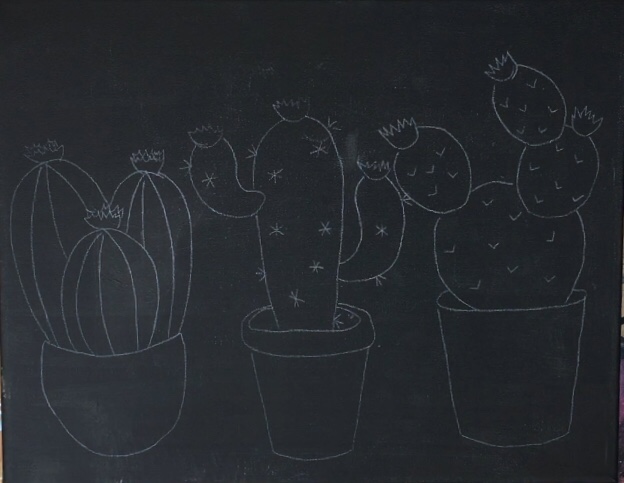
To get the cacti drawing on the canvas, simply use my free traceables printed out on standard size computer paper. I provide three different traceables for each of the cacti and you’re welcome to mix and match them as well! Use white graphite paper so the transfer will show up. You can also use a piece of chalk if you’d like to free hand the cacti or come up with your own unique succulent shapes. They actually aren’t too tricky to draw! Just make sure the sizing is appropriate to the size canvas you’re using and to leave room for a fun quote.
Enjoy this tutorial! I can’t wait to see your paintings! Happy Painting Artists!
Materials Needed:
How To Paint Cacti "Good Vibes Only"

This tutorial for the beginner painter will guide you through the steps on how to paint three cute cacti in pots on a black canvas. There are three free traceables for this painting so that you do not have to draw the cacti.
Materials
Supplies
- 11" x 14" canvas painted black
- Acrylic Paint
- Paint Brushes
- Traceable of Cacti
- White Graphite Transfer Paper
Brush Sizes
- #12 Flat
- #4 Round
- 10/0 Liner
Colors
- Mars Black
- Titanium White
- Alizarin Crimson Hue Permanent
- Cadmium Orange Hue
- Cadmium Yellow Deep
- Brilliant Yellow Green
- Hookers Green
- Phthalo Green
- Light Blue Permenent
- Quinacridone Magenta
Optional Supplies
Color Palette:
Note: there’s quite a few colors in this painting! Most of them can actually be interchanged and optional depending on if you are customizing the colors in your cactus pots. The following colors are optional: cadmium orange hue, alizarin crimson hue permanent, light blue permanent.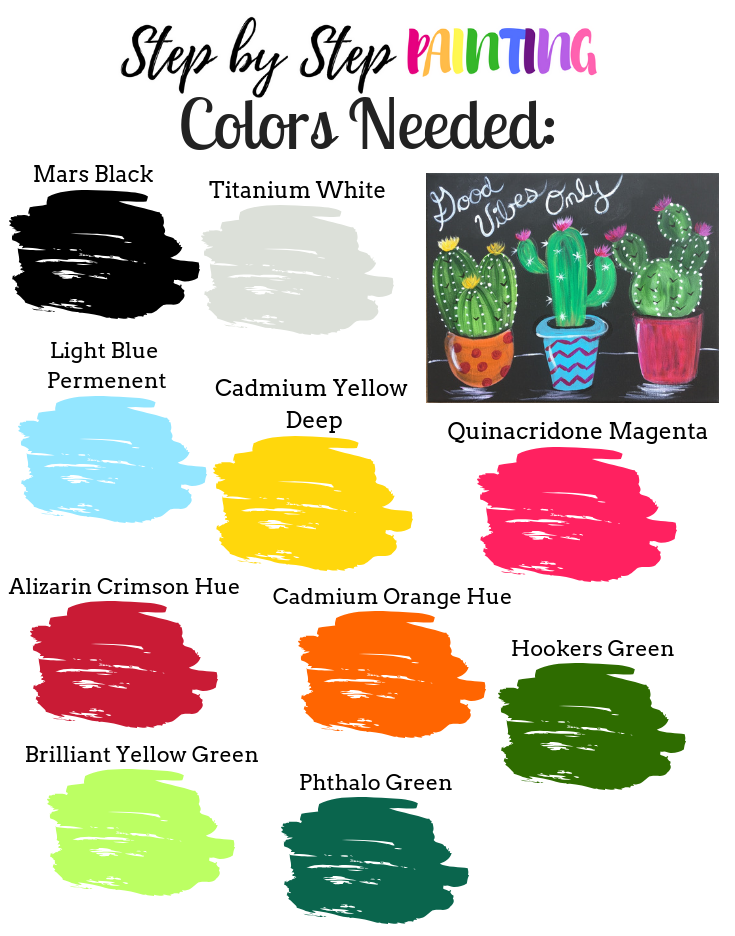
Traceables:
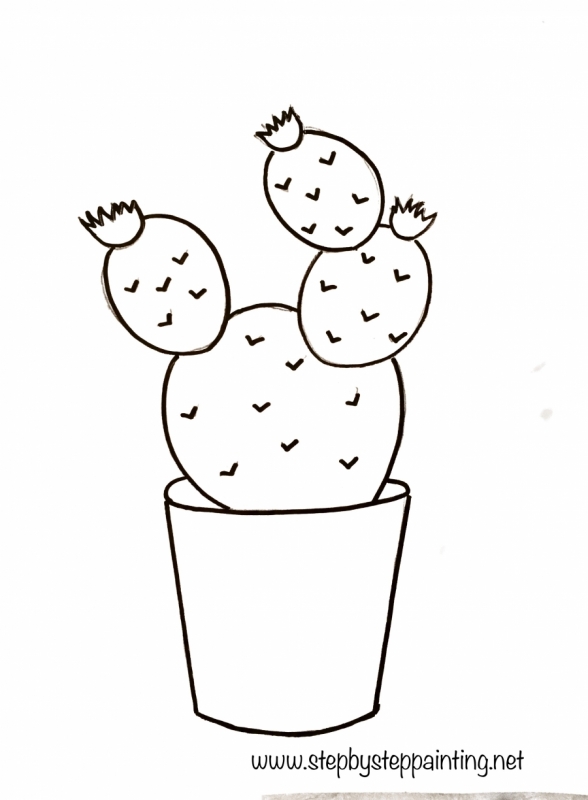
Each cactus has its own traceable! Print each on an 8.5″ x 11″ paper. It might help to cut them out a bit so that you can better arrange them so they fit on the 11 x 14 canvas. You may also enlarge them if you’re doing a larger canvas. Go to PDF library to grab the downloads.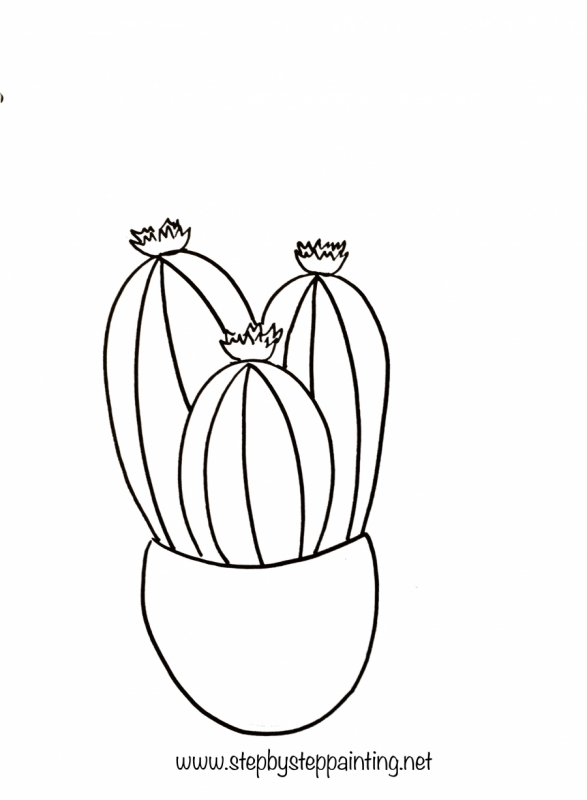

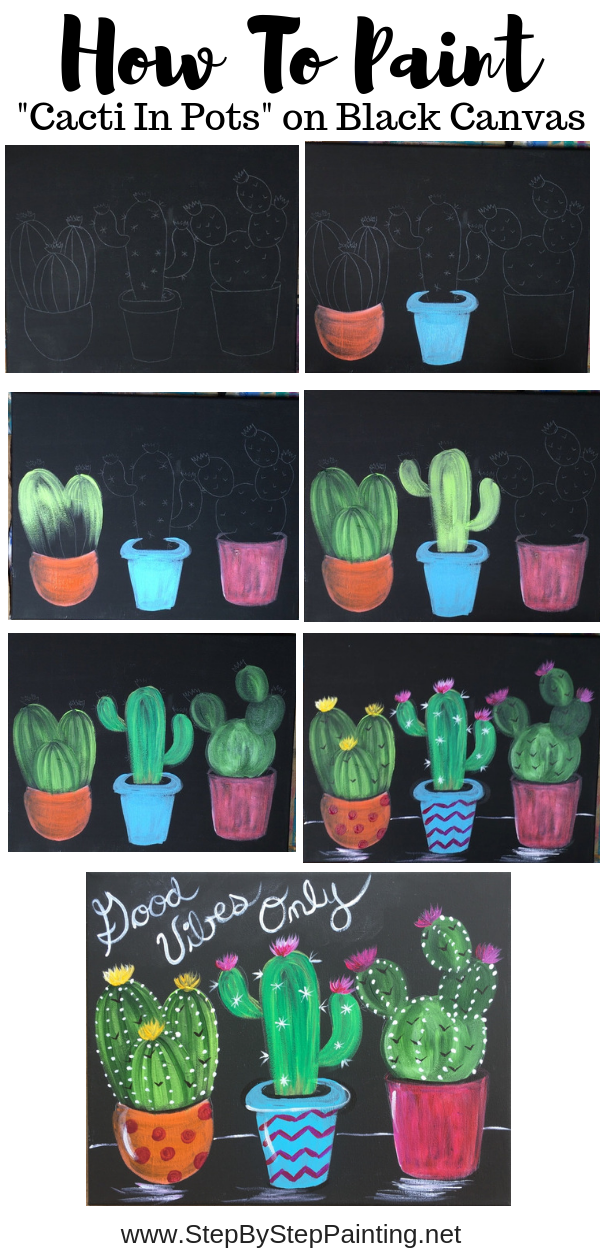
Directions At A Glance: 

Video:
Directions:
1. Paint a blank canvas black
If you bought a black canvas, you can go ahead and skip this step. To paint my canvas black, I used Apple Barrel Matte Black Acrylic Paint. I used a 3/4″ flat brush and painted one coat, allowed that coat to dry and then painted a second coat. The finish should be a nice matte with almost no sheen. Note: the image below shows the cacti traced on the canvas already. I did not get a photo of myself actually painting the canvas black. 
2. Draw or trace the cacti onto the canvas
You may wish to free draw the cacti or use the printables to transfer to the canvas. Just lightly sketch them out with a regular pencil and use a white color pencil to draw over the drawings.
If you are using the traceables, print them out on separate papers. Use white graphite paper to transfer. Position the cactus pot so that it is very low on the canvas but leaving enough room for a quote. It might help to cut the cactus out a bit so you can play around with the spacing. 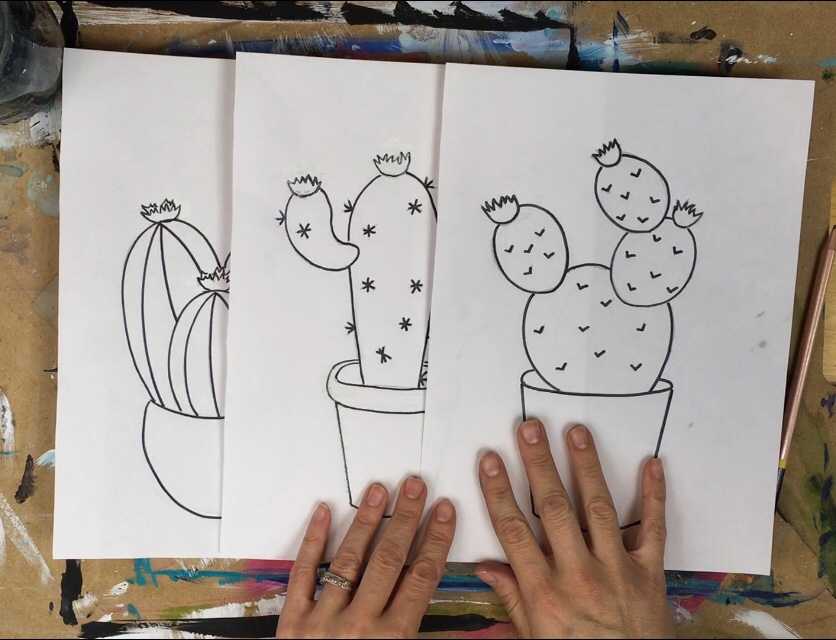
Simply trace with a regular pencil over the traceable (with the graphite paper in between the canvas and traceable). The image will transfer very visible onto the black canvas. 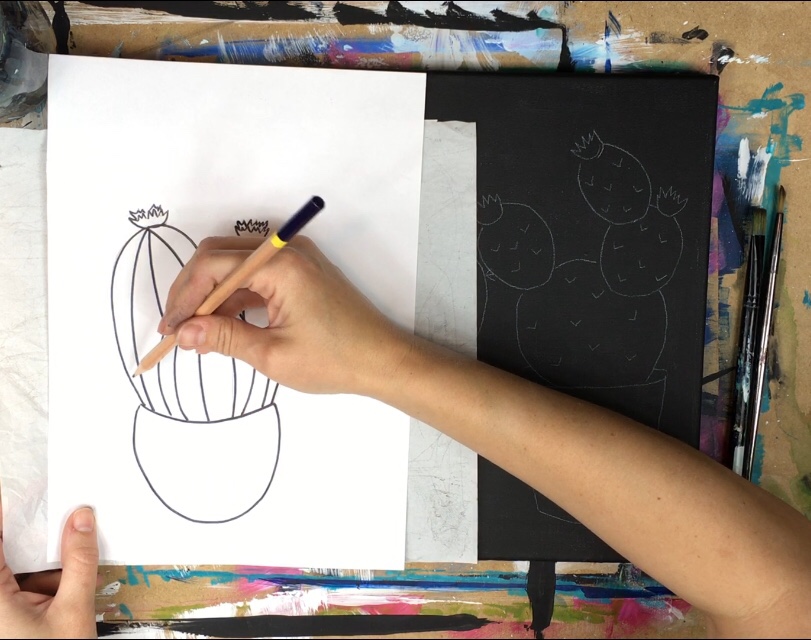
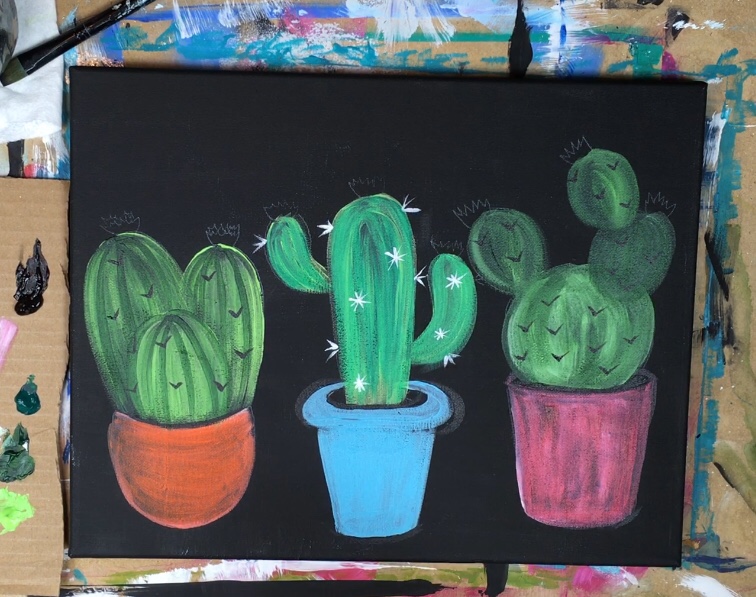
My canvas looked like what is pictured below. Note that I did not draw the table line or the quote until the end. I also did not draw out the patterns on the pots. 
3. Paint the pots
I used the colors cadmium orange hue, light blue permanent, alizarin crimson hue permanent and titanium white. I also used a #12 flat brush. 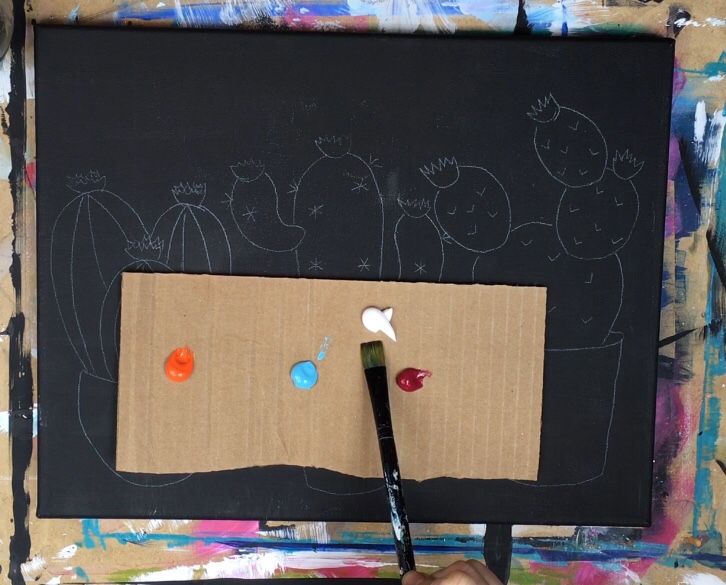
The titanium white is used only to help the color be “opaque” on the black canvas. Certain acrylic paint colors are “transluscent” and others are “opaque” or “semi-opaque”. Cadmium orange hue, for example is transluscent. Therefore it will not show up very well against the black. Light blue permanent is very opaque, therefore no white is needed. Alizarin crimson hue permanent is transluscent and will need white. To combat the transluscent colors, you can “white out” the area of the pot first. OR you can double load your brush in orange with a little bit of titanium white. I did the latter because it is quicker. I also didn’t mind a little black still showing through – it makes it look like a “chalk board” painting. 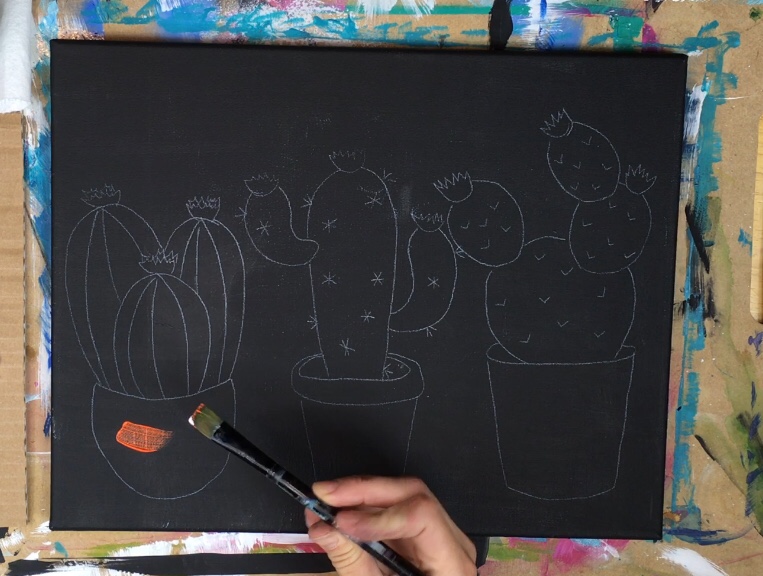
I double loaded my #12 flat brush in cadmium orange hue with the corner in titanium white. Then I painted the orange pot using left and right curved strokes in the shape of that pot. After that coat dried, I applied another coat with more cadmium orange hue. 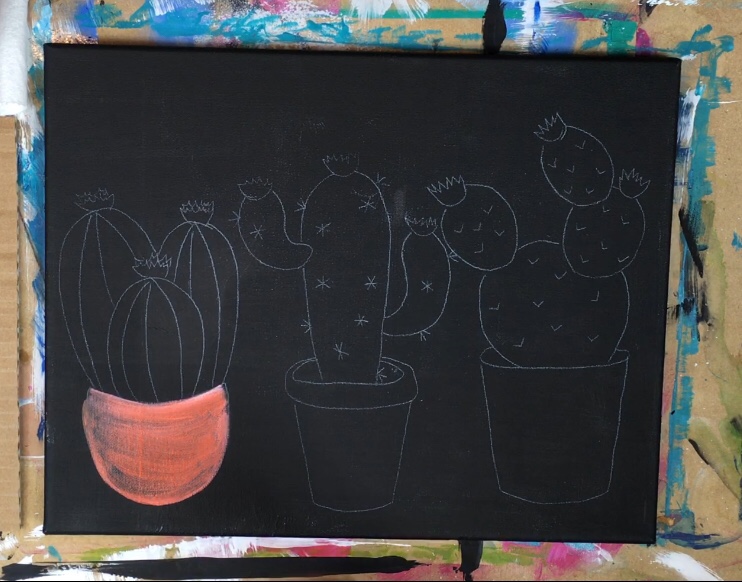
Then I painted the light blue permanent pot in the middle. Again, this light blue permanent color is opaque enough that no white is needed. 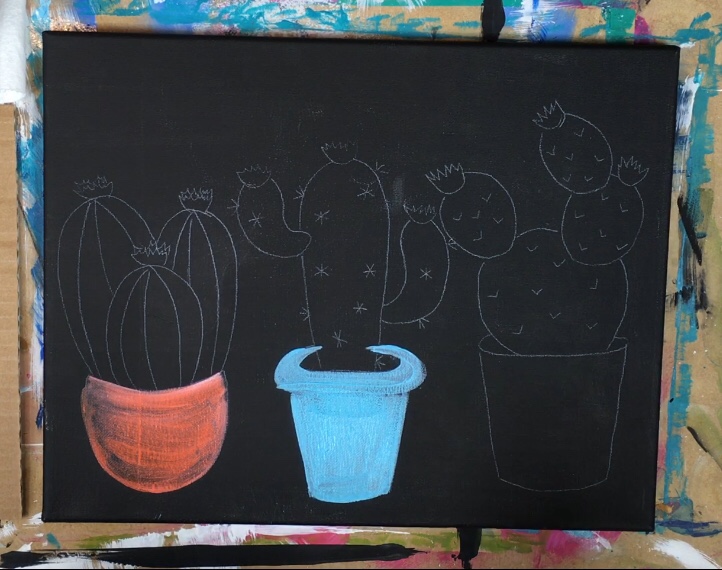
For the alizarin crimson hue permanent pot, I double loaded my brush in the titanium white. Then I painted up and down strokes. 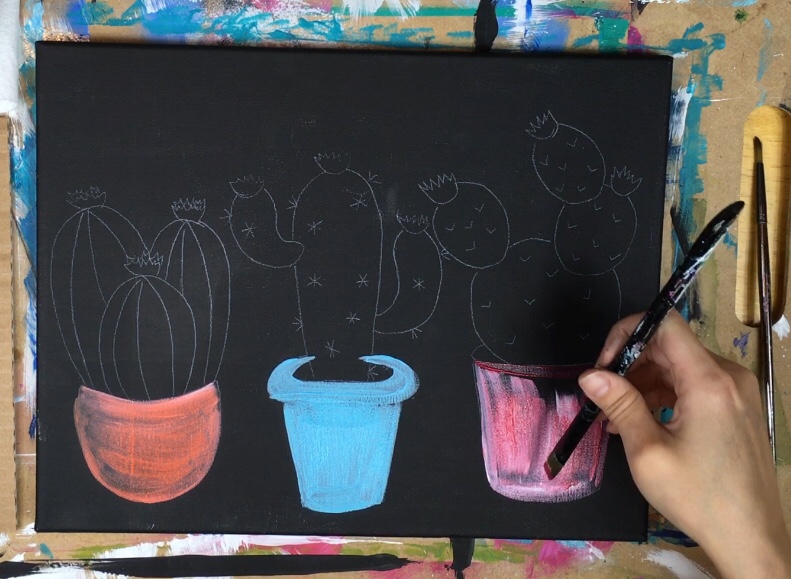
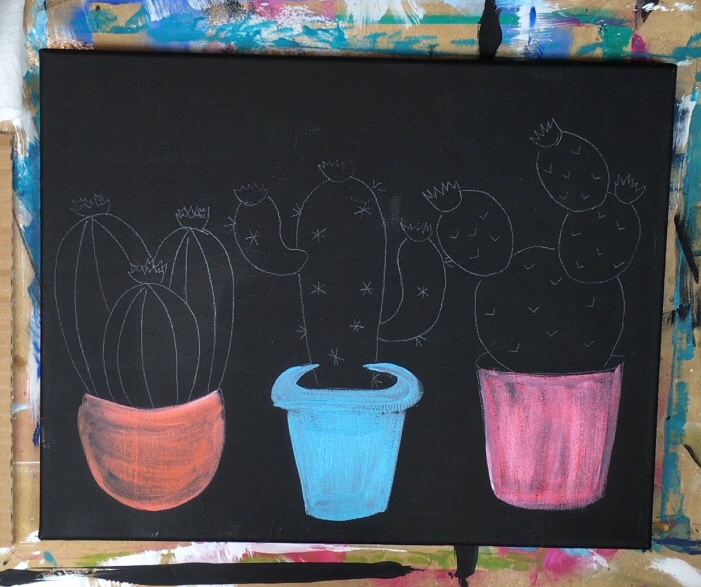
4. Paint the far left barrel cactus
Load your palette with brilliant yellow green and hookers green. Note: brilliant yellow green is opaque and hookers green is semi-opaque. No white will be needed for this step. 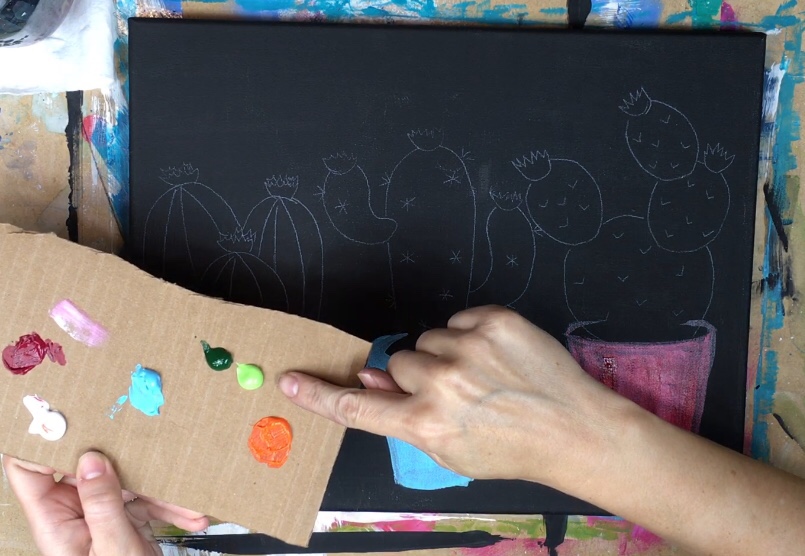
Start with the cactus on the left. Load your #12 flat brush in brilliant yellow green. When you paint these cacti, start at the top and drag your stroke down to form the shape. Your stroke should get kind of dry as it goes down. The cactus does not have to be 100% opaque. Let some of that black show through. This allows the cactus to have some texture and give it that chalkboard look. Also, notice that I did not paint the front part of this cactus yet because it is overlapping the two back ones. 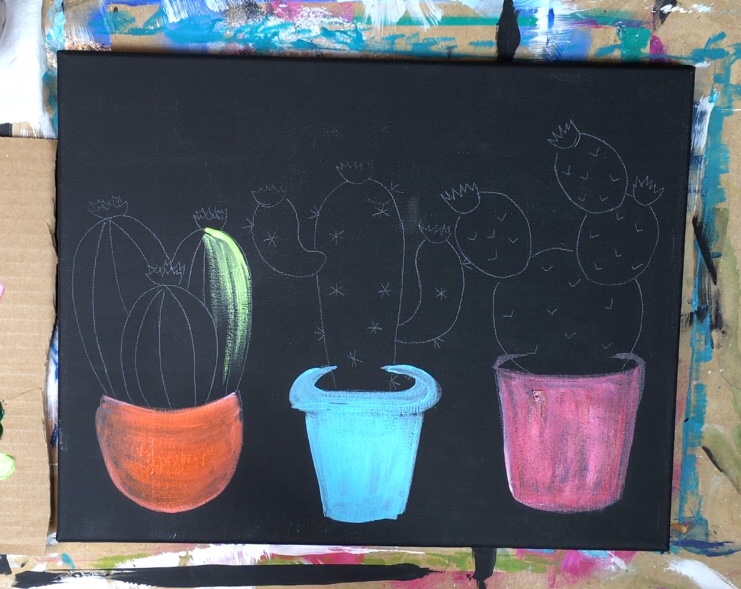
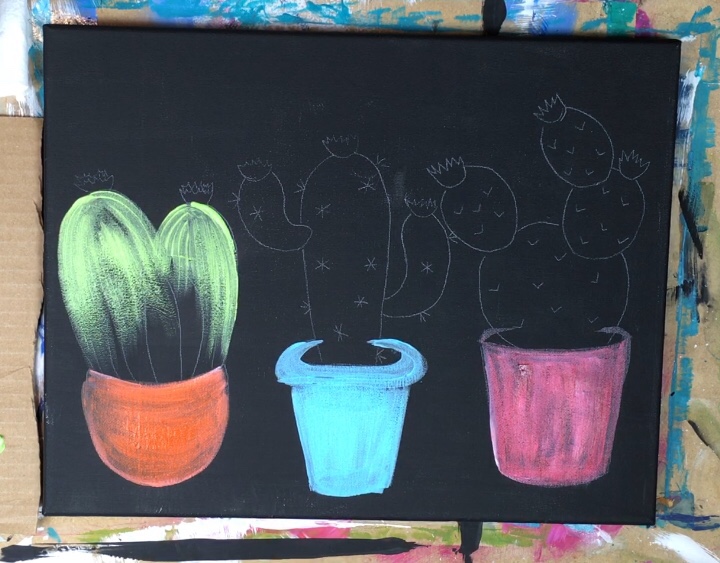
Then load your brush (without rinsing) in the hookers green. Go over the strokes again dragging from the top down and allowing the paint to dry out. Let the two greens blend but not all the way. You should get a nice unmixed combo of light green and darker green. 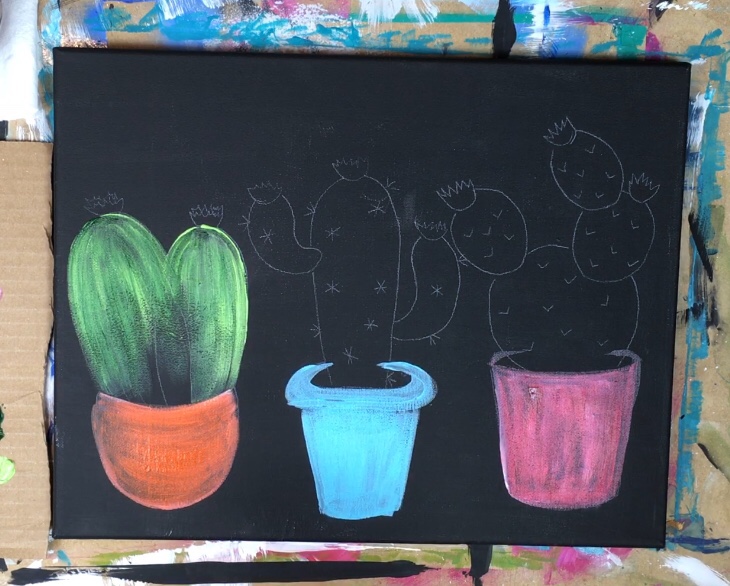
Then repeat that process with the front part of that cactus. I think I added a bit more brilliant yellow green to this part so it would show up slightly brighter. 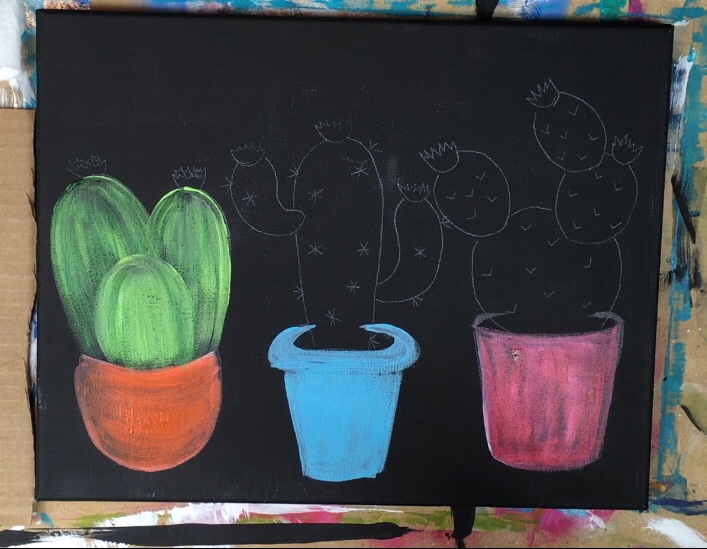
Next use the #4 round brush and the color hookers green to paint the lines on the cactus. This darker green should show up enough to see. Start at the top of the cactus and drag the stroke down. I painted 4-5 curved lines on each of the barrels of this potted cactus. 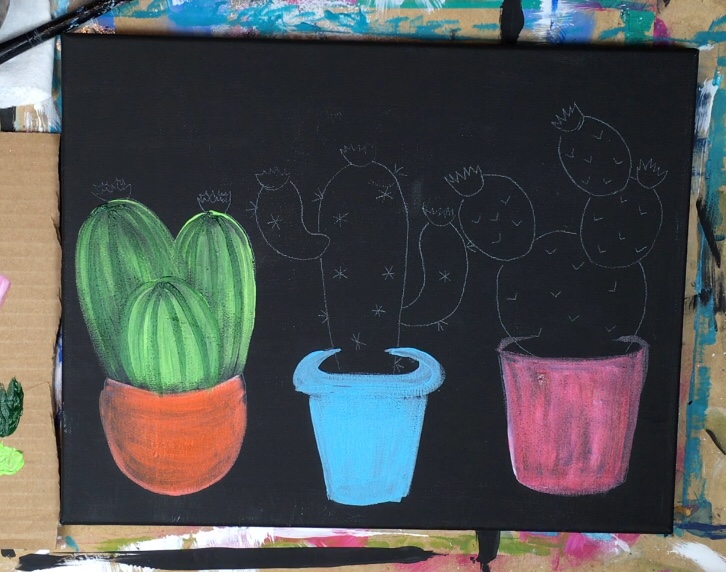
5. Paint the middle saguaro cactus
Use your #12 flat brush to paint brilliant yellow green. Do the same thing you did with the barrel cactus – start at the top with your stroke and drag it down. Let the paint be kind of dry so a little black still shows through. 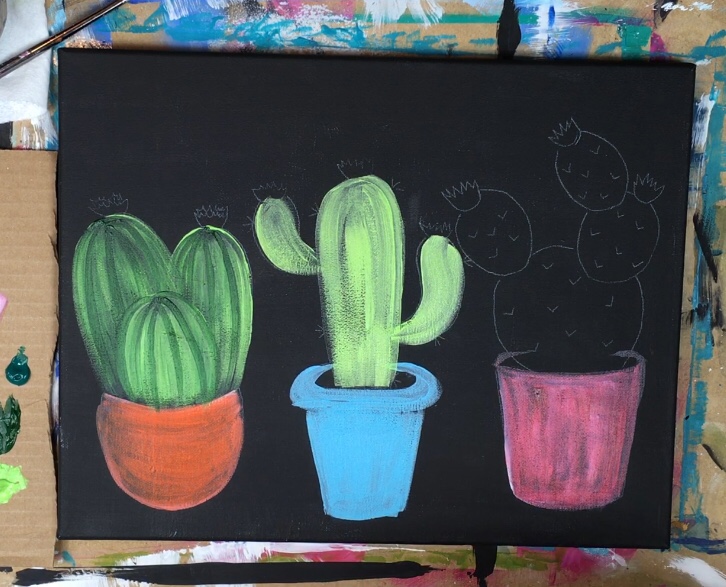
Then add in the color phthalo green. Do the same technique of loading this green on the brush (not rinsing the brilliant yellow green off) and painting downward strokes so the two greens blend together unevenly. This phthalo green is almost a teal color. If it seems “too blue” you can always add more brilliant yellow green into it.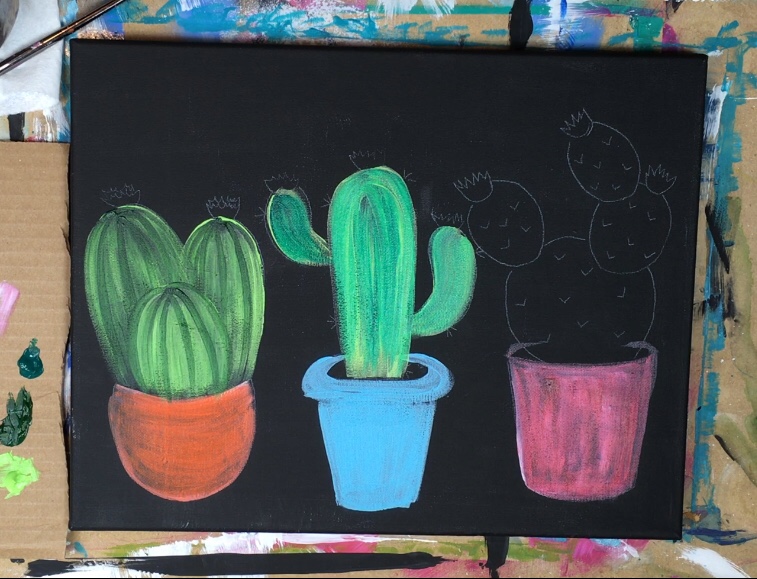
5. Paint the prickly pear cactus on the right.
For this cactus, I double loaded my #12 brush in hookers green and a little bit of titanium white. Note: each cactus has a different green color combo. Paint in curved stroke but still starting at the top and dragging each stroke down. The white and hookers green will blend together unevenly to create a sort of light color green. 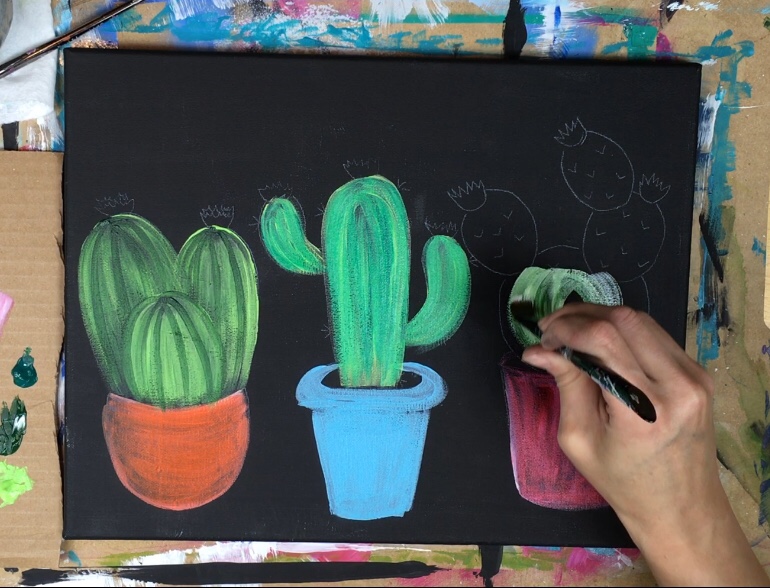
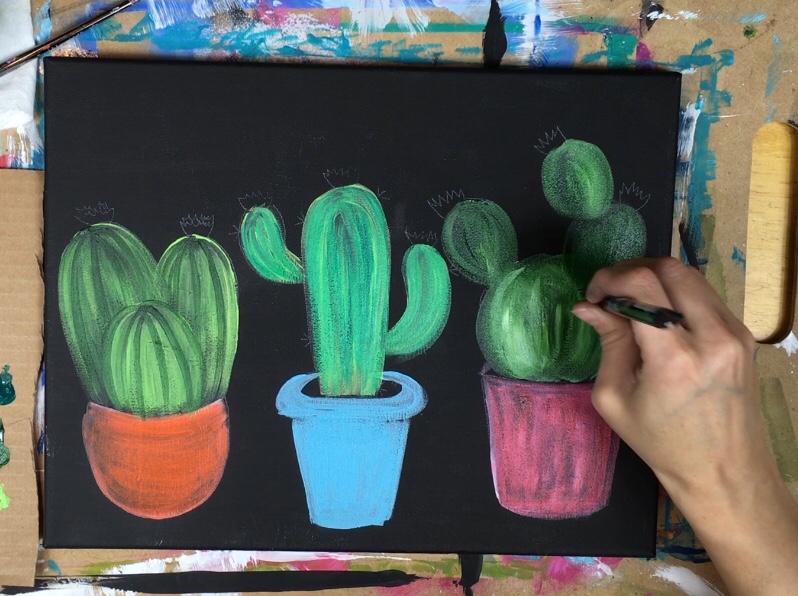
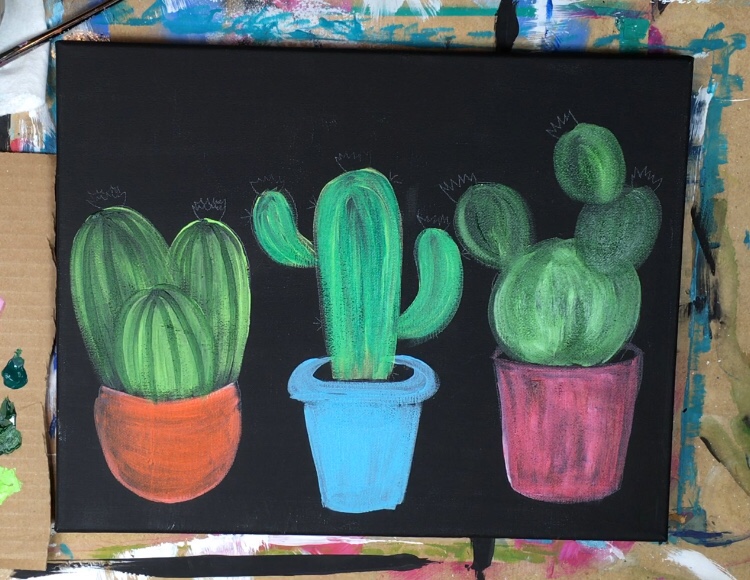
6. Paint spikes
Use the #4 round brush or a #10/0 liner (for more control) to paint the spikes on each of the cacti. For the barrel cactus and the prickly pear cactus, I used the color mars black and painted little “V” lines. For the saguaro, I used titanium white and painted little asterisks. 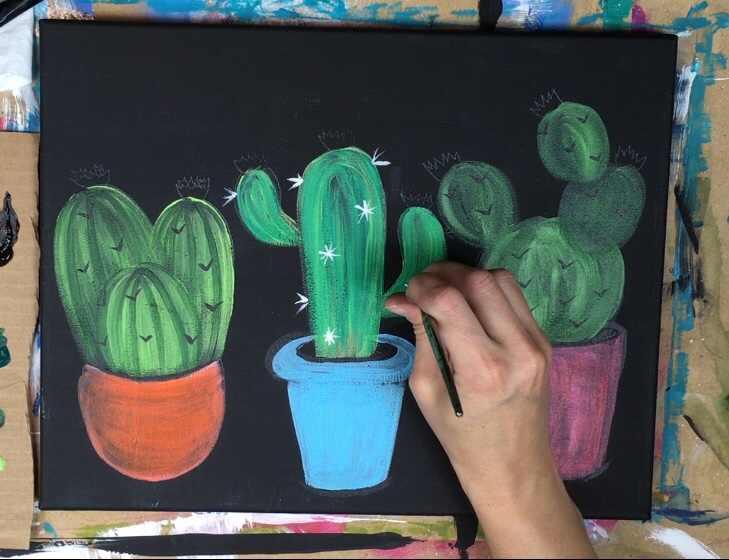
7. Paint the cacti blossoms.
Use a #4 round double loaded in quinacridone magenta and titanium white. To paint the flowers, simply make small curves strokes that start at the base of the flower and point up. Experiment with different amounts of white/magenta. The less white – the darker the flower. 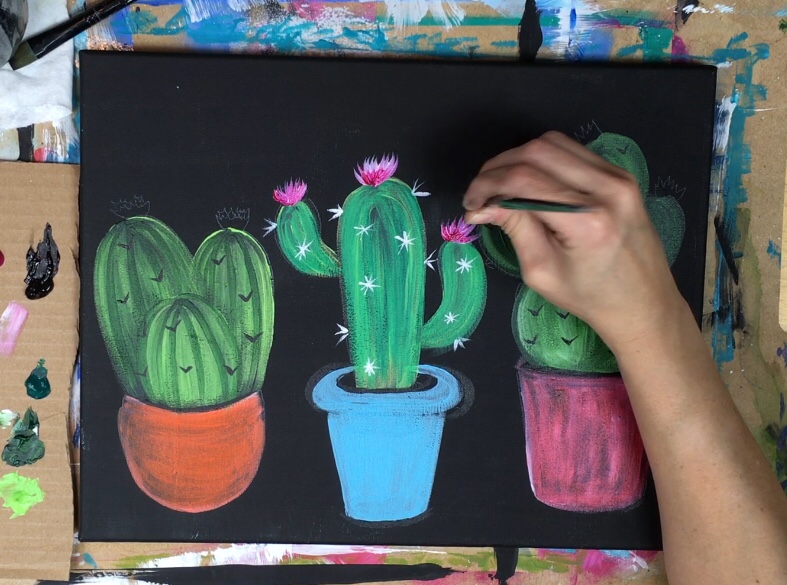
For the prickly pear cactus, I used quinacridone magenta too. The barrel cactus blossom was painted with cadmium yellow deep double loaded in titanium white. 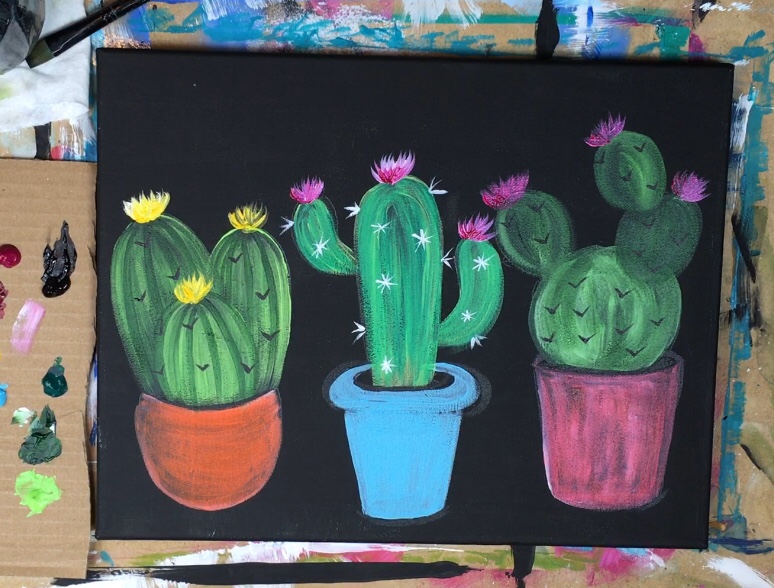
8. Paint fun designs on the pots
For the pots, I used my #4 round brush. I did the chevron pattern in the middle and the polka dots on the left with quinacridone magenta. The pot on the right I did not add any designs to. 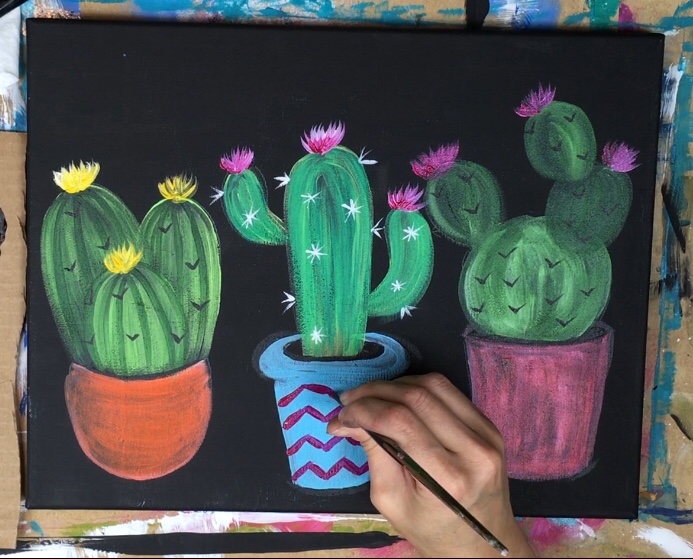
9. Paint the table line and white shadows
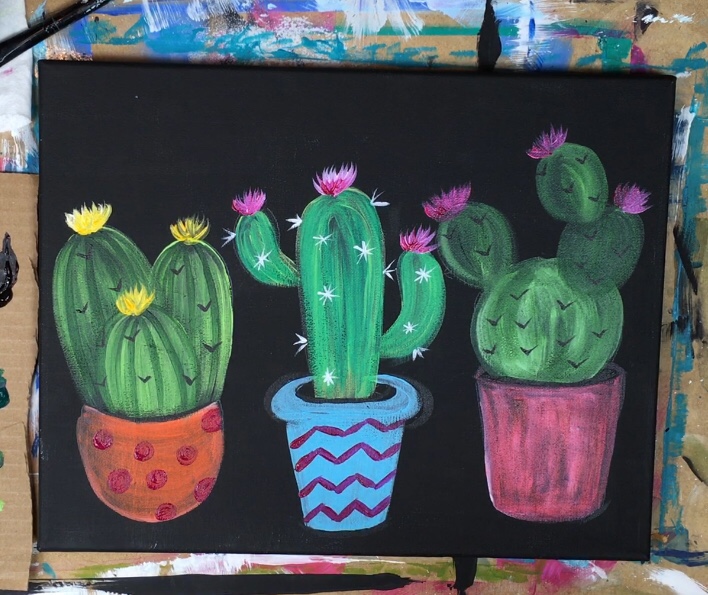
For the table line, I just free handed a white line with the #4 round brush. I also watered down that white a bit and made some zig-zag shadow lines just under the pots. 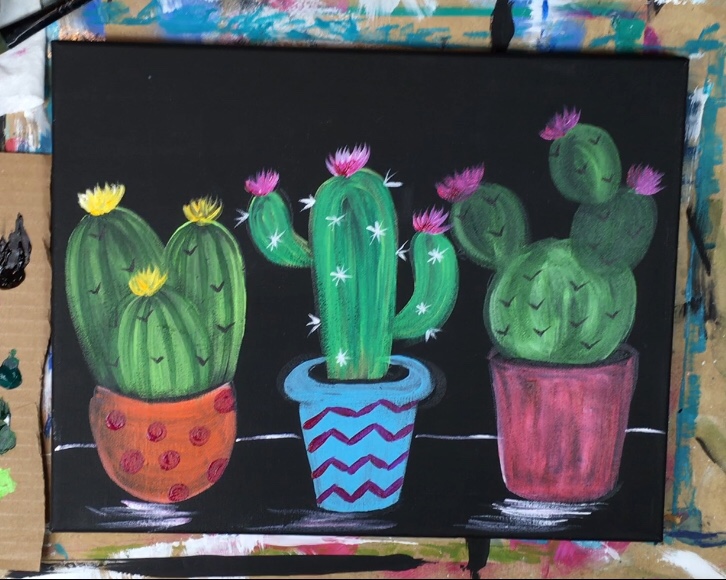
10. Paint the dots
This can be optional if you don’t like the dots on the cacti. I used the #4 round brush and titanium white to make the dots. Start with the barrel cactus on the far left. Start at the top and make the little dots on the lines that you painted. Also make the dots on the outline. 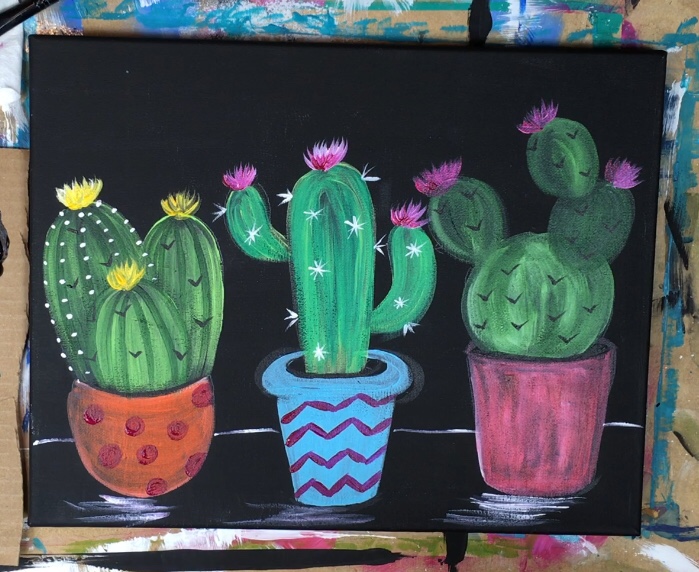
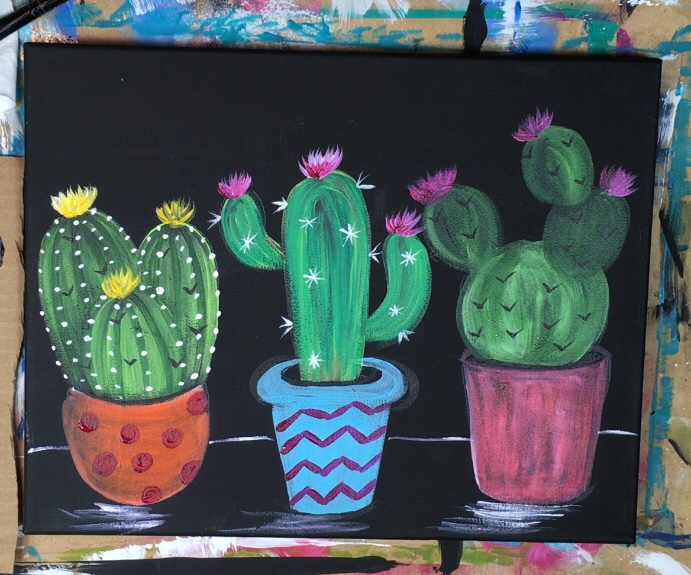
For the prickly pear cactus, do the same thing with the dots curving to form the shape of the cactus. 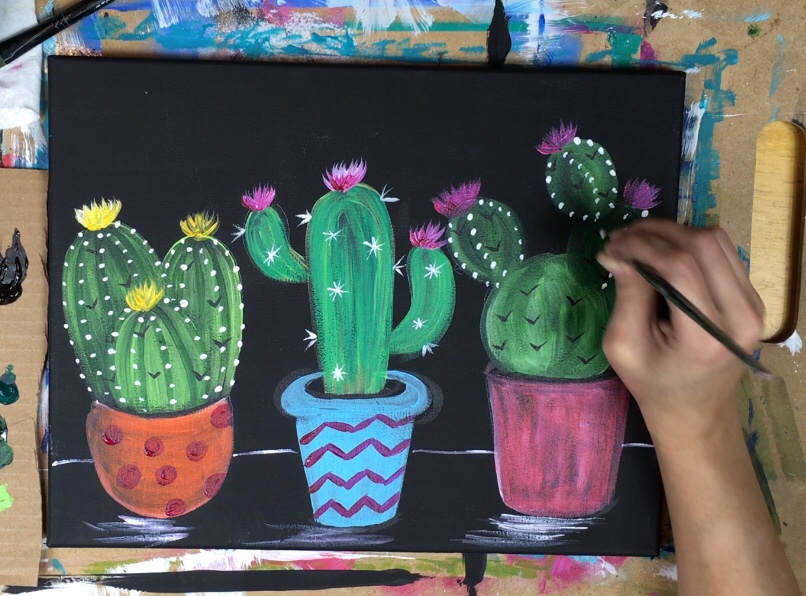
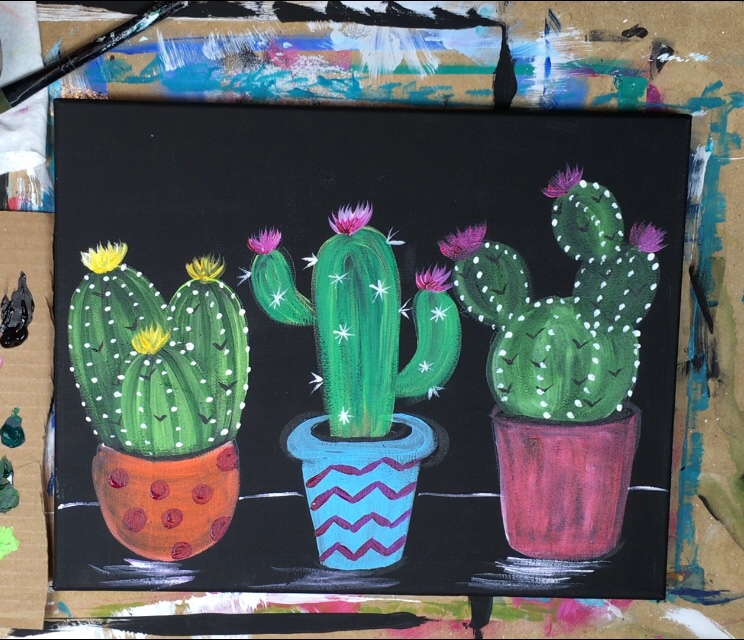
11. Paint the quote
Draw the quote out with pencil first so you can erase and adjust the letters as needed. This is a very casual painting so no fancy calligraphy is needed! I just did basic cursive. 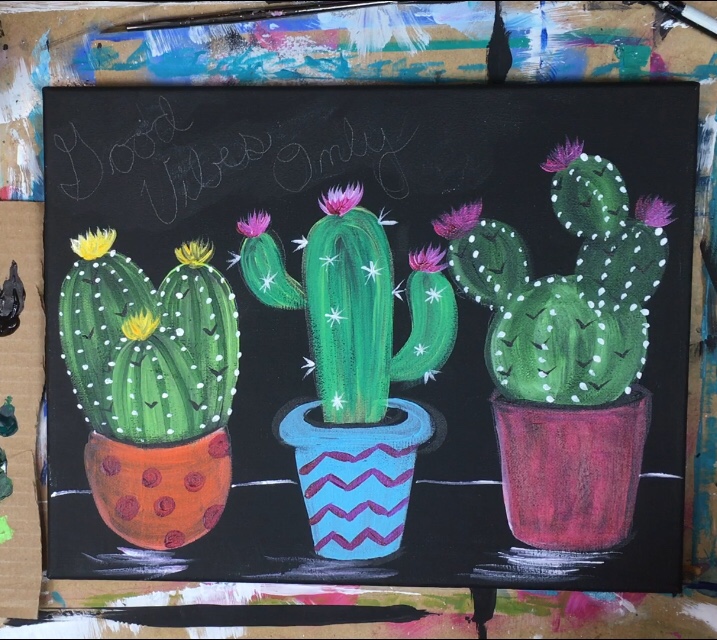
Then use a white paint pen (preferably) to paint the letters. If you don’t have a white paint pen handy (I didn’t at the time) you can use a steady hand and a 10/0 round brush and titanium white. It helps to water down the white slightly to get it to flow better. 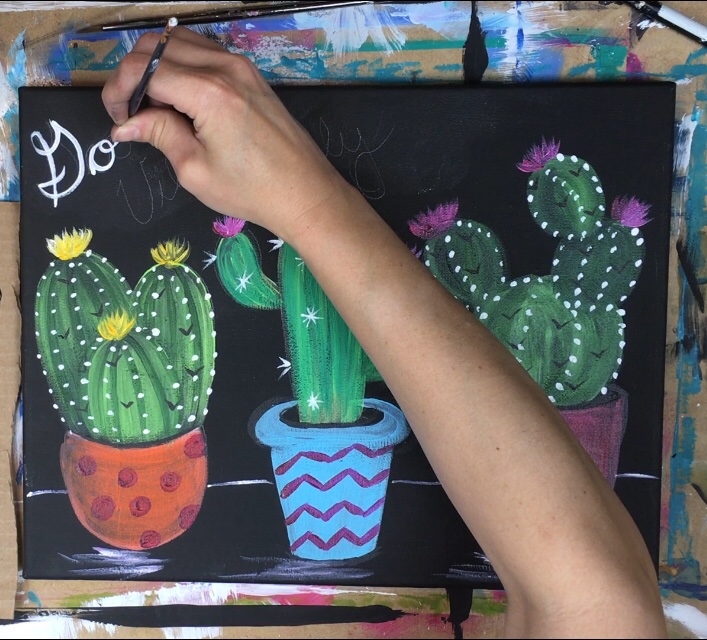
When the white paint dries, you can go back and erase the leftover pencil marks. 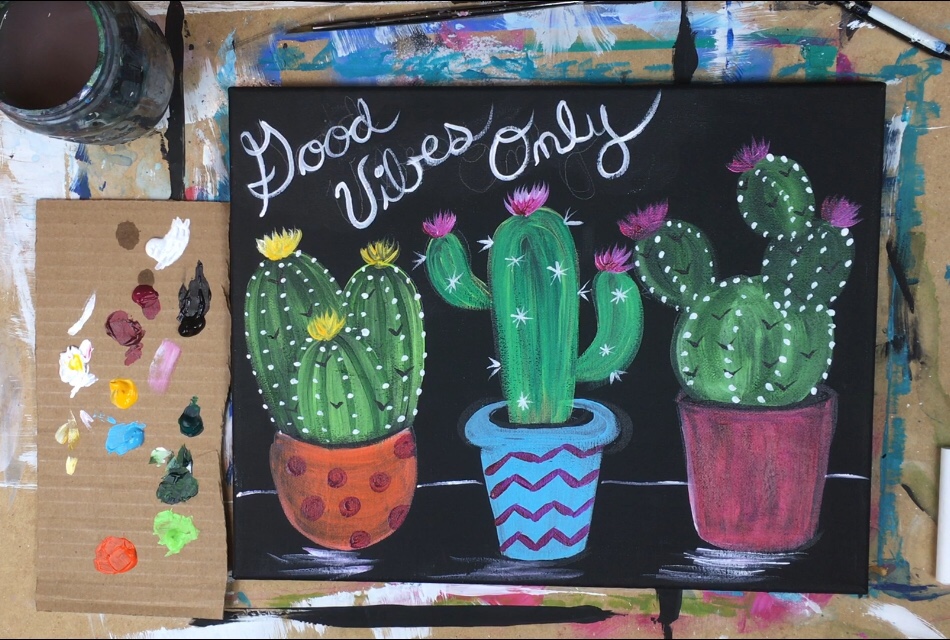
Then as a final touch, I painted some highlight lines on the pots!

Finished!
Share Your Art!
Upload a photo of your art on social media! 



I hope I’m not annoying as i don’t think my comment posted yesterday, but could i use a #3 round vs the #4 round, I bought the multi pack from amazon you linked in the “diy paint party supplies” list and it didn’t come with a 4 round
Hi Kalei! I did not see your comment yesterday, sorry about that! But yes you can definitely use a #3 vs #4! For round brushes, the numbers make subtle differences but the technique is the same. Feel free to ask anymore questions you want about brushes!
Thank you! I’m planning my birthday party and your website has been incredibly helpful between the party supply list and your tutorial! Thank you so so much!!
You’re welcome!