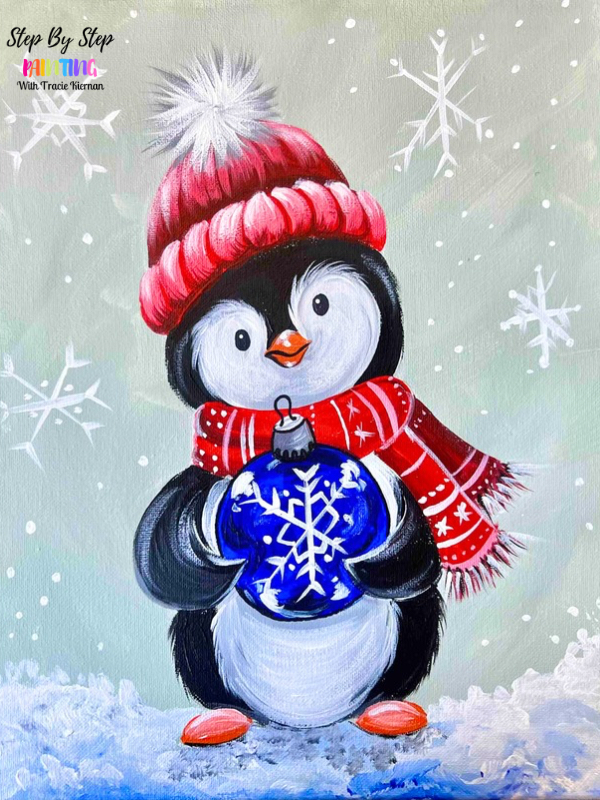
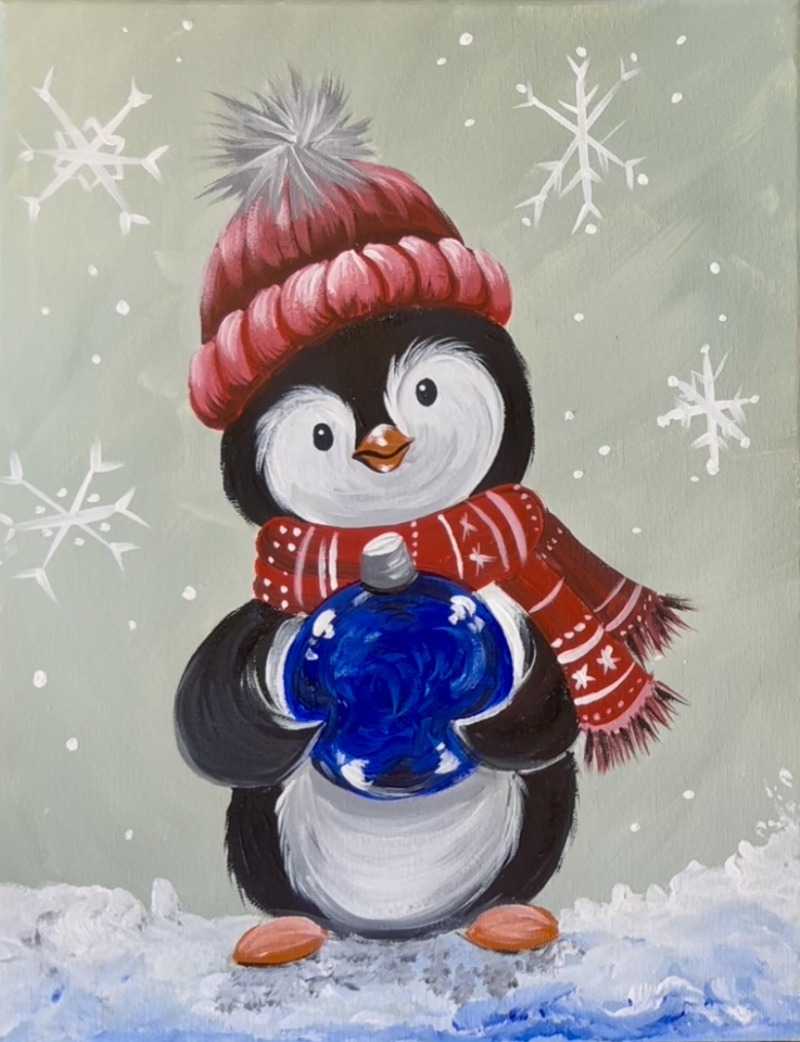
“Merry Little Penguin” is an adorable winter acrylic painting featuring a cute little penguin bundled up for the holidays! Snow-covered ground, softly falling snowflakes, and whimsical winter details complete this charming holiday scene.
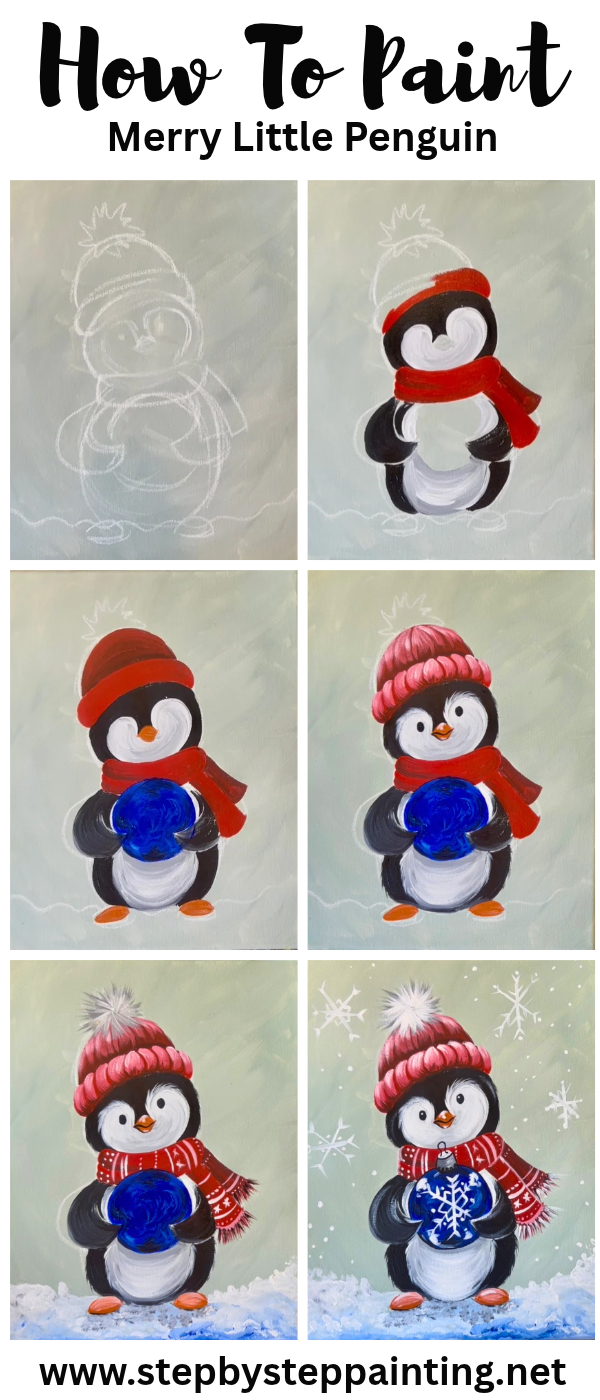
In this beginner-friendly acrylic painting tutorial, you’ll learn how to paint the penguin’s fluffy black and white body, create dimension with simple shading and highlights, add texture to the knitted hat and scarf, and paint a beautiful blue ornament with a decorative snowflake. A fun and festive painting that’s perfect for the Christmas season!
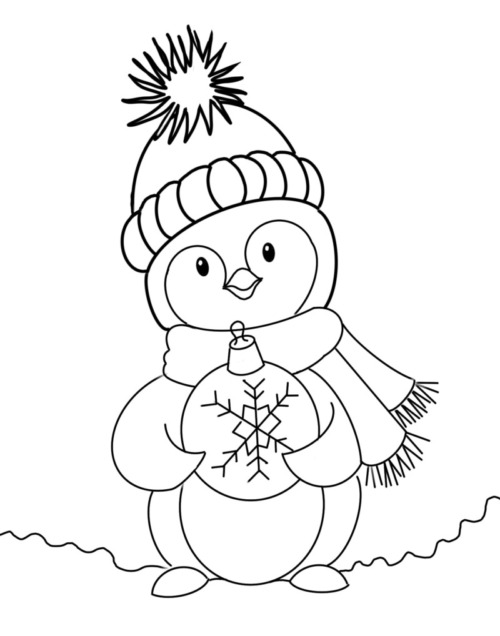
There is an optional traceable template for this one as well as drawing instructions.
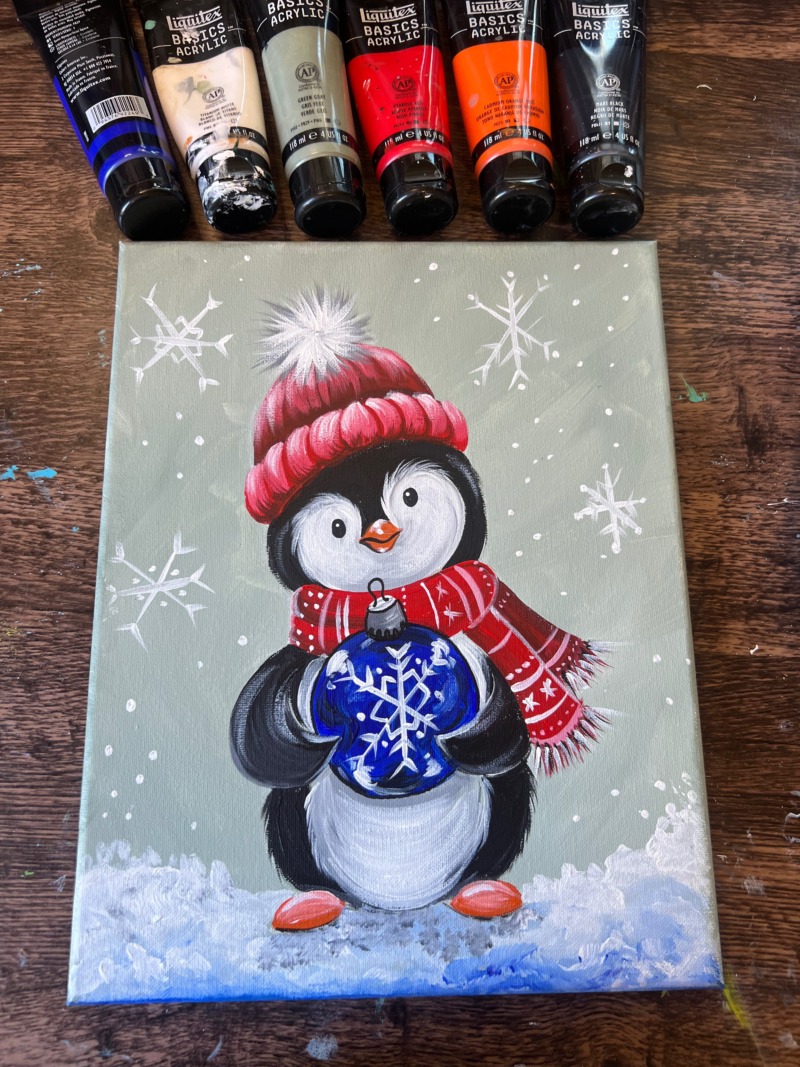
Enjoy and happy painting!
How do I view the tutorial?
There are several ways to enjoy this painting tutorial!
- Picture Instructions: Follow along with the step-by-step photos in this post.
- YouTube Video: Watch the video tutorial on YouTube (published this weekend)
- Member Access: Members can log in to the member portal to enjoy the tutorial ad-free and download it for easy access anytime.
- Digital Download: Prefer a convenient, downloadable version? You can purchase this tutorial for just $5 in my digital shop.
Materials:
- 11×14 canvas (or any size)
- Acrylic Paint (see colors)
- Brushes (see sizes)
- Chalk for drawing
- Traceable (optional)
- Graphite Paper (optional for traceable)
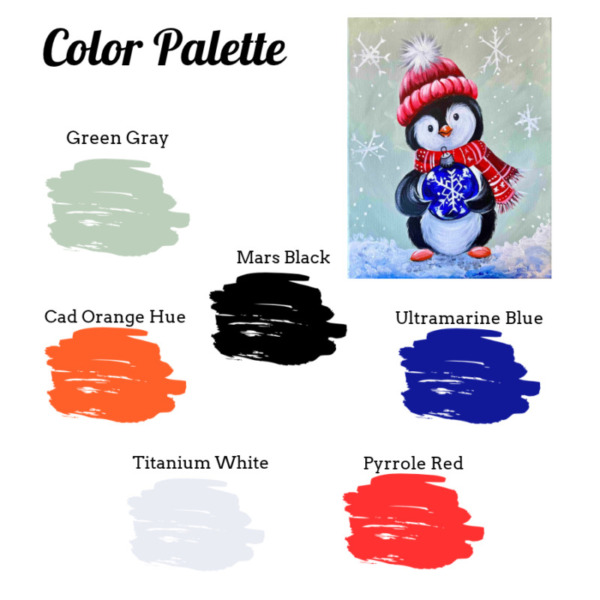
Colors:
- Mars Black
- Titanium White
- Pyrrole Red
- Gray Green*
- Ultramarine Blue
- Cadmium Orange Hue
*Gray green can be made by mixing: titanium white, mars black, yellow oxide and ultramarine blue
Brushes:
- 3/4″ Flat Brush
- #4 Round
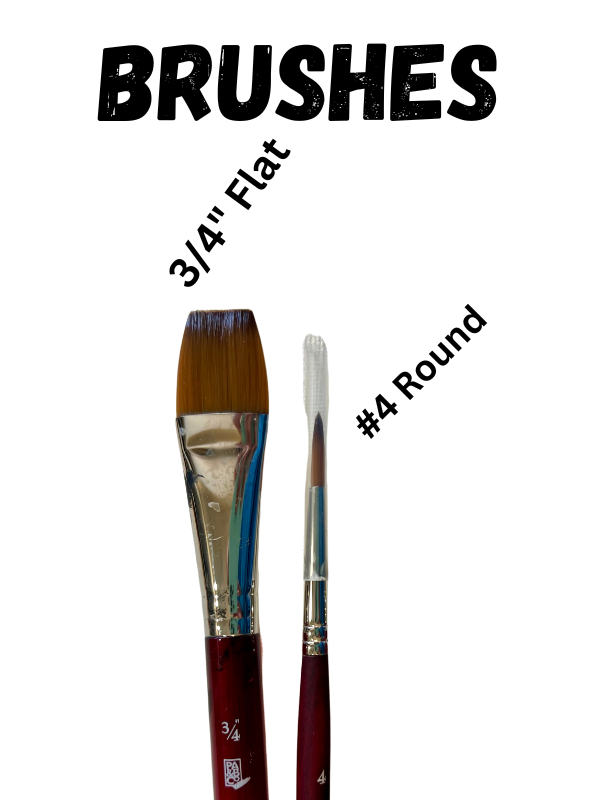
Directions At A Glance
Traceable
Other sizes available in my digital download shop!
Video
Coming soon!
Step By Step Instructions:
1. Paint the background
Use the 3/4″ wash brush and double load it into the colors “green gray” and “titanium white”. Note: green gray is a color by “Liquitex BASICS”. It can be made by mixing black, white (make a light gray by mixing more white than black) and then adding a little bit of ultramarine blue and yellow oxide into it.
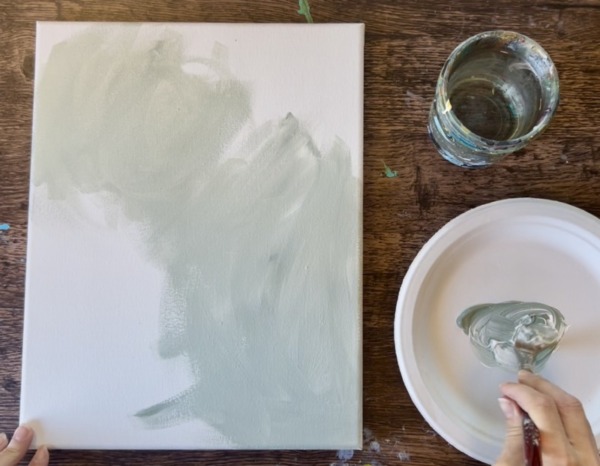
Paint the entire canvas using large expressive brush strokes. Let the green gray and white blend gently to create different variations of the color.
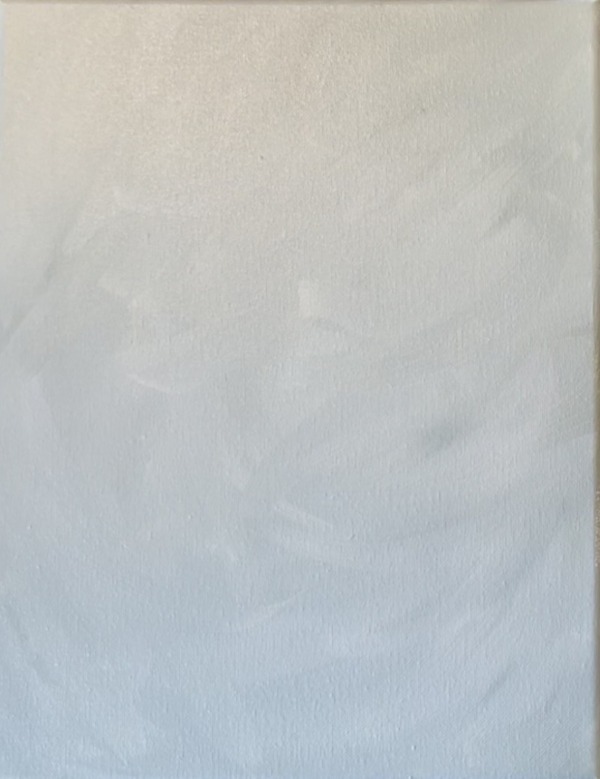
Let this dry before going onto the next step.
2. Draw The Penguin (or use tracer template)
If using the traceable, position template over dark graphite paper and trace the design onto the canvas. Trace firmly on a flat surface for best results.
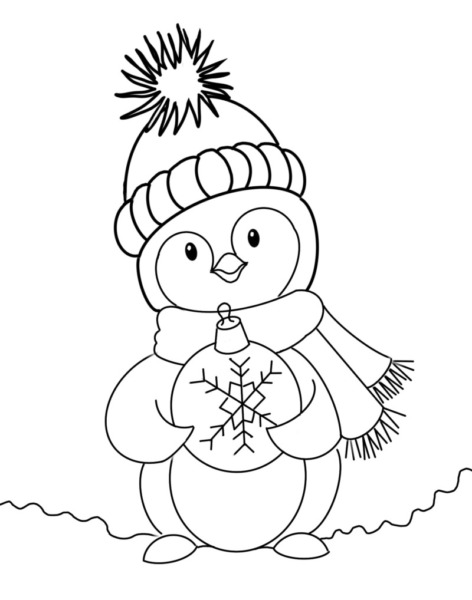
If hand drawing the penguin, I recommend using a piece of chalk for the drawing. Start by drawing a low wavy line to represent the snowy ground that the penguin is standing on. This is about a few inches from the bottom edge of the canvas. Then draw a large U/ line to create the shape of the body. This is about 5″ high. Draw a small oval shape going across the top of the body for the head and make it slightly diagonal.
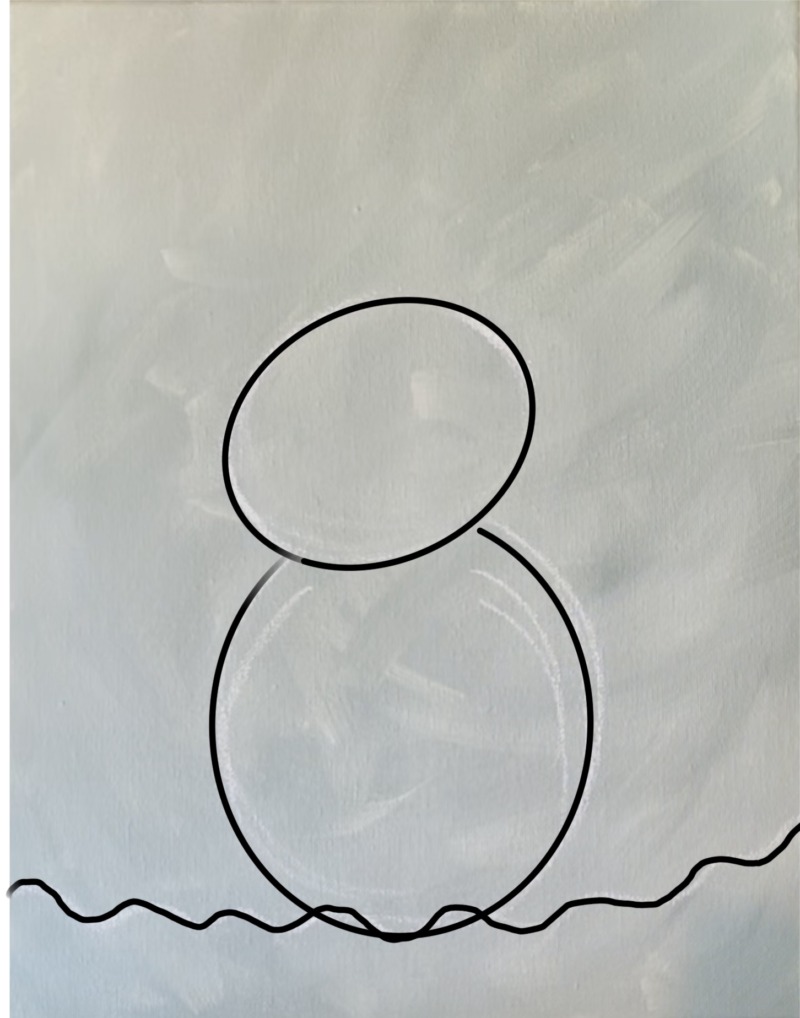
The initial part of this penguin drawing will resemble a snowman! Then draw a scarf that overlaps the portion where the head and body meet. Draw two hanging pieces on the right side of the scarf that slightly overlap each other.
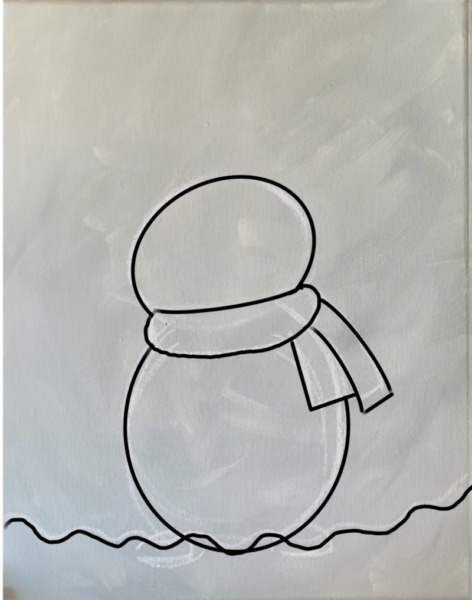
Draw the hat that slightly overlaps the top of the head. Draw a bottom “liner” shape for the hat, a half circle shape going in a slight diagonal direction and a fuzzy starburst shape for the very top of the hat.
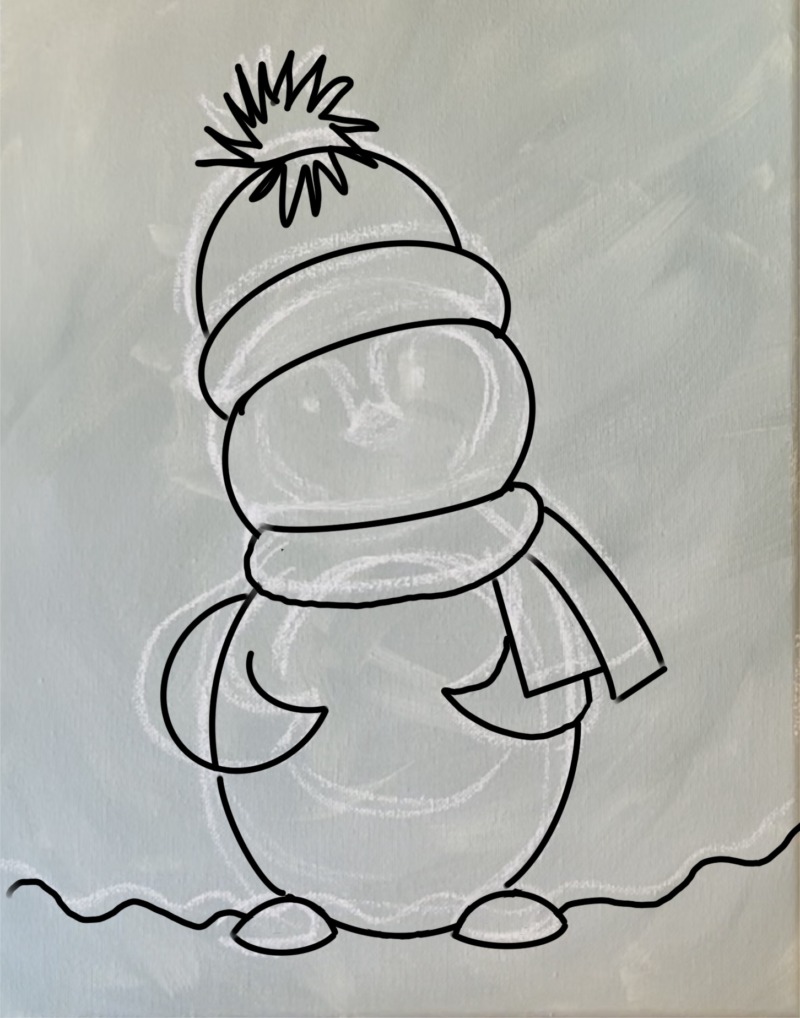
Then draw the wings/arms so they curve and overlap the front of the penguin. These go to a pointed shape on the end. Draw the feet as a set of half circle/ saucer shapes that slightly overlap the bottom portion of the penguin.
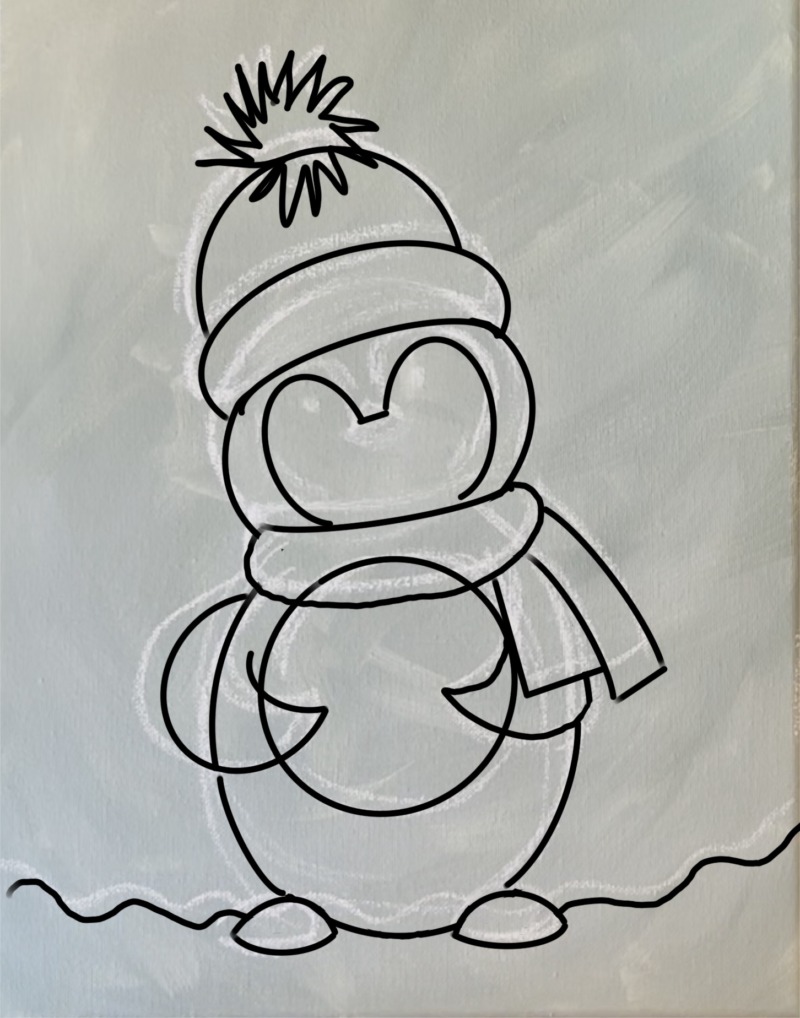
Draw a circle for the ornament. This overlaps the scarf slightly and goes behind the arms. Then draw an M shape for the shape of the face. Draw a set of ovals for the eyes (going slightly diagonal because the head is tilted). The beak is sort of an almond shape that is pointed on the left and right sides.
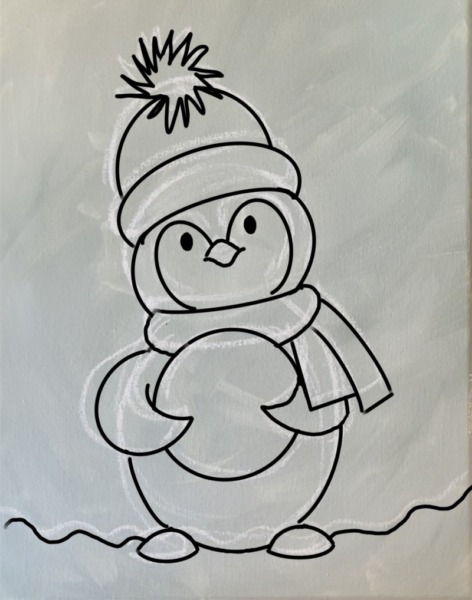
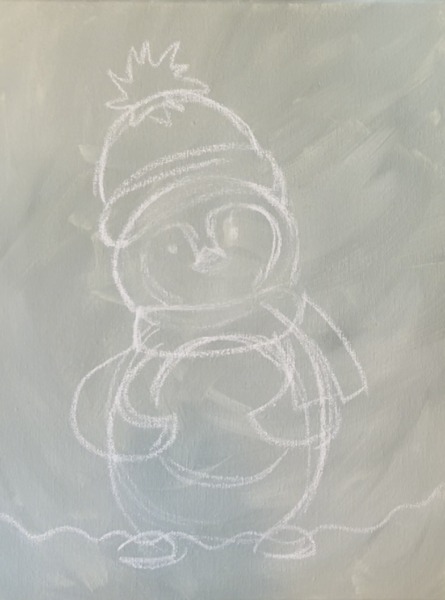
The image below shows the drawing as done with a piece of chalk. It’s okay if it looks messy and sketch like right now!
3. Paint black areas of penguin
Use a #4 round brush and black to paint the head region, arms and sides of the penguin. Leave a small gap where the arms are so we can highlight/ lightly outline them with white or gray so the edges can stand out.
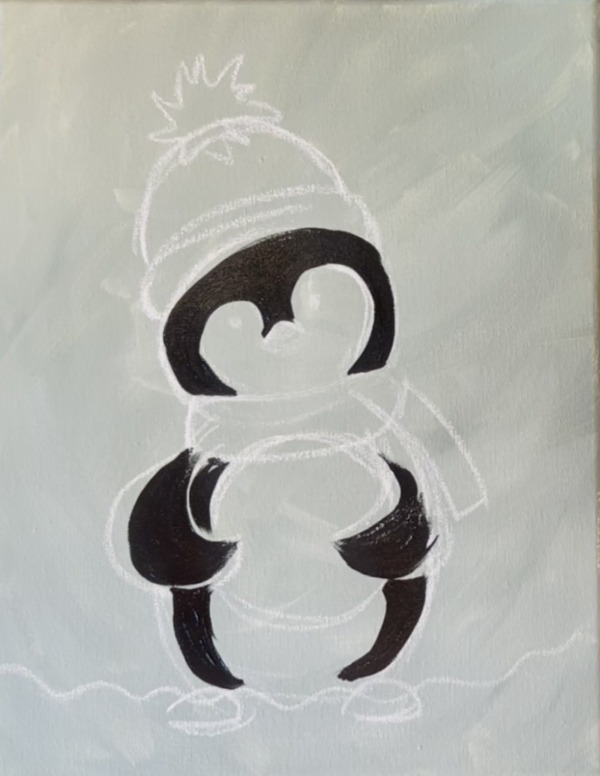
4. Paint white areas of penguin
Wipe the brush but don’t rinse. Add white to the brush so that when you apply to the canvas, it shows up gray. Paint around the ornament and paint the penguin’s face. Go around the beak. Blend extra gray under the ornament. Make your brush strokes curve/ contour in the shape that it’s in.
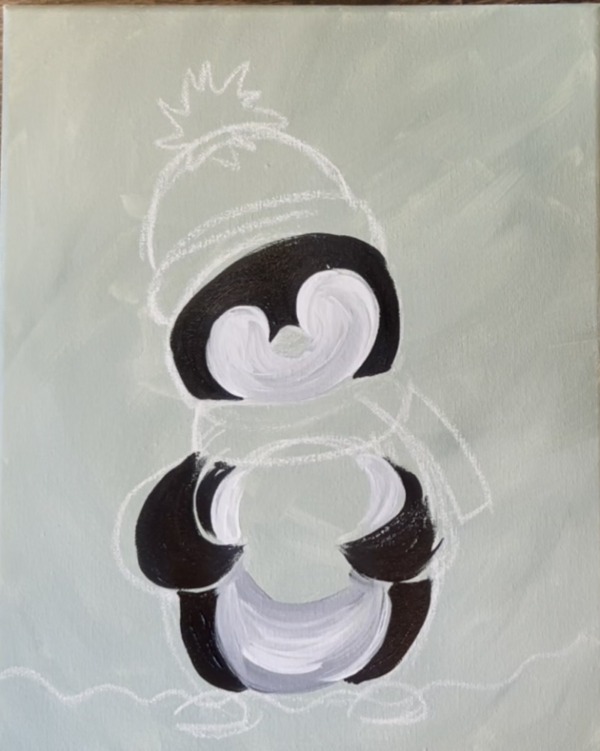
5. Paint scarf & beanie
Use the #4 round brush and red to paint the scarf. Blend a little bit of black into the red (just the tiniest amount) and paint some shadowing in the middle and bottom of the scarf so it blends with the red.
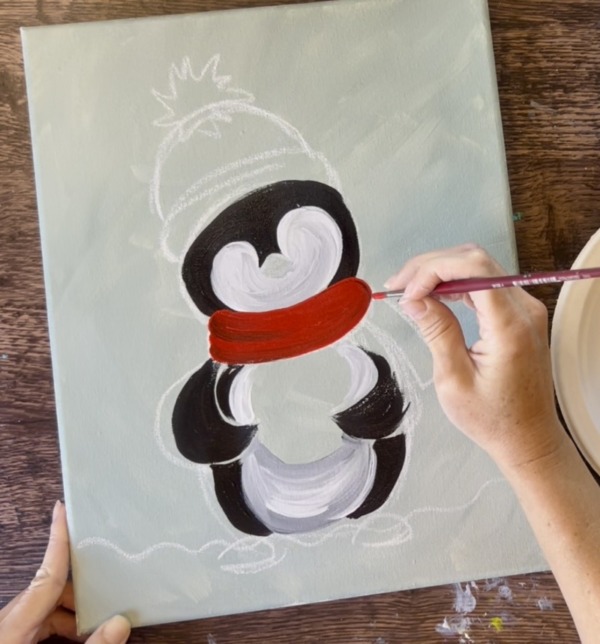
Paint the folded pieces of scarf with the same red. Add just a little bit of black to the red to darken the piece of scarf towards the back.
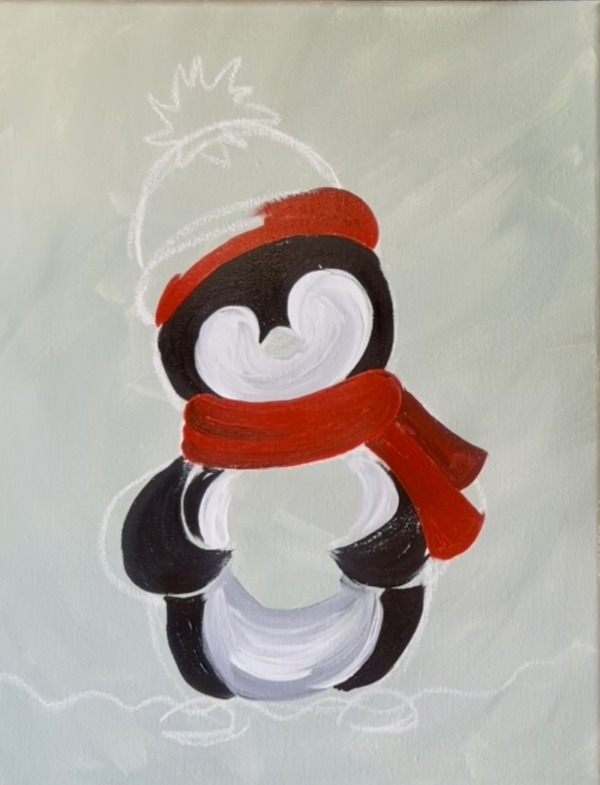
Paint the beanie with the same red. Add just a tiny bit of black to the red at the top of the beanie where it meets the liner/ bottom portion.
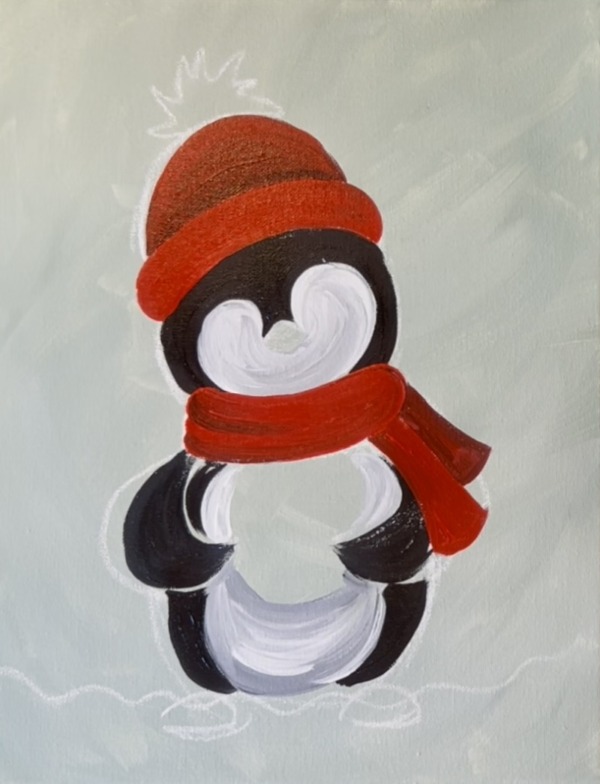
6. Paint feet & beak
Use orange to paint the feet and beak shape. Then touch up the edges of the penguin’s wings with some gray paint. Paint this so that it sort of highlights the edges and curves of the arms so the arms stand out.
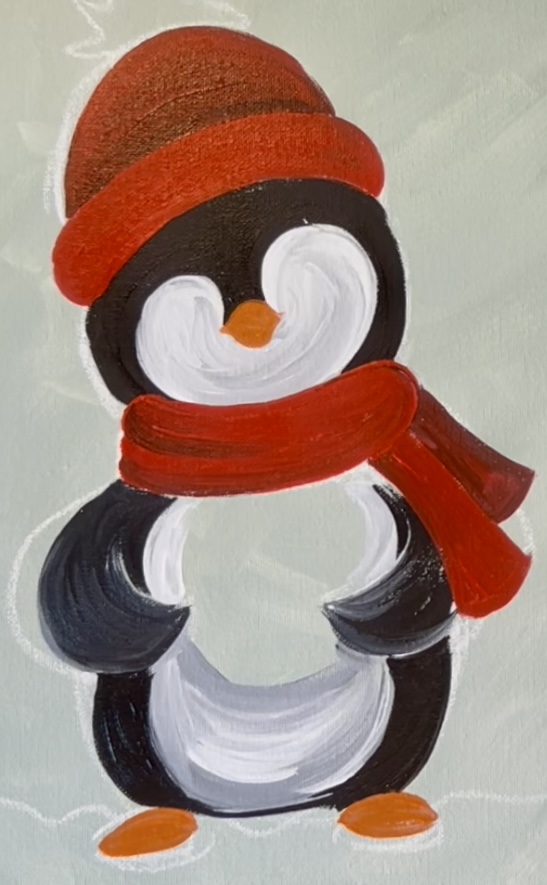
7. Paint ornament
Use ultramarine blue to paint a circle. It’s okay if you need to paint over the arms temporarily to get this circle in! Then paint the ornament solid blue. If there are areas where the blue shows through, blend a little white into the blue to help those areas be more opaque.
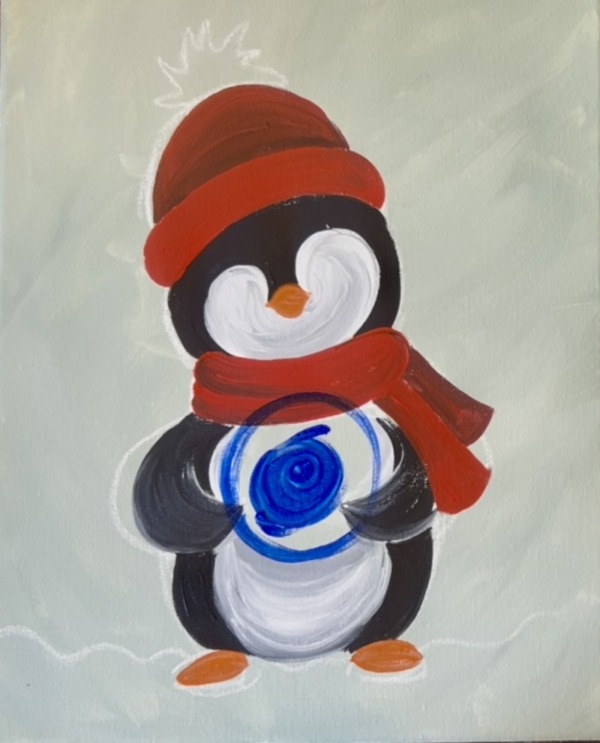
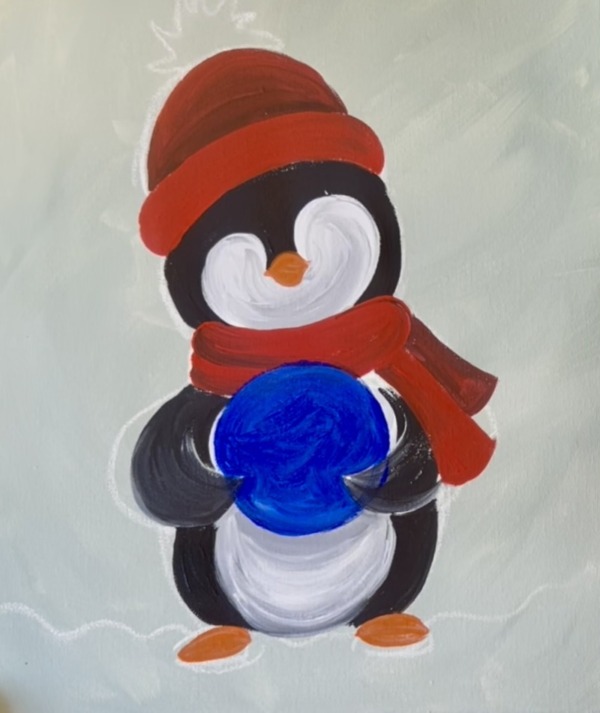
Then blend just a little bit of black into the blue and add some shadowing along the top, bottom and sides of the ornament.
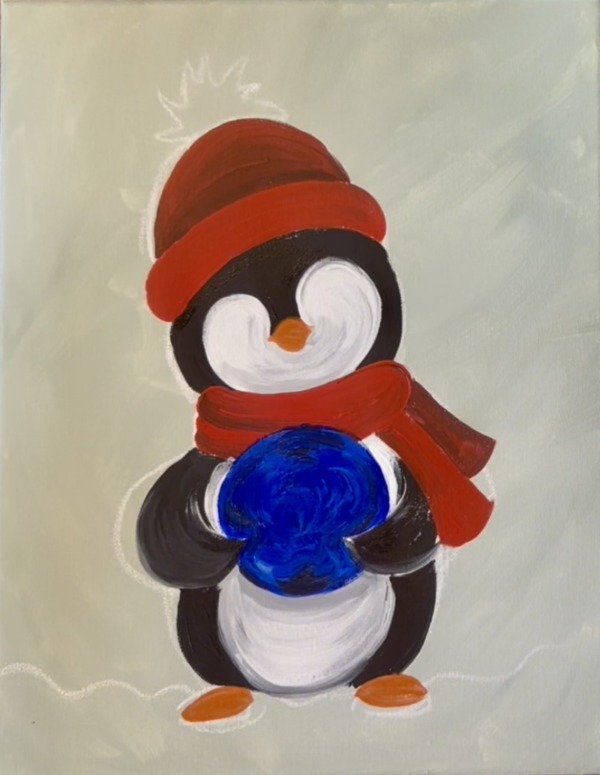
8. Knit details on beanie
Use the #4 round brush and mix about equal amounts of white and pyrrole red together to make a light red. Pain curved marks along the bottom edging of the beanie. Note the direction of each of the curved marks and how the direction switches in the middle. Leave a gap in between each of the marks where the original red layer shows.
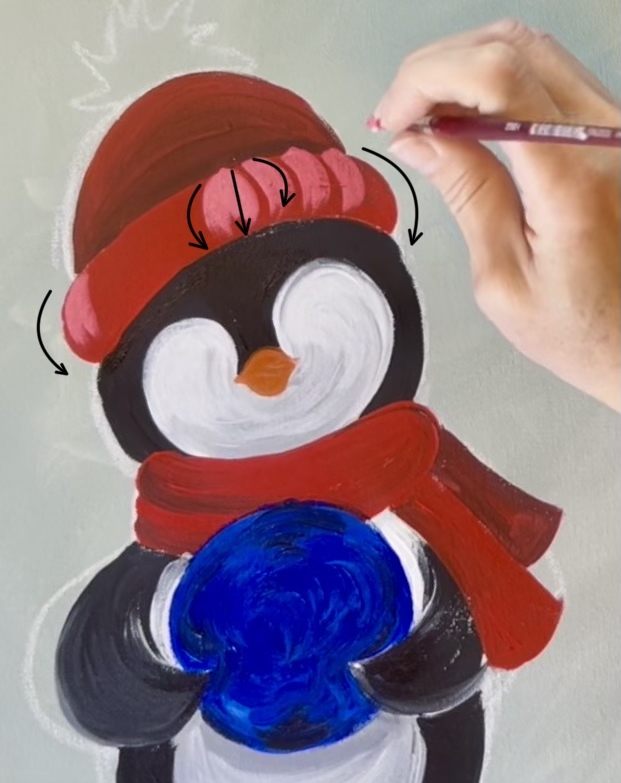
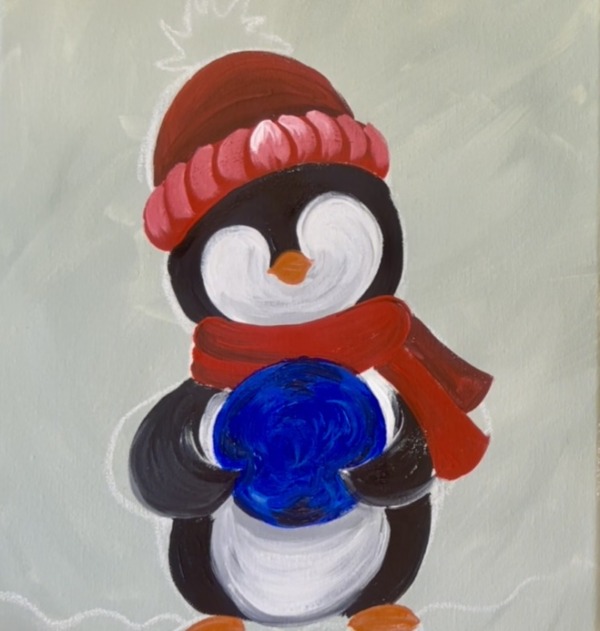
Next, add more white to the brush. Then gently blend another layer of those curved marks but just at the very top of each of the marks. This highlight will give that area more depth.
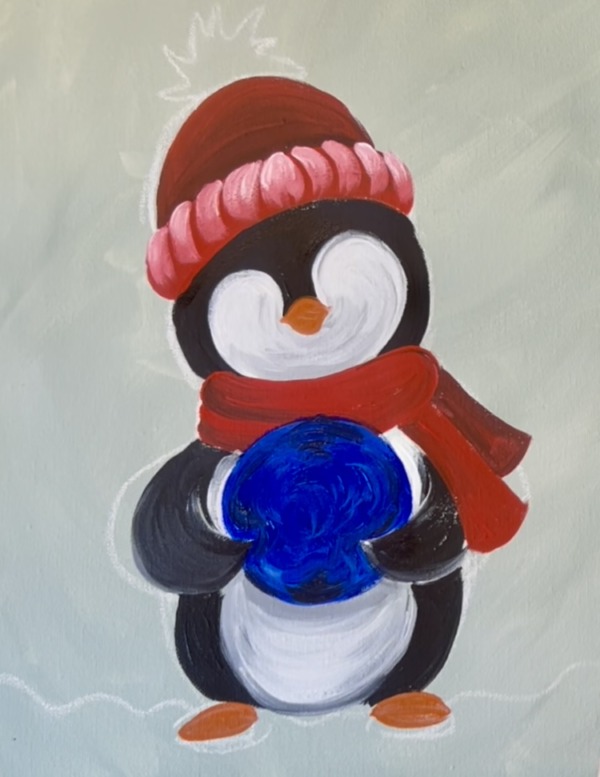
Next, highlight the top part of the hat. Start with your red and white combination of color that you just used for the bottom lining of the hat. Brush the color from the top and curve downwards. Keep the same curve pattern that use used for the bottom lining and leave a dark gap in between each section (note the sections are larger than the bottom curves). Then highlight the top of this with a touch more white in the light red color.
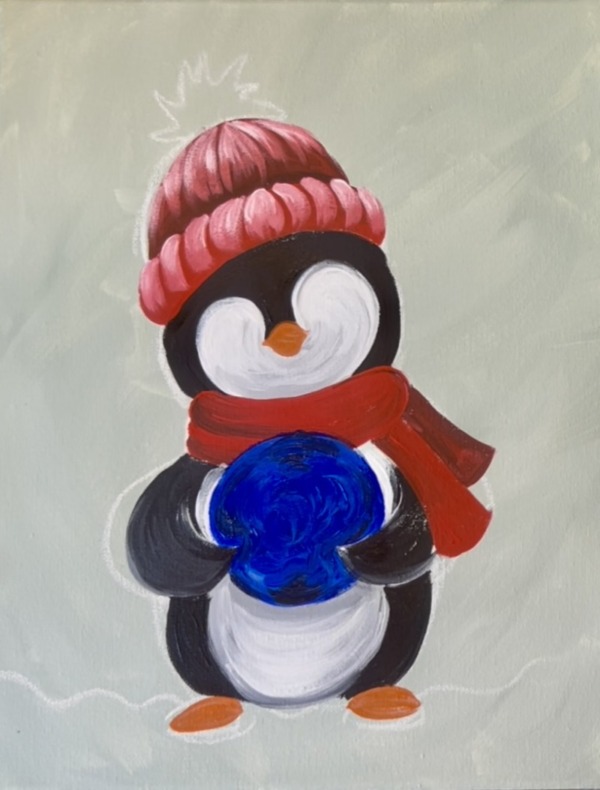
9. Optional feather textures
This is completely optional! To give the penguin some feather textures, use the white and the round brush and brush pointed brush strokes outwards along the top curves on the face. Do this to the white belly region as well. Then use black to paint some pointed brush marks going outwards along the penguin’s side.
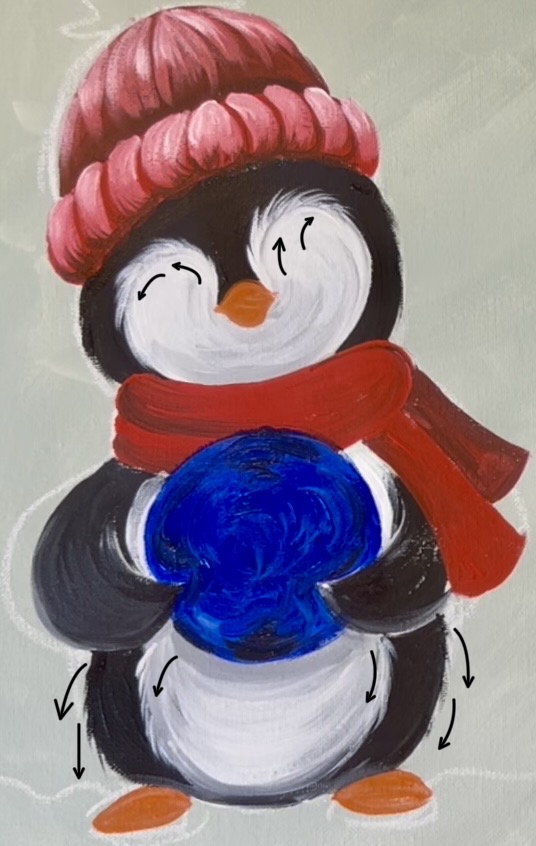
10. Beak highlight & eyes
Use black or a black paint pen to draw or paint a curve line in the center of the beak. Then use white to paint a little mark at the top of the beak and the tiniest curved mark at the bottom.
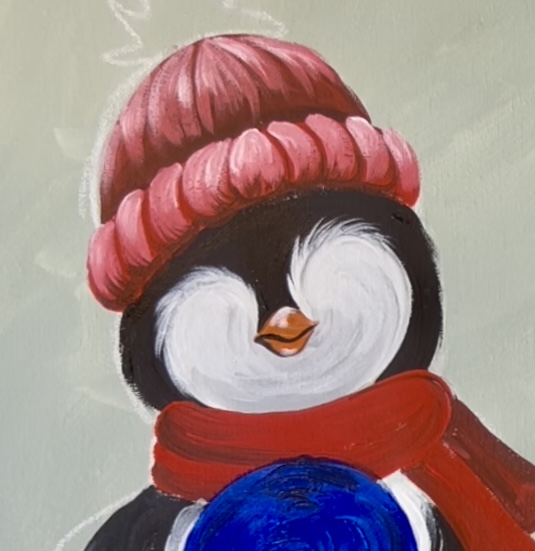
Then use a black pain pen or tiny round brush and black paint to paint two ovals for the eyes. They are lined up slightly diagonally from each other.
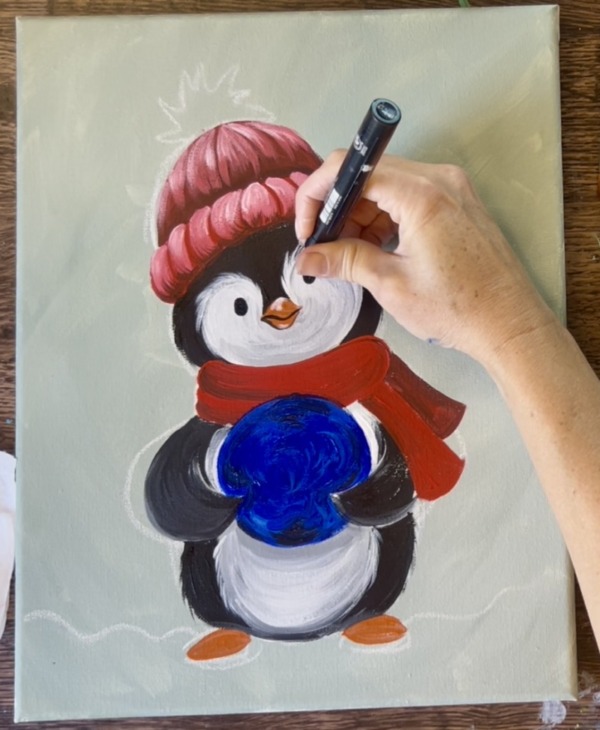
11. Snow on ground
Use a 3/4″ flat wash brush to paint the ground. Start by layering on short, choppy brush strokes below the penguin and along where you originally drew the ground area. You don’t need to cover all of the background layer up.
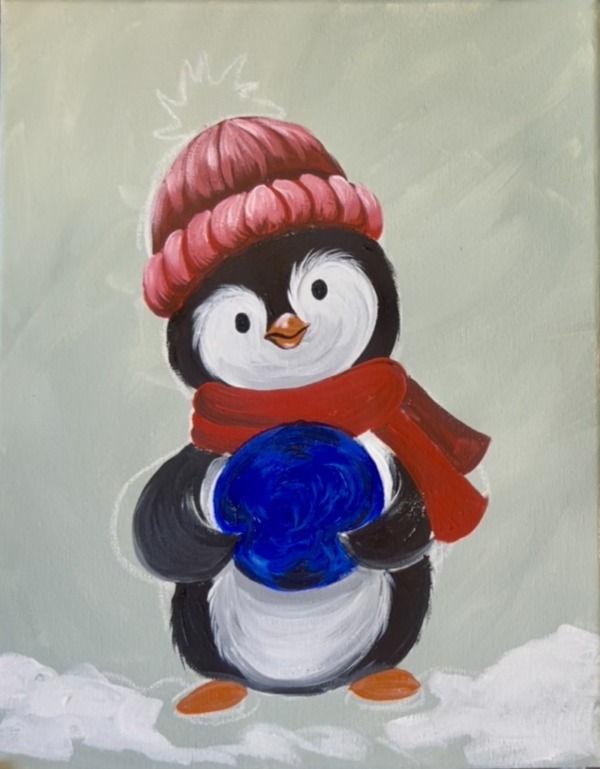
Then mix a small amount of the ultramarine blue into the white and use that color for shadowing on the snow. Apply this mostly to the bottom of the canvas and below the penguin’s feet and blend it with the rest of the white.
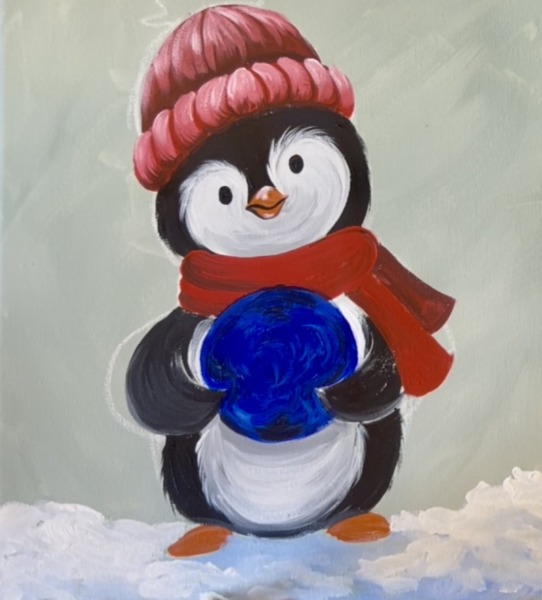
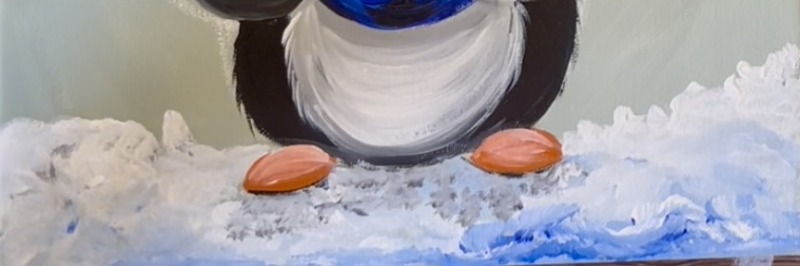
Optional: use the tiniest bit of black mixed with the white and “stipple” on some dotted texture in the snow below the penguin’s feet for extra shadowing.
12. Scarf pattern, fuzzy ball on hat, highlights on ornament
Use titanium white to paint patterns on the scarf. You can do stripes, dots, snowflakes, a combination of designs, etc. You can also keep the scarf simple and keep it solid red or whatever color you chose to paint it!
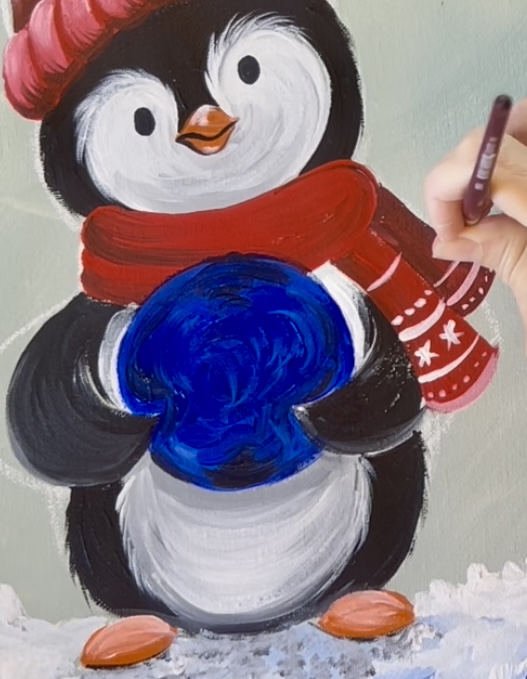
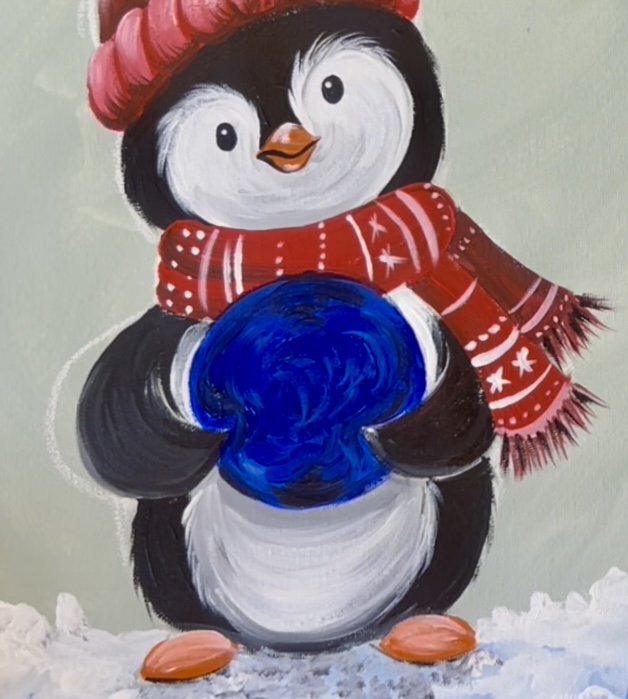
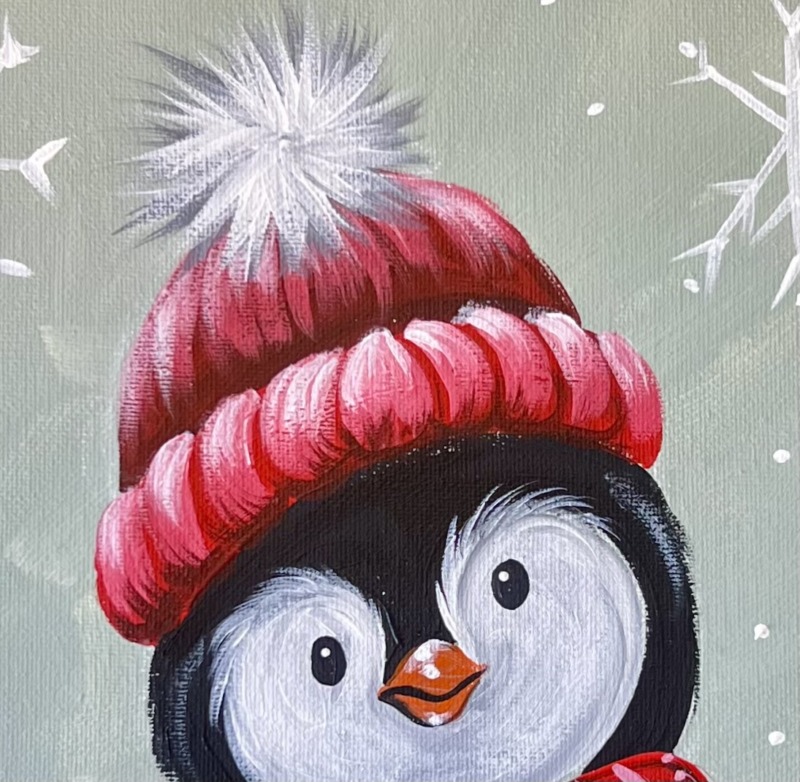
Then paint the fuzzy part of the hat. Use the #4 round brush and mix equal amounts of black and white together to make a dark to medium gray color. Then brush lines going in an outwards direction from the center of the circle. When you “flick” the brush outwards, release the pressure of the brush quickly to make a pointed/ feathered edge to each of the lines.
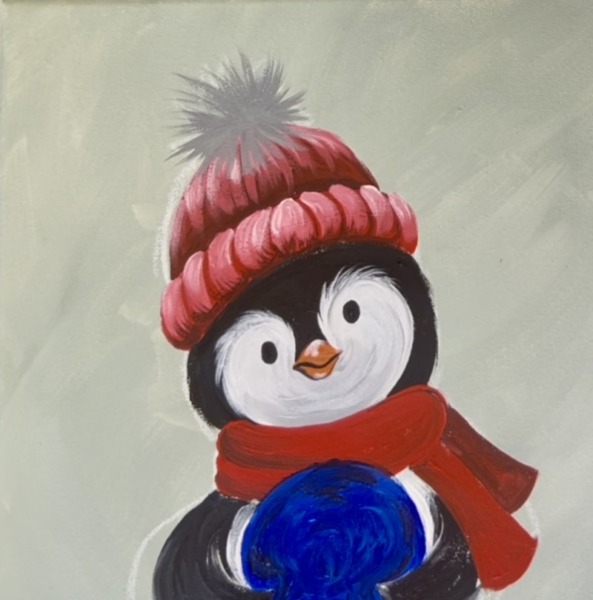
Then load the brush into white without rinsing the brush. Apply a second layer of these texture lines to the fuzzy ball but don’t cover all of the first layer.
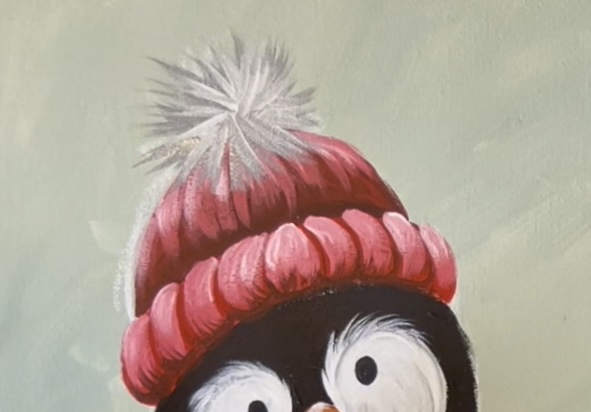
When this dries, you’ll add a third bright white layer to the top of this.
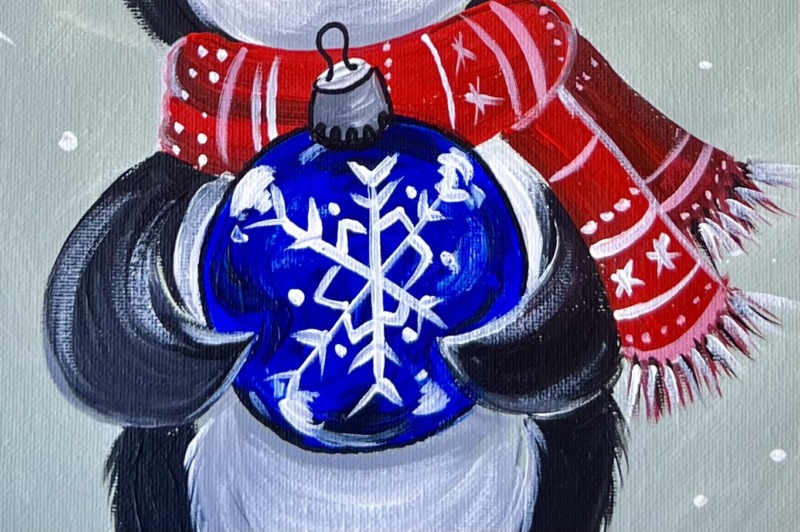
Next, add highlights to the ornament. Paint curved marks to each quadrant of the circle. Then use the color gray to paint the hook/ top piece of the ornament. Paint a cylinder shape with a white oval shape at the very top.
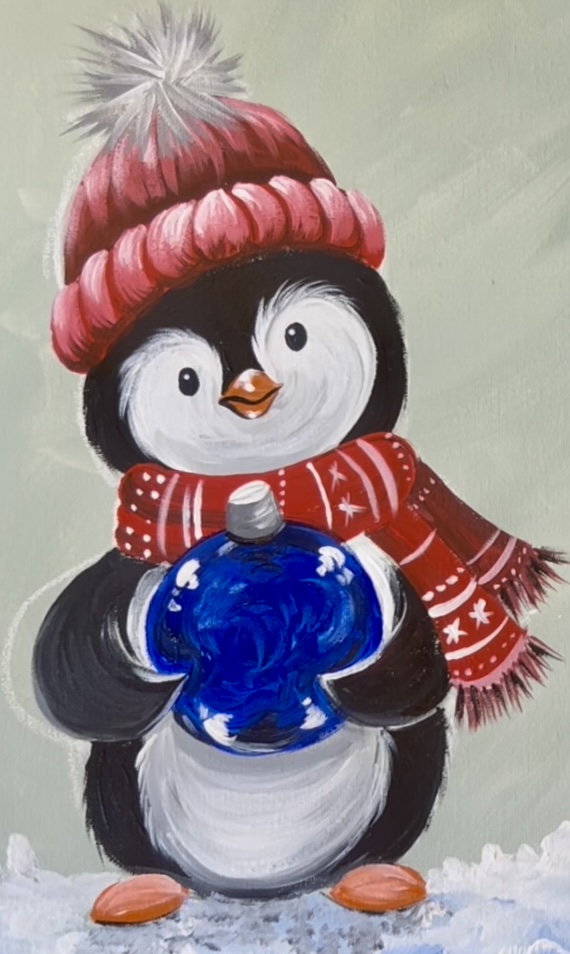
13. Snowflakes & final details
Use the #4 round brush and titanium white to paint decorative snowflakes in the sky around the penguin. Start each snowflake by painting an X and then one line through the middle of the “X”. Decorate each of the points of the snowflake with little lines, dots, etc.
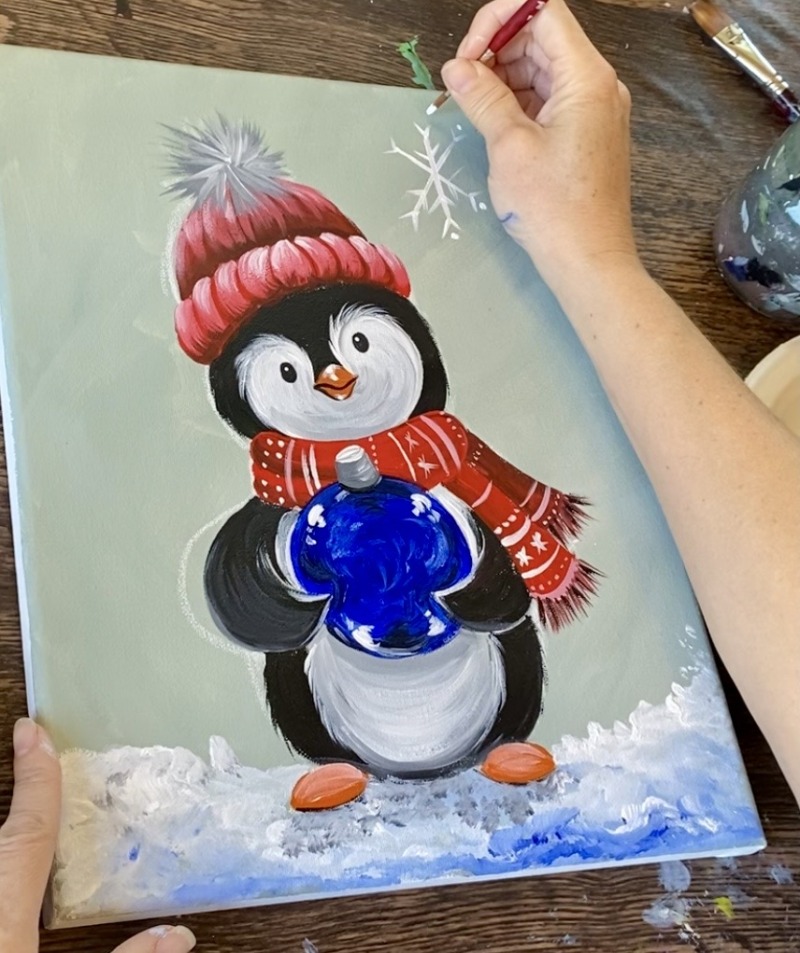
Paint individual snow dots along with the variety of large snowflakes.
Add the final “fuzzy texture” to the ball of the hat by layering on one final round of white lines and leave a lot of your darker gray lines still showing along the edges.
Then paint a snowflake or other design on the ornament. Finish the ornament “hook” by using a paint pen.
Finished!