
Would you like to save this?
Mediterranean Lemon Tree – Beginner Acrylic Painting Tutorial
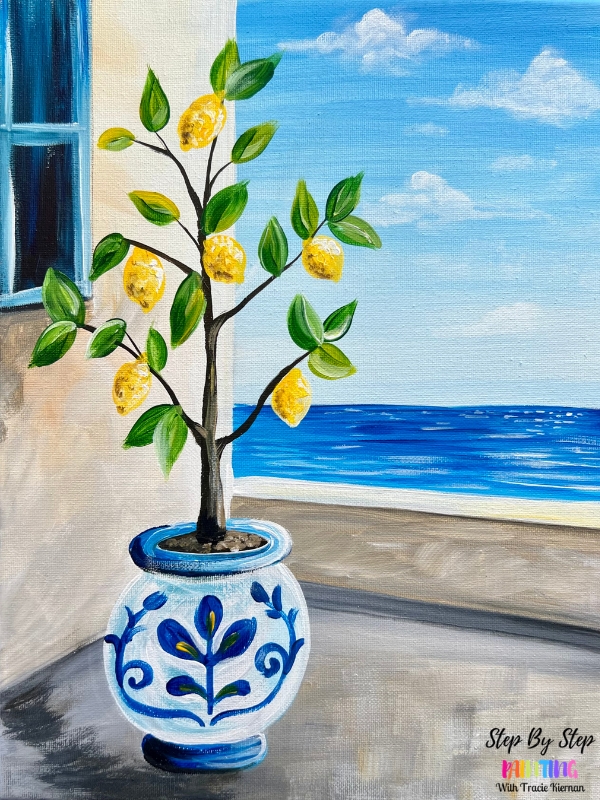
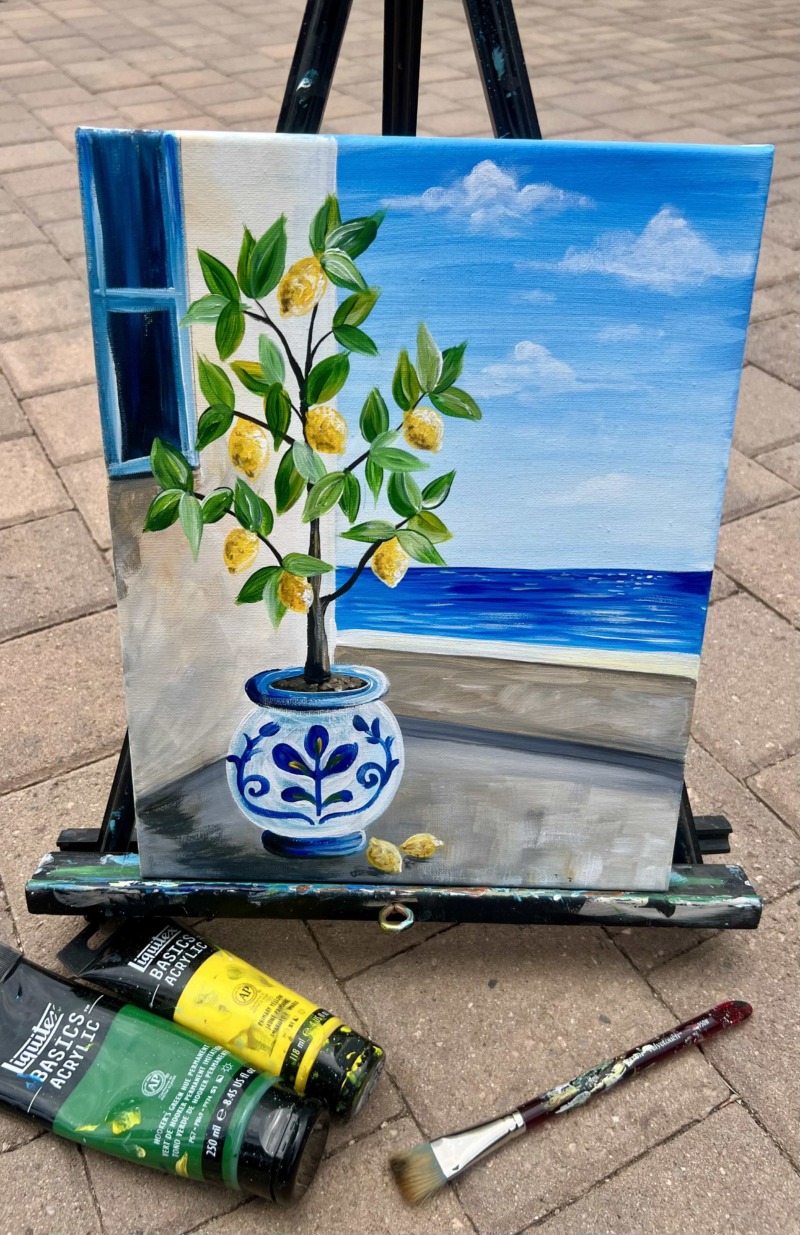
Bring a touch of the Mediterranean to your canvas with this bright and relaxing beginner acrylic painting! In this step-by-step tutorial, you’ll paint a charming lemon tree growing in a classic blue-and-white ceramic pot. Along the way, you’ll learn how to create a soft blue sky with fluffy clouds, paint vibrant green leaves and textured lemons, add depth with simple shadows, and capture the beautiful contrast between warm sunshine and cool ocean blues.
Enjoy and happy painting!
Want to view this ad-free? All-Access members can see this in the member login area as well as download the lesson to view offline. You can also purchase this as an individual $5 tutorial download with bonus traceables. Find out more here!
Materials:
- 11×14 Canvas
- Acrylic Paints
- Brushes
- Ruler
- Pencil
- White Chalk
Colors:
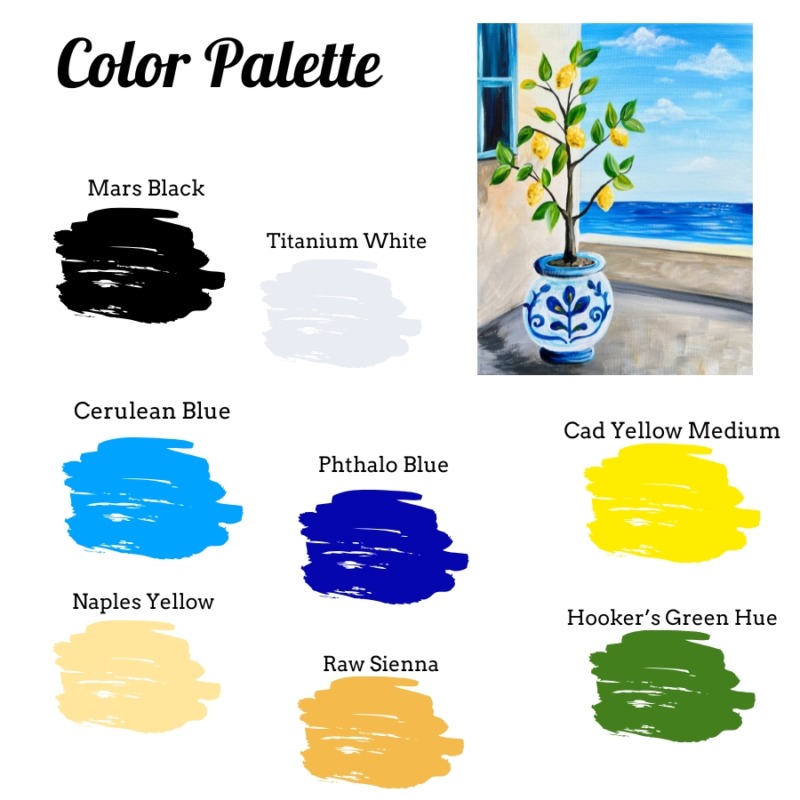
- Cadmium Yellow Medium Hue
- Hooker’s Green Hue
- Phthalo Blue
- Mars Black
- Titanium White
- Raw Sienna
- Naples Yellow
- Cerulean Blue
Brushes:
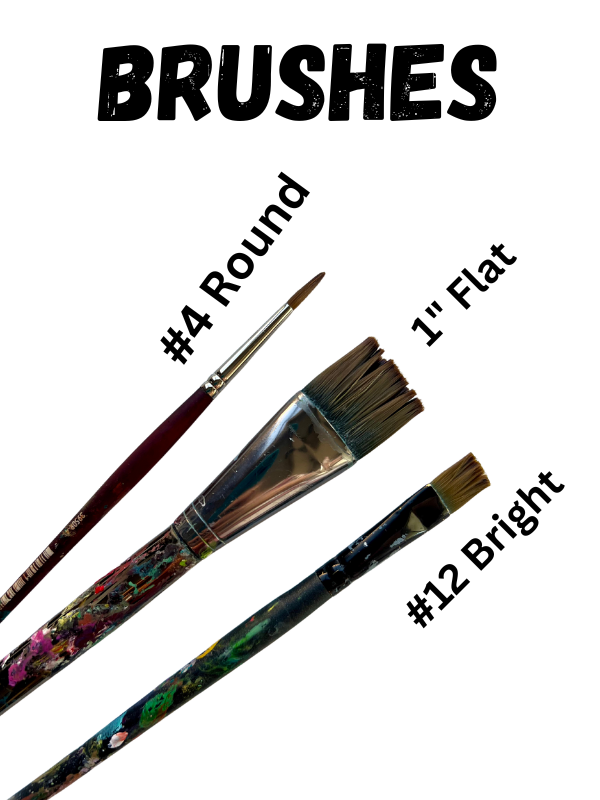
- 3/4″ Flat Wash
- #12 Bright Brush
- #4 Round Brush
Directions At A Glance:
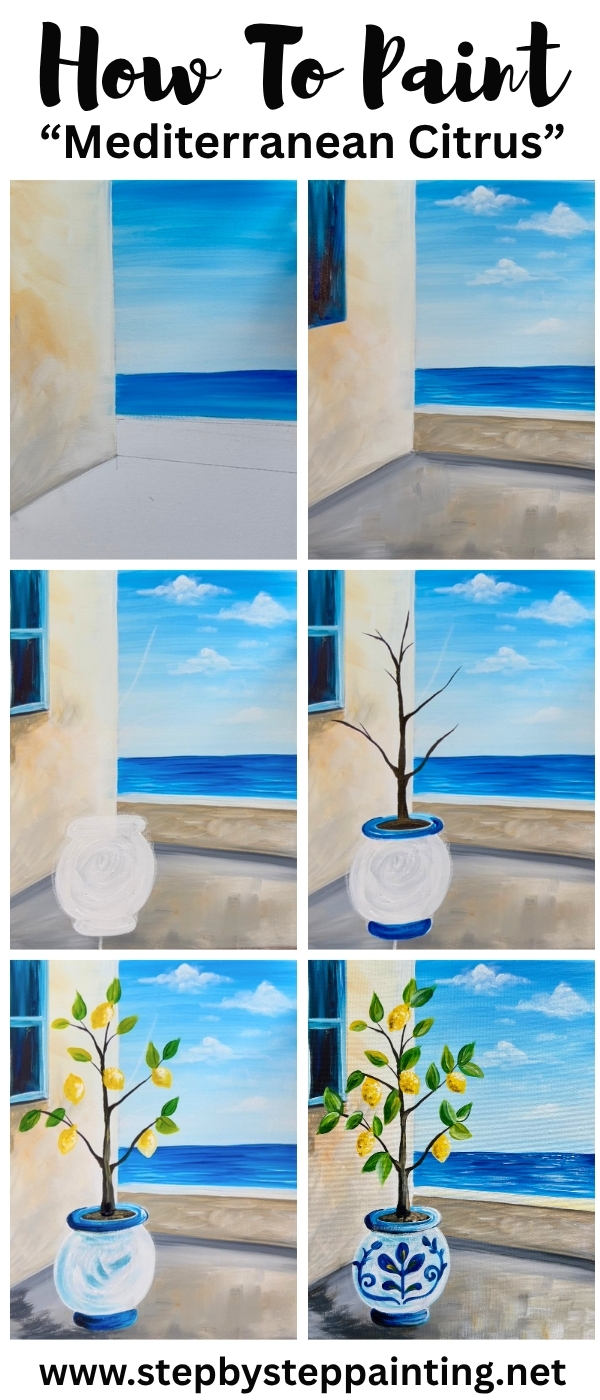
Video:
Step By Step Instructions:
1. Draw layout of walls/ ocean background
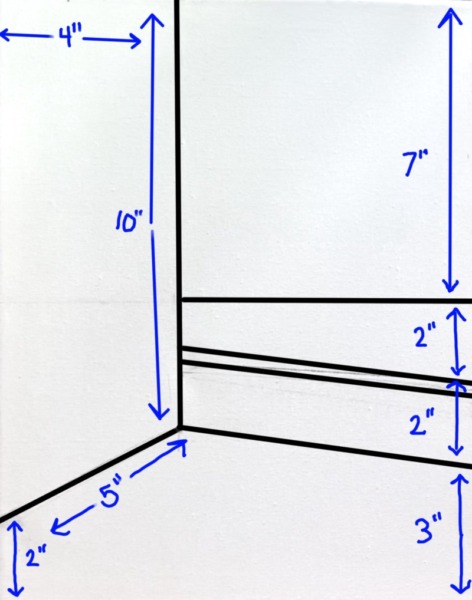
See diagram for measurements. These do not need to be exact. In fact, you are welcome to estimate the placement of the walls/ floor without actually measuring.
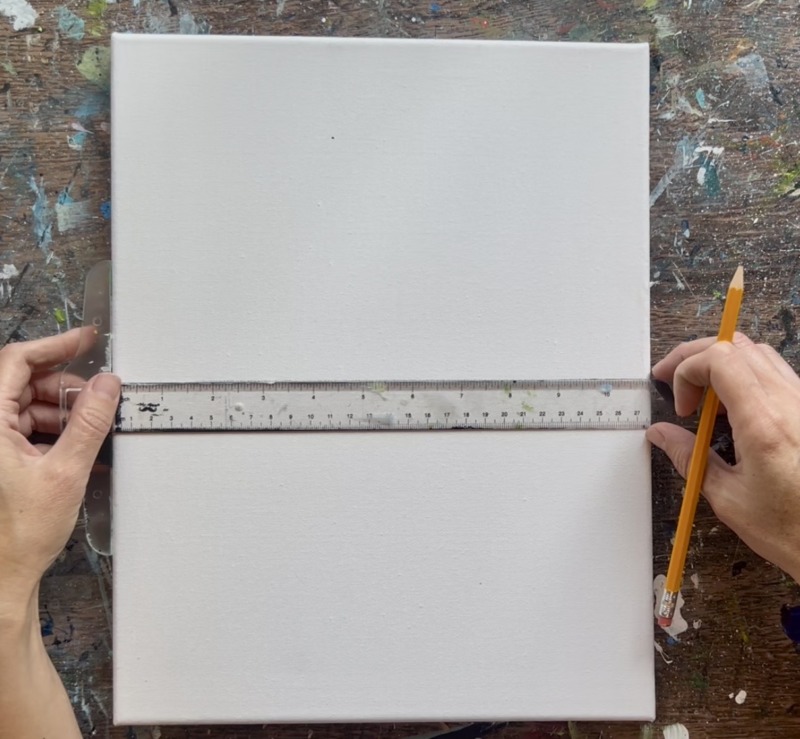
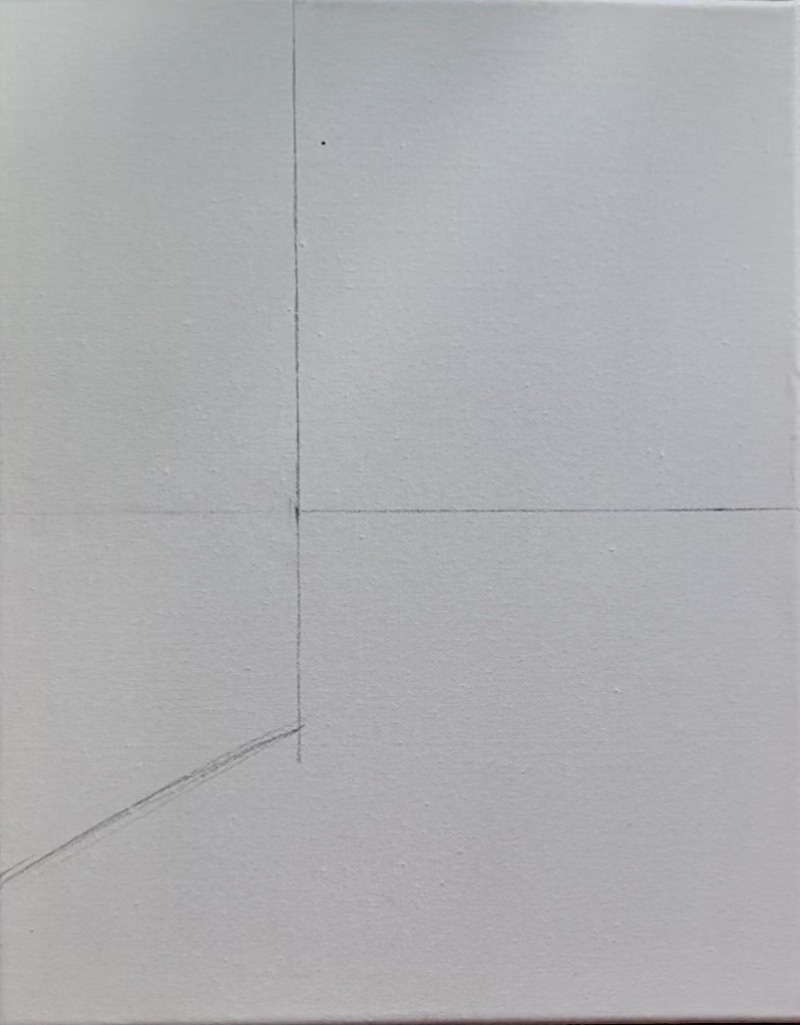
Use a ruler and a pencil to draw the layout of the painting. Start by locating the center of the canvas (with the canvas placed vertically). Draw a horizontal line across the center.
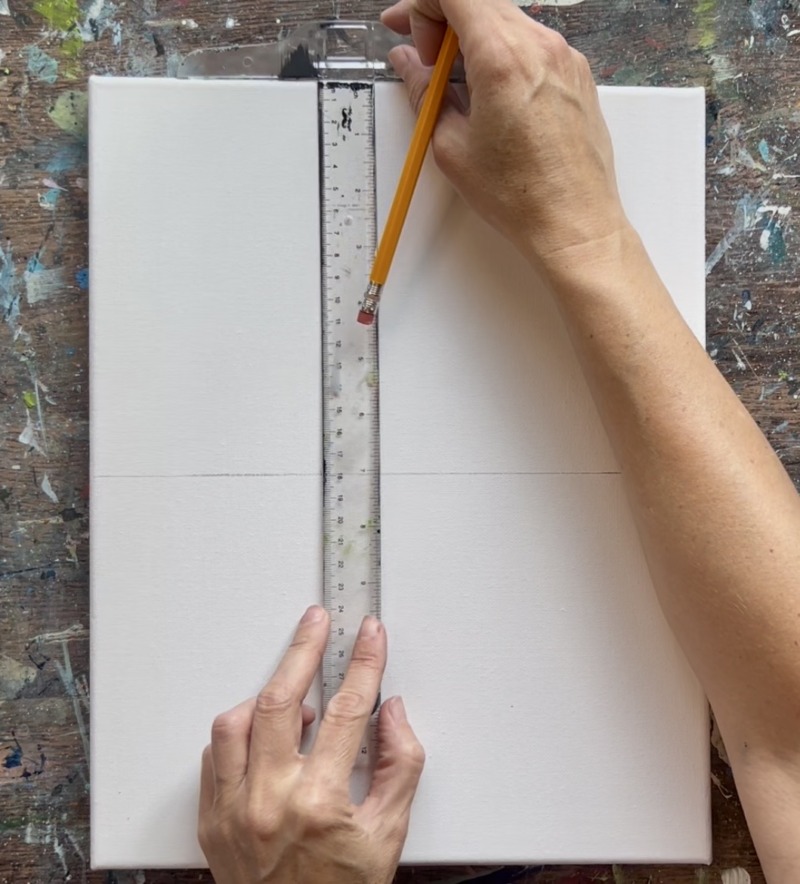
Next, draw a vertical line on the left side of the painting. This line is approximately 4″ from the left edge. Bring the line from the top edge of the canvas and make it 10″ long.
Then draw a diagonal line to complete this wall. This diagonal line is about 2″ from the bottom edge of the canvas and connects to the bottom of that vertical line. Note: this diagonal line can also be approximated.
Draw another slightly diagonal line to the right.This is the bottom of the short wall.
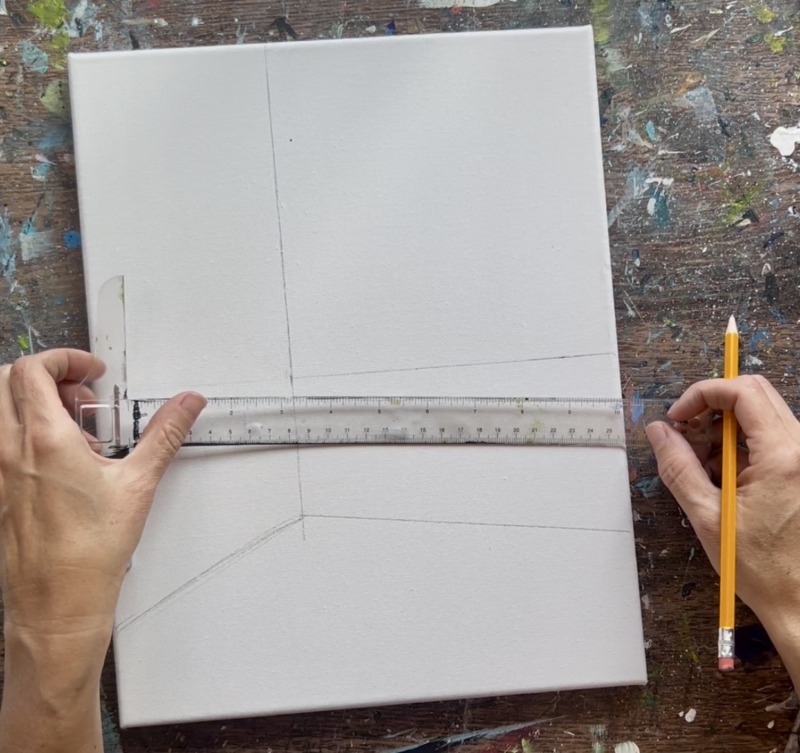
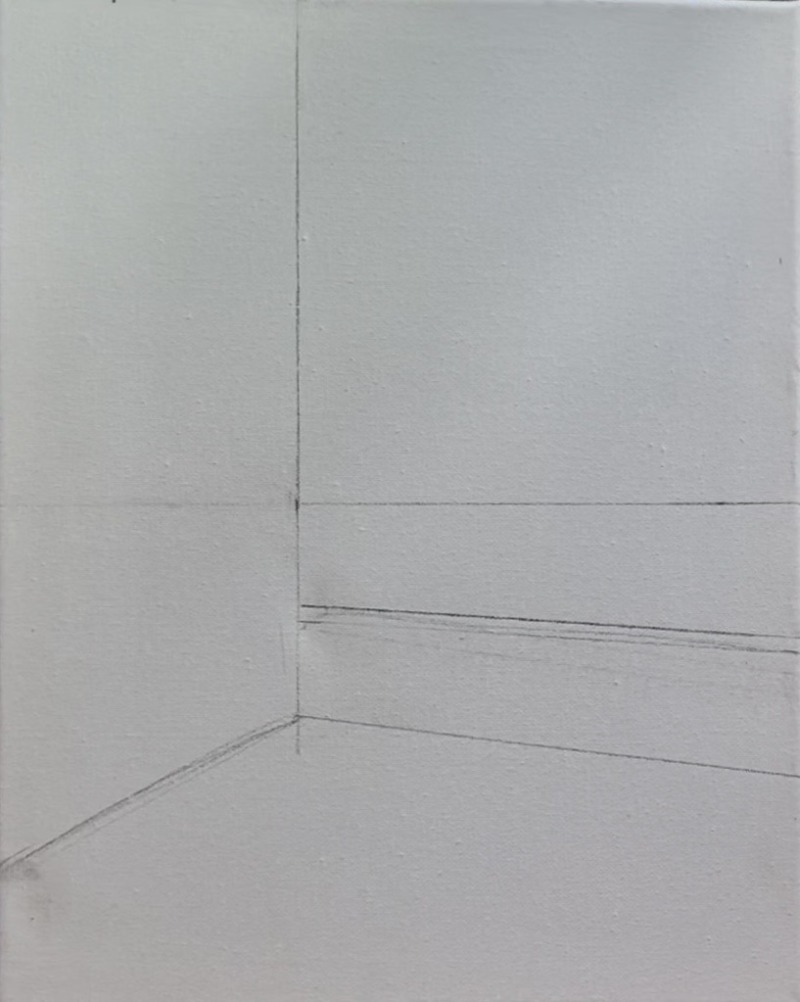
Then draw another slightly diagonal line for the top of the short wall and another line just slightly above it for the top of the short wall.
2. Paint Sky
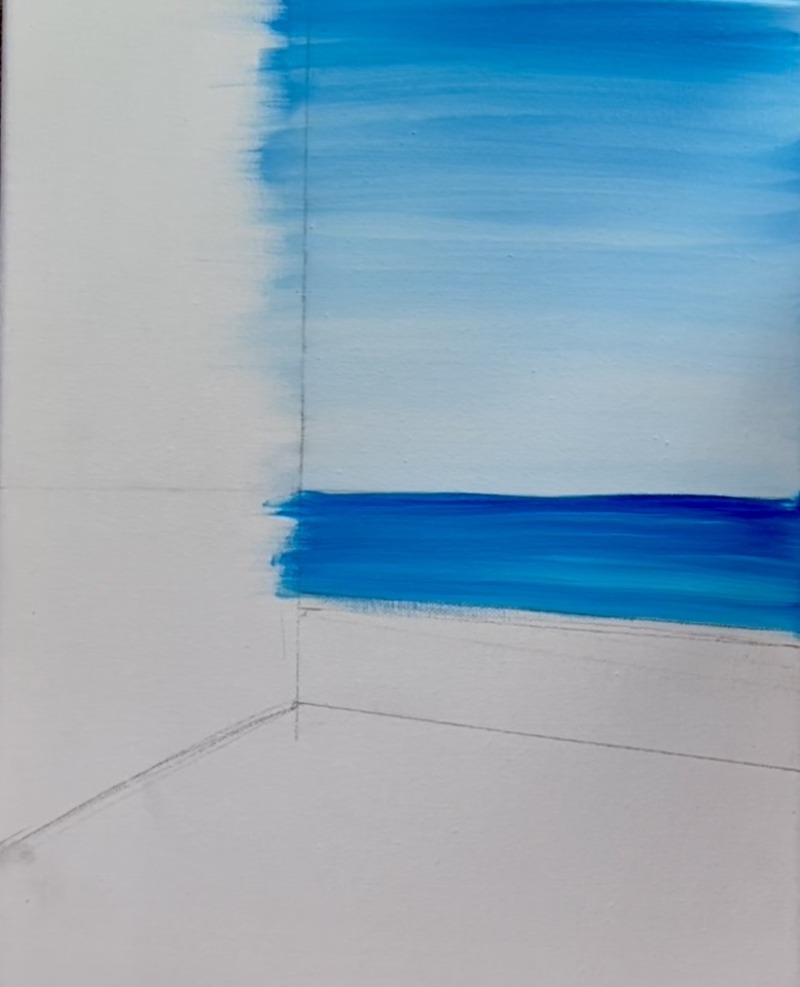
The upper right quadrant of this painting is all blue skies! Use the color “cerulean blue” and “titanium white”. Mix about 3 parts white to 1 part “cerulean blue”. Start at the top and paint left and right paint strokes with this light blue. Continue to paint the sky using left and right paint strokes and go all the way down to the horizon line. Gradually blend more white into the blue so that the sky becomes lighter as it approaches the horizon.
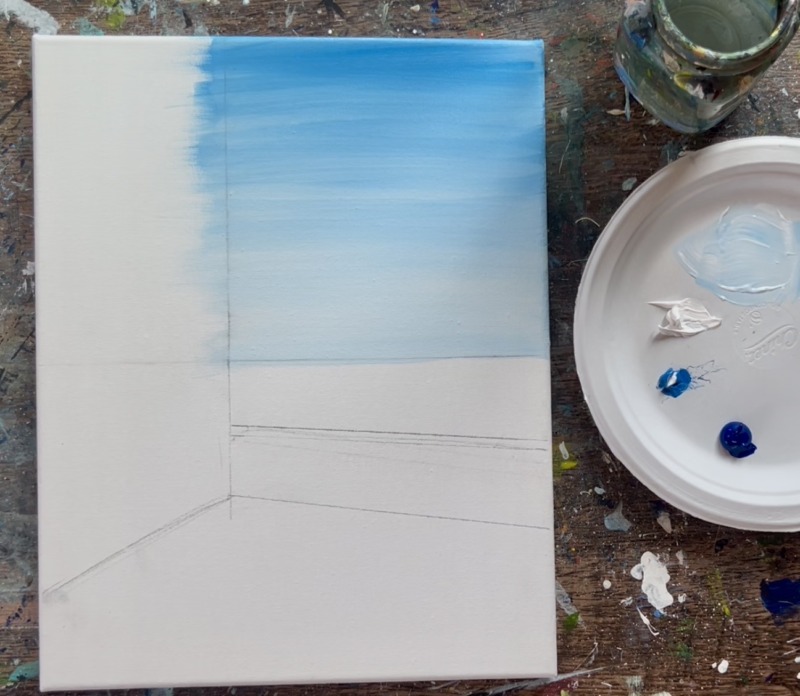
Next, wipe the brush but do not rinse. Load it into “phthalo blue” and paint left and right paint strokes from the horizon line down to the top of the short wall. Blend just a little bit of white into this dark blue at the bottom and leave some streaks of lighter color unblended. Note: we can add more detail in the ocean later.
3. Paint Walls & Flooring
Note: your color mixing does not have to be exact for these next steps. We will be using a combination of White, Naples Yellow, Raw Sienna and Black to create different variations of color to mimic a Mediterranean light stucco color.
Use the color “titanium white” and mix just a tiny bit of “Naples Yellow” into this white to turn it into a cream/ off white color. Use the 3/4″ flat wash brush and paint just the far right edge of the wall with this pale white color.
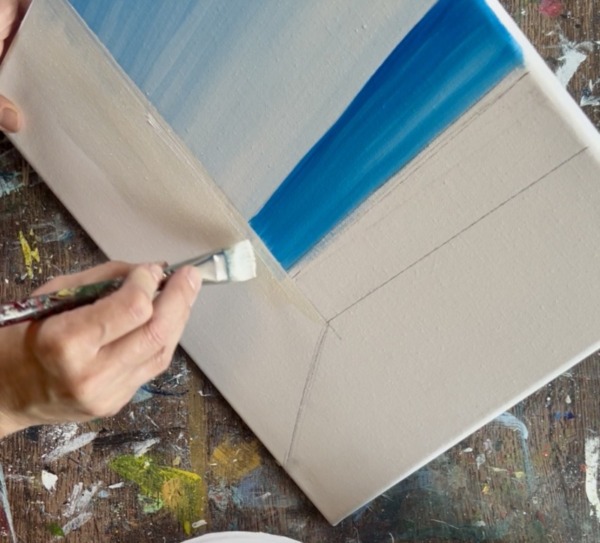
Next, blend little bits of “Raw Sienna” and little bits of “Naples Yellow” into your white and paint expressive diagonal paint strokes that gently blend the light cream color into a warm light stucco color on the left side of the canvas. Add a tiny bit of black into your light off-white color you mixed earlier. This will create a taupe (gray/beige) color. Blend this on the bottom left of the wall. Then use this color to outline the bottom diagonal line of the wall.
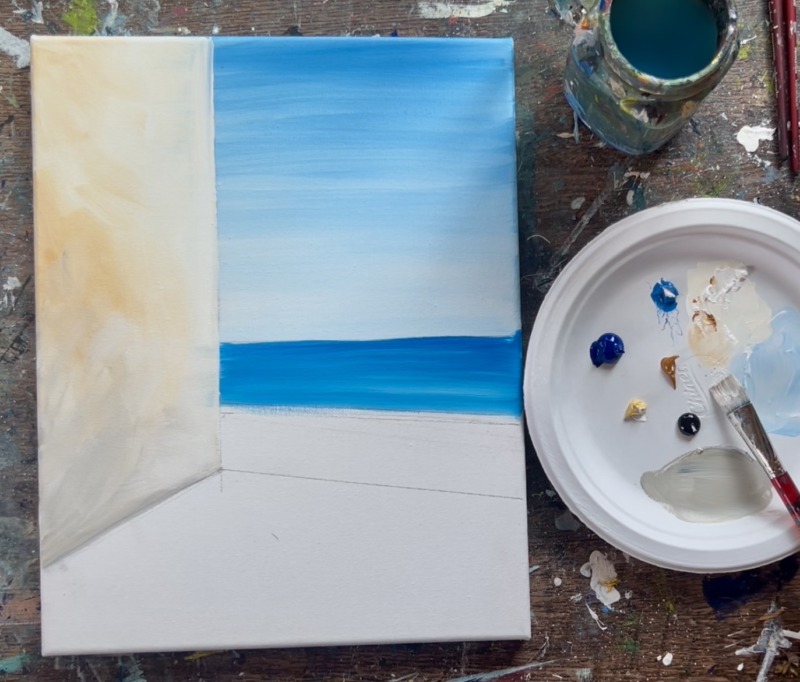
Use this same color but add just a tad bit more black into it to make it slightly darker. Paint the bottom of the short wall using this dark beige/gray color.
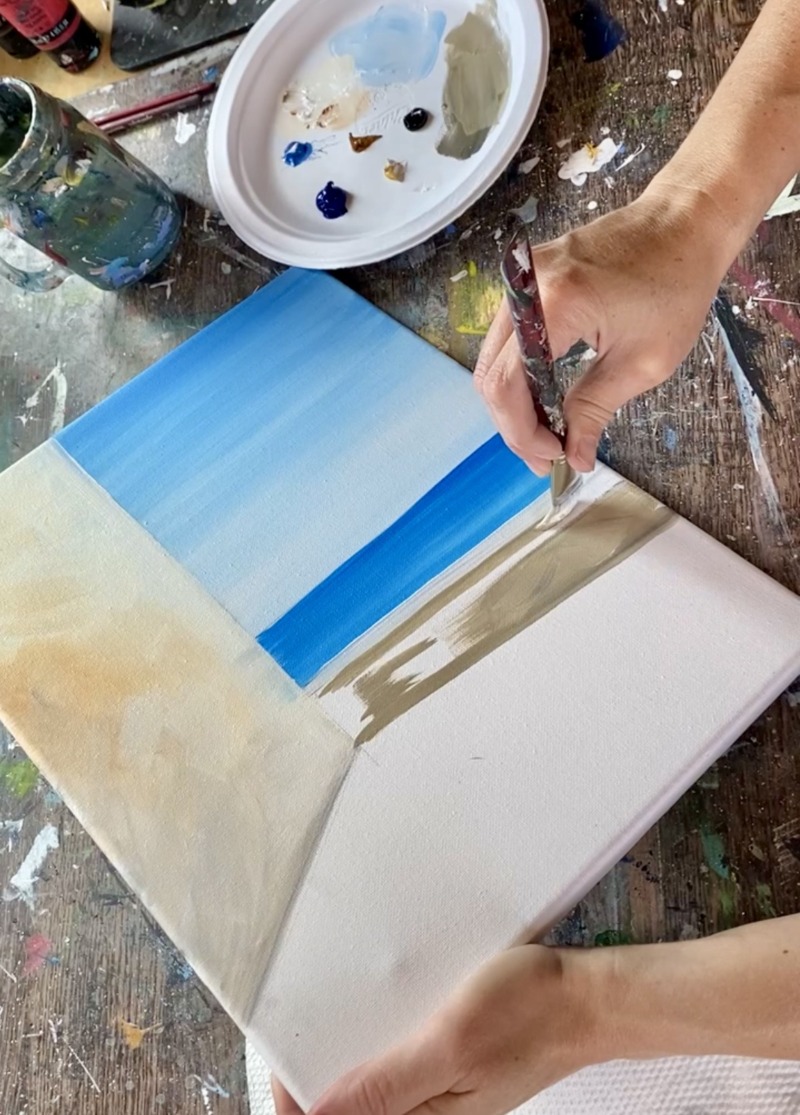
Use this same dark beige/gray color to paint the flooring. Start with this color in the lower left of the canvas and paint using the 3/4″ wash brush. Paint diagonal/ expressing brush strokes.
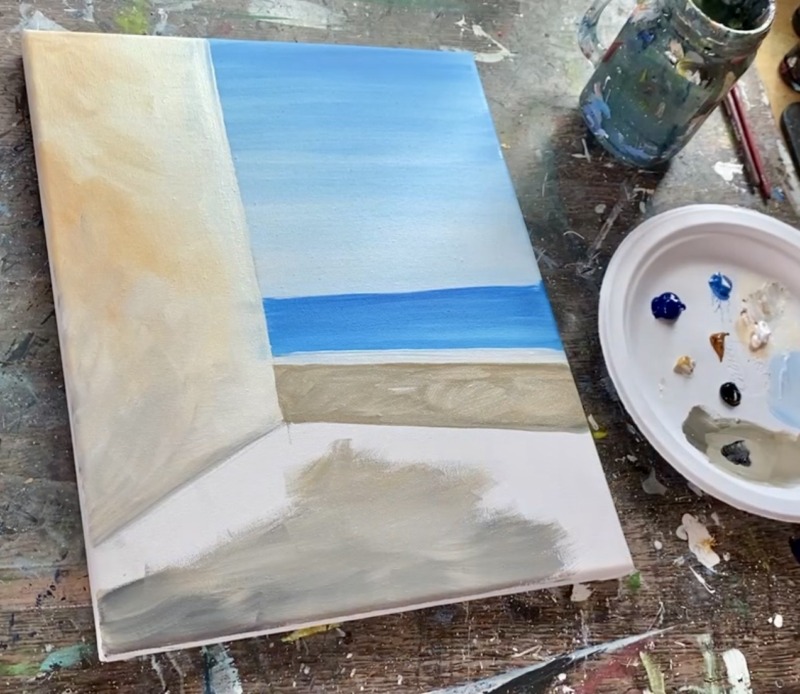
Then gently blend lighter beige colors in the middle of the flooring (add more white to it). Paint darker shadowy gray/beige color just under the short wall and under the tall wall.
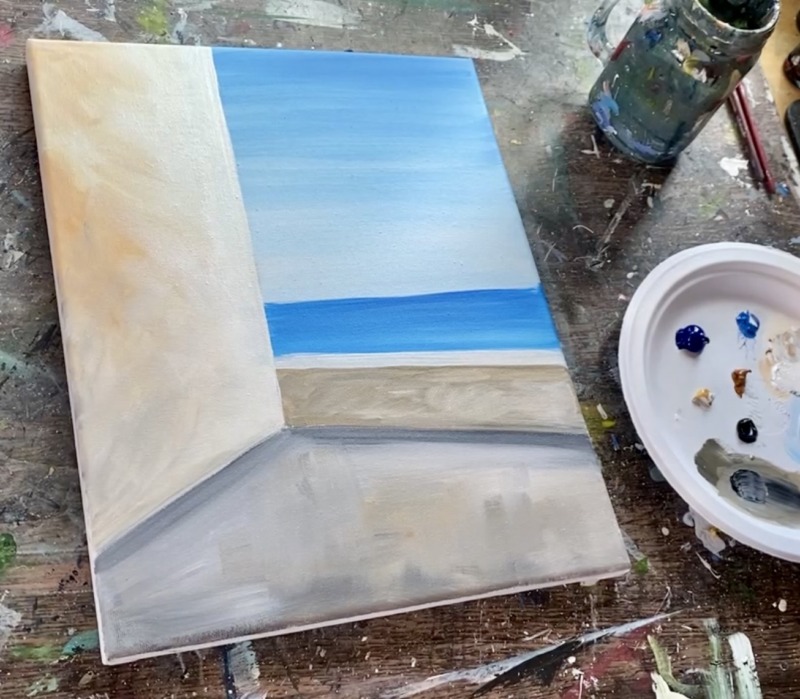
4. Paint Clouds
I like to use a #12 bright brush and just titanium white to paint simple clouds. I call them “dry brush clouds” because the trick is to ensure only small amounts of paint are on the brush to get a translucent look to the cloud.
Start by loading the edge of the brush into the white but wipe it off with a paper towel. Then use the leftover paint on your brush to paint your first cloud. I make clouds that are mostly flat on the bottom but lofty/ rounded on the top.
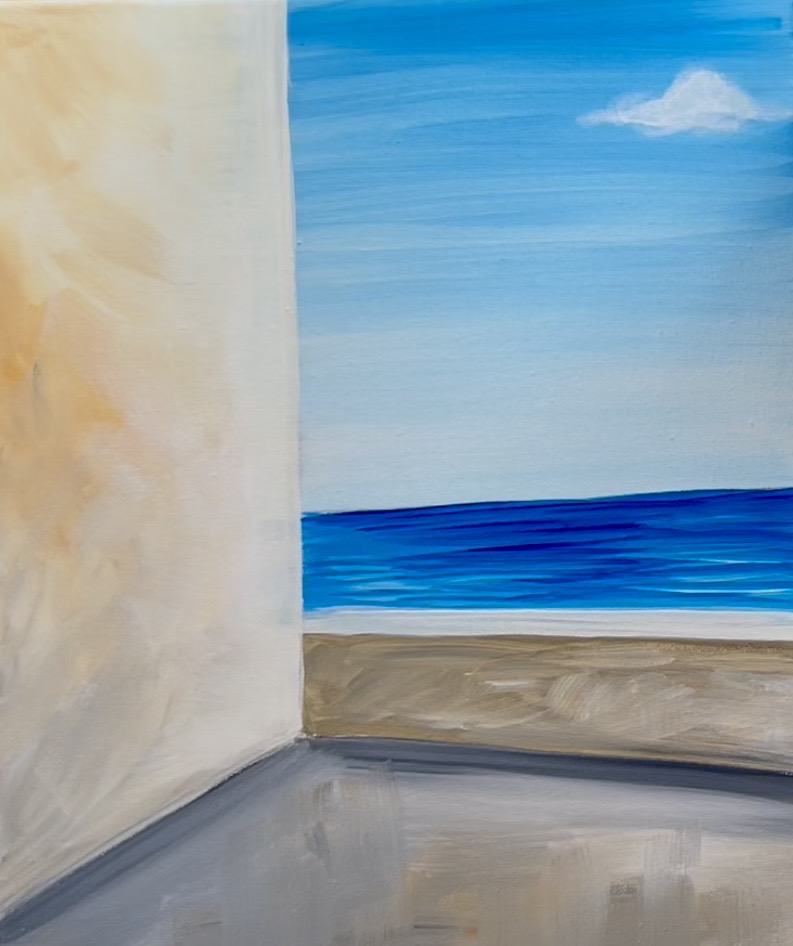
Repeat this to create several clouds in the sky. Clouds closer to the horizon line are smaller/ thinner and clouds higher in the sky are larger and puffier.
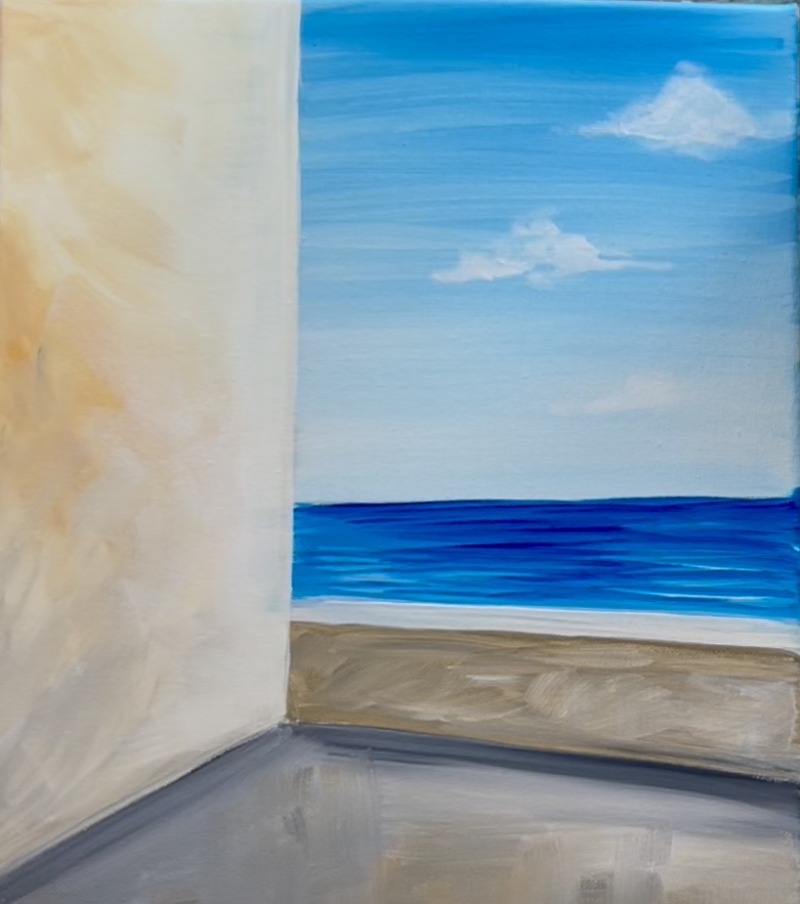
After doing the initial dry brush layer, go back and highlight the clouds. Load the brush into white and wipe the brush off again. This time, add your layer just the very top curves of the clouds. This adds brighter white to the top but leaves the bottoms more translucent.
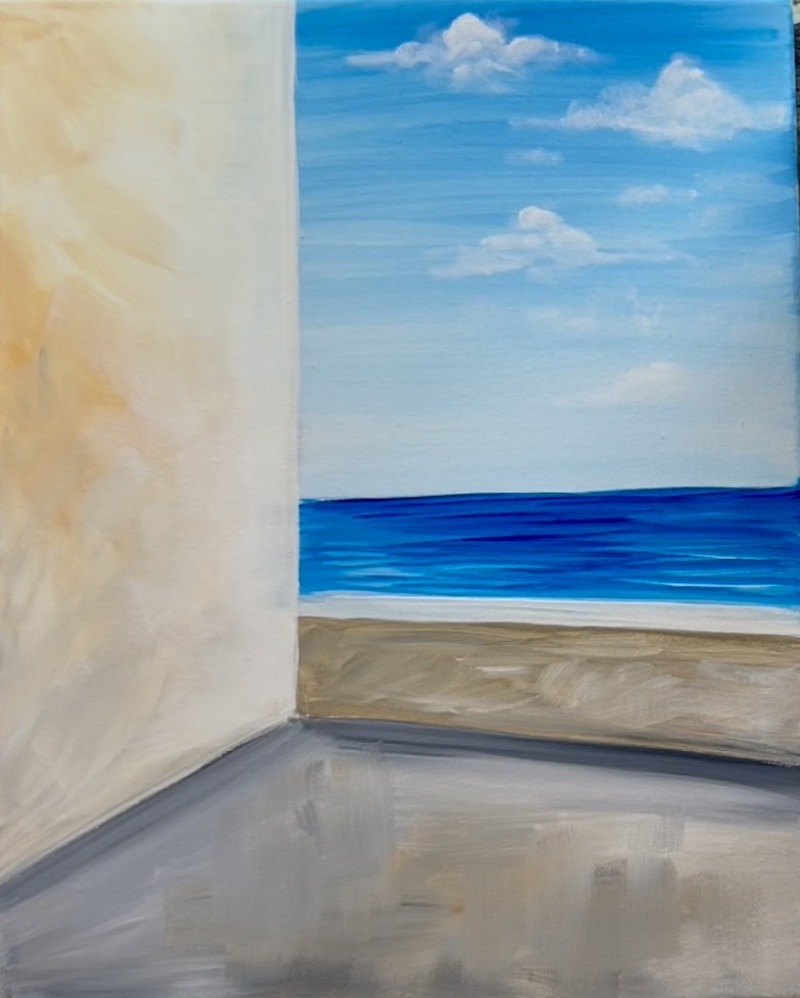
5. Draw/ Paint Window
Use the ruler to draw a rectangular window on the left side of the wall going off the edge of the canvas. This window is about 5″ tall and 1.5″ wide.
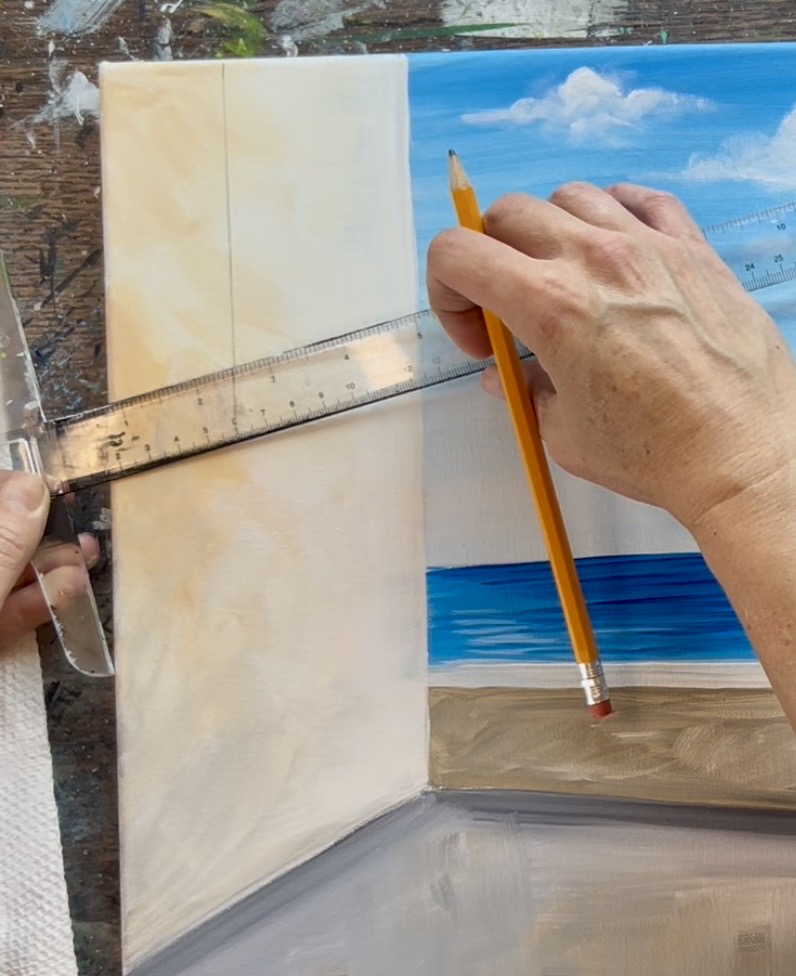
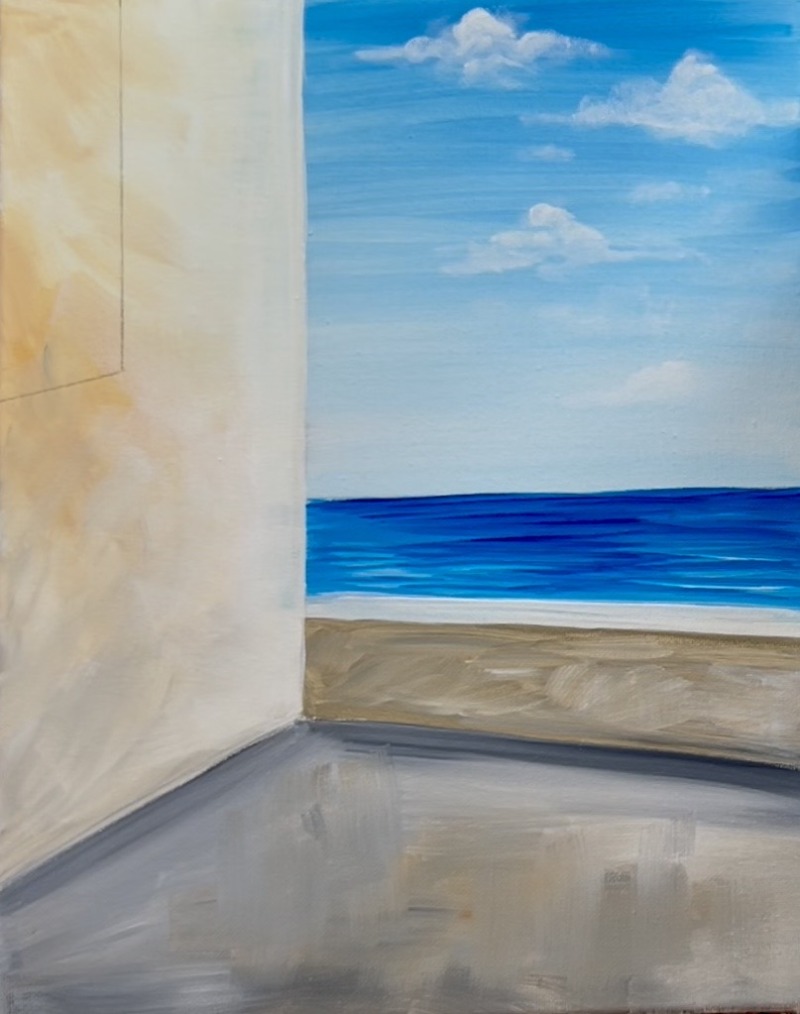
Then load your #12 bright brush into both “phthalo blue” and “mars black”. Brush up and down paint strokes and allow the blue and black to gently blend together. Add just a tiny bit of white to the brush and paint more vertical strokes that slightly blend with this dark blue.
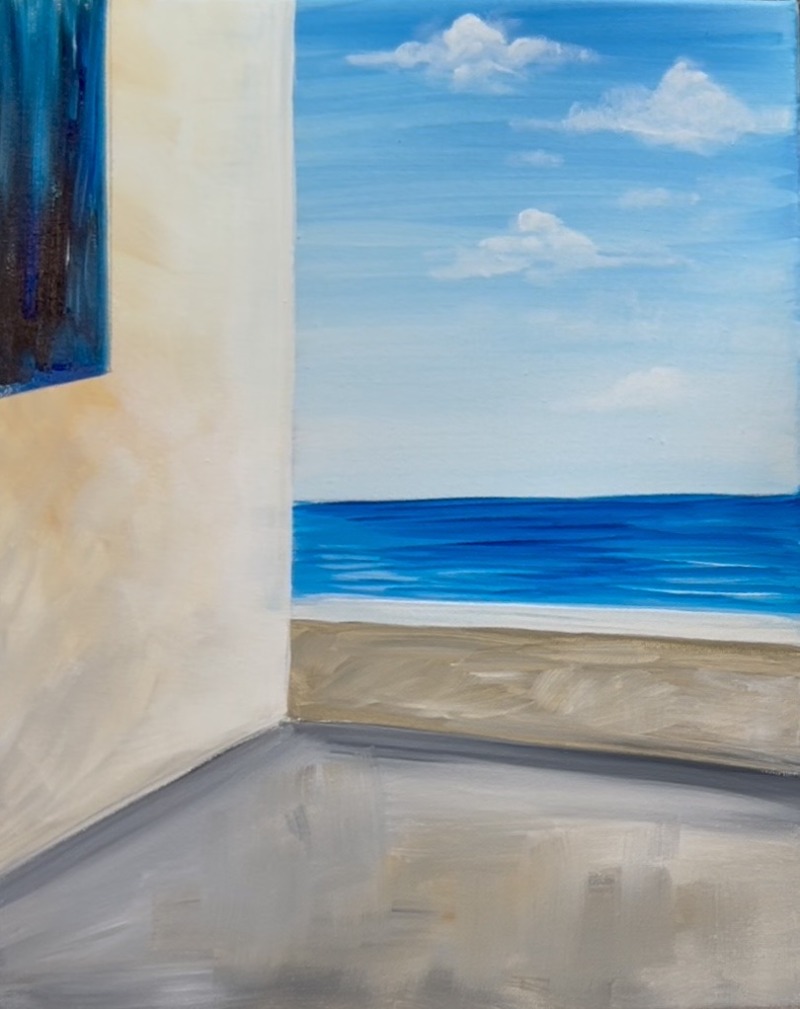
Next, wipe the brush but do not rinse. Load the #12 bright brush into “Titanium White”. Paint a frame around the inside perimeter of the dark blue rectangle. Then paint a horizontal and vertical window pane line. As you do this, the white will blend with the dark blue creating a light blue window frame.
Then paint shadows under the window using your dark beige color on your palette (mix white with a tiny bit of black and a tiny bit of raw sienna). Dry brush this shadow under the window.
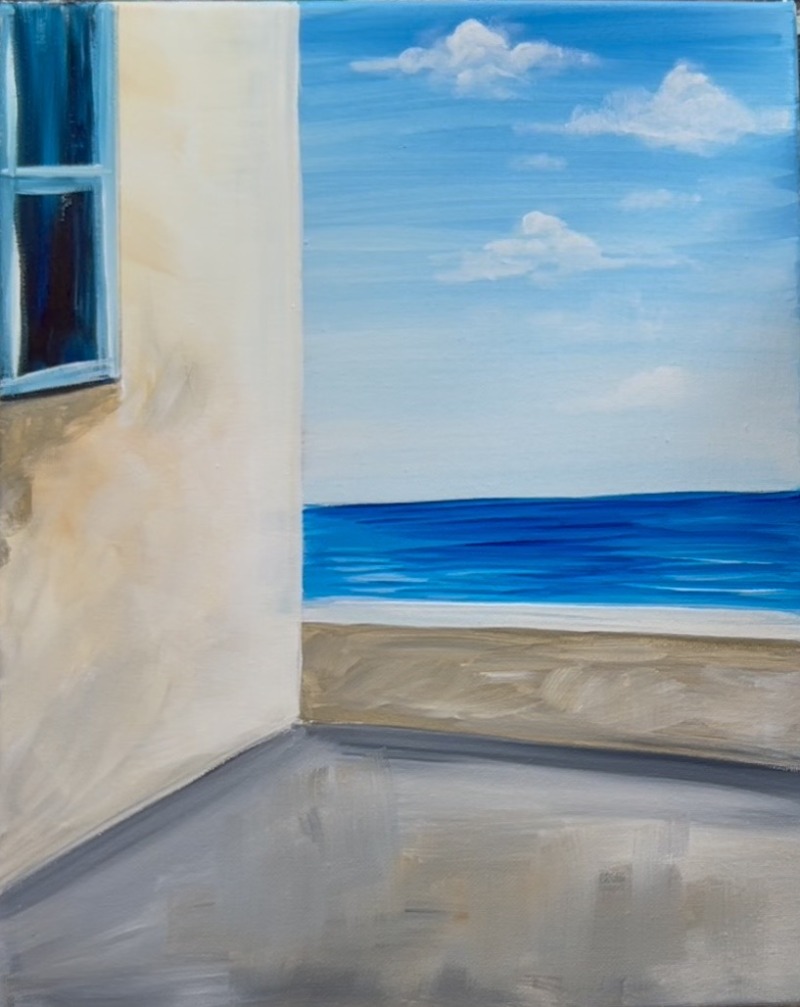
6. Draw/ Paint Lemon Tree Pot
Use a piece of white chalk to draw the lemon pot. I recommend using a ruler to define a “line of symmetry”. This line also defines where the tree trunk will be. I wanted my trunk to be to the left of the wall edge so I drew the line of symmetry accordingly.
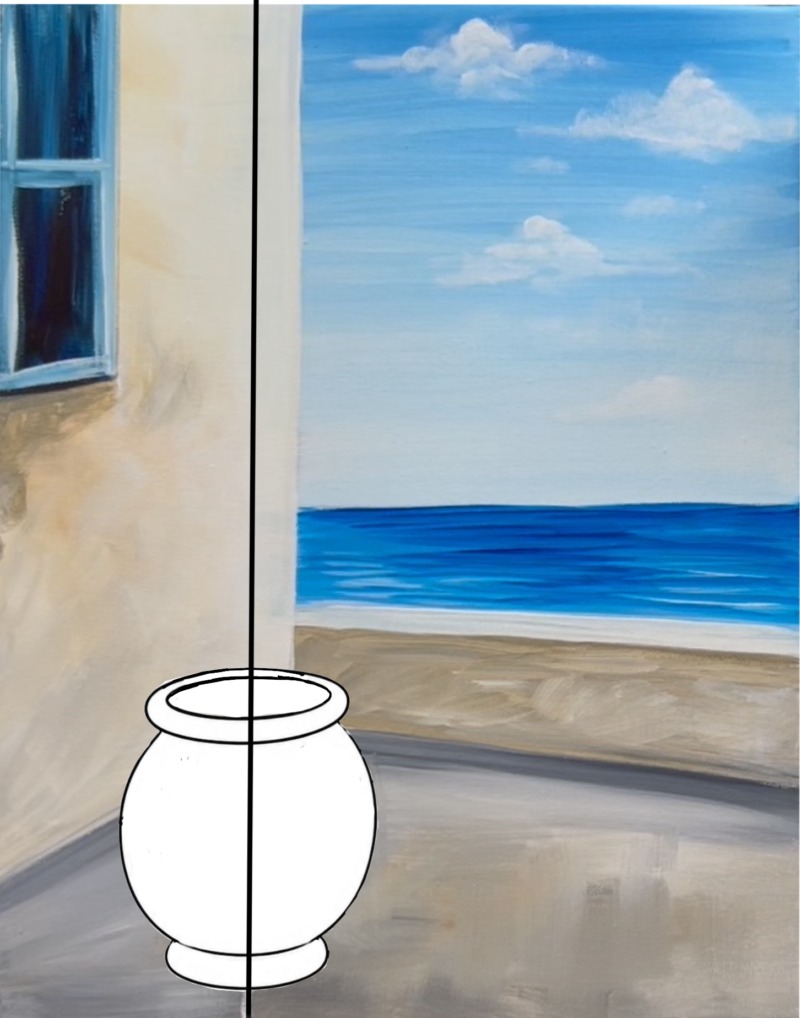
After drawing your vertical line, draw the pot. Start by drawing a narrow oval opening at the top, a large U shape for the bowl and a small curved shape for the bottom stand of the pot.
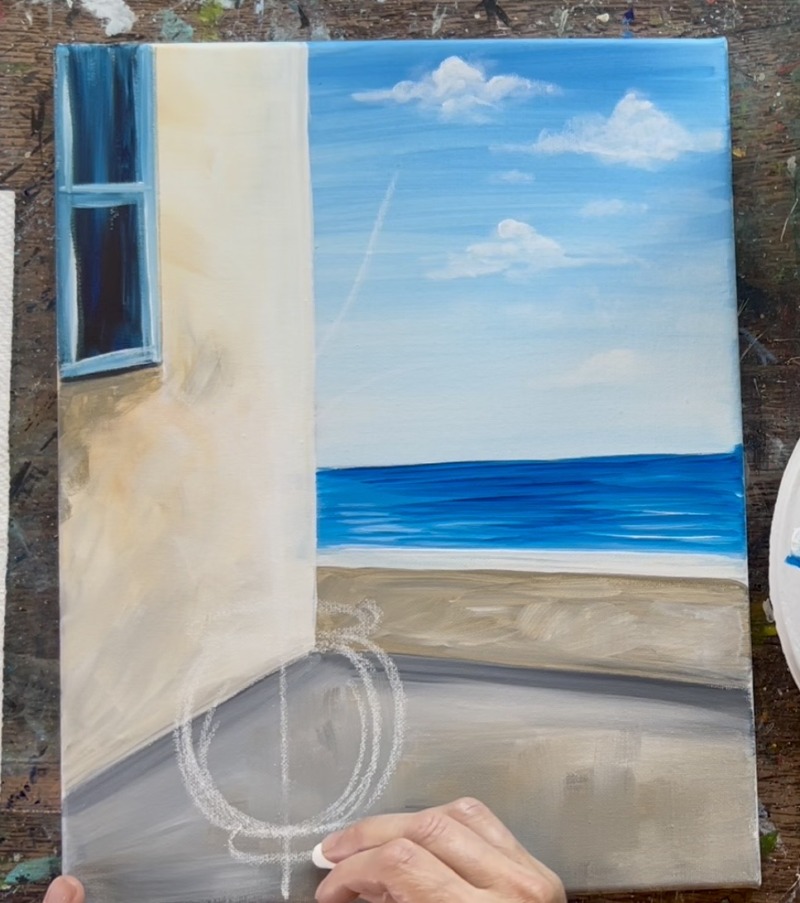
If you want, you can draw your tree and branches with the piece of chalk too but this won’t be very visible in that area because of the light background.
Next, use a #4 round brush to paint the pot a solid coat of “Titanium White”.
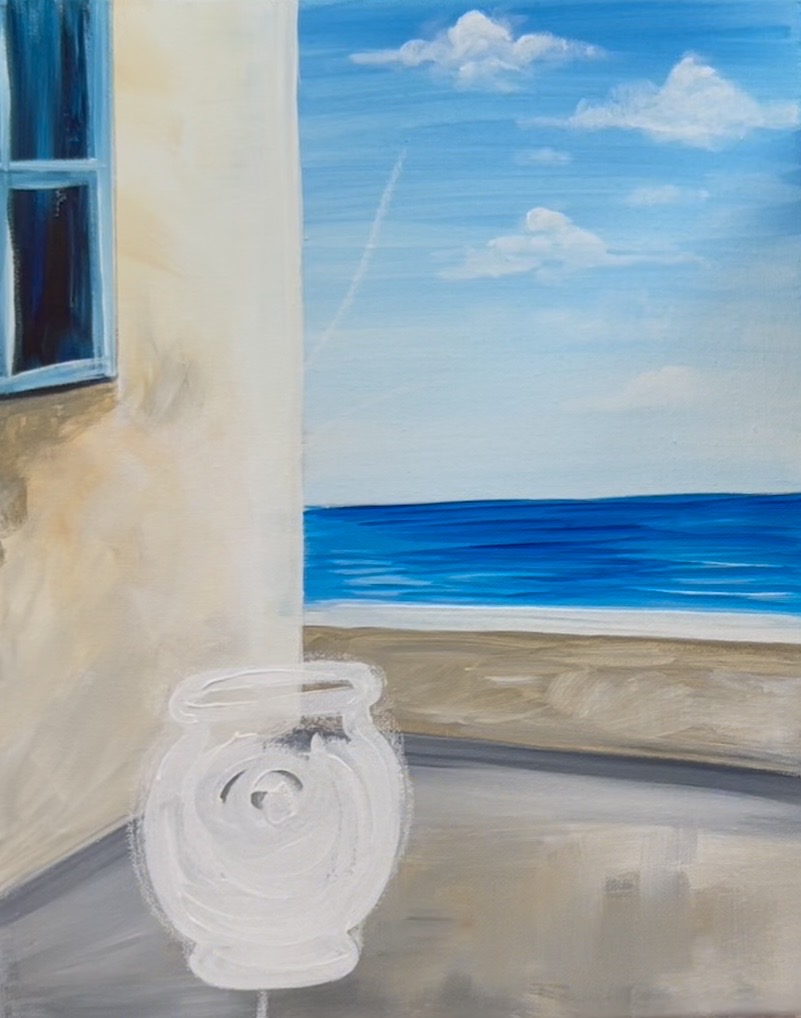
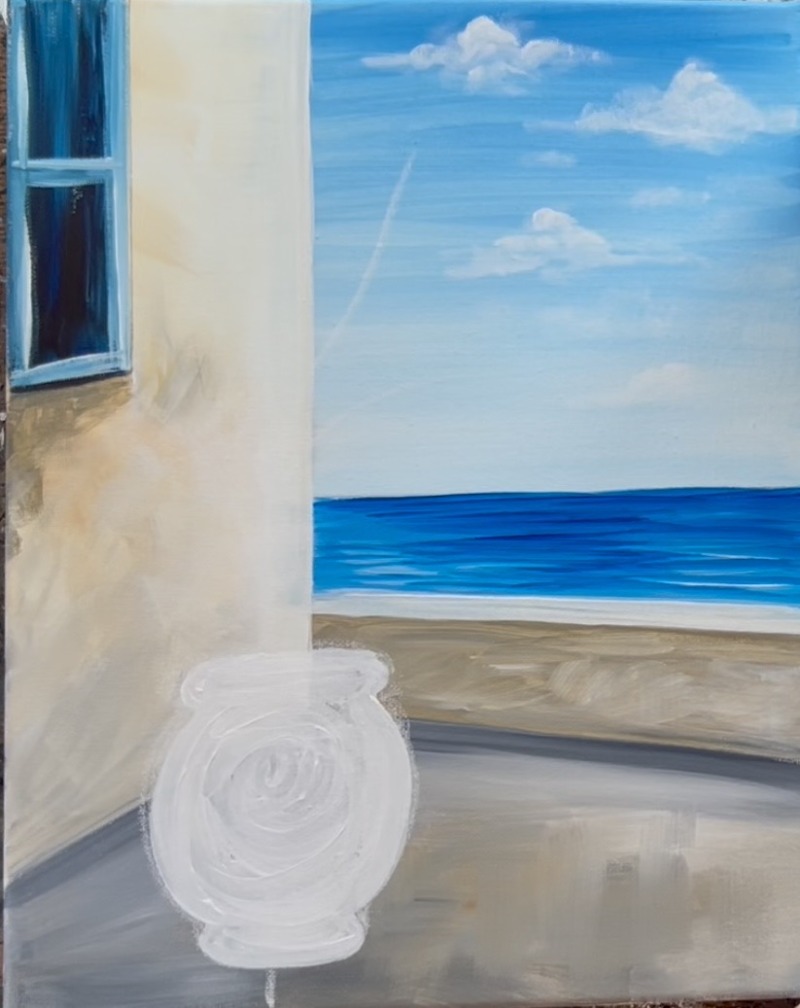
7. Paint Lemon Tree Branches
Mix equal amounts of “Mars Black” and “Raw Sienna” together. Slightly water it down. Use the #4 round brush to paint the trunk and limbs of the lemon tree. Start at the bottom and paint a trunk that trumpets slightly outwards. Then paint the trunk growing vertical and allow it to get narrow towards the top of the tree. Paint a set of very thin branches that split and form a “Y” formation. Then paint another main branch going diagonally outwards. As you paint these branches, make sure to use very light pressure on the brush to create thin lines.
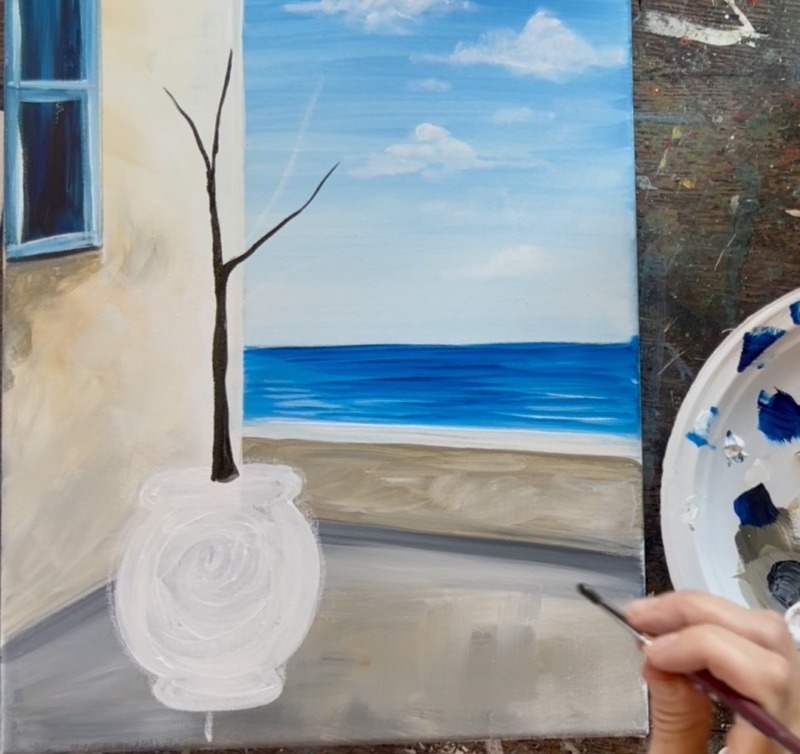
Repeat this to create several more branches. Use the same color to paint the soil in the pot (a small oval on the inside rim).
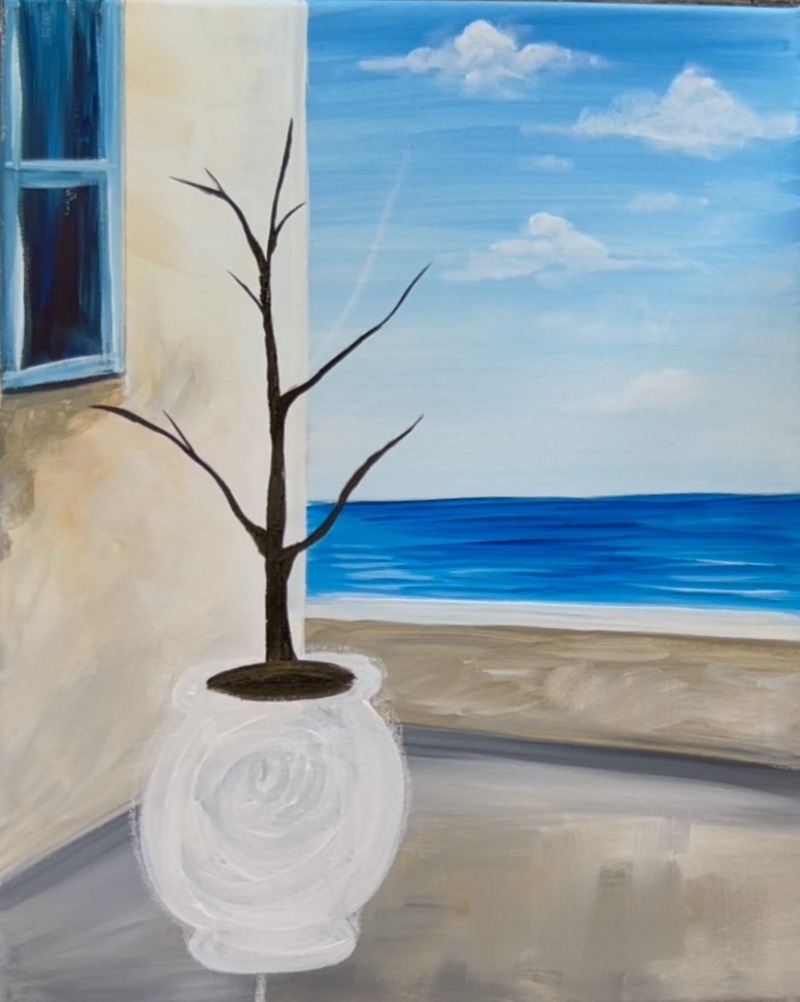
8. Details On Pot
Double load the #4 round brush into “Phthalo Blue” and “Titanium White”. Paint the rim of the pot and let the two colors blend together on the canvas. Then paint the bottom “stand” of the pot with the same colors. Wipe the brush off and “dry brush” some shadowing on the left side of the pot (optional).
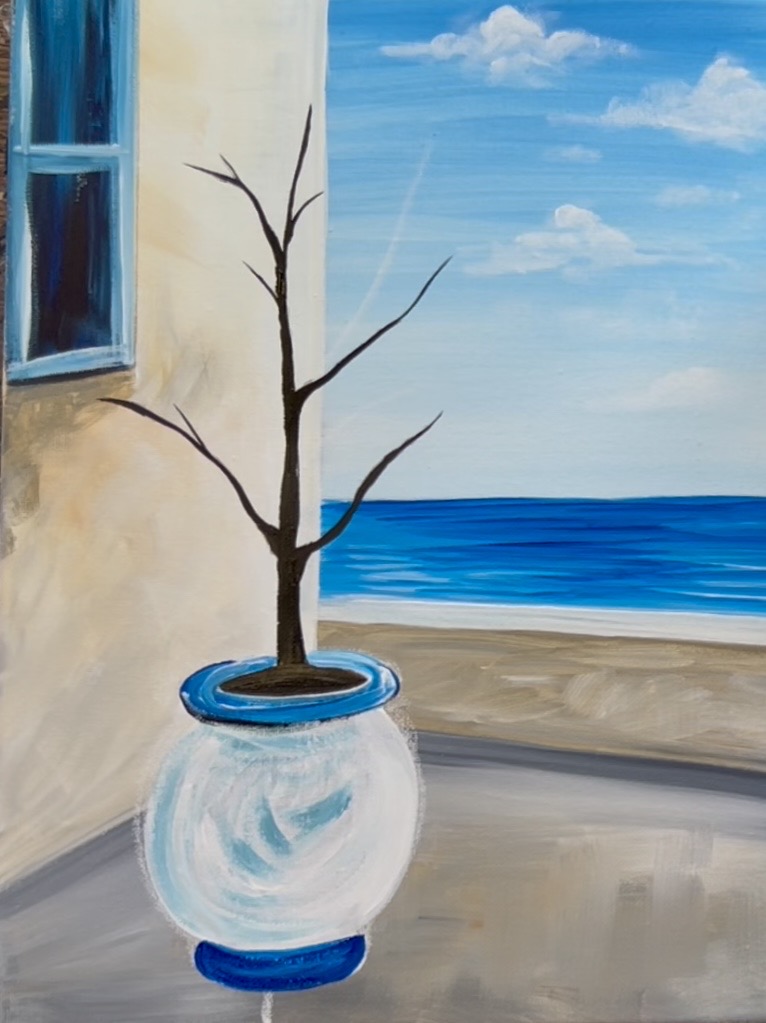
Paint shadow under the pot and towards the left edge of the canvas. Use the same color you used for shadowing from the window shadow and dry brush it with a #4 round brush.
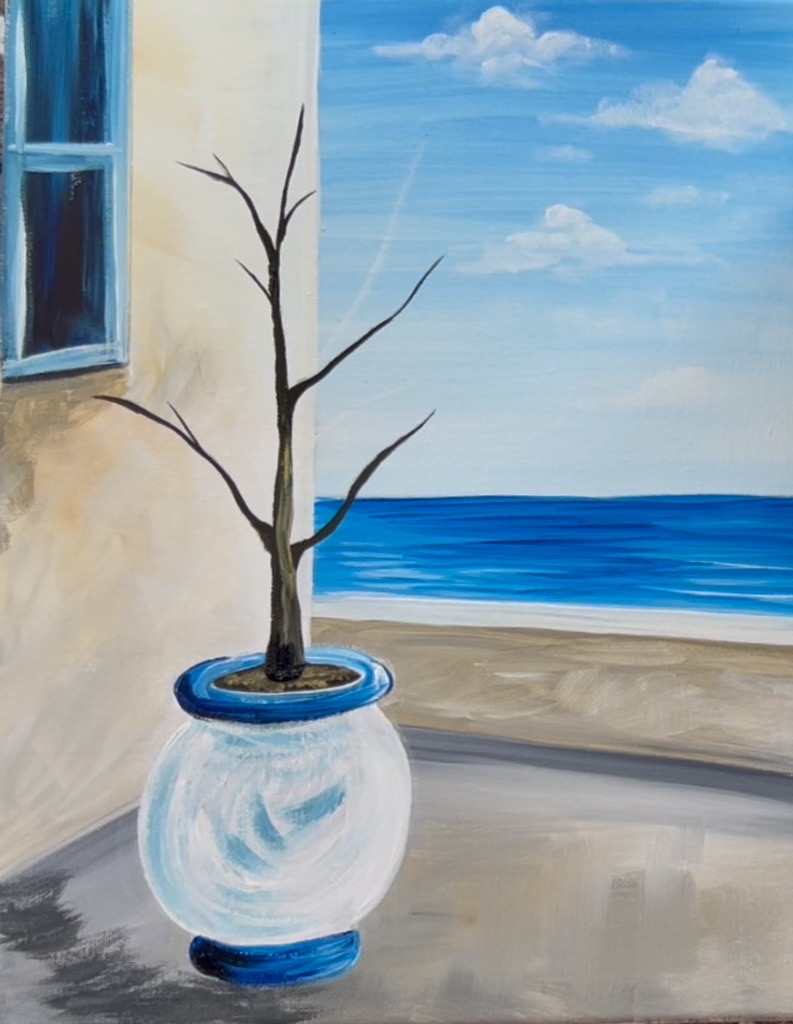
9. Leaves & Lemons
Use the #4 round brush and “Hooker’s Green Hue” to paint leaves on the ends of all of the branches. Vary the colors of the green by blending in bits of yellow and white into the green of the leaves. Paint several leaves going at different angles and even overlapping each other. This first round of leaves do not need to look “full” yet because you will be painting some of the lemons next.
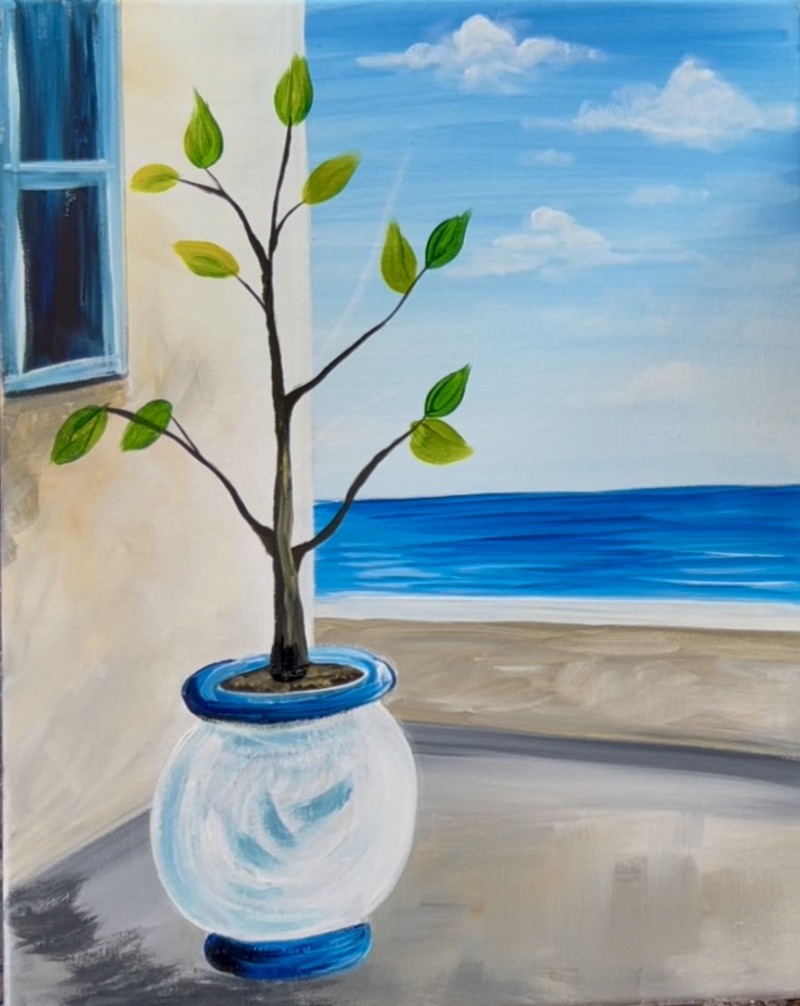
Then paint the lemons. Mix “Cadmium Yellow Medium Hue” and “Titanium White” together to make a light opaque yellow color. Use this as the base color for all of the lemons. Paint a lemon shape (oval with a small notch at each end). Repeat this to create several lemons on the branches of the tree.
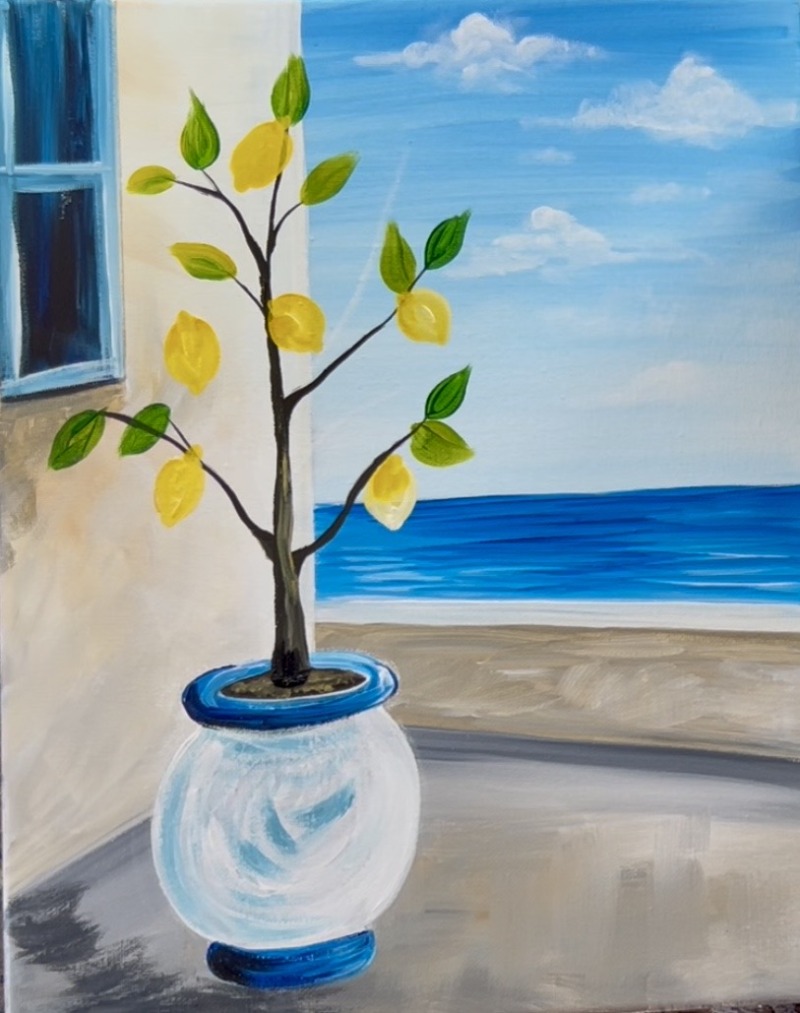
Then add highlights and shadows to the lemons. For the shadow color, mix “Raw Sienna” and “Cadmium Yellow Medium Hue” together. Use the #4 round brush and “stipple/ dot” these dark yellow dots on the left side of each of the lemons. Rinse the brush and use “Titanium White” to “stipple/dot” white dots on the right side/ tops of each of the lemons for the highlights. Note: if the white looks too bright, try mixing a little yellow into it.
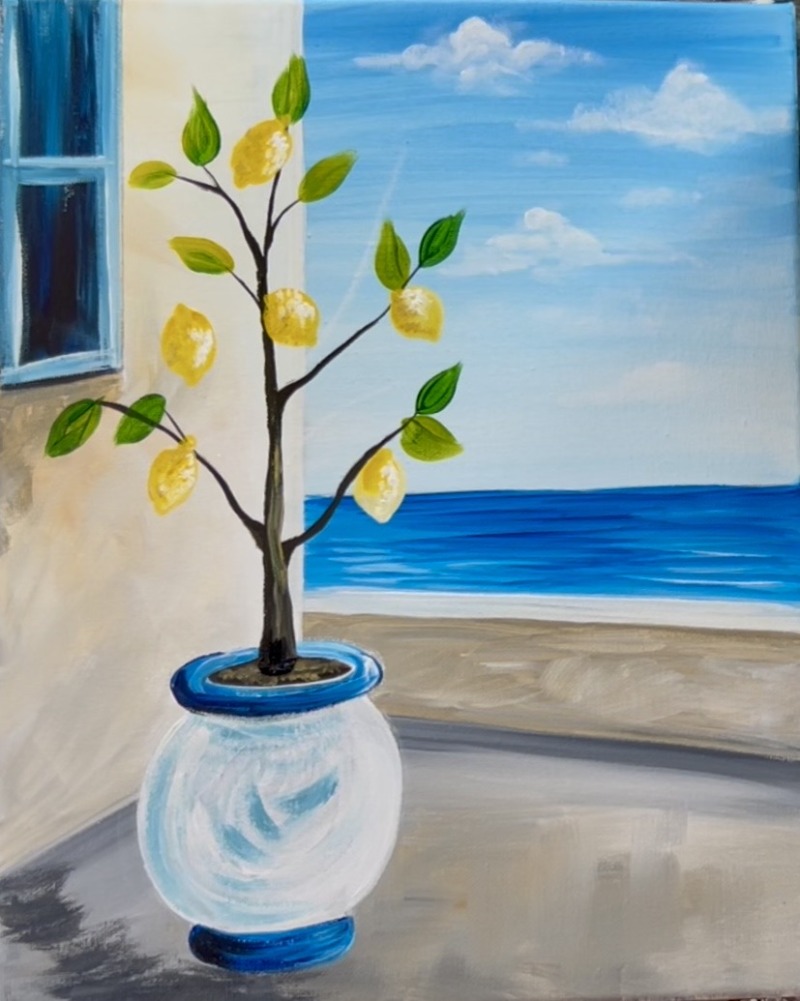
10. Decorations On Pot
Use the #4 round brush and phthalo blue to paint the designs on the pot.
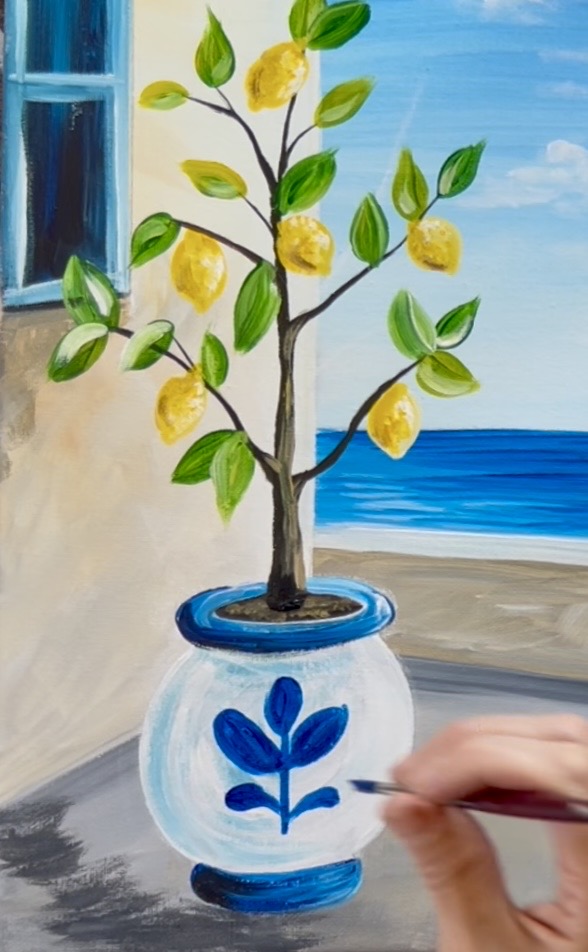
Note: this is supposed to look hand painted and loose. If you do mess your design up, you can always use white to paint over parts of the design.
Final Details
Final touches for this painting can be: painting more lemons and leaves in the tree, painting lemons on the ground, painting more “sparkles” in the ocean water (use little white dash marks way in the distance and add more longer white lines that are closer), painting more layering on the ground
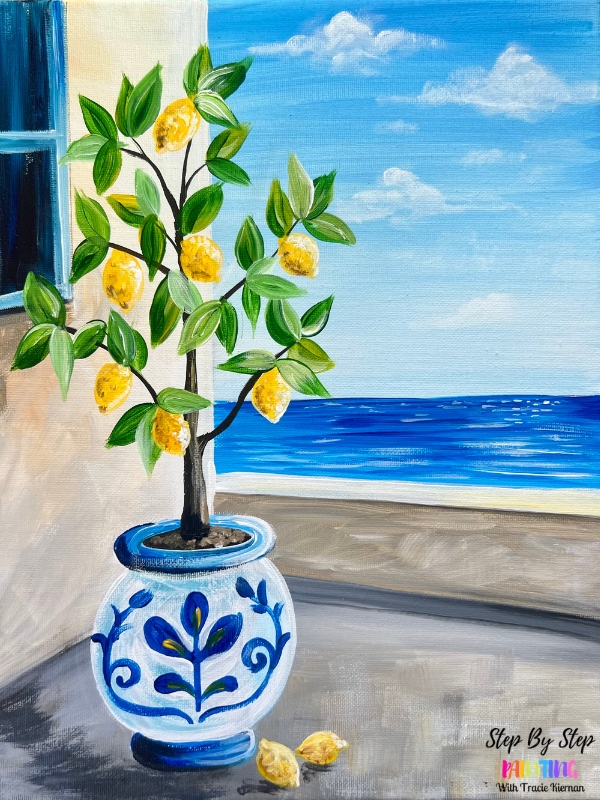
Thanks, Tracie! I really enjoyed doing this painting!