
Would you like to save this?
Love this tutorial? You can purchase the download in my PDF shop! This includes the ability to download the video and different size traceables. Find out more here!
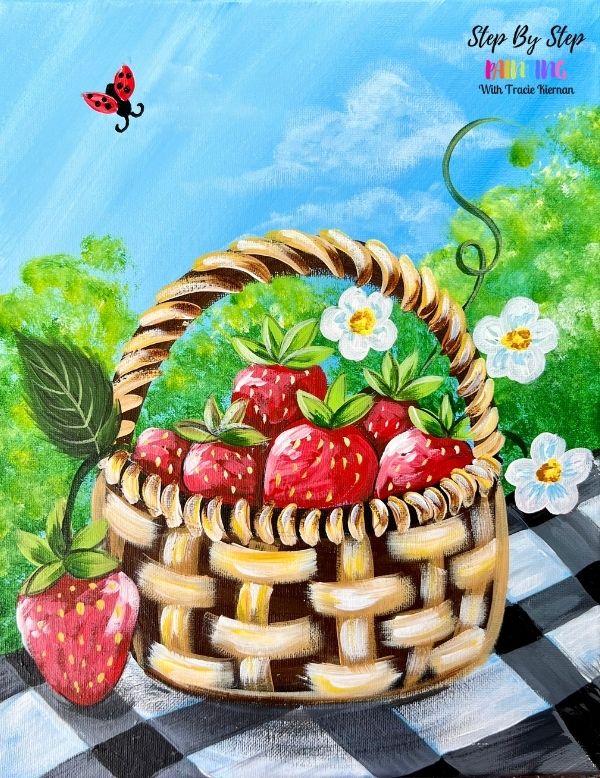
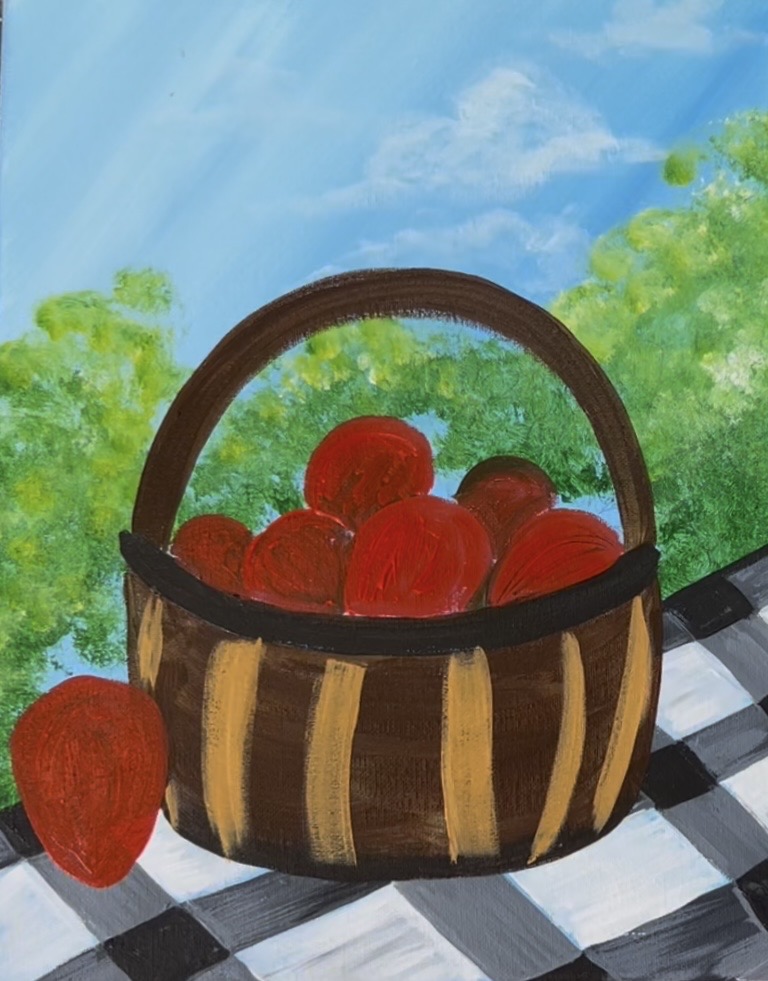
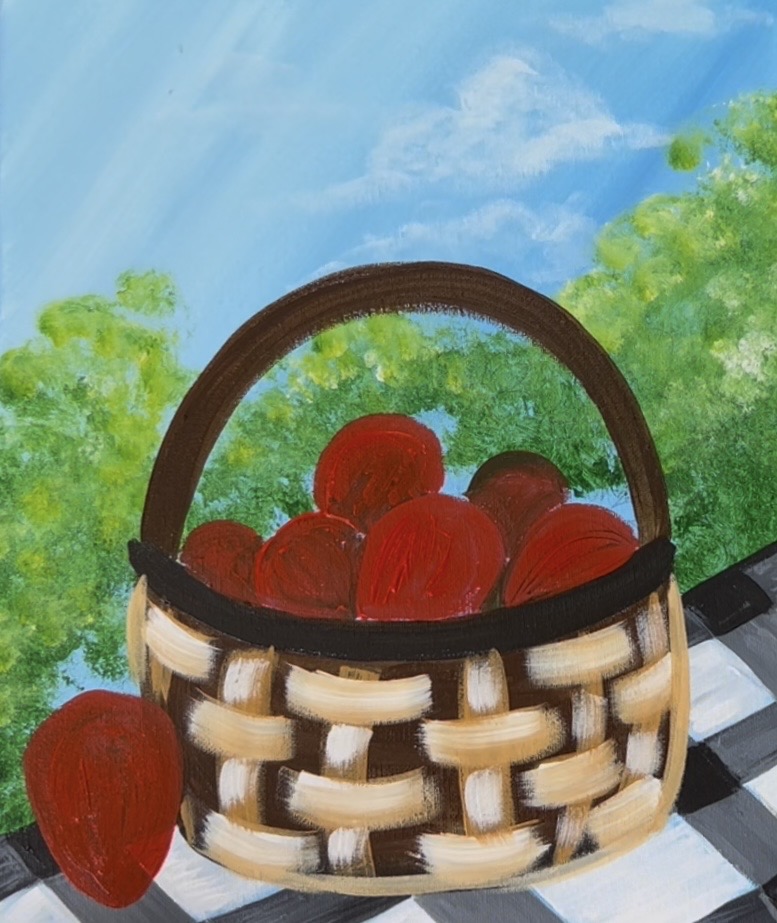
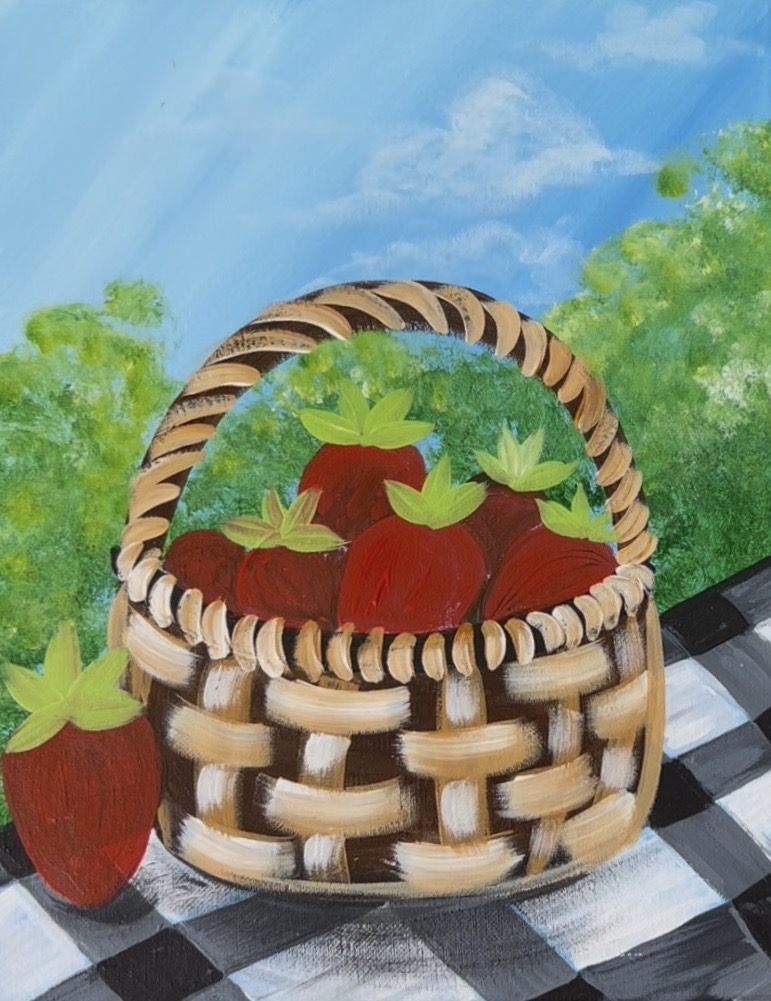
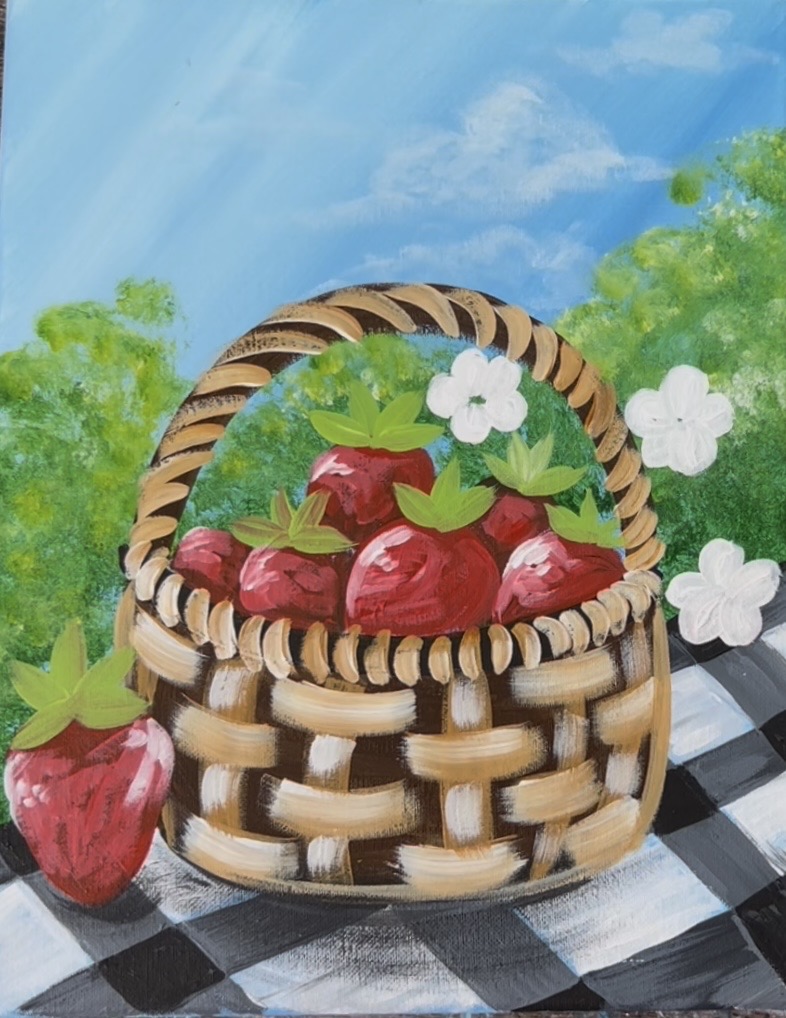
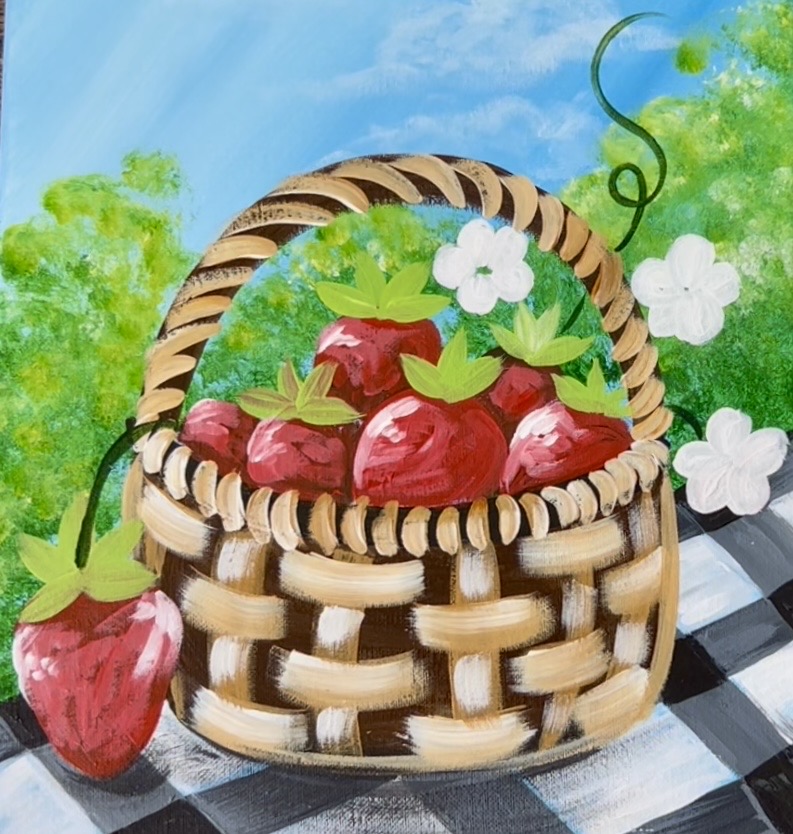
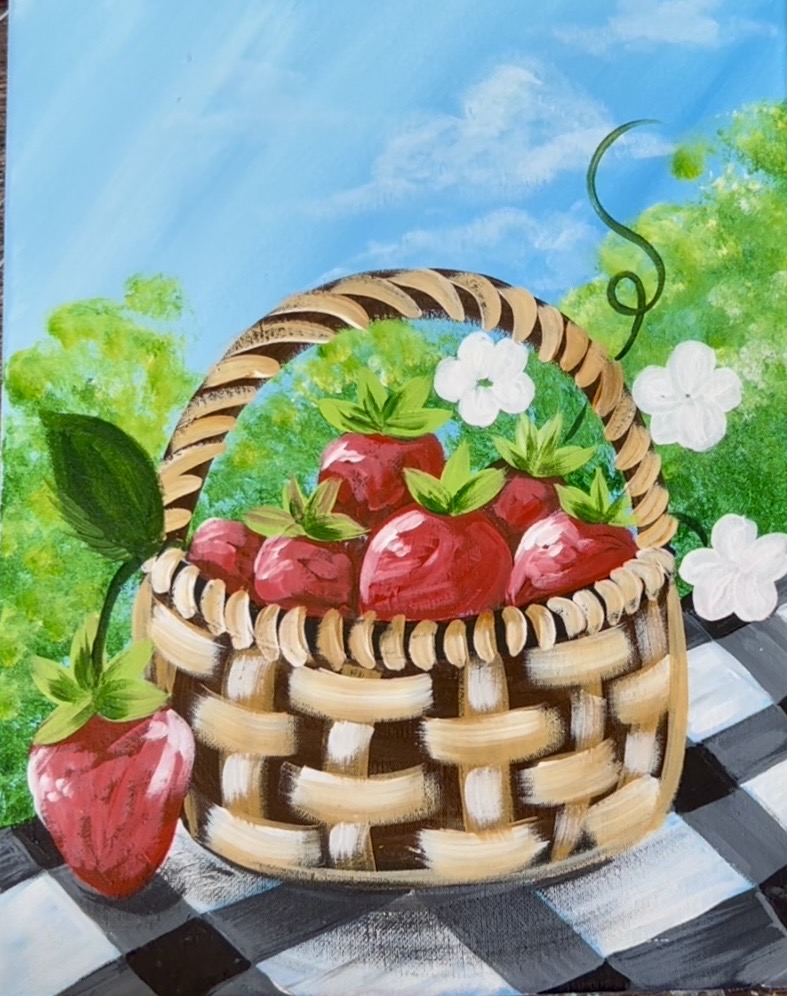
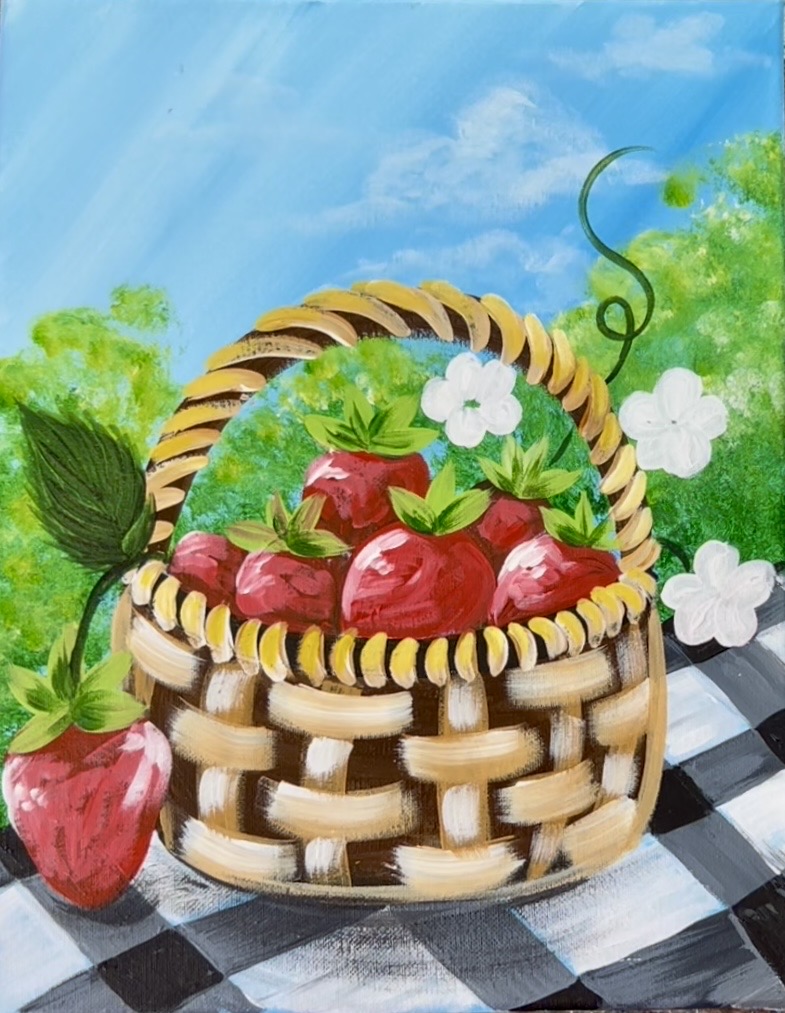
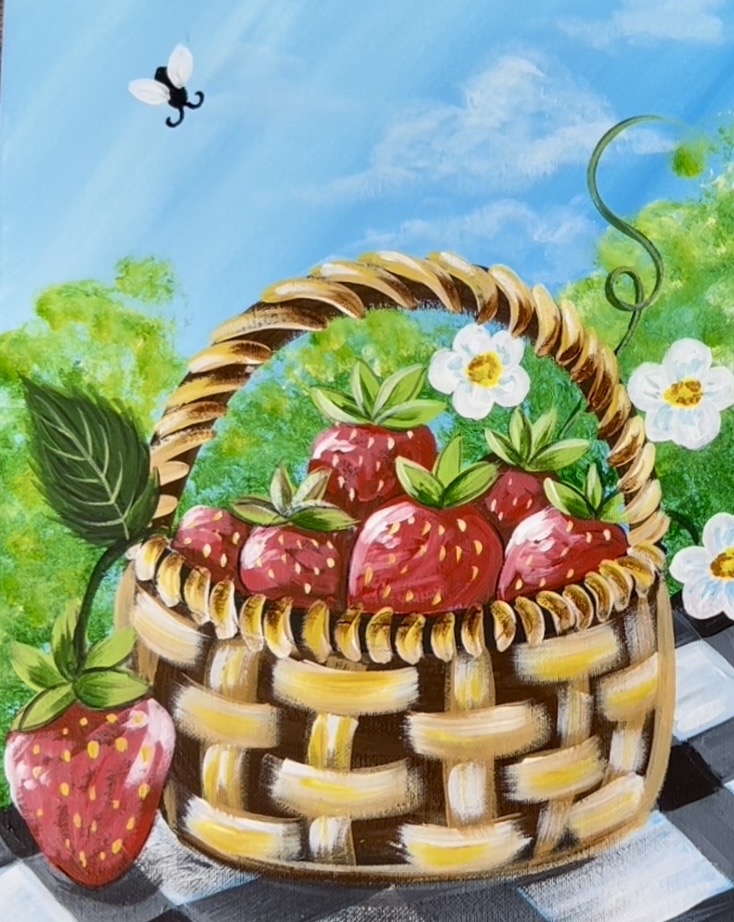
Paint a cheerful summer scene titled “Strawberry Patch Picnic”. This whimsical painting features a basket full of bright red strawberries, delicate white blossoms, a playful ladybug, and a classic black-and-white picnic blanket. This online tutorial includes a printable traceable template to make drawing easy.
In this acrylic painting tutorial, you’ll learn how to paint:
- Strawberries with highlights and texture
- A woven picnic basket
- Black & white gingham plaid design
- Simple flowers and greenery
Enjoy and happy painting!
Materials:
- 11 x 14 Canvas
- Acrylic Paints (see colors below)
- Brushes (see sizes below)
- Traceable Template
- Graphite Paper
- Pencil
- Ruler (optional)
- Black Paint Pen or Sharpie (for ladybug)
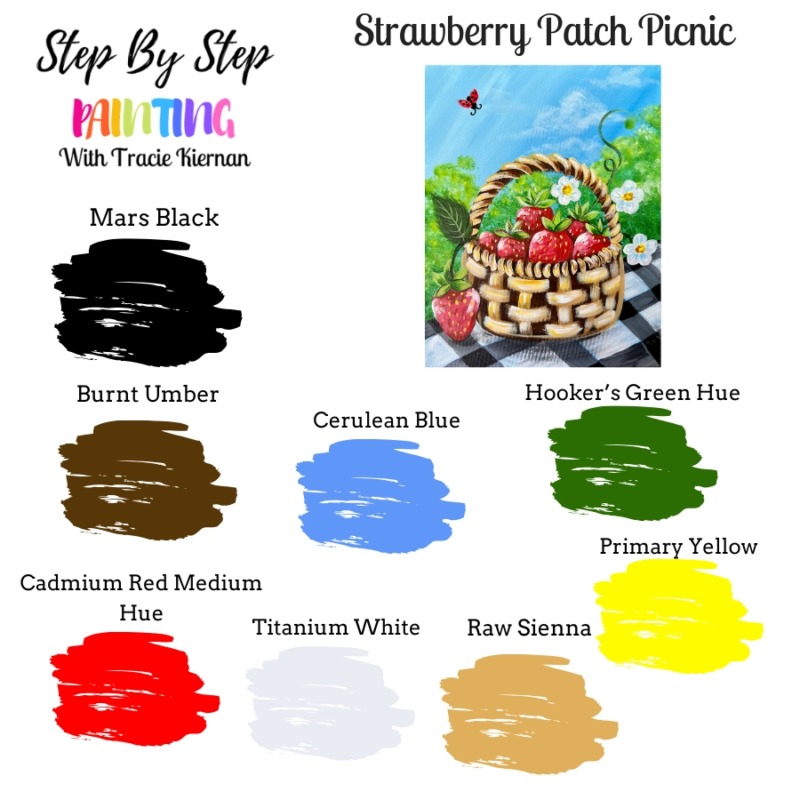
Colors:
- Cadmium Red Medium Hue
- Primary Yellow
- Hooker’s Green Hue
- Cerulean Blue
- Mars Black
- Titanium White
- Burnt Umber
- Raw Sienna
Brushes
Color Palette
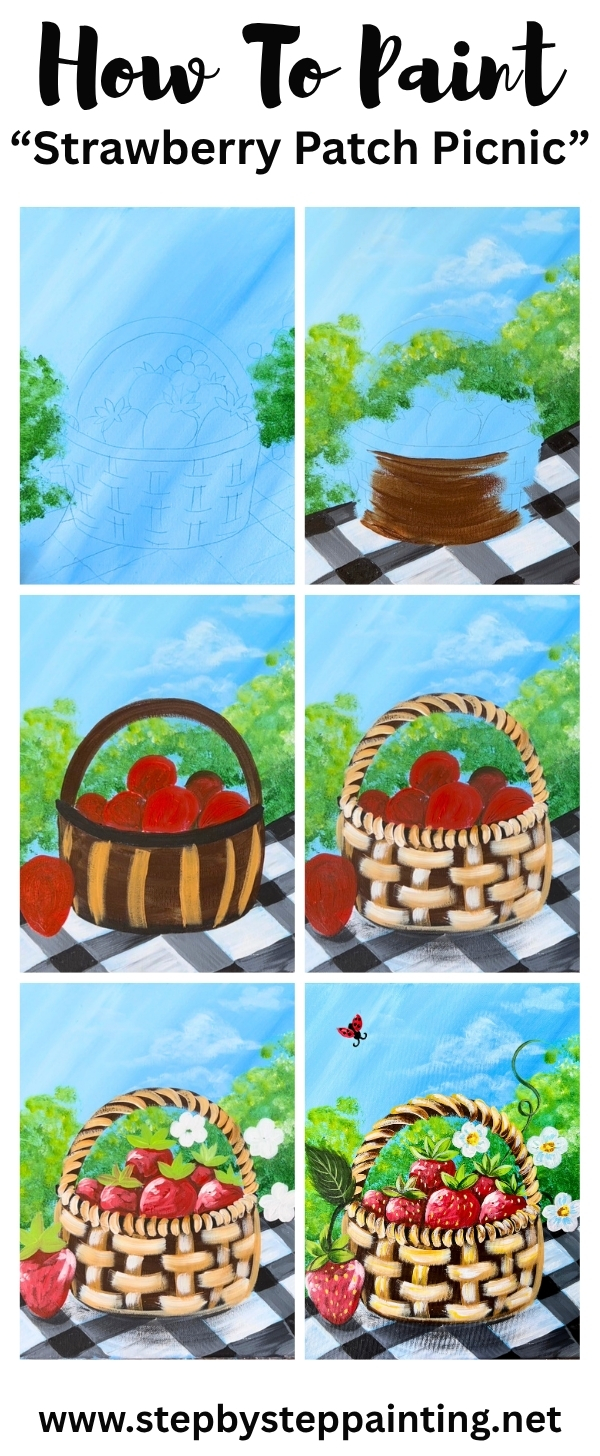
Directions At A Glance
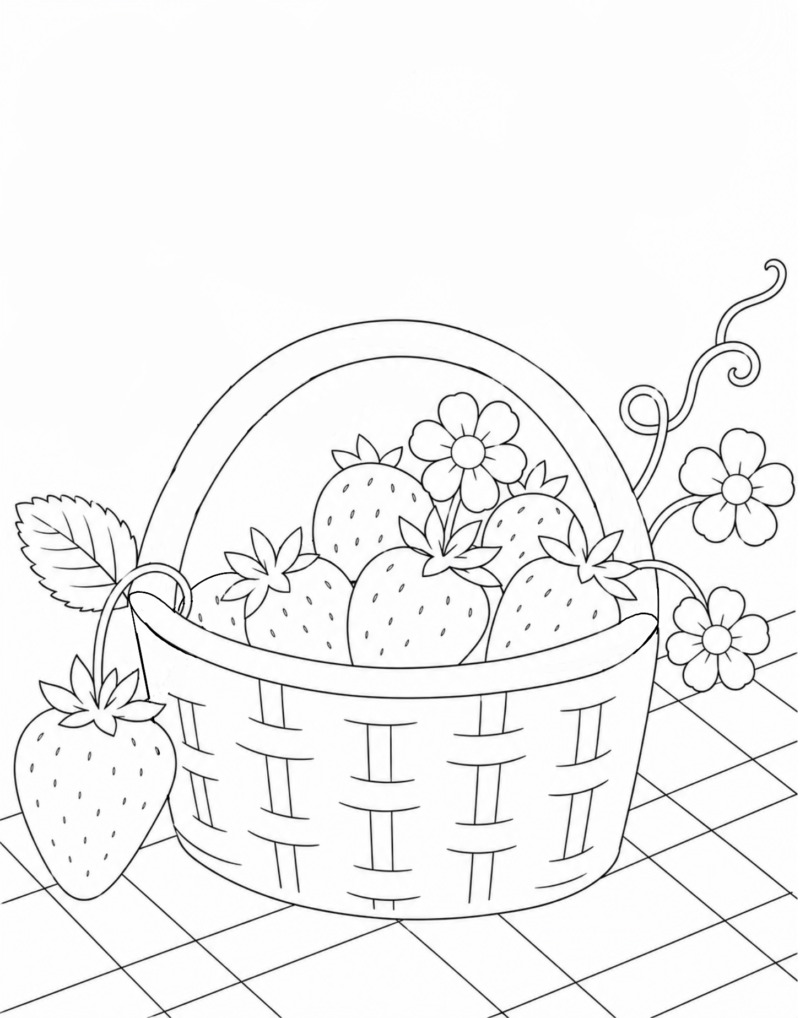
Traceable
We will be painting an “under painting layer” first and then transferring this to the canvas after that layer dries. Alternatively, you can trace this on a white canvas, outline with sharpie and then paint your layer over it.
Let’s practice that basket weave!
This is the same technique used in my Easter Basket Painting! If you haven’t seen or done that painting, here is a great practice exercise for painting that weave:
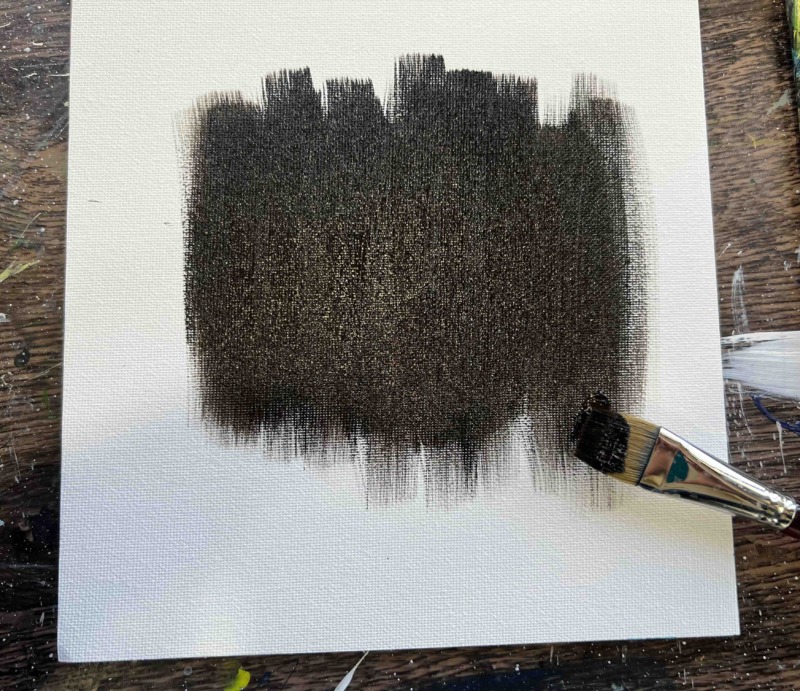
- To paint the basket weave, first start with a dark base. I mixed “burnt Sienna” and “mars black” to paint a square area. You could also make this a tab bit lighter but for this demonstration, we will make this very dark. Let this dry before going on…
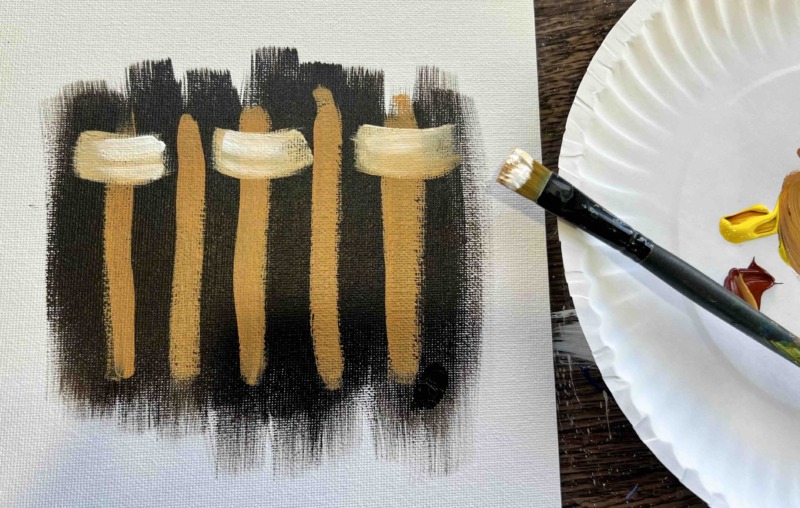
- Then paint the vertical “warp” pieces. For this demonstration, we can just paint them vertically. In the basket painting, they will bend a little bit to form the shape of the basket. This needs to be with a light, golden brown color. Mix “burnt Sienna” with “primary yellow” and “titanium white”. Use a #4 round brush and paint vertical, equally spaced lines. These lines don’t have to be fancy! And I made my about 1/4″ thick but you can make them thicker if you want.

- Then use the #12 bright brush (or any flat brush about 1/2″ thick). Load it into the same “light golden brown color” but this time add just a little more white into the color. You want it to be lighter or different than the vertical strokes so it will stand out. Use the full width of the brush to paint the horizontal “weft” marks. When you make these paint strokes, curve the stroke downwards a bit. This will give the weave a little bit of bend. Skip a vertical line and then do the next one! Try not to let your brush stroke touch the vertical stroke next to it. Release the pressure of the brush at the end of the stroke.
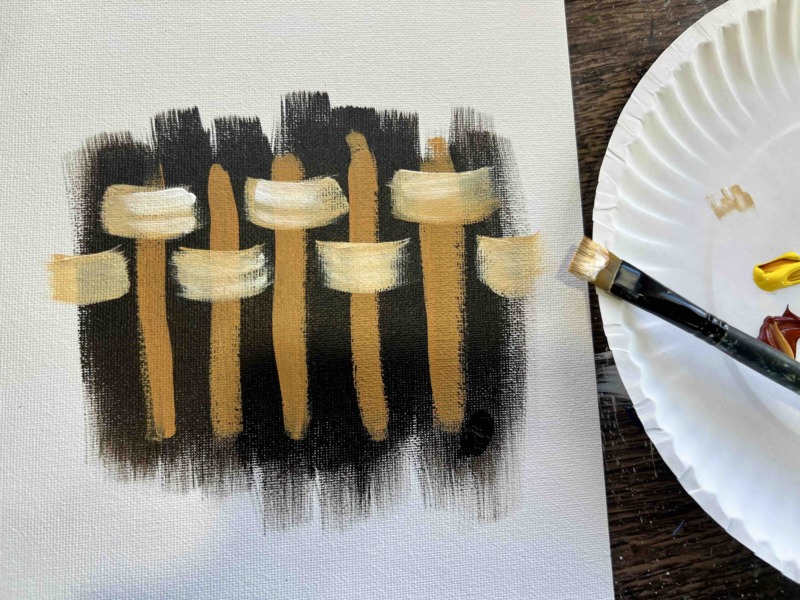
- Then do the opposite in the next row! Skip the opposite vertical strokes.
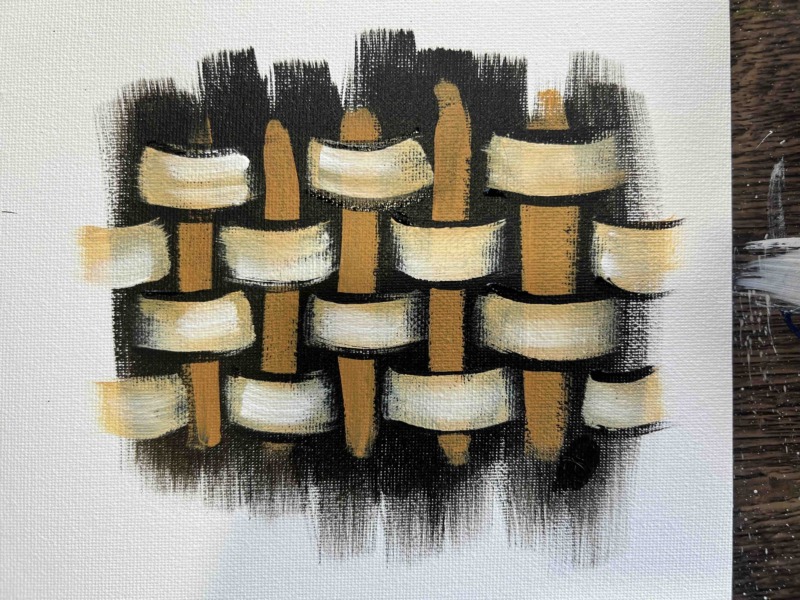
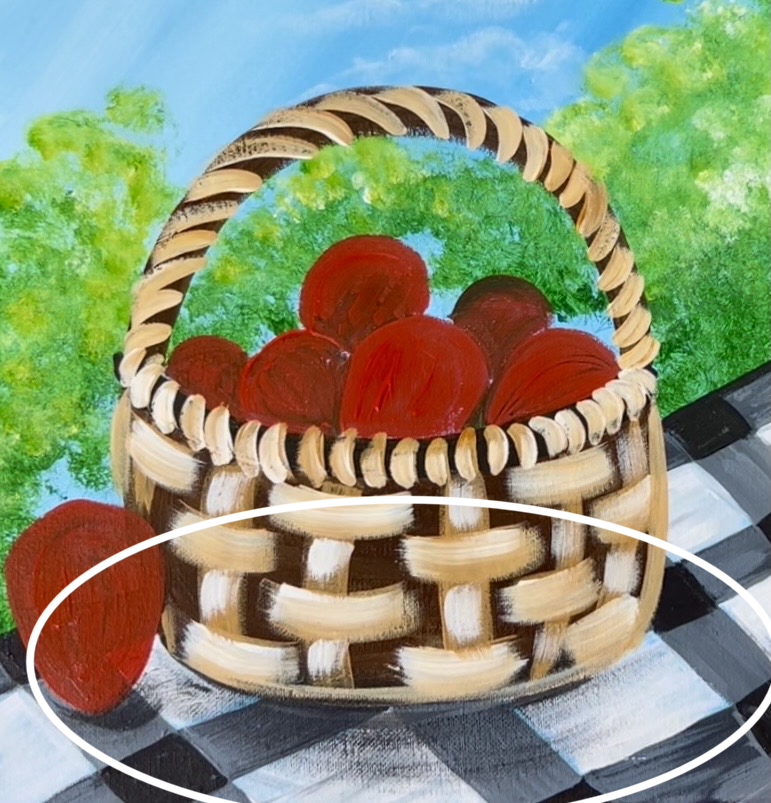
- And repeat to form the basket weave pattern! With each row, you are skipping every other vertical piece. That “shiny white” on the horizontal weaves is achieved by adjust just a bit more white to the paint brush and then brushing over your paint stroke several times. To get that “faded look” on the edging of the horizontal weaves, release the pressure of the brush so the paint stroke fades away.

- Optional: outline the horizontal weaves with a #4 round brush and mars black. This helps it to “pop” a bit more. I’m not sure if I like it outlined or simple like the previous picture. You could also experiment with different shades of brown or other colors for this technique!
Step By Step Directions
1. Paint Canvas Light Blue (under painting)
Paint the canvas an “under layer” color of light blue. Mix equal amounts of “titanium white” and “cerulean blue” together. Use the 3/4″ flat wash brush and paint diagonal paint strokes to fill up the canvas. Blend a little extra white towards the top where the sky will be.
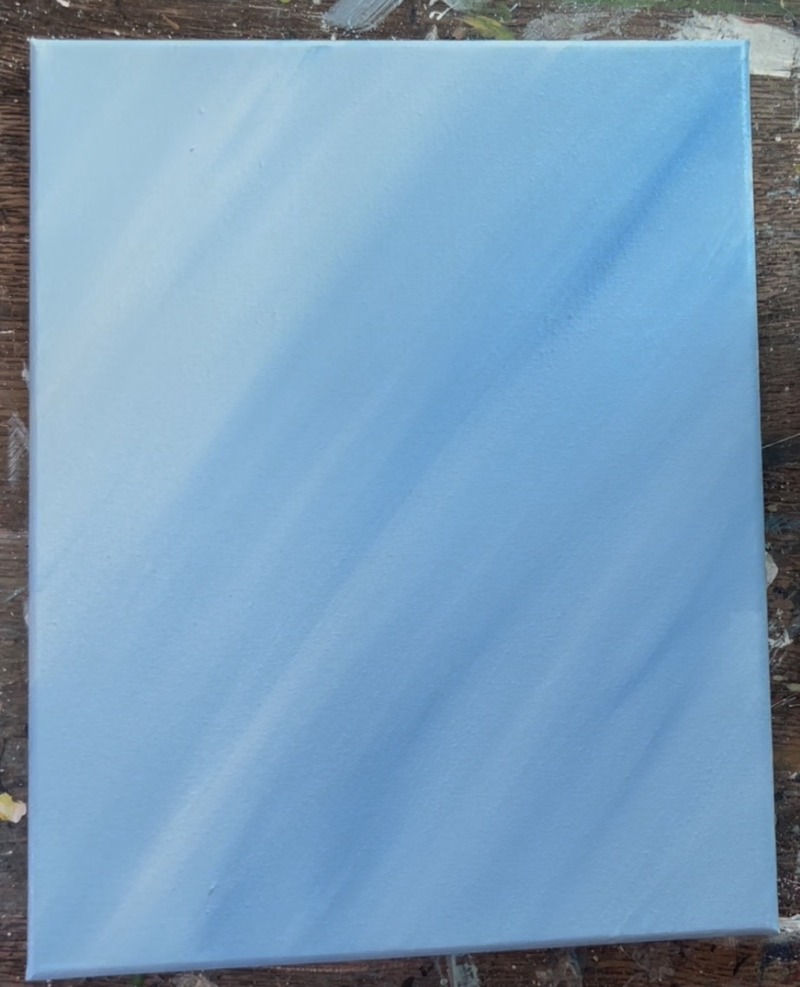
This should be a thin layer of paint (slightly water it down if needed). Wait for this to dry before going onto the next step.
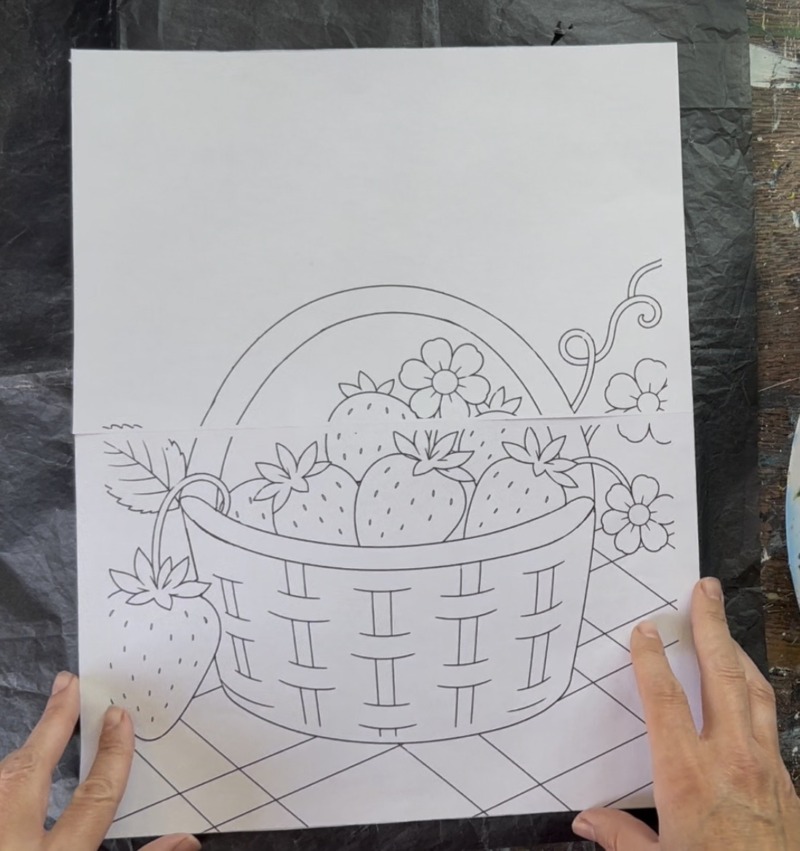
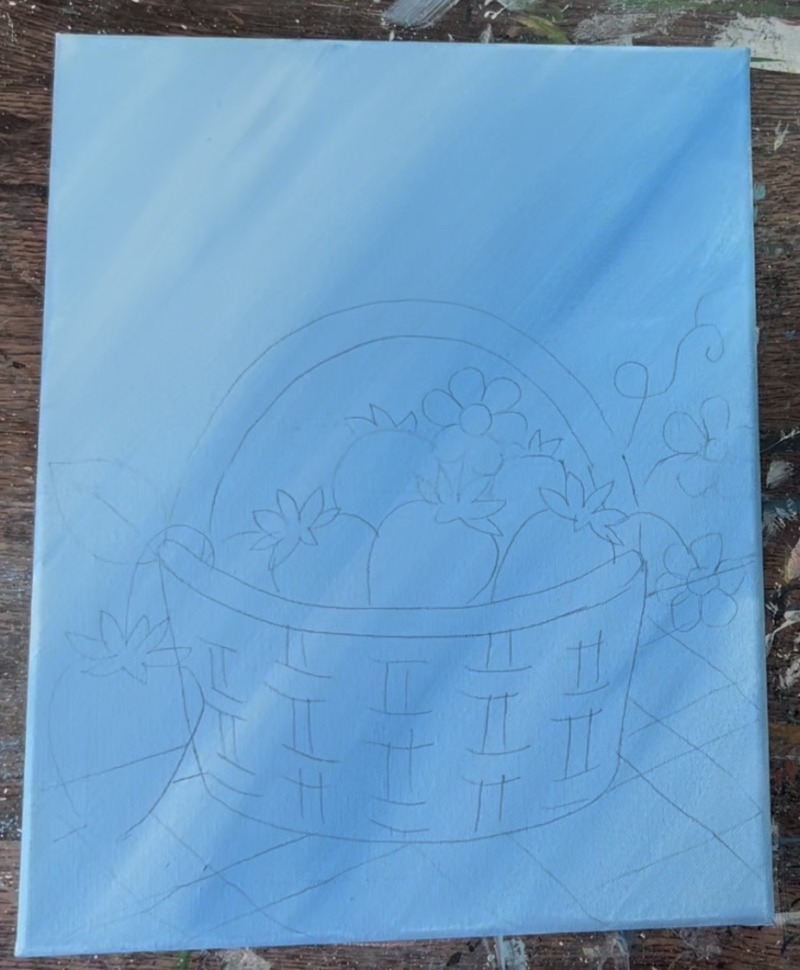
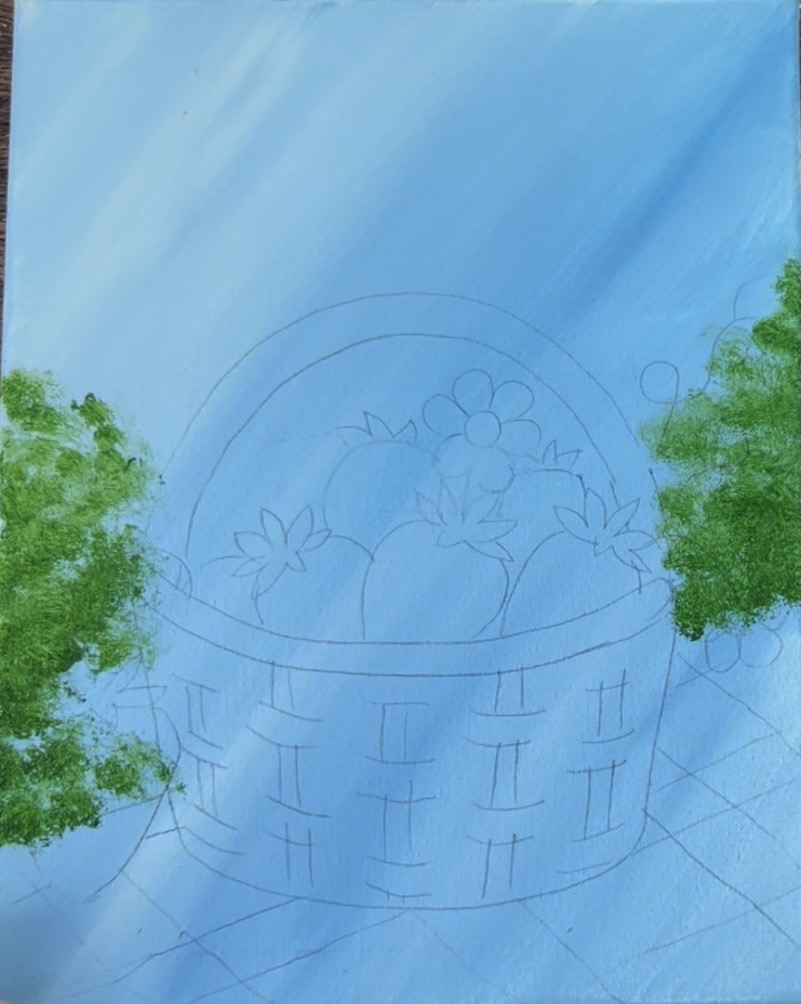
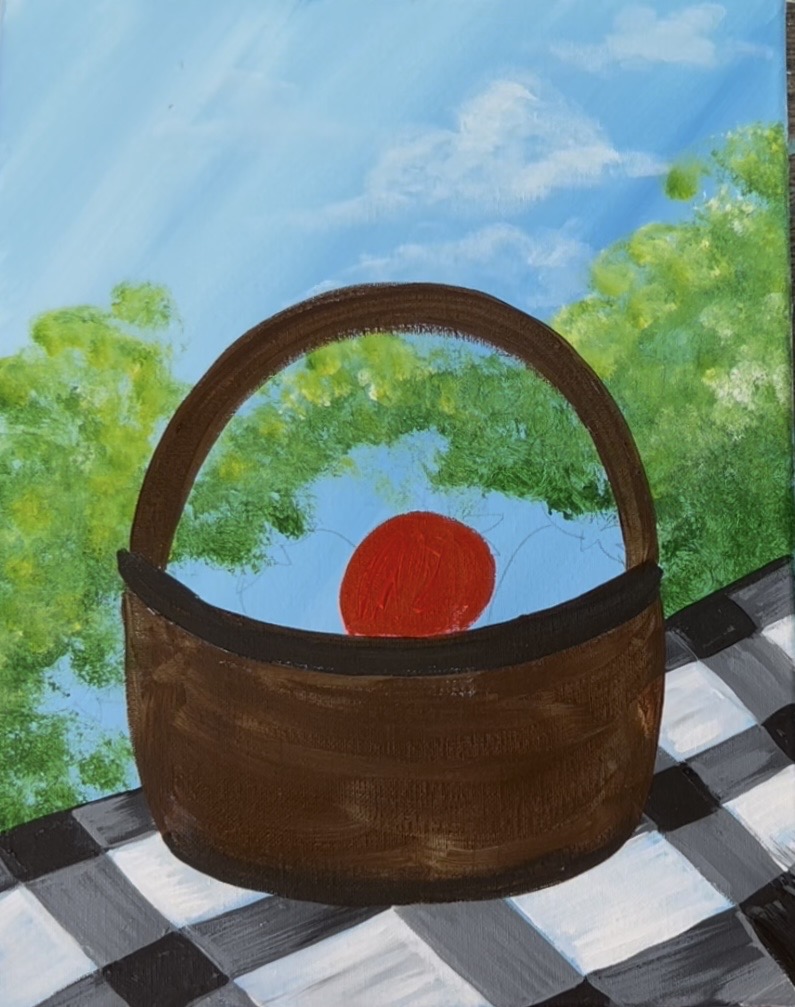
2. Transfer Basket & Strawberry Template To Canvas
Print out the template or hand draw the basket with strawberries. Place a sheet of graphite paper below the template. Position it so that it completely fits on the 11×14 canvas. Note: the two papers get taped together.
Then firmly trace with a pencil. You can trace all the lines or some of them! I like to just trace the basic shapes but not all the intricate details.
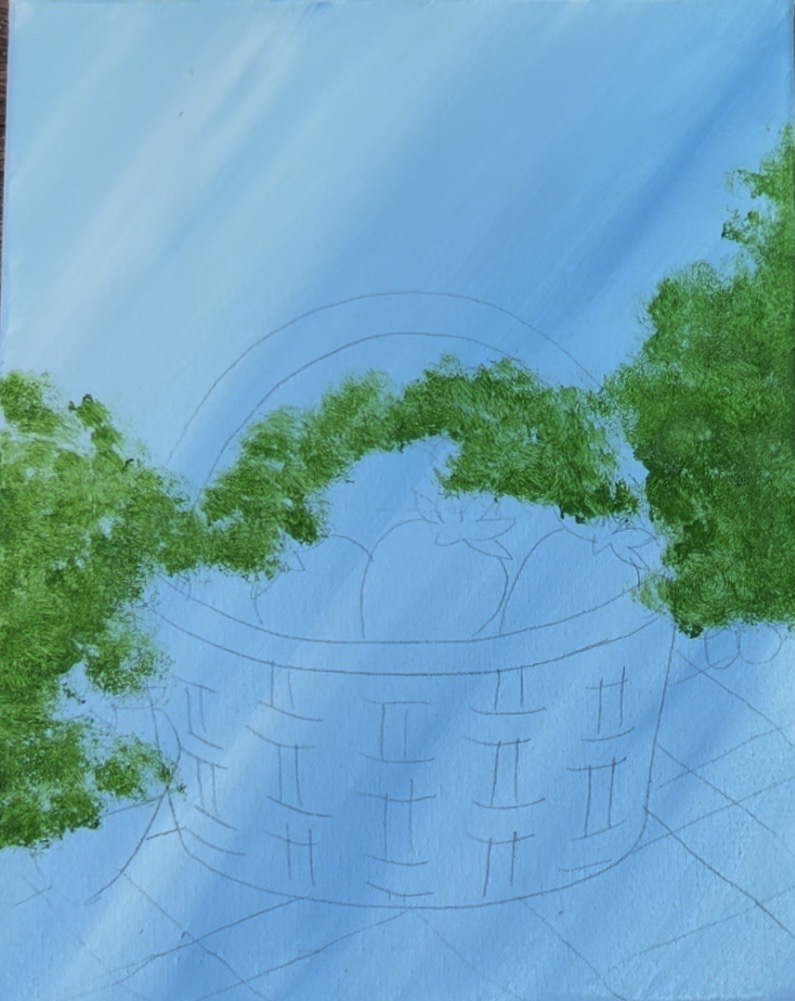
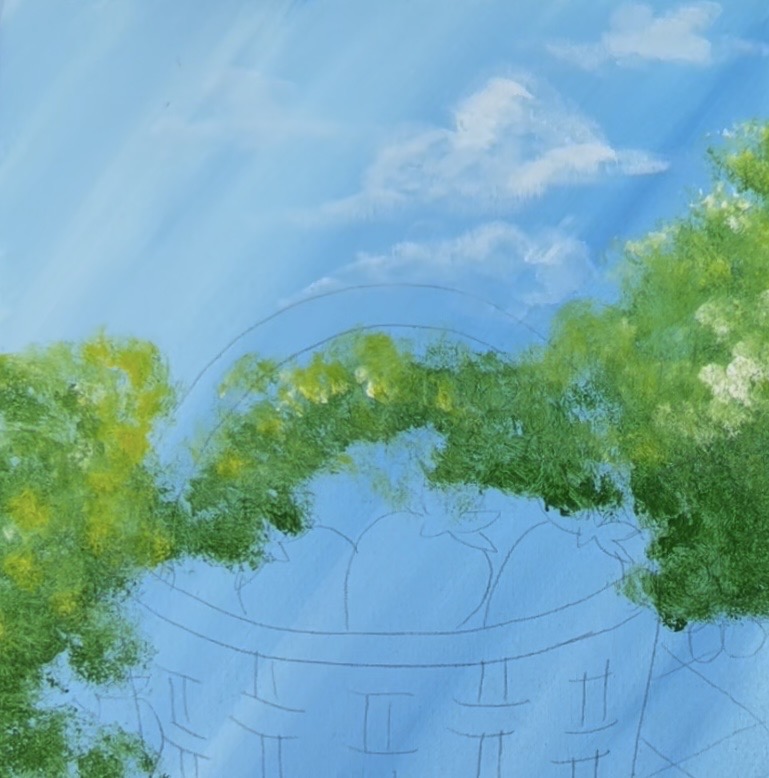
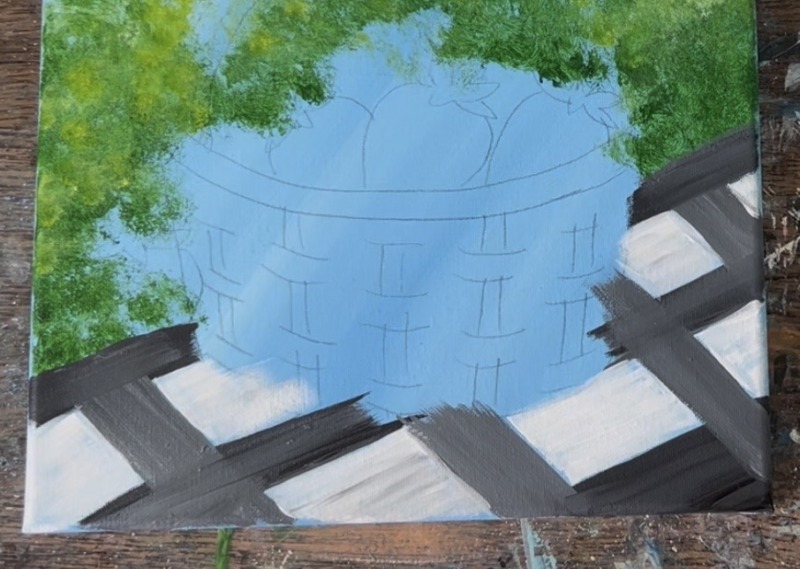
3. Sponge Paint Greenery Around Basket/ Background
Use a sponge to apply the greenery to the background behind the strawberry basket (above the “table line”). Start by loading your sponge in just “hooker’s green hue”. Then lightly dab the sponge to form the green bushes in the background.
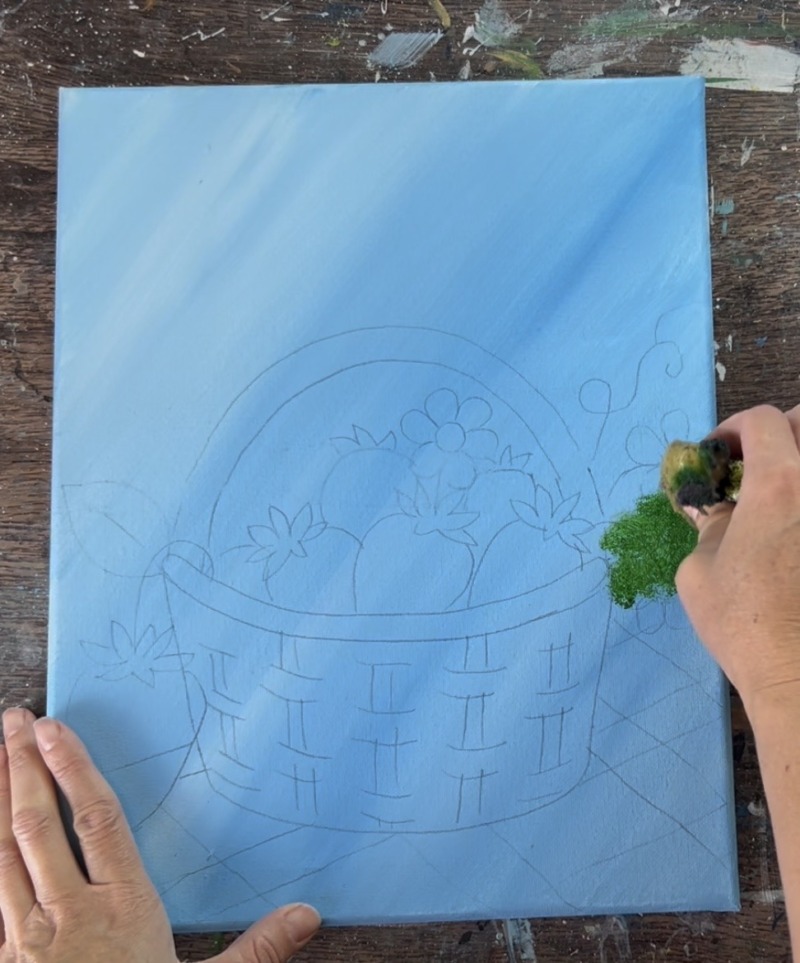
Go up about to the halfway point in the sky on each side of the canvas. Go around the basket and don’t paint over it. You may need to paint over some of the smaller things such as the flower and vine.
Then add a little bit of greenery behind the basket above the strawberries but try not to paint over too many parts of the strawberries. Note: you don’t have to cover all of the blue in the background of the greenery, it’s okay that some of our “under painting” shows through.
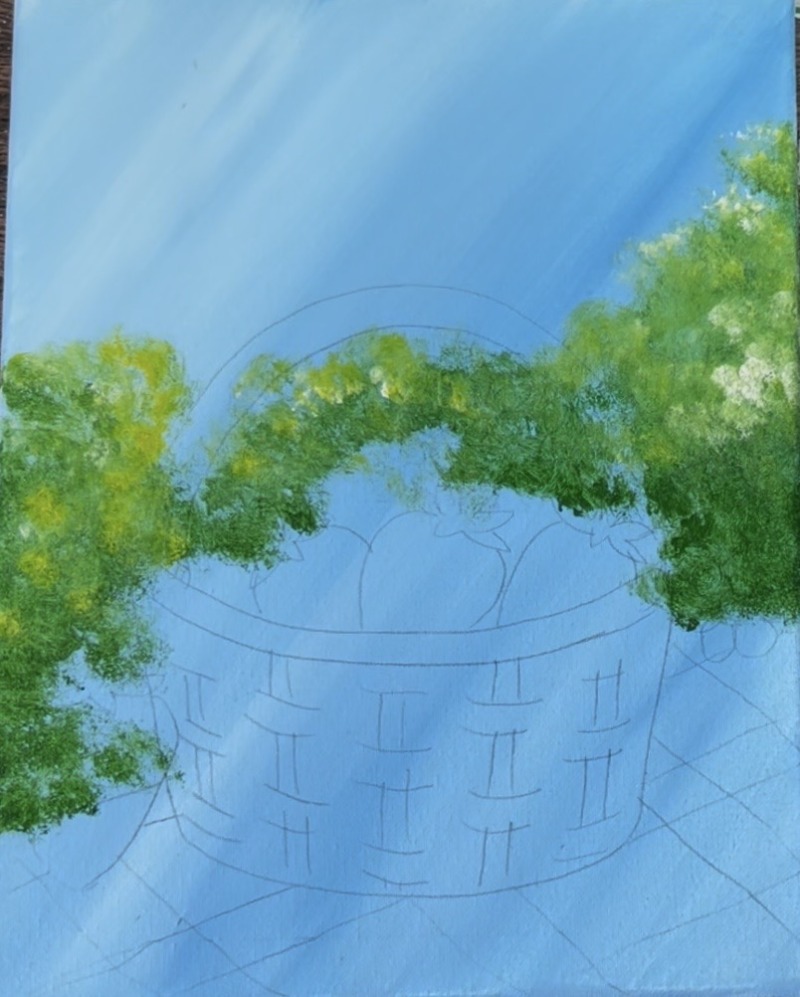
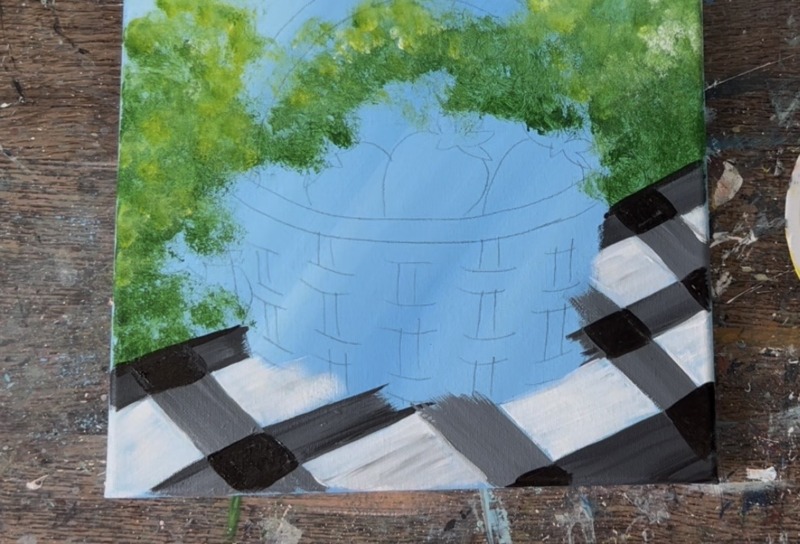
Next, we are going to highlight our greenery. Mix white and yellow into the green to create a light yellow green color. Use the sponge to only dab the lighter colors on the top of the darker greenery but leave the bottom dark and shadowy. This will give your bushes more depth.
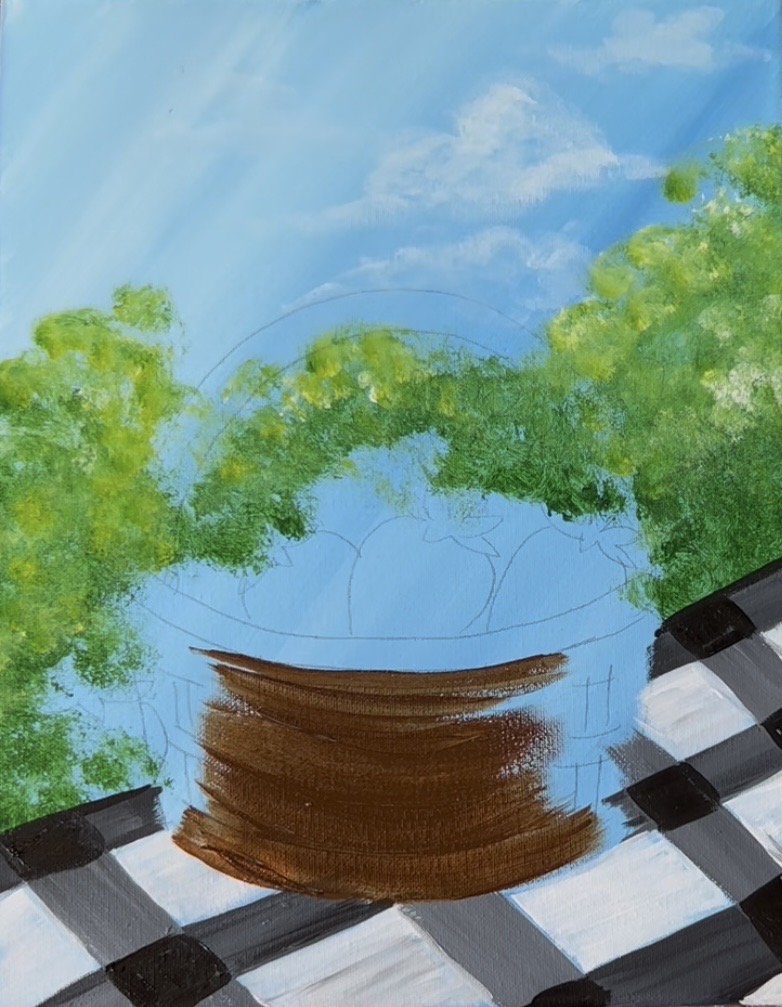
4. Paint Clouds (optional)
Use a #12 bright brush to “dry brush” light colored clouds in the sky. Start by mixing white with just a tiny bit of blue (so it’s not pure white). Then load the very light color onto your brush but wipe off excess paint. You only want a small amount of paint on the brush (think dry brush). Then paint in circular paint strokes to form a cloud shape. The cloud is rounded and “lofty” on the top and sort of flat on the bottom. Your color should be very thin, dry and translucent which is perfect for these types of subtle clouds.
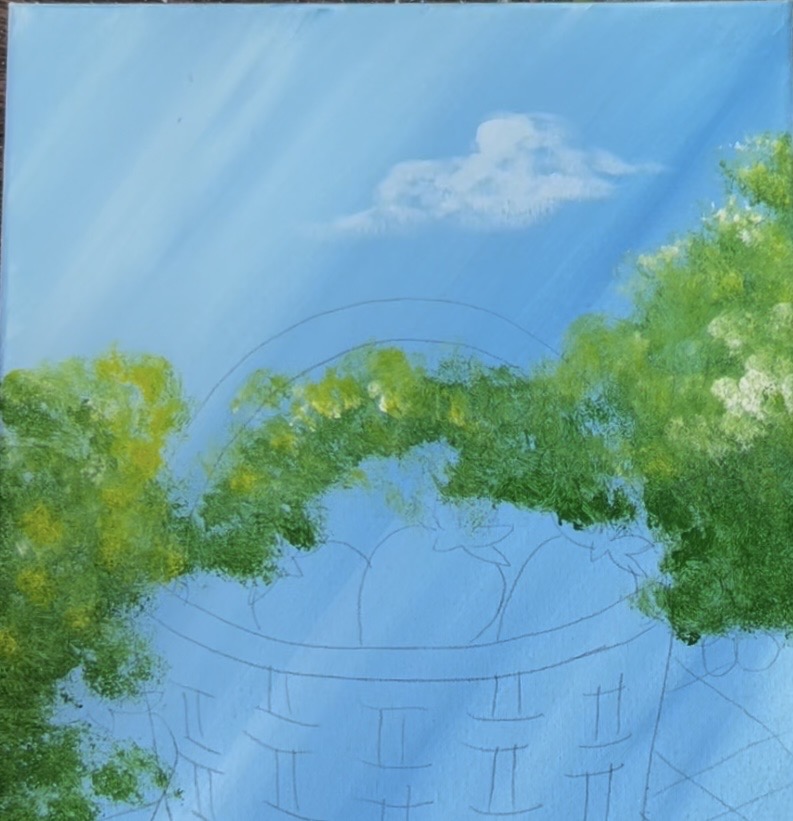
Repeat this to create several clouds in the sky. Keep them very thin and translucent. You can “highlight” your clouds but add just a tad bit more white to your brush and “repaint” the top curved edges of the clouds. This gives the clouds just a little more depth.
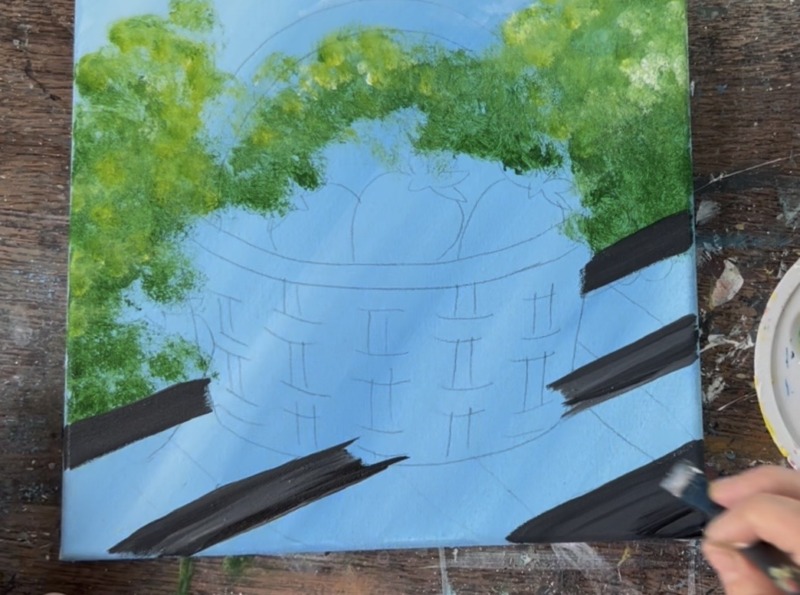
5. Paint Plaid Tablecloth
Use the #12 bright brush. Mix a dark gray color by mixing equal parts white and black together. Then paint the tree diagonal lines of the plaid pattern as shown below. Make sure to paint around the picnic basket.
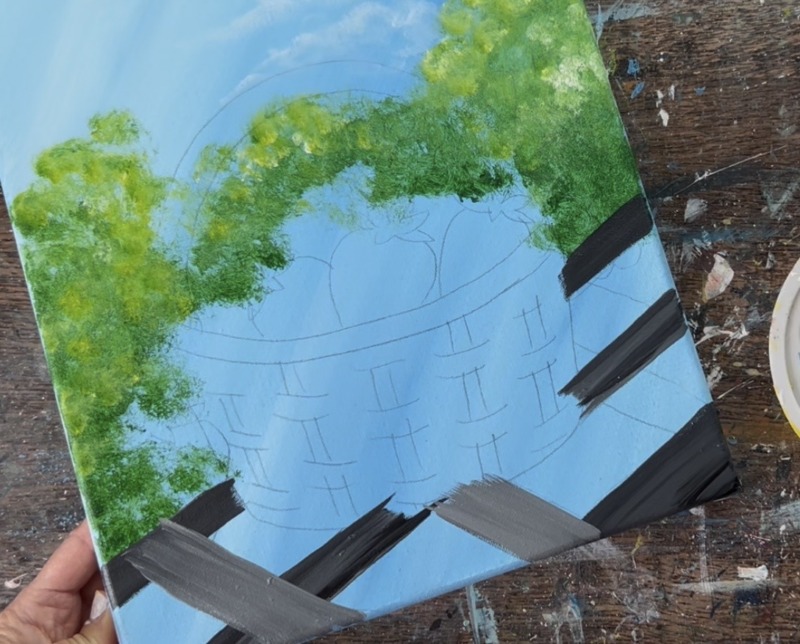
Next, mix a lighter gray by adding some white into that dark gray that you just used. Paint the four lines that are going the opposite direction on the table cloth.
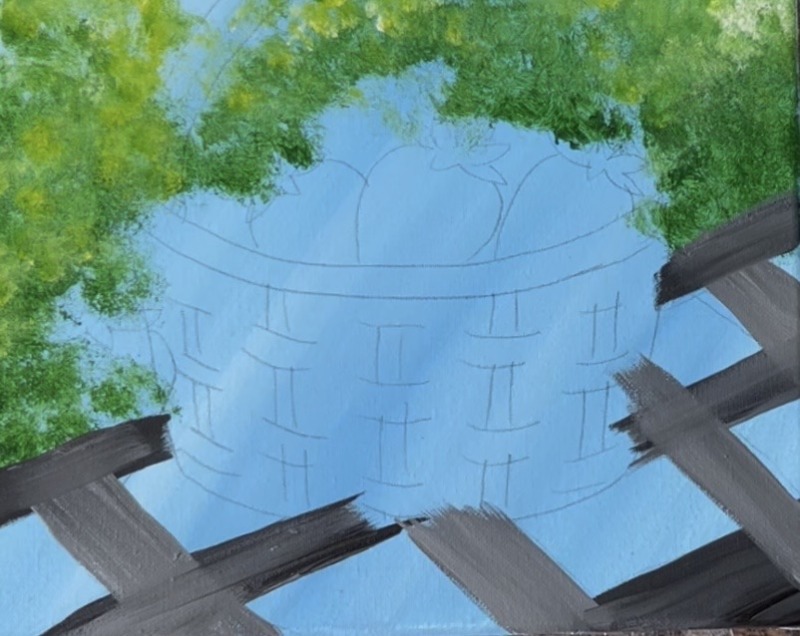
Next, use the #12 bright brush to paint the remaining light blue square with white. It’s okay to have some of the underpainting show through the white.
Wait for this to dry a little. Then use the #4 round brush and “mars black” to paint all of the small squares where the gray lines cross each other. This will complete the plaid pattern. Note: you can also touch up some of your lines with the white or gray paint.
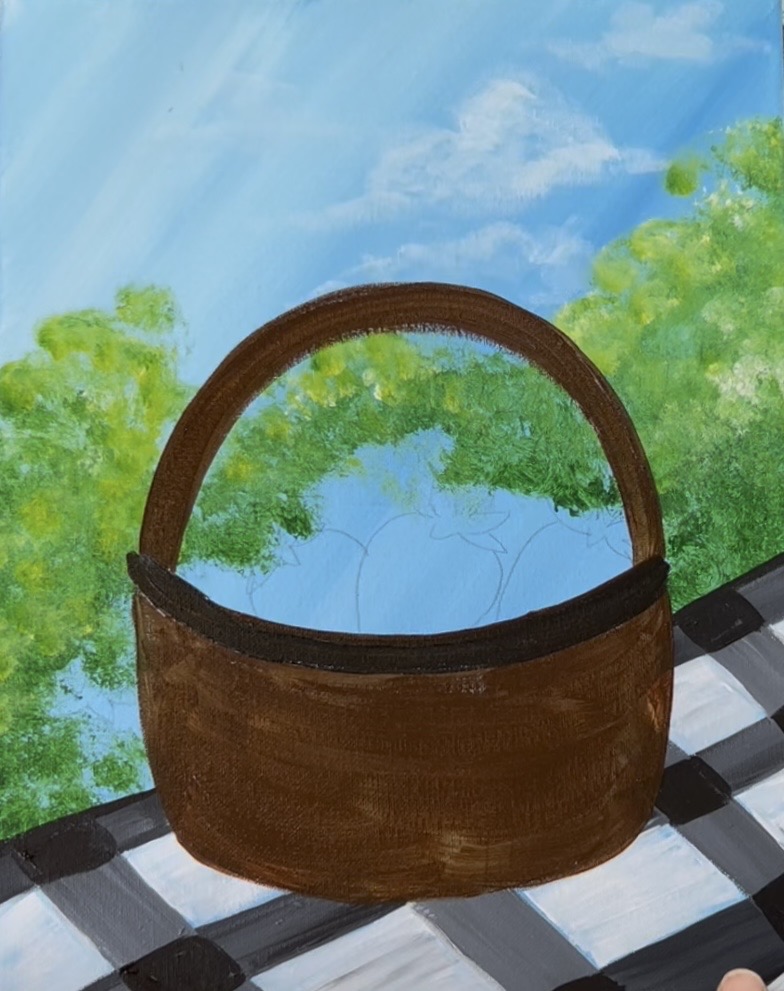
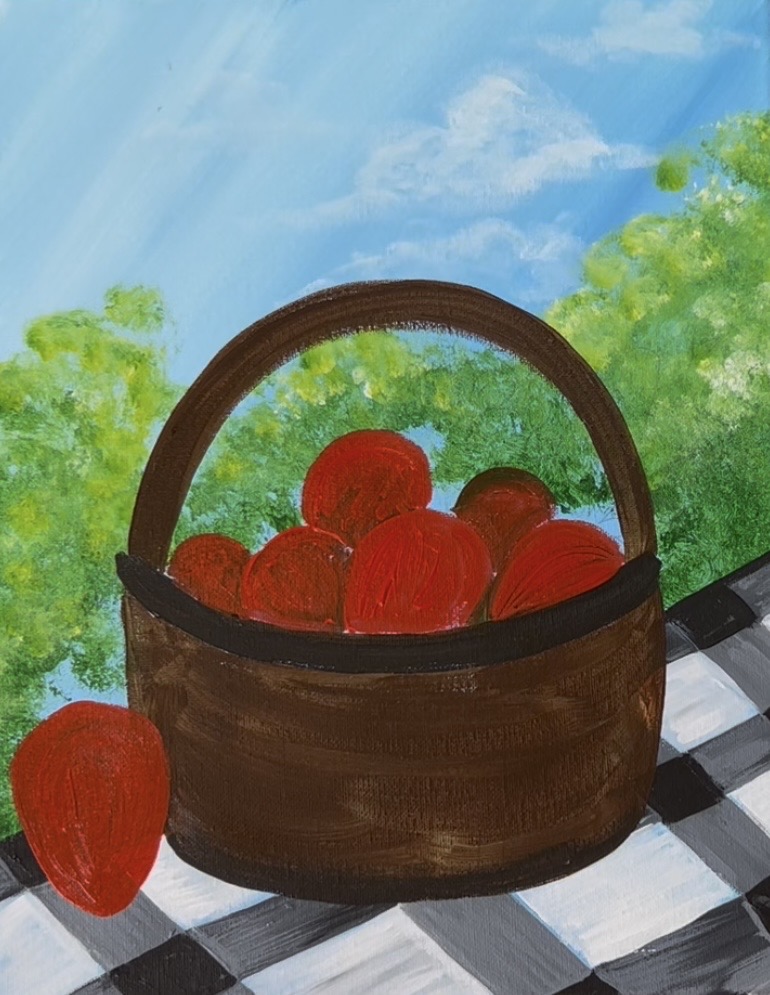
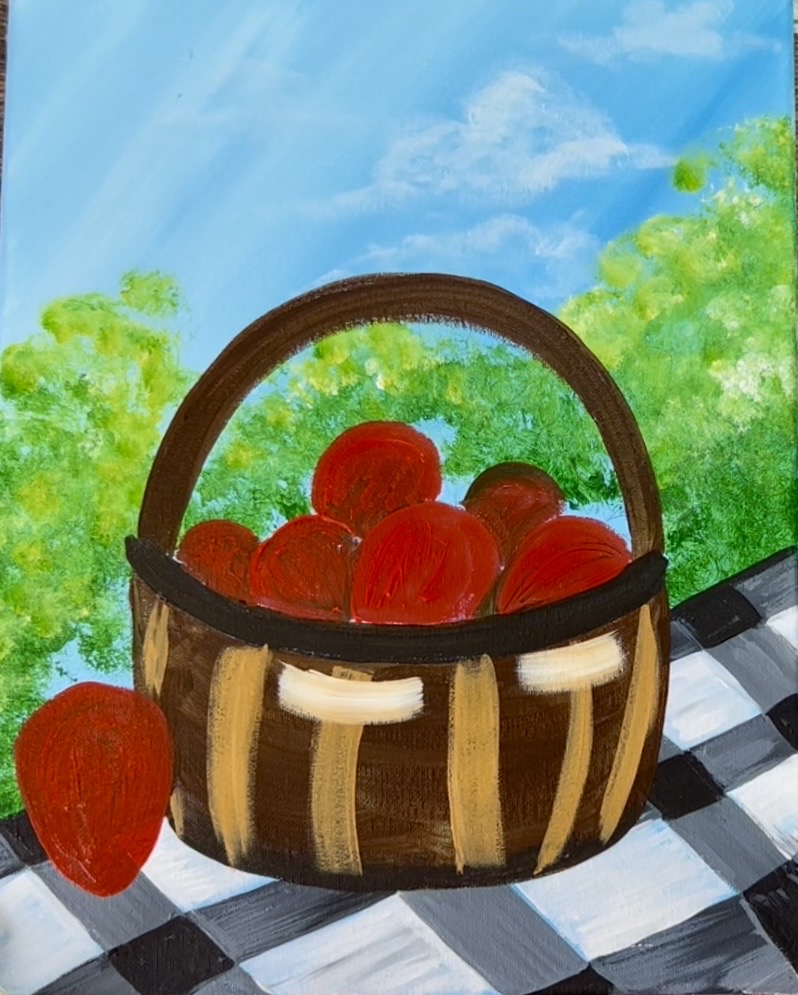
6. Paint Dark Basket Layer
Use the color “burnt umber” and the #12 bright brush to paint the basket. Paint this going in curved paint strokes.
Paint the handle of the basket. When it comes time to painting the “rim” of the basket, make that slightly darker so that it stands out from the rest of the basket. Mix equal parts brown and black together to create this dark color.
7. Paint Strawberry First Layer
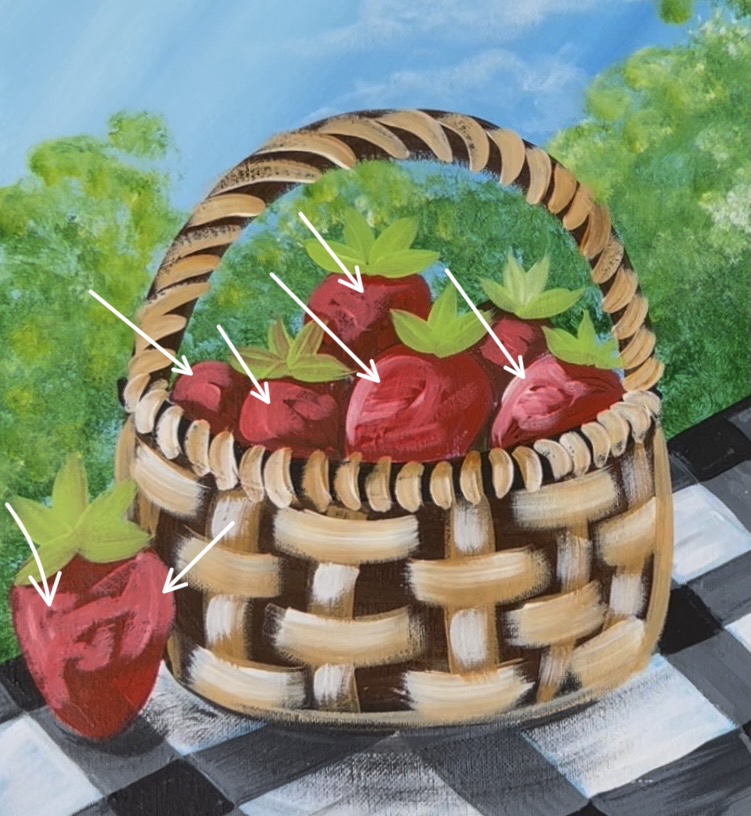
Use the color “cadmium red medium hue” and a #4 round brush to paint the strawberries inside the basket. Start with the center front strawberry and fill it in solid red.
Because there will be overlapping of strawberries, we will need to mix darker shades of red. To make a dark red, mix 1 part “hooker’s green hue” to 3 parts “cadmium red medium hue”. This is going to darken the red! Paint the strawberry that is to the left of the center strawberry with this darker red. The darker color will create a shadow effect.
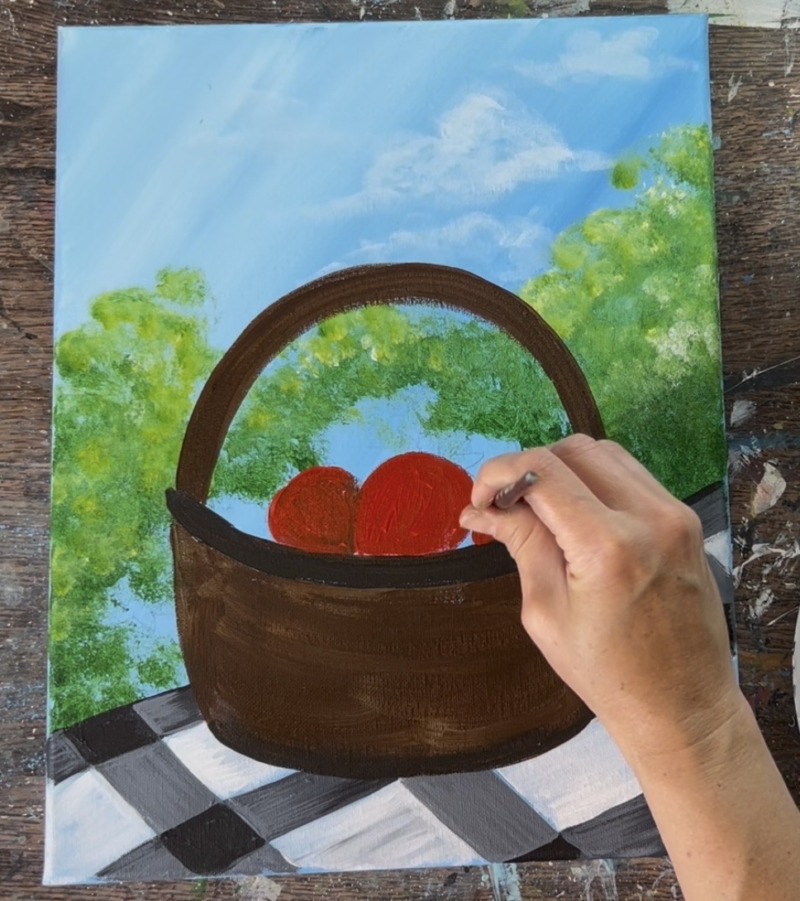
Paint the rest of the strawberries in the basket with the red. Use the “dark red” wherever the strawberries are overlapping. For example: strawberries in front will get the pure red but strawberries in back get some of the shadowy color blended in where it is being overlapped. The large strawberry outside of the basket will just be pure red for now.
Right now the strawberries will look very dull and somewhat flat. We will add highlighting to them later after this layer dries.
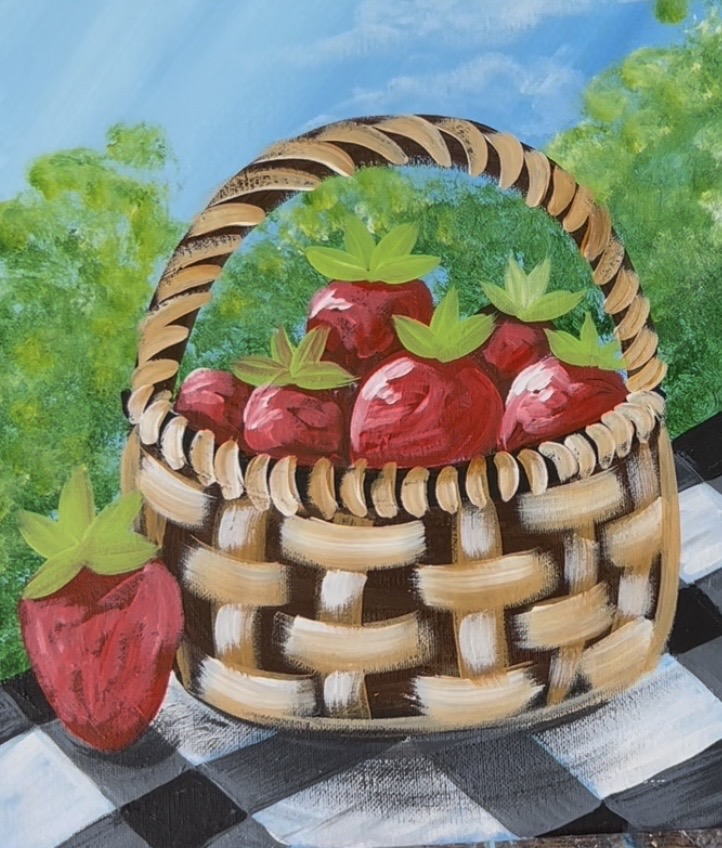
8. Paint Basket Weave
Use the #12 bright brush and “raw sienna” mixed with some “titanium white”. You are going to paint all the “vertical weaves” first. Start on the right side of the basket and paint two thin lines (about 1/4″ with to 1/2″ wide) that go slightly curved and parallel to the right curved edge of the basket. Then paint a more vertical line in the center of the basket.
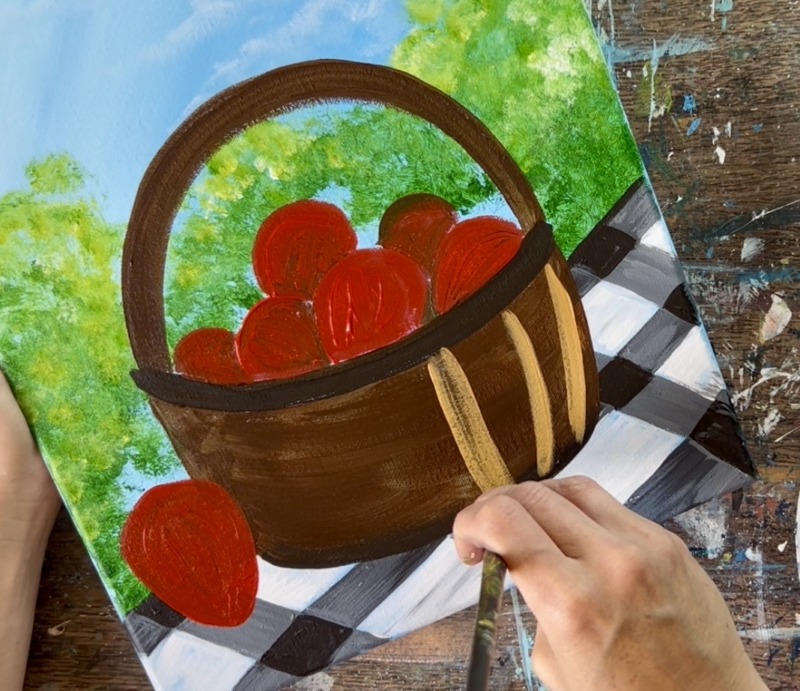
Paint three more lines on the left of the basket for a total of 6 lines.
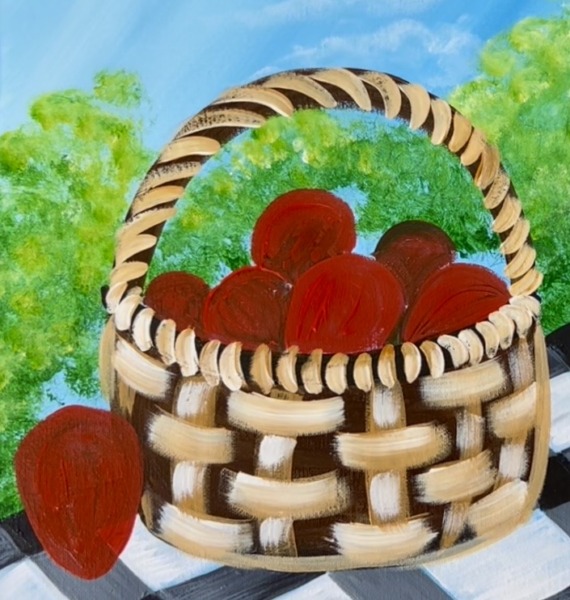
Then paint the horizontal weave pattern. This time you are going to paint sets of slightly curved lines that cross over/ overlap your vertical weave lines. Load the #12 bright brush in the same “raw Sienna + white” color but this time add a little more white so that it will show up brighter. Paint a curved line at the top crossing the vertical weave. Then skip a vertical weave and paint another curved horizontal weave line.
Continue painting these slightly curved horizontal weaves and make sure you are skipping a vertical weave. I painted them in rows and just made sure I skipped a vertical line for every horizontal weave I painted.
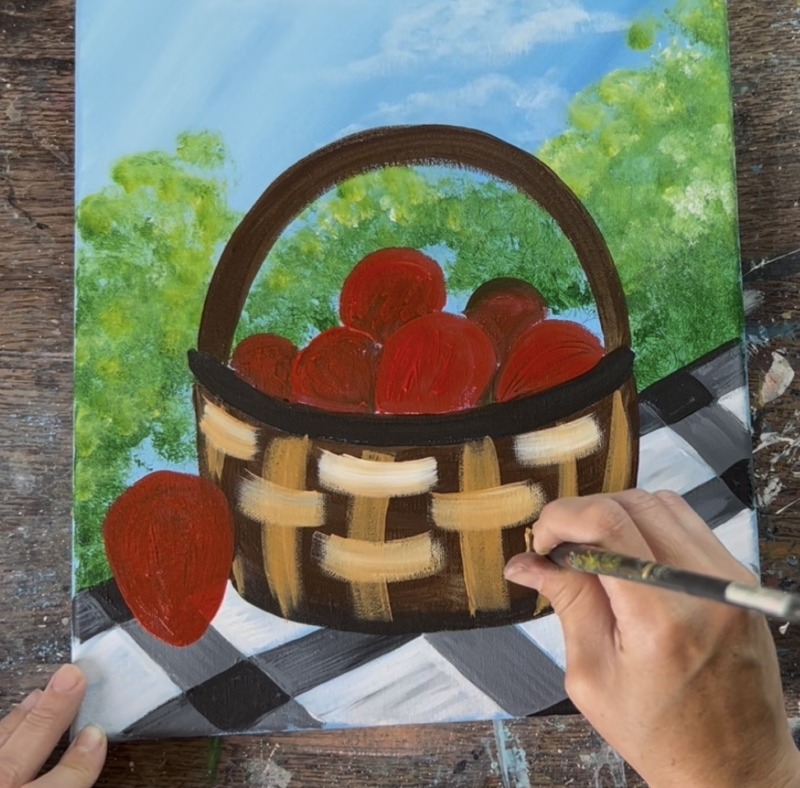
Fill the basket with the horizontal weaves.
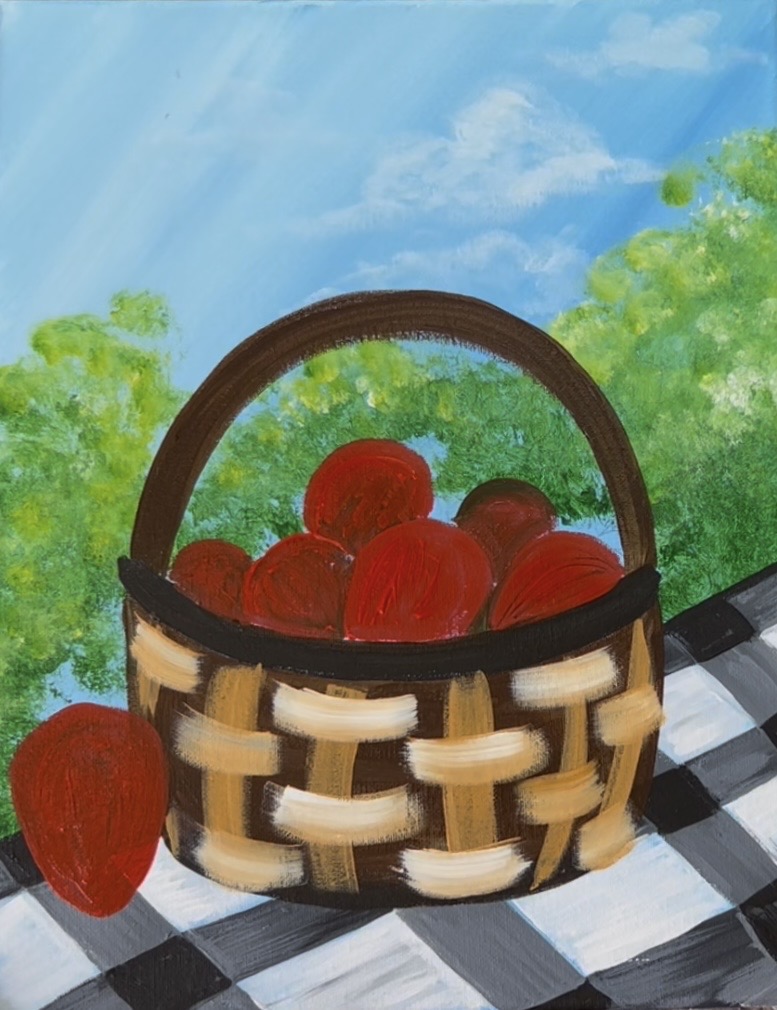
Optional: go back and highlight the weave pattern by loading the #12 bright brush in just a tad bit more “titanium white”. Lightly brush the light color over your weave lines to highlight them (but don’t cover all of the first layer).
Next paint the curved twisted texture along the handle and rim of the basket. Use the #4 round brush and the same “raw Sienna + white” color. Paint little curved marks going diagonal along the handle of the basket. Be sure to leave a little sliver of dark brown between each of the curves.

Do this all along the handle of the basket. Then repeat this along the rim of the basket. This time the little curved marks are going more vertically instead of diagonally.
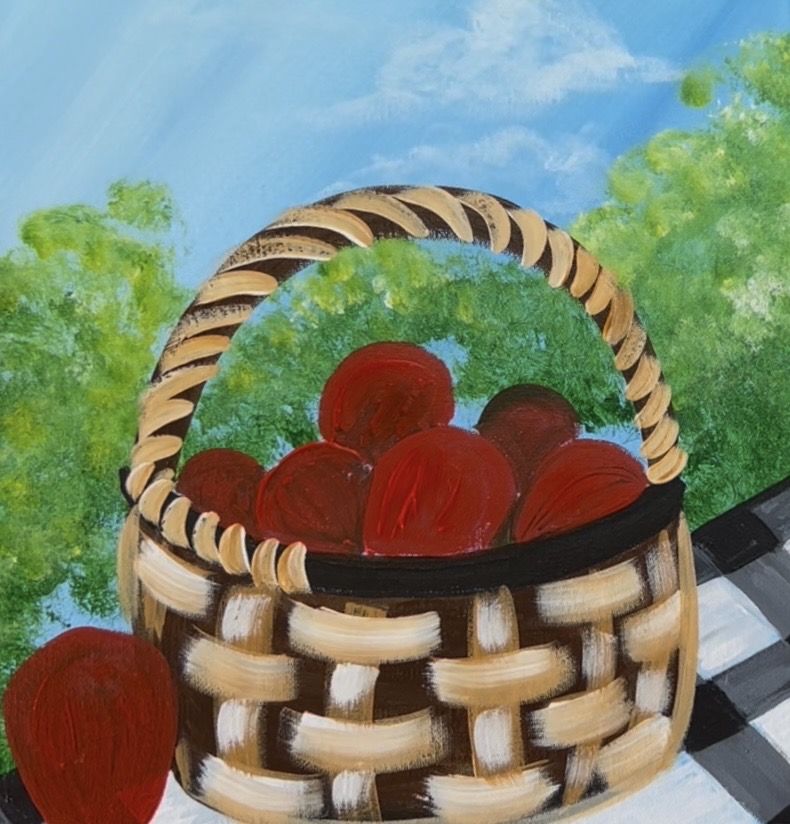
The curve will change from going one way to the opposite way along the rim of the basket.
9. Paint Shadow
Use the #12 bright brush to “dry brush” shadows under the basket and strawberry. Load the brush into “mars black” and then wipe the brush so only a small amount of paint remains. Lightly brush black shadowing under the basket going in a curved direction. Your paint should show up very see-through and dry! This creates a shadow effect. Do the same under the large strawberry to the left of the basket.
10. Paint Strawberry Leaves
Mix a light yellow green on your paint palette by mixing equal parts white, yellow and green. Add more white if needed to lighten the green up further. You want to create a light green that stands out against the darker greenery from the sponge painting in the background. Then use the #4 round brush to paint narrow rounded/ pointed leaves on the tops of each of the strawberries. These are simple 3-5 bunches of leaves that fan outwards.
11. Highlights On Strawberries
In this next step we will try to get these strawberries to “pop” more because right now they are kind of “dark” and “flat”. I did this more expressively with very loose paint strokes.
Start by mixing equal parts “red” and “white” together to make a light red. You don’t want pure white yet! We will work our way from dark to light to build up depth in these strawberries.
Each of the strawberries will have a highlight on the left sides. Start by lightly outlining the left side of the strawberries and then paint a few loose, expressive strokes in the middle of the strawberry with the light red. Leave your shadowy colors alone. You can kind of “scribble” your paint strokes and leave some of the color from the under dark red layer still showing through.

Apply this to each of the strawberries! For the strawberry outside of the basket, I did the highlights on both the left and right sides.
Take your “light red” and add more white to it. Then add more highlights to the left sides of the strawberries. This time add them just on the very upper left edges but don’t add too much of this brighter color. Just a few “dabs” is all that is needed and this will create even more brightness in the strawberries.
If needed, you can add just a small amount of pure white on the the left sides of the strawberries for even more brightness.

12. Paint Flowers
Use the #4 round brush and “titanium white” to paint strawberry flowers. Note: the template has 6 petal flowers but strawberries have 5 petals. I painted them with 5 petals. These are simple petal shapes. First paint the floating flowers without stems or centers.
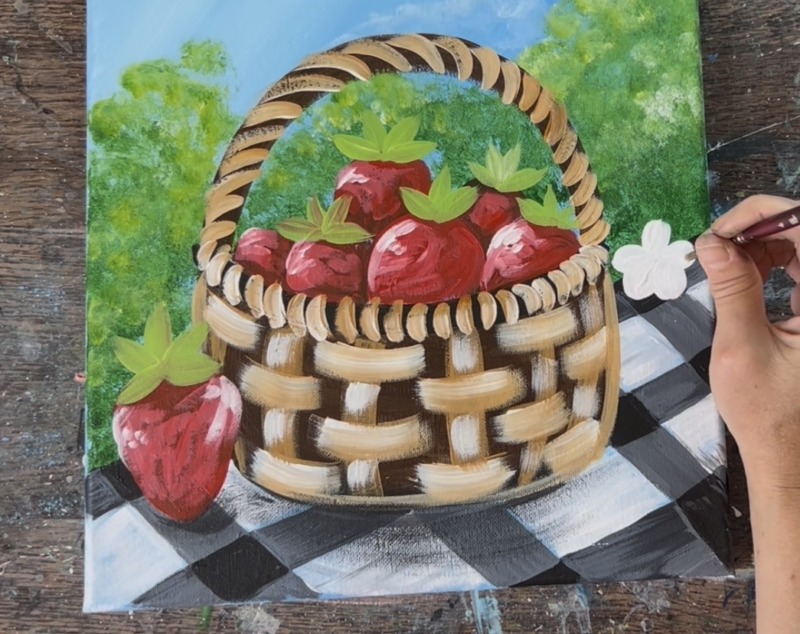
Let this dry before detailing the flowers.
13. Paint Vines & Leaf
Mix a very dark green on your paint palette by mixing 1 part “mars black” and 3 parts “hooker’s green hue”. Slightly water this very dark green down. Then use the #4 round brush to paint a curling strawberry vine sticking up and out of the basket. Paint stems that attach to the flowers and attach to the large strawberry hanging out of the basket.
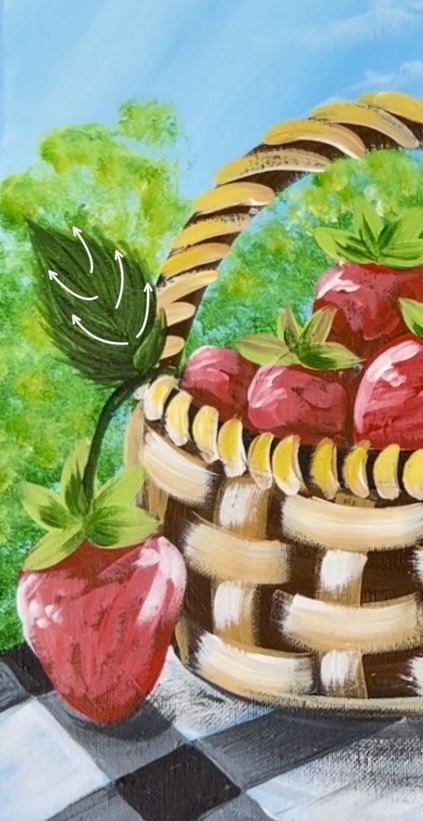
Paint a large leaf attached to the large strawberry on the left. Then add just a small amount of this dark green on the bottom of the light green strawberry leaf tops. Drag the dark green from the bottom and slightly upwards.
Optional: add some spiky “edging” on the large strawberry leaf on the left. I used a #8 long round brush to drag paint strokes outwards from the edge of the leaf to create a “spiky” point. Start each of the strokes from the center of the leaf and outwards. This will create textured edgings.
14. Paint Seeds On Strawberries
Tip: you can use a paint pen for this if you have a yellow one!
Mix equal parts yellow and white together to create a light yellow. Use any of the round brushes to paint tiny little vertical oval “dashes” in columns on each of the strawberries.
The seeds painted in columns go in a slightly curved direction along the shape of the strawberry. Paint these light yellow seeds on all of the berries.

15. Paint Yellow Inside Flowers & Details On Leaves
Use the #4 round brush to “stipple” circle shapes on the interior of all of the flowers (overlapping the petals). Then use light blue (mix white with a tiny amount of cerulean blue) to paint little dashes on the bottoms of all of the petals (for shadowing).
Use the #8 long round brush and a light green (mix white with yellow and green) to paint a line down the middle of the large leaf and diagonal lines going outwards from the center.
Use the #8 long round brush and the ver dark green (green mixed with black) to lightly outline the strawberry leaves. This can help create contrast in the leaves on the tops of the strawberries especially the ones that overlap the green sponge paint in the background. You can also lightly outline the actual strawberries with this dark green to help define the shapes more.
16. Paint Ladybug
I used a sharpie to create the “cutesy” ladybug for this step! You can use a black paint pen or paint brush. Start by drawing or painting an oval for the body and a small semicircle for the head. Draw or paint a set of antennae.
Then use the #4 round brush to paint two white wings going outwards. These are pointed oval shapes.
After the white dries, use red to paint the wings.
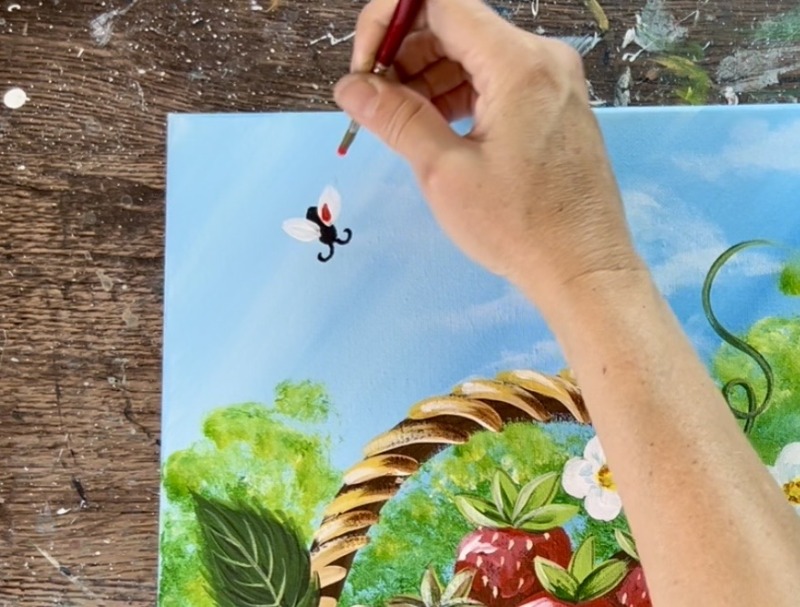
Use either the paint pen or the round brush to paint little black dots for the spots.
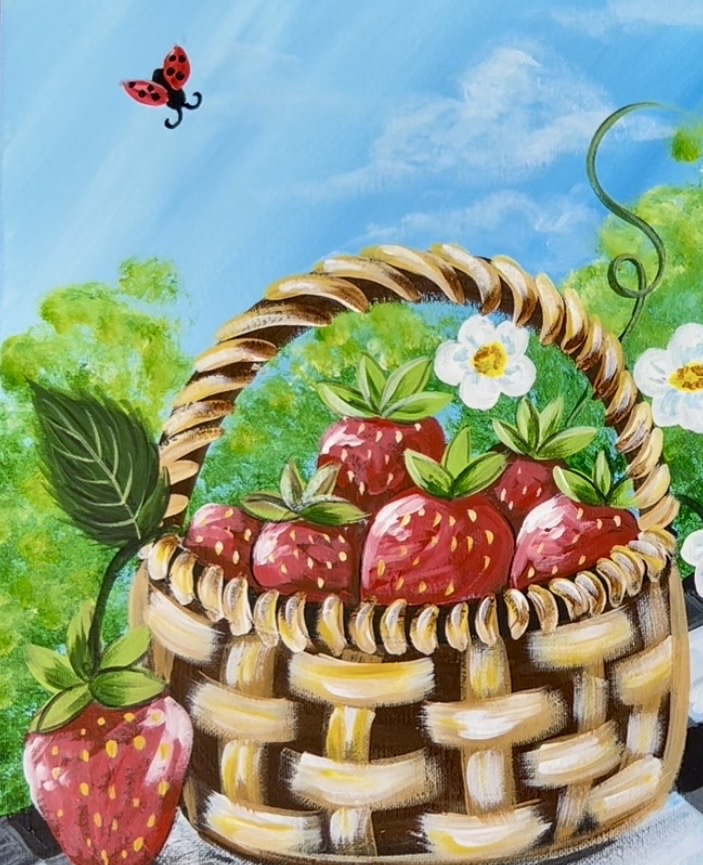
Finished!
