

Would you like to save this?
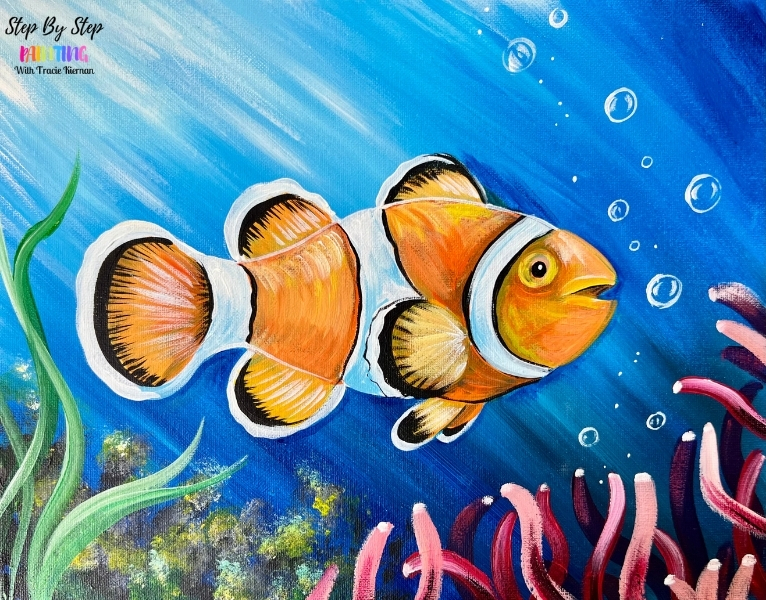
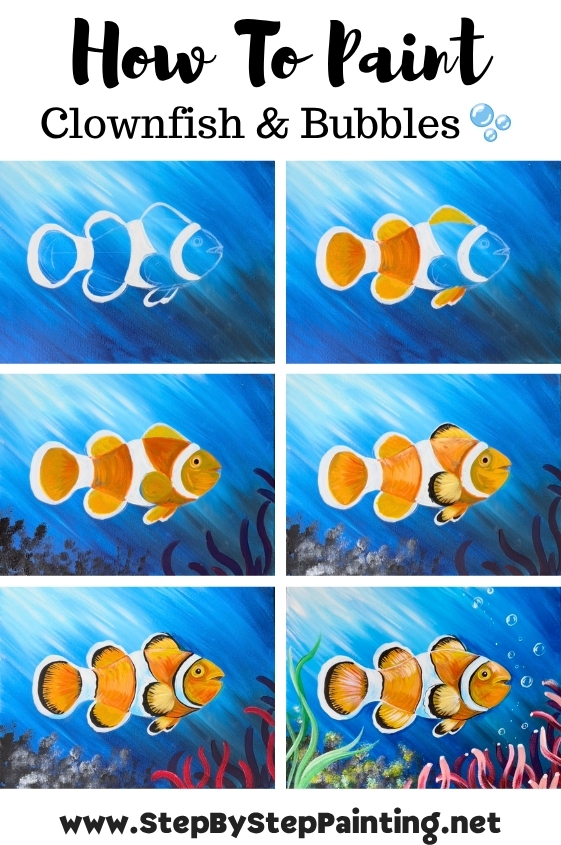
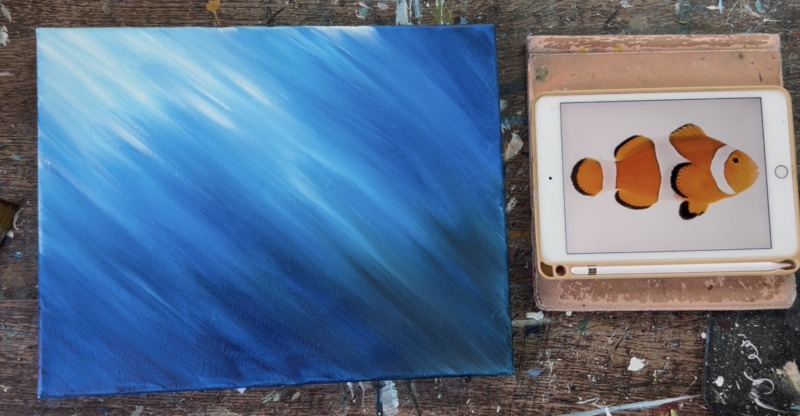
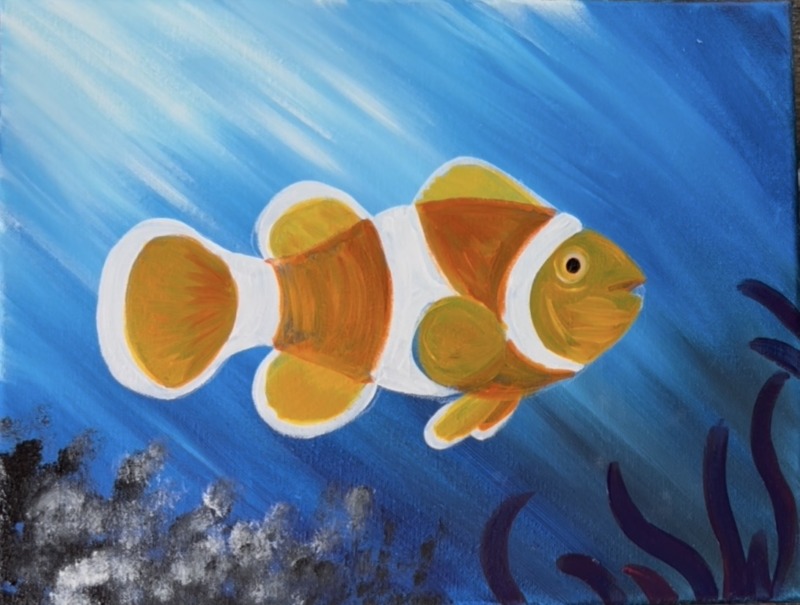
This tutorial will show you how to draw and paint a realistic looking clownfish! We will paint the background first, then draw a clownfish by looking at a “reference photo” and then paint the clownfish in with detailed shading and highlighting! Finally, we will paint some fun seaweed, sea anemone and coral in the background.
This is more of an advanced tutorial because of the detailed rendering in the fish. To simplify things a bit, you can use my template to skip the drawing portion and focus more on the painting.
Enjoy and happy painting!
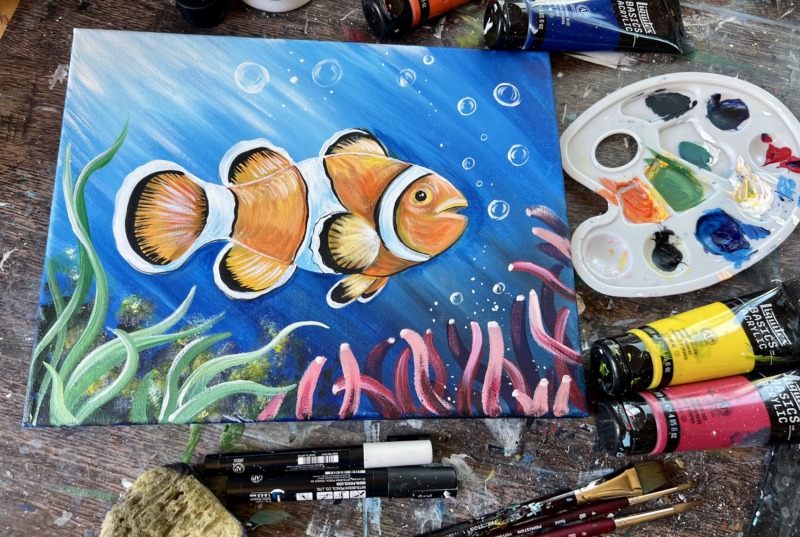
Materials Needed:
Clownfish Painting Tutorial

Create a detailed clownfish painting with acrylics on canvas.
Materials
- Acrylic Paints (see colors below)
- Brushes (see sizes below)
- 11 x 14 canvas (or any size canvas)
- White Chalk Pencil
- Sponge
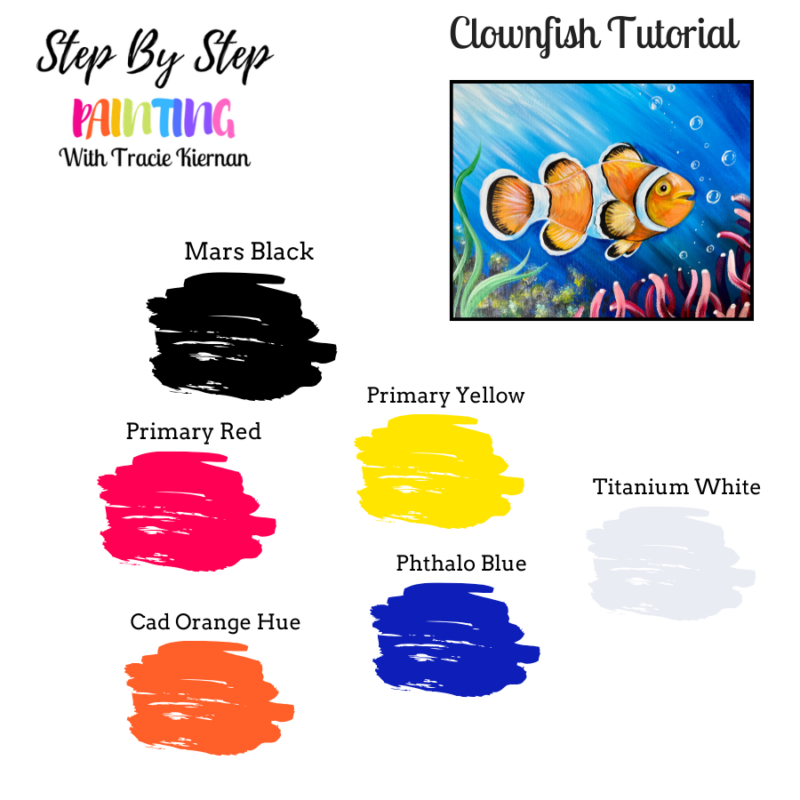
Colors
- Titanium White
- Mars Black
- Primary Red
- Cadmium Orange Hue
- Primary Yellow
- Phthalo Blue
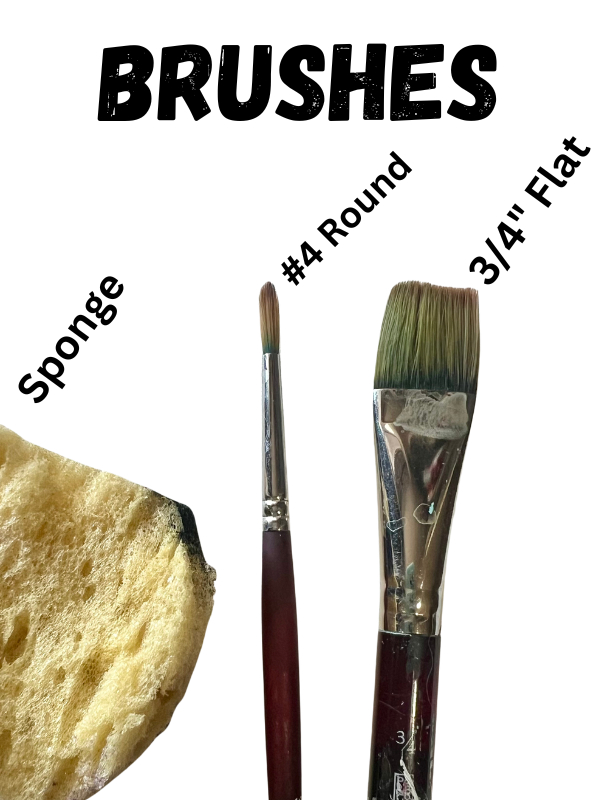
Brushes
- 8 Long Round
- 4 Round
- 3/4 Flat
- Sponge (for coral texture)
Color Palette:
Only 6 colors in this painting! If you don’t have “primary red”, use a “quinacridone magenta” or any magenta color (it’s for the sea anemone).
Brushes:
Not pictured: #8 long round brush (optional). That brush will be used for some of the fine line details but you can use any tiny detail brush or black and white paint pens for that.
Directions At A Glance:
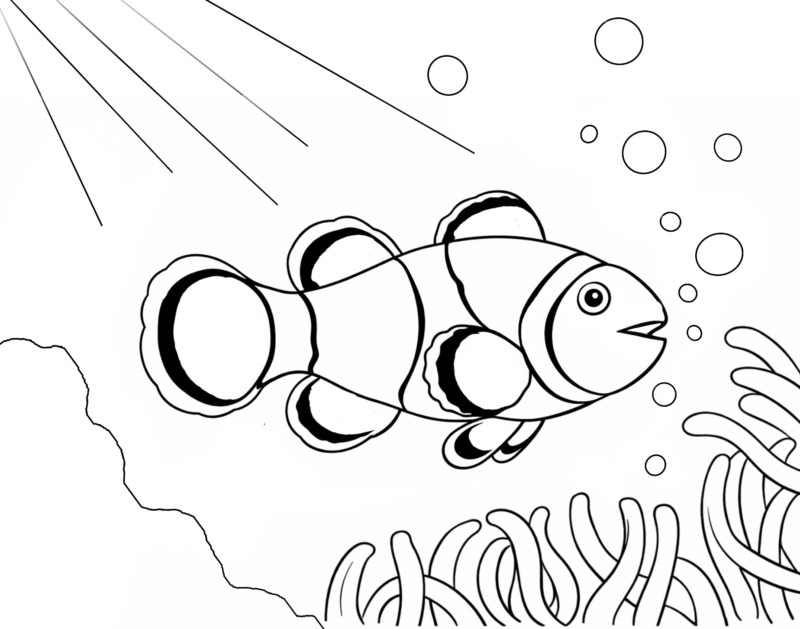
Traceable:
This tutorial has a drawing component. We will look at a reference photo of a clownfish and learn how to draw it. If you want to skip the drawing portion, you can use my template to trace onto the canvas! I would recommend white graphite paper for tracing (because it will go over a dark blue background). Alternatively, you can trace the fish on a white canvas and paint the background around it.
Video:
Coming soon!
Step By Step Directions:
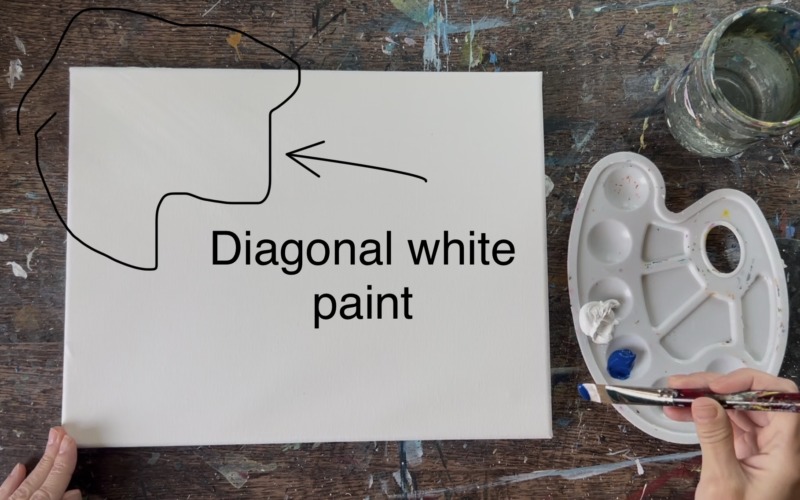
1. Paint Background
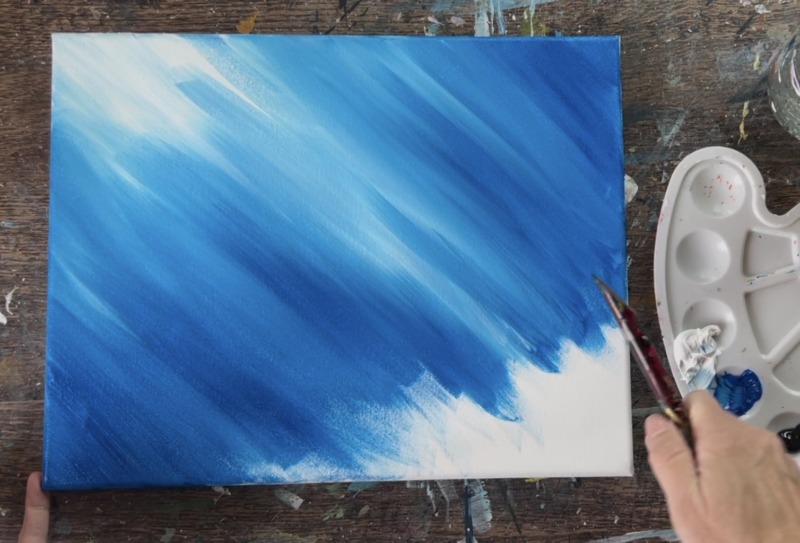
The background consists of three colors that blend in a diagonal direction. The goal is to make the upper left corner look like white is shining through the water while the lower right corner is very dark and shadowy.
Load your paint palette with the two colors: “phthalo blue” and “titanium white”. Use the 3/4″ flat wash brush and load into the “titanium white” first. Paint diagonal paint strokes in the upper left corner. This provides a nice base for the next step of blending blue to make this look like light shining through the water!
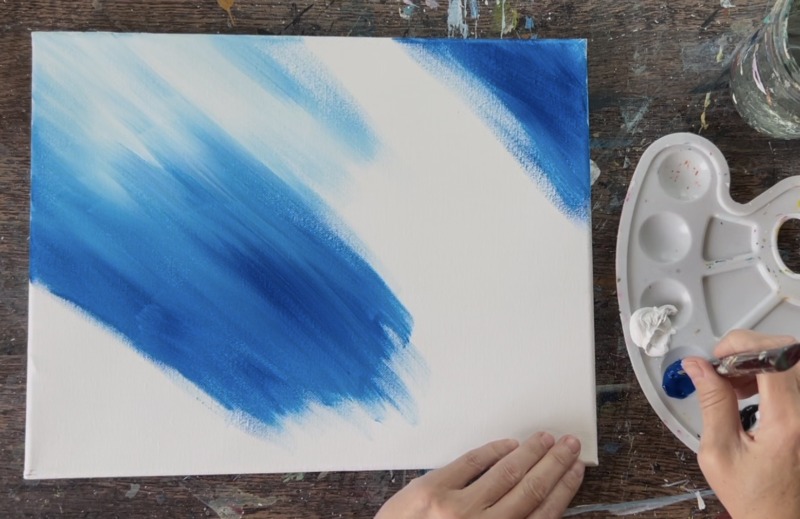
Without rinsing the brush, load a small amount of blue onto the brush. You want to start with only a small amount of blue at first so that it doesn’t overpower the white. Paint diagonal paint strokes that blend with the white. The upper left corner area is to remain light and bright but as you blend your blue in the middle and lower parts of the canvas, add less white and more blue to ensure that it becomes dark.

Continue to paint full width paint strokes going in diagonal directions.
As you approach the lower right corner, add little bits of black to the brush and blend with the rest of the blue. Don’t add too much black to the brush because it will overpower the blue.
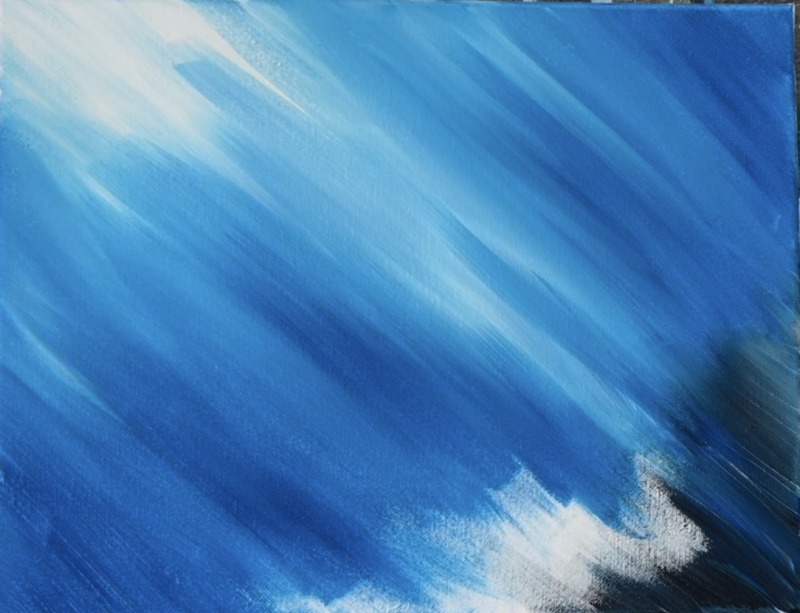
Blend more white in the upper left corner as needed and more black in the lower right corner as needed. The result is a really pretty blended background with streaks of black and white gently blending with the blue.
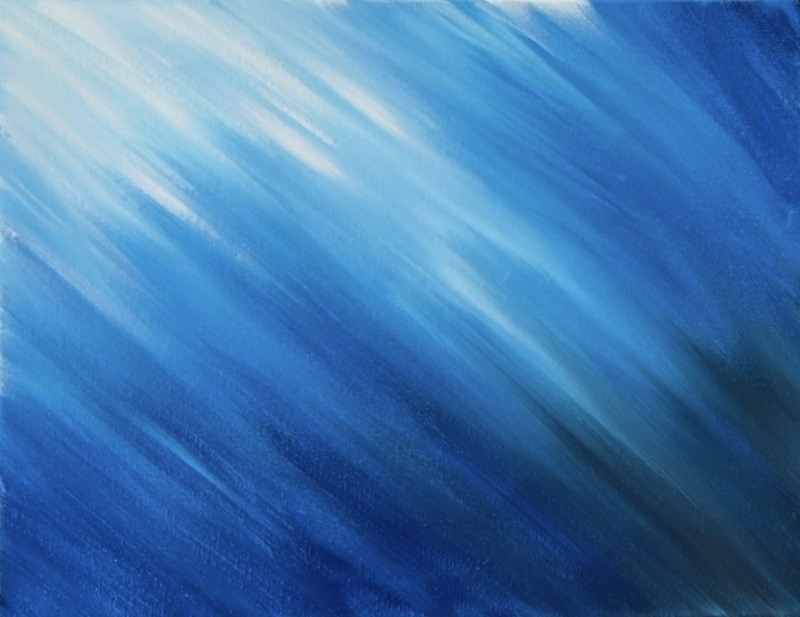
Wait for this to dry before going onto the next step.
2. Draw Clownfish
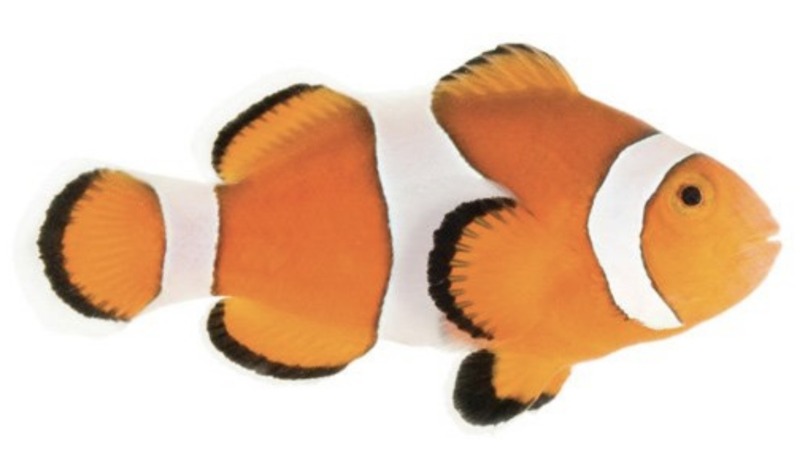
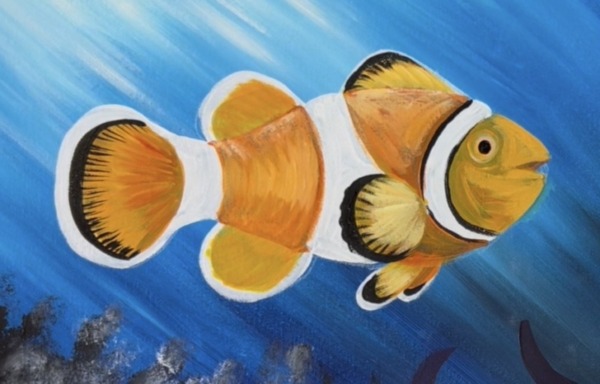
I highly recommend using the reference photo for drawing the clownfish. Observe where the stripes are, the shapes of the fins, location of eye and mouth, etc.
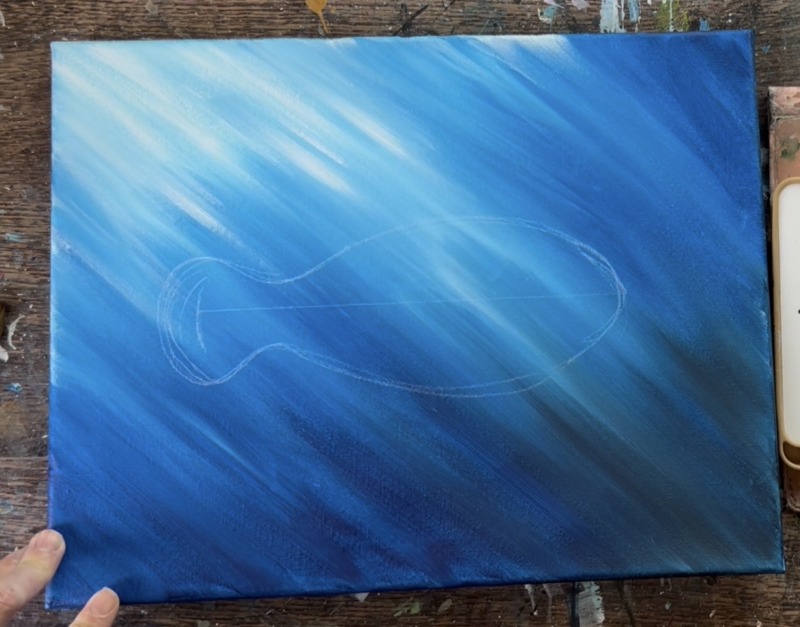
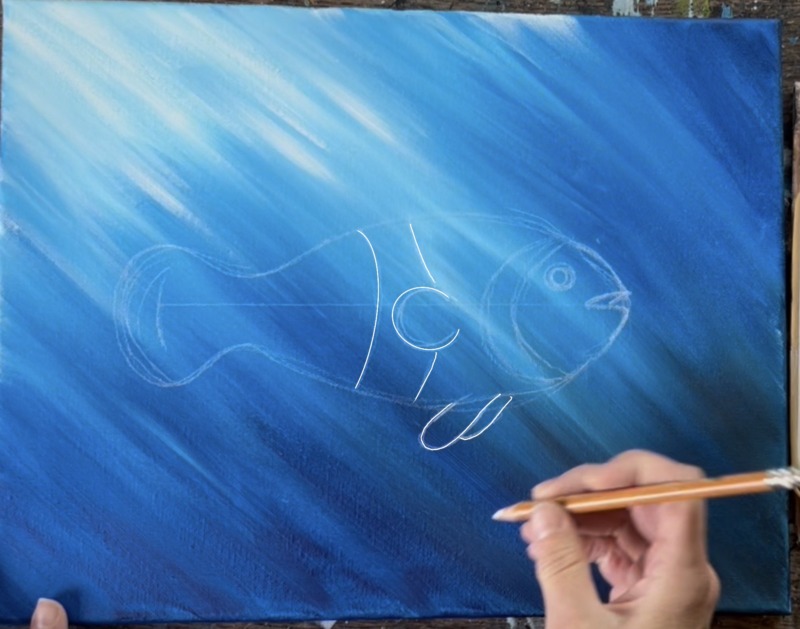
Start by defining the length of the fish on the canvas. Use a ruler to draw a horizontal line. This line will help divide the fish in half lengthwise and help with drawing the symmetrical basic shape of the fish.
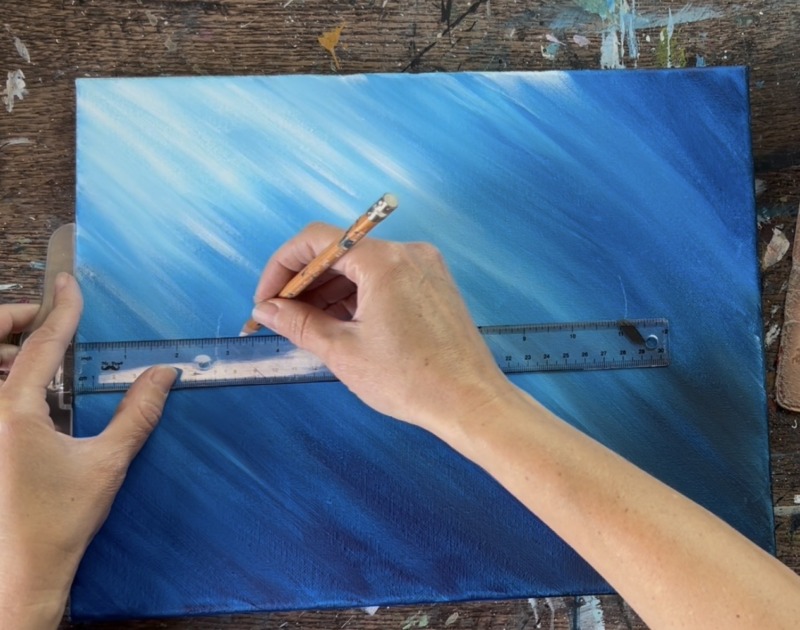
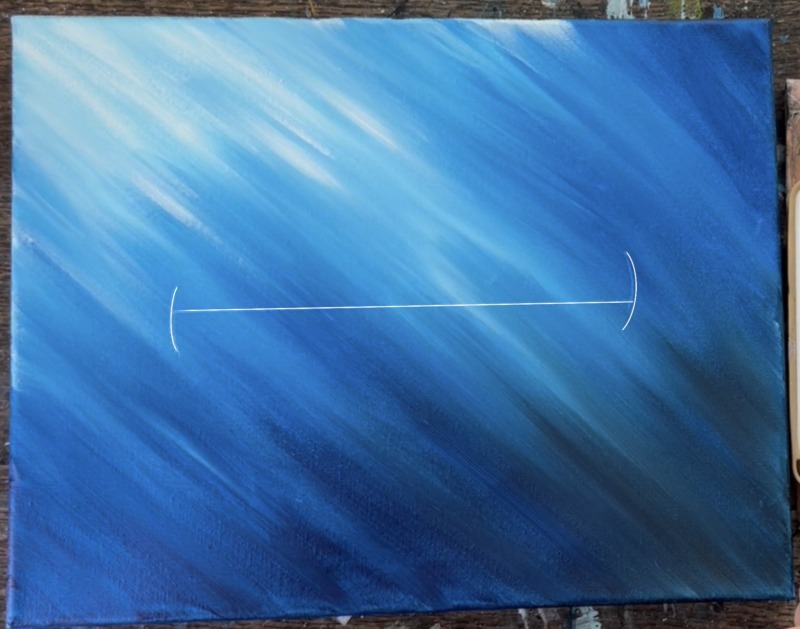
Then make little curved marks on the end of that line to define where the front of the fish’s mouth will be and where the end of the tail will be.
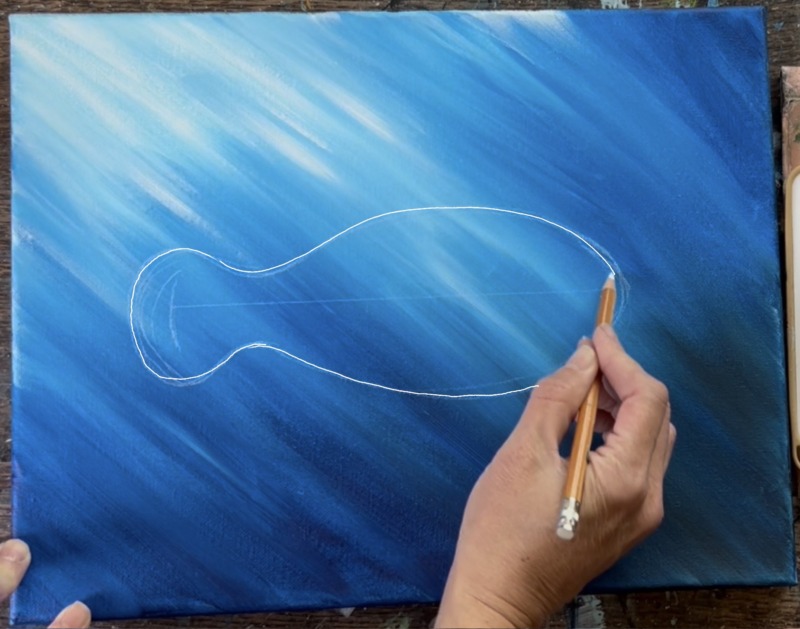
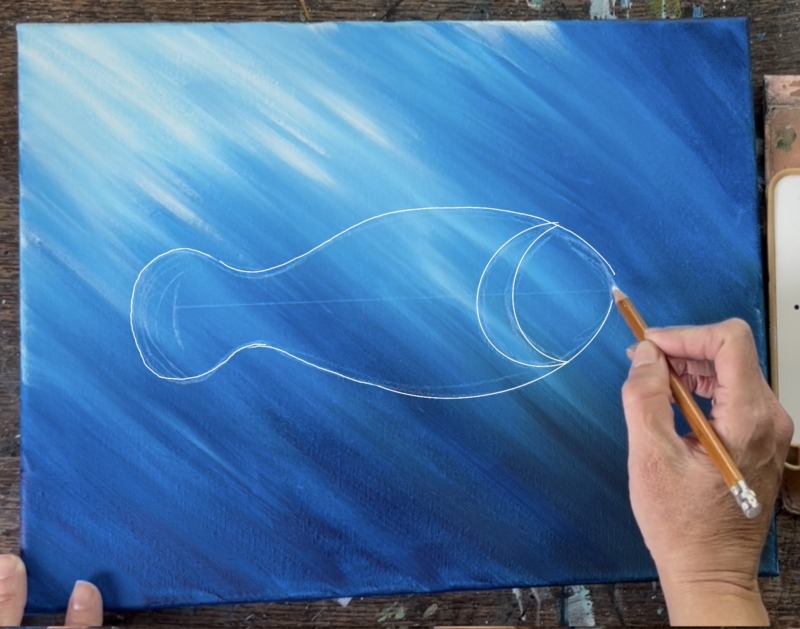
Draw the body of the fish including the back fin. Use that middle horizontal line as the “line of symmetry”. This fish shape looks very similar to a “goldfish cracker”!
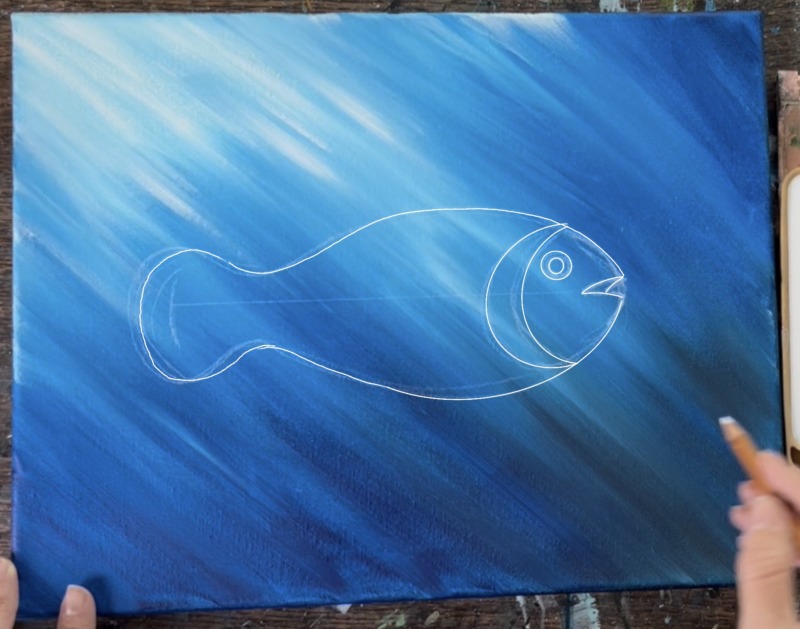
Draw the first stripe shape on the right side. This stripe also defines the head area of the fish. The stripe resembles a “crescent moon” shape.
Draw a “donut” shape for the eye (a small circle inside a slightly larger circle). Then draw a little triangular shape going inwards for the mouth and an optional interior line for the opening of the mouth.
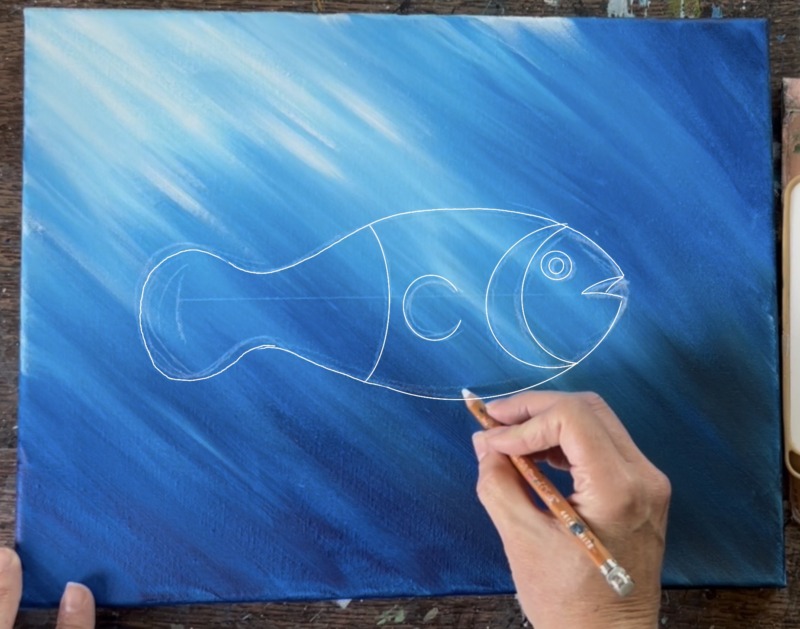
Draw a little “C” line for the side “pectoral fin”.
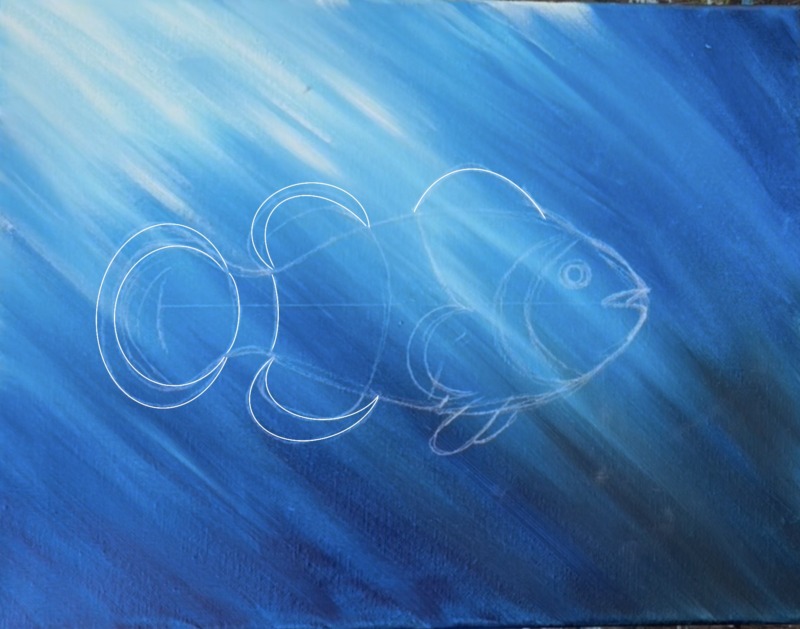
Draw the center white stripe. This one goes behind the side “pectoral fin”. Then draw the two front “pelvic fins” going diagonally downwards with one overlapping the other.
Draw the back fins and the top front “dorsal fin”. Then draw the back stripe that is at the base of the tail. The tail as well as the two back fins have a “crescent” shape border on the edges of them. This will be painted white when we paint it in.
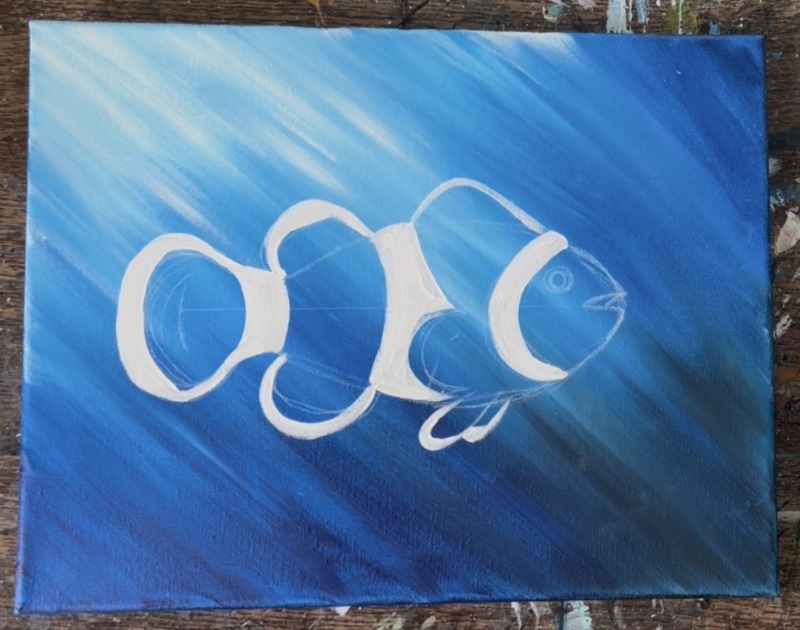
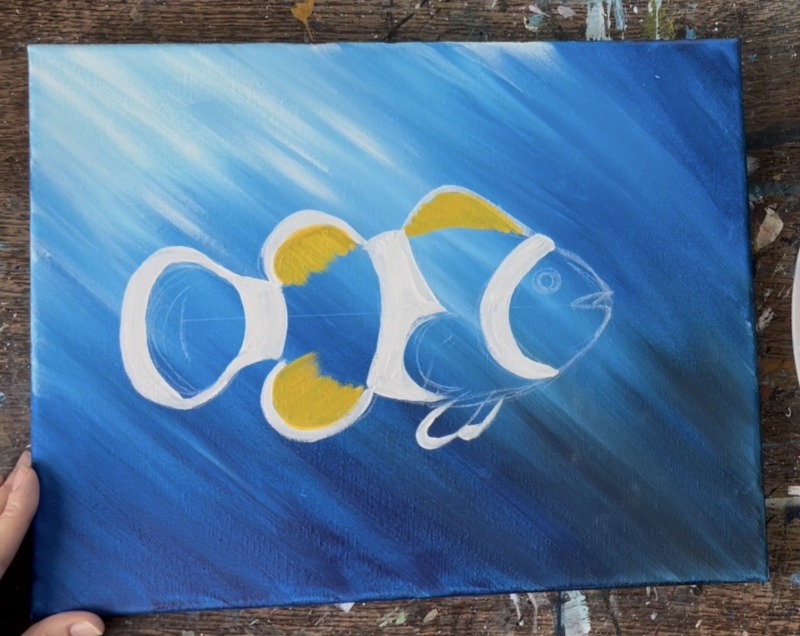
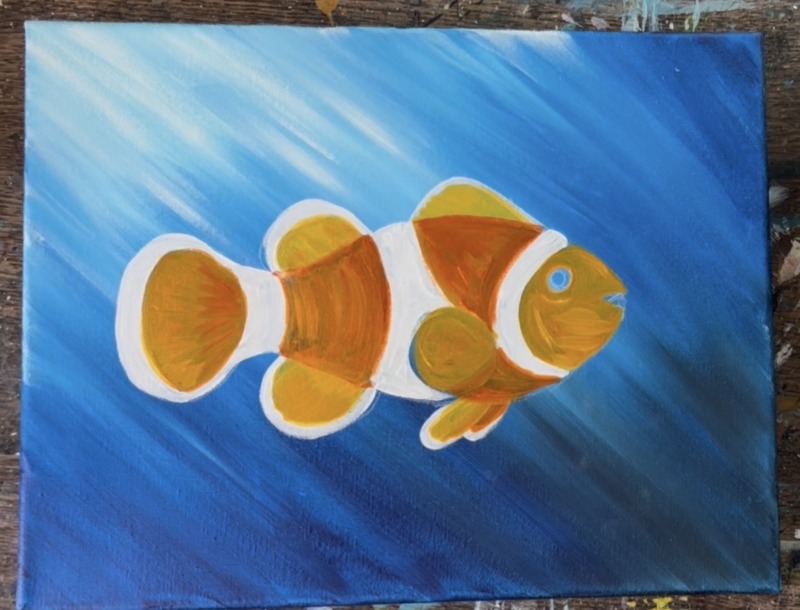
3. Paint White Stripes & White Edging
Use the #4 round brush and “titanium white” to paint the three white stripes on the clownfish. Outline the shape of the stripe and fill in with paint strokes that go in the direction of the curves of the stripes.
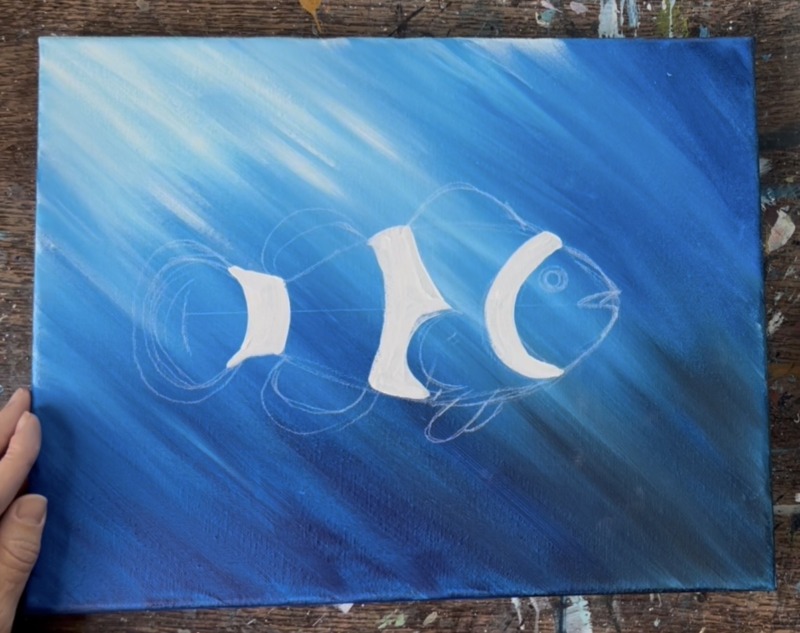
Then outline the outer border edges of each of the fins. Use the reference photo to observe where the white markings are on the fish.
4. Paint Fins
Load your paint palette with the three colors: “primary yellow”, “cadmium orange hue” and “titanium white”. Mix equal parts each of those colors together to create a “golden yellow” color. This “golden yellow color” will be referred to often as one of our base colors!
Use the #4 round brush to paint the two top fins and the back bottom fin. Note the direction of the paint strokes for the two back fins and how they slant diagonally backwards.
Next, paint the two “pelvic fins” (lower front). Make the back one slightly darker by adding more orange. Paint the tail using the same golden yellow color as the other fins. Add some more orange to the bottom of the tail so that it is slightly darker on the base of the tail.
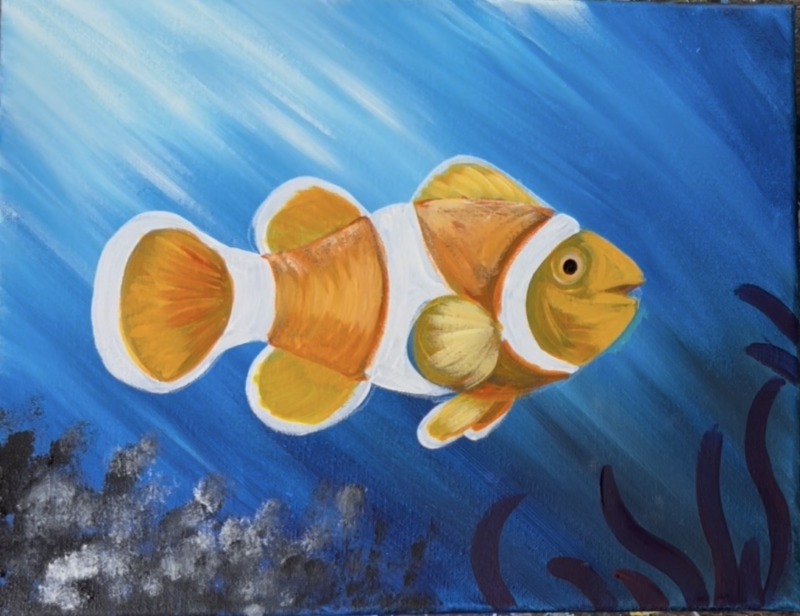
5. Paint Orange Layers On Fish’s Body
To make the body stand out from the fins, use a darker orange. Basically take that same “golden yellow” color you used for the fins but add more orange into it to make it darker. Outline the area that is to be painted in and then paint with curved paint strokes. The curved direction will create “form” for the fish.
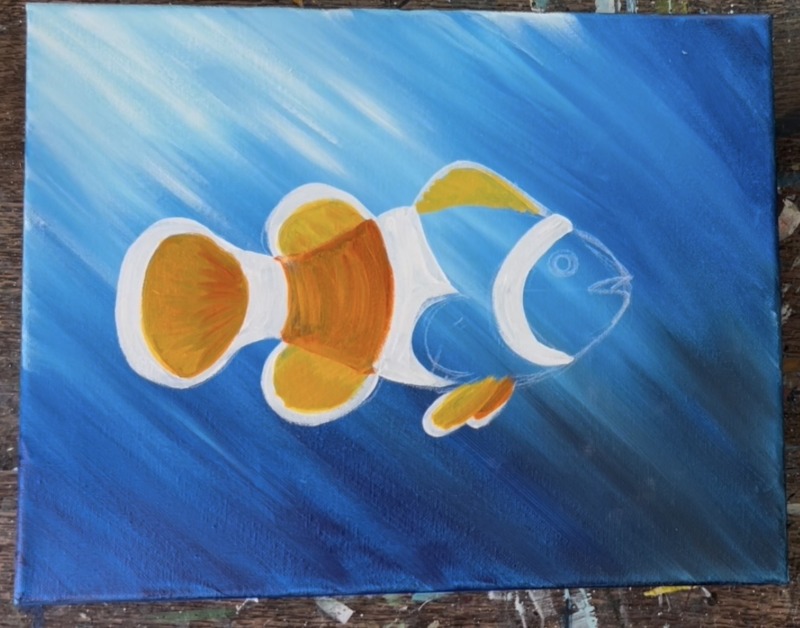
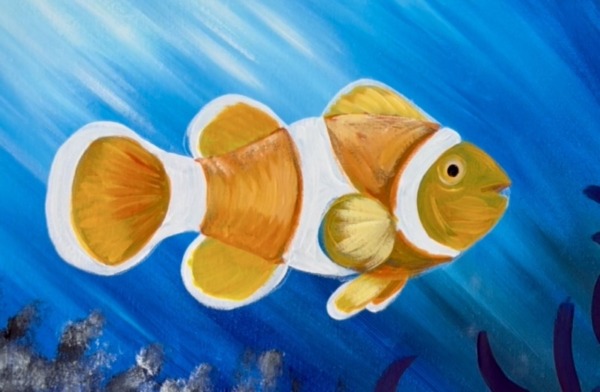
Paint the front part of the fish too using the same orange. Then paint the side “pectoral fin” using the “golden yellow” color so that it is lighter and stands out from the darker orange around it.
Paint the head area with the “golden yellow” color (or more of the orange color but I decided to paint the head lighter initially). Paint around the eye and around the mouth opening.
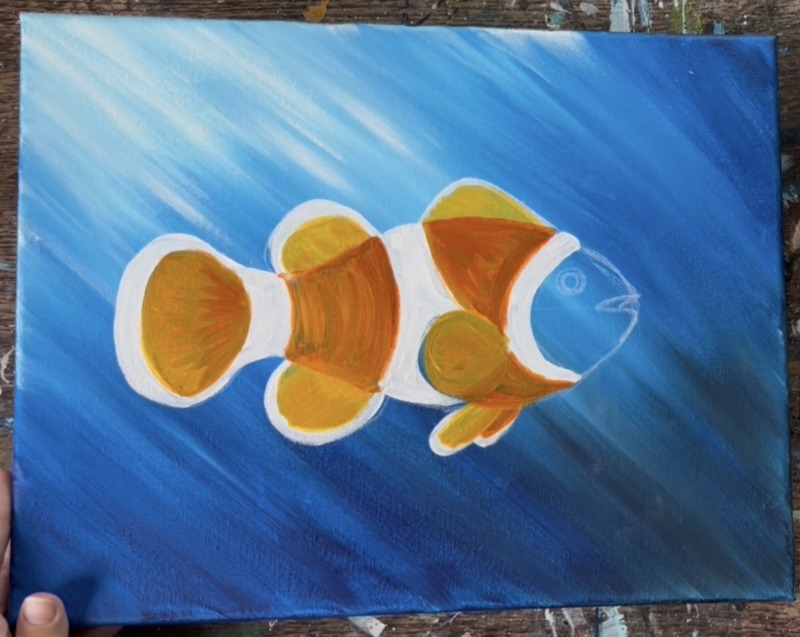
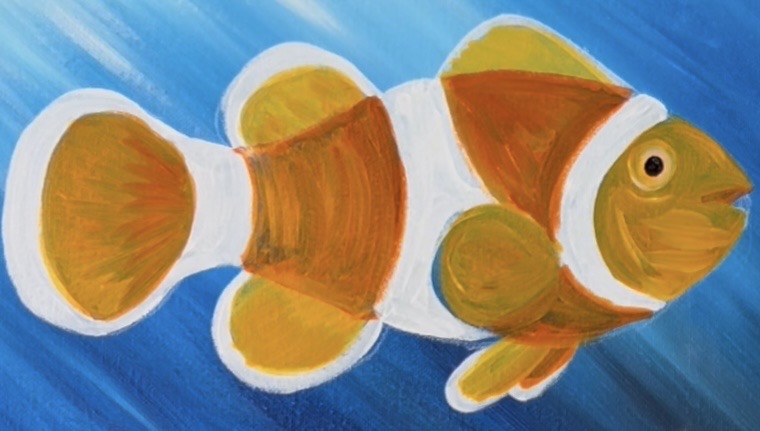
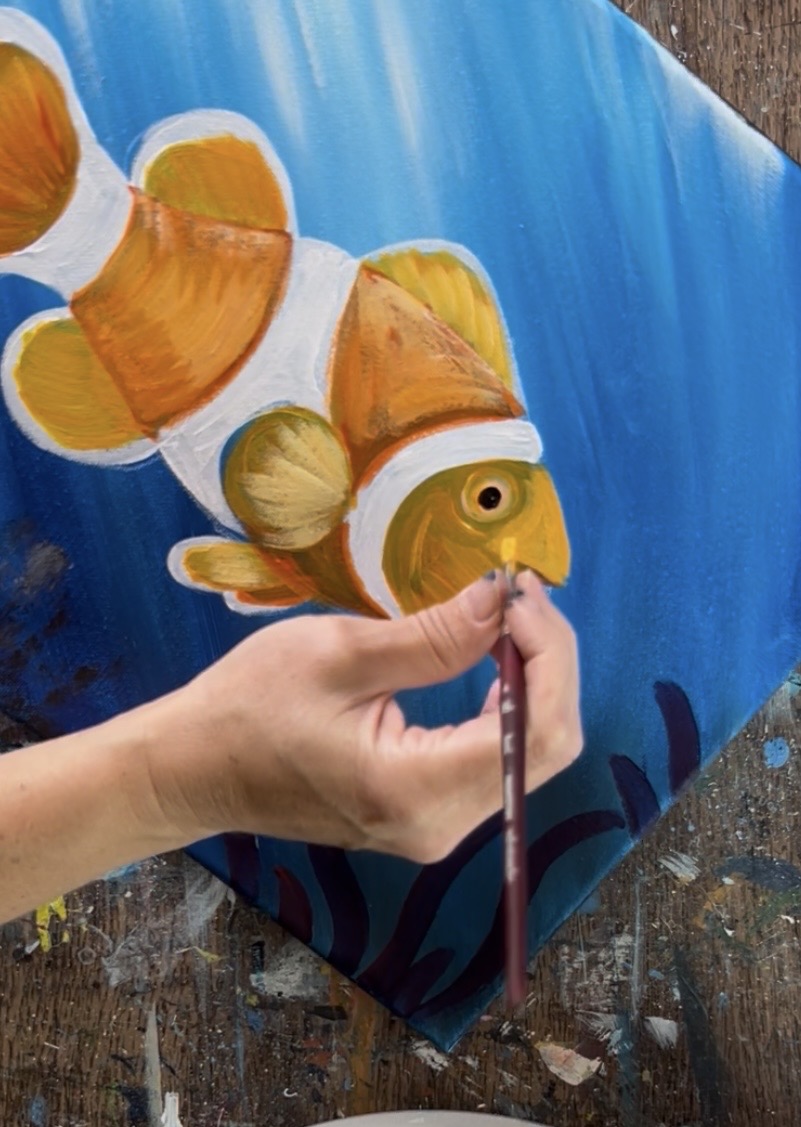
6. Paint Eye
Mix a little white into the “golden yellow” color to make it lighter. Paint a “donut” shape for the eye area. Then paint a black circle inside the donut shape. Use orange to paint the inside top of the mouth opening.
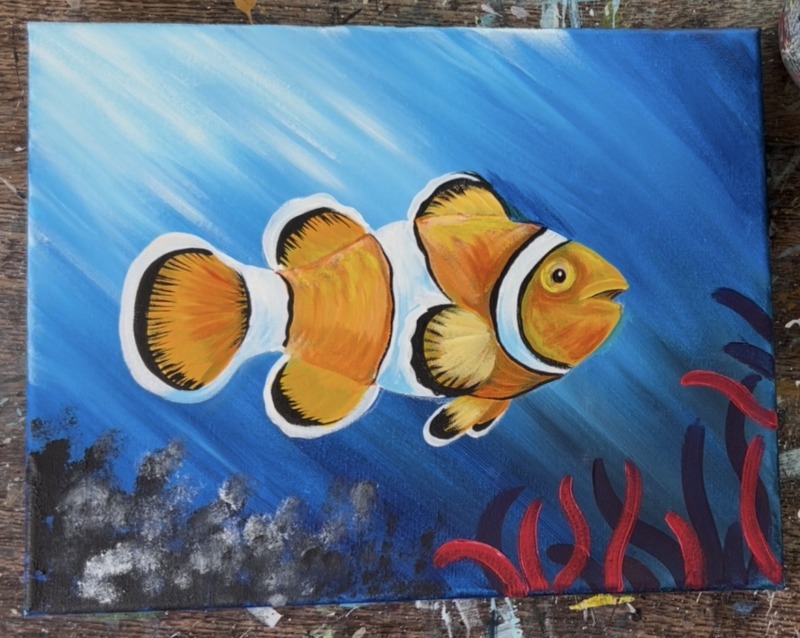
7. Paint Sea Anemone & Coral (first shadowy layers)
Load the color “primary red” onto your paint palette. Mix equal parts “primary red” and “phthalo blue” together to make a very dark purple. Use this “dark purple” and the #4 round brush to paint sea anemone “tentacles”. These are simple wavy lines with curved ends. Paint a variety of lengths and directions.
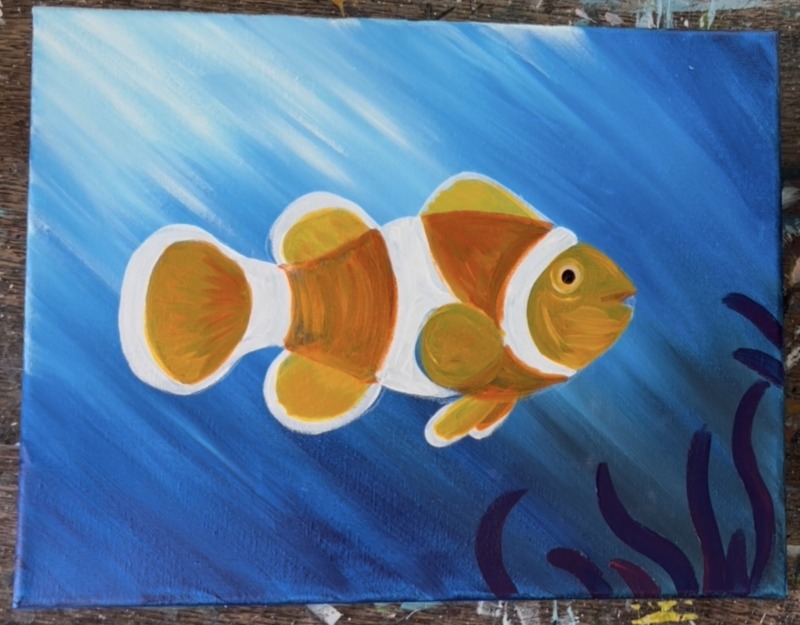
Next use your sponge to create a base layer for coral. Load a small amount of “mars black” onto the sponge. Stamp an area in the lower left region. You can paint little “columns” that go slightly upwards.
Then add a tiny bit of “titanium white” to the sponge. Only a small amount is needed and it will blend with the black that is still wet. Highlight this coral area before the black dries. Paint edges of the coral/ add a light layer to create depth in the coral.
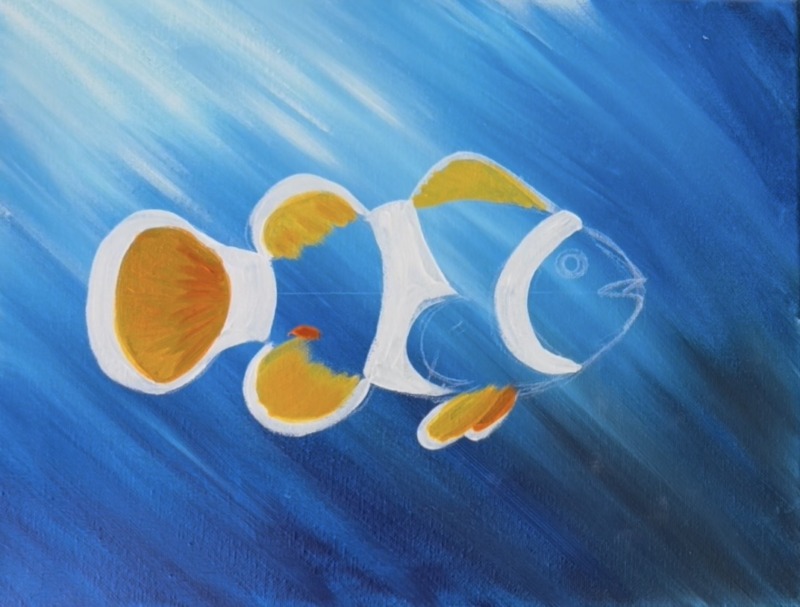
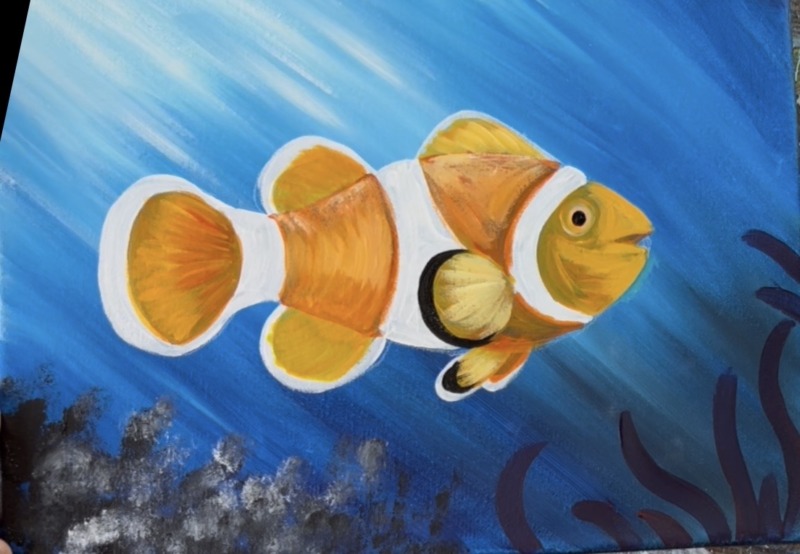
8. Paint Second Coat Of Orange Layers On Fish’s Body & Fins
This second coat of paint is important because the first layer of orange will look “dull” due to orange being a translucent color and painting it over a dark background. We will paint this second coat with orange lightened up with a little yellow and white!
Use the #4 round brush to add a second coat of paint to all the orange areas of the fish. Mix the orange with a little yellow and white to lighten the orange up. Apply this lighter color over the body areas of the fish where you painted your first layer of orange. The goal is to brighten the orange because we initially painted it over a dark background. Paint in curved directions to give the fish “form”.
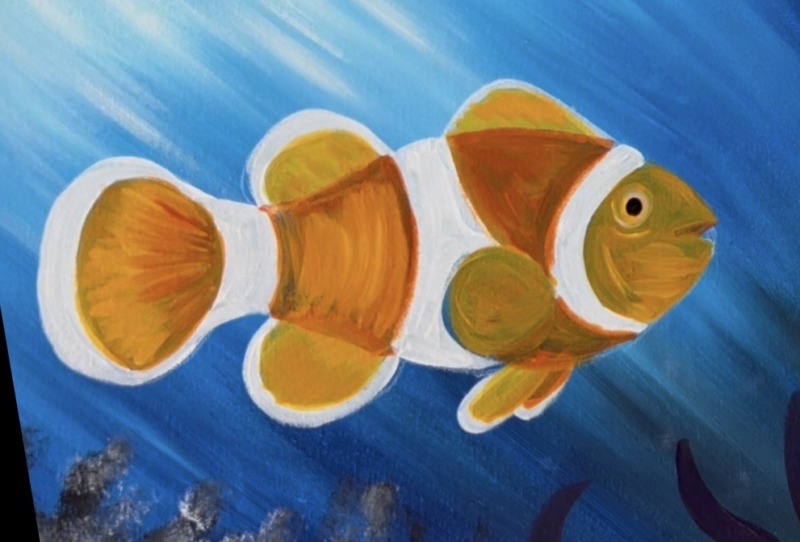
Don’t cover all of your dark orange layer. In fact, leave the edges of that dark orange still showing along the top of the fish’s back and closest to the stripes. You are basically “glazing” over your first layer so you still see some dark below it. Add a second coat of paint to all of the fins too. Add just a little bit more white to your “golden yellow” color to lighten it up. Add this to the side “pectoral fin” and the rest of the fins.
Add a second coat of paint to the head as well. Use the same “golden yellow” color. Paint around the donut shape of the eye.
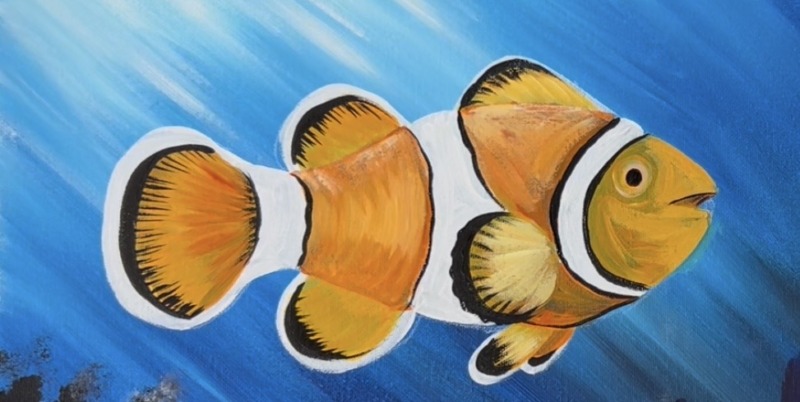
This is what my “second coat” looked like for the fish! You can still see some of that first dark orange layering below it and this second coat helped to brighten it up. The direction of the paint strokes flow differently depending on what part of the fish you are painting (angled on the fins and curved/ contoured on the body/ head).
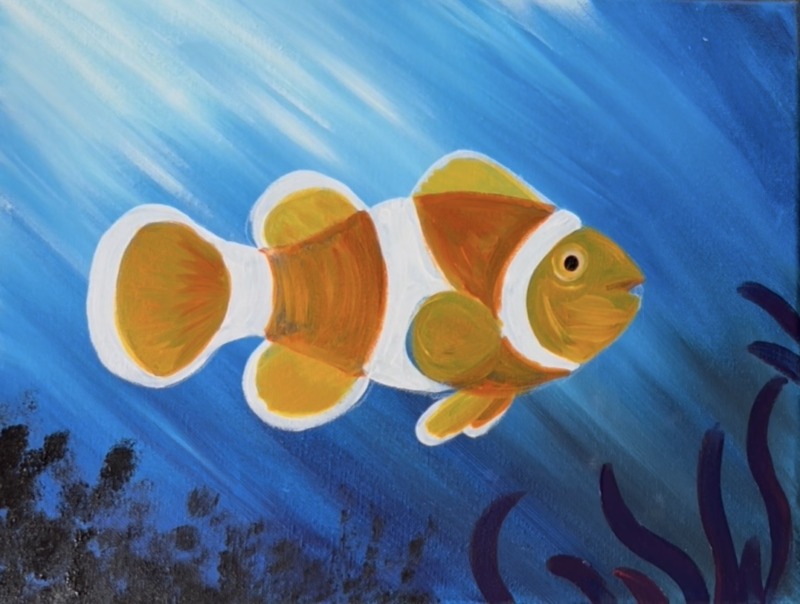
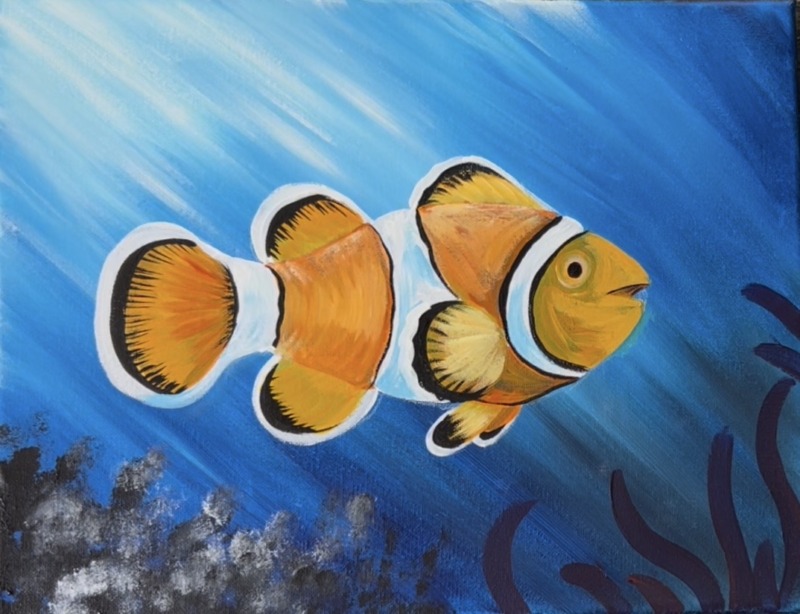
9. Paint Black Edgings
In this step we will add all of the black markings which will really help our fish to “pop”! It helps to look at the reference photo for where all the black markings are.
Use the #4 round brush and mars black. Tip: water it down just slightly for better control/ flow of the paint. Start with the side “pectoral” fin. The black outline edging forms almost a “crescent shape”. Then paint black on the pelvic fins (lower front fins). Those also form a “crescent shape”.
Paint black on the top dorsal fin. Then drag little lines going from the black marking towards the bottom of the fin. This creates a little texturing on the fin.
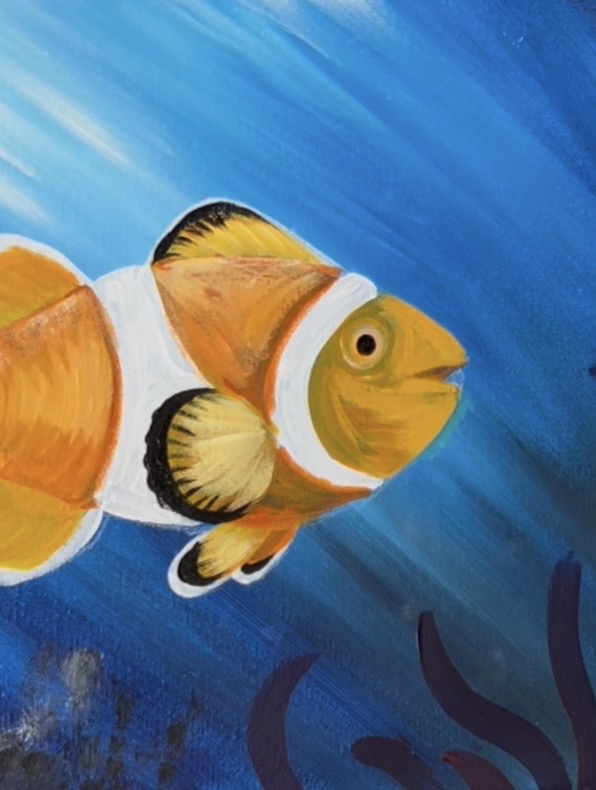
Then lightly outline the outer parts of the front white stripe with black.
Paint an outline on the back tail and then paint little lines going diagonally towards the base of the tail for texturing.
Outline the other set of white stripes with a very thin black line. Then paint the back fins with a “crescent shape” black edging plus little lines going diagonally.
10 . Second Coat On White Stripes/ Shadowing
It is optional to paint a second coat of white on the stripes! The one coat of titanium white should be fine but if you still see some background showing through or you want the white to be brighter, then a second coat might be needed!
Also, if you want to add shadowing in the white stripes, blend just a little bit of “phthalo blue” into the white. Paint this very light blue just on the bottom of the fish but keep the top parts white.
11. Highlight Dot On Eye
Use just the tip of the brush (or even a toothpick or white paint pen) to paint a white dot inside the black part of the eye.
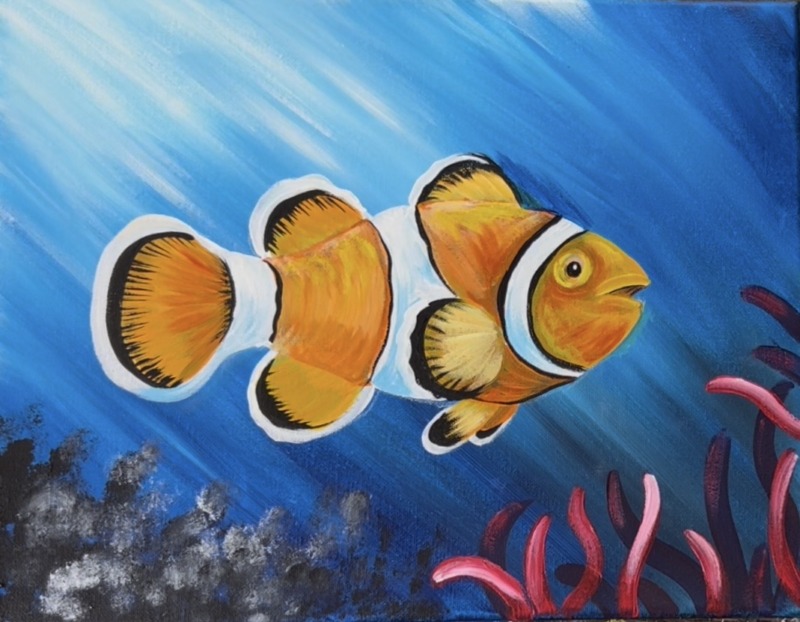
12. Pink Sea Anemone Layer
Use primary red and the #4 round brush to paint another set of sea anemone. These are overlapping the darker layers and swaying different directions.
Highlight the sea anemone tentacles by adding just a little white to “primary red” and blending it just at the top of the tentacles. Leave the bottom parts dark and shadowy. You can also “dry brush” a little “primary red” at the top of the dark purple tentacles in the background.
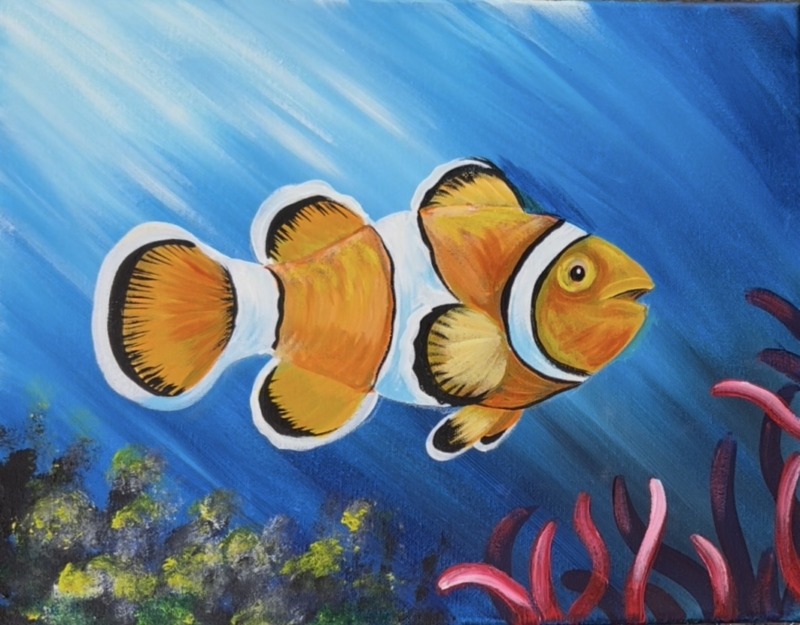
13. Yellow/ Green Coral Layer
Use the sponge to apply yellow over the lighter colors you applied earlier. You can also mix a green on your palette (mix blue and yellow) to add little dabs of green on the coral. Leave the bottom parts of it darker and shadowy.
14. Bubbles
Use the #8 long round brush to paint little circles for bubbles.
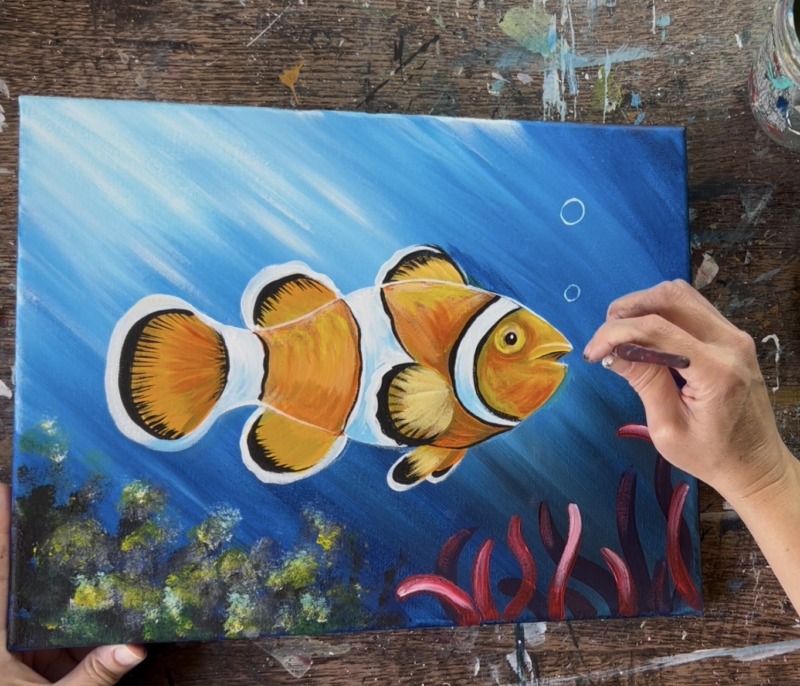
You can keep these bubbles very simple! Make a variety of sizes that cascade from around the anemone to the top of the canvas. Then paint little curve “highlight” inside the bubbles.
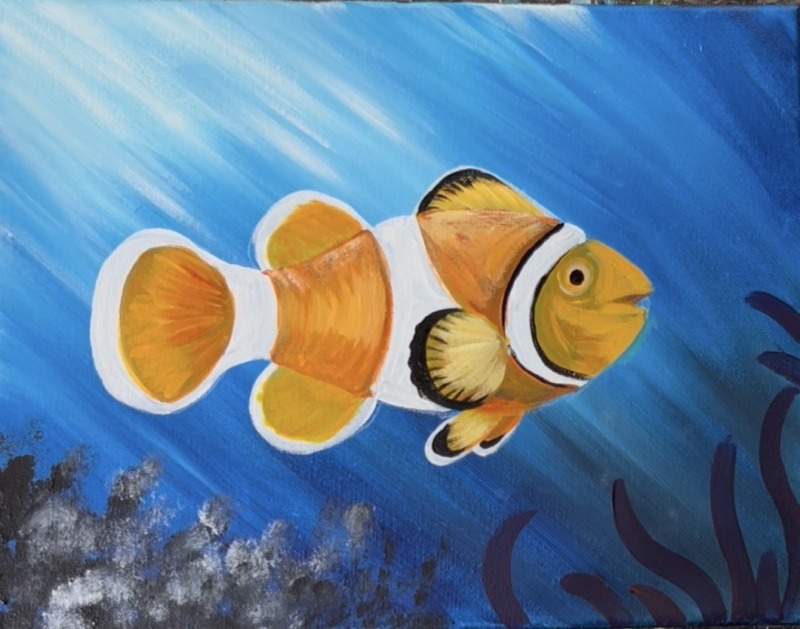
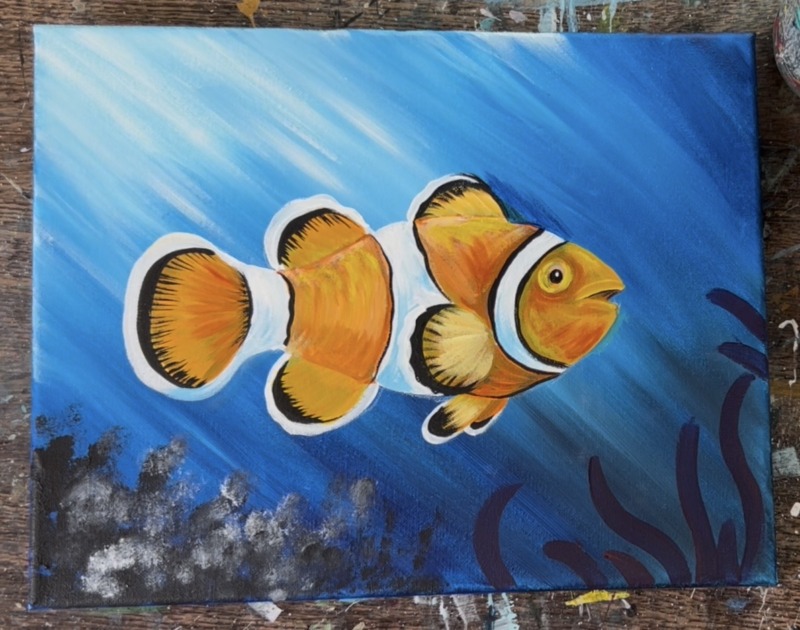
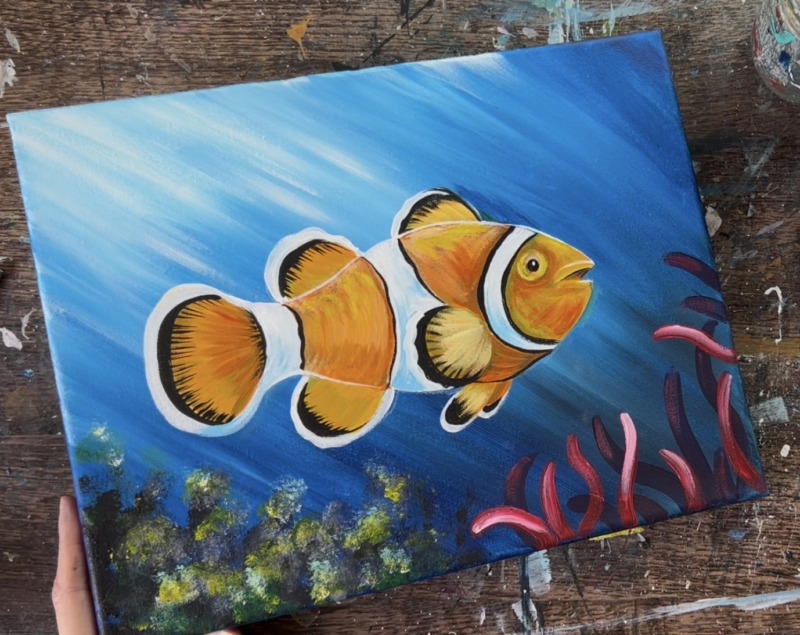
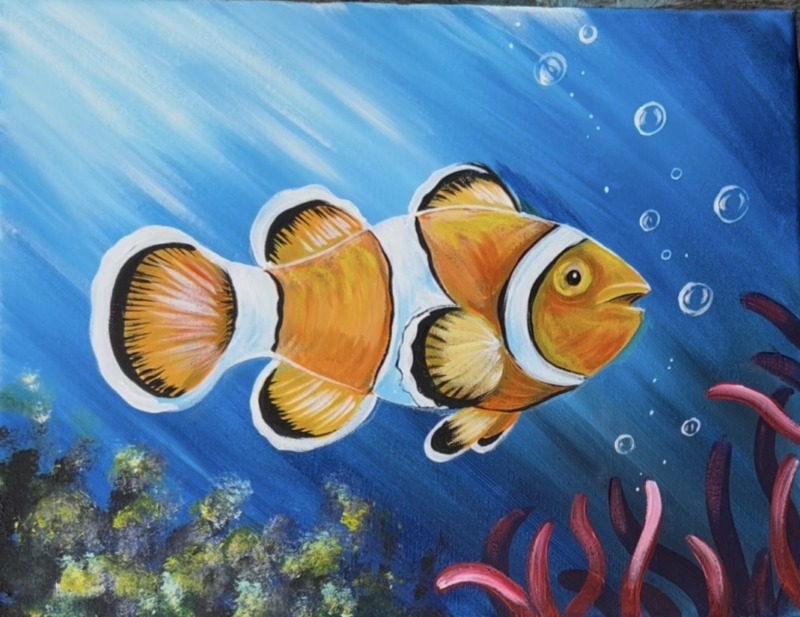
15. Highlights On Fish/ Some Outlining Where Needed
Use the #8 long round brush (or a white paint pen or tiny round brush) to lightly outline the top of the fish’s back and under the fins. This light white outline will help define the fish a little more. Also, use the #8 long round brush to paint little diagonal lines going outwards on the fins to highlight them. These little white lines add texture as well.
16. Lighter Pink Sea Anemone Layer, Details On Anemone & Green Sea Weed
Mix a light coral color by mixing equal parts: “titanium white”, “primary red” and “cadmium orange hue”. Use the #4 round brush to paint another layer of tentacles for the sea anemone overlapping the other layers.
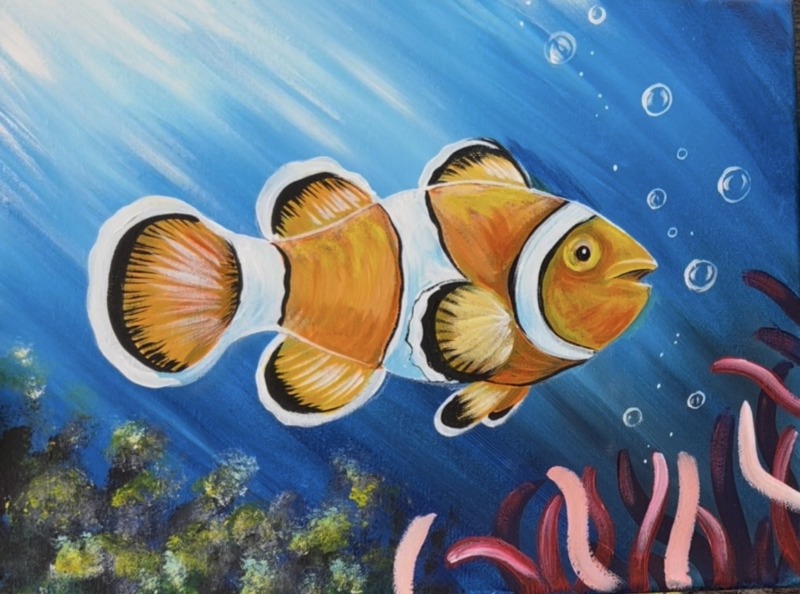
Paint little white ovals on the ends of the tentacles. Add shadowing on the bottom of the tentacles by using “primary red” and blending that on the bottom of the coral colors.

Use the #8 long round brush to paint seaweed. Mix “primary yellow” with “phthalo blue” to make a green. Then use the #8 long round brush to paint long, swaying seaweed grass lines that overlap the coral. You can add bits of white to the brush and paint over the green lines to highlight them.

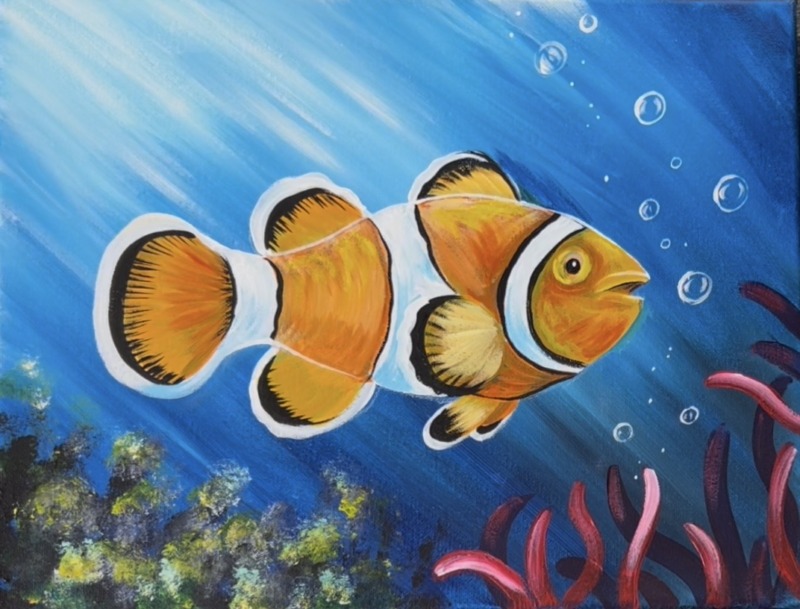
Finished!