
Would you like to save this?
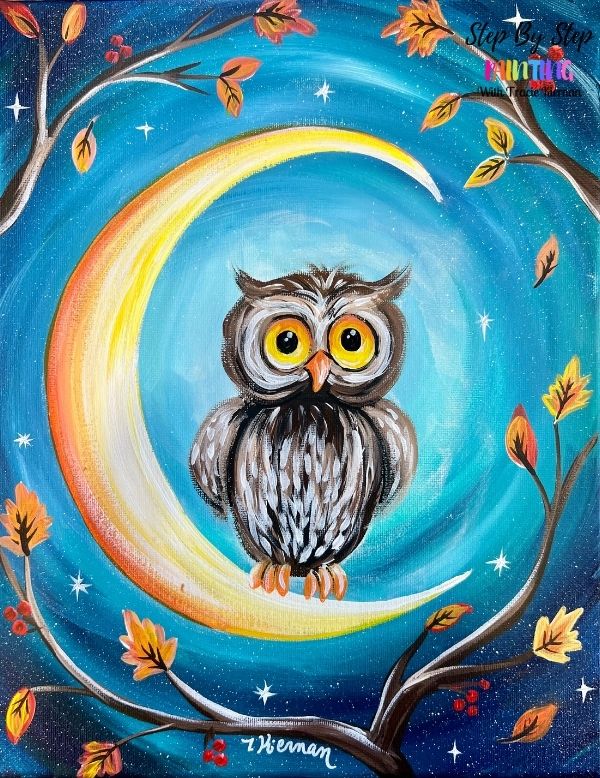
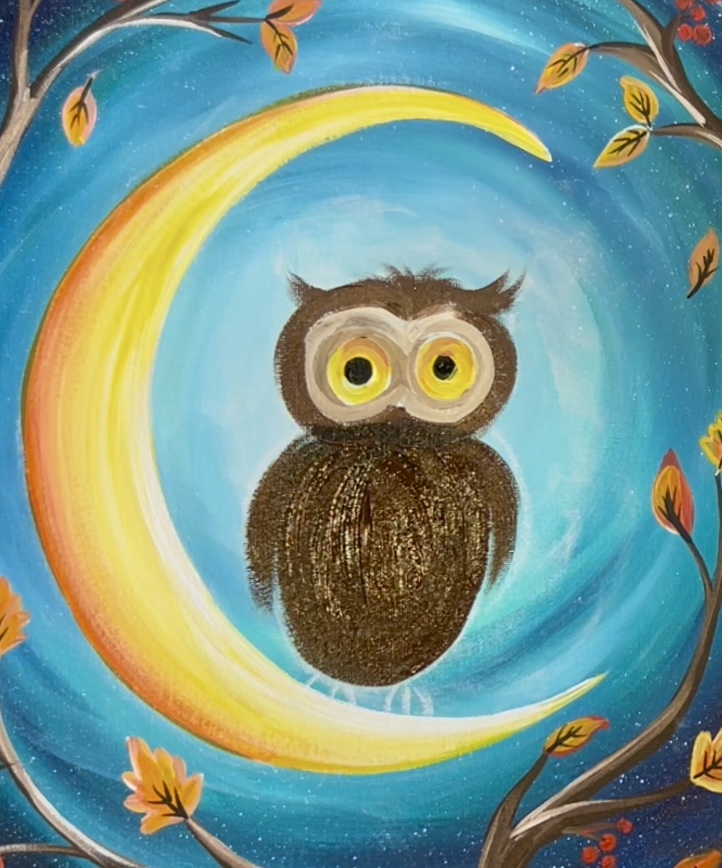
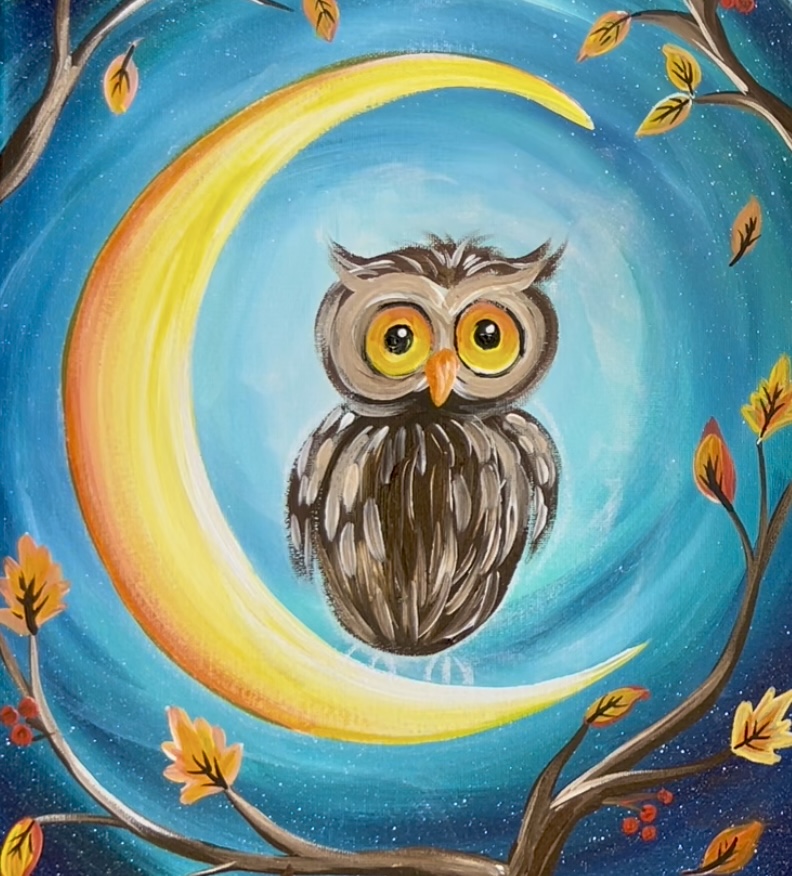
In this whimsical beginner painting tutorial, we’ll create a magical nighttime scene featuring a cute little owl perched in front of a glowing crescent moon.
Using simple step-by-step techniques, you’ll learn how to paint a soft night sky, add glowing moonlight, and bring your owl to life with easy shapes and layers.
This design is perfect for painters of all levels and can be customized with your own colors and details. By the end of the lesson, you’ll have a charming “Crescent Owl” painting that’s both fun and relaxing to create.
Enjoy and happy painting!
Materials Needed:
- 11 x 14 Canvas (or other size)
- Acrylic Paint (I like Liquitex BASICS)
- Paint Brushes (see sizes below)
- Chalk or white chalk pencil
- Black & White Paint Pen (optional but helps with detail work)
- 8″-9″ circle to trace (I use a paper plate)
- Ruler (optional)
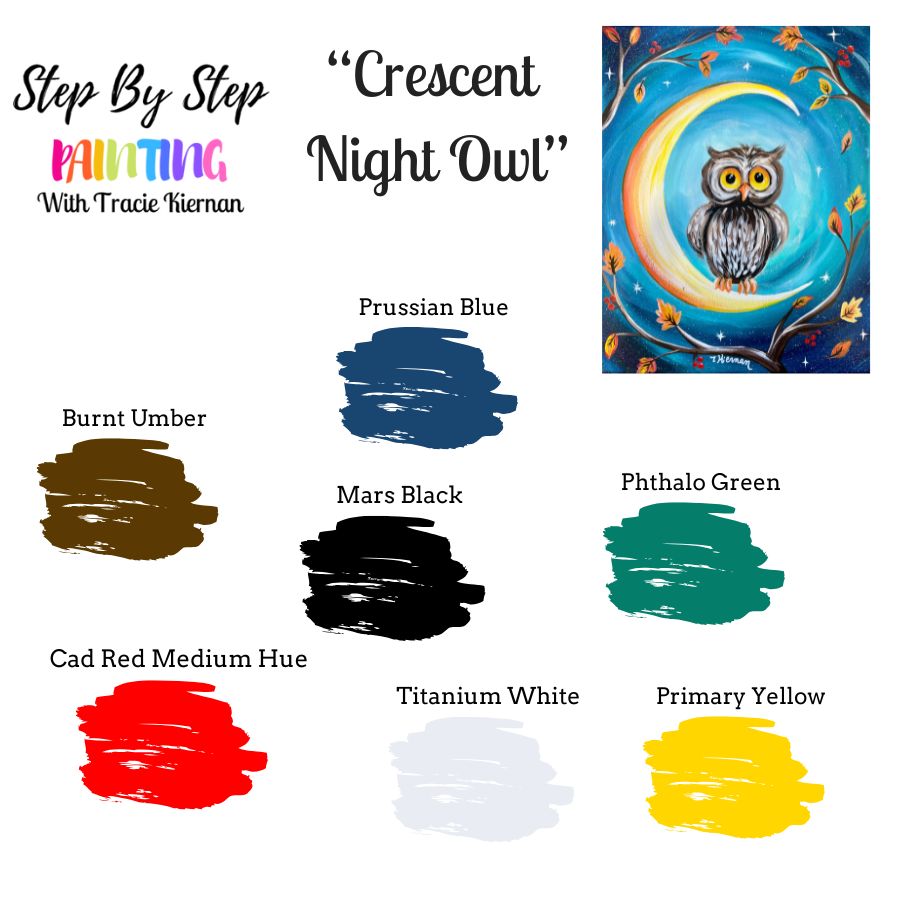
Colors:
- Titanium white
- Mars Black
- Burnt Umber
- Cadmium Red Medium Hue
- Primary Yellow
- Prussian Blue
- Phthalo Green
Brushes:
- 3/4″ Flat Wash
- #12 Bright Brush
- #8 Long Round (optional or you can use a tiny detail brush)
- #4 Round Brush

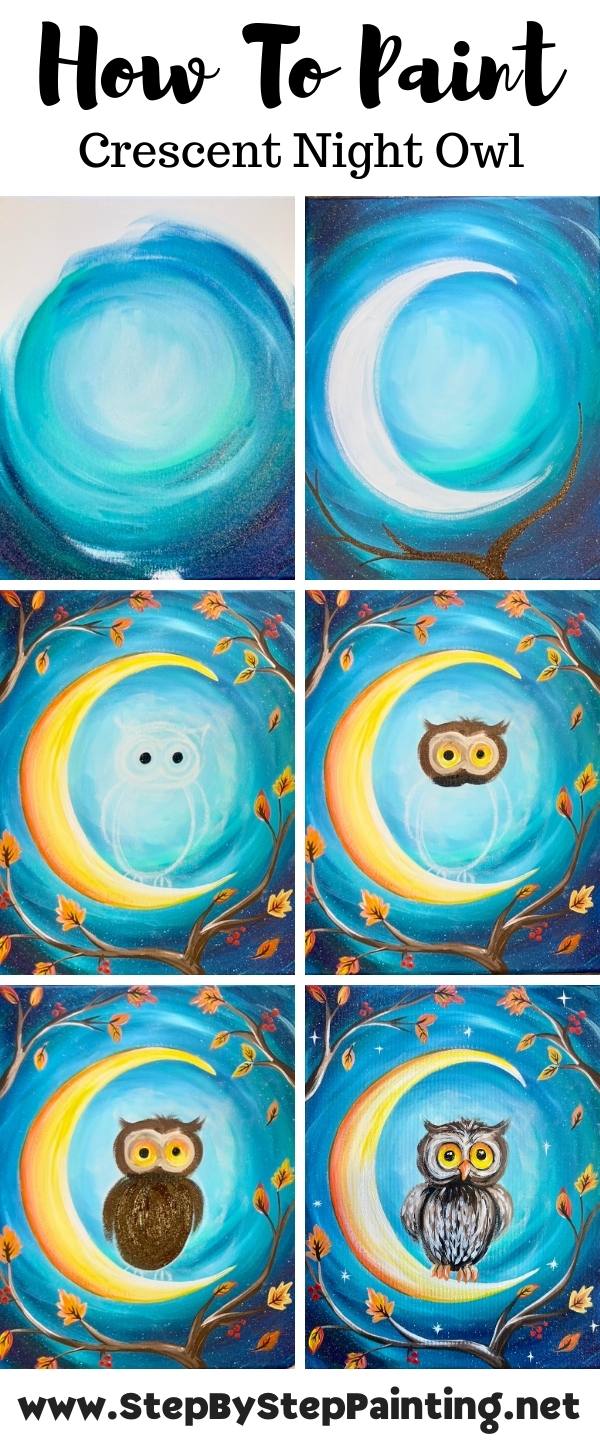
Directions At A Glance
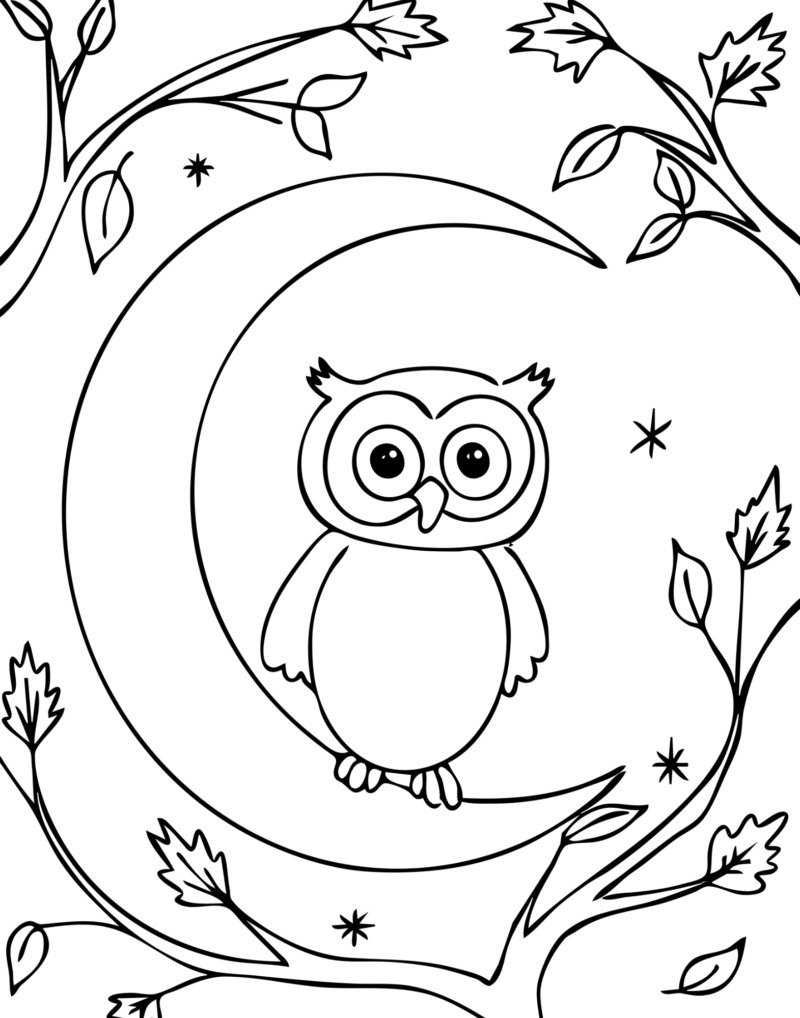
Traceable (optional):
Video:
Step By Step Instructions:
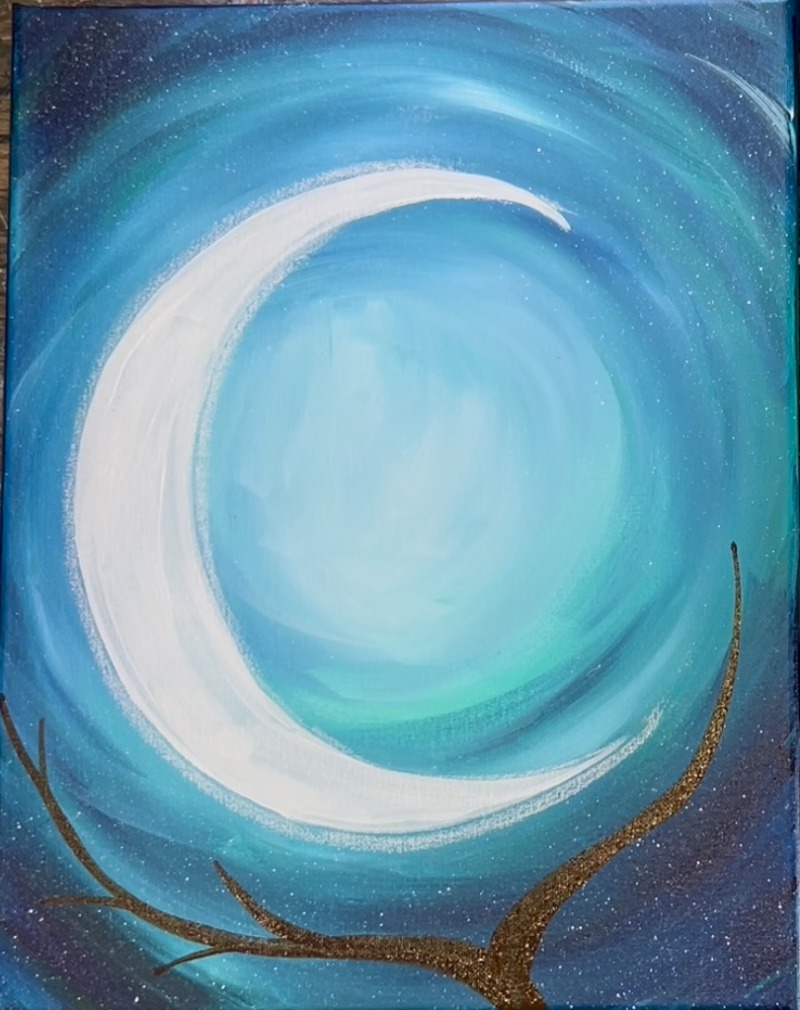
1. Paint Sky
Load your paint palette with the three colors: “Prussian blue”, “Phthalo Green” and “Titanium White”. Mix a very light “mint green” color on your paint palette by mixing 4 parts white, 1 part Prussian blue and 1 part Phthalo green.
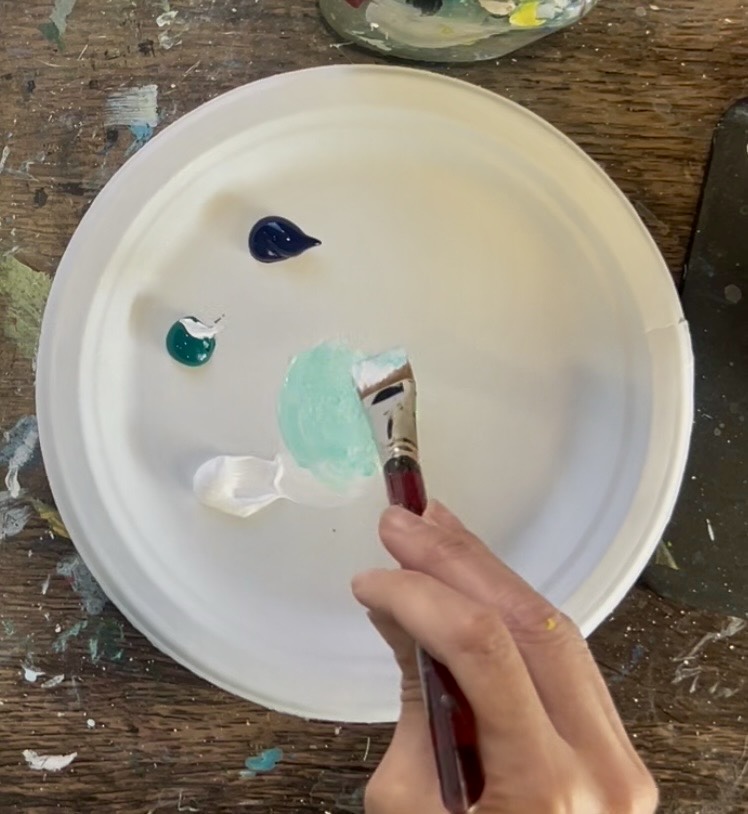
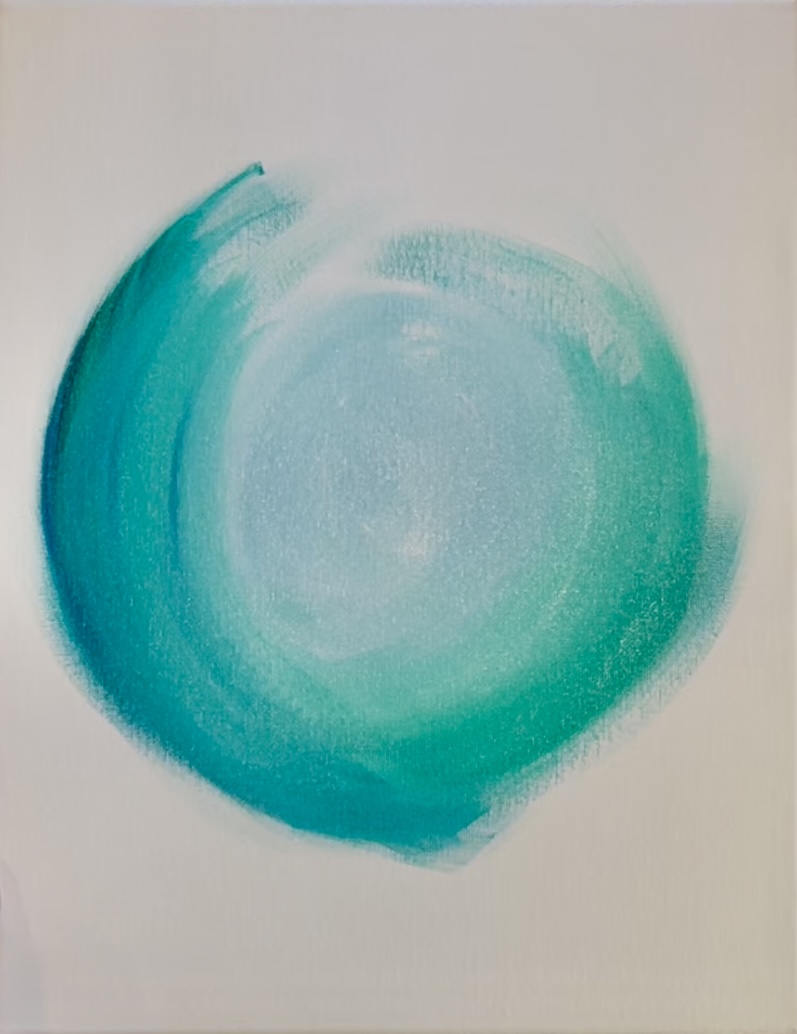
Start in the middle of the canvas and paint a circle about 6″ in diameter. This is because the center of the sky background will be the brightest. If needed, add a bit more white in the middle and blend it.

The rest of the sky is painted using circular paint strokes going around this middle bright aqua area. Without rinsing the brush, load it into the “Prussian blue”, “phthalo green” and only a small amount of white. Blend this in circular strokes around your bright center. Blend the colors right onto the canvas and leave it “streaky” so the colors don’t blend all the way.
As you work your way to the edges of the canvas, add more of the “Prussian” and “Phthalo Green” and blend it. Allow it to get darker on the outer parts and add less white as you blend with circular paint strokes.
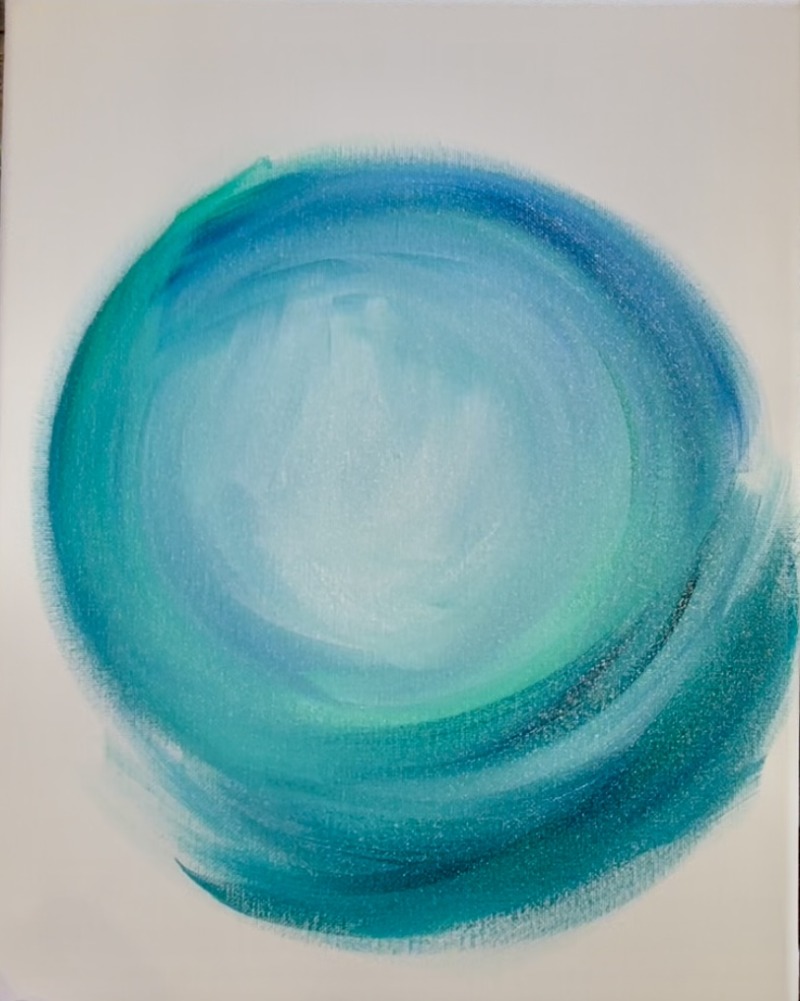
When you reach the outer corners of the sky, add pure “Prussian blue” to ensure these corners are very dark! Continue to make your paint strokes go in curved directions even though you are painting off the edges of the canvas. Continue to blend your colors onto the canvas.
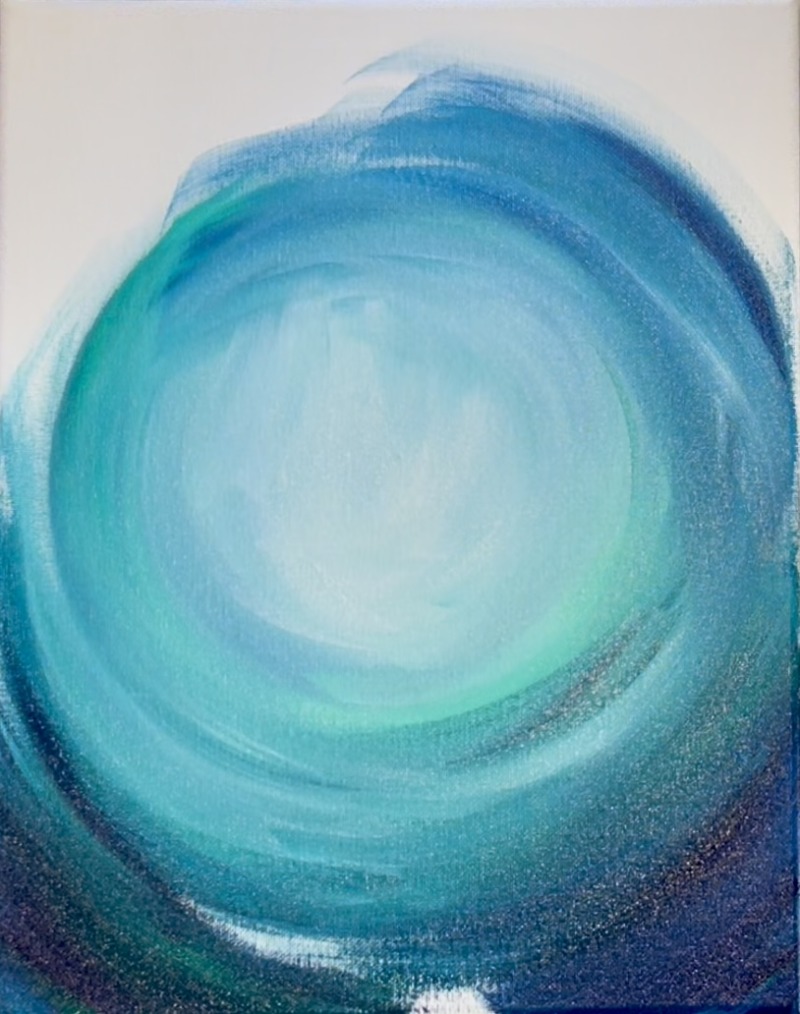
Fill more “phthalo green” and “Prussian blue” in circular directions until the whole background is filled.
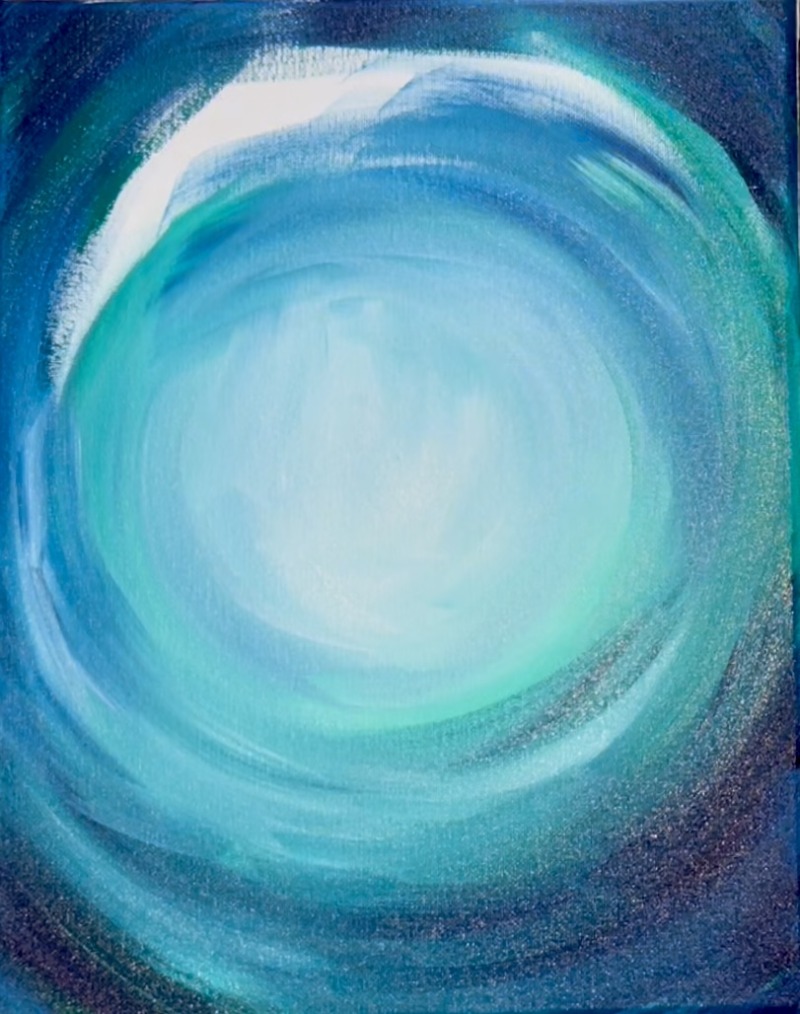
If needed, go back and blend more “titanium white” in the center and paint circular strokes outwards from the center to ensure the middle is bright and the outer parts are dark. You don’t need to blend the color all the way and it’s okay to keep it “streaky”. This adds to the “swirly moon sky” effect!
Then, use a toothbrush (or a 3/4 flat brush) and “titanium white” to splatter little fine white star specks all throughout the sky. It helps to slightly water the white down but not too much! Test out a separate surface first before flicking the paint on the canvas.

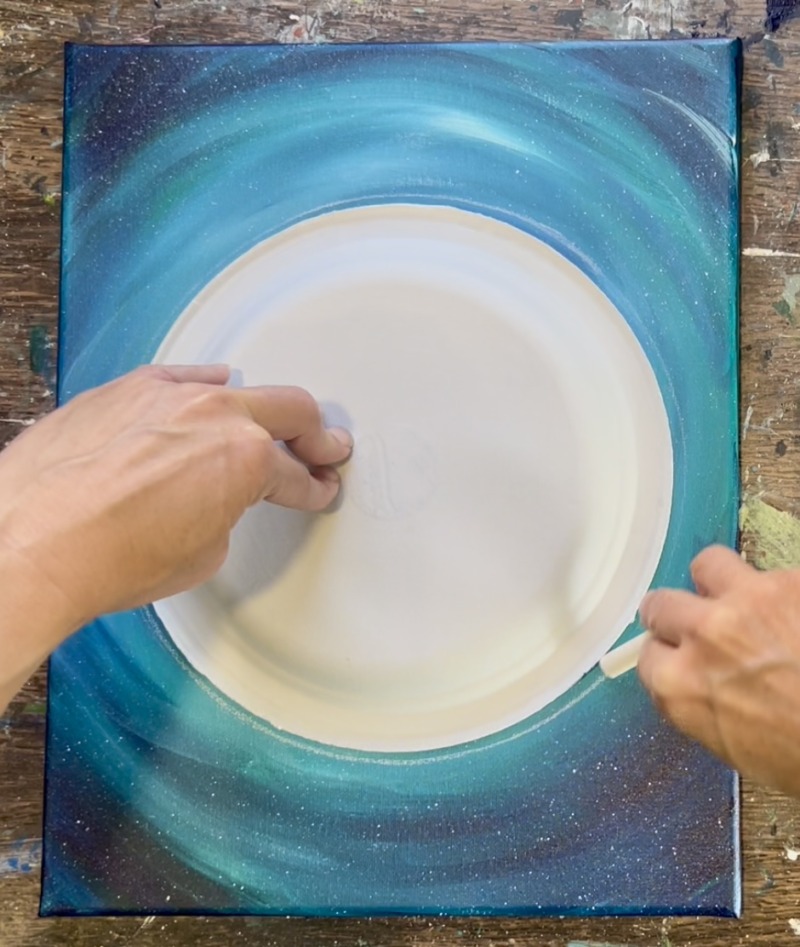
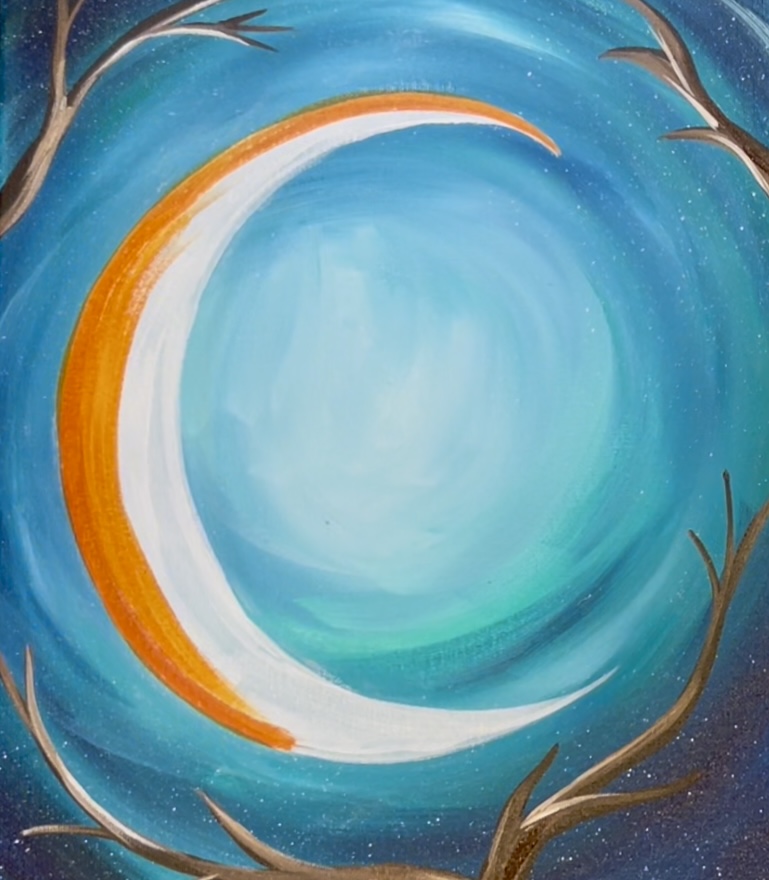
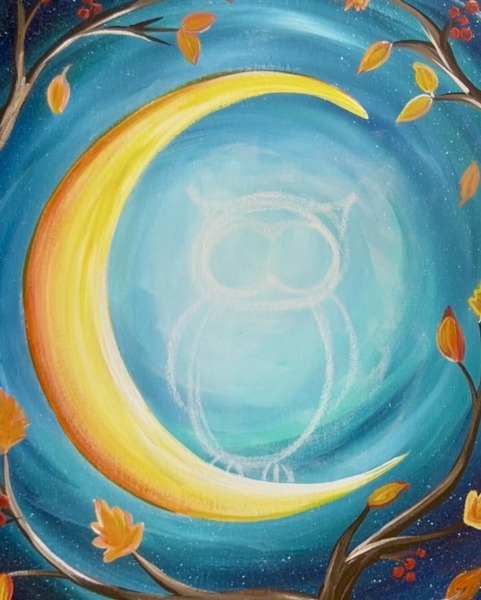
2. Draw Crescent
Use a 9″ circle found around the house to trace the moon! A 7 or 8 inch circle works too! I used a paper plate to trace this. Use a piece of chalk, center the circle on the canvas and trace the outer edge.
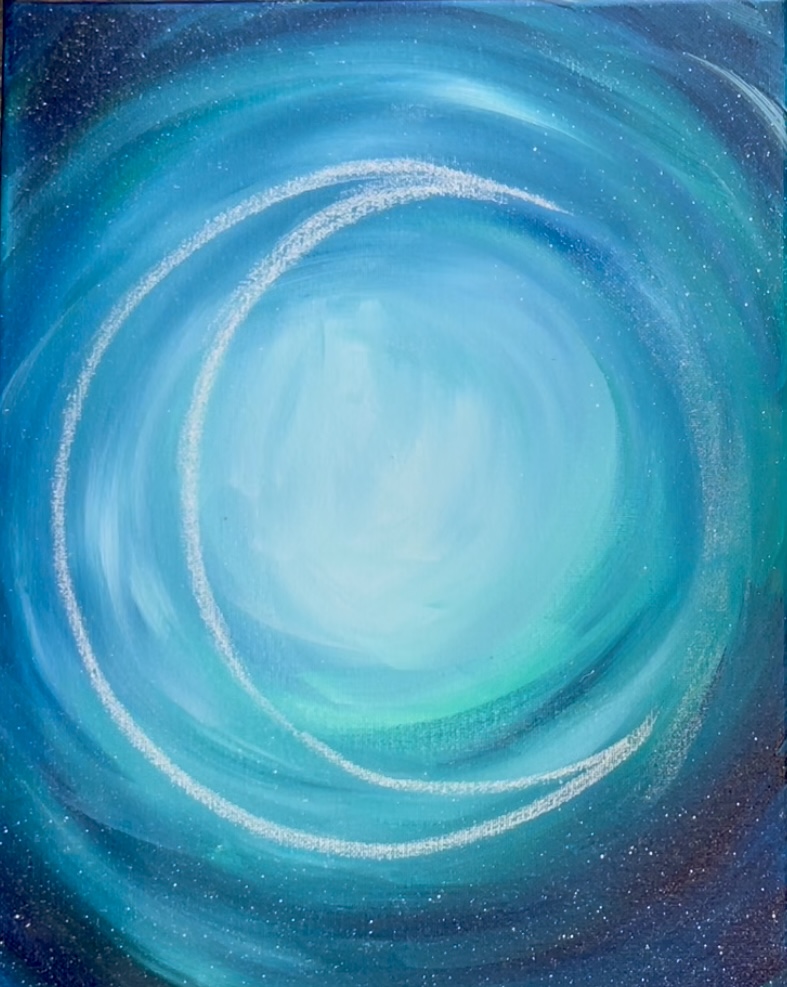
Next, turn the circle into a crescent shape. Start on the top center of the circle and then draw a curve inwards. The bottom point is actually slightly more to the right than the top point.
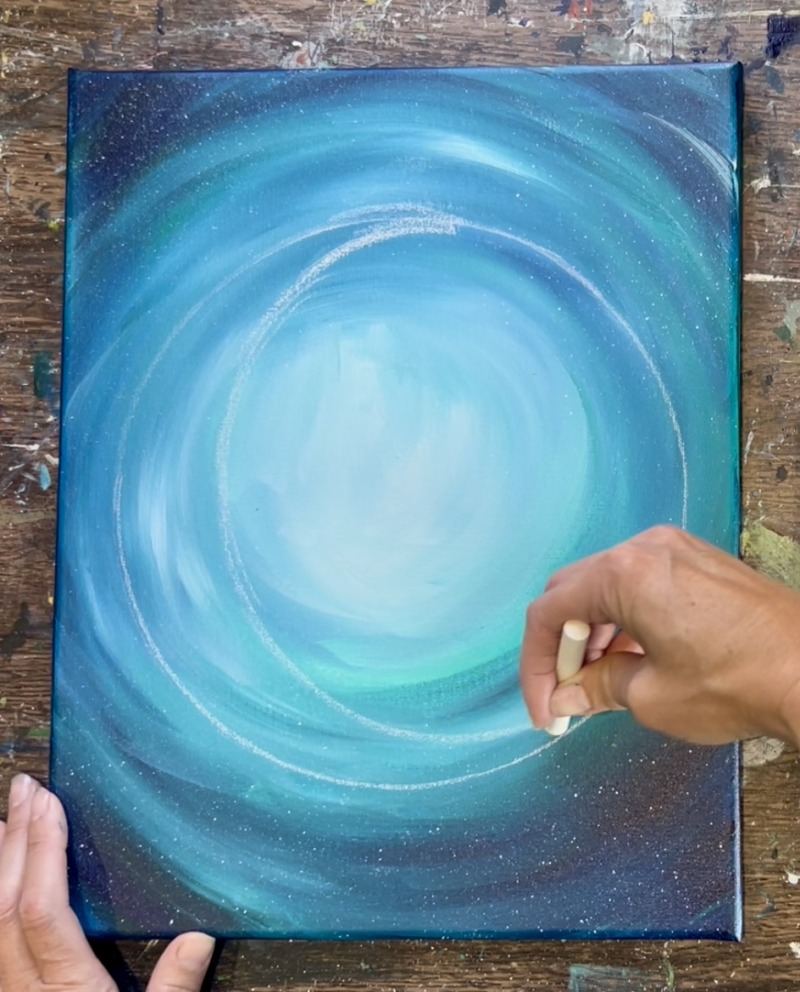
Erase extra chalk lines after you finish creating your crescent shape.
3. Paint Moon White
Use the #12 bright brush and “titanium white” to paint the moon solid white.

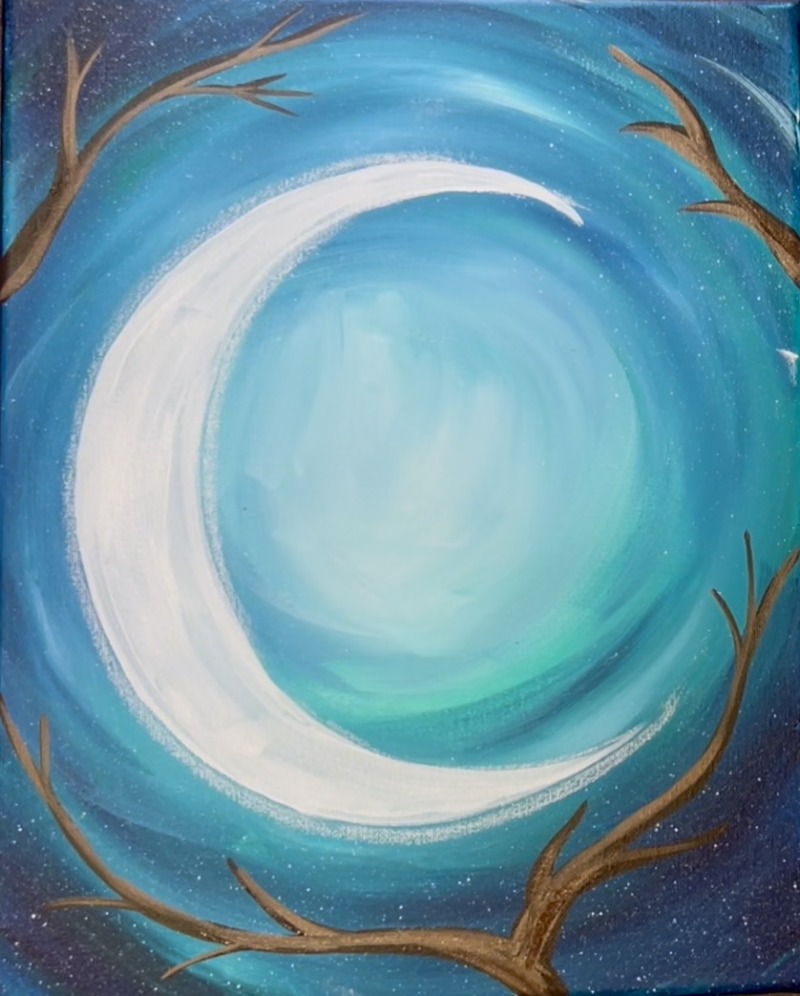
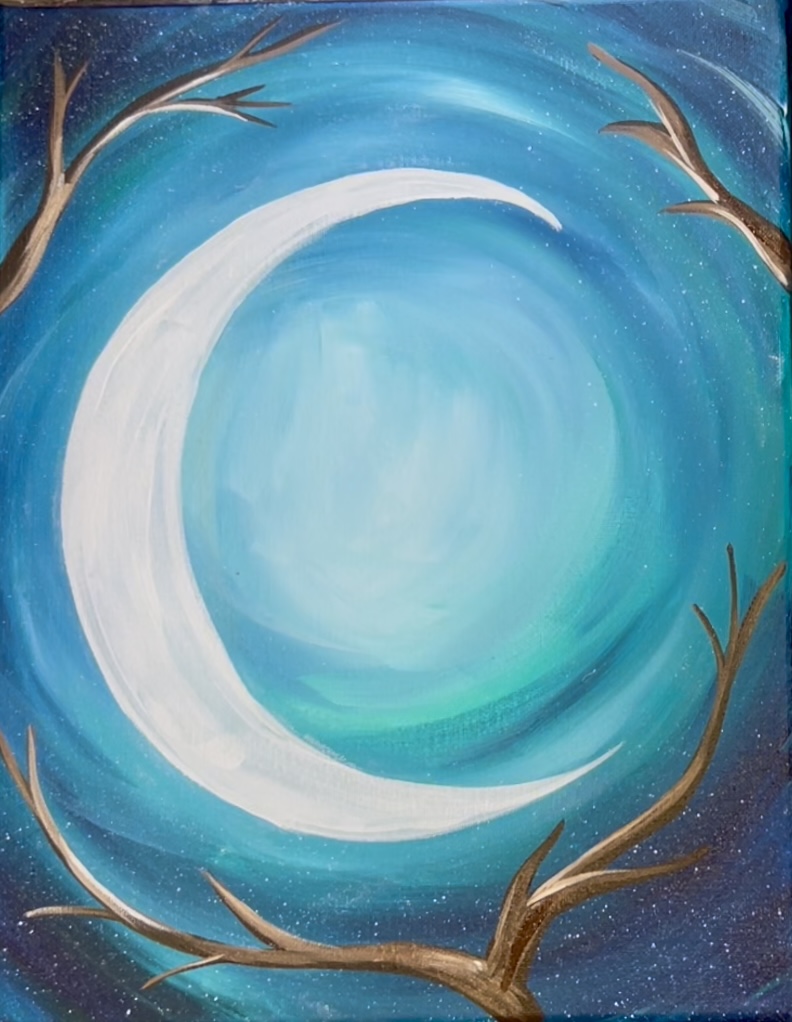
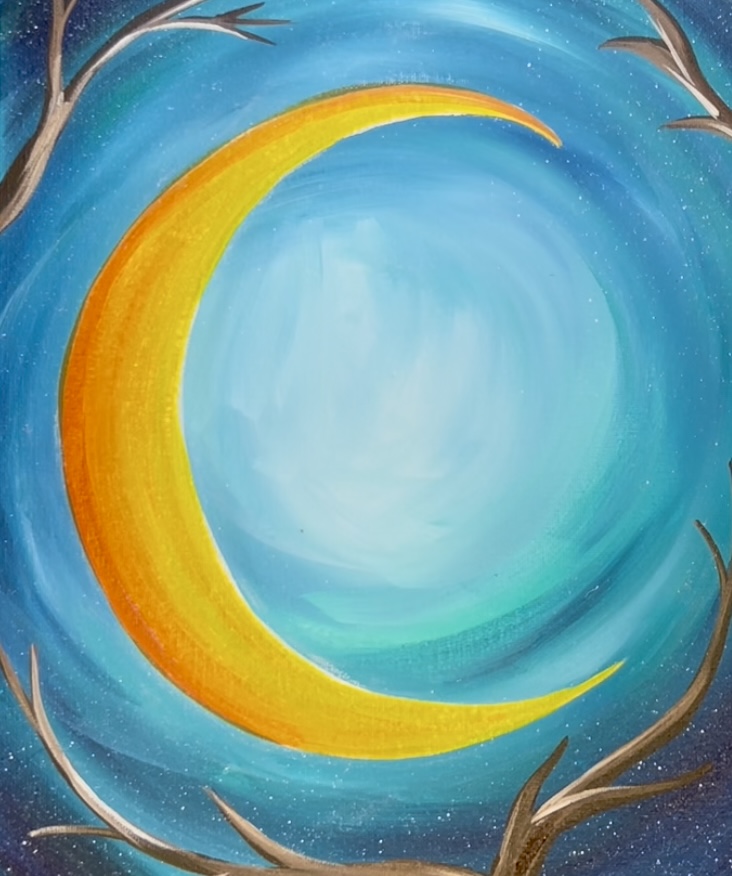
4. Paint Tree Branches
Use the #8 long round brush and “burnt umber” to paint tree branches. Start on the bottom and create a large branch that splits in two directions. Curve the branch so that it contours around the moon. Create smaller branches by using very light pressure on the brush. Create larger branches by applying more pressure on the brush. Also, it is helpful to make sure the brown you are using is slightly loose and not thick paint. You can loosen it by adding a little water into the paint on the palette.
Create two more sets of branches on the top that come forth from the sides of the canvas but still curve around the moon in that circular direction.
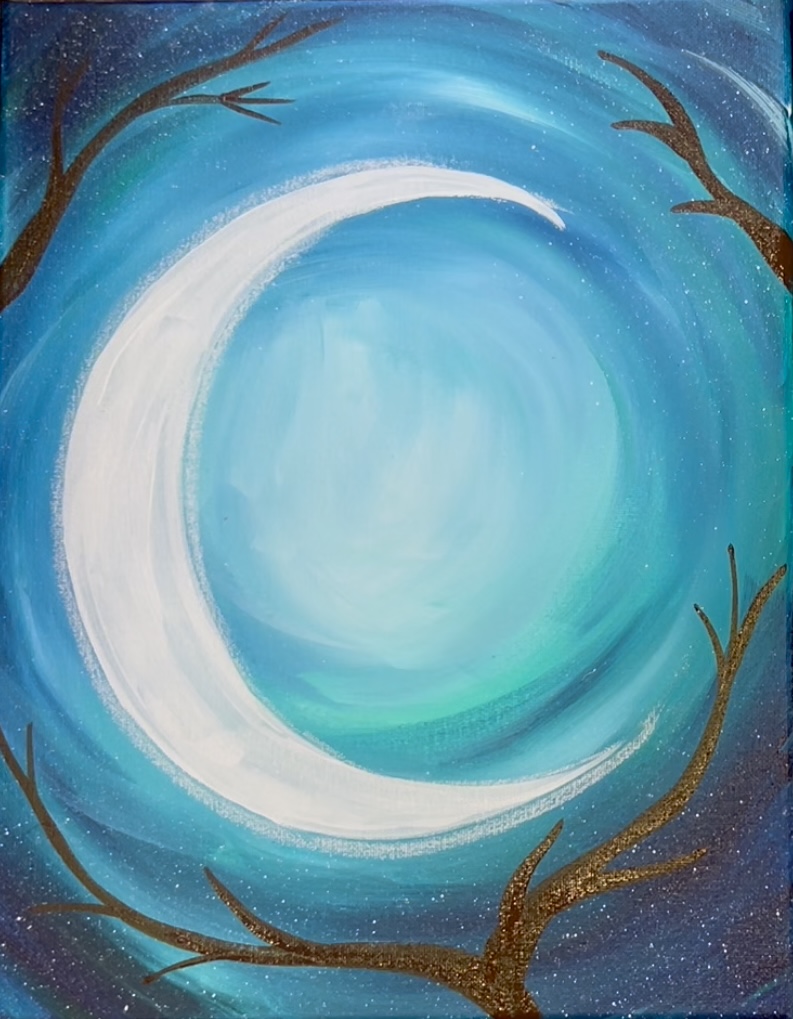
After painting the first layer of the branches with solid “burnt umber”, add highlights to the branches to create depth. Mix equal parts “titanium white” and “burnt umber” together to create a light brown. Then brush this light brown onto the tree branches. Paint over your dark brown but leave edges without this light brown to make sure it stays shadowy on one side. The side of the branch that gets the lighter color is the side facing the moon.
Then load the very end tip of the brush into “titanium white”. Paint the far edges of the branch by lightly outlining it. This is the side closest to the moon on each of the branches.
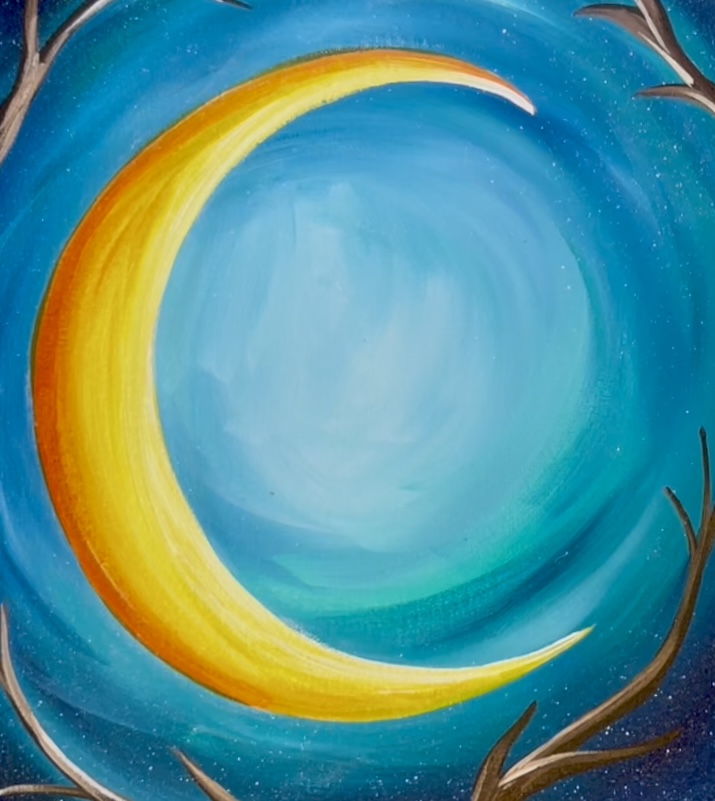
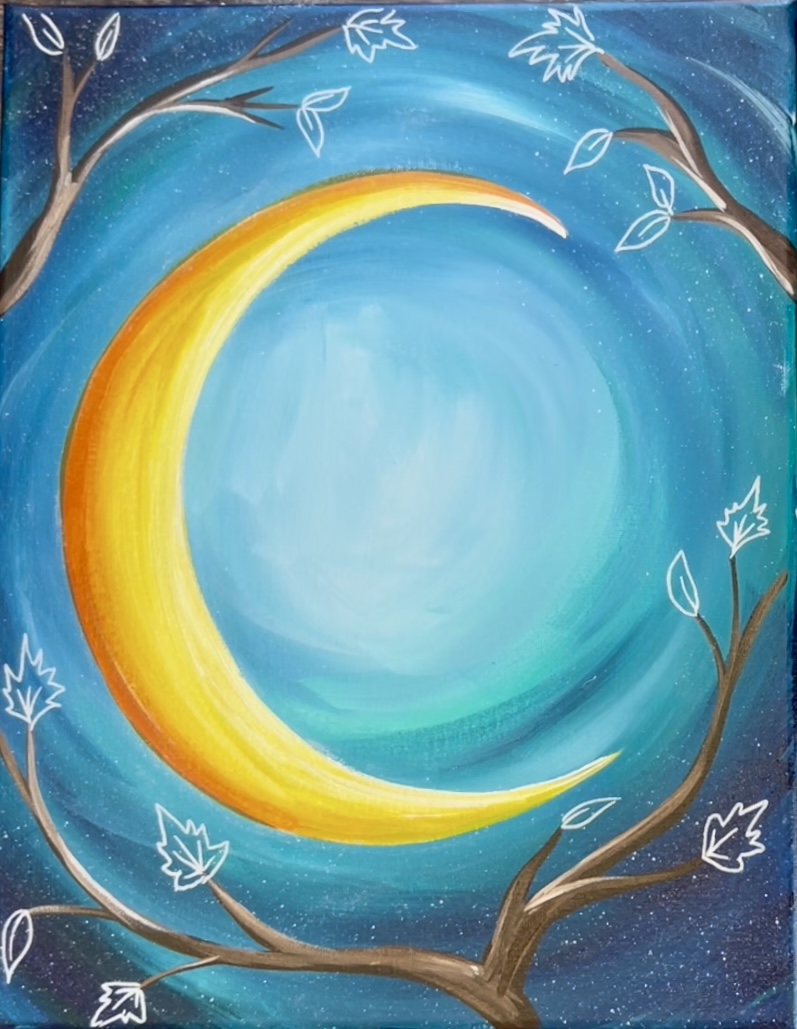
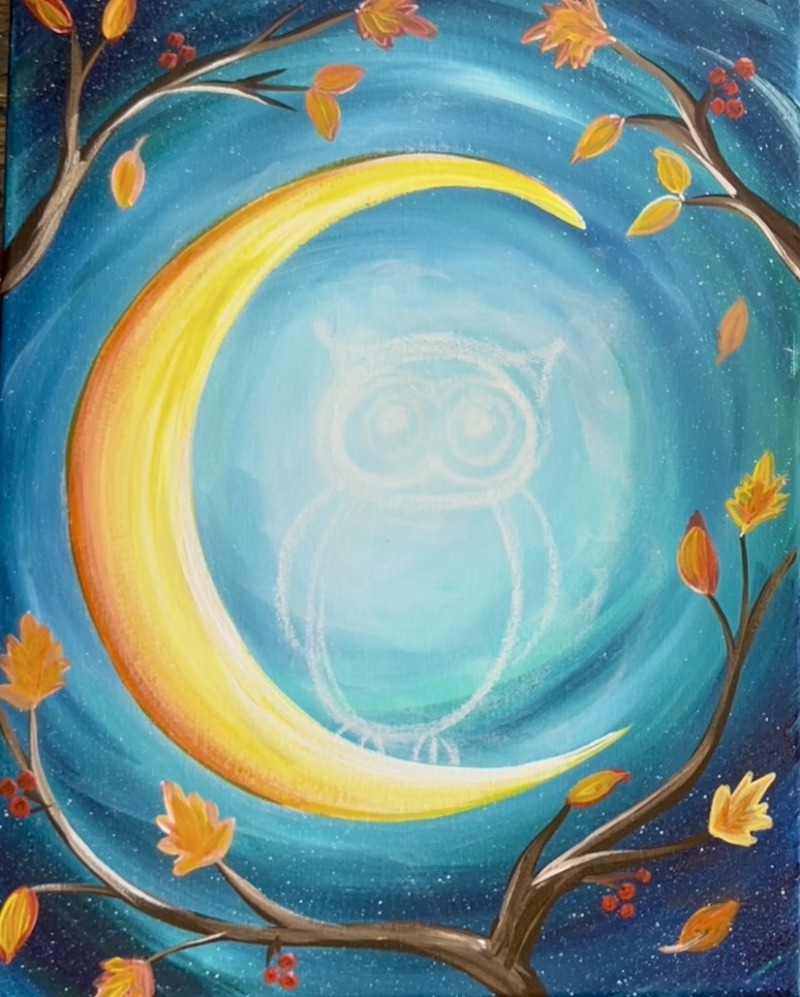
5. Paint Moon Orange/ Yellow
Load your paint palette with “primary yellow” and “cadmium red medium hue”. Mix the two colors together (about 1 part red to 2 parts yellow). Use the #8 long round brush and paint the far left edge of the moon shape. Paint half the moon with this orange.
Then wipe the brush (but don’t rinse). Load the brush into just “primary yellow”. Blend the yellow into the orange.
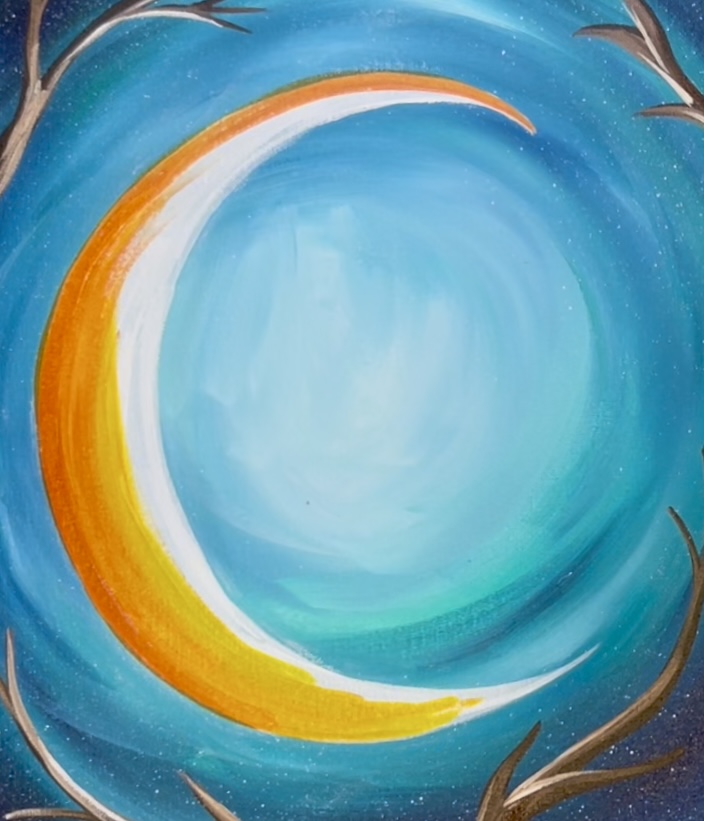
Paint the rest of the moon with this yellow that blends like a gradient to the orange on the left side of the crescent.
Rinse the brush. Then load it into “titanium white”. Blend the white on the right side of the moon. It will mix with the yellow and make the yellow brighter. Blend this all the way to the left side but don’t add any white over the orange area.
6. Draw & Paint Leaves
Use a white chalk pencil, regular pencil or even a white paint pen to draw the leaves.
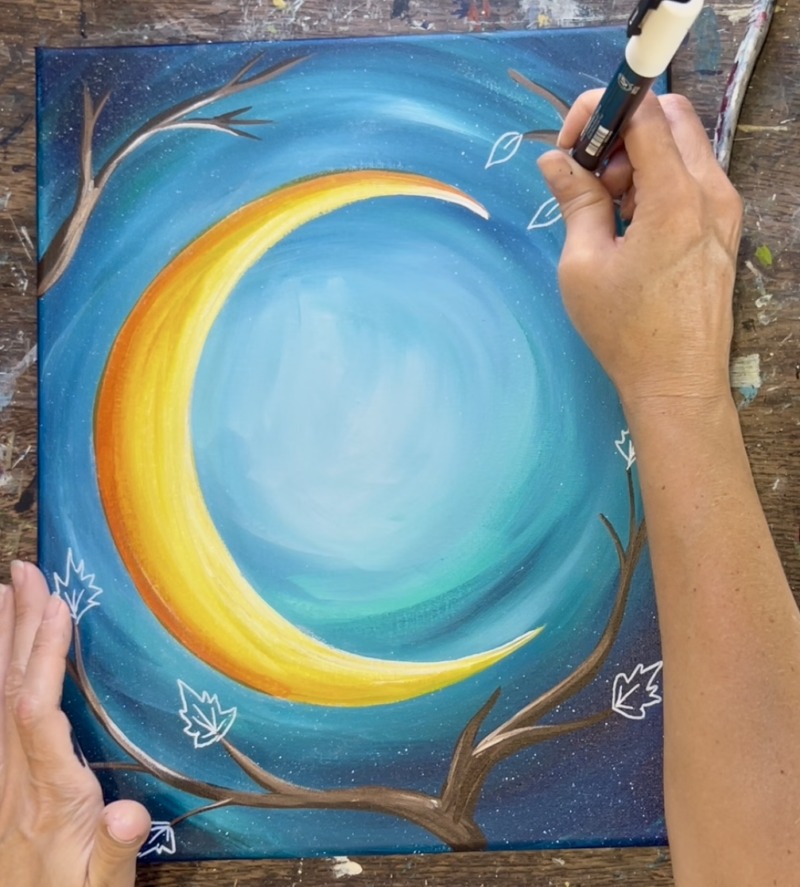
I did a variety of leaves including multi lobed leaves like a maple leaf or simple rounded/ pointed leaves. Draw leaves on the edges of all of the branches.
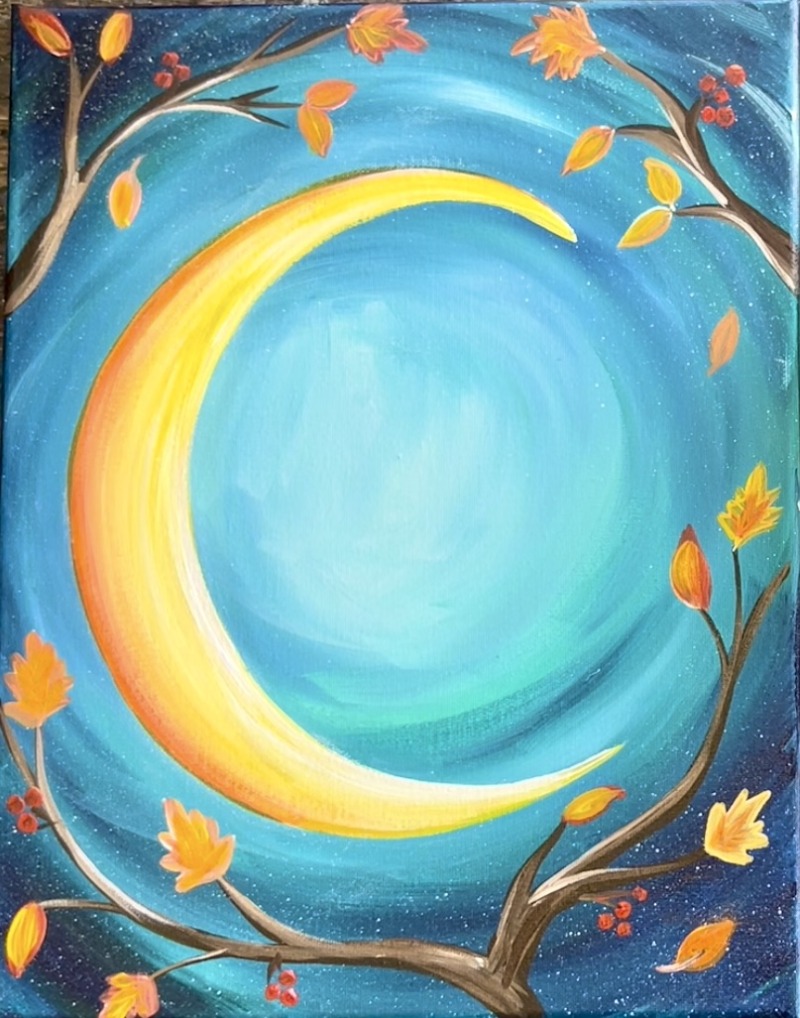
Then use the #4 round brush to paint the leaves. Use a variety of colors in these leaves including red, yellow and white. I recommend mixing white with your colors if painting over a dark part of the background. The white will help to brighten the color of the leaf so that it shows up.
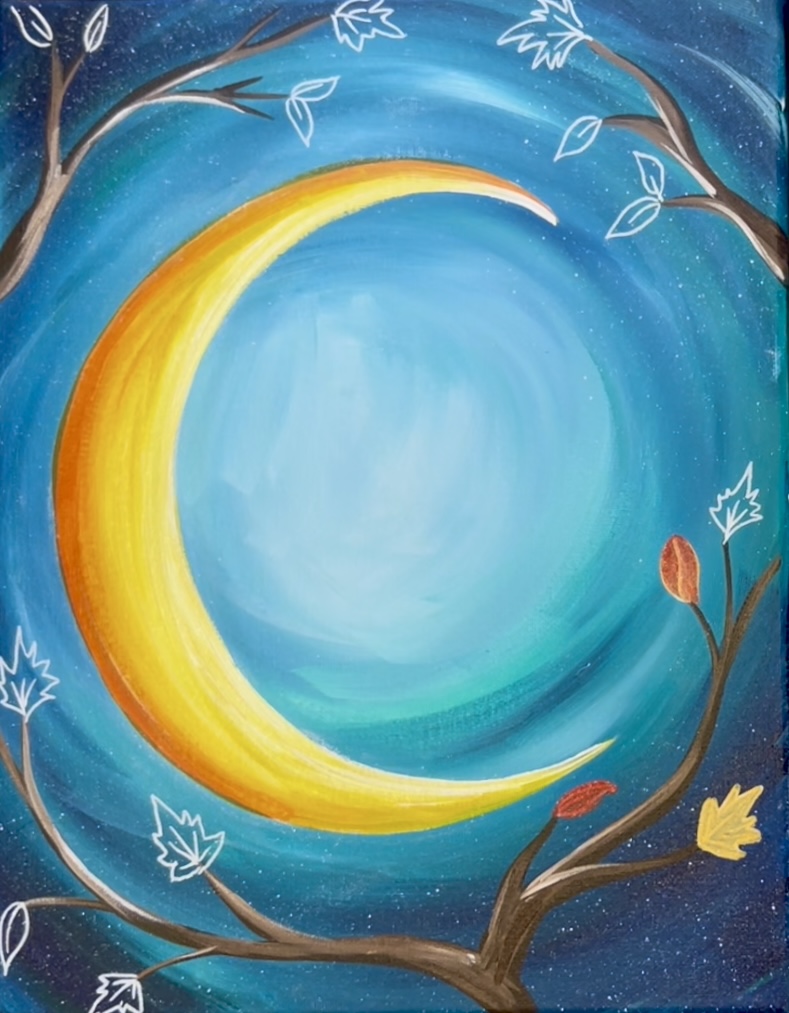
After painting all of the leaves, paint little red circles for berries.

Then paint little brown stems attached to the berries. Also, paint a few falling leaves throughout the sky.
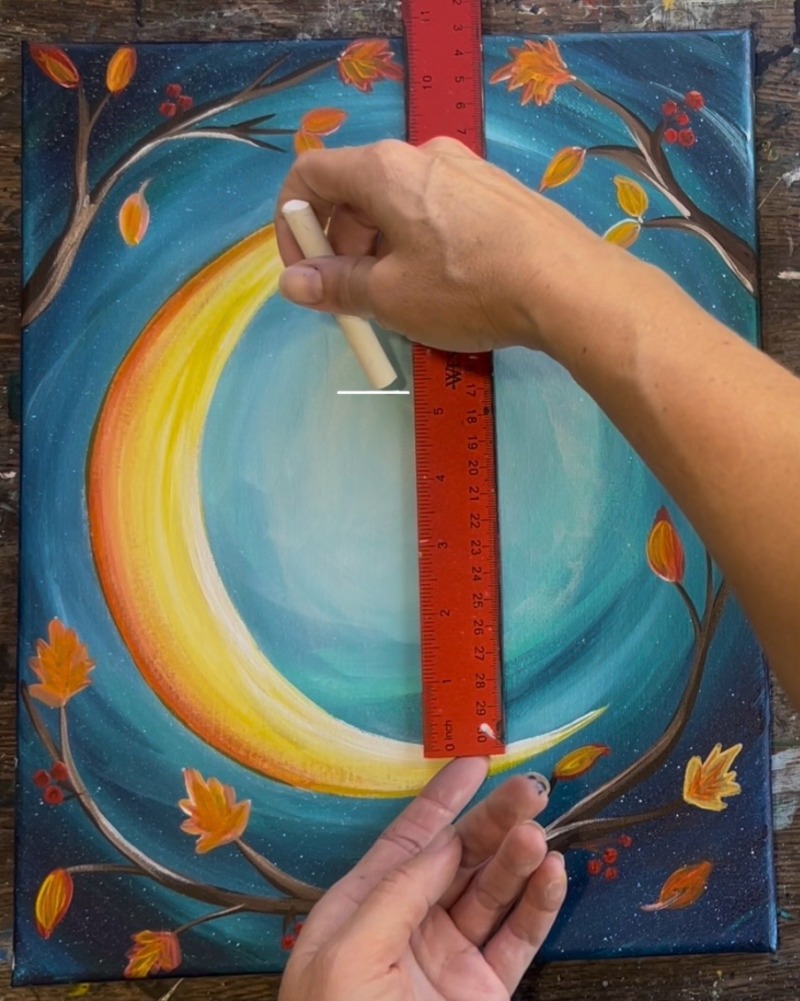
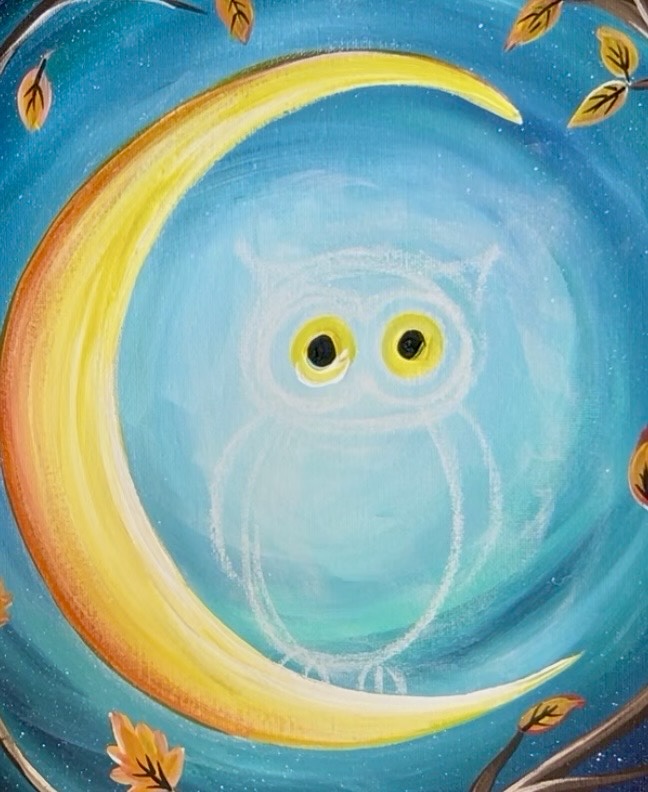
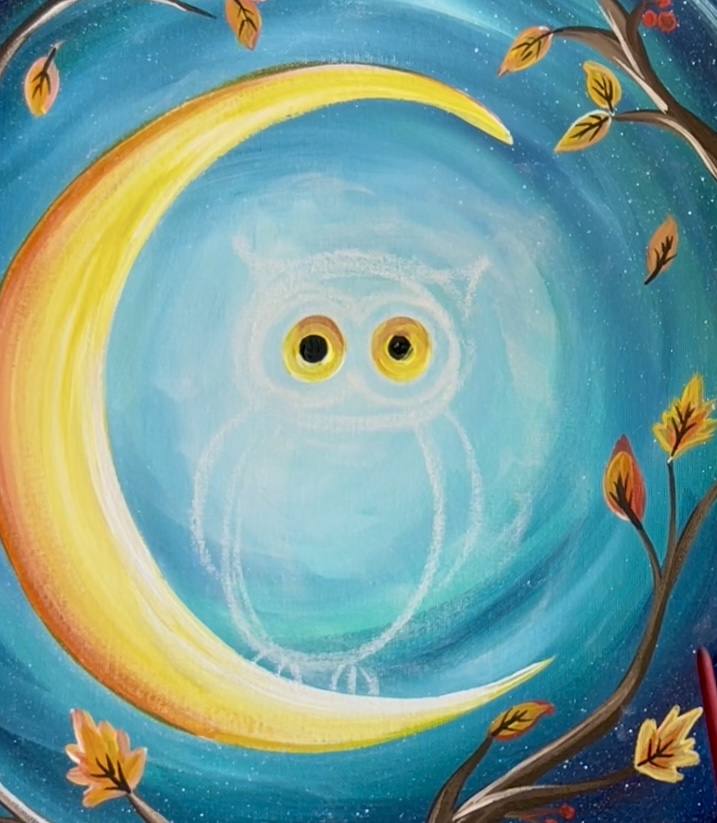
7. Draw Owl
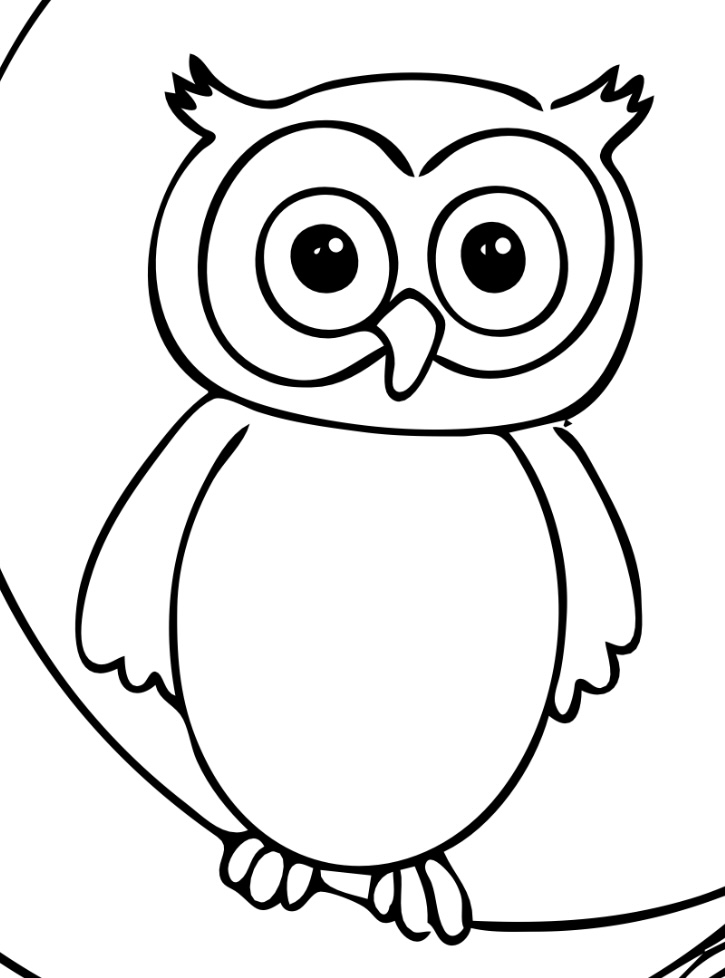
Use a piece of chalk to draw the owl.
Start by measuring about 5.25″ from the bottom surface of the crescent moon. Make a little mark. This is about how tall the owl will be (although you are welcome to make it smaller or larger).
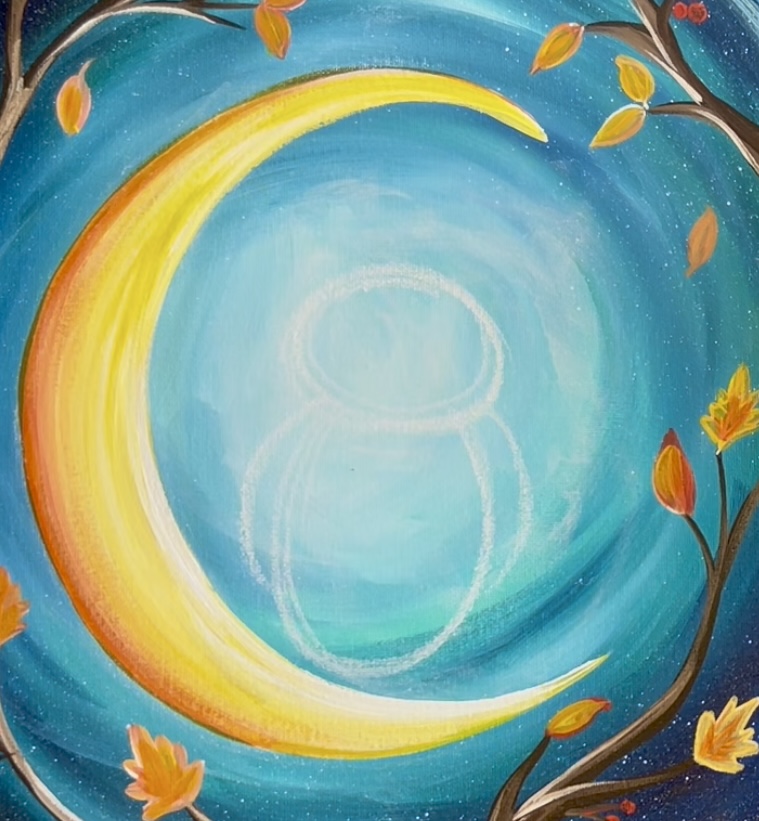
Then use the piece of chalk to draw an oval on its side for the owl’s head. Then a large oval under that for the owl’s body.
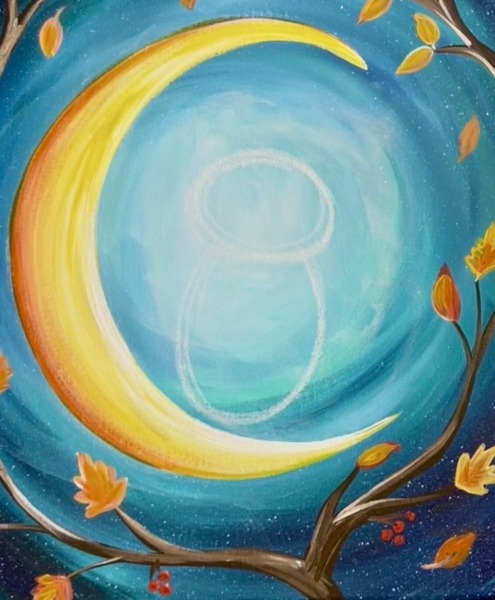
Draw two curved lines on each side of the owl’s body for the wings.
Then draw two ears/ curved lines on the top left and right sides of the head.
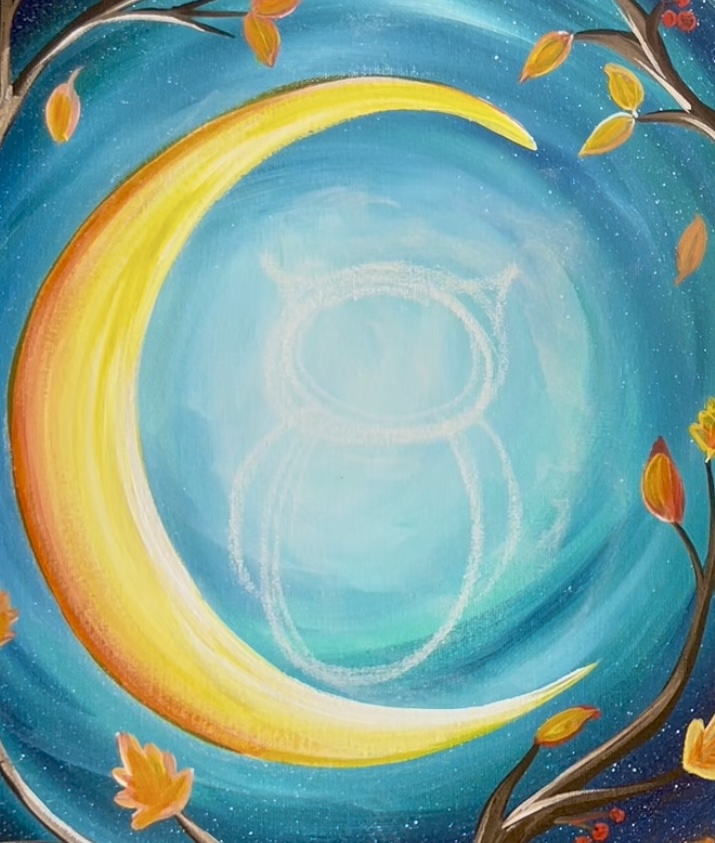
Draw a “figure 8” inside of the oval shape of the head.
Then draw a set of circles and a solid small circle for the pupils.
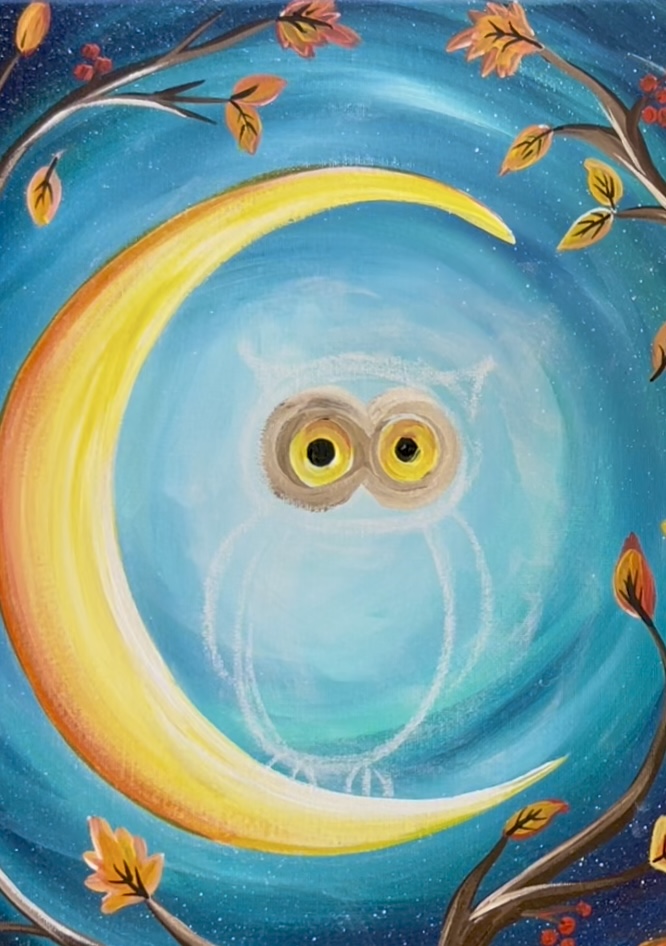
8. Paint Owl Eyes
Use the color “mars black” or a black paint pen to paint the two small circles in the middle of the owl’s eyes. White the black eyes are drying, paint vein lines on the leaves. Use the #4 round brush or a black paint pen for this.
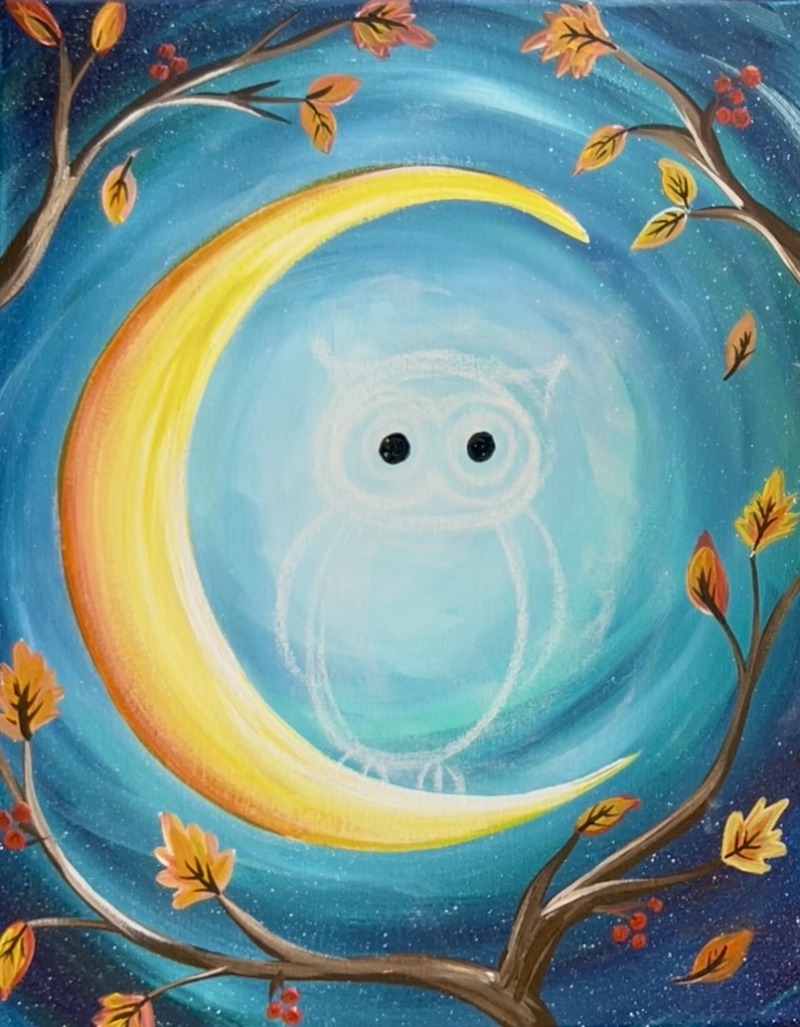
Wait for the black eyes to dry. Then mix yellow and white together. Paint this bright yellow around the black.
Wipe the brush. Then add a little bit of orange to the brush and blend orange on the top of the circle. This will make the top of the circle a little “shadowy”. You can also take this a step further and add just a tiny bit of brown and blend that with the orange at the top.
9. Paint Owl Head
Mix a light brown on your paint palette by mixing 2 parts “titanium white” with 1 part “burnt umber”. Use the #4 round brush to paint the “mask” shape around the yellow/orange eyes. This is similar to a “figure 8” on its side!
Then load your brush into “burnt umber” for a dark brown. Paint the head of the owl around the “figure 8”. In the top middle of the head, drag some paint strokes upwards and diagonally for fluffy feather texture sticking up on its head! Also, drag some paint strokes diagonally on both sides of the head on the top for the owl ears.
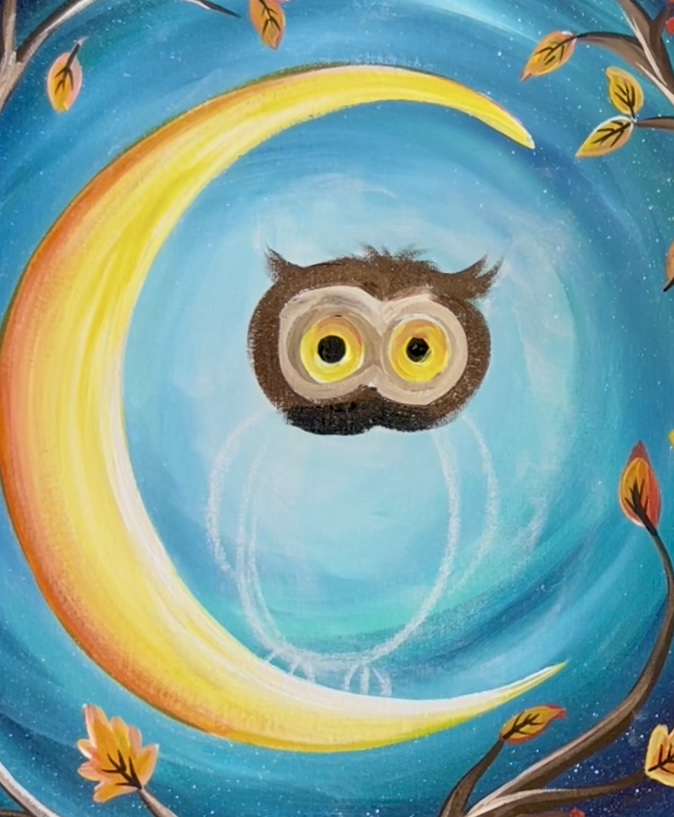
10. Paint Owl Body/ Wings
Paint the large body with the same dark brown color. Drag your paint strokes downwards in a curved direction to form the oval shape. Then drag paint strokes on the sides of the owl to create the wings. Leave a little bit of a gap between the body and the wings.
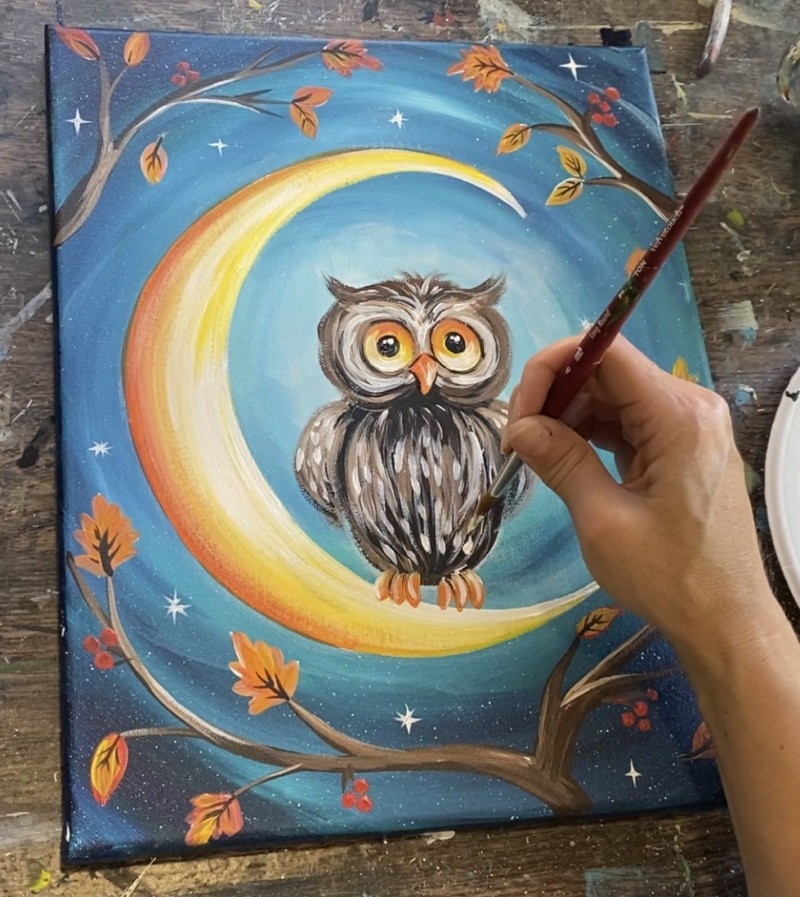
11. Paint Feather Details On Owl
Use the light brown color you used for the “figure 8” to add feather paint strokes on the top of the head. Do this over your dark layer but don’t cover all of your dark layer. These are thin lines that curved to form a “part” on the top center of the owl’s head and curve upwards with the ears.
Then use the same light brown to paint more feather paint strokes. Paint thick but short lines going in a downwards direction on the owl’s wings. Then paint longer more slender lines on the owl’s body. Make the direction of the paint strokes curve with the shape of the oval of the owl’s body. Change the direction of the paint strokes on each side of the body.
12. Paint Details On Eyes
Lightly outline the eyes with a thin black line. You could also do this with a black paint pen. Then use titanium white paint (or a white paint pen) to paint two highlight dots on the upper right of each of the eyes.
13. Paint Owl Beak & Talons
Use titanium white to paint the beak. This is a “kite shape” that starts between the eyes and the top of this shape lines up with the bottom of the owl’s pupils.

After the white dries a bit, paint the beak orange then add a little bit of white and blend it on the right side of the beak for a “highlight”.
Use the same orange to paint the owl’s talons. These are simple curved lines that slightly overlap the moon to make it look like the owl is perched on the moon.
14. Optional: More Feather Details/ Shading
You can use a combination of “black” and “white” to layer on more feathering. Add black by painting loose paint strokes under the head, next to the wings (where they meet the side of the body) and on the very bottom of the owl. Lightly add this black to create shading in those areas. Then go back over with a small amount of “titanium white” to lightly add more feather texture around the eyes on the “figure 8”, on the wings and on the owl’s body.
Also, slightly outline the owl’s beak with “mars black” and add a second highlight “dot”.
15. Paint Stars
Use the #8 long round brush “point” to create stars. I like to use titanium white to create a small dot and then drag that paint with the point of the paint brush to create the points of the stars.

Create a variety of “twinkle stars” all throughout the sky to add to the magical, whimsical theme of the painting!
Final Touches!
I went back and added more owl feather paint strokes with “titanium white” over the wings and body. These are little dash marks going mostly in a vertical or slightly curved direction.
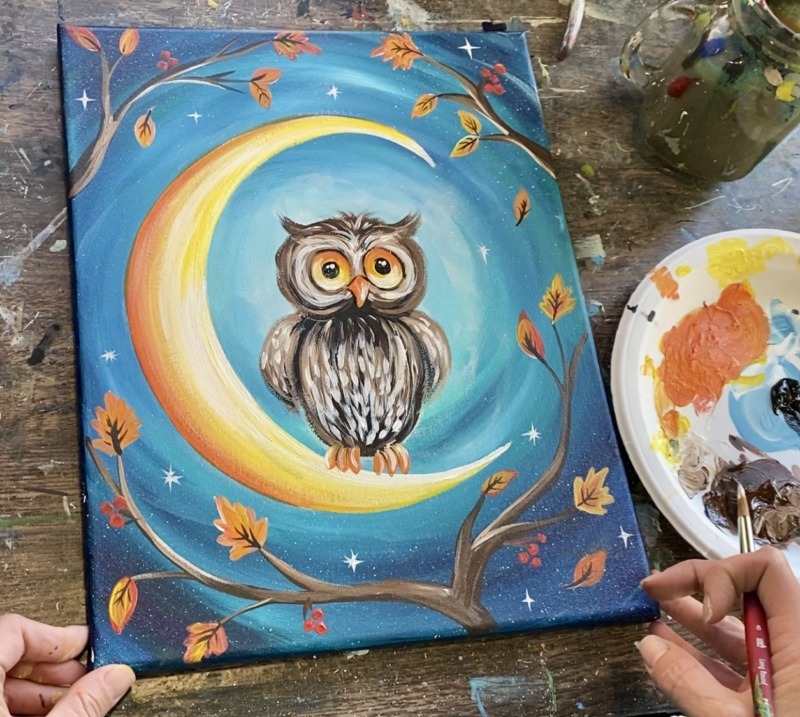
Finished!