
Would you like to save this?
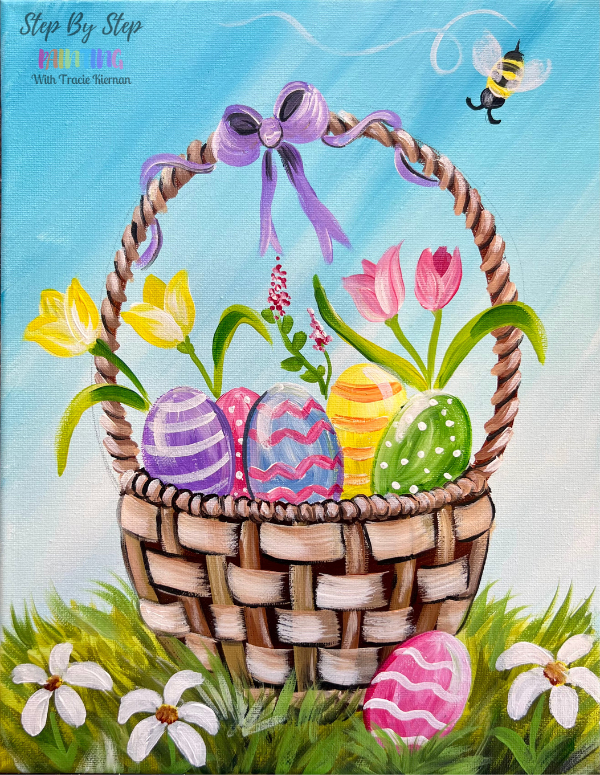
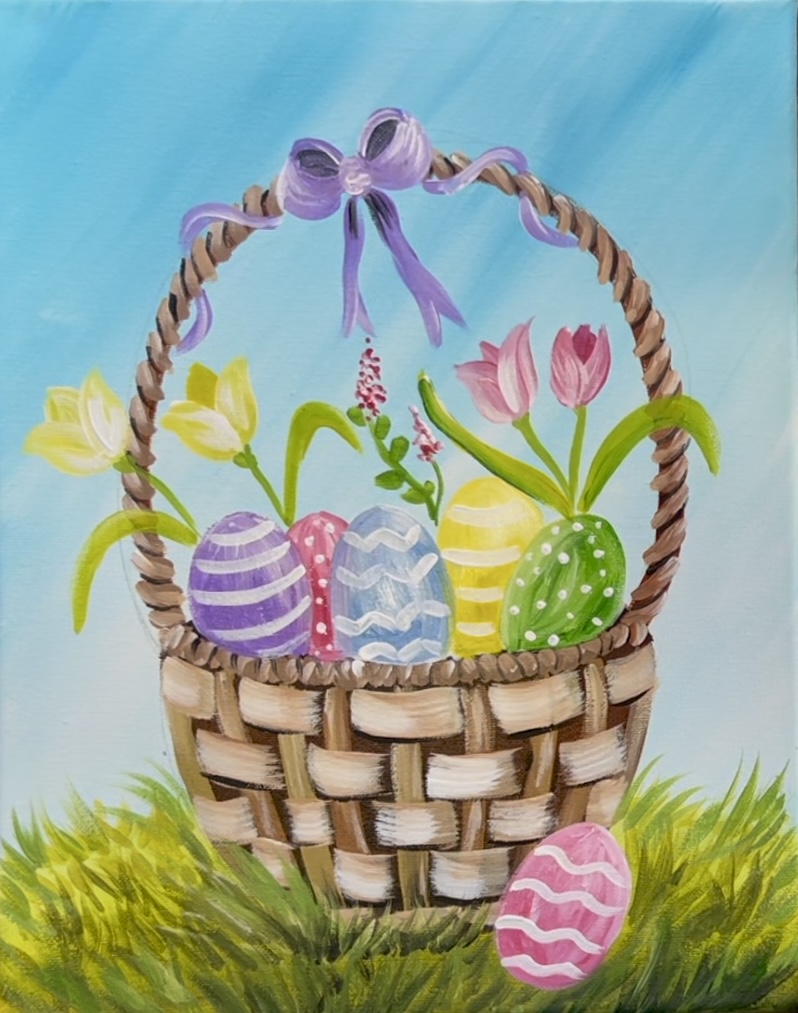
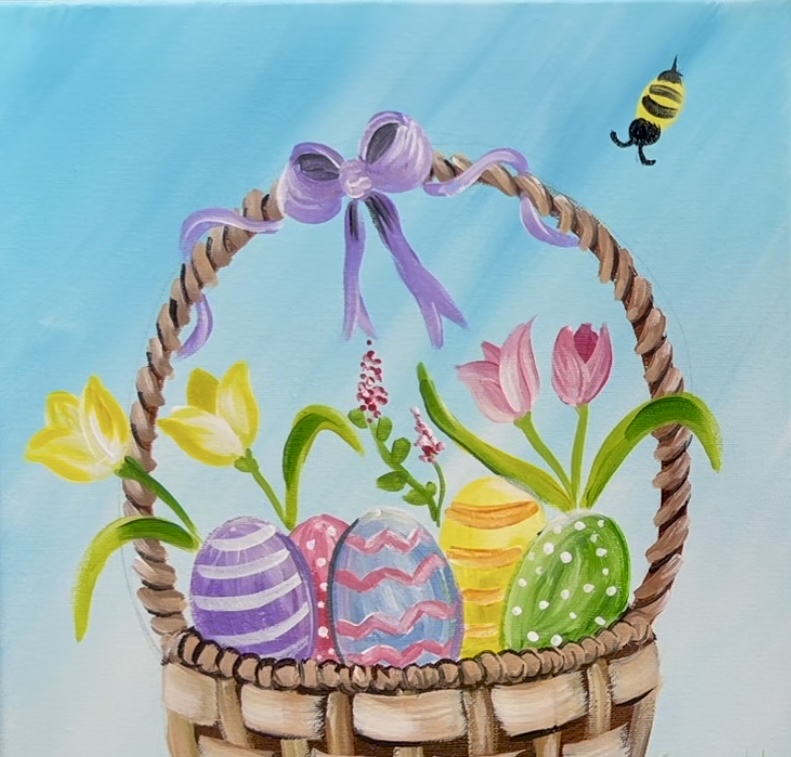
A splash of color and a basket full of joy! 🎨🥚 Celebrate Easter and Spring with this delightful painting.

This painting tutorial will show you how to paint an easter basket with acrylics on canvas. I will show you how to get that fun “basket weave” texture on your basket as well as technique for painting grass and simple flowers.
Enjoy and happy painting!
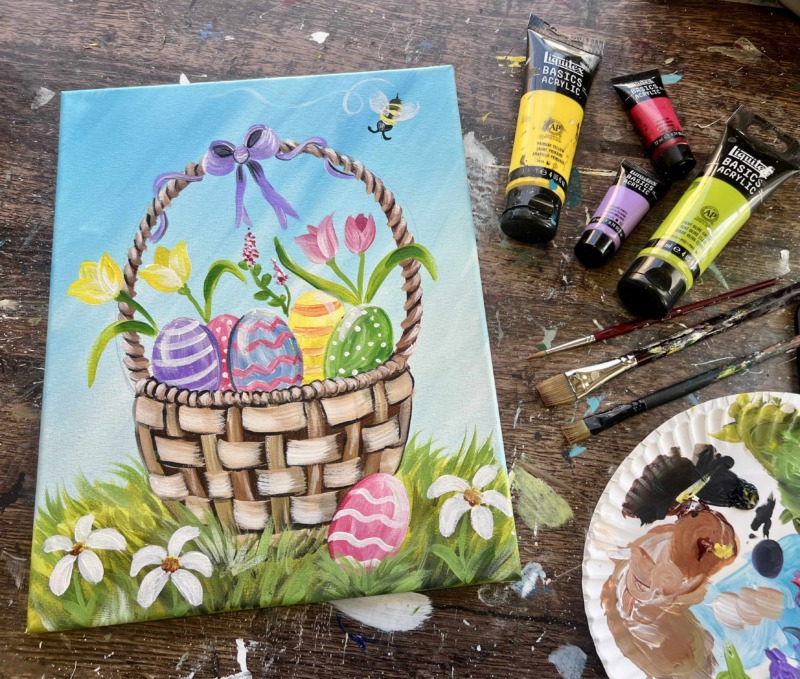
Materials Needed
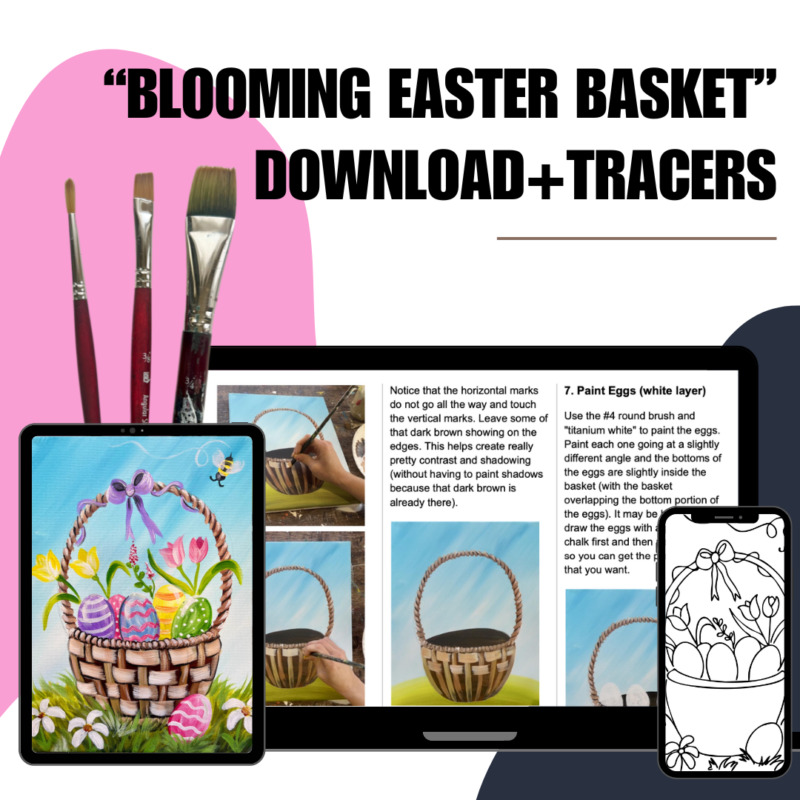
Easter Basket Painting
A splash of color and a basket full of joy! 🎨🥚 Celebrate Easter with this delightful painting.
Materials
- 11 x 14 Canvas (or any size you want to paint on)
- Acrylic Paint
- Brushes
- Pencil
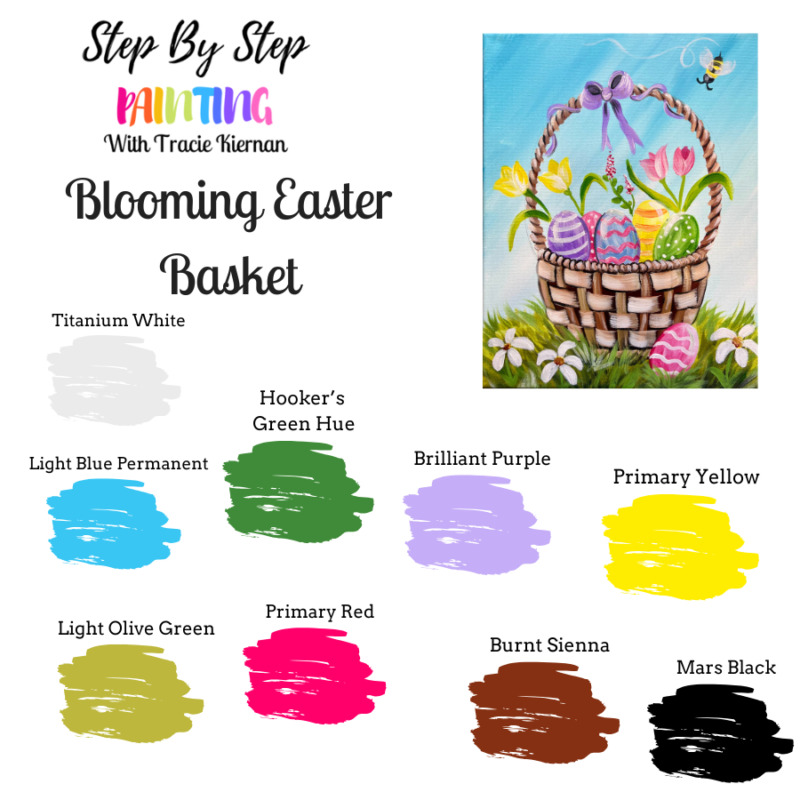
Colors
- Titanium White
- Mars Black
- Burnt Sienna
- Light Blue Permanent
- Primary Red
- Light Olive Green
- Hooker's Green Hue
- Primary Yellow
- Brilliant Purple
Brushes
- 3/4 Flat
- 12 Bright
- 4 Round
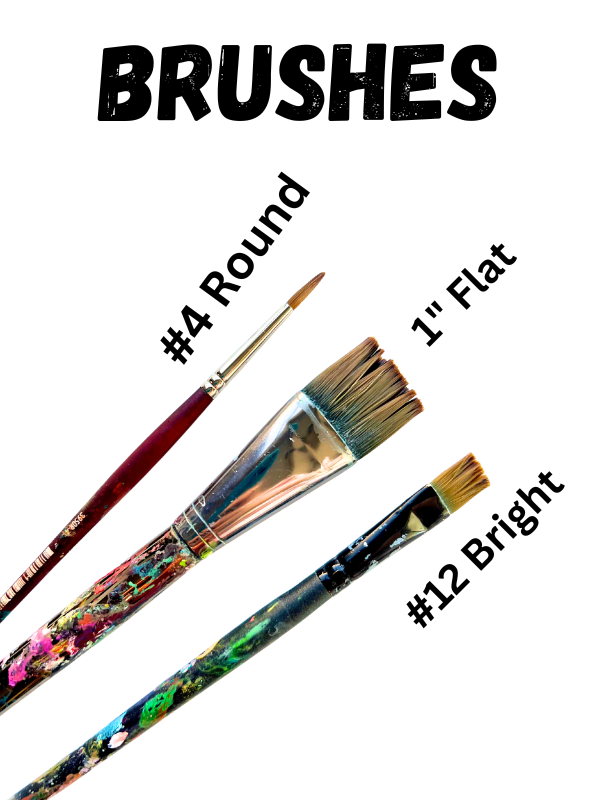
The #4 round and 3/4 flat brush that I use can be found in this set. That #12 bright brush can be found here.
Color Palette
I use Liquitex BASICS acrylic paints. If you are using a different brand or craft paints, you can look at the chart below to help you match your colors. This 18 piece craft set by Apple Barrel would actually have all of these similar colors!
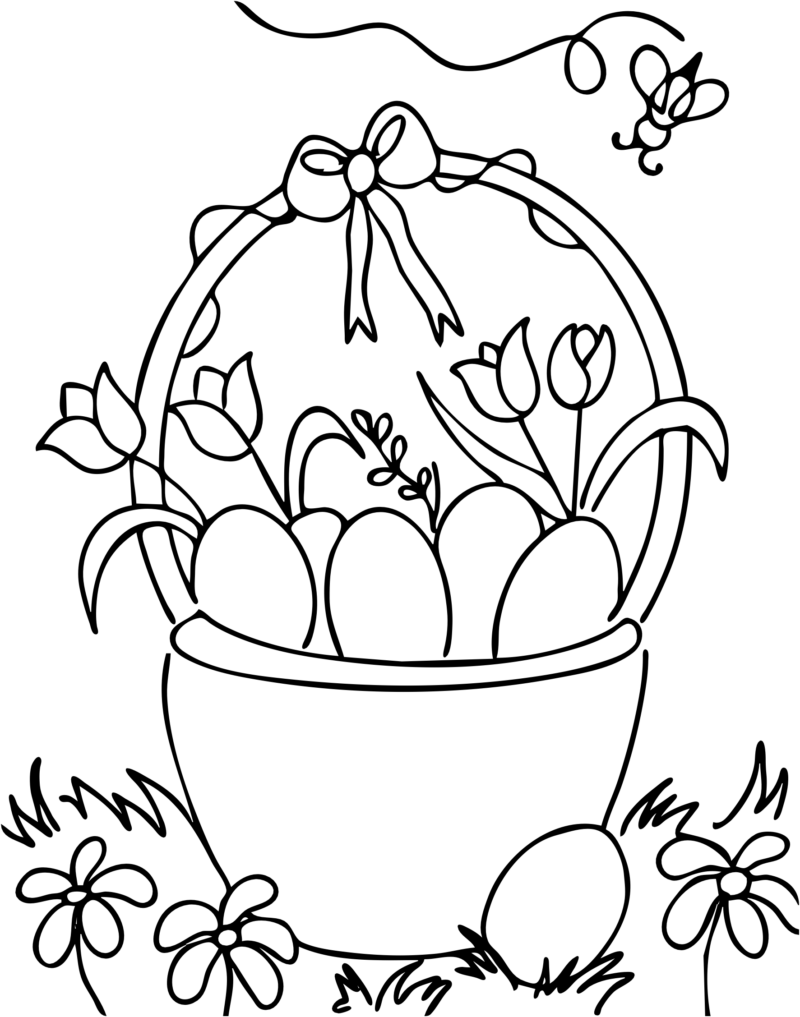
Optional Traceable
Skip the drawing portion! This traceable is completely optional. I would recommend that, if you are using this, to trace this after your first layer of paint so that it shows up.
Looking for more traceable sizes?
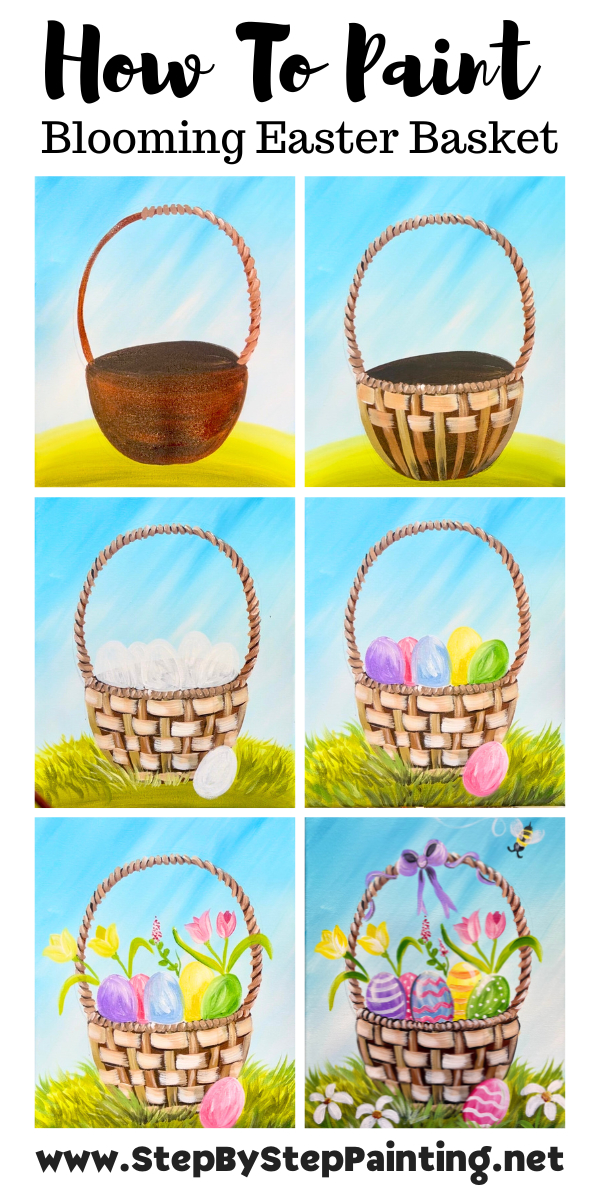
Directions At A Glance
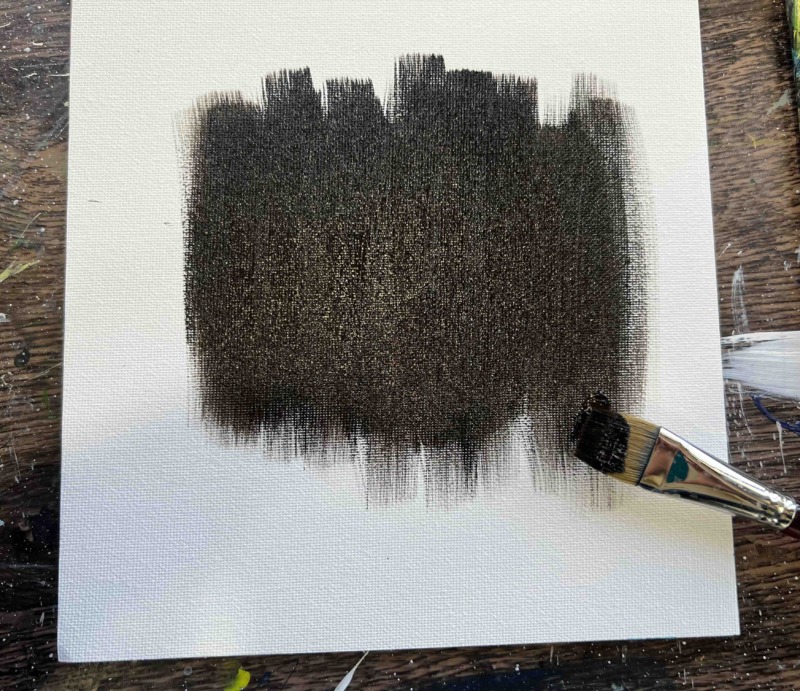
Let’s practice that basket weave!
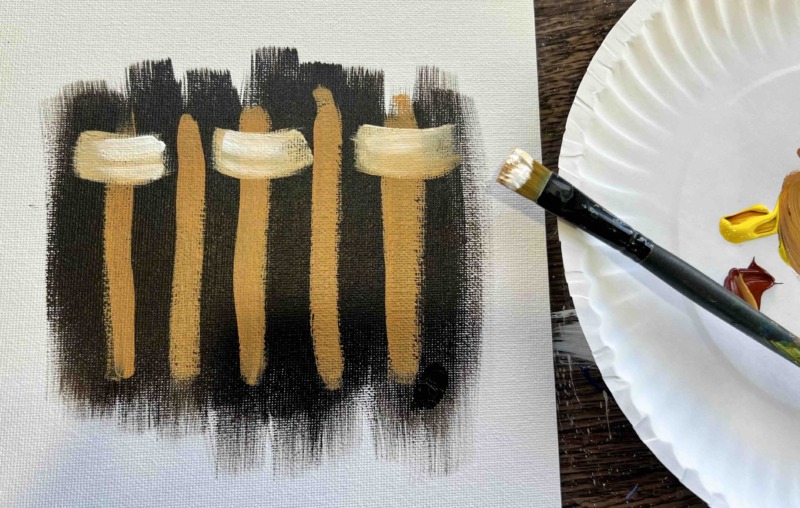
- To paint the basket weave, first start with a dark base. I mixed “burnt Sienna” and “mars black” to paint a square area. You could also make this a tab bit lighter but for this demonstration, we will make this very dark. Let this dry before going on…
- Then paint the vertical “warp” pieces. For this demonstration, we can just paint them vertically. In the basket painting, they will bend a little bit to form the shape of the basket. This needs to be with a light, golden brown color. Mix “burnt Sienna” with “primary yellow” and “titanium white”. Use a #4 round brush and paint vertical, equally spaced lines. These lines don’t have to be fancy! And I made my about 1/4″ thick but you can make them thicker if you want.

- Then use the #12 bright brush (or any flat brush about 1/2″ thick). Load it into the same “light golden brown color” but this time add just a little more white into the color. You want it to be lighter or different than the vertical strokes so it will stand out. Use the full width of the brush to paint the horizontal “weft” marks. When you make these paint strokes, curve the stroke downwards a bit. This will give the weave a little bit of bend. Skip a vertical line and then do the next one! Try not to let your brush stroke touch the vertical stroke next to it. Release the pressure of the brush at the end of the stroke.
- Then do the opposite in the next row! Skip the opposite vertical strokes.
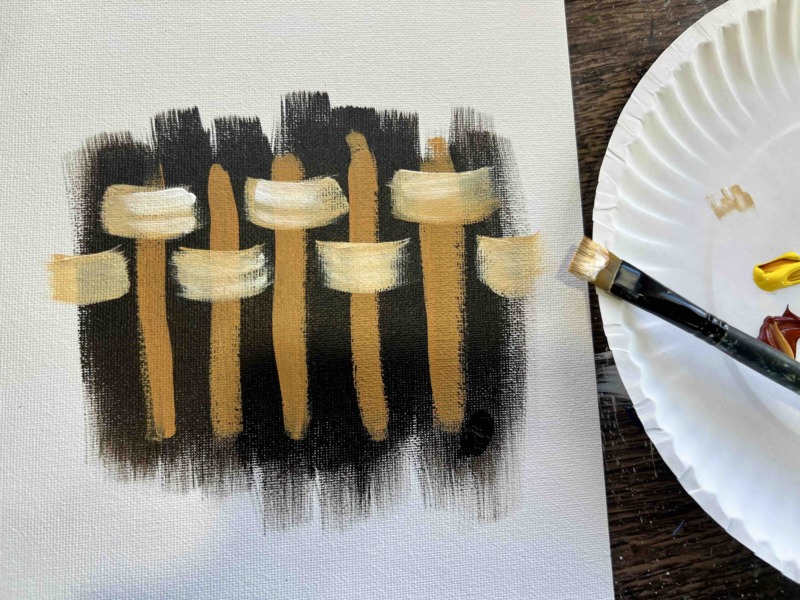
- And repeat to form the basket weave pattern! With each row, you are skipping every other vertical piece. That “shiny white” on the horizontal weaves is achieved by adjust just a bit more white to the paint brush and then brushing over your paint stroke several times. To get that “faded look” on the edging of the horizontal weaves, release the pressure of the brush so the paint stroke fades away.

- Optional: outline the horizontal weaves with a #4 round brush and mars black. This helps it to “pop” a bit more. I’m not sure if I like it outlined or simple like the previous picture. You could also experiment with different shades of brown or other colors for this technique!
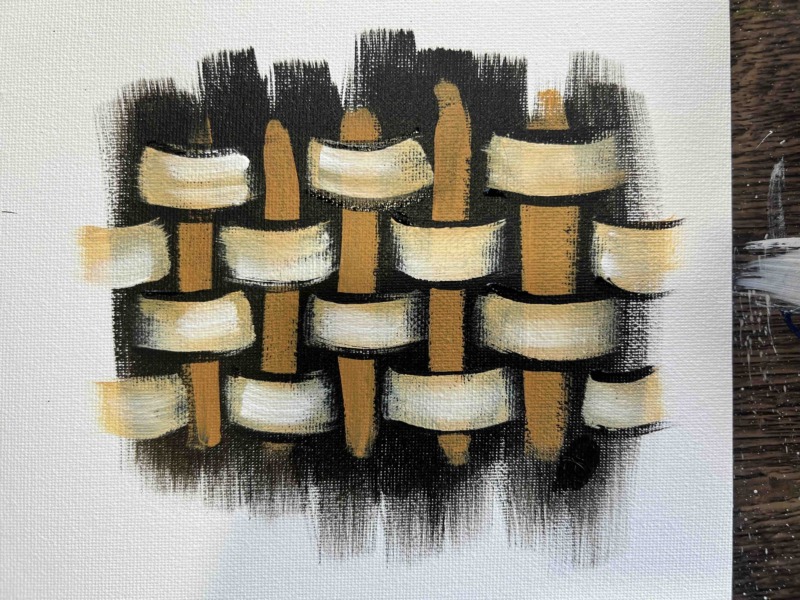
And that is the simple way of painting the basket weave for our Easter Basket painting!
Video
Step By Step Instructions
1. Paint Background & Grass Hill Ground
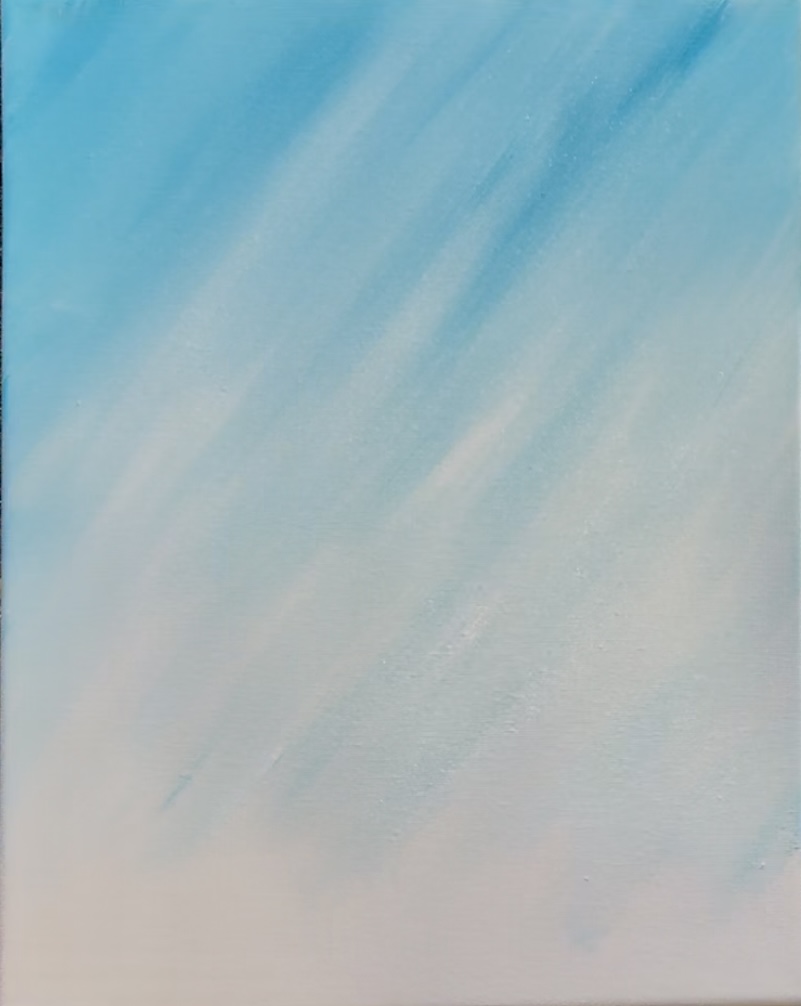
Load your paint palette with the two colors: light blue permanent and titanium white.
Use your 3/4 wash brush. Double load the brush in about 2 parts blue and 1 part white. Start at the top of your canvas. Paint diagonal paint strokes using the full width of the brush. You want to go down about a third of the way down the canvas from the top edge.
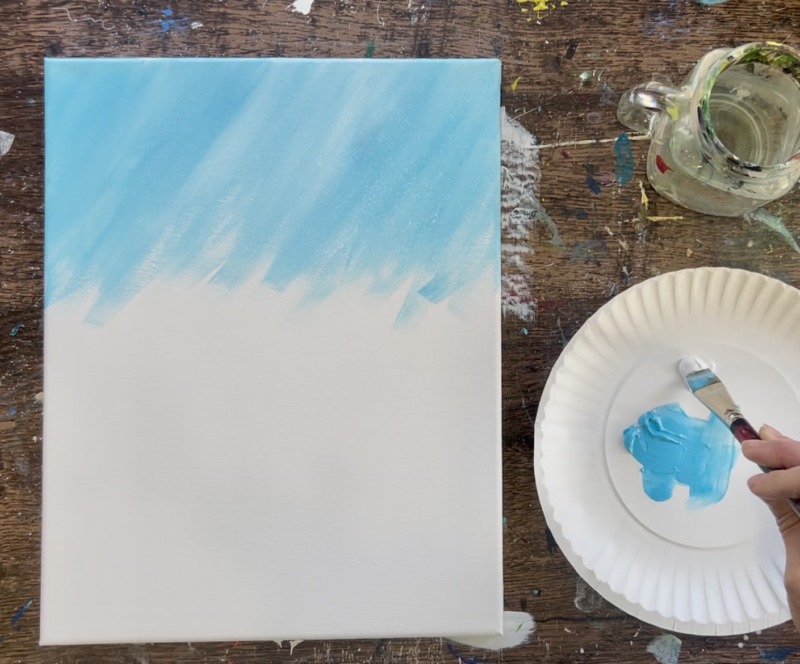
Then without rinsing the brush, load it into the white. Continue to paint diagonal paint strokes and blend the white into the light blue. We want the sky to be slightly dark at the top of the canvas and lighter towards the bottom.
Leave about 1-2 inches of blank canvas space on the bottom edge of the canvas.
Next, load your paint palette with the color “light olive green” and “mars black”. Take your clean 3/4 flat brush and mix just a tiny amount of black into the green to darken it slightly.
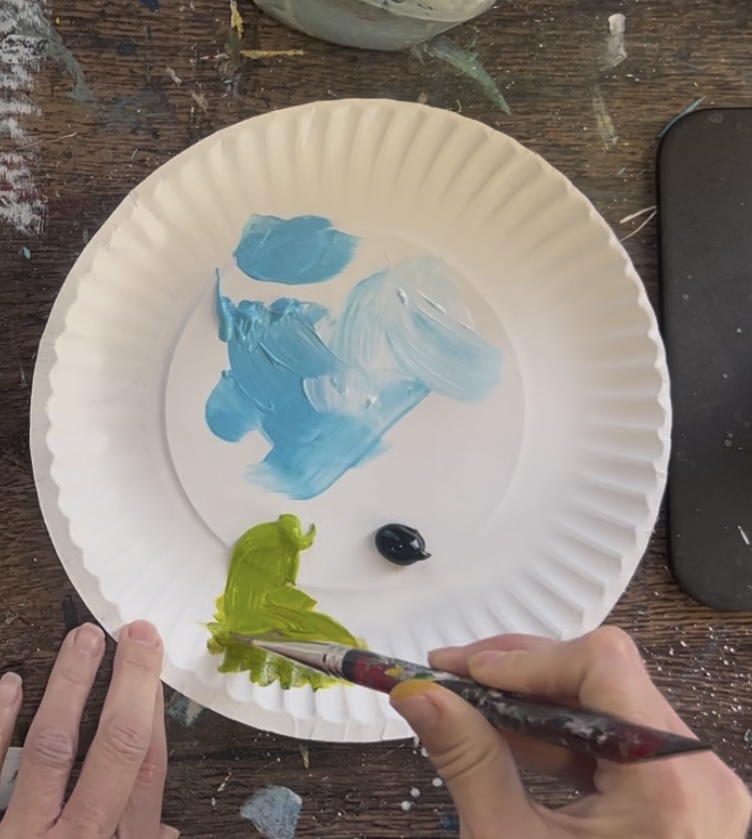
Take your darkened green color and paint a small hill area on the bottom of the canvas. This hill is going to be slightly darker on the bottom and get lighter at the top. Go up about 1 inch with this green, painting in a curved direction to form a hill.
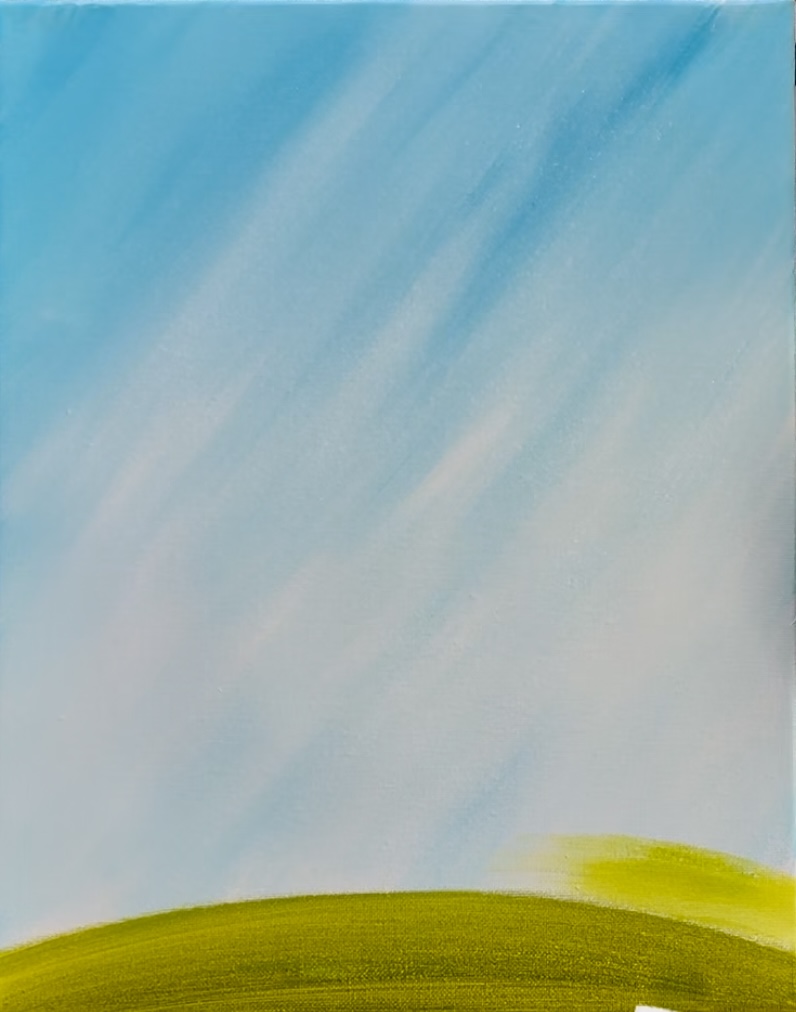
Then rinse your brush. Mix titanium white into your “light olive green” this time to make a light green. Make your hill slightly larger by painting this light green at the top and blend it down.
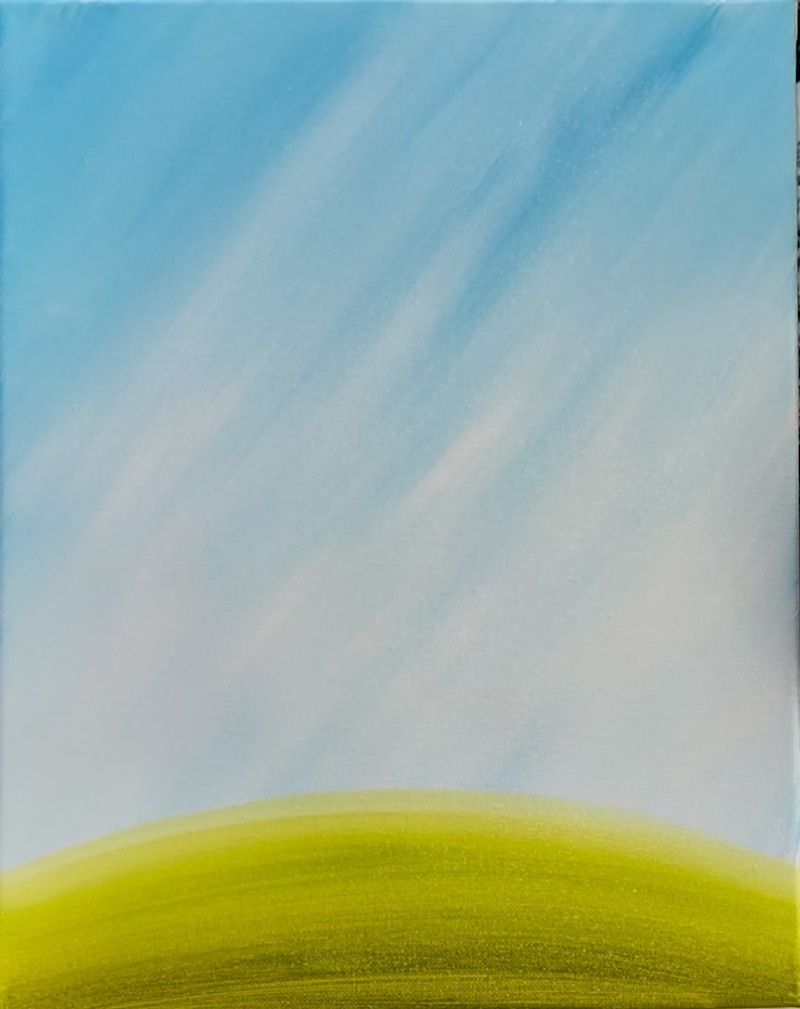
Your green hill is now lighter at the top and darker at the bottom. The middle point at its highest is about 3″ high, however, this measurement does not have to be exact.
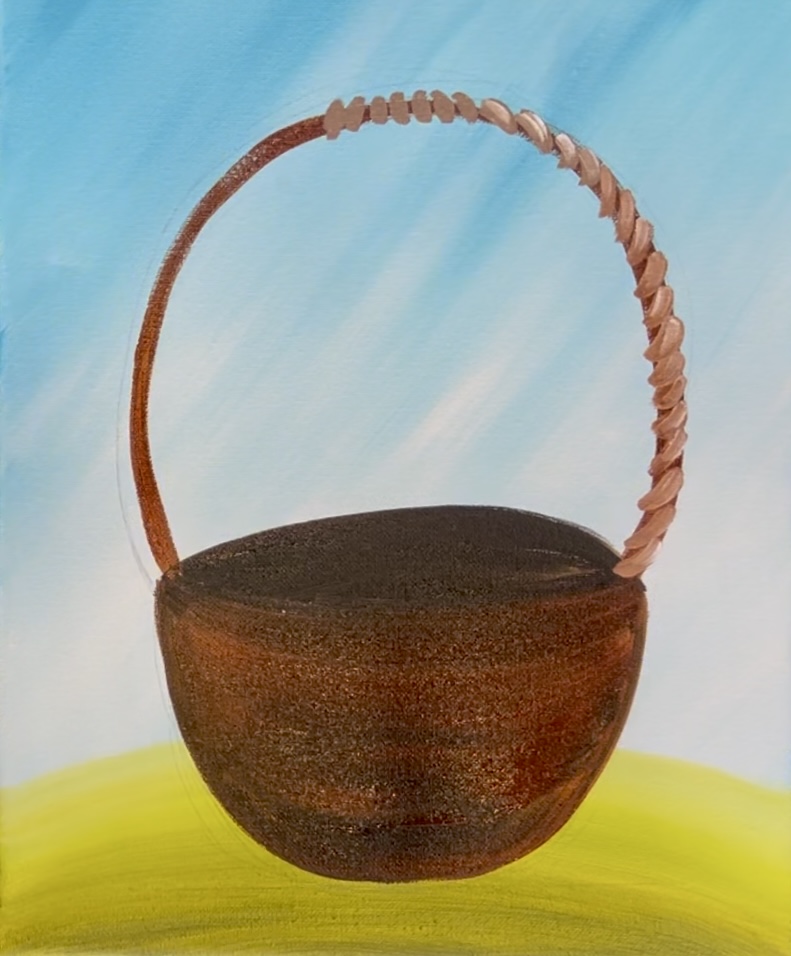
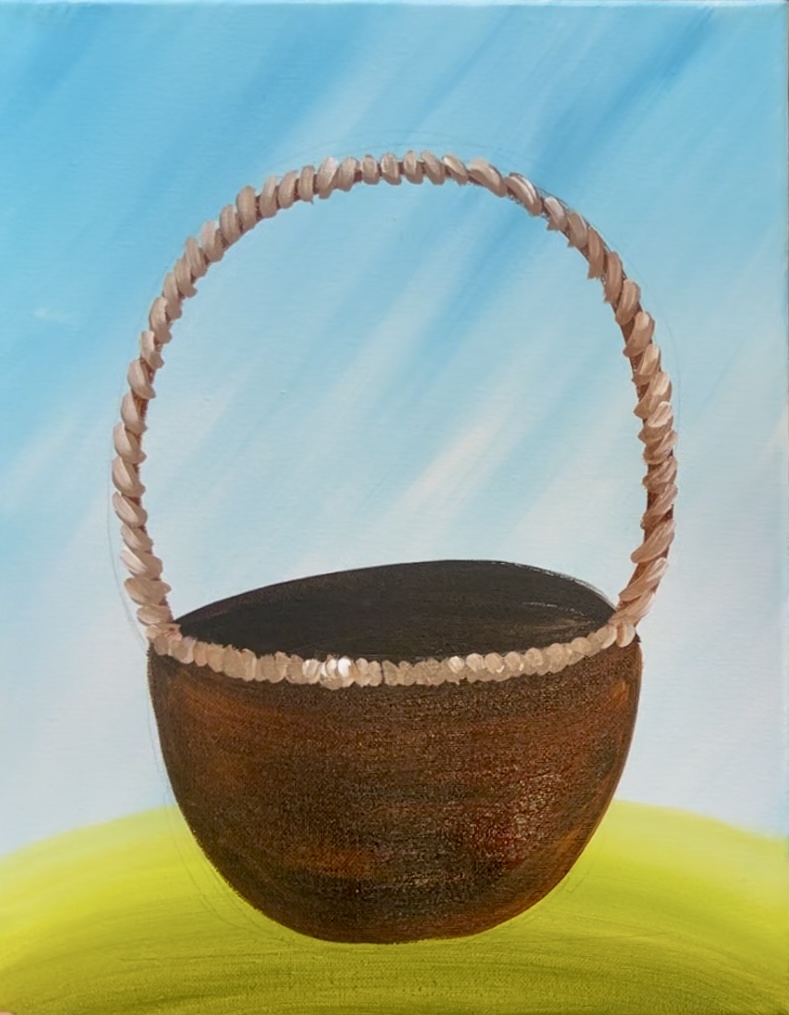
2. Draw Basket
Wait for this to dry before going onto the next step.
Use a pencil to draw the basket. Start by sketching a large half circle shape for the container of the basket. The bottom is about 1.5″ from the bottom of the canvas. Draw a straight horizontal line for the top edge of the basket (we will give it more of a curved shape later). The height of this basket container is about 3.5″.

Then sketch an oval shape over that horizontal line to form the opening of the basket.
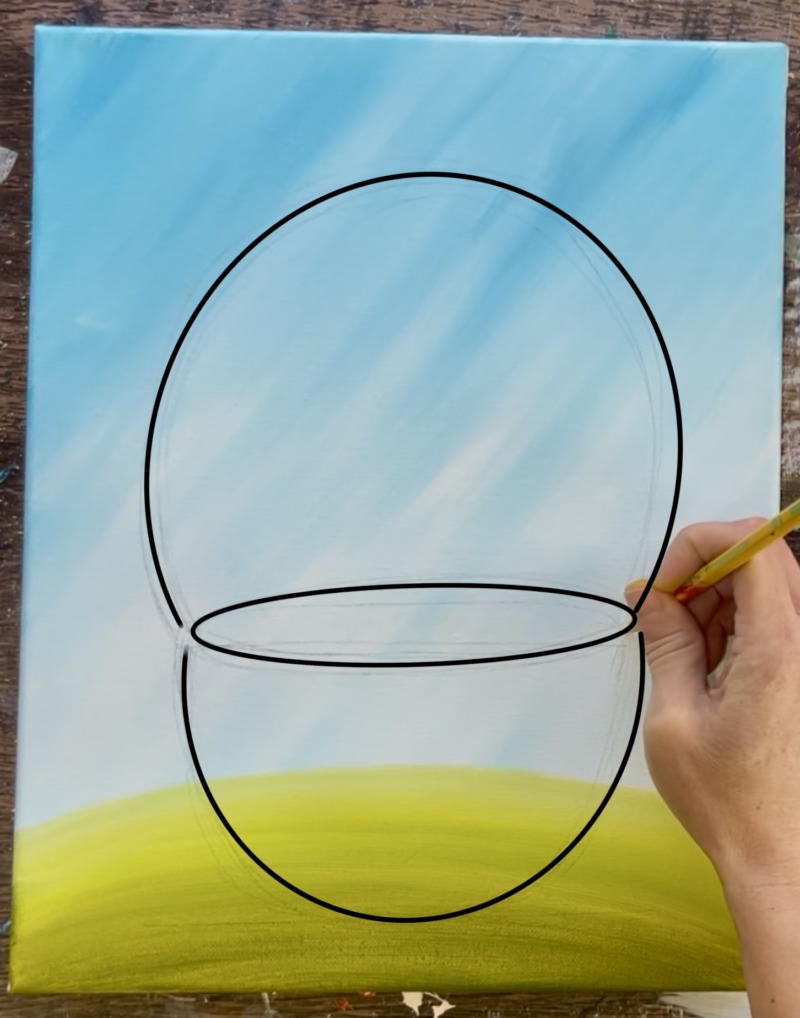
Draw a large handle that goes up very high in the canvas. This is about 7″ high from the center of the basket. It is very large and almost like a horseshoe shape
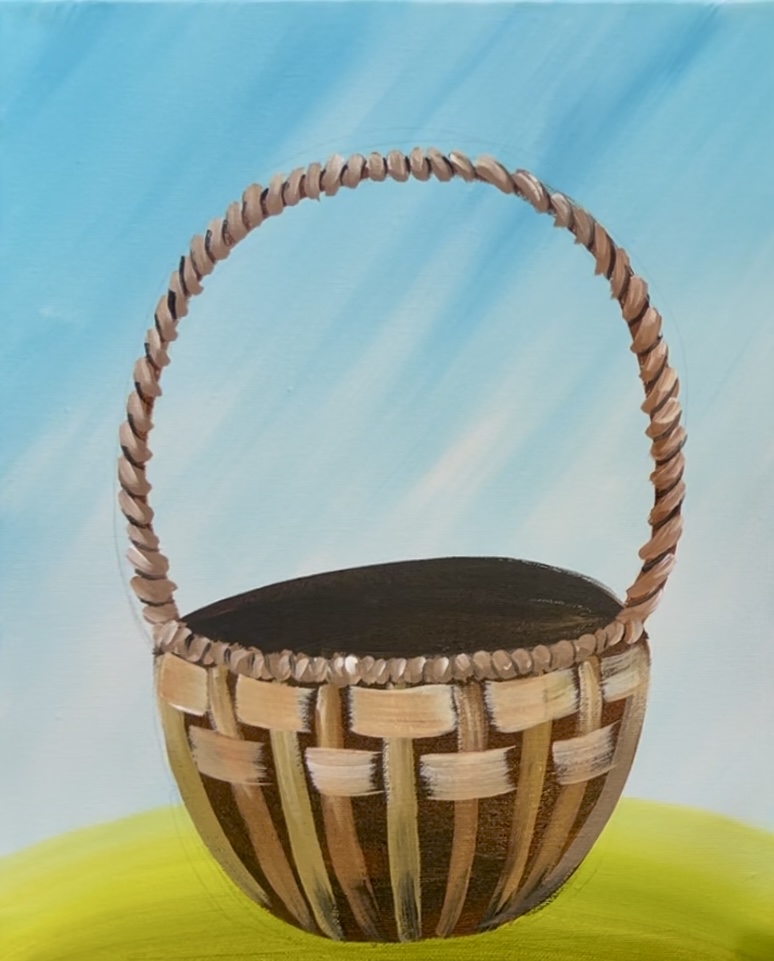
3. Paint Basket Dark First Layer
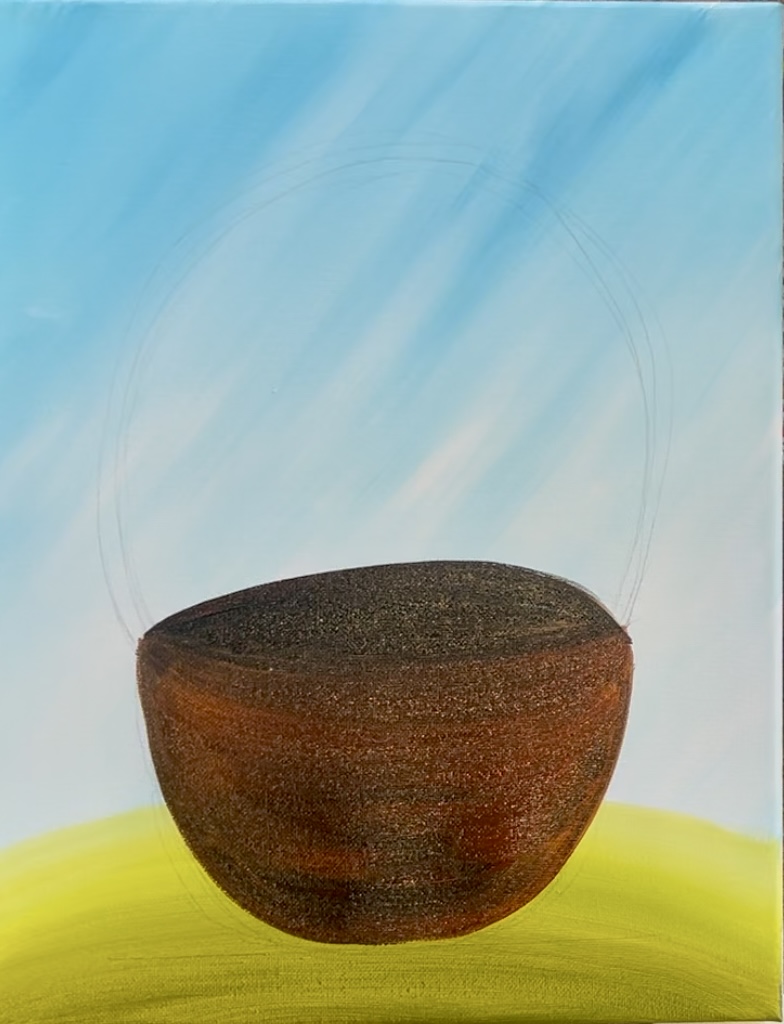
Load your paint palette with: “burnt sienna” and “mars black”. Use the 3/4 wash brush and double load it into both the brown and black. Then paint the basket shape. Do this by using the full width of the brush and paint in a curved direction to form a “bowl shape” for the bottom of the basket.
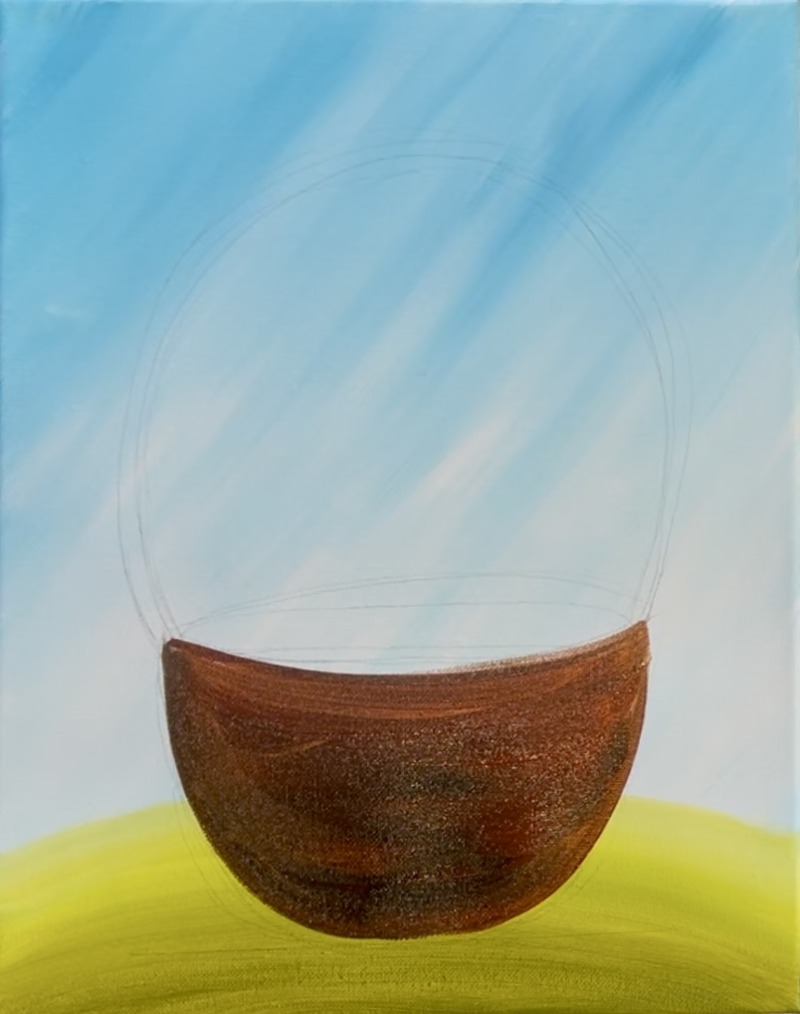
Then paint the opening part of the basket solid black.
Use a #4 round brush for the handle. Paint the “horseshoe shape” basket handle. Use the #4 round brush and “burnt Sienna” to paint this.
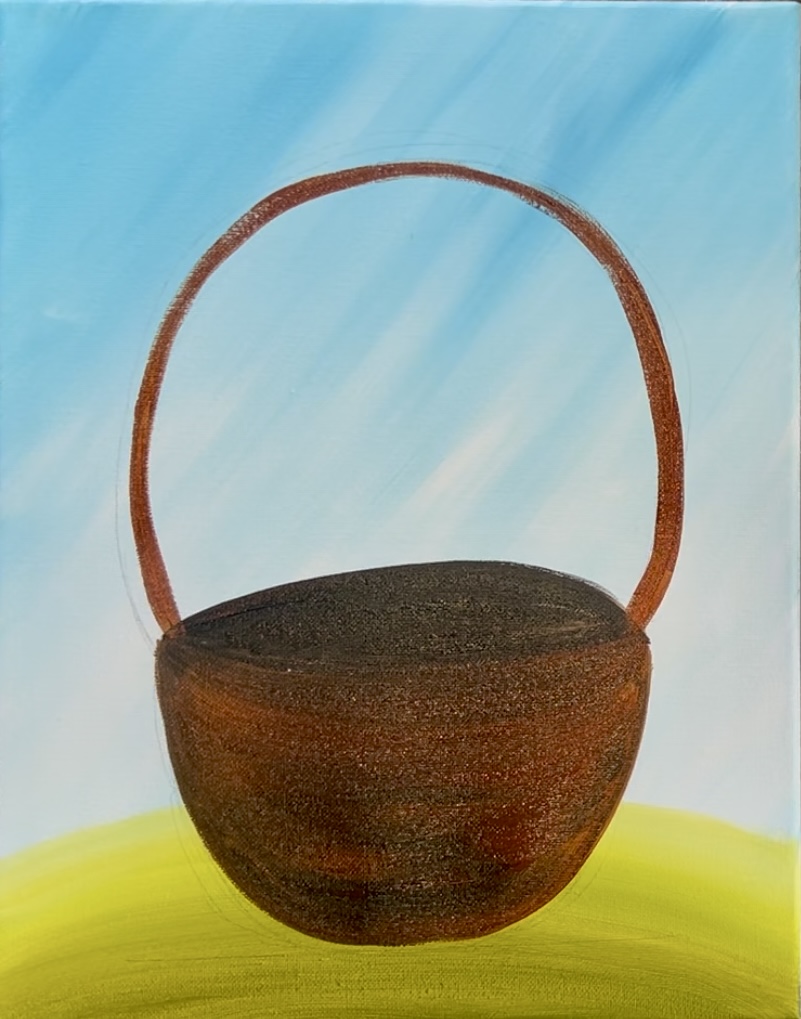
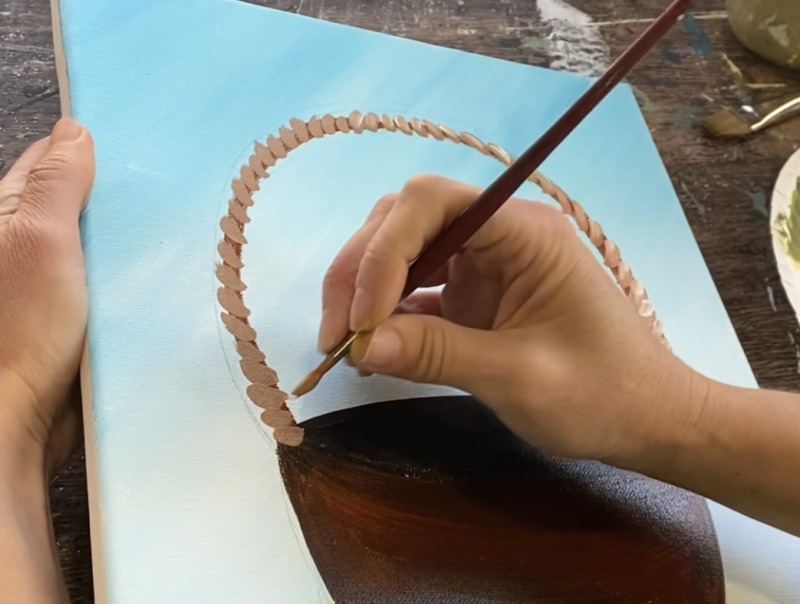
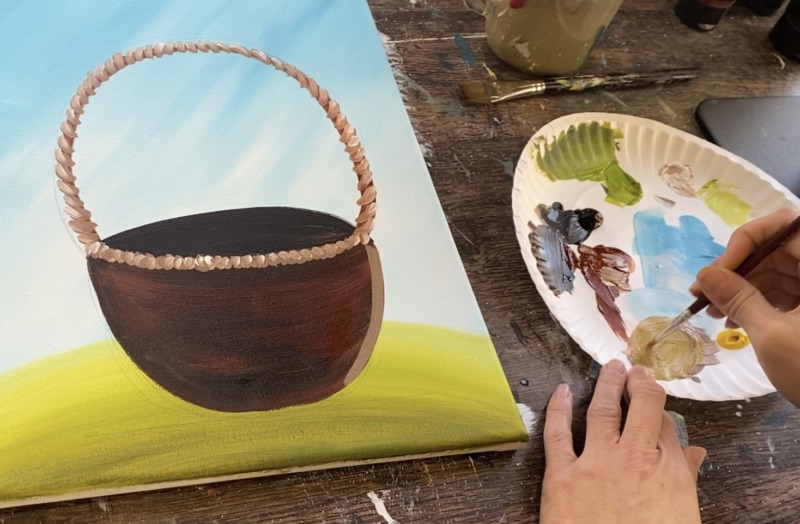
4. Paint Basket Twists On Handle & Rim
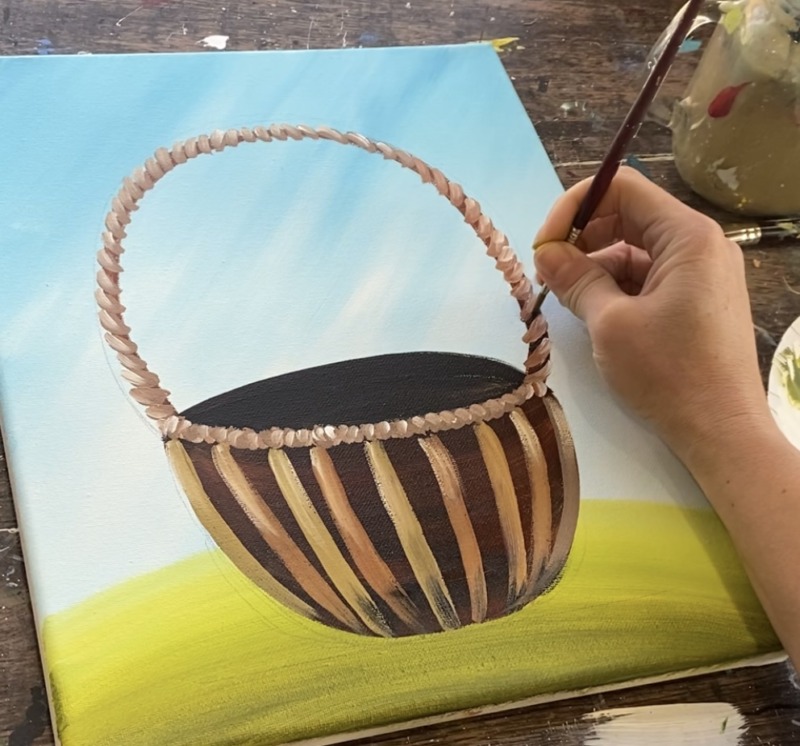
On your paint palette, mix a light brown. Do this by mixing equal parts titanium white and “burnt Sienna”. Use the #4 round brush to paint small curved “twist” marks going in a diagonal direction starting on the bottom right of the basket handle. As you paint each of these small curved lines, leave a little bit of a gap from the dark brown handle still showing through each of them.

Go all the way up. When you get to the middle top area, paint these little marks using more “vertical” paint strokes rather than curved.
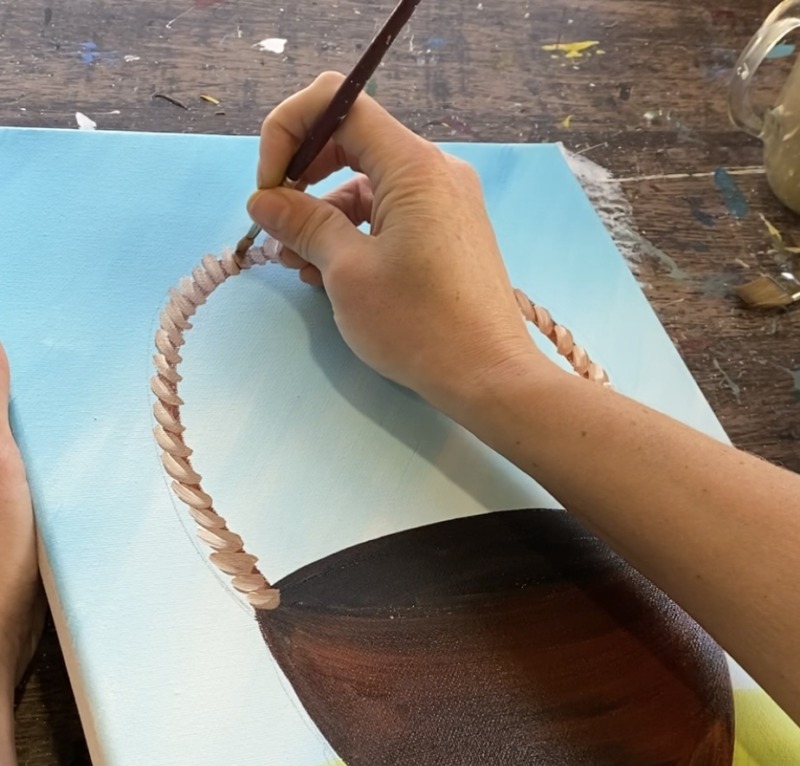
Then paint the rest of the basket handle twists. When you paint these twists on the left side, they go in an opposite direction as the ones on the right.
Then add white “highlights” on all of your curved twist marks. Do this before your light brown dries. Load your #4 round brush into the white (just a little bit) and then make little white marks over your curved marks but go only about half way (don’t cover all of the light brown).
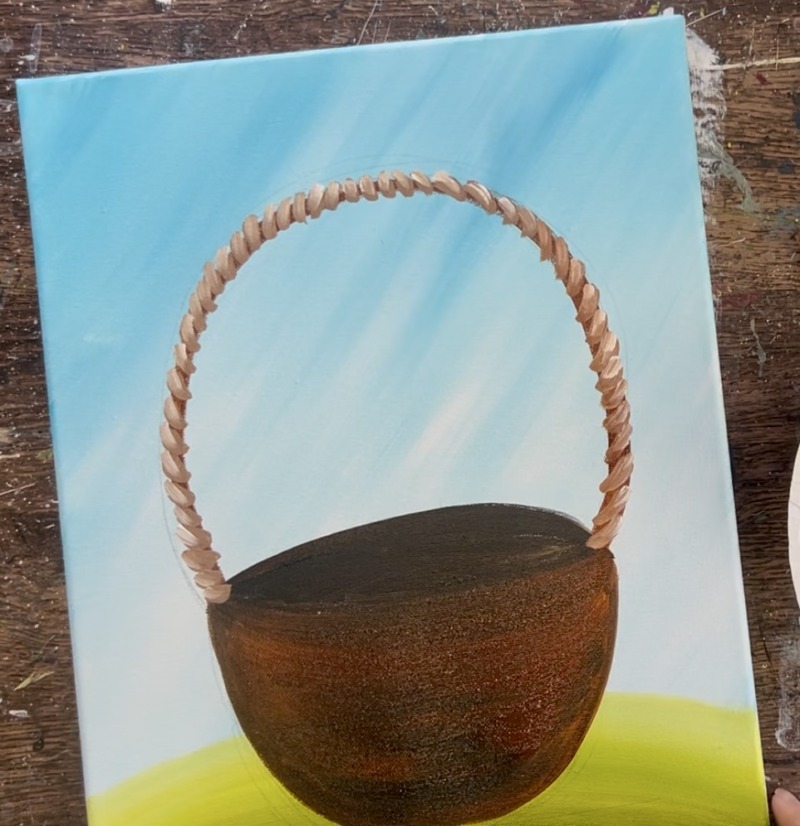
Next, paint little marks along the top rim/ edge of the basket opening. You only need to do this to the front part of the basket as the eggs will be covering up the back. Use the #4 round brush and the light brown to make these little, slightly rounded marks.
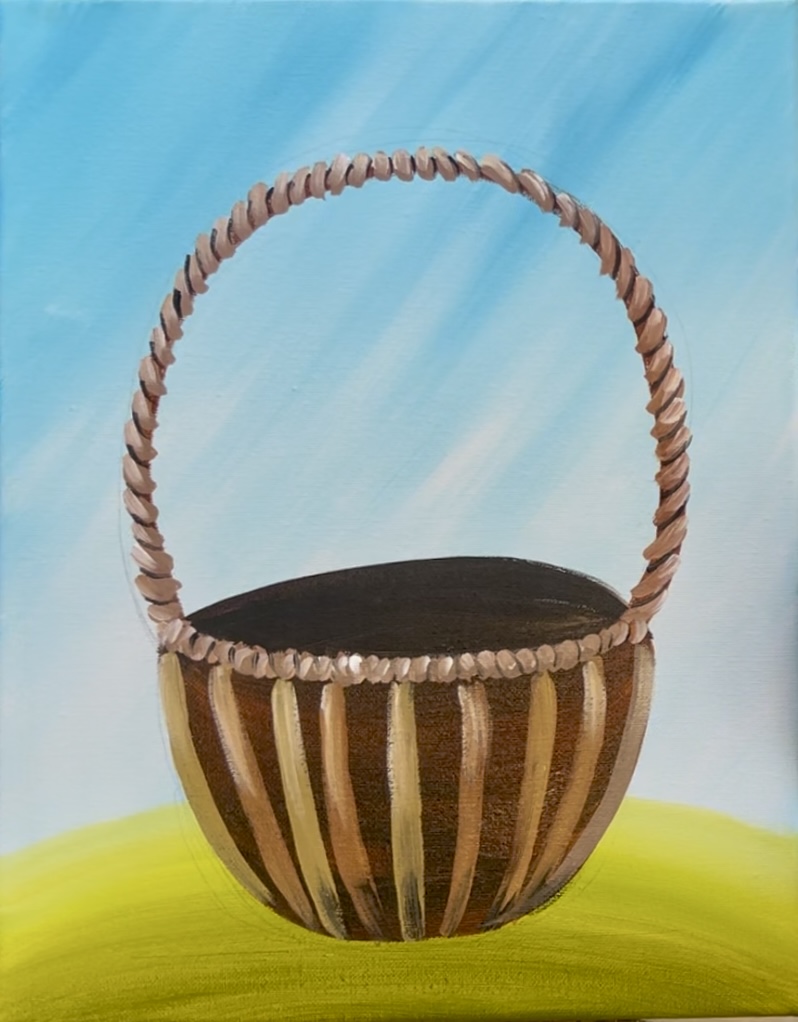
5. Paint Basket Weave Texture (vertical warp weave)
Next, use the #4 round brush to paint the vertical weave pieces. Mix a golden yellow brown on your palette by taking that same light brown you used and adding “primary yellow” to it. Only a little bit of yellow is needed to turn it golden brown.
Then paint two curved lines on each side of the basket along the edges. These lines curve in the shape of the edge. Paint a line in the middle and then a second set of vertical lines. These lines are actually not vertical, they curve in the form of the basket shape.
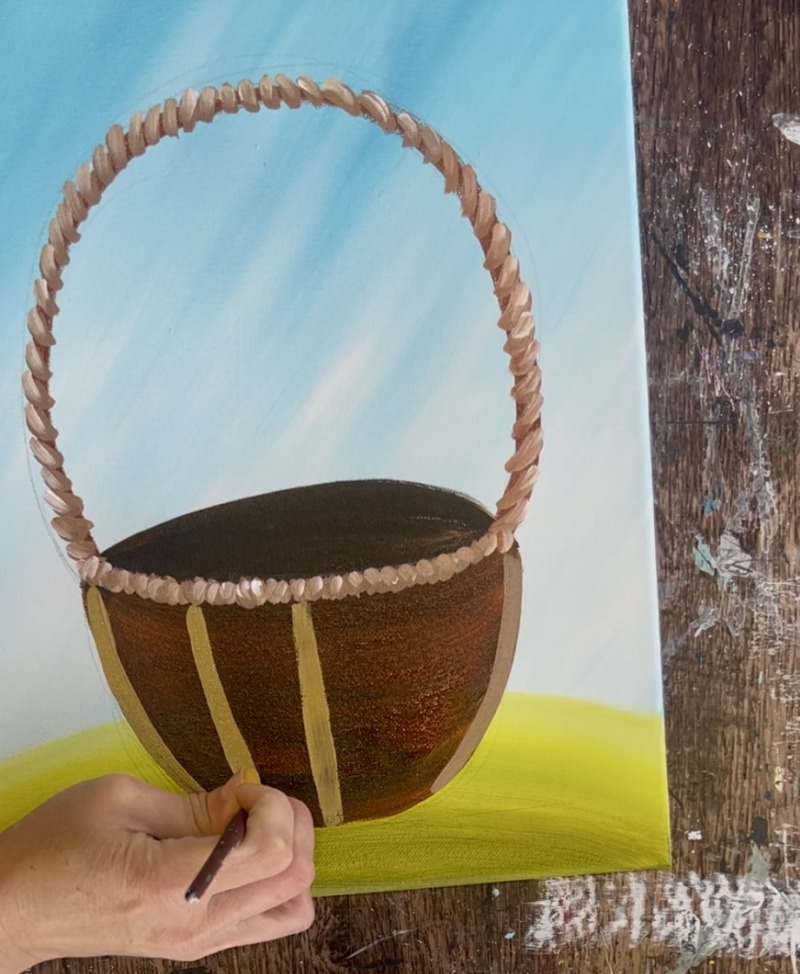
Below there are 9 vertical weave pieces. Note: the color variation comes from adding more “burnt Sienna” into the color for some of the lines. You don’t have to do this color variation, you can just leave them all the same color (that golden light brown color).
Wait for your vertical weave lines to dry before going onto the next step.
Optional: while your vertical weave lines are drying, you can loosely outline your spiral curved lines on the basket handle with “mars black”.
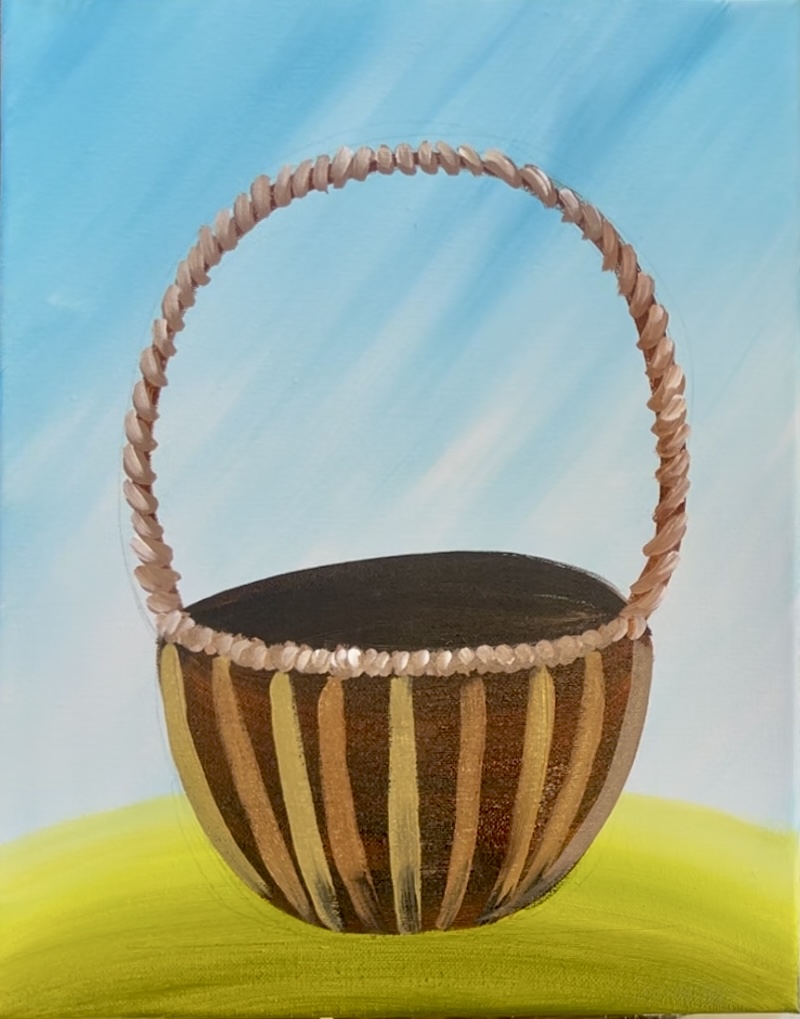
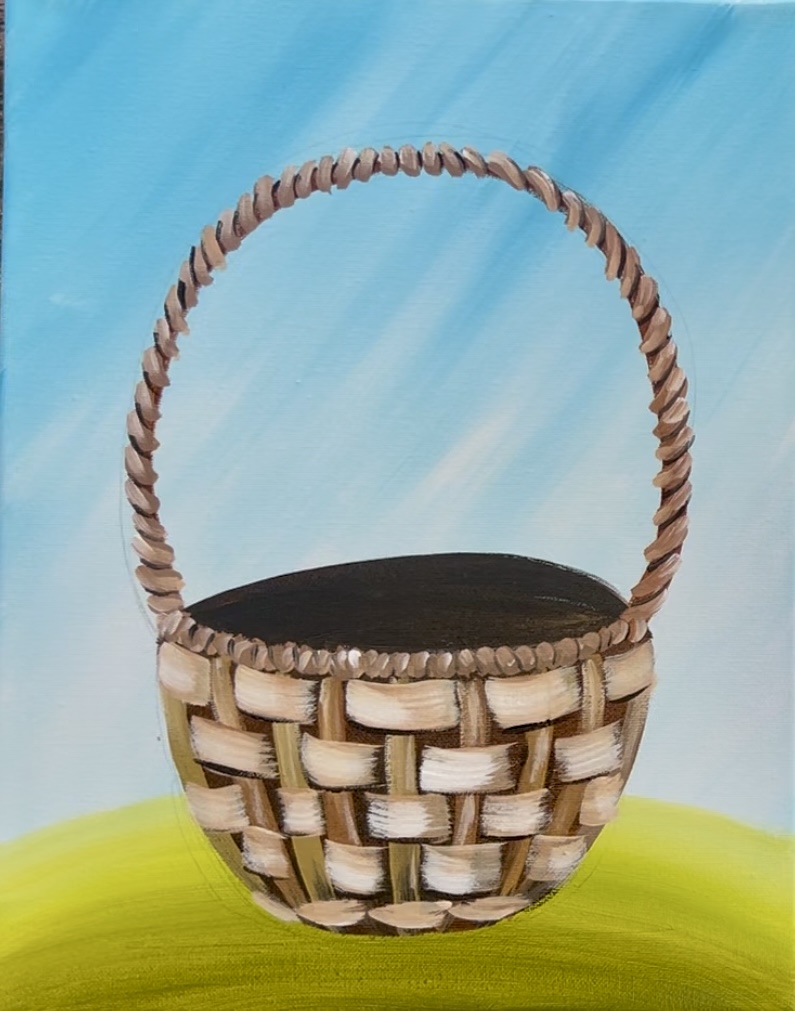
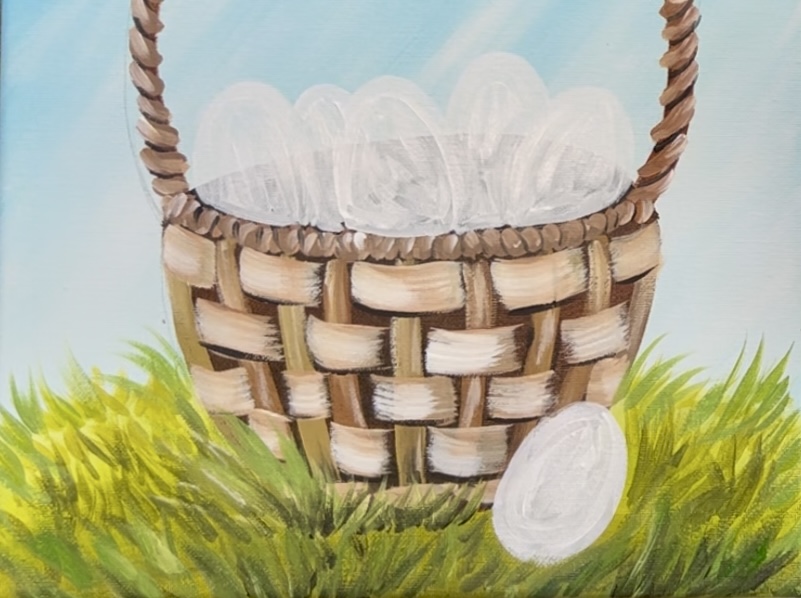
6. Paint Basket Weave Texture (Horizontal weft Weave)
Next we will paint the horizontal weave marks on the basket. Use the #12 bright brush. Load it into your “light brown” and also a little bit of “titanium white” so that it will be a very light brown (lighter than the vertical weaves). Use the full width of the brush.
Start at the upper left of the basket. Paint a horizontal mark (it’s actually going a little curved parallel to the edge of the basket. You want to overlap the first “vertical weave” and then skip the next one. Do a pattern of overlapping and skipping.

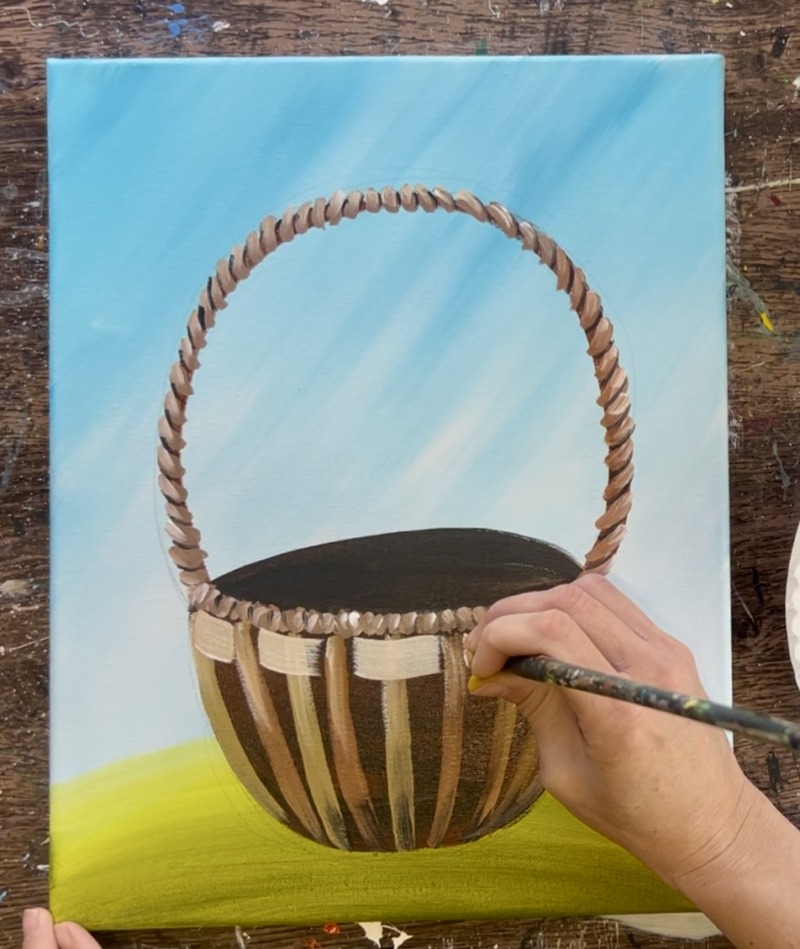
Then do your next row of horizontal weave. This time skip your first vertical mark and then go over the next. Basically, do the opposite of the row above it. When you do this opposite pattern, you create a basket weave texture!
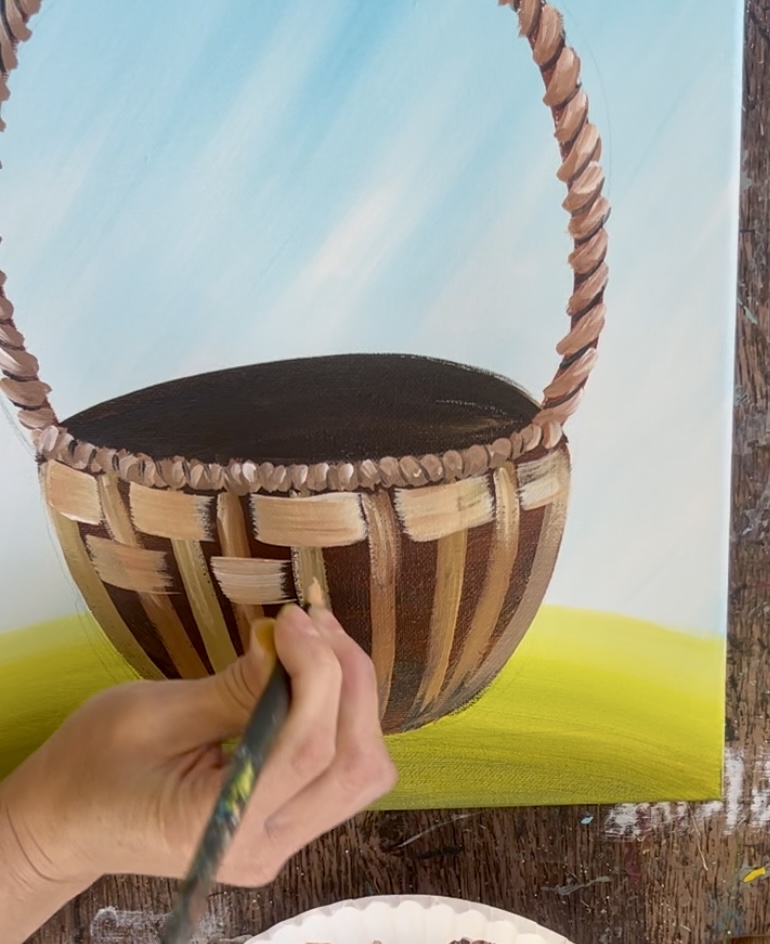
Notice that the horizontal marks do not go all the way and touch the vertical marks. Leave some of that dark brown showing on the edges. This helps create really pretty contrast and shadowing (without having to paint shadows because that dark brown is already there).
Create each horizontal row of basket weave using this technique. If wanted, add a little bit more white to your brush to brighten the weave a bit more!
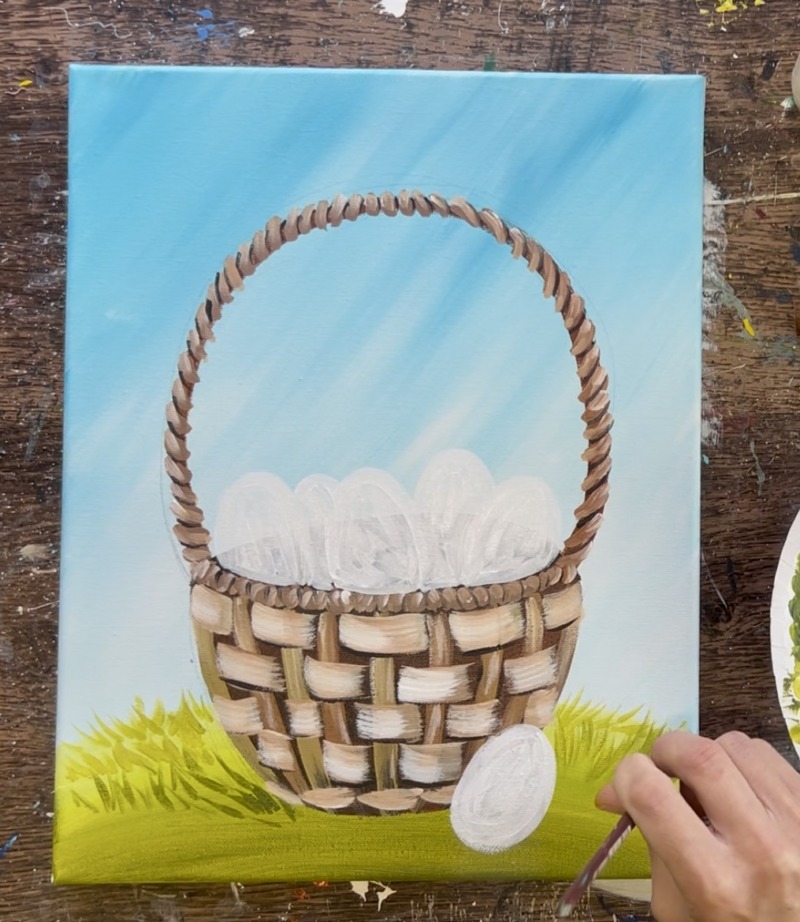
7. Paint Eggs (white layer)
Use the #4 round brush and “titanium white” to paint the eggs. Paint each one going at a slightly different angle and the bottoms of the eggs are slightly inside the basket (with the basket overlapping the bottom portion of the eggs). It may be helpful to draw the eggs with a piece of chalk first and then paint them in so you can get the placement that you want.
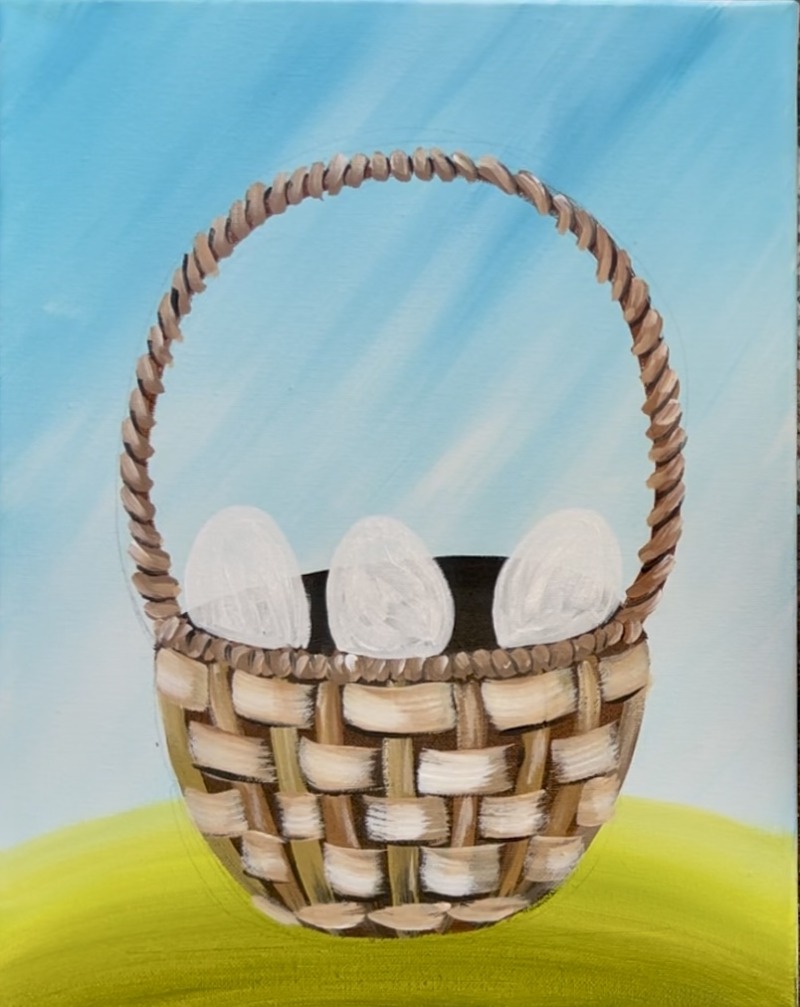
Paint the back eggs and be careful not to loose the shape of the front eggs. Paint another egg on the ground overlapping the right of the basket.
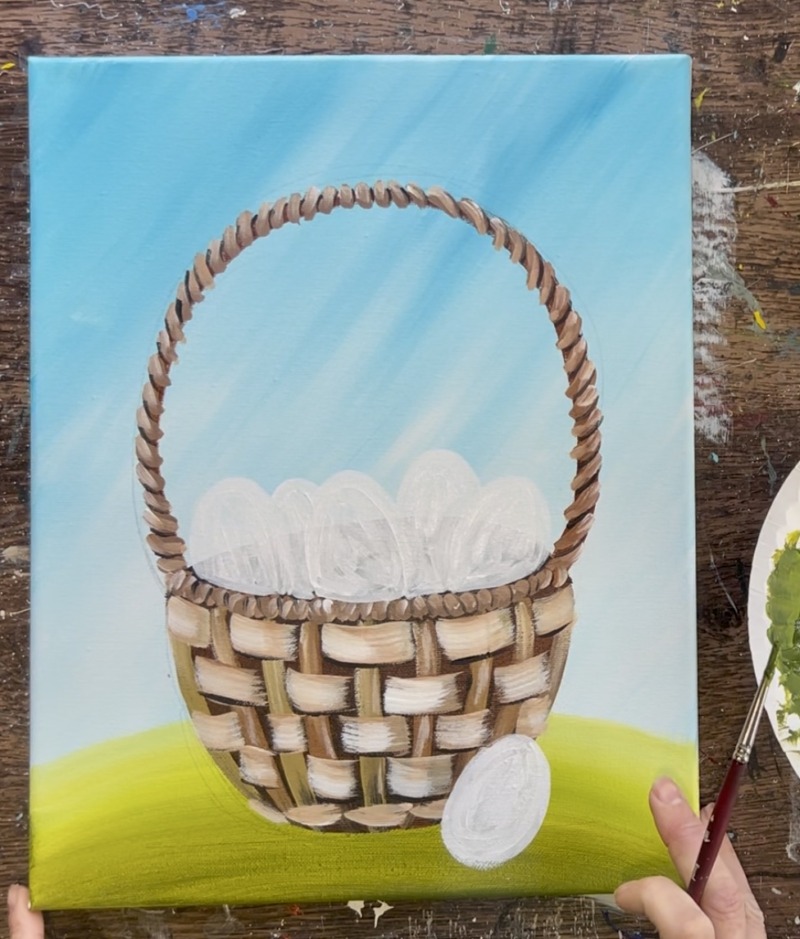
8. Paint Grass Texture
Grass texture is achieved by painting various tints and shades of green color by mixing little bits of black in the green for darker blades and little bits of white into the green for lighter green. You can also add yellow to your green. Also, for variety in color, I use both green colors: “light olive green” and “hooker’s green hue”. You can opt for only one of those greens to make things simpler.
Start with your light color green. Mix white into your “light olive green”. Start in the back (upper part of the hill behind the basket). Paint small angle lines with the light green. Make your grass angle opposite sides on each side of the basket.
As you work your way down, add darker blades of grass and paint the grass blades slightly longer. Make some of your grass blades overlap the bottom edge of the basket. This will make it look like the basket is nestled in the grass.
Keep layering on your grass! I made my glass slightly darker on the bottom by using more of the “hooker’s green hue” and more “black” mixed with the green.
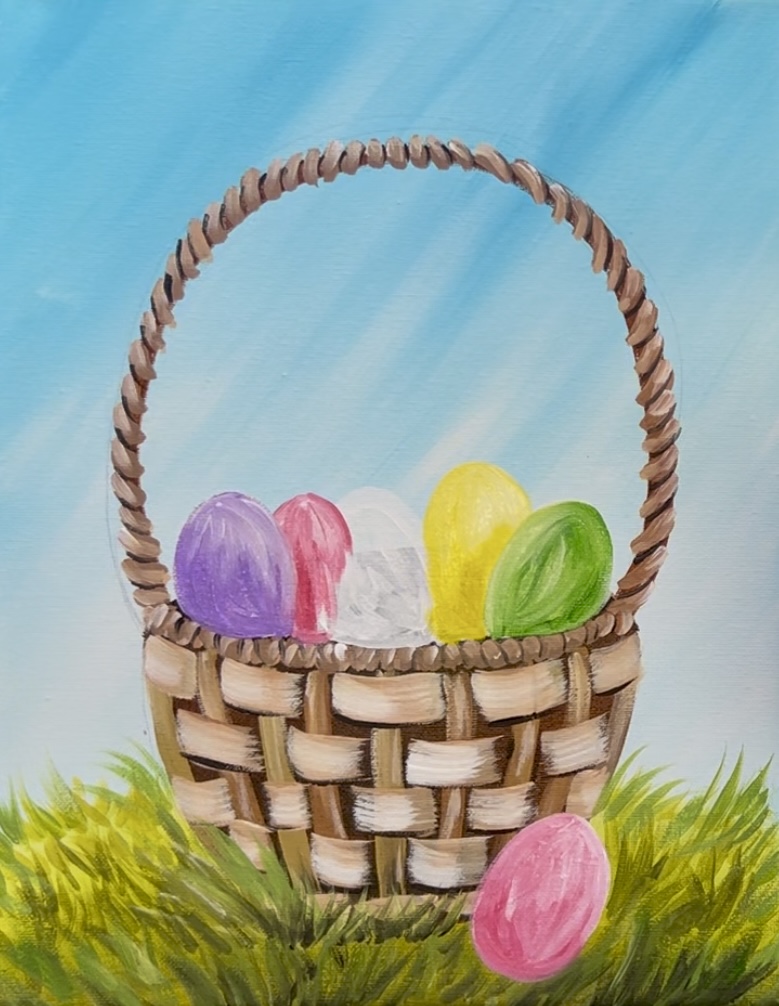
9. Paint Colors On Eggs
Load your paint palette with the colors you will be using for eggs. I’ll be using: “primary red”, “primary yellow”, “hooker’s green hue”, “brilliant purple” and “light blue permanent”. You are welcome to change the colors if you want!
To create a bright pink color, mix “titanium white” with “primary red”. Use the #4 round brush. Paint the egg in brush strokes that go in a curved direction. Blend a little extra white towards the top of the eggs to create more of a shiny look.
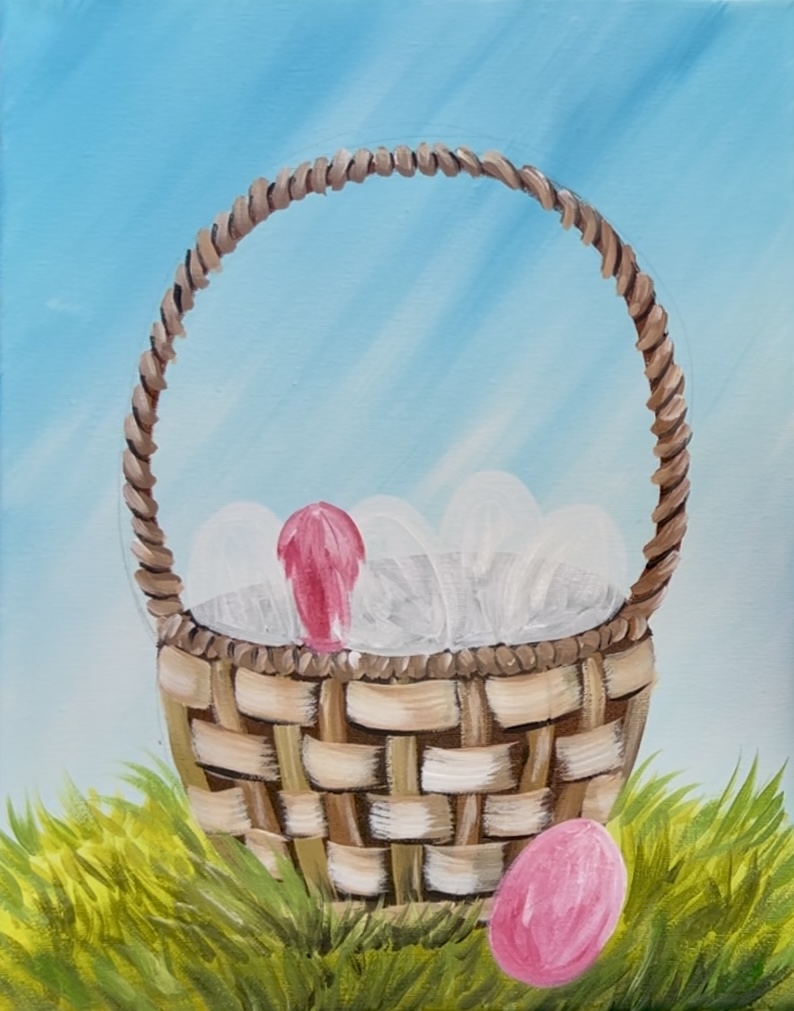
With each color, you want to mix a little bit of white into it to make the color more of a pastel “Easter color”. I also recommend painting the eggs in the back first and then the eggs in the front.
Wait for this layer to dry before painting decorations on the eggs.

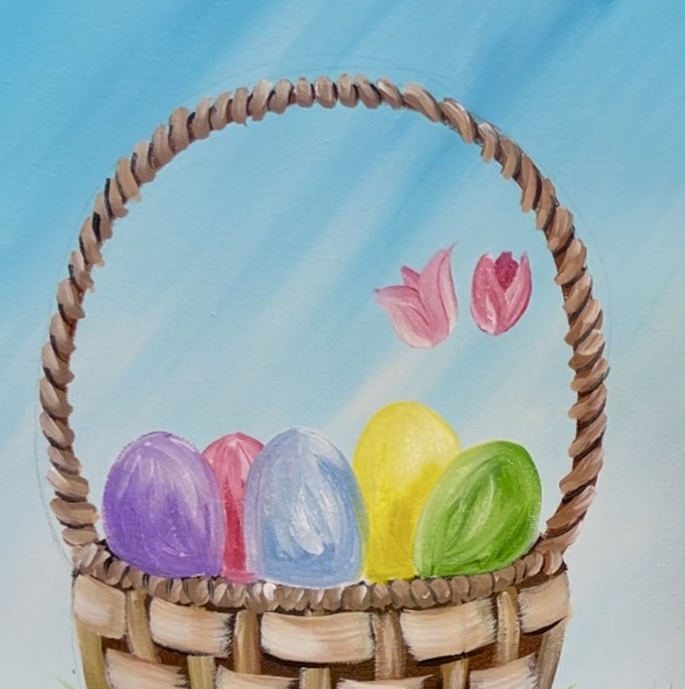
10. Paint Flowers
Use the #4 round brush and the “pink color” to paint tulips on the right side of the basket. Use “primary yellow” mixed with “titanium white” for the yellow color on the left side.
Start by painting an oval for the center-back part of the tulip.
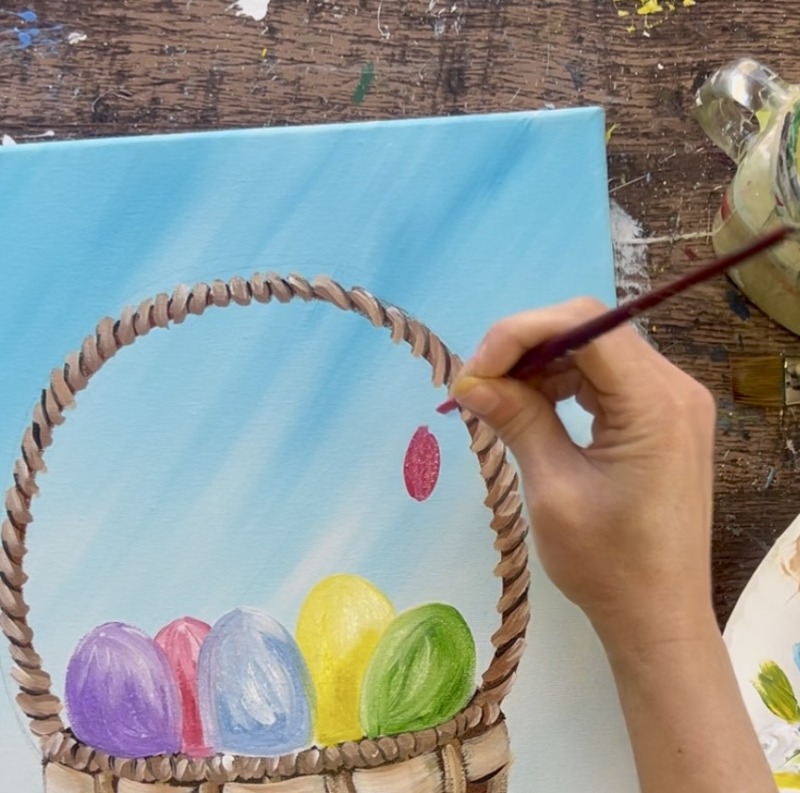
Then load your brush in titanium white and the pink color. Paint two teardrop shaped petals on each side of that “middle back oval”. These petals will overlap to create the front part of the tulip.
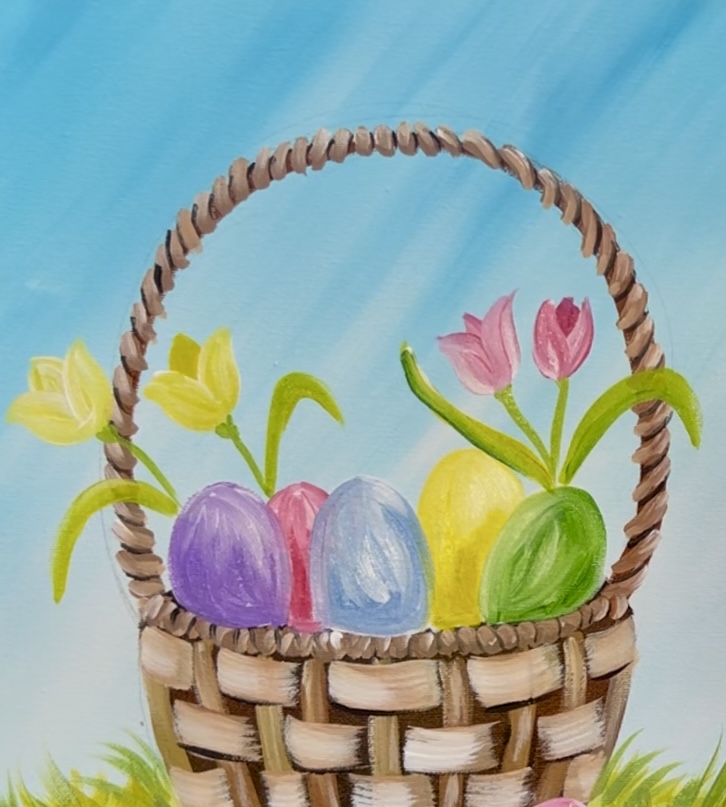
Repeat that technique for the yellow tulips on the left.
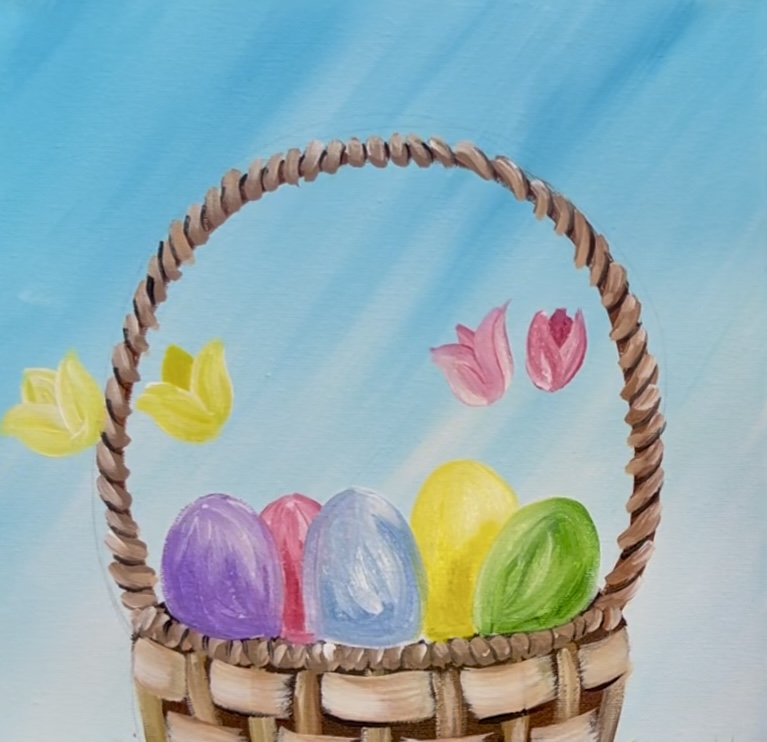
Then use the “light olive green” mixed with yellow and white to paint stems. The tulip stems “flute outwards” at the bottom of the flowers. Then paint long, narrow and pointed leaves that bend different directions. You can decide if your leaves and/or flowers either overlap or go behind the basket handle.
Paint another type of flower. These ones are more of a lupine/ hyacinth type. Paint green stem with simple rounded leaves. Then use the end of the round brush to “stipple” little dots of primary red and white to create a column of little blooms. I did two of these flowers.
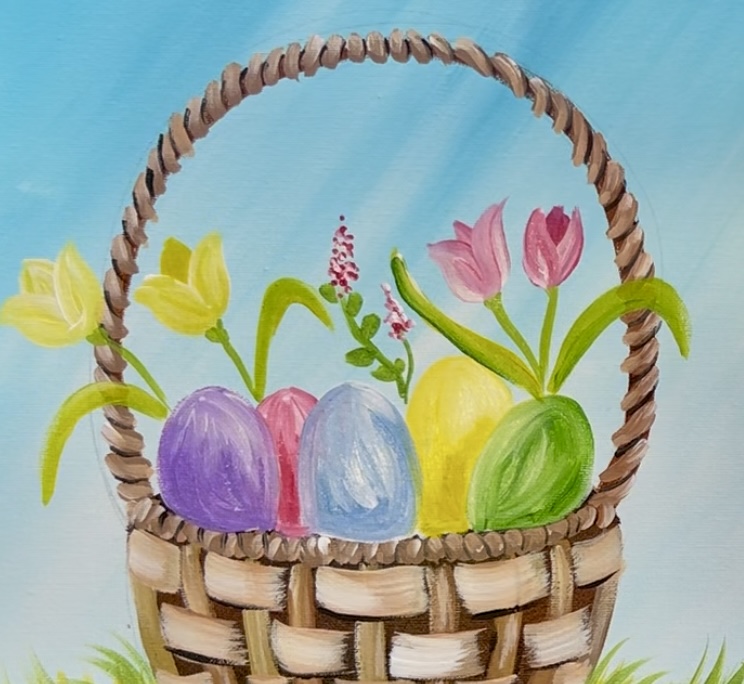
If you love painting flowers, you are welcome to add more in your basket!
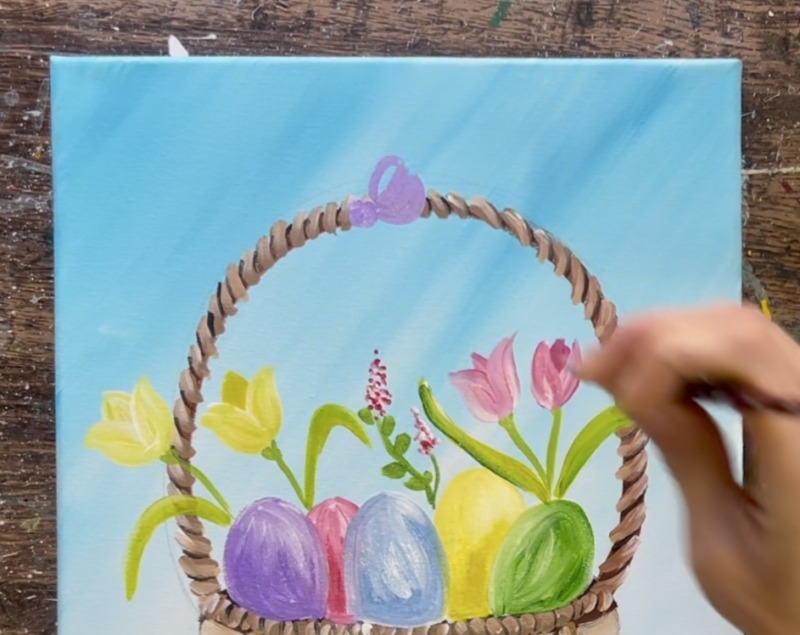
11. Paint Bow
Use the #4 round brush and brilliant purple (or another color) to paint the bow. Start by painting a circle for the center. Then make a loop shape and form it into a bow tie. Leave the top loop part with no paint and open for now.
Then paint the other side of the loop. Paint two bow tails extending downwards.
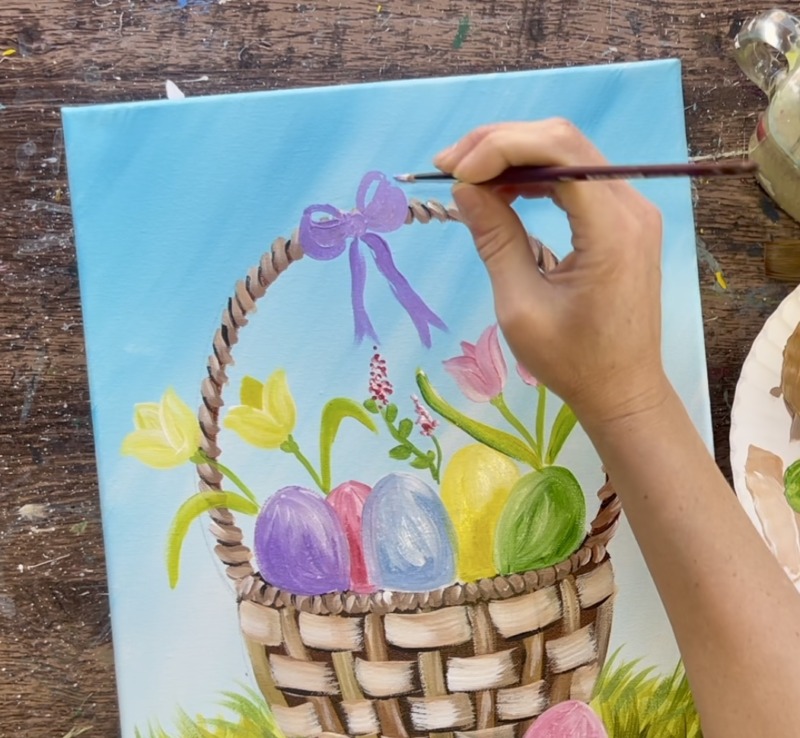
Then paint two pieces of ribbon that twist around the handle of the basket. Add a little bit of white into the purple in some areas of the bow for “highlights”.

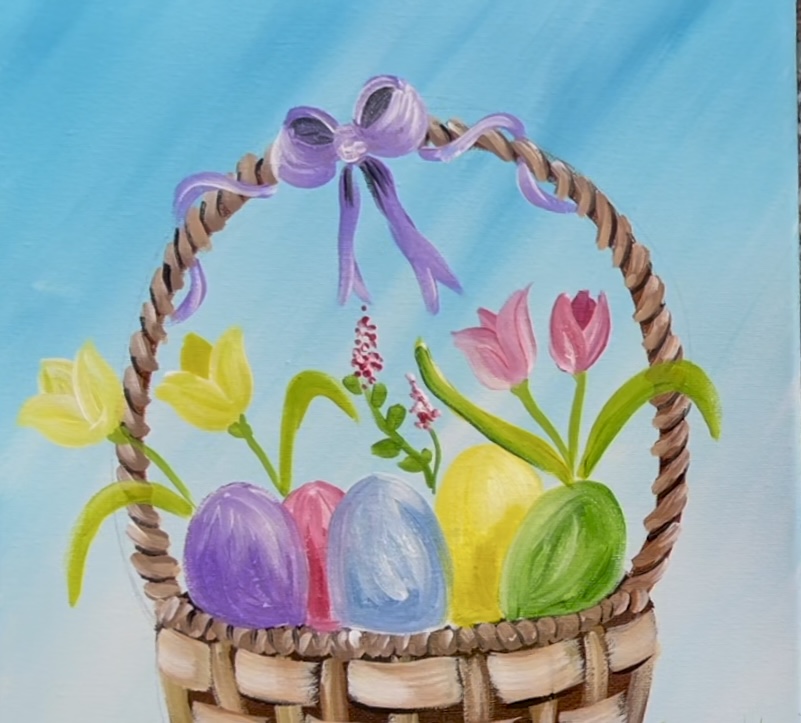
Then mix black with the purple to make a very dark purple. Paint this dark color on the inner part of the bow loops. Add a little bit of this dark color to the top parts of the bowties.
12. Paint Patterns On Eggs
Use a #4 round brush and “titanium white” to paint patterns on the eggs. You can paint stripes, zig-zags, dots, etc.
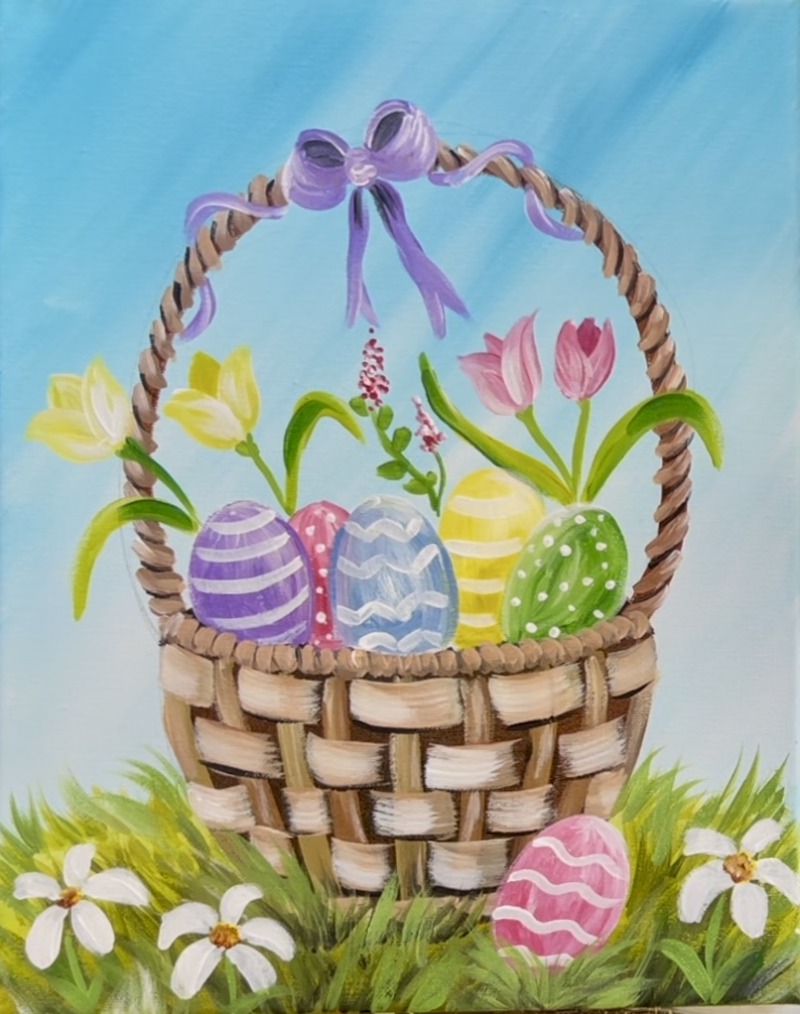
13. Paint White Daisy Flowers
Use a #4 round brush and titanium white to paint medium sized five petal flowers. Paint the petals elongated and curved at the end. Your petals in the back will be smaller because they fold backwards and longer in the front.
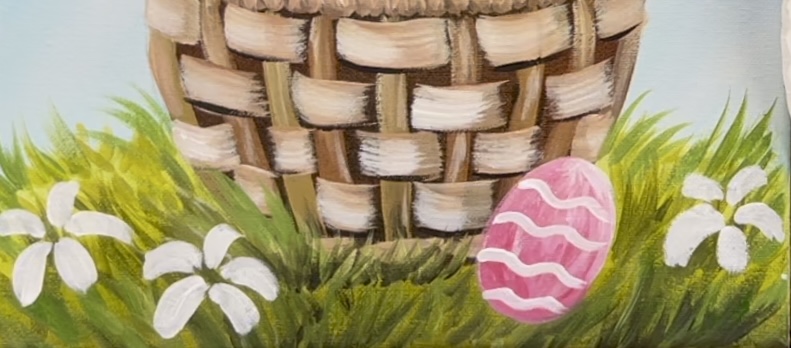
Paint the centers of the flowers using yellow and burnt Sienna. Use the #4 round brush and “stipple” little dots in the centers of each of the flowers.
14. Paint Bee
Use a #4 round brush and the colors: “primary yellow” and “titanium white” mixed together. Paint a small oval.
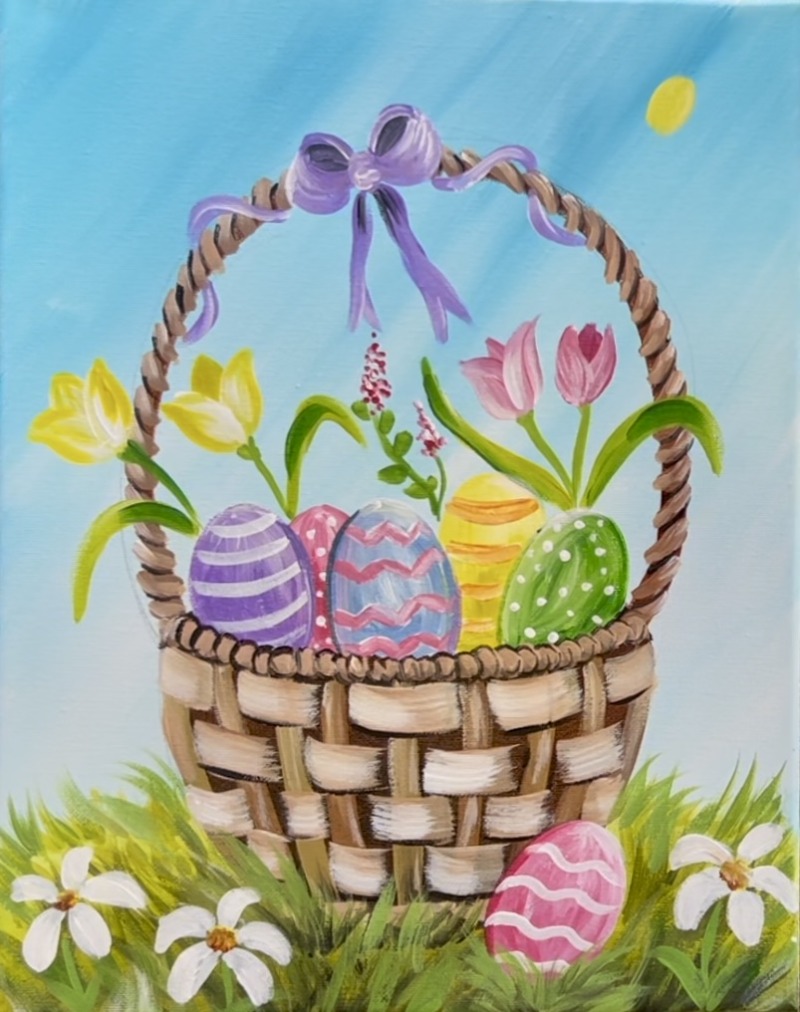
Then use mars black to paint a little circle for the head, two stripes going in opposite curved directions and a little stinger! Paint little antennas (or use a paint pen for this).
Wait for this to dry. Then use titanium white and paint a very thin layer to paint two oval shaped going outwards for the wings. Then water down the white and paint a light colored bee trail that loops and goes off the side of the canvas.

Final Touch Ups & Finished!
Some other final touchups you can do are: add a small white curved highlight on the top side of each of the eggs. You can also loosely outline some of the basket weave shapes (horizontals and verticals) to help define some of the edging.