Would you like to save this?
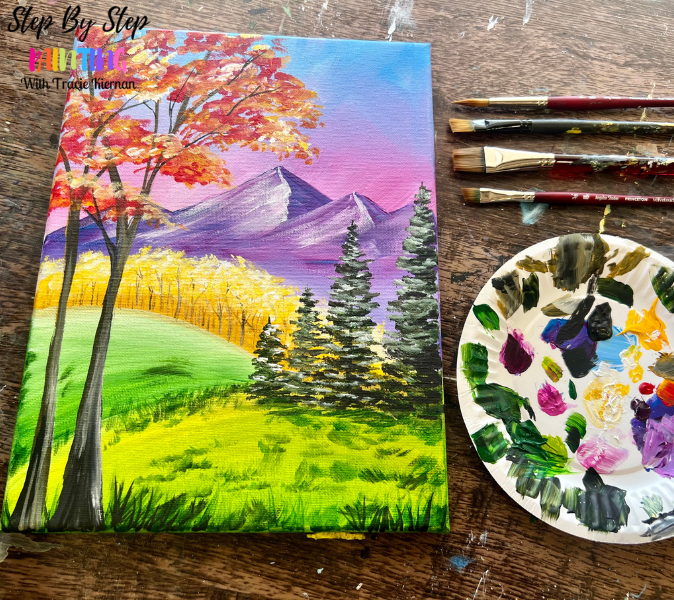
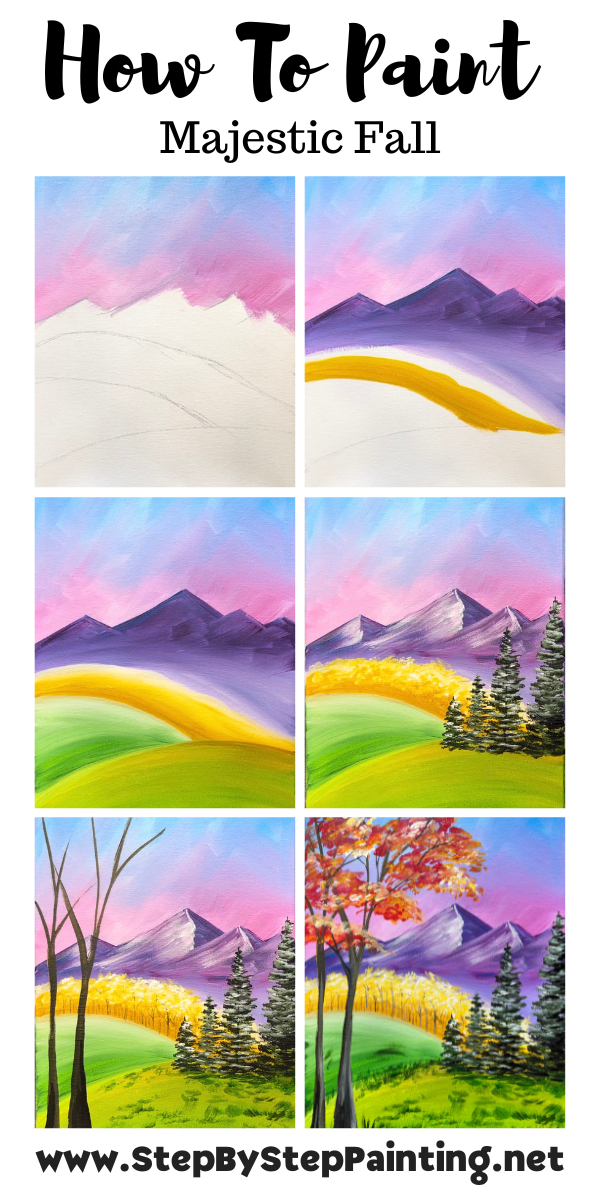
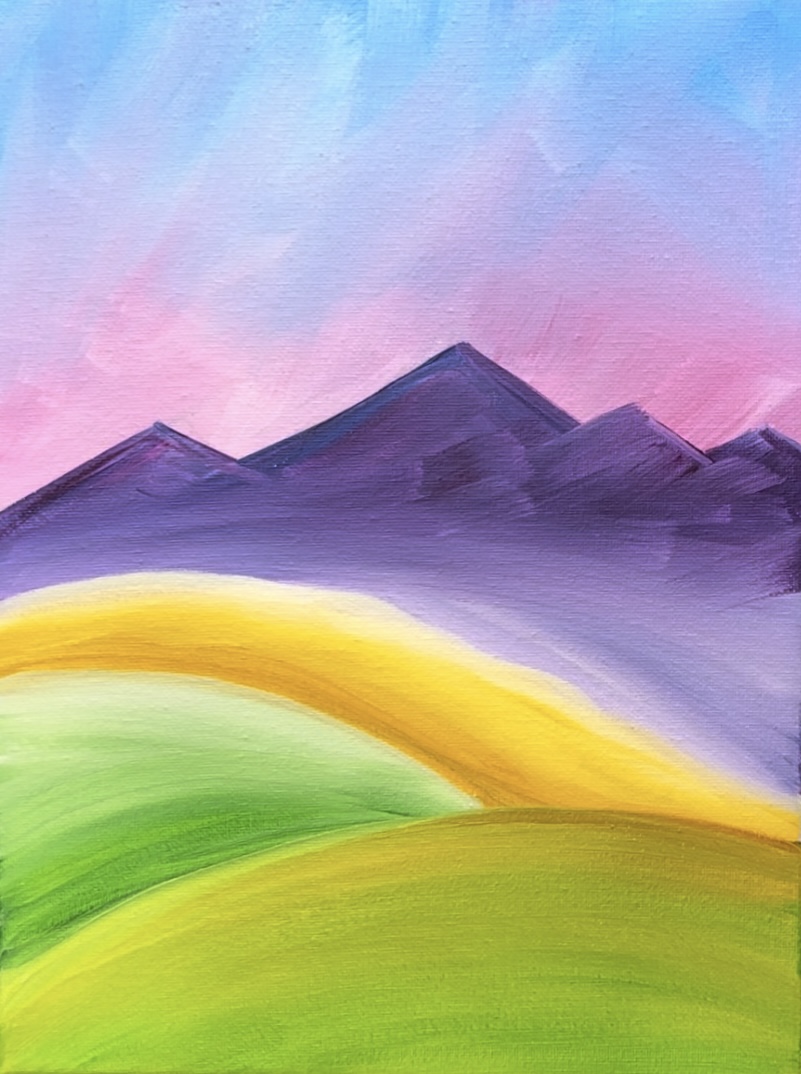
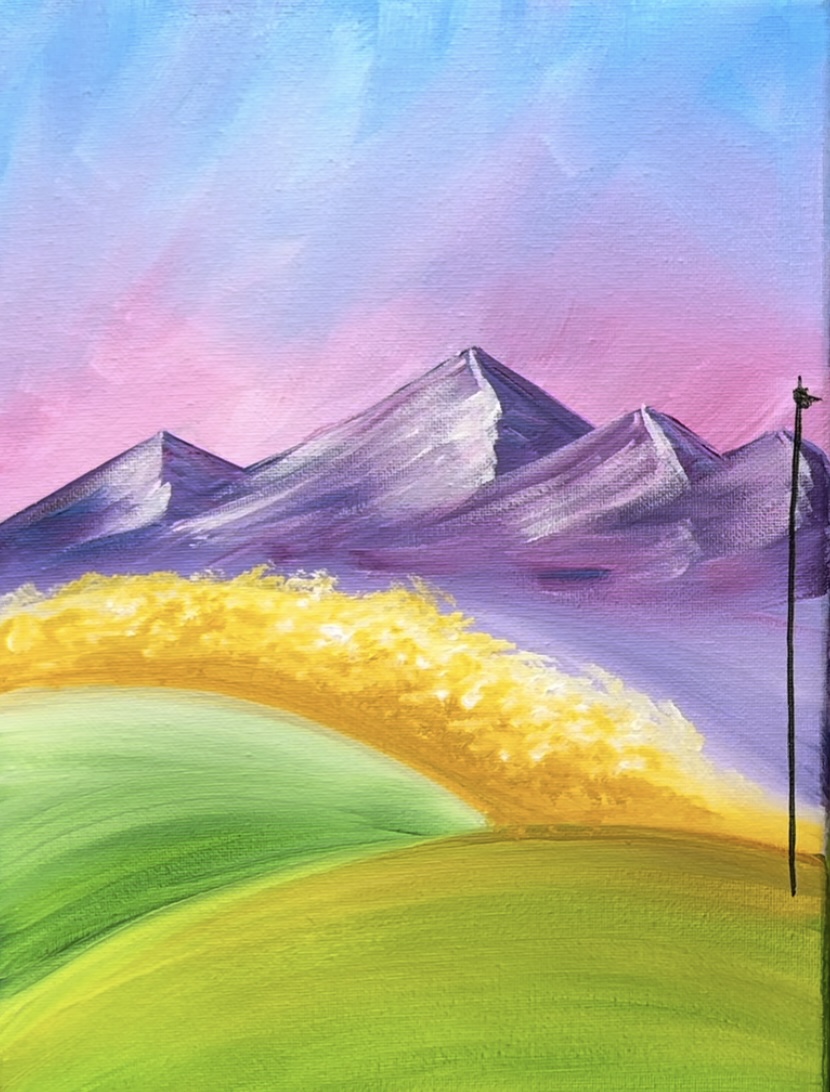
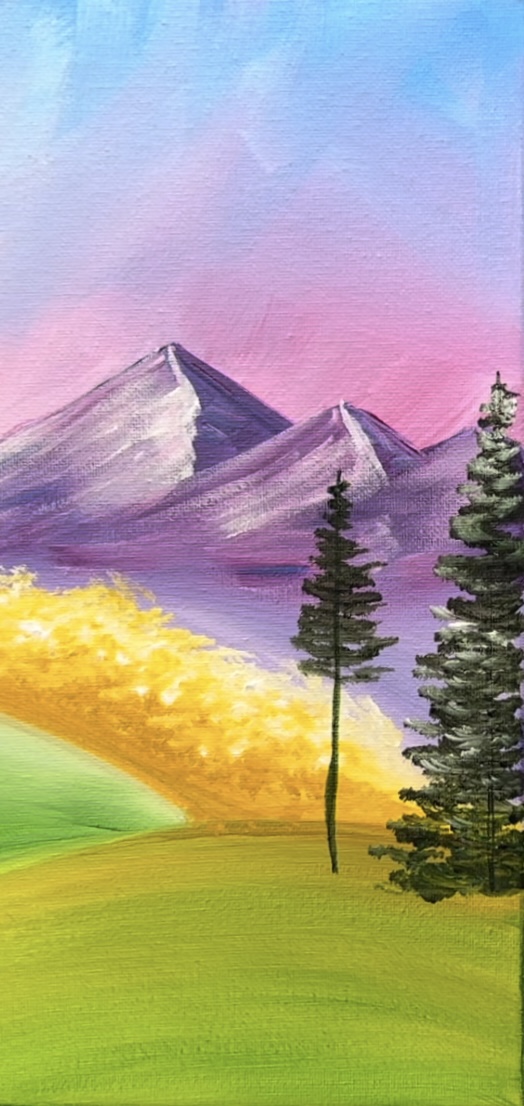
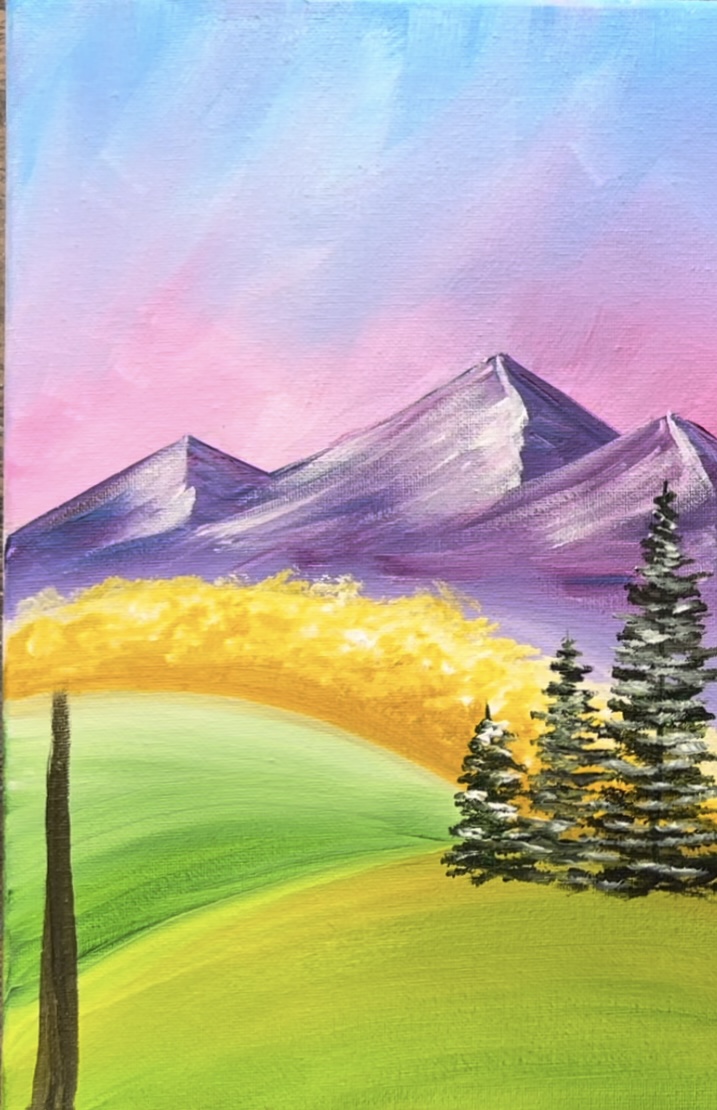
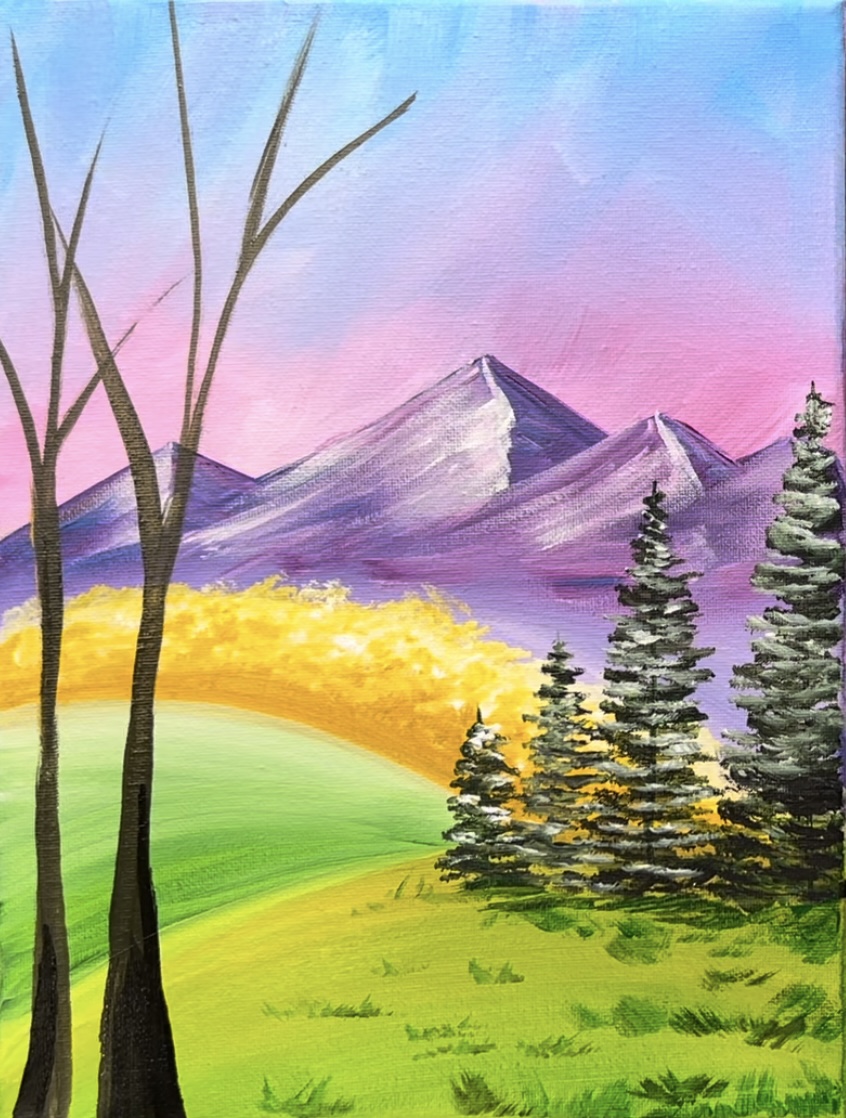
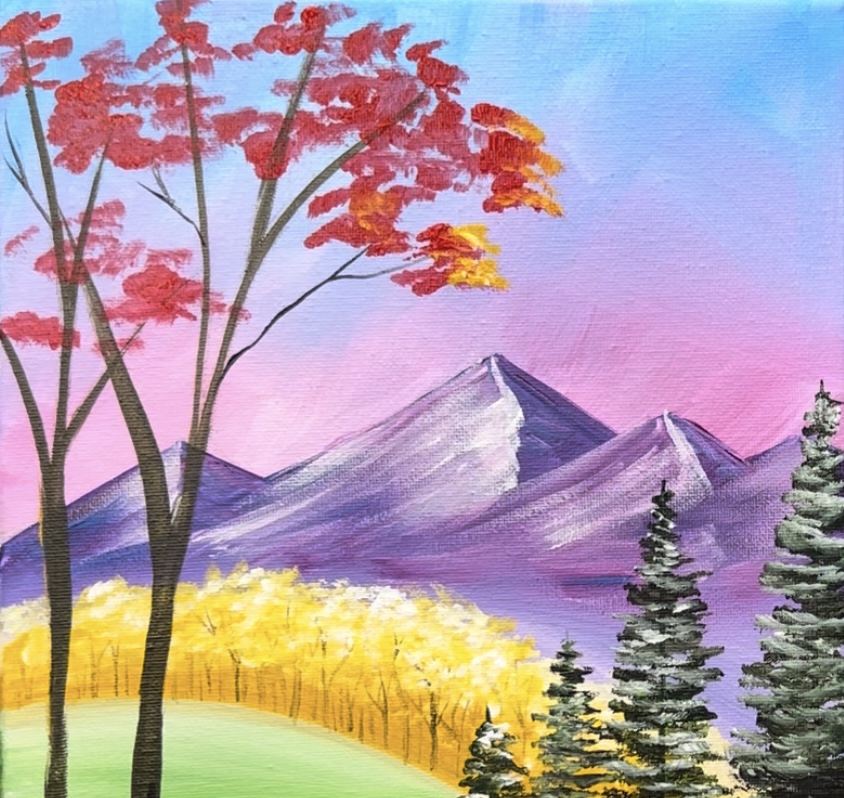
When the mountains meet a splash of pink in the sky, magic happens! We will be painting a vibrantly colorful fall landscape with golden yellow trees under purple mountains. This rainbow landscape painting has 10 different paint colors in it!

This is an easy level tutorial which covers basic landscape painting techniques. We will start by dividing the canvas into different sections to create a simple landscape composition and then paint each section one at a time!
When you divide up your canvas painting into sections it makes things a little easier and less overwhelming.
Enjoy and happy painting!
Materials
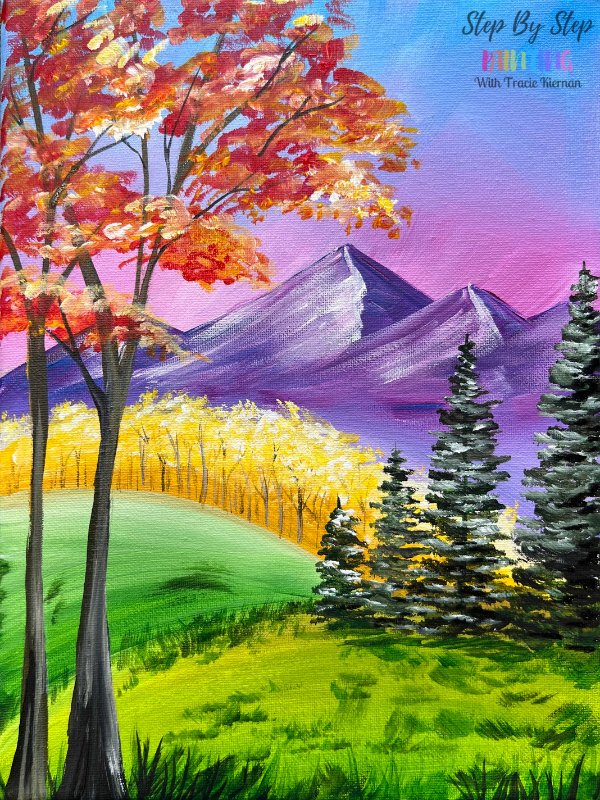
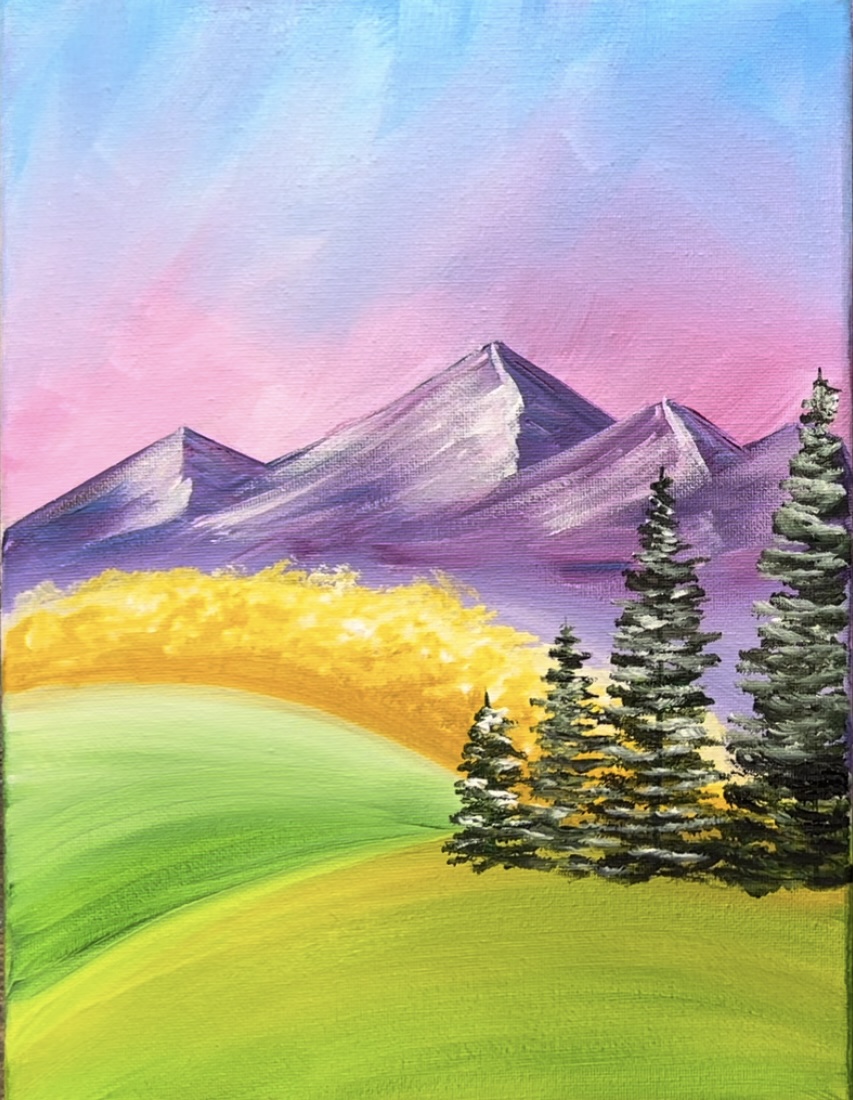
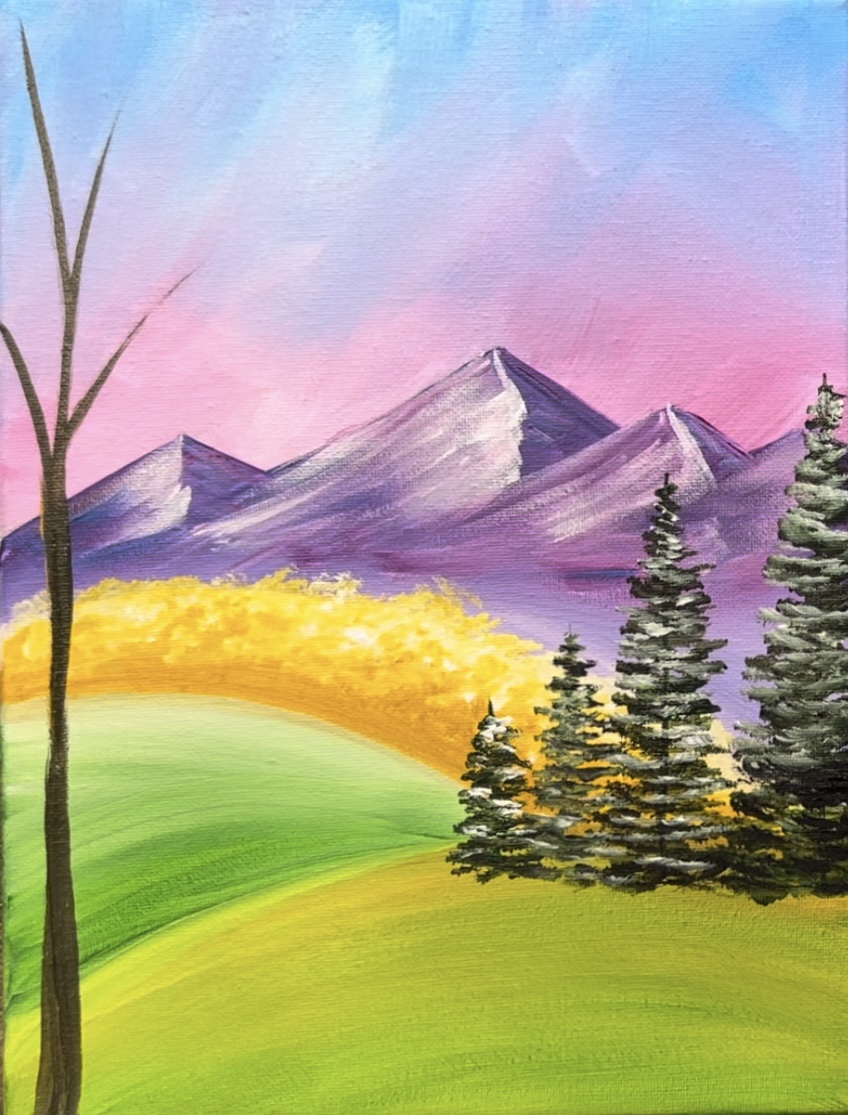
Majestic Fall Landscape

Embrace the beauty of nature with this easy fall landscape painting tutorial!
Materials
- 9 x 12 Canvas (can use any size)
- Acrylic Paints (I use Liquitex BASICS)
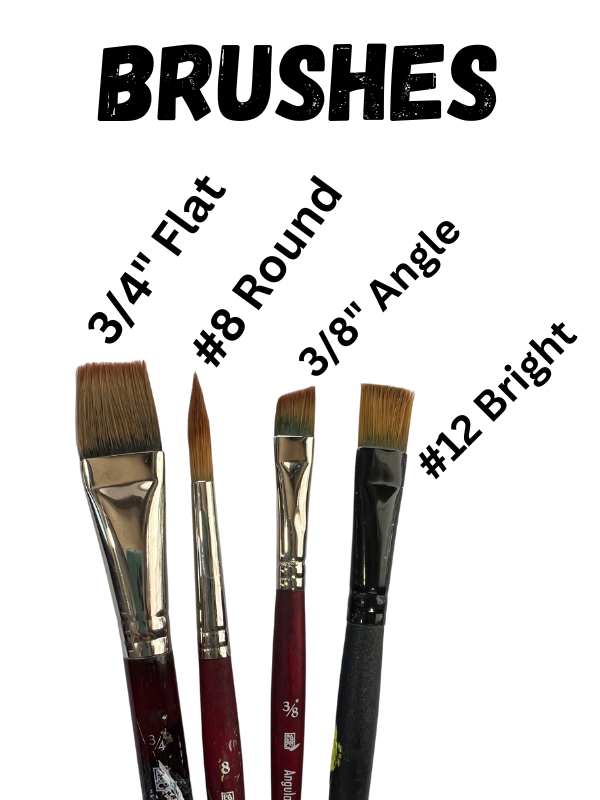
- Brushes
- Pencil
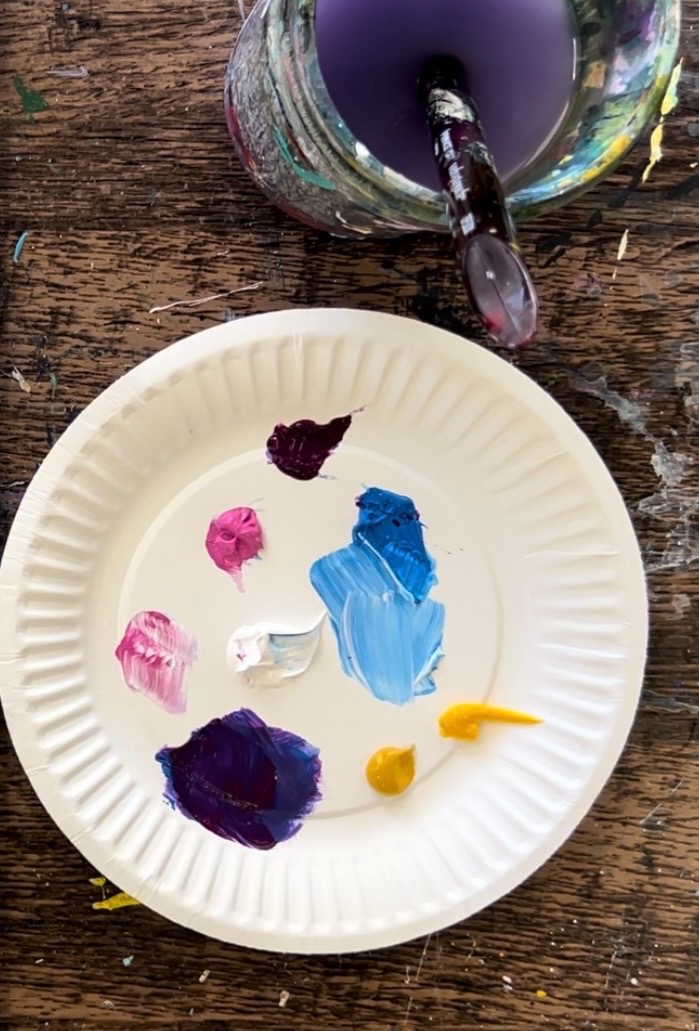
- Paint Palette
- Water Jar
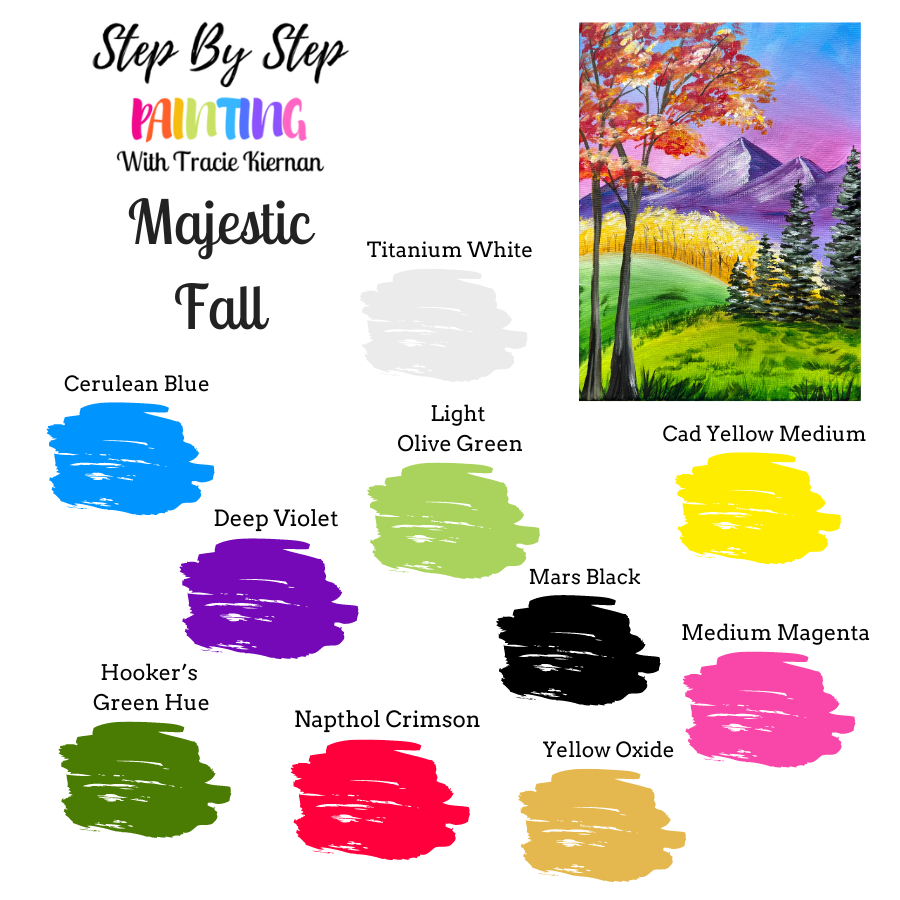
Colors
- Titanium White
- Mars Black
- Cadmium Yellow Medium Hue
- Hooker's Green Hue
- Light Olive Green
- Cerulean Blue
- Deep Violet
- Medium Magenta
- Yellow Oxide
- Napthol Crimson
Brushes
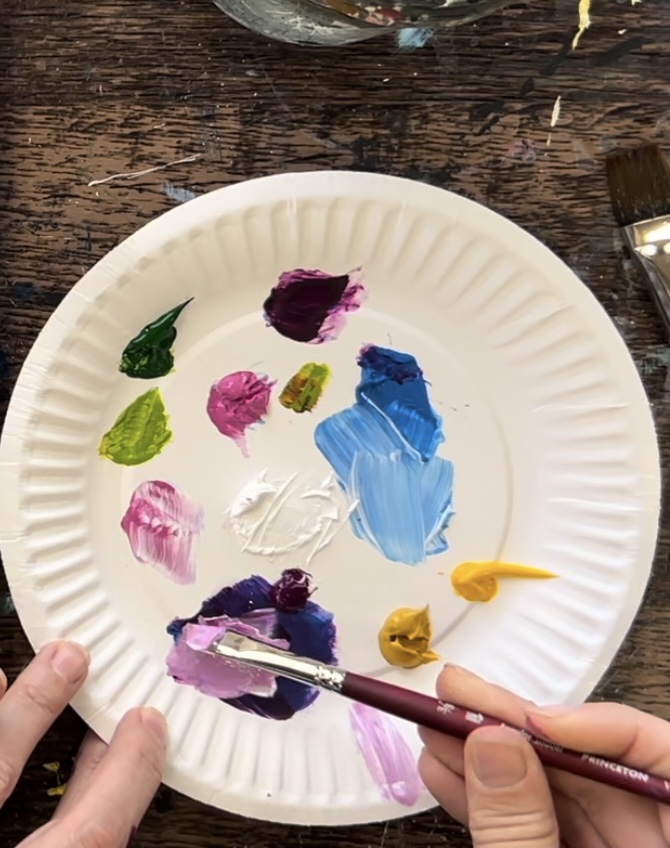
Color Palette
I use Liquitex BASICS paints. If you are using another brand, use the color chart below to help you match colors. You don’t have to use these exact colors!
Directions At A Glance
Video
Step By Step Instructions
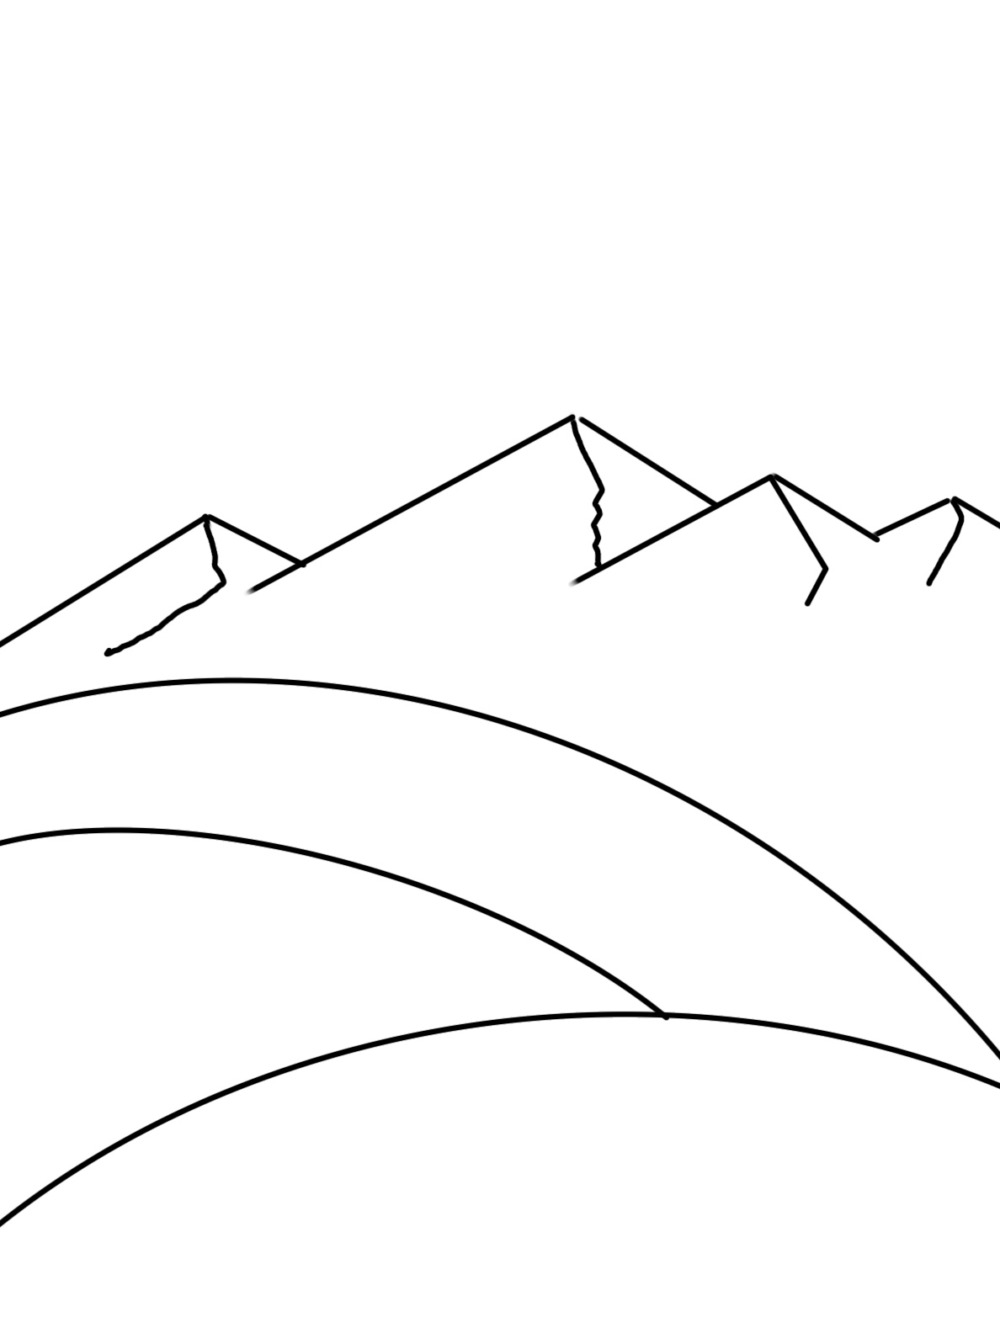
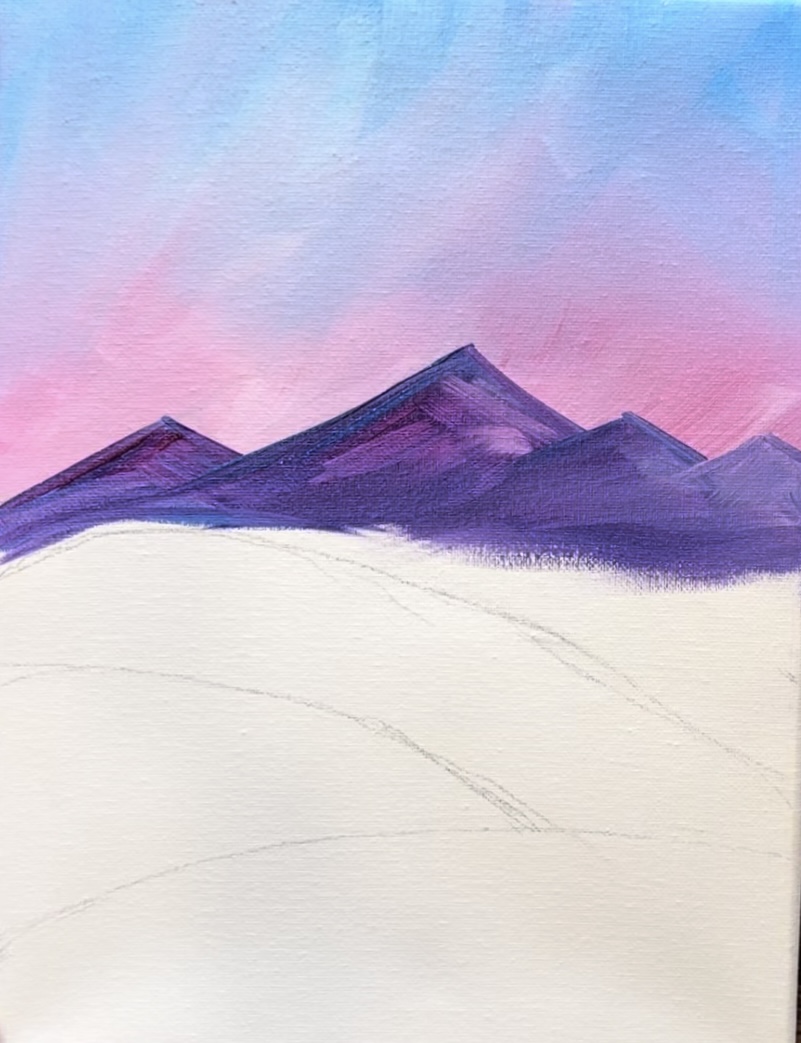
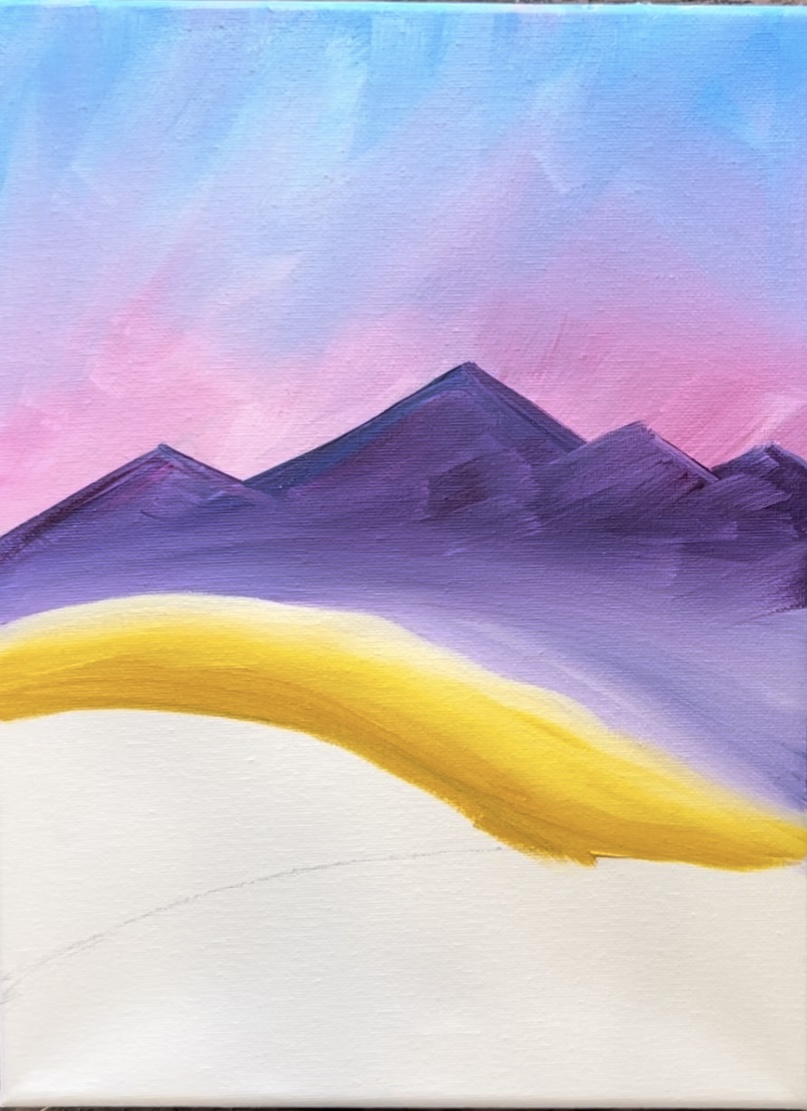
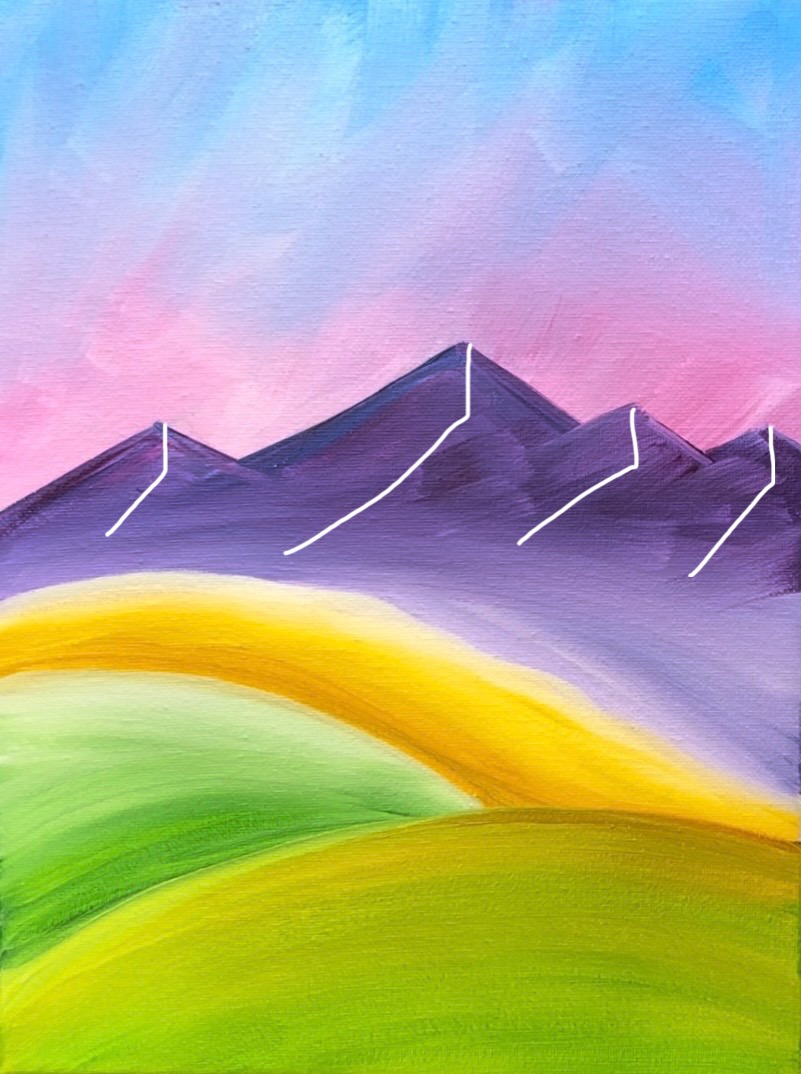
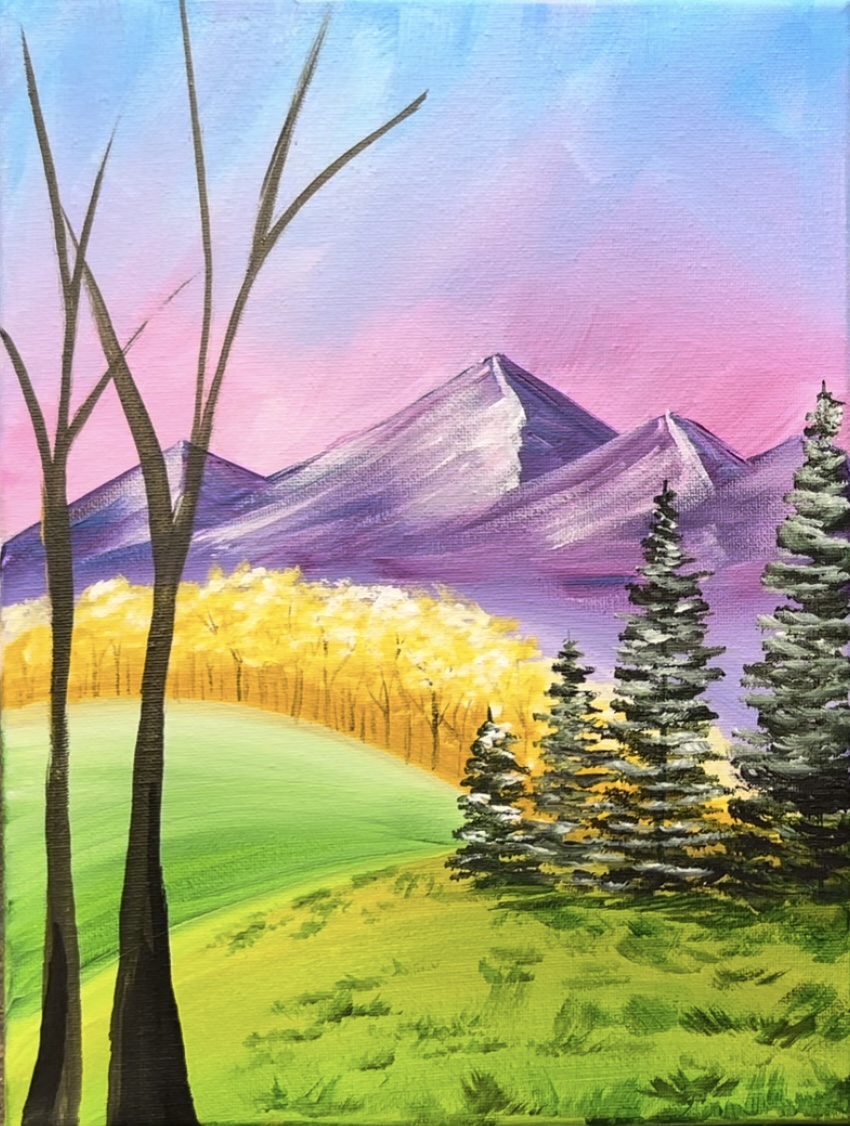
1. Draw composition of landscape
Position your canvas so that it is vertical. Divide up the landscape by drawing two hill lines as shown below plus a third curved line (the tree line). These measurements do not need to be exact and will vary depending on your canvas size. As reference, the top curve line (which will be our “tree line” is in the exact center of the canvas.
Since my canvas is a 9 x 12, I did my top curved line at 6″. The bottom curved lines meet together on the right. These bottom two curved lines will be the foreground hill and the mid ground hill.
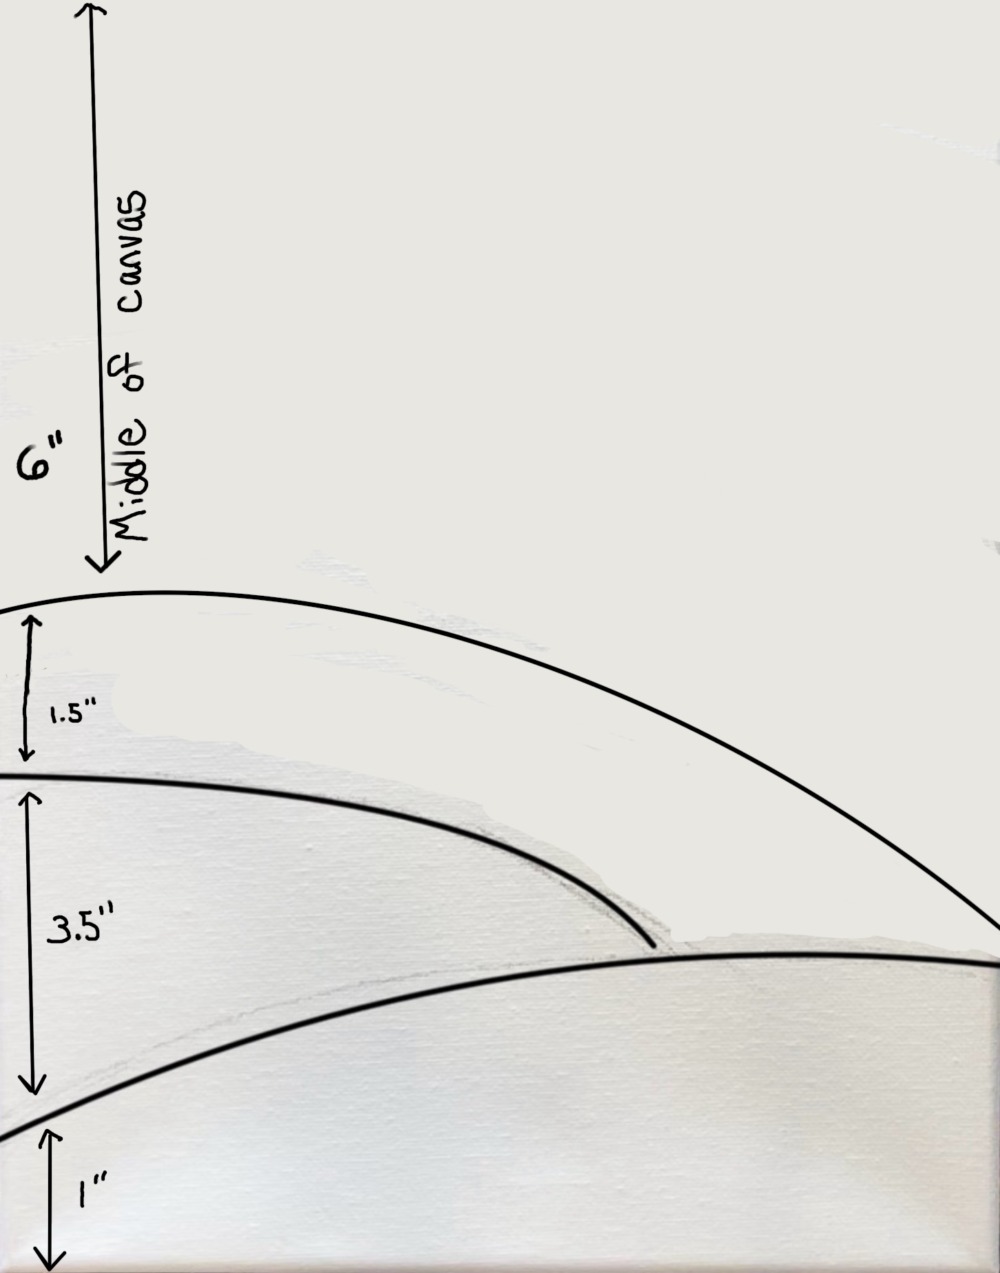
Next, draw your mountain lines. I drew these as 4 triangular peaks with each one slightly overlapping each other. The highest peak is about 8″ from the bottom edge of the canvas. Make sure you leave enough room for the sky!
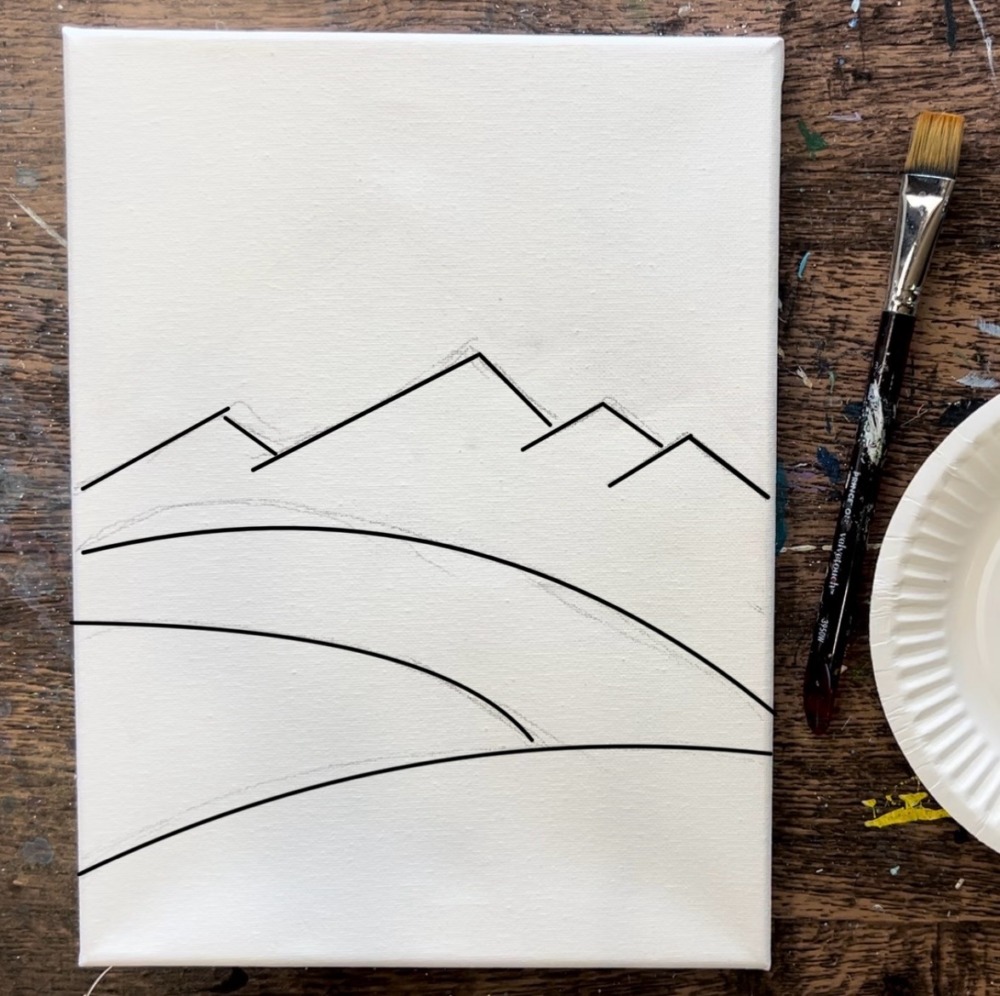
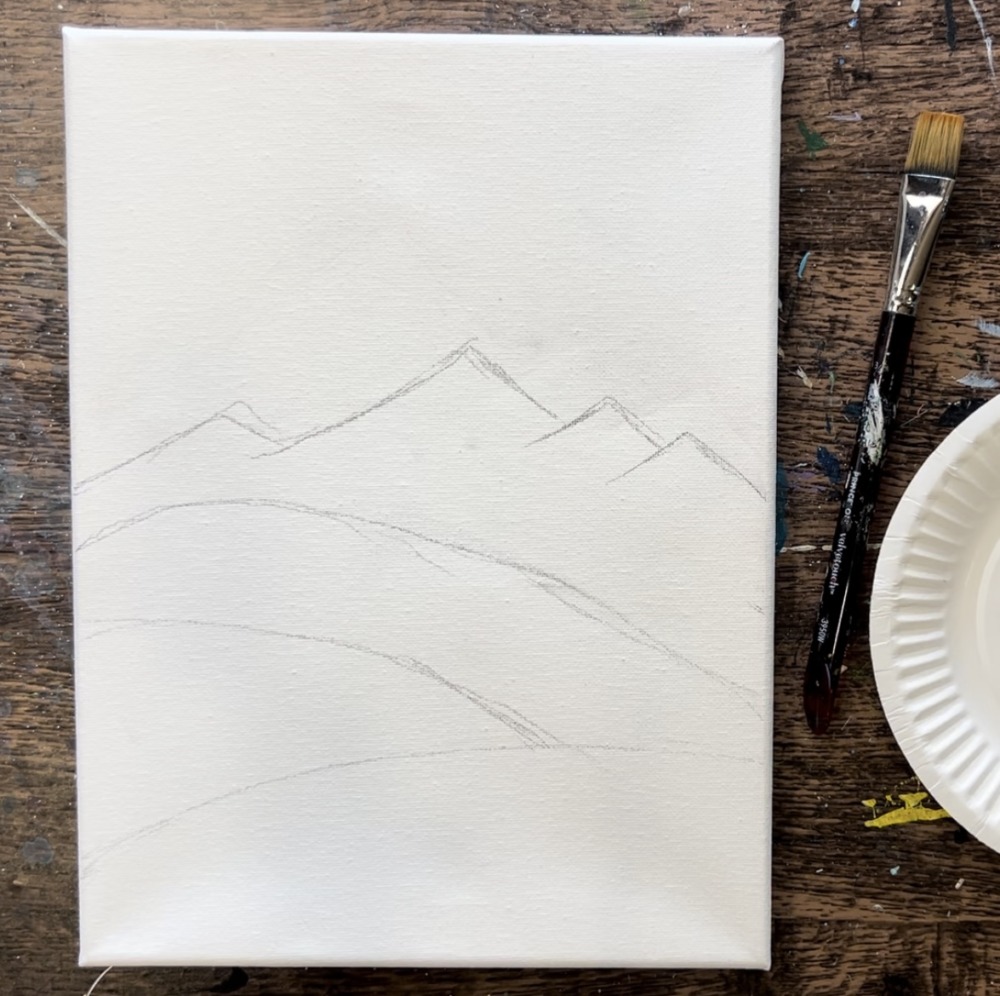
Now that your canvas is divided up, we can paint each section one at a time to create our landscape painting!
2. Paint Sky
The sky is a gradient blend of light blue to pink! The goal is to create a “splash of bright pink” above the mountain range.
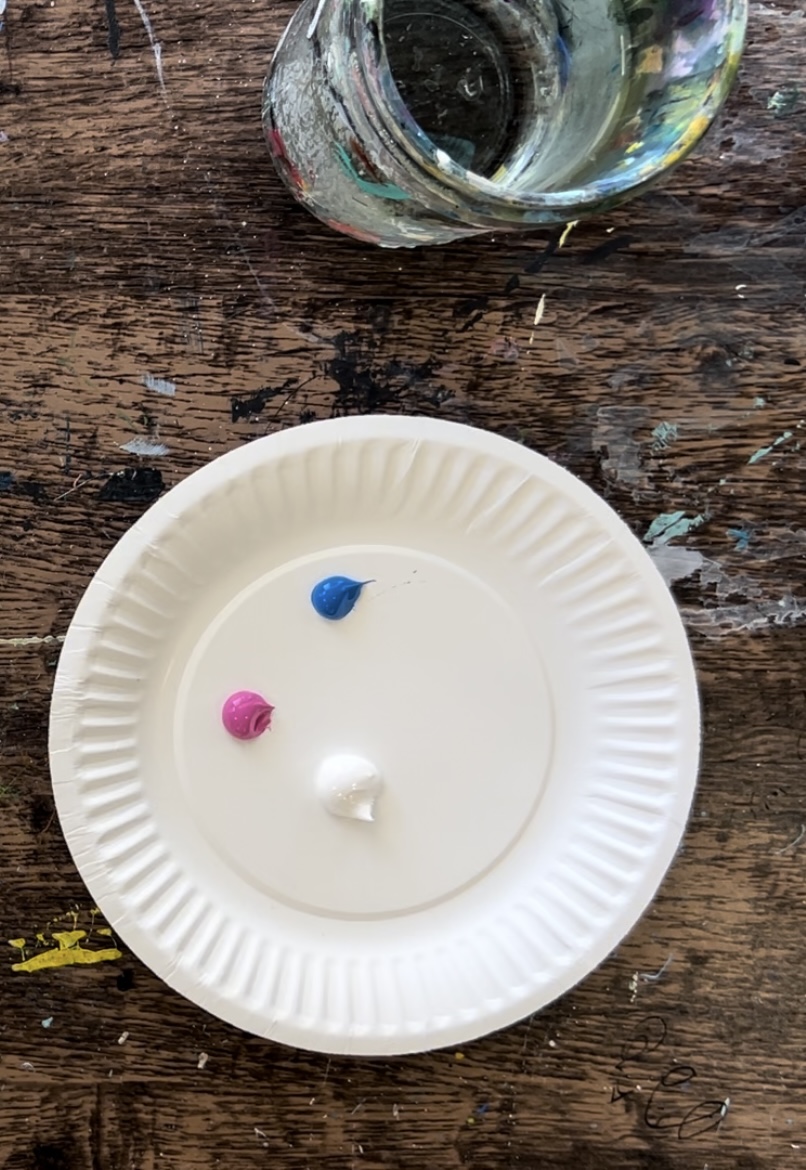
Load your paint palette with the three colors: cerulean blue, titanium white and medium magenta.
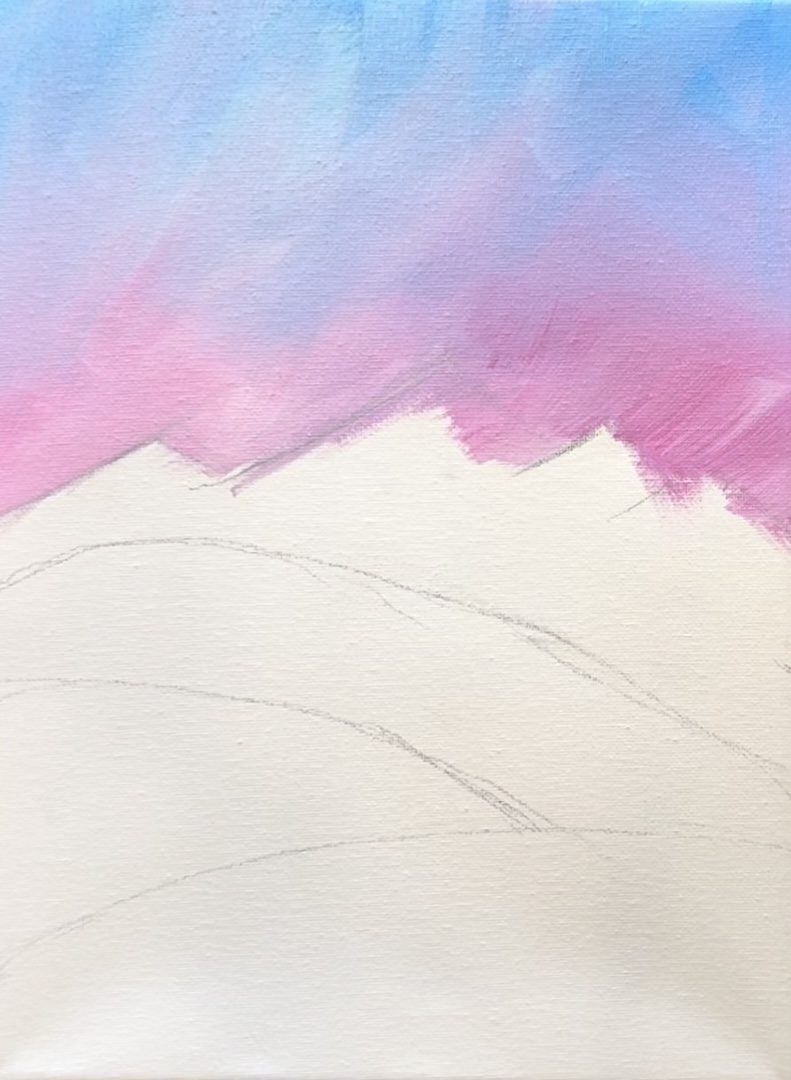
Use the 3/4″ wash brush. Mix the cerulean blue with the titanium white (equal amounts). Start on the top of the sky. Paint full width paint strokes going in different angles. Add a little more white in the middle area of the sky.
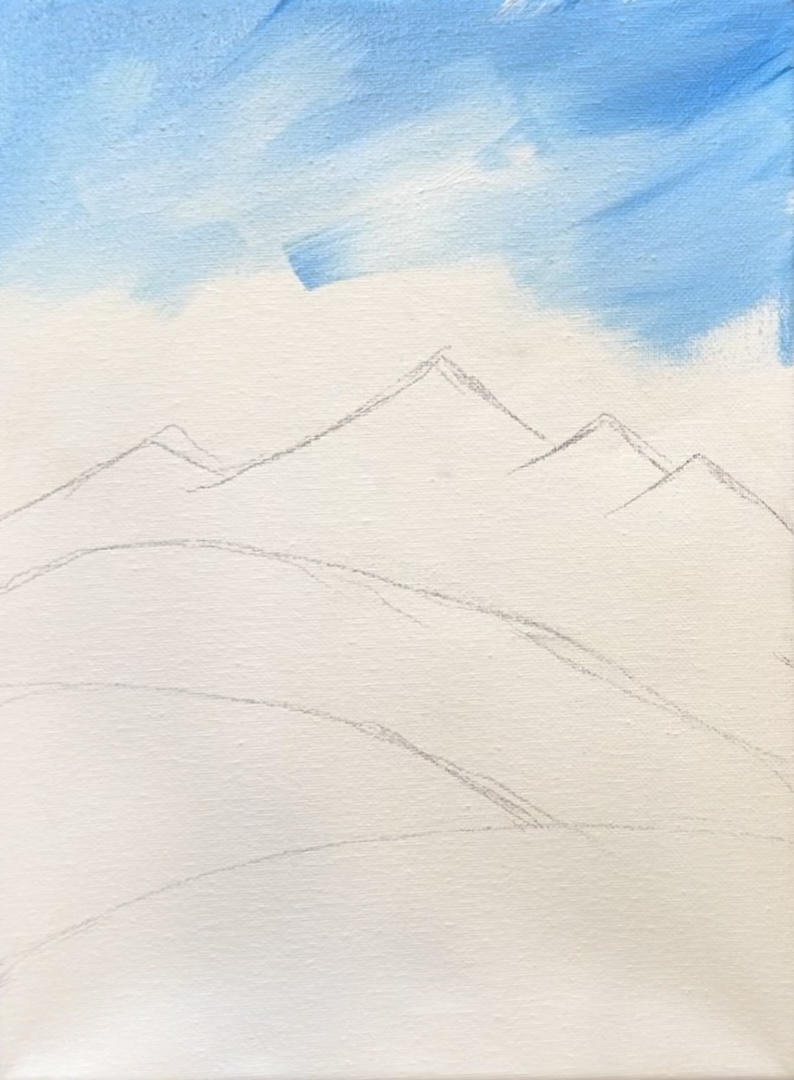
As you approach the mountain lines, blend the pink into the sky. Either wipe or rinse the brush. Mix equal parts pink and white together. Blend the pink into the blue. Go in an angled direction into the sky. Try not to over-blend the color. The top should be blue and bottom should be pink. The middle will turn into a purple color.
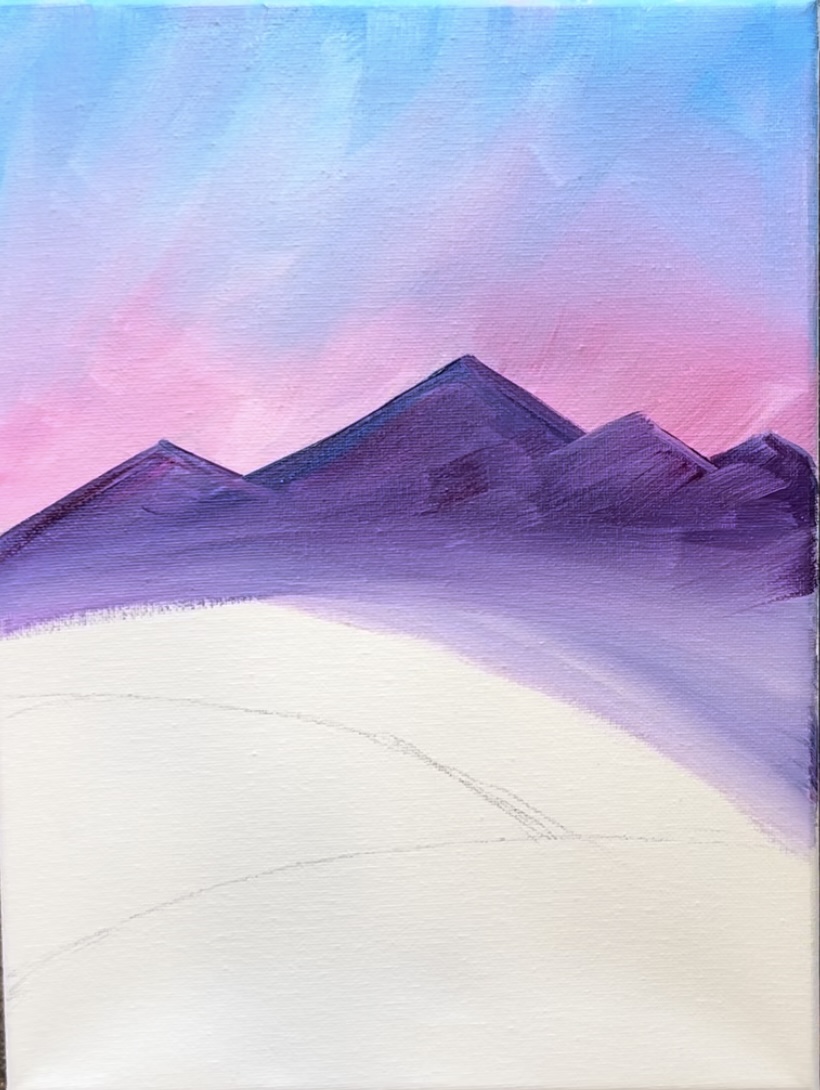
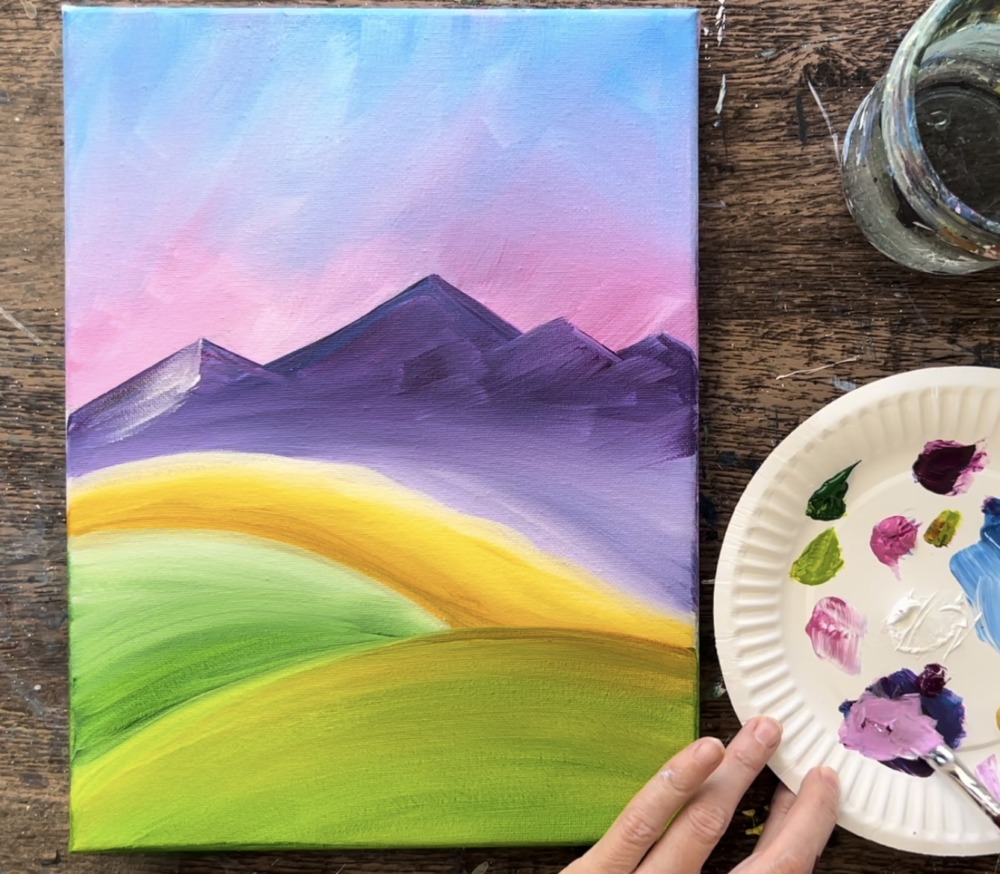
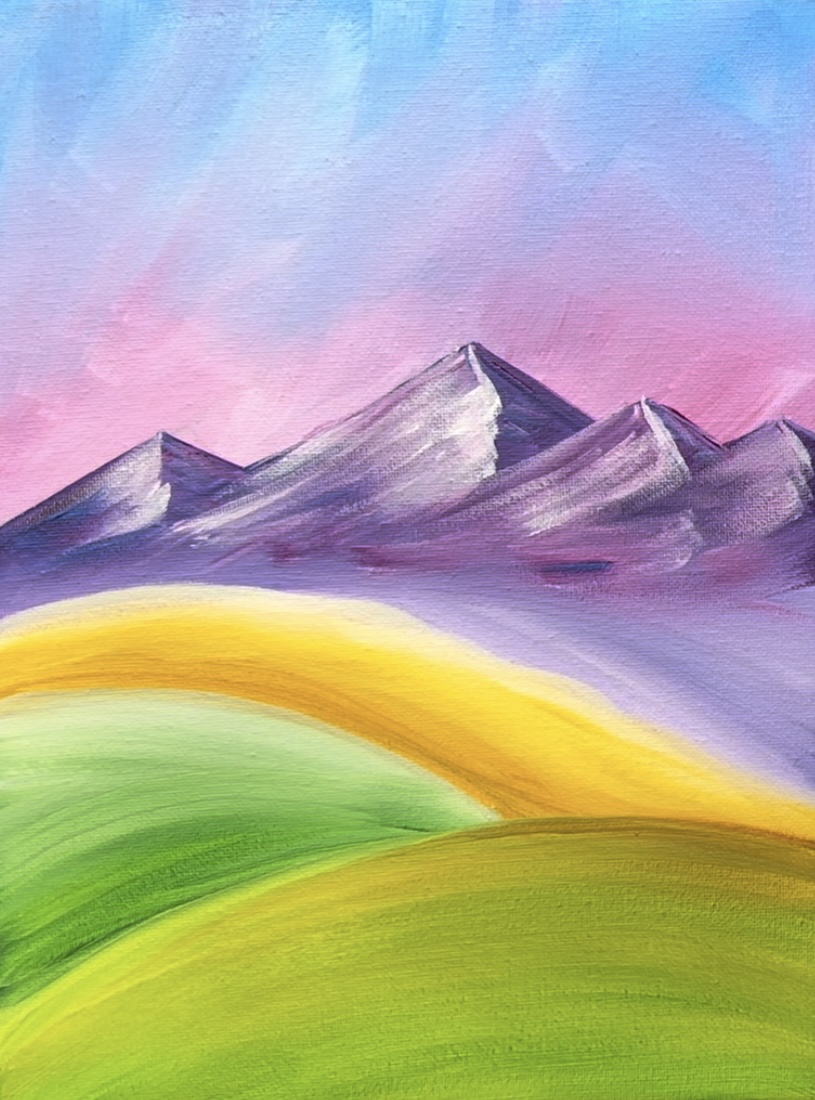
3. Paint Mountains
Load your paint palette with deep violet and more cerulean blue if needed. Mix equal parts purple and blue together. This will create a deep blue-purple color.
Use the 3/8″ angle brush to paint the mountains. Right now we are just filling them in with color and not painting the highlights on them. I recommend outlining the shape of the mountain to define the edges and then fill them in using angled paint strokes that go down the to left and also to the right.

Leave the bottom of the mountains open to blend white in that area.
After filling the mountains with the blue-purple color, add a little white to your brush. We will be filling the bottom area of the mountain in with a light purple gradient that is lighter on the bottom and blends to the dark purple mountain peaks. The reason for this is to give it a “misty mountain” effect. This also gives our mountains more depth. We can paint this going in a curved and flat direction.
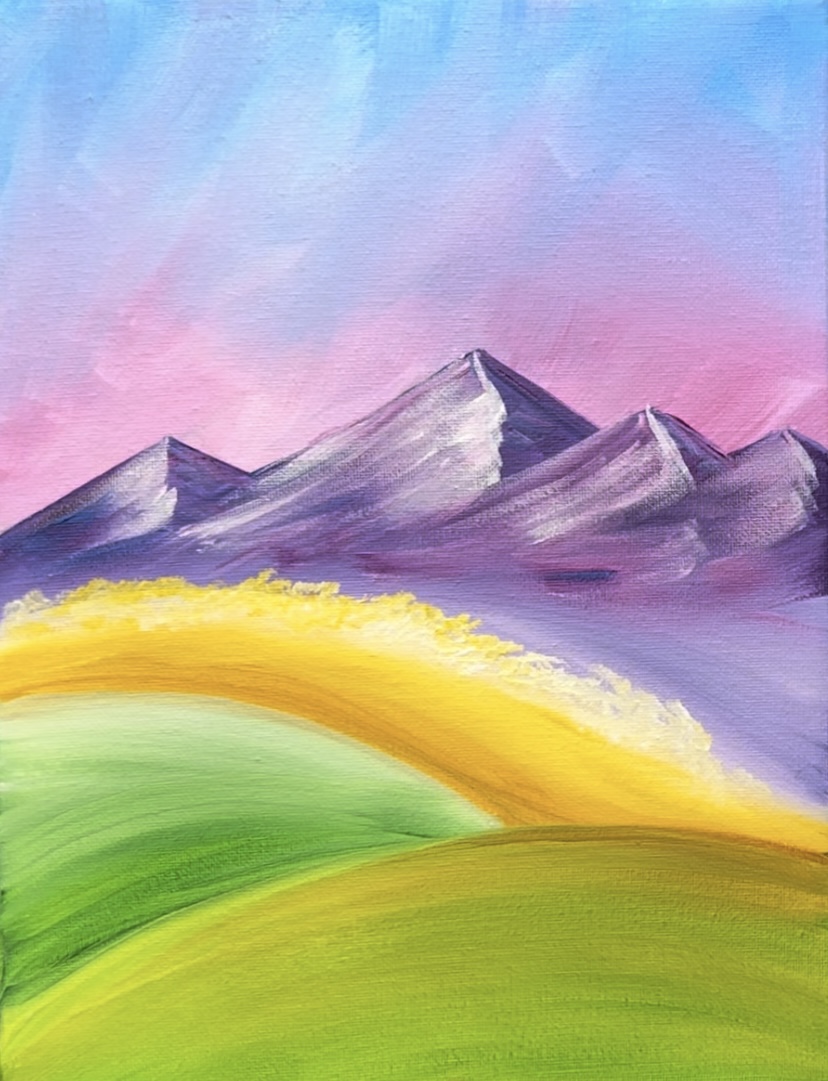
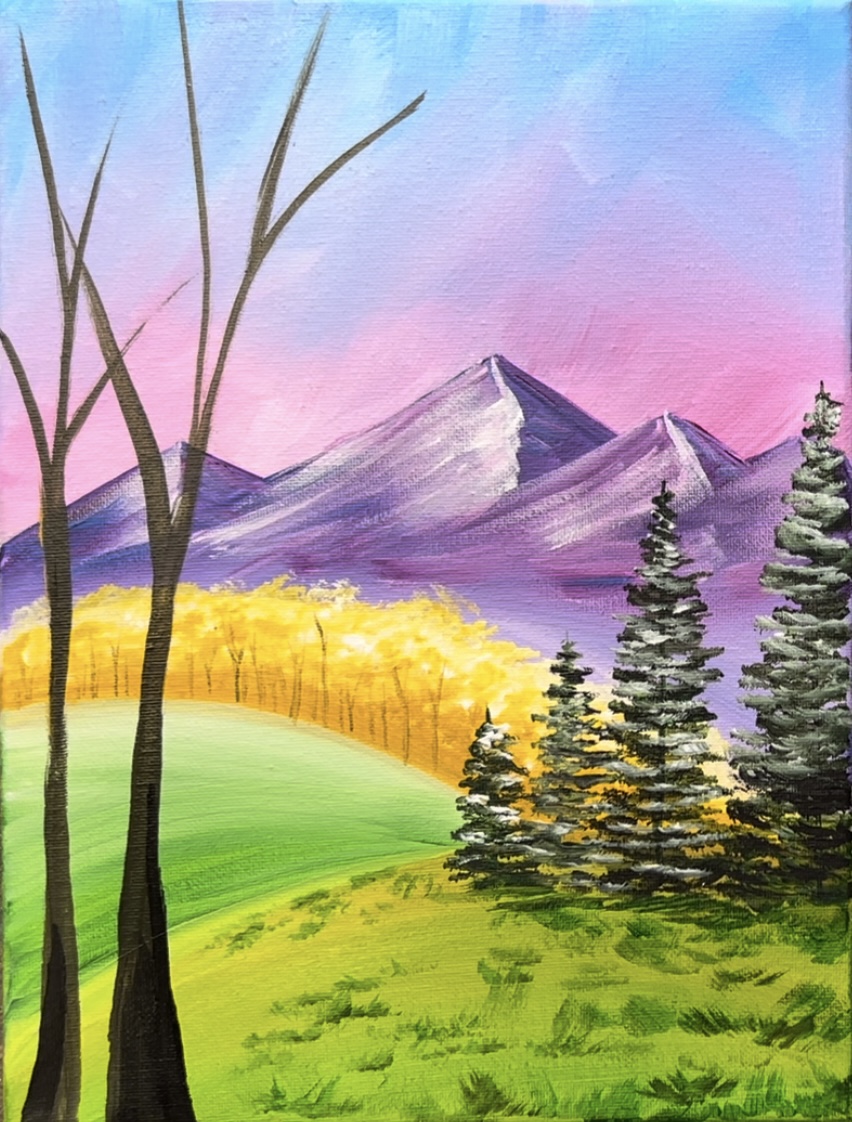
4. Paint Golden Tree Line
The next section we will be painting is the golden tree area. For now, we will paint this like a simple gradient of dark yellow on the bottom and light yellow on the top. We will add texture to this after this layer dries to make them look more like trees.
Load your paint palette with: “Yellow Oxide” and “Cadmium Yellow Medium Hue”. Use the 3/4″ wash brush.
Paint yellow oxide on the bottom of this area.
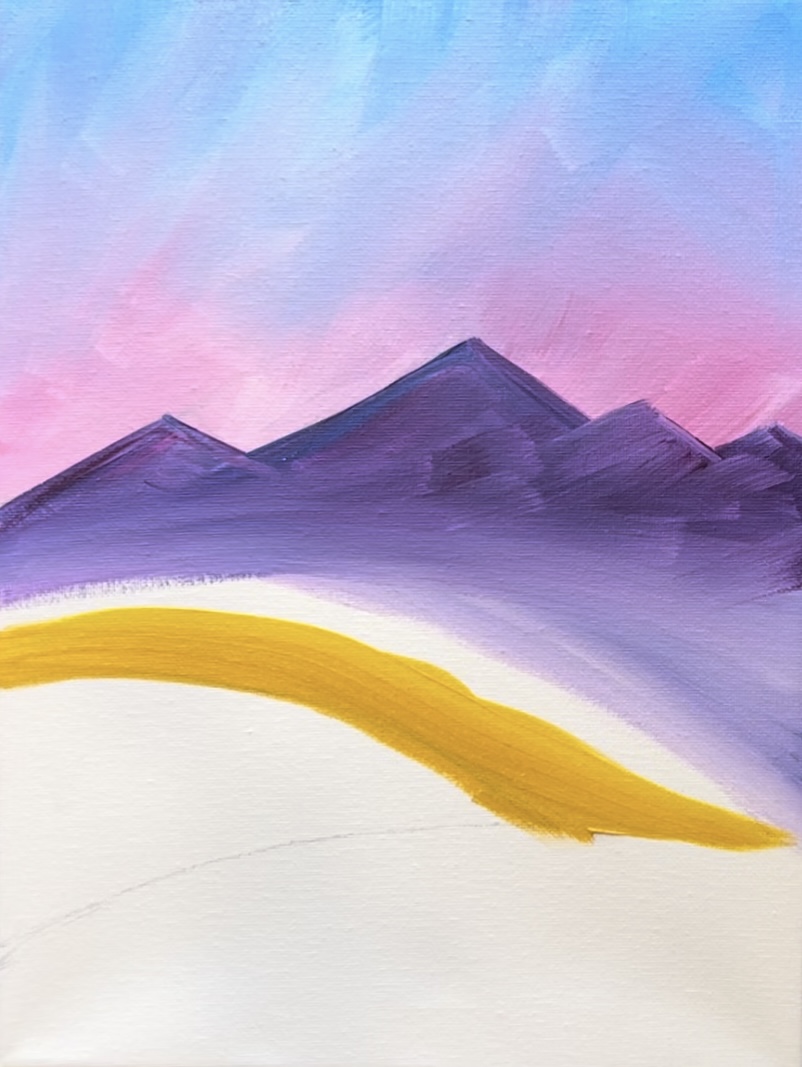
Then blend the lighter yellow in the middle and then add white on the top so that you have a dark to light gradient area.
5. Paint Hills
The next two sections we will work on are the bottom and the middle hill. Load your paint palette with “hooker’s green hue” and “light olive green”.
Paint the middle hill with a combination of “hooker’s green hue” and “titanium white”. Start on the bottom of the hill and use your 3/4″ wash brush to paint an area solid green. Then blend “titanium white” into the green so that it blends to a lighter color on the top of the hill.
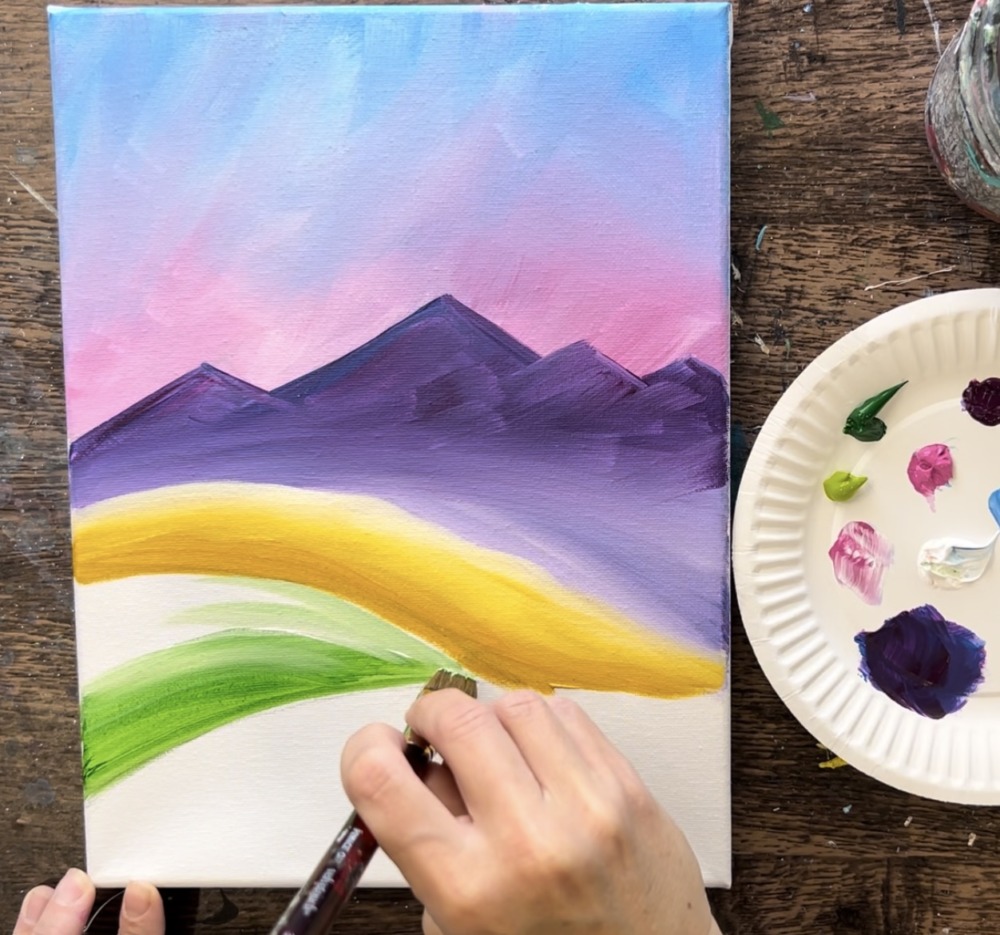
You will create a blend of light green on the top of the hill and dark green on the bottom.
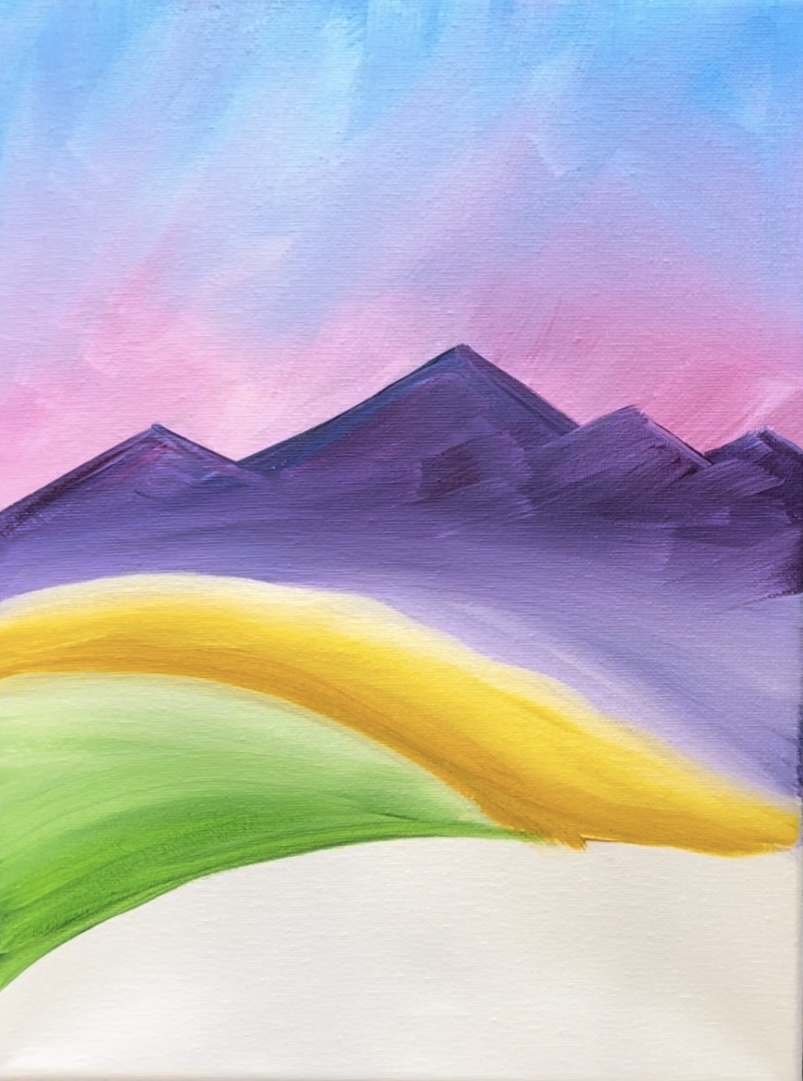
The bottom hill (foreground hill) has “light olive green” as the main color. Without rinsing your brush, load it into “light olive green”.
Start at the top of the hill and paint the top half with the “light olive green”. Blend a tiny bit of purple (yes purple) on the top right edge of this hill. It will make the green slightly darker/ brownish. This is because this area will have pine trees and this is a a way to make that area a little more shadowy.
Paint the rest of the hill light olive green all the way to the bottom edge of the canvas.

Add a little “hooker’s green hue” on the bottom edge just to make it slightly darker on the bottom. If needed, add a little “titanium white” on the top left edge of the hill to make sure this area is light and stands out against the other green hill behind it.
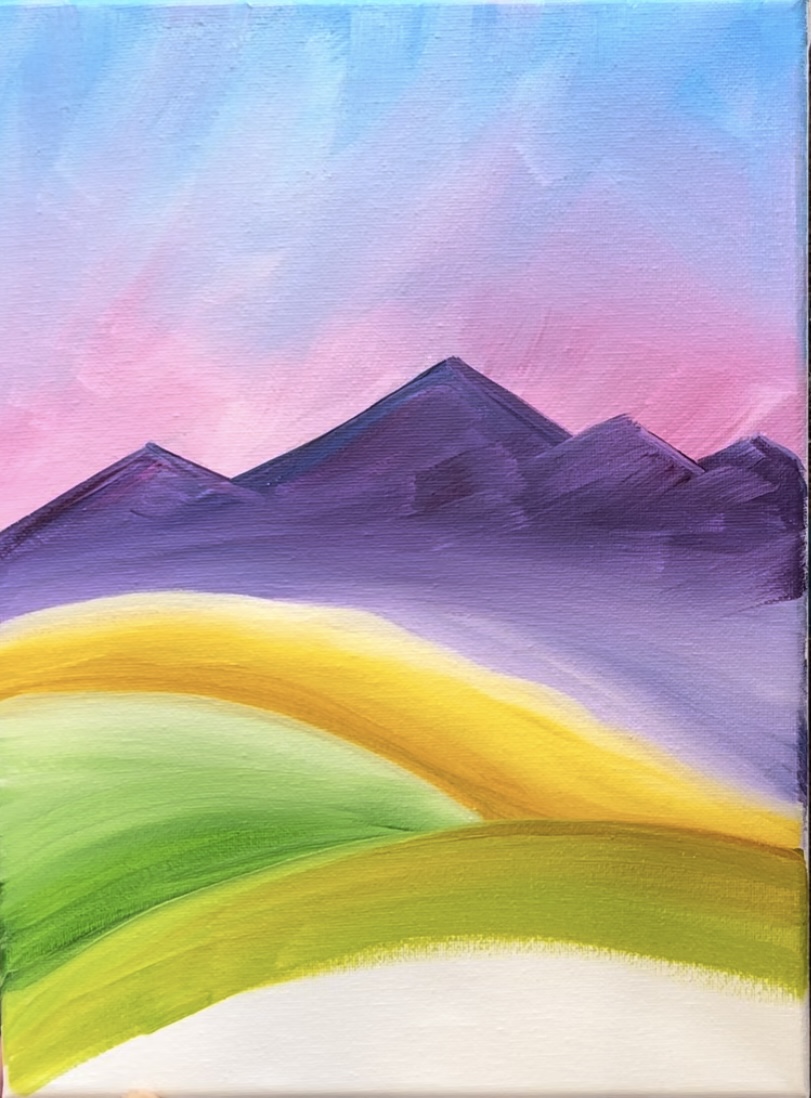
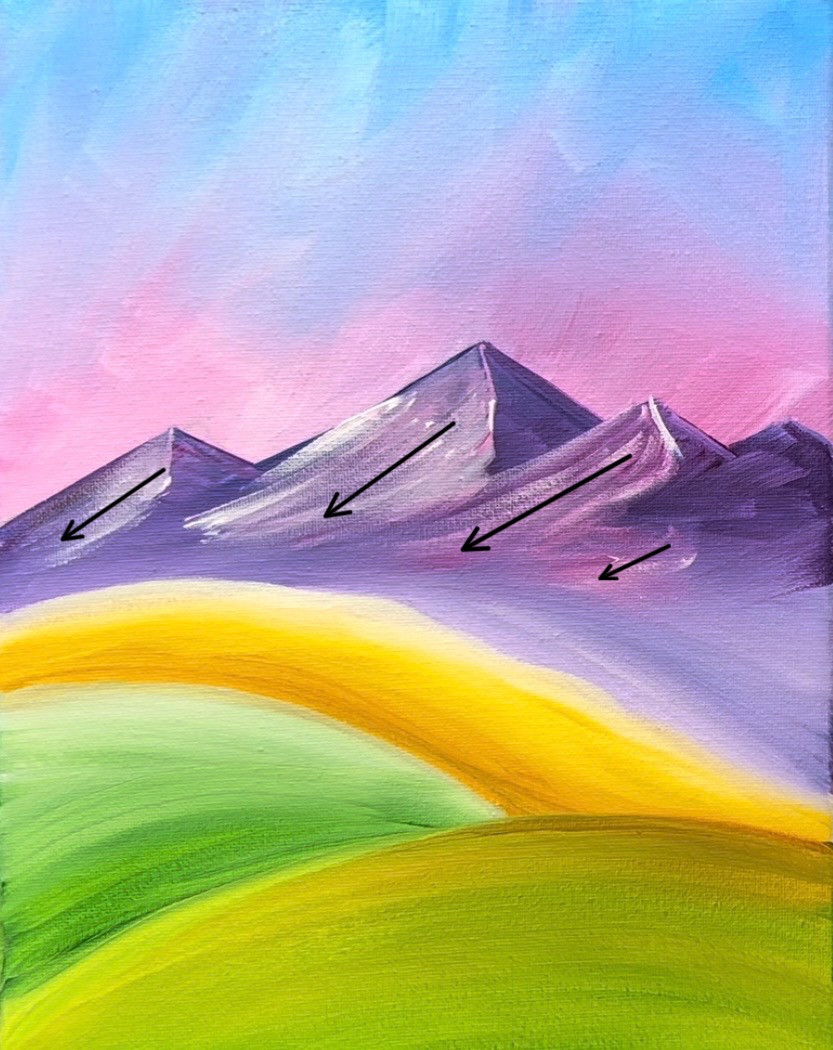
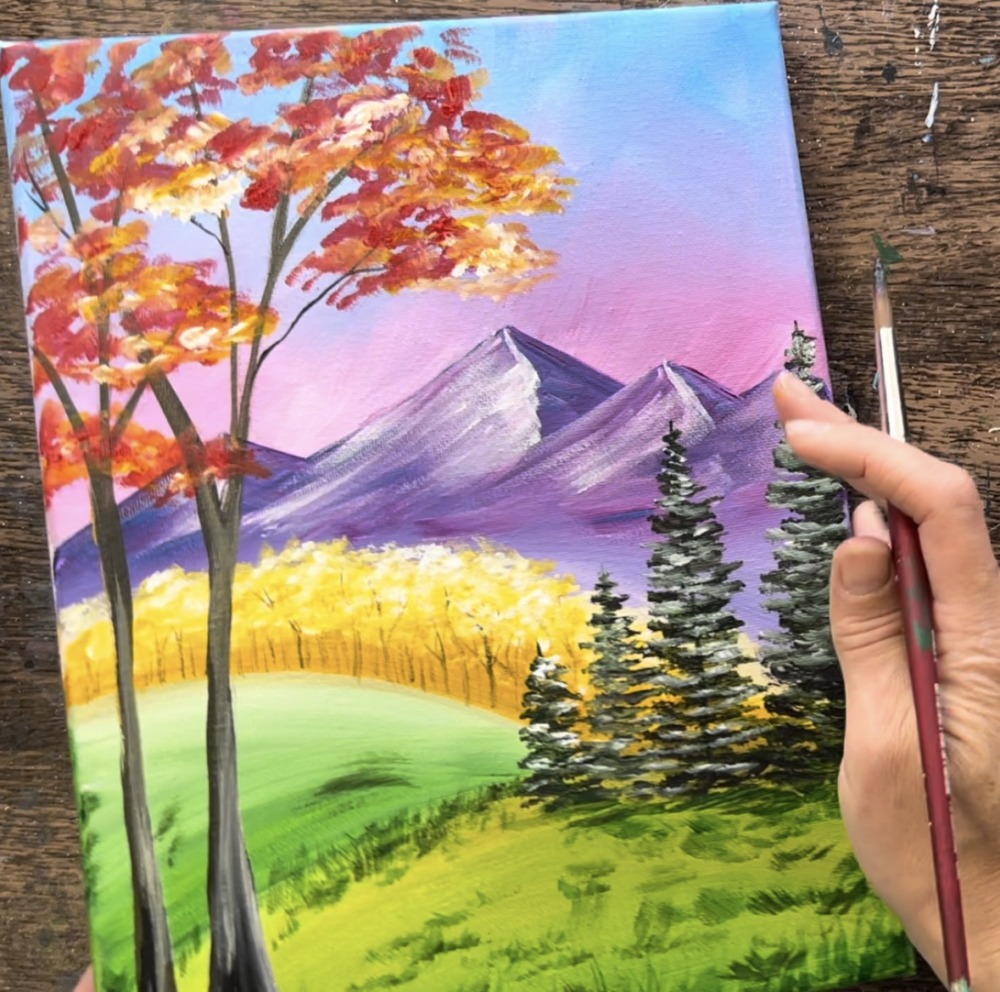
6. Paint Left Side Of Mountains
Use the 3/8″ angle brush to paint the left side of each of the mountains. I like to divide the mountain peaks in half starting at the apex of the peak.
Mix “deep violet” with “titanium white” (equal parts) on your palette. You want your mountain highlights to be a light purple so that it stands out and shows up bright against the dark purple. However, we are not painting these as “snow” on the mountain peaks (unless you want to). That is why we don’t want it to be pure white
Start on the left mountain. Use the end of the brush to divide the mountain down from the top of the peak. Then use the full width of the brush to drag the paint at an angle to the left. You want this to show up “dry brush” and not cover all of the first dark layer.
Repeat this for each of the mountain peaks. You can vary your color a little by adding more white or more purple to the brush. Leave the right side of each mountain peak dark. As you paint these highlights, you can bring it down all the way to the left and have it overlap the mountain next to it.
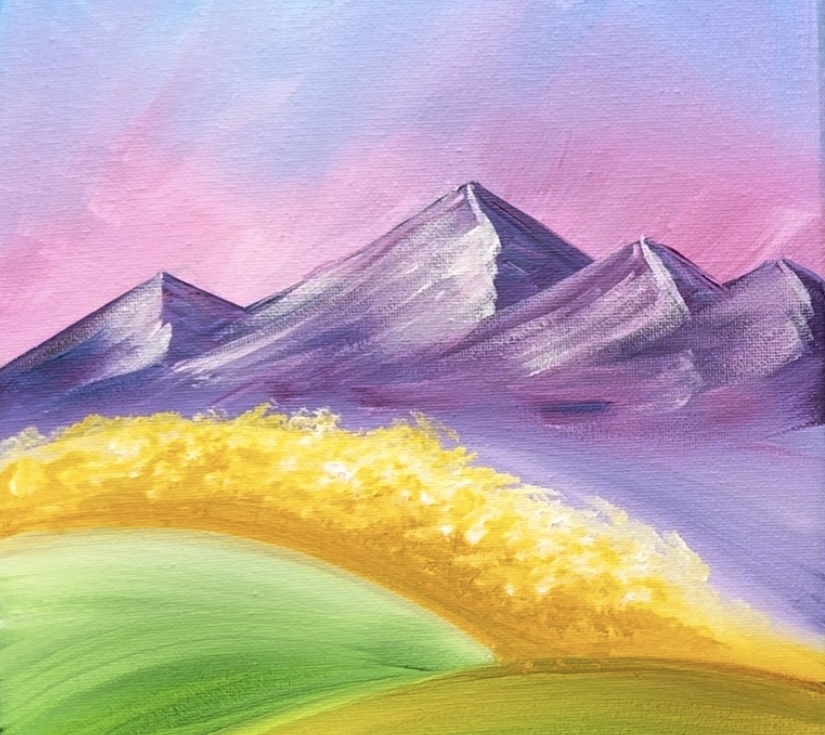
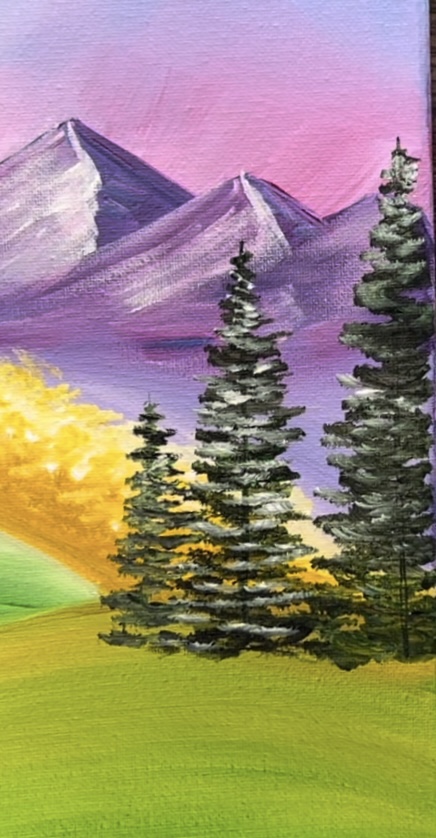
7. Paint Texture In Trees
Use the #12 bright brush (smaller flat brush) to “stamp” texture in the golden tree area. Start at the top and “stipple” both “cadmium yellow medium” and “titanium white”. To “stipple” means to stamp in a way that creates texture.
On the bottom of this area, stipple “yellow oxide” texture and have it blend with the lighter colors on the top. You basically are repeating the same gradient as you painted flat earlier but now adding a texture layer. Also, it is okay if the top of your tree line overlaps parts of the bottom of the purple mountain area.
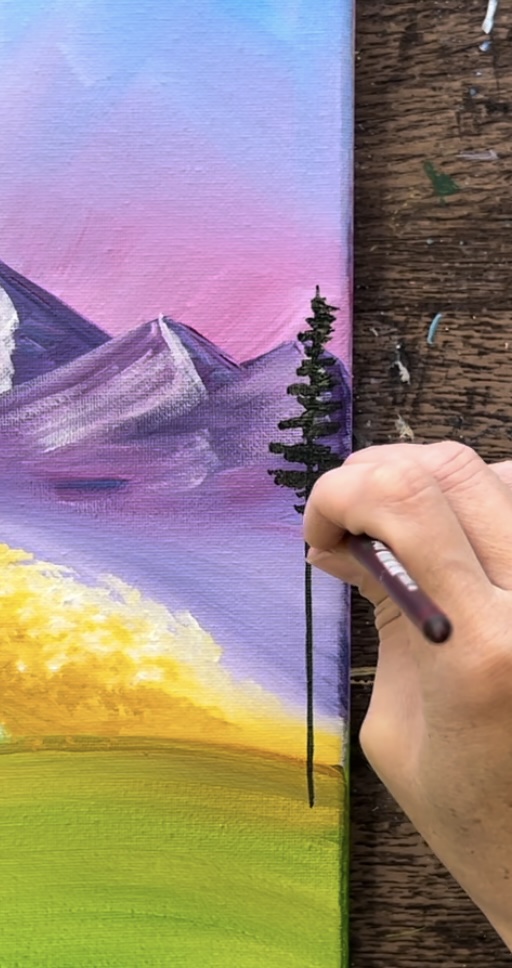
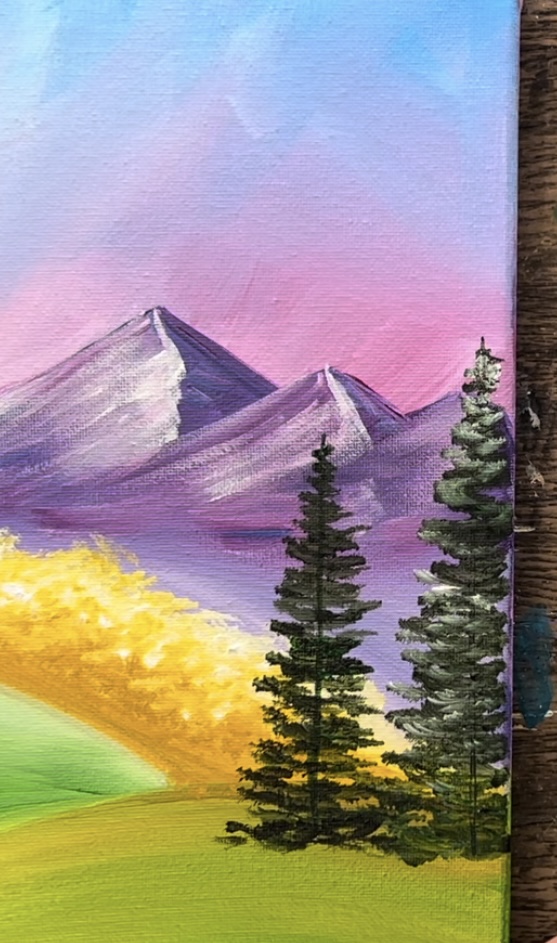
8. Paint Pine Trees
Use the 3/8″ angle brush. On your palette, mix about equal parts “mars black” and “hooker’s green hue” together. Start with the tallest tree on the far right. Paint a thin vertical line for the center of the tree. Use the edge of the bristles to do this thin line.
Then hold the brush horizontally. Start at the top to paint the branches. Use the end of the angle of the brush to paint the smaller branches. Hold the brush very lightly to create these smaller branches.

You are basically “stamping” the bristles and going in a left and right “zig-zag” direction as you work your way down the vertical line of the tree.
As you work your way down, the branches get wider and you are pressing harder on the brush.
Go all the way to the bottom of your vertical line to fill the entire tree.
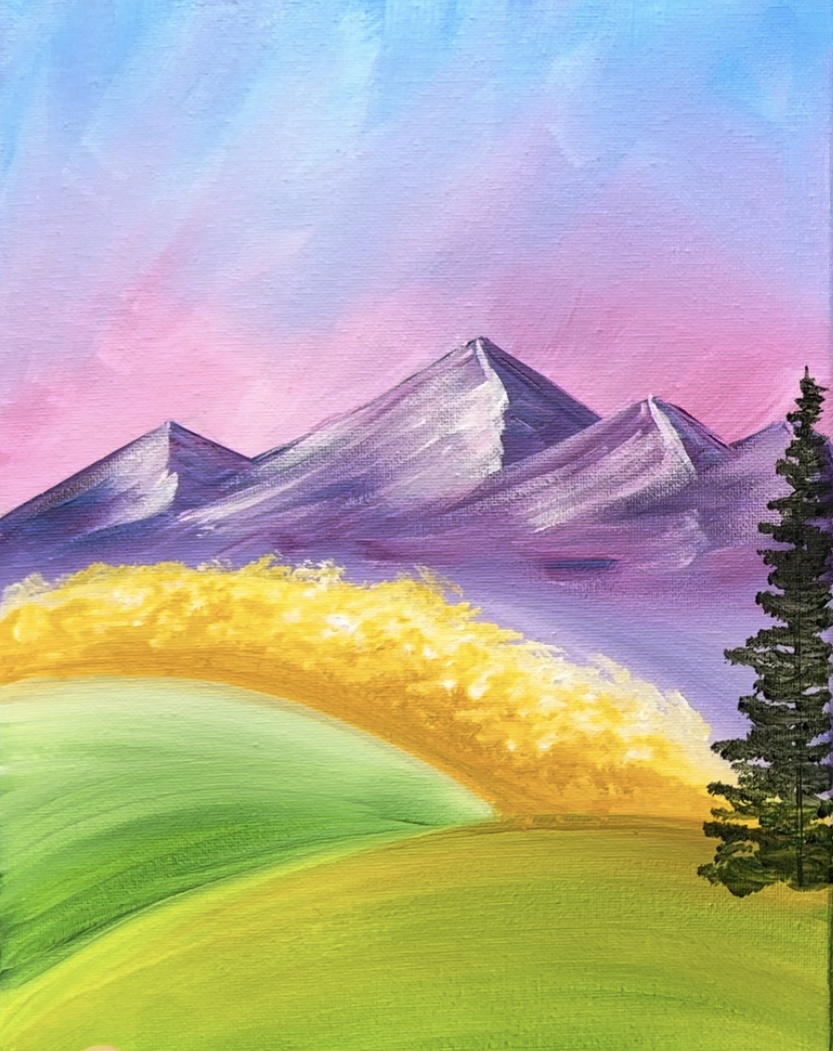
Next, go back over this tree with a thin layer of white mixed with green. Basically, add a tiny bit of white to your 3/8″ angle brush without rinsing it. Add a light layer by repainting the branches but do not cover all of the initial dark layer. The idea is to add a lighter layer on top of this darker layer to give the tree more depth.
Repeat these steps to create three more trees. Each tree is slightly shorter than the one to the right of it.
You’ll notice that as each tree is smaller, it may be harder to paint because of the smaller brush strokes!
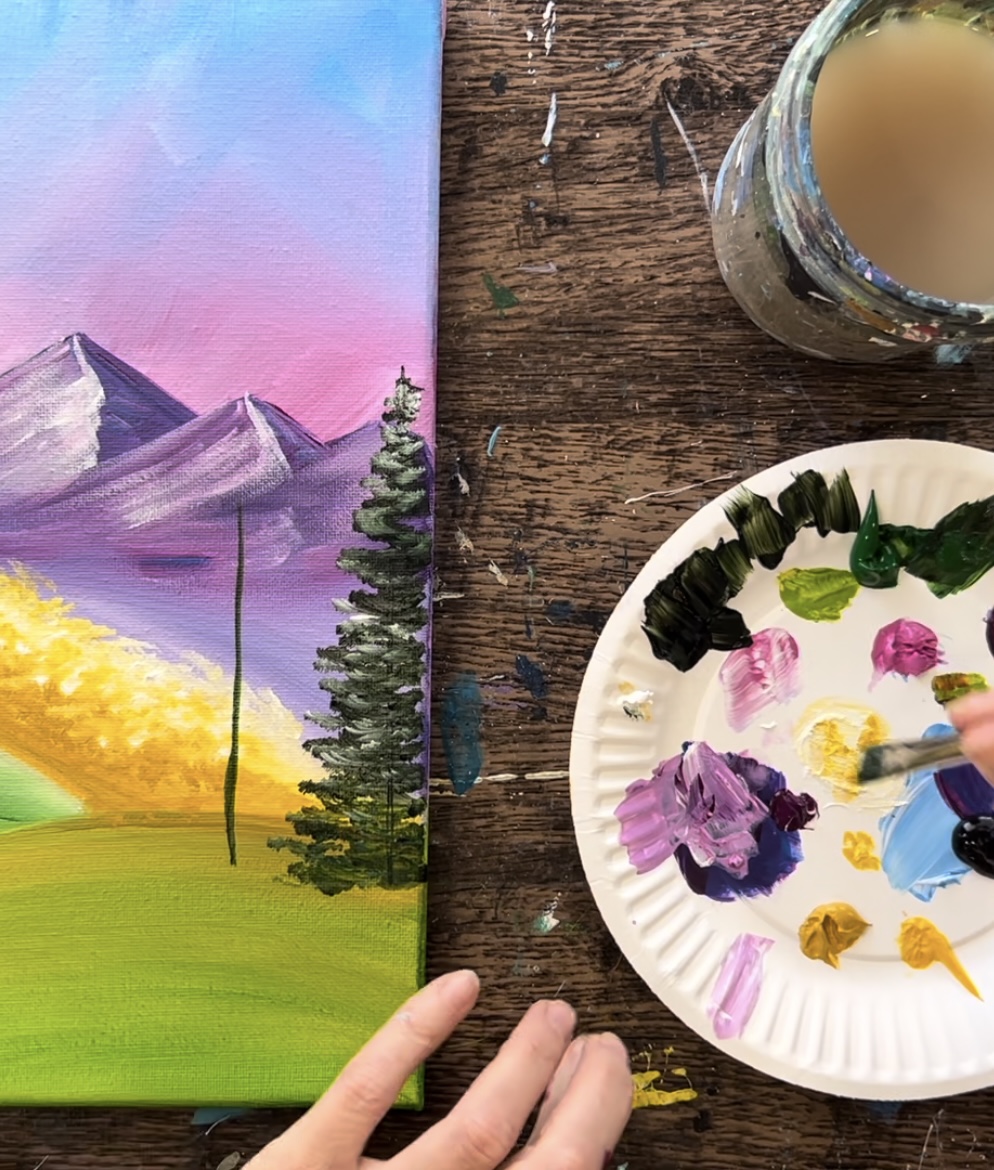
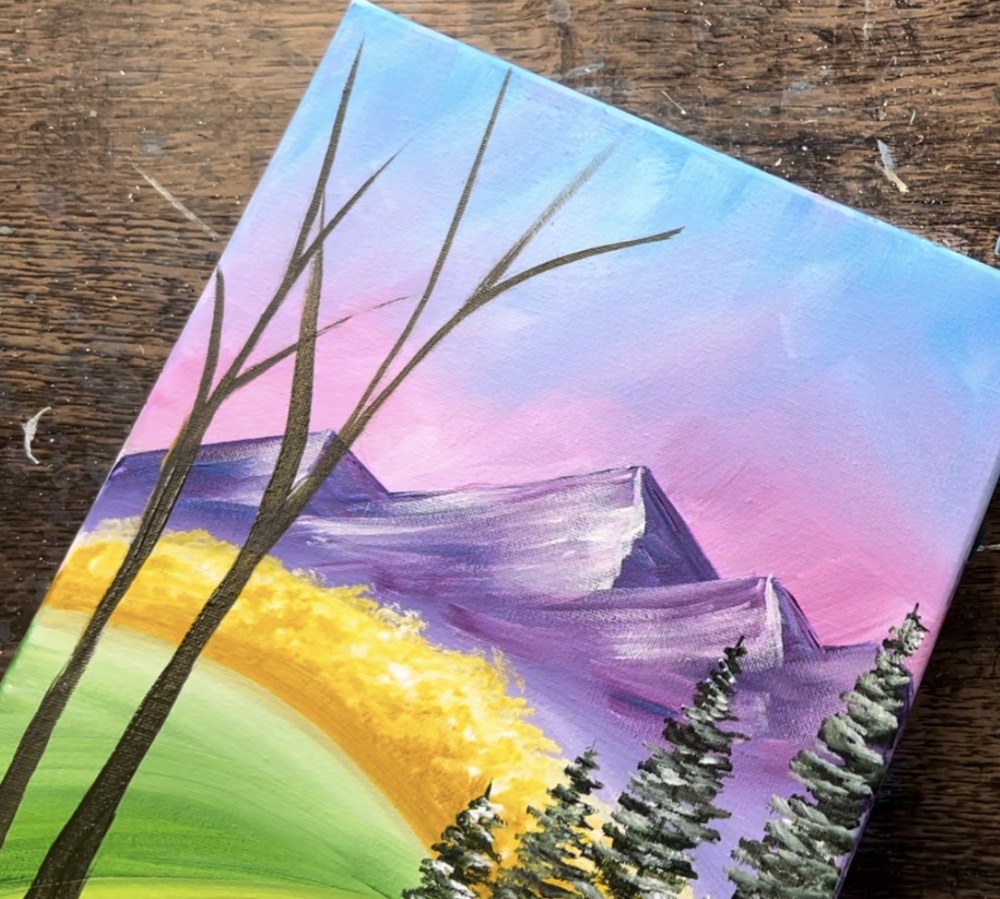
9. Paint Tall Trees
Mix a dark brown on your palette by mixing a small amount of “mars black” into “yellow oxide”. Use the #12 bright brush for this tree (or use the round brush or whatever brush you like to use to paint branch like trees). Start on the bottom and paint a wide trunk.
Then turn the wide trunk into a thinner trunk as you paint upwards above the mountains. Use the brush on its side to create thinner branches that stem out and go to multiple points. To get your branch to go to a point, release the pressure of the brush so that it becomes thinner.
Paint a second tree really close next to the first one. Do the same technique and make the branches go all the way to the top edge of the canvas.
10. Paint Grass Texture (optional)
Use the #12 bright brush and “hooker’s green hue”. Paint clusters of grass texture in the hill area on the bottom of the canvas. To do this, use the full width of the brush and drag it slightly up to create this texture.
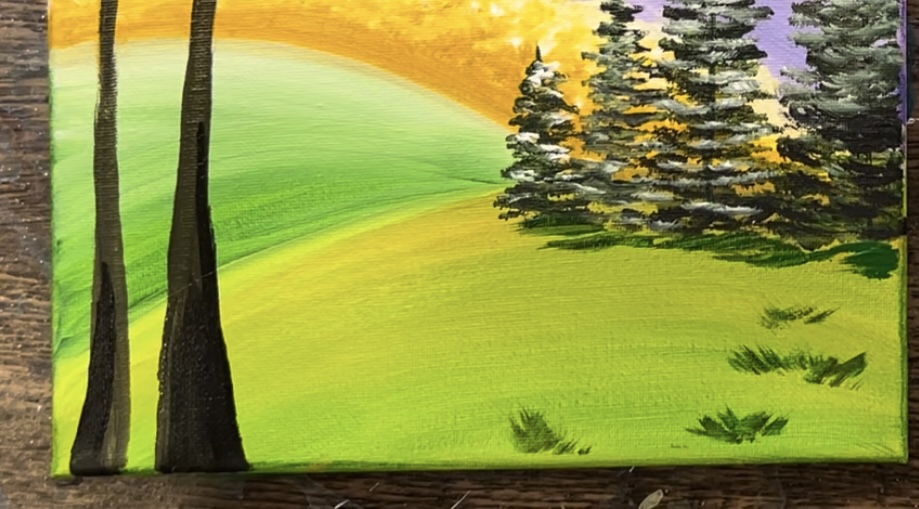
Do this all throughout the front/ bottom hill area and add extra dark green texture under the pin trees (for more shadowing in that area).
11. Paint Tree Trunks In Golden Tree Area
I used the point of the bristles of the #8 long round brush because it can be used to paint fine detailed lines. If you don’t have a #8 long round brush, I recommend using any tiny detail brush or even a fine point pen for this step.
Use the same color you used for the trees (the dark brown). Paint tiny “Y” branch lines that start on the bottom of the golden tree area and go up into the lighter leaves.
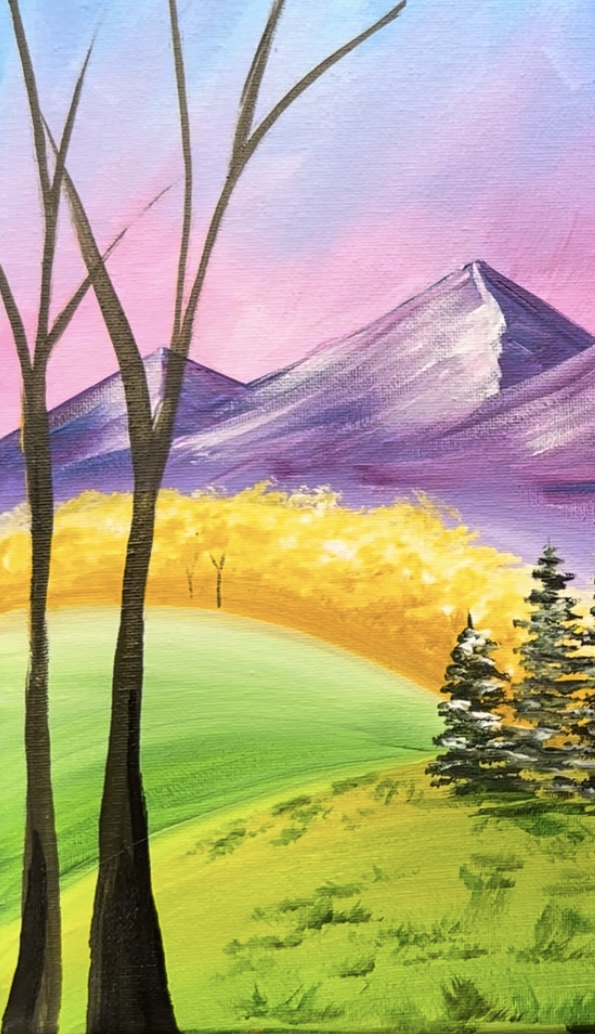
Make various heights in your trees. Make some that are closer together and some more further apart. Also, you can vary the color by making some of the branches lighter and some darker.

If needed, go back and add more leave texture on the top of the trees by stamping more yellow and white with the 12 bright brush.
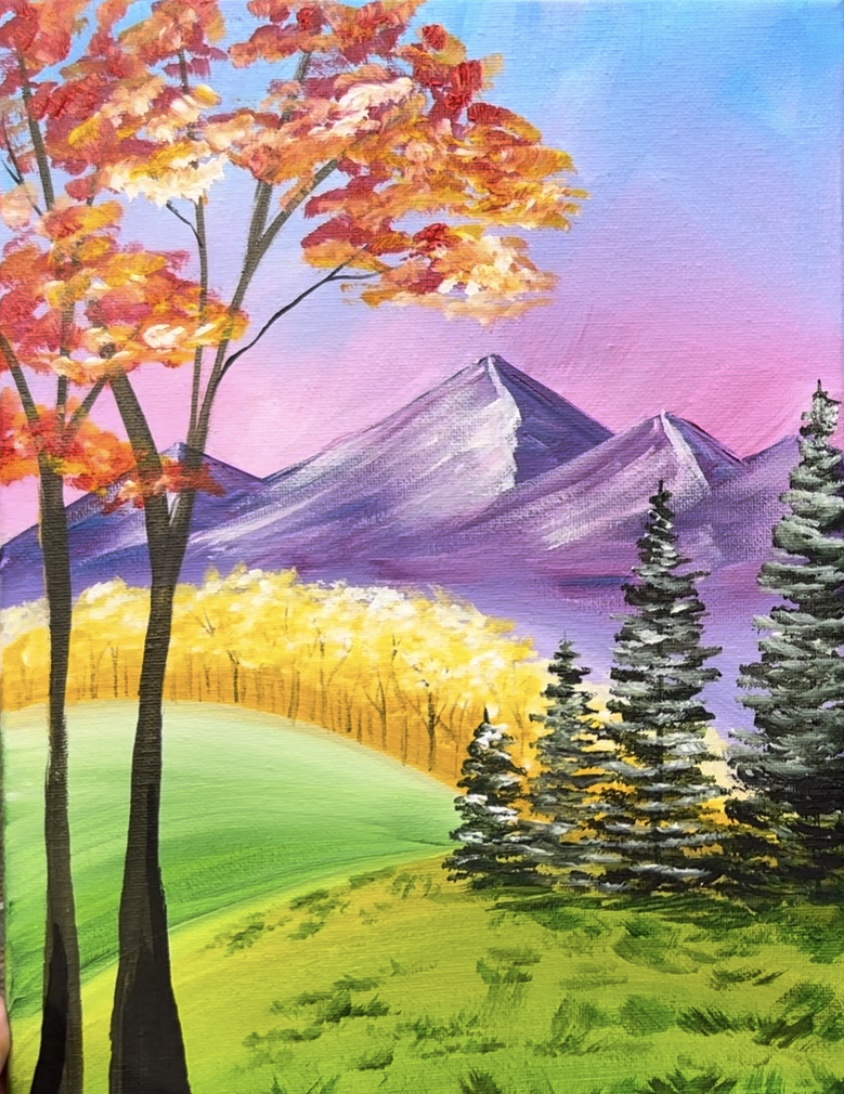
12. Paint Red Leaves On Tall Trees
Use the #12 bright brush to “stamp” red leaves up in the branches. I used the color “naphthol crimson” for this.
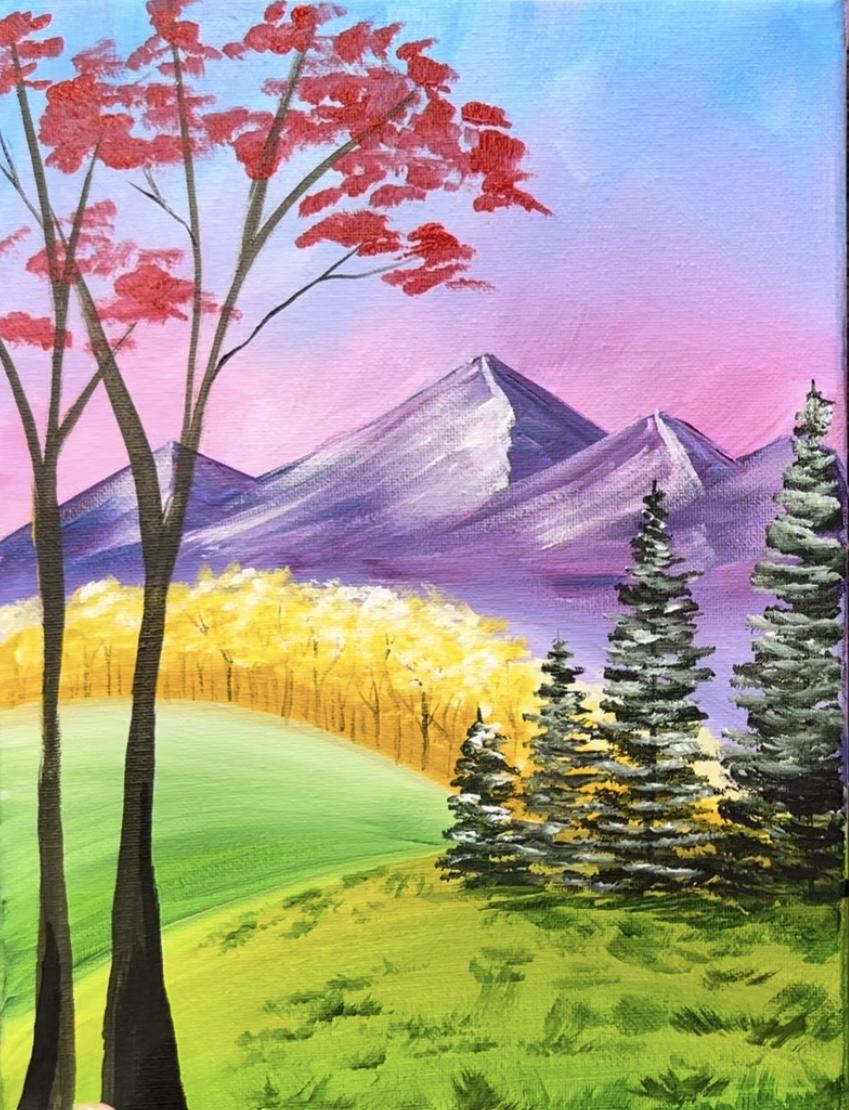
Stamp various clusters of these leaves all at the ends of the branches.
Then add yellow into the leaves. I did this mostly to the right edges of the clusters. Blend it with the red to create more orange tones in the leaves. Then add little bits of white to the leaves in some of the areas to add a pop of brightness.
Optional: use the #8 round brush to add more branches into the tall trees. You can paint branches that are showing on top of some of the leaf clusters.
Some other final touches in this painting could include: painting more leaves, painting grass lines on the bottom area of the canvas and highlighting the trunks of the large trees. To highlight the trunks of the large trees, mix white into your dark brown mixture. Then use the #12 bright brush to lightly paint light colored brown on the tree trunk.
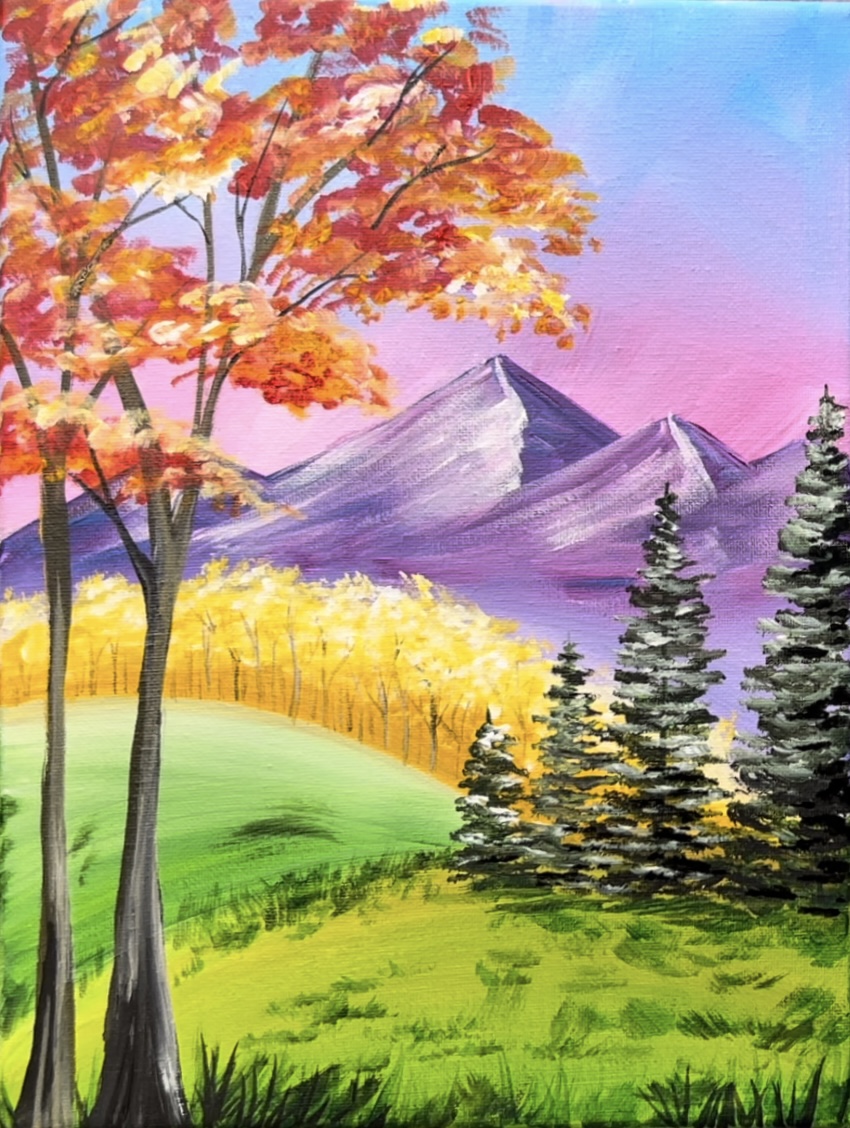
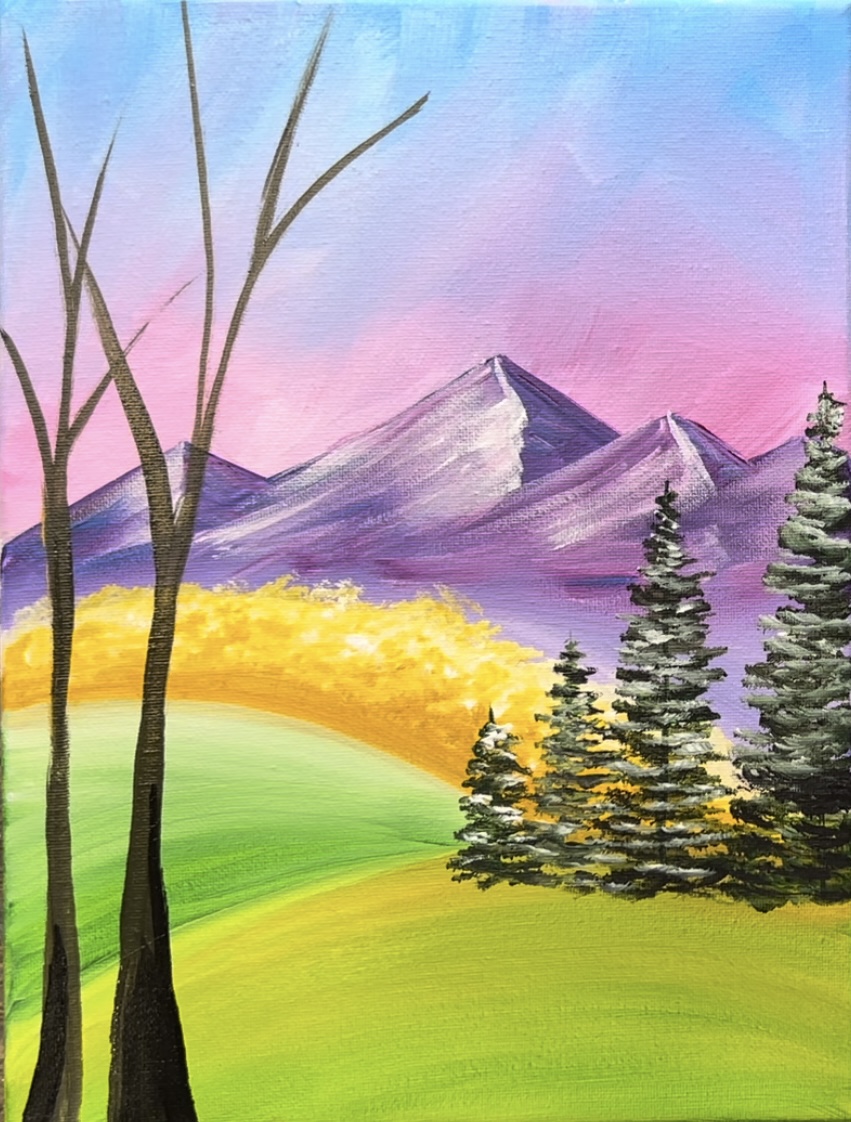
Finished!