
Would you like to save this?
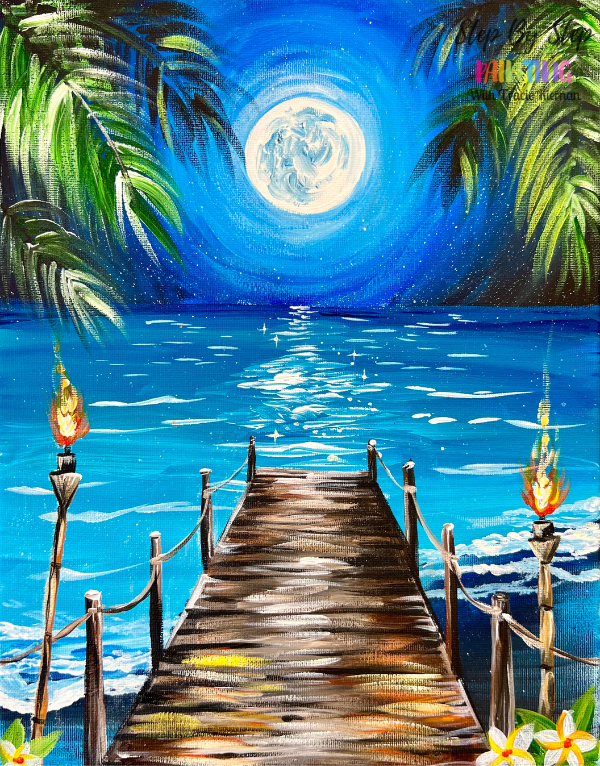
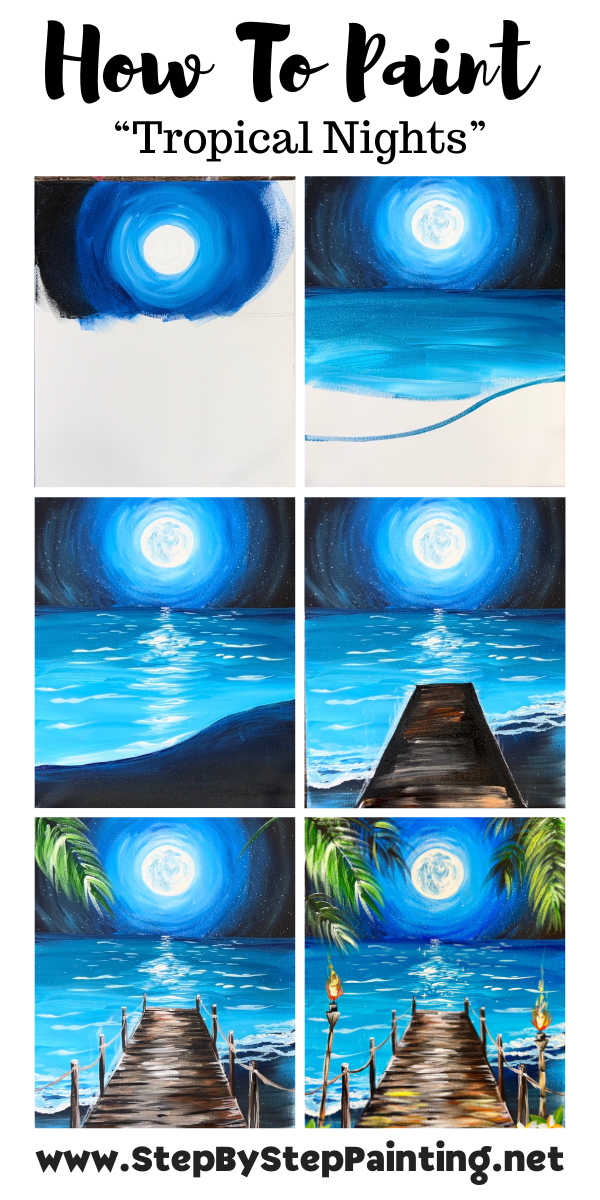
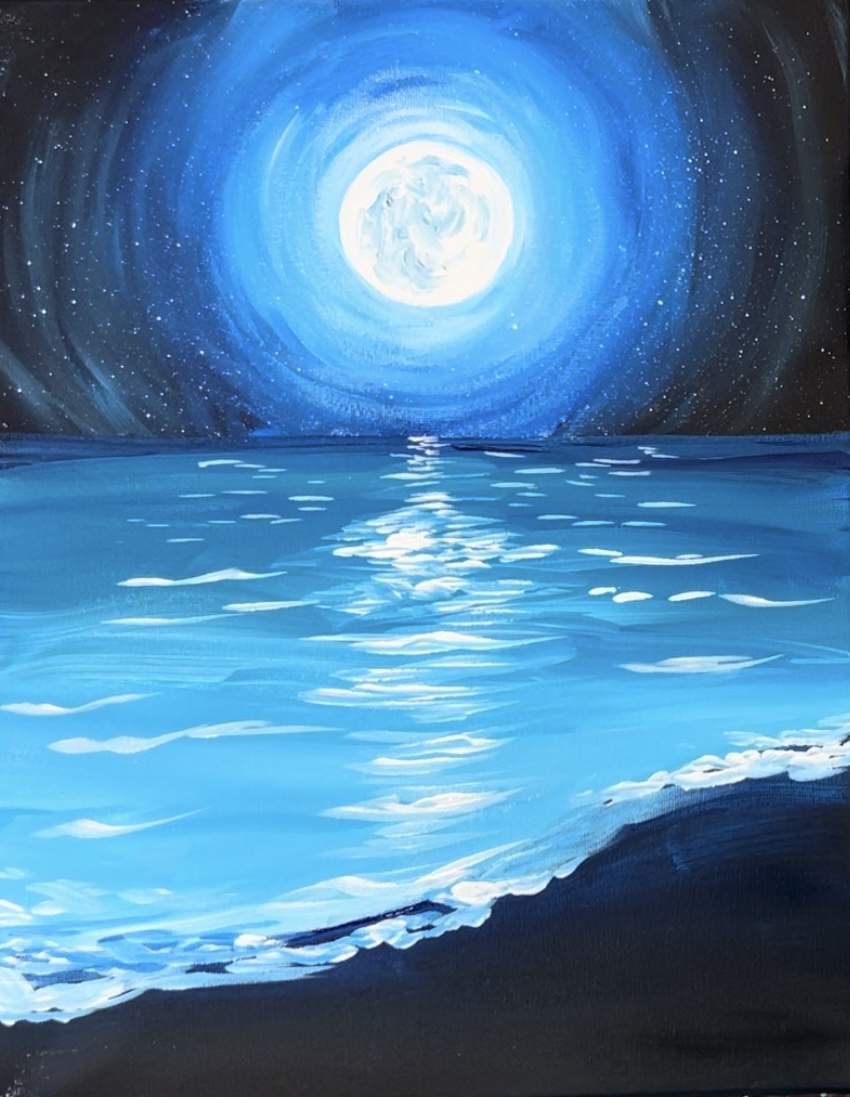
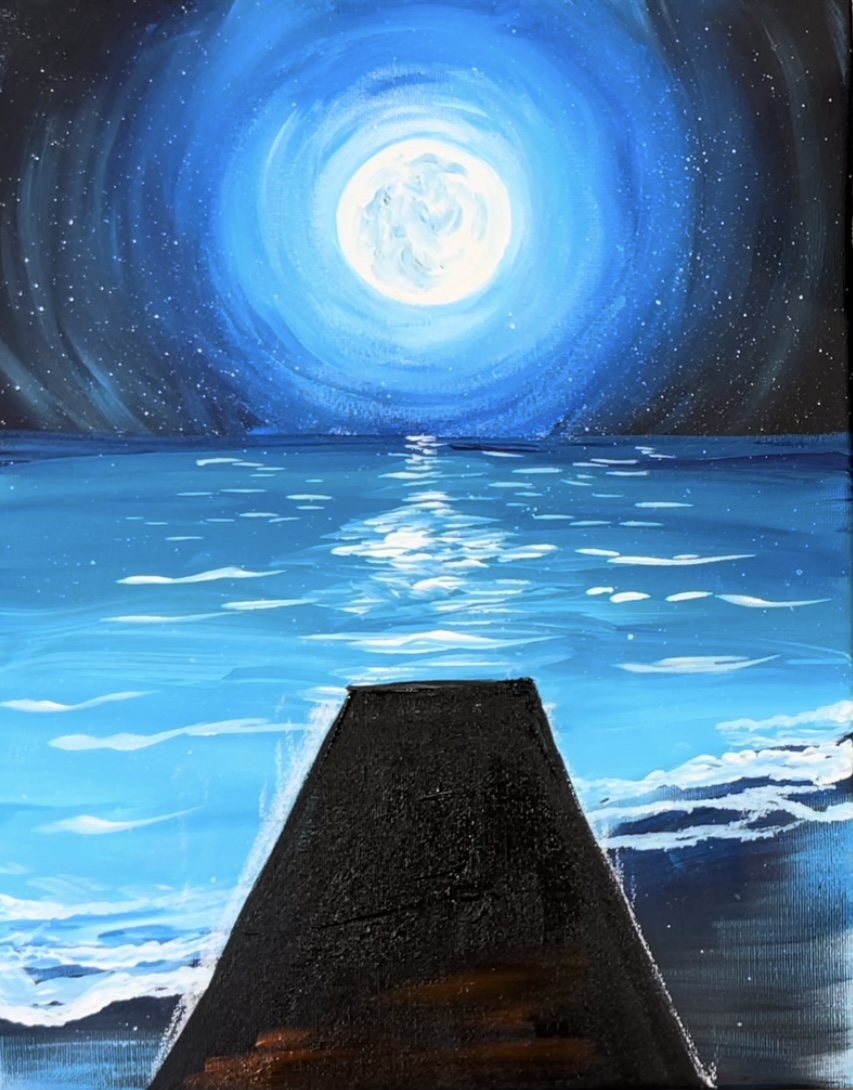
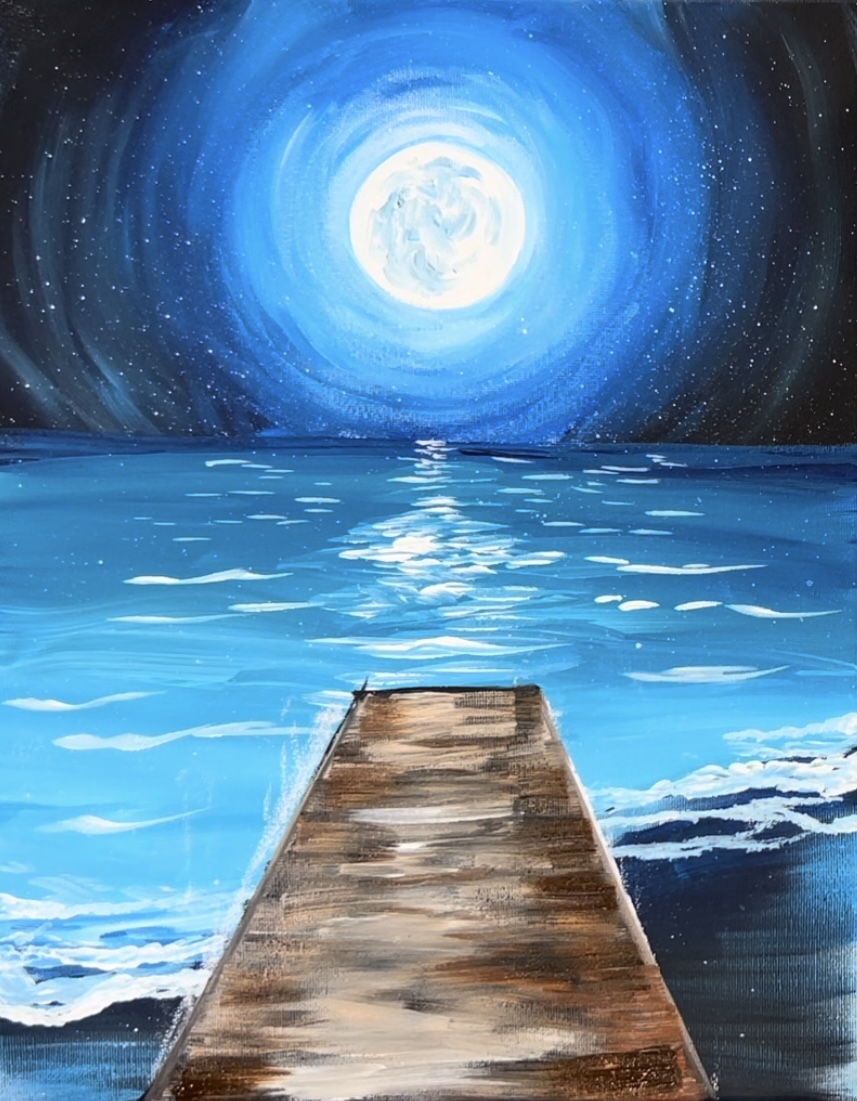
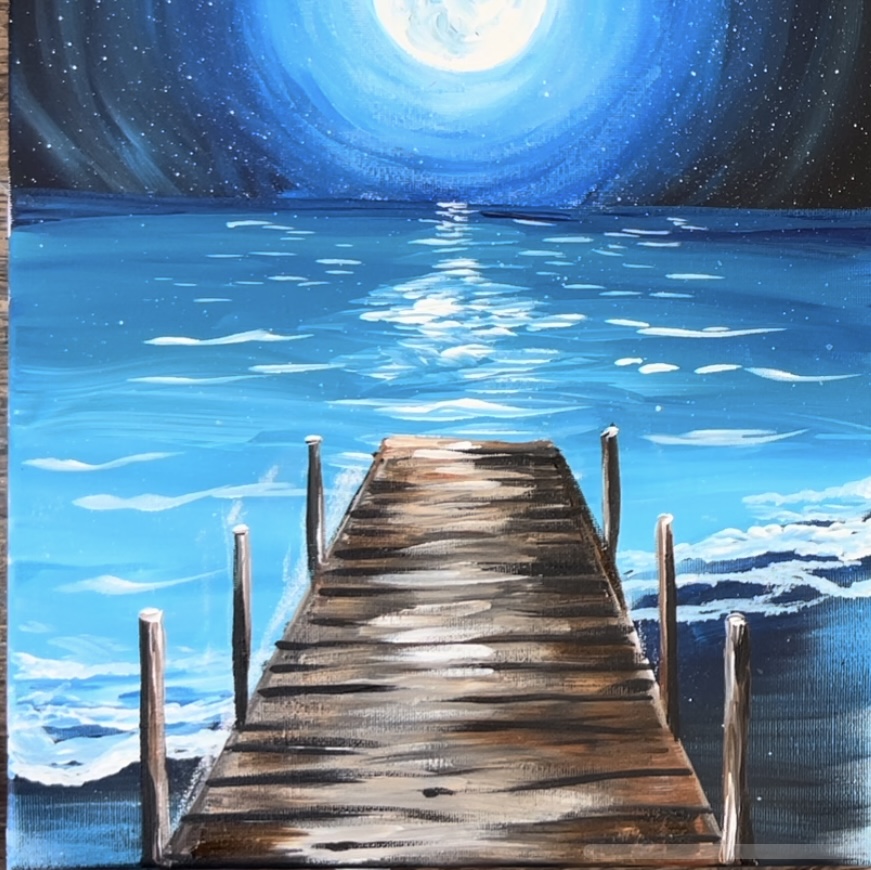
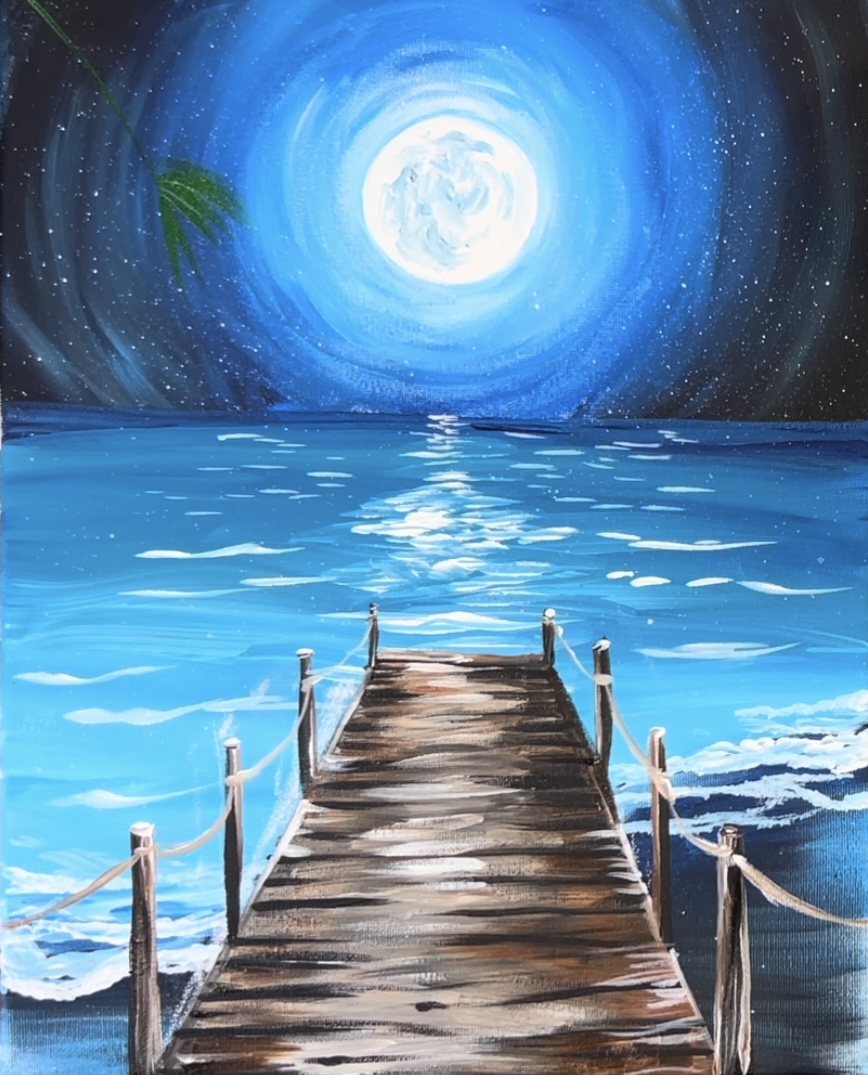
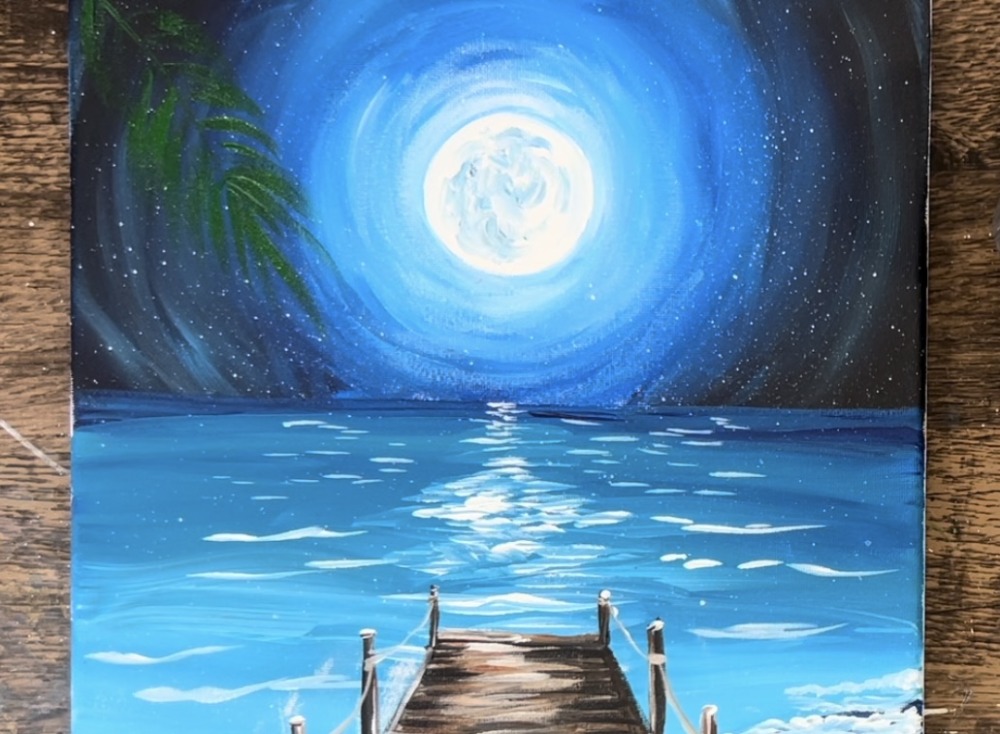
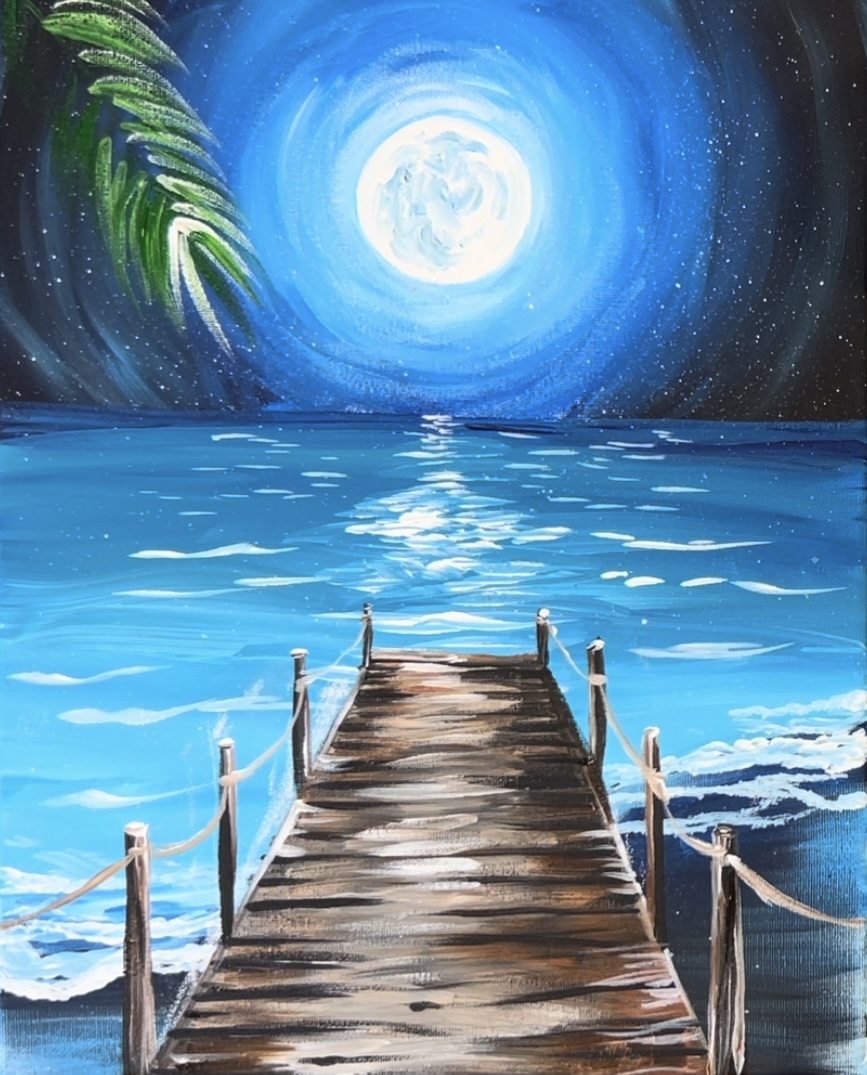
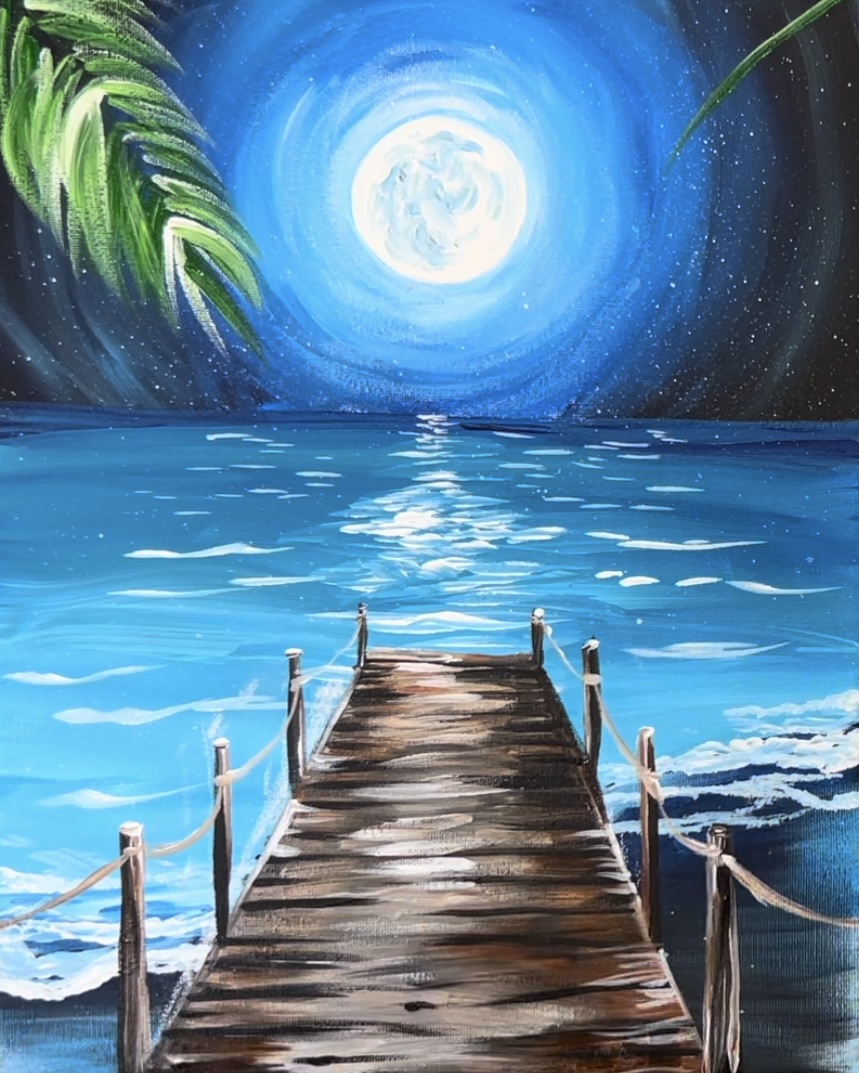
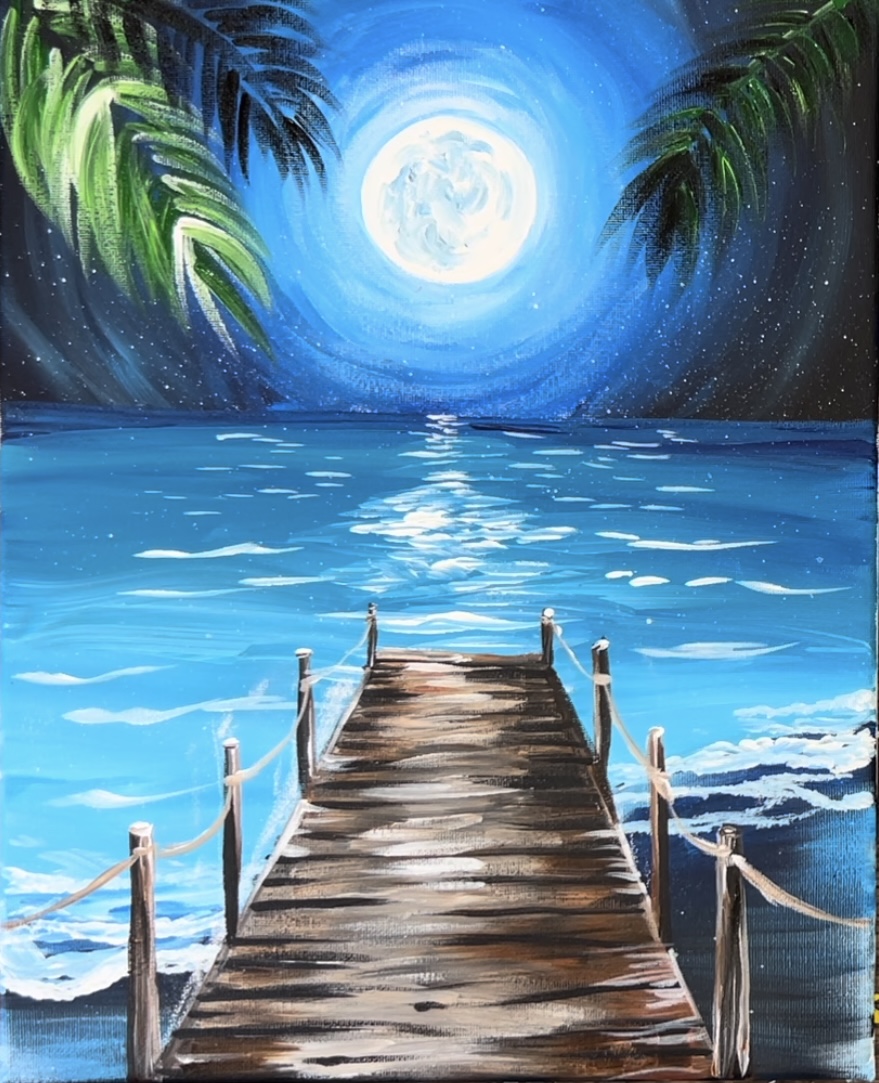
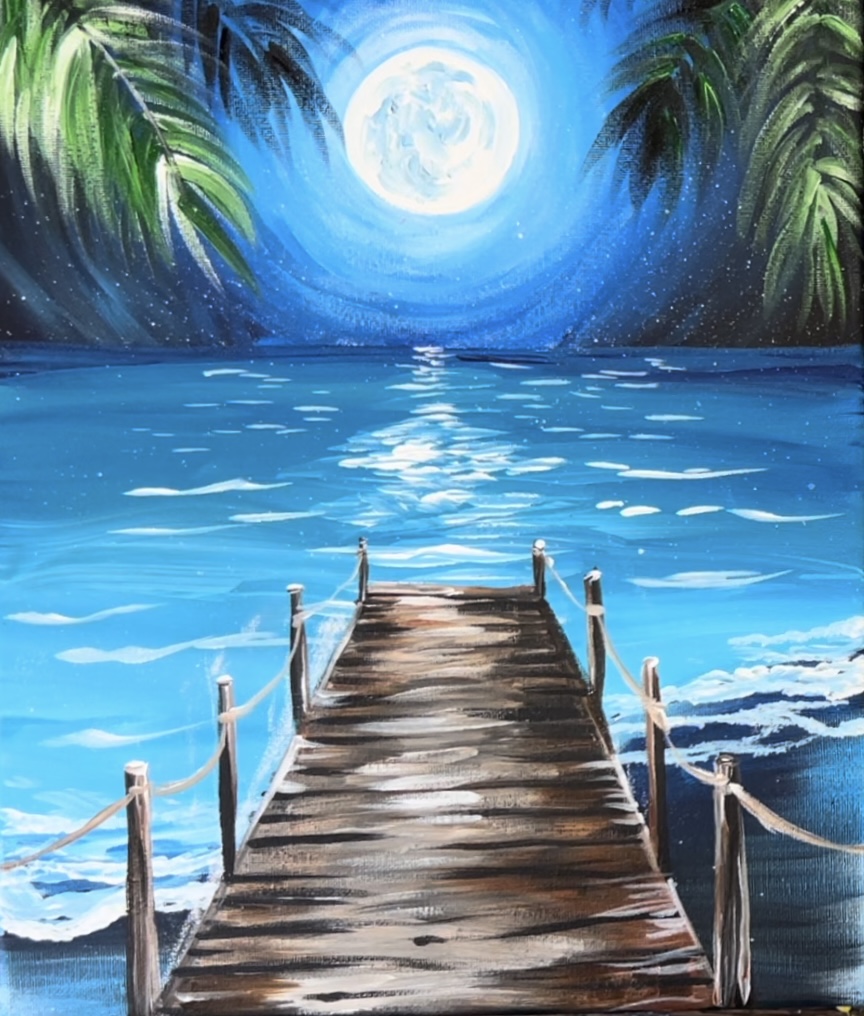
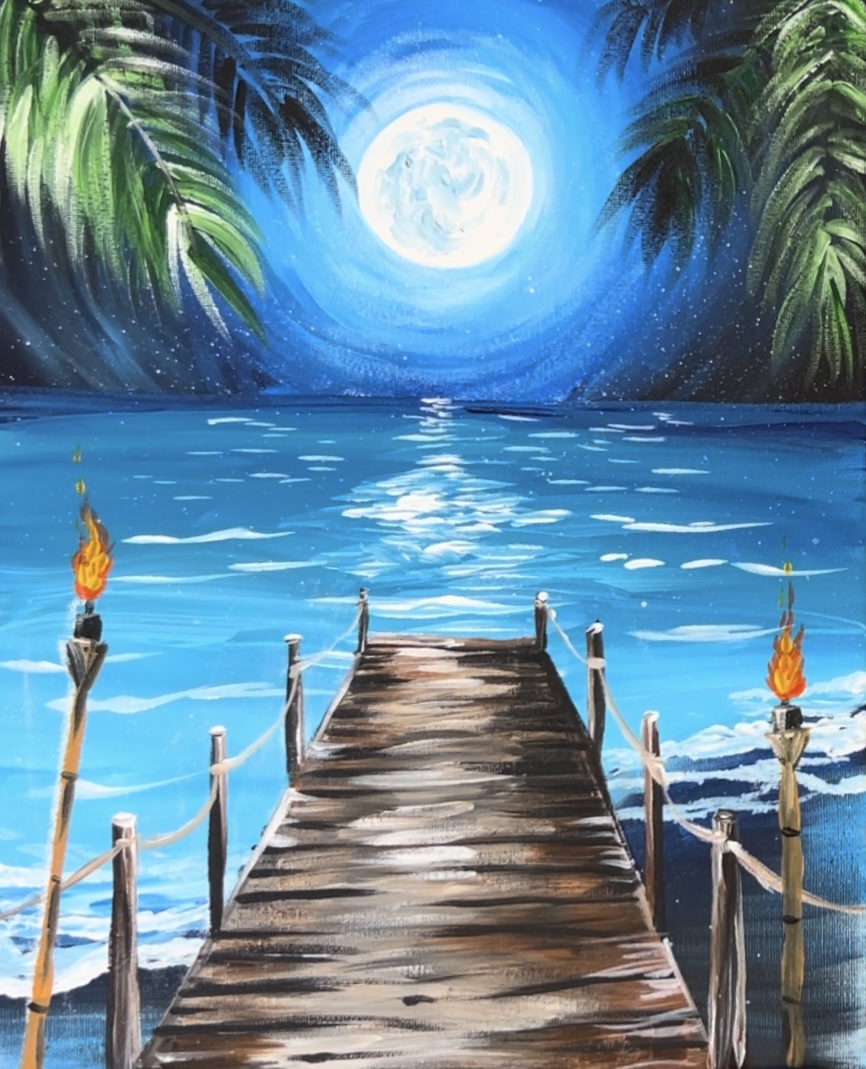
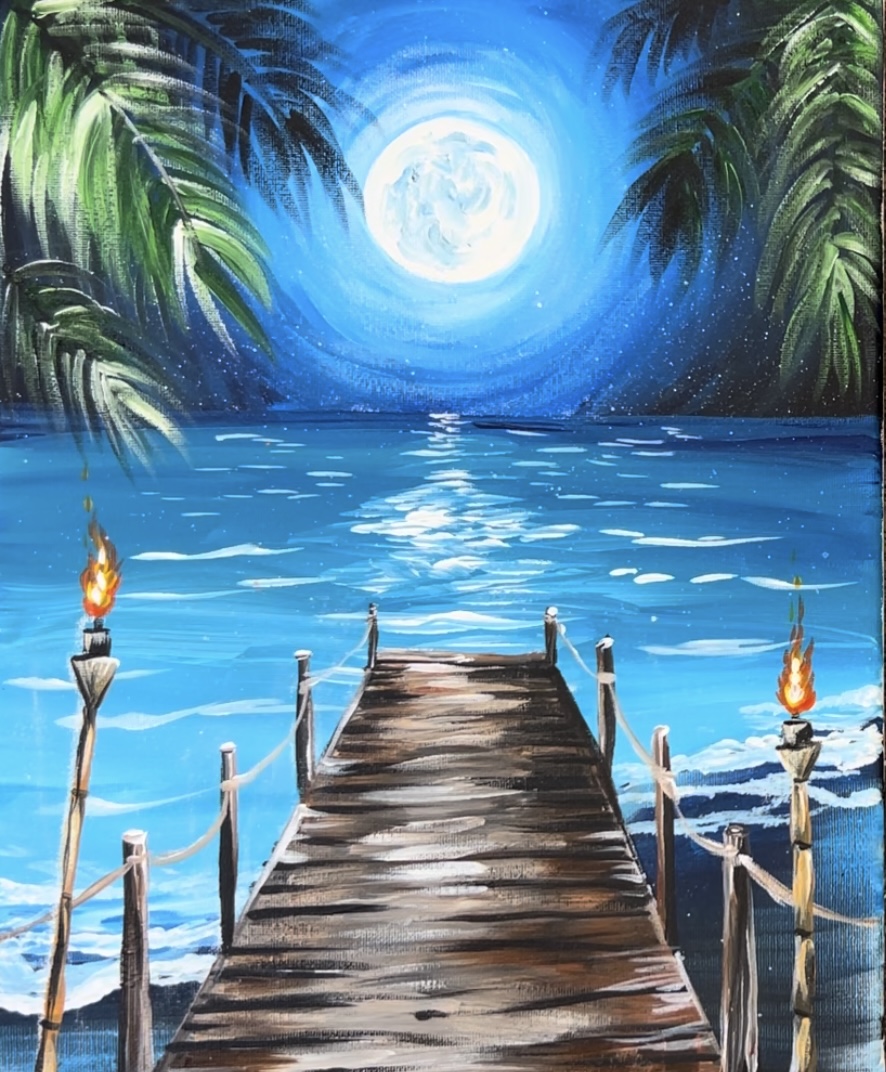
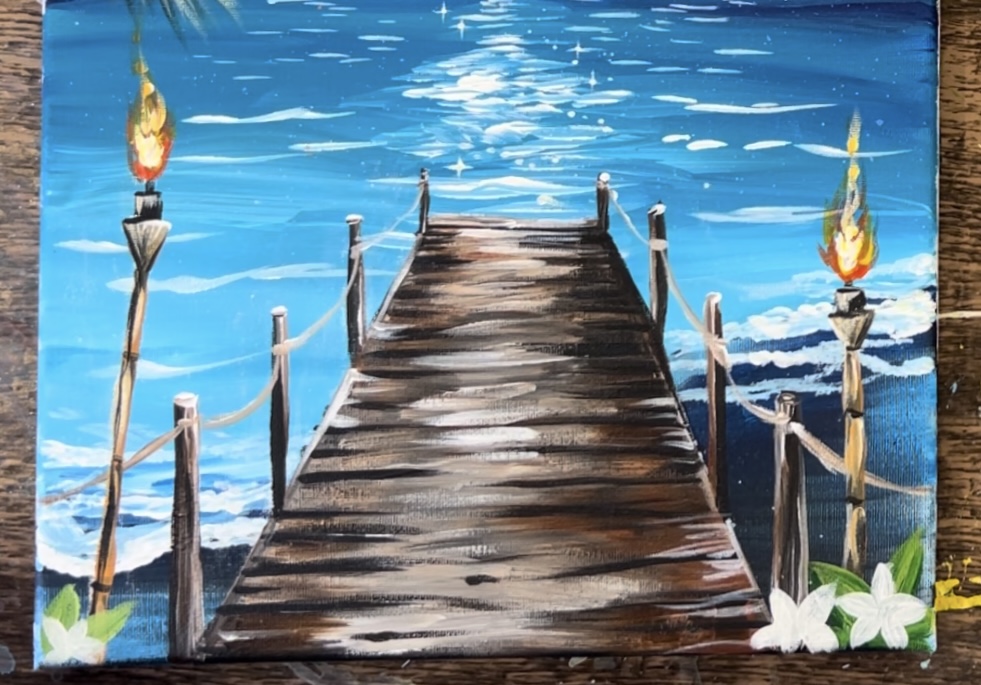
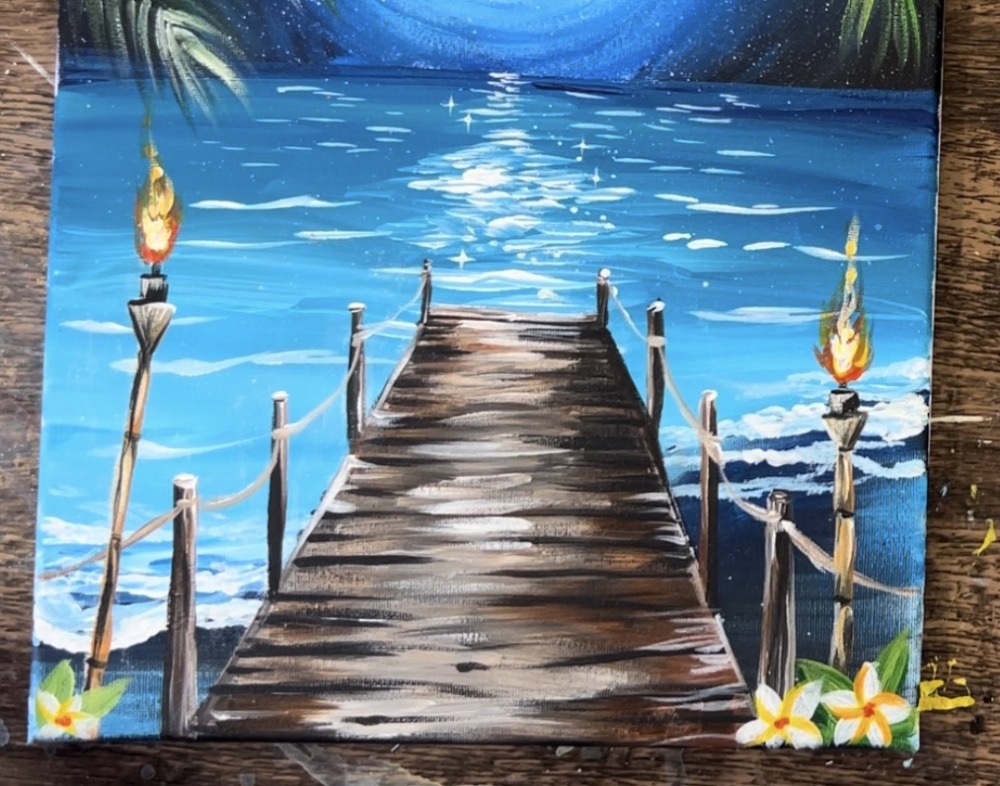
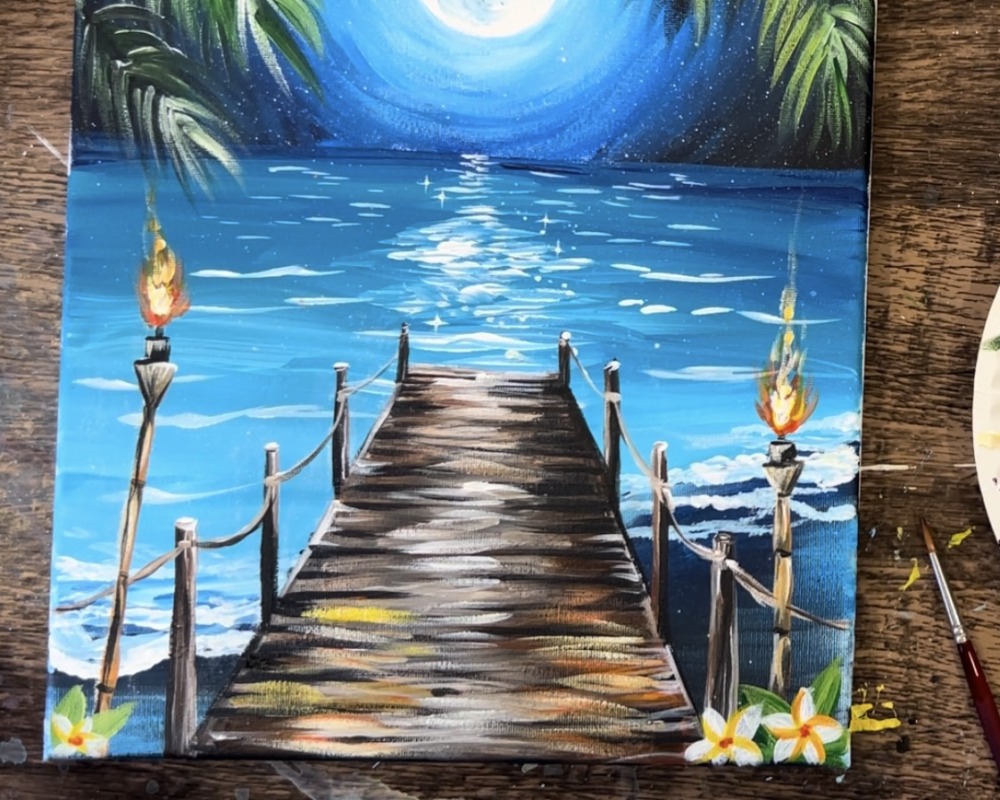
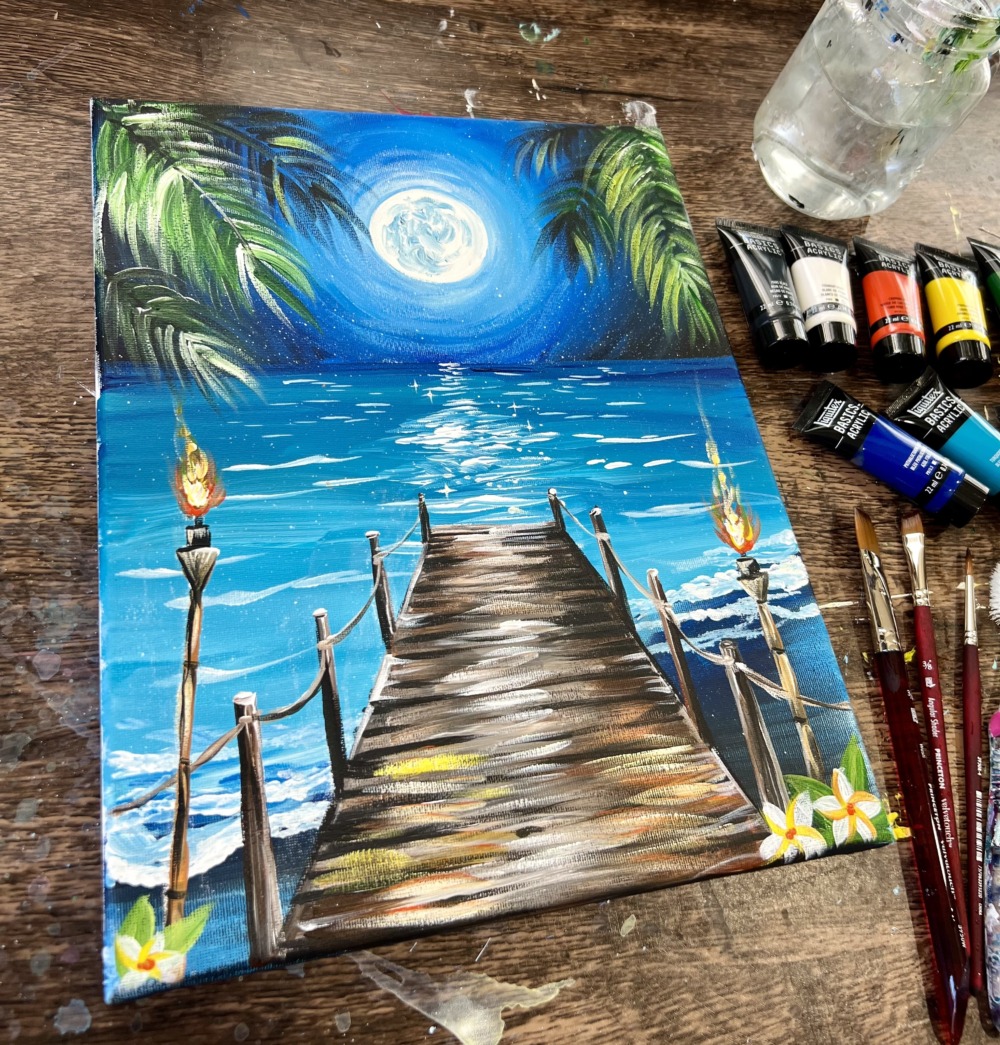
Learn how to paint “Tropical Nights”! This acrylic painting is demonstrated on an 11×14 canvas, however, you can paint this on any size or surface. We will learn how to paint the rustic beach pier venturing out over the ocean shoreline. There are tiki torches, a full moon and swaying palm trees!
Enjoy and happy painting!
Materials Needed
"Tropical Nights" - Acrylic Painting Tutorial
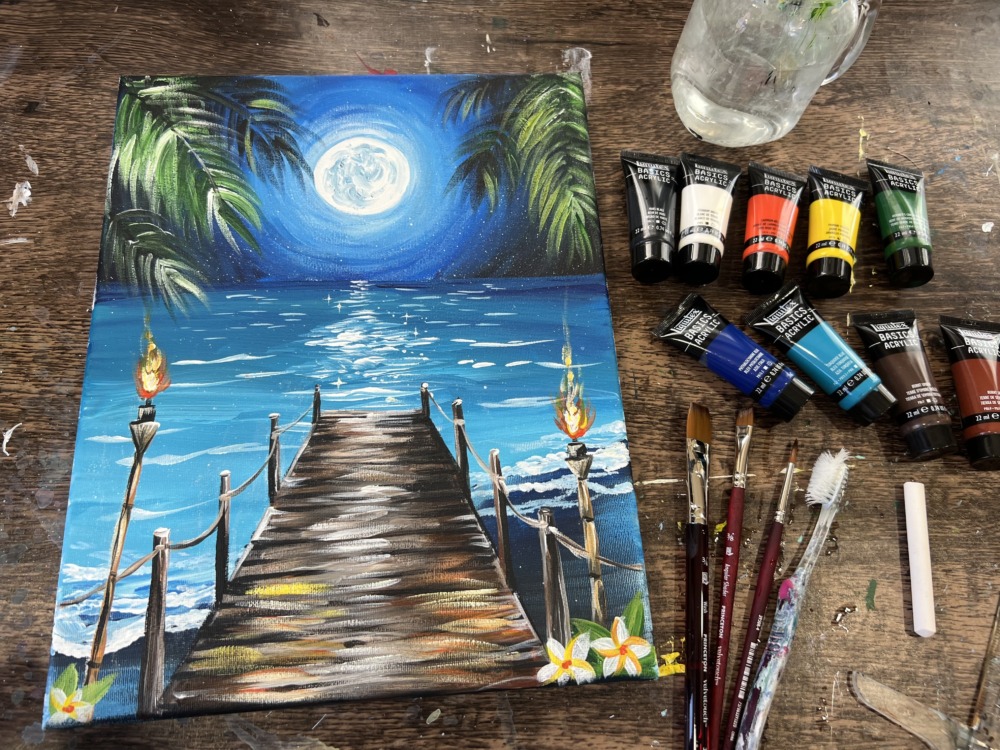
Materials
- 11 x 14 Canvas
- Acrylic Paint (I use Liquitex BASICS)
- Brushes (Princeton Velvetouch)
- Toothbrush
- T-Square Ruler
- White Chalk
- Palette (I use paper plates)
- Water Cup (I use a glass mason jar)
- 2" Circle To Trace Moon
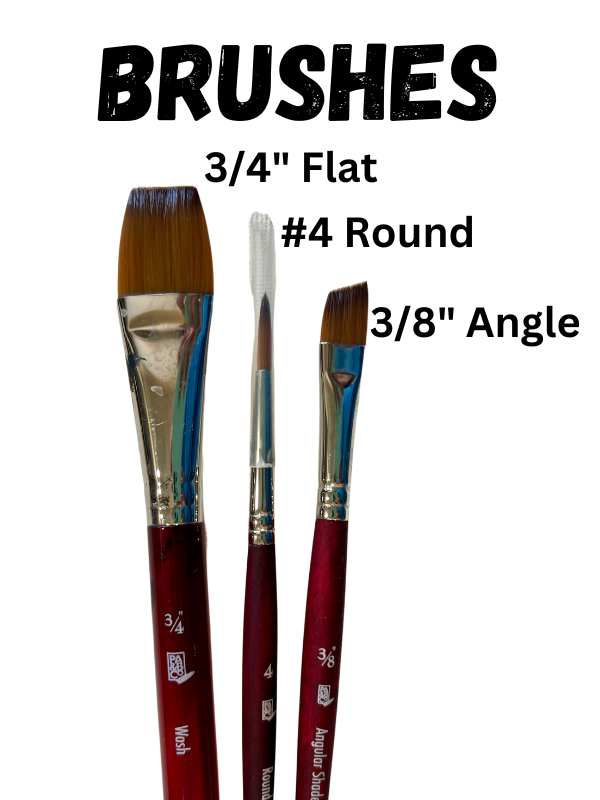
Brushes
- 3/4" Flat Wash
- #4 Round Brush
- 3/8" Angle Brush
- Toothbrush
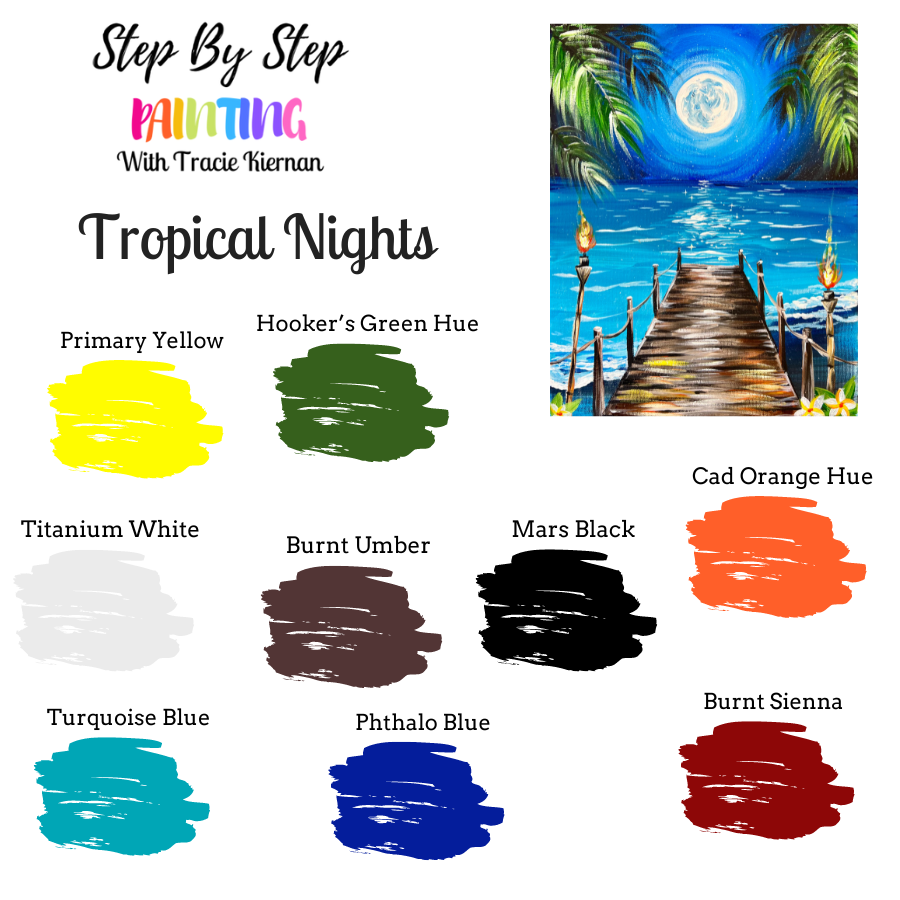
Colors
- Titanium White
- Mars Black
- Primary Yellow
- Hooker's Green Hue Permanent
- Phthalo Blue
- Turquoise Blue
- Burnt Sienna
- Burnt Umber
- Cadmium Orange Hue
Color Palette
I use Liquitex BASICS for my paintings! If you are using a different brand, you can use the color chart below to help you match your colors. Colors do not have to match perfectly!
Brushes
I use “Princeton Velvetouch” brushes! If you don’t have this exact set, use whatever similar brushes you have available!
Directions At A Glance
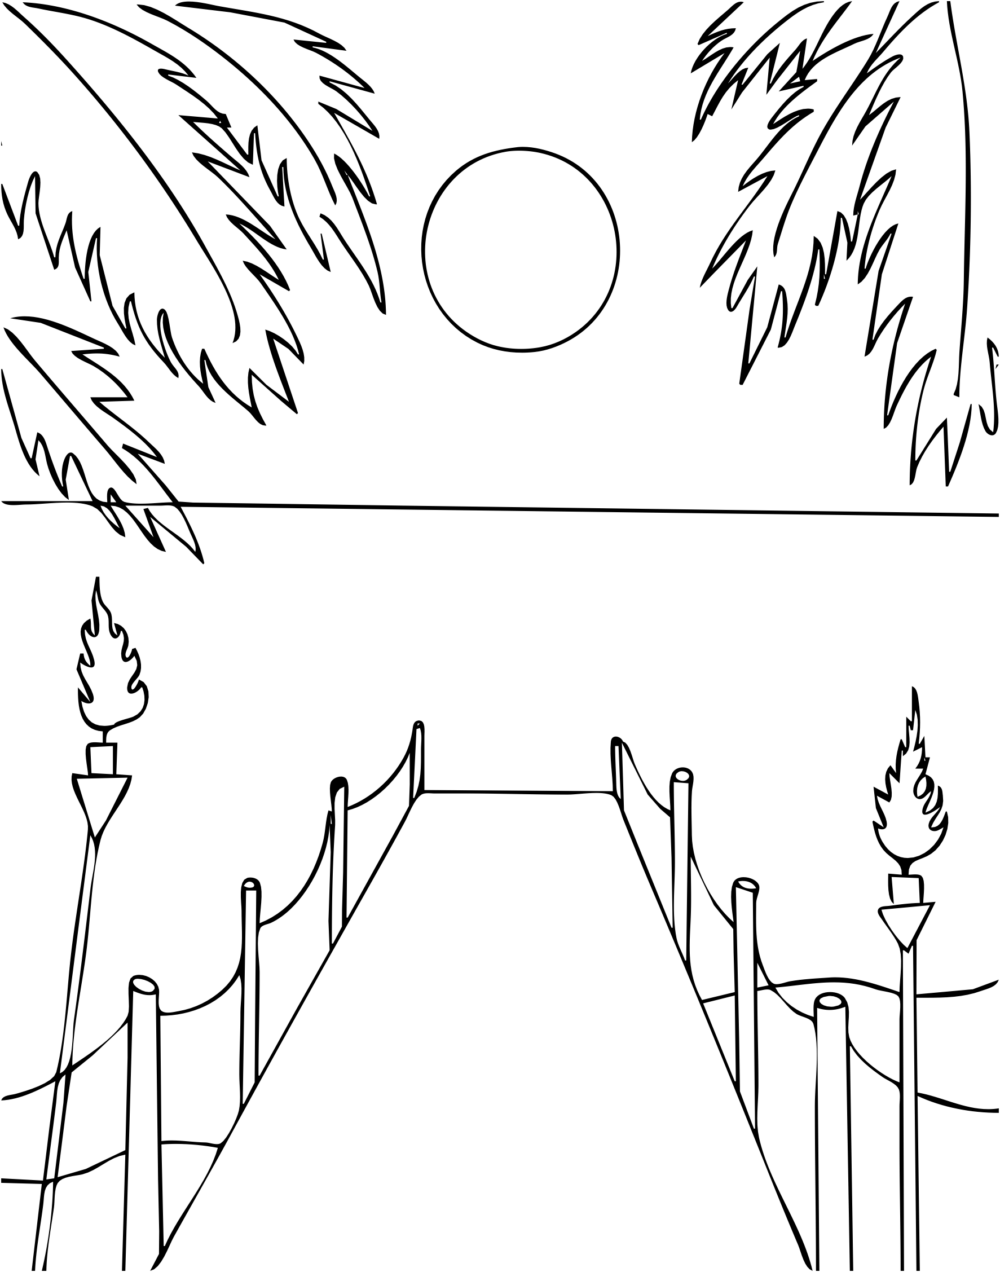
Traceable
This is optional! I do not use the traceable in the tutorial. However, you are welcome to trace this to the canvas to help you with the drawing portion.
Video
Step By Step Instructions
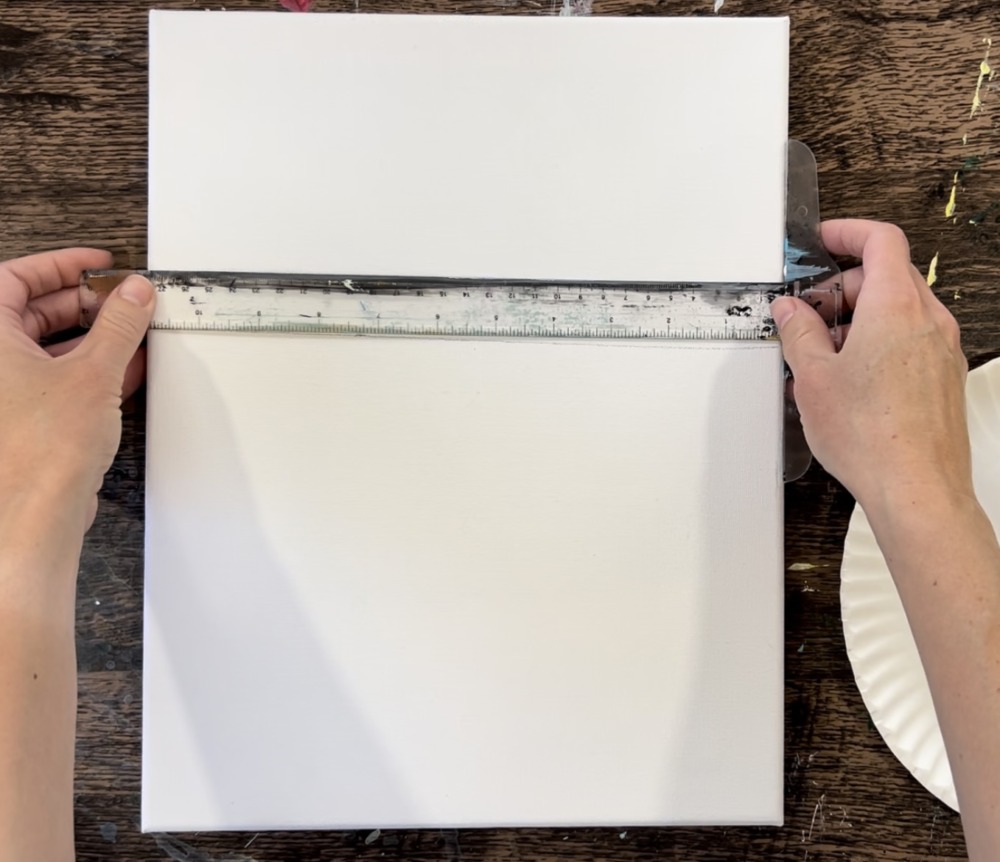
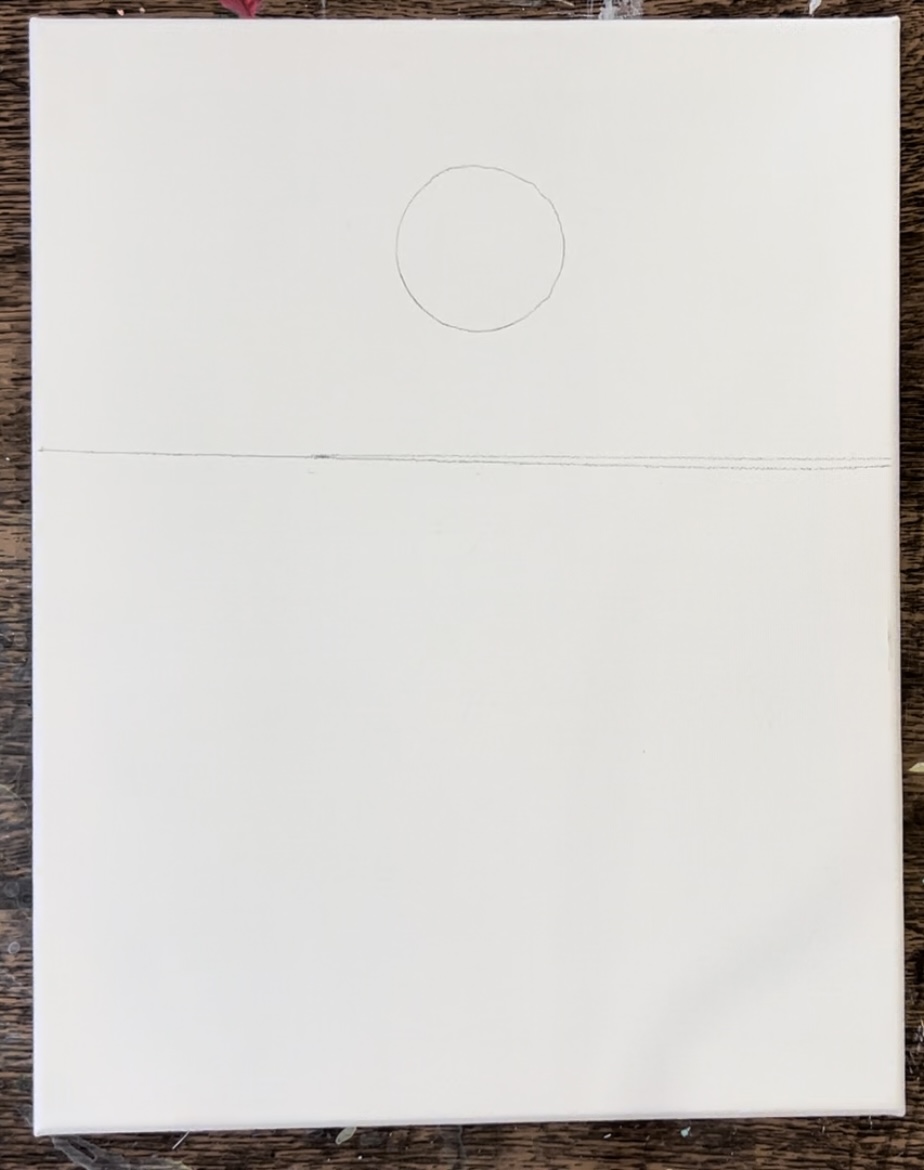
1. Draw Horizon Line & Moon Circle
Position your canvas in a vertical format. Measure 5.5″ from the top edge of the canvas and then use a t-square ruler to draw a horizontal line.

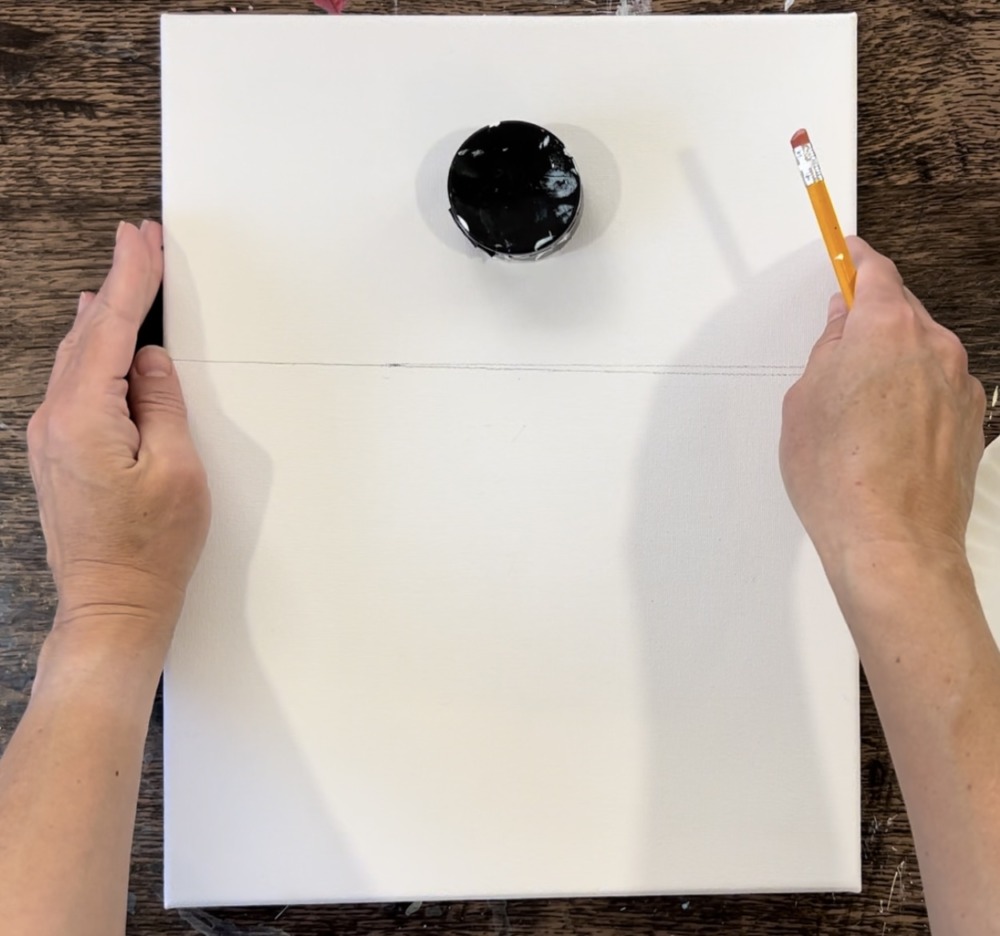
Next, draw a circle for the moon in the center of the sky. I used a lid to trace a 2″ diameter circle. You can use a compass or find a similar size. Trace this lightly with a pencil.
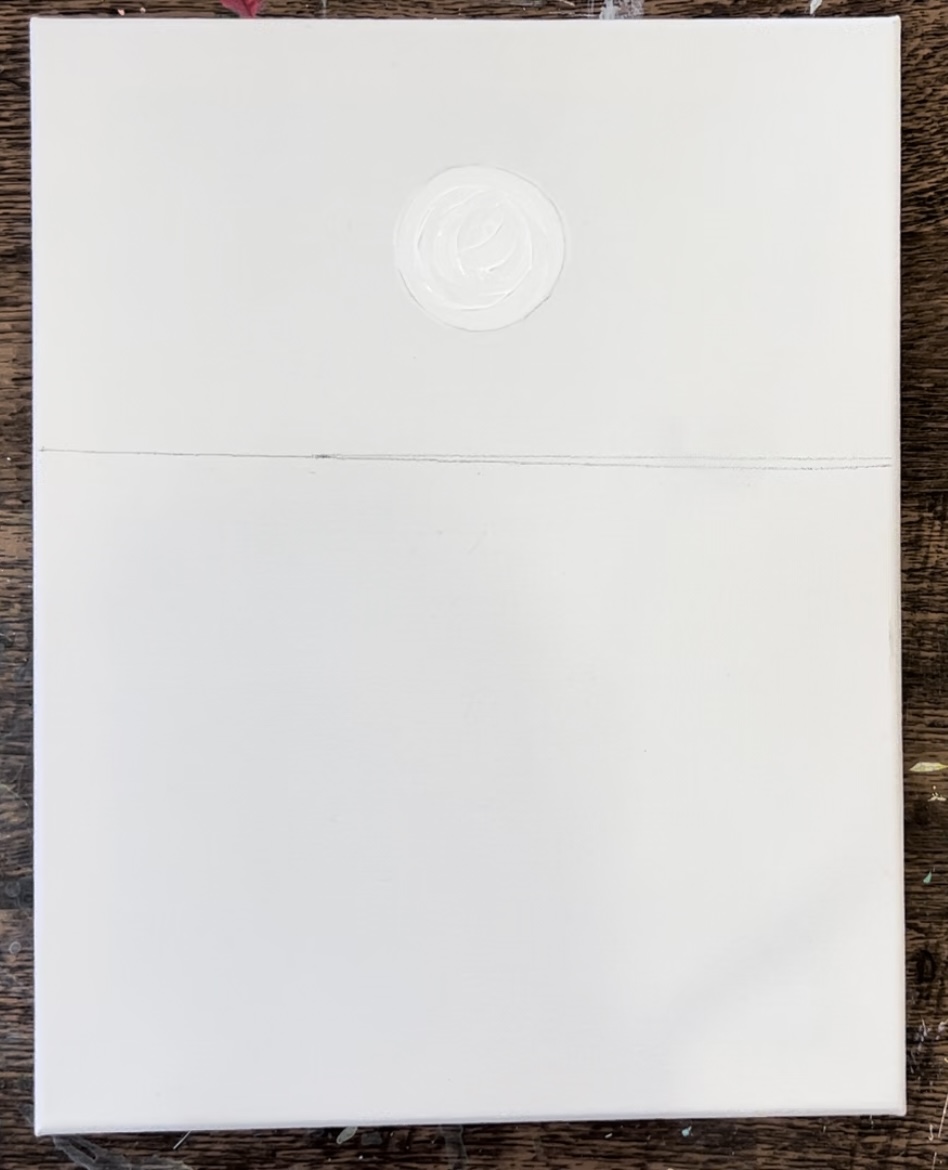
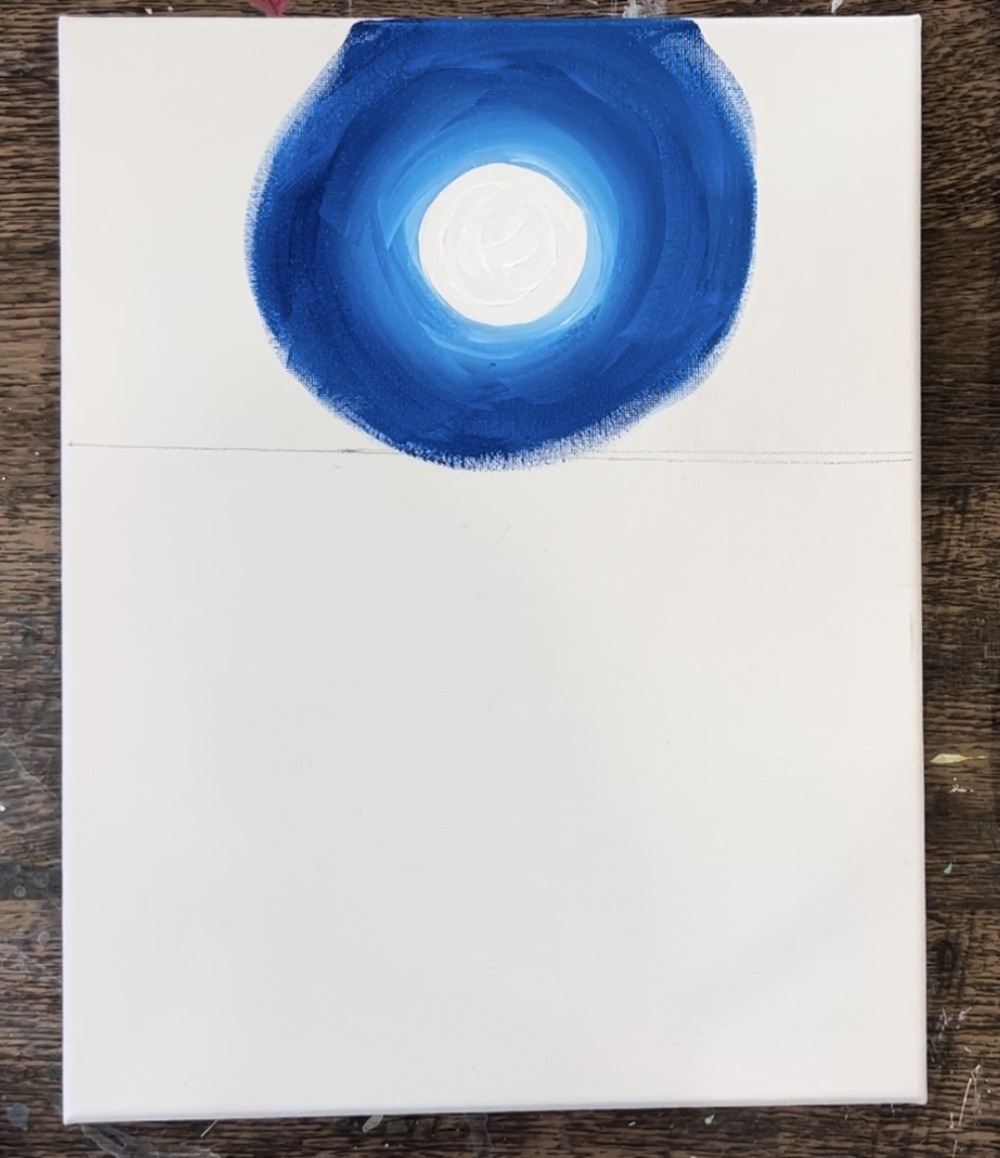
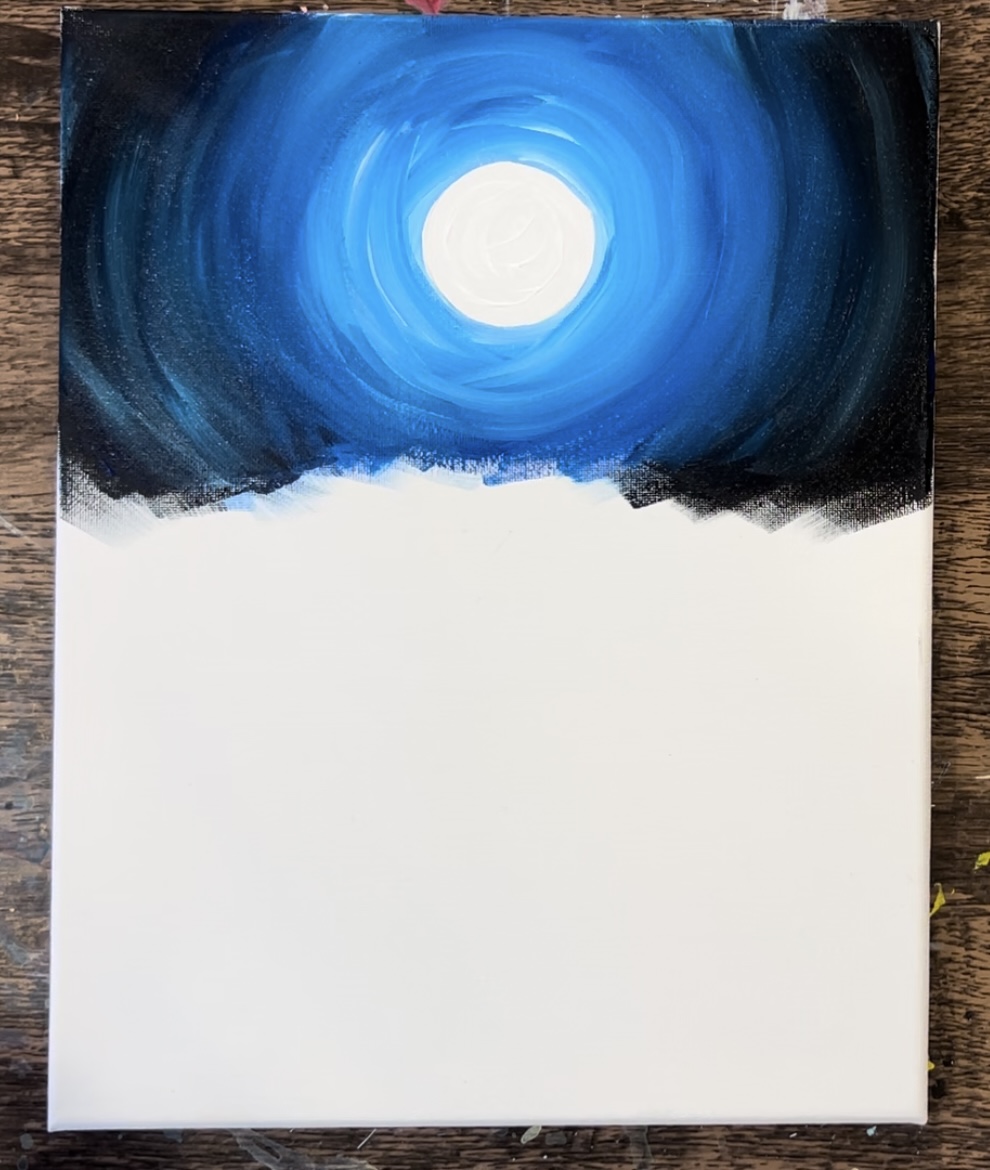
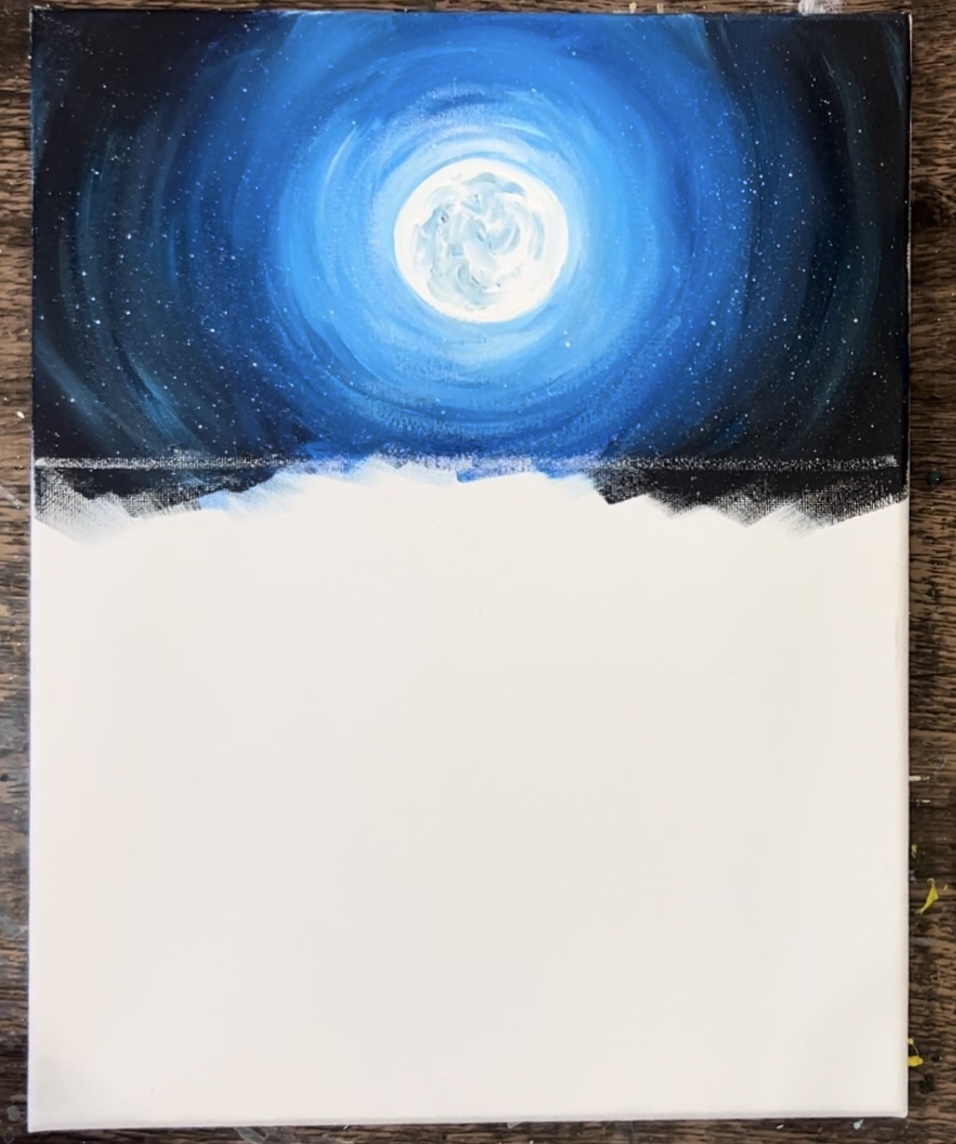
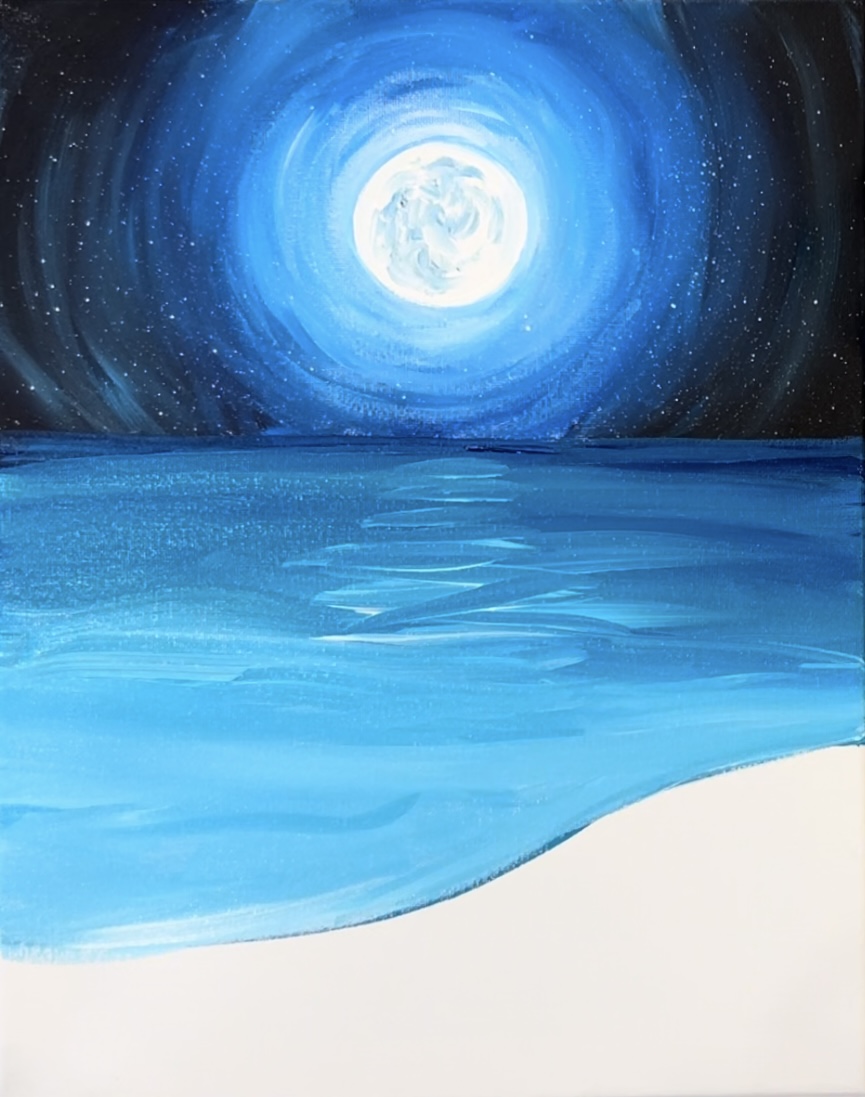
2. Paint Moon & Sky
Use a #4 round brush and “titanium white” to paint the circle a solid coat of white paint.
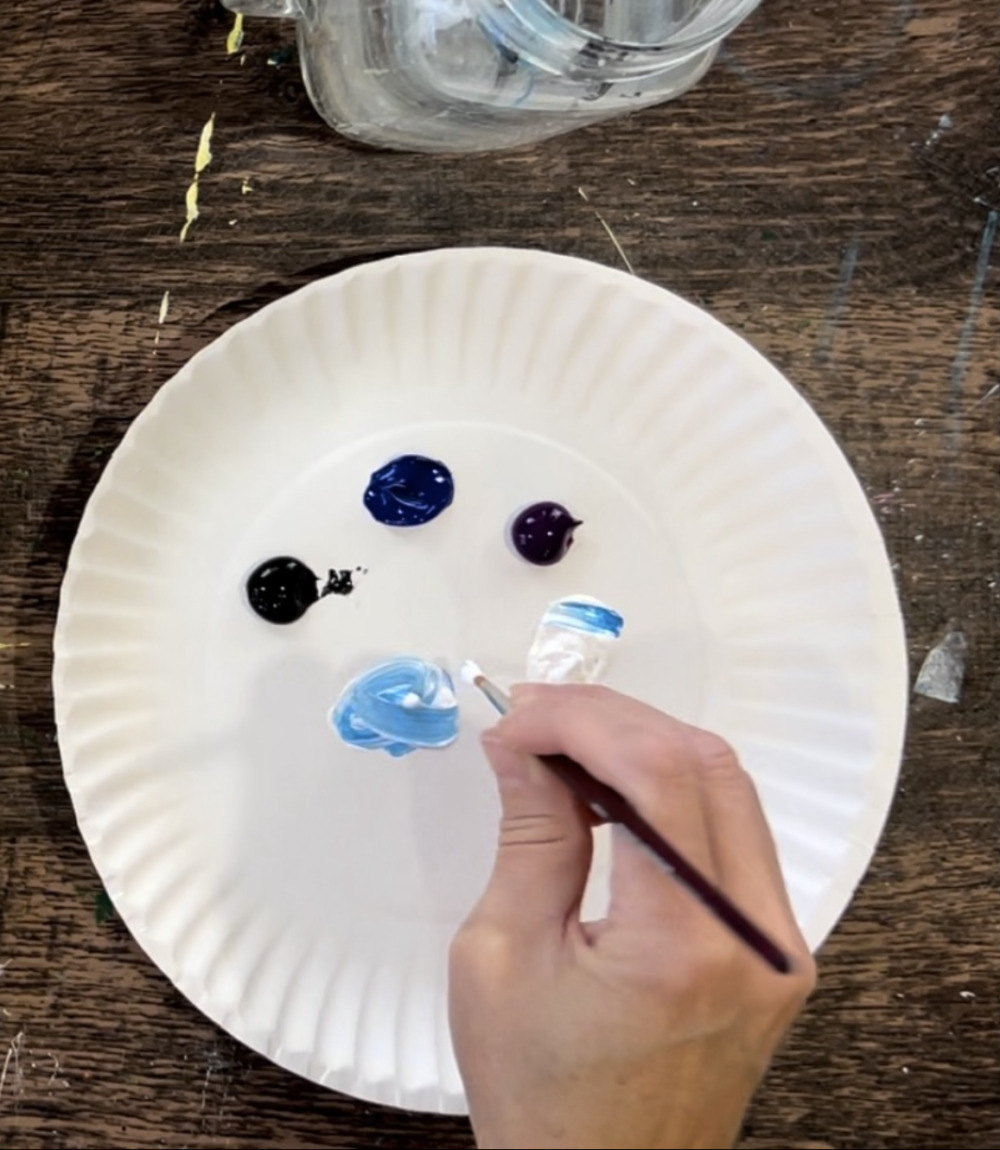
Next, without rinsing your brush, mix “titanium white” with a small amount of “phthalo blue” paint. This will make a light blue color.
Take your light blue color and paint around the white circle of the moon. Make sure you are painting in a circular direction. Paint as close as possible to the white circle without actually getting blue on the moon.
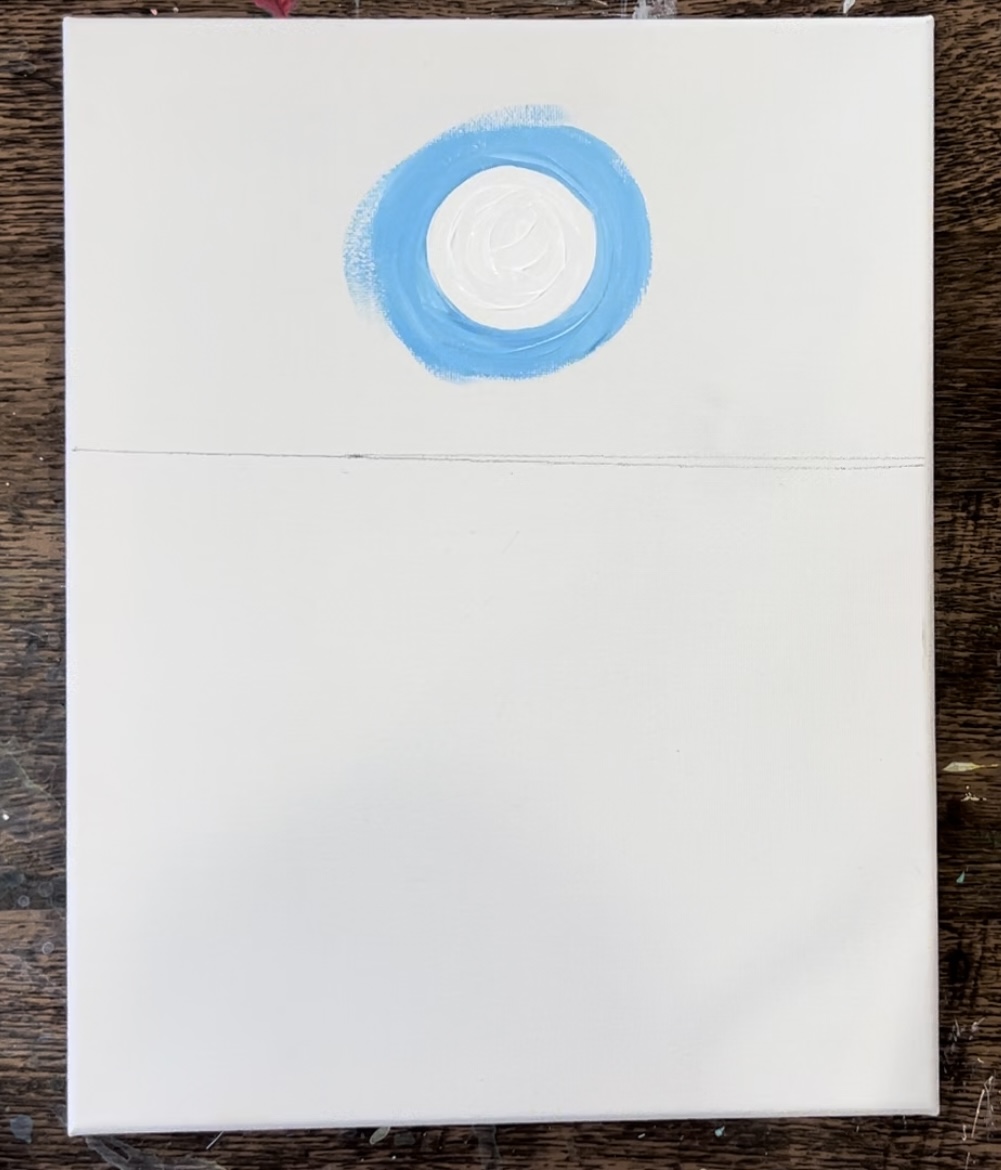
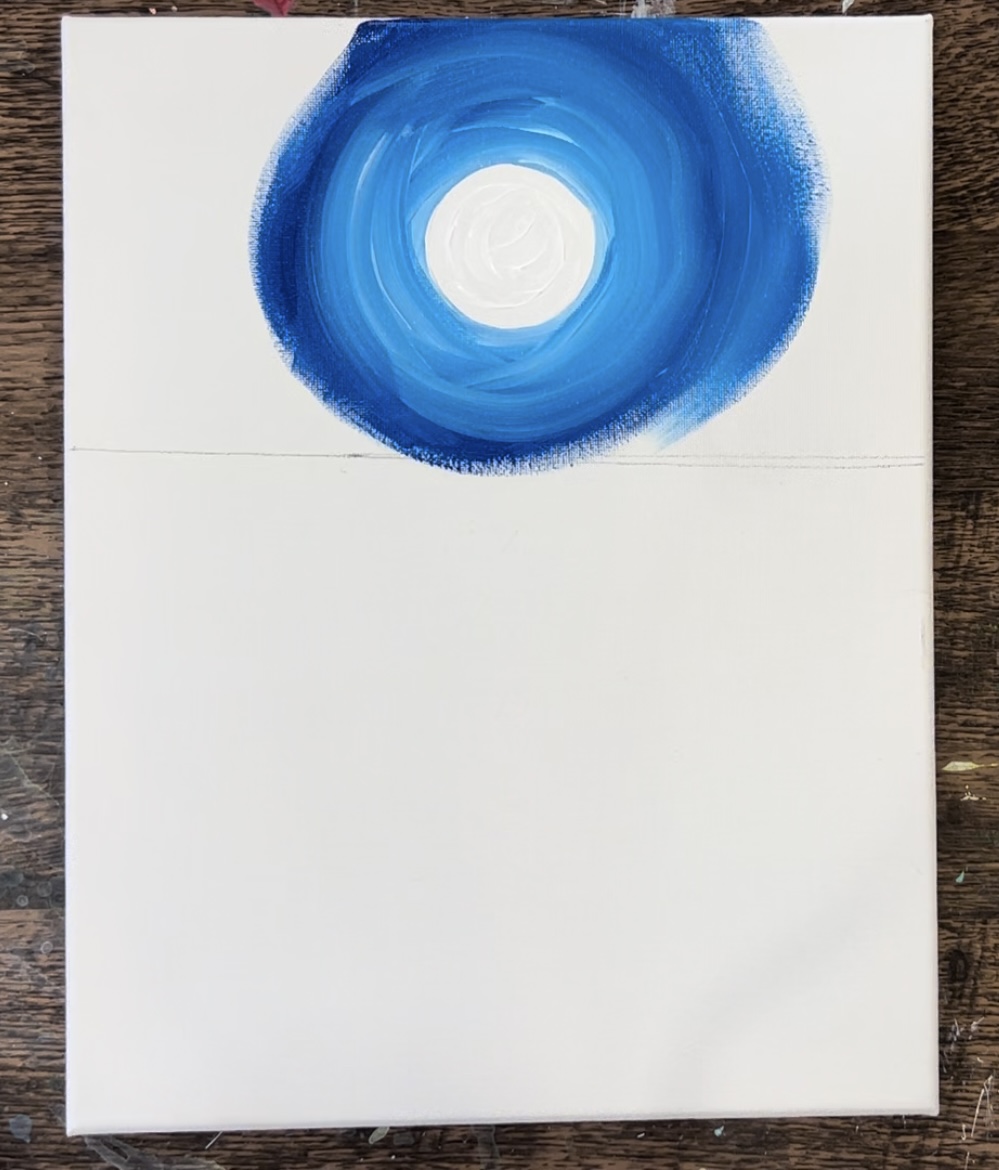
Next, switch to the 3/4″ flat wash brush. Load it into a small amount of “phthalo blue” paint. Then paint in circle directions blending the dark blue with the light blue.
If needed, go back and add more white or light blue to your brush to get your light blue color to blend. Essentially we want the sky to look like it is glowing around the moon so that area just around the circle needs to look brighter.
Continue to paint in a circular direction and go to almost the left and right edge of the canvas. Then load your paint brush with “mars black”. Blend your black with the dark blue in the sky. If needed, rinse the black off the brush and add more blue to it to help it to blend.
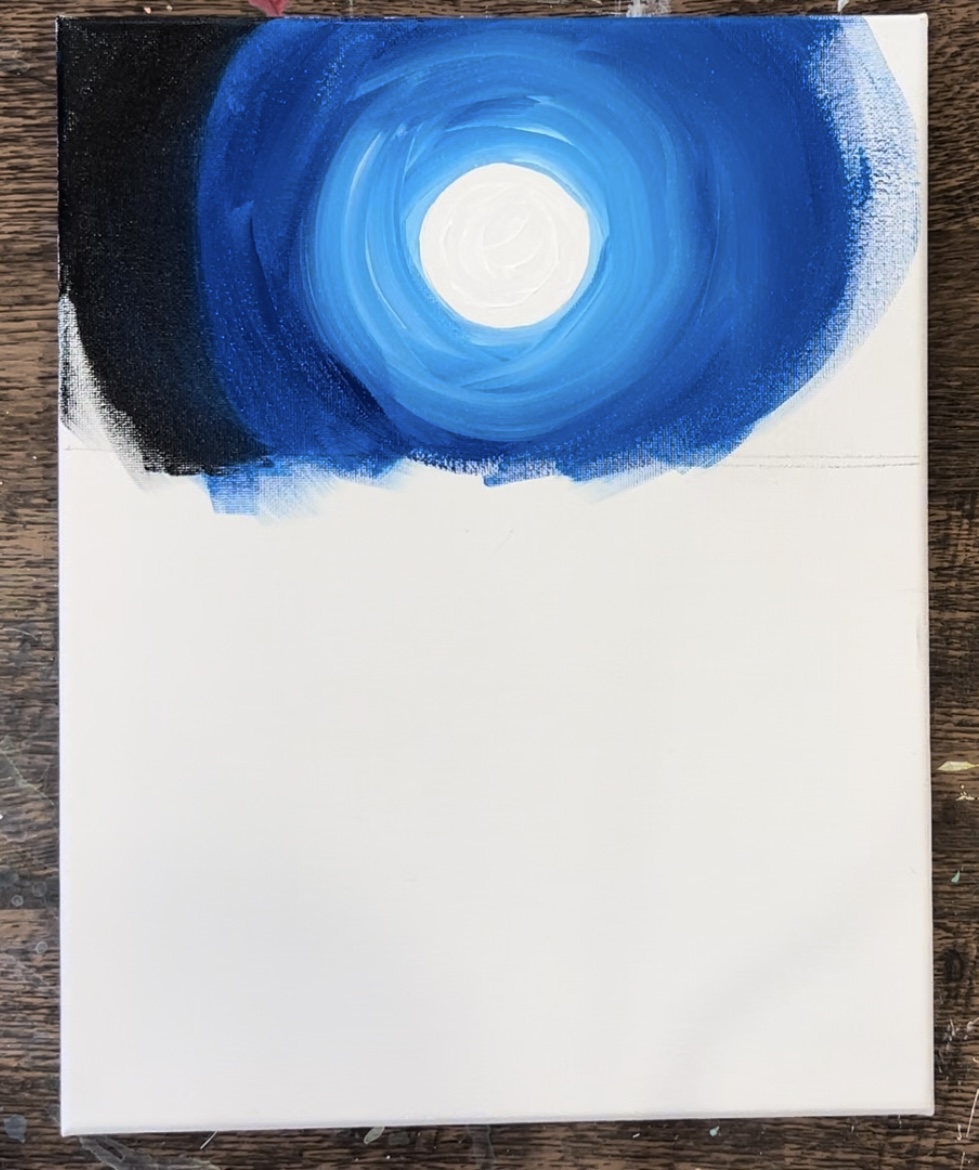
Do the same on the right side.
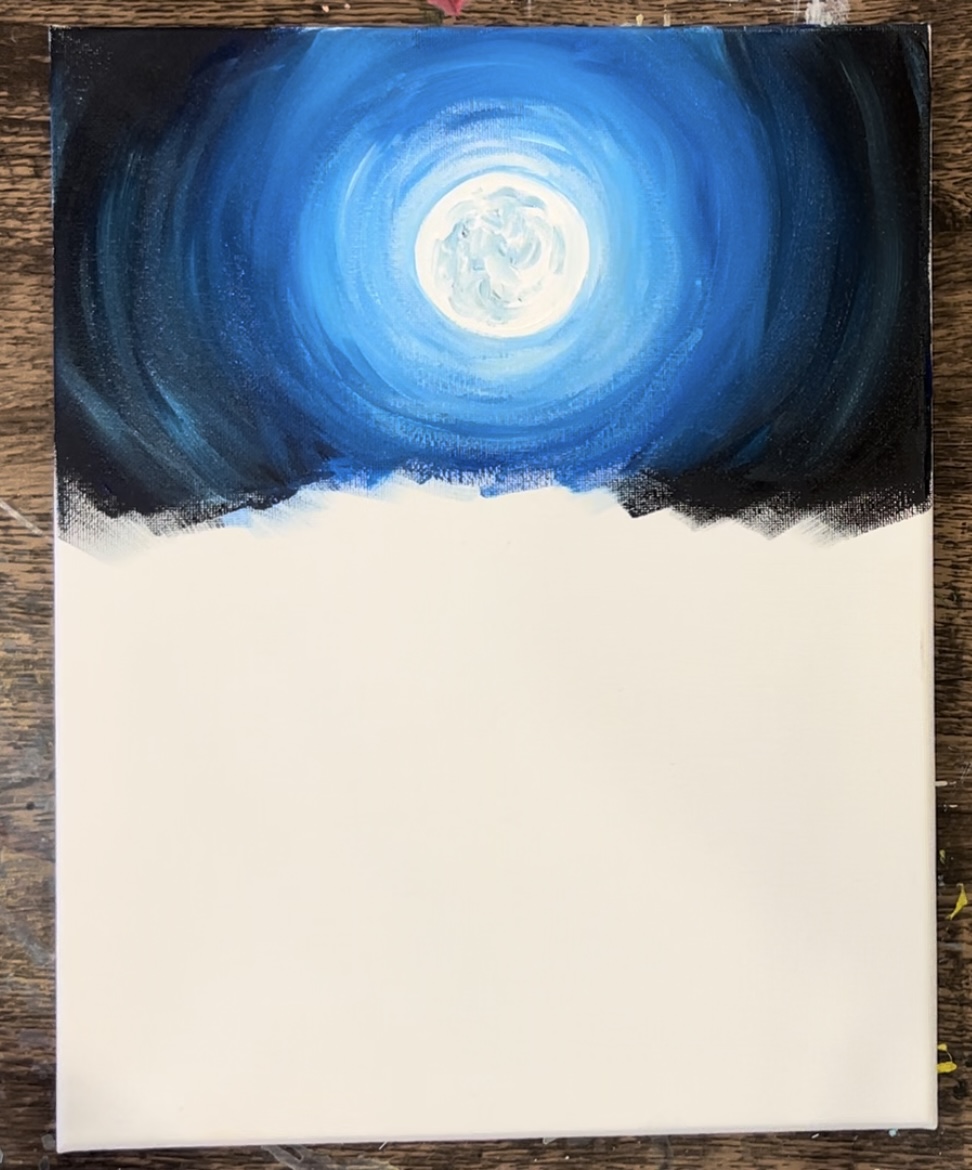
Blend your black with the blue. It may help to add a little white to your brush to help your black and blue blend together. You can also leave “white streaks” in the sky by not blending your color all the way. This helps to create that “glowing moon” look in the sky.
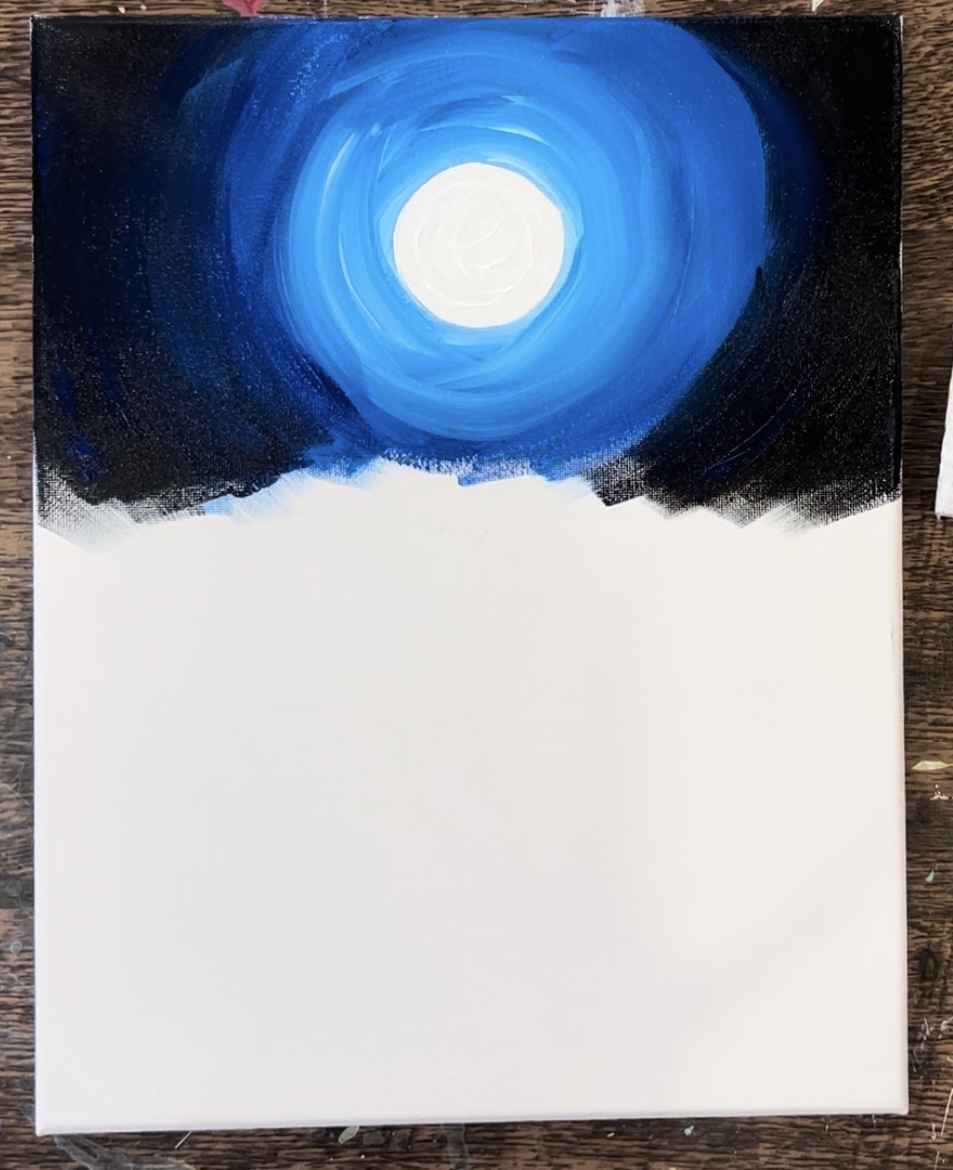
Next, use the #4 round brush to paint the texture craters on the moon. To do this, mix white with a small amount of black and blue on your palette. This will make a medium blue-gray color. Then use the end of the round brush to “dabble” little blotches on the moon.

Paint the blotches in she center of the moon and a little extra to the left. Leave the inner circumference of the moon bright and white.
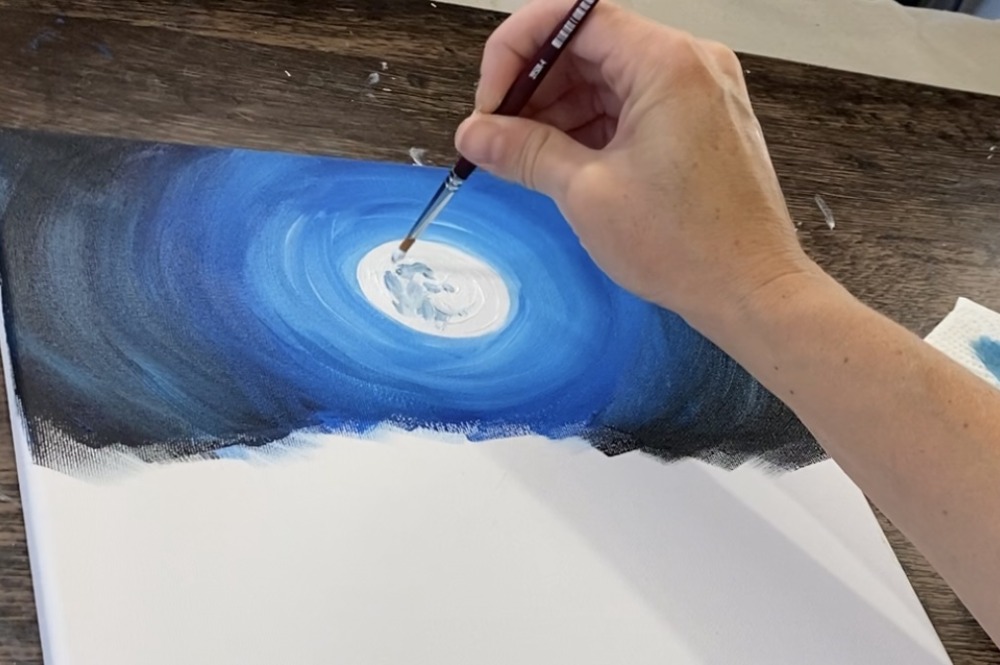
If needed, add more titanium white to your brush to lighten up some of the craters. You can also lightly “dry brush” some titanium white paint using the #4 round brush around the moon to create “moon beams” or more of a glow around the moon in the sky.
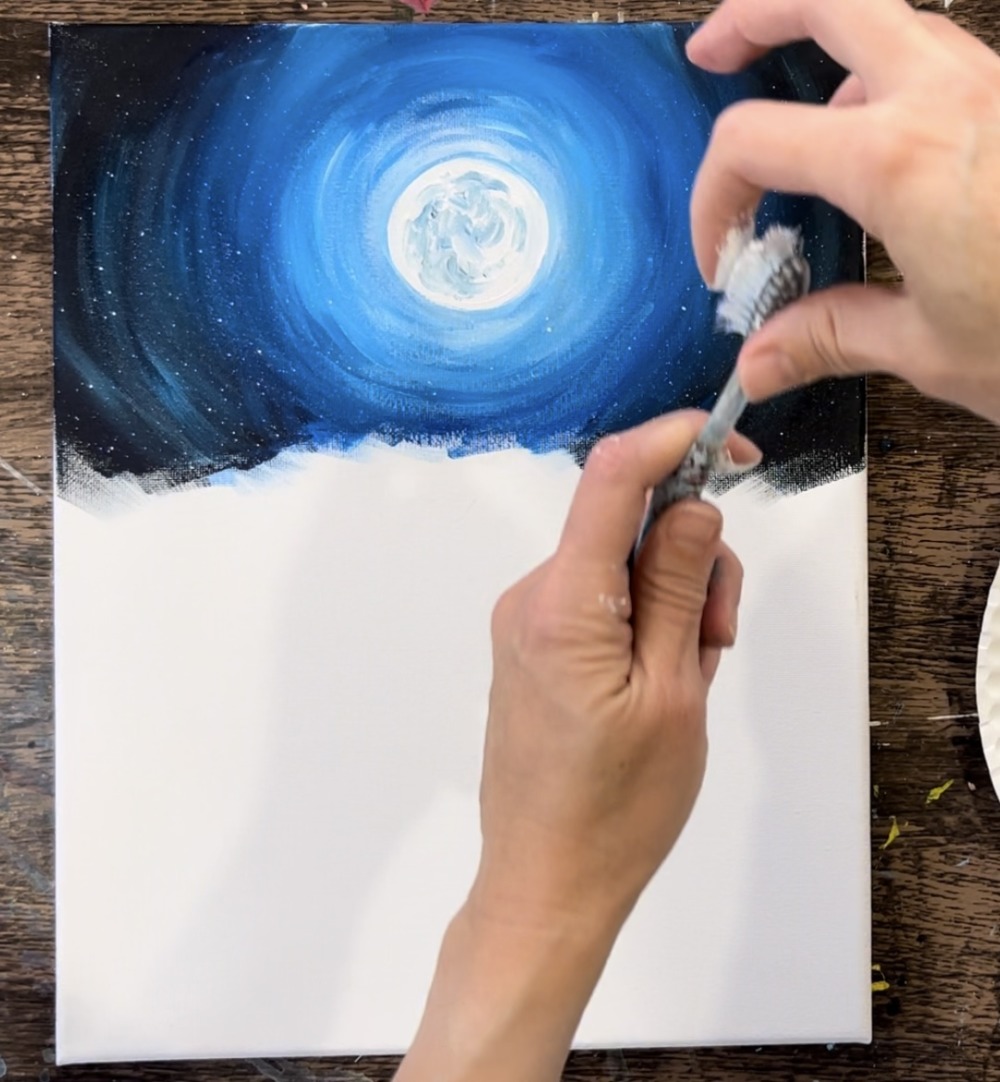
Use a toothbrush. Load it into a little bit of water then add titanium white paint to the brush. Test out a separate surface first. Then flick the brush to splatter little paint dots all throughout the sky.

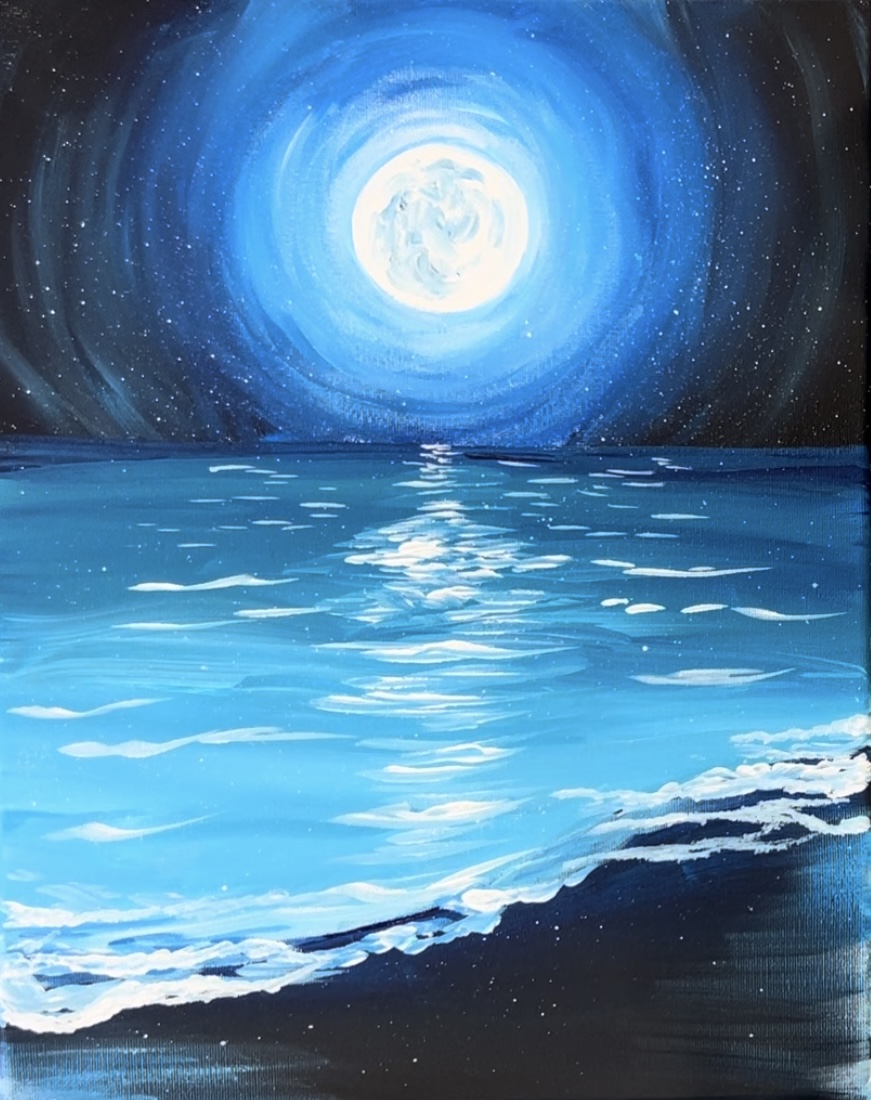
3. Paint Ocean Water
If needed, use a piece of chalk to redraw the horizon line.
Load your paint palette with “turquoise blue” and “pthahlo blue” paint. Use the 3/4″ flat wash brush and gently blend the two blues together in the ocean area. Paint full width paint strokes.
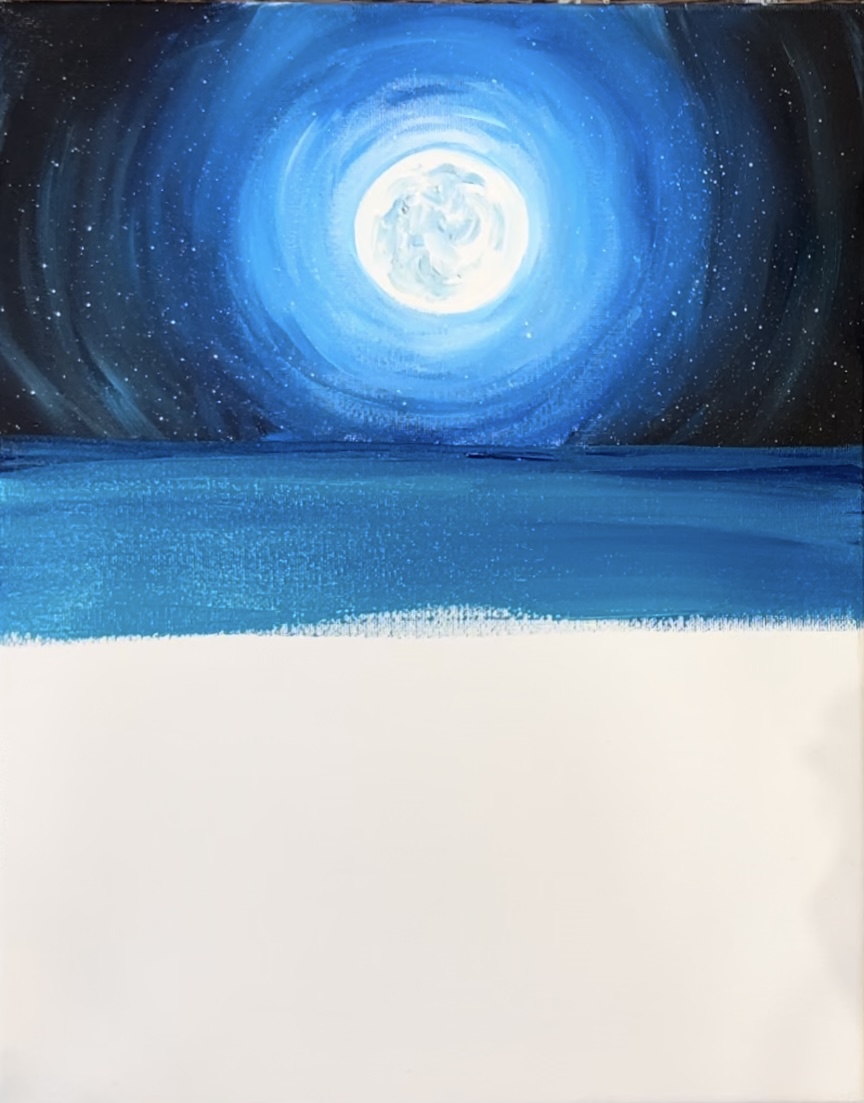
As you work your way down, use more of the turquoise color than the phthalo blue color. Use the end of the 3/4″ wash brush to paint the “shoe line”. The line starts at about 5″ from the bottom of the canvas on the right. It dips down/ curves and then goes to about 1.5″ from the bottom edge of the canvas on the left.
Next, gently blend in “titanium white” with the “turquoise blue”. Allow your ocean water to get lighter as it reaches the bottom of the shore line. Essentially your ocean water is darker in the distance and lighter on the bottom.
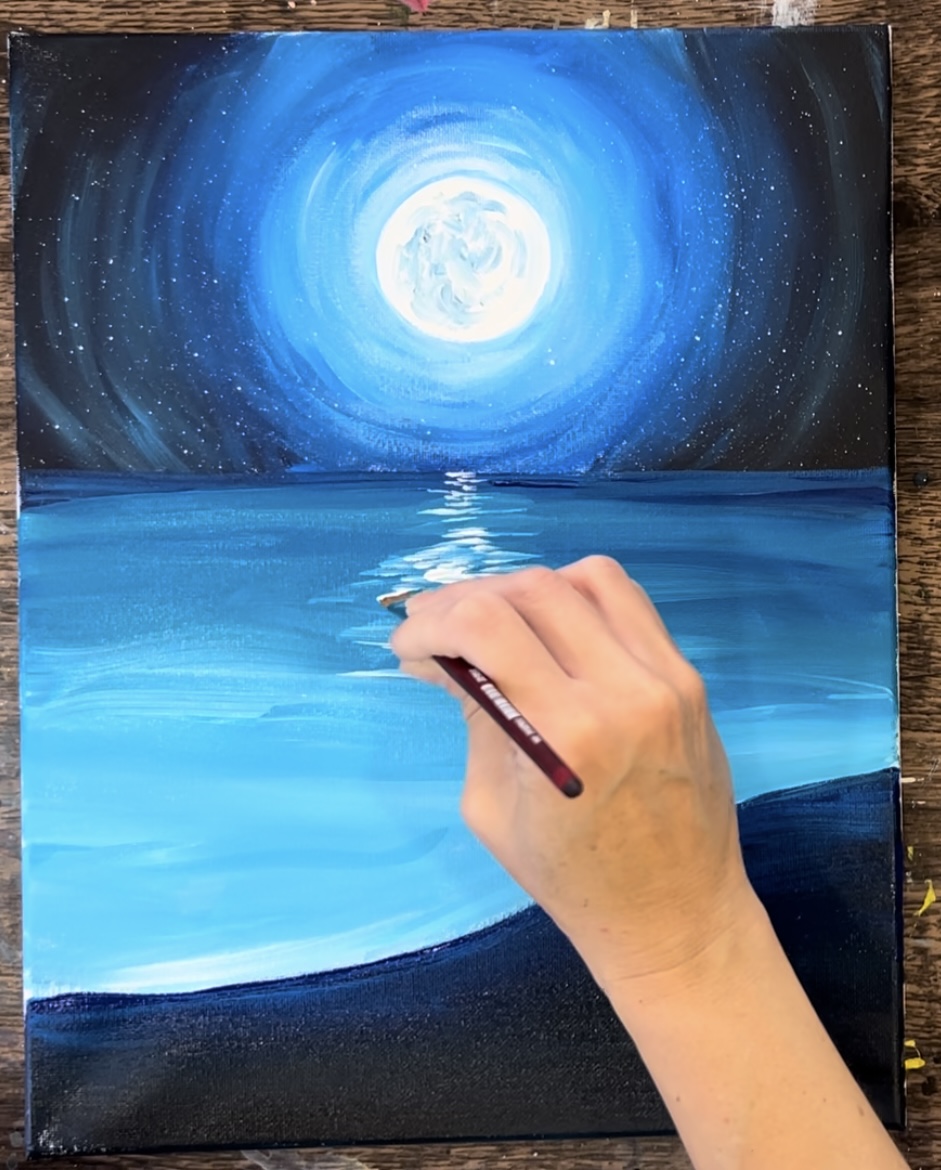
Wipe your brush off but don’t rinse it. Load it into just “titanium white” and gently blue white with the turquoise in the very center of the painting under the moon. Paint loose, left and right paint strokes in this area. It won’t look very bright yet! We will add more reflection lines when this dries.
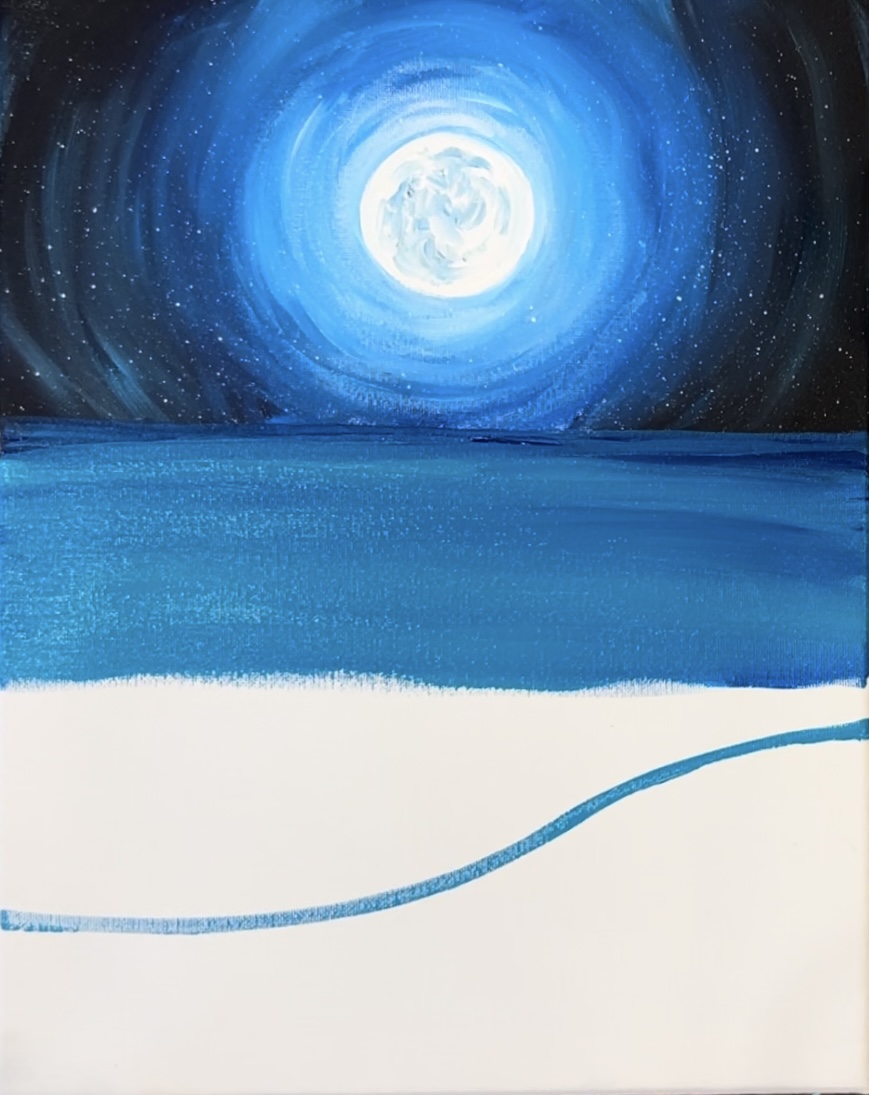
4. Paint Sand/ Shore
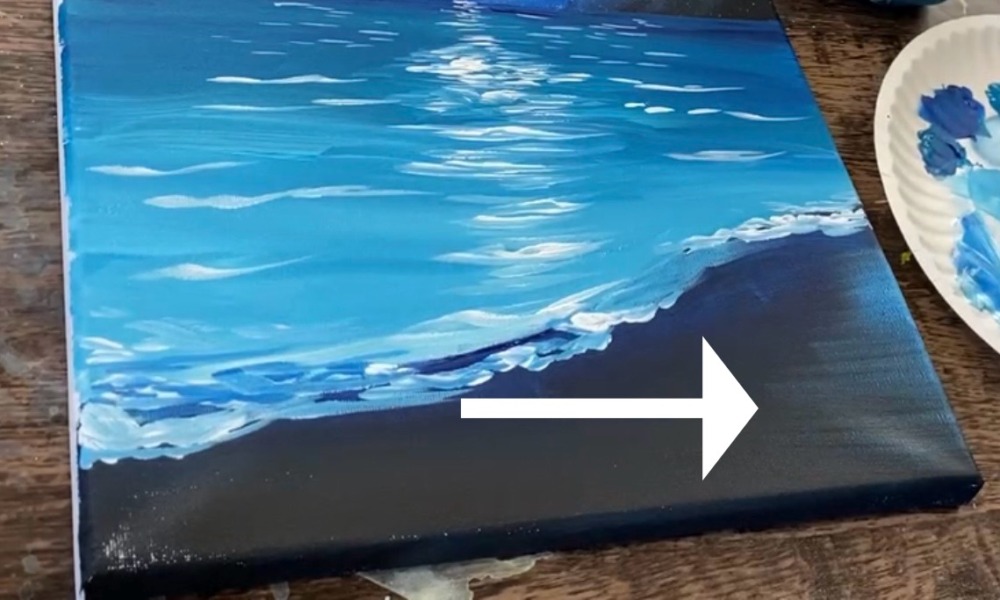
Use the 3/4″ wash brush and “mars black” to paint the sand area on the bottom of the canvas. Paint the bottom half black. Make sure to paint left and right full width paint strokes.
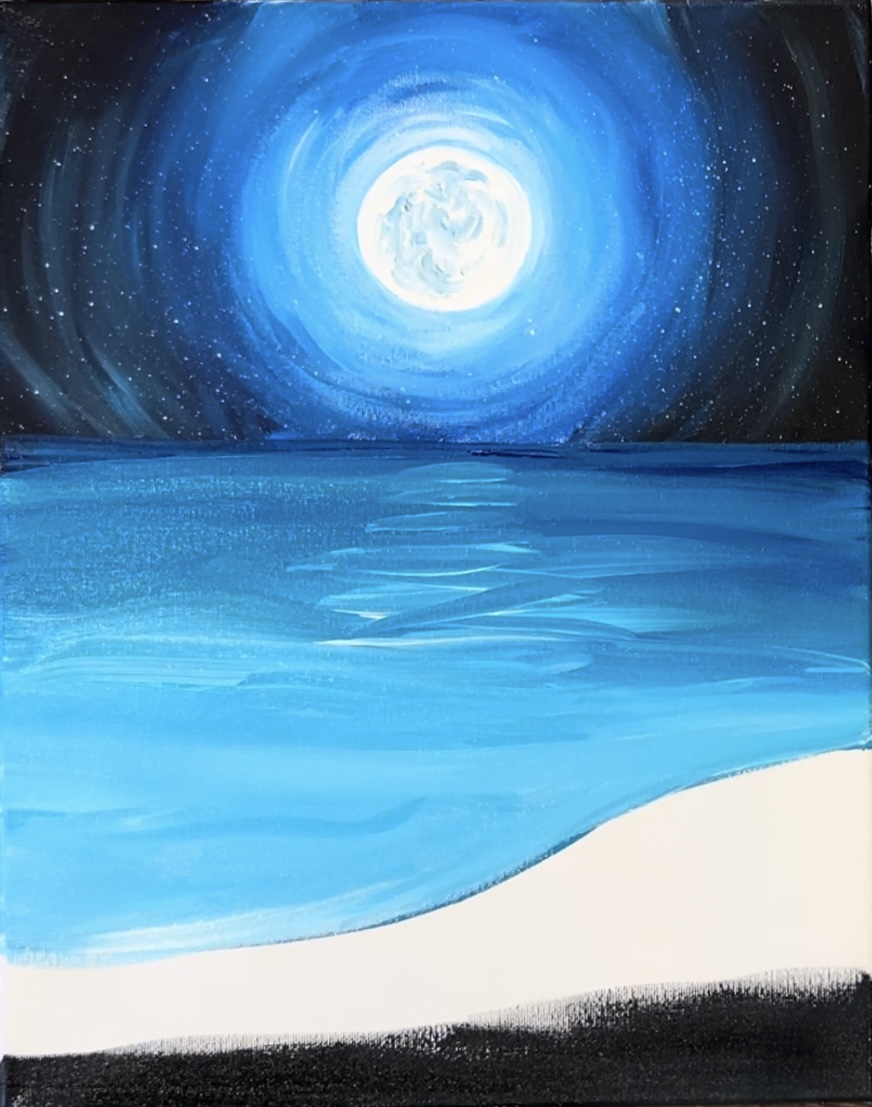
Then blend “phthalo blue” at the top of the sand area (the part that meets the shore line).
Right now, the sand area is dark blue blended to pure black at the bottom. You’ll need to let this dry before painting the wave lines over the dark blue sand.
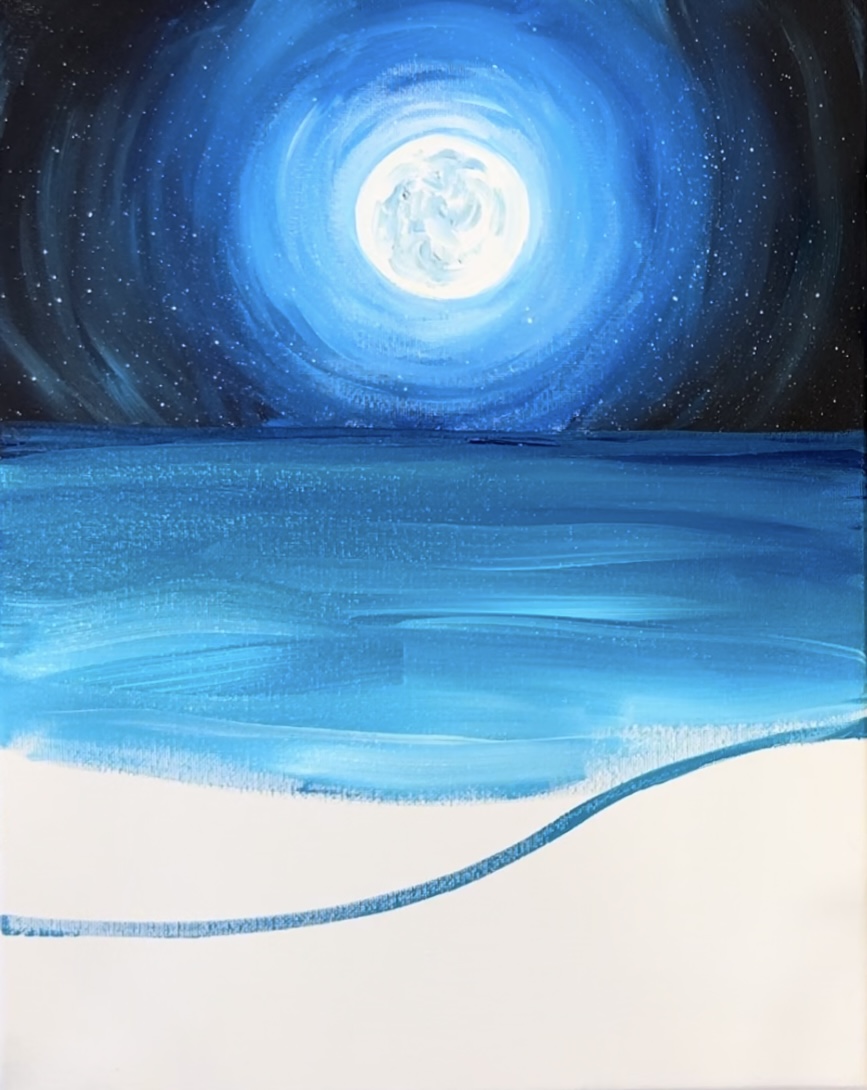
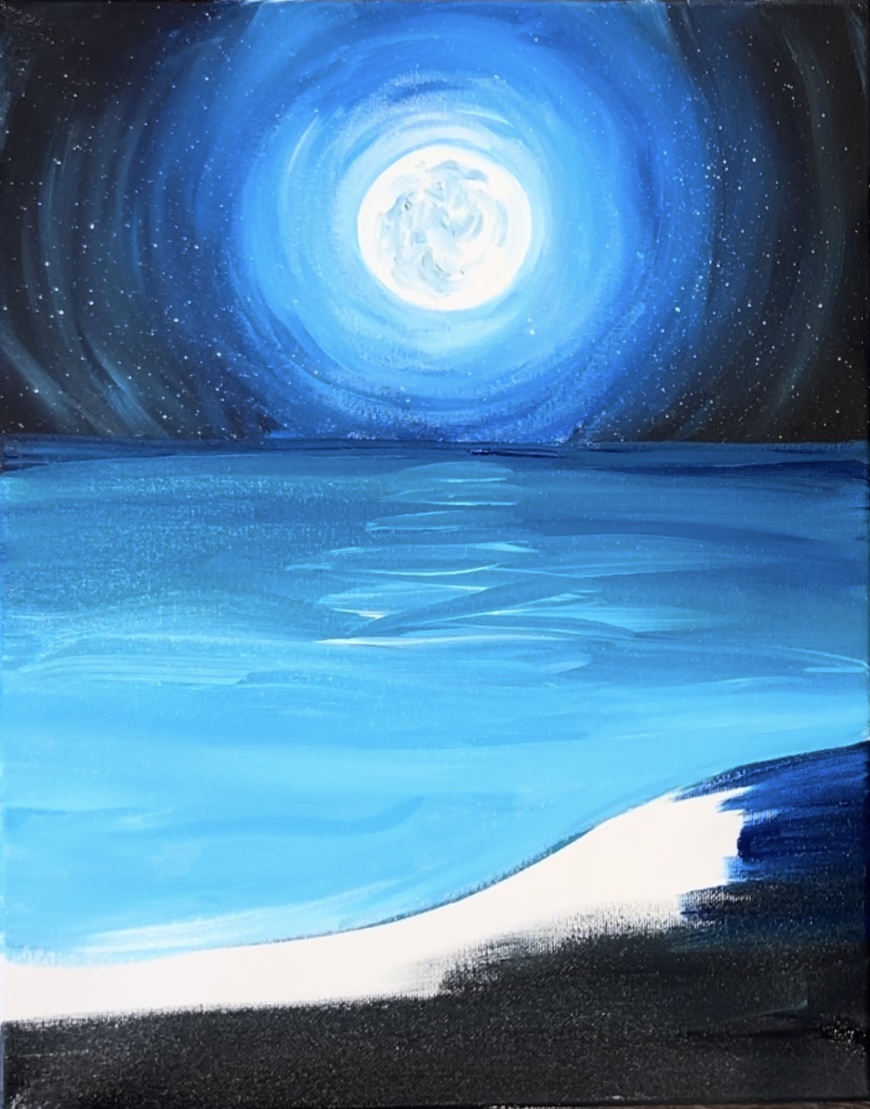
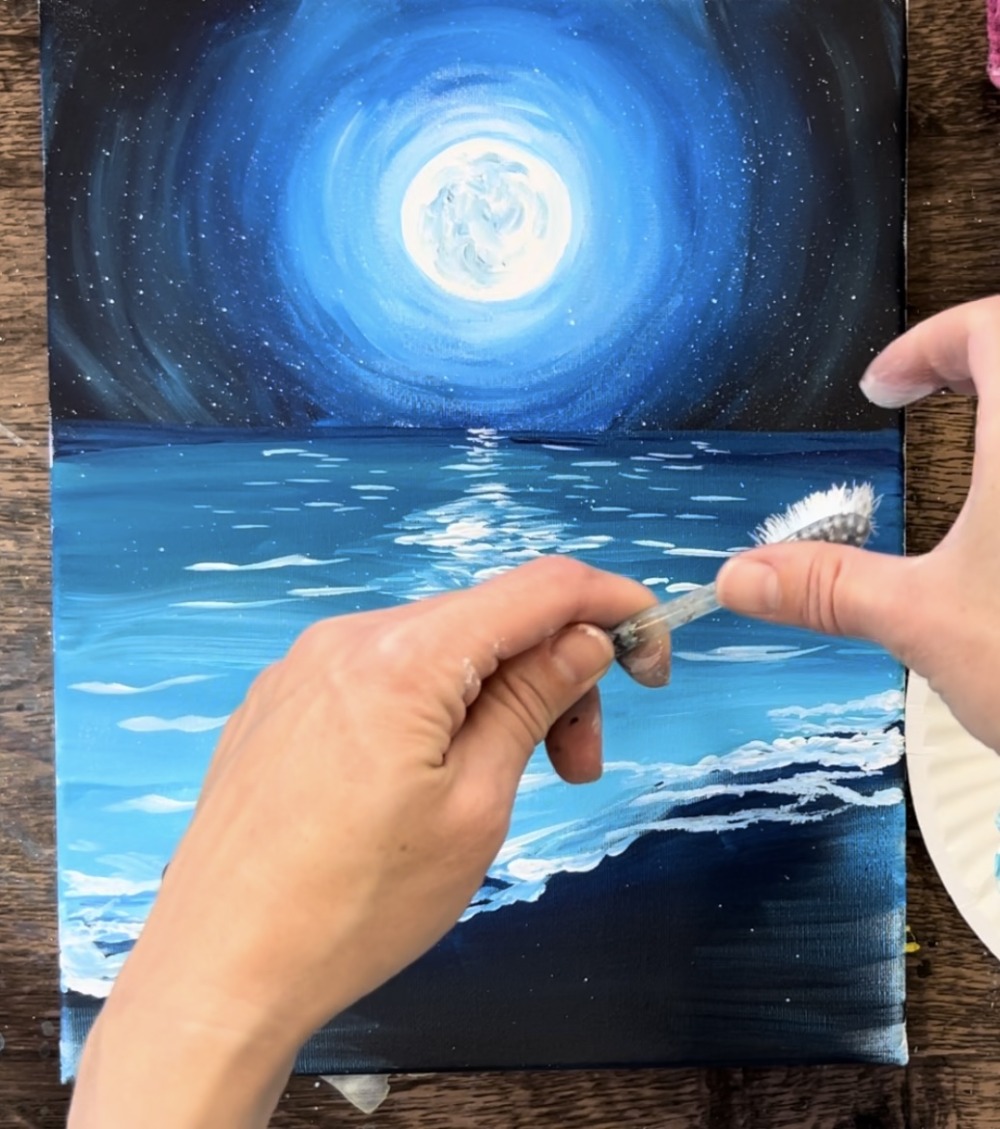
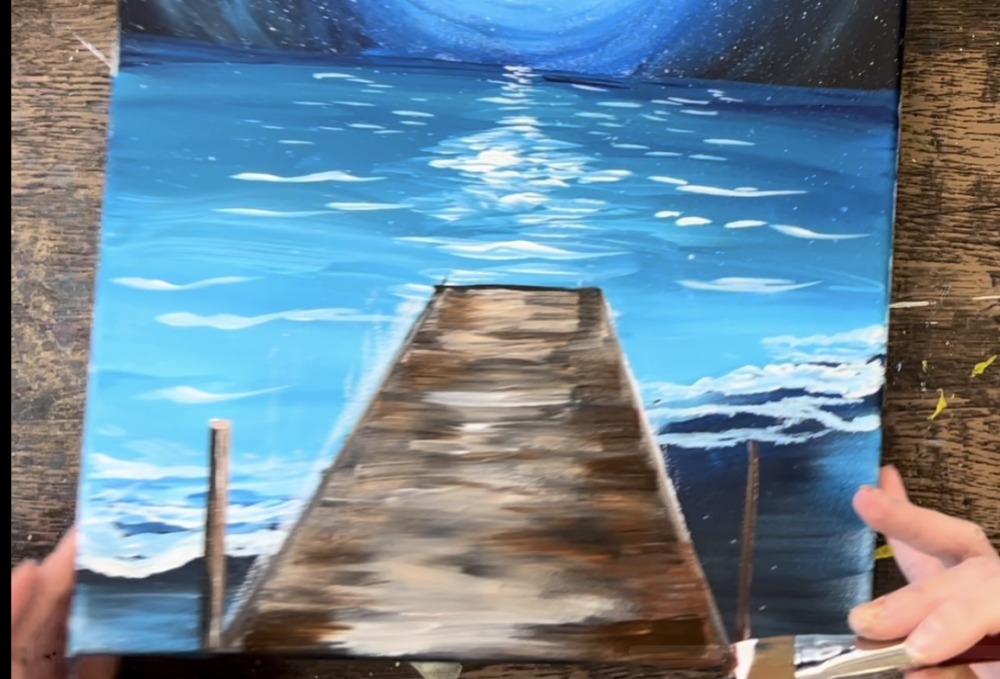
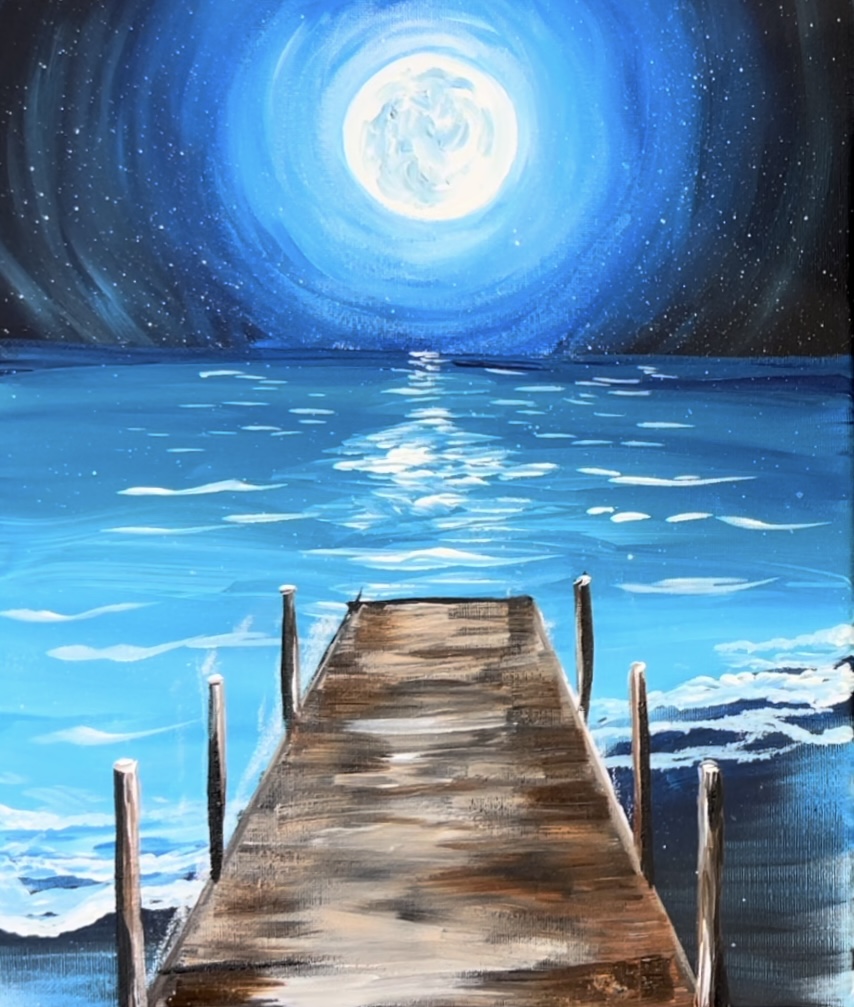
5. Paint Moon Reflection & Soft Waves
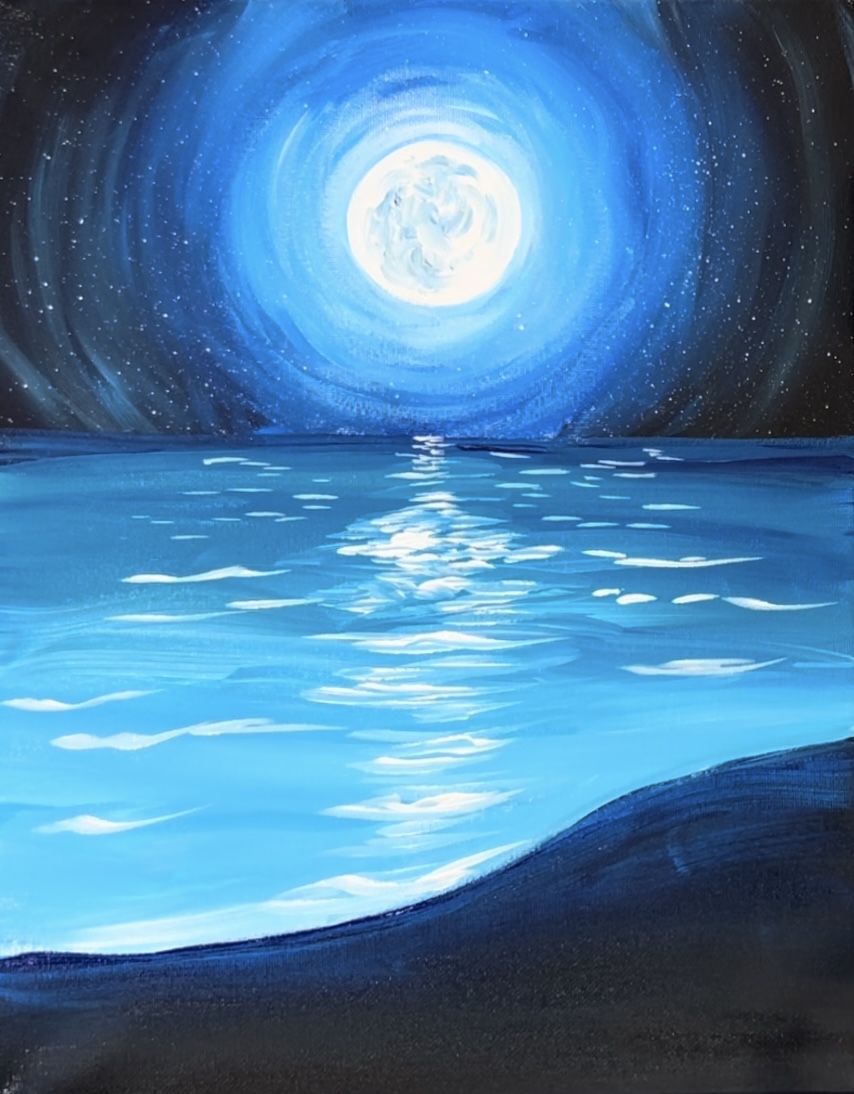
Use a 3/8″ angle brush and “titanium white” to paint a bright reflection in the ocean water. Start at the horizon line. Paint very thin and close together lines. As you work your way down in a vertical direction, paint your lines so they are wider and a bit further apart.
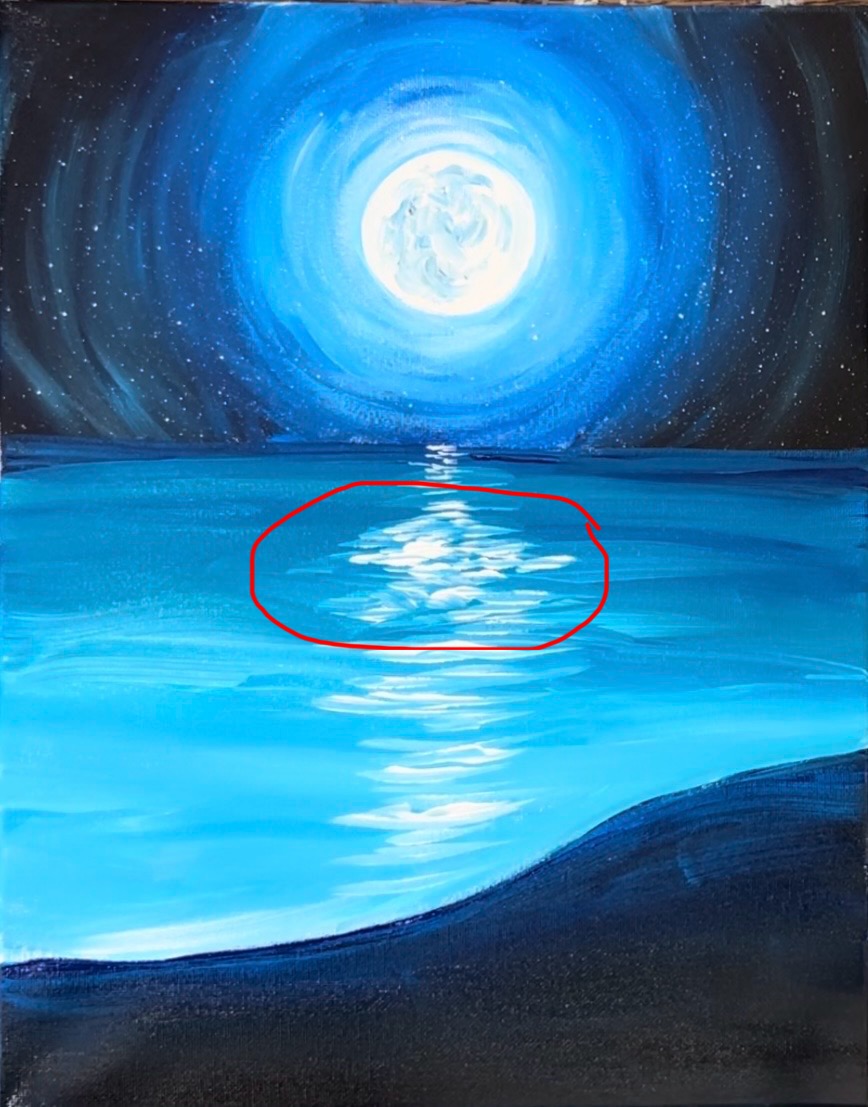
Paint an area towards the middle of the ocean area that has a larger reflection. This is where the moon is reflecting on the water.
Paint more reflection lines further down to the sand area. These reflection lines are thicker and wider paint strokes.
Then paint soft wave lines throughout the ocean area. Paint the wave lines so that they are thinner and closer together further in the distance and thicker, further apart closer to the shore. Be careful not to add too many white lines in the ocean. The center part should be the brightest part of the ocean because of the moon reflection.
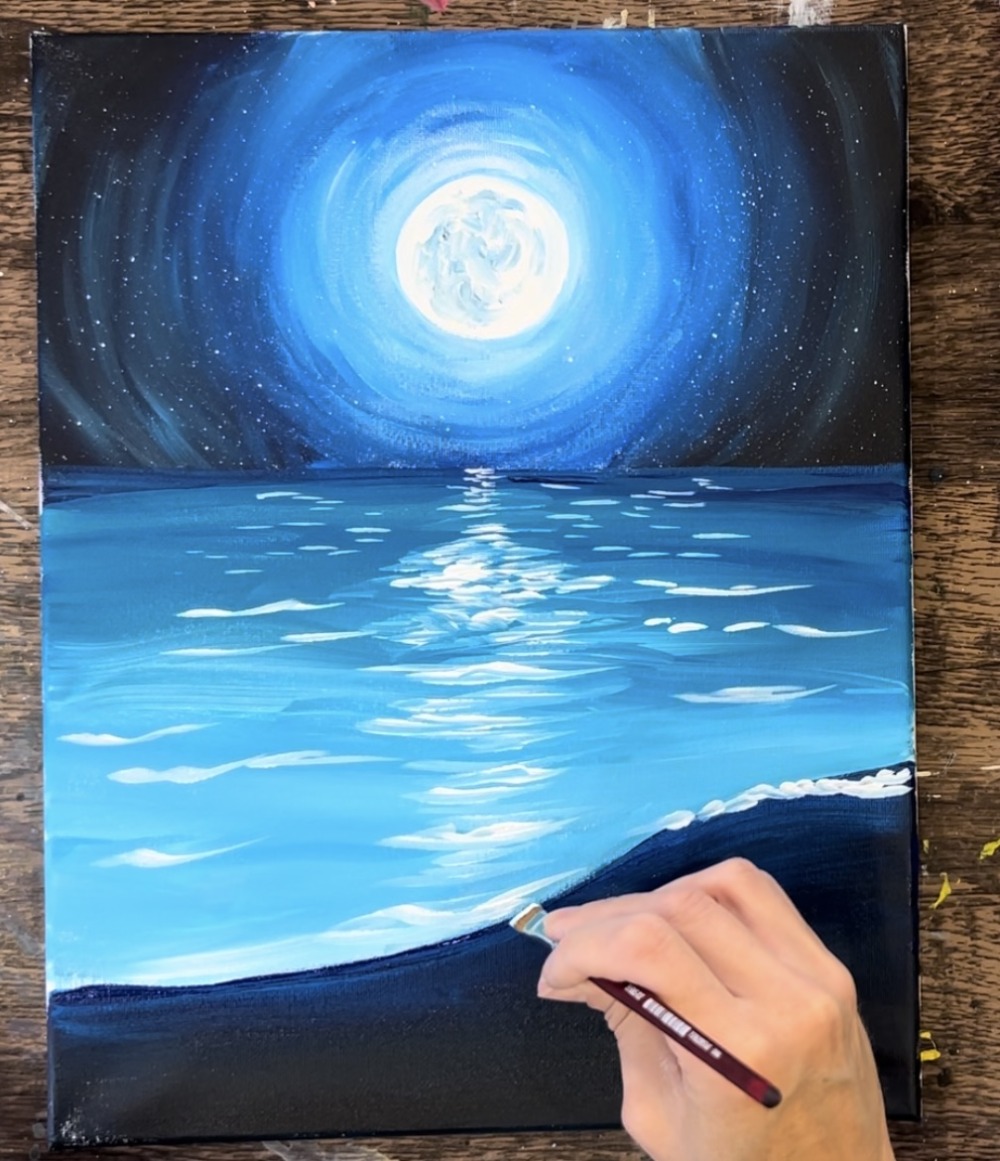
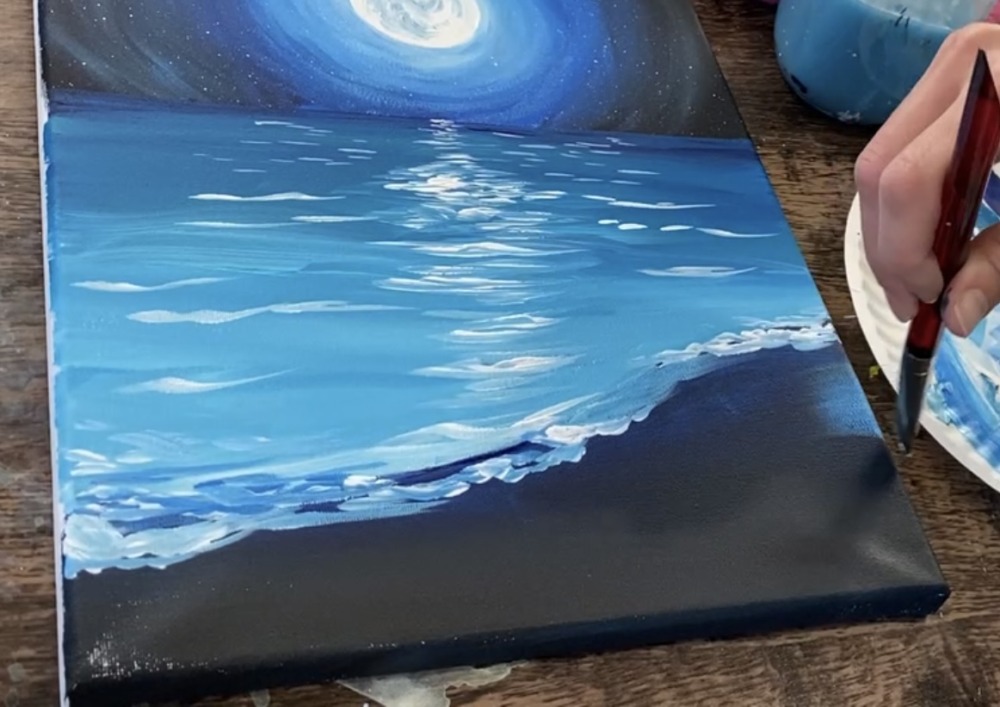
Next, paint some soft waves that are overlapping the bottom sand area. Use the 3/8″ angle brush and titanium white. “Stamp” the brush to paint thick white paint strokes that slightly overlap the dark sand area.
Keep in mind that the middle of the painting will be covered by a large dock. This means you do not need to do detailed wave lines in the middle area.

Continue to “stamp” the brush to create soft white waves that slightly overlap the sand area. Some of the dark blue blended with the white for me so that is why the waves look more blue than white.
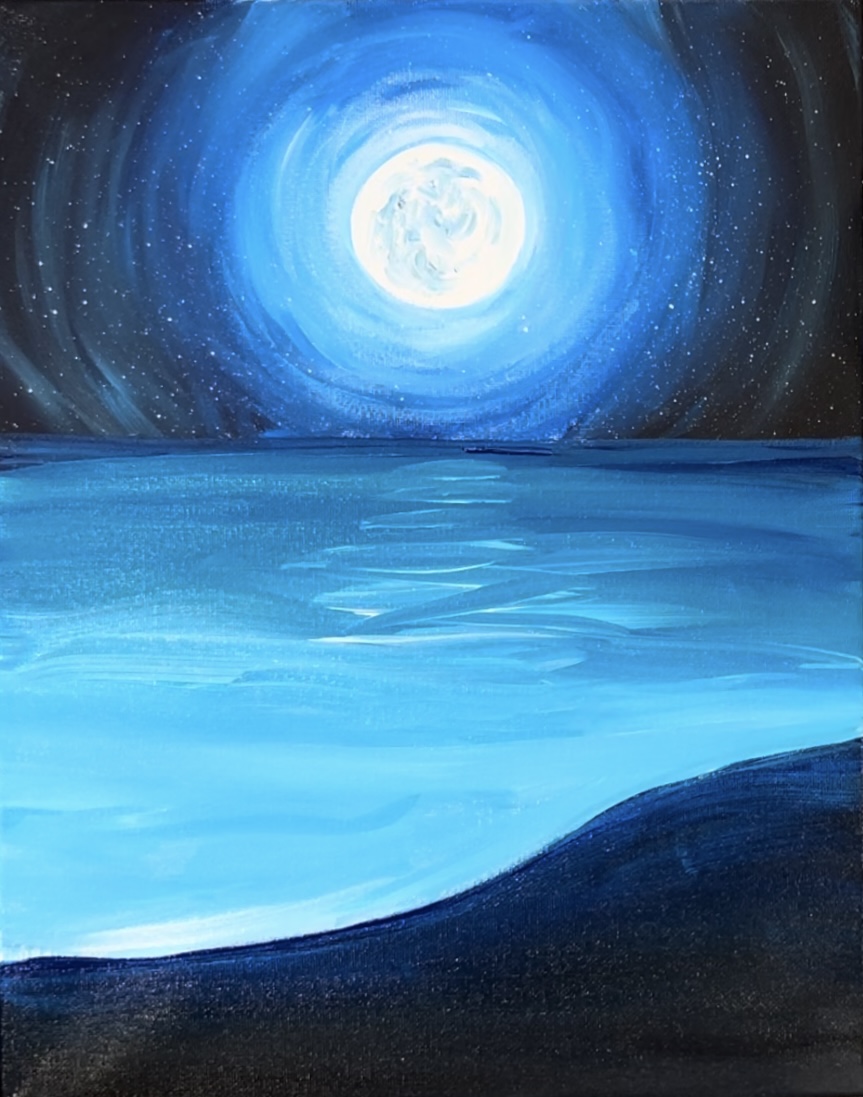
6. Highlight Sand/ Shore & Paint Star Reflections
Use the full width of the 3/4″ flat wash brush to “dry brush” light blue (titanium white mixed with a small amount of phthalo blue) in the sand area just on the far left and far right edge of the canvas. Load only a small amount of white on the brush and wipe off some of the paint. This will allow the color to look translucent. Then drag the brush gently. Leave the center of the sand area dark.
Then splatter more straps on both the ocean water and the sand area!
Wait for this to dry before going onto the next step.
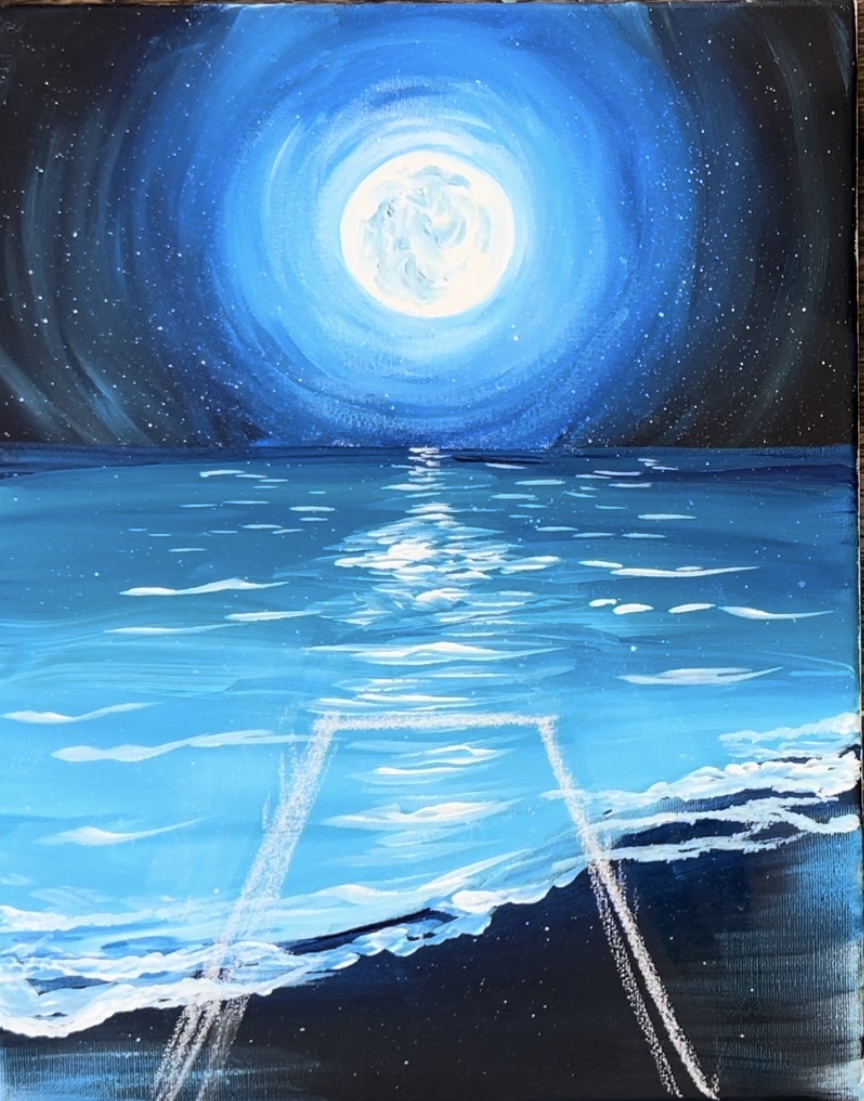
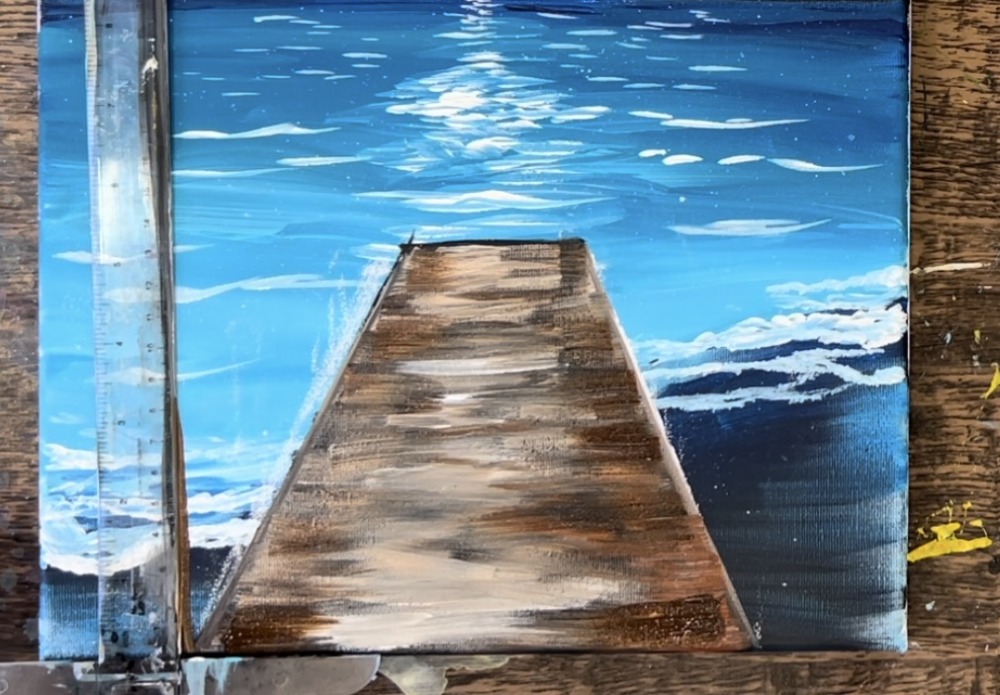
7. Draw Pier
Use a piece of chalk to draw the pier. This is a “trapezoid shape”. It is wide on the bottom and goes narrow as it passes over the shoreline.
The width on the bottom of the pier is about 7″. The width is about 2.25″ at the top. The two diagonal lines are about 6″ long. These measurements do not have to be exact. You can also make your pier longer or shorter!
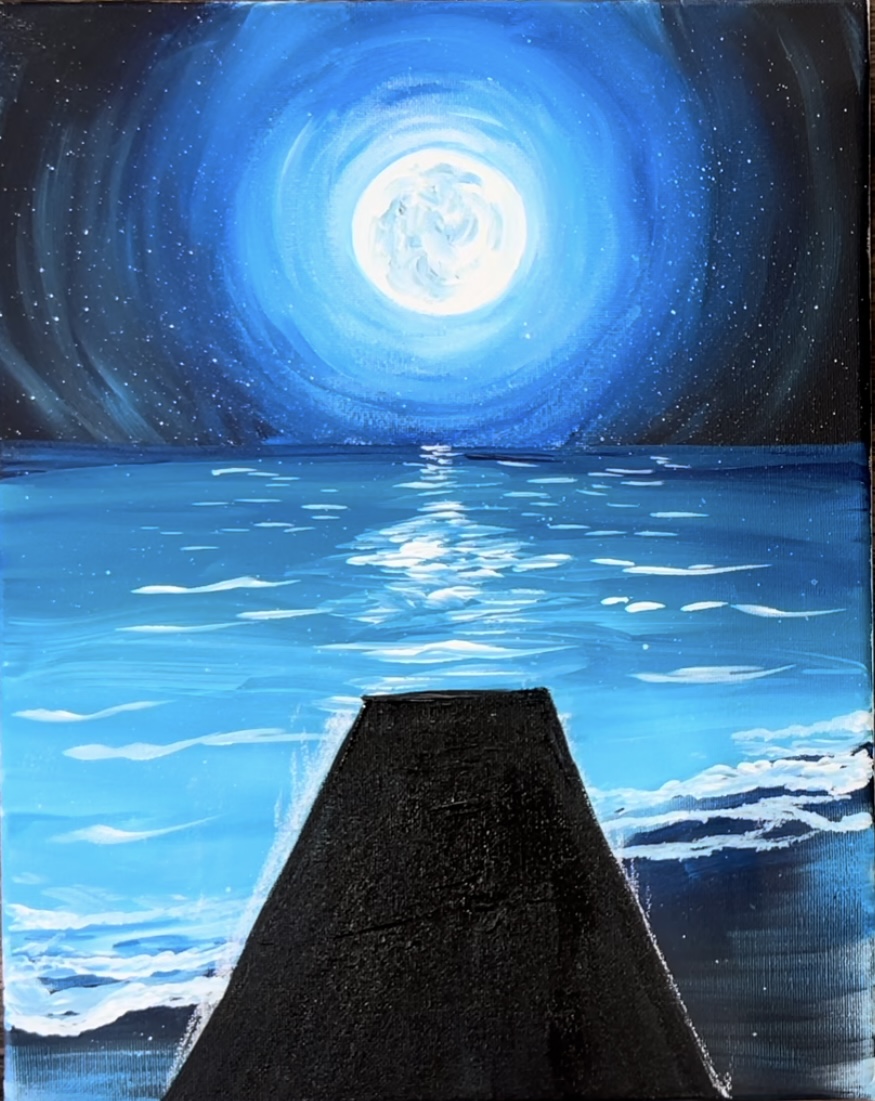
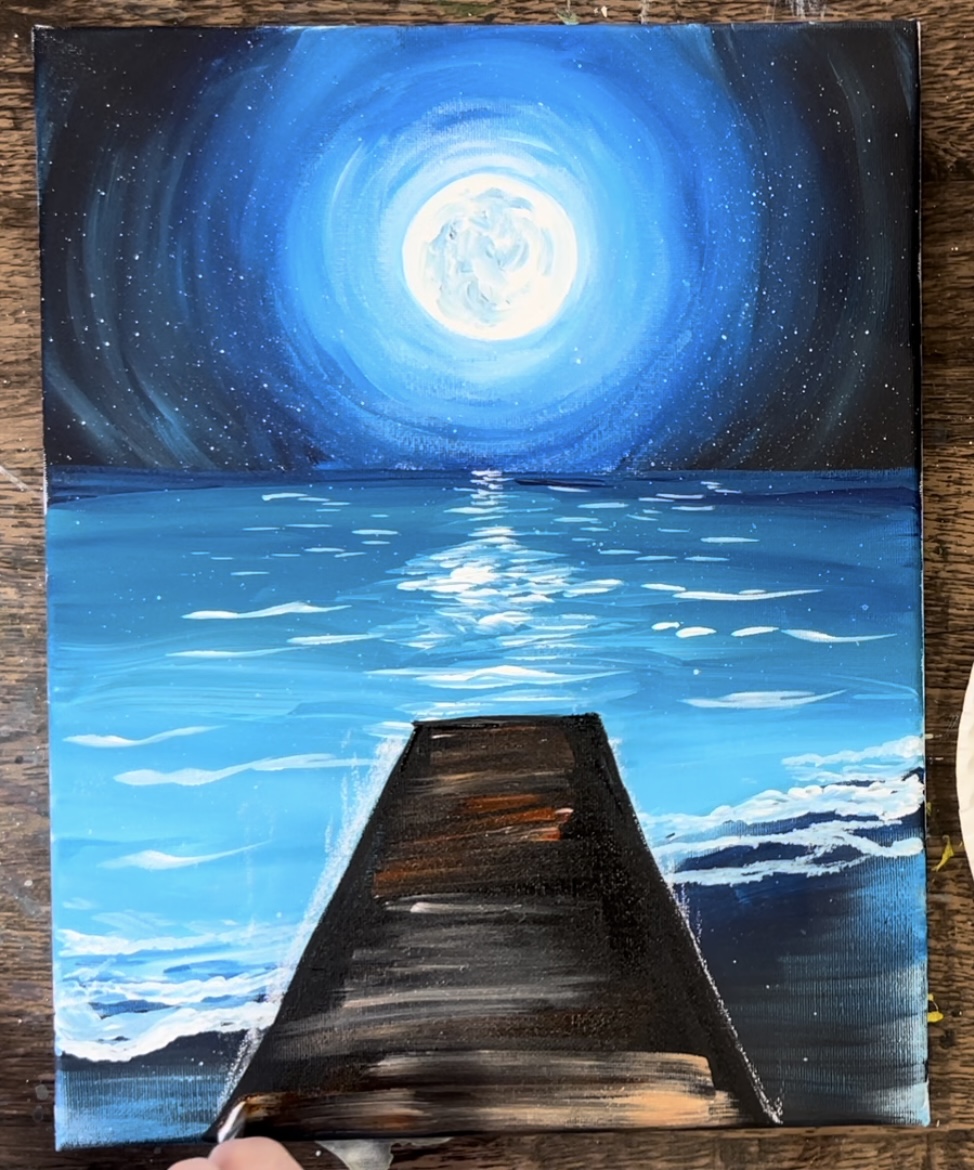
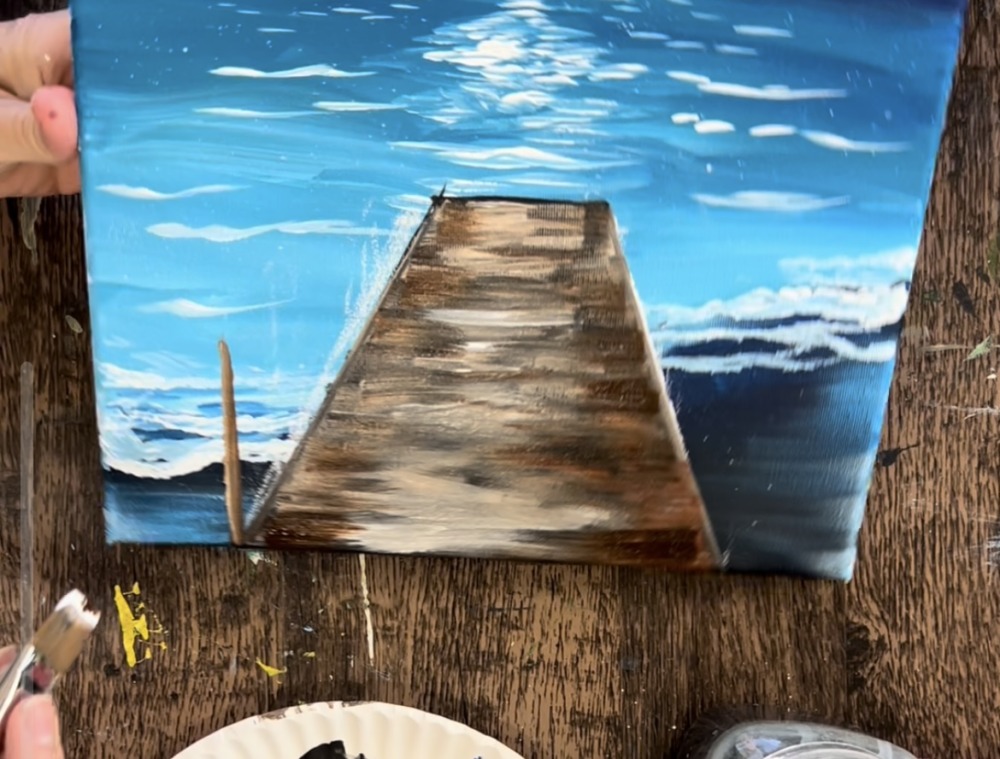
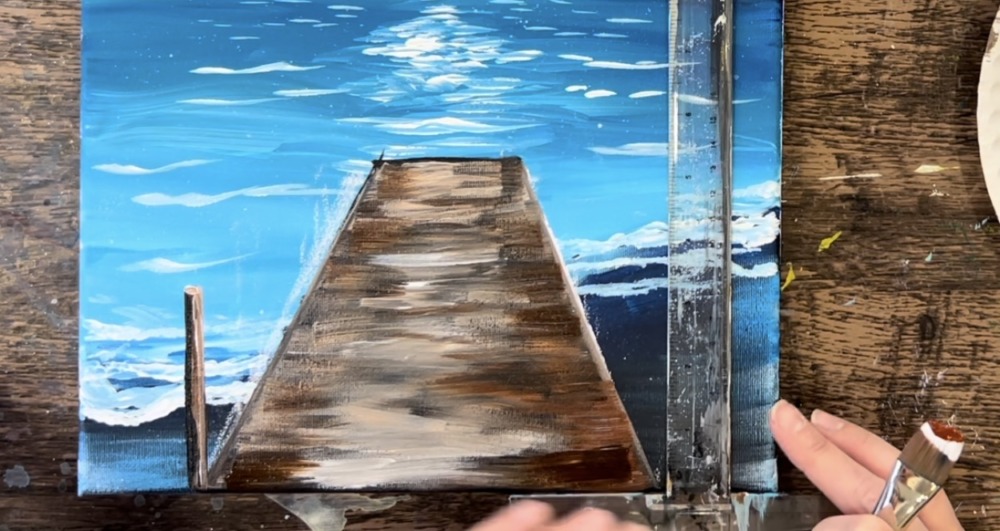
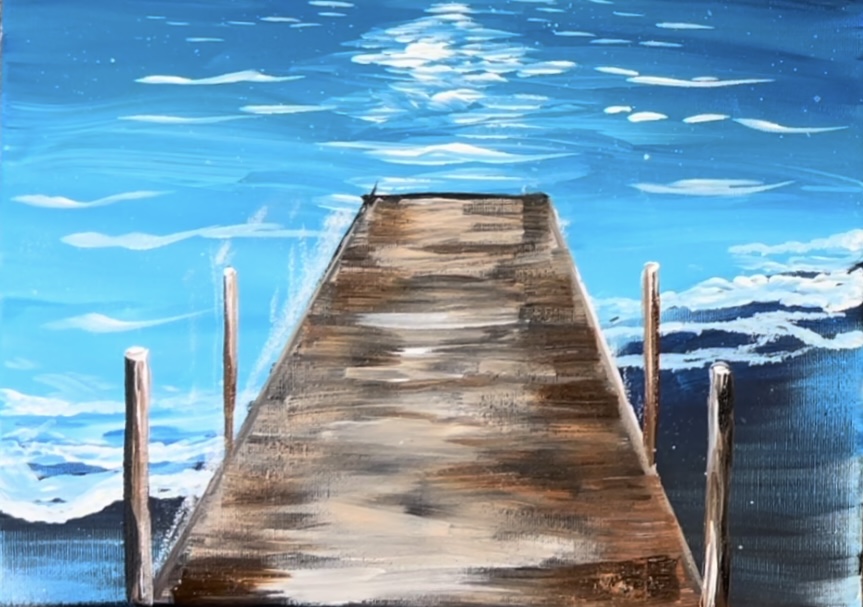
8. Paint Pier
Next, use the 3/4″ wash brush and “mars black” to paint the pier black. Paint a solid coat of black and define the shape (outline and fill in).
Next, load your paint palette with: burnt Sienna, burnt umber and titanium white.
Load your 3/4″ wash brush in the “burnt sienna”. Then paint left and right paint strokes on the bottom of the pier. The brown will gently blend with the black. Note: if you black has dried, double load the brush in black and burnt Sienna.
The goal is to create a “faux wood” effect on the pier. You don’t want to cover all of the black layer. You want to use that black layer to show horizontal paint strokes through your next brown layer of paint. When you don’t “blend it all the way”, this will create streaks of different shades/ tints of brown.
Add “burnt umber” and “titanium white” to your brush and gently blend that throughout the pier but don’t blend it all the way.
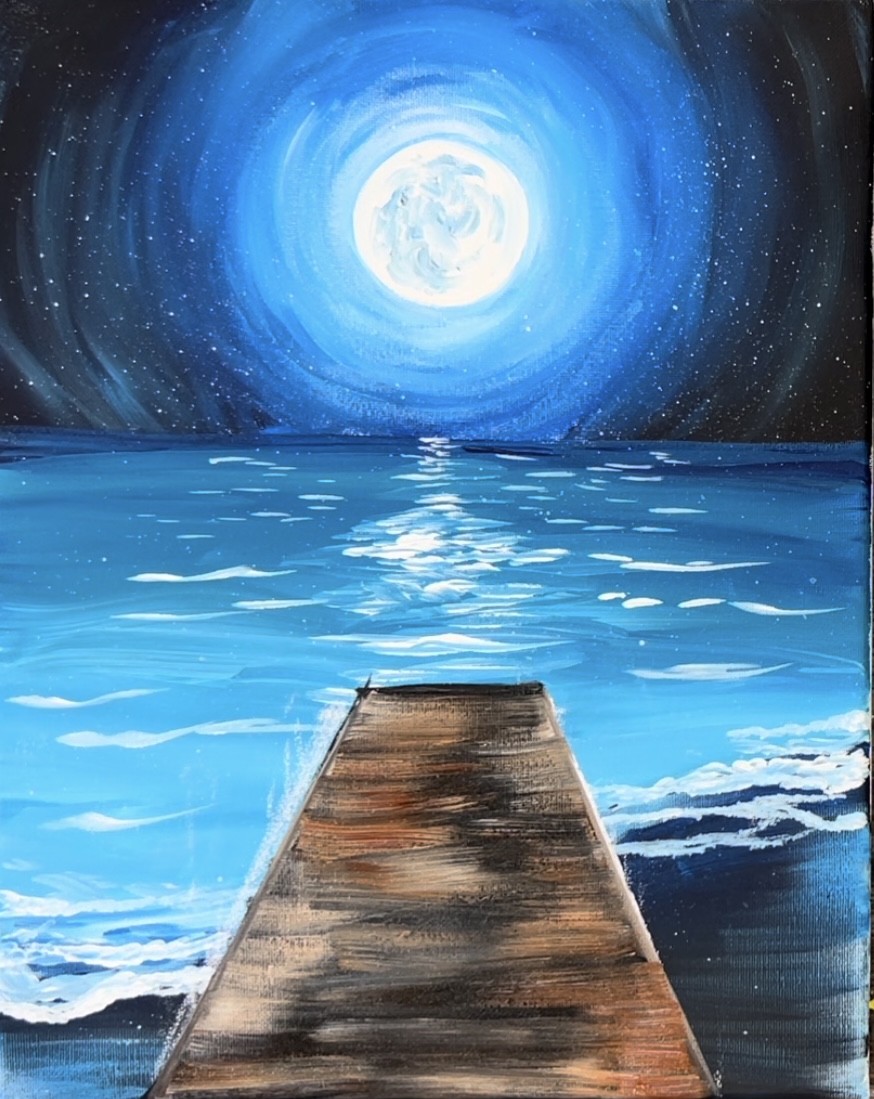
Add just a bit more light brown (white mixed with burnt umber) in the center of the pier where the moon would be reflecting more light on it.
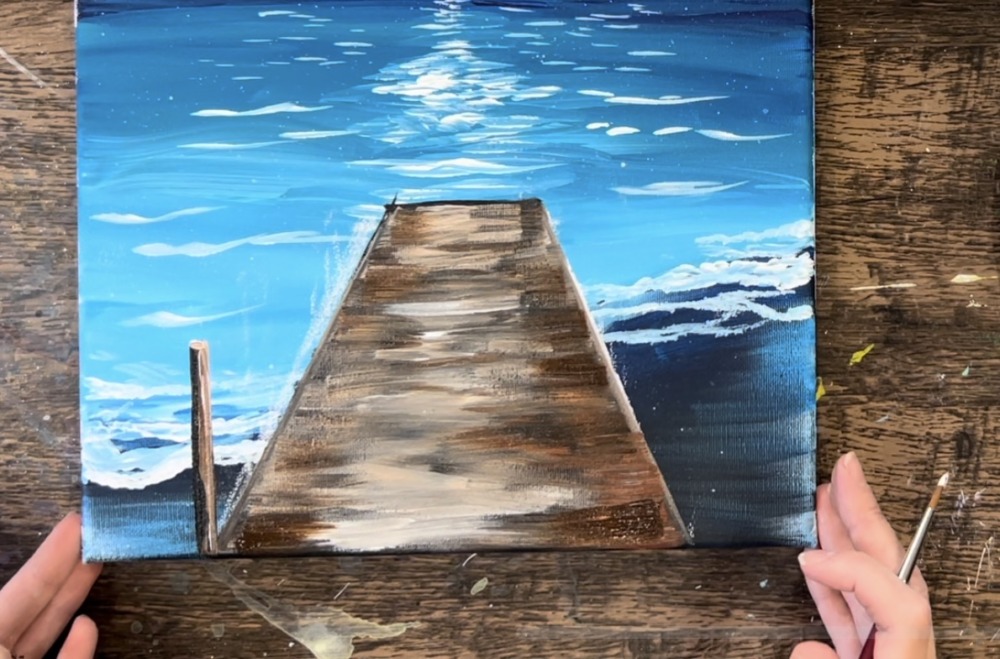
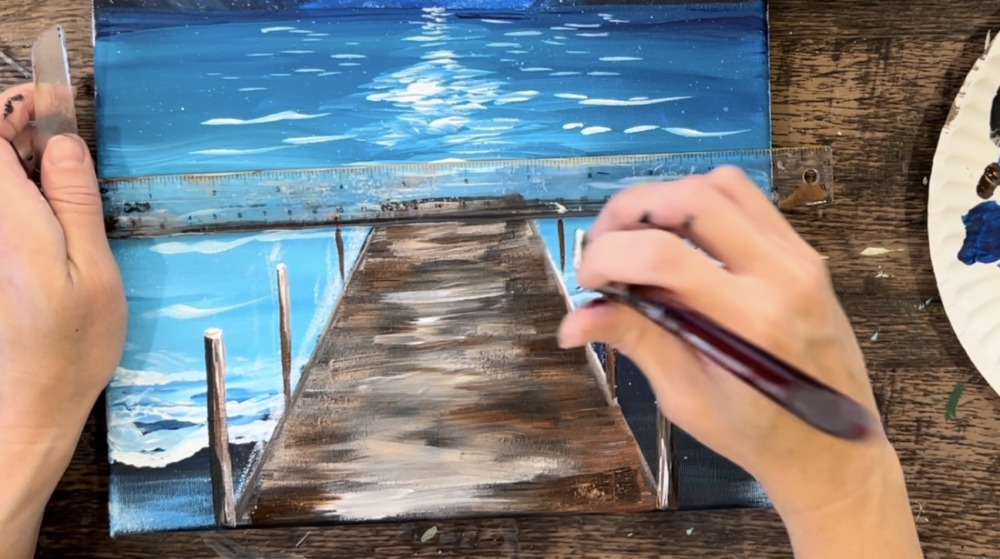
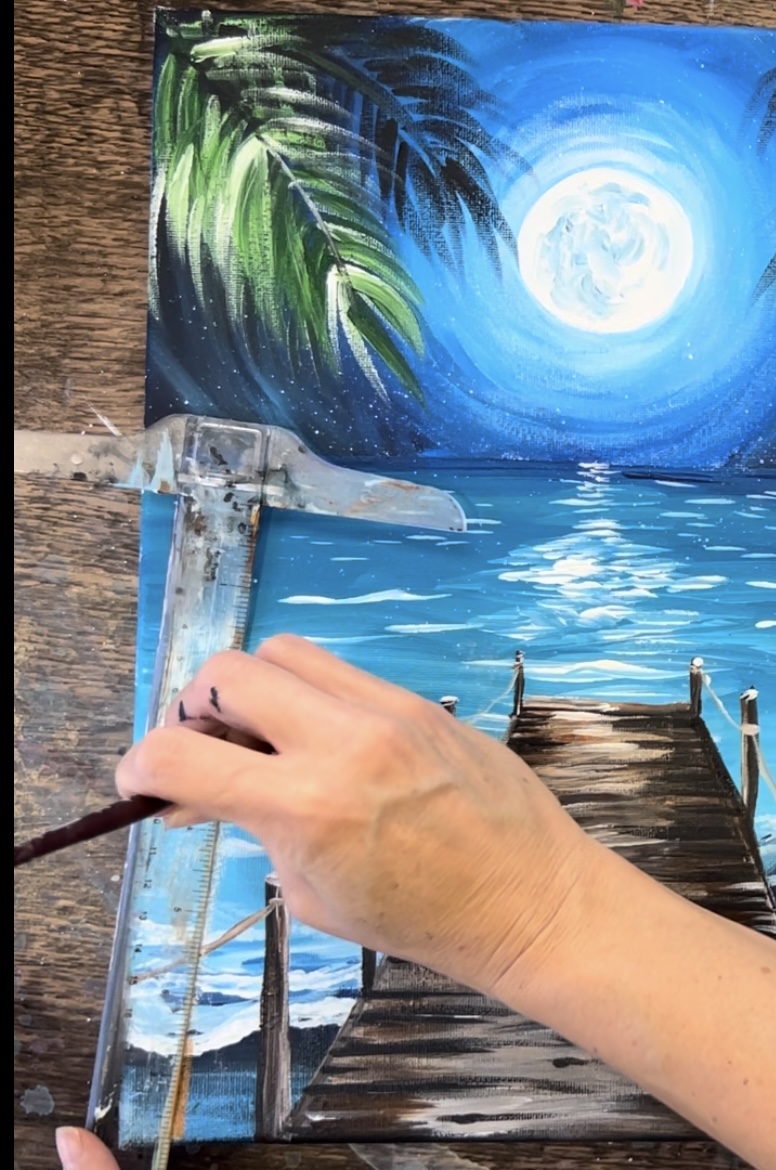
9. Paint Pier Posts
I found it helpful with use a t-square ruler to paint the pier posts. This allows you to get the post to be vertical. Also, each pole is going to get smaller as it goes in the distance.
Line your t-square ruler on the bottom edge of the canvas. Use the #4 round brush and “burnt umber” mixed with a little bit of “titanium white”. Paint a semi-thick vertical line to start the post. This line is about 3.25″ high.
Then highlight and add shadow on the line. Use the #4 round brush to paint black on the left side of the post. Then paint light brown (white mixed with brown) on the right side of the post. Next, paint a very tiny oval on the very top of the post using light brown.
Repeat this on the right side of the pier. Make your post about the same height as the one on the left.
This time, paint the highlight and shadow opposition as the post on the left. Paint the highlight on the left side of the post and the shadow on the right side.
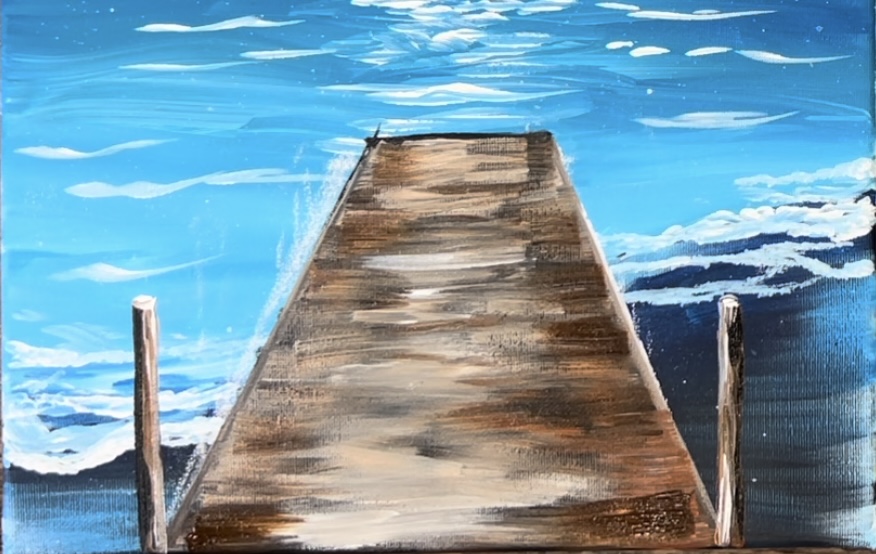
Paint the second set of posts. These are going to be slightly smaller and also slightly shorter than the first set. I painted this second set approximately 1.5″ apart from the first set and 2.5″ high.
Add your highlight, shadow and small oval shape on the top of these two posts.
Paint your third set of posts. These are thinner and shorter. I did these about 1.5″ apart from the second set and about 1.5″ high. (These measurements are approximate and don’t have to be exact. You can estimate your post measurements!)
Highlight and add shadow to these posts and also add your small oval shape on the top.
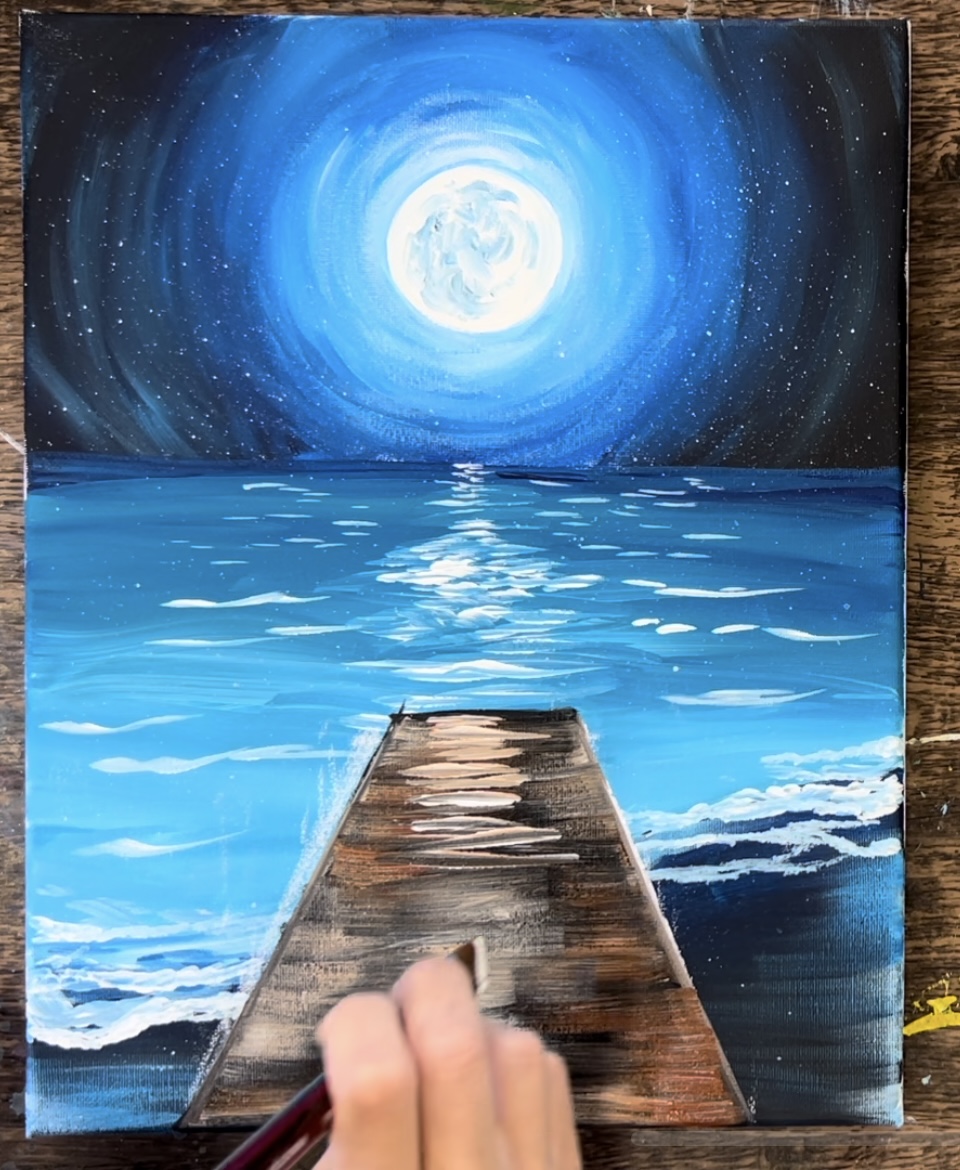
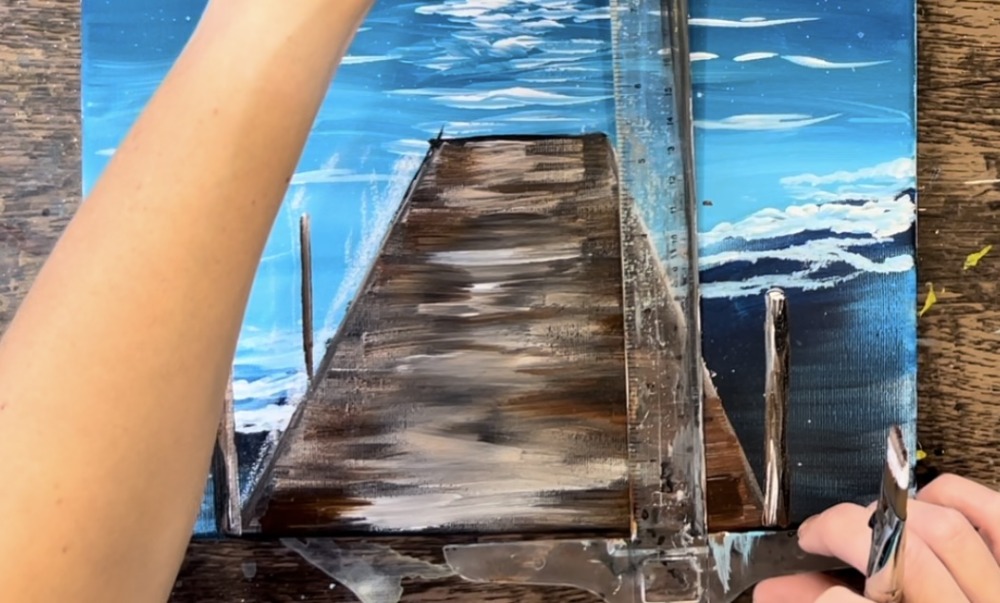
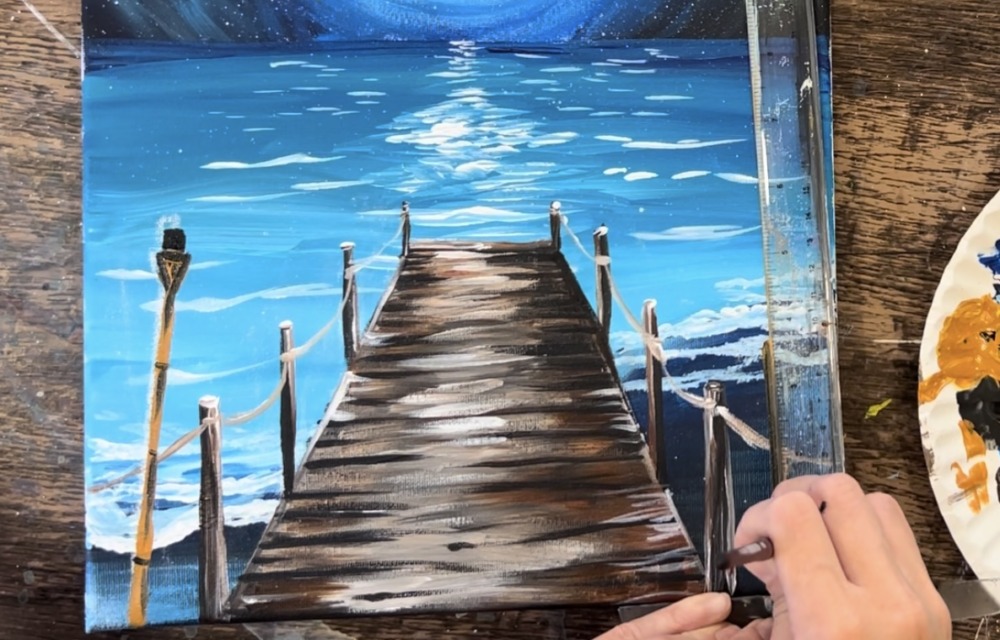
10. Paint Horizontal Black Lines On Pier
Next, use either the 3/8″ angle brush or the #4 round brush to paint very loose black horizontal lines along the pier. I did these with a #4 round brush. It helps to slightly water the black paint down so your paint will flow nicely. Also, these black lines do not have to go all the way across and be evenly spaced apart.
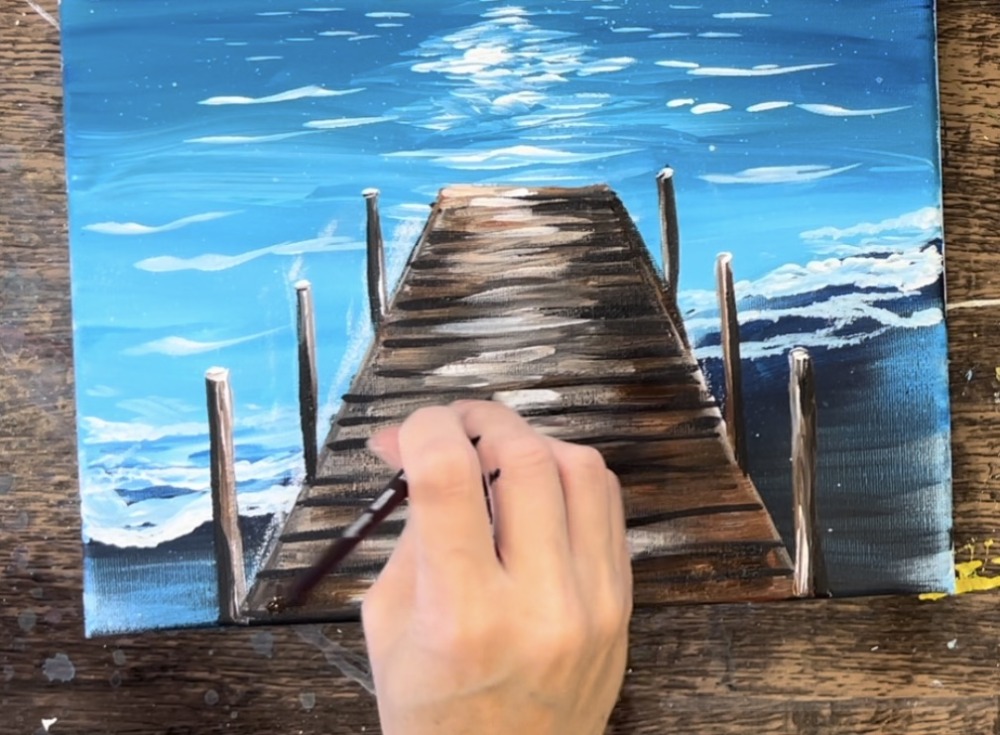
It gives the pier a more rustic look if you don’t do all the lines evenly and you paint them very loosely.
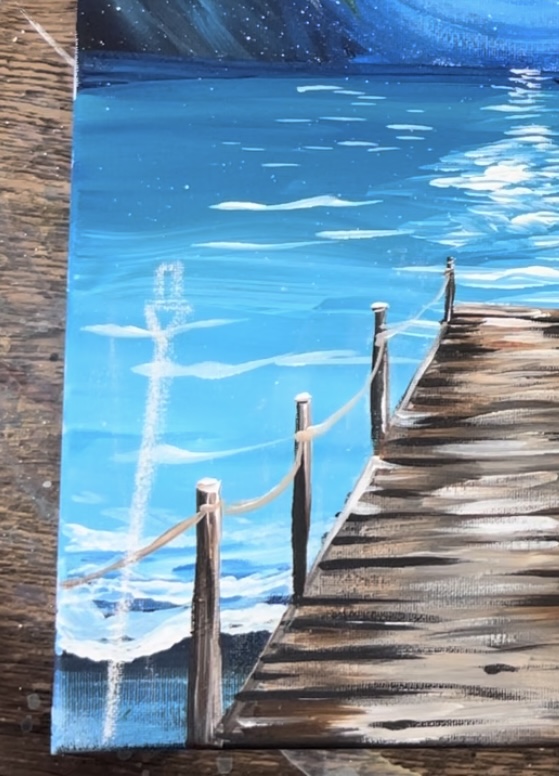
11. Paint Ropes
I didn’t go into much detail with these ropes. I simply painted a curved line that attaches to each of the posts and made it look like the rope was slightly dipping down. Mix white with burnt umber to make a light brown color.
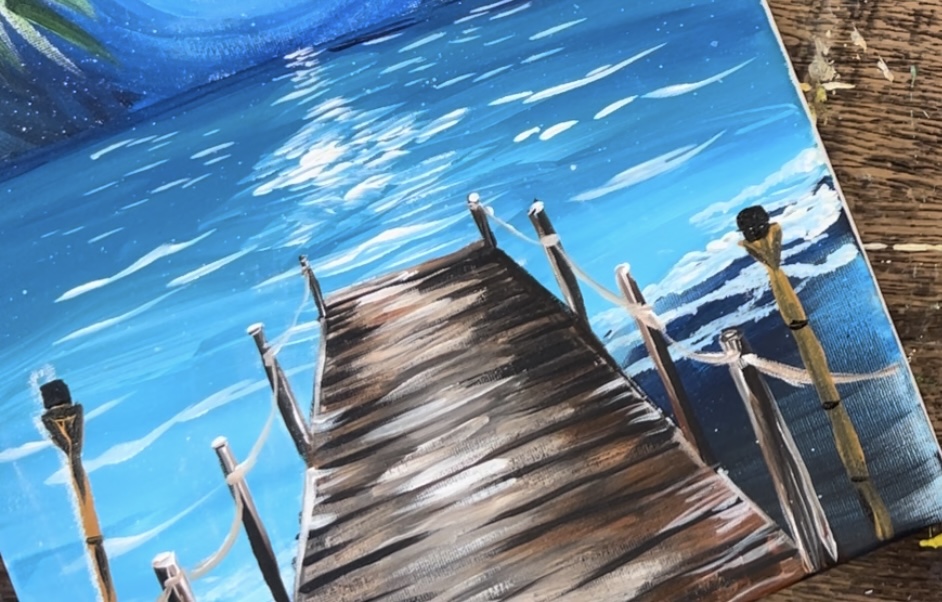
On the bottom posts, extend the ropes off the lower right and left edges of the canvas.
Then (optional) add a final set of posts at the end of the pier. Paint these about 1″ high and 1.5″ away from the preview set of posts.
12. Paint Palms
Load your paint palette with the color “hooker’s green hue”. Use the #4 round brush. Paint a curved/ diagonal line starting from the upper left corner. Then, after painting the initial line, start to paint the palm leaves. Use the very end of the bristles of the #4 round brush and paint each stroke going outwards and pointing down.
This first layer is just green.
Then double load your brush in the green and the white. Paint more curved palm leaf strokes that show up lighter. This will create color variation in the palm and make it look like the moon light is creating different tints of green in the palms.
Repeat this on the right side of the painting with another palm coming from the upper right corner.
This time, make the palm darker by painting black and green palm leaves.
Paint another palm that overlaps the first palm on the left. This time, make it more of a silhouette style palm.
With each palm, change the direction of it and the colors! This will create depth and color variation in your palms. You can also slightly overlap part of the moon if you want as well as overlap parts of the ocean water.
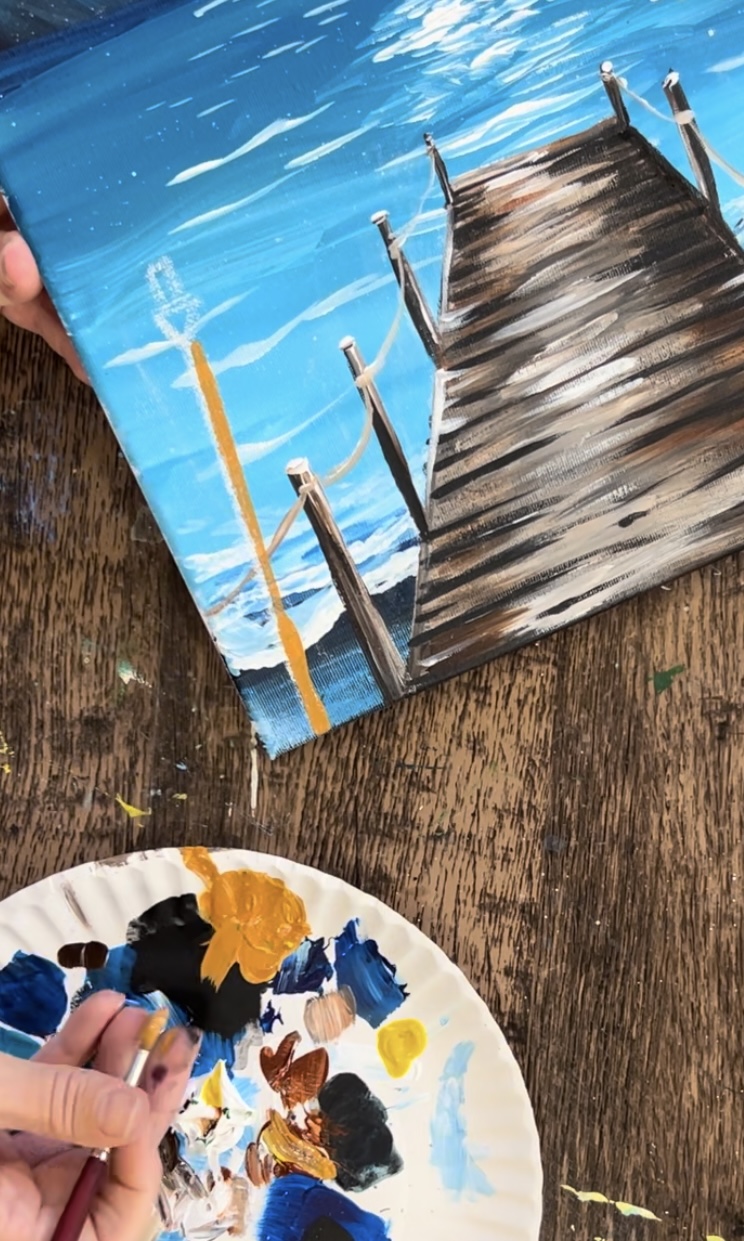
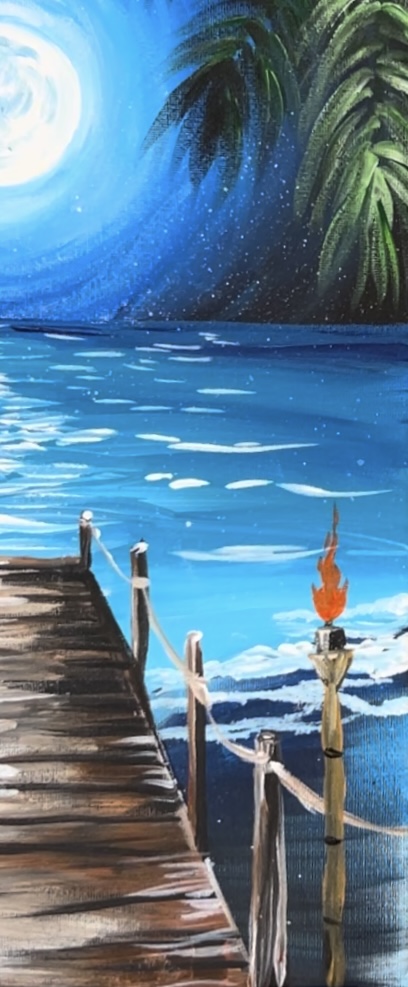
13. Paint Torches
Use a piece of chalk to draw the torches. Draw a slightly diagonal line (the torch doesn’t have to go completely vertical, it can be slanted). Draw the pole of the torch so that it goes higher than the pier posts. The bottom starts on the bottom edge of the canvas. Draw a small triangle on top of it. Then draw a small rectangle shape.
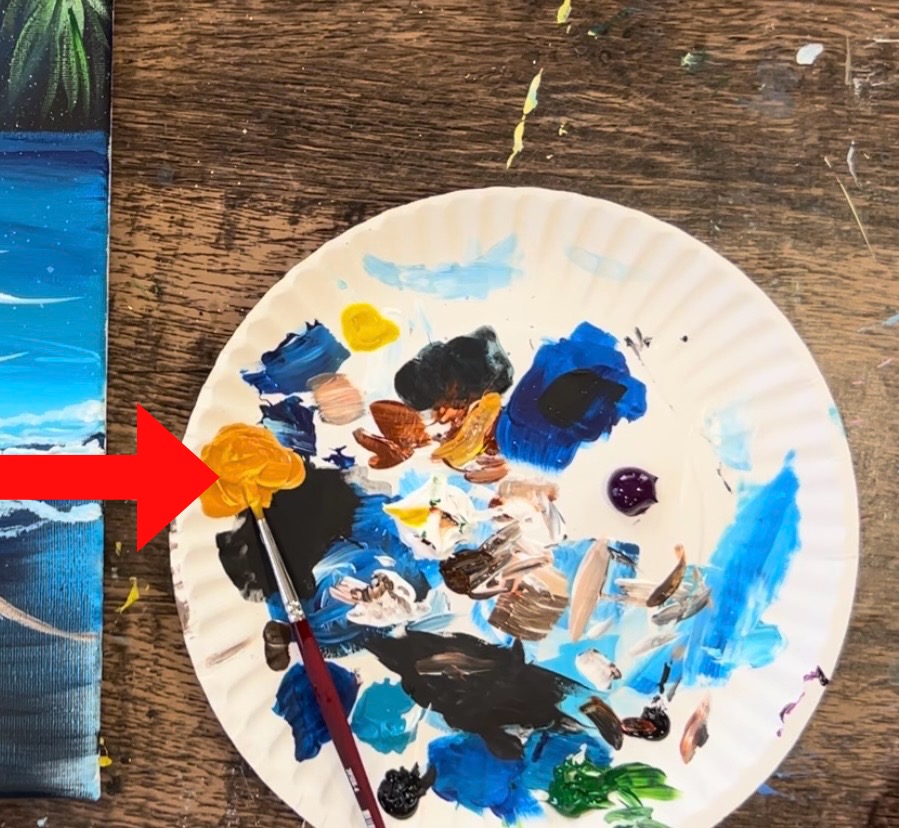
Mix an “orange brown” on your palette by mixing “primary yellow”, “burnt Sienna” and “titanium white”.
Use the t-square ruler (optional) to help guide your line. Use the #4 round brush to paint this “pole line” using the orange-brown color.
Next, paint little “notches” in the pole. Use black to paint little curves along the pole that divide it up. This gives it more of a “bamboo pole” look. Then use the “orange brown” to paint the little triangle on the top. Paint the little rectangle on the top with “mars black”.

Repeat this on the right side. I made this tiki torch slightly shorter than the one on the left.
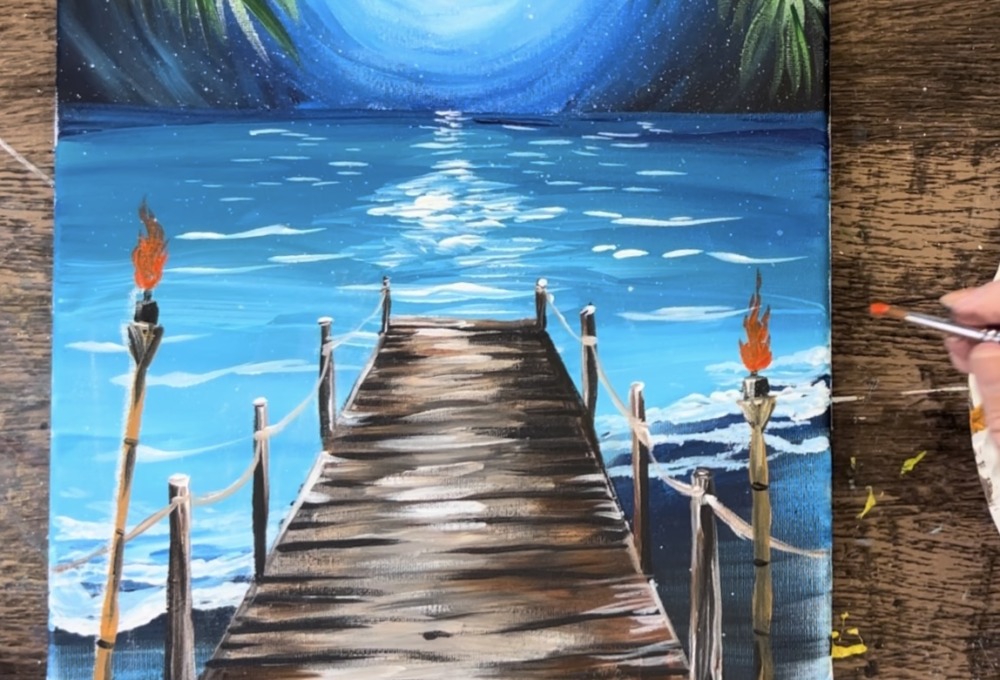
Paint the flame next. Load your paint palette with “cadmium orange hue” paint. Use the #4 round brush to paint a flame shape above the black rectangle of the torch.
Do this on both sides.
Rinse the brush off. Then load it into just “primary yellow”. Paint a yellow flame shape on the inside of the orange flame shape. This time, make it smaller and don’t cover all of the orange.
Let this dry a little bit. Then load the clean #4 round brush in “titanium white”. Paint a tiny white flame (this is just little dashed strokes) inside of the yellow flame area. By painting white in the very center of the flames, it makes it look bright.
Note: after painting the flames, I also painted another palm on the left that slightly overlaps the horizon line and some of the ocean.
14. Paint Plumeria/ Final Touchups
These plumeria flowers are optional but add a nice tropical touch and a pop of color on the bottom of the painting. Start by painting the plumeria leaves. Mix a yellow-green color on your palette by mixing “primary yellow”, “titanium white” and “hooker’s green hue” on your palette.
Then use the #4 round brush to paint a long oval shaped leaf. Paint several on the bottom right corner.
Paint another set on the lower left.
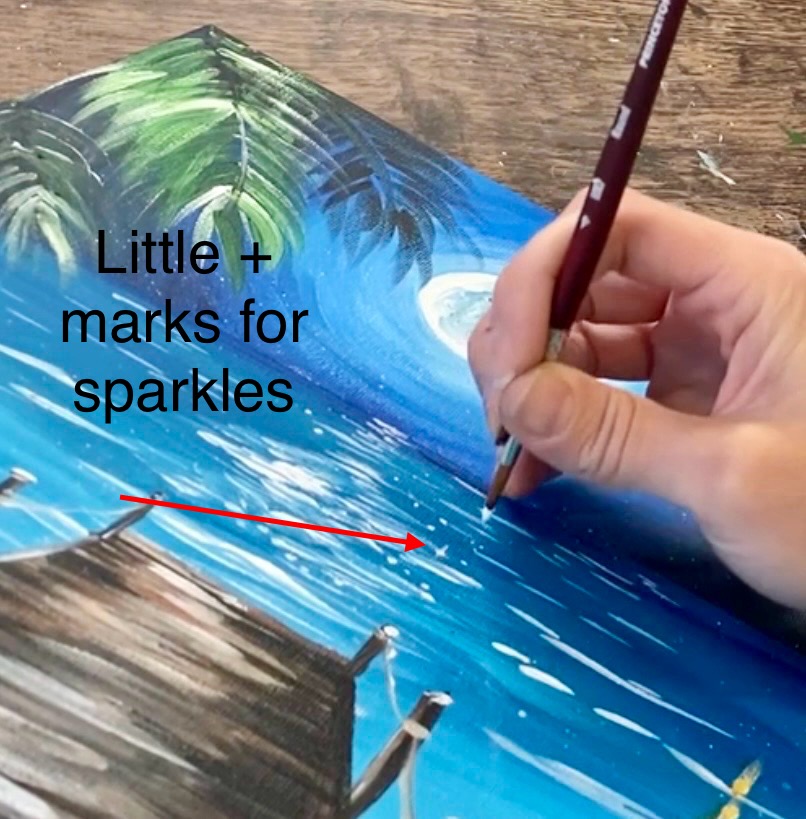
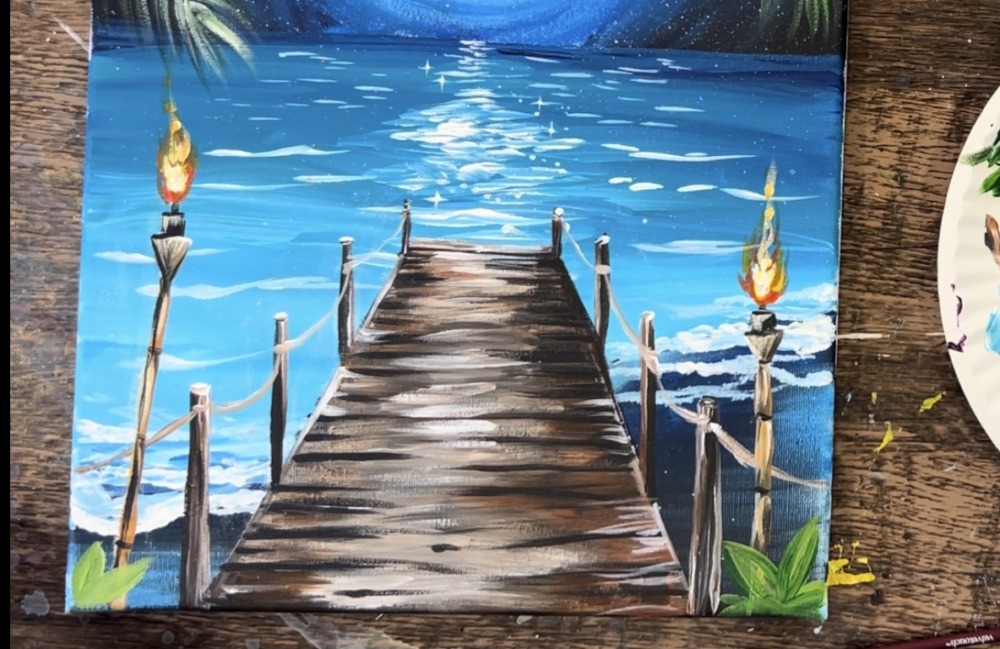
Then, while the leaves are drying, paint “sparkles” in the ocean water around the moon’s reflection. Paint little dots with titanium white. Then turn some of the dots into little “+” marks. This will make that reflection area of the water look like it’s sparkling.
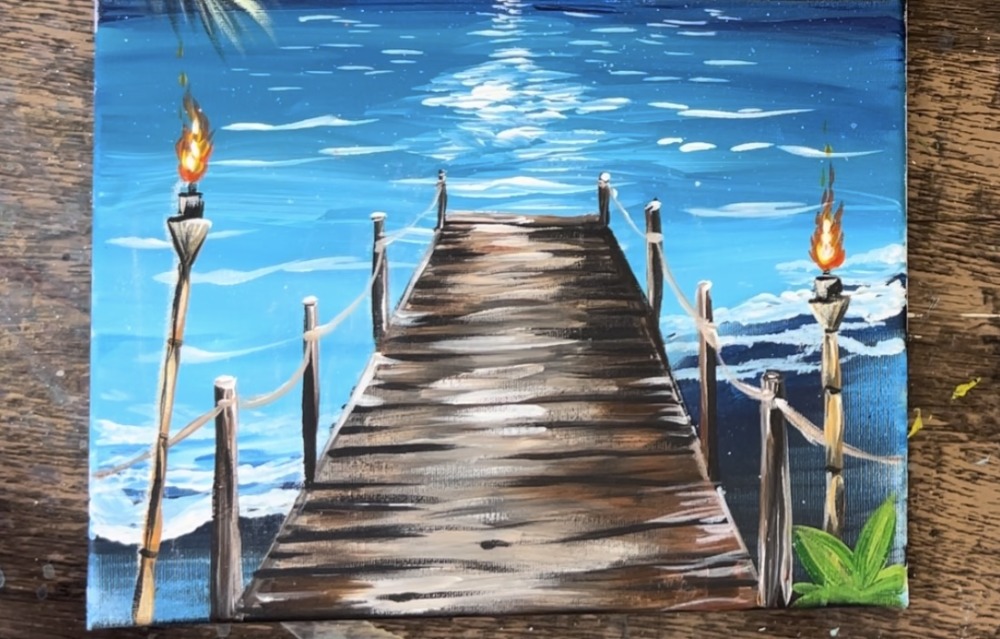
When the plumeria leaves are dry, paint the flowers. Use the #4 round brush to paint five petal flowers.
Then paint one side of each of the white petals with yellow mixed with orange. Then paint a little orange dot in the middle of each of the flowers.
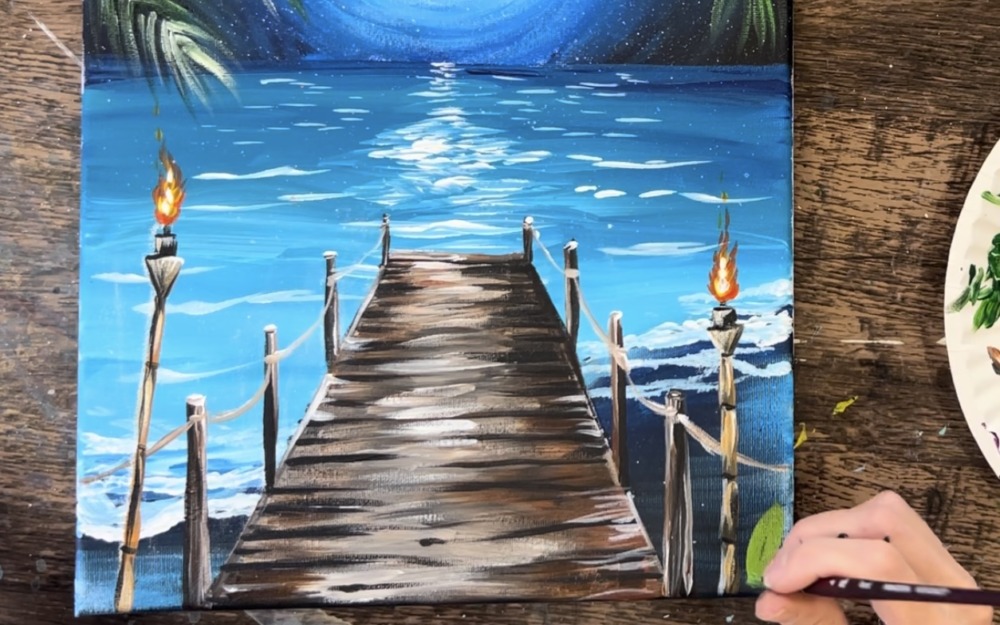
As a final touch in this painting, dry brush orange and yellow marks on the dock to represent some of the glow from the fire. Use the #4 round brush and a combination of orange and yellow (with little bits of white too). Paint these “dry brush” marks in a horizontal direction just on the bottom portions of the pier. You also don’t want these colors to be very bright and opaque. Make them translucent so you still see the brown under layer of the pier.

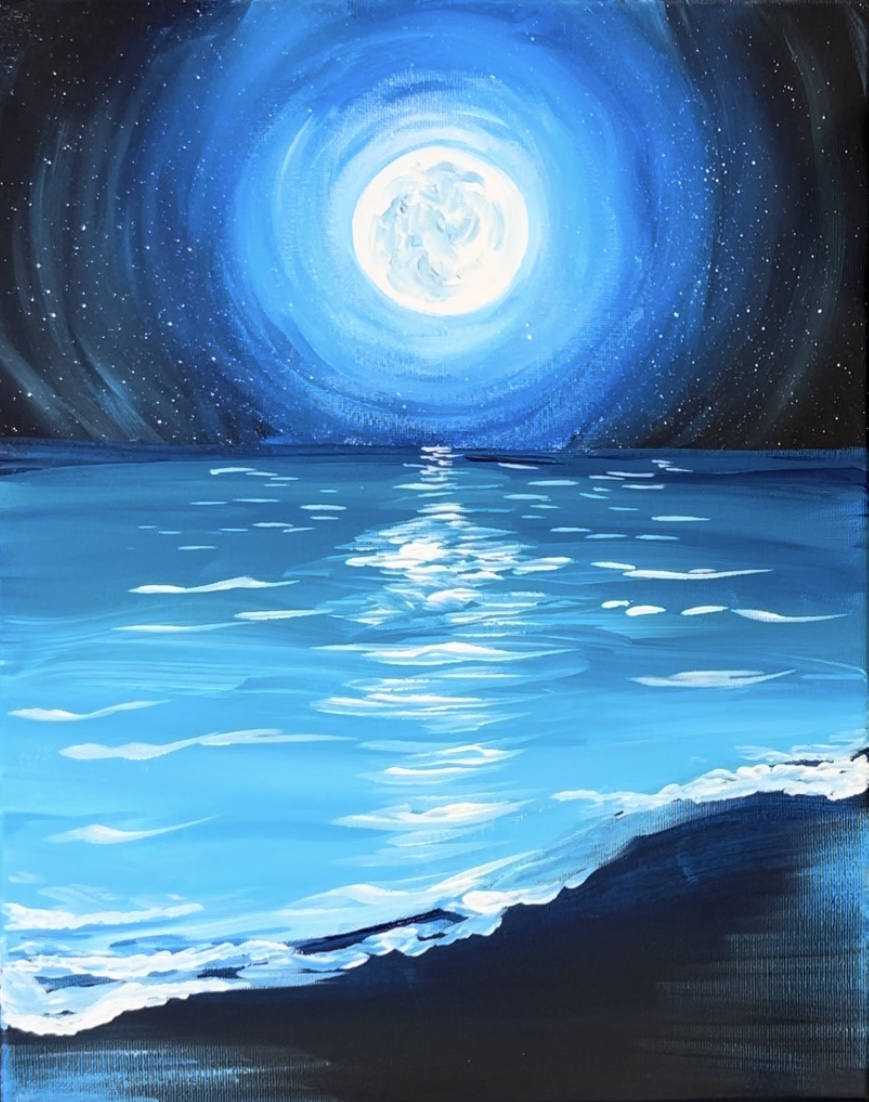
Finished!