
Would you like to save this?
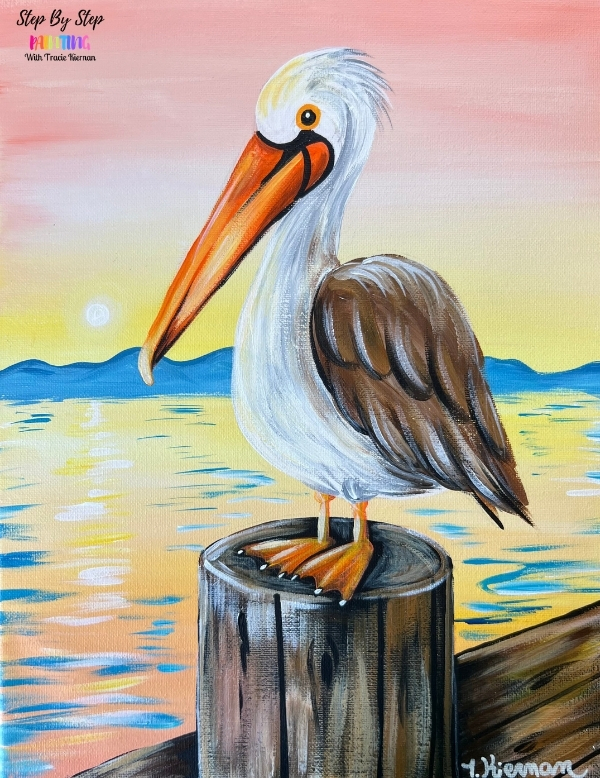
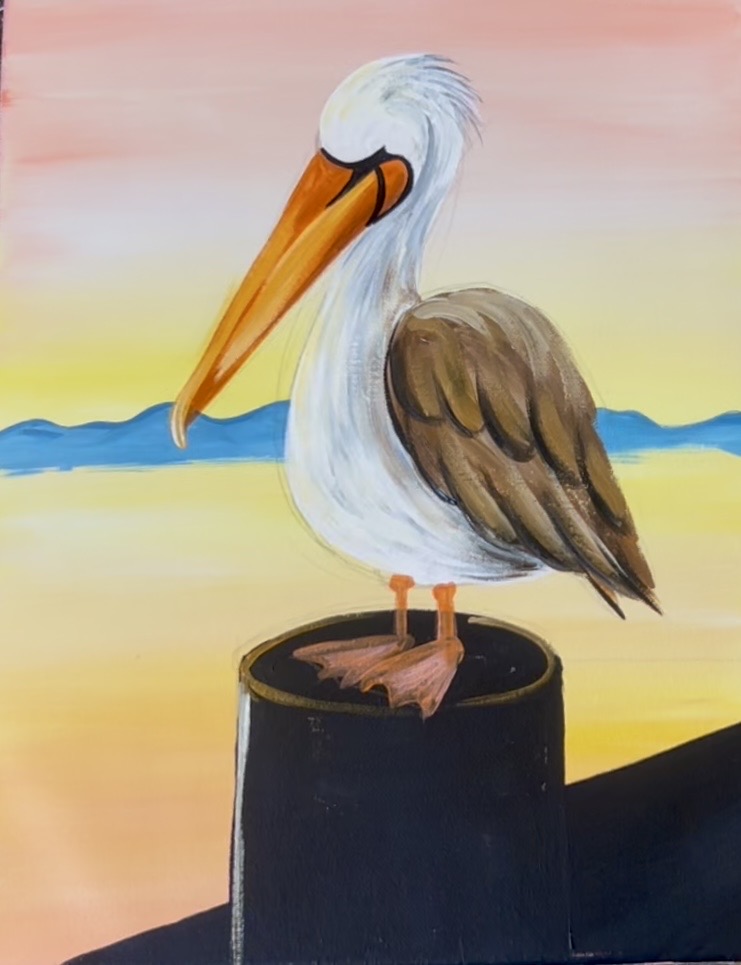
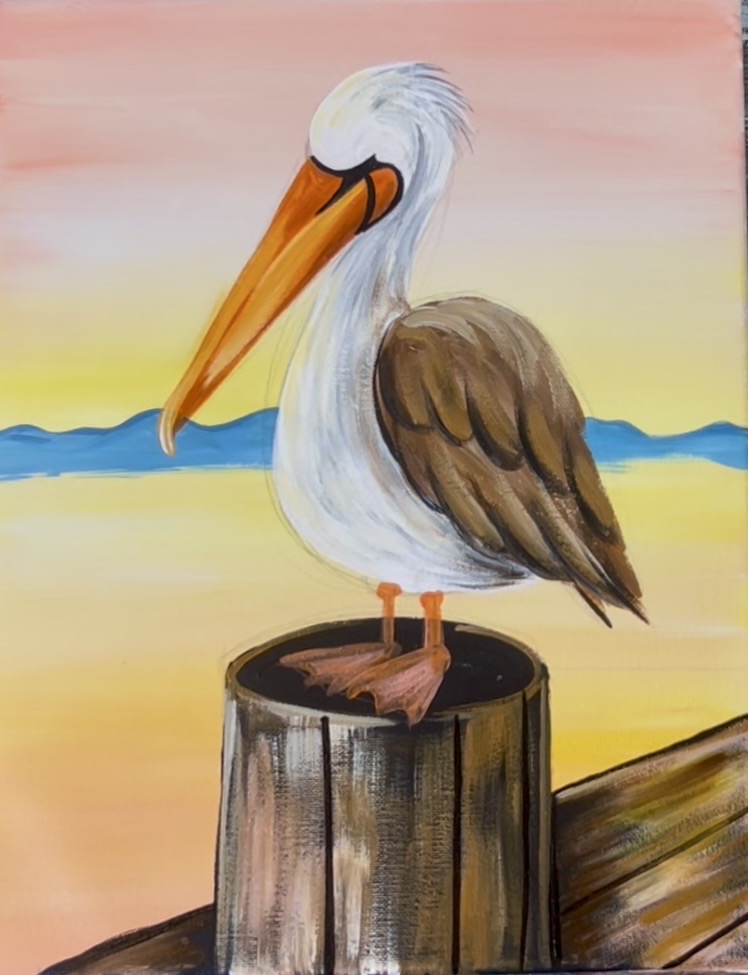
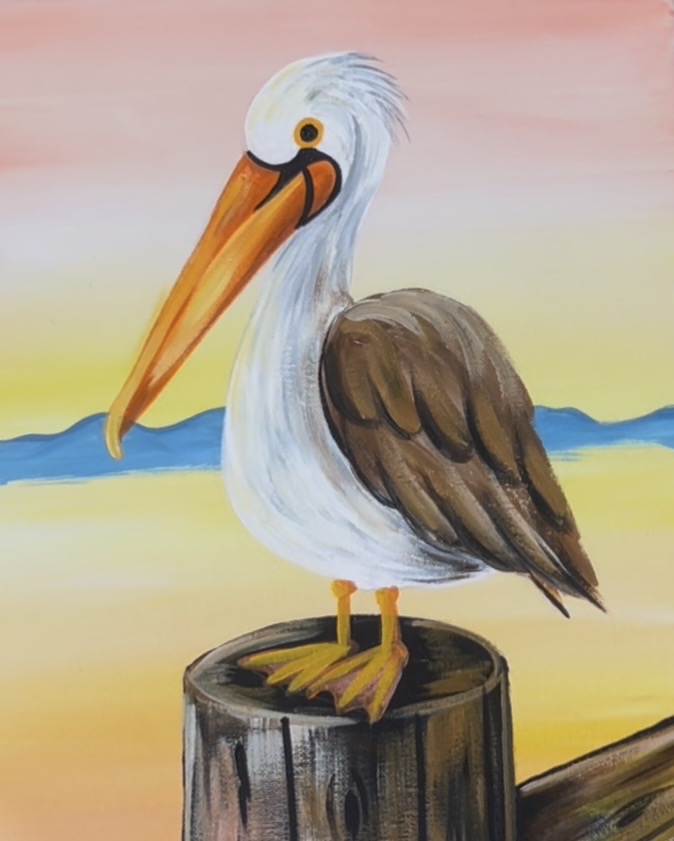
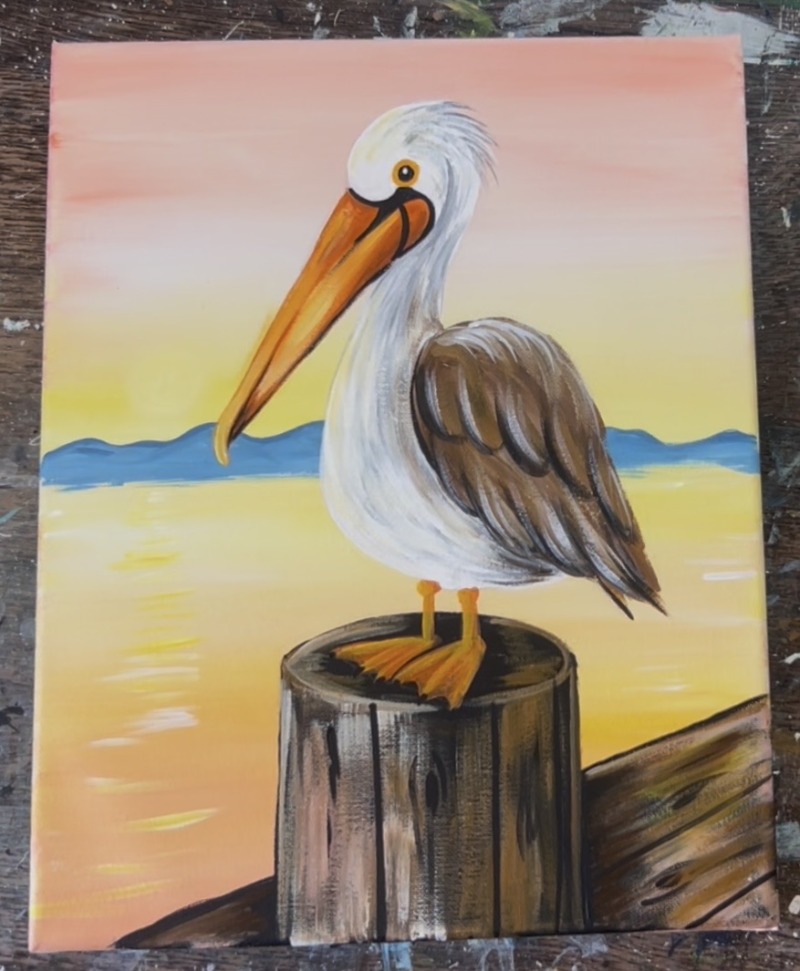
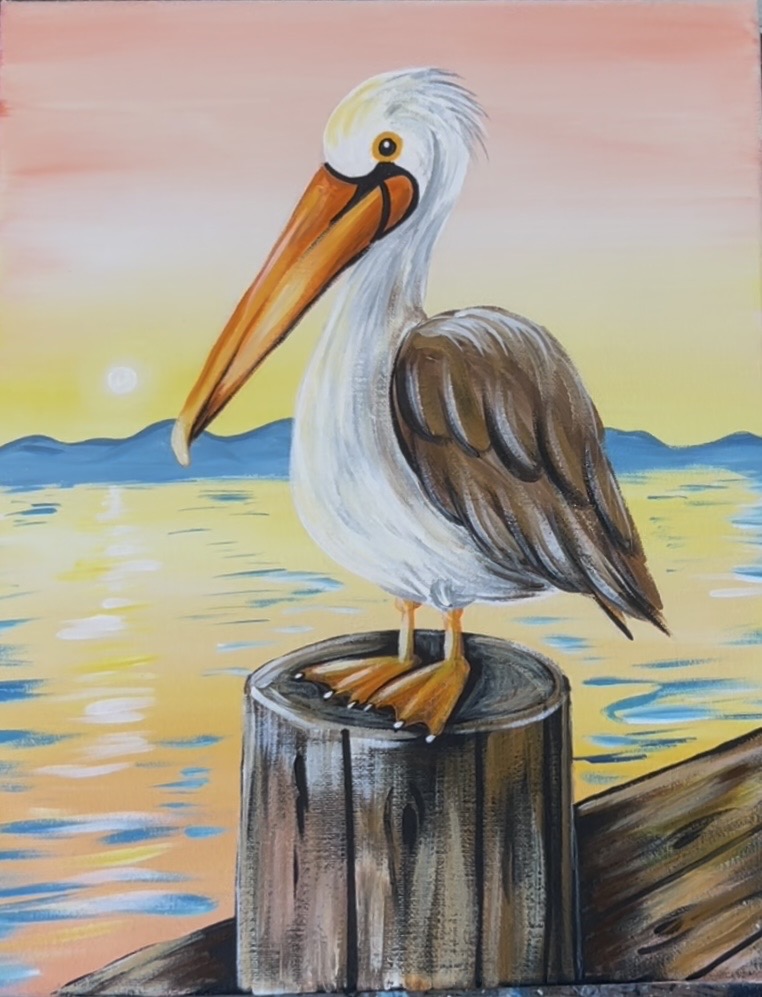
This tutorial is a peaceful coastal favorite—a beautiful Sunset Pelican painting! In this beginner-friendly acrylic lesson, we’ll create a charming pelican perched on a dock post, surrounded by glowing sunset reflections across calm water and soft pastel skies.
This tutorial is perfect for practicing smooth blending in the sky and water, simple feather shapes, and bold highlights that make the pelican really stand out. We’ll also work on creating warm sunset tones with soft pinks, yellows, and blues to give the whole painting a relaxed, coastal feel.
Enjoy and Happy Painting!

Materials:
- 11×14 Canvas (or any size)
- Ruler
- Pencil
- Eraser
- Acrylic Paint (see colors below)
- Brushes (see sizes below)
- Optional Traceable Template
- Traceable Graphite Paper (if using the template)
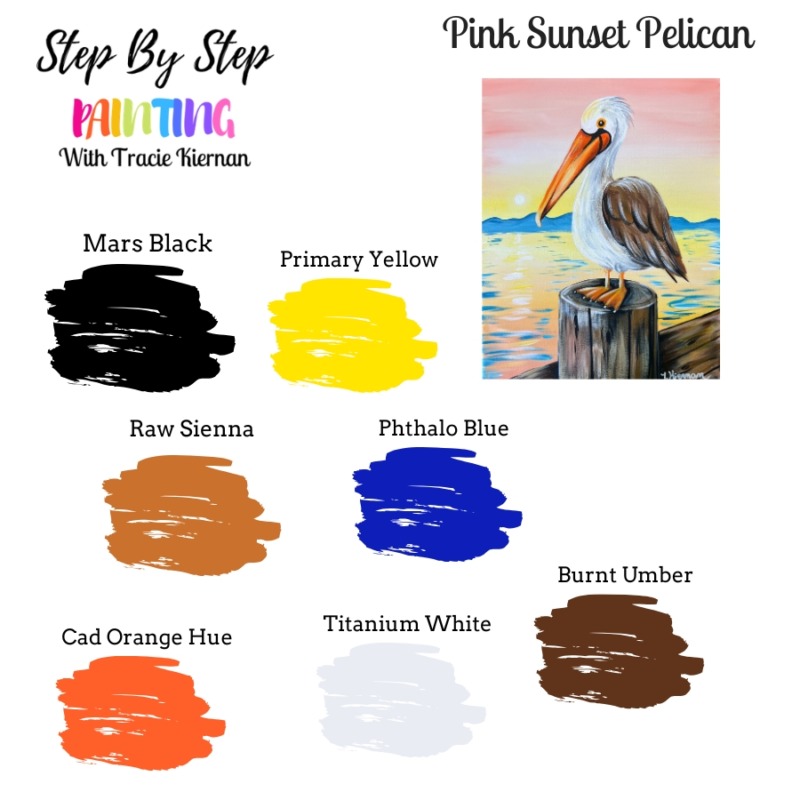
Colors:
- Mars Black
- Titanium White
- Cadmium Orange Hue
- Primary Yellow
- Raw Sienna
- Burnt Umber
- Phthalo Blue
Brushes:
- 12 Bright
- 3/4 Flat
- 8 Long Round (optional)
- 4 Round

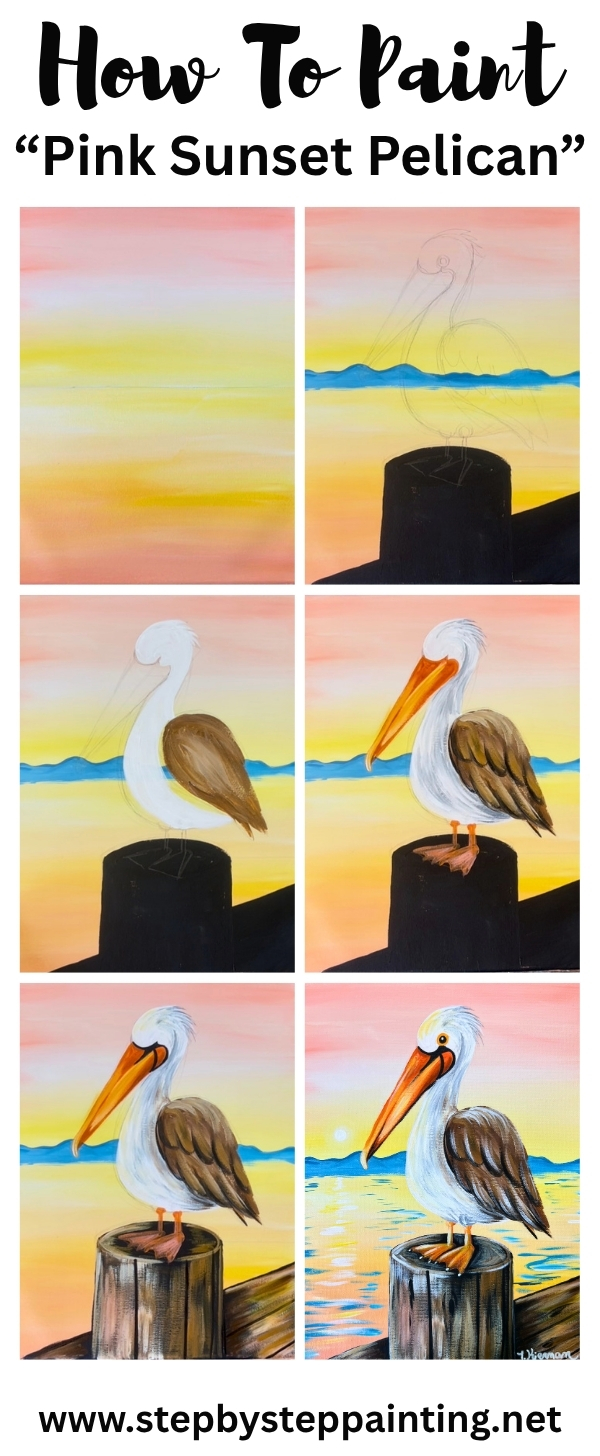
Directions At A Glance:
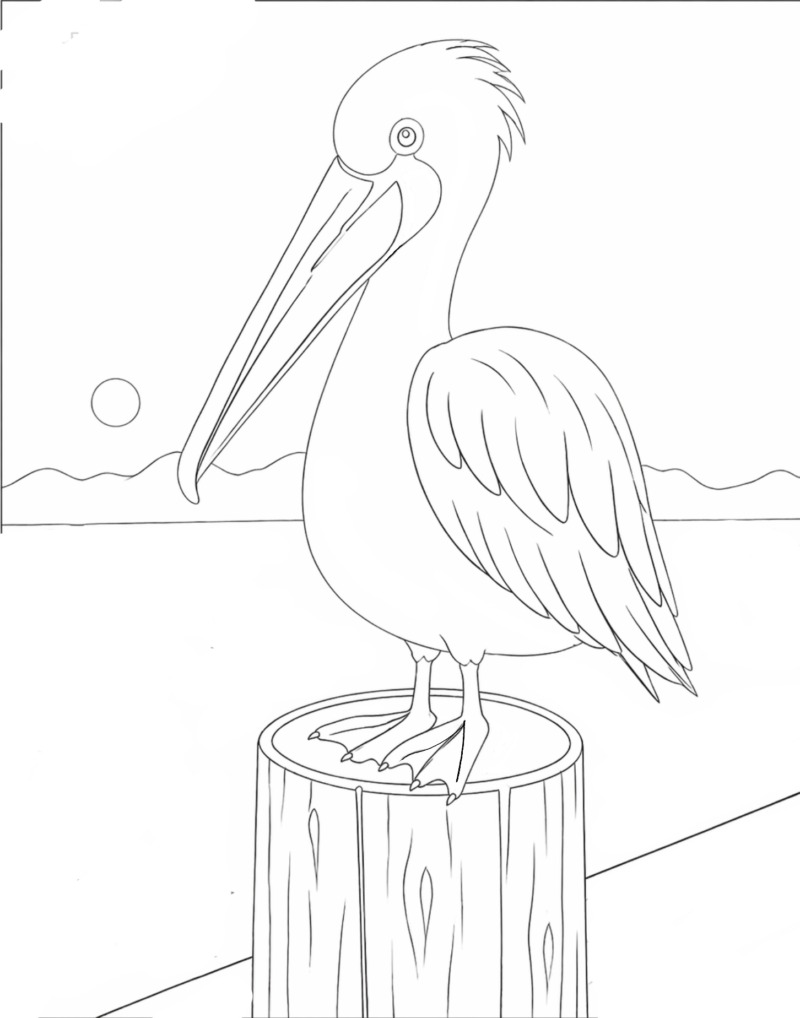
Optional Traceable:
Step By Step Directions:
1. Paint Sky
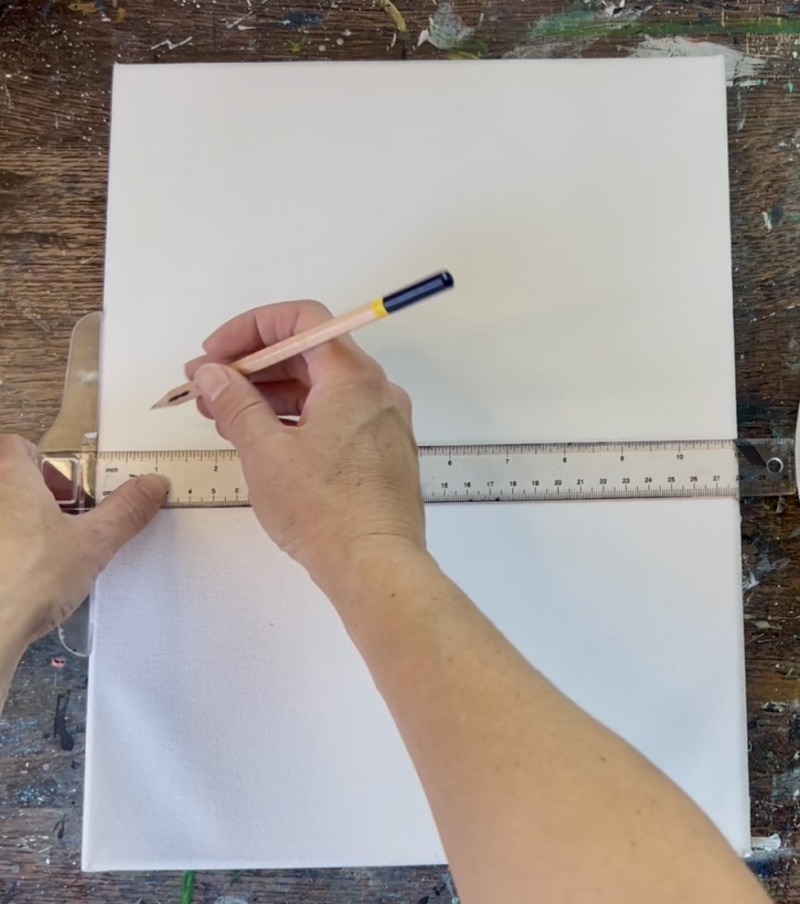
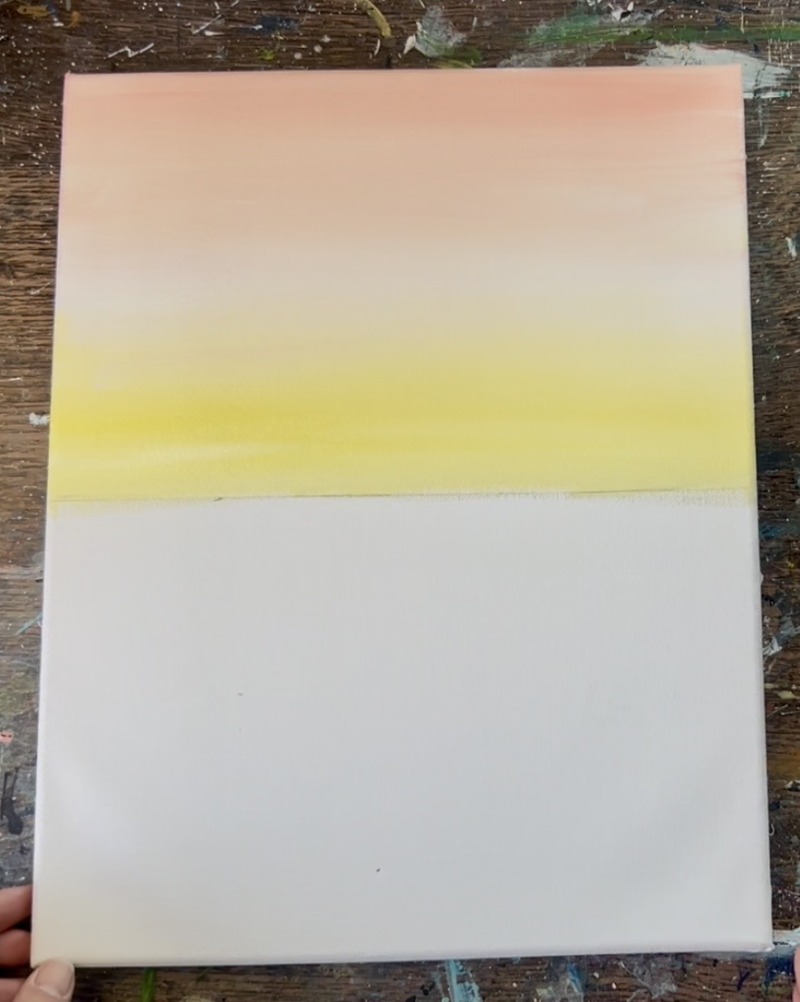
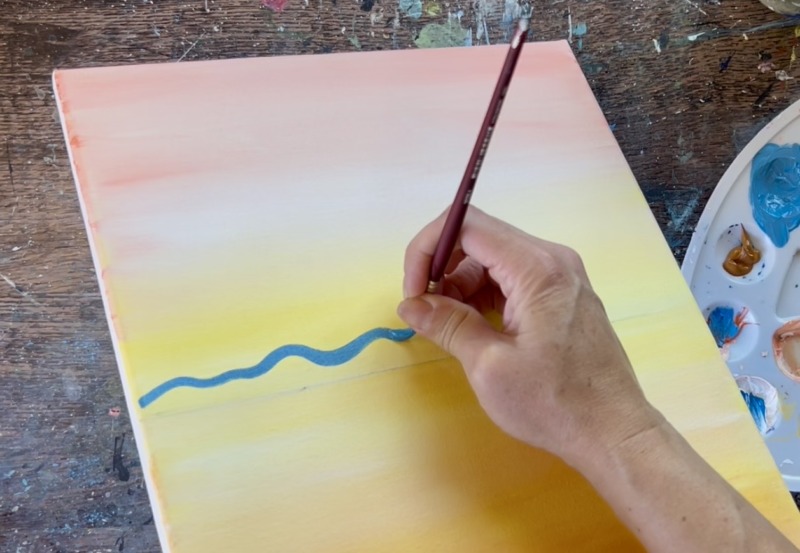
First, place your canvas in a vertical position. Locate the center of the canvas and use a ruler and pencil to draw a horizontal line all the way across the canvas. This will be the “horizon line” in our painting.
Next, mix a very light orange color on your canvas that is going to resemble a “salmon pink” color! Mix about 3 parts white, 1 part cadmium orange hue and 1 part raw sienna. Yes, “raw sienna” is used in this color to create this pretty pink color!
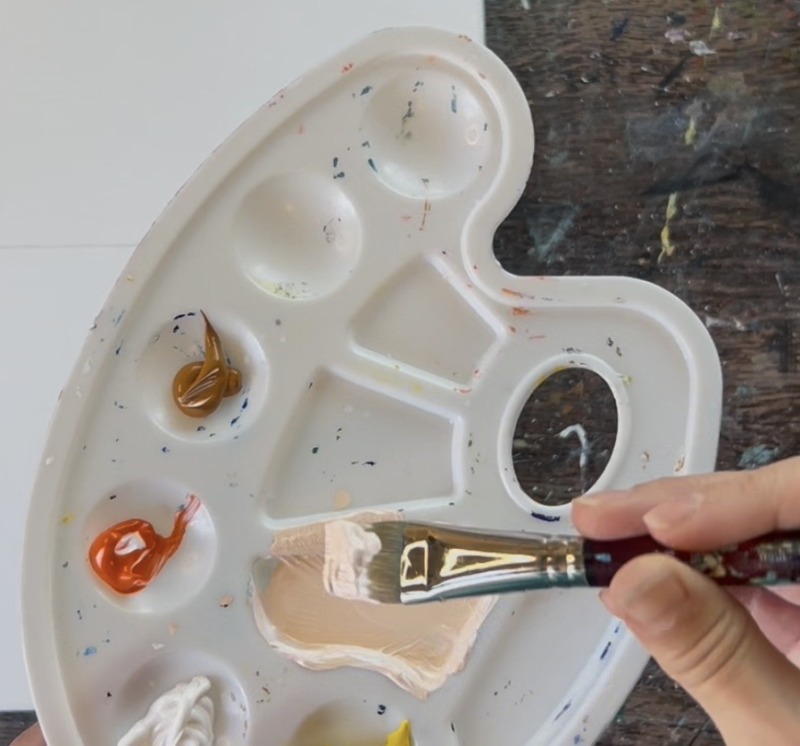
It should be a very light pastel color. The lighter the better! Add more white into the color if needed. Then use the 3/4″ flat wash brush and paint the top third of the canvas with this light pink color-orange color.
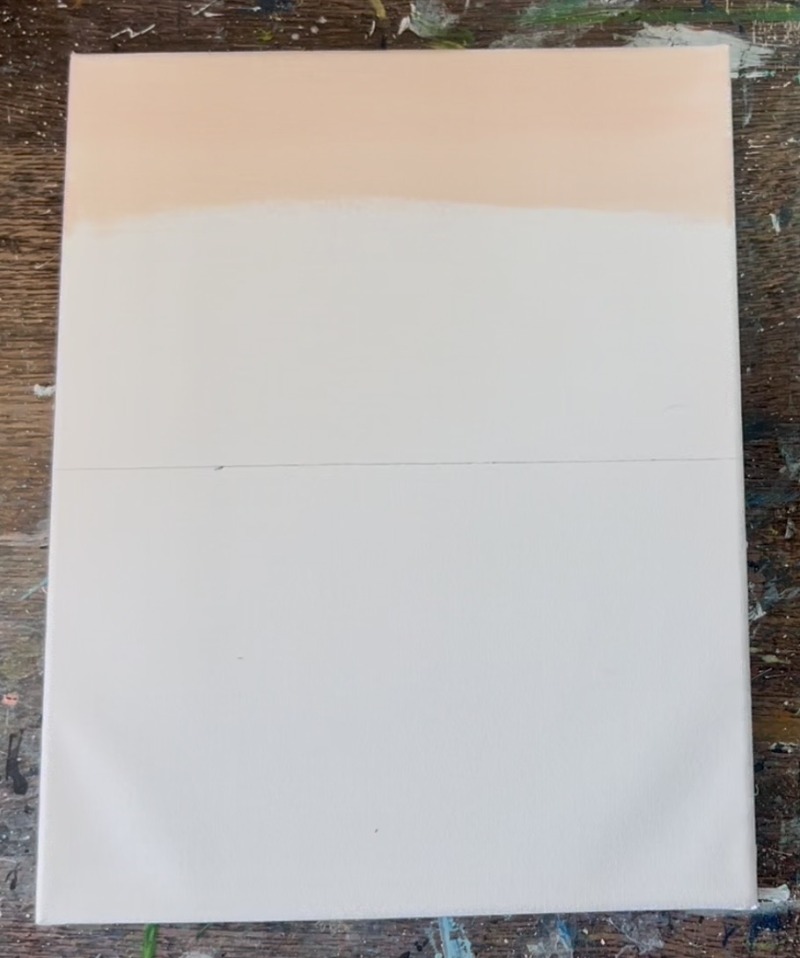
Wipe the brush but don’t rinse it. Then load the brush into “titanium white”. Blend the middle third of the sky with white and blend it up into the “salmon color” top part of the sky. All your paint strokes in this sky are full width strokes that go in a left and right direction. As you blend the color, it will turn to a very light pink color in the middle of the sky.
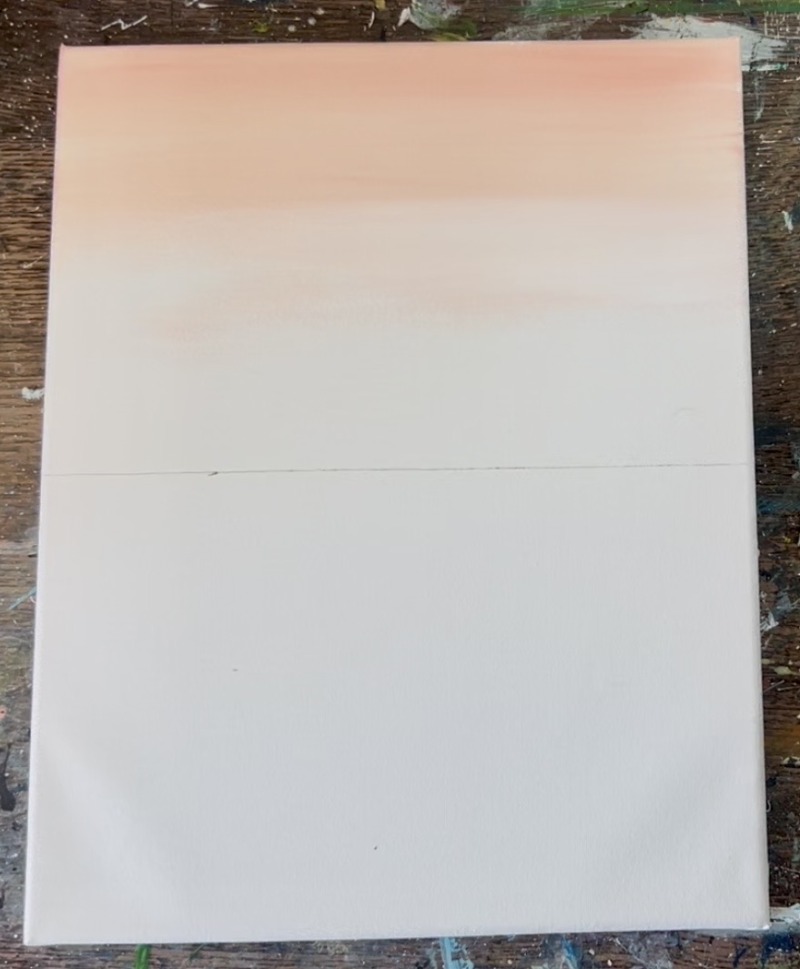
Next, mix yellow and white on your paint palette. Use the 3/4 flat brush to paint the bottom third of the sky with this light yellow color. Blend it up into the middle of the sky. Blend the rest of your sky if needed. I added just a tad bit more orange at the top of the canvas and blended it down just to make the very top of the sky slightly darker.
2. Paint Ocean Water
The water is the same color as the sky and same technique! The only difference is we are going to make the water just slightly darker than the sky. Start at the bottom with your “salmon pink color”. Mix just a tad bit more orange and raw Sienna into this color on your palette to make it slightly more darker (but not too dark). Use the 3/4″ wash brush to paint left and right paint strokes with that color. Go up about a third of the canvas.
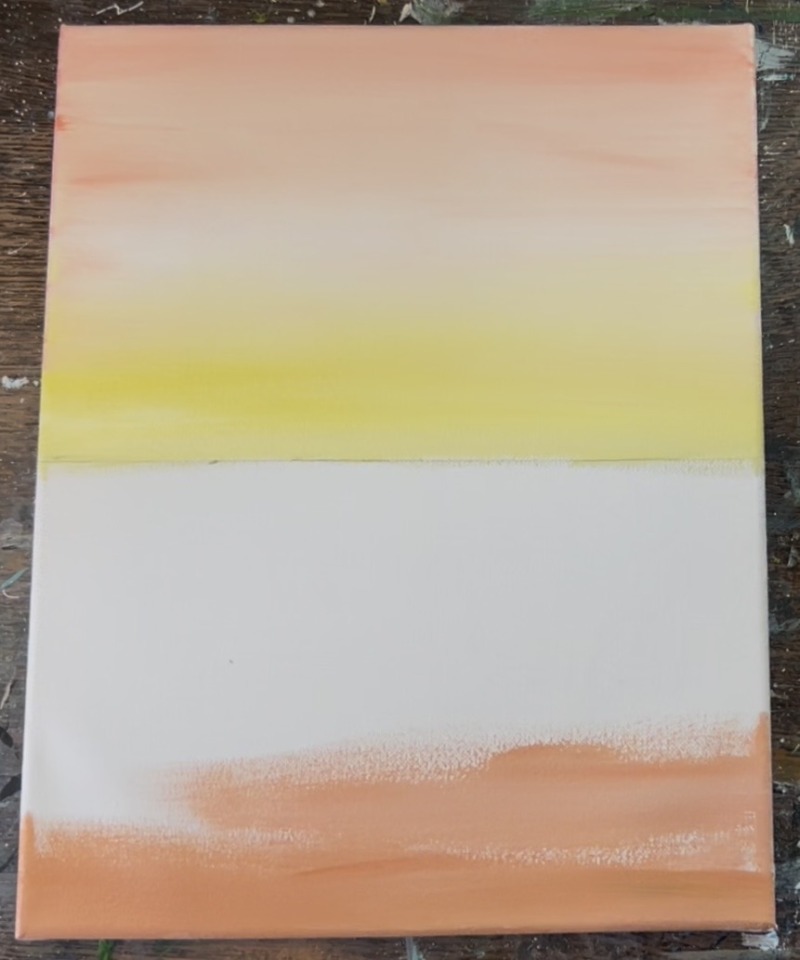
Note: don’t worry about where the dock will be, simply paint the whole bottom half of the canvas with the base color for the ocean.
Next, blend the yellow into this color in the middle of the ocean. When this blends with the pink, it will turn more “orange” and that’s okay!

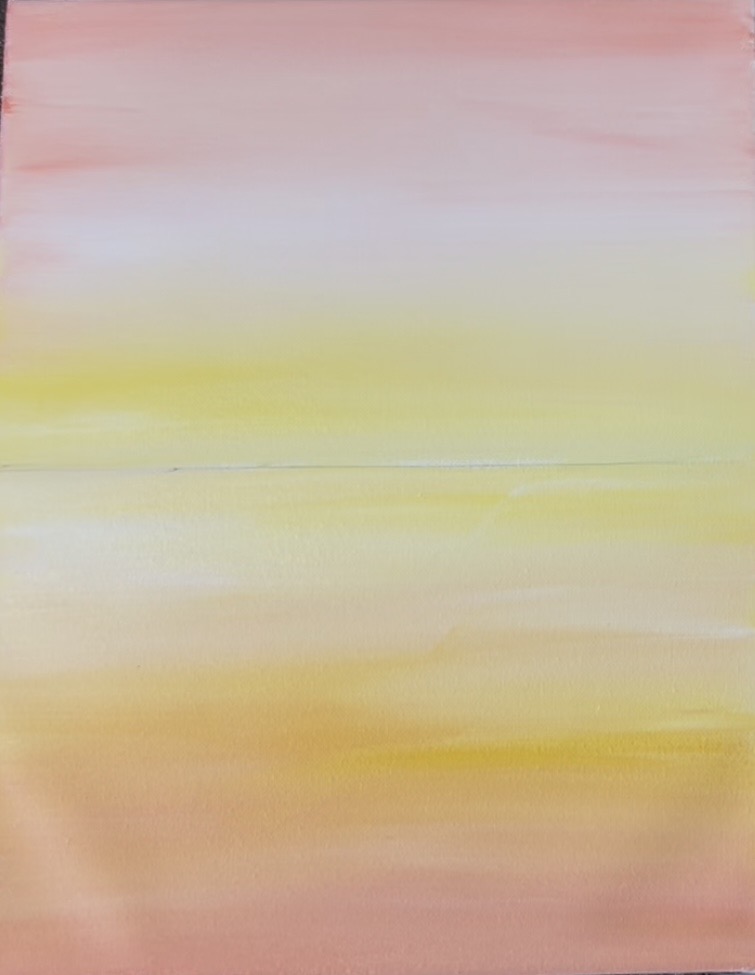
Then wipe the brush and add white to the brush. Blend the white all the way up to the horizon line. Adding this lightest color further in the ocean will create a little depth.
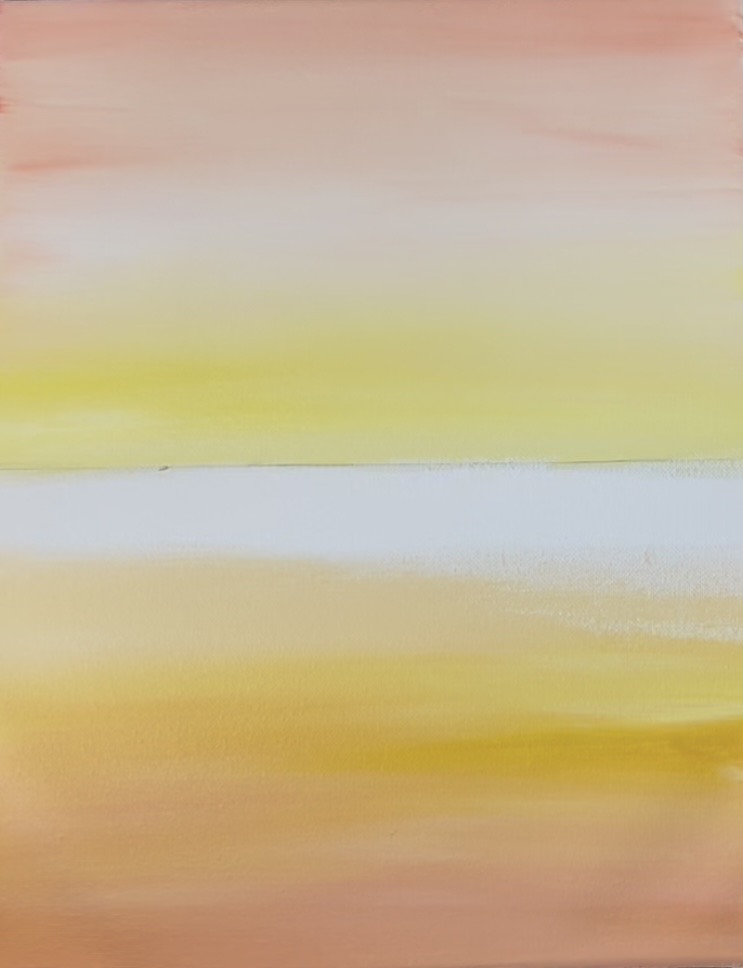
Continue blending your color with the brush until your canvas is full of color. You should still be able to see your horizon pencil line.
3. Paint Mountains
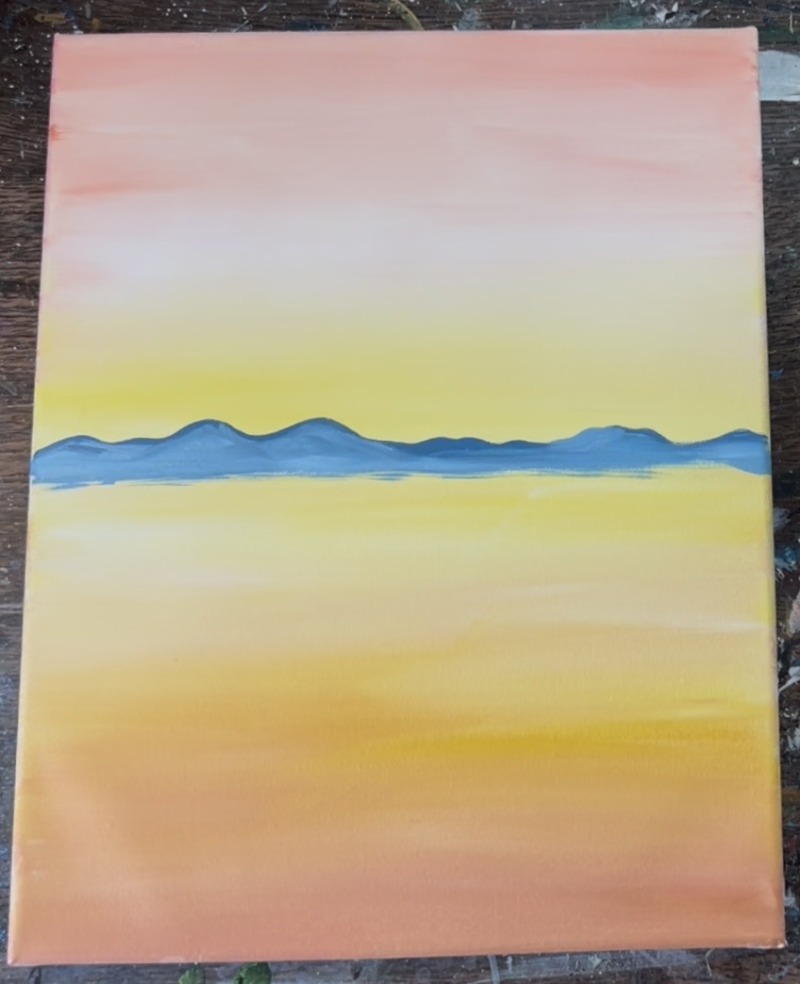
Load your paint palette with “phthalo blue”. Use the #4 round brush and mix 1 part blue, 1 part white and just a touch of that pink/salmon color you used for the sky! This will make your blue warmer and also lighter! Slightly water the blue down and use the #4 round brush to paint the top edge of the mountain peak. This is a loose, wavy line that goes all the way across just a little bit above the horizon line.
After painting your initial mountain line, paint the entire mountain in. Make it slightly darker at the top (by using that color you just mixed to paint the line). Then blend white at the bottom to make the mountains slightly lighter on the bottom. This creates a little “perspective” in our mountains.
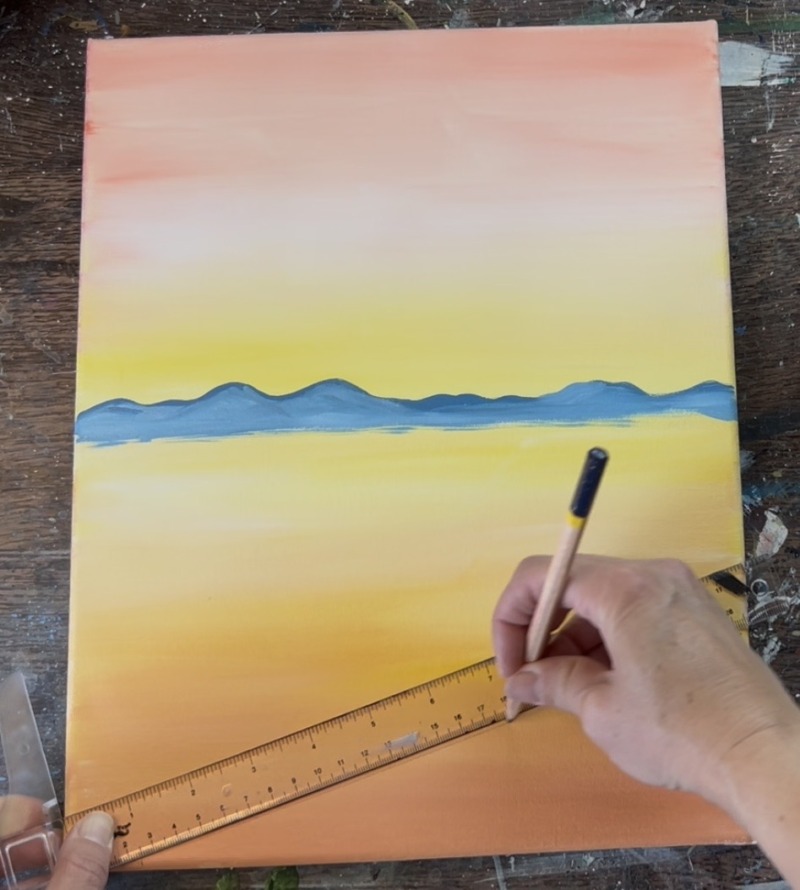
4. Draw & Paint Deck (First Shadow Layer)
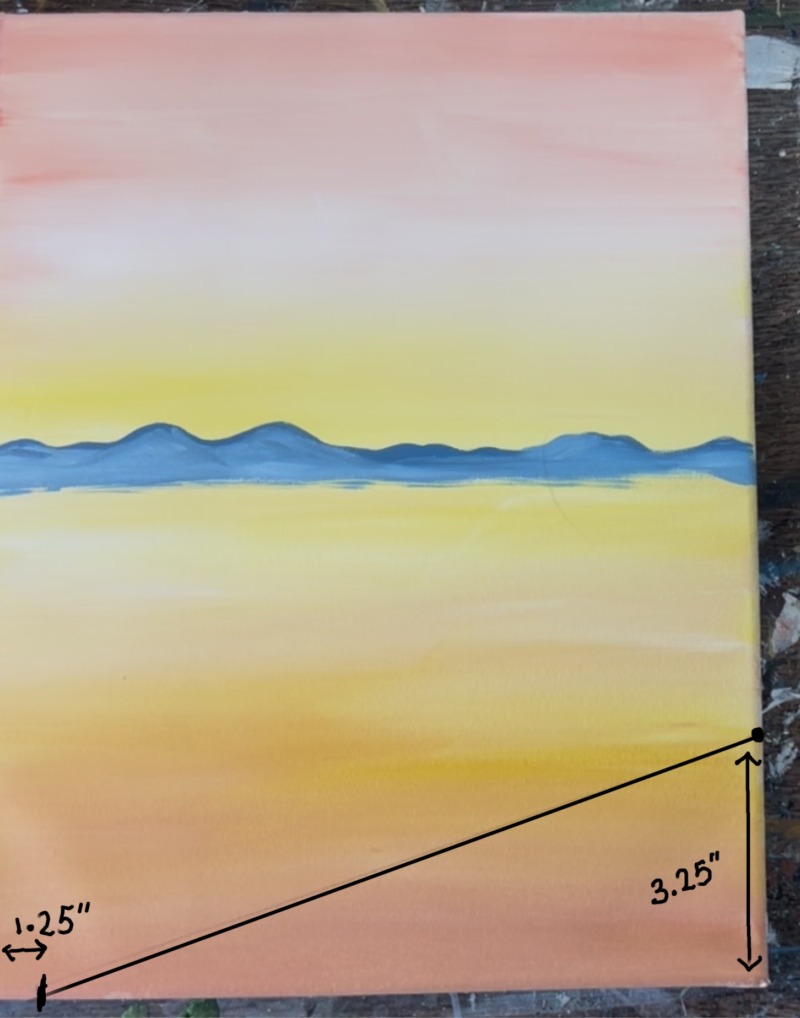
We will be drawing the dock/ post next! You don’t have to use these exact measurement, you can estimate them if you prefer! I first marked 1.25″ on the bottom edge of the canvas. This will be the end of the diagonal line for the edge of the dock. Then on the right edge of the canvas, I measured 3.25″ up from the right edge of the canvas. Connect these two points together to create a diagonal line.
Next, draw the post that the pelican will be standing on! This post is about 4.25″ wide and goes about 4″ high. It is offset 2.5″ to the right of the bottom edge of the deck (as picture). Use a ruler to draw a rectangular shape for the post.
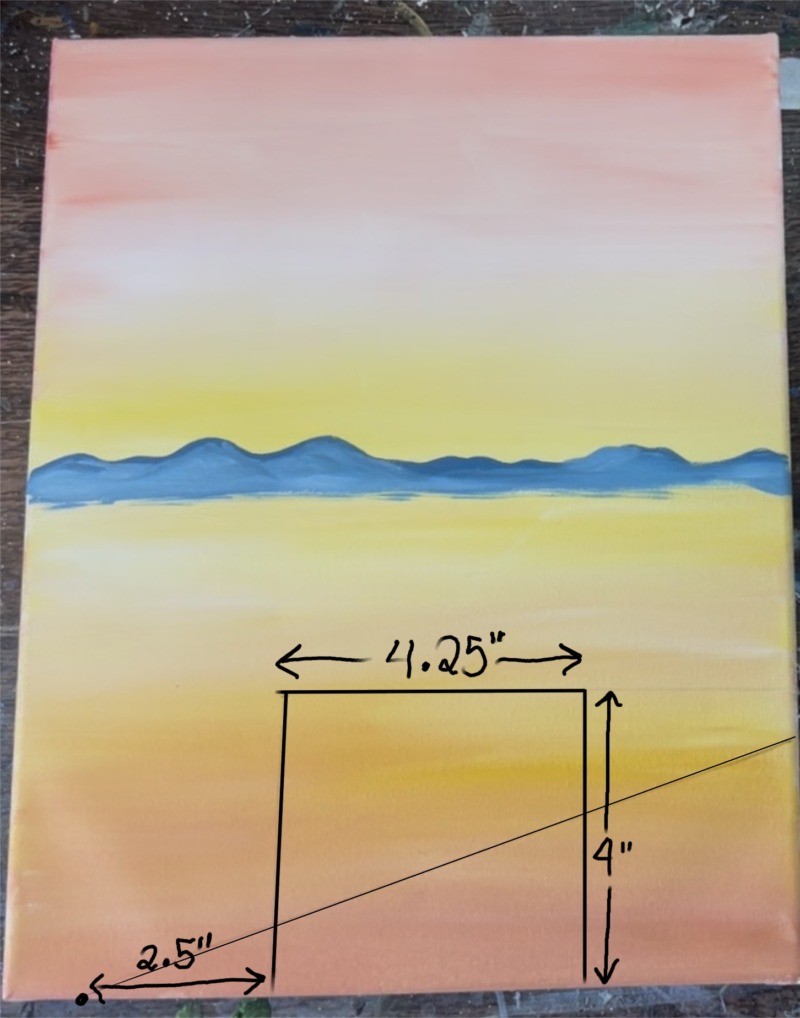
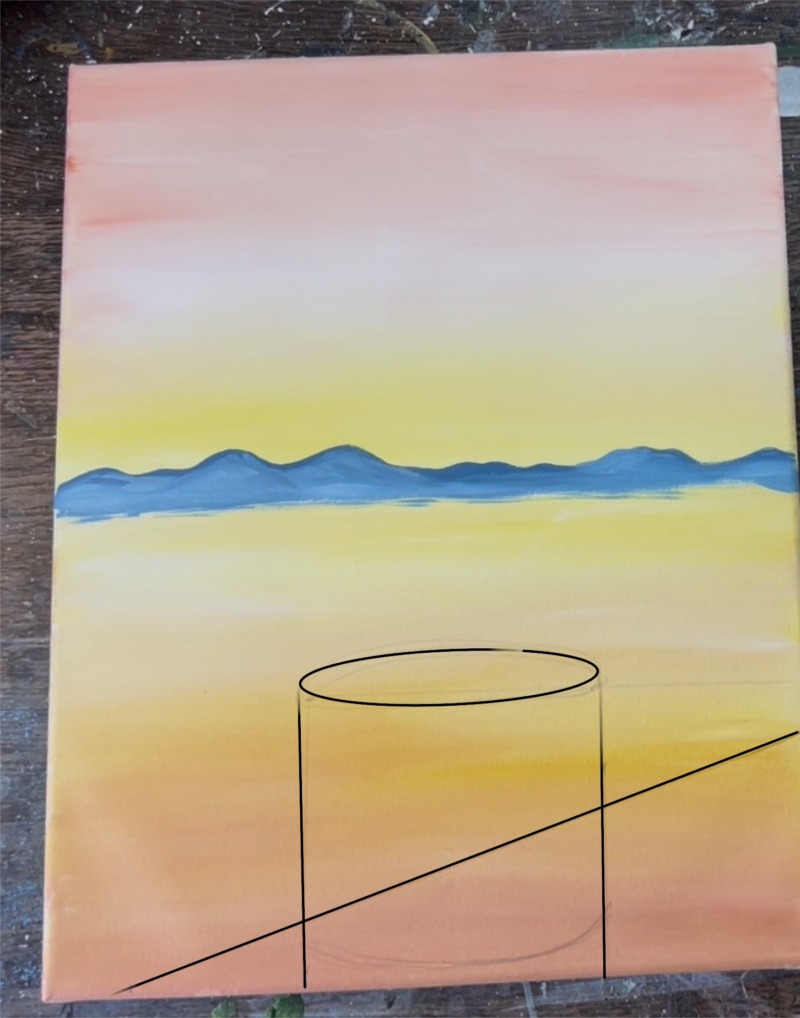
Next, draw an elliptical/ oval shape on the top to turn this into a cylinder shaped post. This shape overlaps that top flat line of the rectangle.
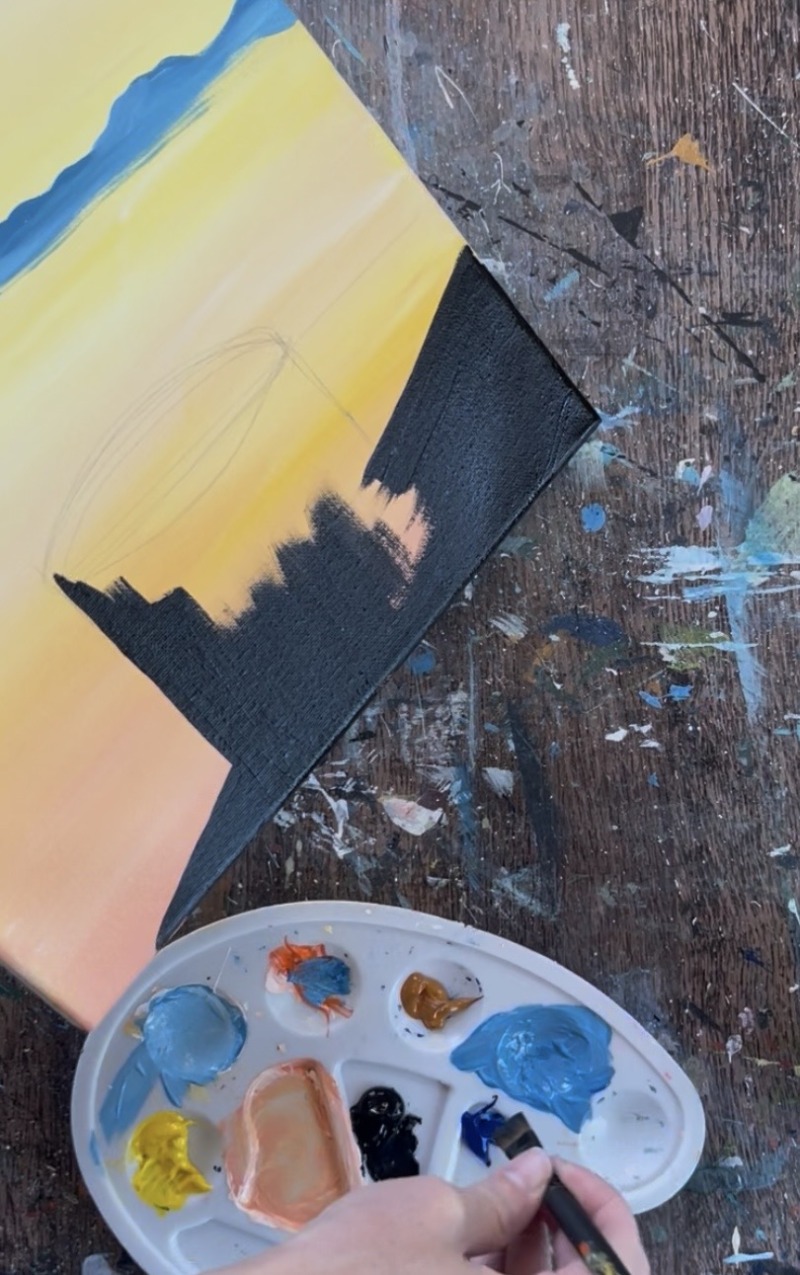
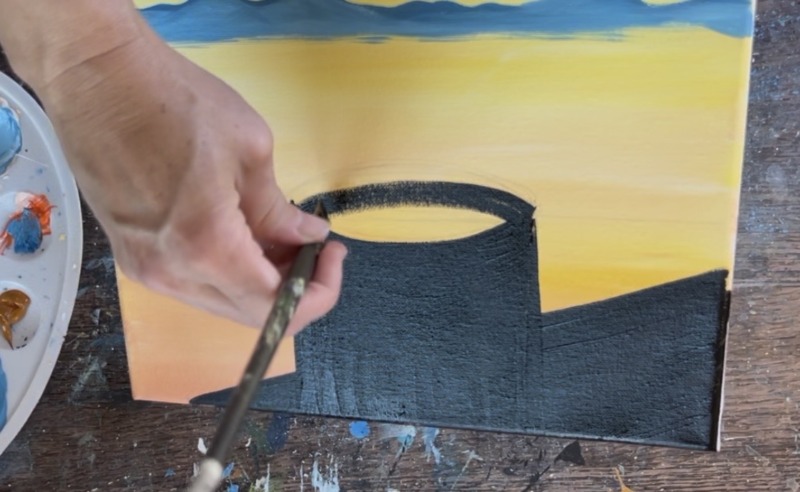
Next, use “mars black” and the #12 bright brush (or 3/4 flat) to paint the dock and the post solid black! Even though you are painting black, make sure the direction of your paint strokes go in the direction that the wood grain will be going. For example, the deck goes diagonal/ parallel to the diagonal line you drew and the post goes vertical (up and down brush strokes).
For the oval on the top, outline the shape and then fill in with brush strokes that go any direction.

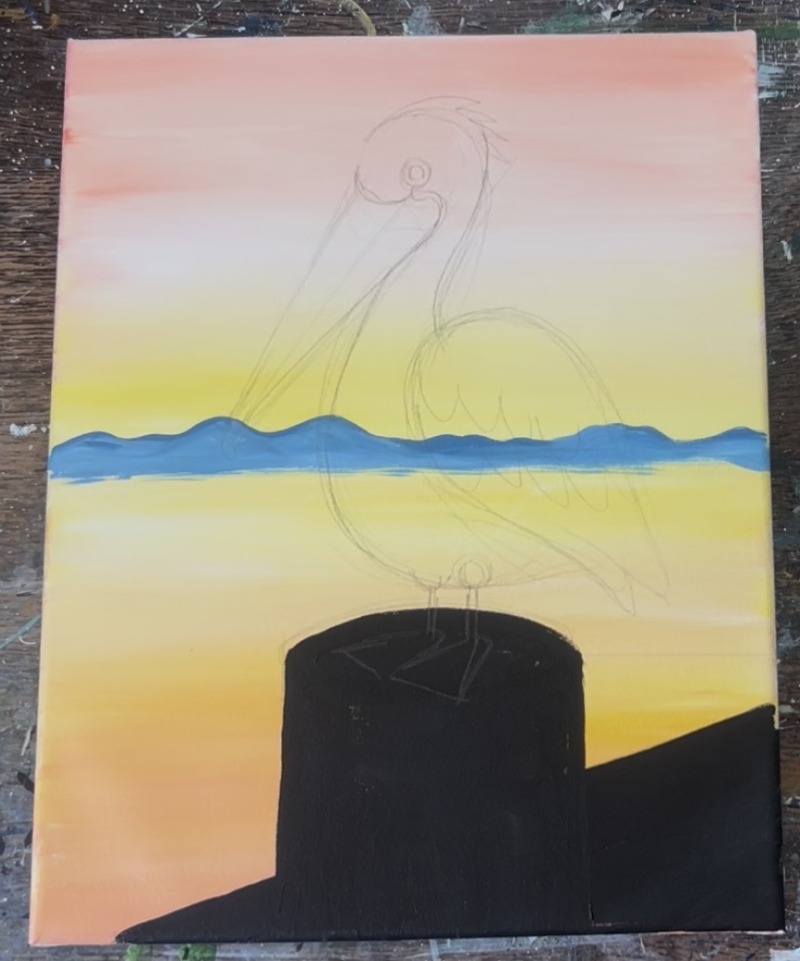
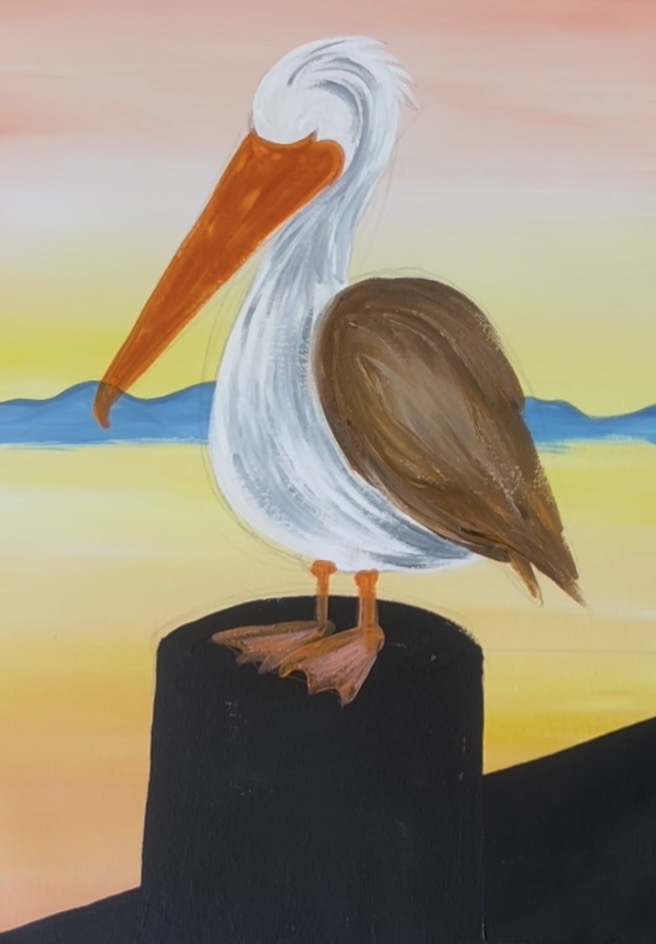
5. Draw Pelican
The height of this bird from the bottom of the feet to the top edge of the head is 9″. Estimate where the bottom of the feet will be (the feet sit on the flat top of the post) and then make a mark at 9″.
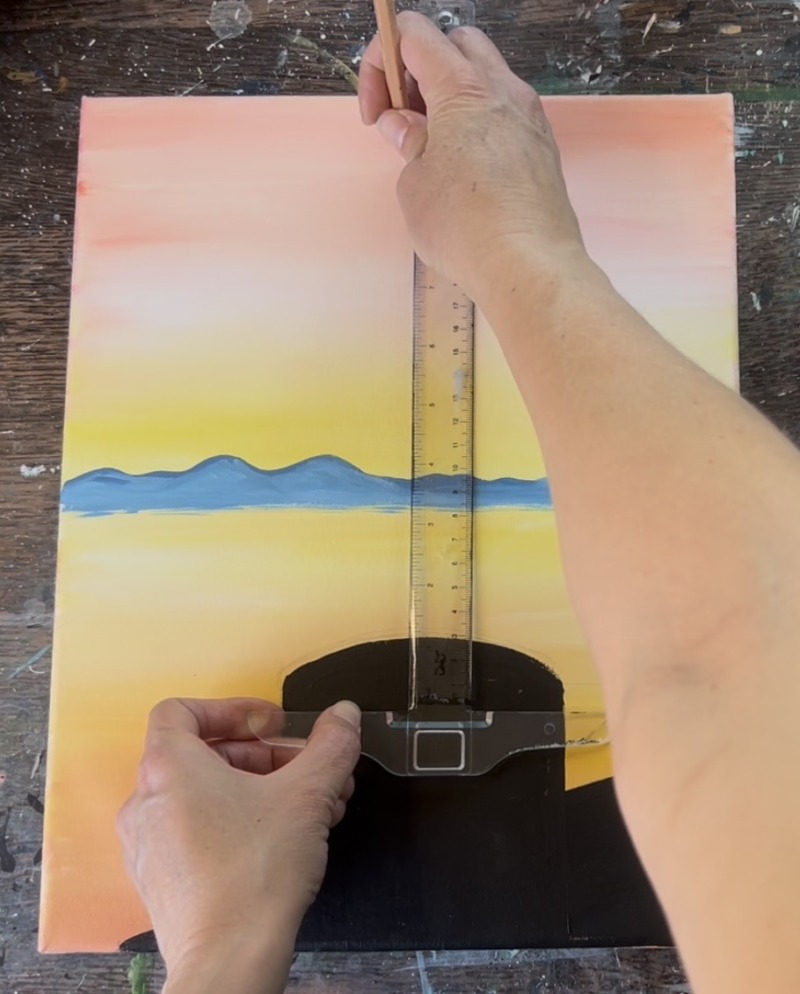
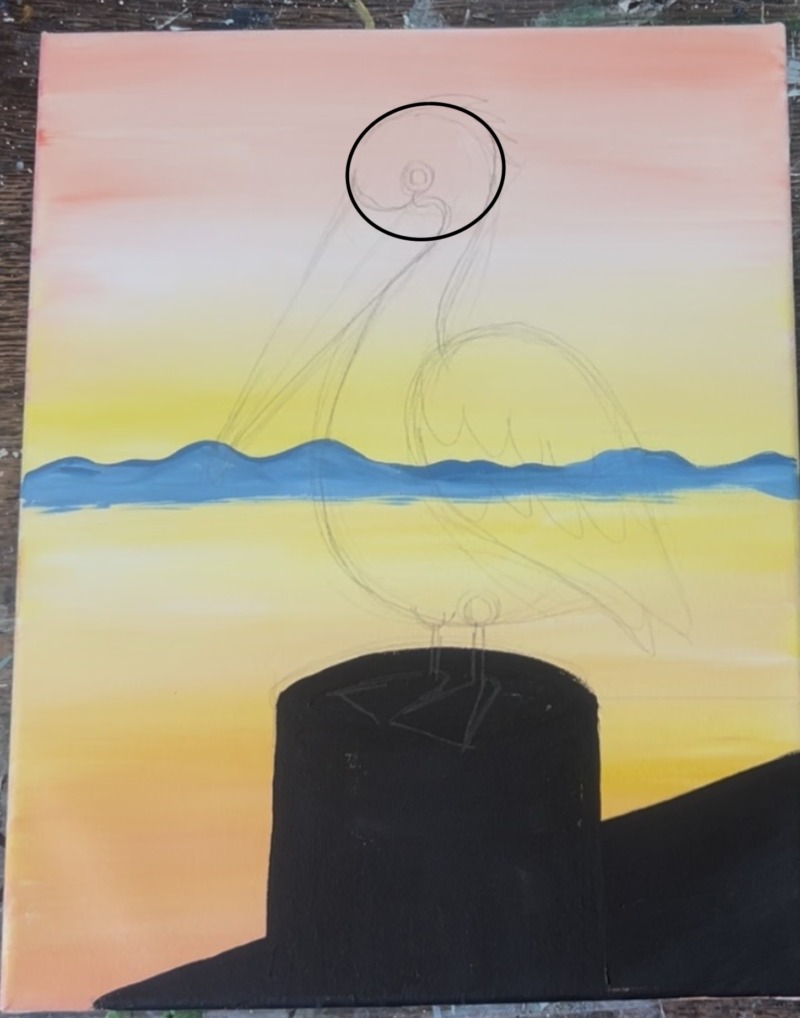
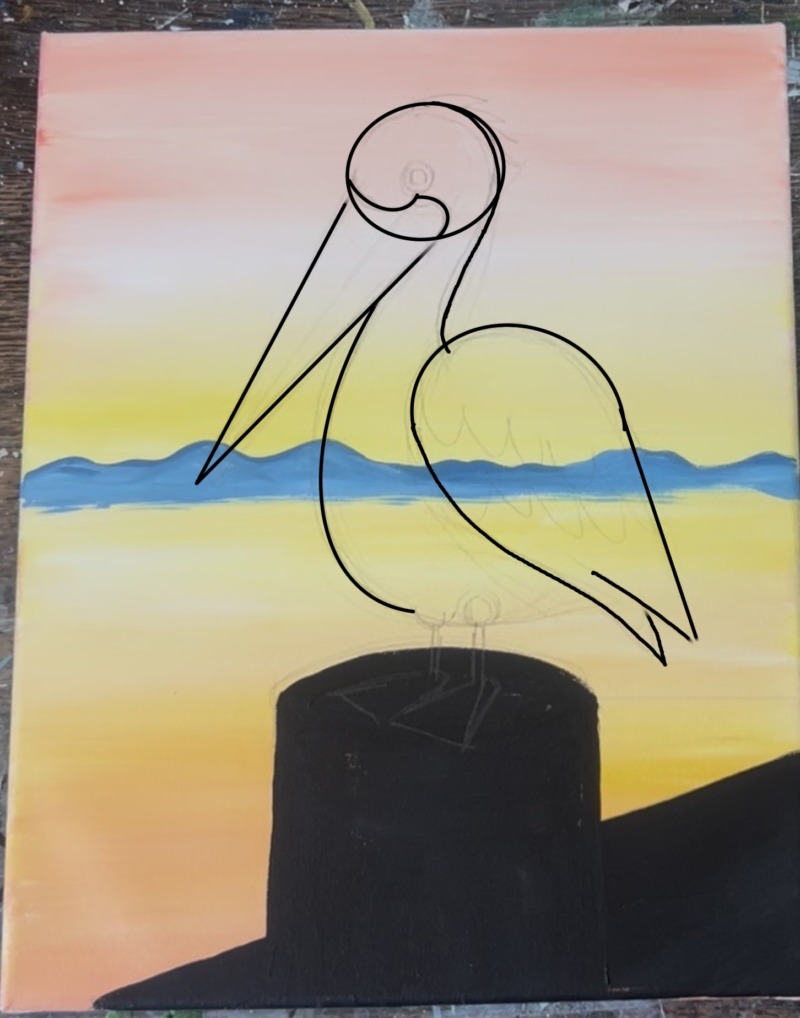
Then sketch the shape of the pelican starting with the head. This is a circle (slightly stretched to technically more of an oval shape). It is about 2″ in diameter and the top edge is at that 9″ mark. Use a pencil to lightly sketch this pelican. The lines in the steps below are darkened so you can see them better.
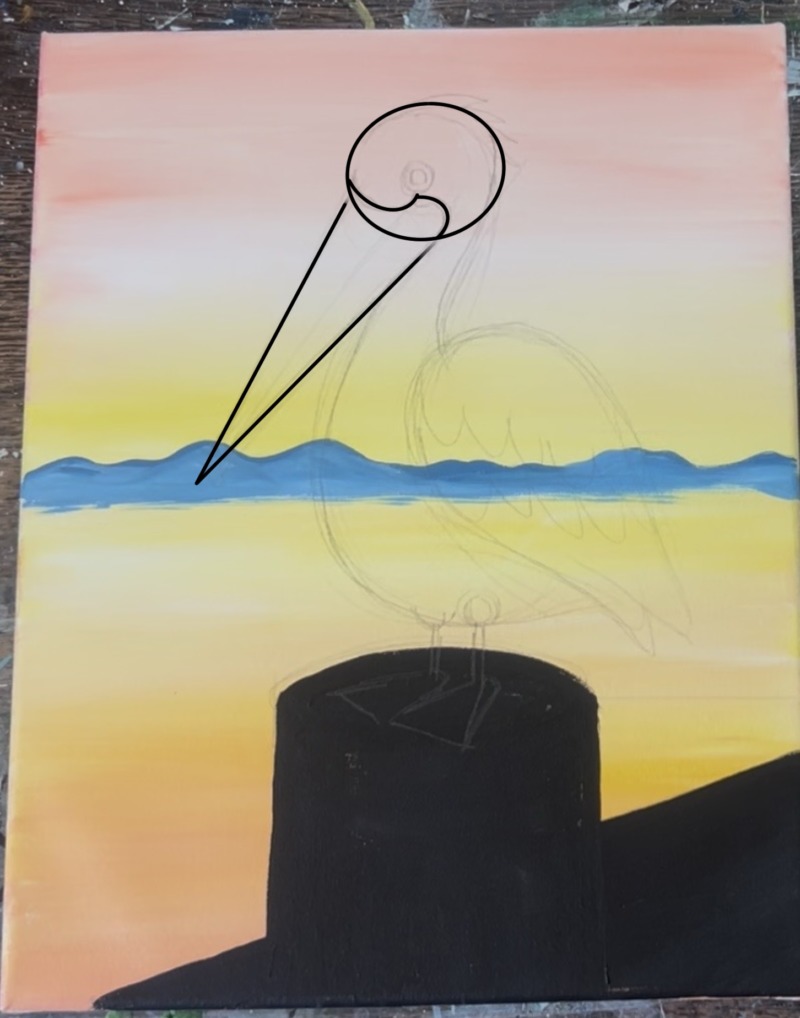
Next draw the beak. This is a very elongated triangle shape that starts at the lower left quadrant of the circle/ head. It goes to a point (for now). Then the base of the beak makes a set of curved shapes that overlap the lower left interior of the head.
Next, draw the back of the pelican’s neck. It curves slightly inwards to the left.
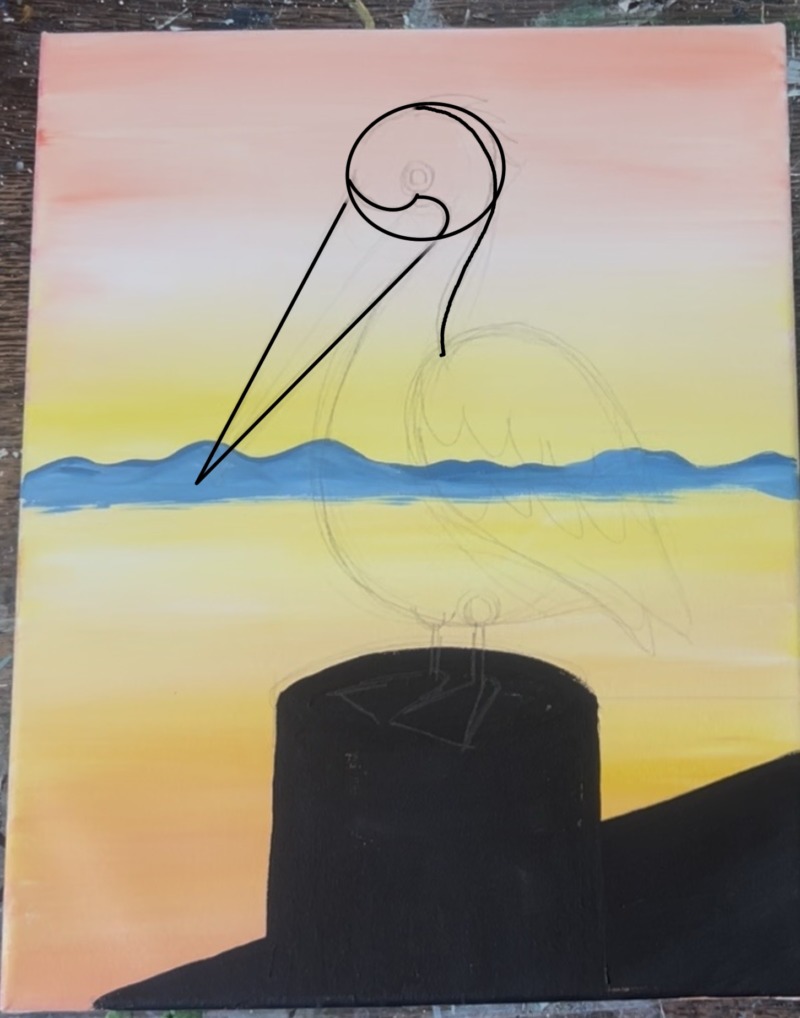
Then draw the front part of the pelican’s belly. This curves outwards. Start this below the beak so it looks like the beak is overlapping the front part of the bird’s neck/chest area.

Then draw the side wing of the pelican. This resembles a teardrop shape that is pointed in two sections on the bottom end of the wing. It goes slightly diagonal and starts at the bottom right of the pelican’s neck.
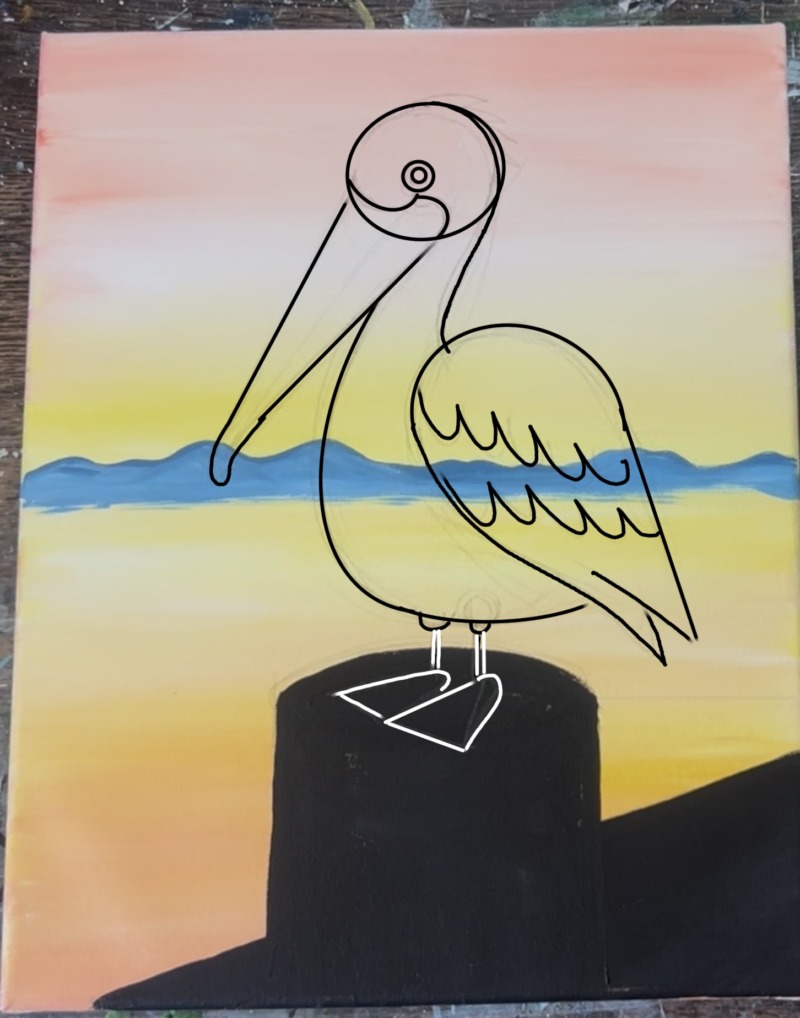
Then continue the front belly line down and connect to the lower part of the side wing. Draw two little curved “bump lines” on the underside of the bird where the legs will be. Then draw a set of vertical lines to create two very thin legs that go downwards and overlap the top part of the dock post. Draw a set of triangular shapes going diagonally to form the feet of the pelican. The front foot slightly overlaps the back foot.

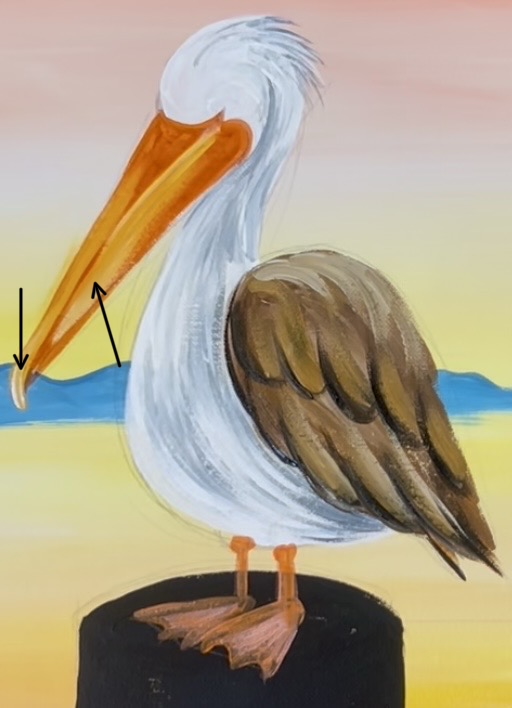
Next, draw a donut shape for the eye of the pelican. This is located pretty much in the center of the head touching the top base part of the beak where it overlaps the head. Then make the end of the pelican’s beak not pointed but slightly curved downwards (this creates that pelican beak look). Then draw “U” shaped lines for the side of the bird’s wing. Draw two rows going slightly diagonally.
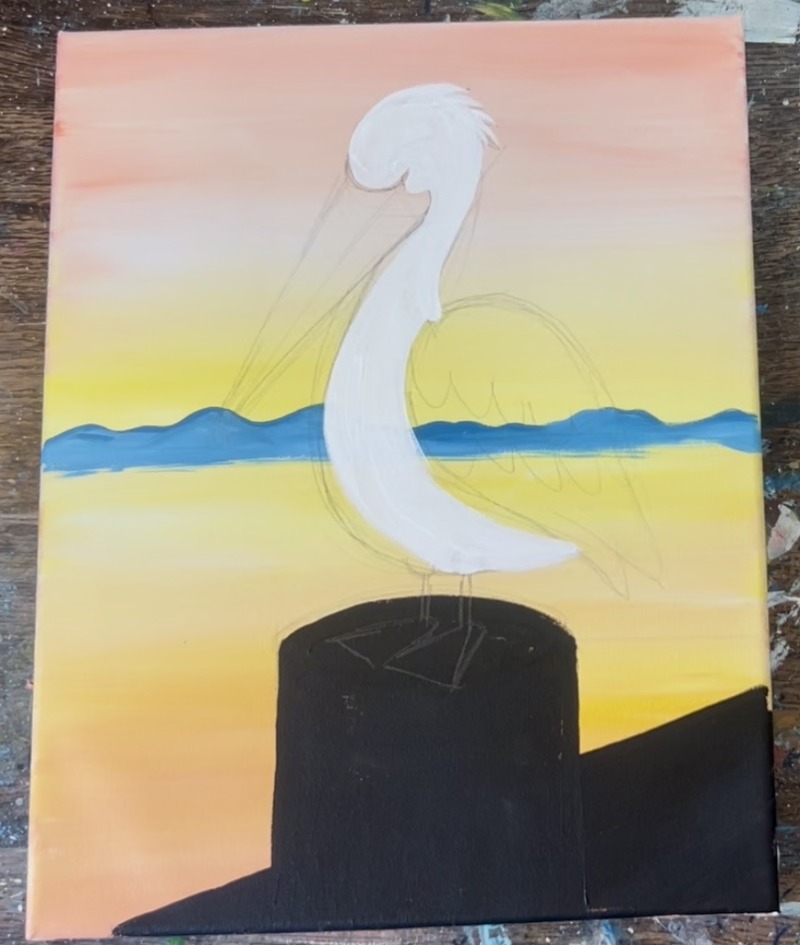
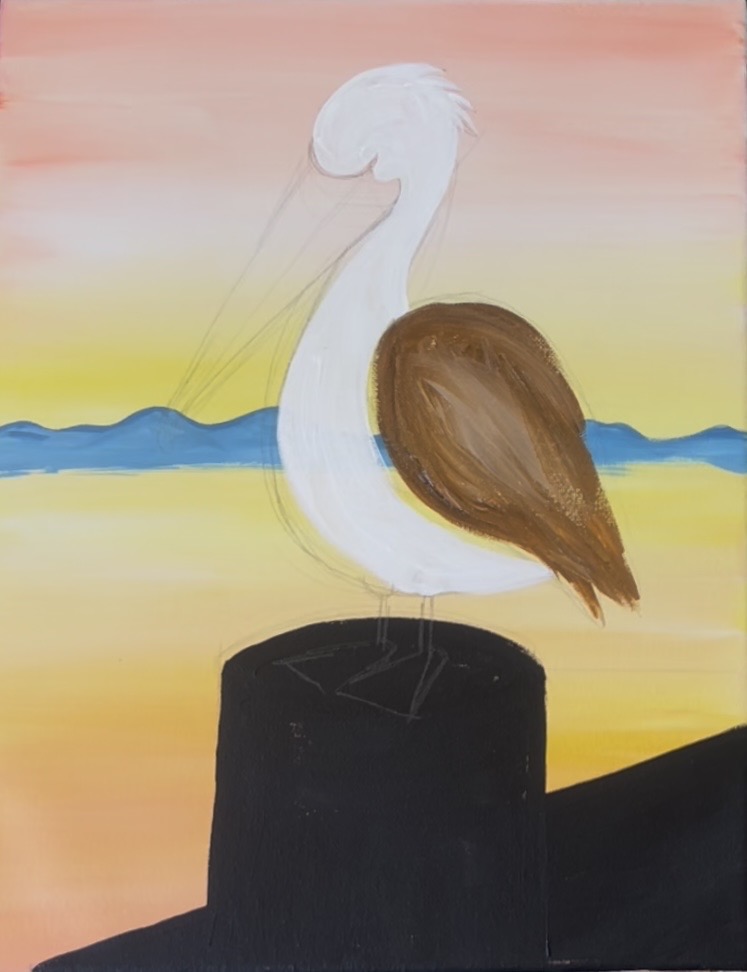
6. Paint White Parts Of Pelican
Use a #4 round brush and titanium white to paint the head, neck and belly/ chest region of the pelican. Apply a generous amount of white so the shape you are filling in is opaque. Make your paint strokes curve and go in the direction of the shape of the bird. For the spiky feathers in the back of the head, I used a #8 long round brush but you can do those with any tiny round brush. Simply drag little pointed strokes outwards in that same curved direction of the back of the head.
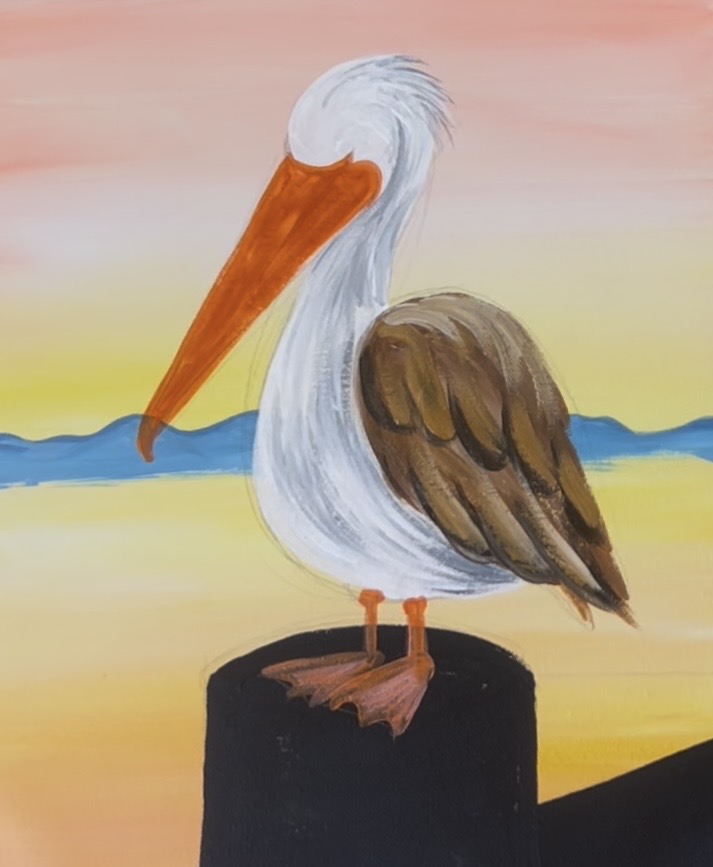
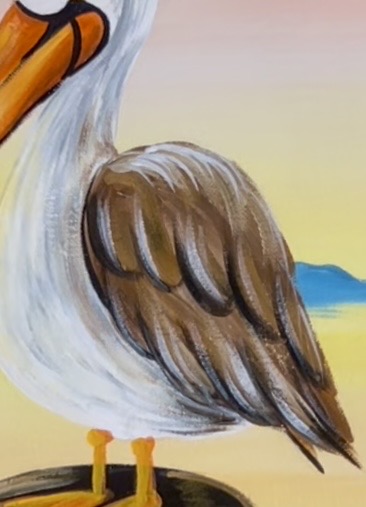
7. Paint Side Wing
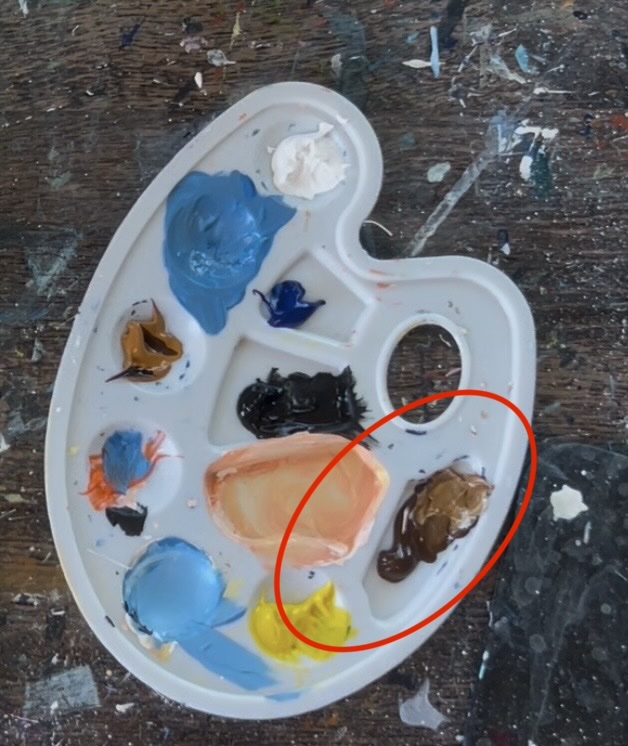
Load your paint palette with “burnt umber”. Mix equal amounts burnt umber and raw sienna together then mix a little bit of white into it. Note: I did not mix this color all the way because I wanted some color variation to start out with for the side wing.
Then outline the shape of the wing and fill it in with paint strokes that go in the same diagonal direction as the wing. I chose not to blend the color all the way!
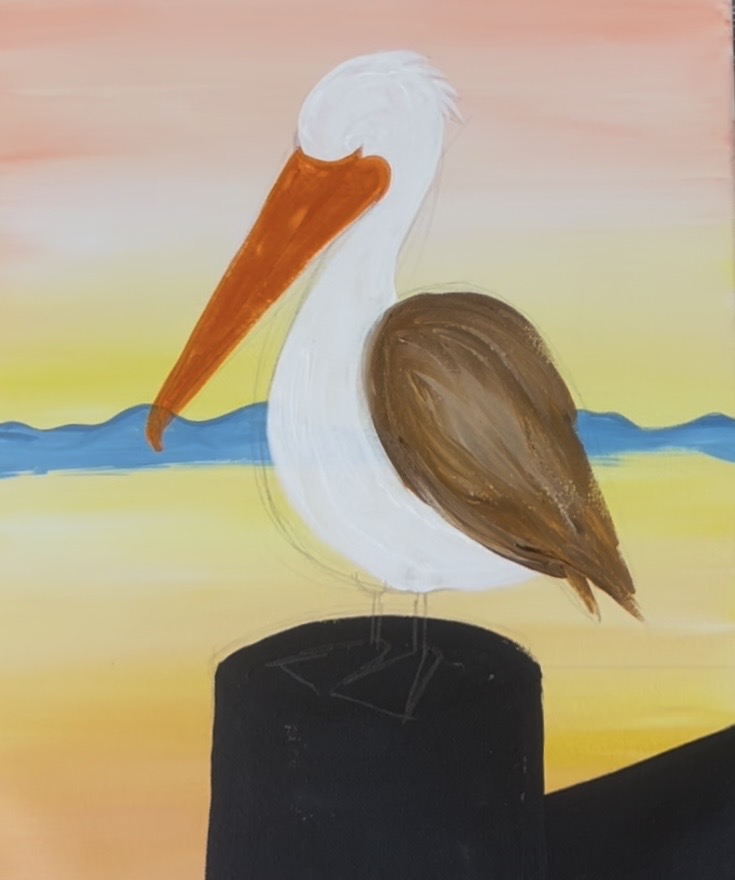
8. Paint Beak
Use the #5 round brush and “cad orange hue” to paint the beak. Outline the edges of the beak and fill in with diagonal paint strokes that go in the direction of the shape of the beak.
9. Paint Legs/ Feet
Mix “cad orange hue” with “titanium white”. Use the #4 round brush to paint the shape of the feet and the vertical rectangular legs in.
10. Paint Feather Texturing
Mix 1 part “mars black” and 3 parts “titanium white” together. Use the #4 round brush to paint light gray “feather texturing” on the white parts of the pelican. Lightly “dry brush” curved, fine lines along the shape of the pelican.
Next, paint feather side wing texturing. Mix a little black with “burnt umber” to make a very dark brown. Use the #4 round brush to paint two rows of “U” lines going in a diagonal direction. Then rinse the brush. Create a lighter brown by adding white into the “burnt umber”. Use the #4 round brush to paint small curved lines on the top edge of the side wing that curve downwards.
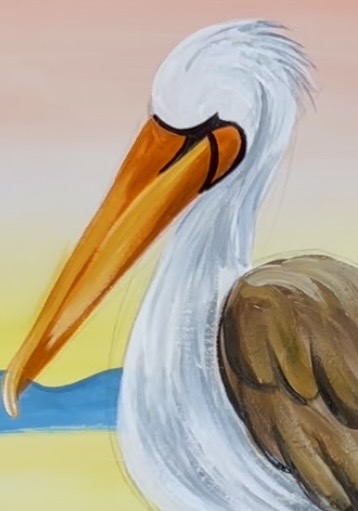
11. Paint Details On Beak
Mix “primary yellow” with “titanium white” and add a little bit of “cad orange hue” to it to create a light orange-yellow color. Use the #4 round brush to paint the top portion of the beak including the little curve that points downwards on the top end. Then add a little brighter yellow on the bottom half of the beak.
Next, paint black border/lining on the base of the beak towards the head. Use the #4 round brush and mars black (or a black paint pen) to paint the small curves/ point as shown in the picture.
12. Paint Dock & Post Wood Texture
Use a #4 round brush and mix “burnt umber” with a little bit of “titanium white’. Outline the top oval shape of the post around where the pelican’s feet are.
Then use the #12 bright brush to paint vertical marks to create texture on the post. Add little bits of titanium white into the brown to create “color variations”. You don’t want to cover all of the initial black layer. Leave a lot showing through and between your brush strokes. Only load small amounts of the brown on your brush so that it comes off as “dry brush style”.
The post brush marks are going vertical and the flat dock brush marks should go diagonally, parallel to the edge of the dock. Leave a lot of shadowing around the post.
Blend in little bits of that “pink-orange” color from the sky and blend little bits of “primary yellow”. This will give the dock some reflection from the sunset. Leave a lot of dark on the right side of the post and on the area on the dock around the post. This keeps contrast and shadowing in this area.
Use a #8 long round brush and “mars black”. Paint vertical lines on the post and diagonal lines on the dock for the in between “cracks” of the wood.
Then use either of the round brushes to paint knots in the wood. Paint little black oval shapes and curved lines contouring around the shapes.
13. Paint Eye
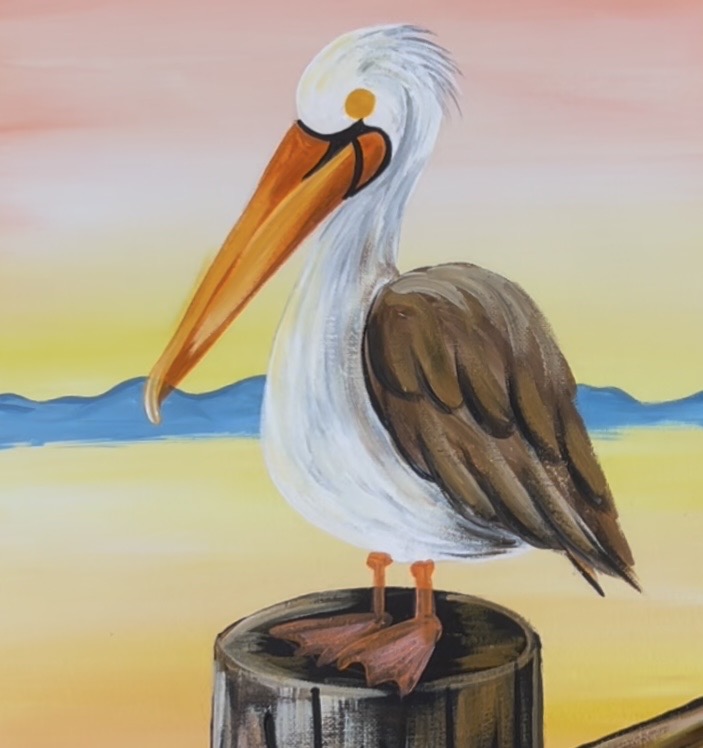
Use the #4 round brush and mix yellow, white and orange together. Paint a small circle just above the black bordering of the beak (in the center of the pelican’s head).

Start out small and gradually form the shape of the circle.
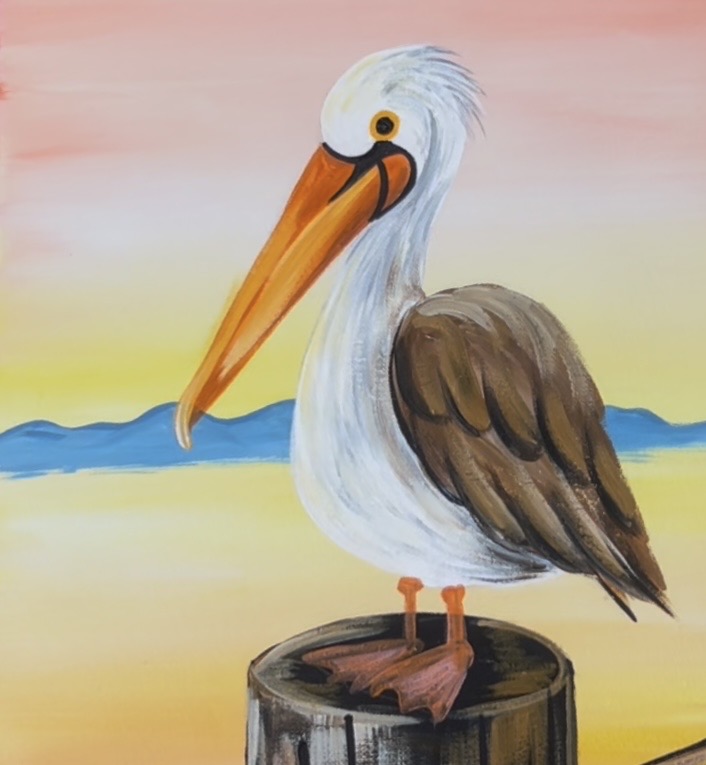
Rinse the brush and load into black. Add a smaller black circle inside of the orange circle. Let this dry before adding a highlight on the eye.
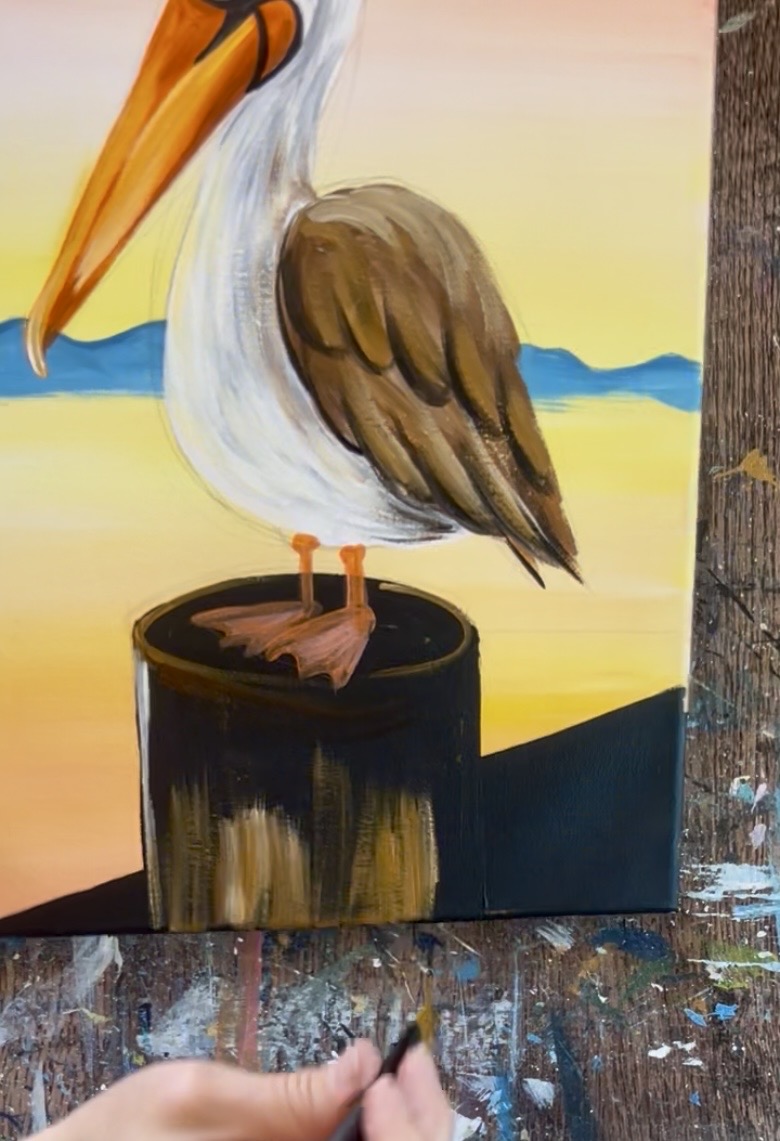
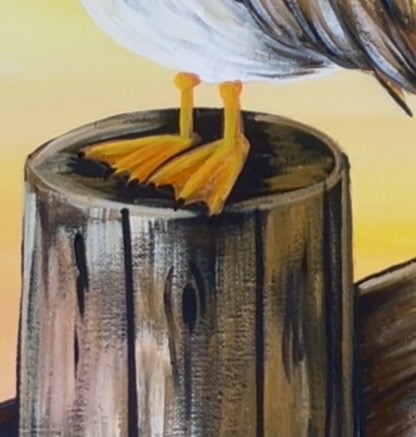
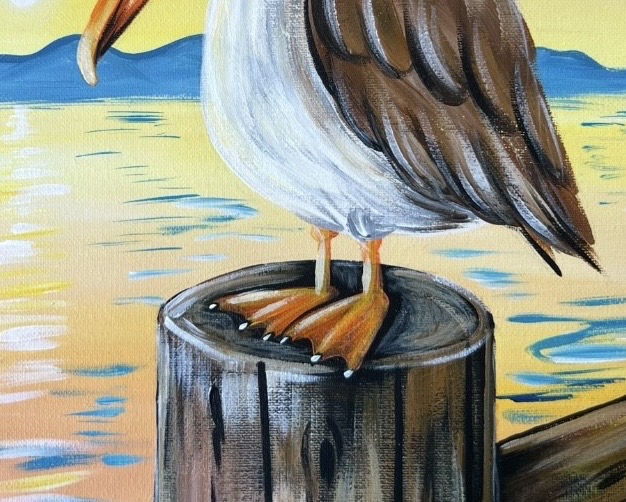
14. Details On Feet, Eye & Wing
Add another lighter coat of paint on the feet. Use the same color you just used for the orange part of the eye and paint over the legs and add a set of three diagonal lines on the feet. These three lines start from the bottom of the leg and go to the points of the toes.
Then add a layer of orange in between each of the three lines. This creates the “webbed foot” look with the lighter color on the top of the toes and the darker parts on the skin between the toes. Then use black to paint little marks on the ends of the toes for claws (these will be hard to see for now because of the dark surface the pelican is standing on).
Next, use “titanium white” to dry brush more white curved feather texturing on the top of the pelican’s side wing and in between the “U” shapes. Lightly apply this so the dark layering still shows through.
Additionally, dry brush some brown texturing on the white area of the pelican near the edge of the side wing and on the far right under part of the bird. This adds more shadowing and texturing in that area. Leave the far left part of the bird bright. You can even add more layers of white or little hints of yellow on the left part of the bird and top left part of the bird’s head because that is where the light is hitting it.
Paint a little white dot on the pelican’s eye for a highlight.
15. Paint Water Texture & Sun
Use the #4 round brush to paint little water reflection lines in the ocean area. Start by double loading the brush in both yellow and white. Make a column of little horizontal marks below where you will paint the sun. The lines further in the distance should be closer together and smaller while the lines lower in the painting should be further apart and longer.
Next, create water lines using the blue! Mix blue with white (or use the same color you used for the mountains). Paint loose lines throughout the ocean area. Large, spread out lines on the bottom and smaller, closer lines in the distance.
Mix a little more white into the blue and add lighter blue water lines throughout the ocean. Keep the area under the sun light and bright with mostly white/yellow lines.
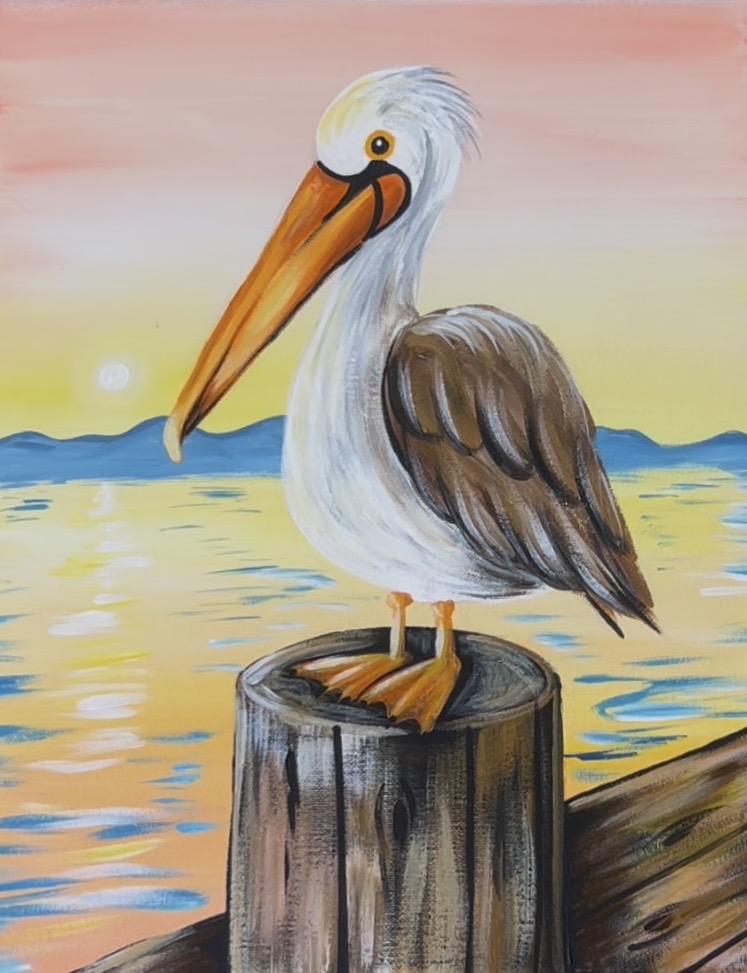
Paint the sun next! Start by painting a yellow glow where the sun will be. You can load your round brush in yellow and white and then paint a small circle. Use your index finger to smear it outwards to make it a blurry, glowing circle! Then use just titanium white to paint a white circle inside the glowing yellow larger circle. Paint another set of white water lines in a column below the sun.
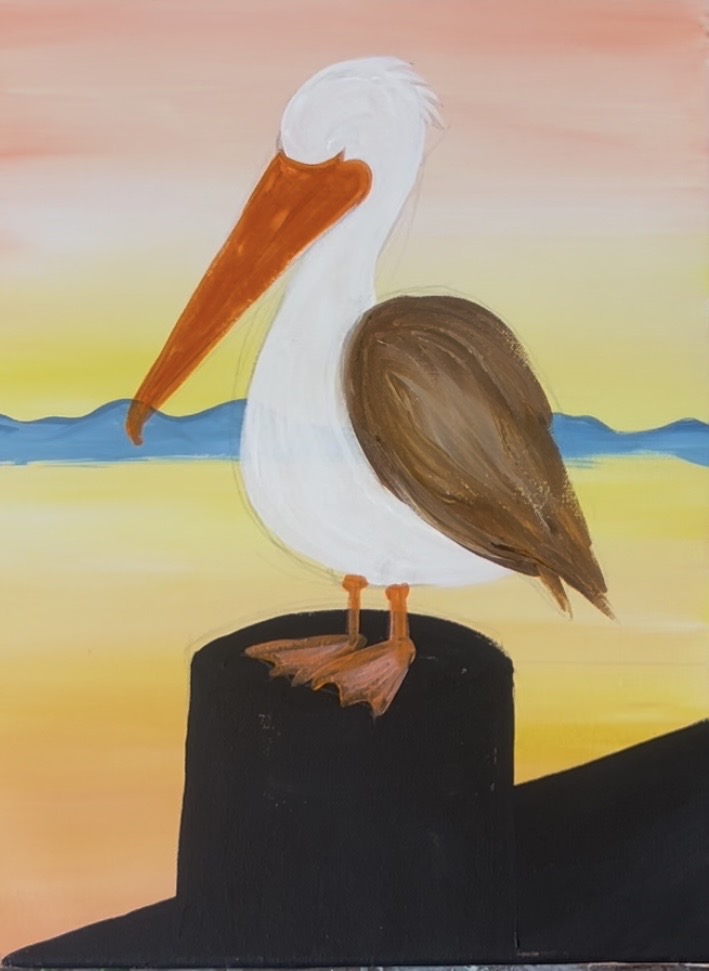
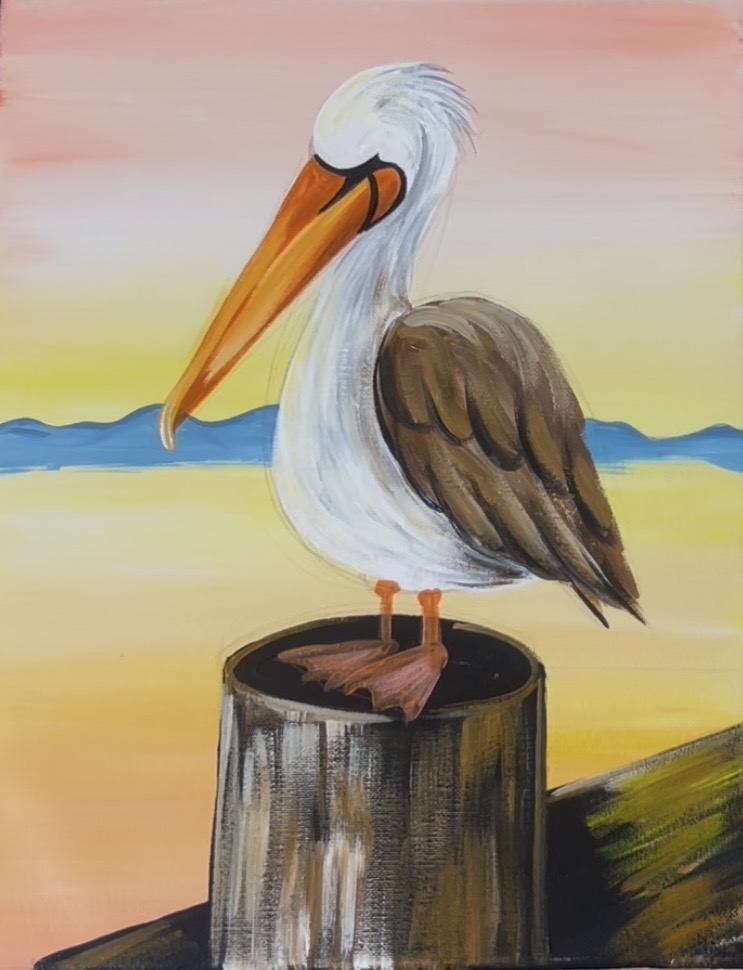
16. Final Touches
Some final touches for this are: painting little white dots on the “claws” of the pelican. This tiny highlight is enough to get those to stand out much better! Add another slight highlight to the toes/ legs of the pelican with white mixed with a little yellow. Paint a very thin bright colored line along the tree webbed toe lines and on the far left of the legs. Additionally, paint one white/ gray “bump” where the leg on the right meets the body at the top of the leg.
Some other final touches you can do include adding some white dry brush highlights to the post and the dock. Do this very lightly on the edges that face the sun but keep the right parts of the post and dock dark and shadowy.
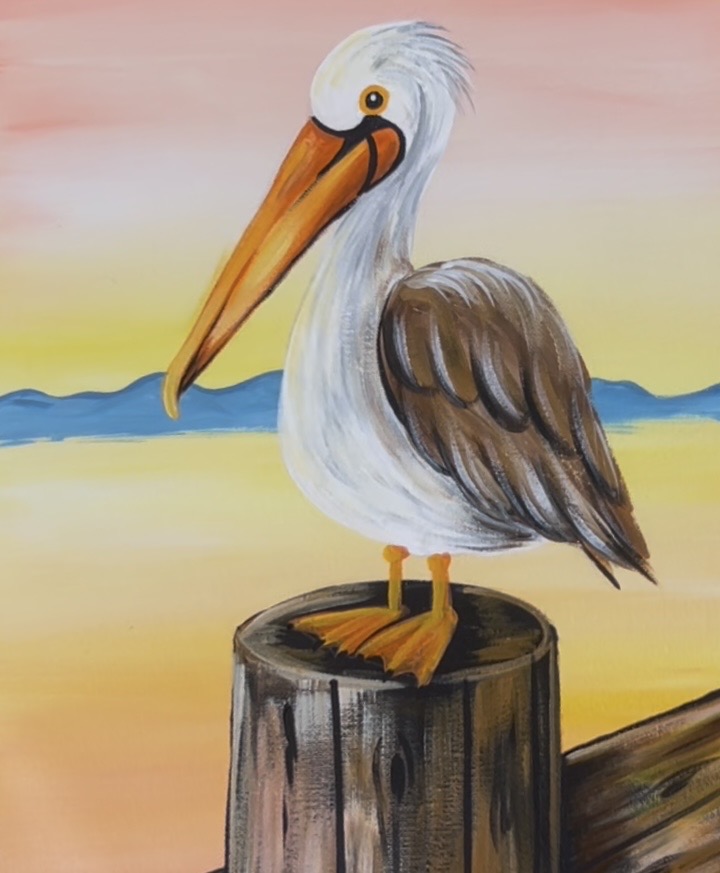
Finished!