

Would you like to save this?
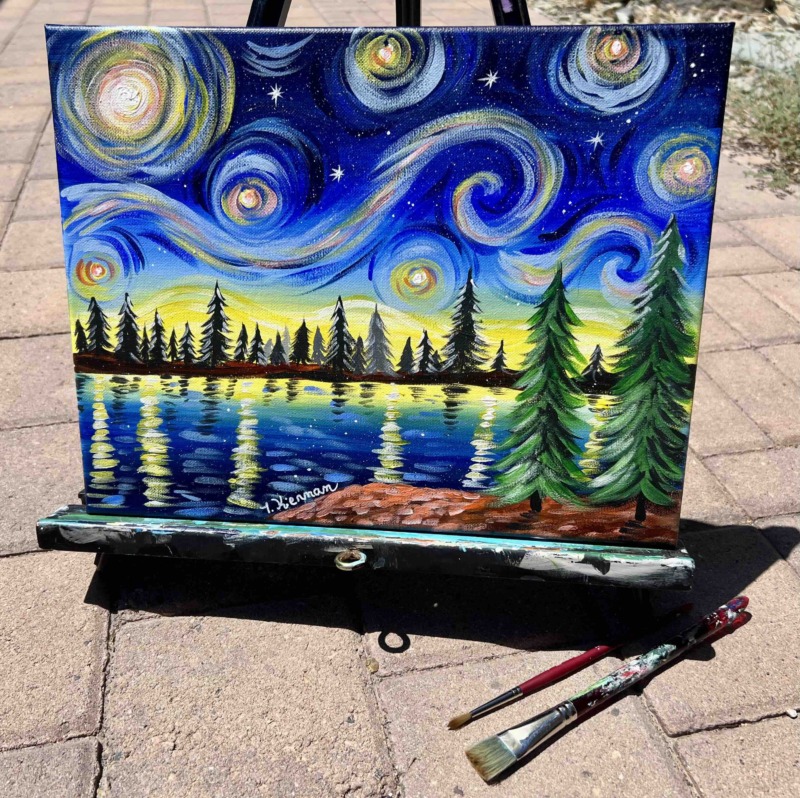
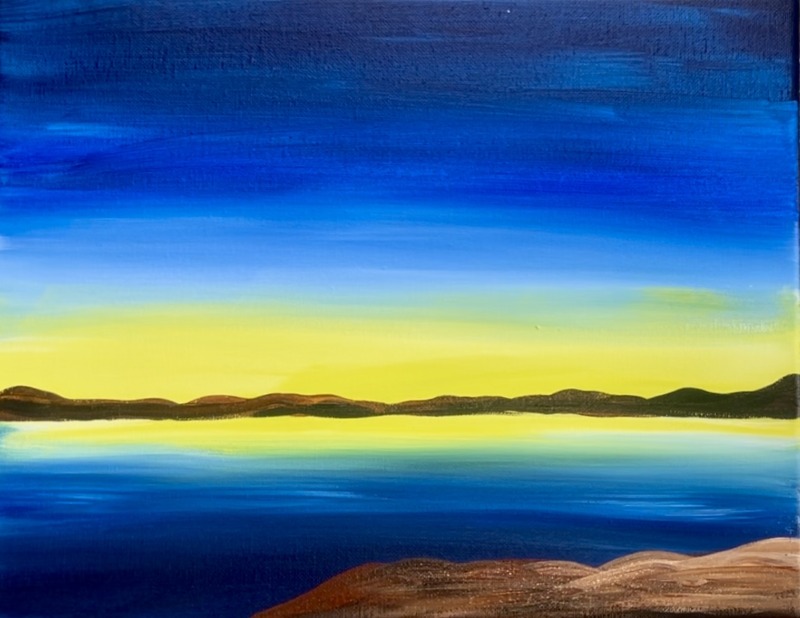
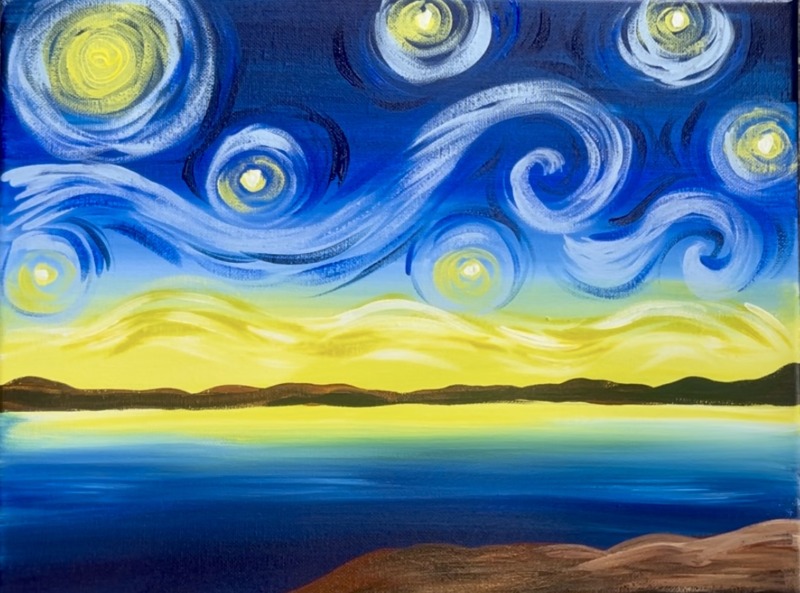
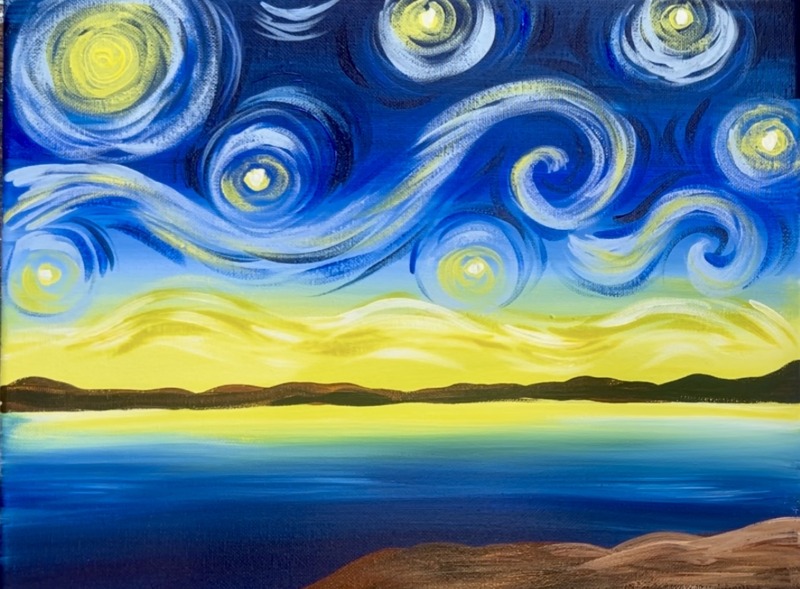
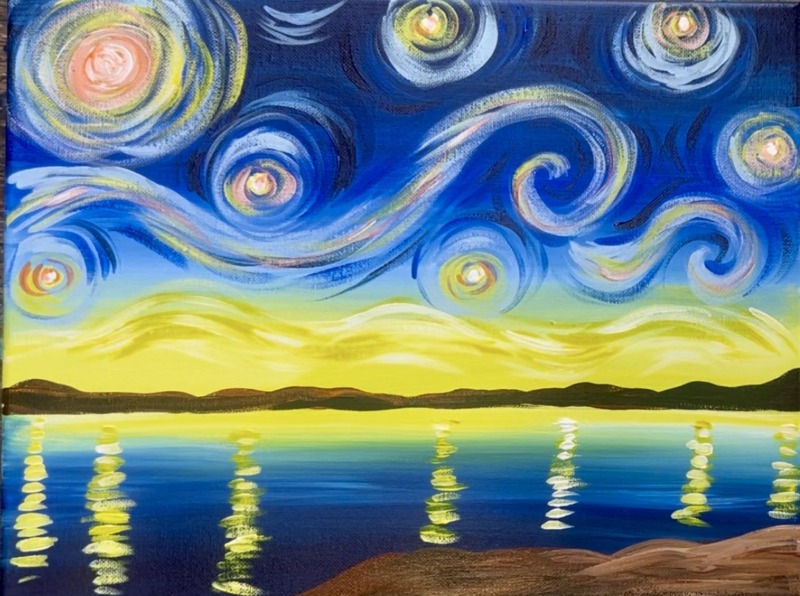
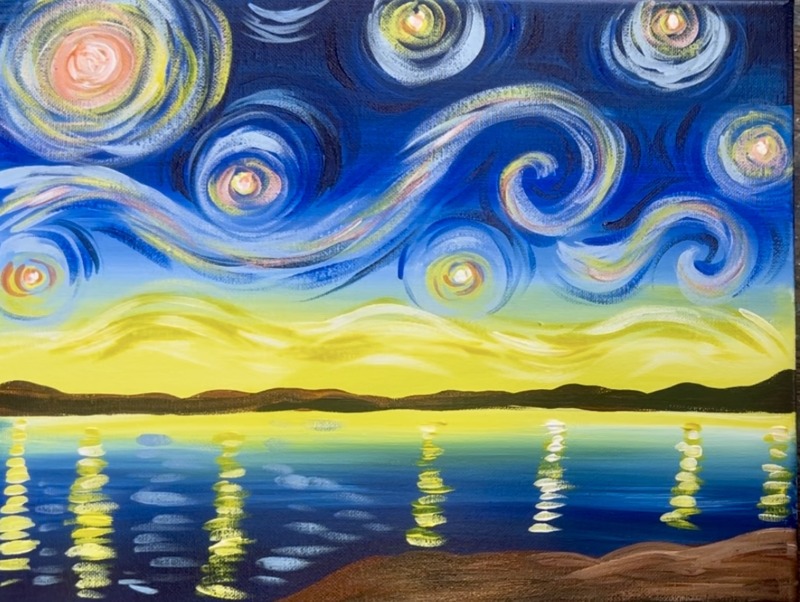
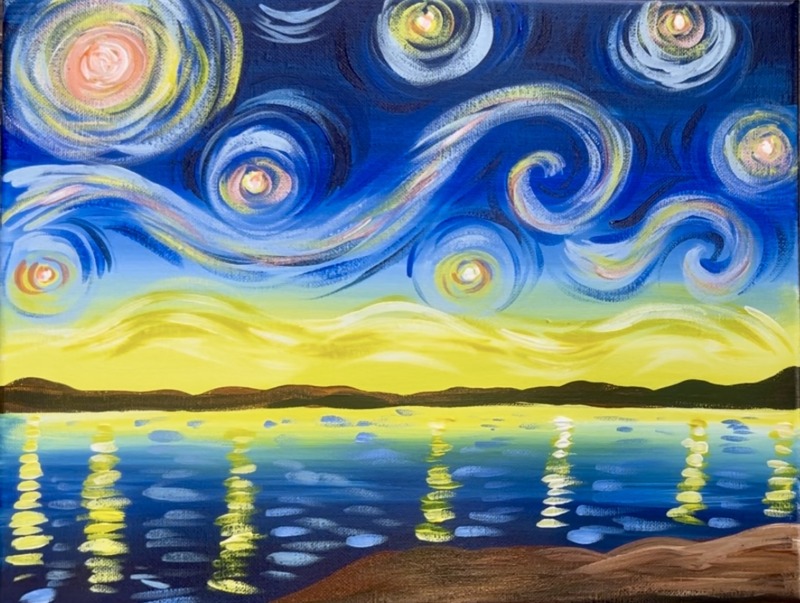
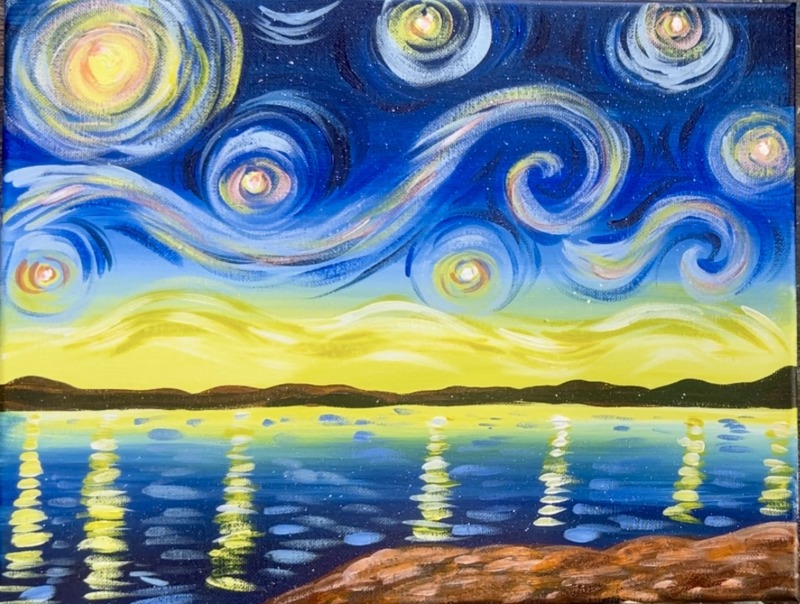
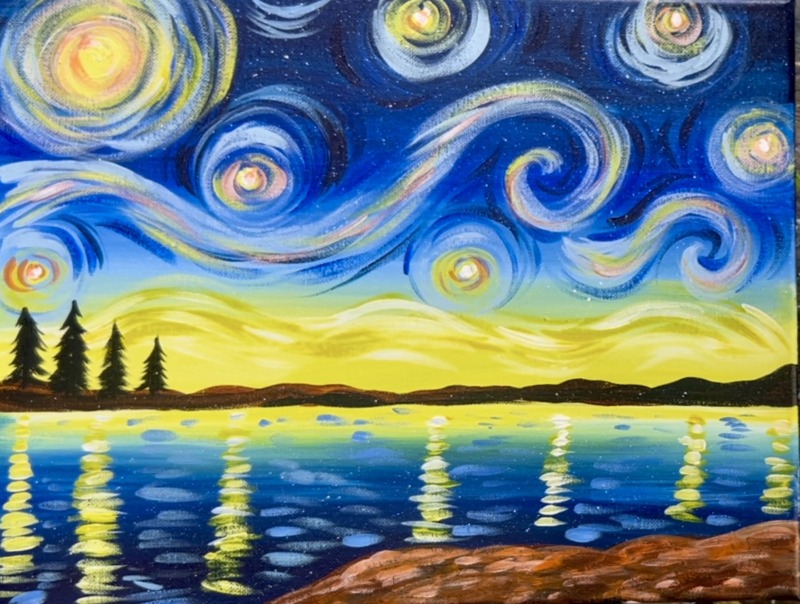
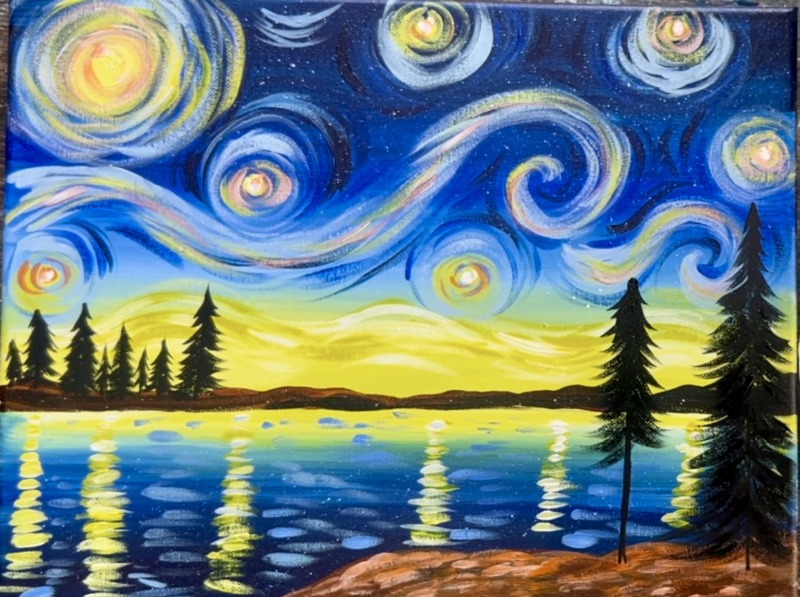
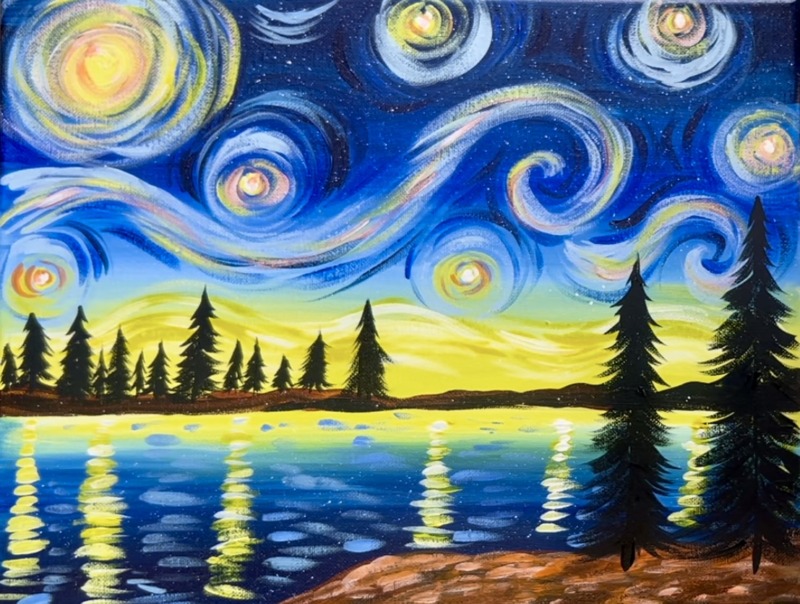
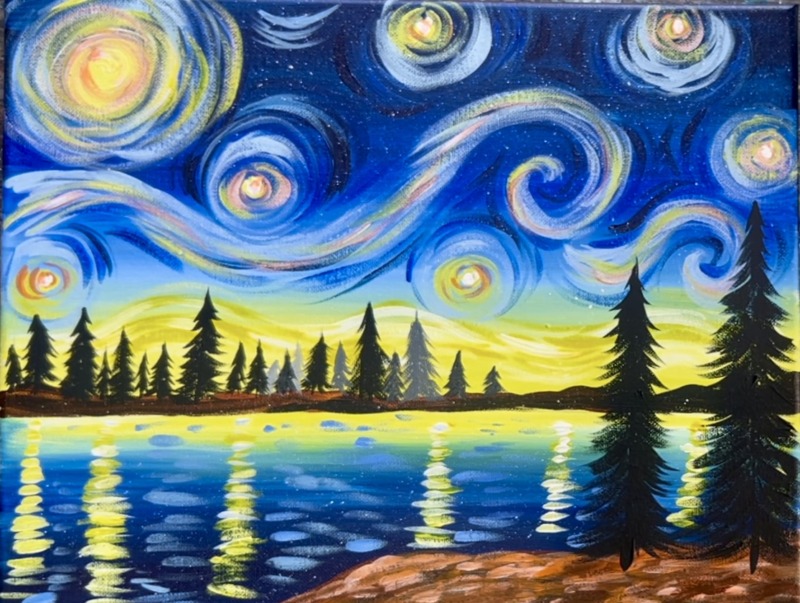
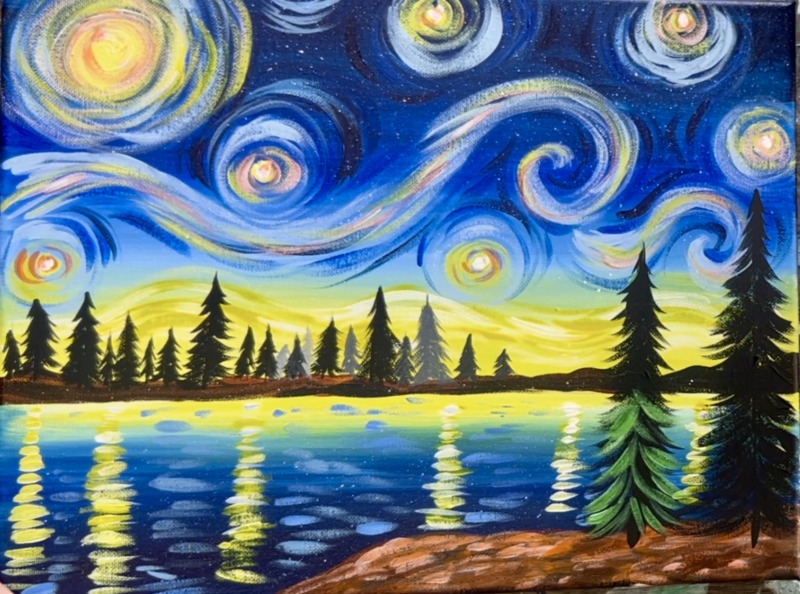
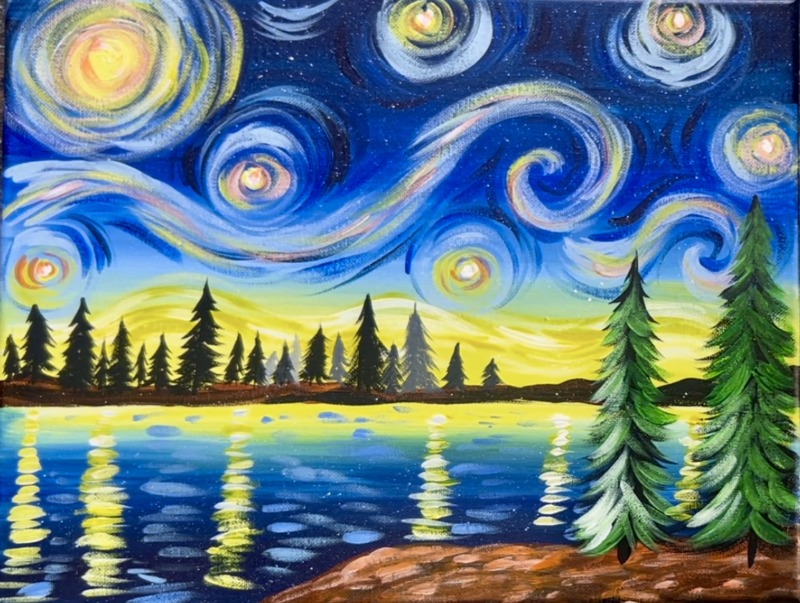
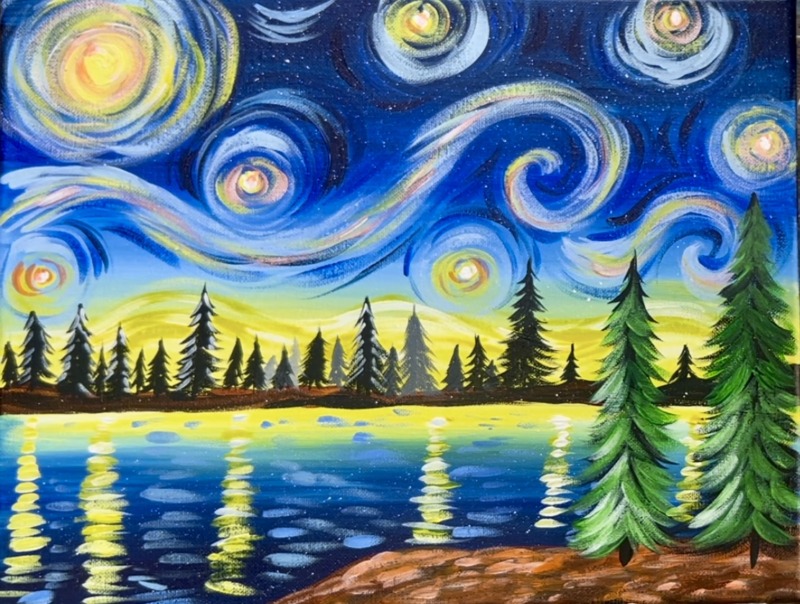
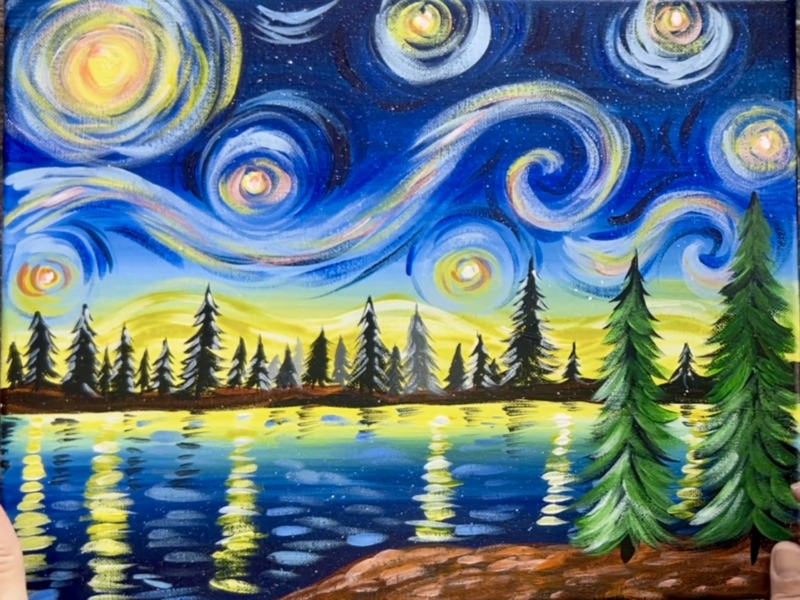
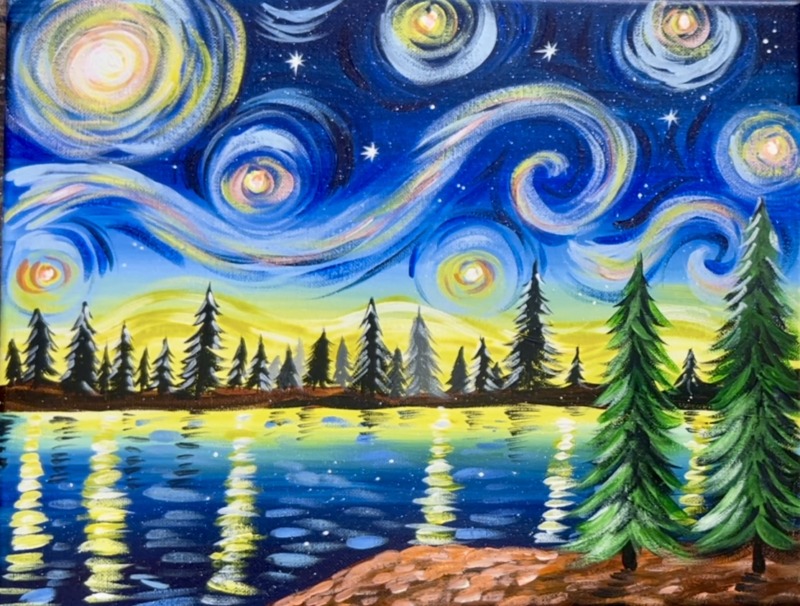
“Starry Night In The Forest” is a magical landscape forest lake scene in the style of Vincent Van Gogh’s “Starry Night”.
This tutorial will show you how to paint this step by step with acrylic on an 11 x 14 (or any size) canvas.
Enjoy and happy painting!
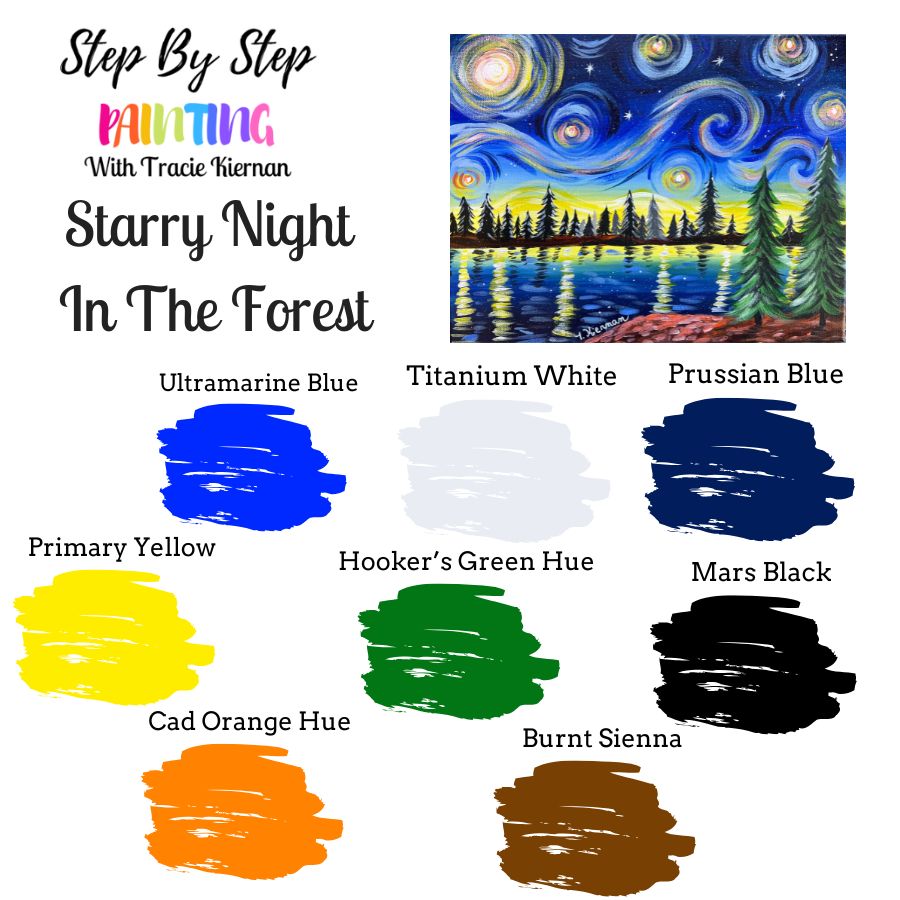
Materials
Brushes
- 3/4″ Flat
- #4 Round Brush
Colors
- Titanium White
- Mars Black
- Burnt Sienna
- Primary Yellow
- Ultramarine Blue
- Prussian Blue
- Hooker’s Green Hue
- Cadmium Orange Hue
Color Palette
Use whatever colors and paint brands you have available!
Directions At A Glance
Video
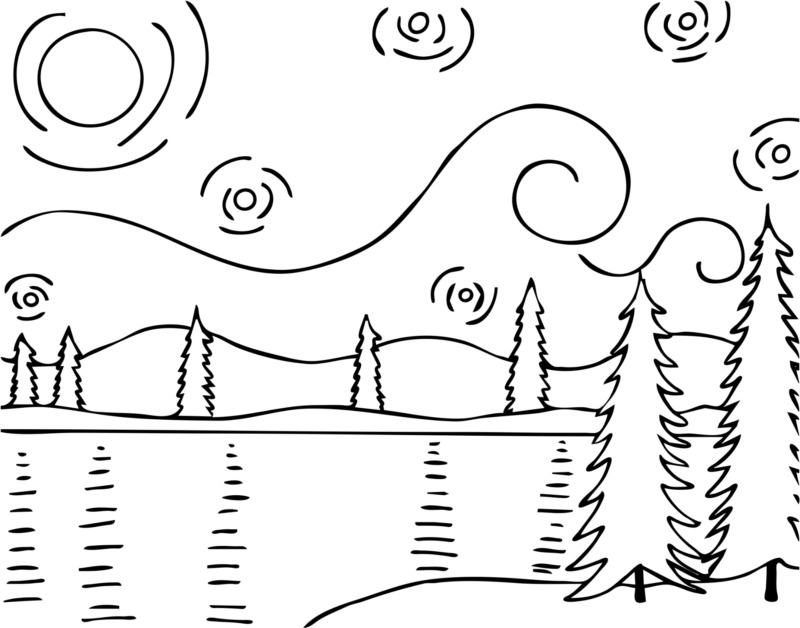
Traceables (optional)
Step By Step Directions
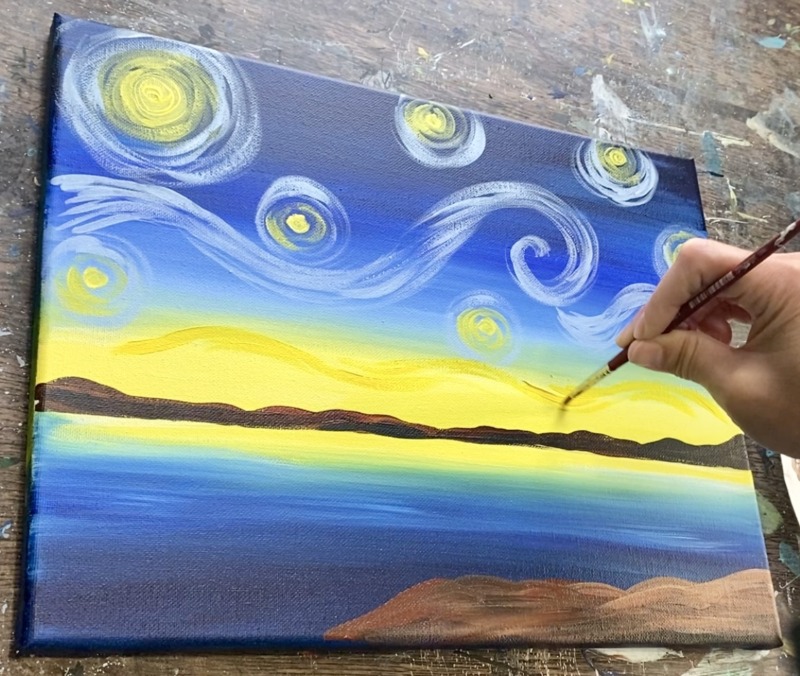
1. Paint Sky
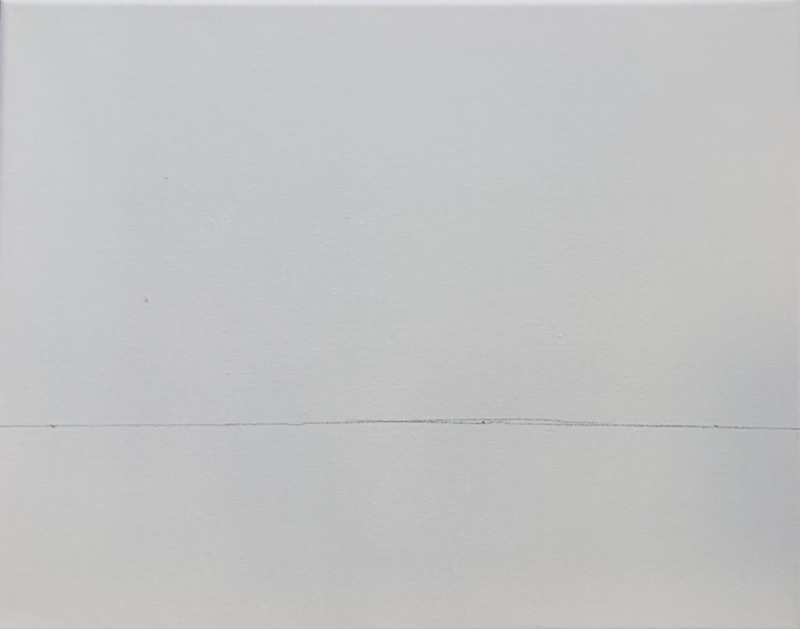
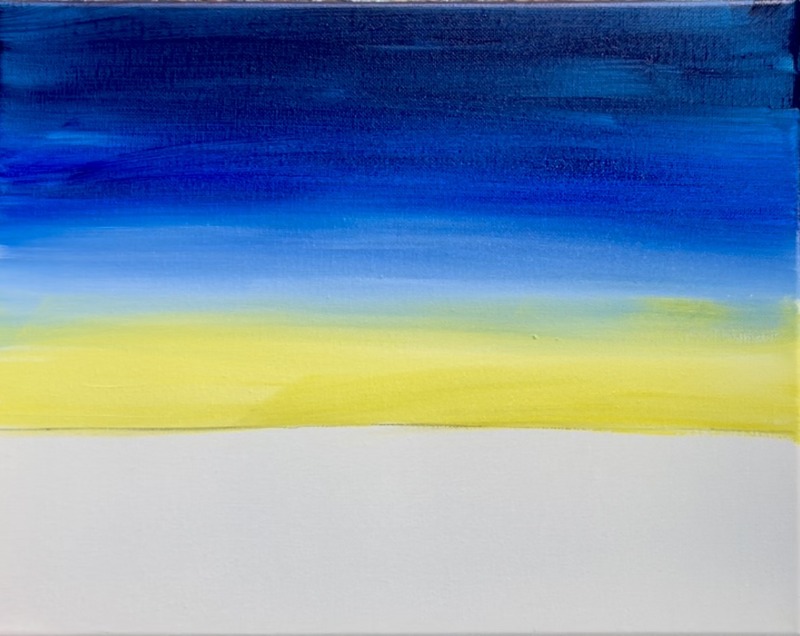
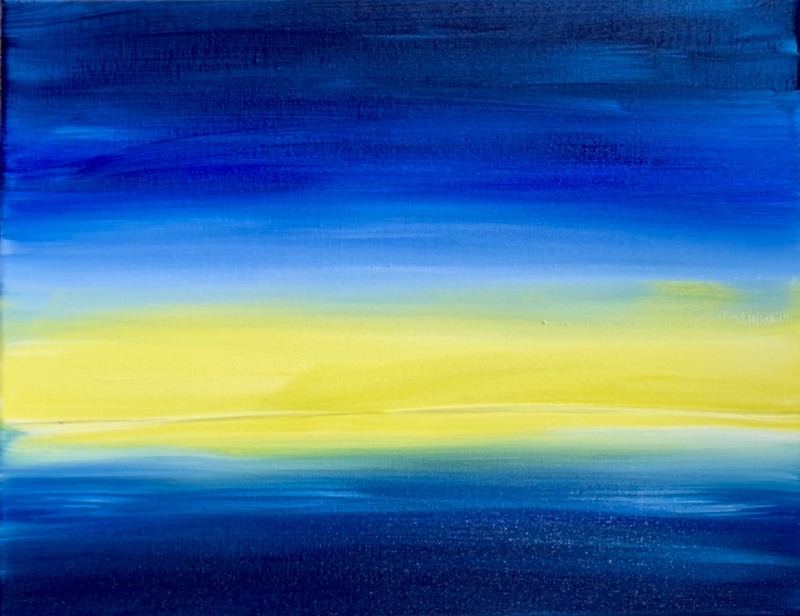
Position your canvas horizontally. Measure 1/3 of the way up from the bottom edge of the canvas. I did about 3.5″ on my canvas but I am working on an 11 x 14 canvas. Draw a horizontal line with a pencil and ruler across to create this horizon line.
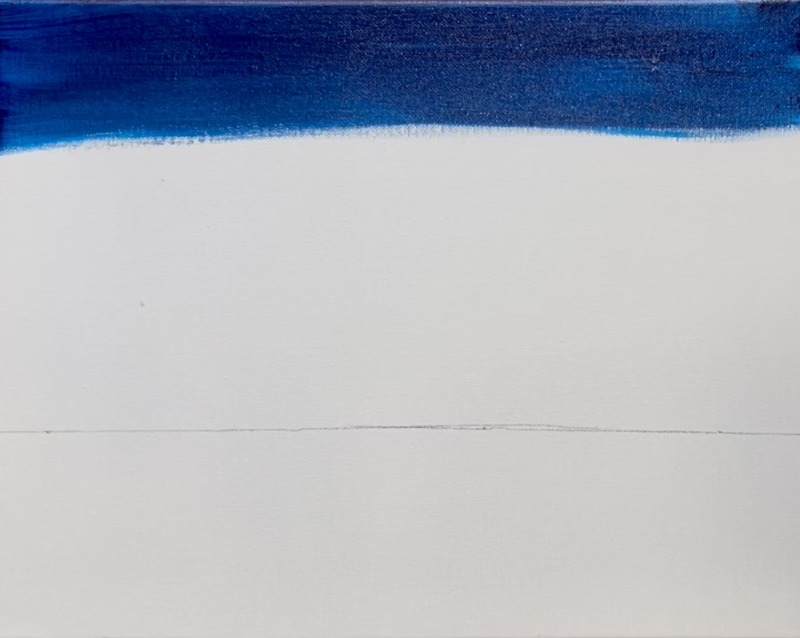
Load your paint palette with the colors: Prussian Blue, Ultramarine Blue, Titanium White and Primary Yellow. Use the 3/4″ flat wash brush and load it into the water. Then tap or squeeze excess water off from the brush. Load the brush into “Prussian Blue”.
Paint left and right paint strokes all the way across the canvas. Go down about 1/3 of the sky with this very dark blue.
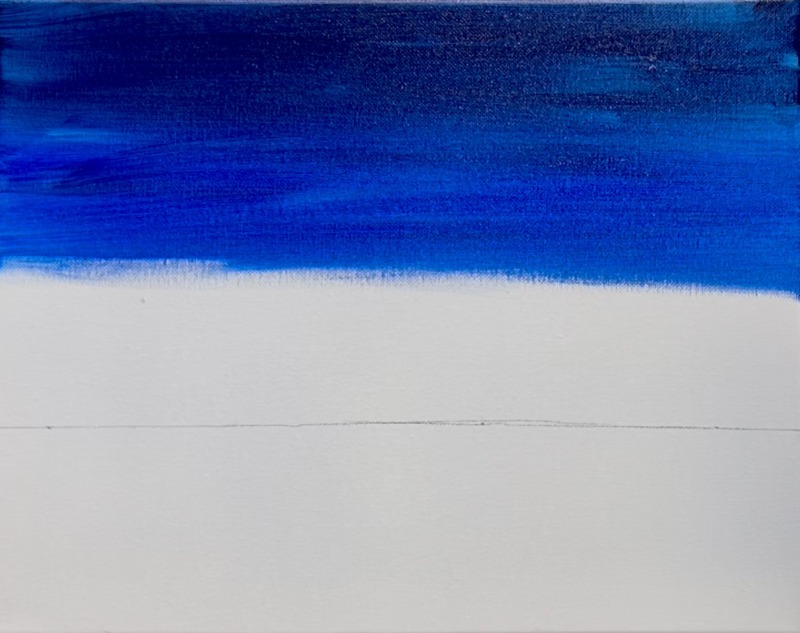
Wipe the brush off but do not rinse. Then load the brush into the color “ultramarine blue”. Blend this blue with the darker Prussian blue. Note: these are two similar colors, however, the “ultramarine” is much brighter! You should see a noticeable difference on your canvas.
Go down to about the halfway point on the sky with this “ultramarine blue”.
Wipe the brush but don’t rinse it. Load it into “titanium white”. Blend titanium white below the “ultramarine blue”. This will create a light blue area in the sky. Go down to almost the horizon line but leave about a 1.5″ gap above the horizon.
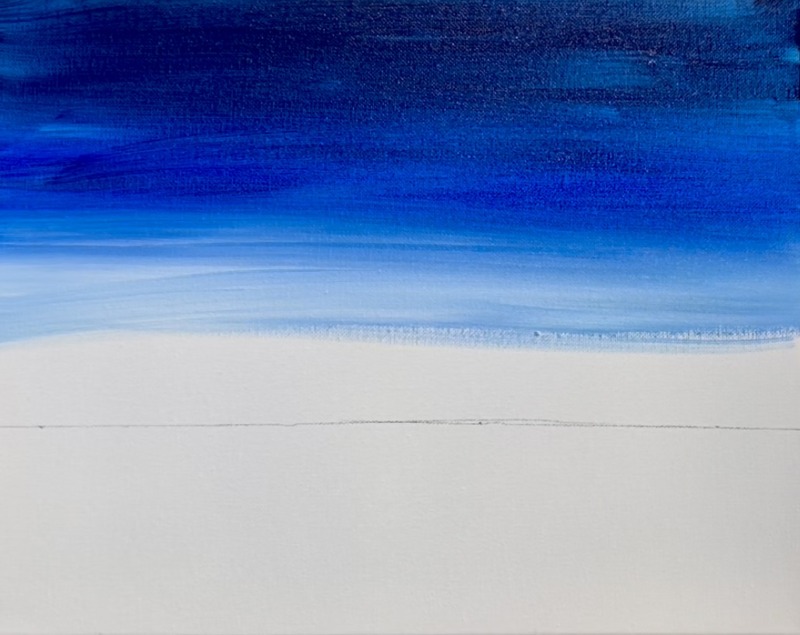
Completely rinse and dry the brush to get all of the blue out. On your palette, mix both “primary yellow” and “titanium white” together (equal amounts). This will make a light “lemon yellow” color. Start on the bottom of the horizon (just above the horizon line). Paint left and right paint strokes and fill the rest of the bottom of the sky with this bright yellow. Gently blend this yellow with the light blue but try not to blend it too much (so you don’t get too much green in the sky).
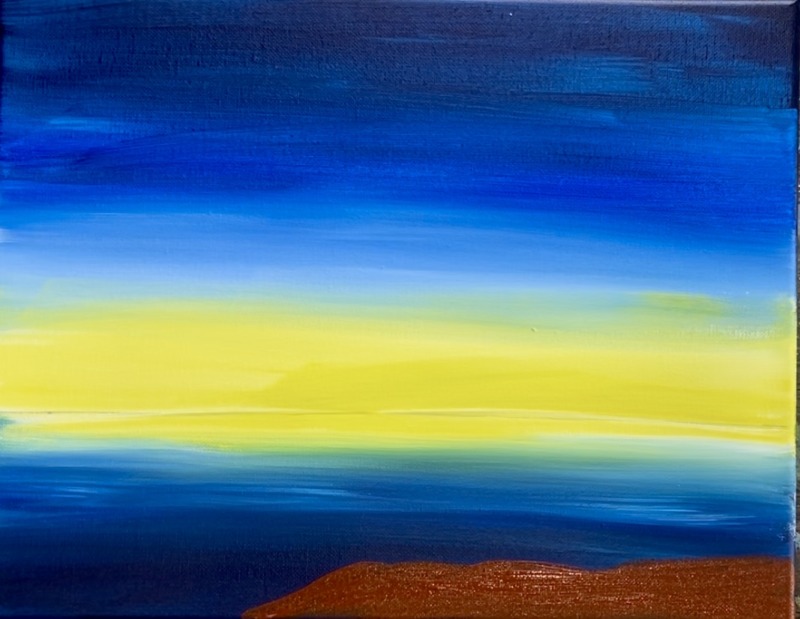
2. Paint Water
Use the 3/4″ flat wash brush and your “lemon yellow” color. Paint about 1″ of loose, left and right paint strokes below the drawn horizon line. This is going to start the “mirror reflection” of the color of the sky into the color of the water.
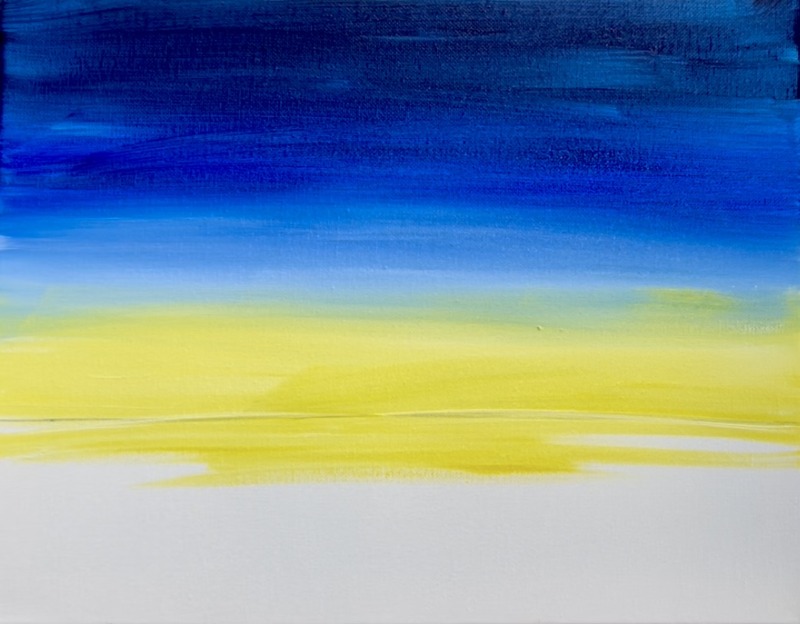
Rinse the brush. Then load it into “Prussian Blue”. Paint this dark blue on the bottom edge of the canvas and go up a few inches (but not all the way to the yellow).
Then load the brush into “Ultramarine Blue”. Blend this blue with the dark “Prussian Blue” and go all the way to the yellow but don’t blend with the yellow.
Then wipe the brush but don’t rinse it. Load it into “titanium white”. Use the white to blend the blue up into the yellow (basically painting that light blue color like in the sky).
Note: the water mirrors the same colors in the sky but it is a smaller area so the colors are more “squished together”.
Let this dry before going onto the next step.
3. Paint Land
Use the #4 round brush and “burnt sienna”. Paint a land area on the bottom left part of the canvas. This land area goes up about 3/4″ high and doesn’t go all the way across the canvas. Leave a gap on the left side where the lake will continue in that area.
Next, paint the land that is situated at just above the horizon line. Mix about 1 part “mars black” with 3 parts “burnt Sienna”. This will make a dark brown. Use the #4 round brush and this dark brown to paint the land that is just behind the lake. This is an uneven/ short mountainy area that goes all the way across the horizon.
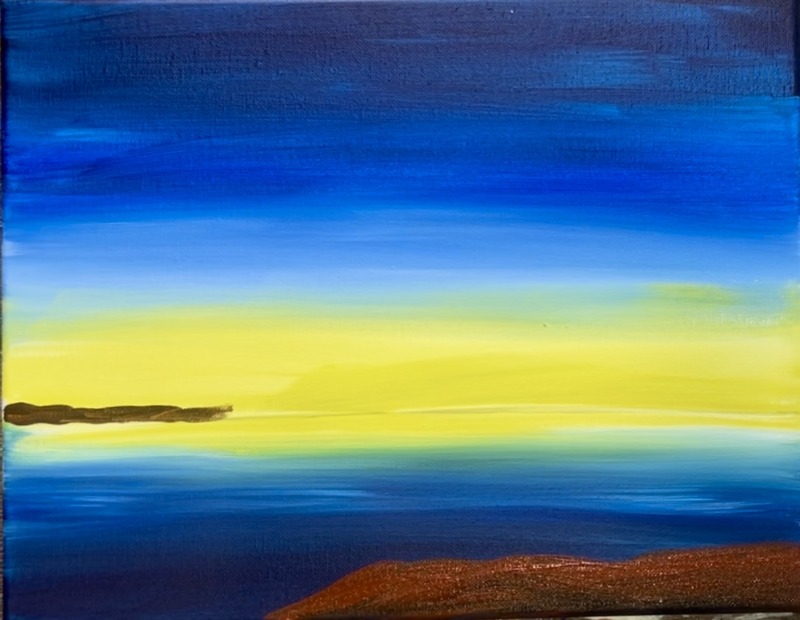
You can change the height in some of the area of this land to make it look higher or lower in some areas.
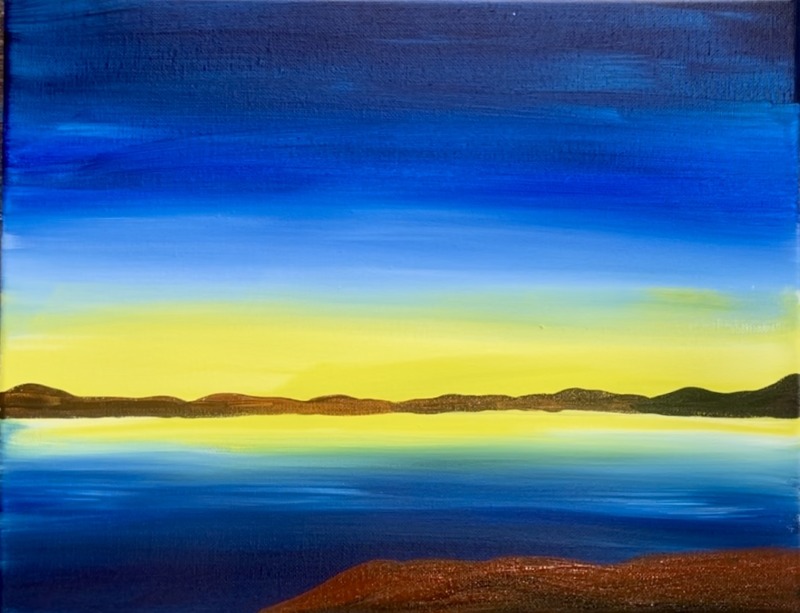
Then, go back and highlight the land in the foreground. Mix about equal parts “titanium white” and “burnt Sienna” together. Then use this light brown to paint the top part of this land area and blend it down with the rest of the brown.
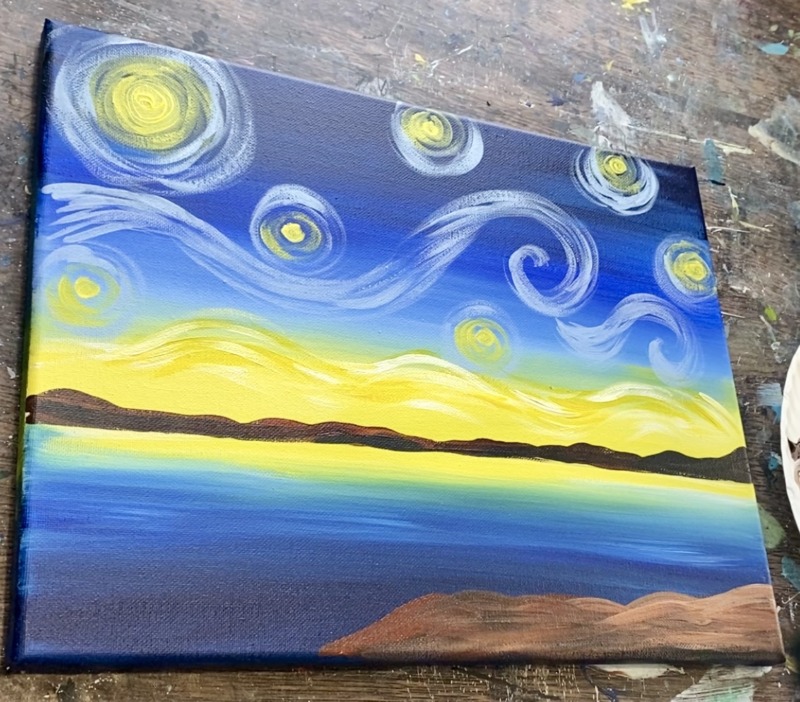
4. Paint Moon & Star Circles
Use a #4 round brush. Mix equal parts “titanium white” and “primary yellow” together. Paint a medium size circle in the upper left part of the canvas. This will be the base for the moon.
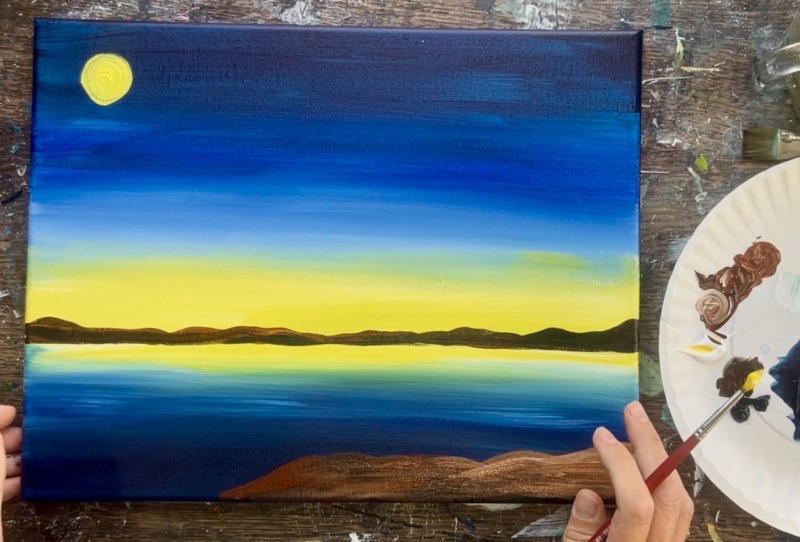
Then paint little circles all throughout the sky for the individual stars. Leave some room in the middle of the sky for the spiral lines later.
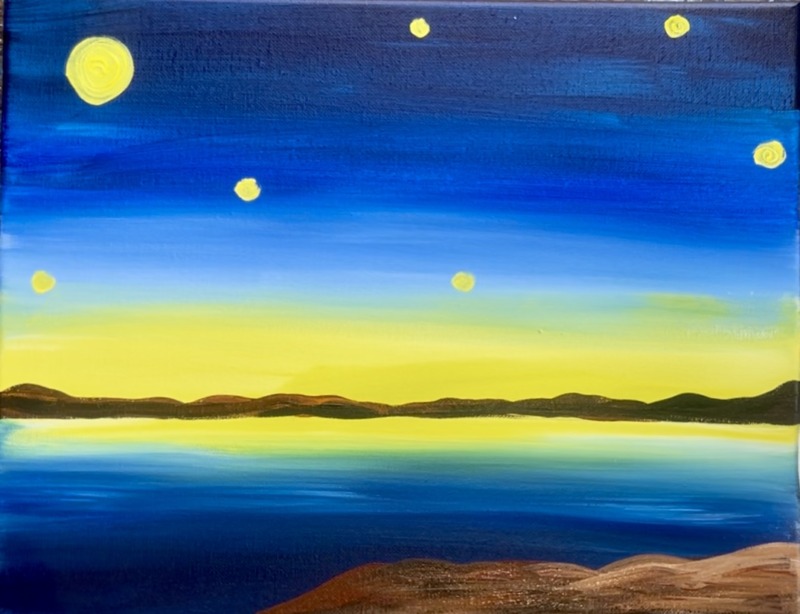
After painting each initial circle, go back and “dry brush” radiating lines around each of the circles. To “dry brush”, load your brush into the same yellow color but wipe off some of the paint off the brush. Paint curved lines around the circles that radiate outwards. This starts the glowing star effect which is in the style of Vincent Van Gogh’s Starry Night.
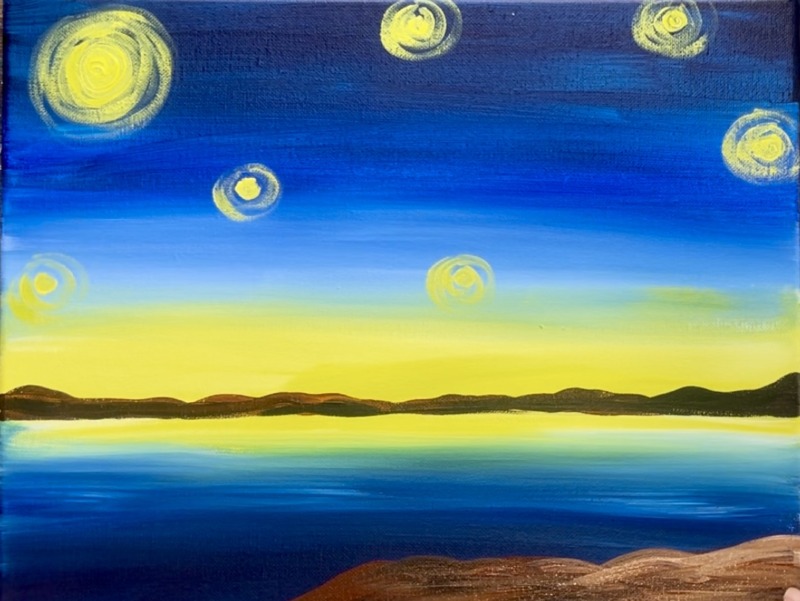
5. Draw Spirals
Use a piece of white chalk to draw spirals. These are two spiral lines that go across the sky in the middle of the canvas. They are elongated and go from the left end to the right. You may change the direction or position of your spirals depending on where your stars are in the sky.

6. Paint light blue over spirals and around yellow stars
Mix on your palette equal amounts of “ultramarine blue” and “titanium white” to make a light blue.
Use the #4 round brush and this light blue to paint long dashed lines along the chalk spiral line.
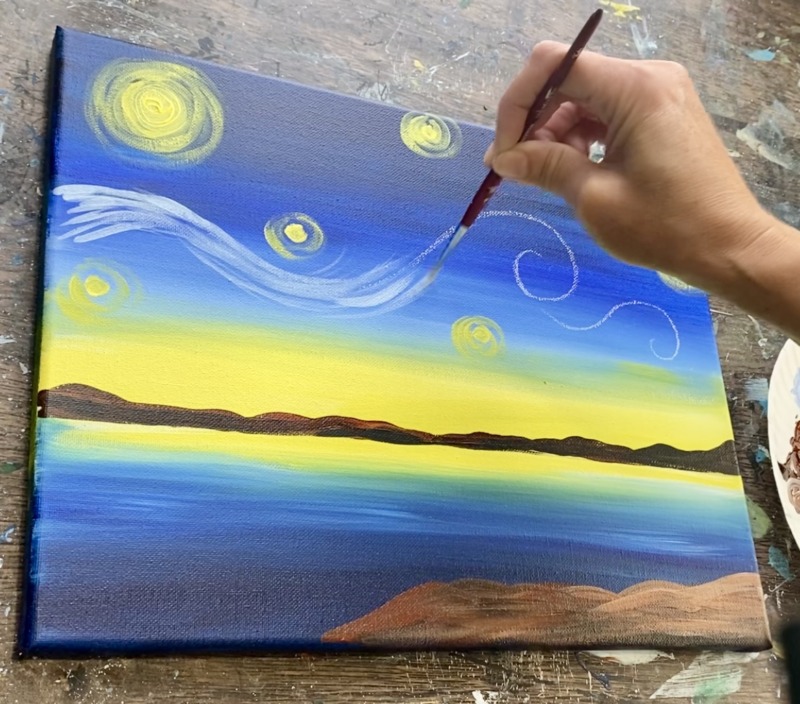
As you are painting these dashed lines, expand the spiral lines to become thicker. Do this to both of your spiral lines.
Then take your same light blue color and paint more radiating dashed “dry brush lines” around your stars. Paint these lines about an inch outwards from the yellow radiating lines.
7. Paint yellow wavy line above horizon
Rinse the #4 round brush. Then load it into just “primary yellow”. Paint a thick wavy line across the glowing yellow area of the sky. This should show up over that light lemon yellow color.
After painting an initial wavy dashed line area, load your brush into “titanium white”. Then paint another set of white wavy lines over the yellow lines. This helps brighten them up.
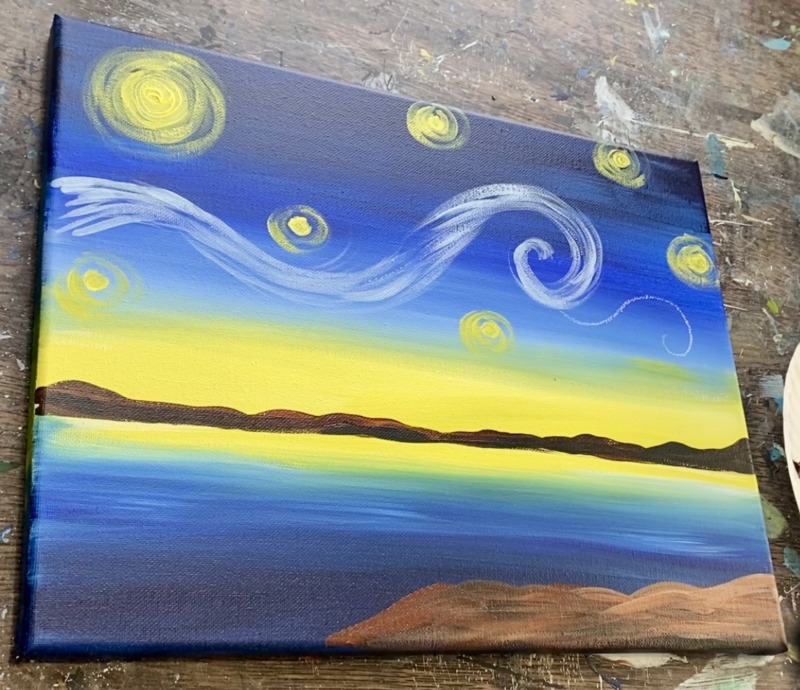
8. Paint Dark Lines Around Light Blue Lines
Rinse the brush. Then load it into “ultramarine blue”. Paint dashed radiating lines around the light blue lines in the sky. This includes going around the stars, the moon and the large spirals. The direction of these lines should go in the direction of the way the spirals/ stars are going!
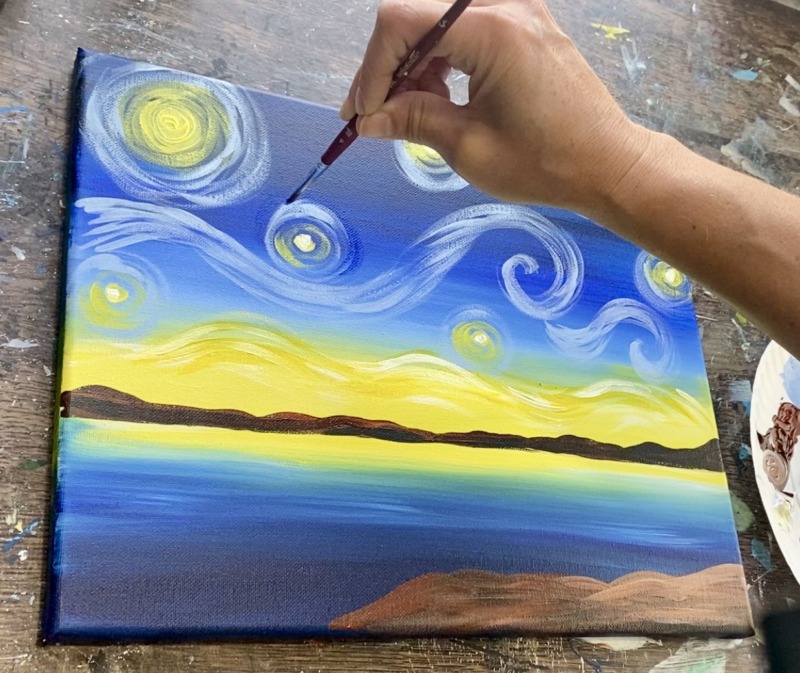
After doing a round of the “ultramarine blue” dashed lines in the sky, load your brush into “Prussian blue” and add more lines around the ultramarine blue lines! This will add more texture into the sky! Do this in the dark areas of the sky and don’t add any of the blue lines in the yellow area above the horizon.
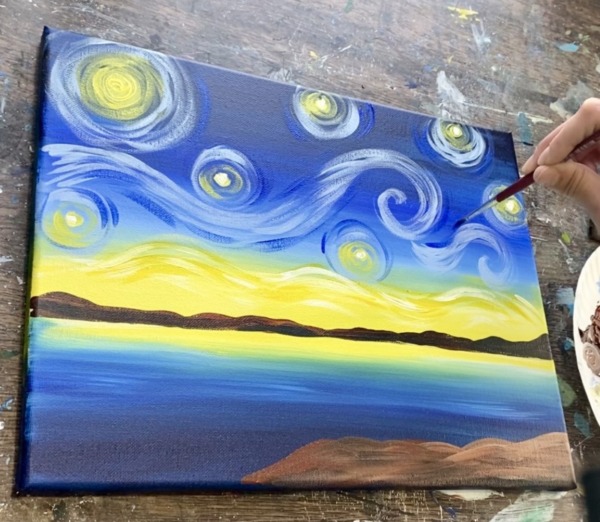
9. Paint Yellow Over Middle Part Of Spirals
Rinse the brush. Then load it into your yellow & white combination. Lightly add this light yellow in the middle area of your large swirl in the sky.
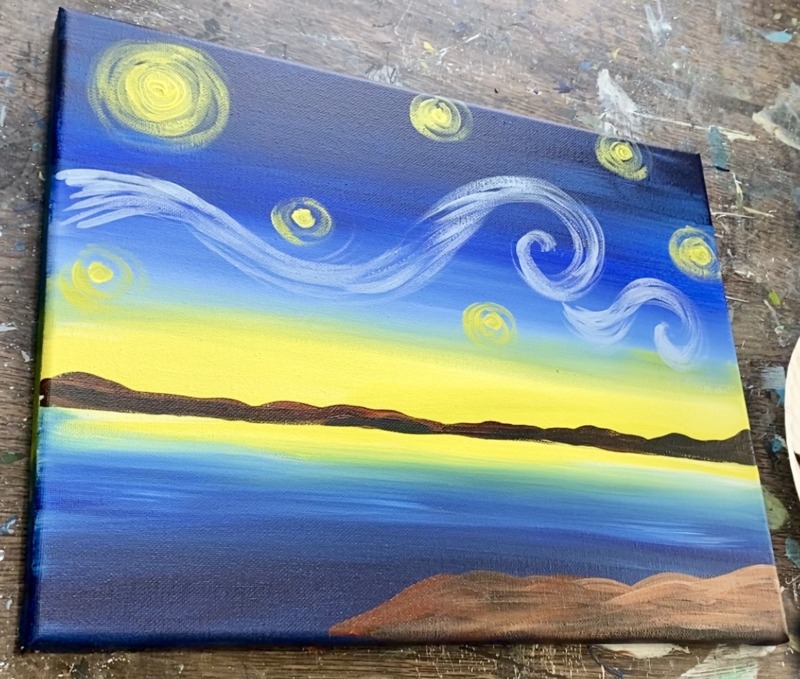
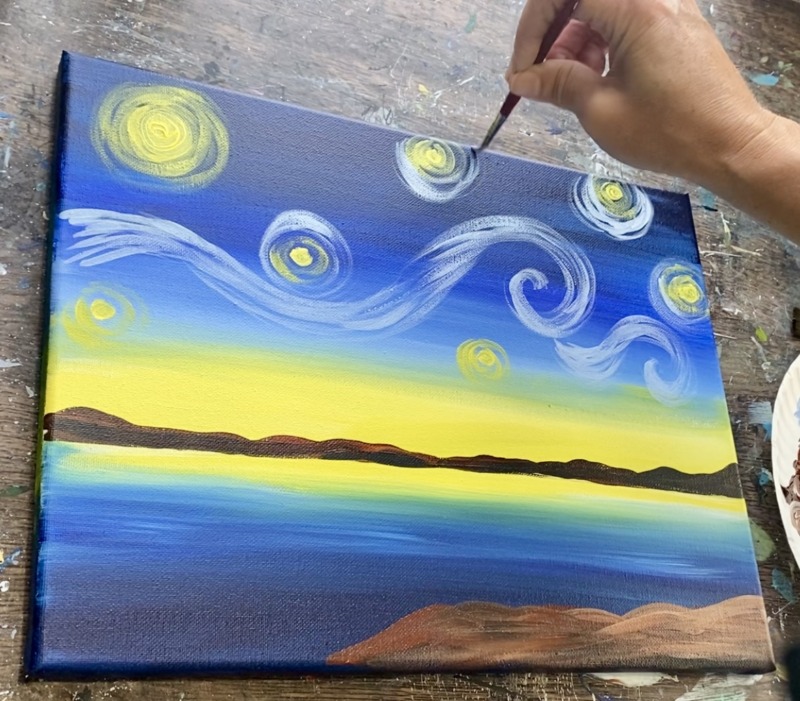
10. Add Orange To Moon, Stars And Spirals
Load your paint palette with “cadmium orange hue”. Use the #4 round brush and paint a little orange circle in the center of all of the stars. Then paint an orange circle in the middle of the moon (for a full moon shape). If you want to do a crescent moon, you would paint a crescent shape.
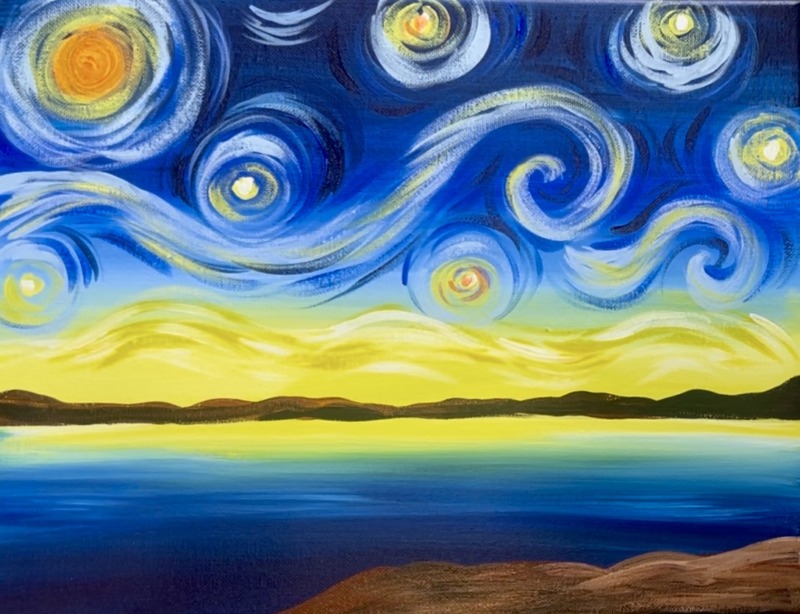
Mix orange and white together. Add this orange-white in the middle of the moon and in the middle of all of the stars. Additionally, add this orange-white as radiating lines around the stars and in the middle of the spirals.

11. Paint Reflections In Water
Load your paint palette with “primary yellow” and “titanium white”. Use the #4 round brush to paint thick horizontal reflection lines in the water.
Start with JUST the color “primary yellow”. Start at the back of the lake (where the yellow is) and paint small horizontal marks. Create a column of these marks and leave a small gap that still shows the dark water between the lines. As you work your way down, make the lines slightly wider. This will make a little perspective in your water reflections.
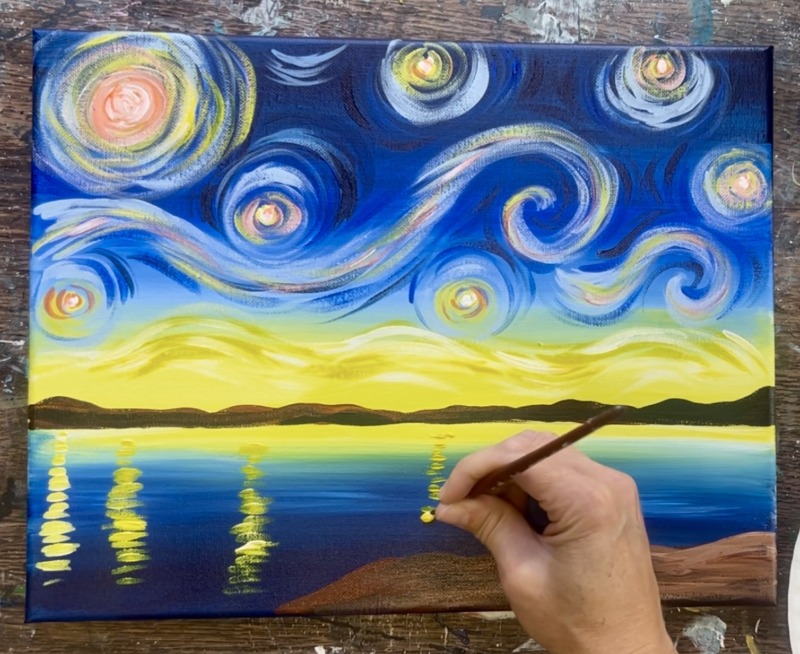
Make your columns line up with most of the stars and the moon.
After doing the first round of lines with the yellow, load your brush into “titanium white”. Do a second round over your yellow lines. Adding white over the yellow brightens this up!
Rinse the brush. We are going to do more reflection lines between all of our yellow reflection lines. This time these will be “light blue”. Mix “ultramarine blue” and “titanium white” to make light blue (about equal parts). Use the #4 round brush and paint more horizontal lines but do this between all of your bright yellow columns of lines. Create more perspective by making the lines smaller in the distance and larger towards the bottom of the canvas.
12. Splatter Stars (optional)
Use the toothbrush to splatter white specks in the sky. Load the brush in slightly watered down white paint and test out a separate surface to make sure it’s the right consistency.
Splatter all over the sky and water.
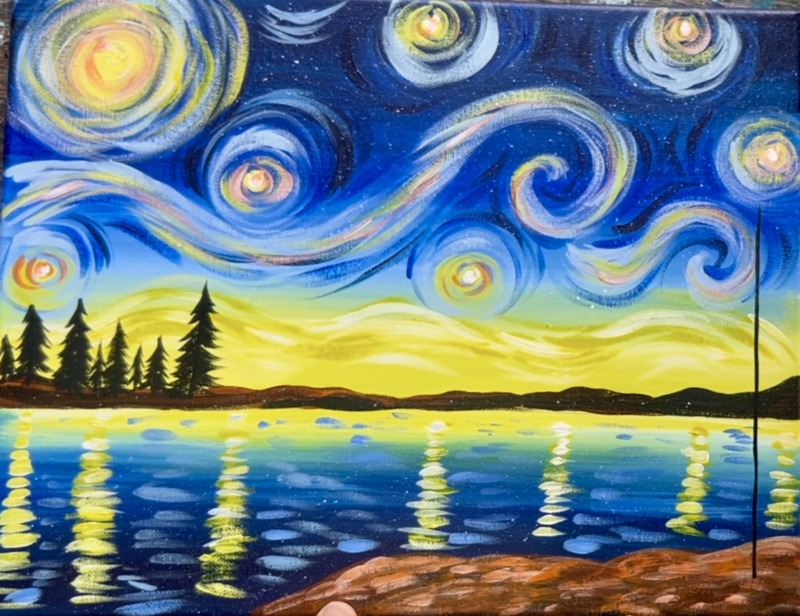
13. Paint Tree Silhouettes
Use the color “mars black” and the #4 round brush. Paint silhouette pine trees along the horizon.
When you paint these trees, start by painting a vertical line. Then start at the top of the tree and brush downwards to create individual branches.
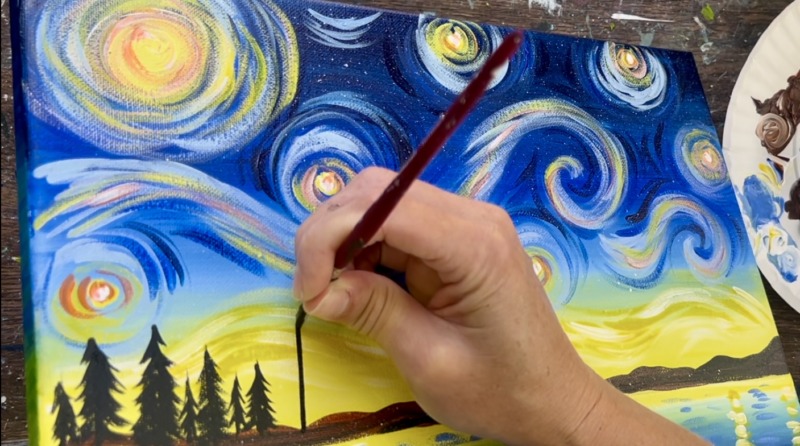
I did a few trees on the left side of the horizon area and then did the two large trees on the right. Paint this tree starting on the ground area in the front and make the line go up to the middle part of the sky.
Then do the same technique for painting trees. Start at the top of the line and brush your branches downwards and outwards.
Make two trees. The second tree in the front is slightly shorter. Your trees may be placed differently depending on where your stars and reflections are.
Continue painting as many silhouette trees as you want in the background.
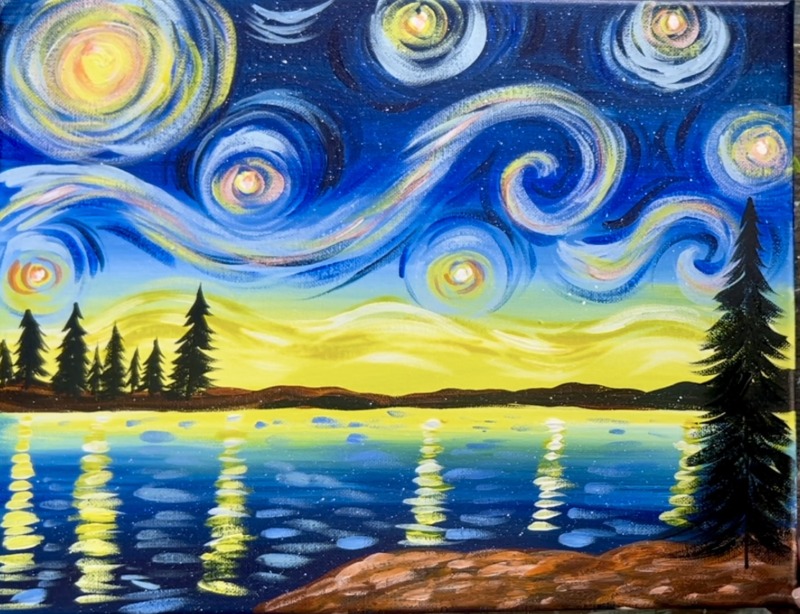
14. Optional: Add Dimension Into The Trees
If you want some colors in the trees other than “silhouette”, you can try mixing different shades of grays. This makes the trees look like they have some distance/ depth. Mix white with black to make different variations and then paint more trees. The further away the tree, the lighter the color.
Also, you can add green to your trees in the front! Load your paint palette with “hooker’s green hue” and “titanium white”. Double load the #4 round brush in both green and white. Start at the bottom of one of the large trees in the front. You are going to re-paint branches but leave a lot of that black still showing through. Paint rows of branches that go from the bottom to the top. These branches will overlap each other.
Repeat this for both of the trees.
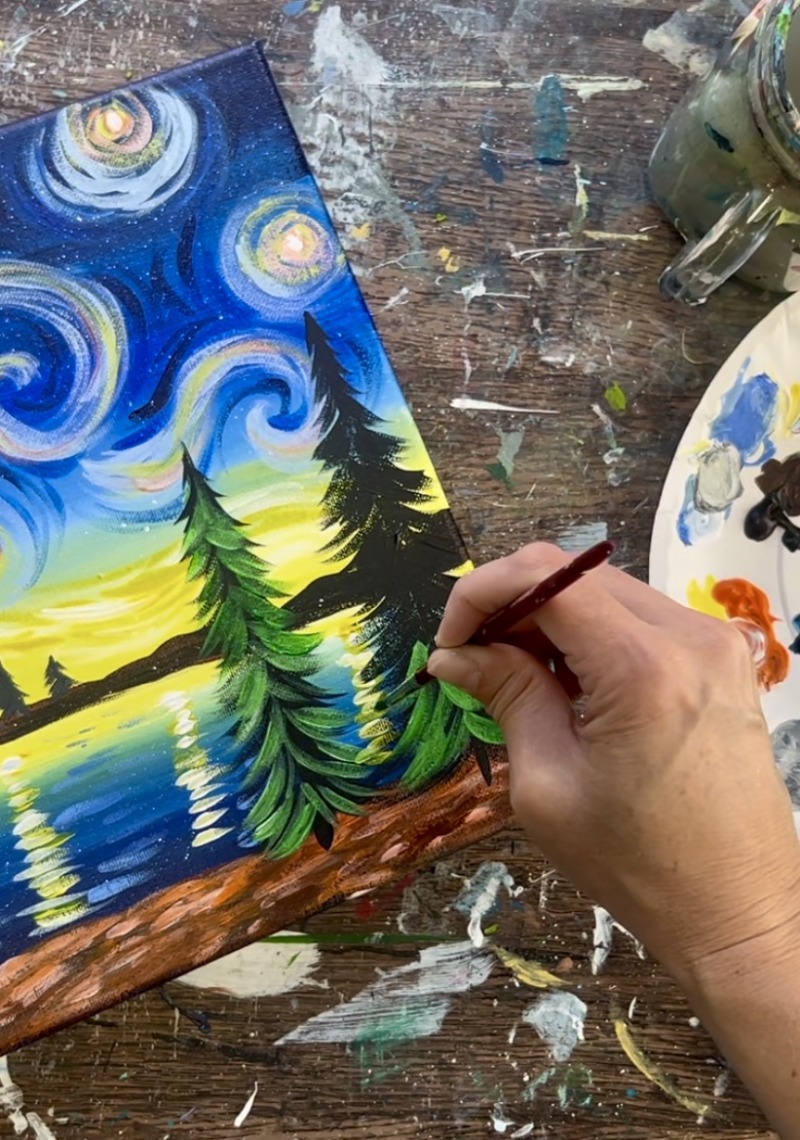
Optional: add a little more white on the brush and add some lighter branches on the left side of both of those trees for extra highlight!
If you want, add more silhouette trees along the horizon.
To make the “shadow silhouette” trees have a little more “dimension”, you can use titanium white to lightly outline the outer left and right branches.
15. Optional: Paint Twinkle Stars
As a final touch, I added twinkling stars in the sky! We already did splatters and the “Van Gogh” style stars. This adds such a pretty sparkle to the painting. Use the #4 round brush to paint little dots of white and then paint little points on the stars.
Finished! Sign your name and show it off!