Would you like to save this?
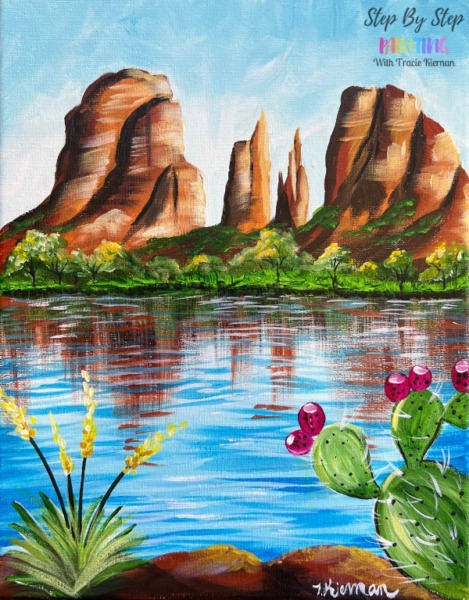
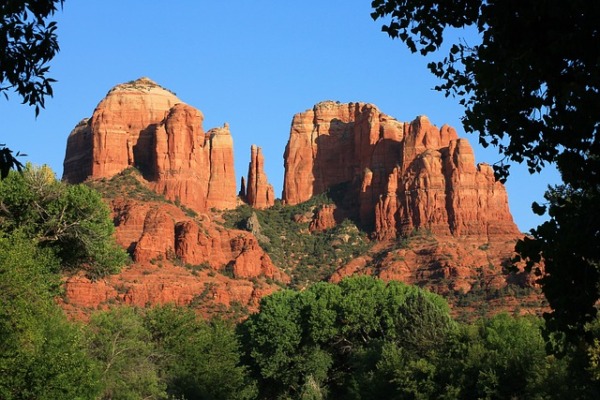
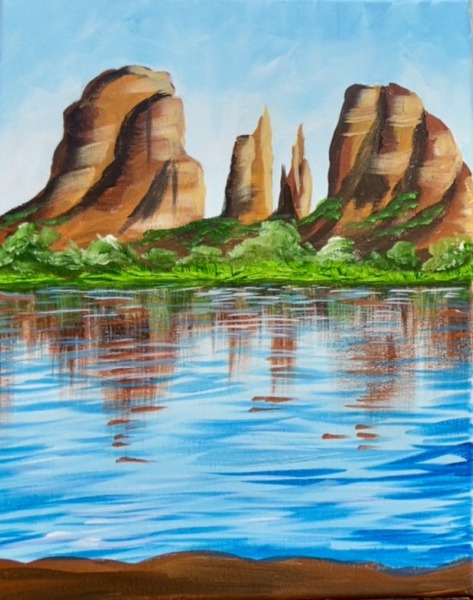
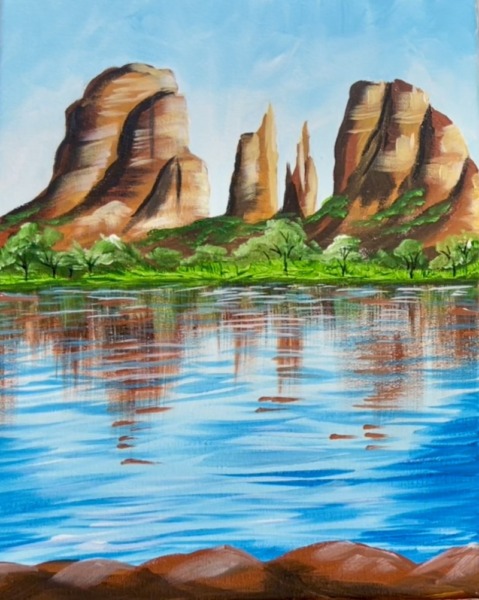
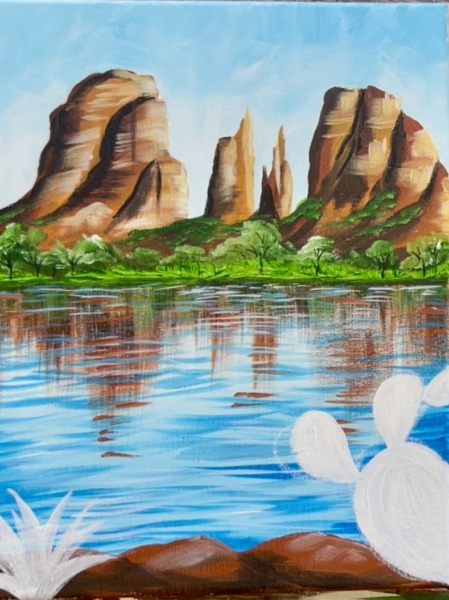
I have a special painting to share with you this week! This is Cathedral Rock in front of Oak Creek in Sedona, Arizona. It’s a challenging painting but I encourage you to try it even if you are a beginner! The technique for the rocks are similar in style to the “Havasu Falls” tutorial I did in 2021.

I have been to Sedona a few times and absolutely love this beautiful area! One of my most memorable Sedona trips was when I was a teenager and my Aunt Karen took me and my sisters there for the first time. We had so much fun exploring the shops in the town, learning the names of all the red rock formations and hiking around Oak Creek. It was such a memorable trip and I think about her every time I see Sedona.
My Aunt always inspired me to see beauty in even the smallest things. She recently passed away and this painting is dedicated to her.
Enjoy and happy painting!
Materials Needed
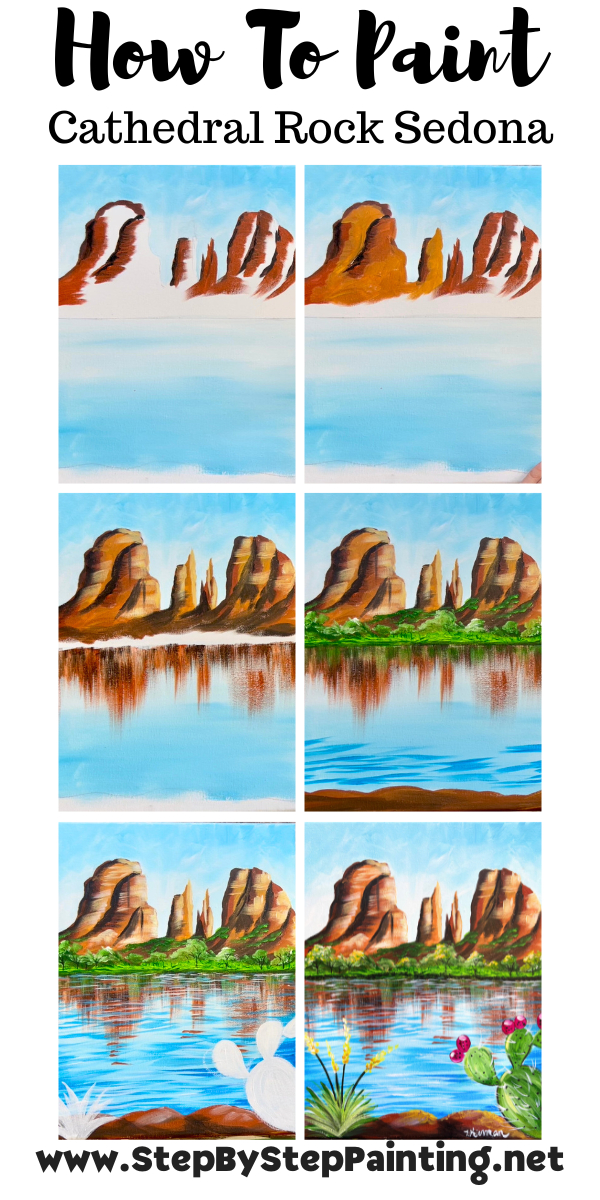
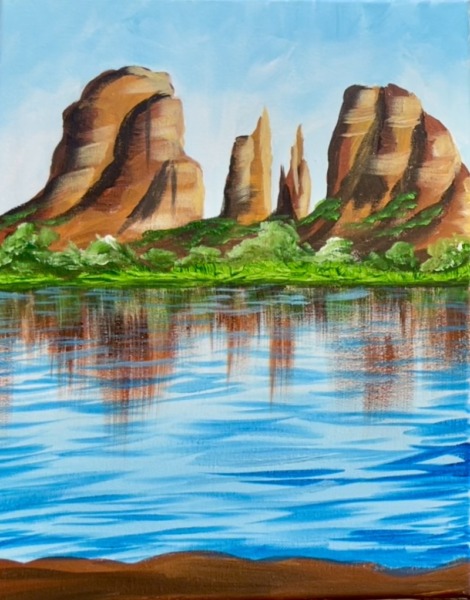
Cathedral Rock Sedona
Learn how to paint beautiful Cathedral Rock in Sedona, Arizona reflecting over Oak Creek with cactus prickly pear and yucca plant in the foreground.
Materials
- 11 x 14 Canvas
- Acrylic Paint
- Paint Brushes
- Pencil
- Optional Template (to help with drawing canyon if you need it)
- Ruler
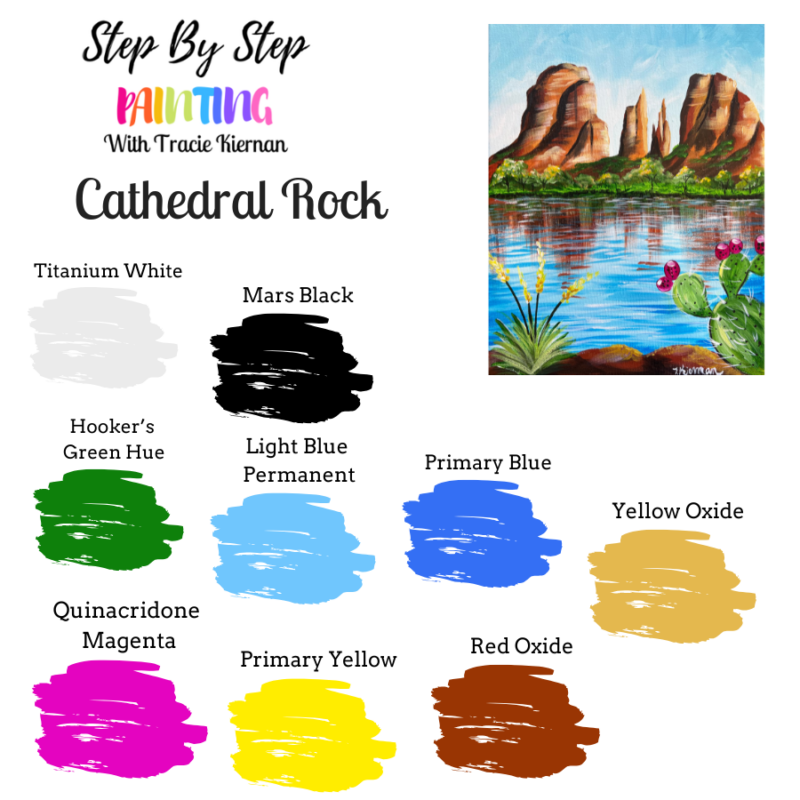
Colors
- Titanium White
- Mars Black
- Red Oxide
- Yellow Oxide
- Hooker's Green Hue
- Primary Blue
- Light Blue Permanent
- Primary Yellow
- Quinacridone Magenta
Brushes
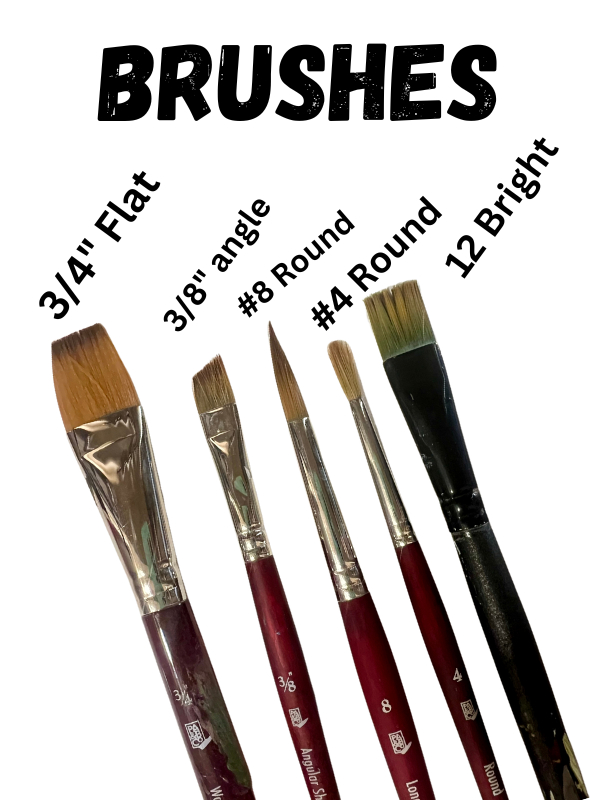
Note: the 3/8″ angle brush is optional and only used sparingly in this painting.
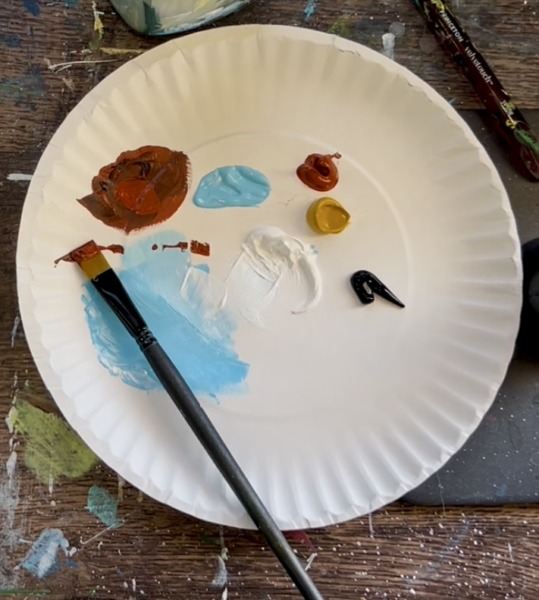
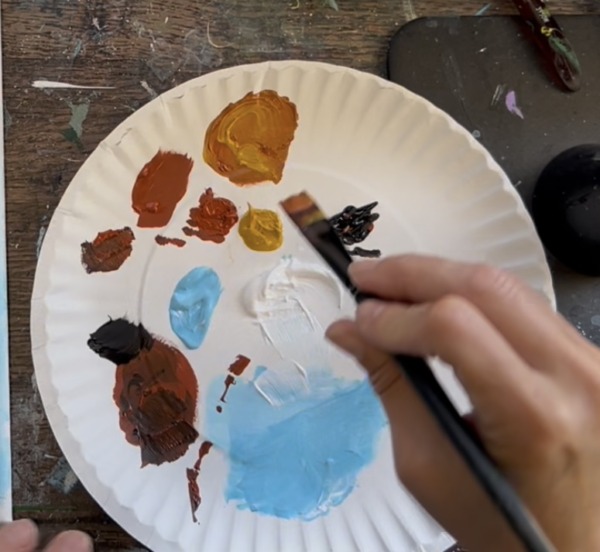
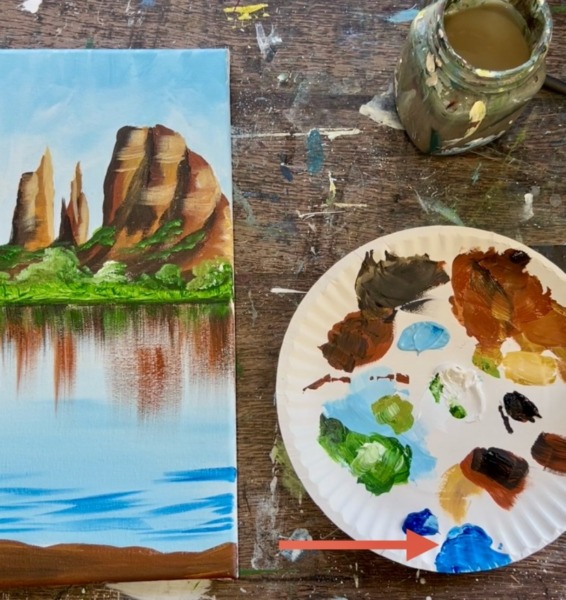
Color Palette
Red Oxide and Yellow Oxide are important colors in this one so we can capture the rusty red color in those rocks! If you don’t have “Red Oxide” you can try using “Burnt Sienna” and mix a little red into it to make the brown more reddish. If you don’t have “yellow oxide”, a “yellow ochre” works or you can substitute “raw sienna”.
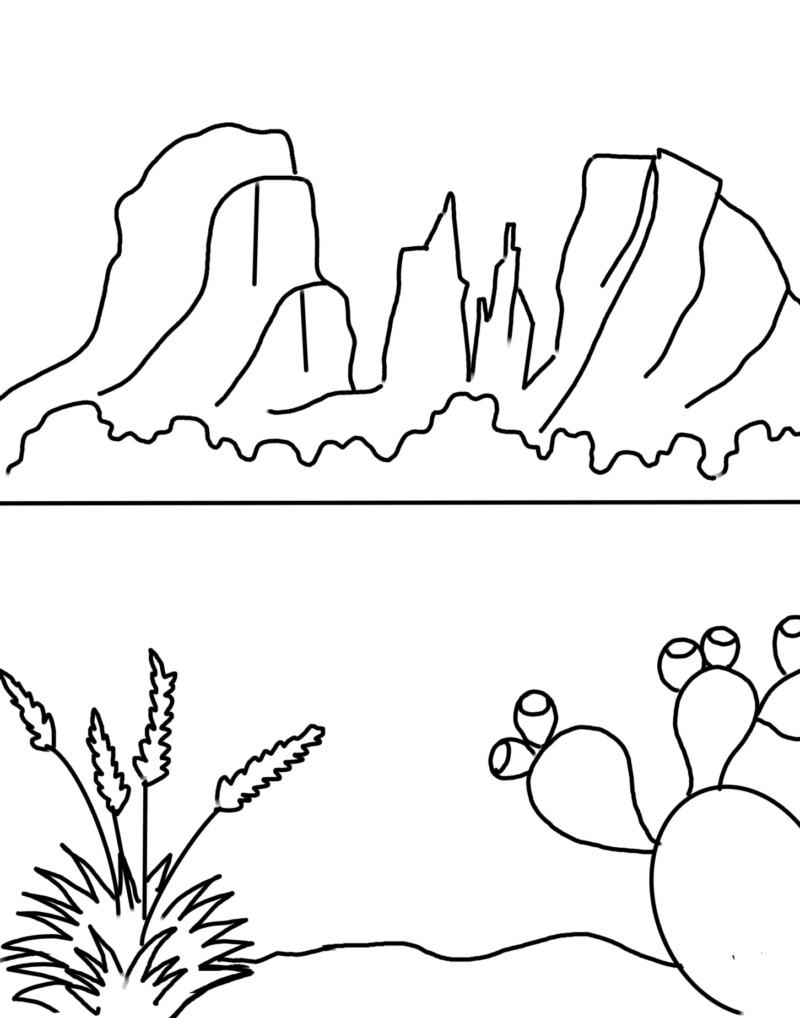
Traceable (optional)
Use this to help with drawing the cathedral rock.
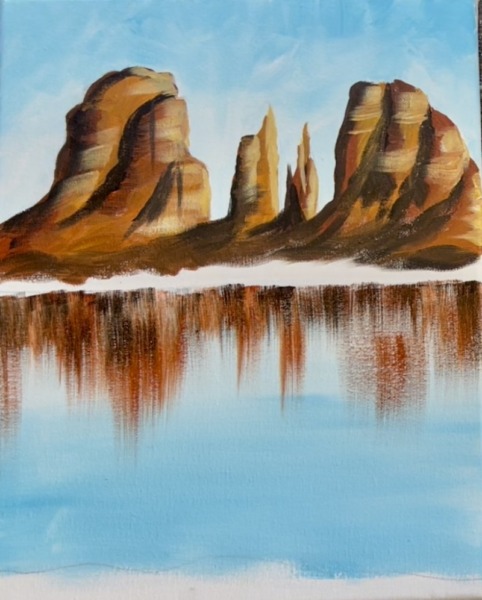
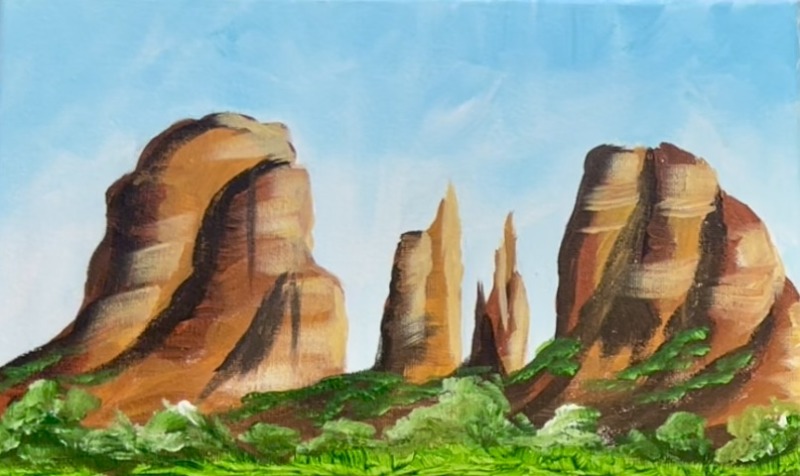
Reference Photo
A reference photo is helpful for this painting, especially when drawing and getting the shape in for the canyons.
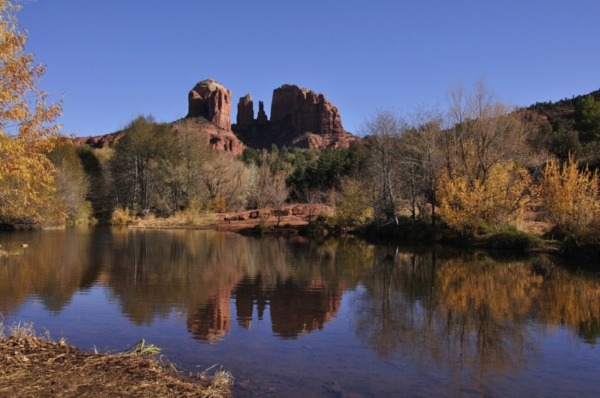
Here is a photo with the canyon reflecting in the water. We are going to do more of an abstract/ impressionistic style reflection just to make things easier.
Directions At A Glance
Video
Step By Step Instructions
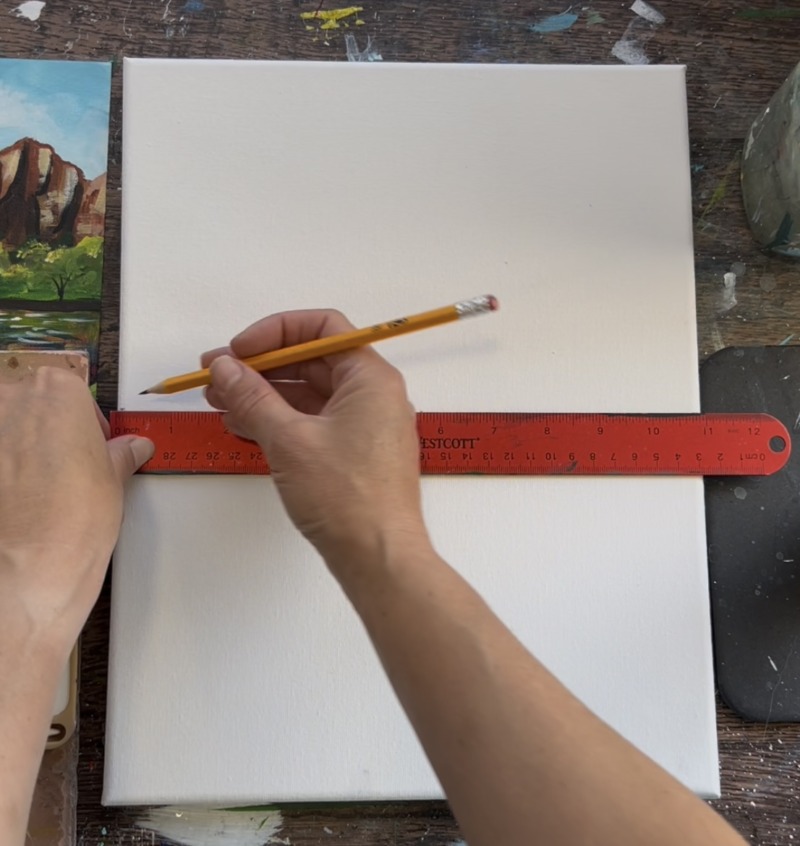
1. Draw Cathedral Rock Shape

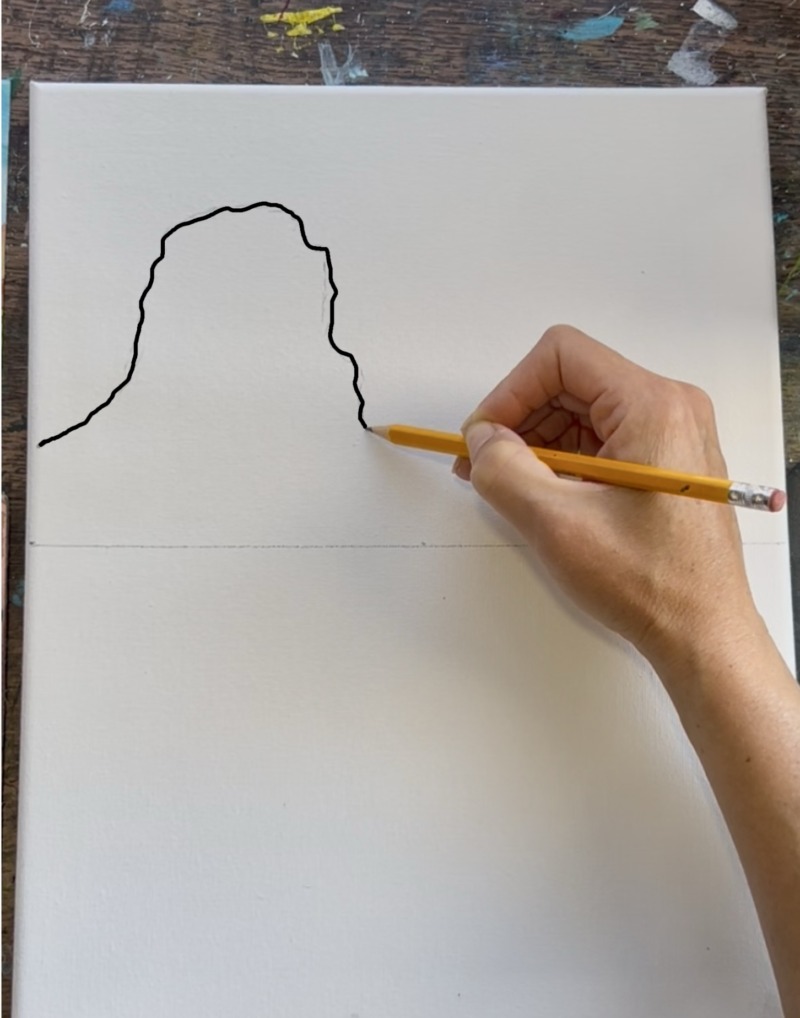
Position your canvas vertically. Locate the center of the canvas. Since my canvas is 14″ high, I marked my line at exactly 7″. Draw a straight horizontal line across the canvas.
Then sketch the shape of the rock formation. I recommend looking at a photo of Cathedral Rock in Sedona. Observe the shape of the rocks and the lines that define the edging.
Use your pencil to start sketching. Do this very lightly with small “tick mark” sketch style strokes. Start with the large rock shape on the left. Leave about an inch of space above your “horizon line”. The rocks don’t touch that line at all.
Then start drawing the narrow rock pillars in the center of cathedral rock. There are two narrow rectangular rock shapes. The one on the right is more of a narrow triangle.
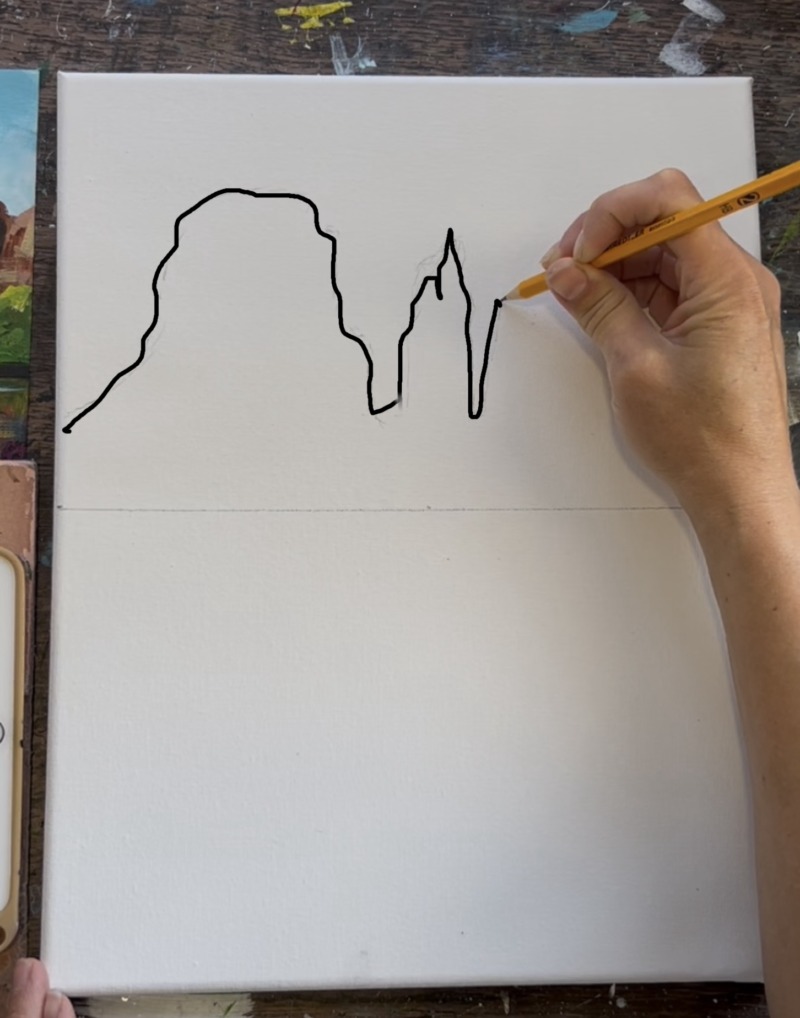
Draw the large rock shape on the far right. Draw a few lines curving down to create layering in your rocks. These layering lines will help us define where the shadows go when we start painting this in.
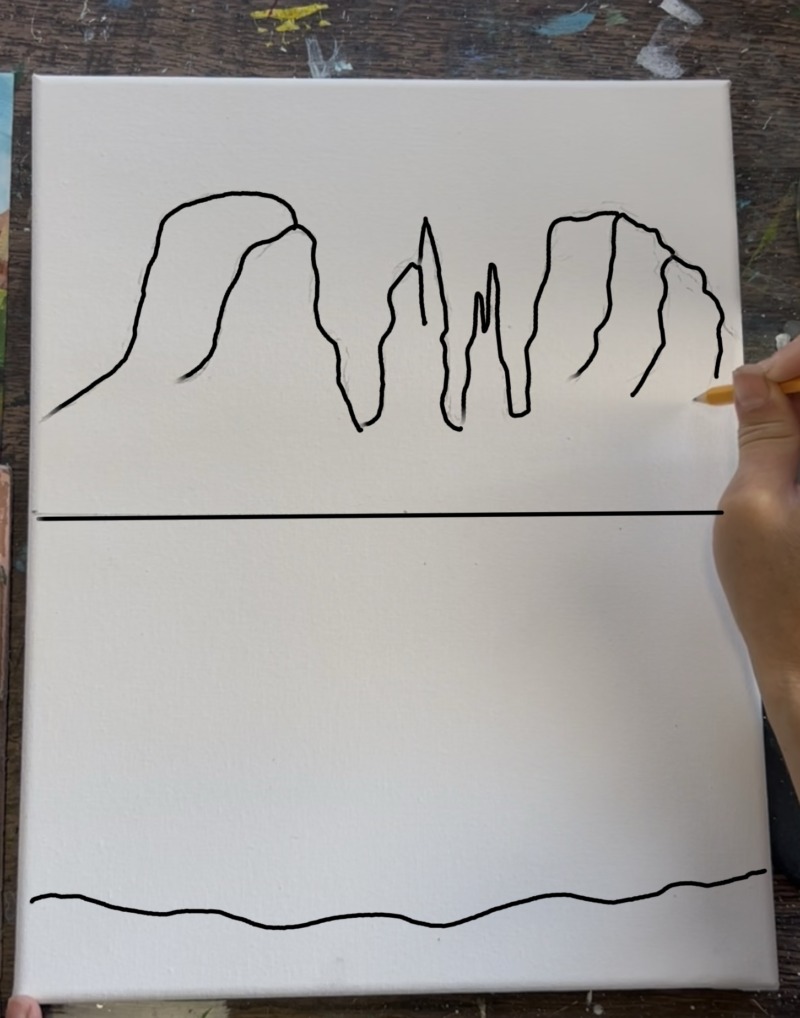
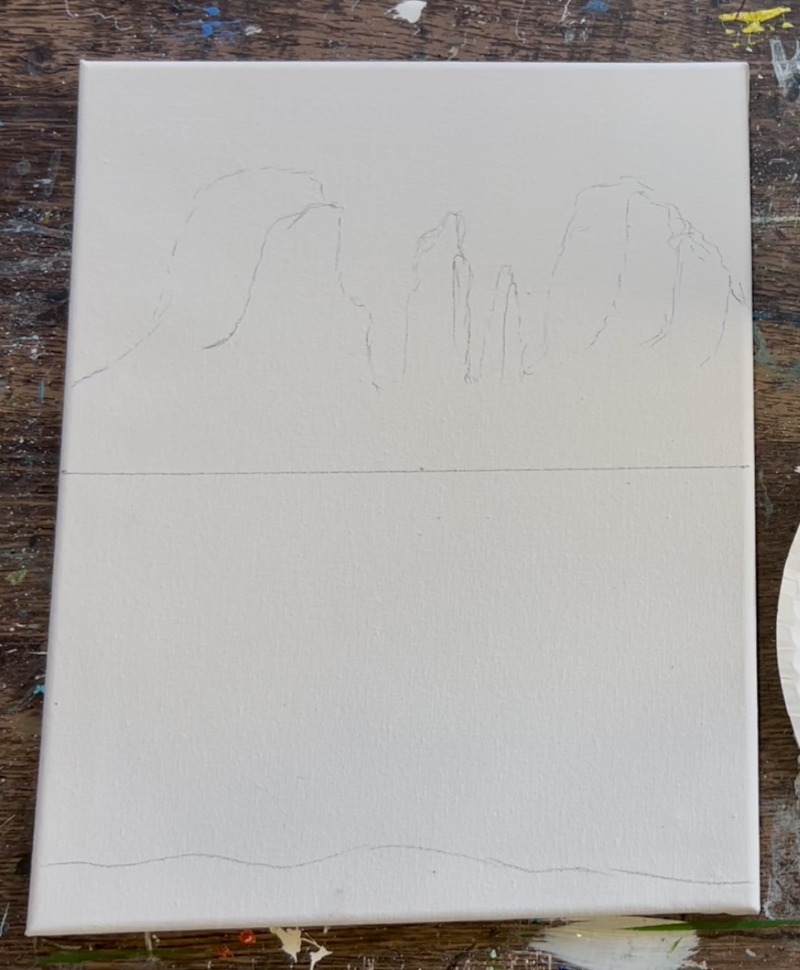
On the bottom of the drawing, there is about an inch of space where there will be some land that hosts the prickly pear cactus and yucca plant. We won’t draw these plants right now.
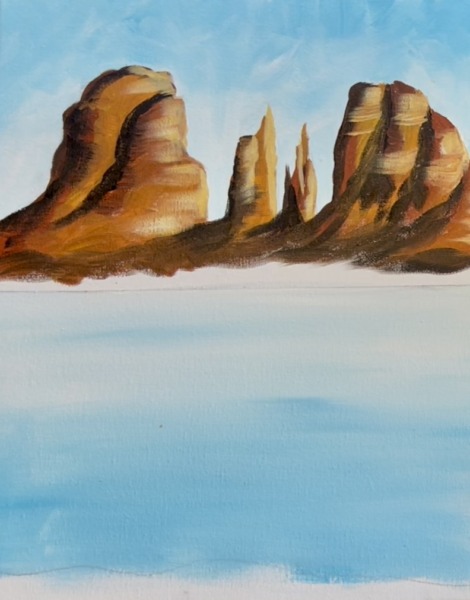
2. Paint Sky & Water
Next we are going to paint the sky and water with light blue and the 3/4″ flat brush.
Load your paint palette with “titanium white” and “light blue permanent”. Take your 3/4″ flat brush and mix both the white and light blue together. Start at the top of the sky. Paint angle paint strokes to create a “textured” sky.
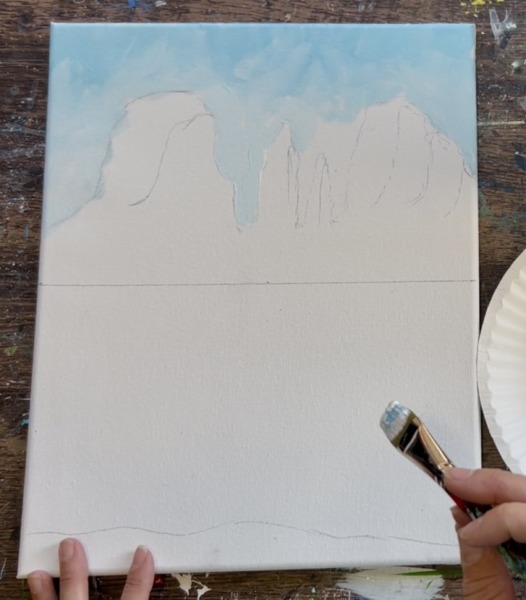
As you work your way down, paint around the canyon drawing. Add more white to your brush so the sky becomes lighter on the bottom of the sky. Adding lighter color to the bottom of the sky and around the rock formations will make some very pretty contrast when we paint the red rocks in later!
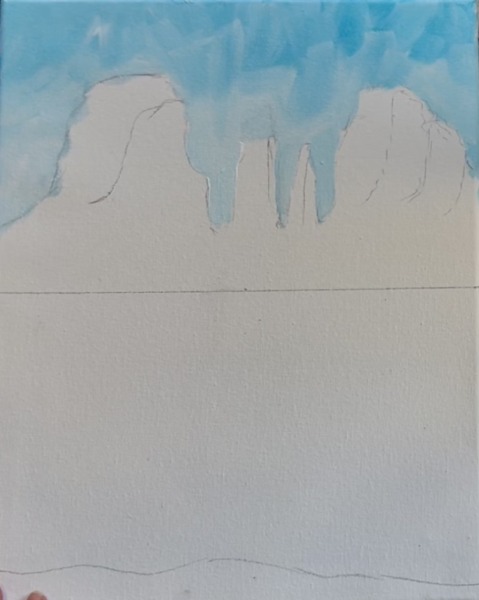
If needed, add more “light blue permanent” not mixed with white on the top of the sky to create more contrast in your sky (showing it going from dark to light).
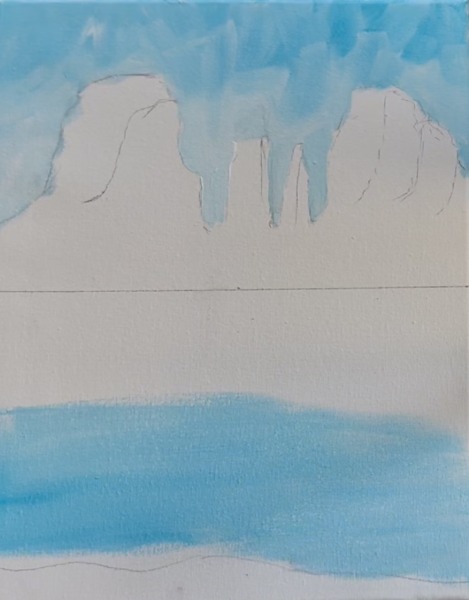
Then paint the water. This first layer of water will be left and right paint strokes as a very thin layer. Add a little bit of water to your “light blue permanent” and “titanium white. Then paint left and right paint strokes starting at the bottom of the water. As you paint up towards your “horizon line”, add more “titanium white” to your brush so the blue becomes lighter. You want to paint a very gentle gradient blend of dark blue (on the bottom) and lighter blue (at the top). Stop at the horizon line and also don’t paint the bottom land area.

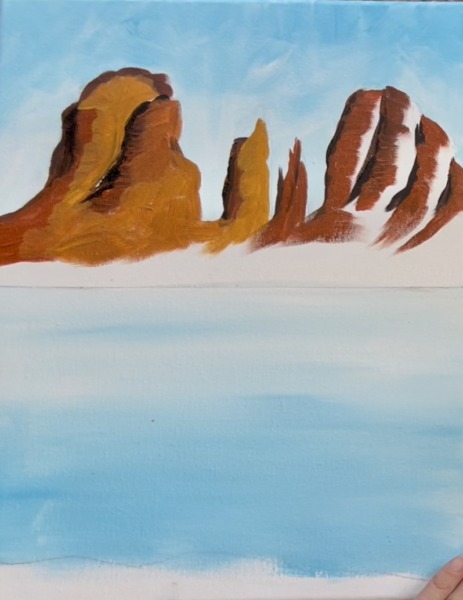
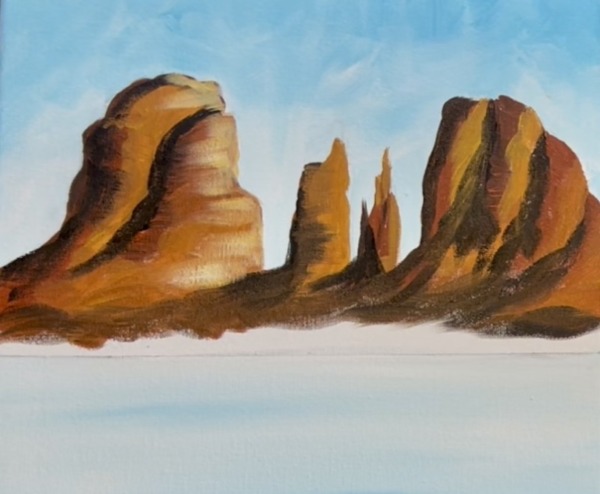
3. Paint Shadows On Rock Formations
We are going to paint these Sedona Rocks starting from our darkest shadowy layers and doing the lightest highlights last. At first your rocks are going to look very dark but we will be gradually adding lighter layers to them! Also, when you paint these canyons, you can do so in a very loose expressive way!
Load your paint palette with “red oxide” and “mars black”. Mix a small amount of “red oxide” with “mars black” to make his red a dark red. Then use the #12 bright brush. Outline the far left and the far top edges of all of your rock formations.
I started on the rock on the left.
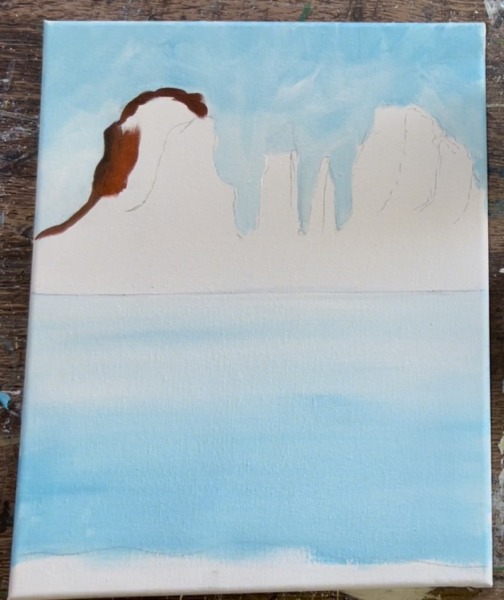
Outline the overlapping layers on the rock as well. Basically all the left vertical areas of the rocks get outlined. Bring the vertical shadow layers down and slightly bend them to the left on the bottom of the canyons. Leave a gap above your horizon line and on the bottom of the rocks.
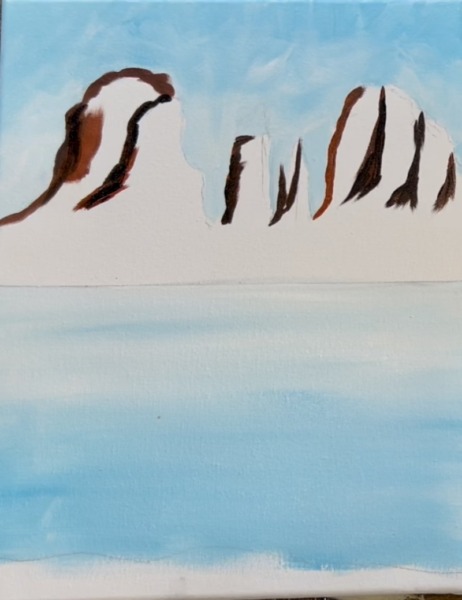
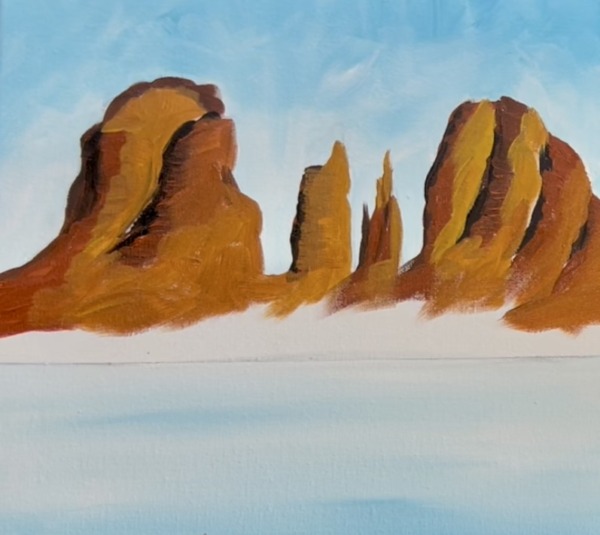
4. Paint Medium Dark Layer Of Reds On Canyons
Next, wipe the brush but do not rinse it. Load it into just the “Red Oxide” color. Use the #12 bright brush to paint little horizontal marks that extend to the right of each of your shadow lines. You want that dark color to blend with this red a bit so drag some of that black with it. Also, these rock formations have little horizontal sedimentary layers. To mimic that, we can make our paint strokes go in horizontal directions. Leave the far right parts of the rocks blank for now (don’t cover all of the shape in).
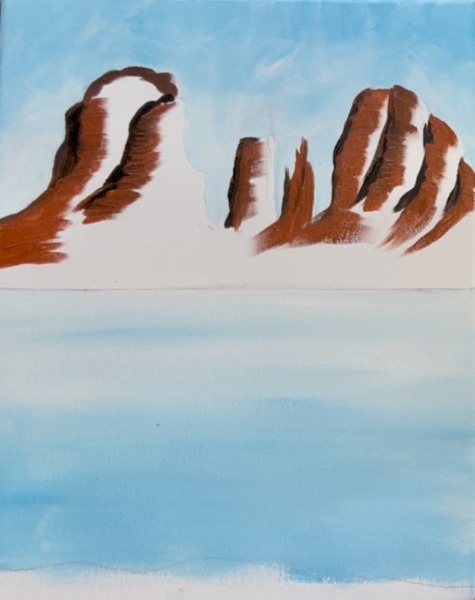
5. Blend In Yellow Oxide Layer On Canyons
Rinse the brush. Mix “yellow oxide” with “red oxide” on your paint palette.
Then paint your next layer of color on the rocks. Add this yellow and red wherever there is white canvas left over. It’s okay for this to blend with the red in the cliffs.

Fill this in with short paint strokes going horizontal and also all directions.
Leave the area blank on the bottom of the rocks where the trees will be.
6. Blend Dark Layer Of Base Of Canyons
Next, mix the yellow oxide, red oxide and a small amount of black on your paint palette. Use the #12 bright brush and paint the base of the rocks/ cliffs. This adds a very dark shadowy layer on the bottom. Do this with short, expressive angle types of paint strokes.
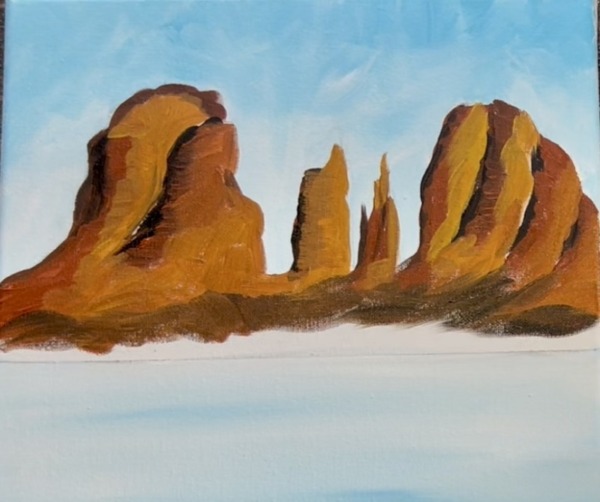
7. Paint More Shadowing
Wipe the brush. Then load it into your red oxide and black mixture again. Go back over your shadow areas and repaint them to be thicker and more defined. You can go back and define the left edges of the cliffs as well. Also, it’s okay to blend this dark into some of the yellow and red layers you just painted (just don’t over blend the colors).
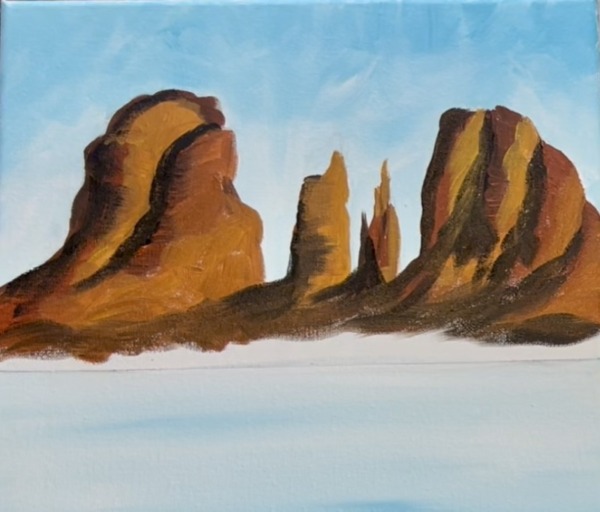
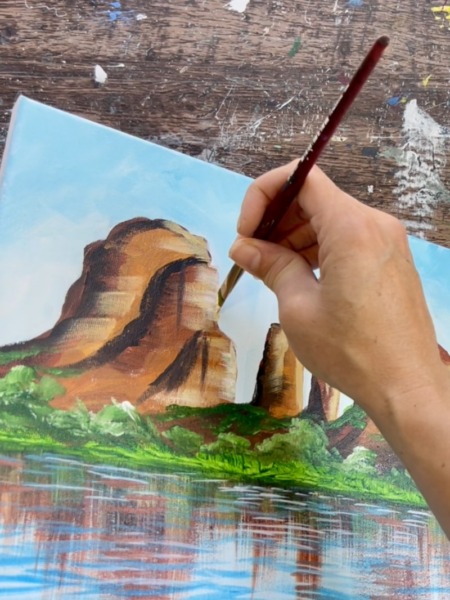
8. Add Light Layer/ Highlighting
On the more narrow pillar shaped rocks, you can paint your yellow marks going in a vertical direction instead of left and right. Add your highlighting to all of the rocks on the right side opposite of the shadows. There may be areas where you actually overlap some of your light colored paint strokes over your shadow colors and that is fine!
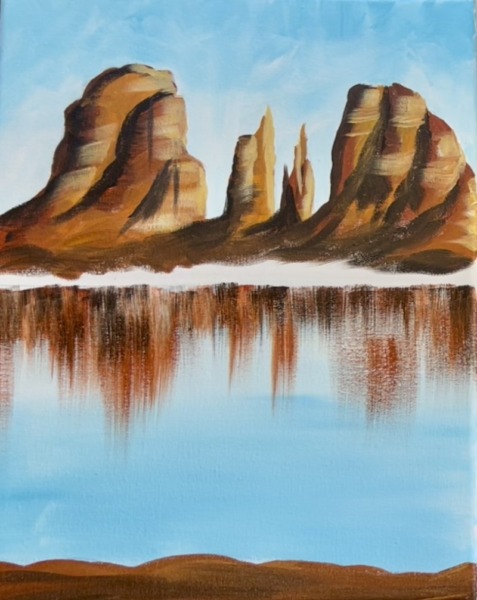
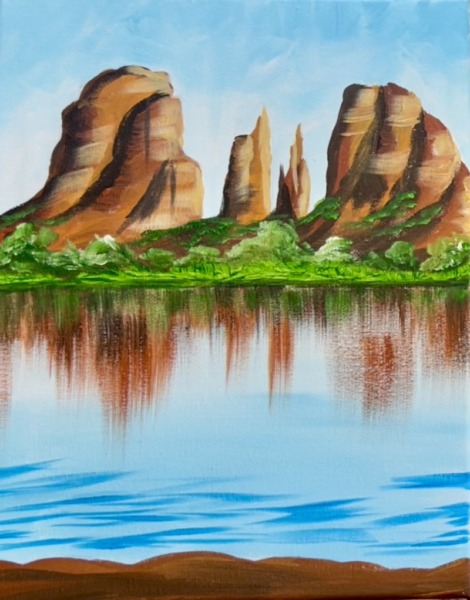
9. Paint Reflections
The reflections in this painting are simplified but still pretty and resemble the rock formations reflecting in “oak creek”.
Use the 3/4″ flat brush and the color “red oxide”. You can try this technique either “dry brush style” where you only load a small amount of paint on the brush and lightly brush it to look dry and “see through”. Or you can try watering the paint color down to make this more of a watercolor effect. The point is we want it to look a little translucent and not opaque. We want to see the layer of the blue water showing slightly through.
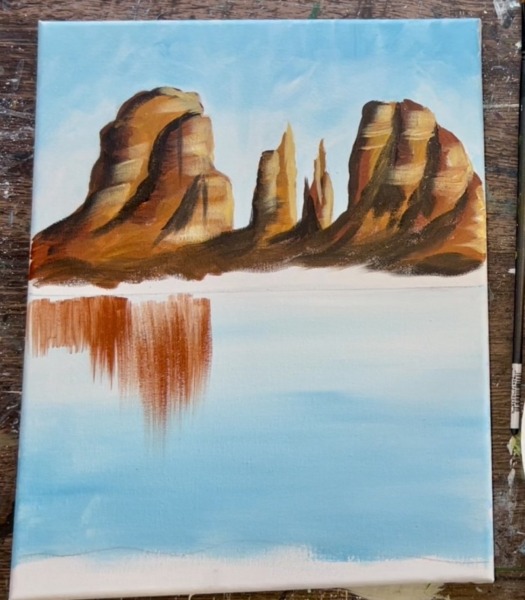
Take your 3/4 flat and drag the “red oxide” down in vertical directions to mirror the shapes of the rocks. Start below the horizon line (there is still a gap above the horizon line where the trees will be). Use the full width of the brush and drag it downwards and then release the pressure to make your paint stroke fade away.
Then load a small amount of black onto the brush with the red oxide. Go back and create darker reflection marks. This time only apply these dark marks on the upper part of the reflection and don’t brush all the way down. This dark gives us some variation of color in the reflection.
10. Paint Bottom Land Area
Use the 3/4 flat brush and “red oxide” to paint the bottom land area.
11. Paint Greenery On Base Of Canyon
Load your paint palette with “hooker’s green hue”. Use the #12 bright brush and “dab” the brush in the area where the trees are. Fill this entire area with green by “stippling” or “dabbing” the paint brush.
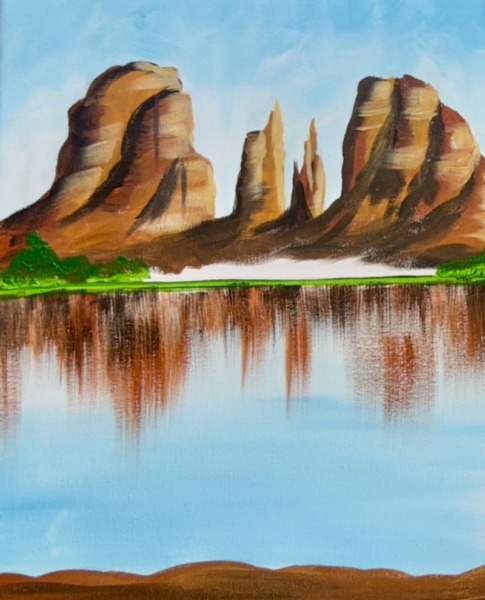
Vary the heights of the treetops and make them overlap parts of the bottom of the canyons.
Then load your brush into green and “titanium white”. Go back and use this light green to highlight the tops of the trees. This helps to lighten the tree tops up a bit.

There is greenery running up the sides of these rocks. Dab a little green going up the shadowy parts of the canyons (towards the bottom).
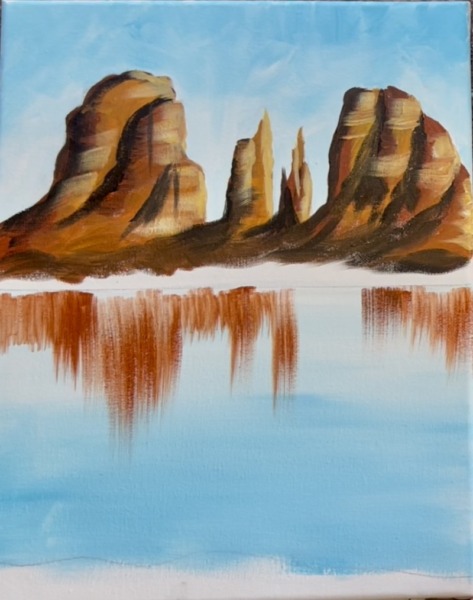
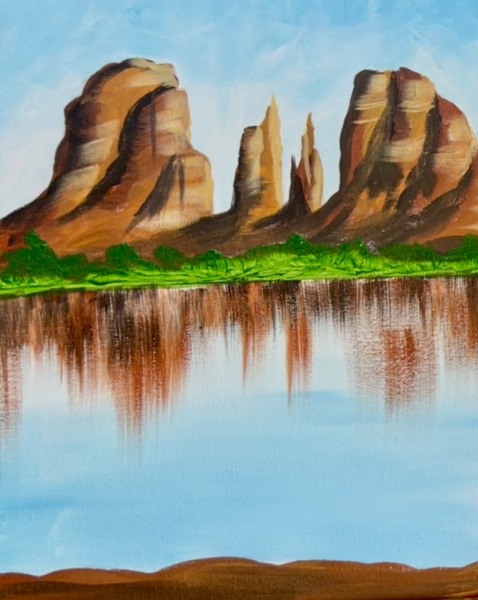
12. Paint Water Lines
We already painted a light blue color for our first layer of the water. In this next step, we will be using “primary blue” mixed with “light blue permanent” to paint horizontal water lines to create the impression of water texture.
Take your 3/4″ flat wash brush and mix equal amounts of both of the blues on your paint palette. Then use just the end of the bristles to paint horizontal water mark lines. Start at the bottom of the creek and paint larger and wider lines. Don’t cover all of the light blue, let that still be visible between your lines.
As you add more water line marks, make the lines thinner, smaller and closer together further back in the creek. This will create perspective in our water. Paint very thin and close lines over the red rock reflections. This will create even more depth and the illusion of reflection in your water.
Optional: add some white into your blue mixture and paint more lines but these are just lighter colors. You can also paint a few “red oxide” lines in the water. We already painted some vertical reflections with red oxide earlier but we can have fun and paint a few red oxide horizontal lines too.
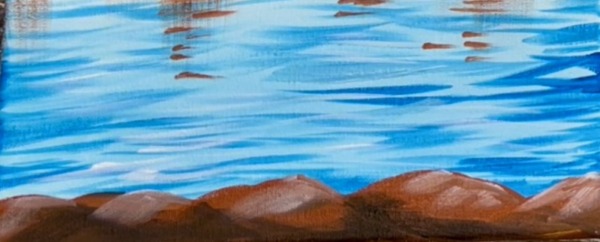
13. Add Detail In Bottom Land Area (optional)
Add some shadowing and highlighting on the bottom of the ground area. Add the “dark red oxide” color (black mixed with red oxide) and blend it on the bottom of the land. Then rinse the brush and dry brush “white mixed with red oxide” on the upper right of the little mounds of dirt.
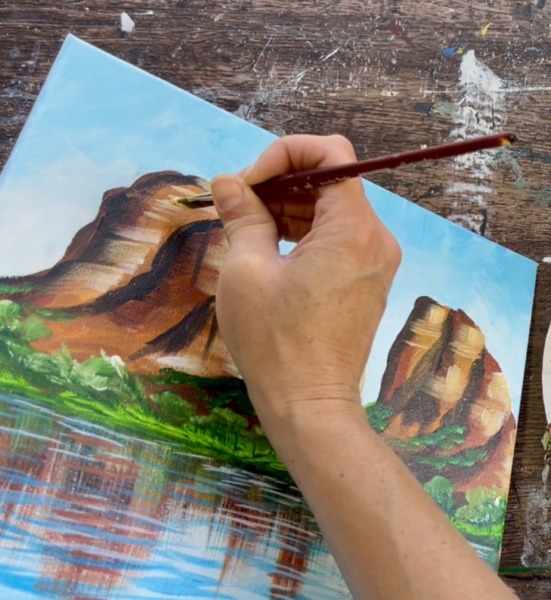
14. Some Final Touches On Sedona Rocks
You can try this with an angle brush! I used a 3/8″ angle brush. Mix white with “yellow oxide” to make a very light pale yellow color. Dry brush this on the right sides of the rocks. This will highlight them and brighten them even more.
You can also add more horizontal rock sediment lines.
I even made a few of those horizontal lines overlap some of the dark areas of the rocks slightly.
15. Paint Tree Branches
Use a #8 long round brush (for the fine point) and mars black to paint little tree branches under your greenery tree line area. Alternatively you can do this with a paint pen or even skip this step!
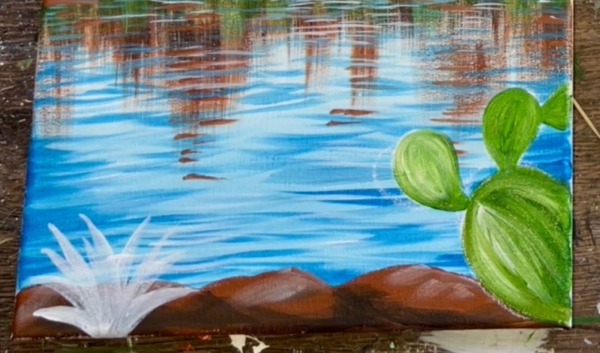
16. Draw And Paint Cactus & Yucca (optional)
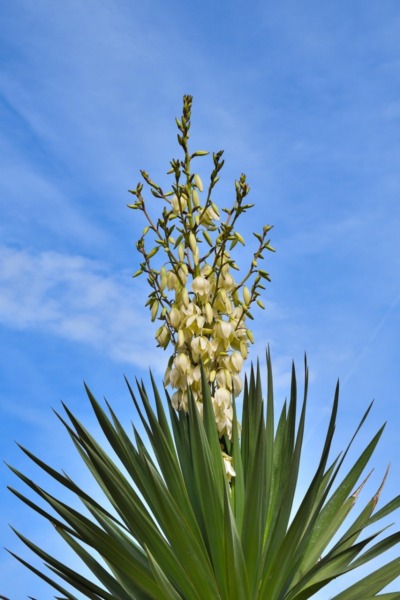
Here are some reference photos of a yellow flower yucca and a prickly pear cactus both native to the Sedona area!
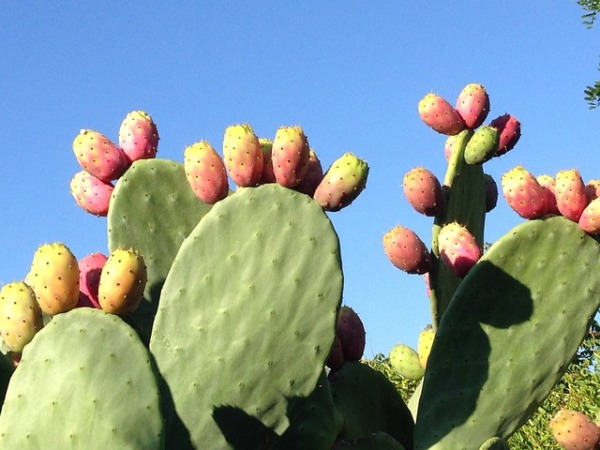
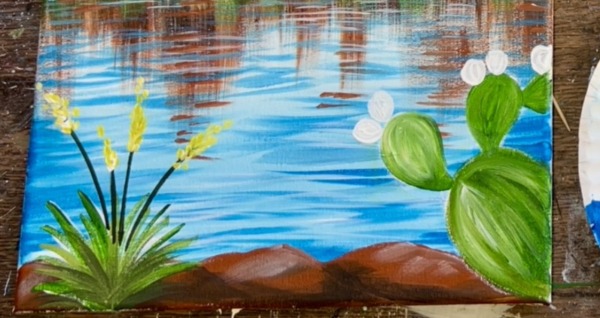
Use a piece of chalk to draw a prickly pear cactus on the lower right of the canvas. Draw a large teardrop shape. Then draw smaller similar shapes attached to the main piece of the cactus.
Next, use a round brush to paint the prickly pear cactus “titanium white”. Use the #8 long round brush (or you can use any brush you feel comfortable with) to paint the leaves of the yucca plant. These are curved and pointed leaves. Painting both of these plants white first will help with it standing out later when we paint colors in.
Wait for the white to dry.
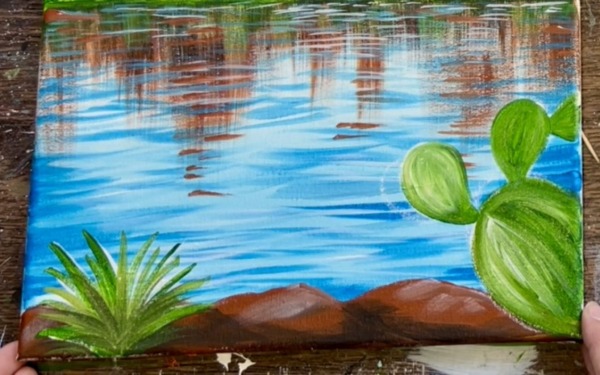
Next, use the #4 round brush and “hooker’s green hue” to paint the prickly pear cactus. You can have fun and mix white and/or yellow oxide into your green to create different variations of the green. Make your paint strokes go in curved directions in the shape of the cactus.
Use the #8 long round brush and green to paint the leaves of the yucca plant. Mix different variations of the green with yellow oxide, white and tiny bits of black mixed with the green to make darker shades.
Use titanium white to paint the base layer for the prickly pear fruit. Paint little oval shapes on the ends of the cactus pieces. I did two on each arm but you can do more or less.
Use any of the brushes (I used a #8 long round) to paint stems for the flowers of the yucca plant. Mix black with green to make a very dark green color. Then paint several stems coming out of the plant.
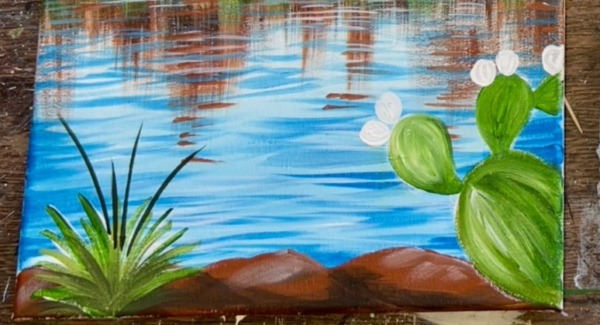
Next, paint little yellow flowers on the ends of these dark branches. Mix yellow with white. Then use the #4 round brush to paint little dots or tic marks forming a column at the end of the branches. This is very similar to painting lavender.
Add some more details to the cactus! Use the #8 long round and black (or a paint pen or a toothpick). Paint little dots on the cactus. Then paint the fruits using “quinacridone magenta” and the #4 round brush. Paint a little white oval on the top middle part of all the fruits.
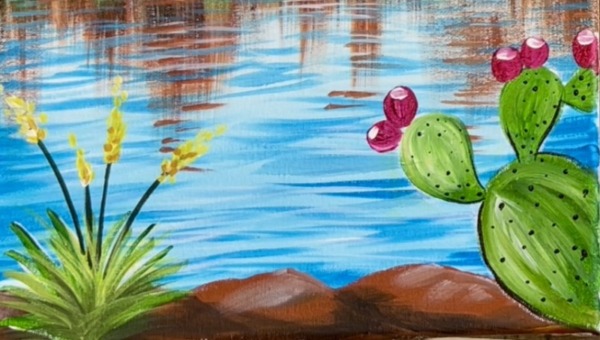
Add little black dots on the fruits as well. Then when the black dots dry, use the #8 long round brush (or a white paint pen) to paint all the thin little cactus spikes. I did 2-3 white lines coming from almost all of the black dots and going in different directions.
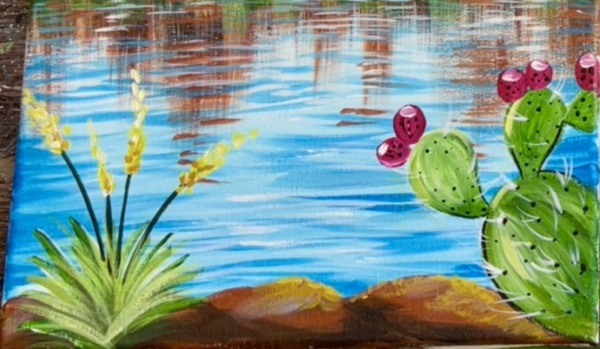
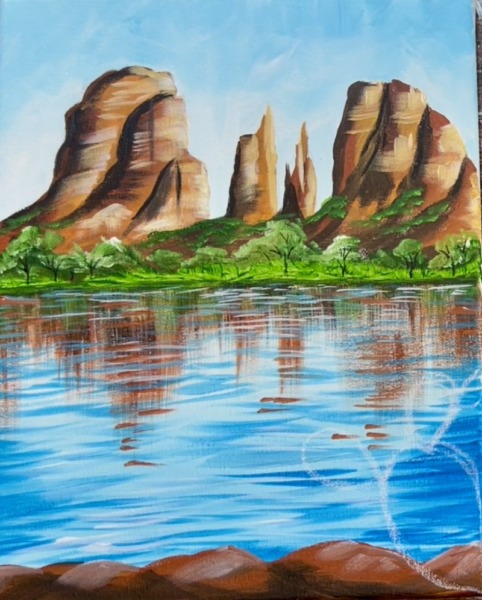
Finished!
Sign your name and show it off!