


Would you like to save this?
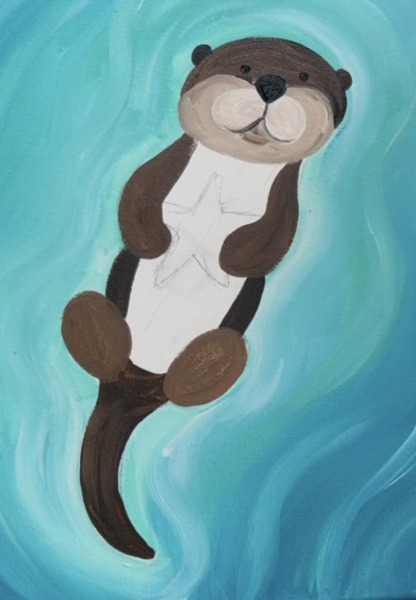
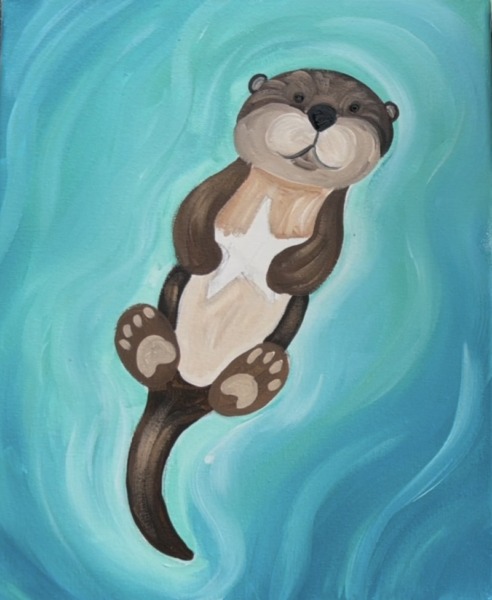
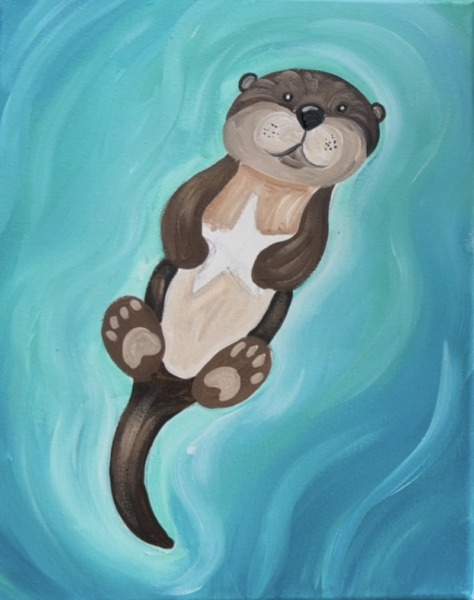
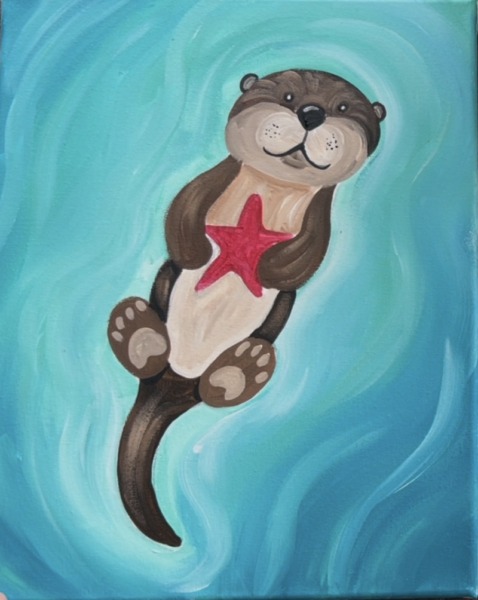
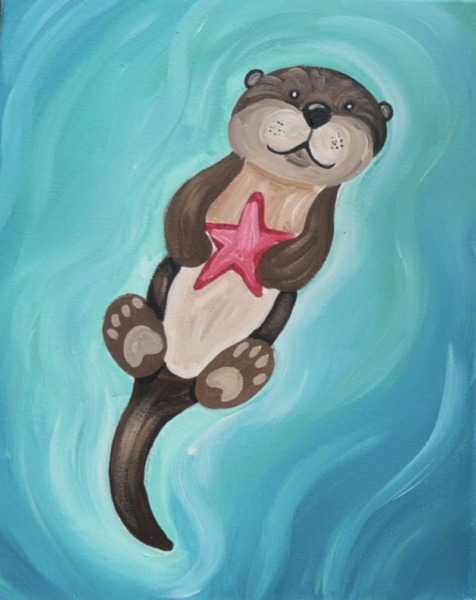
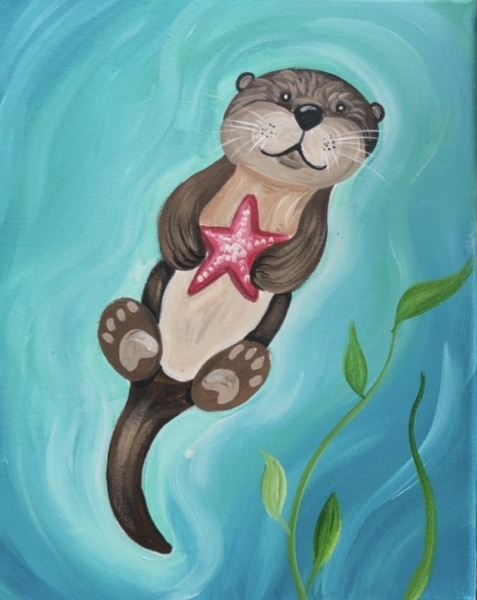
This tutorial will show you how to paint a happy otter, holding a sparkly starfish, floating blissfully in a vibrant turquoise sea.

The tutorial will show you how to draw and paint an otter! There is also an optional template you can use to trace onto your canvas.
Enjoy and happy painting!
Materials
Sea Otter Painting Tutorial
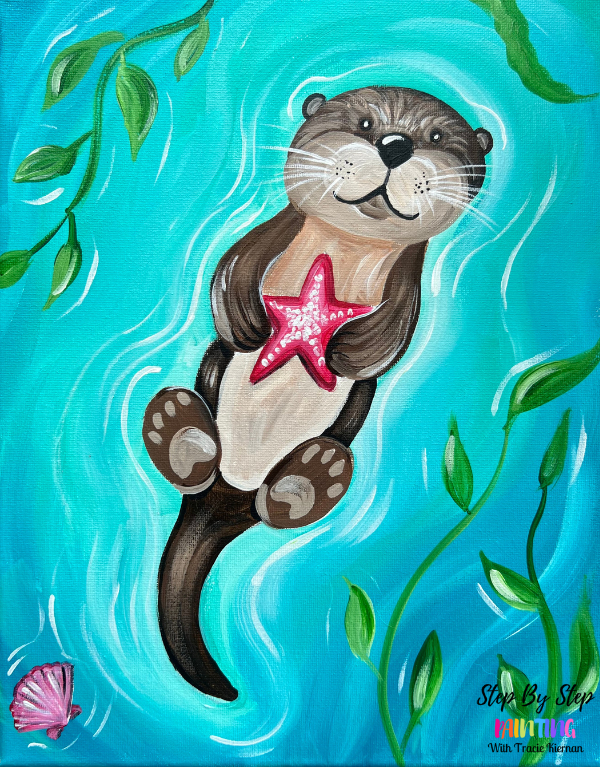
Leaern how to paint "otter bliss" and adorable cartoonlike sea otter floating on its back and holding a starfish.
Materials
- Acrylic Paint
- Brushes
- Pencil With Eraser
- Optional Traceable
- Optional Graphite Paper If Using Traceable
- 11 x 14 Canvas
- Black Paint Pen (optional)
- Toothpick (optional)
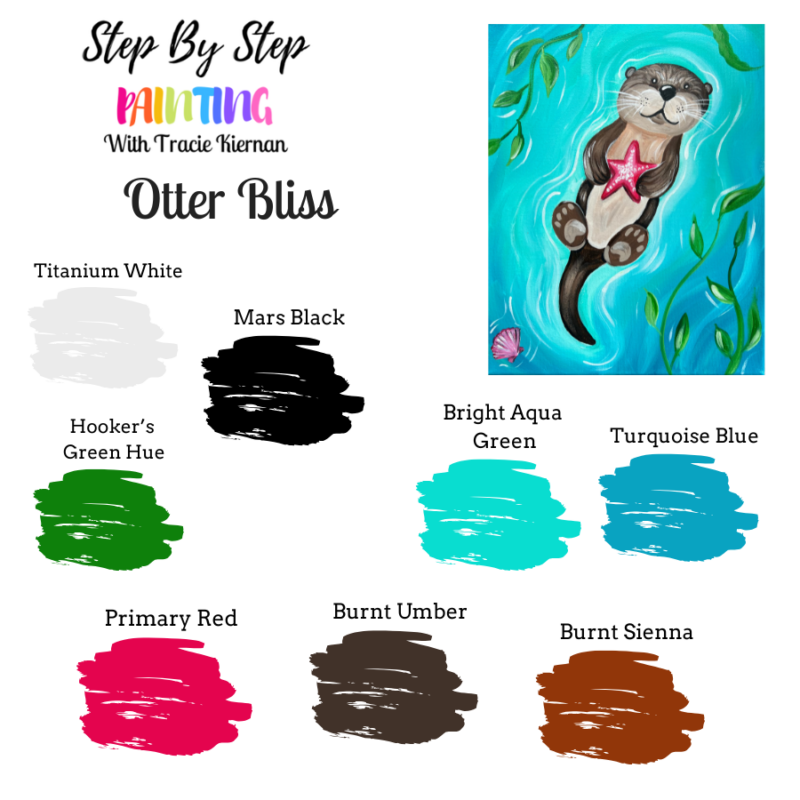
Colors
- Titanium White
- Mars Black
- Burnt Umber
- Burnt Sienna (optional)
- Primary Red
- Hooker's Green Hue Permanent
- Turquoise Blue
- Bright Aqua Green
Brushes
Download this tutorial!
Colors
What paints do you use?
I like to use Liquitex BASICS. You don’t have to use these, you can use whatever paints you have available. It’s also okay to use craft paints!

Where do you get your brushes?
I often get asked where I get my brushes! I use the Princeton Velvetouch brushes which are in this pack. The #12 bright brush is a Royal & Langnickel brush and you can buy this one at Blick.
Directions At A Glance

Traceable

This traceable is optional. You are welcome to use this to trace onto your canvas if you want to skip the drawing portion of this painting lesson.

Video
Step By Step Instructions
1. Draw Otter (or tracing with template)
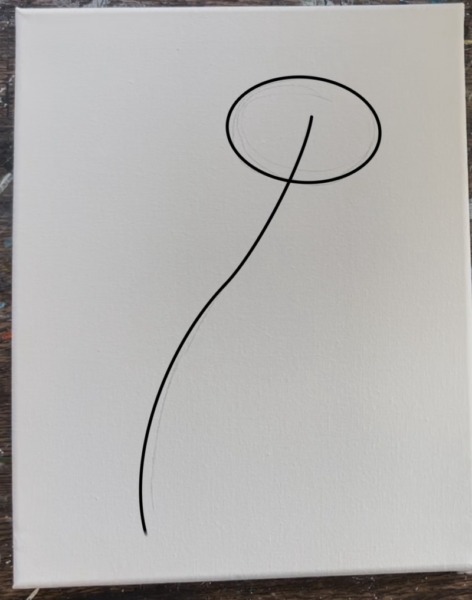
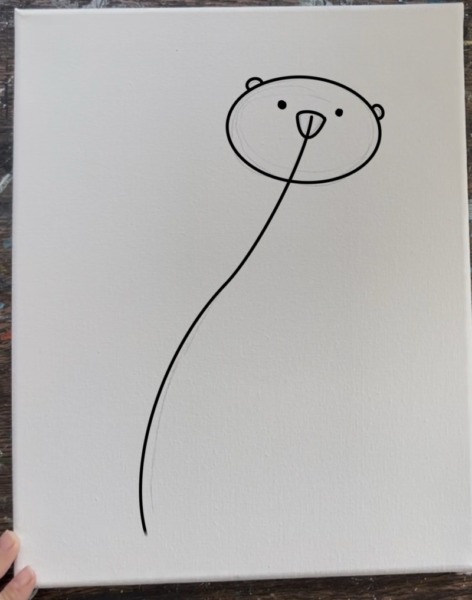
The first step in this painting involves sketching the otter! When I draw animals, I like to break the drawing down into simple lines and shapes.
Start with a long line that will extend from the tail end to the top of the head. Since the otter is floating and going at an angle with a curved tail, I made this line also go at an angle with a slight curve. Drawing is darkened for demonstration purposes, I recommend drawing lightly with a pencil.

At the top of that line, draw an oval for the head with the line going down the center of that oval.
Draw the nose, eyes and ears next. For the nose, draw a triangle with curved edges in the top center part of that oval and then two small dots for eyes just slightly above the nose. Draw two tiny half circles for the ears.
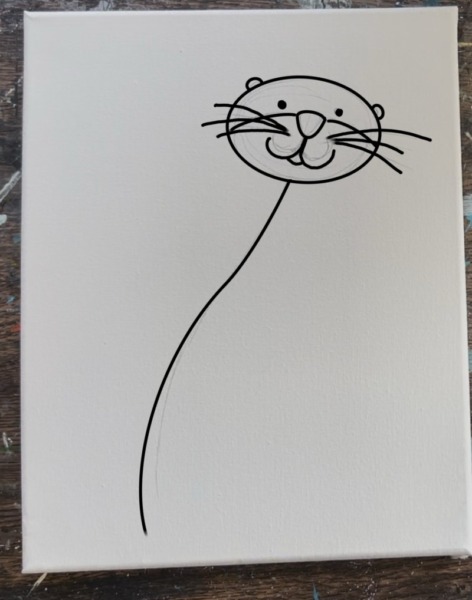
Draw two curves under the nose for the mouth and a small opening for the mouth on the bottom.

Draw a curved line that divides the top and bottom of the head (this curve starts towards the top of the nose) and then draw whisker lines that start on the sides of the nose.
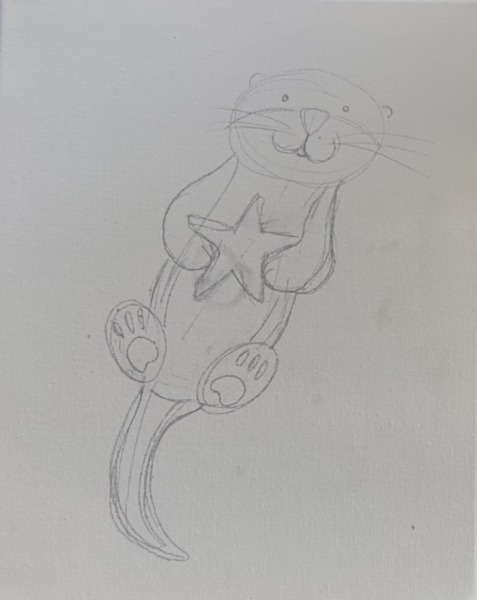
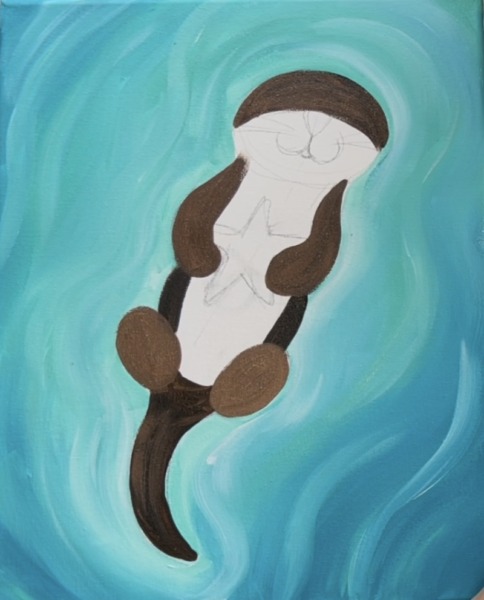
Then start drawing the body of the otter. Draw a curved narrow shape for the tummy of the otter, draw two arms that overlap the tummy and will later be holding a starfish. Draw two ovals for the ends of the otter’s feet and then draw a long tail that has a slightly pointed end.


Draw the starfish below the arms of the otter. Erase any “guidelines” from your sketch including that middle line. Draw the detail on the bottom of the feet including the heel and toes.

Below is the drawing as a sketch with pencil lines so you can see it without the darkened lines. It’s okay if it still isn’t defined! We can adjust our drawing when it’s time to paint the otter in.
2. Paint Water Around Otter
We will be painting the water around the otter/ background first before painting the otter. Load your paint palette with: titanium white, bright aqua green and turquoise. Use the #12 bright brush (1/2″ flat). Double load the brush in both the aqua and the white. Paint around the otter in contouring paint strokes that fill the negative space.
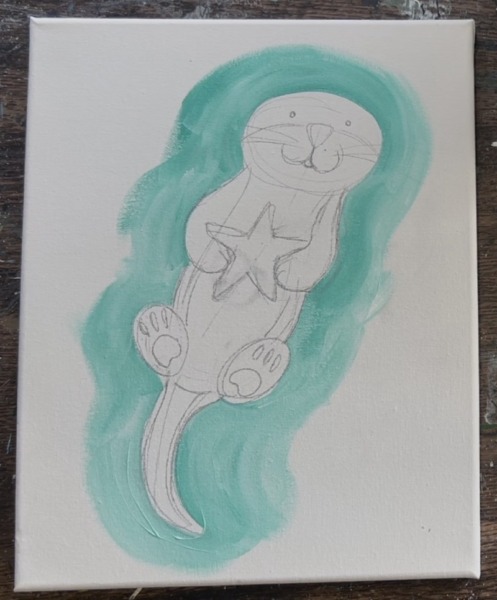
Blend the aqua and white on the canvas so that you have different variations of color. As you work your way outwards, switch to the 3/4″ flat brush so that you can fill the canvas with bigger paint strokes. After going about an inch around the otter, load the brush in a little bit of turquoise. This will show up much darker so you want to blend it very gradually. If needed, add more aqua and white to help with the transition of light to dark.
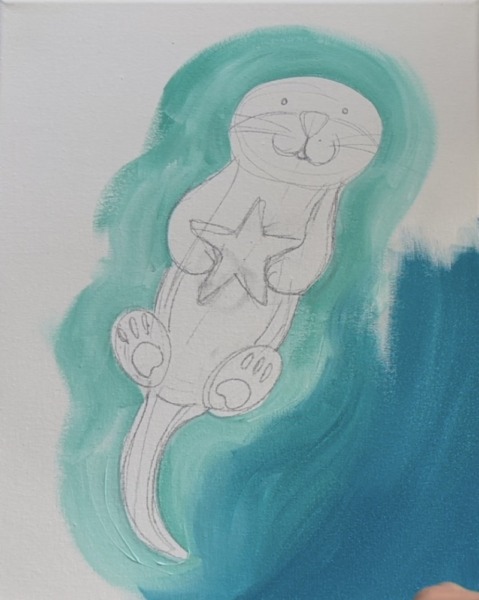
Continue to paint curved strokes around the otter with paint strokes that go in the direction of the curves of the otter. As you work your way to the edges of the canvas, your strokes may just end up going in a diagonal direction.

Water on the edge of the canvas shows up darker and water closest to the otter shows up lighter. Continue to blend your aqua and turquoise all throughout the canvas until the entire background is full.
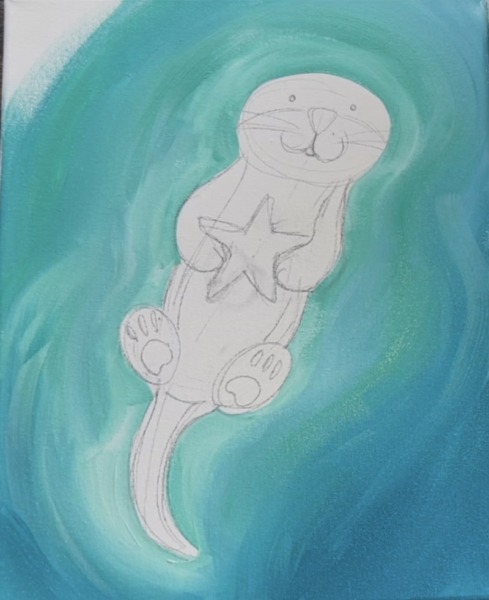
The idea is to try to get the water to look like it is creating flowing ripples around the otters. That is achieved by making your paint strokes curve and contour around the otter.
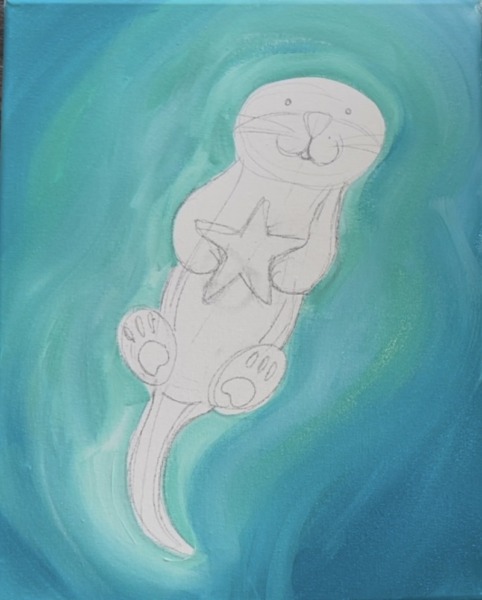
Wipe the 3/4 wash brush but do not rinse. Load it into a small amount of white. Then blend thick ripple lines around the otter to create this flowing water effect. This should show up lighter but not bright white and it should blend with the color already on the canvas. Later in the painting, we will add thin white lines but for now this is the first layer for the water background.

4. Paint Otter
Load your paint palette with: “burnt umber”, “*burnt sienna”, “mars black” and “titanium white”. The “burnt sienna” color is optional but I like to use it with burnt umber to get different variations in my brown.
We are going to use a combination of these colors to make the different browns in the otter. The white will help lighten the brown where needed and the black will help darken the brown.
Use the #4 round brush. Mix a small amount of black with “burnt umber”. This is going to make a very dark brown. Start by painting the tail and sides of the body between the arms and legs. You can simply outline the shape and then fill it in solids. If you need to go outside of the lines and overlap the water, that is okay! Now is where we can adjust our drawing as we paint the otter in.
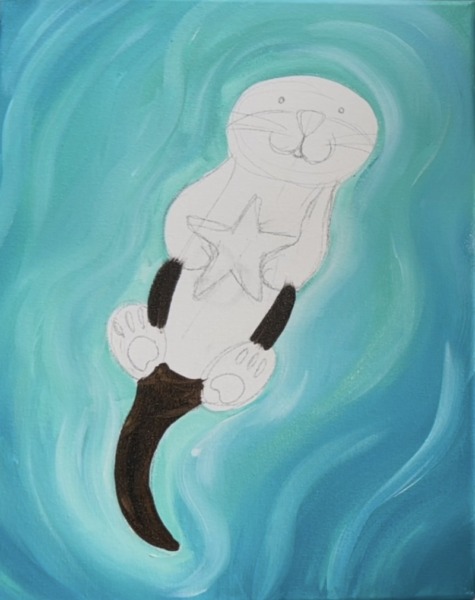
For the arms, I wanted a slight variation in the brown so they can stand out better. Use the “burnt sienna” and a small amount of “titanium white”. Mix that into your dark brown color you just used. Then outline the arms and fill them in.

Then use this same color to paint the bottom of the otter’s feet. Simply paint the oval shapes solid and don’t worry about the toes/ bottom of the feet shapes.

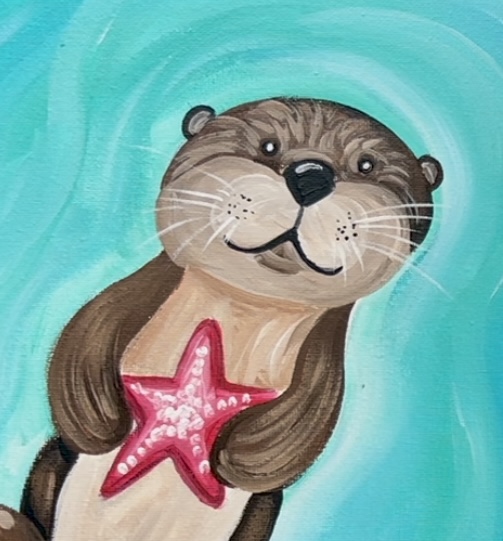
Paint the top half of the otter’s head (you’ll have to cover up the eyes for now). This is a crescent moon shaped area. Use the same color you used for the arms and feet.
Then mix a really light brown color on your paint palette by mixing a bunch of “titanium white” into your brown color that you just used for the top of the head. It really needs to be many tints lighter! Paint the bottom half of the head area and go around the nose shape and around the mouth shape (we will form “cheeks” on the sides of the mouth in the next step).
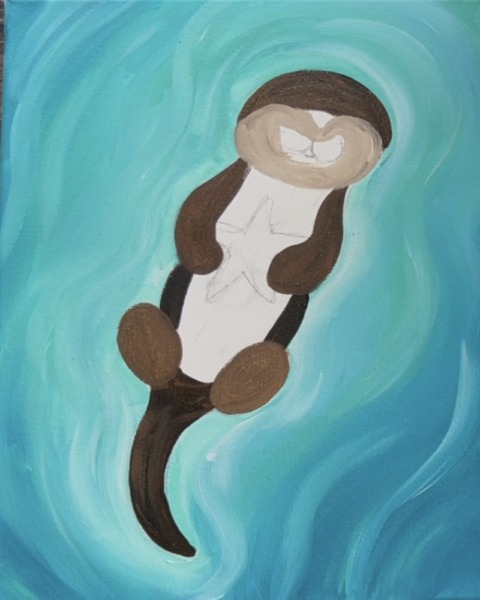
Mix a lighter brown color next by mixing even more white into that light brown color you just used! Form two circle shapes (the bottom of the mouth will be the bottom of these circles shapes). This will form the cheeks.
Use the darker brown to paint a little curve under the mouth/ cheeks area.

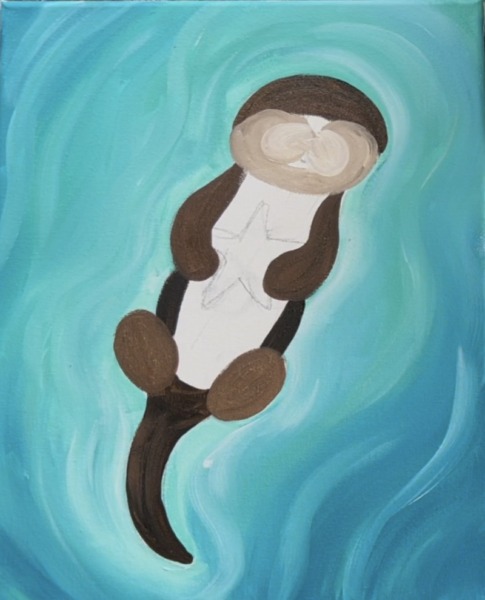
Then completely rinse the brush. Load it into “mars black” and paint the nose and mouth. Alternatively, you can do this with a black paint pen.
Then paint two little circle dots for the eyes that are just to the left and right of the nose.

Use the dark brown to paint two little half circles for the ears. The ears are more on the sides of the otter’s head and not on the top.
Optional fur texture…
The fur is optional in this but it does allow there to be some lighter color in the head area which helps the eyes to stand out better. To do this, use your #4 round brush and load it into your darker brown. Then add a little white to it to lighten the brown up. You want a brown that is just a few tints lighter than the dark brown you painted for the top of the head.
Then paint little curved strokes that go around the nose and curve opposite directions on each side of the head. Don’t cover all of the dark layer, there should still be dark showing between your fur paint strokes.

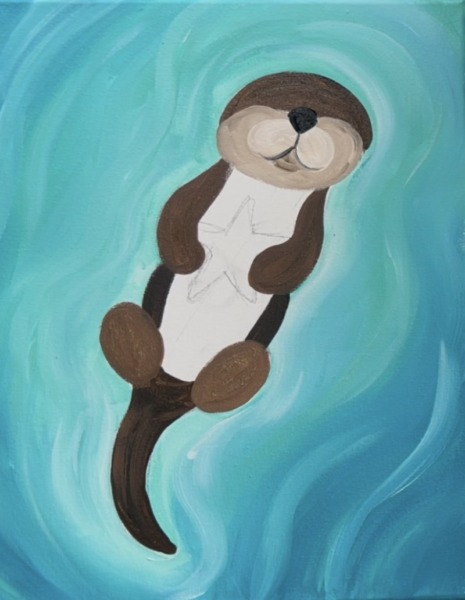
Then paint the interior of the ears as well as the belly area of the otter. Do this with the same light color you used to paint the round cheeks of the otter. Use the #4 round brush to paint the belly. Paint around the starfish.

When you get to the area below the head of the otter, add a little bit of “burnt Sienna” into this light brown color so that it shows up slightly darker/ different. This allows the area under the head where it meets the belly to stand out better.
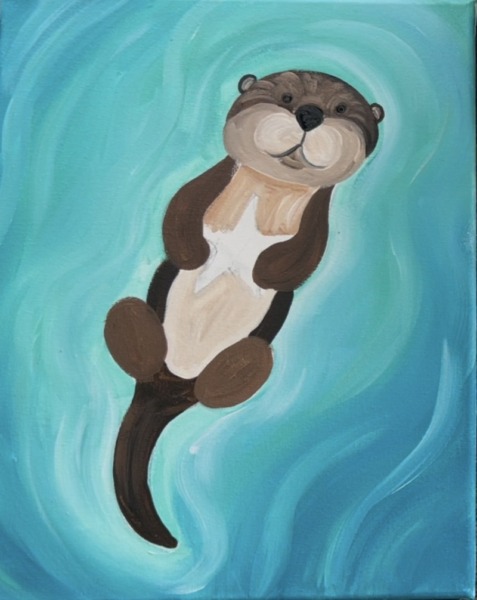
Paint the bottoms of the feet with the same light color you used for the belly as well as the #4 round brush. Paint four oval shapes for the toes and a little curved shape for the bottom of the foot. We are keeping the feet simple and cartoon like!
Use a toothpick or pencil tip to paint one little dot in each of the eyes. Use the toothpick to paint a little curved highlight on the nose. Then paint little black dots on the cheeks which is where the white whiskers will be later.

5. Paint Starfish
Use the #4 round brush and “primary red” to paint the shape of the star.
Before the primary red star dries, load your brush in a small amount of “titanium white”. Paint the center part of the star but leave the edges darker red. This will start to add depth to the starfish to make it look more three dimensional.
Then rinse the brush. Load the end tip of the brush in “titanium white” and paint little white dots in the center of each of the star tips as well as in the center of the starfish. These white dots will add texture and more dimension to the starfish.
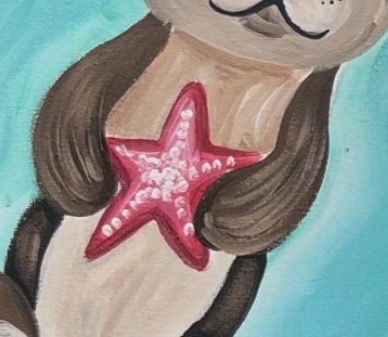
Then mix a very dark red on your palette by mixing a tiny amount of “mars black” with the “primary red”. Use this very dark red to paint the far edges of the starfish. This adds just a little bit of outline and shadow on the edges of the starfish and helps it to look even more three dimensional.

6. Paint Whiskers
Load your paint palette with some fresh “titanium white”. Use the #8 long round brush (the point of the brush) to paint the whiskers. Start each line at the black dot and paint your thin line outwards. Some of the lines are longer and some shorter. Some go outside and overlap part of the water and some go more downwards and only overlap part of the cheek.
Tip: hold your brush very lightly and use just the end tip to paint these thin whisker lines! Alternatively, you could use a paint pen for this step.
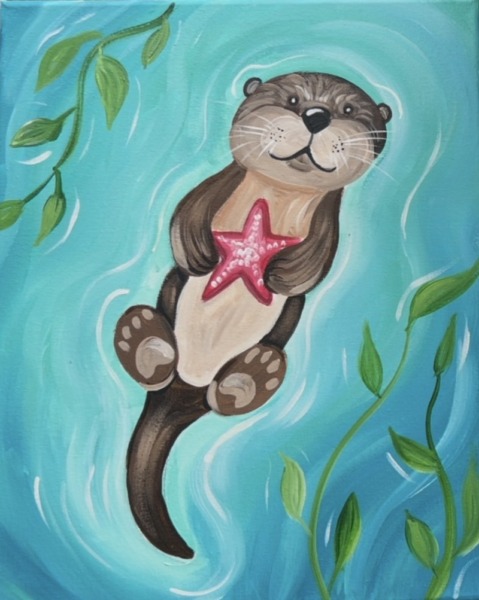
7. Paint Floating Seaweed
Load your paint palette with “hooker’s green hue” and “titanium white”. Use the #8 long round brush. Double load it into both the green and white color. Paint a long, wavy line on the lower right of the canvas.

Paint long, pointed leaves on each side of this seaweed stem. Then paint a second wavy line to the right of it. This one is shorter and waves differently than the first one.
Paint more leaves on that seaweed stem. Then paint another seaweed in the upper right corner of the canvas.

8. Paint Ripples
Use the #8 long round brush and use the tip of it to paint “titanium white” ripples in the water. Start by painting loose wavy lines that contour around the shape of the otter and around the seaweed.
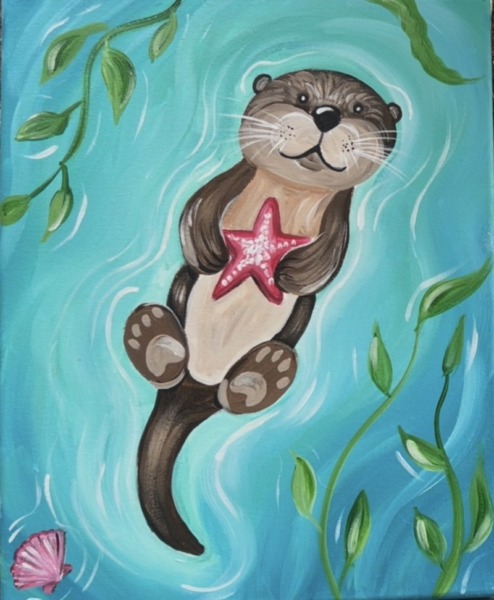
9. Paint Shell (optional)
Mix white with “primary red” to make a light color for the base of this shell. Since we are painting it on a dark background, the white will help the shell color be opaque and show up bright.
Paint a shell shape (curved top and pointed bottom). Then paint two little half circle notches on the bottom of the shell.

After your lighter color layer dries, go back with “primary red” and paint diagonal lines on the shell and outline the top curved edge to make it “scalloped”.

Loosely paint white ripple lines around the shell with the 8 long round brush and titanium white.

You can also lightly outline the shell with black paint or a thin black paint pen.

10. Final Touches
Some final touches could be: highlighting the sea weed leaves with a light green curved line on one side of the leaf, adding more fur texture to the otter, adding more whiskers, adding more seaweed!
And you are finished!