

Would you like to save this?
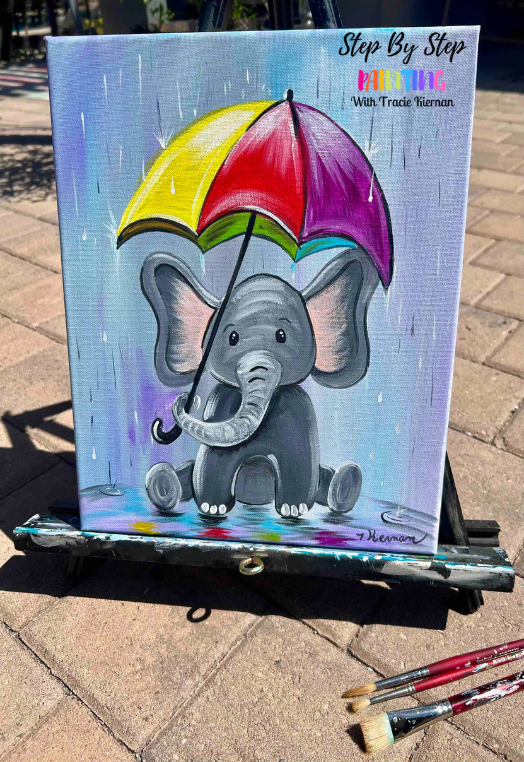
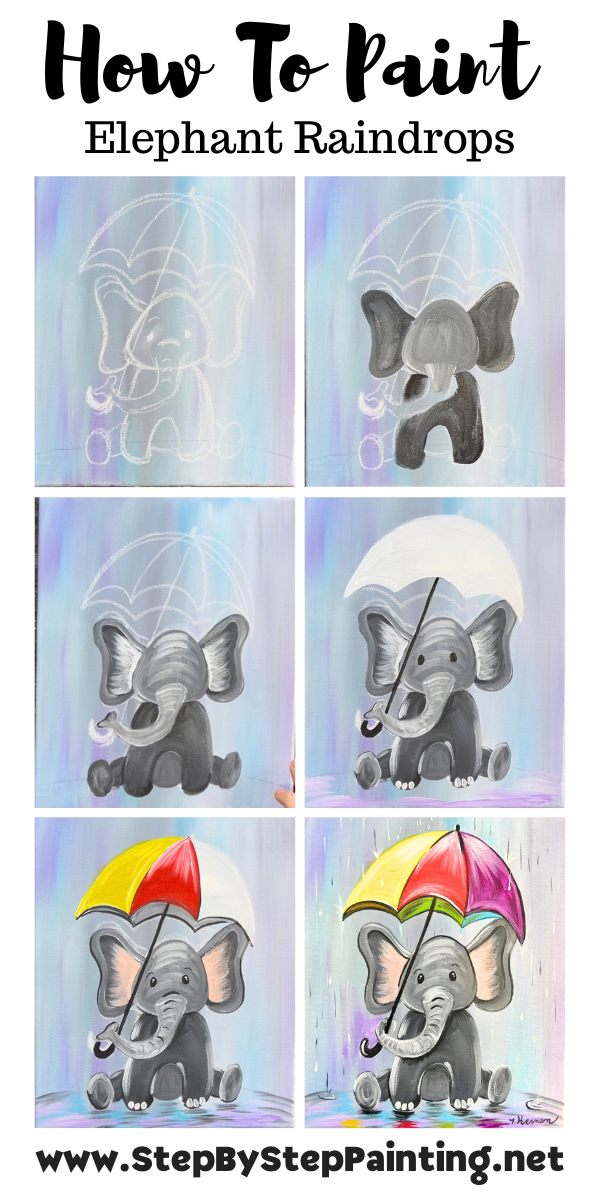
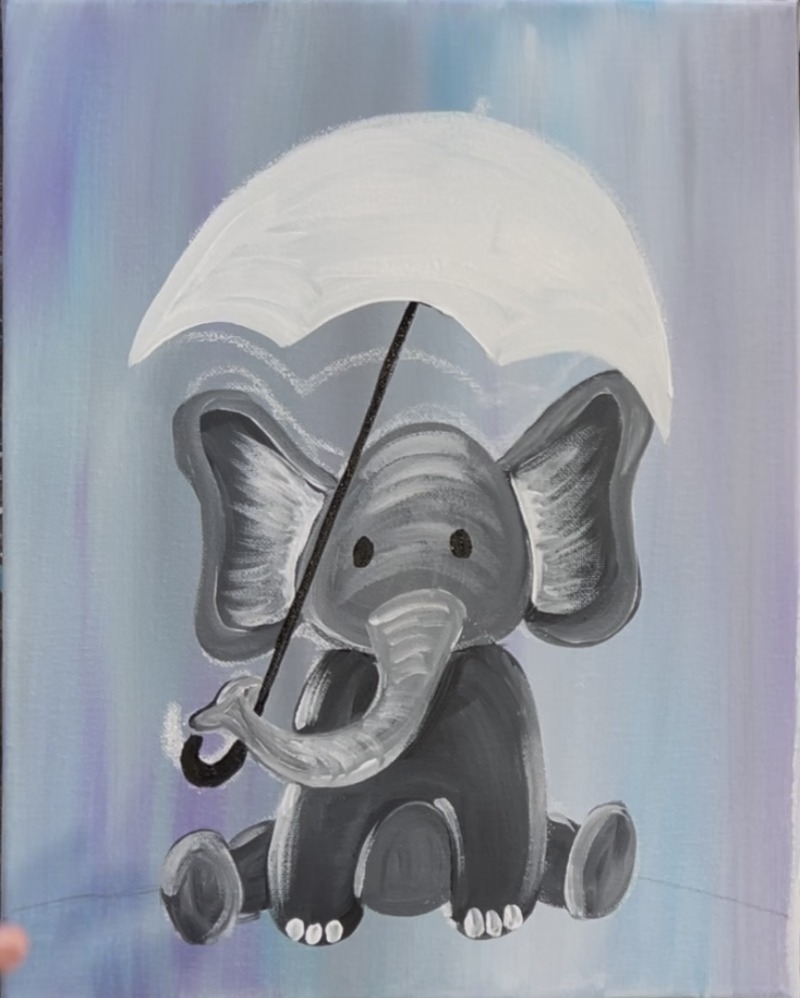
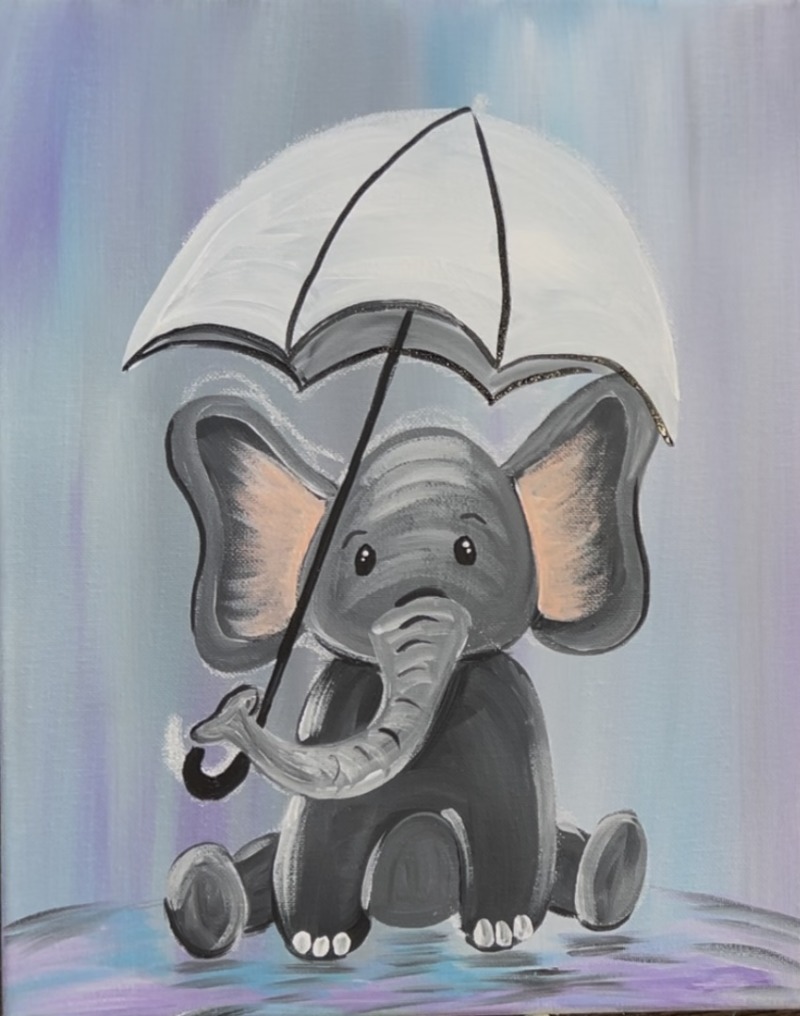
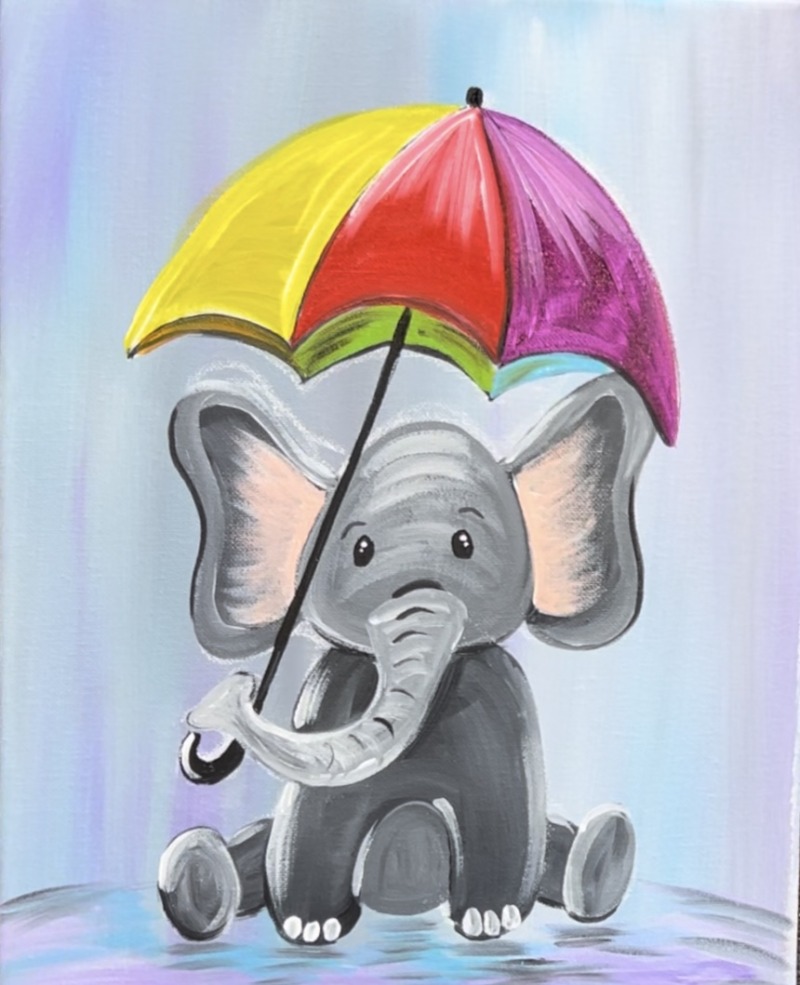
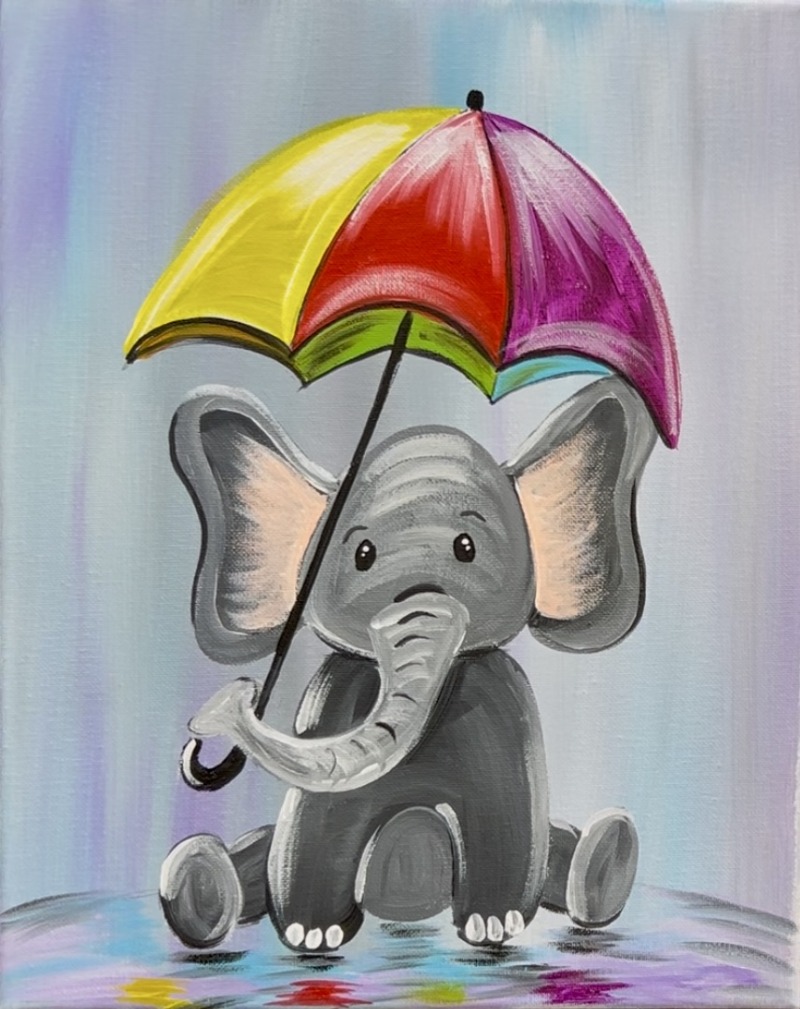
Paint an adorable spring elephant under a colorful umbrella and abstract rainy background! This absolutely darling painting is kid friendly but also intended for all ages!
Enjoy and happy painting!
Materials
Elephant Raindrops Acrylic Painting Tutorial
Learn how to paint "Elephant Raindrops" a whimsical spring theme painting with an elephant holding a colorful umbrella.
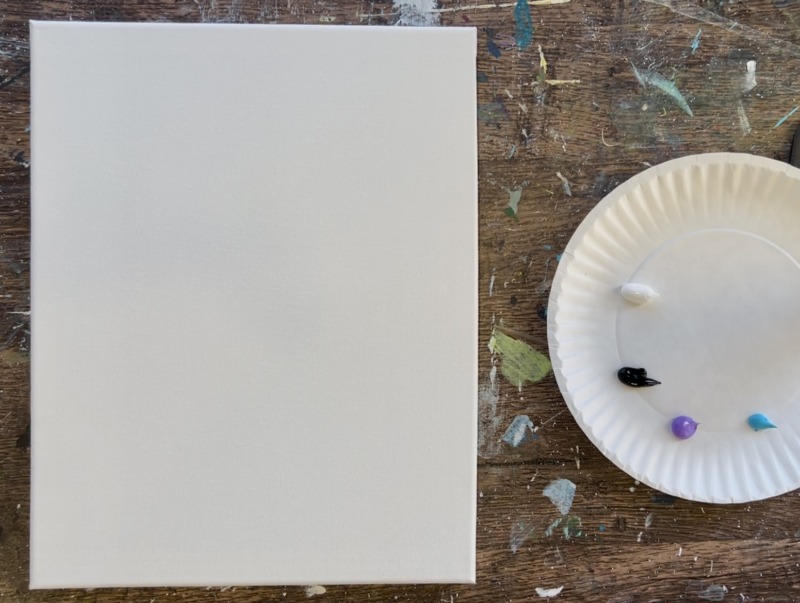
Materials
- 11 x 14 Canvas
- Acrylic Paint
- White Chalk (for drawing elephant)
- Optional Traceable
- Optional Graphite Paper
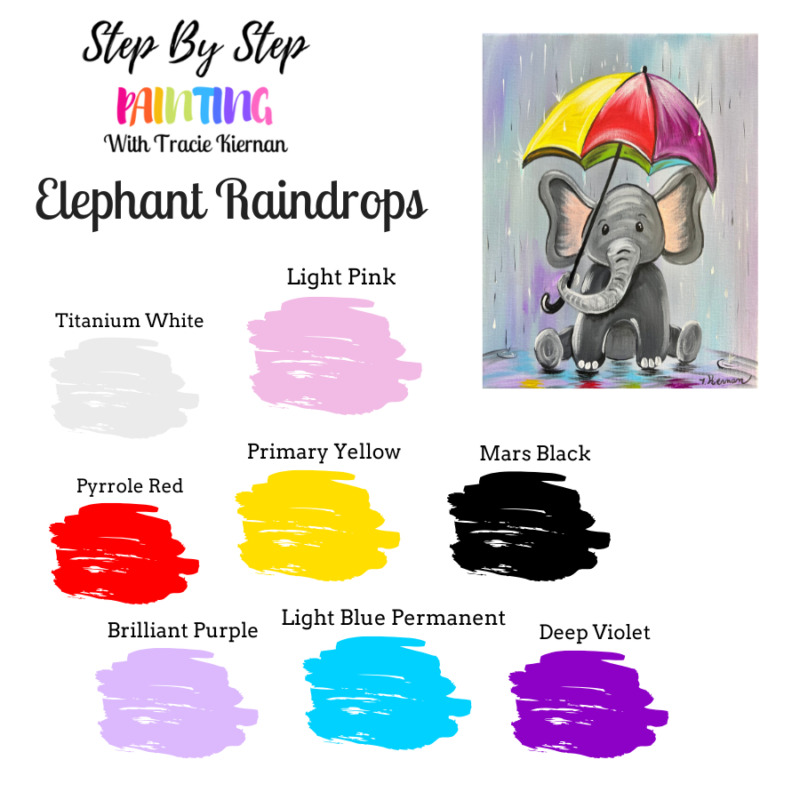
Colors
- Titanium White
- Mars Black
- Pyrrole Red
- Primary Yellow
- Light Blue Permanent
- Brilliant Purple
- Deep Violet
- Light Pink
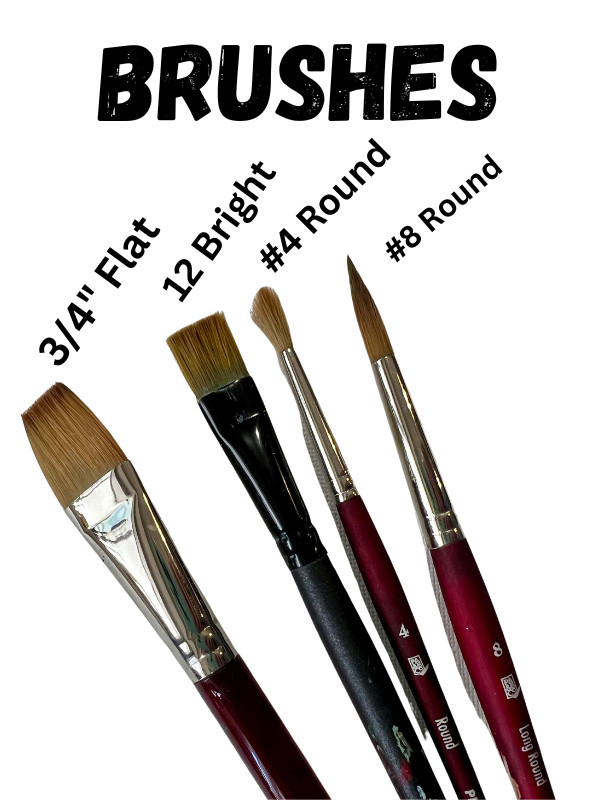
Brushes
Color Palette
You can simplify this palette by taking out the pink and the light purple. Create “light pink” by mixing white with the red and create the light purple by mixing white into the purple.
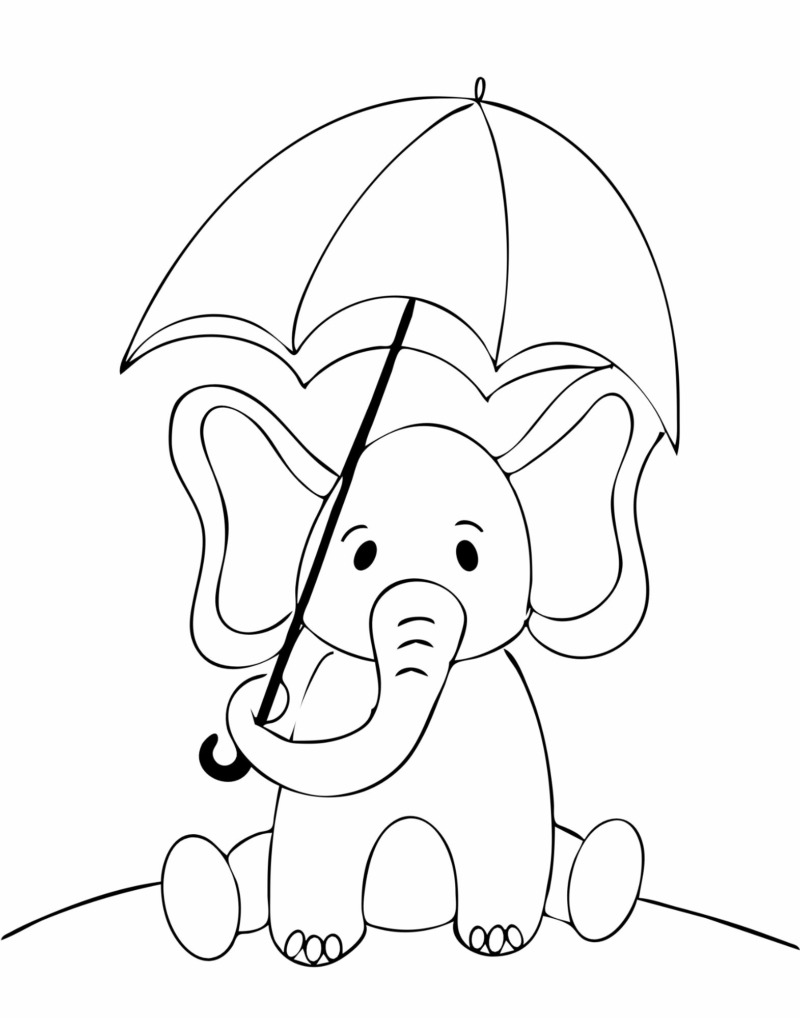
Optional Traceable
Directions At A Glance
Video
Step By Step Instructions
1. Paint background
Load your paint palette with the four colors: titanium white, mars black, brilliant purple and light blue permanent.
Use either a 3/4 flat brush or a 1″ flat brush to paint the background. You want a very light pastel-like background that resembles a rainy day. To do this, load your brush in white and little bits of the blue and purple. Paint up and down vertical paint strokes that blend these colors together. Adding water to your brush will help thin and spread the paint faster.
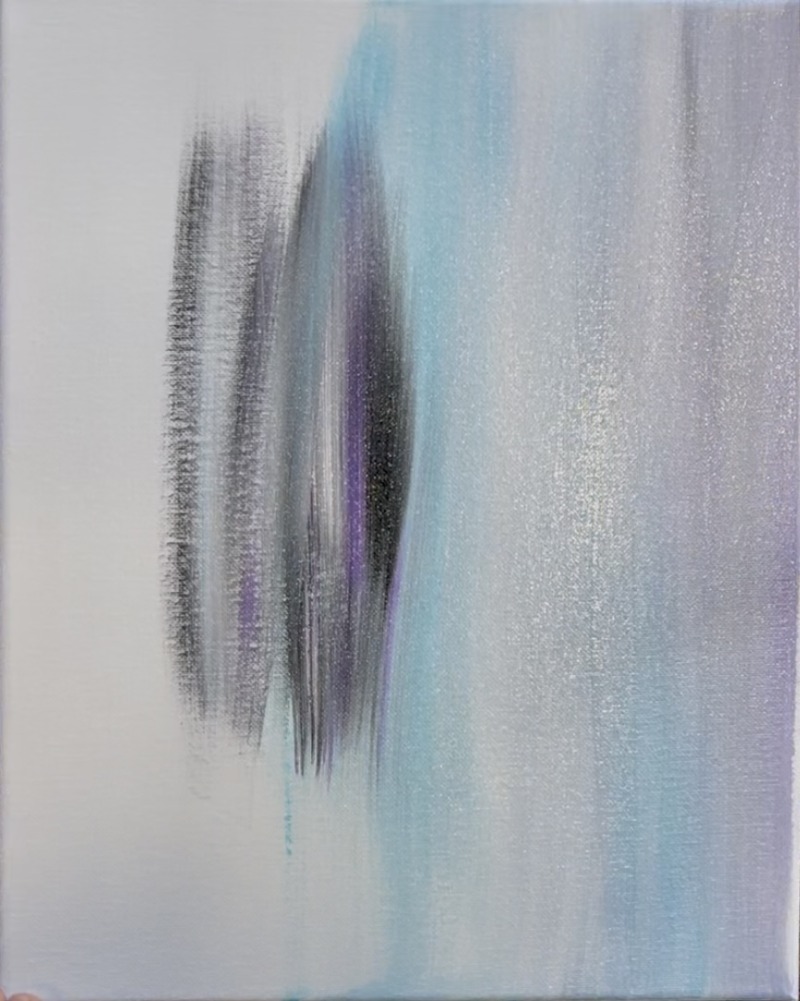
Add very tiny amounts of black into the background. It is very important not to add too much black. Just a little bit will create a gray effect on your colors. You do need a lot of white! So when you load the brush, make sure to add a lot of white and only a small amount of your other colors.
Blend these colors on the canvas by brushing up and down full width paint strokes.
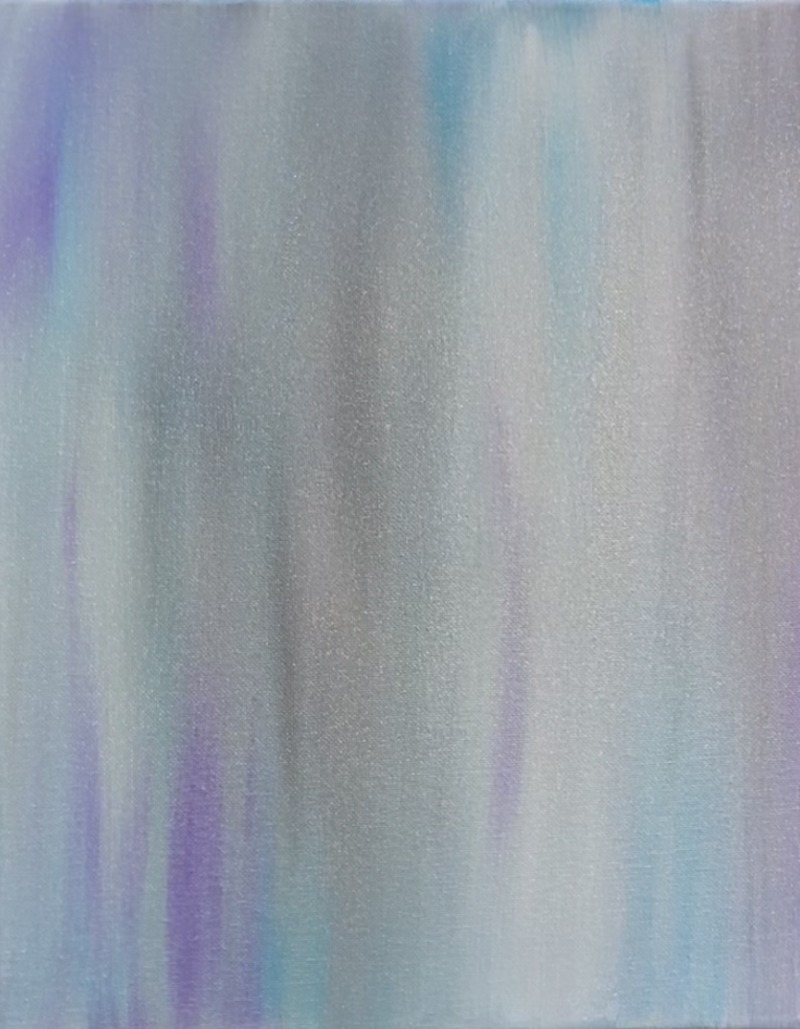
Add streaks of blue and purple into your background and let it blend. Fill your entire canvas with this abstract rain-like background!
Wait for this to dry before going onto the next step.
2. Draw Elephant
Note: there will be two ways you can draw this! You can make the elephant’s trunk look like it’s holding the umbrella OR you can just overlap the end of the trunk over the umbrella handle.
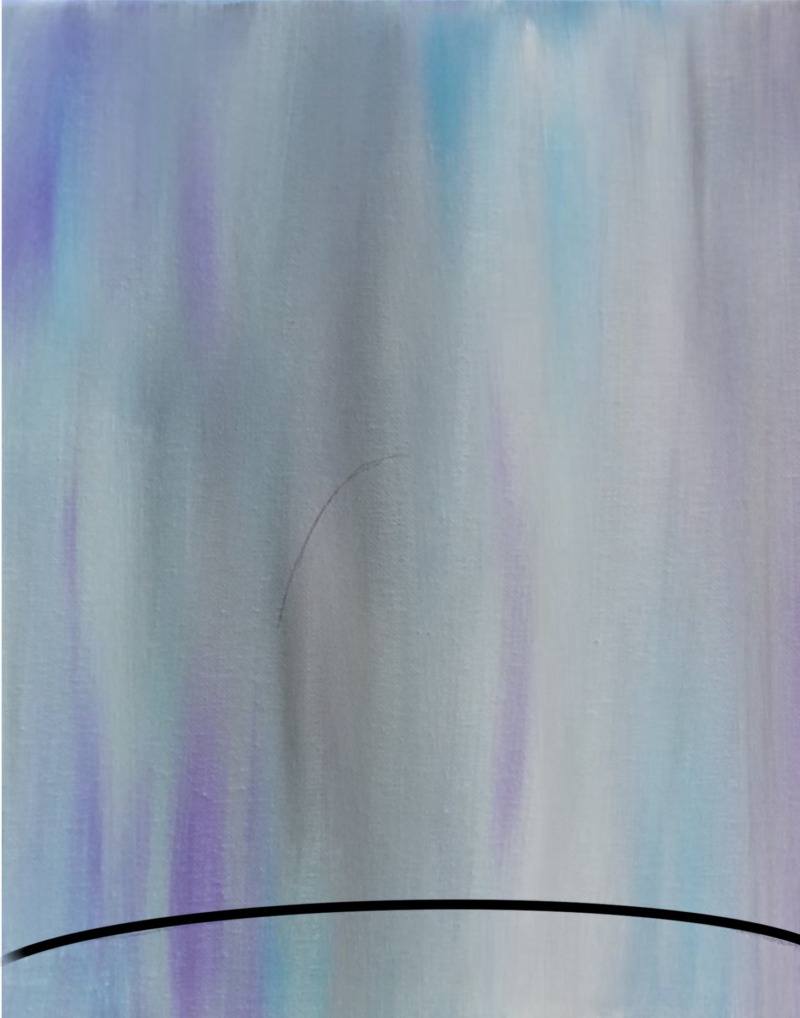
Use a pencil or a piece of chalk to draw the ground line. This starts at about 1″ from the bottom of the canvas. It is a curved line that goes up to about 1.5″ in the middle.
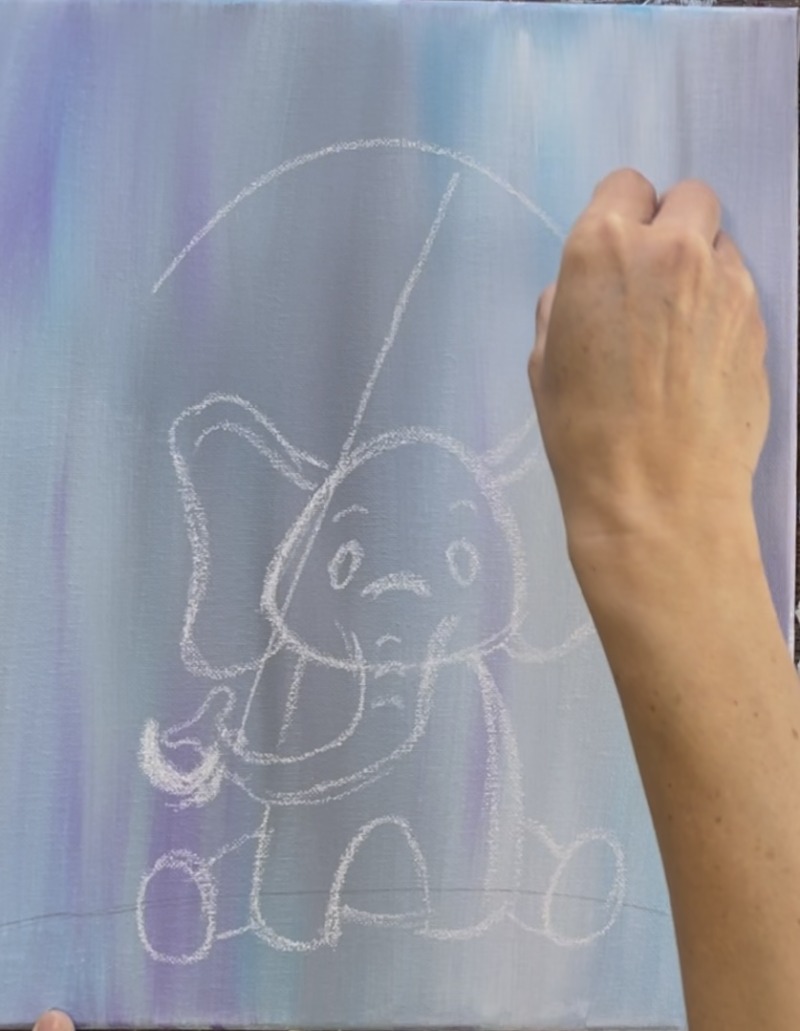
For the next steps, I use a piece of chalk to draw the elephant. The white chalk shows up better against the background color. Start by drawing a head shape that has rounded corners. This is in the center of the canvas. The head is about 3.25″ wide and 3.5″ high. Make sure there is plenty of room above the head for the umbrella!
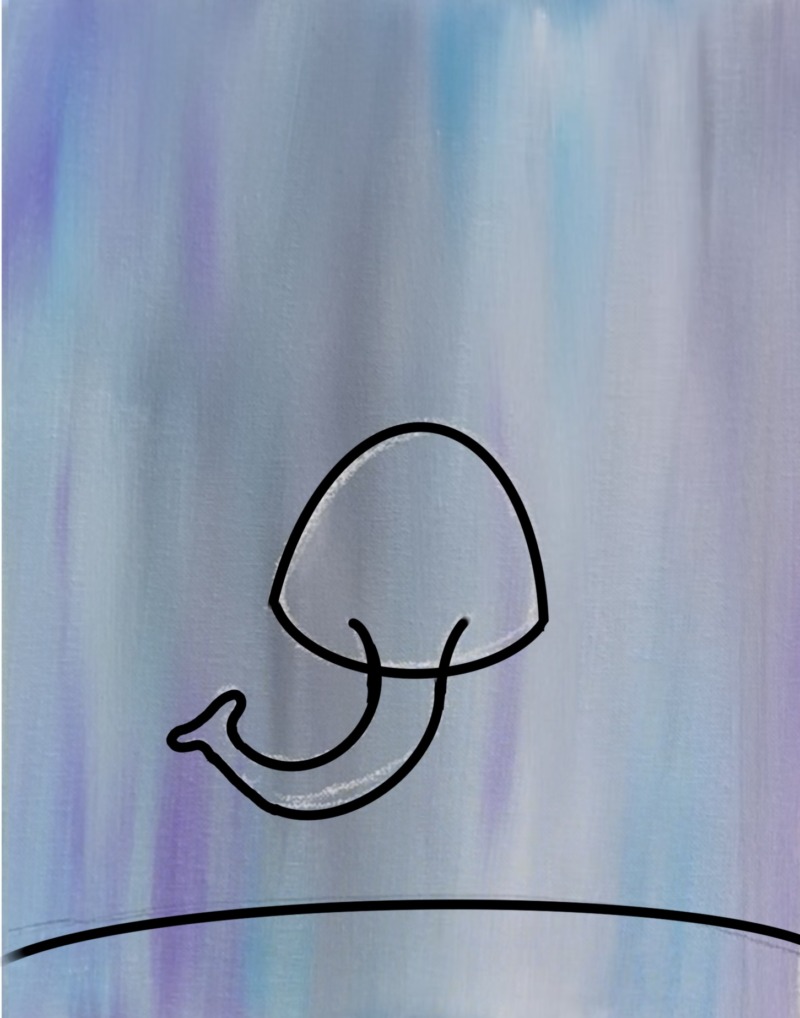
Then sketch the trunk. The trunk trumpets out wider and overlaps the bottom of the head. Draw a curved set of lines and the end of the elephant’s trunk.
Then draw a seat of two lines extending outwards on the side of the head to form the ends of the elephant’s ears. Draw the two front legs. This is almost a “horseshoe” shape that goes behind the elephant’s trunk and overlaps part of the hill/ ground area.
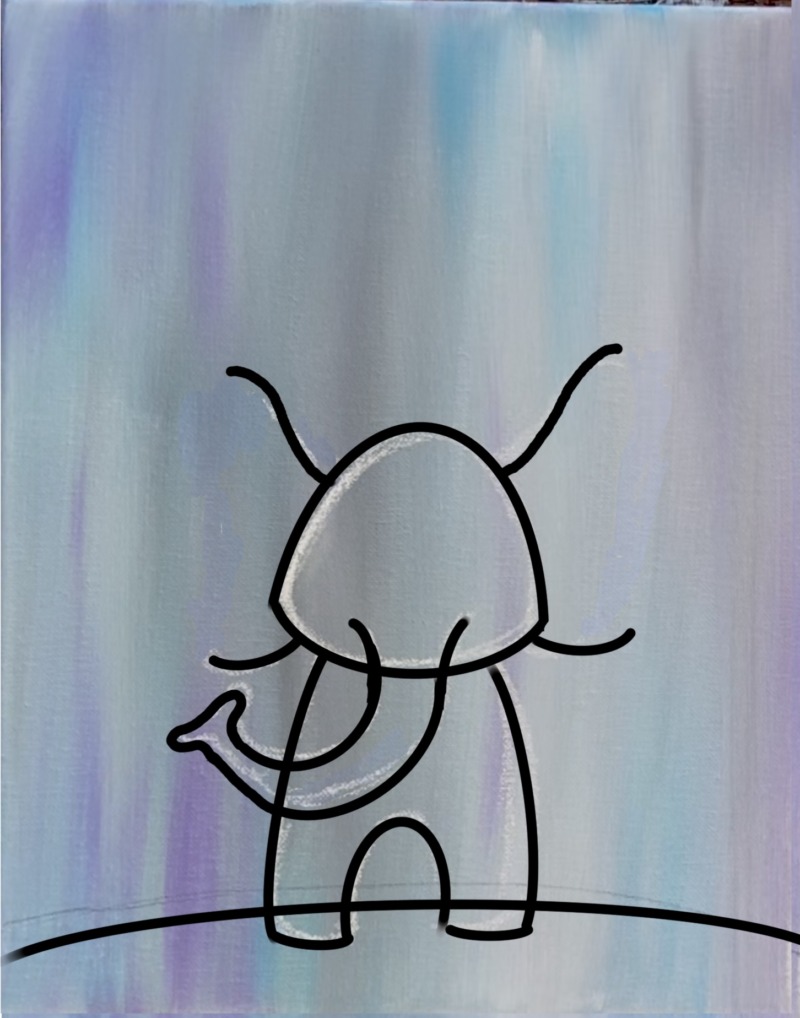
Finish the sides of the ears by drawing two lines that curve inwards. Draw curved lines on the trunk. Then draw to ovals going diagonally outwards for the back legs.
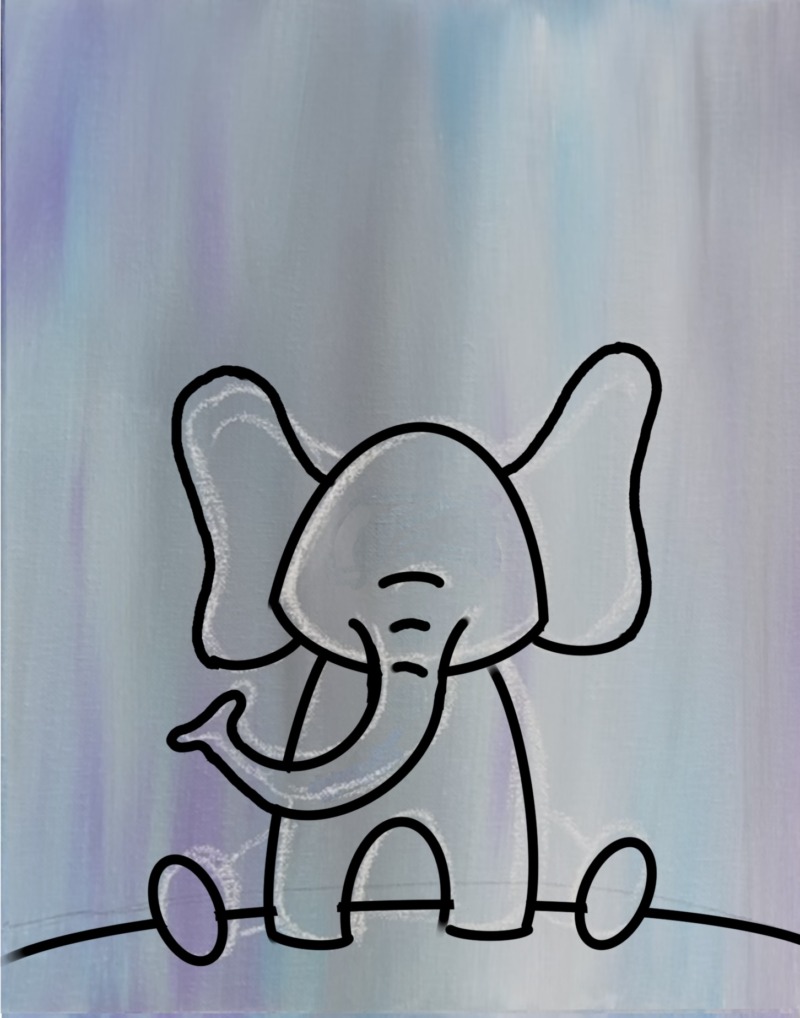
Draw the back legs and draw a curve in between the front legs. Erase parts of the “hill line” that you don’t need anymore. Then draw the pole for the umbrella. Use a ruler/ straight edge to help draw this. It is a diagonal line that overlaps the elephant’s head slightly on the left.
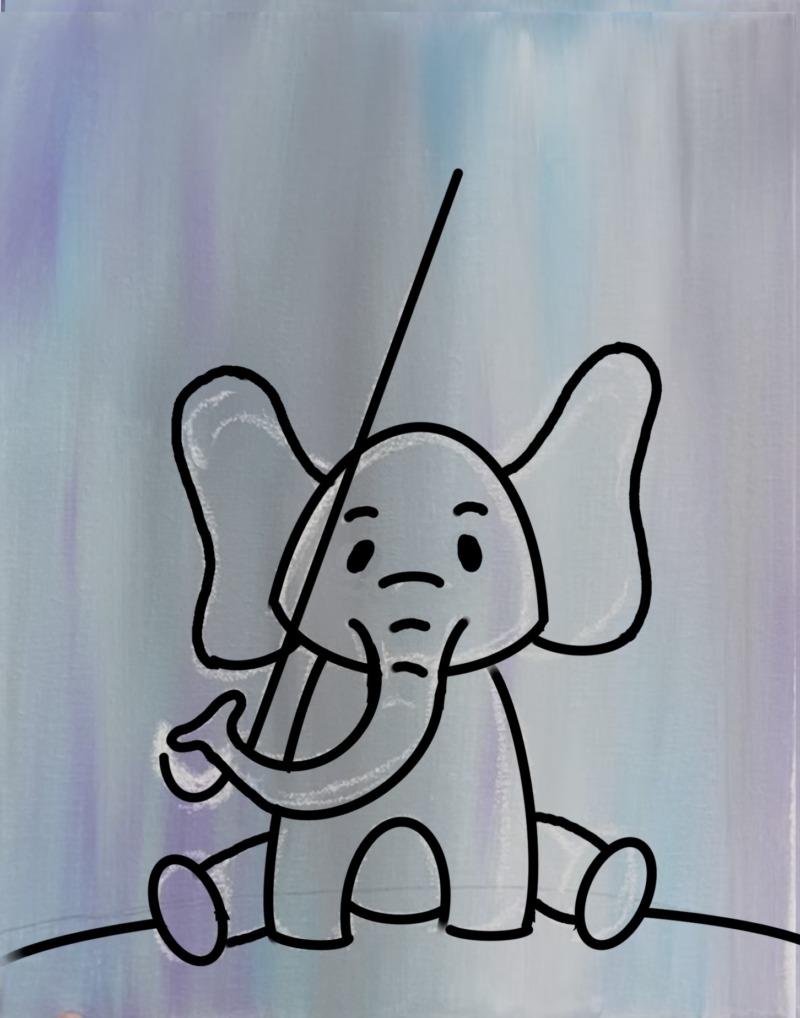
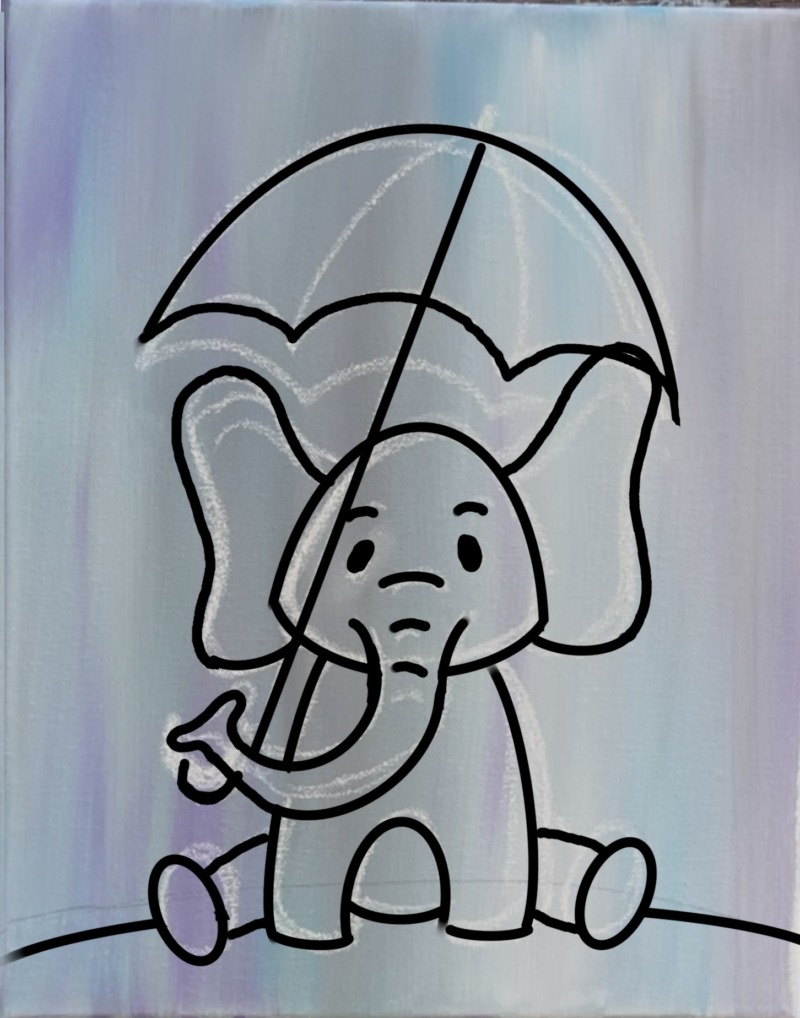
Then draw a large curved arch line on top of this line.
Draw three arc lines for the bottom edging of the umbrella with the center arc line crossing the center of the umbrella pole. You may need to overlap part of the elephant’s ear on the right.
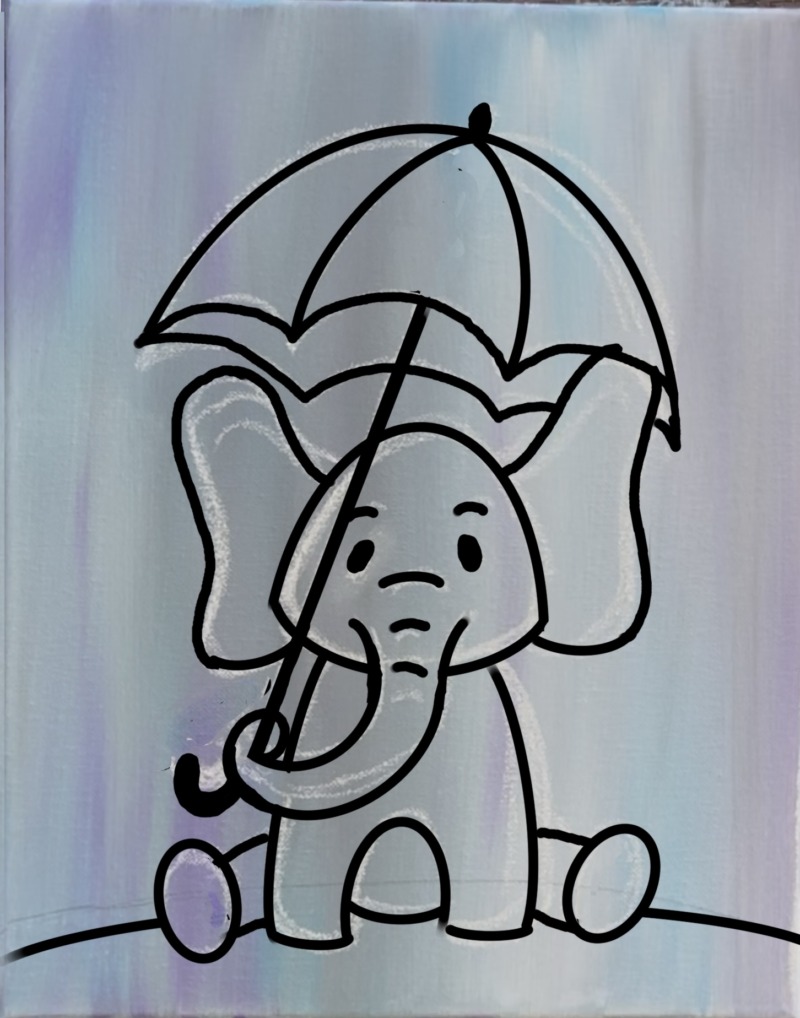
Note: the elephant’s trunk can be changed to make it look like it’s wrapped around the umbrella. Look below at the drawing how the trunk curves around the line. You can do it this way or have the end of the trunk just overlap the umbrella pole. The painted picture instructions will show it the simpler way.
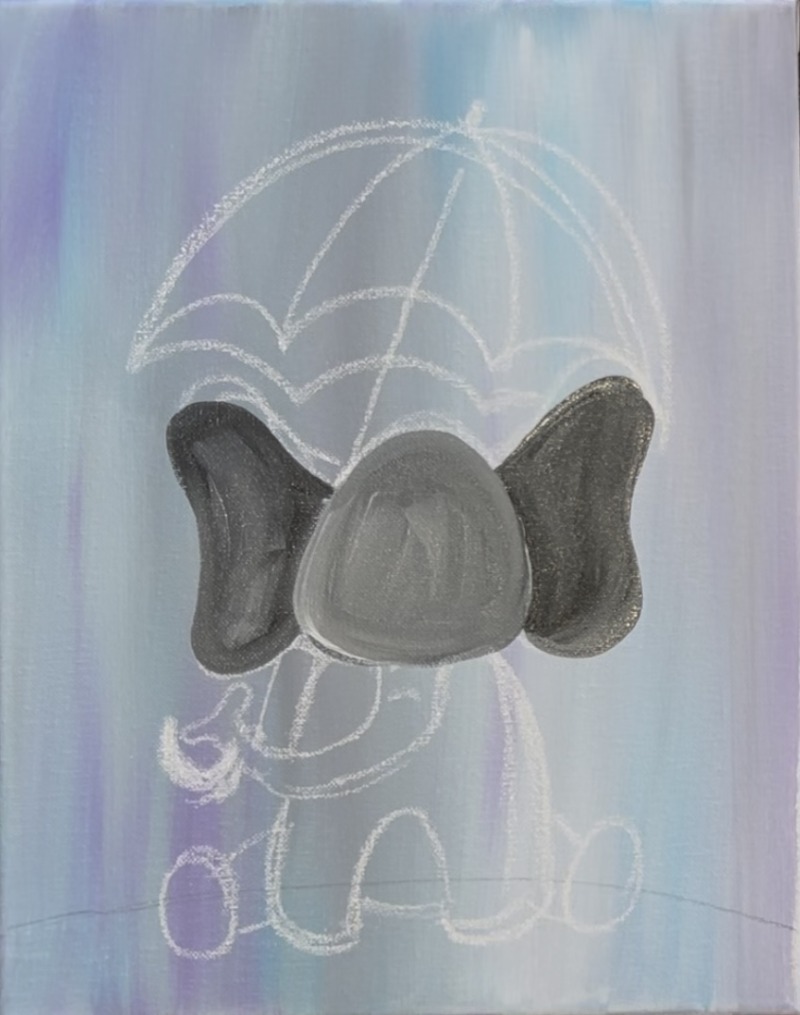
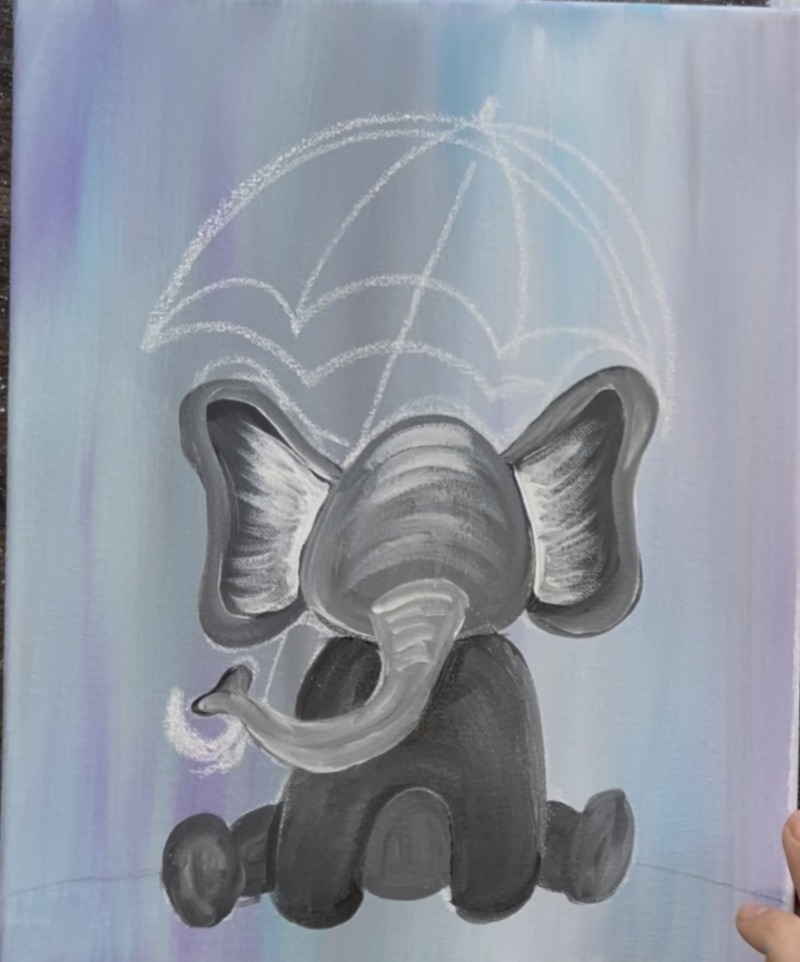
3. Paint Elephant First Layers
When you paint this elephant, you will be mixing different shades of gray for different parts of the elephant. This helps to create contrast so, for example, the ears stand out next to the head. Not everything will be the same shade of gray.
Mix a medium gray on your paint palette by mixing about 1 part mars black to 2-3 parts titanium white. Use the #12 bright brush to mix this color.
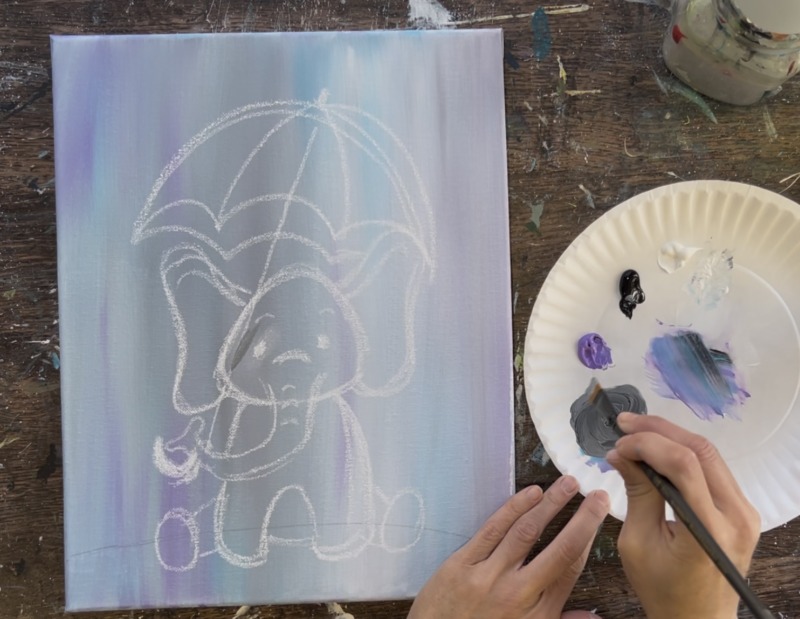
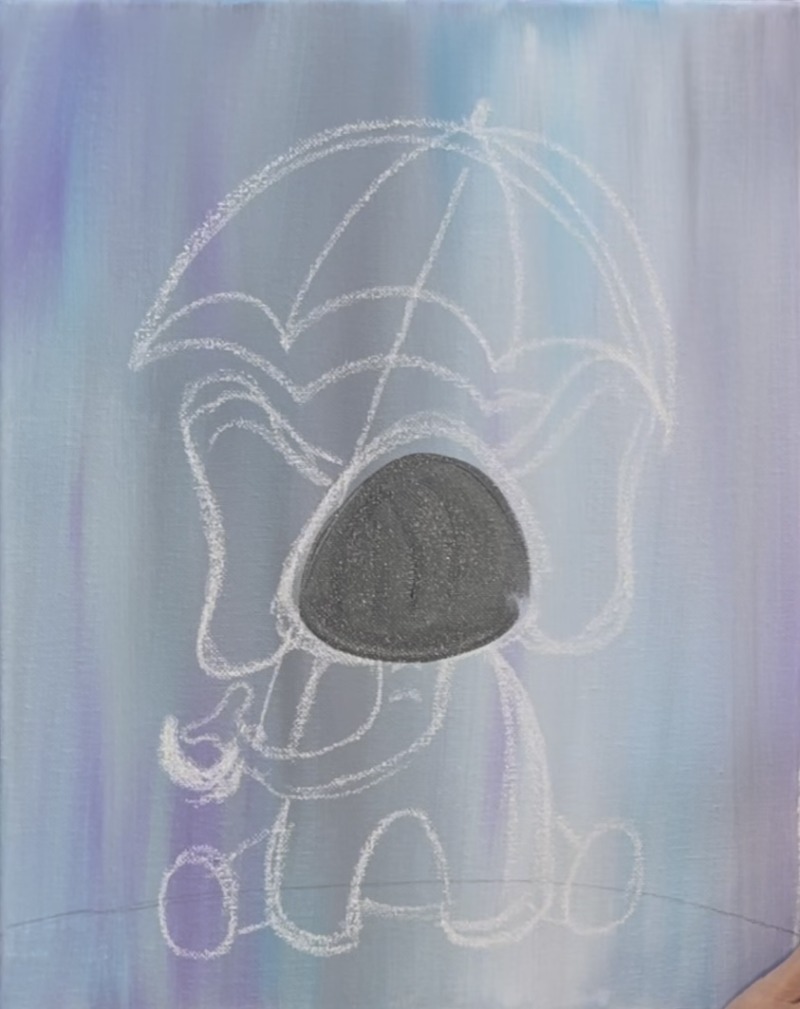
Paint the face. It’s okay if you paint over the eyes! We can add those back later. Make sure this gray layer is dark enough to show up against the background but not too dark!
Then outline the ears. The ears need to be just slightly darker than the face so they stand out. Add just a little bit more black into your gray so that it becomes a few shades darker.
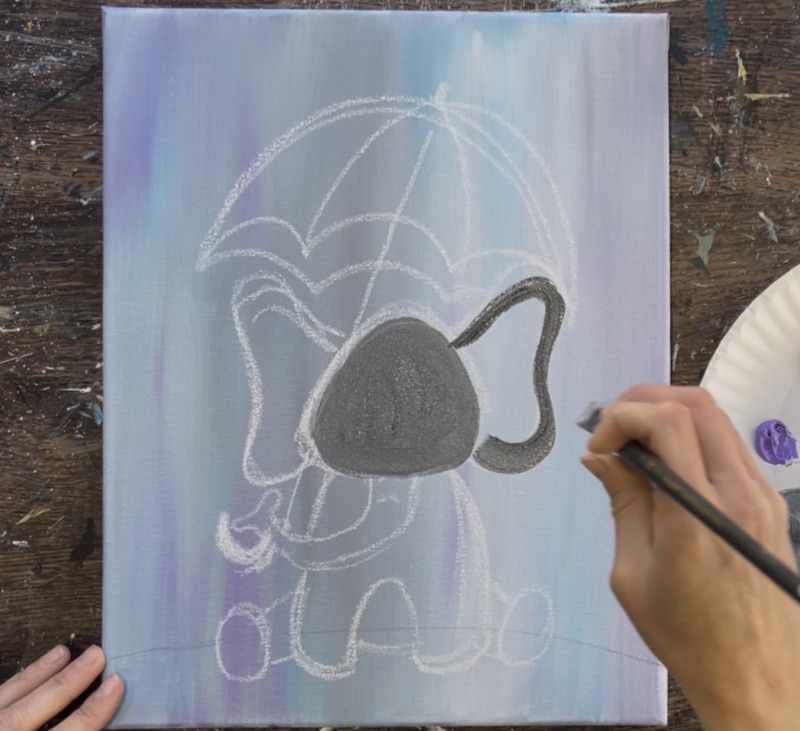
As you can see, the ear is slightly darker and has contrast next to the lighter shade of gray in the head.
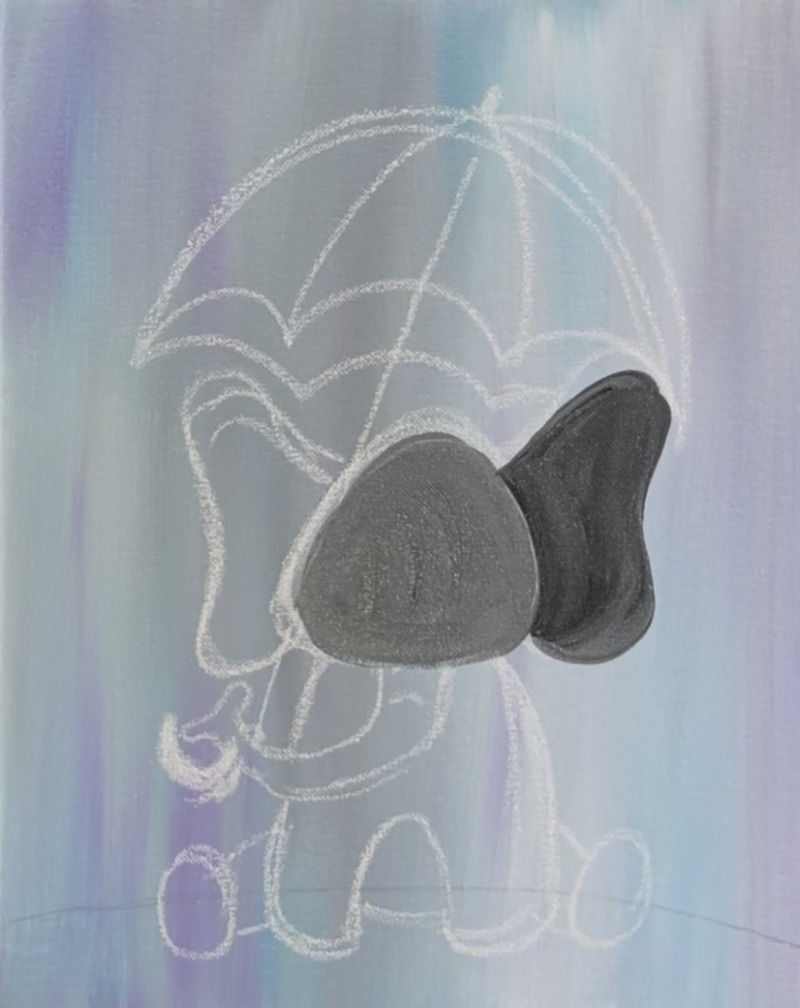
Repeat this for the other ear.
Paint the elephant trunk a few shades lighter than the head so that it stands out. At this point, you can switch to the #4 round brush to help create more curved brush strokes for the trunk.

Paint the body of the elephant with that same dark gray you used for the ears. Then paint the bottom of the feet with the same light gray as the trunk! Likewise use the medium gray (same as the head) for the legs and bottom area of the elephant.
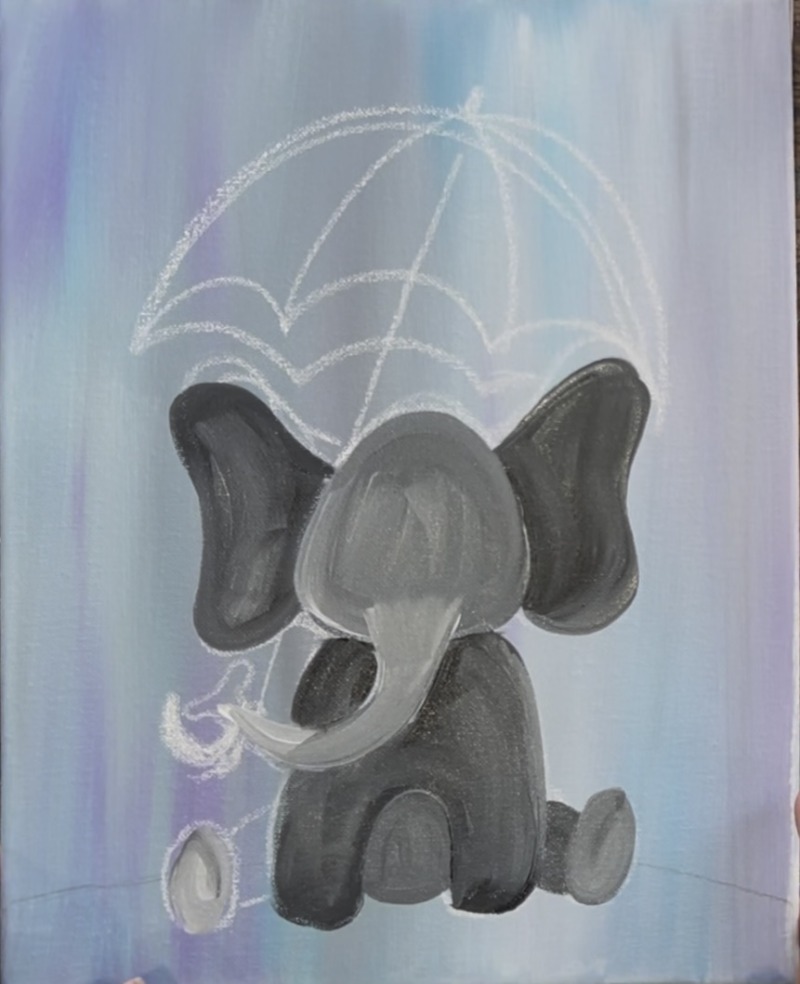
Use the round brush and the medium gray (or light gray) to outline the outer lining of the elephant’s ears. This will create two separate areas of the ears with the inner ears being darker.
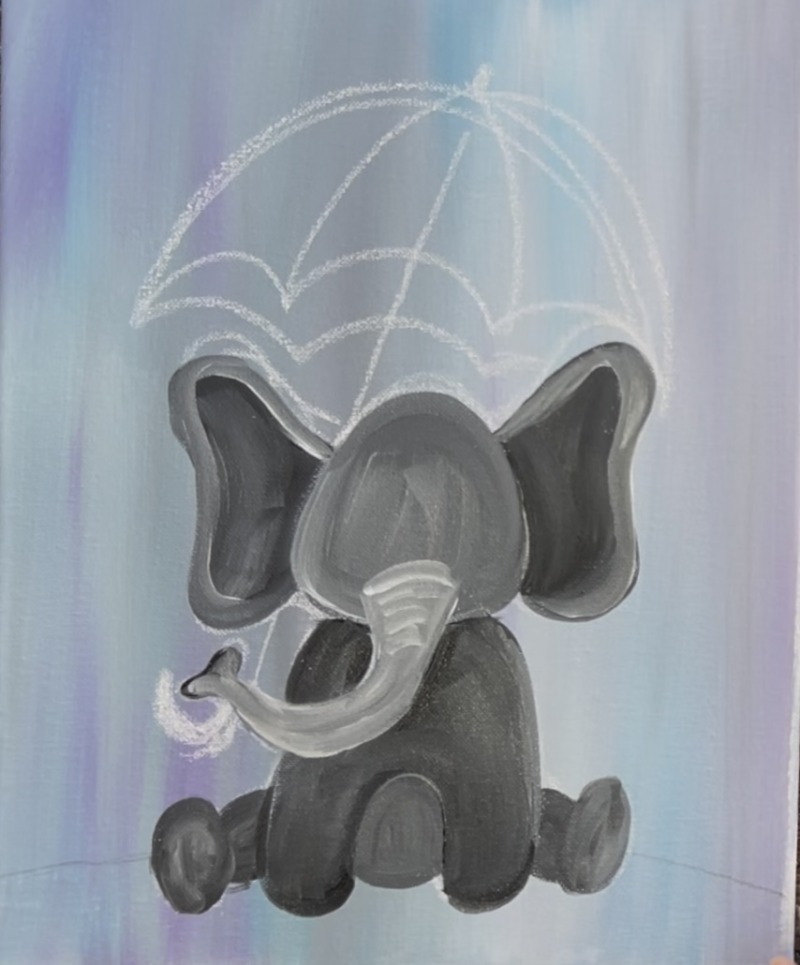
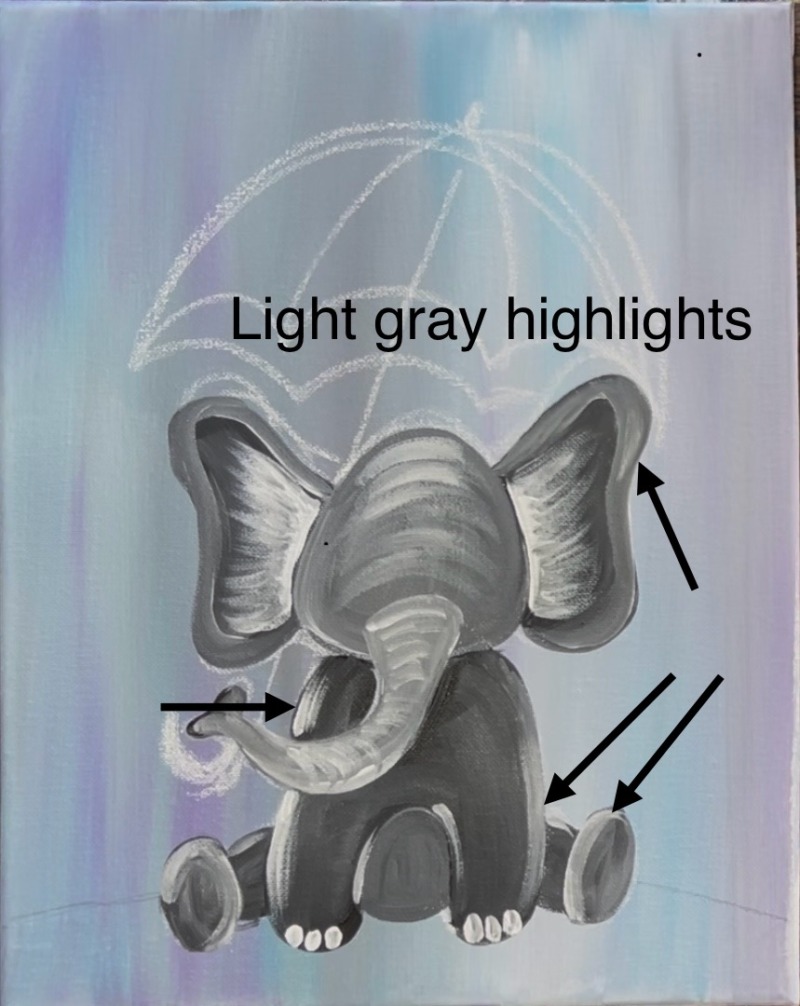
Add some highlights to the elephant next. Use the round brush and make a very light gray (mix a gray that is lighter than the first layer on the head). Paint curved strokes on the head and on the elephant’s trunk to create some wrinkles.
Next, use a #4 round brush and lightly paint white on the inner ear. You can also do this dry brush style by only loading a very small amount of white on your brush.
Drag your brush outwards from the edge of the ear closest to the head. As you stroke outwards, release the pressure of the brush. You just want to lighten the inner ears so that we can add a layer of pink on there after it dries.
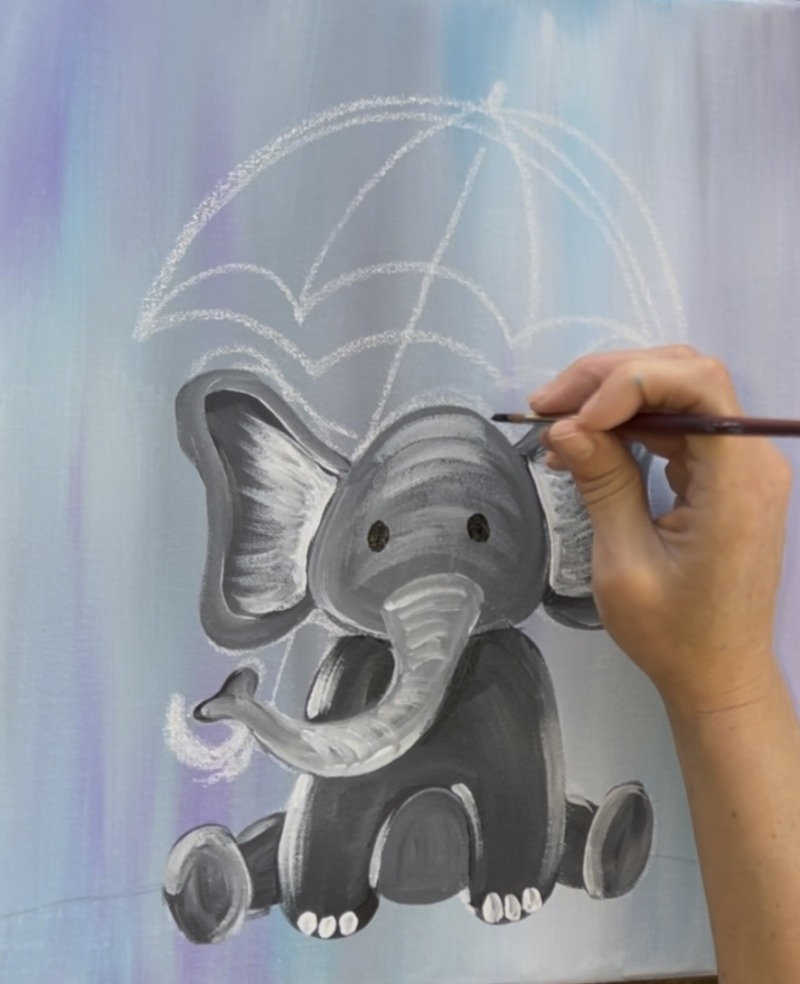
Next, use the #4 round brush and “titanium white” to paint little toes on the bottom of the elephant’s feet.
Highlight edges of the elephant’s legs, ears and feet lightly with light gray. Do this very lightly, almost “dry brush style” so these lines are not thick and bold. They are light and “see through”. This is optional but it could help create contrast on the edges of the elephant’s shapes.
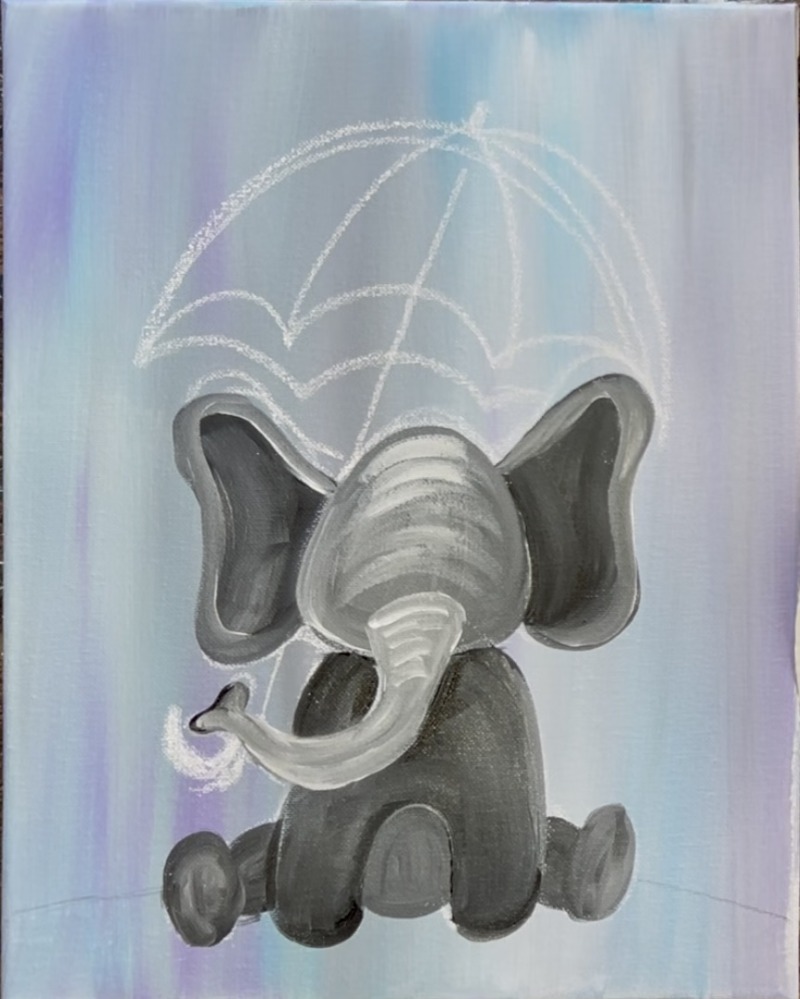
Use the #4 round brush and mars black to paint two eyes. These are two oval shapes going slightly inwards towards each other.
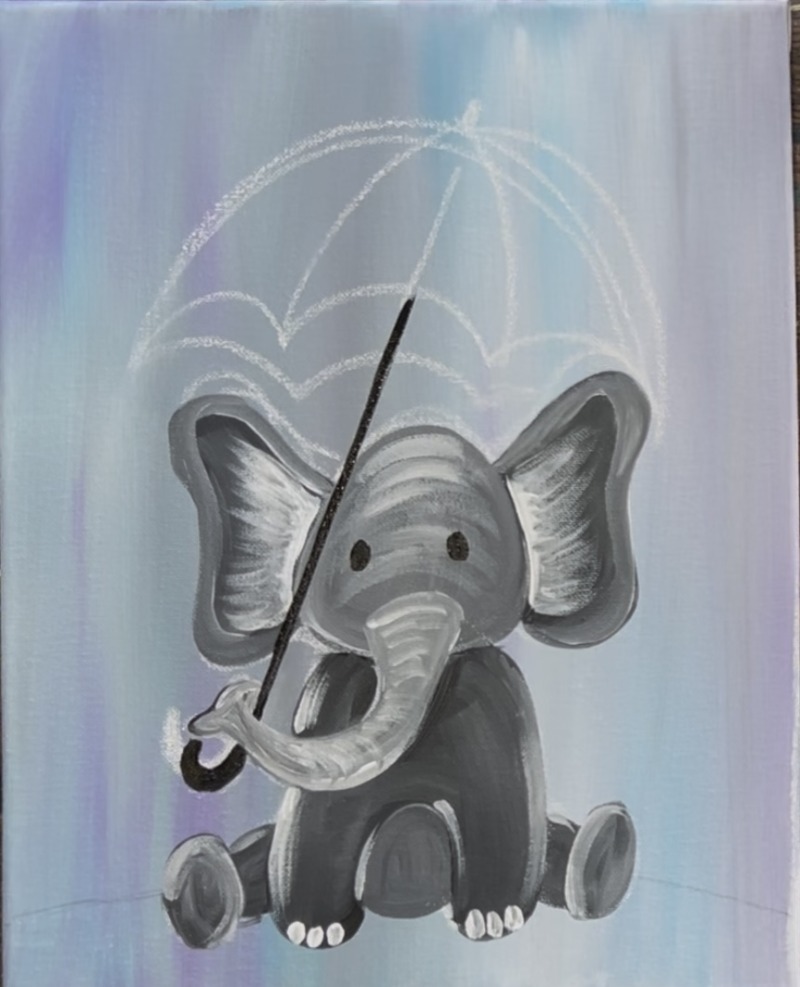
4. Paint Umbrella
Use a #4 round brush and mars black. Loosen the black a little with water so that your paint stroke for the long umbrella pole will flow better. You can also use a straightedge to help this line be straight. Paint the black line that goes from the trunk to the umbrella.
Use either the round brush or the #12 bright brush and titanium white to paint the umbrella.
Then paint the under part of the umbrella with a light gray. Also, paint water reflection on the ground under the elephant. Use a combination of brilliant purple, light blue permanent and medium gray. Use the #4 round brush and paint each individual color. These are little horizontal, loose paint strokes.
5. Paint Inner Ears Pink
Use the color “light pink” and the #4 round brush to paint the inner part of the ear. You are basically painting over the white layer you painted earlier. Release the pressure of the brush so the pink sort of fades out into the dark part of the ear.
6. Detail Eyes & Wrinkles
Use the #4 round brush (or a black paint pen) to paint two eye brows. Paint little curves on the elephant’s trunk. Then paint two white dots on the elephant’s eyes for highlights on the eyes. Make the larger dot on top and the smaller dot on bottom going diagonally downwards from the first dot.

7. Paint Umbrella Colors
Use the #4 round brush to outline the bottom edges of the umbrella as well as the two curved lines in the middle of the umbrella.
Then load your palette with the colors you will use for the umbrella. For the far left slot, paint that with “primary yellow”.
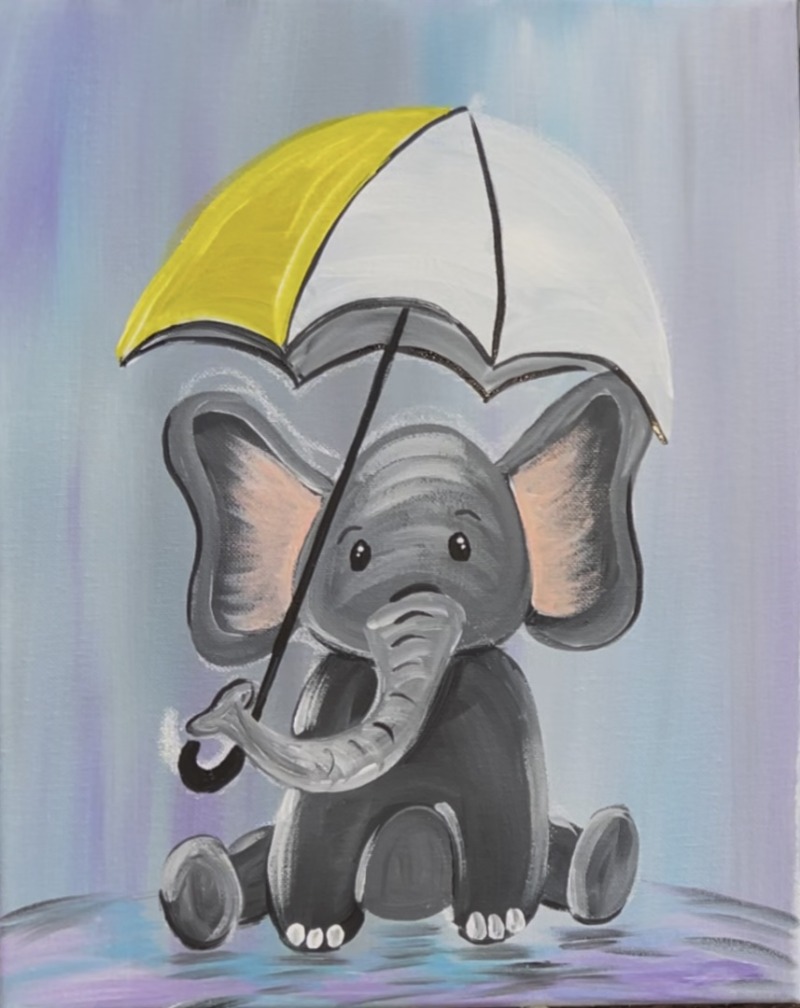
Paint the middle area with “pyrrole red”. At the top of both of the umbrella sections, blend a little white using the #4 round brush. Brush the white downwards into the rest of the color. When you add these highlights, you want to this before the colors dry so that the white still blends with the color.
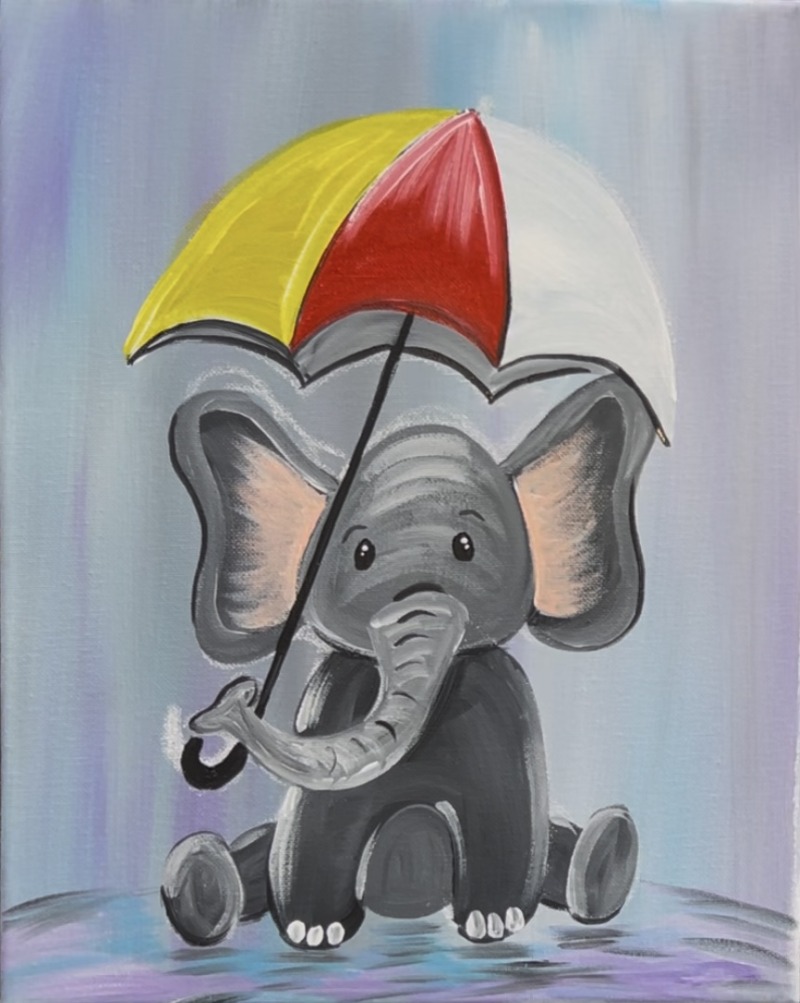
Pint the far right umbrella section with “deep violet”. Then use the white to brush the top of the umbrella and stroke downwards.
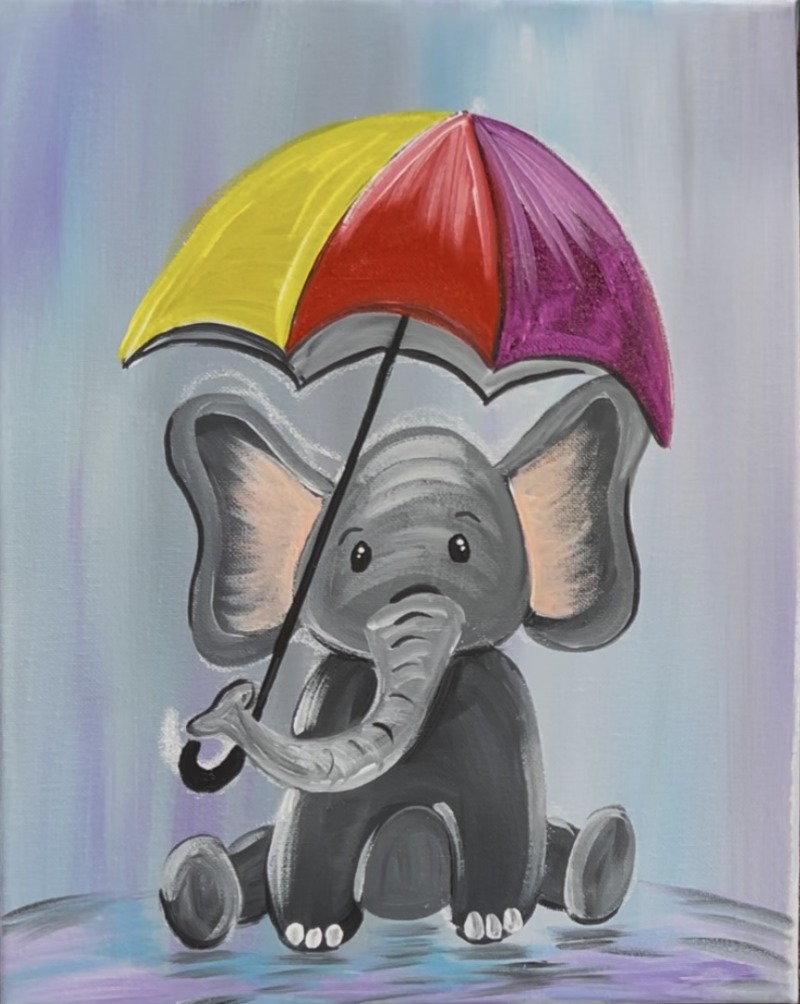
Mix your green and orange colors that are on the underside of the umbrella. To make orange, mix yellow and red together. To make green, mix the yellow with the “light blue permanent”. For the right inner part of the umbrella, I used light blue permanent.
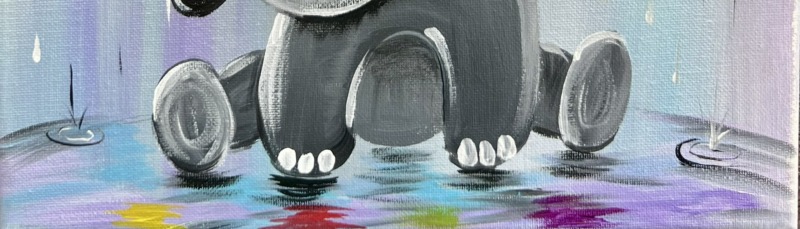
8. Paint Colorful Reflections On Ground
Use the #4 round brush and the yellow, red and purple colors from the umbrella to paint little horizontal reflections on the ground under the elephant.
9. Paint Raindrops
For the raindrops, I use a #8 long round brush which has a fine tip to it. You can also use a “liner brush” or any tiny detail round brush. Start with just “titanium white” and paint little vertical lines throughout the background.

I did a few lines on the points/ edges of the umbrella to make it look like water is dripping down. You can also paint a few “splashes” on the top of the umbrella.
Paint raindrops that are also overlapping the umbrella. Some of the raindrops can be more rounded on the end of the drops and not just straight lines. Also, you can use gray to paint darker drops. This gives more variation with the rain!

You can also paint little drops on the ground and form ripples around the drops. I used this with both white and dark gray.
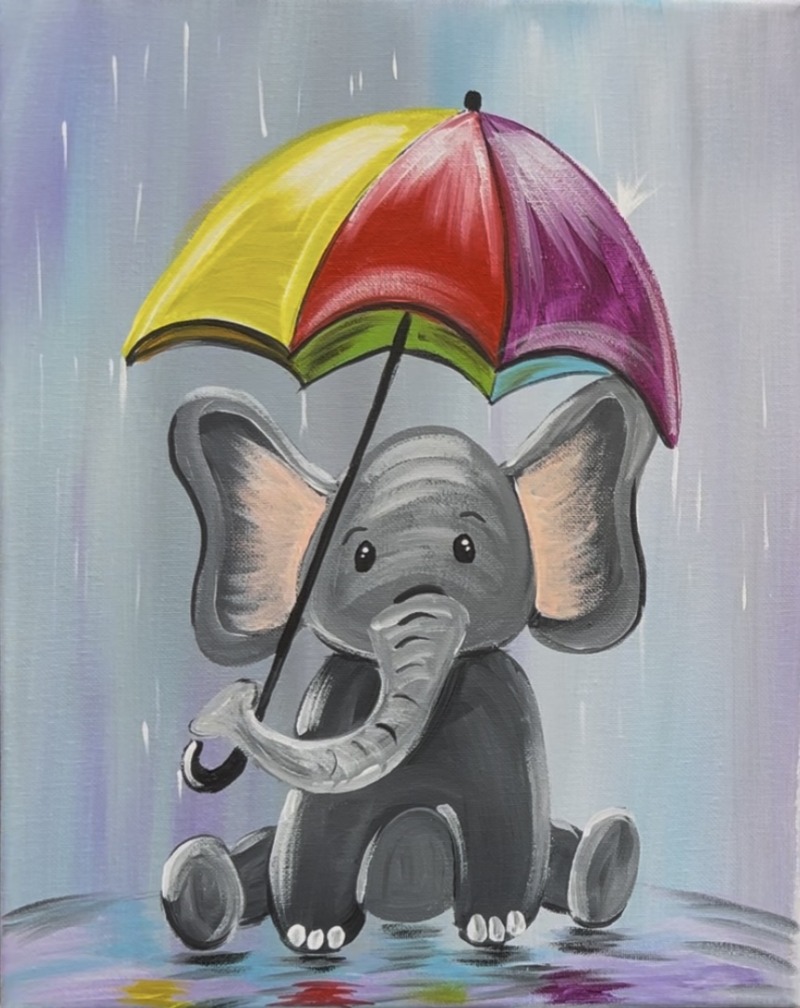
Finished
Some final touch ups for this painting are: adding more highlights to the top of the umbrella with titanium white and loosely outlining some parts of the umbrella and edges of the elephant with black.

Also, I adjusted the trunk to make it look like it is wrapped around the umbrella handle. This has to be done by painting over part of the background (use the same colors you used earlier). Then paint the trunk so the end goes around the pole.