

Would you like to save this?
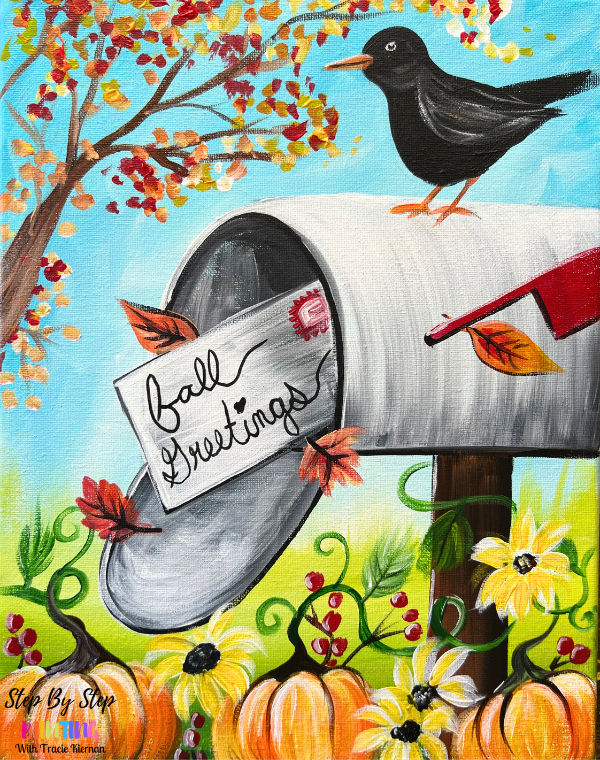
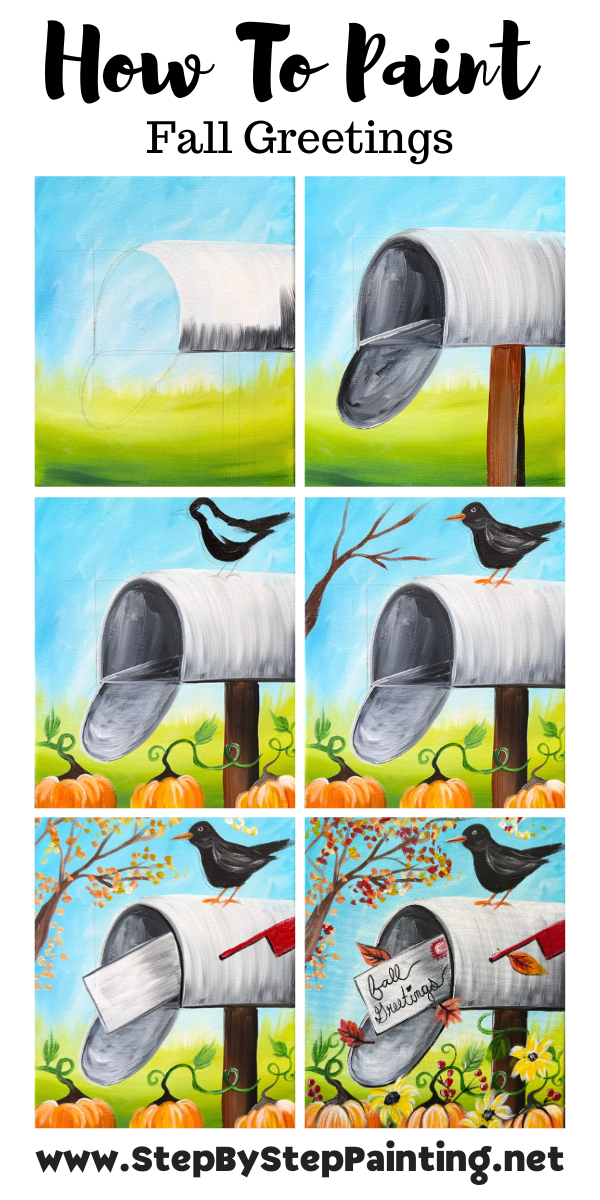
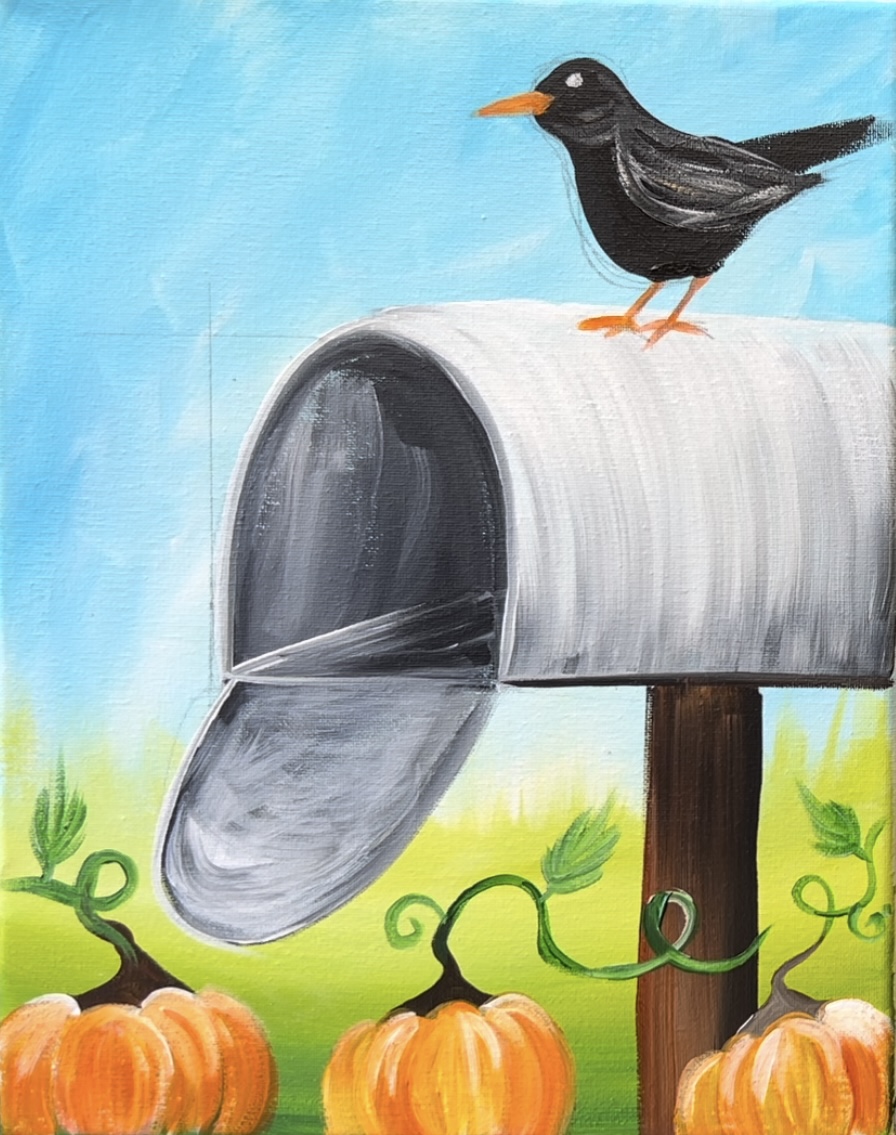
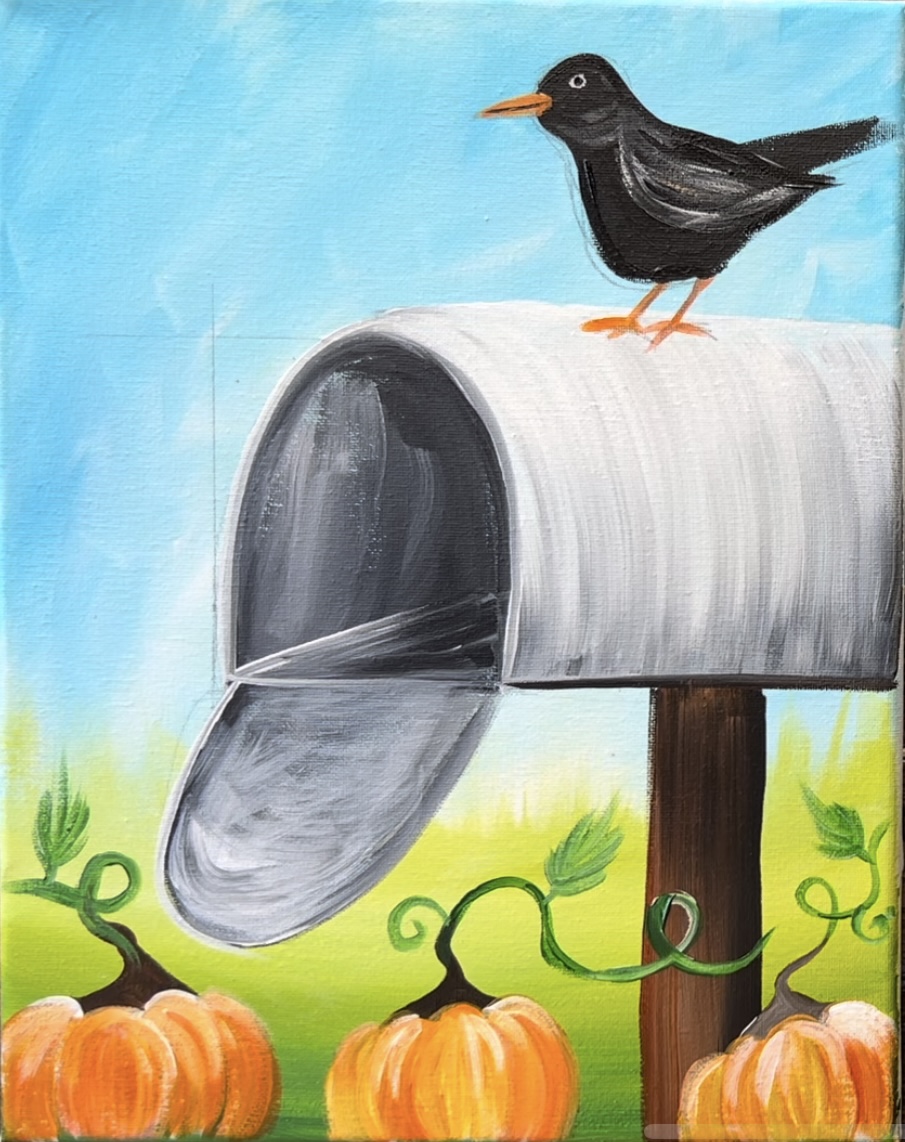
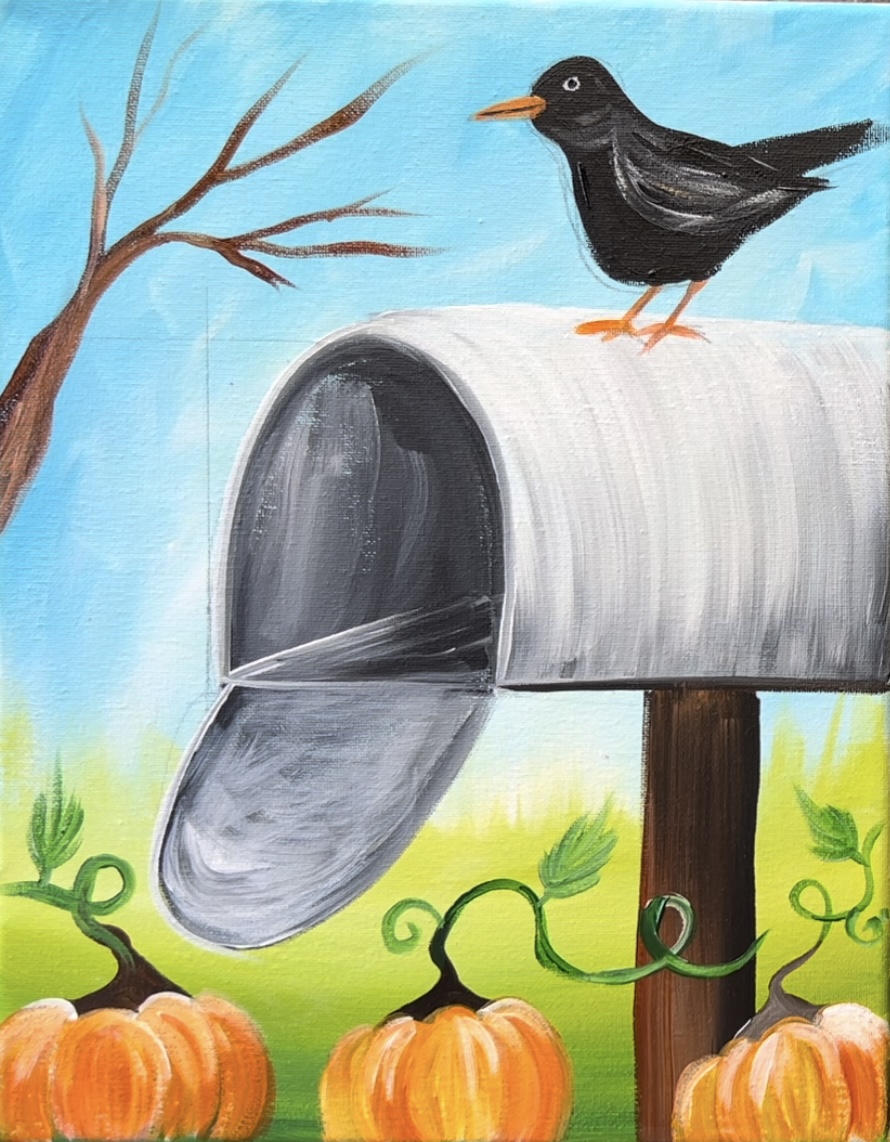
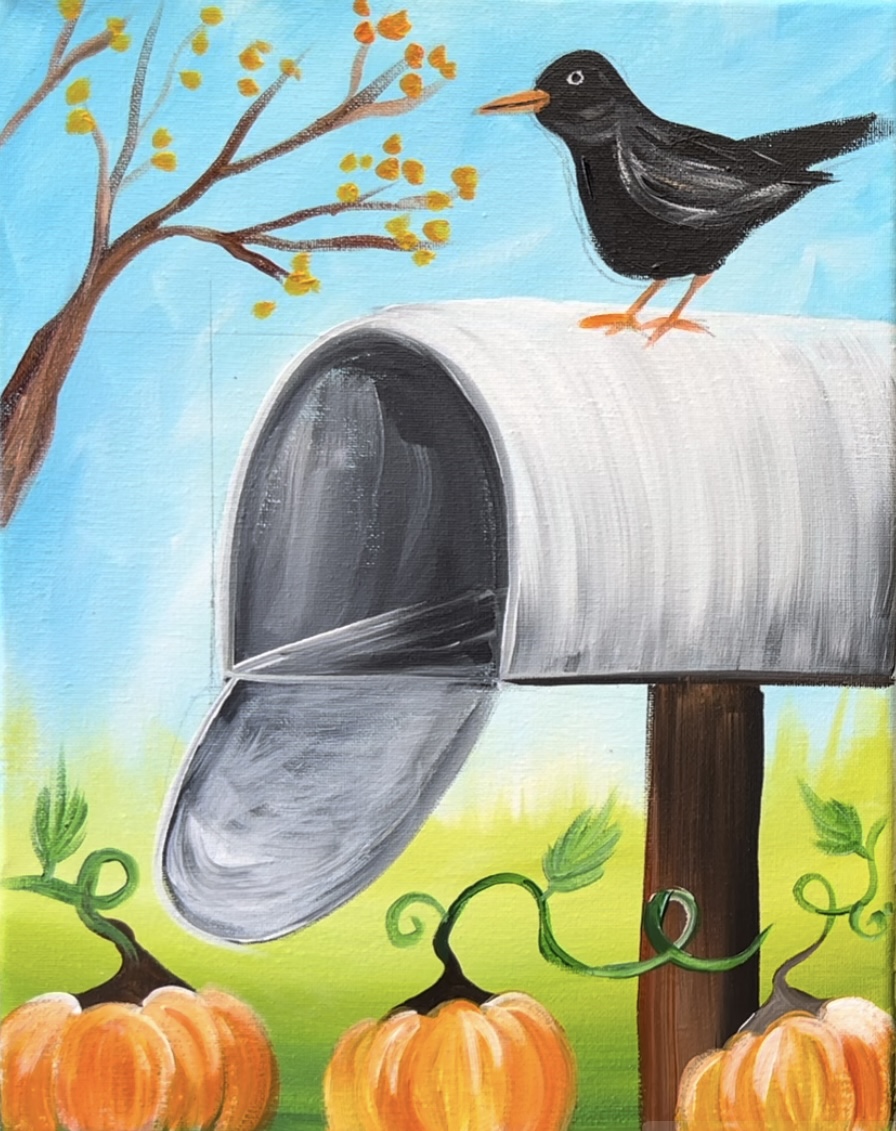
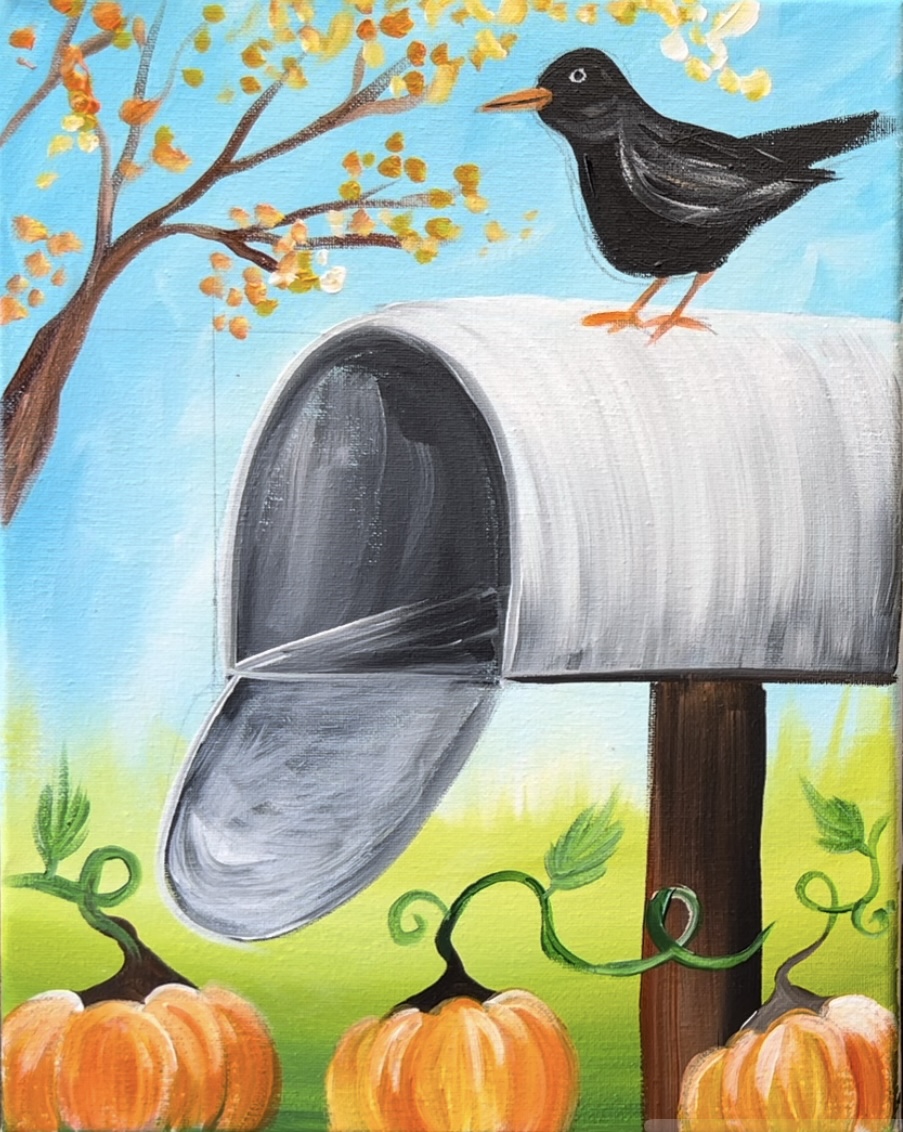
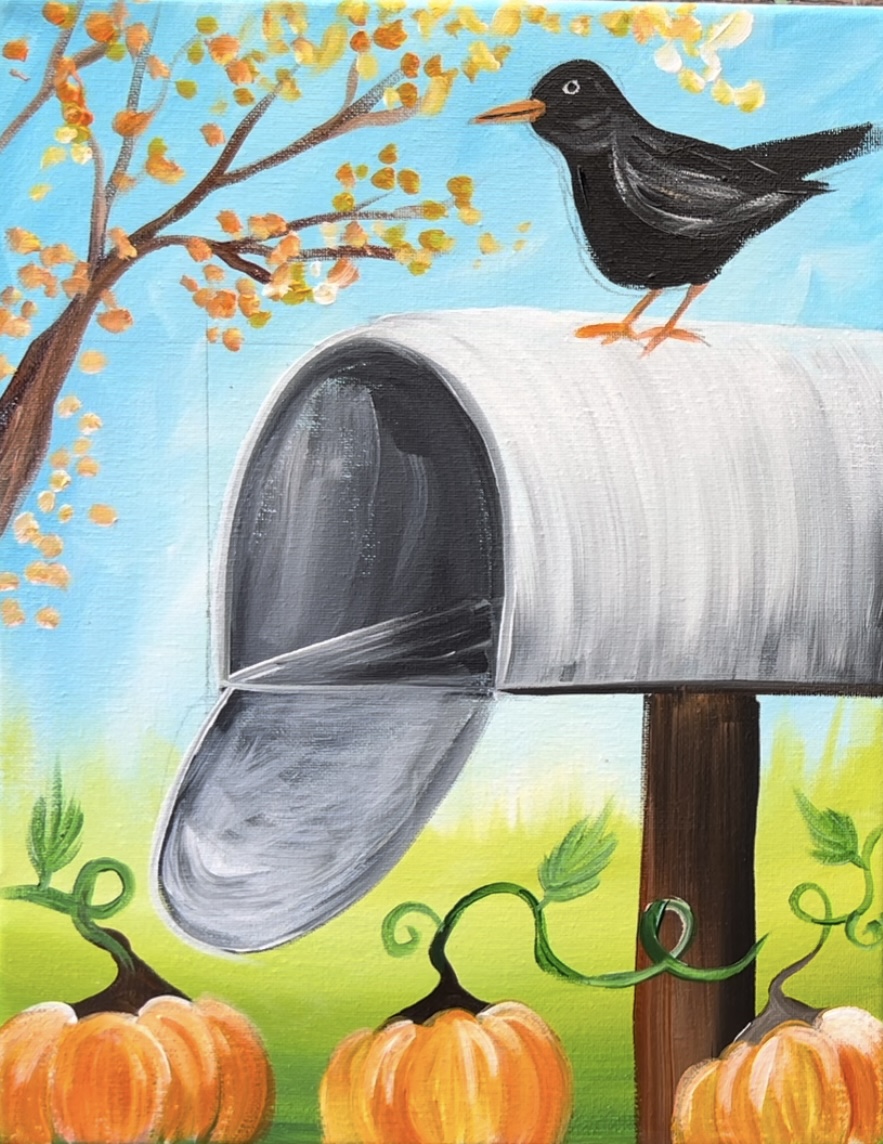
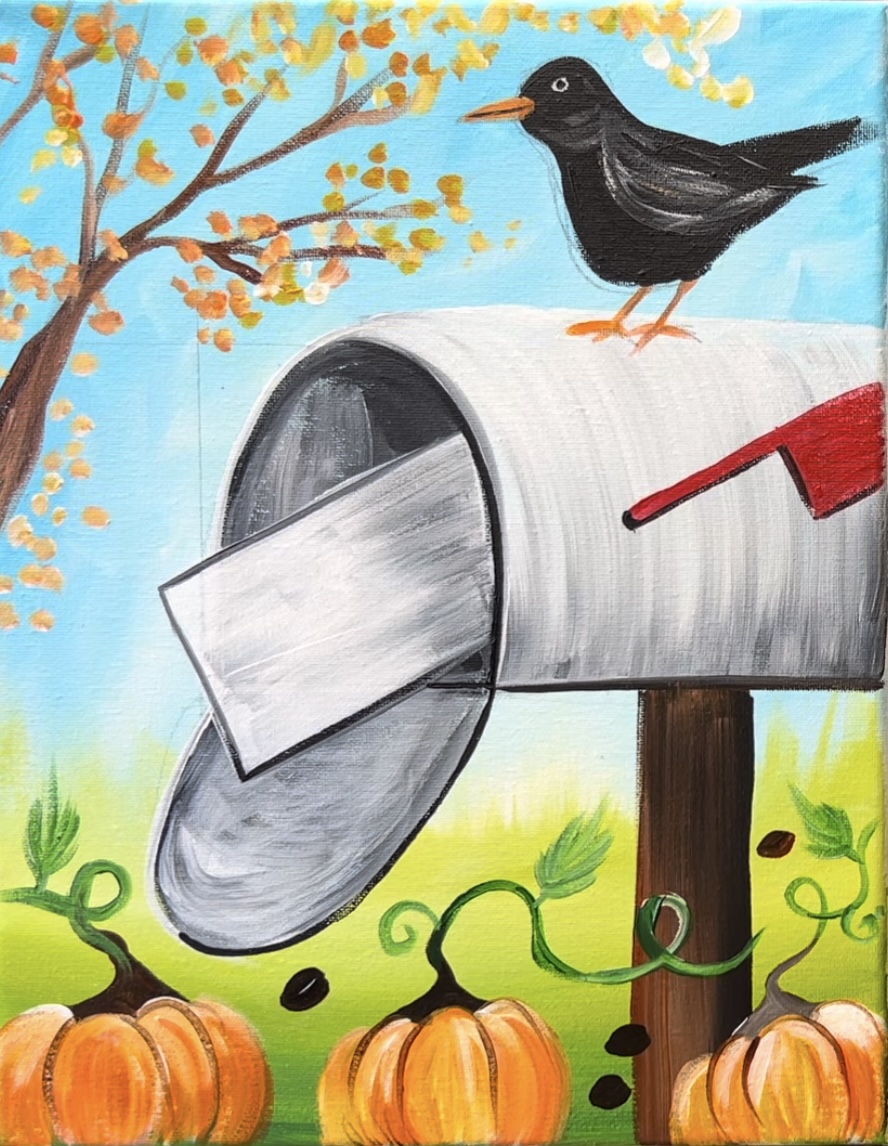
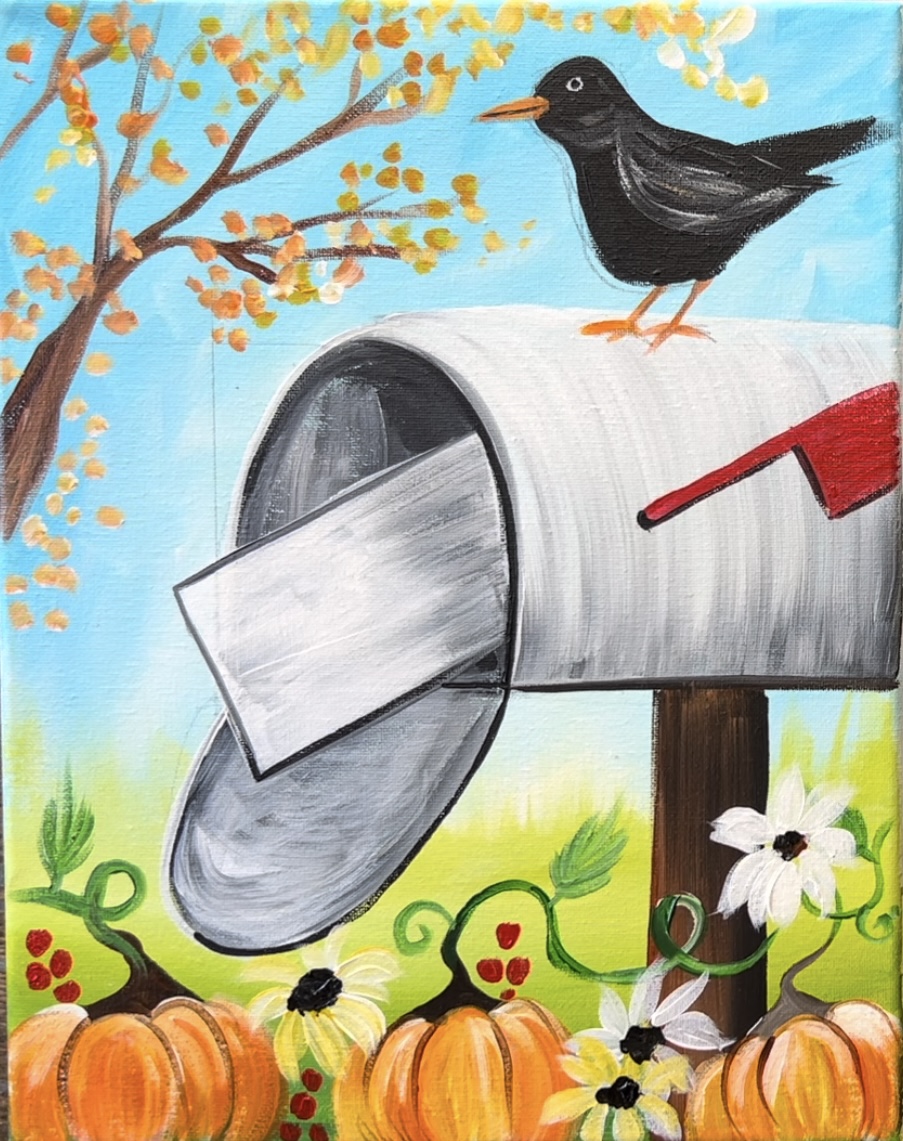
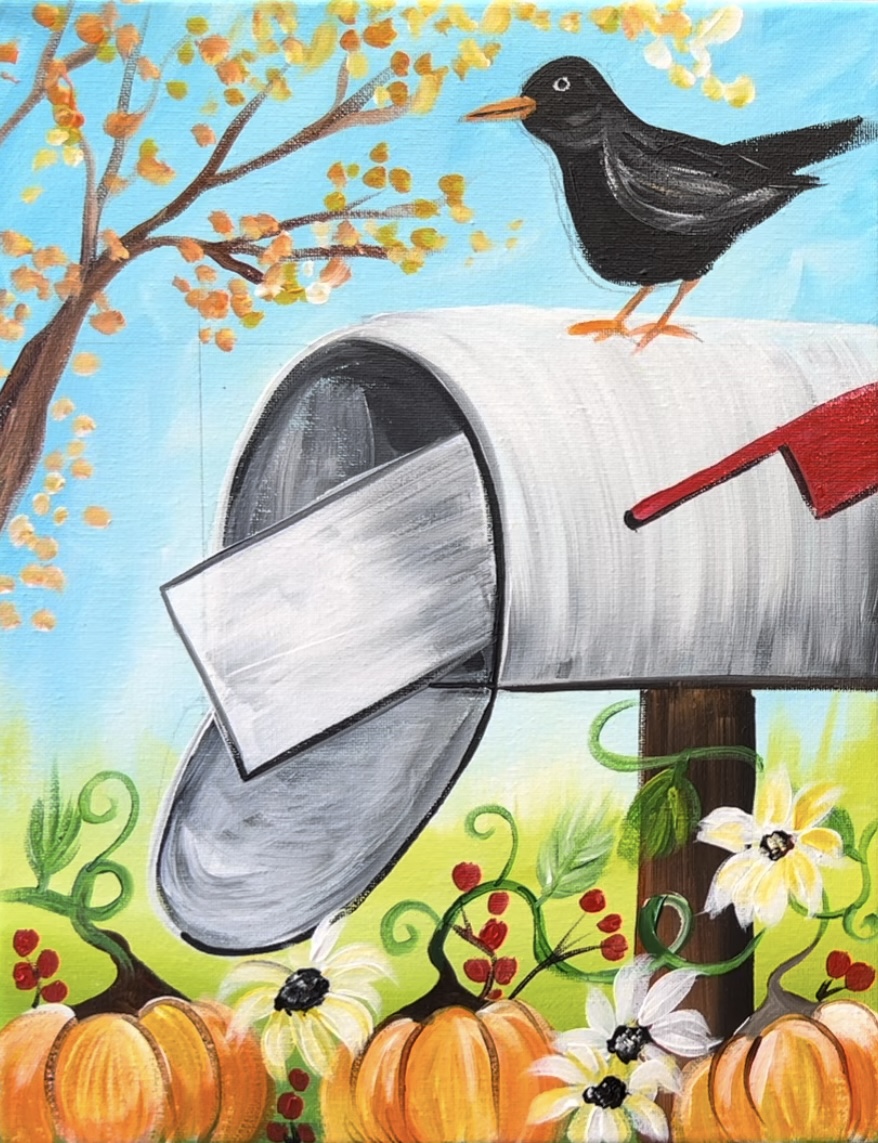
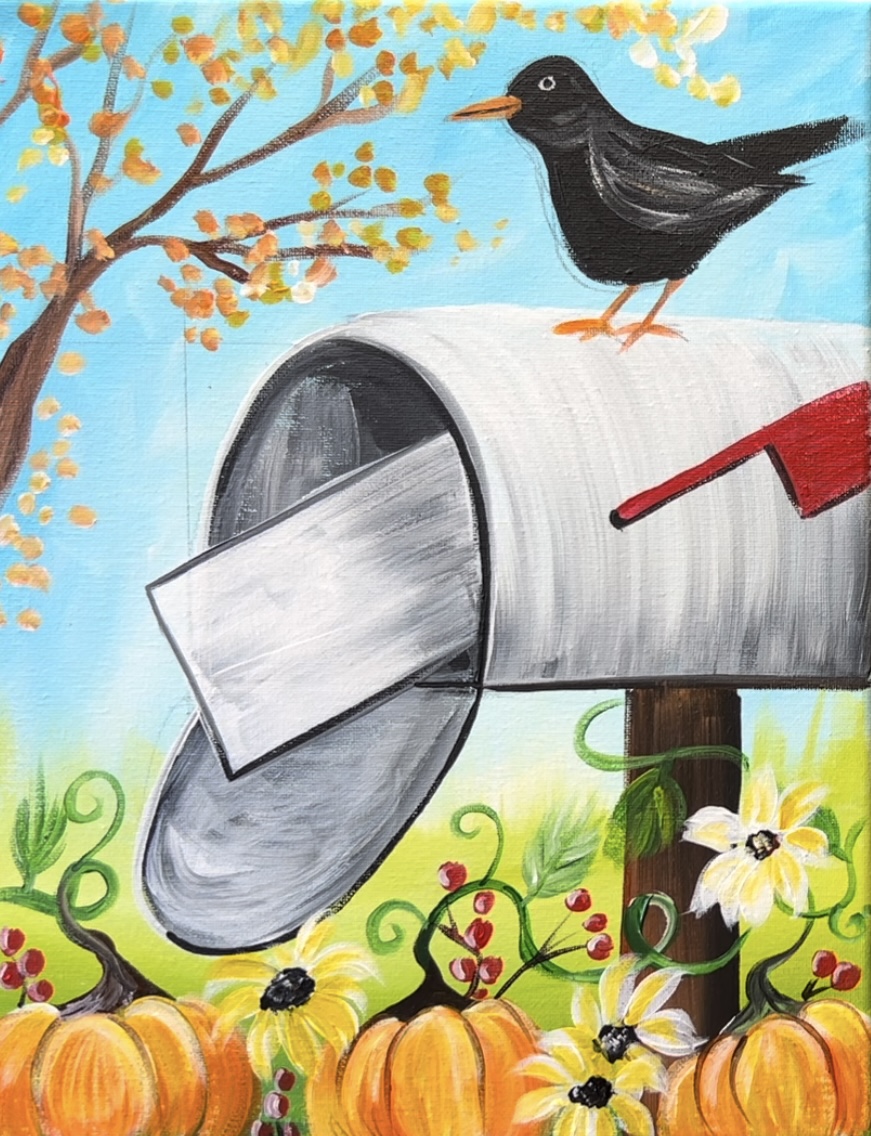
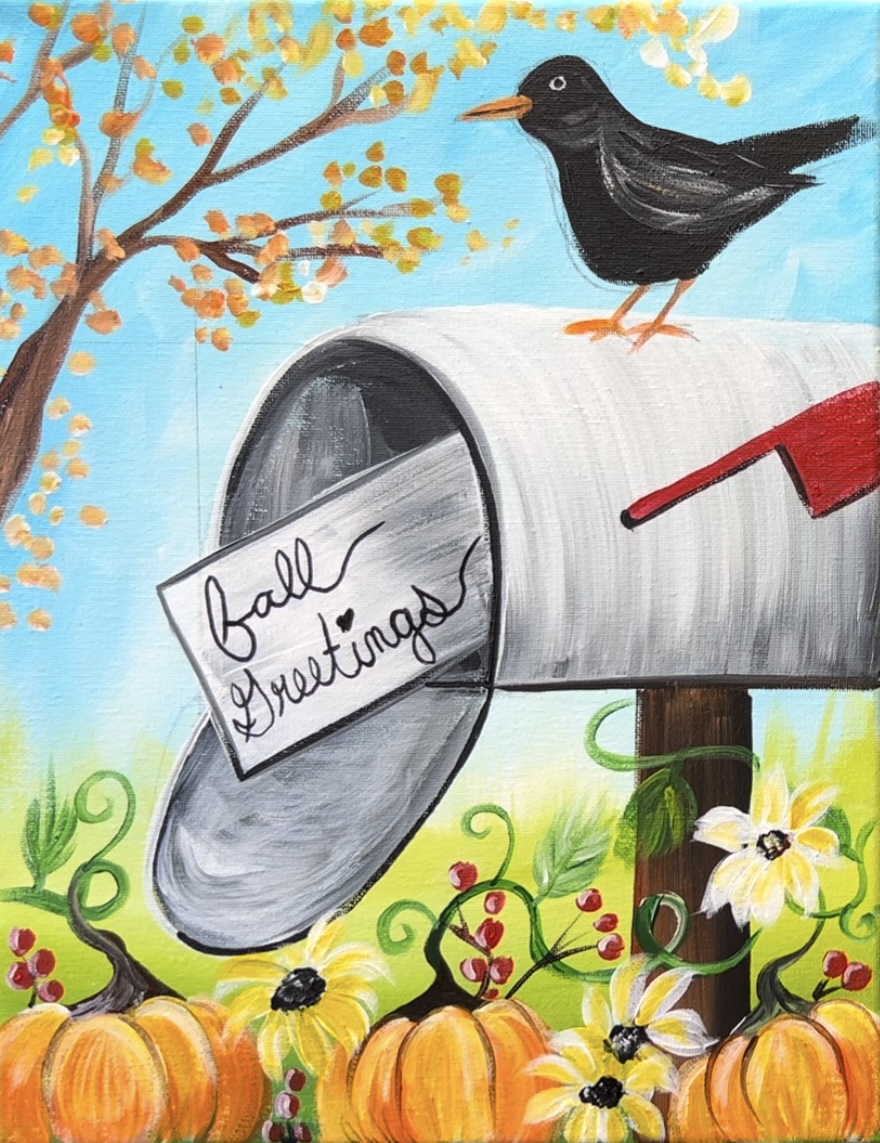
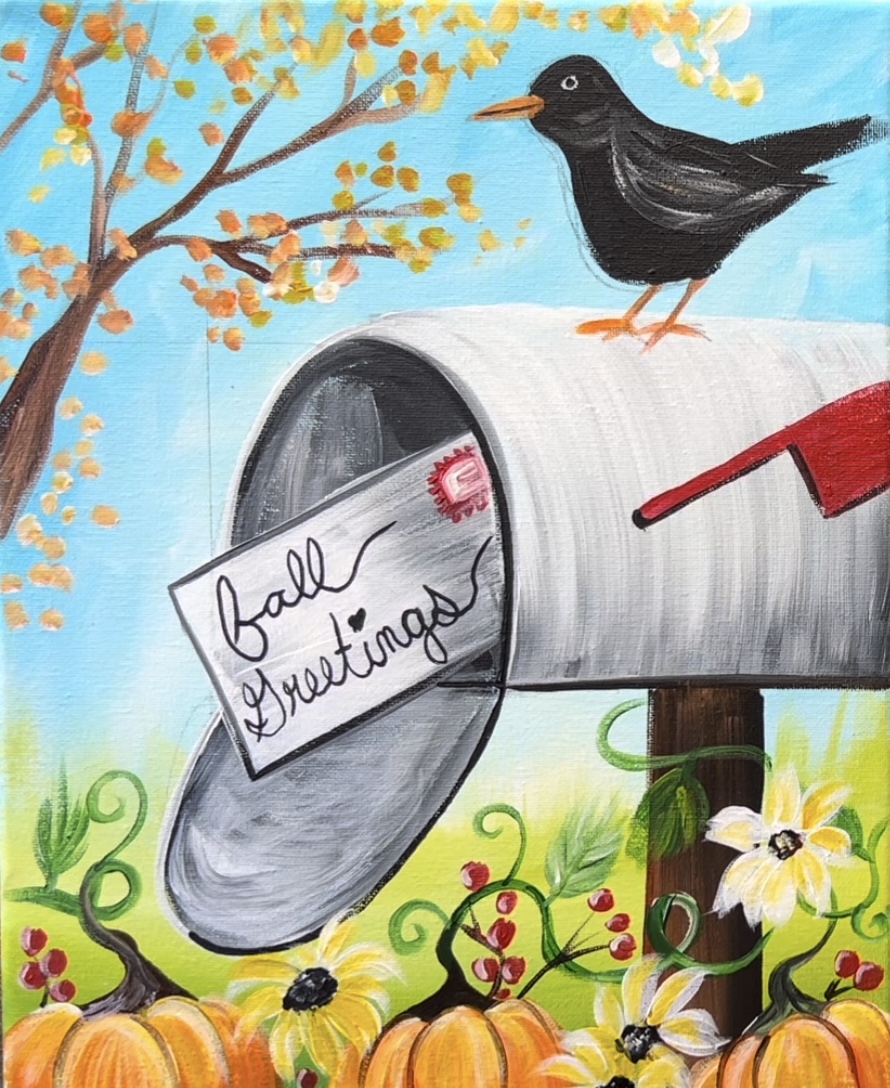
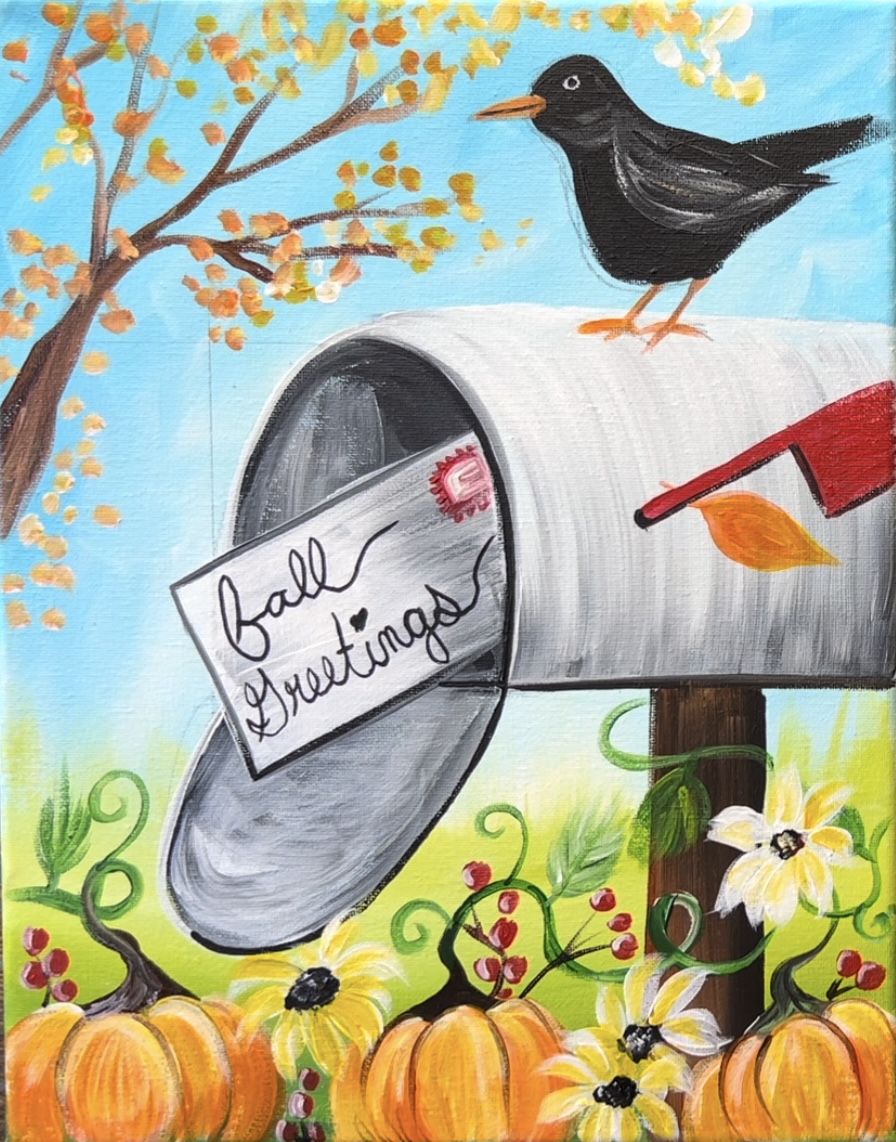
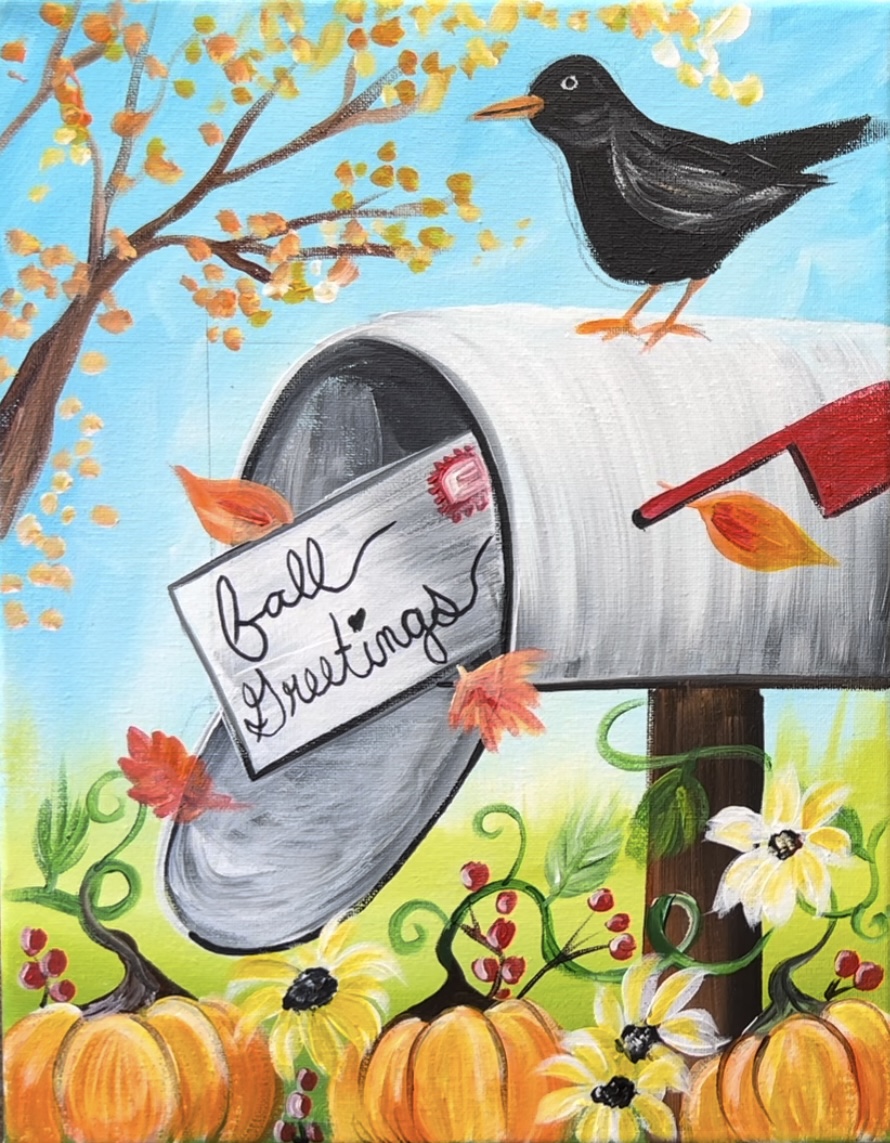
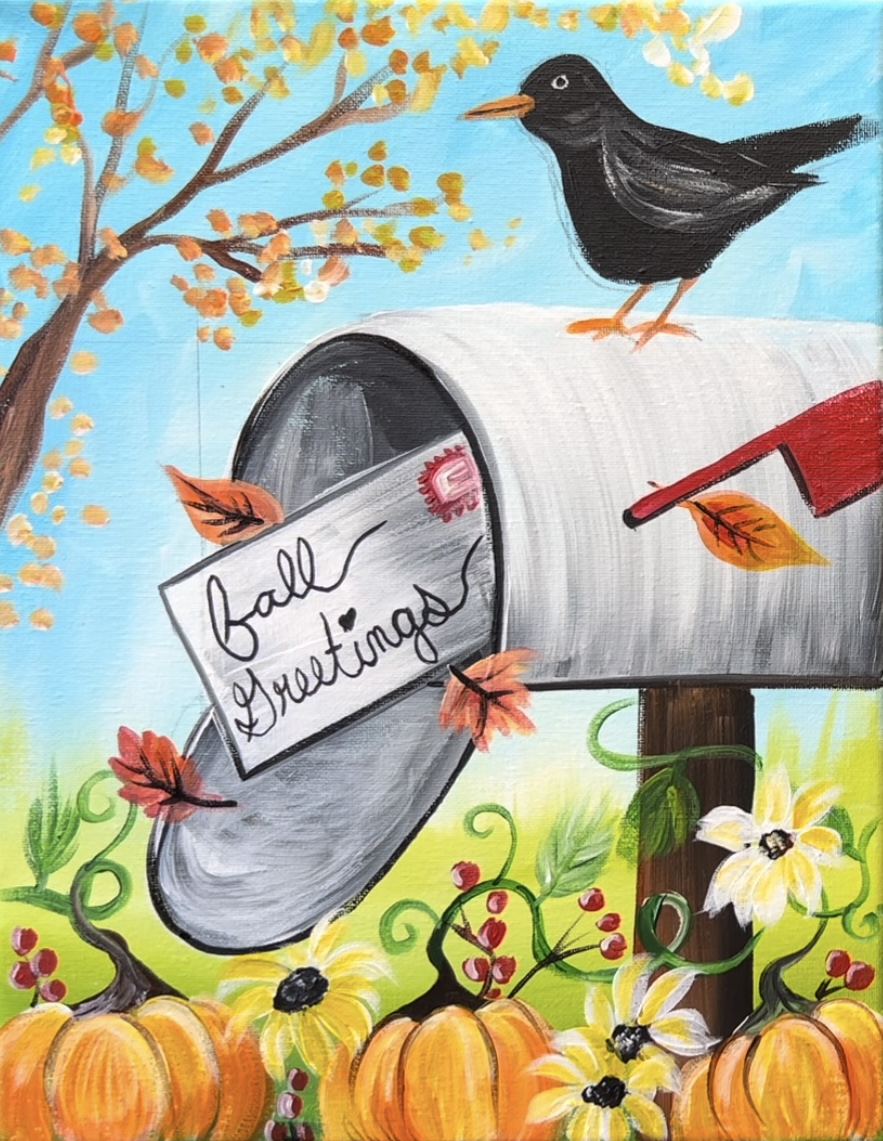
Let’s paint a super cute and charming fall themed mailbox adorned with pumpkins and flowers. A blackbird is perched on top to greet you!
Enjoy and happy painting!
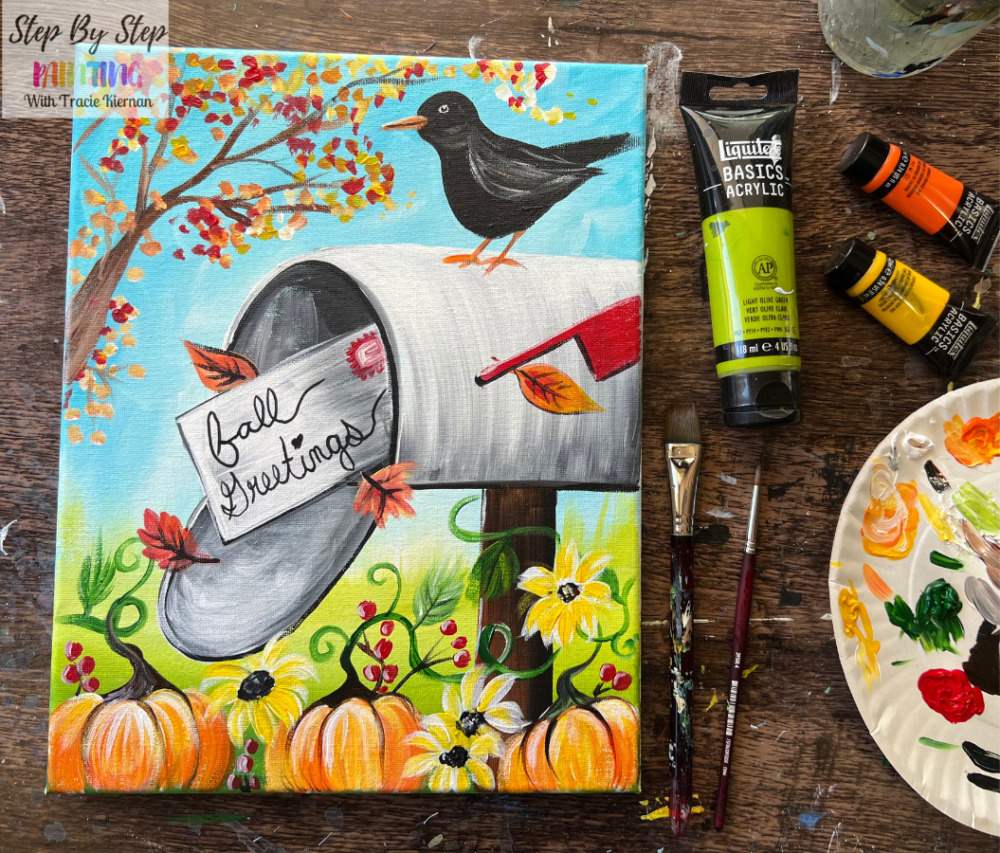
Materials
Fall Greetings - Acrylic Painting Tutorial
Let's paint a charming fall mailbox in a pumpkin patch with a blackbird perched on top!
Materials
- 11 x 14 Canvas (or any size you want to paint on)
- Acrylic Paint (I used Liquitex BASICS)
- Paint Brushes (Princeton Velvetouch)
- Pencil
- T-Square Ruler
- Black POSCA Paint Pen (Optional)
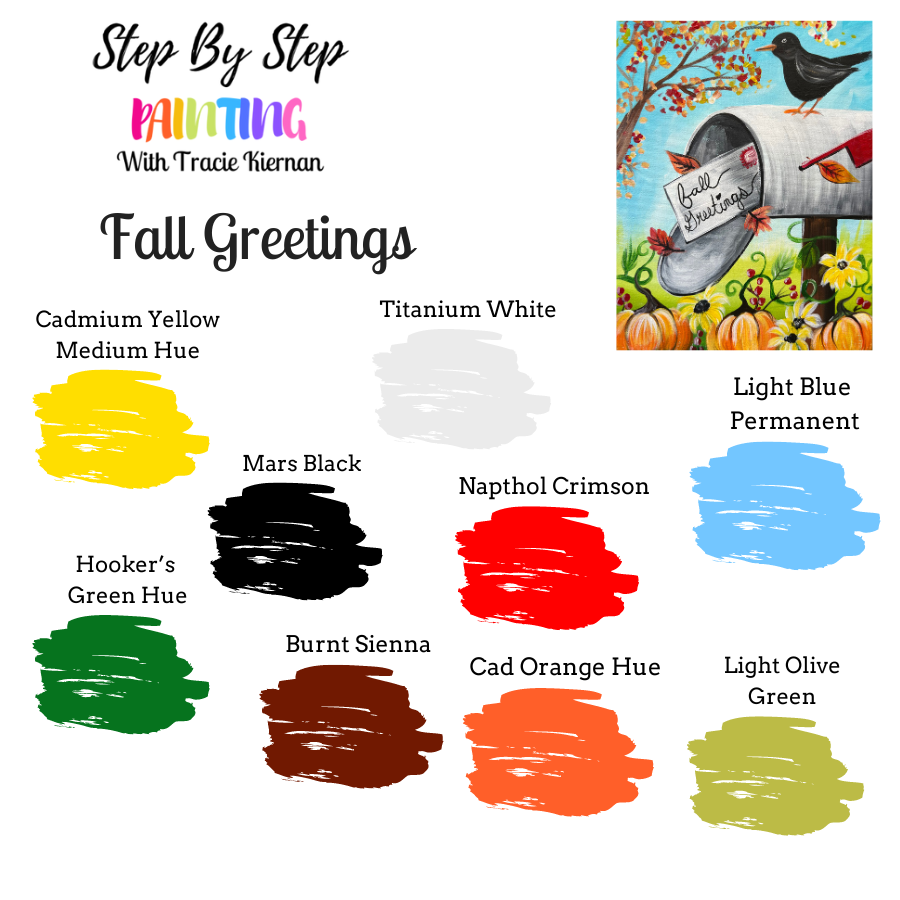
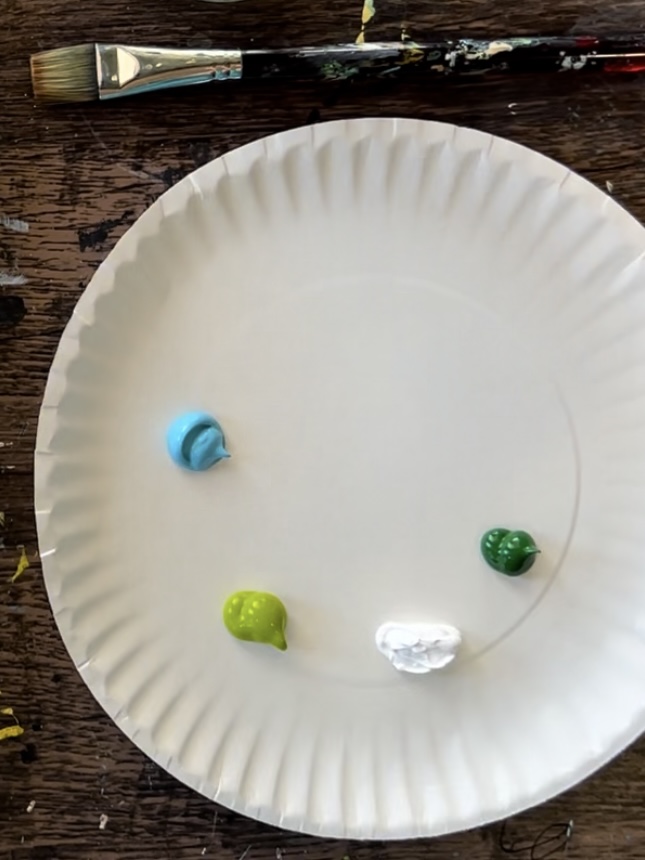
Colors
- Titanium White
- Mars Black
- Burnt Sienna
- Napthol Crimson
- Cadmium Orange Hue
- Cadmium Yellow Medium Hue
- Hooker's Green Hue
- *Light Olive Green
- Light Blue Permanent
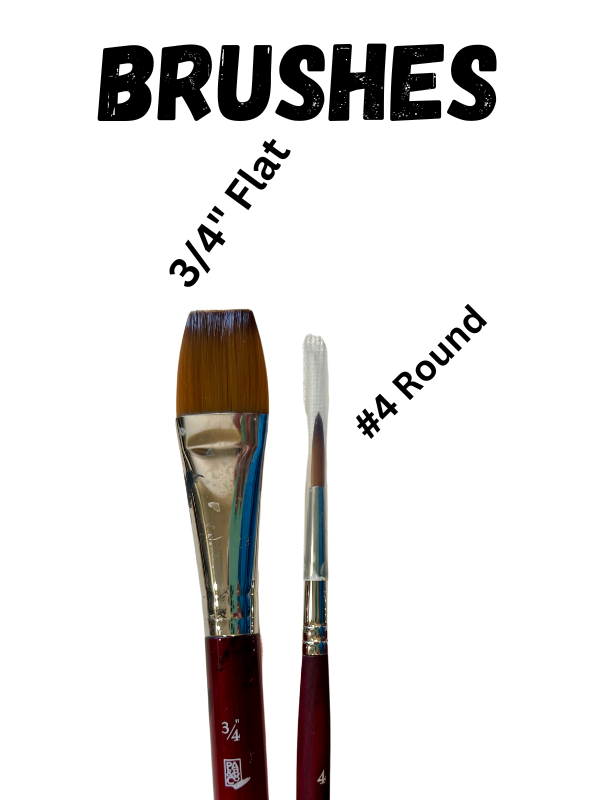
Brushes
- 3/4" Flat Brush
- #4 Round Brush
Tools
Notes
*If you don't have "light olive green", mix "titanium white" and "yellow oxide" into "hooker's green hue" to make it a light-golden green color.
Color Palette
Note: “light olive green” doesn’t come in the variety pack of Liquitex BASICS. If you don’t have that color, you can make “light olive green” by mixing “titanium white” and “yellow oxide” into “hooker’s green hue permanent”.
Directions At A Glance
Video
Step By Step Instructions
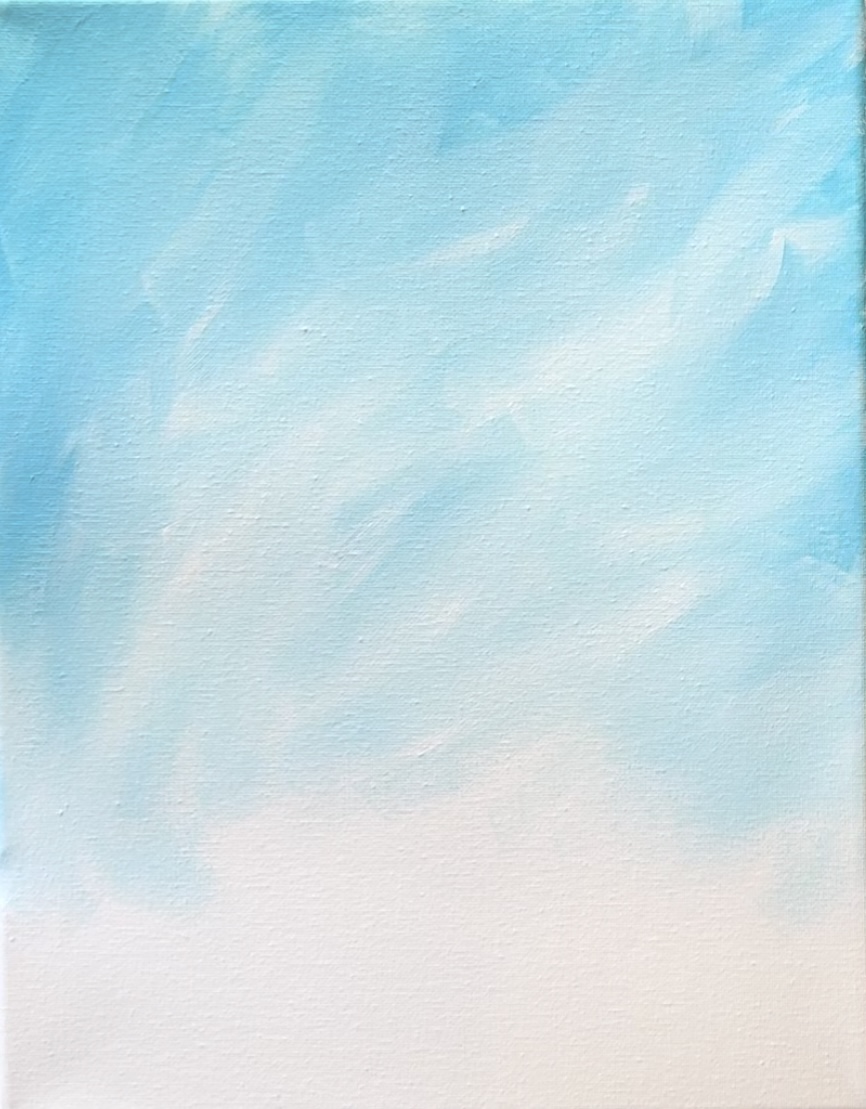
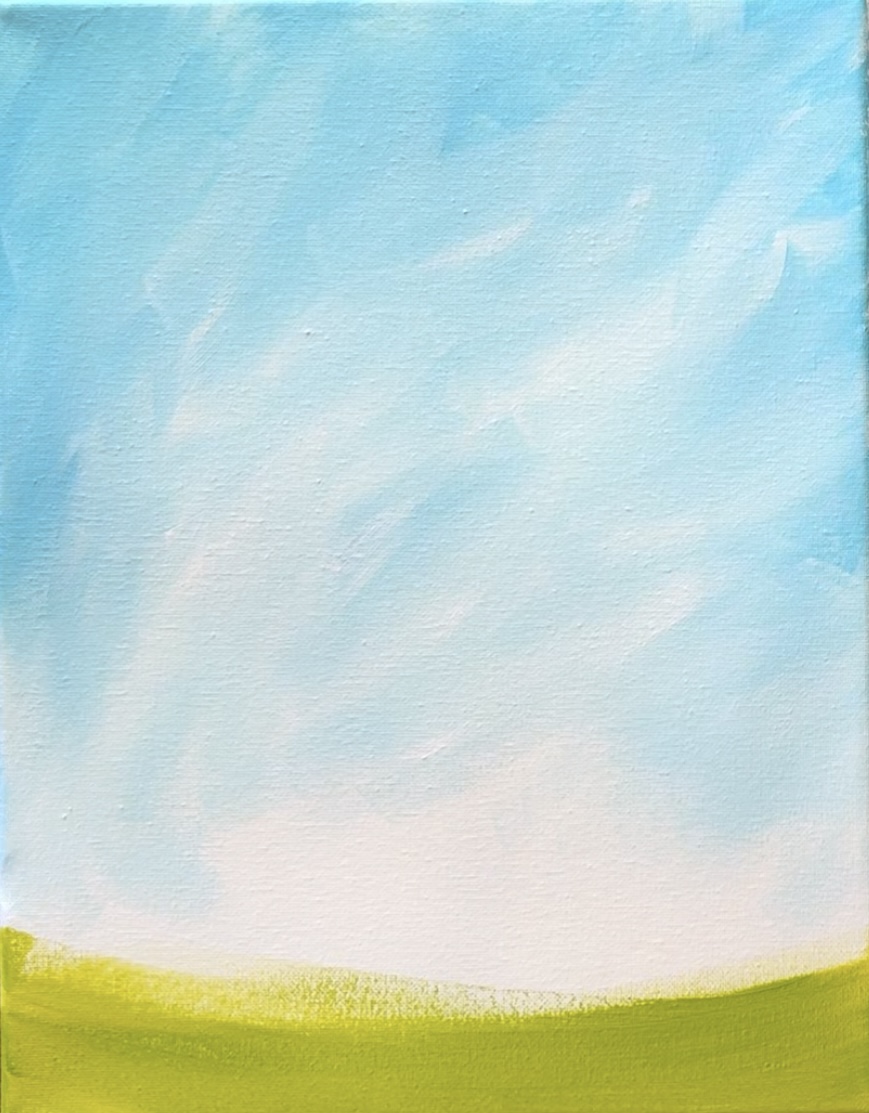
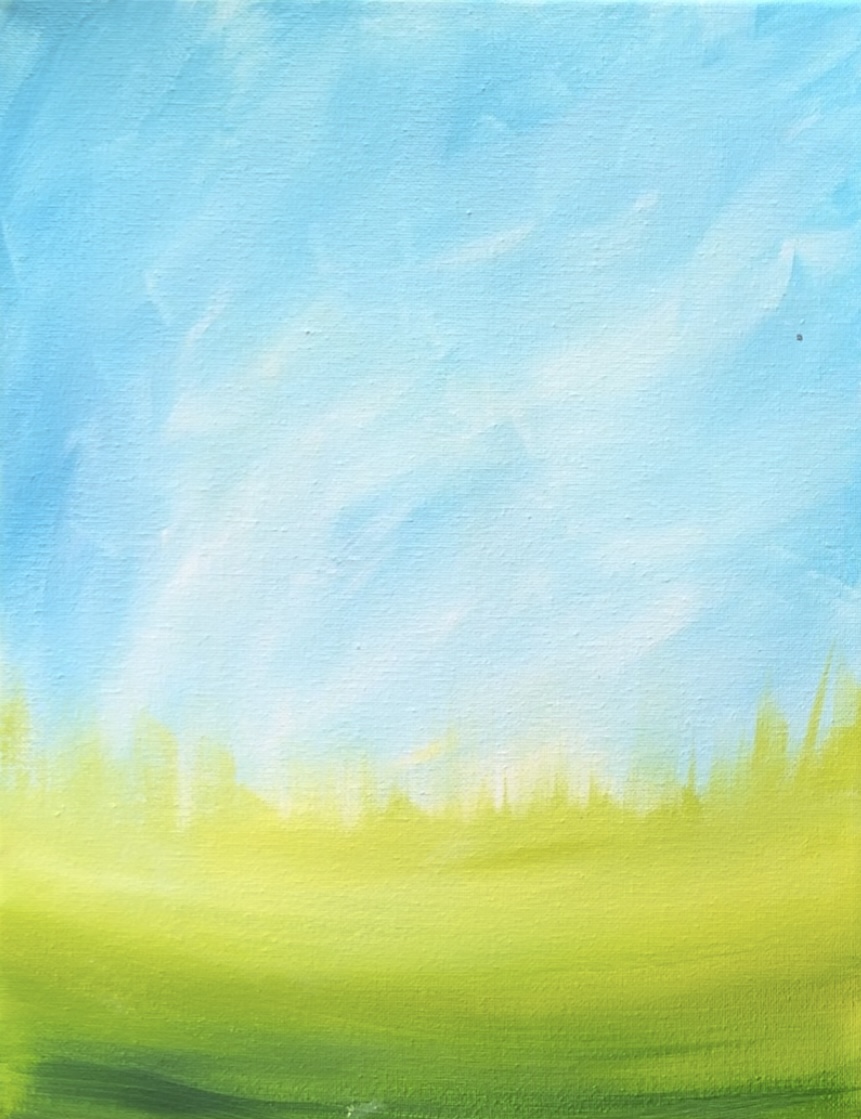
1. Paint The Sky
Load your paint palette with “light blue permanent”, “titanium white”, “light olive green” and “hooker’s green hue”. Note: the greens will be used for the grass/ground and the blue and white will be used for the sky.
Place your canvas in a vertical format. Double load your “3/4 flat brush” in the light blue and the white. We will be painting large, full width paint strokes that are going at angles. We want the outer top, left and right edges of the sky to be slightly darker and the middle and bottom area of the sky to slightly lighter.
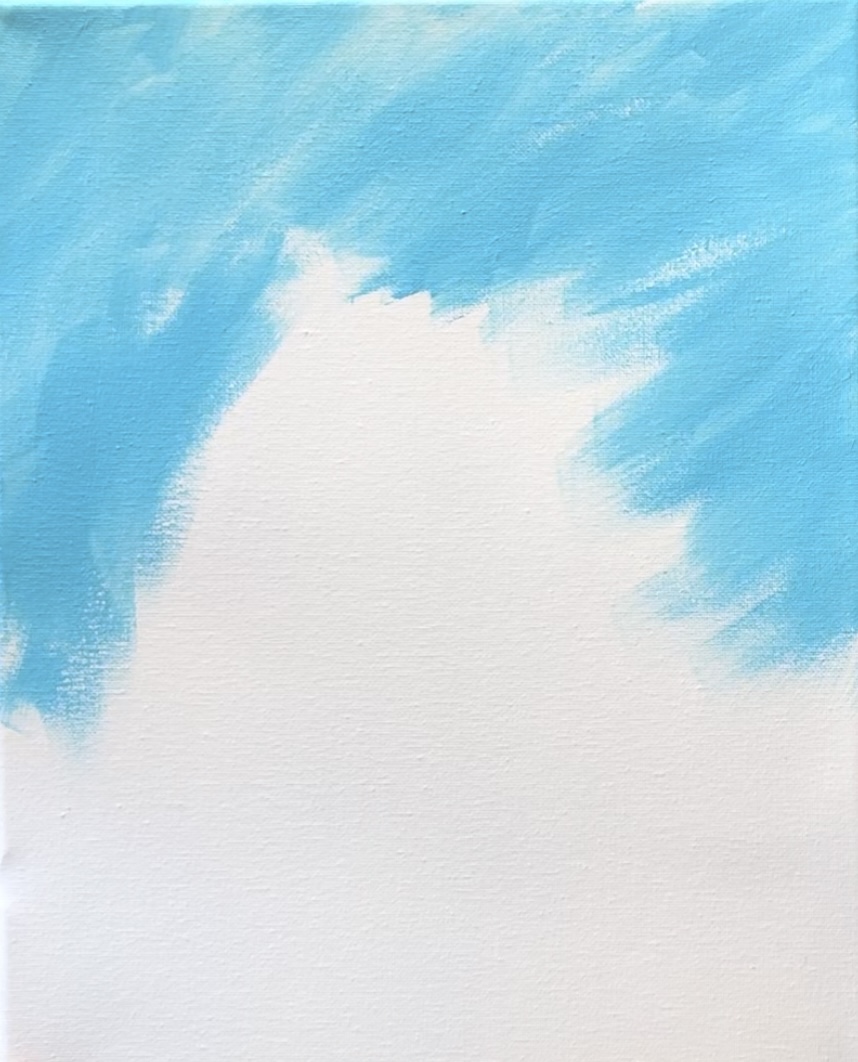
Lightly blend the white with the light blue to create different variations of the blue. This also makes for a textured sky! Go down almost all the way with this light blue. Leave about 3″ of space on the bottom.
2. Paint The Grass
Rinse the brush. Then load it into “light olive green”. Start on the bottom of the canvas and paint from the left edge to the right edge of the canvas. Fill the bottom 1-2″ with this light green but go in a slightly downward curved direction.
Without rinsing the brush, load it into “hooker’s green hue permanent”. Blend this dark green into the light green. You want the very bottom edge of this to be darker and the top to lighter.
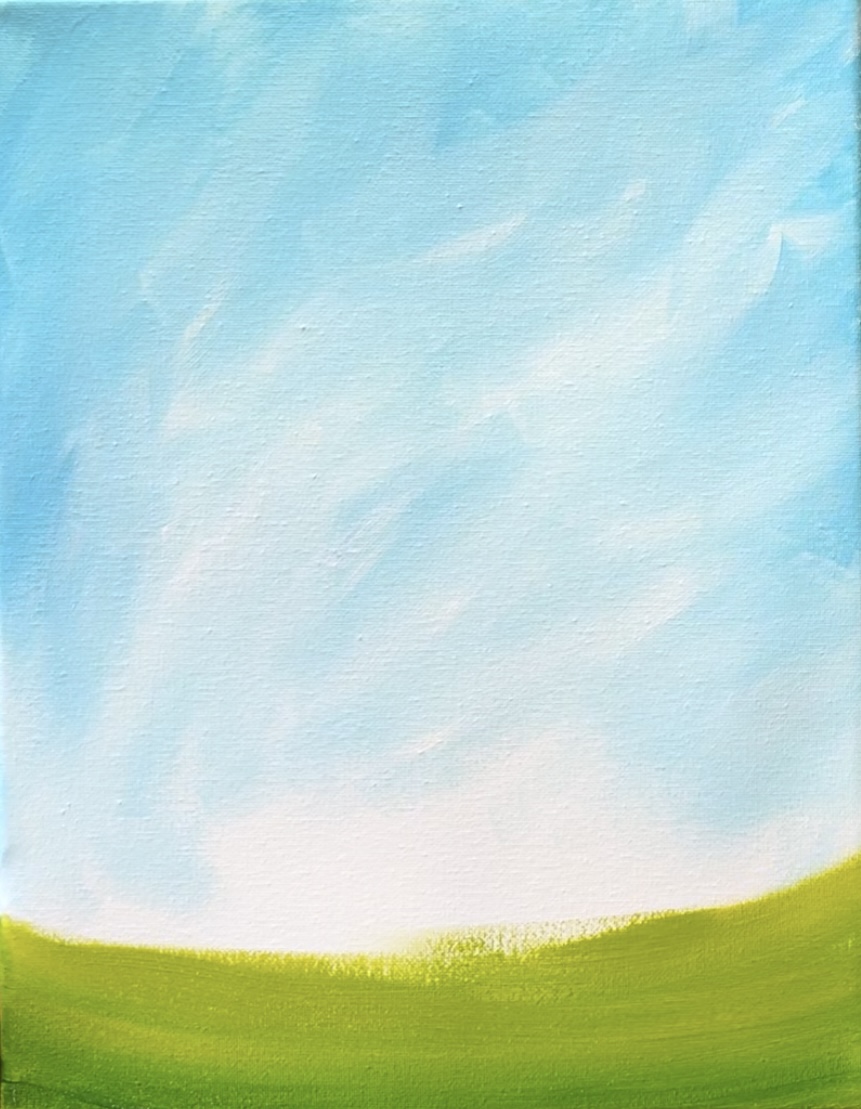
Wipe the brush (but you don’t have to rinse it). Then load it into “titanium white”. Blend white on the top of the light green so that it becomes lighter on the top. You now have a gradient of light green to dark green on the bottom and the direction of this is going in a downward curve.
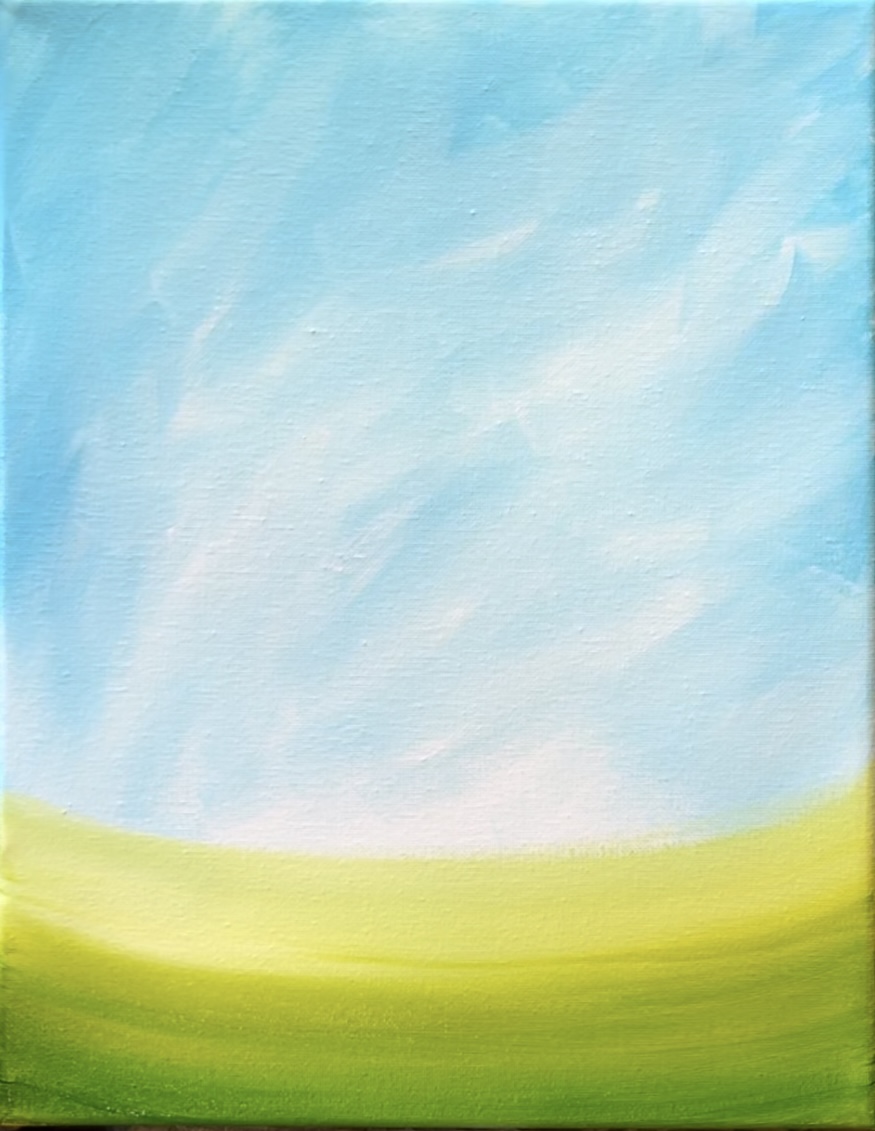
Next, double load the brush in both white and light green. Wipe off some of the excess paint so not a log of paint is on the brush. We will be doing vertical strokes going upwards that overlap some of the bottom of the sky. Basically, drag the paint upwards to form vertical marks that resemble grass.
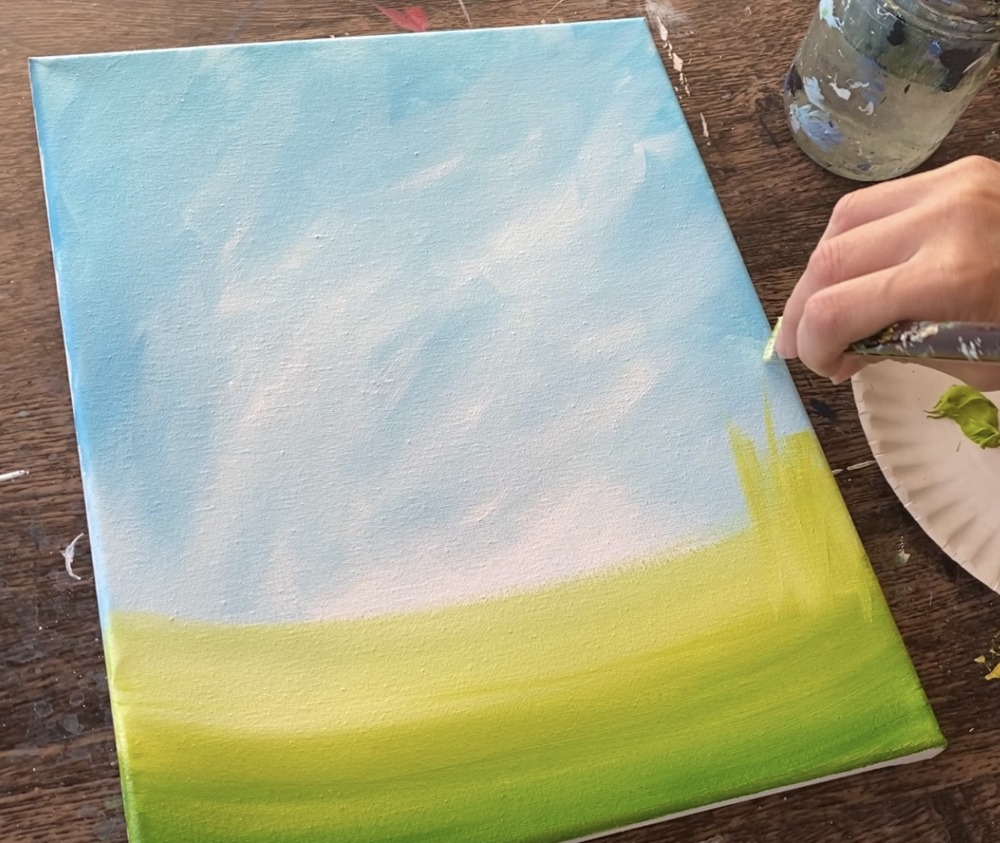
Then use your brush to “smooth” some of the strokes on the bottom so that it goes in a curved/ left and right direction across the canvas. You just want your “grass strokes” to be on the top edge of the green line.
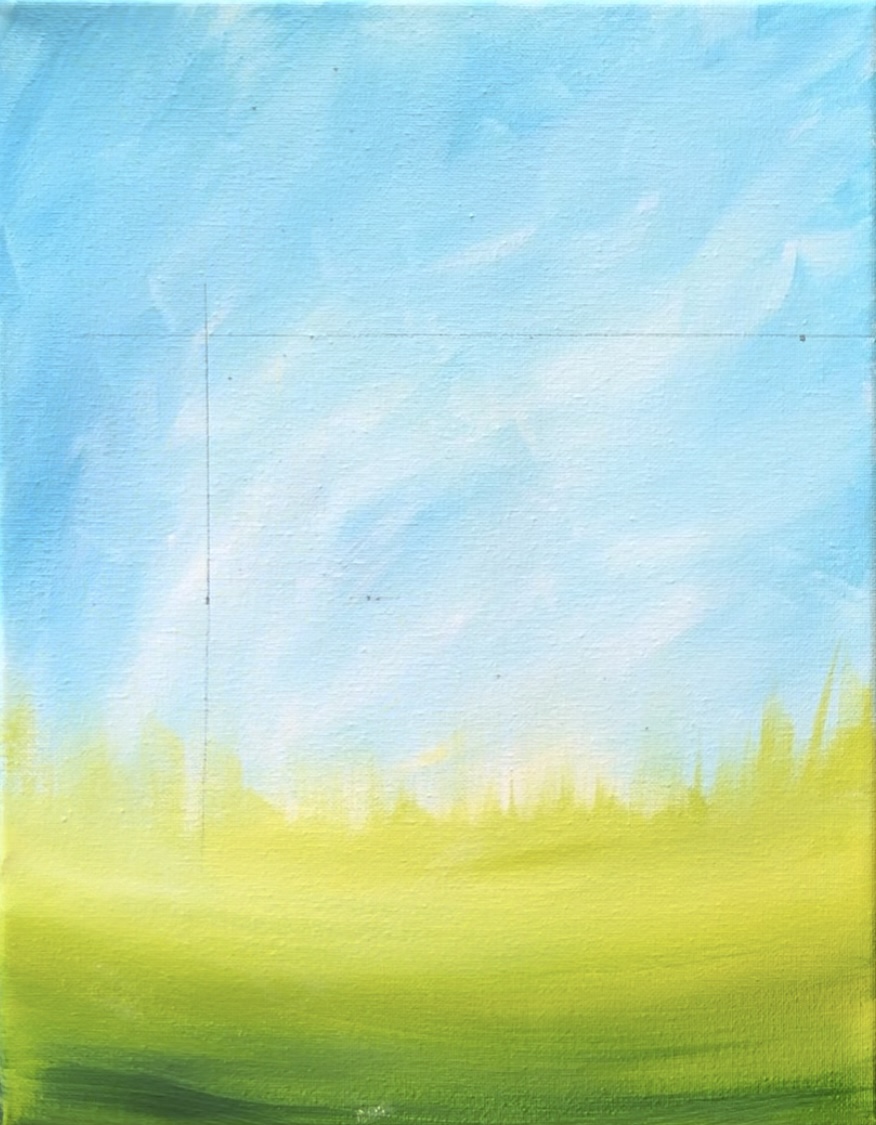
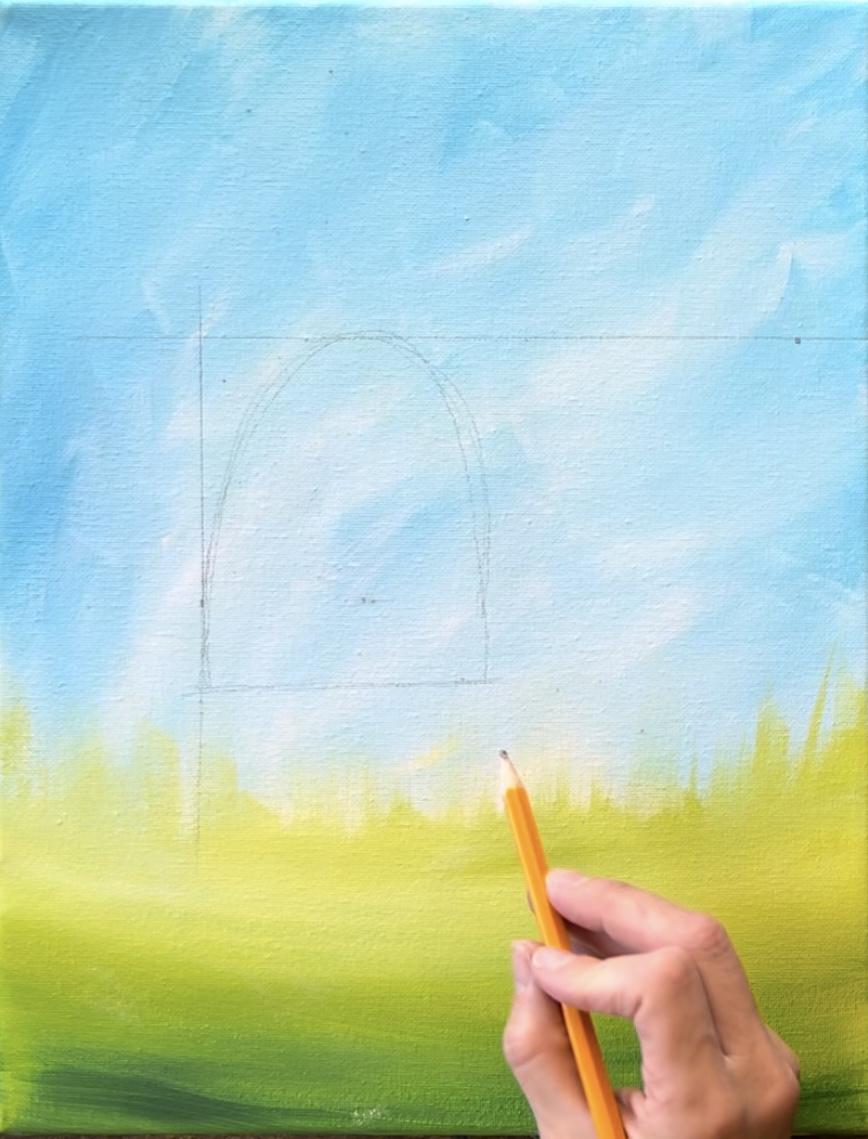
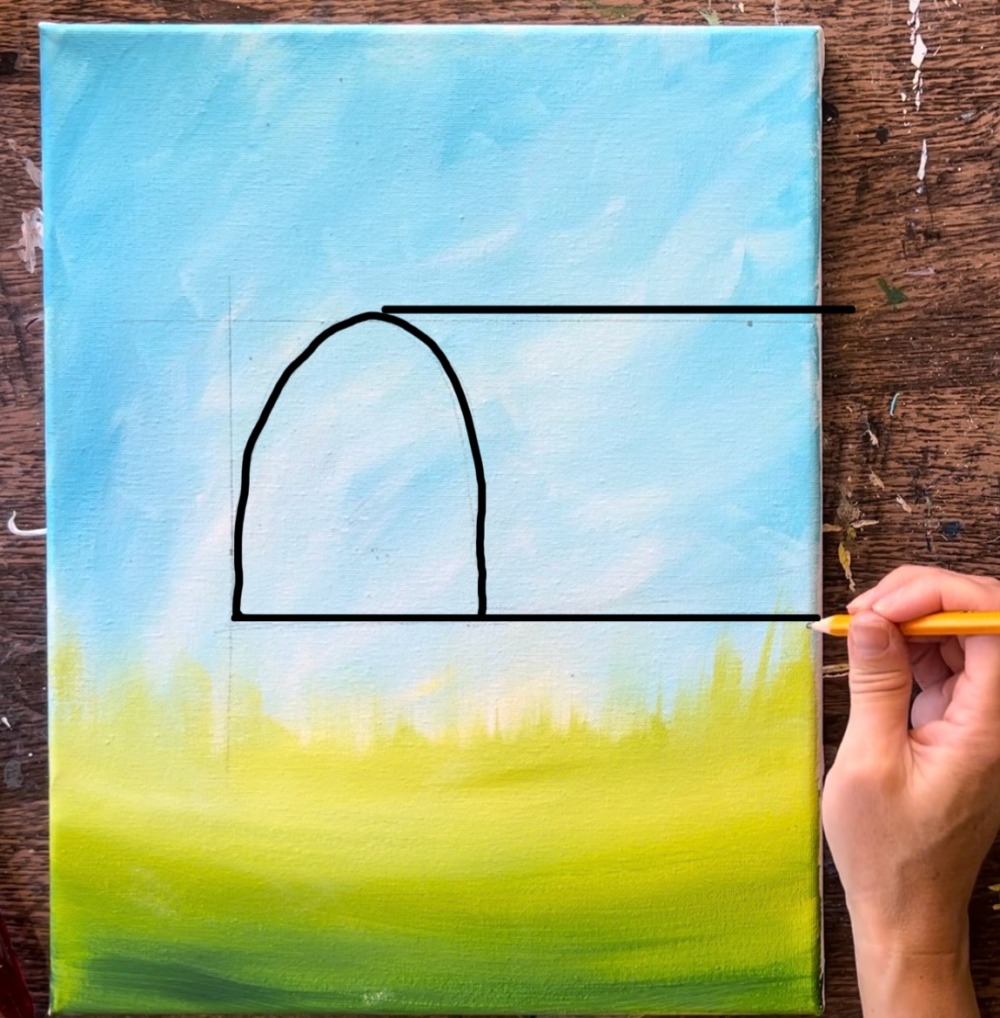
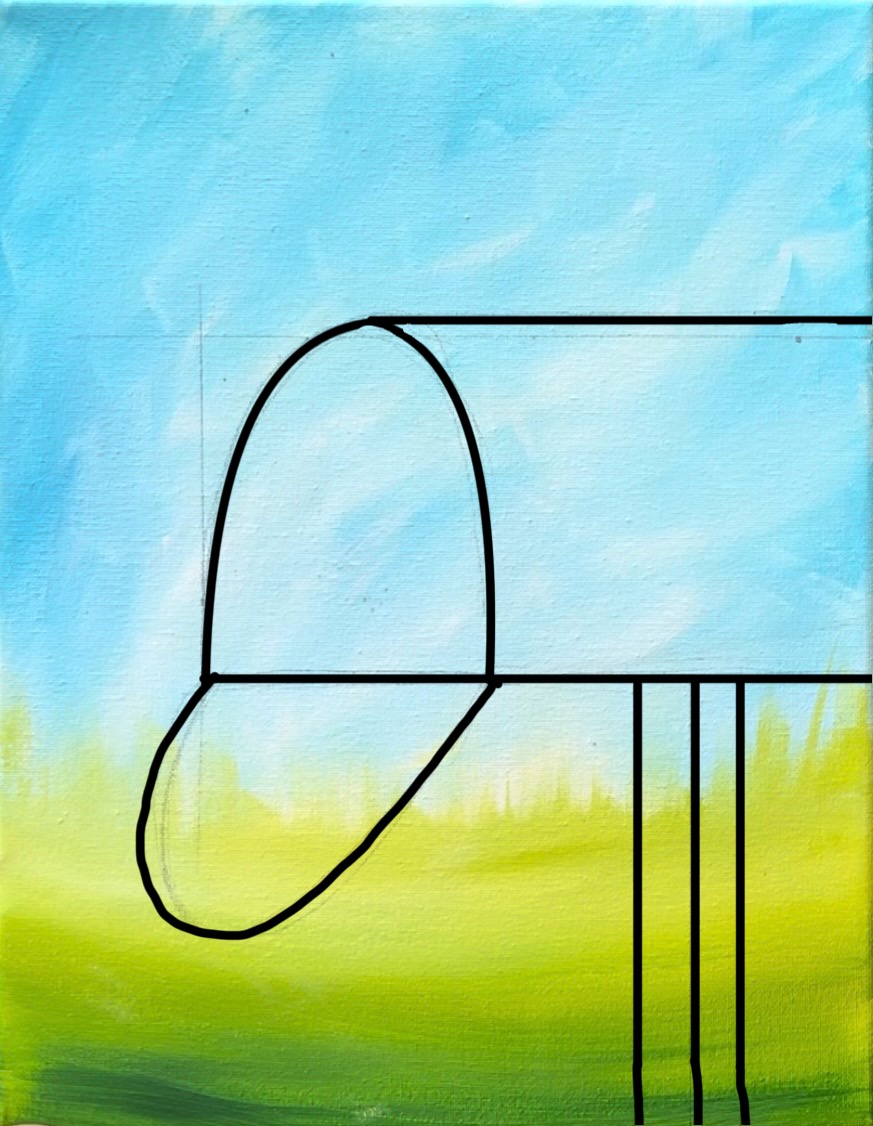
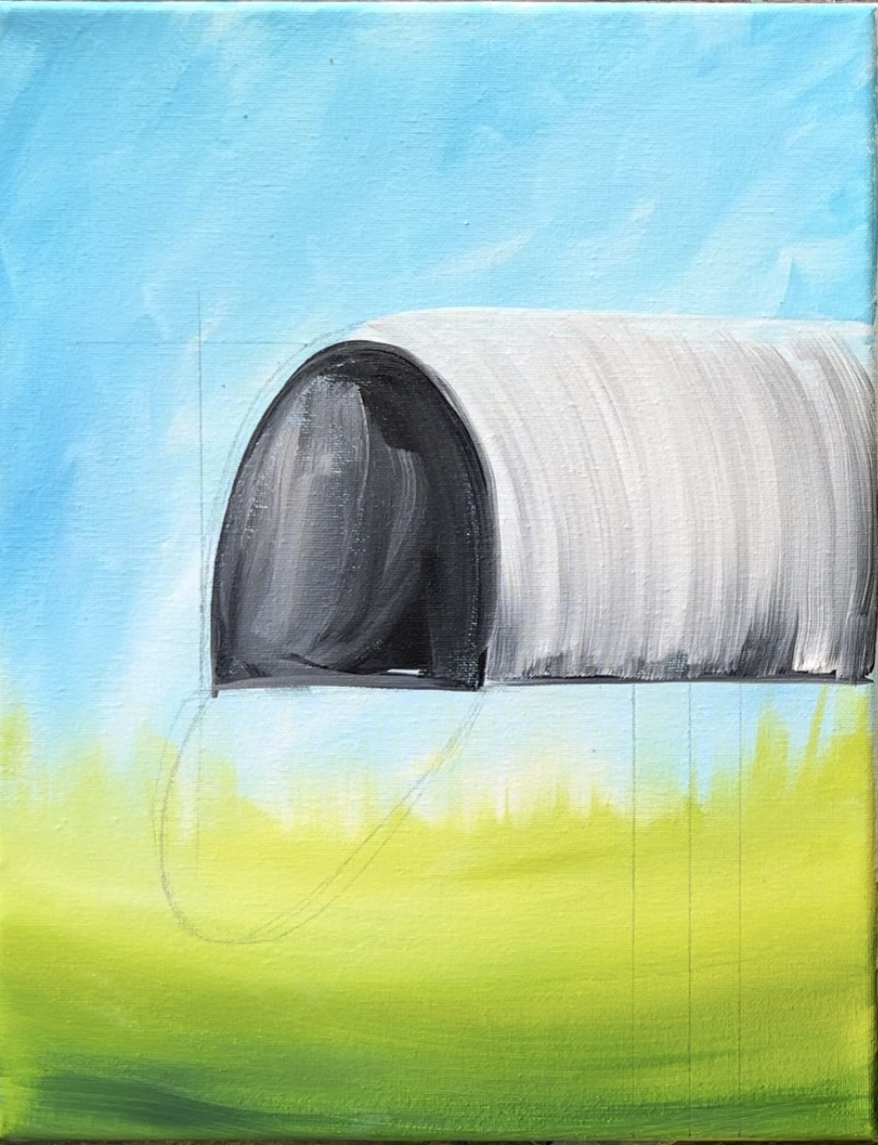
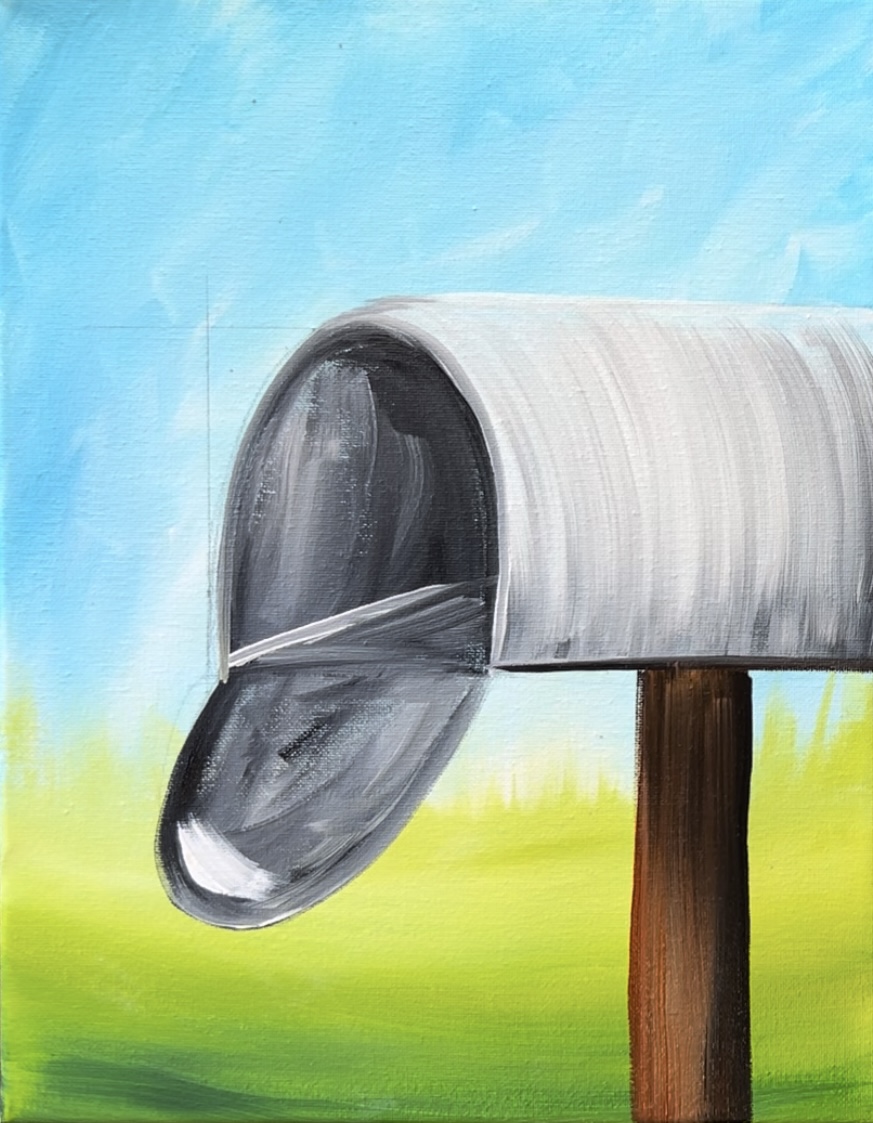
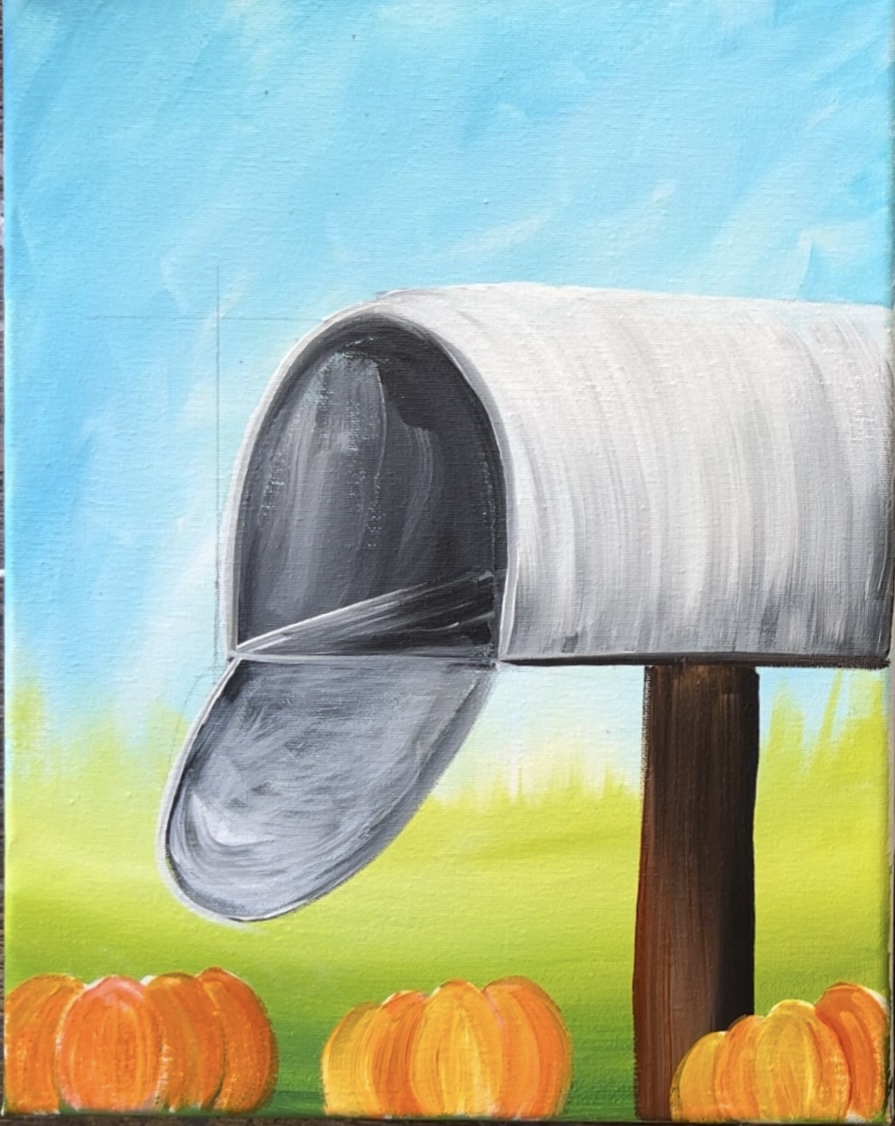
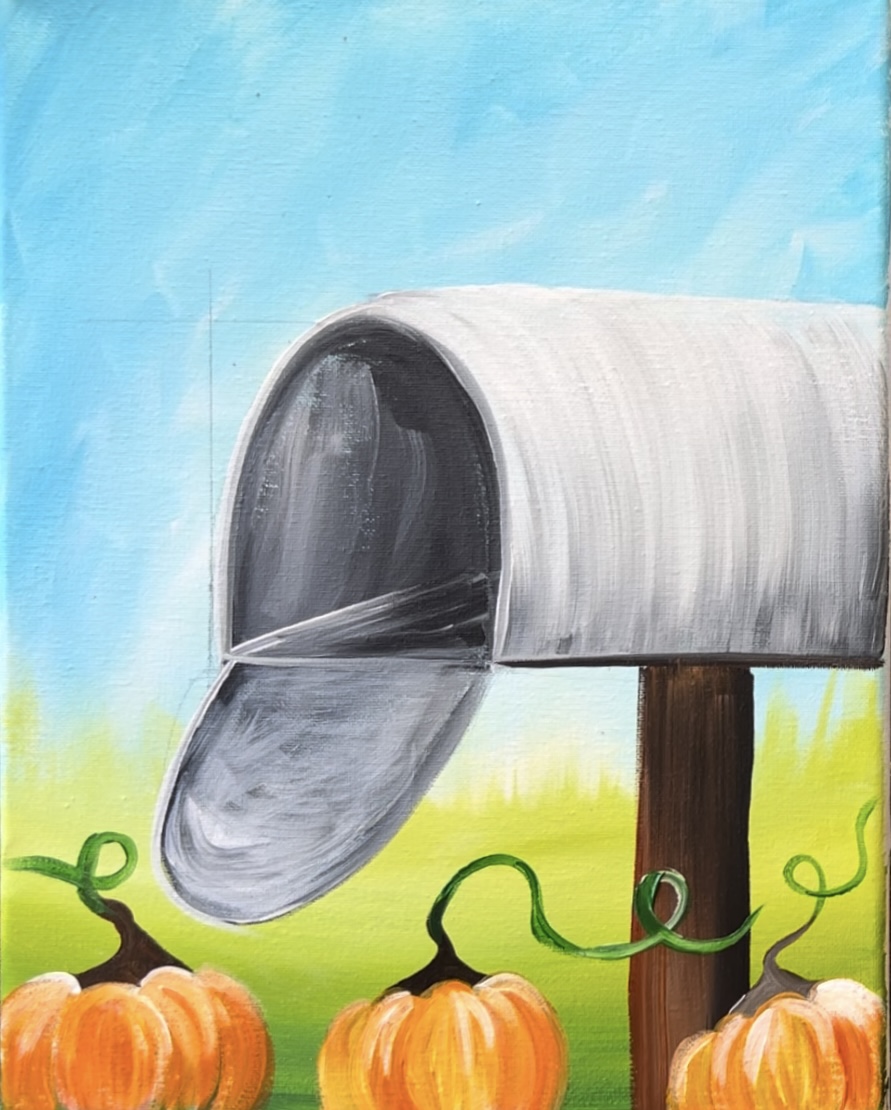
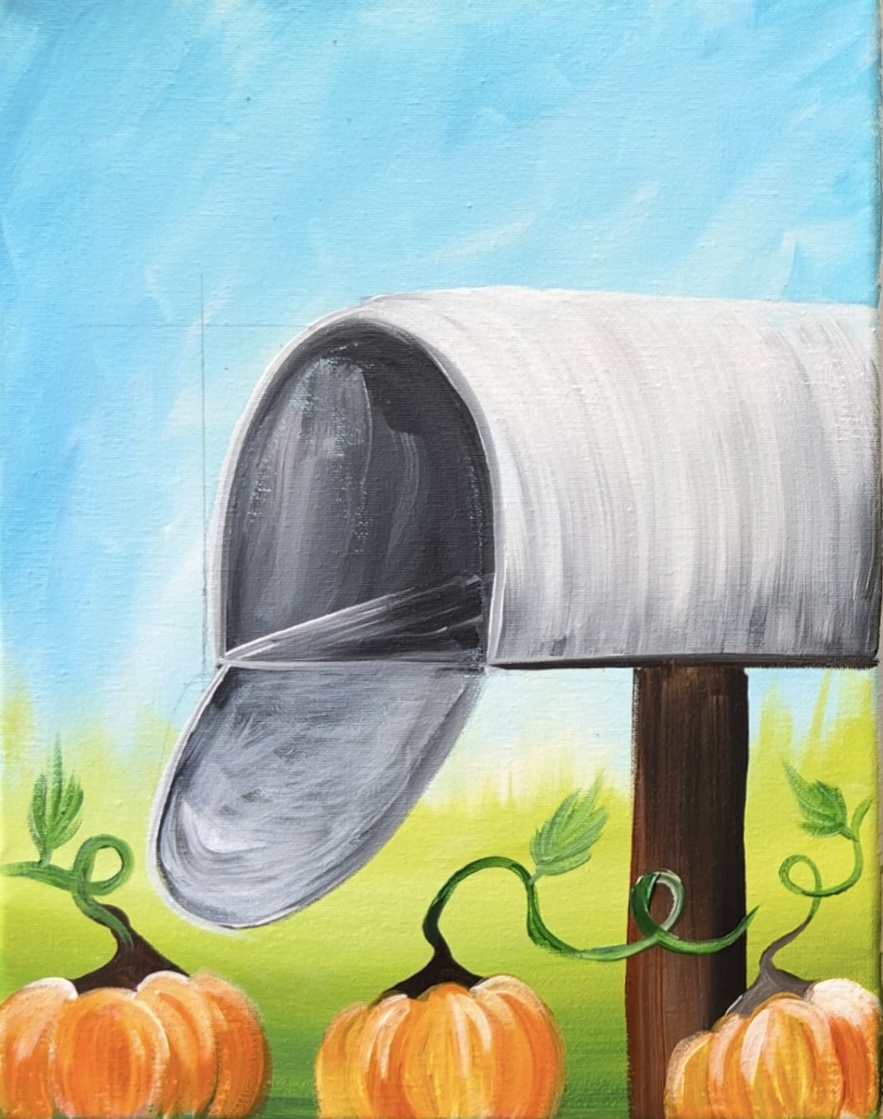
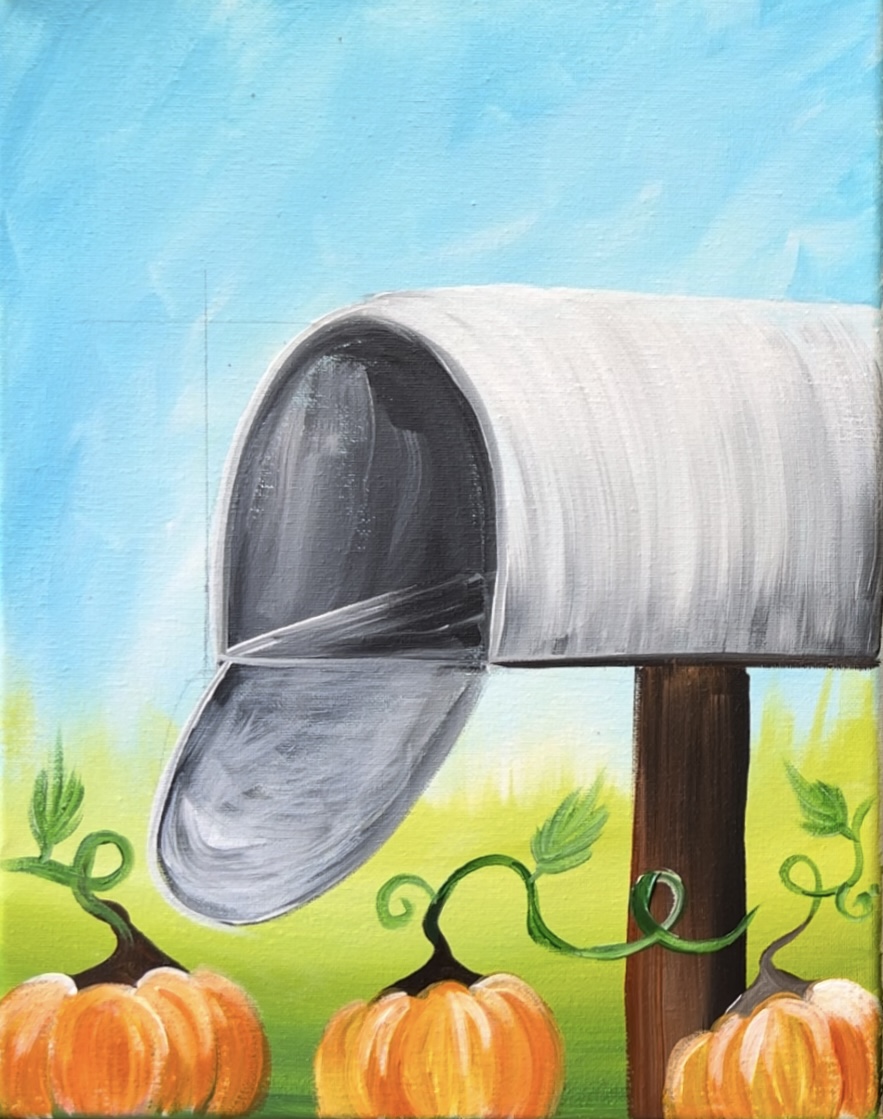
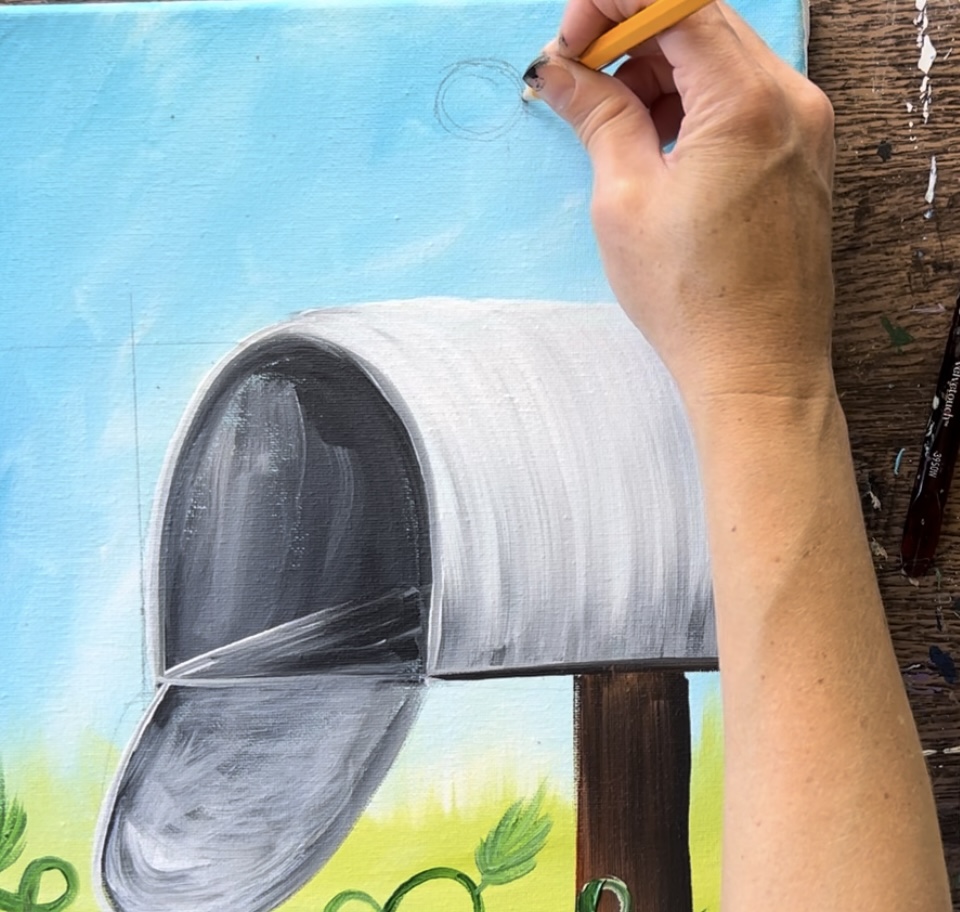
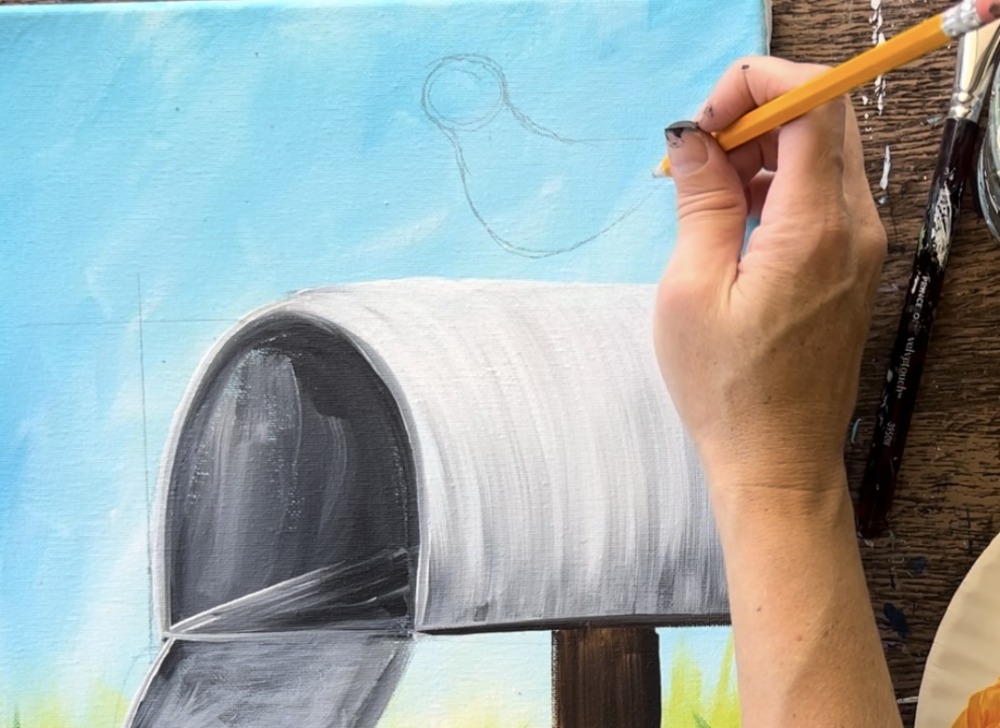
3. Draw The Mailbox
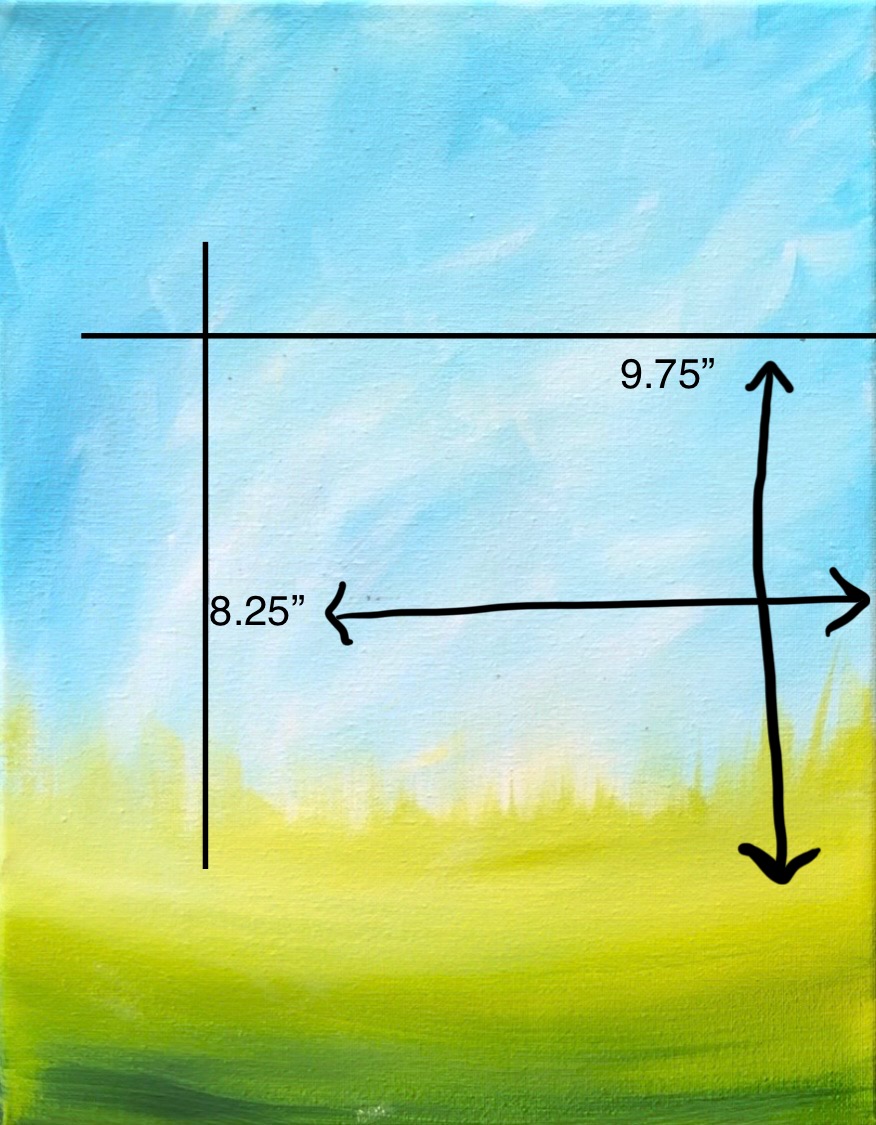
You can use the dimensions in the picture below to help you with the drawing of the mailbox! These measurements are for the 11 x 14 canvas and they do not have to be exact.
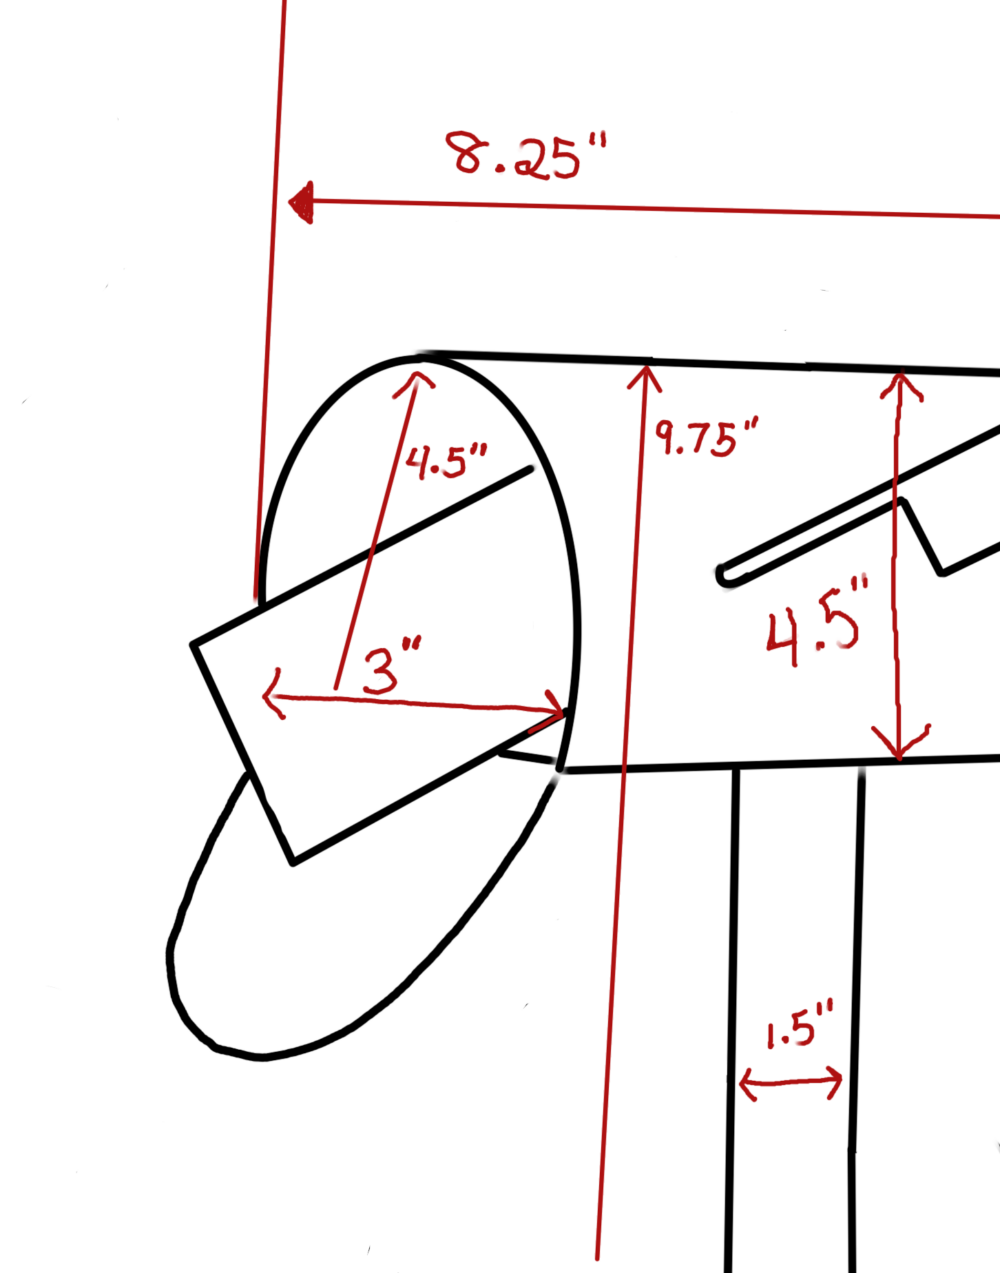
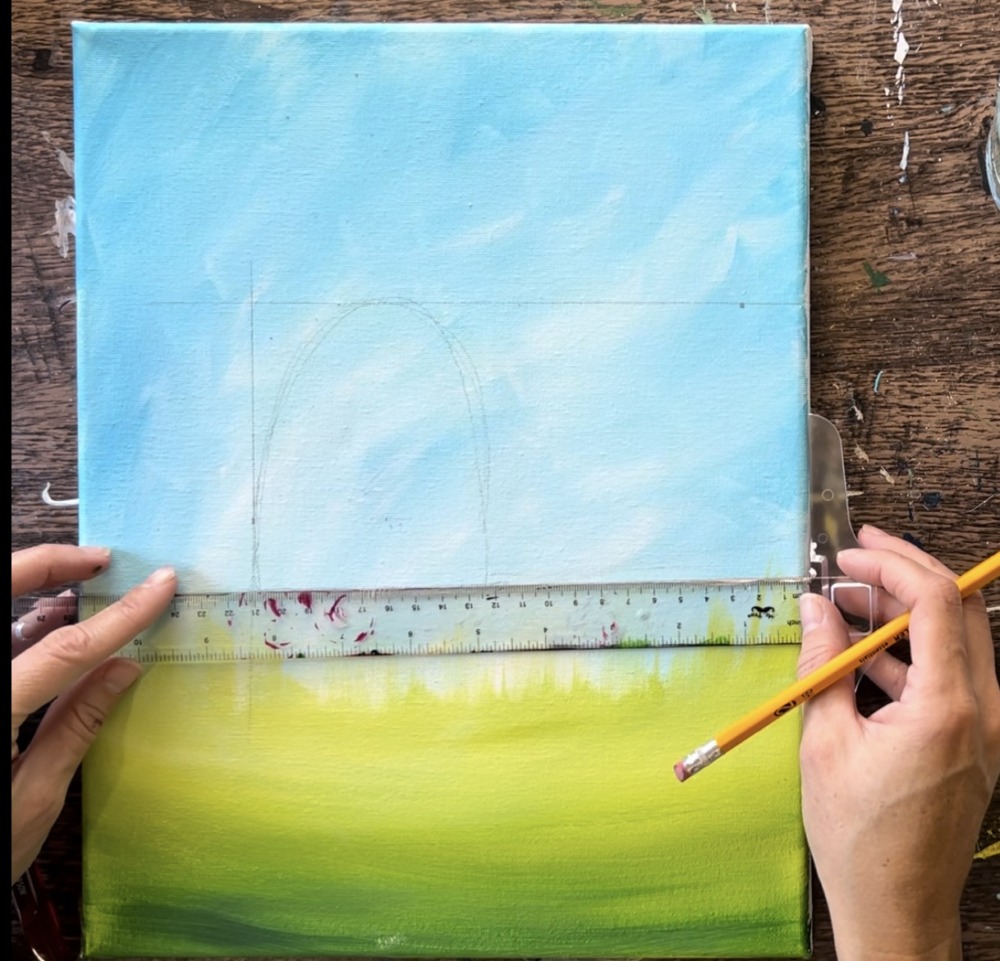
Use a pencil to draw out a rectangular area on the canvas. The top line is approximately at 9.75″ from the bottom of the canvas. The left line is approximately 8.25″ from the right edge of the canvas. Use a t-square ruler to draw these lines.
Next, draw the opening of the mailbox. This is an arc curved line with a flat bottom. The bottom horizontal line of the opening is approximately 3″ wide. The height of the arc is about 4.5″ high.
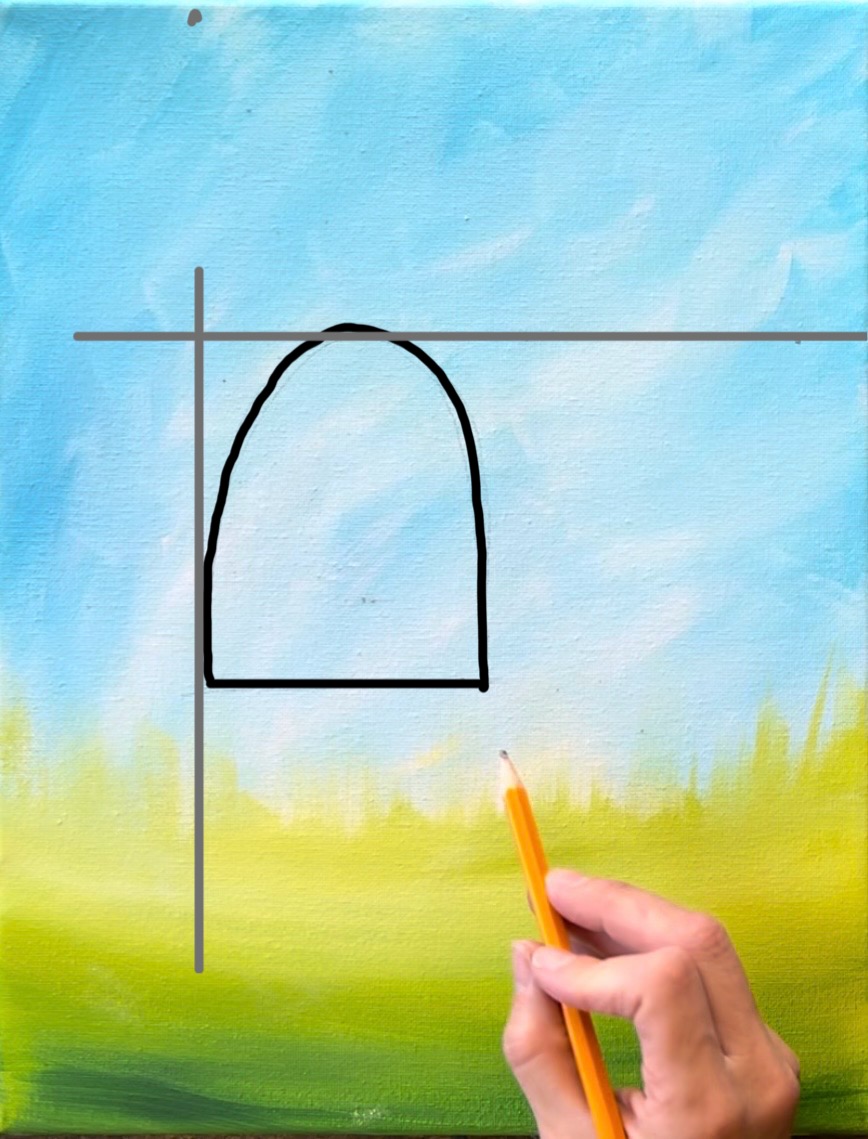
Next, draw a straight line all the way across for the bottom of the mailbox. This goes to the far right edge of the canvas.
Sketch the door of the mailbox. This is an arc shape going at an angle and is relatively the same size as the opening.
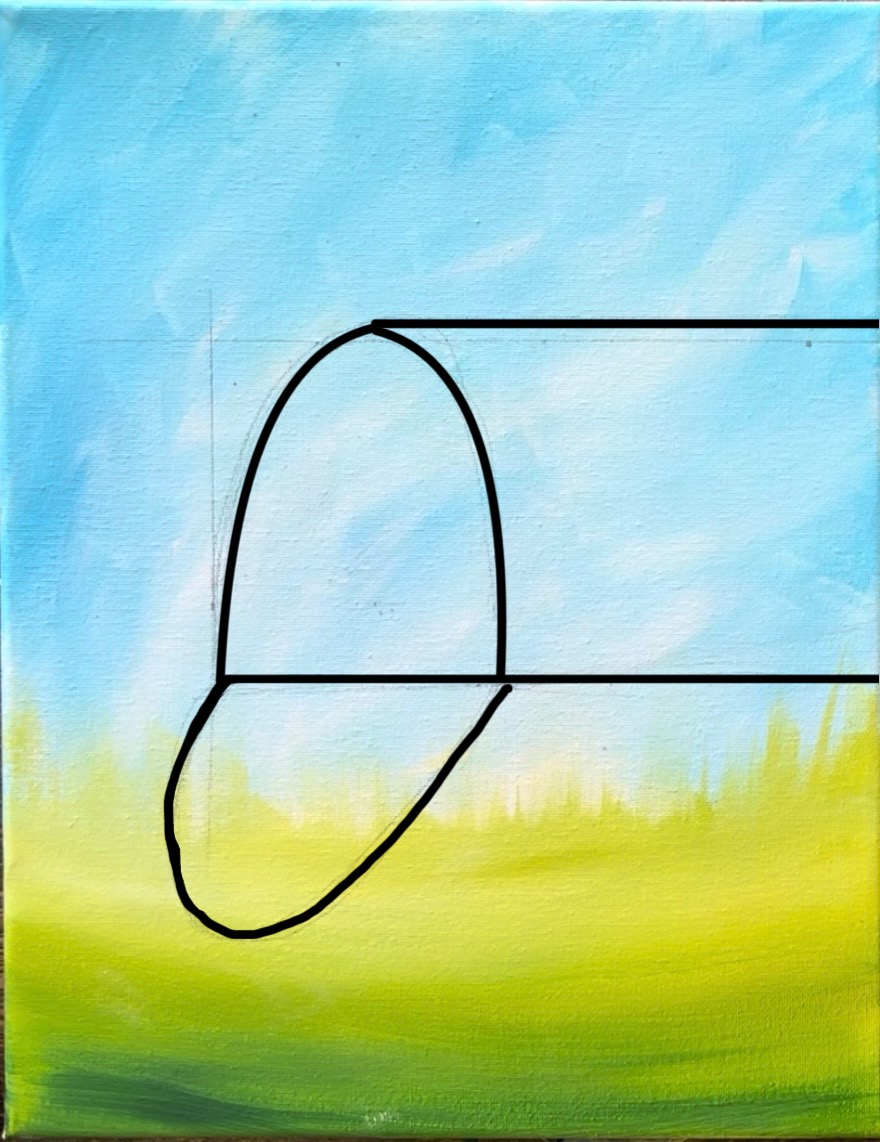
Draw the post of the mailbox by drawing two vertical lines about 1.5″ wide.
4. Paint The Mailbox
Use titanium white and the 3/4″ flat brush. When you paint the side of the mailbox, make sure your paint strokes are going in a curved direction. Each stroke is parallel to the curve of the opening of the mailbox.
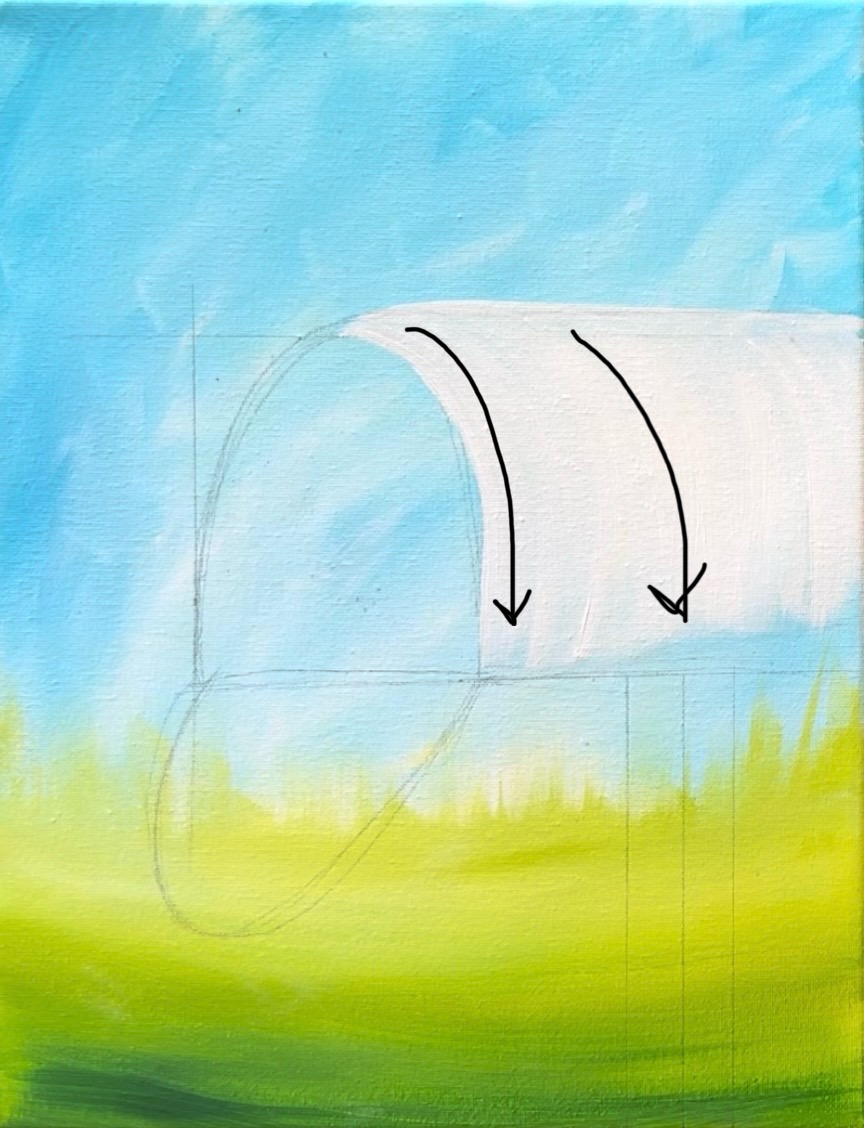
Wipe the brush off but don’t rinse it. Load a very small amount of “mars black” onto the brush. Use the full width of the brush to paint from the bottom edge of the mailbox and stroke upwards to blend with the black.
Basically, you want the bottom edge of the mailbox to be dark and shadowy and the top edge to be much lighter. Blend the black gently into the white so that it becomes a dark gray and the bottom, light gray in the middle and white at the top. Make sure you are using the full width of the brush and going in that curved direction to create form on the mailbox.
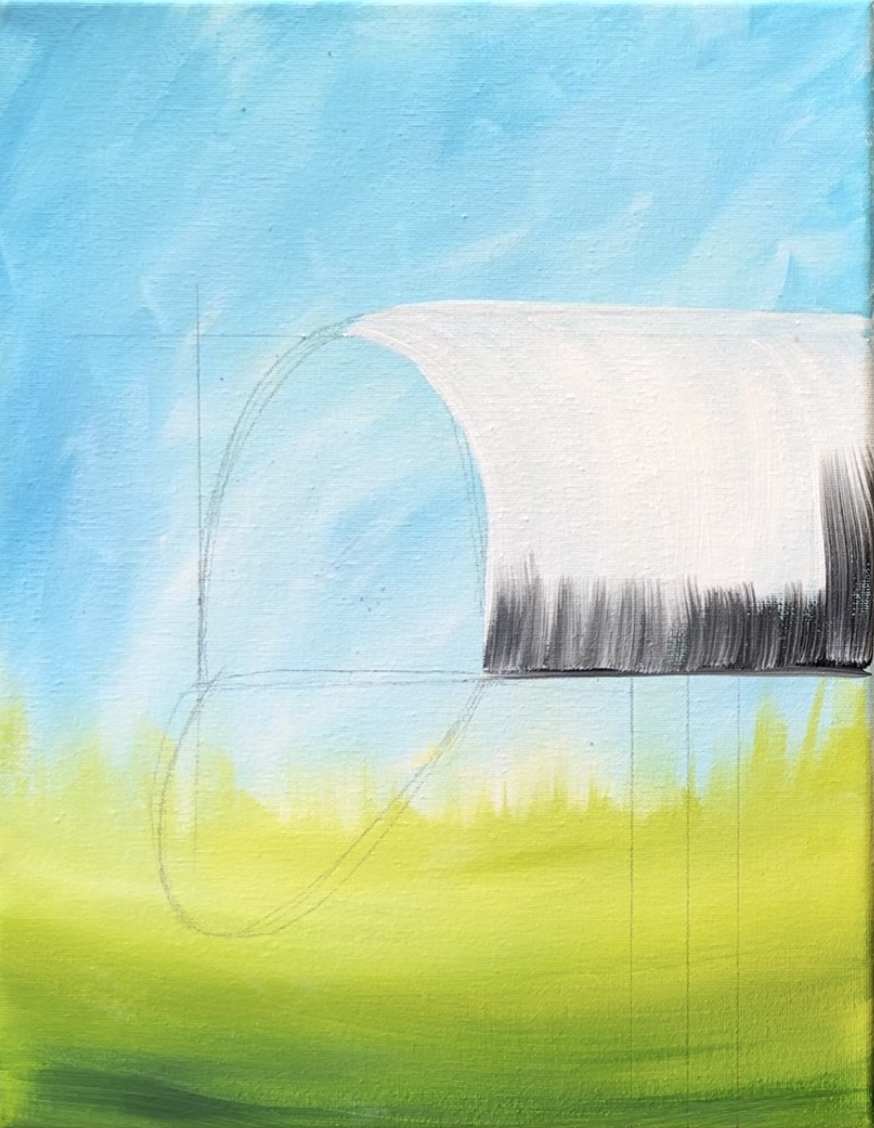
Next, paint the interior of the mailbox. Double load your brush in black and white. Paint the interior so that it is darker on the right side of the interior of the mailbox and lighter on the left side. Use the edge of your brush to outline the arc shape.
Next, paint the door of the mailbox. Paint this using the same color that you painted the interior of the mailbox (double load of white and black).
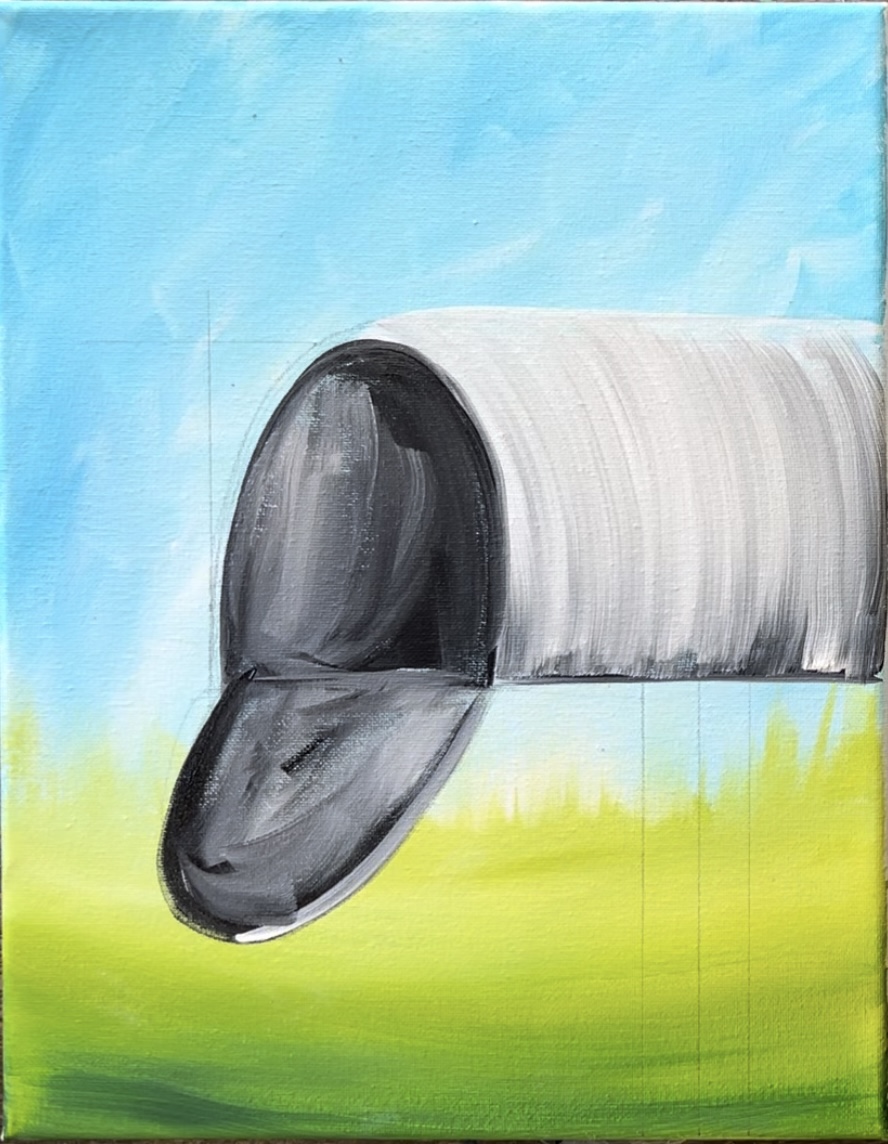
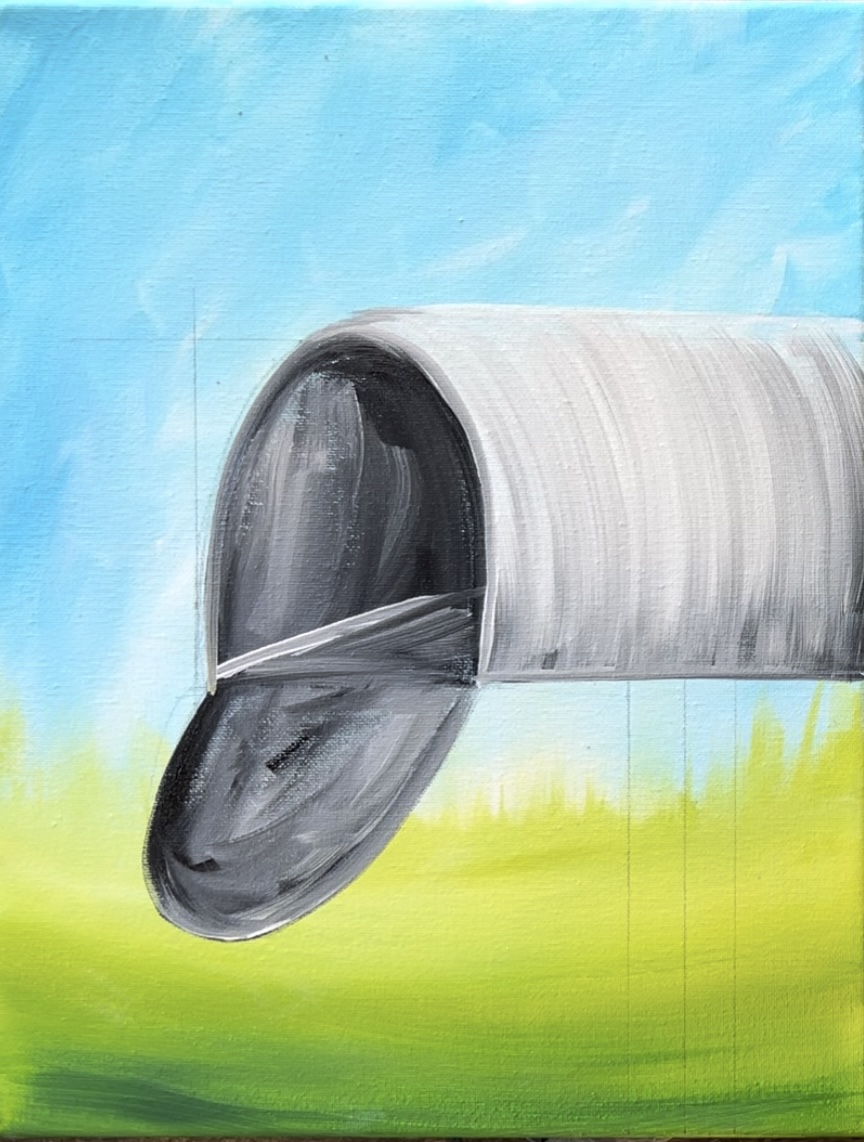
Paint the floor of the interior of the mailbox. Note: this may be covered up later when we paint the envelope.
Use light gray (white and black on the brush) to paint a diagonal line to define the edge of the floor. Then paint the floor using paint strokes that go in a diagonal direction. The color of the floor is slightly lighter than the rest of the interior, which is much darker.
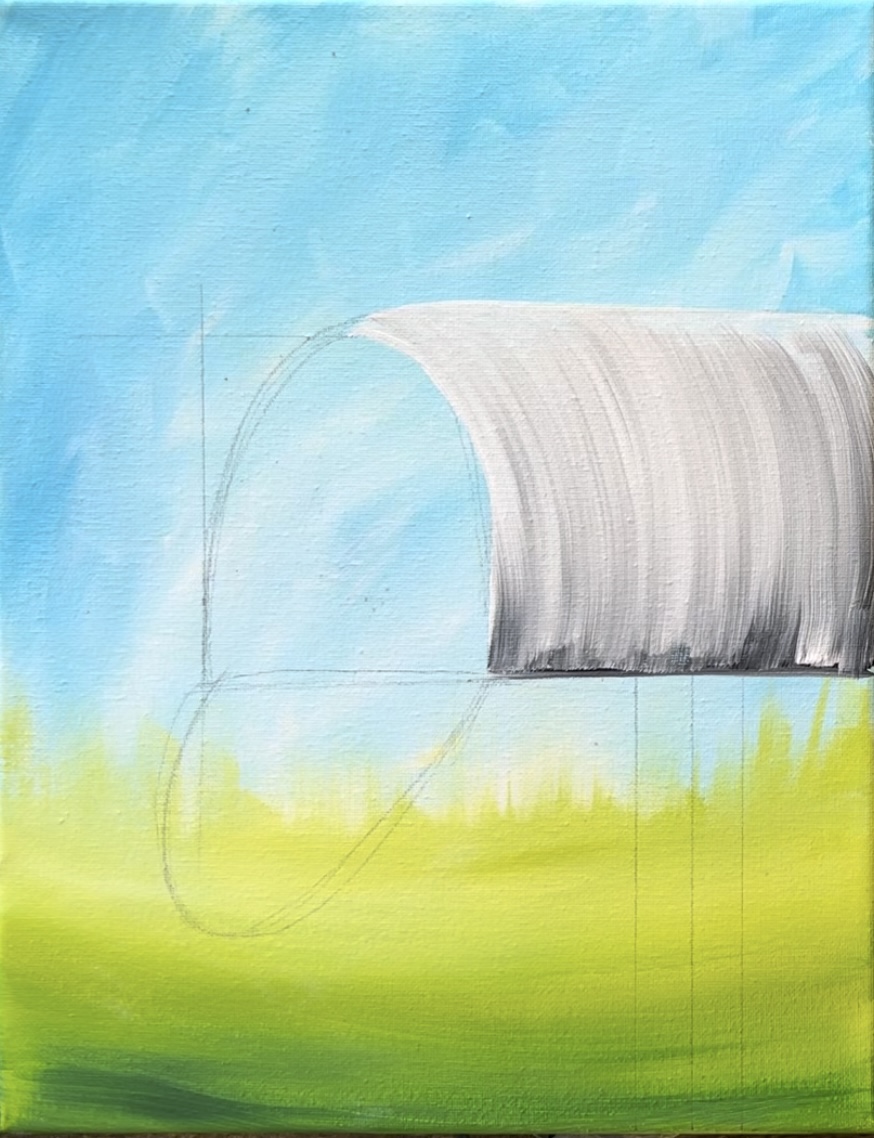
Paint the wood post of the mailbox. Wipe the brush but do not rinse. Load your paint palette with: burnt Sienna and mars black. Use the full width of the brush to paint up and down strokes to define the wooden post. Allow the left of the post to be brown and the right to be black.
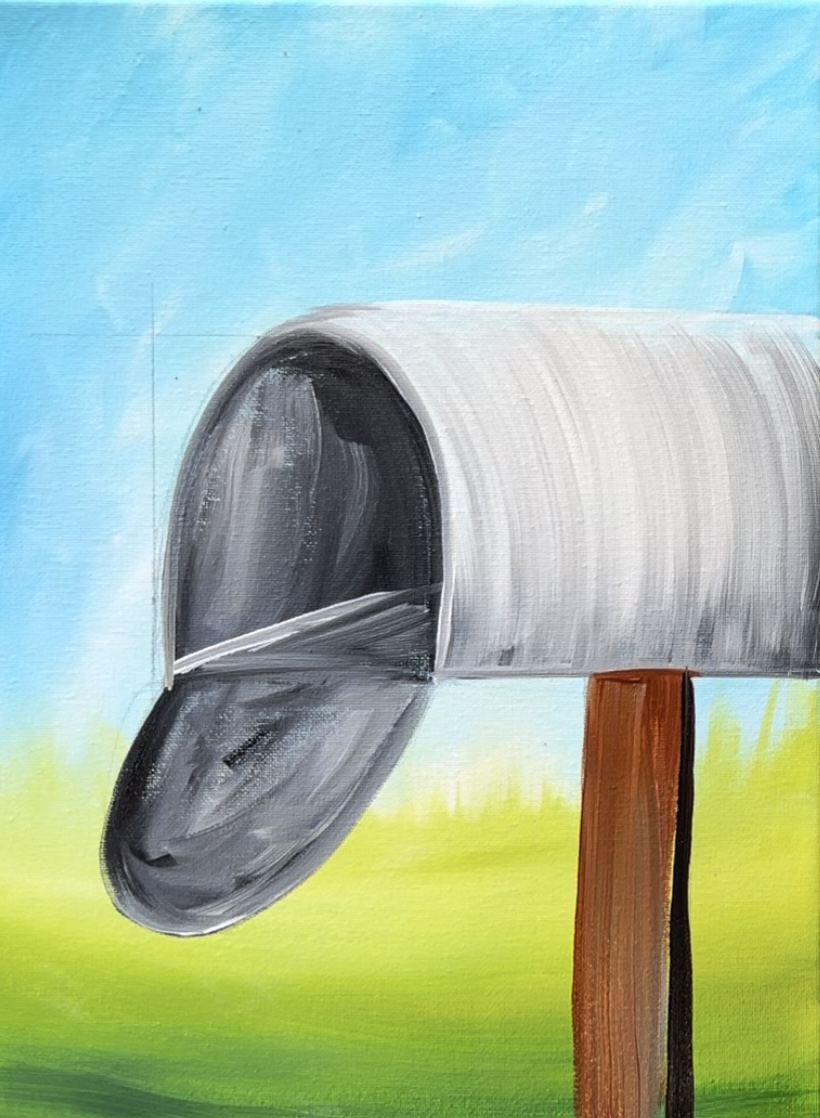
Blend it together gently so the right side of the post is more darker and shadowy and the left side is a little lighter.
Optional: paint a second coat of paint with the white on the door of the mailbox. I added just a little bit more white in this area so that it is slightly lighter than the interior of the mailbox.

5. Paint The Pumpkins
Use the #4 round brush and titanium white to paint pumpkins. You will need to paint the pumpkin shapes white first before painting them orange.
Paint the pumpkins by painting the center “oval” first. We don’t see the whole pumpkin, just the top 3/4 of the pumpkin (we don’t see the bottom). After painting the center “oval”, paint two more “pumpkin bumps” on the left and the right of the oval. Do this by stroking your brush from the top and stroking down in a curved direction.
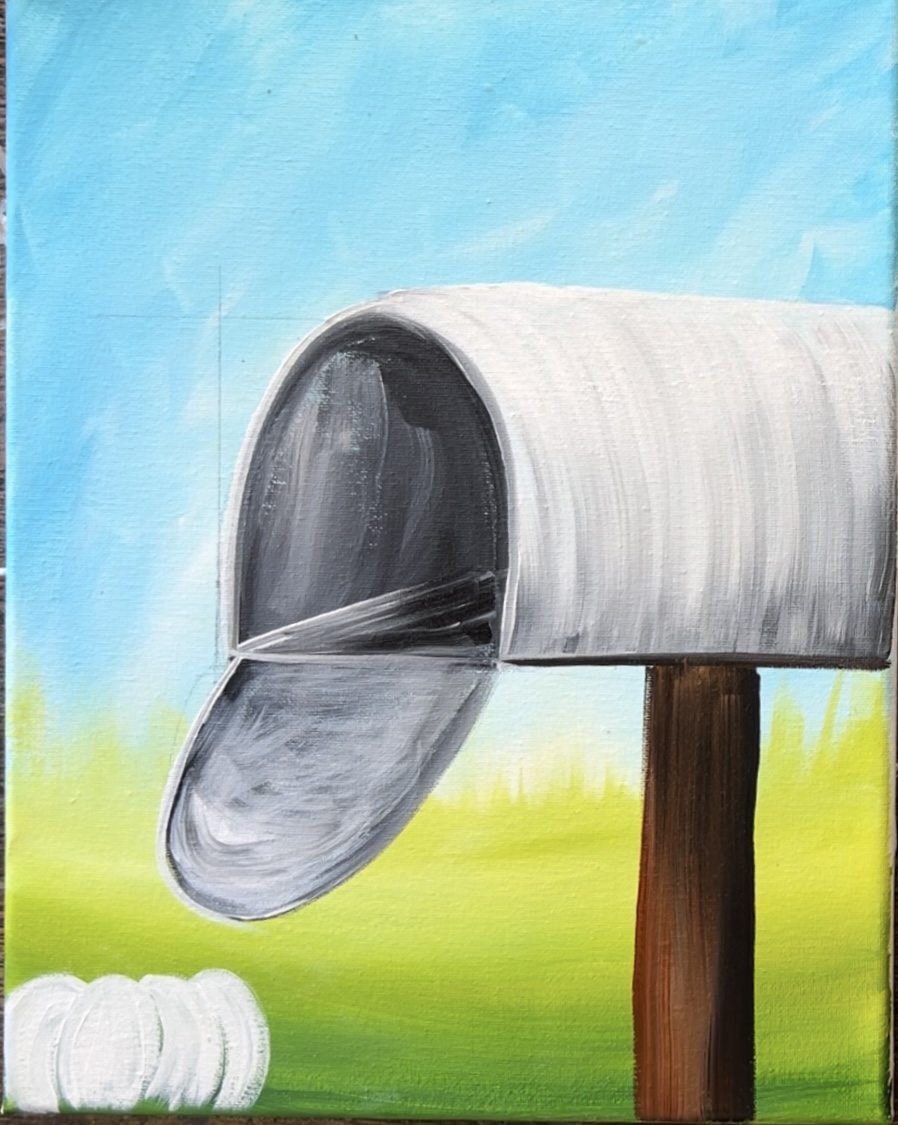
Repeat this technique for two more pumpkins. I did a pumpkin that overlaps the wood post (make sure the brown is dry if you are overlapping the post).

Each pumpkin is relatively the same size and height.
Next, wait for the white to dry. Load your paint palette with “cadmium orange hue” and “cadmium yellow medium hue”. Start with just loading the #4 round brush into orange. Paint just the center oval of the pumpkin on the far left.
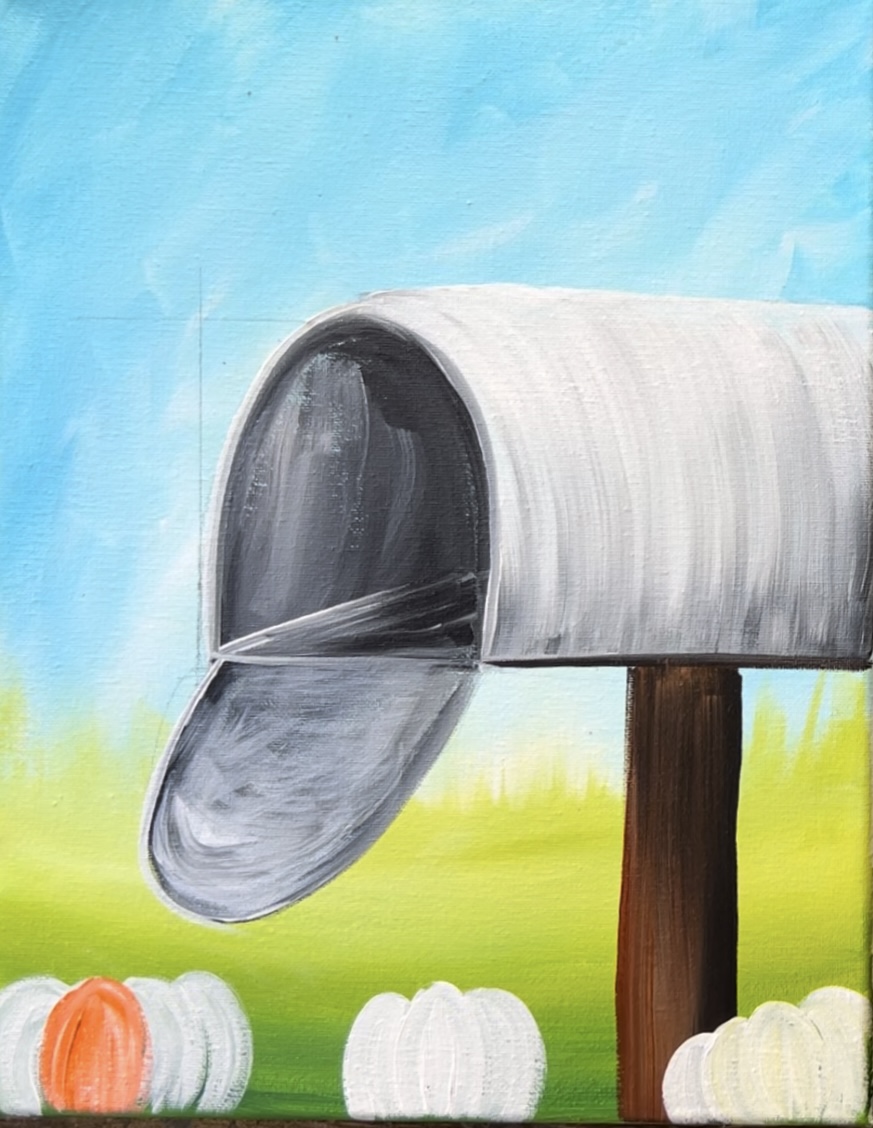
Then load your brush in orange and yellow. This is because we want to slightly alter the orange to different variations of color for each “pumpkin curve” so they can stand out.
Paint the rest of the pumpkin with orange and yellow. Paint in a curved direction going from the top and stroking downwards in a curve.
Repeat this technique to paint the next two pumpkins. Again, you want to vary your orange and yellow for each curve that you paint on the pumpkin.
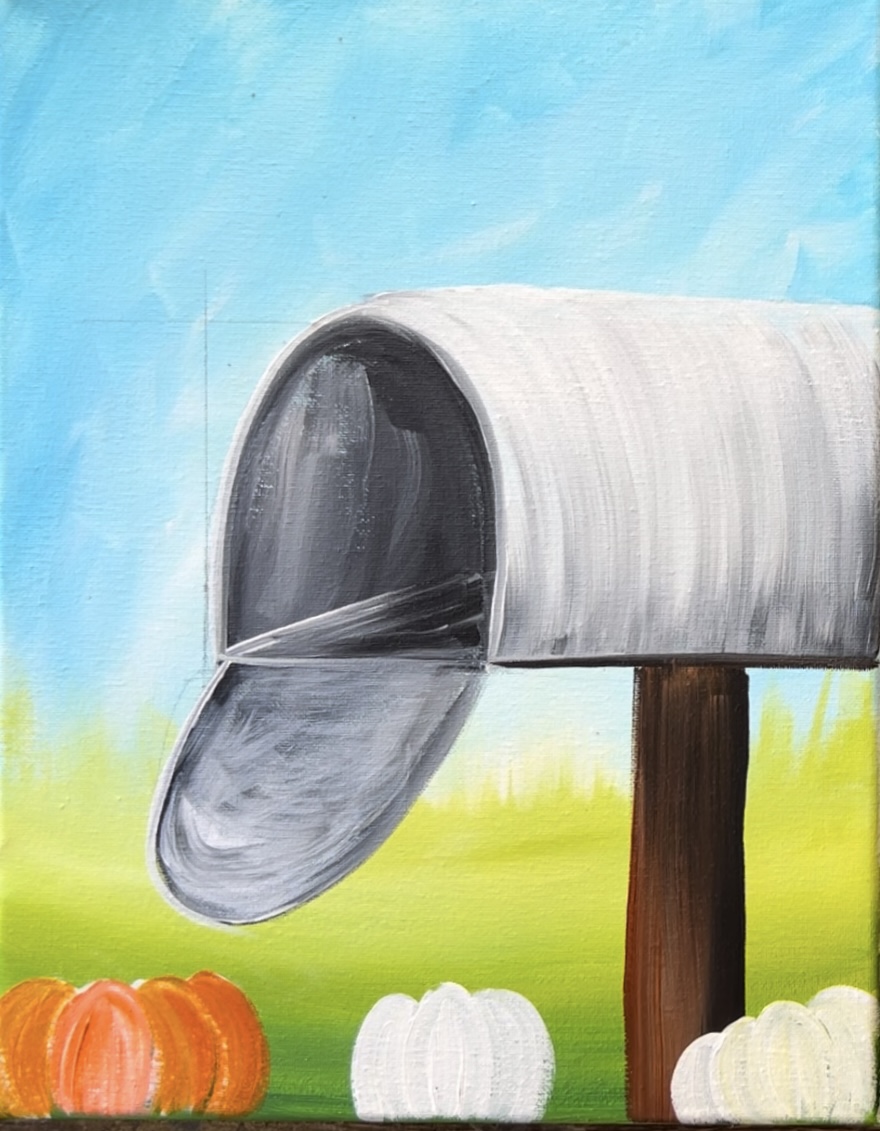
Rinse the brush. Then paint the stems of the pumpkins. Mix black with “burnt Sienna”. Paint the stems of the pumpkins. These stems start on the top of the pumpkin. They start very wide and then go narrow and curve to a point.
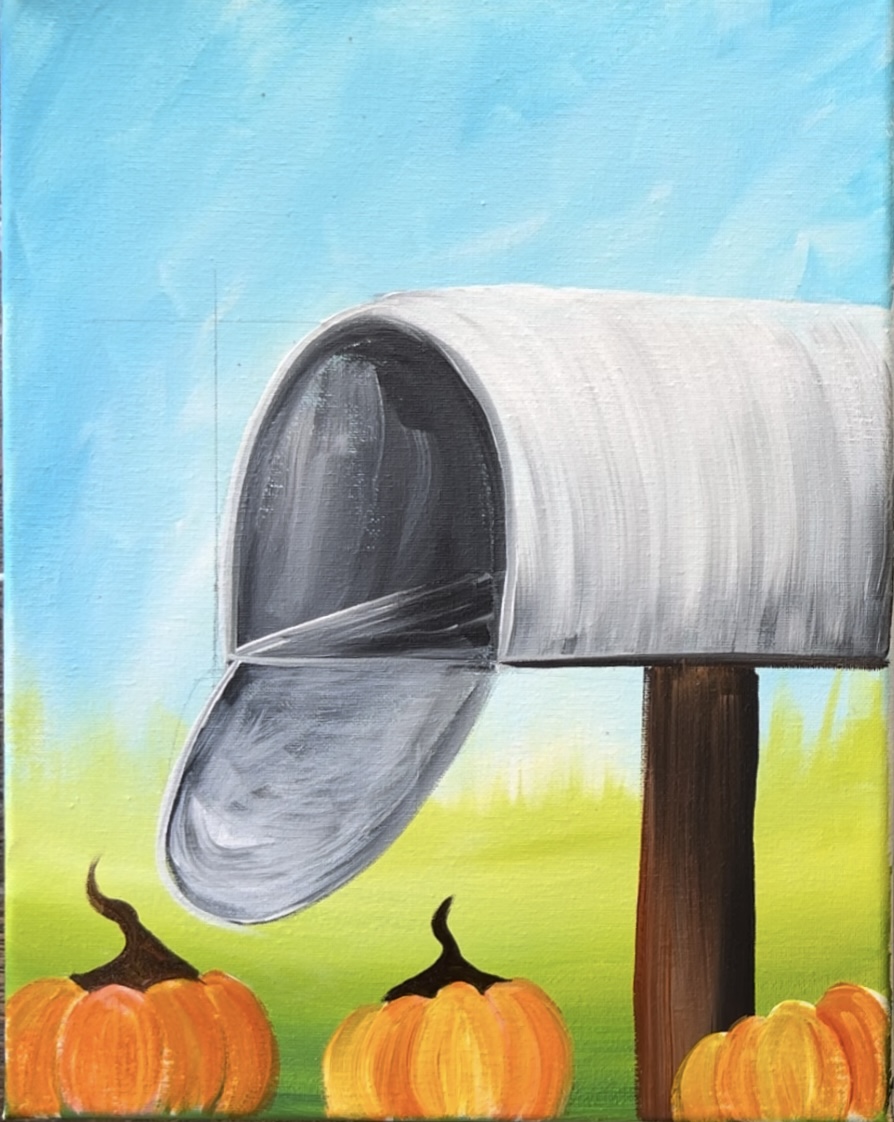
For the stem on the far right, I added white into the brown to allow it to stand out since it is overlapping the dark post of the mailbox.
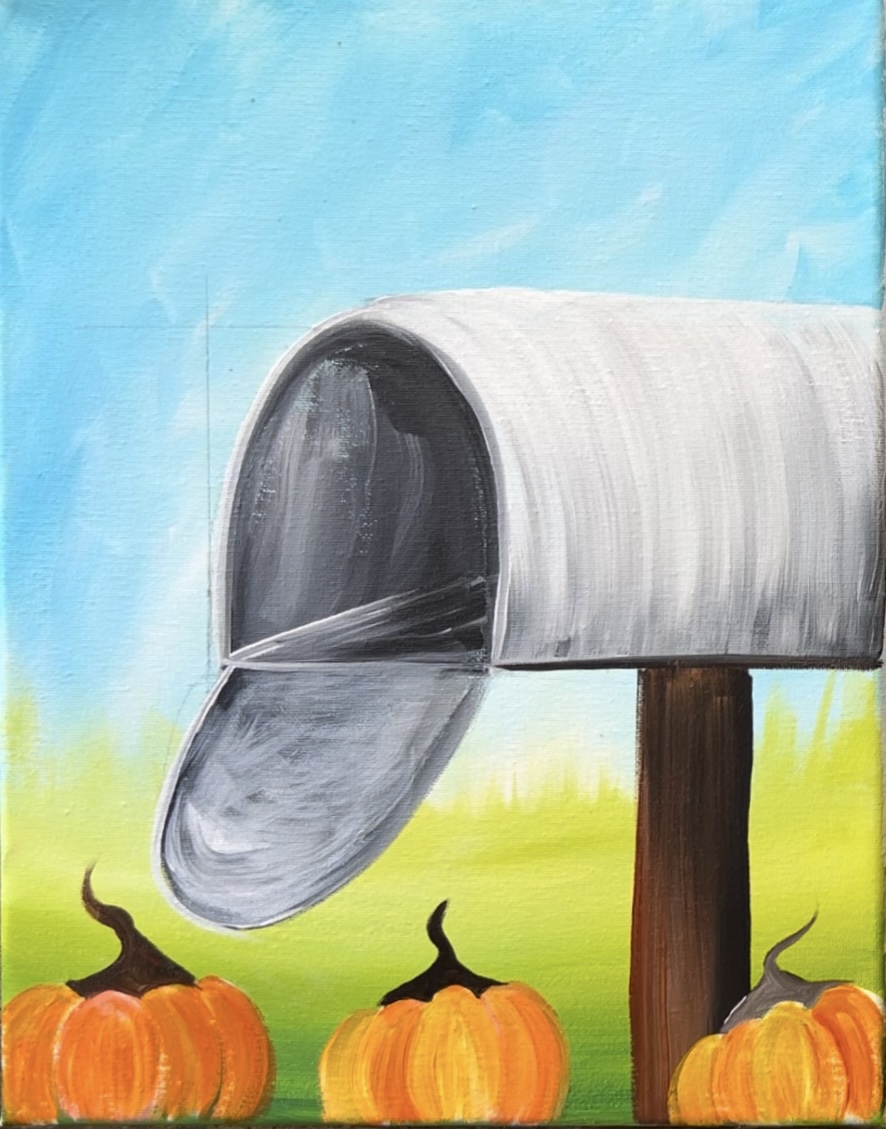
Next, paint the green pumpkin vines. Use the #4 round brush and “hooker’s green hue” to paint curved vines that go in looped directions. These are attached to the brown stems of the pumpkins.
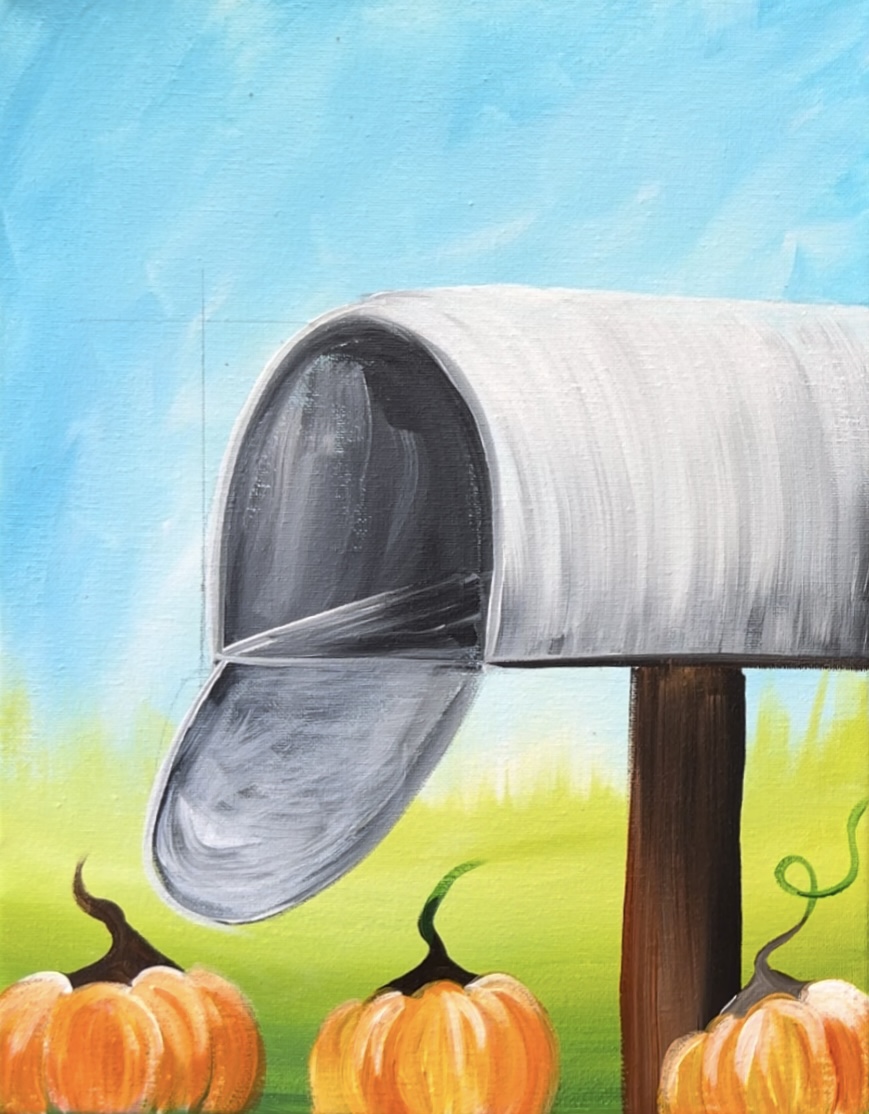
Each pumpkin has a vine that twists in different directions.
Then paint simple pumpkin leaves. Use a combination of the “hooker’s green hue”, “titanium white” and “light olive green”. Paint a line for the center of each of the leaves. Then stroke your paint outwards and form the shape of the leaf.
Paint more curls on the vine if needed. We will go back to this area later to add more details later!
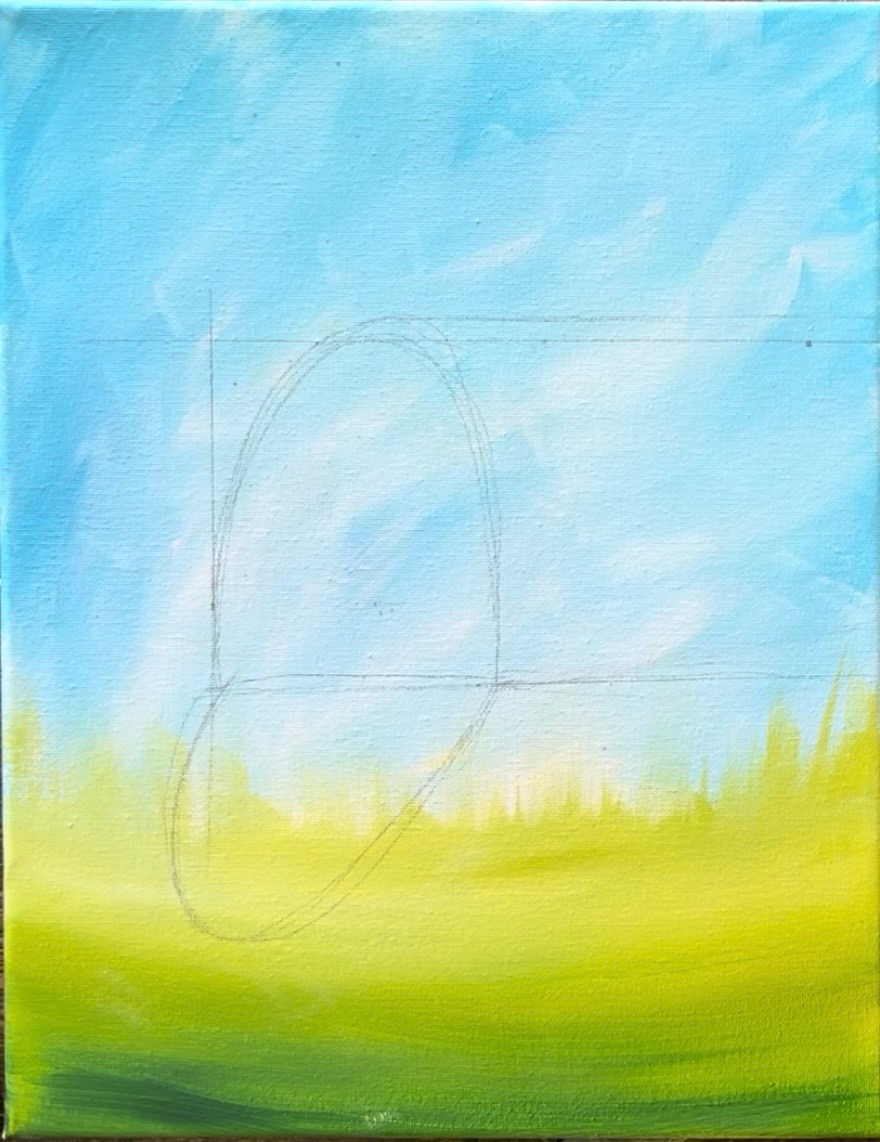
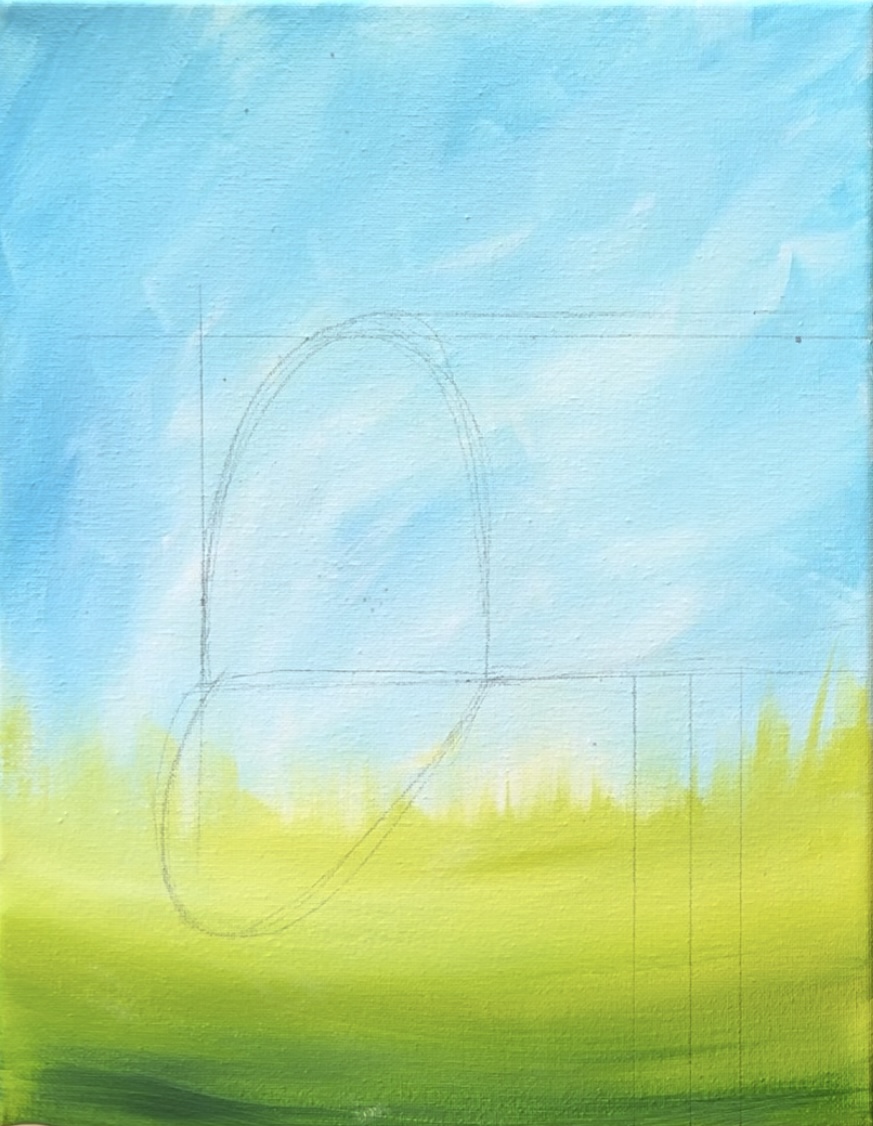
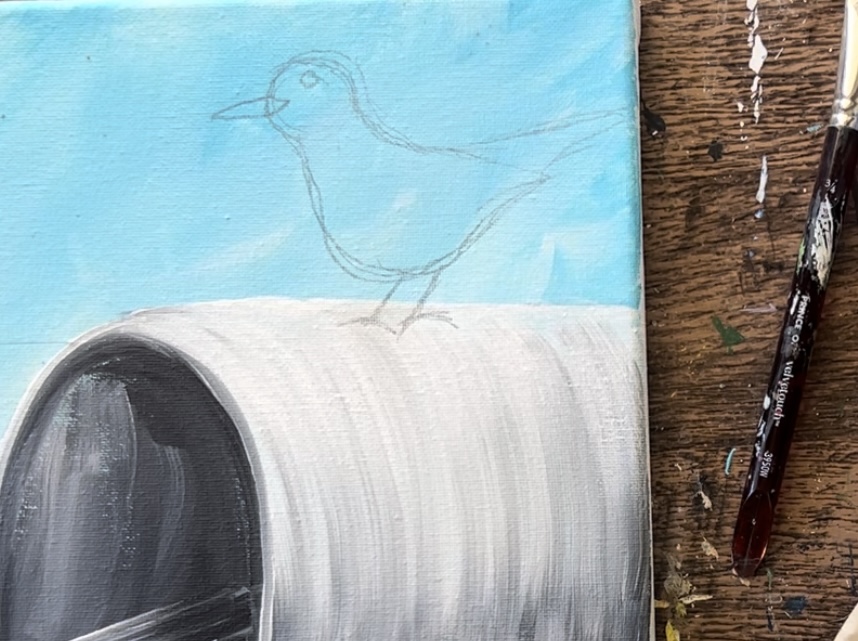
6. Draw & Paint The Blackbird
Use a pencil to draw the bird. Start above the mailbox and draw a circle for the head.
Then draw a curved line that dips down for the belly of the bird. Draw another curved line the dips down from the top of the head and forms the back.
Draw a small circle on the side of the head for the eye. Draw a pointed and thin triangle for the beak. Part of the beak forms another small triangle on the inside of the circle/head.
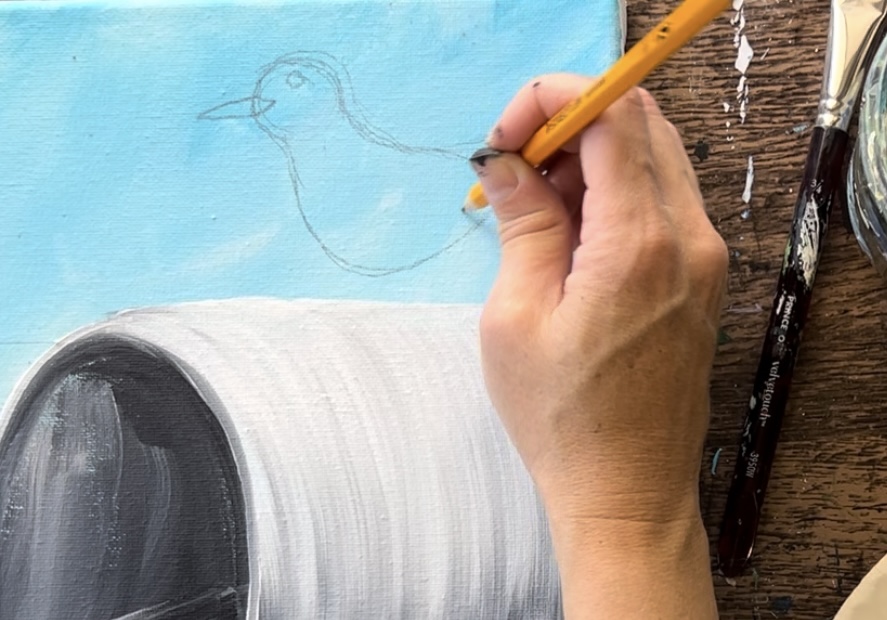
Draw the tail. This goes to a point and slightly bends upwards and off the right edge of the canvas. Then draw the legs. These are two diagonal lines going towards the left. Draw two curved lines on the bottom of these lines for the feet of the bird.
Next, load “mars black” onto your paint palette. Use the #4 round brush to paint the bird. Outline the inner part of the shape of the bird.
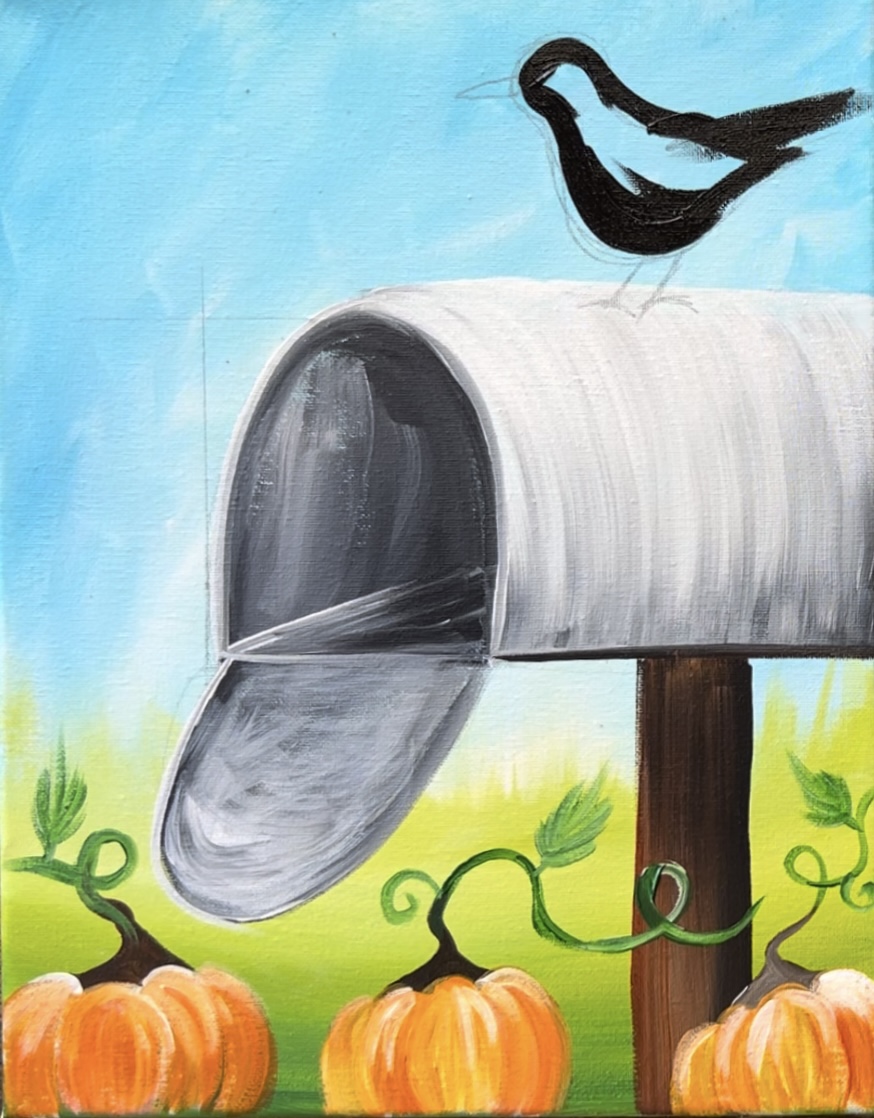
Then fill it in solid black.
Tip: It helps to paint in small paint strokes a little at a time. It’s harder to mess up with small strokes versus large strokes.

Wait for the black to dry. Then paint the beak. Use the #4 round brush and orange mixed with a little yellow. Pain the beak so that it is going to a point on the left and overlaps and forms a small triangle on the right end. Then paint the legs of the bird by outlining the lines you drew with pencil with orange paint.

Optional: highlight the side wing of the bird by painting gray marks that form a half circle shape. Make this gray by mixing black and white together. Then lightly paint the bottom edge of the wing. Lightly add feather strokes in the middle of that half circle to create some texture.
Paint the eye of the bird by first painting a small gray circle. Then when it dries, paint a little black dot. Then paint a very thin black line in the middle of the beak. Note: you can use a black paint pen or a toothpick for that fine detail step!
7. Paint The Tree
Load your paint palette with some fresh “burnt Sienna”. Use the #4 round brush to paint the branch on the left side of the painting. Start by painting a thicker bottom of the tree that goes thinner and branches off into two or three main branches. Then paint smaller branch lines that go out from the main branch lines. To get your branches to go thinner, you want to hold your brush very lightly and use the end of the bristles.
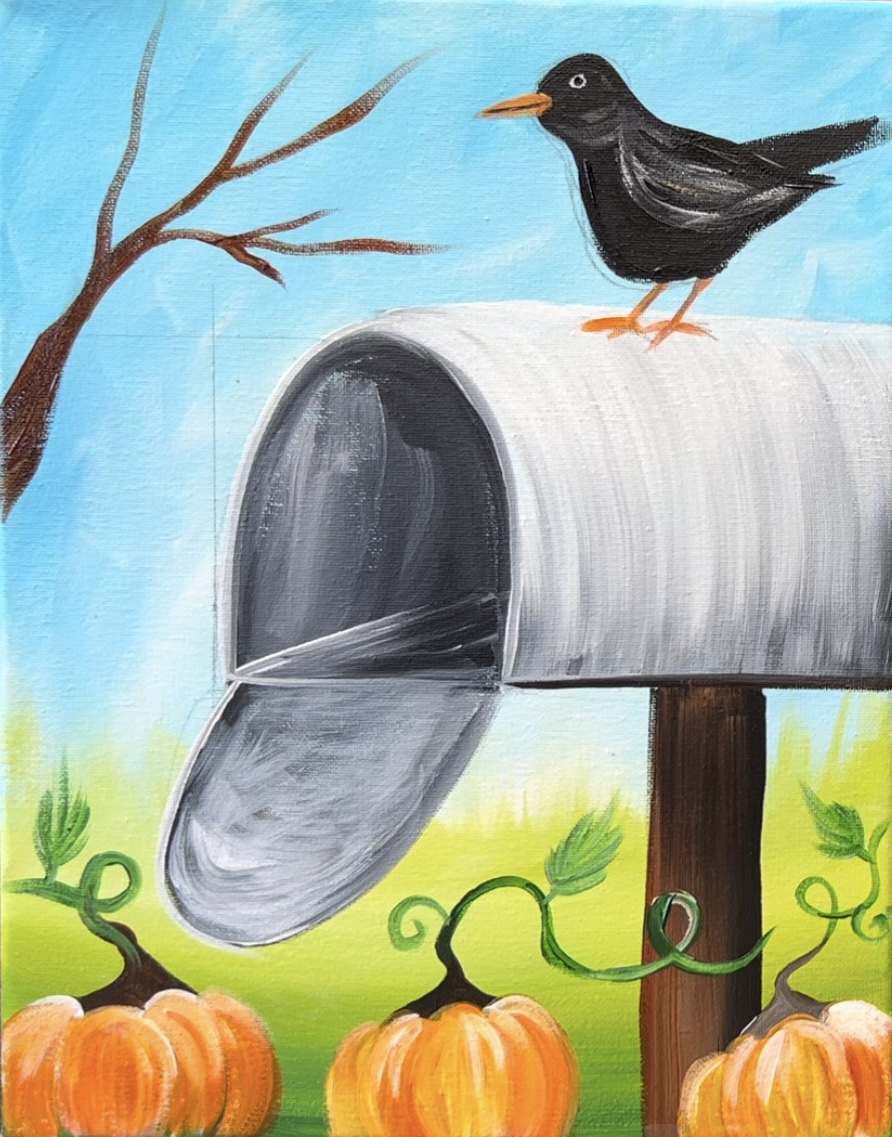
Load your brush in a little “titanium white” and the “burnt Sienna”. Then loosely paint light brown texture lines on the branch so that it gently blends and creates some light brown variations of color. You can also paint more branches using this light brown.
Next, paint the leaves of the tree. Rinse the #4 round brush. Load it into just “cadmium orange hue” and “primary yellow”. Paint little dots on the ends of the branches.
Fill the tree with little fall leaf dots. These paint strokes are relatively thick. You can also add “titanium white” to your brush to create some lighter fall leaf colors. Basically, you want a nice variety of yellow, orange and some white in these leaves.
Go around the bird and also create clusters of leaves on the left edge of the canvas. Not all of the fall leaf clusters have to be attached to branches.
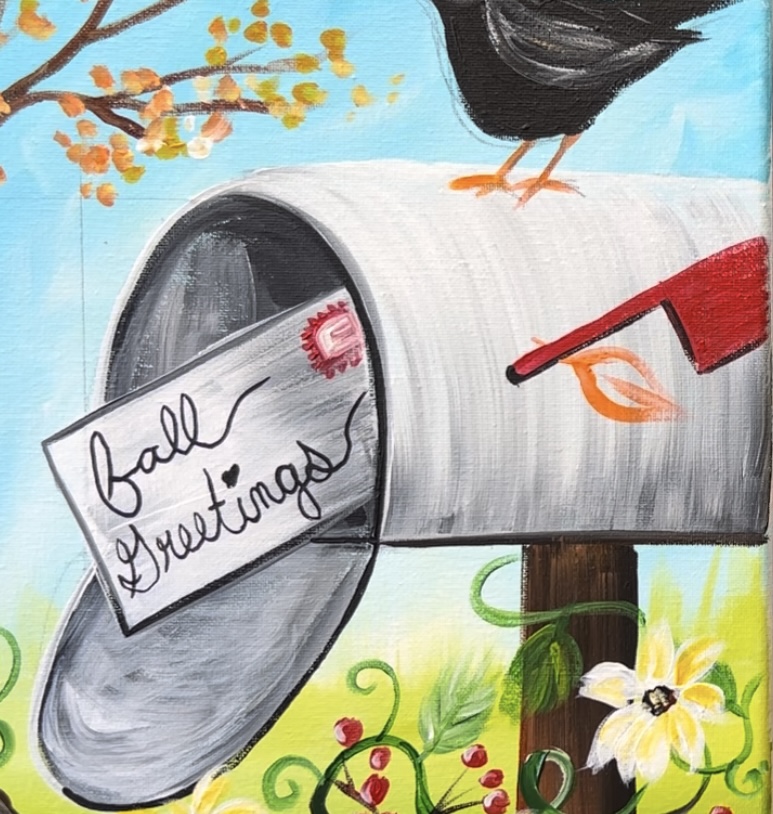
8. Paint The Flag
Load your paint palette with the color “naphthol crimson”. Use the #4 round brush to paint the flag of the mailbox. Paint a diagonal line with a small rectangular or square shape. Mine went off the edge of the canvas. You can also change the angle of the flag if you want!
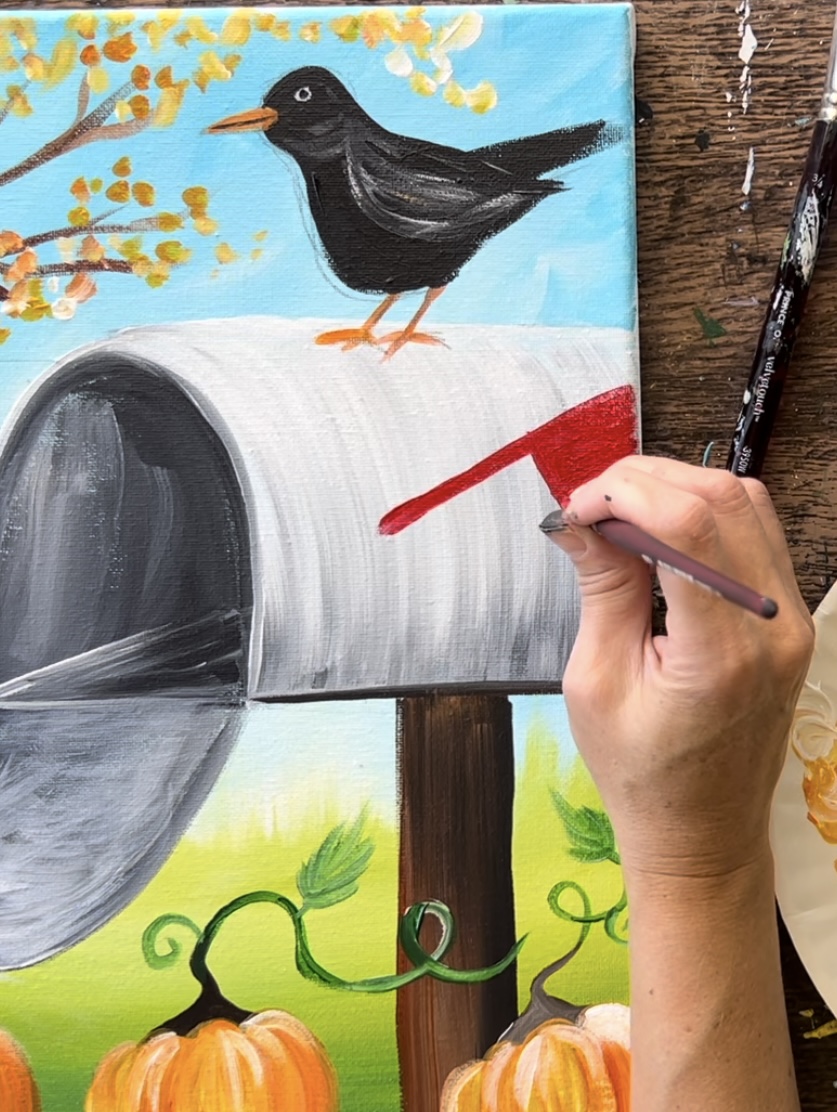
Next rinse the #4 round brush. Load it into “mars black” and loosely outline the bottom edges of the flag with black.
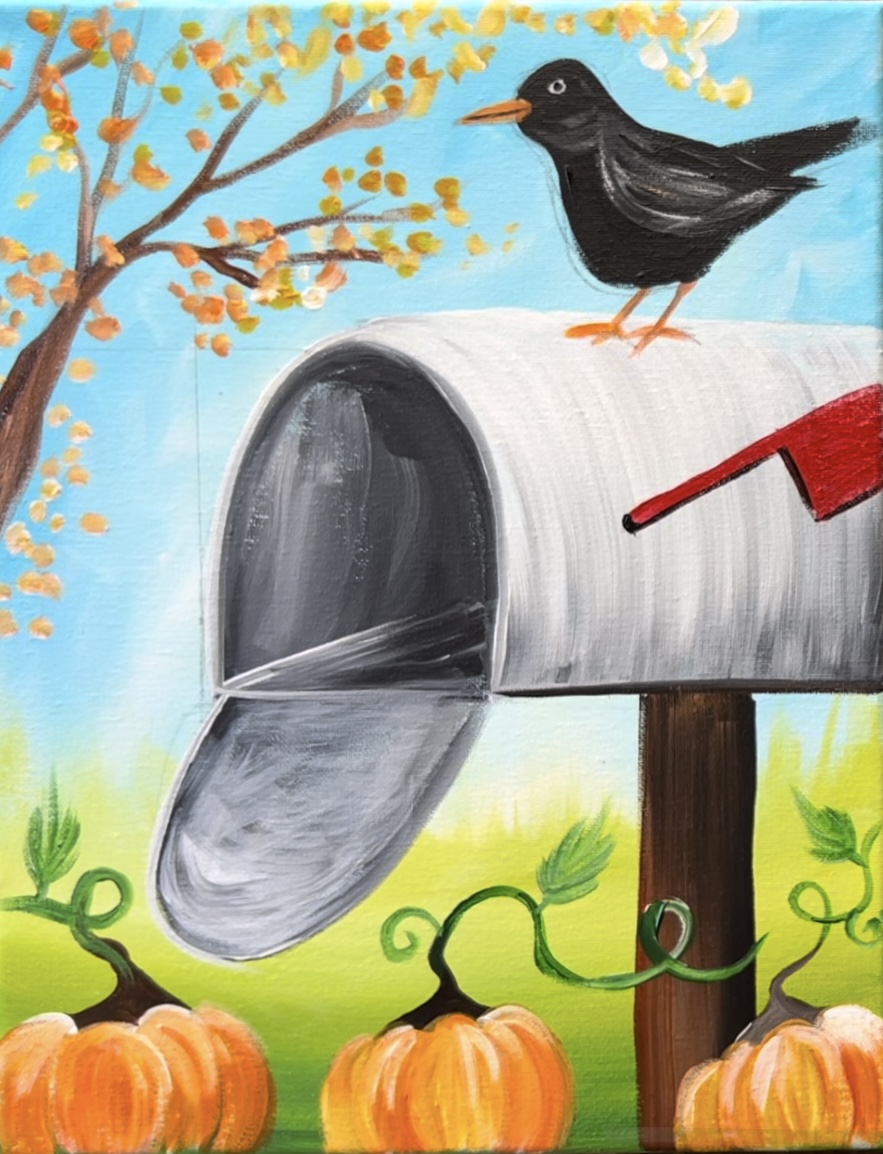
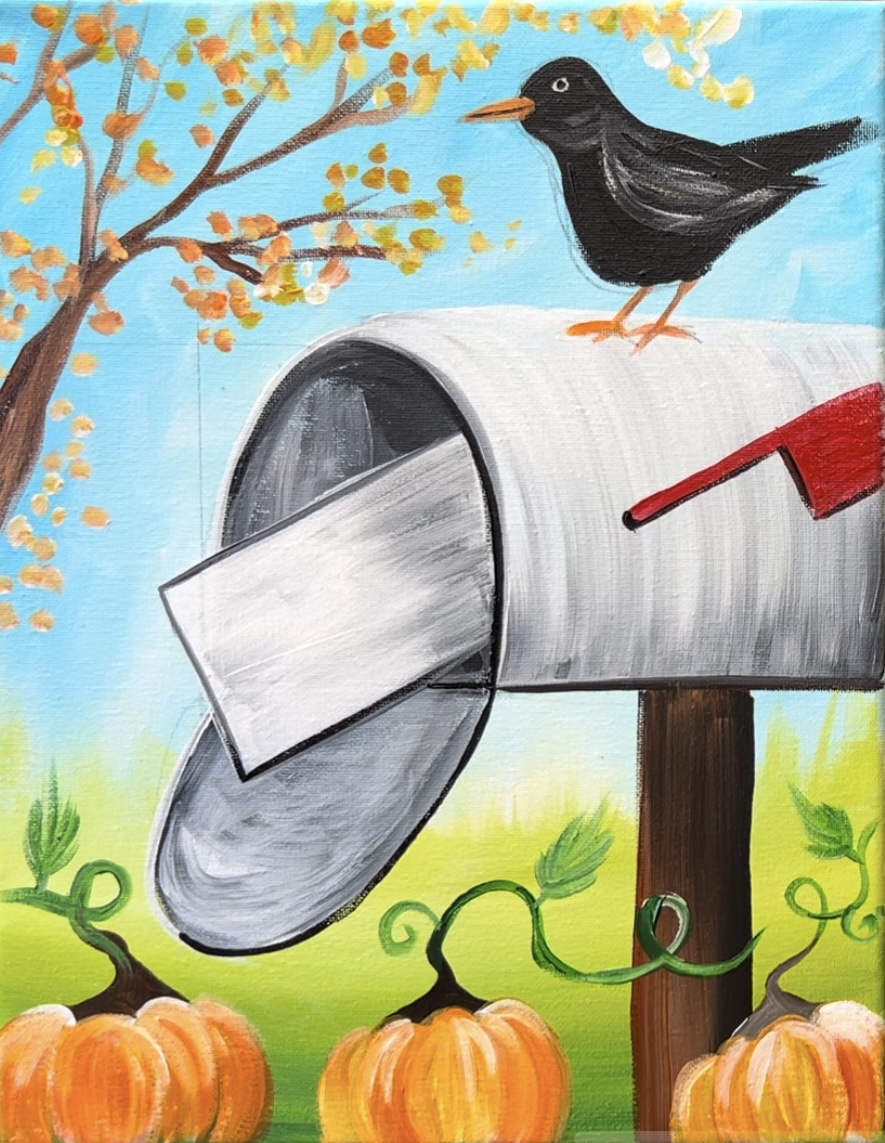
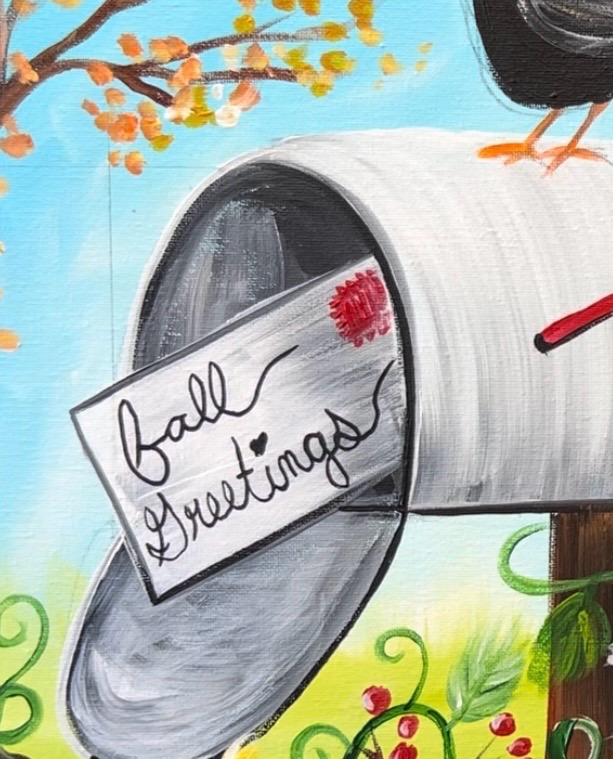
9. Paint The Letter
Use the #4 round brush and “titanium white” to draw the shape of the letter. Paint a rectangle shape going at an angle so it looks like a letter hanging out of the mailbox opening.
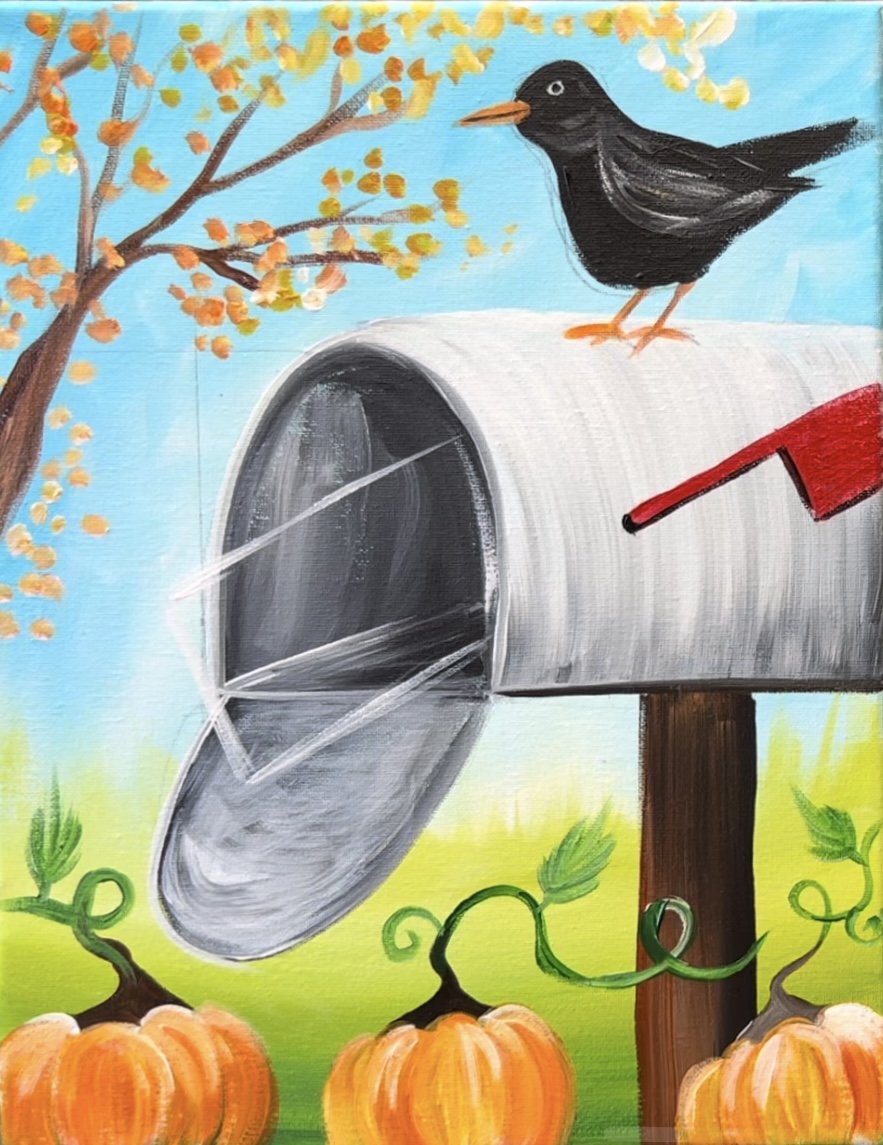
Next, use the 3/4″ flat brush to paint the letter white. Use the full width of the brush and paint strokes that go in a diagonal direction.
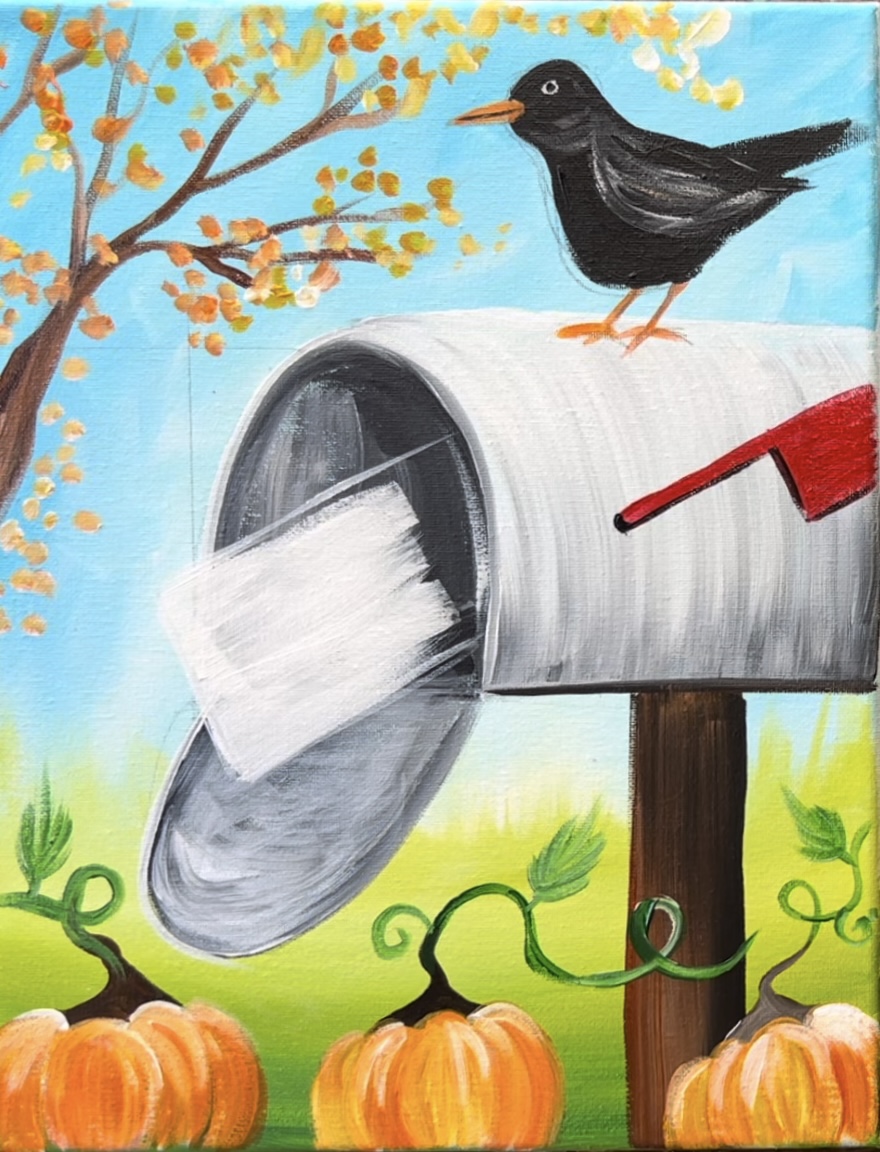
Next, add a little bit of “mars black” into the white. Gently blend the black with the white so that it is a little more shadowy on the far right side of the envelope and pure white on the far left. Next, use the round brush and black to outline the entire shape of the envelope. When you outline this, it will help it to stand out much better!
10. Paint Flowers
Use the #4 round brush and “burnt umber” mixed with “mars black” to paint ovals and/or circles for the centers of the flowers.
Wait for the brown ovals to dry. Then paint the petals of the flowers. Use the #4 round brush and “titanium white” to paint the petals. Start from the oval and paint an elongated oval shape for each of the petals. If you overlap the oval center, you can go back and repaint them.
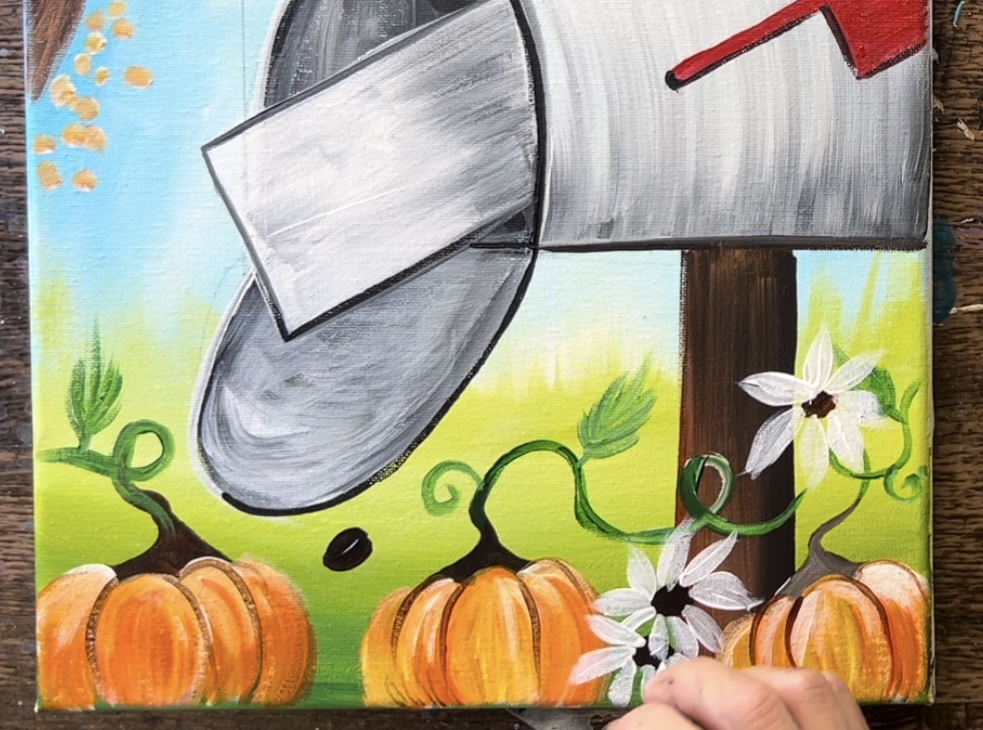
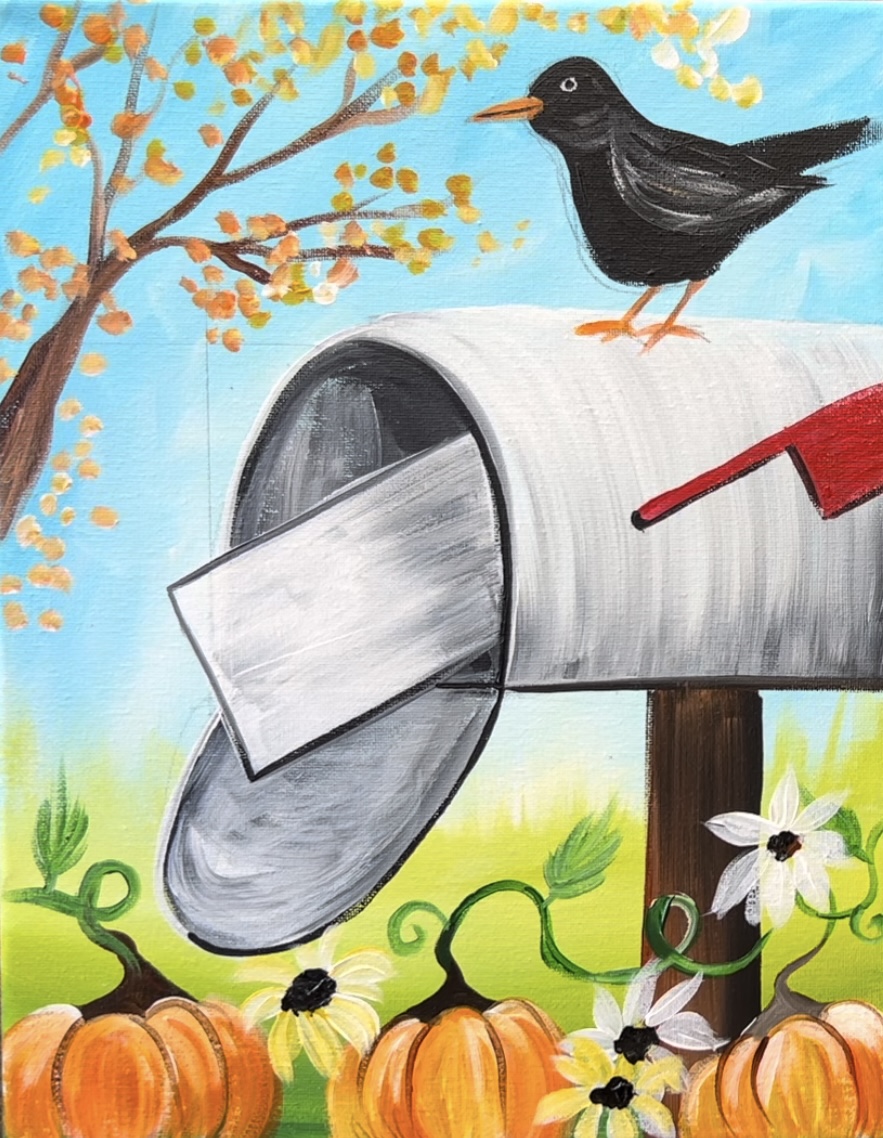
Note: I painted these flowers white first and when the white dried, I went back over with yellow. You can decide to have white flowers or yellow flowers!
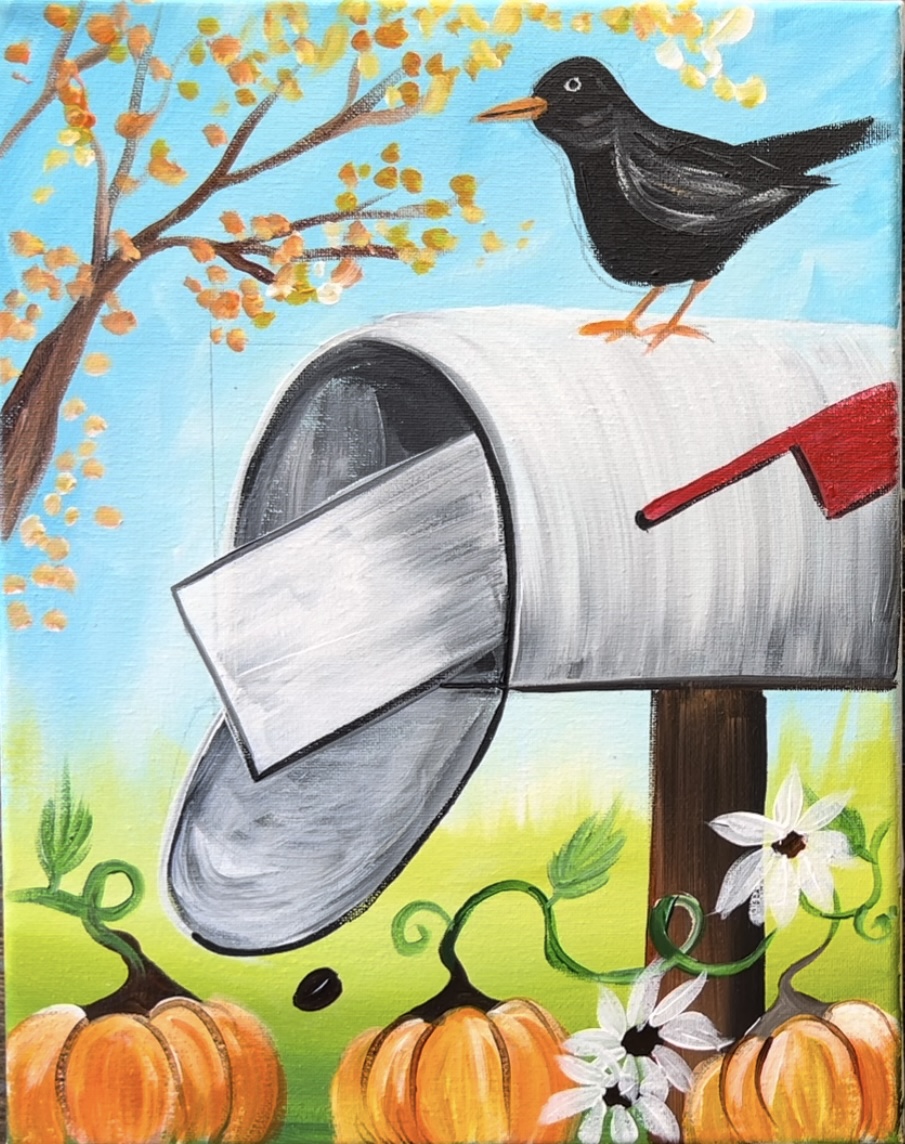
After the white dries, paint over the petals with “cadmium yellow medium hue”.
Next, paint little red berries. Use the color “naphthol crimson” to paint clusters of small red circles. Then paint little stems attached to the circles using the brown/black and the #4 round brush. You can also use a paint pen to do the stems since these lines are so thin.
As a final detail to these berries, paint a small white highlight line on each of the circles using titanium white.
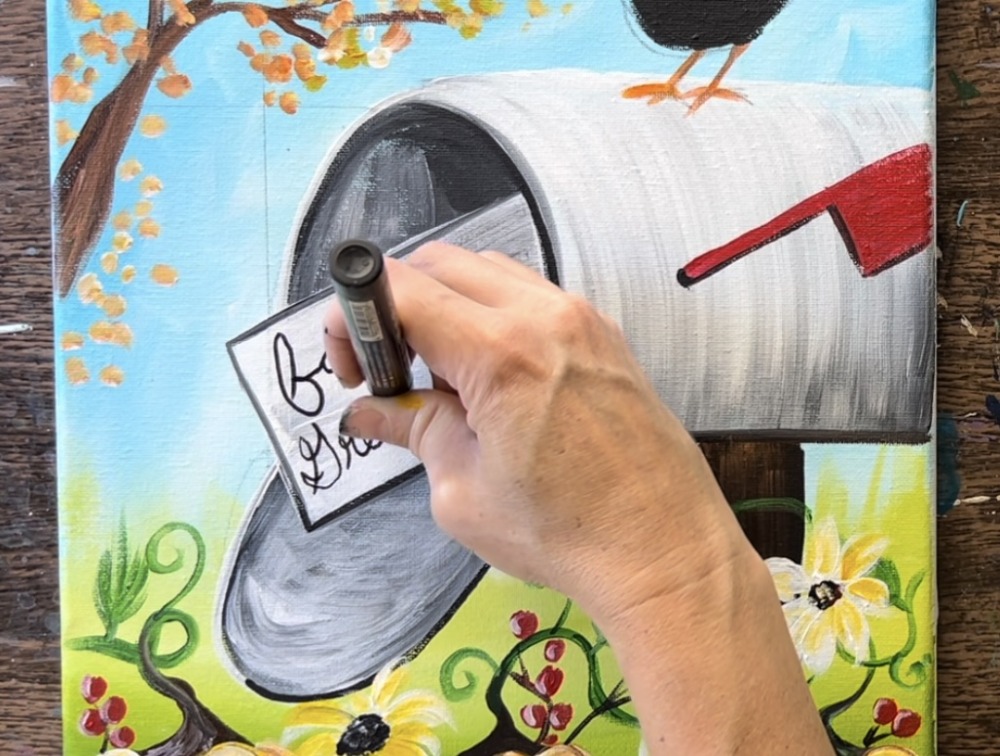
11. Write “Fall Greetings”
Use a black POSCA paint pen to write “Fall Greetings” or another word/quote on the envelope. Tip: you may want to write your lettering in pencil first and then outline with the pen.
Paint a little stamp in the upper right corner of the envelope. Use the red to paint a square with a rounded/ scalloped edge. Then paint a white square in the middle of the stamp.
12. Paint Fall Leaves
Next, paint fall leaves. I did a leaf behind the flag and a few leaves hanging out behind the envelope. I also did a leaf on the opening of the mailbox.
Use a combination of the orange, yellow, white and red to paint these leaves. Also, use the #4 round brush. It’s easiest to outline the shape of the leaf first and then paint it in solid.
Paint the shapes of the leaves first. Then let them dry.
After the first layer of leaves have dried, use mars black (or paint pen) to paint the stem and lines on the leaves.
13. Final touch ups and finished!
Some final touch ups could include: painting more leaves on the trees, painting more branches. Also, you can make the lines on the pumpkins darker (use a paint pen or dark brown paint).