

Would you like to save this?
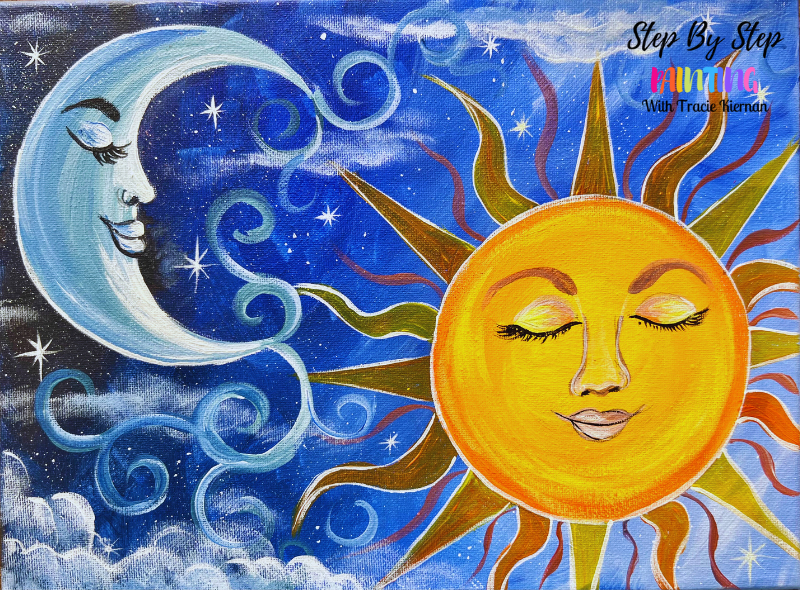
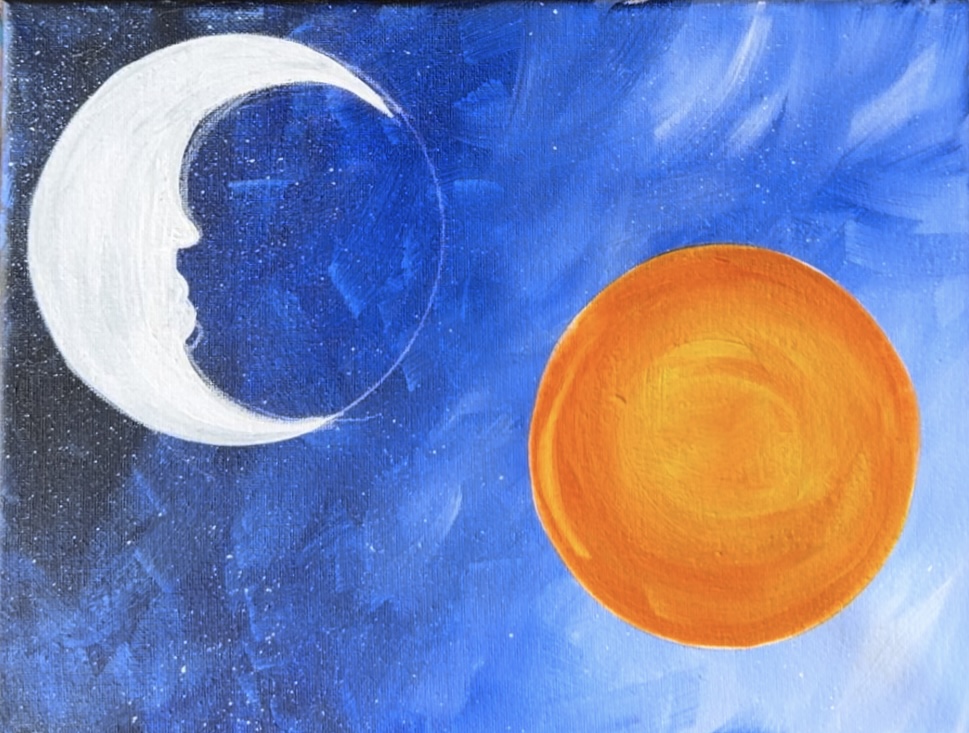
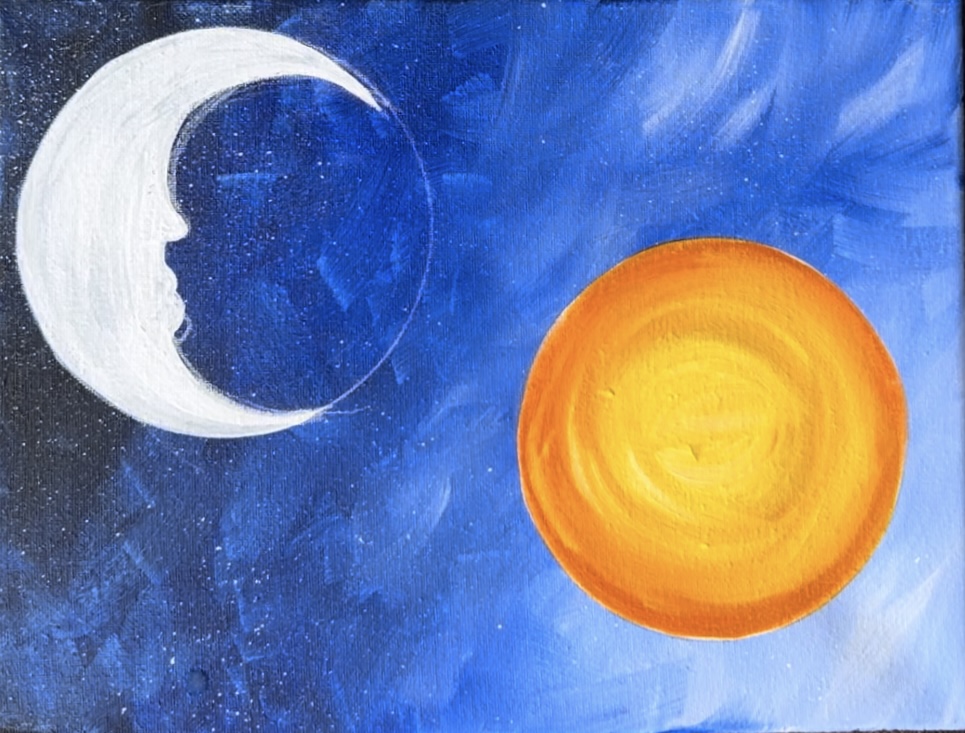
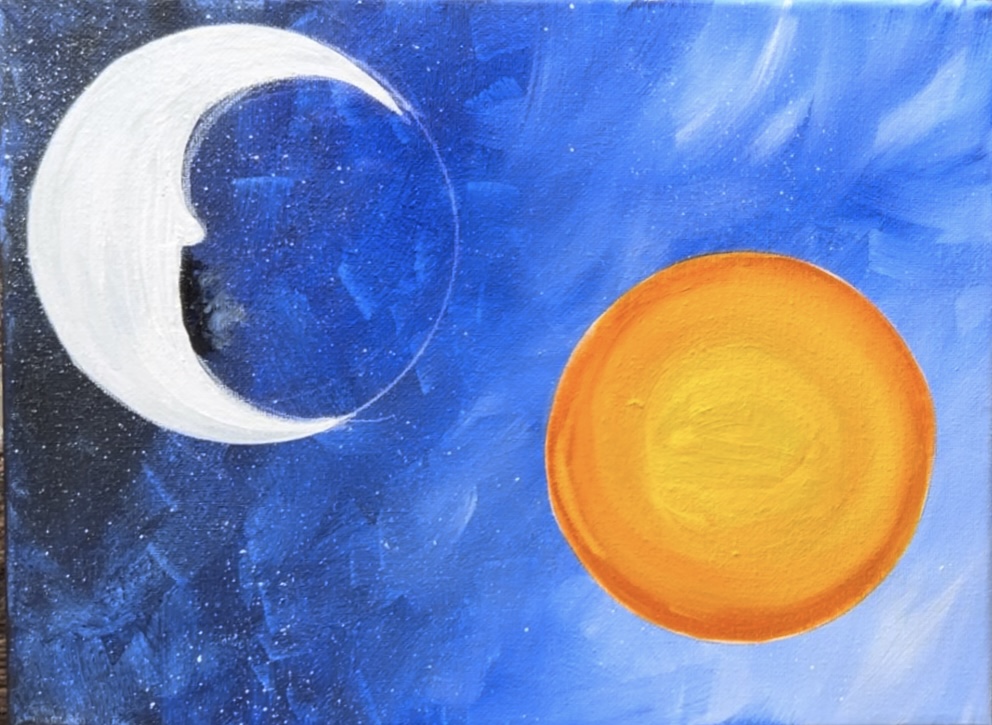
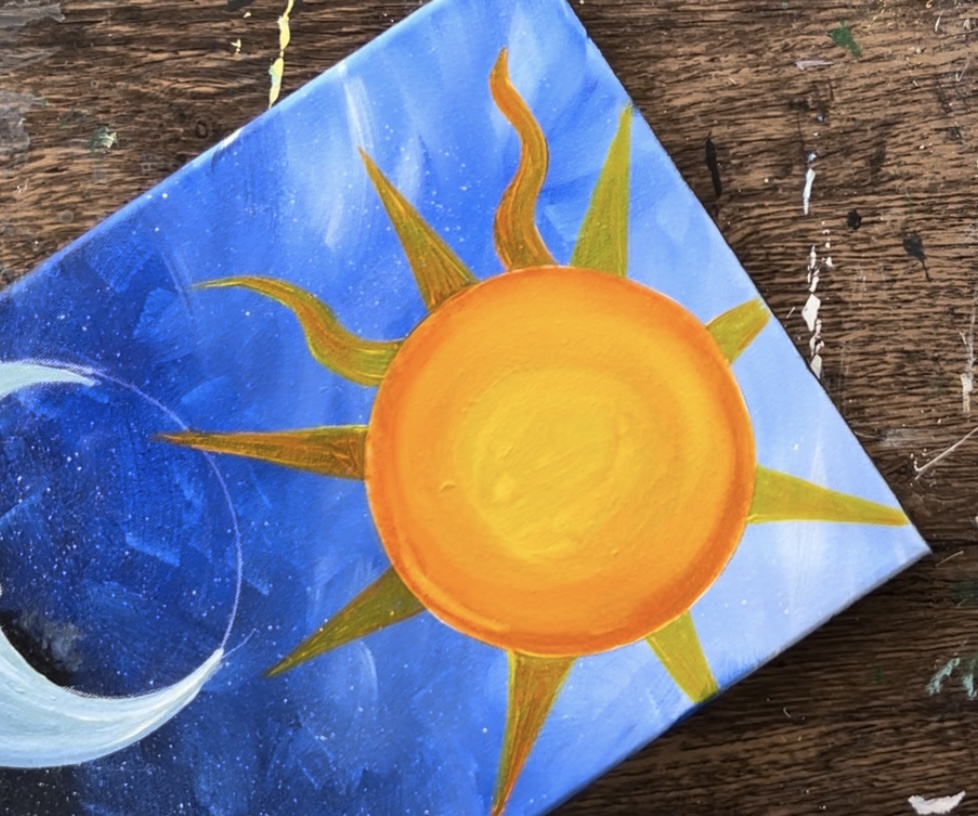
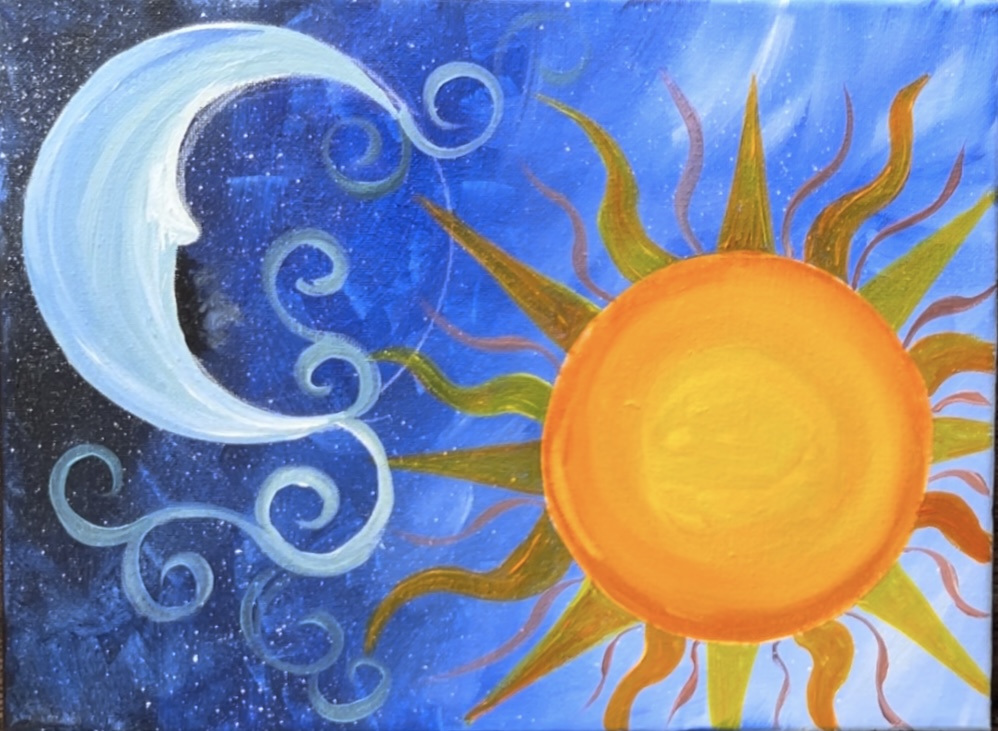
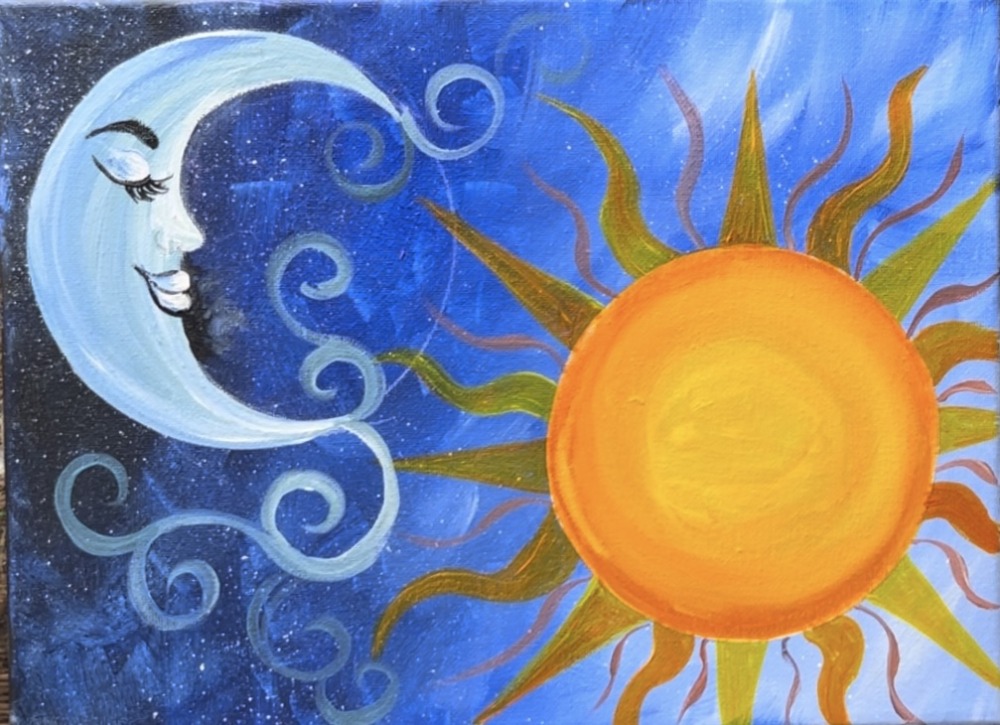
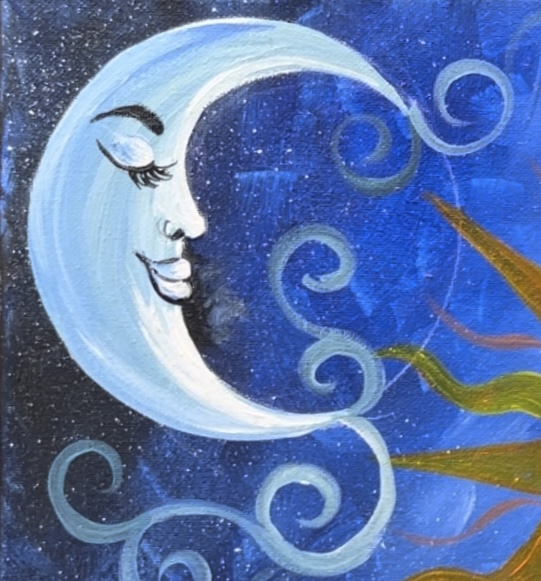
This week we are painting a classic celestial sun and moon painting! Ever since I was a kid, I’ve always loved drawing and coloring this celestial theme of the sun and moon. I love the contrast with light and dark. The bright orange in the sun really pops with the blue background.
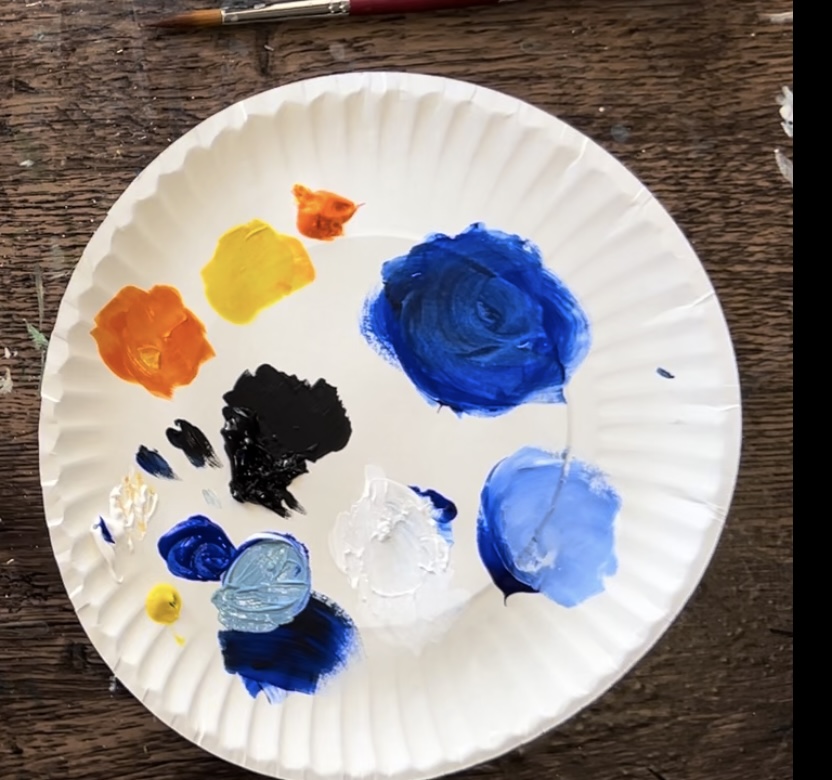
There are only 5 colors in this painting! A small color palette makes things a bit simpler.
This painting design, however, does go into a bit of detail. You can make it easier by simplifying the faces or even not doing the faces.
Enjoy and happy painting!
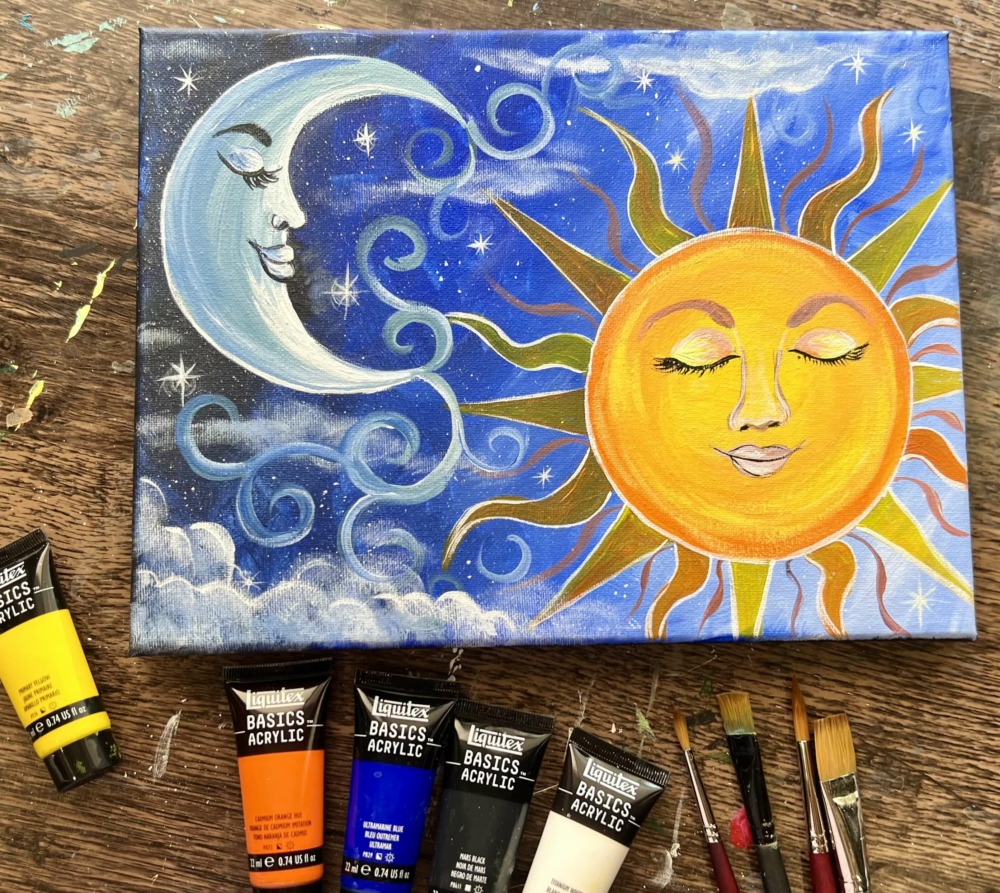
Materials Needed
Celestial Sun & Moon Painting

Paint a celestial sun & moon painting with acrylics on a 9 x 12 (or any size) canvas.
Materials
- 9 x 12 Canvas (can work on any size)
- Acrylic Paints (I use Liquitex BASICS)
- Paint Brushes
- Circle To Trace (mine was 4.75" in diameter)
- White Chalk Pencil (optional)
- Drawing Pencil
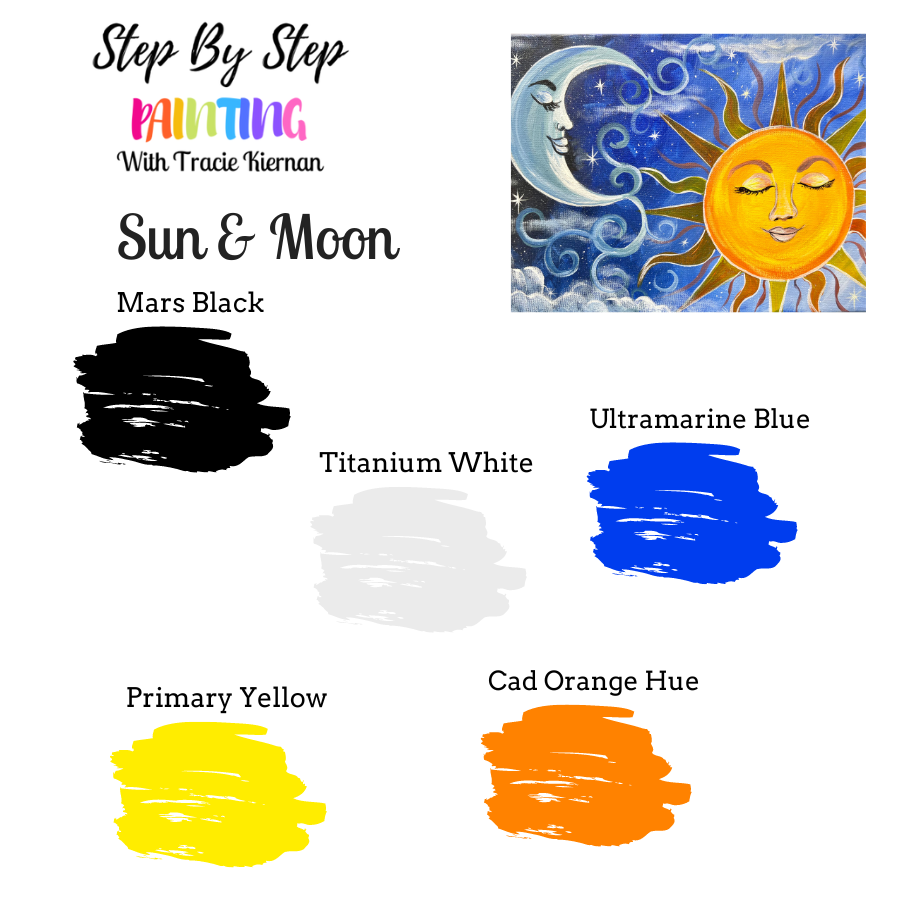
Colors
- Titanium White
- Mars Black
- Ultramarine Blue
- Cadmium Orange Hue
- Primary Yellow
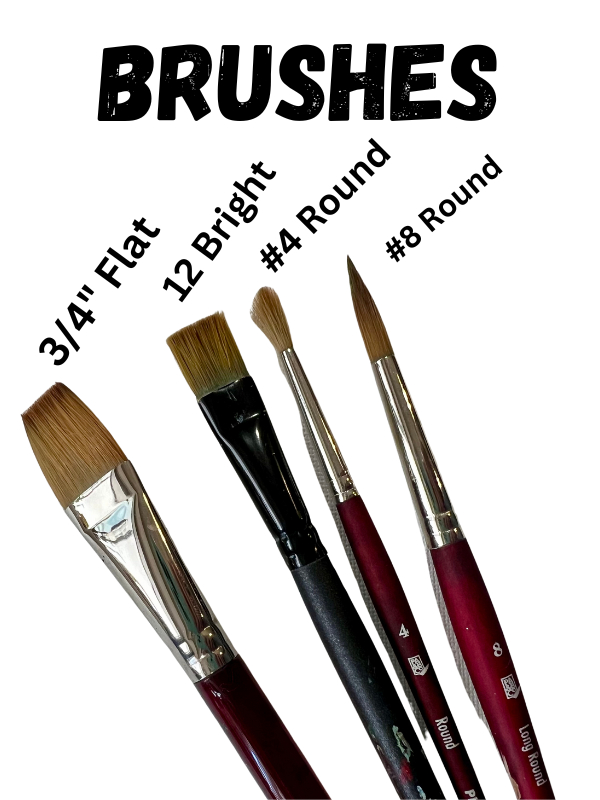
Brushes
- 3/4 Flat
- 12 Bright
- 4 Round
- 8 Round
How To Download This Tutorial:
You can purchase this as a download to view offline, print different size traceables and download the video!
Color Palette
Brushes
Directions At A Glance
Optional Traceable
Video
Step By Step Instructions
1. Paint the background
Load your paint palette with the colors: ultramarine blue, titanium white and mars black.
Use a 3/4″ flat wash brush to mix equal amounts of blue and white. This will create a lighter blue. Start in the lower right part of the canvas. Paint short, angle paint strokes that blend on the canvas.
Work from the lower right corner to the upper left corner. As you approach the middle of the painting, add more blue to your brush and less white. This will make the blue darker in the middle.
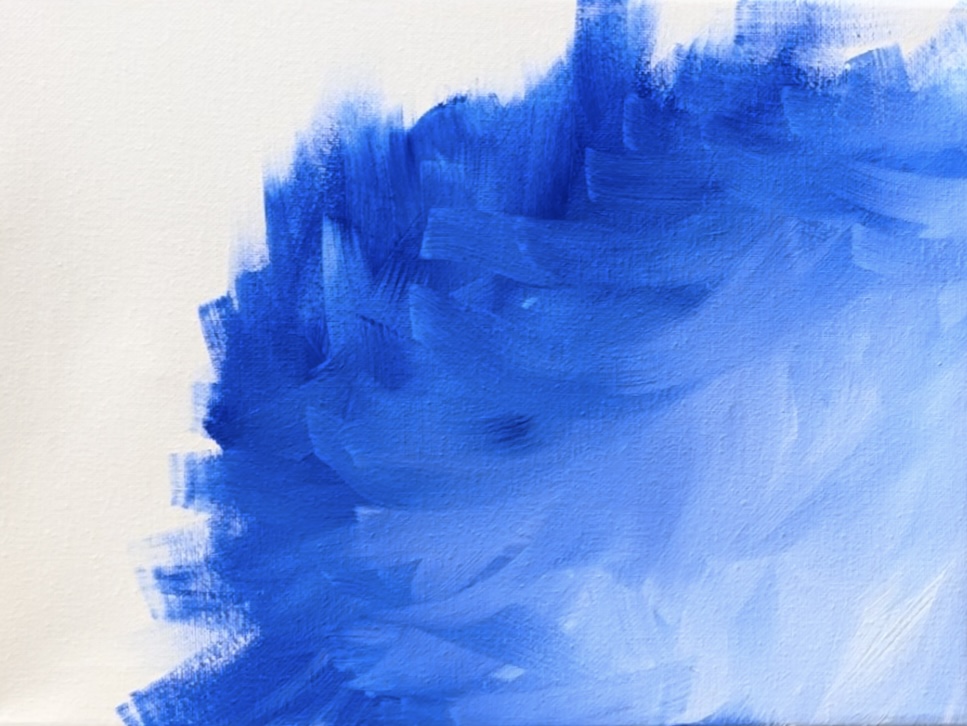
Rinse the brush. Then mix a very tiny amount of black into the blue to make a dark blue. In the upper left corner, paint dark blue. Then mix it with just the blue and fill the rest of the background.

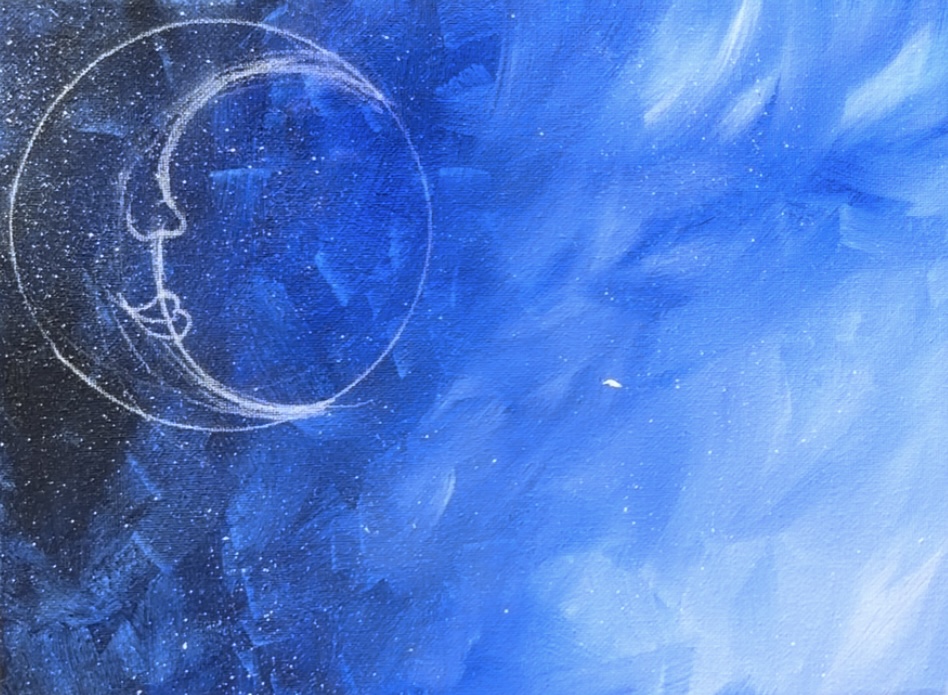
Your background will look like a blended gradient of dark blue to light blue. Your colors do not need to blend all the way and it is okay if the brush strokes are still showing!
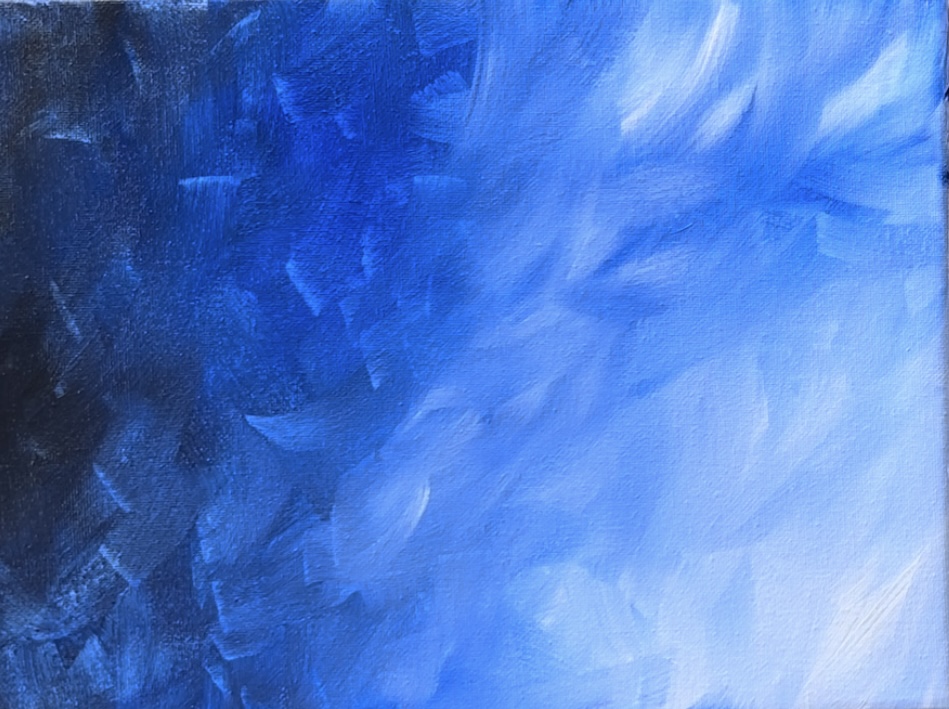
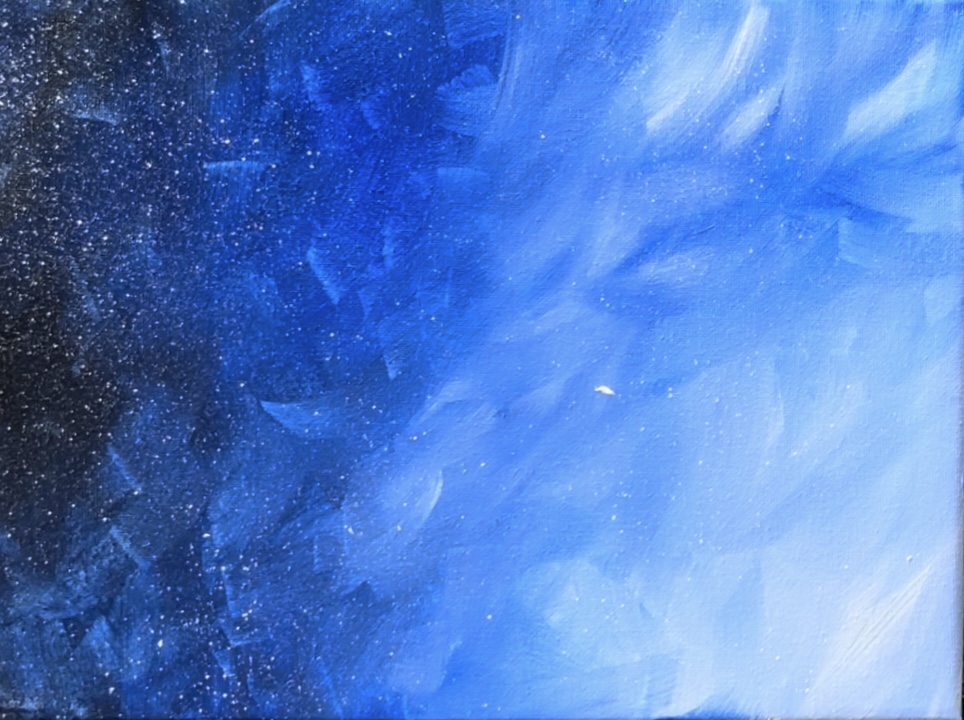
2. Paint Stars
Use a toothbrush. Load it into a small amount of water. Then load it into white paint. Test out a separate surface before splattering the stars on the canvas. It should be thin but not dripping.
Then splatter stars all over the canvas.
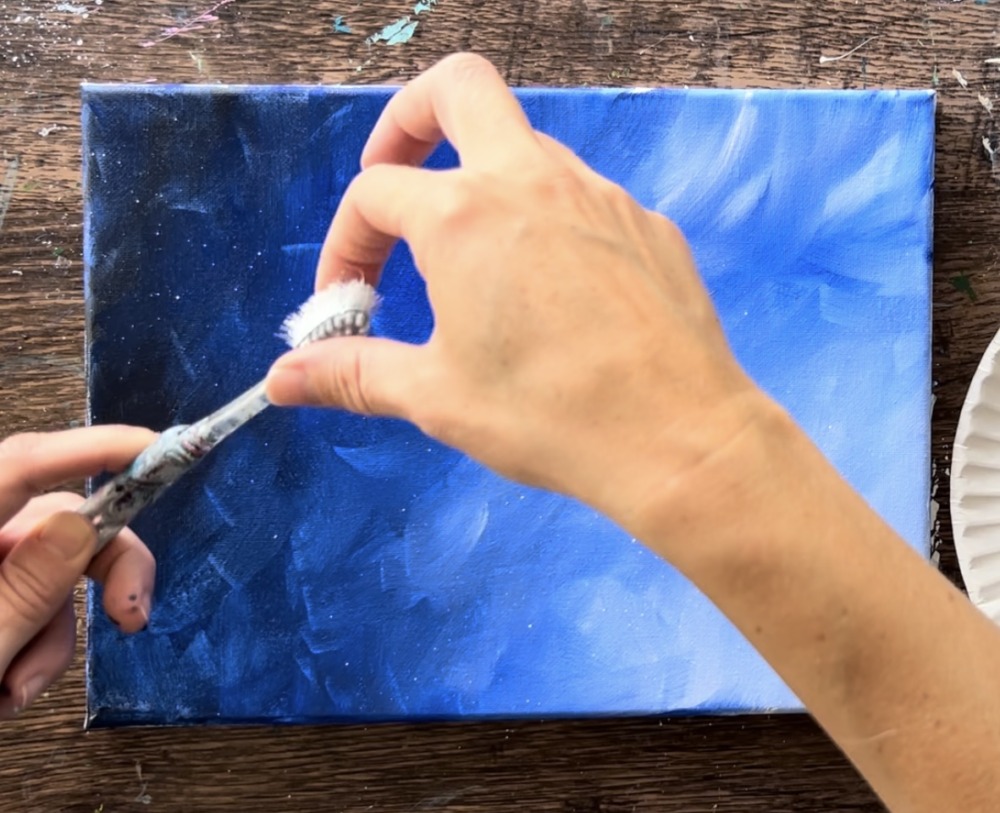
Your stars will show up on the darker part of the sky more than the lighter part!
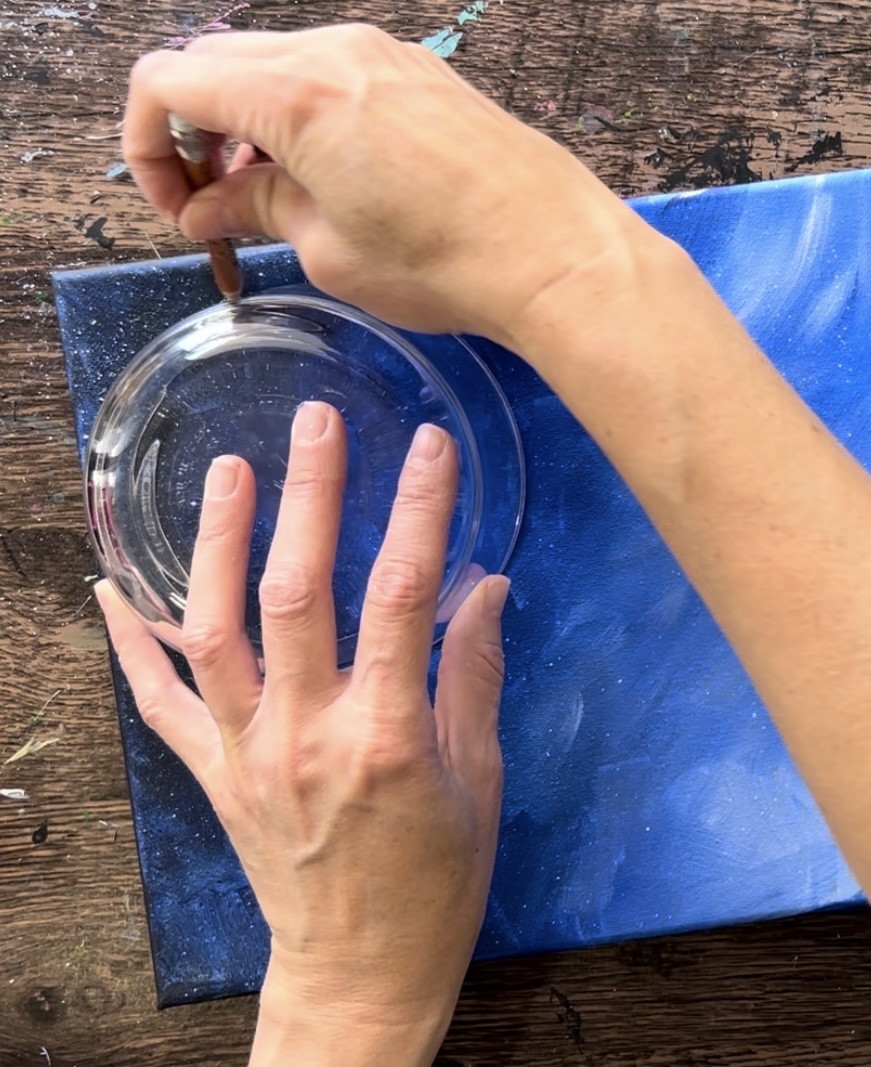
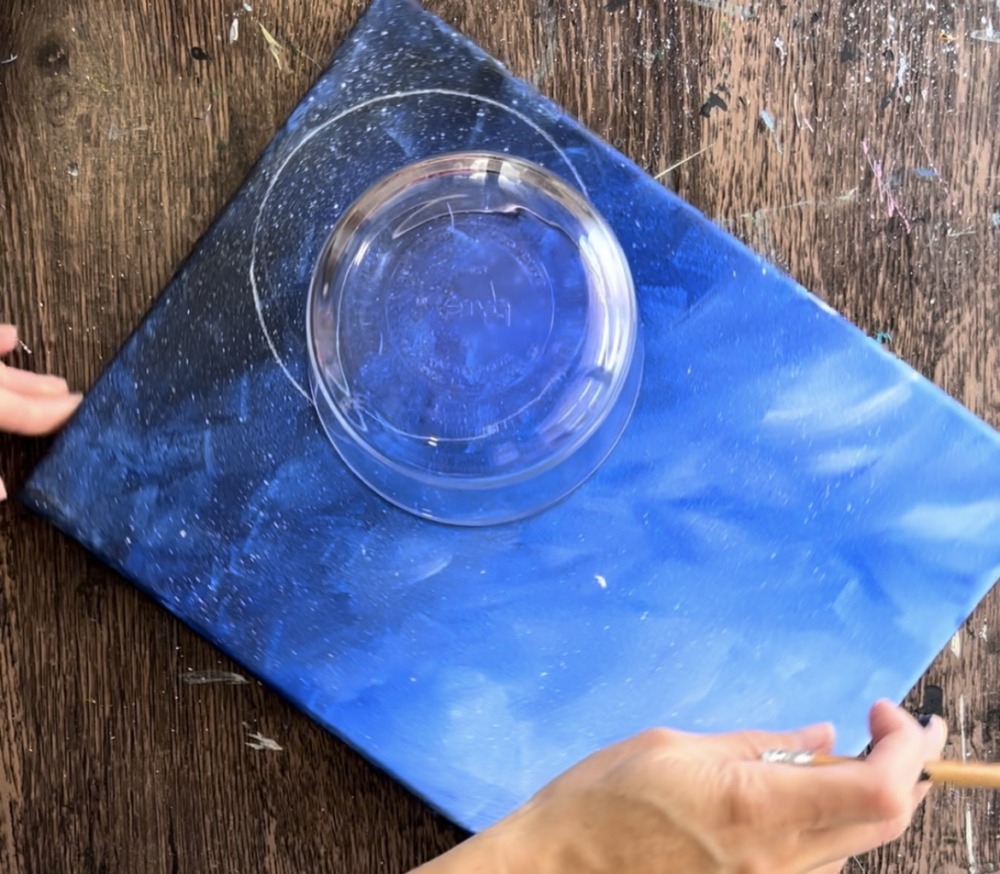
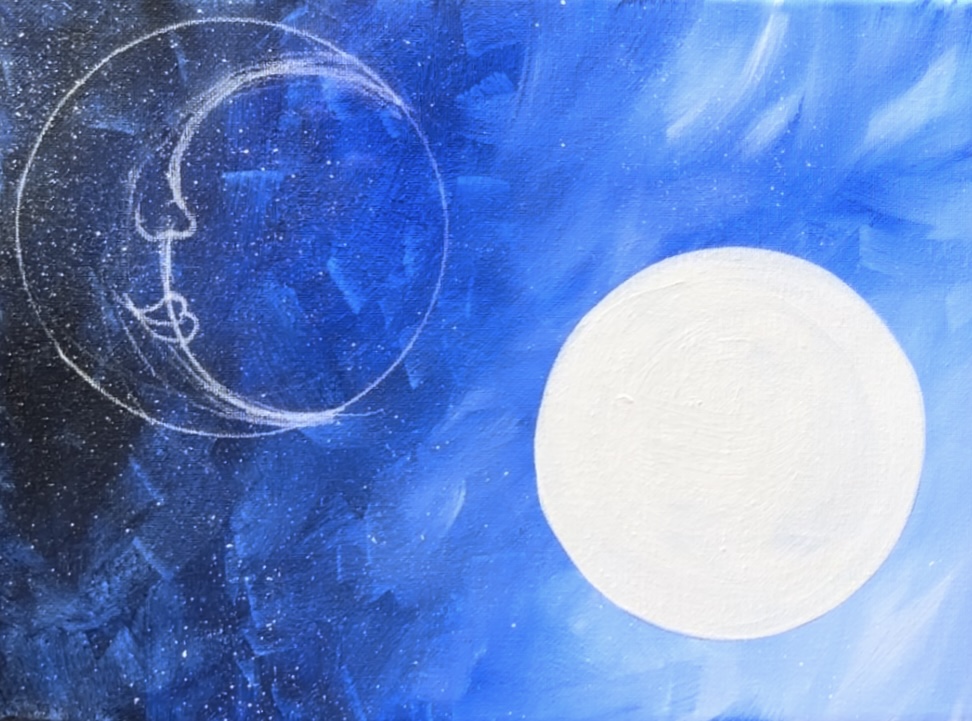
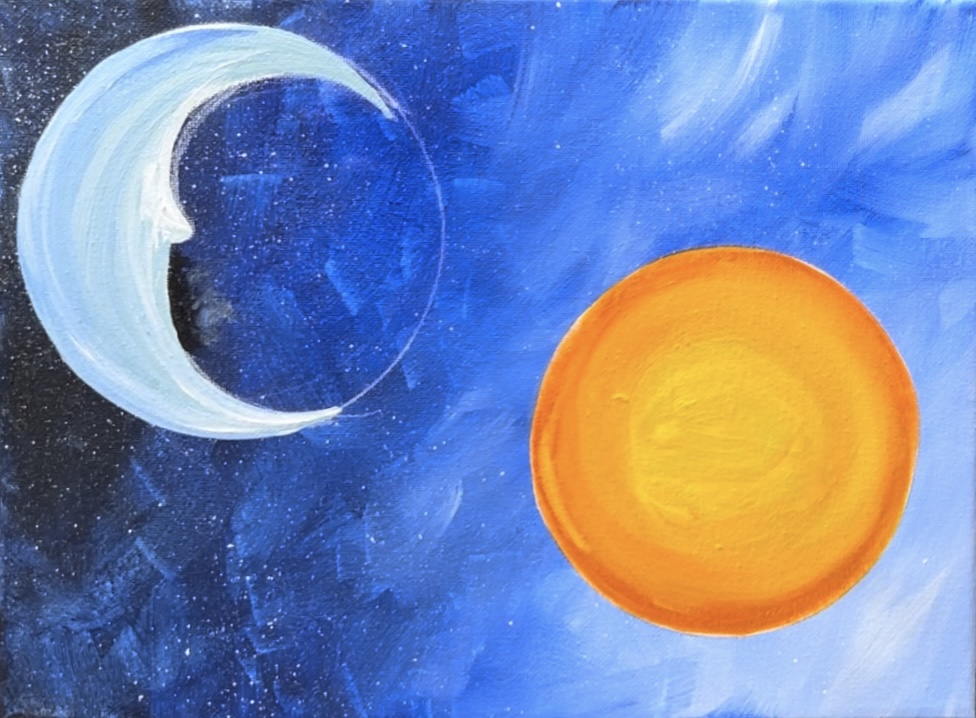
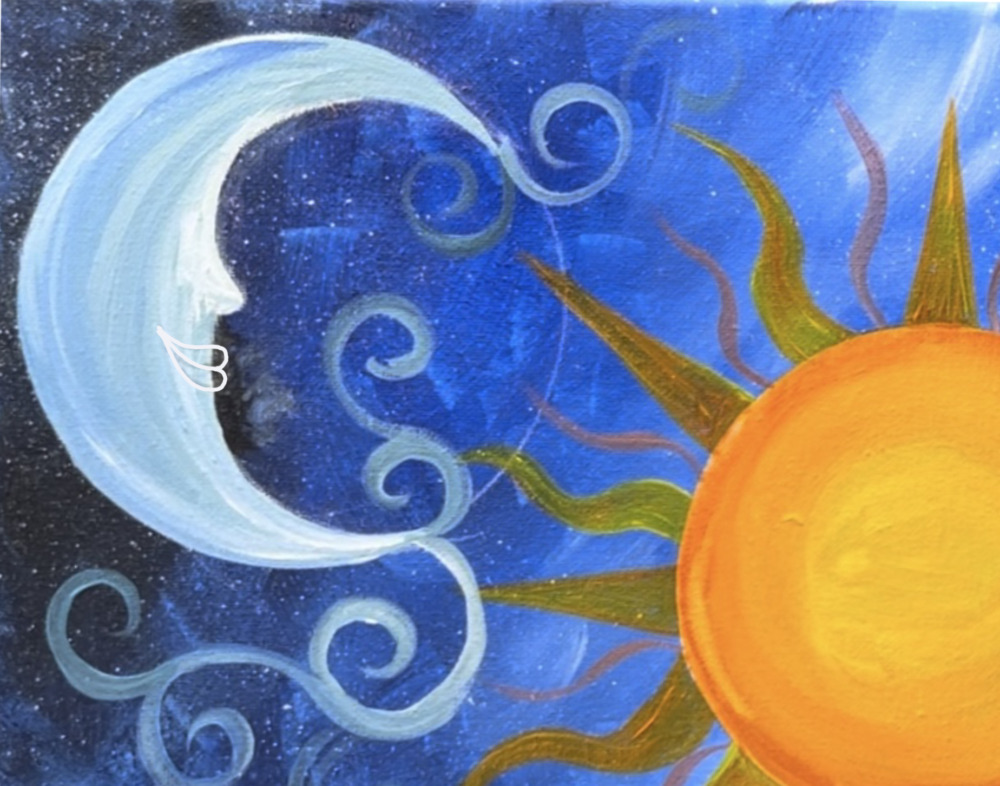
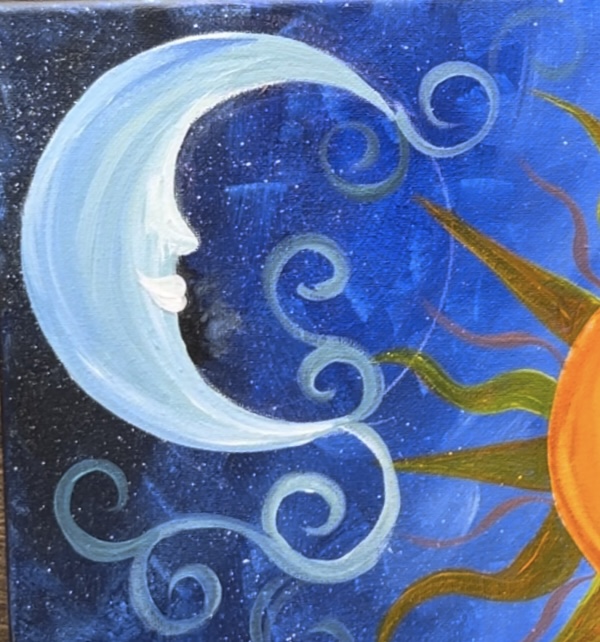
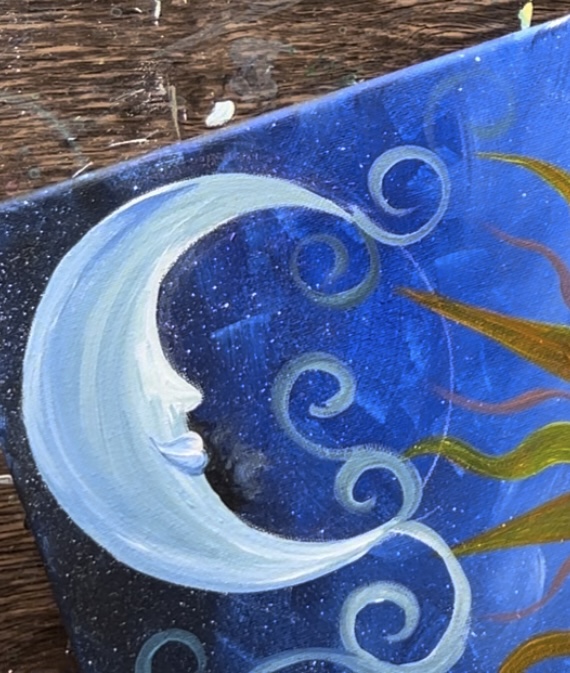
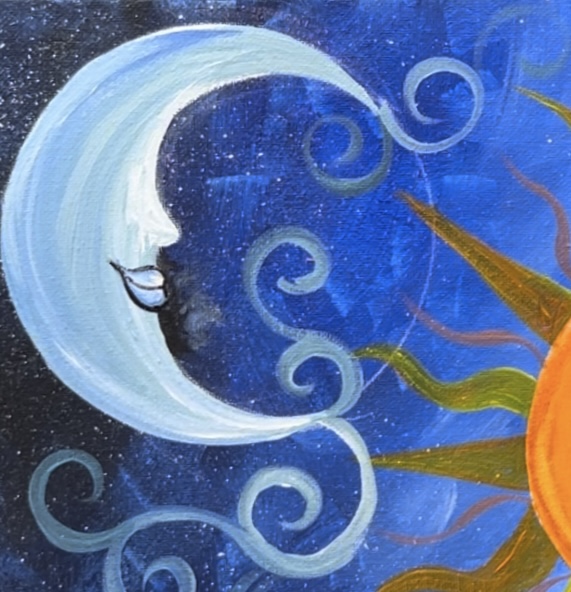
3. Draw Moon & Sun
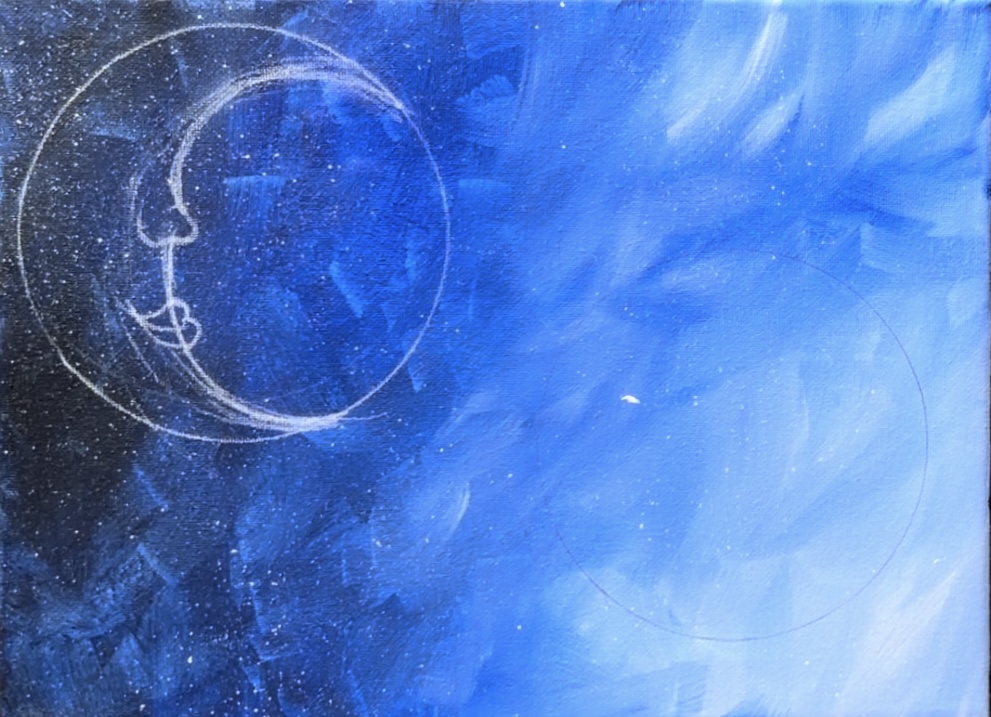
I used a glass bowl to trace the circle for the sun and moon (same size circle for both). This bowl is approximately 4.75″ in diameter. However, you can use something similar size (like 5″ or 4.5″).
Trace the circle for the moon in the upper left corner. Trace the entire circle. I used a white chalk pencil so it would show up against the dark background.
After tracing the circle, trace the circle again on the inside of the moon to form a crescent shape.
You will have a full circle with crescent shape. You can erase the excess circle now or later.
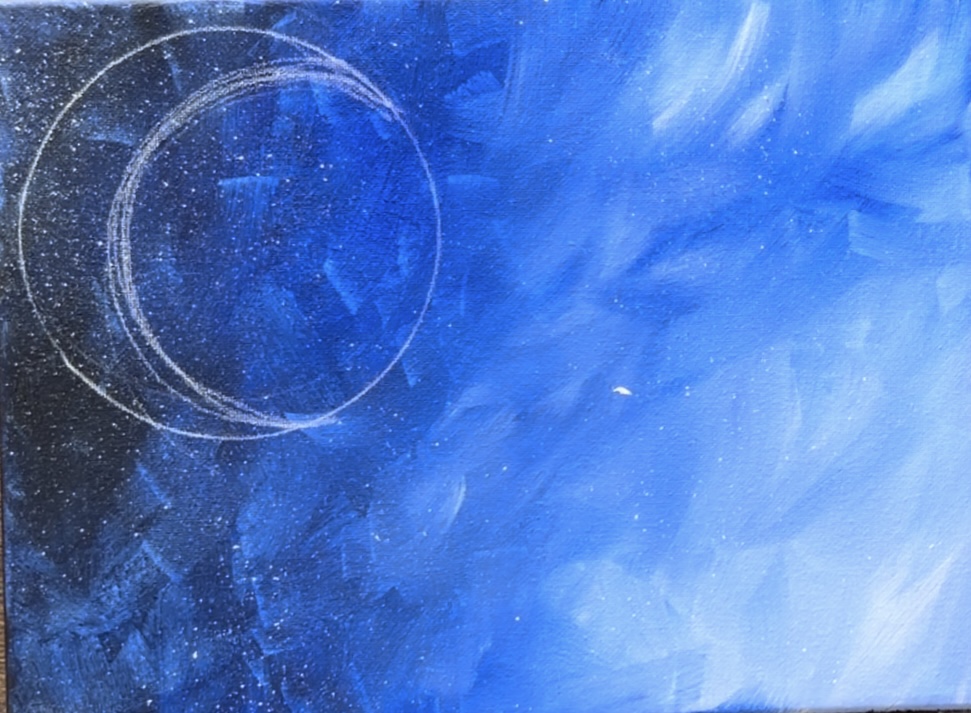
Next, draw the nose for the moon.
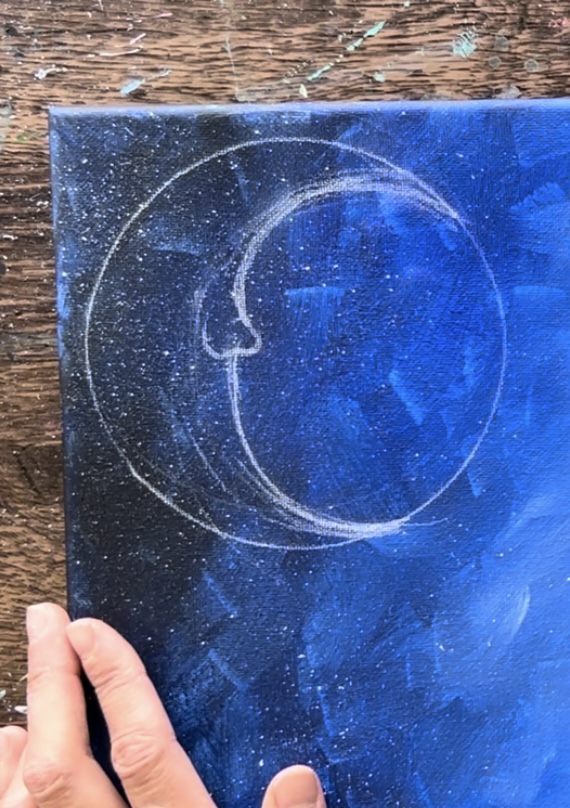
Then draw the lips. The lips are very similar to a heart shape that curves slightly upwards to the left.
Trace a second circle on the lower right corner of the painting.
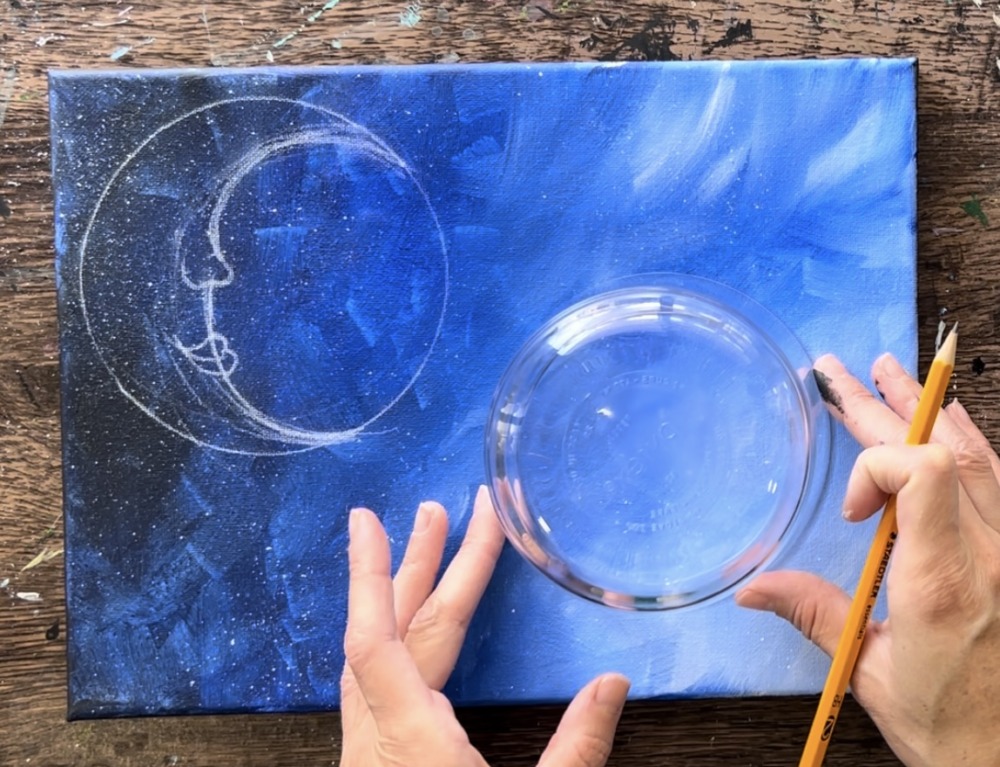
This will be for the sun. No additional details for it need to be drawn at this time.
4. Paint Sun & Moon White
Use a 3/4″ flat wash brush to carefully paint the circle for the sun in a solid coat of “titanium white” paint.
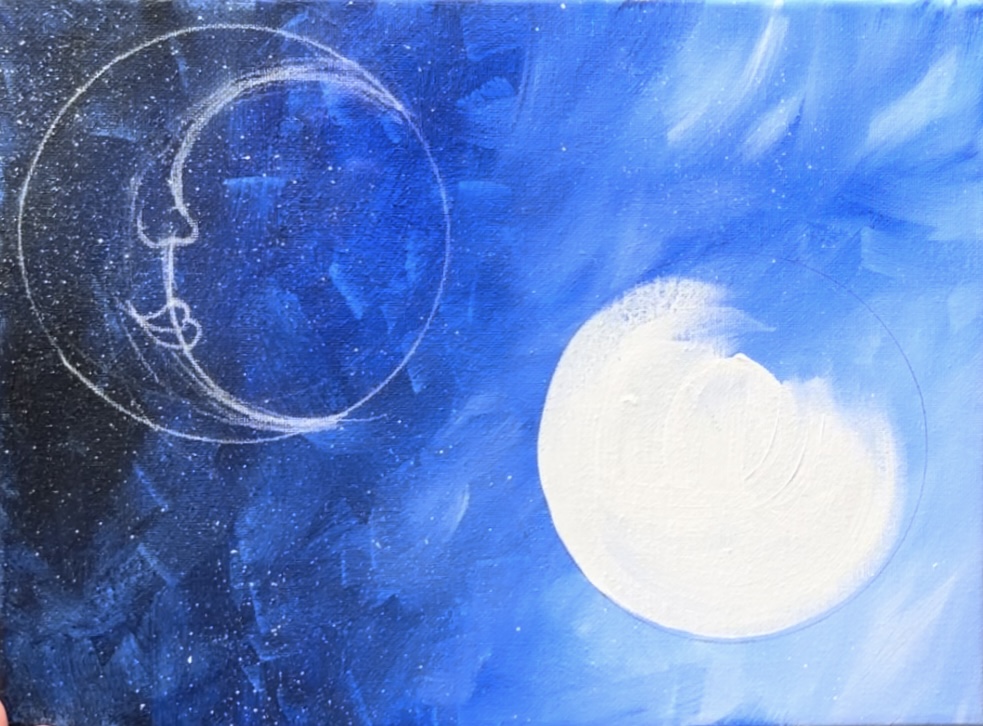
Do the same for the moon as well. Paint the silhouette of the nose and lips in. (Note: I messed up on the lips for this and end up painting over that later)
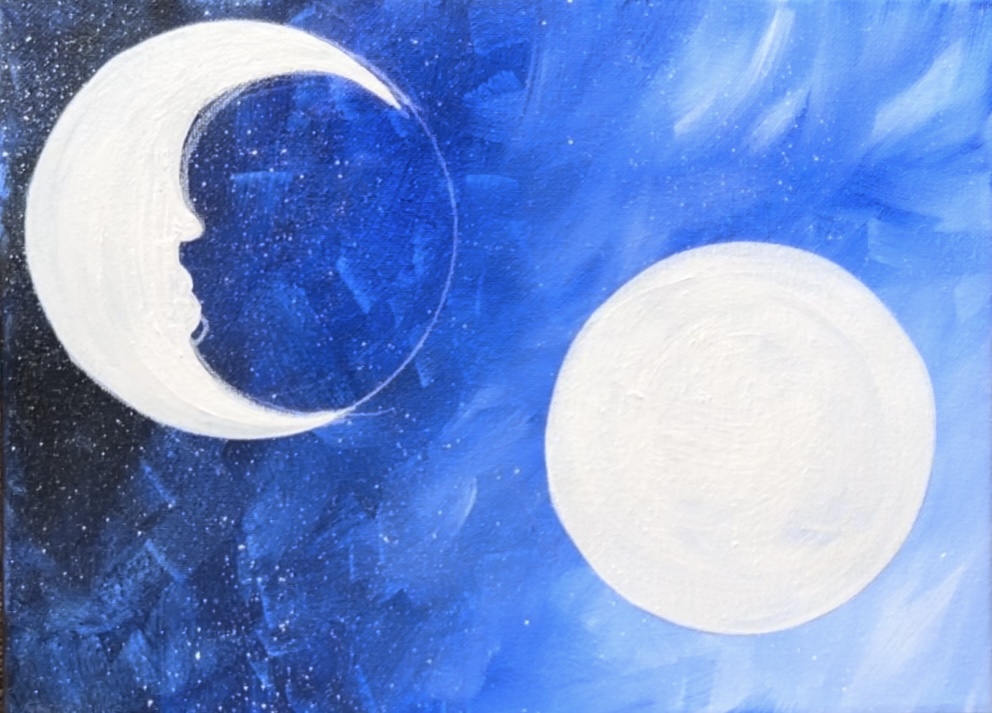
Wait for the white to dry before going onto the next step.
5. Paint Sun
Use a 3/4″ flat wash brush to paint the sun. Load your paint palette with the two colors: primary yellow and cadmium orange hue. Mix both the orange and yellow together. Then start on the outer inside part of the circle.
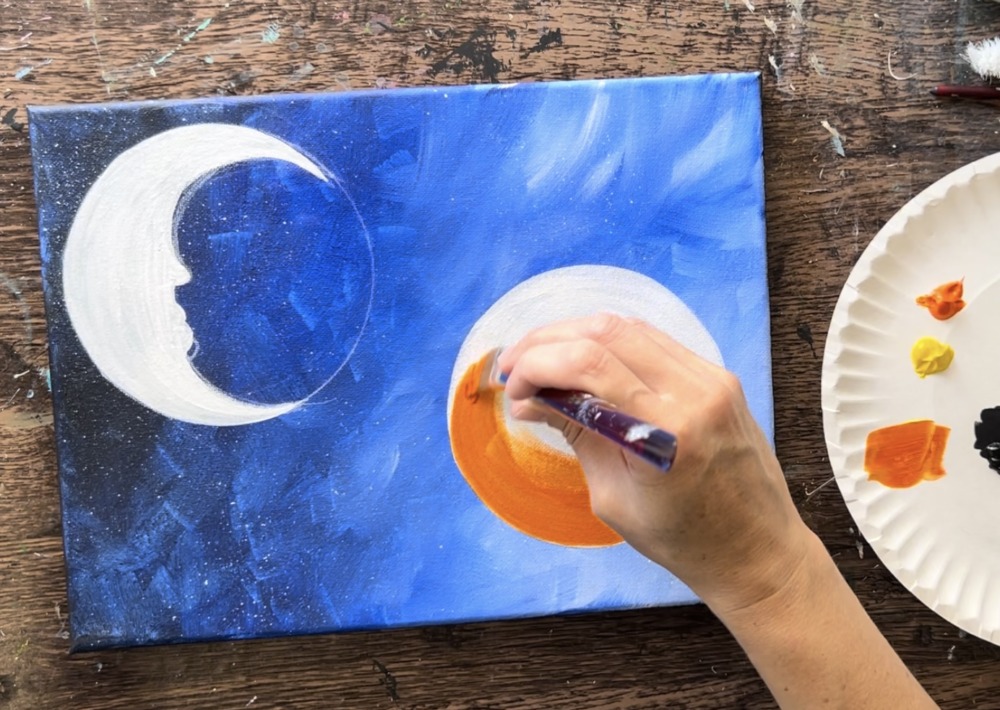
Paint this outer inside part orange. Then gradually add more yellow in the center of the circle.
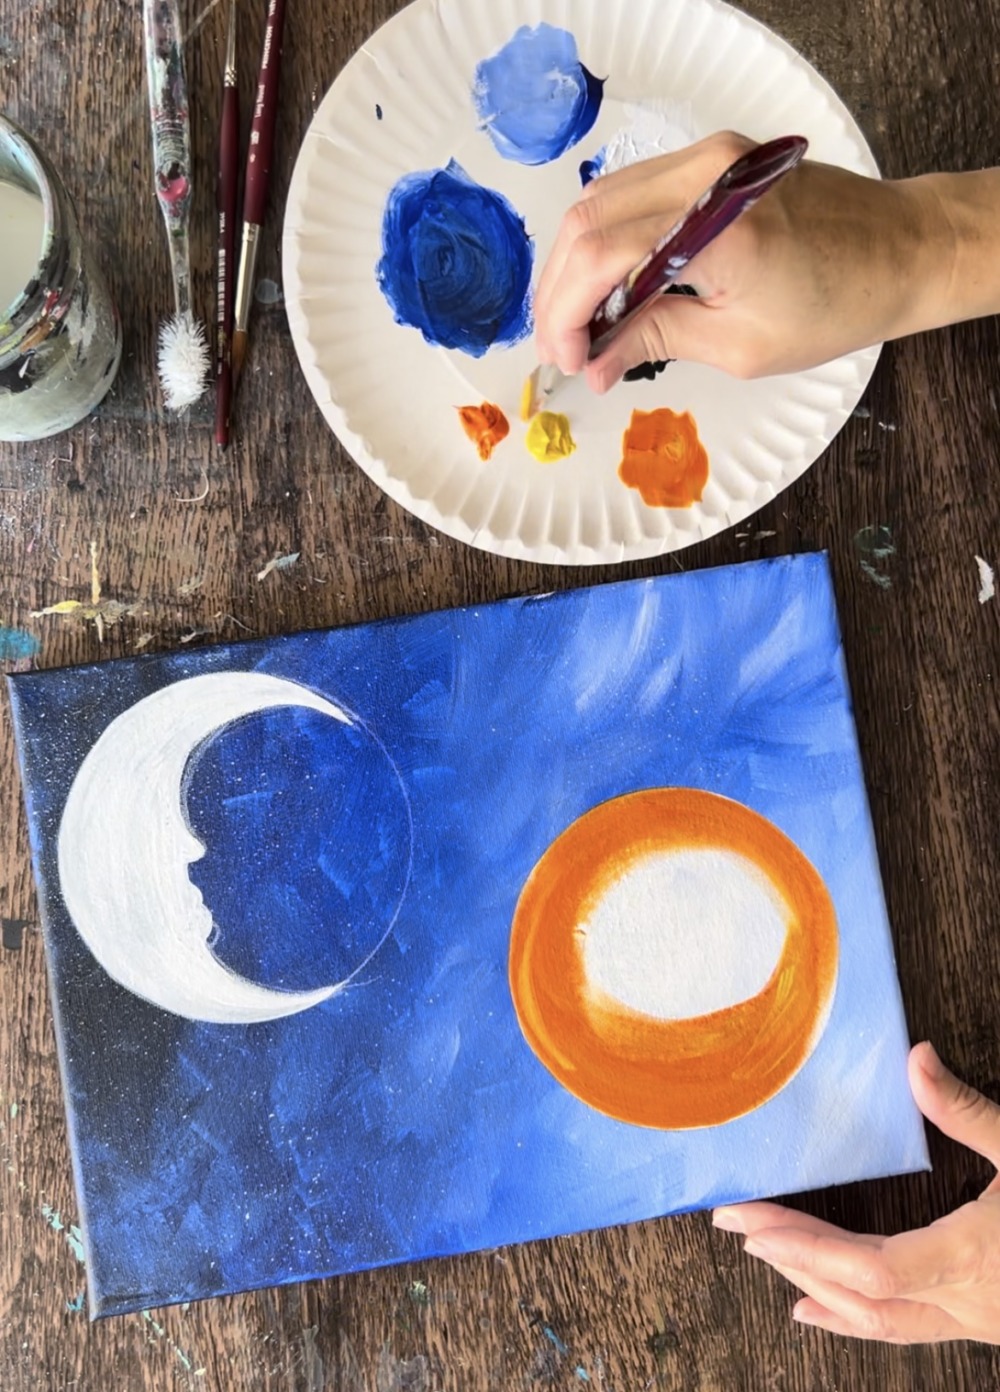
Then sun will be more orange on the edges and more yellow/ light in the center.
Add a little titanium white in the center of the circle so that it is lighter. Blend it in with the rest of the yellow/orange.
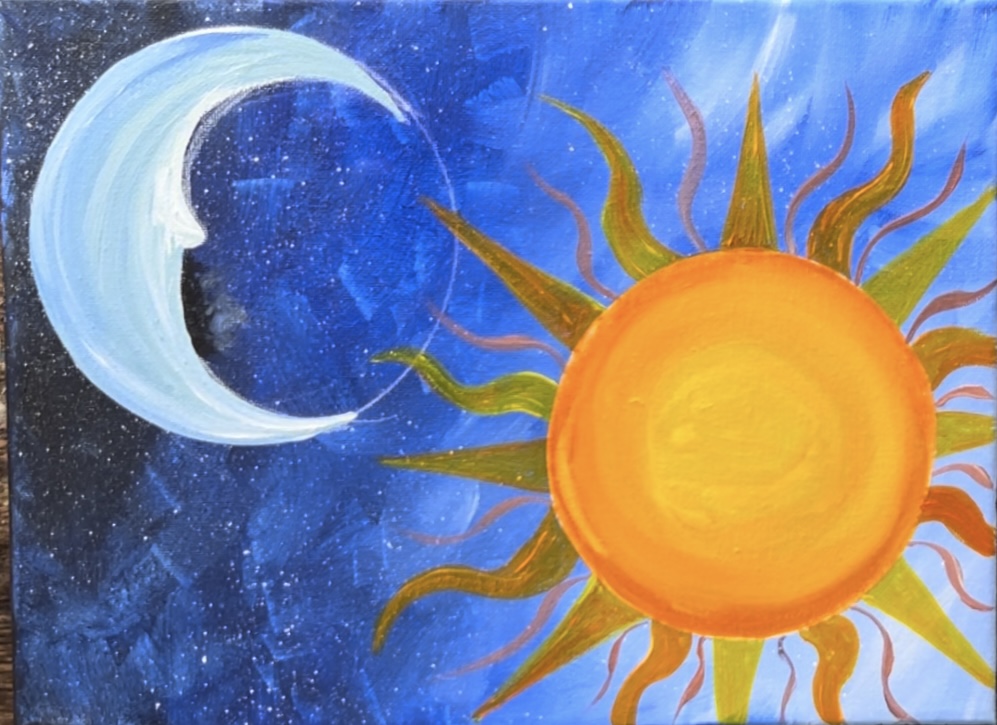
6. Paint Moon
I re-did the lips at this point by painting the same background color over the silhouette shape of the lips.
For the moon color, mix a light blue that has a hint of yellow in it. To make this color, mix 1 part yellow, 3 parts ultramarine blue and 2 parts titanium white. You will create this almost aqua looking color.
Use the #4 round brush to paint the moon. To get the tips of the moon, you may need to switch to the #8 round brush (because it has a fine point on the end of the bristles).
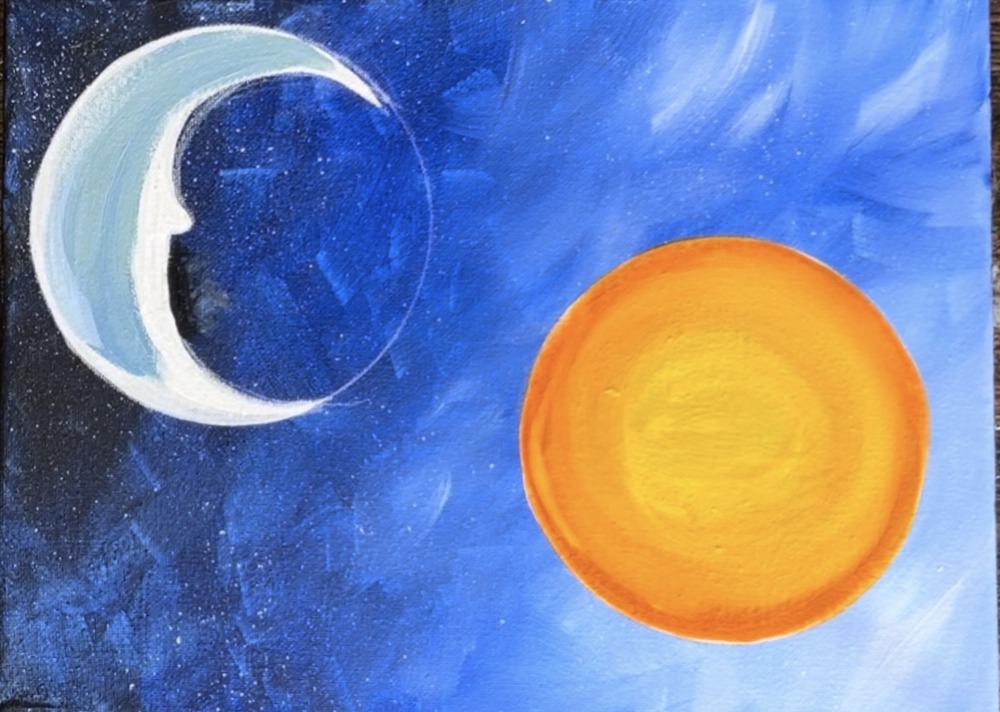
Paint the entire moon with this aqua color. Add some streaks of white and blue in the aqua and let it blend gently. This creates “color variation” in the moon.
7. Paint Rays
Use the #8 round brush to paint triangles for the rays. Mix yellow and orange together (or double load the brush in both those colors). Start at the top of the circle and paint a pointed triangle for the first ray.

Then paint another pointed triangle directly opposite of the first. Paint two more rays on the left and right side of the circle.
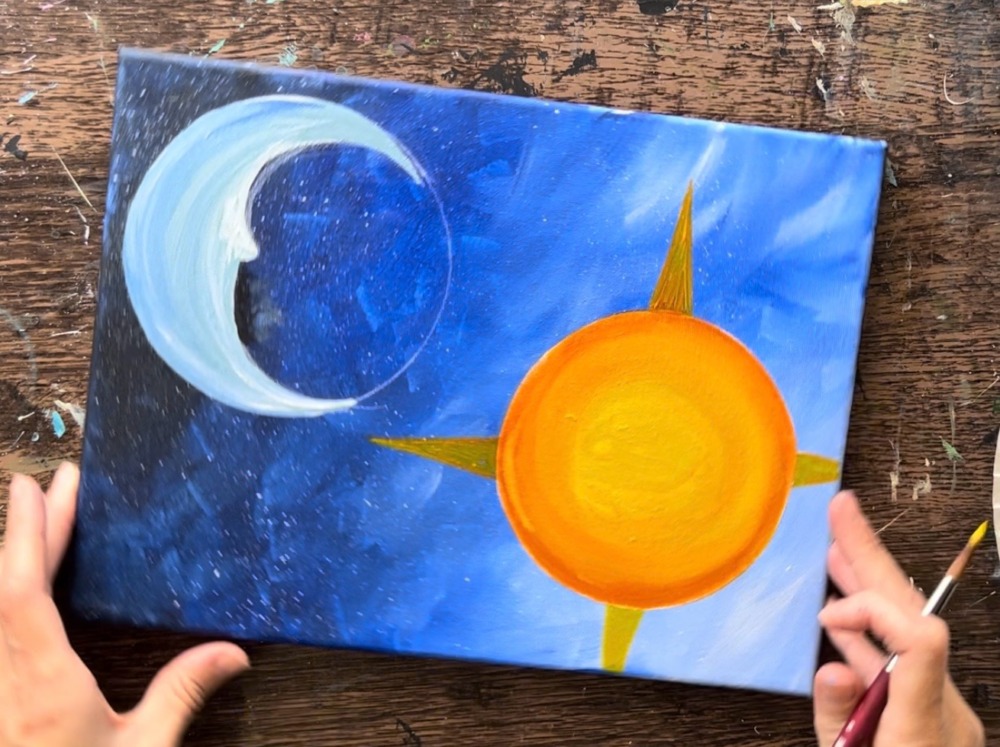
Next, in the center of each of those triangles, paint another set of triangles. These ones are going diagonal.
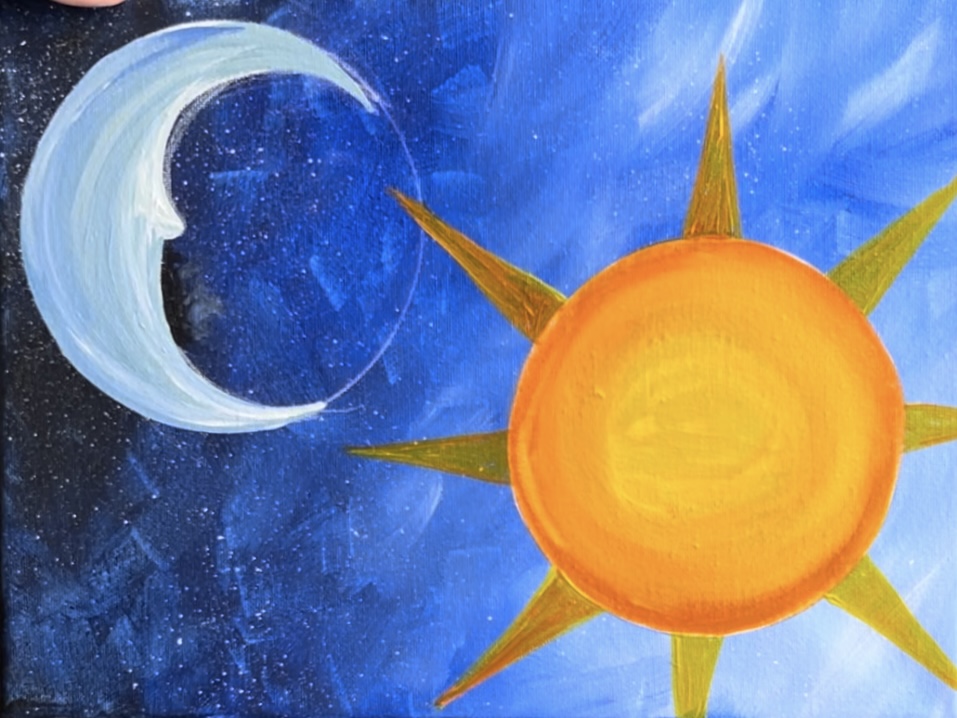
Then paint wavy ray shapes. These are just like the triangles (they go to a point) but instead, they make an “S” formation. Do this in the center of each of the gaps you have from the triangles.
Note: the “color variation” in the rays comes from loading the brush in different amounts of the orange and yellow.
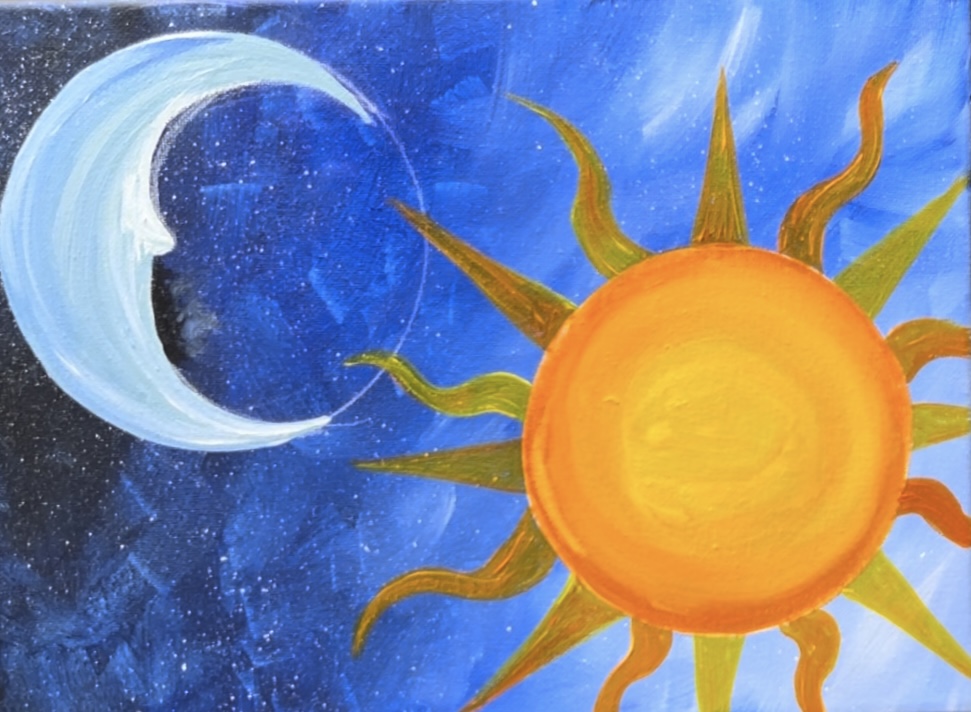
Paint another set of rays. This time, I mixed a magenta looking color on my palette by mixing 1 part blue, 2 parts orange and 1 part white. Use the #8 round brush to paint a thin wavy line between each of the triangles and wavy triangles.
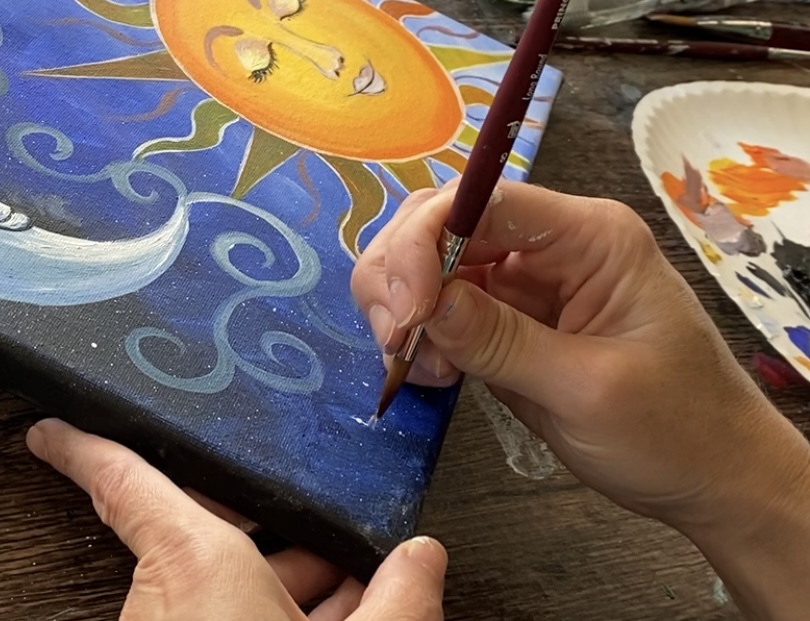
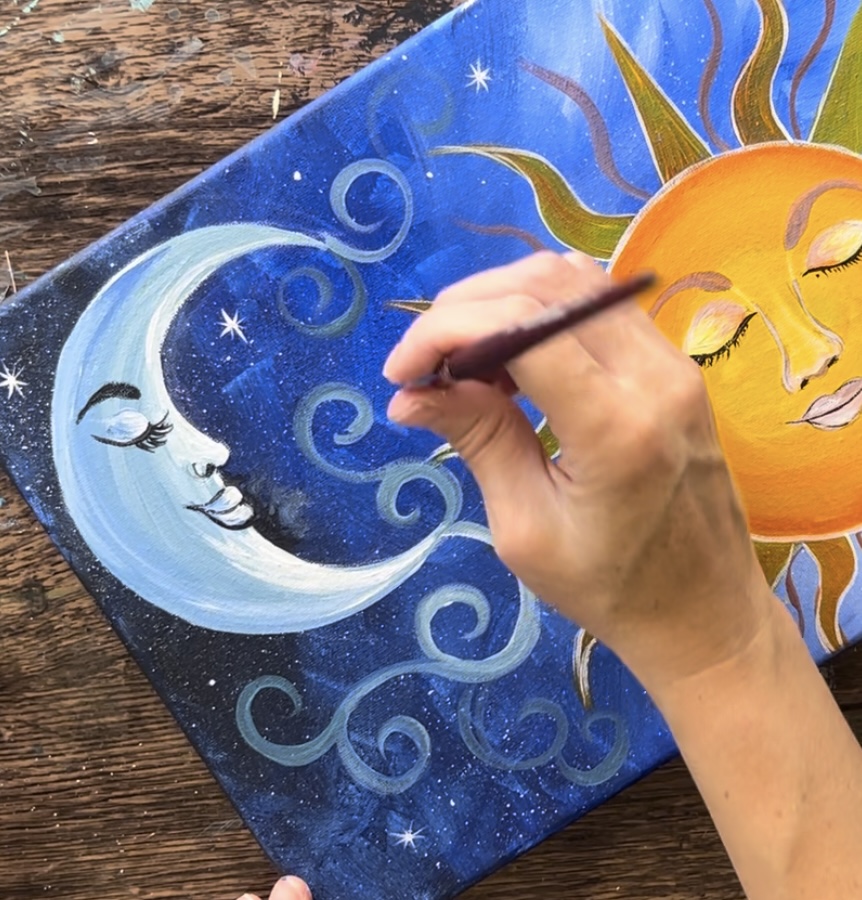
8. Paint Spirals On Moon
On your paint palette, mix the aqua color again (same color you used in the moon). You want to make different variations of that color. So add more blue and more white into some of it as you are loading your brush.
Use the #4 round brush to paint various sized spirals that extend from the tip of the moon. These spirals curve and go different directions.
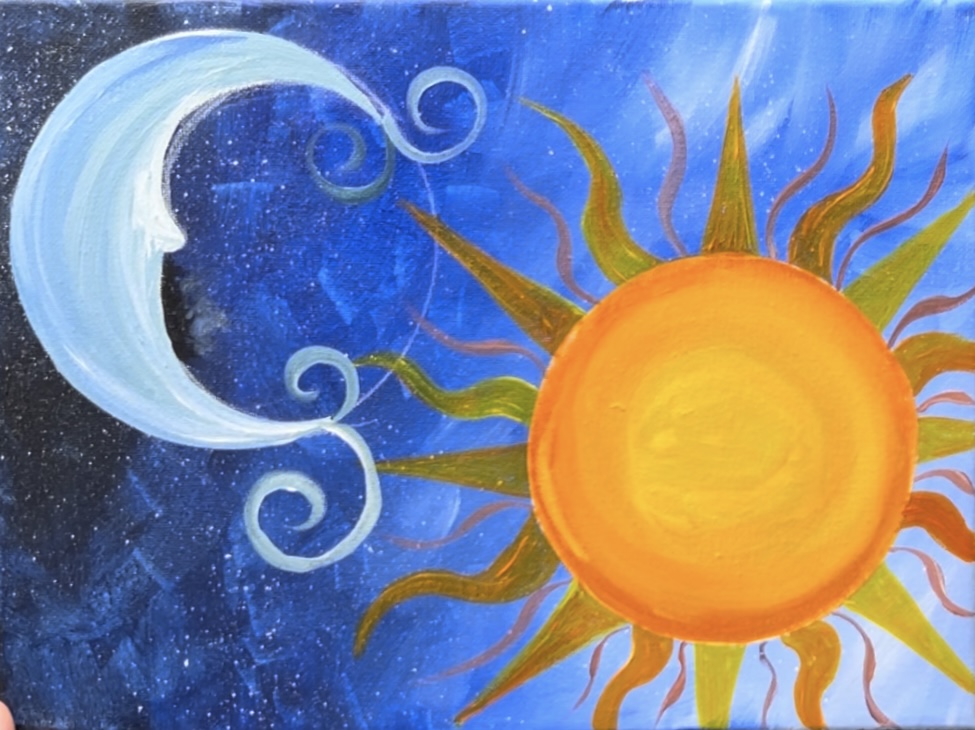
As you paint each spiral, make some of them darker and some lighter. Keep extending them outwards and around the moon on the dark night side of the painting.
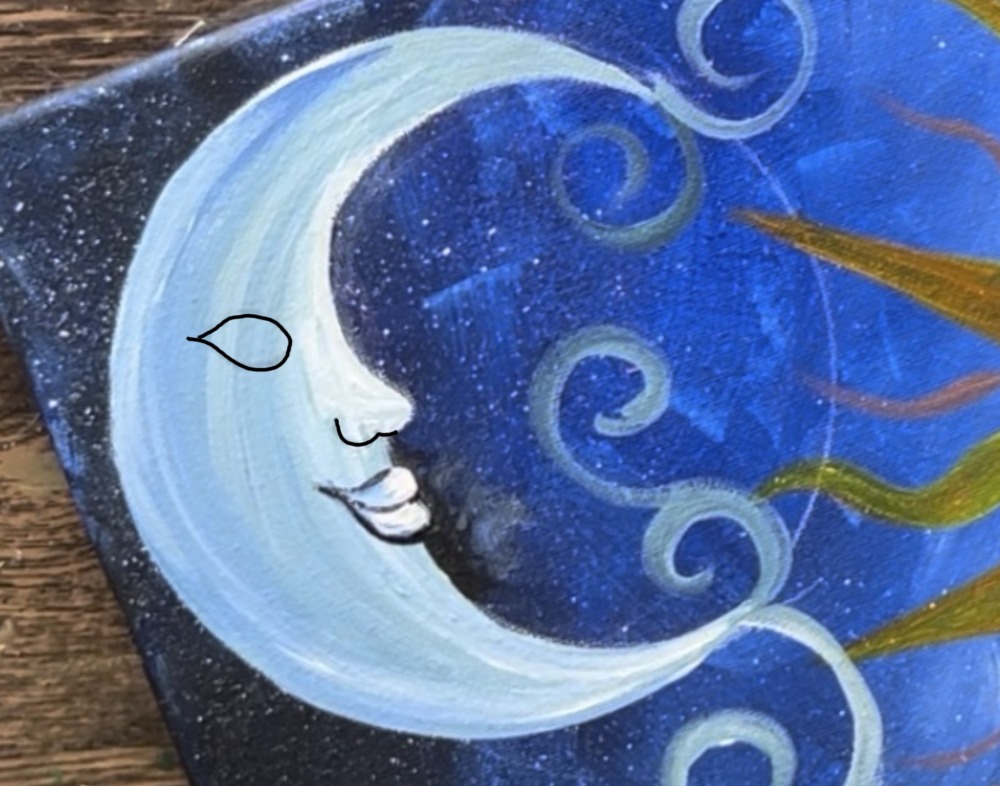
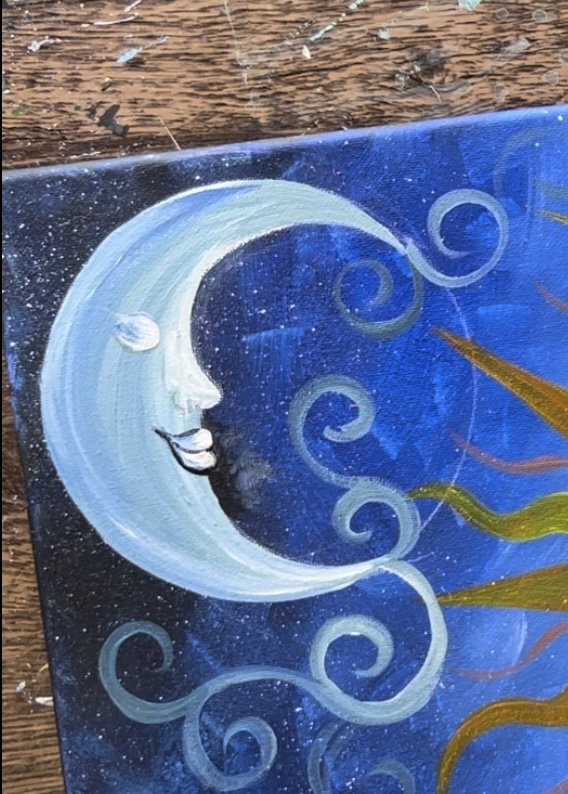
9. Paint Face On Moon
I recommend using a pencil to draw the lips out. Note: I painted over mine to redo them in this step. Yours may already be still drawn out from earlier!
The lips are like a heart shape that slightly curves upwards where the point is.
Next, paint the lips in titanium white. Leave a slight gap in the center where the top and bottom of the lips meet (that smile line).
Then, add a tiny amount of blue to the left side of the lips and blend in with the white. You want the right side of the lips to be lighter (more white) and blend to more blue on the left. (Note: I mixed white with the ultramarine blue so it was more of a medium blue)
Then outline the outer shape of the lips with mars black. Outline the “smile line” as well.
Draw the left side of the nose as well as the eye shape. The eye shape goes slightly up at an angle.
Use the #4 round brush to paint the eyelid white. Add a tiny bit of blue on the left side and blend it in.
Next, use the #8 round brush and mars black to paint the bottom outline of the eye. Paint the little eyelash lines on the left side of the eye. You can also do this step with a black paint pen to get the fine details! Paint the eyebrow so that it is thick on the right side and goes to a point on the left side (drawing this with pencil first might be helpful).
Outline the left part of the nose and make a little black oval for the nostril.
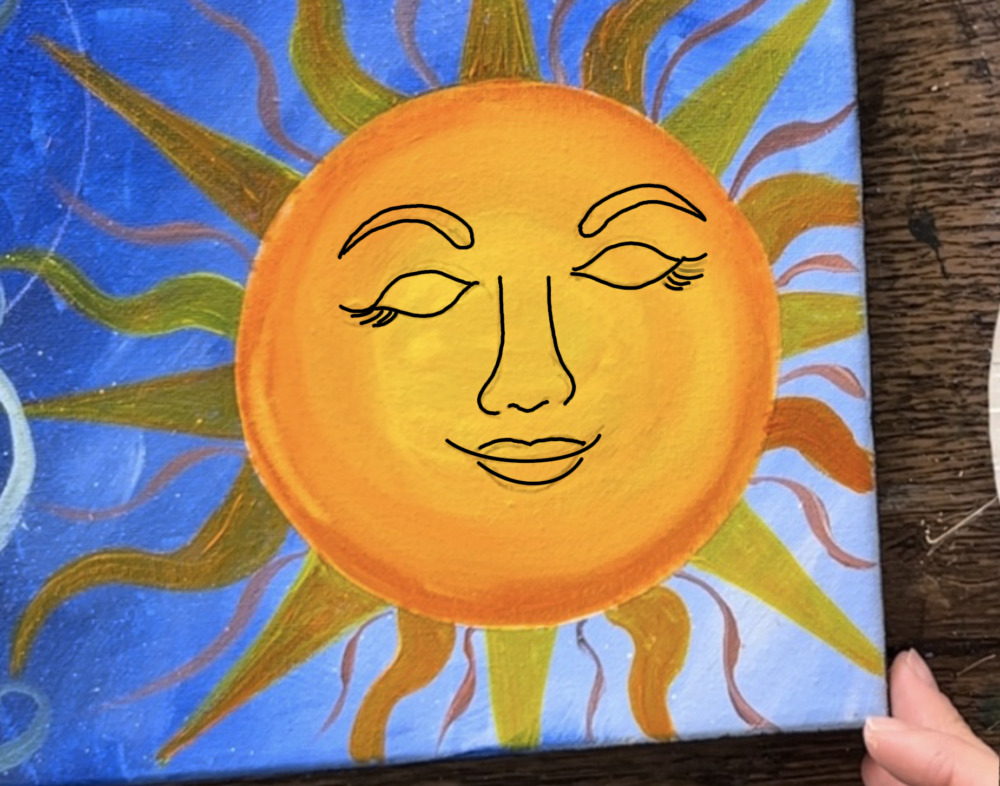
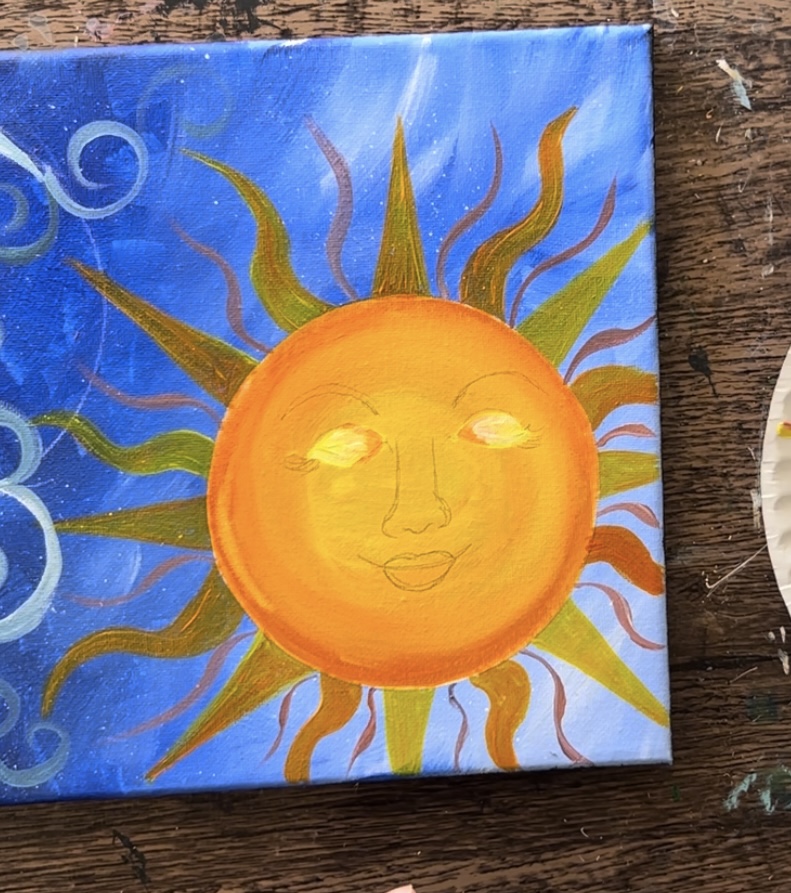
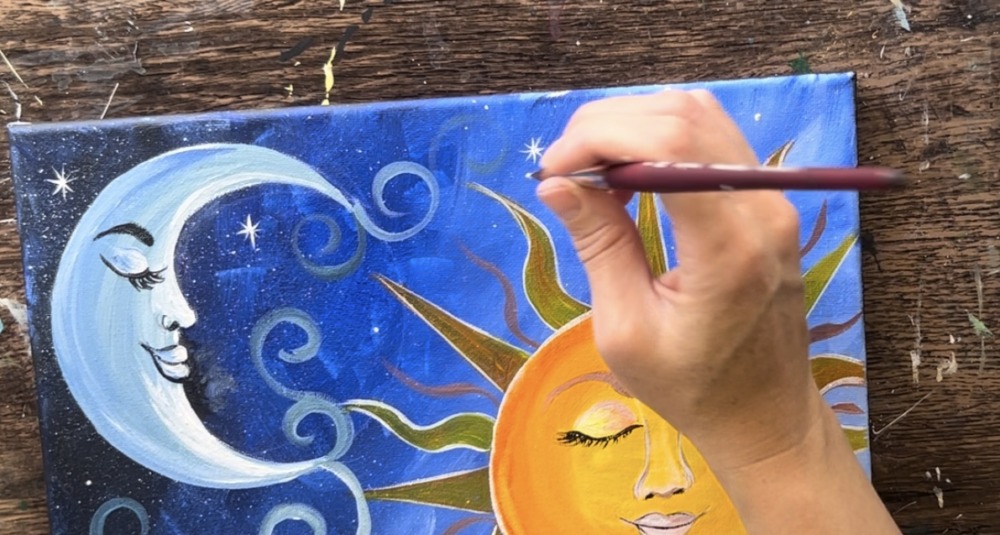
10. Paint Face On Sun
Use a pencil to draw the face for the sun. I started on the bottom for the mouth. Draw a curved “smiley face line” and the bottom and top of the lips.
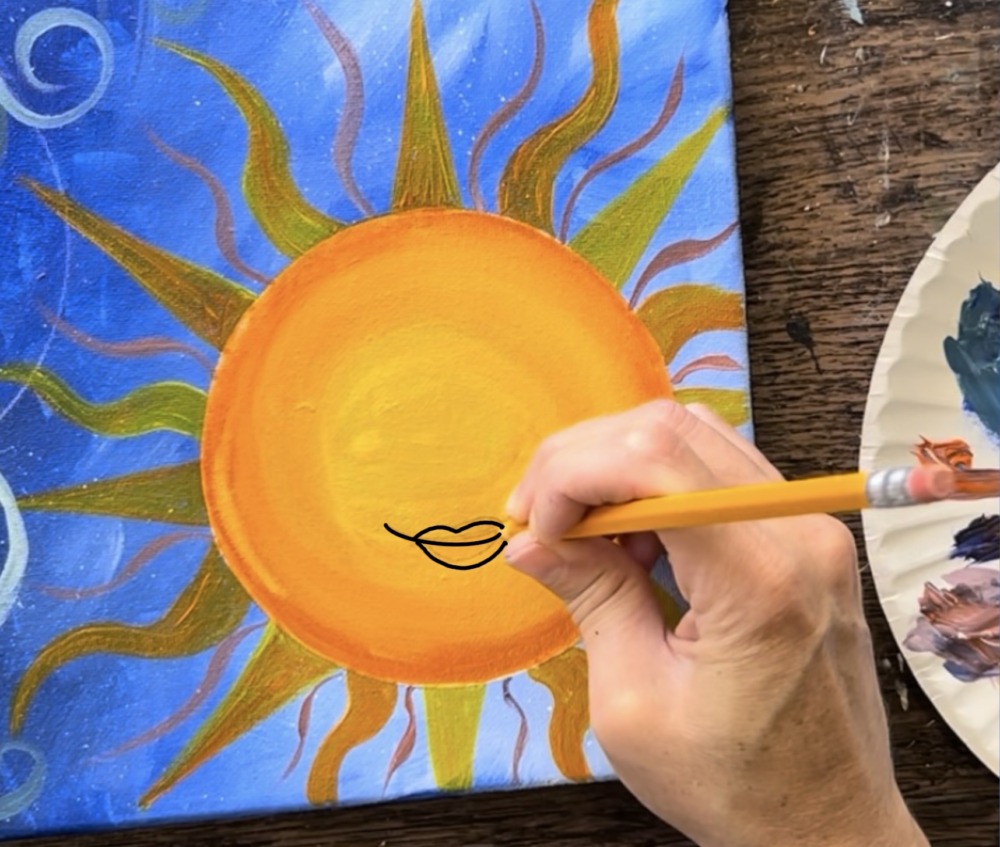
Next, draw a nose.
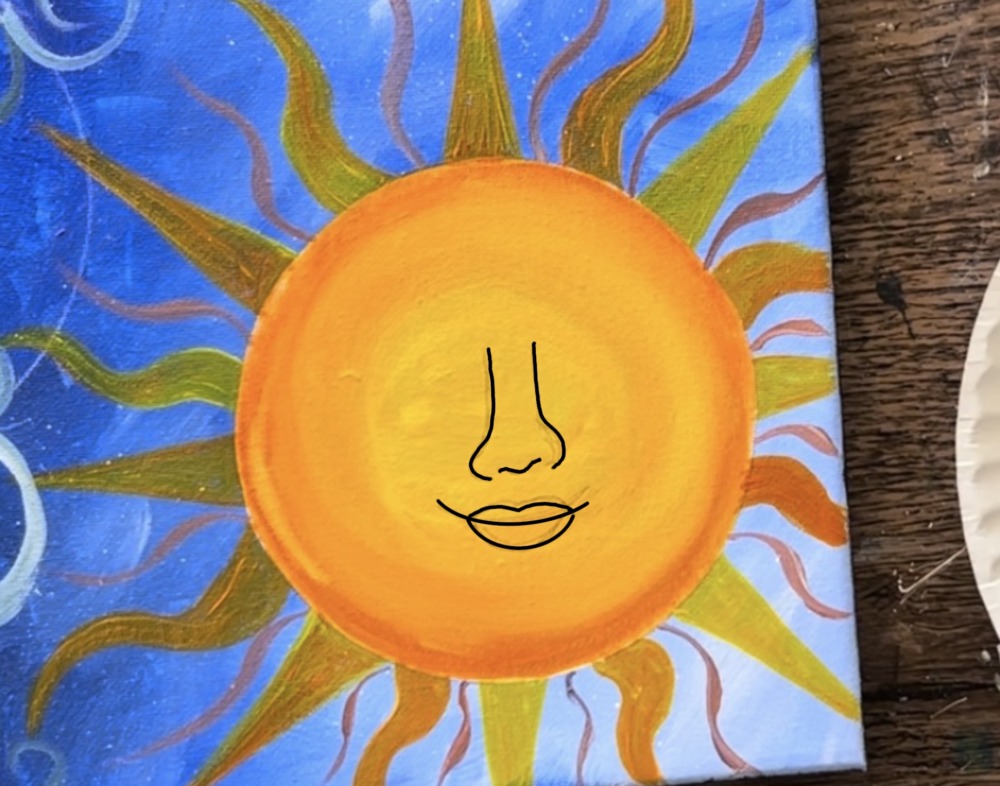
Draw the eyelids and eyebrows.
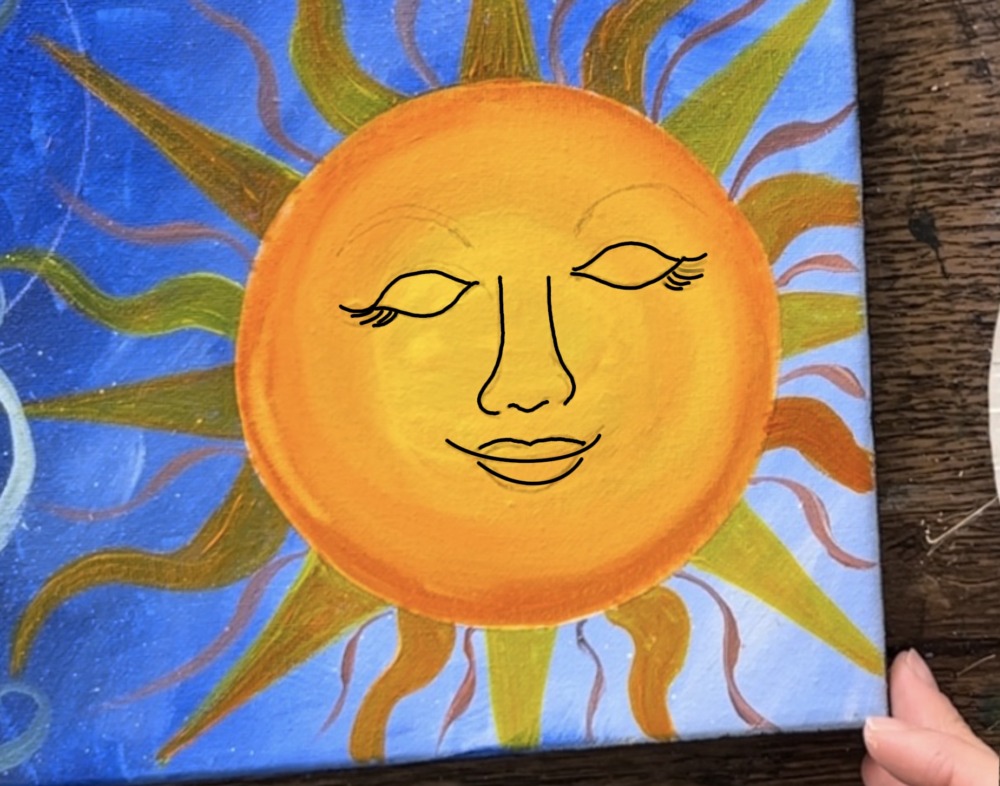
Just like with the moon, you’ll want to paint the eyelids, mouth and nose a similar color to the base color. In this case, we are painting the eyelids a lighter version of the color of the sun. For this, I mixed white with yellow to get a light yellow. Then paint the entire eyelid this color.
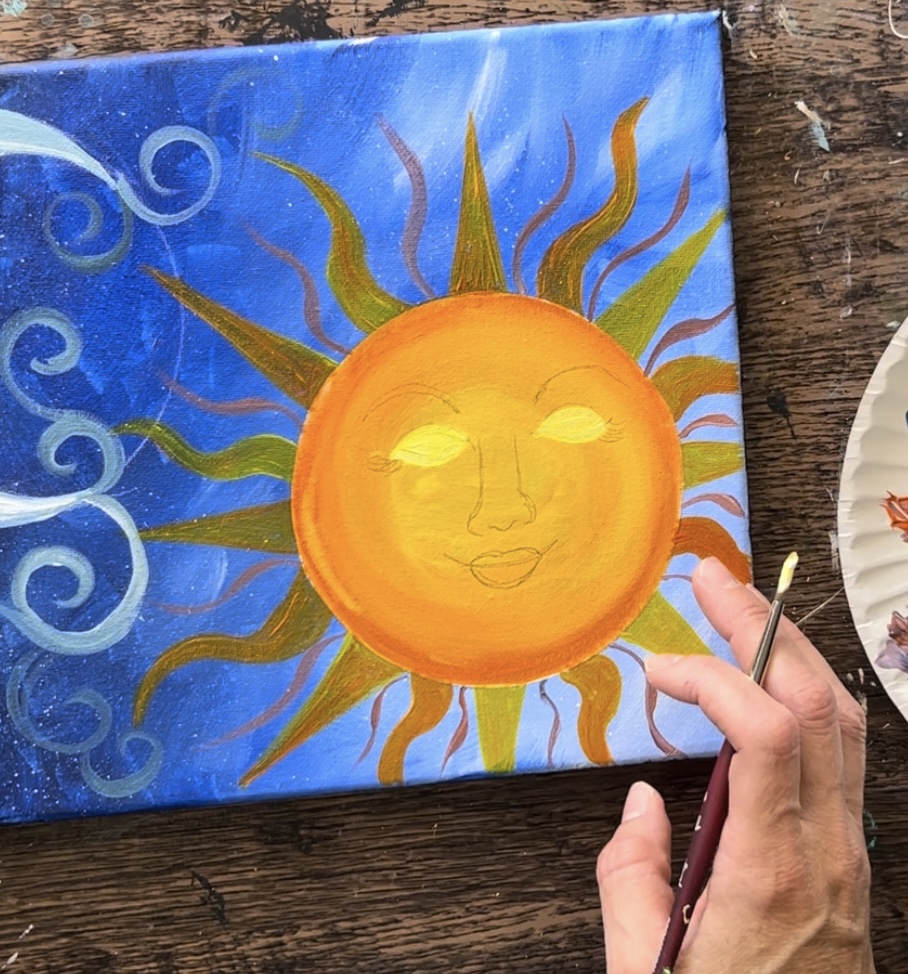
Optional: blend a little orange on the left and the right of the eyelids so it is darker on the sides closer to the nose.
Use a #8 round brush and black paint to paint the outline of the eye. This is just the bottom curved line. Then paint eyelashes going outwards toward the right.
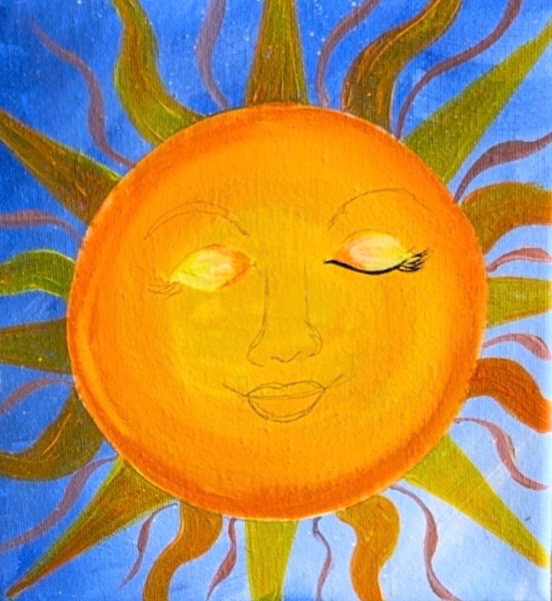
Repeat the lower eyelid outline on the left and eyelashes that go the opposite direction.
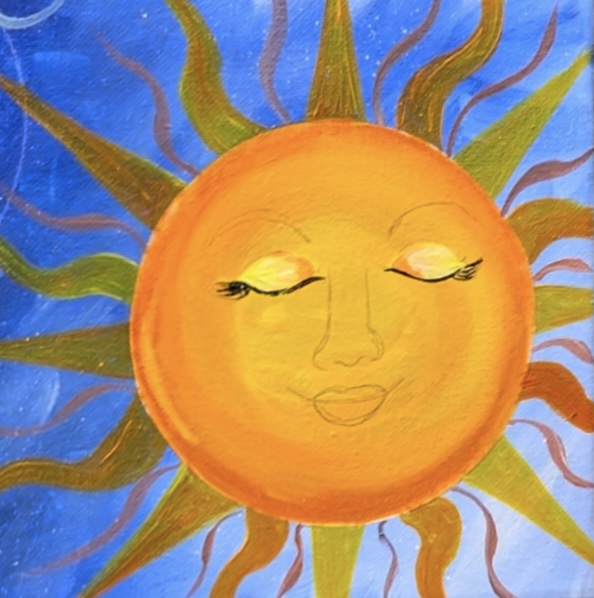
Optional: I made the eyelashes go all the way across but smaller on the rest of the outline.
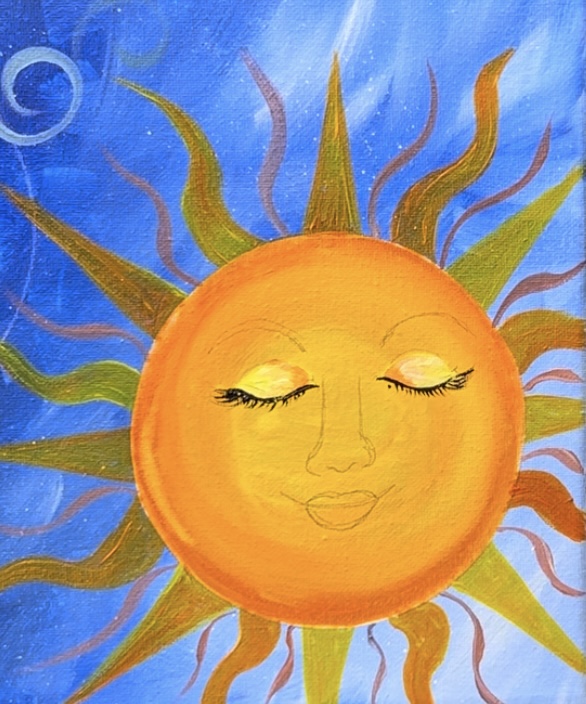
For the eyebrows, mix the same color you used for the smaller wavy Sundays (that maroon/ mauve color we mixed). That color is made by mixing 2 parts orange, 1 part blue and 1 part white.
Use the #8 or #4 round brush to paint the eyebrows. Then use the #8 round brush to outline the shape of the nose and the shape of the mouth. This is a very thin and loose outline.
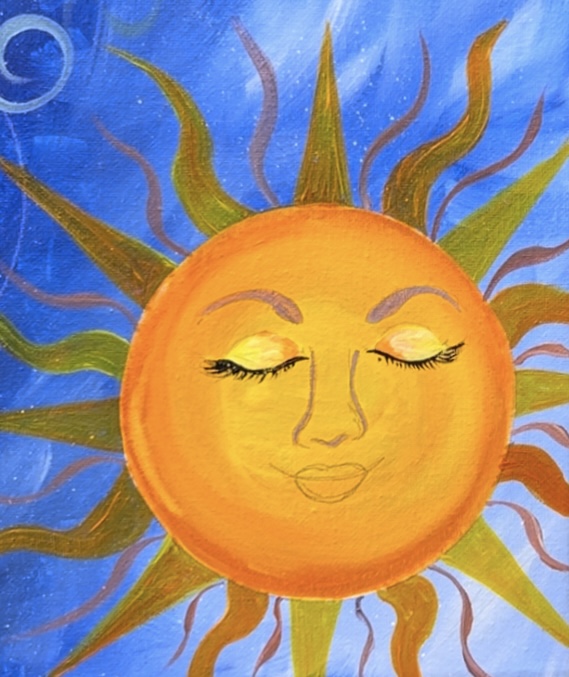
Next, take that same “mauve” color and add more white to it to lighten it up. Paint the top and bottom of the lips but leave the “smile line” dark. You can also outline this smile line in the next step.
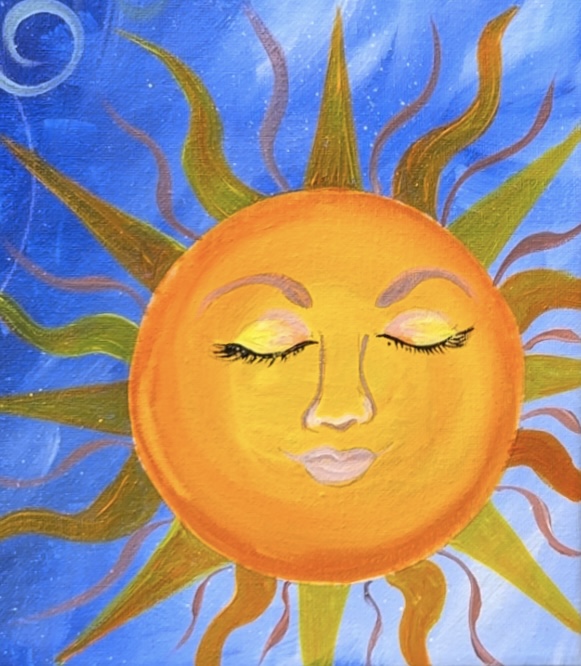
Use black and the #8 round brush to outline the middle curve “smile line” between the lips. This is a very thin black line. You can also outline the lip shape on the top and bottom.
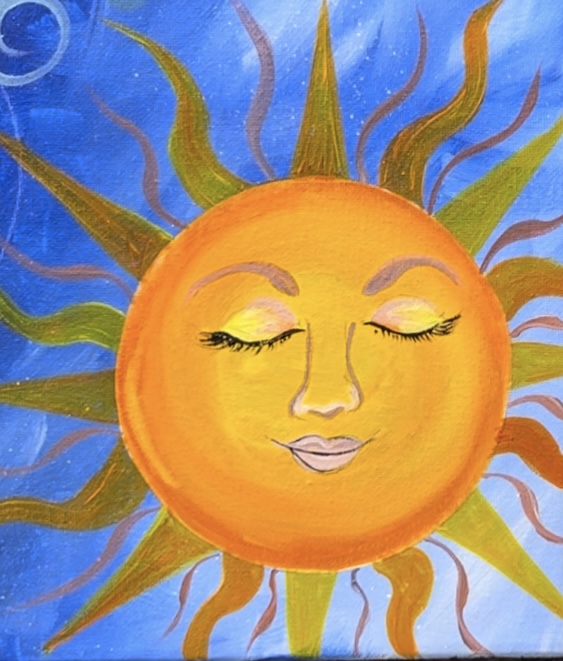
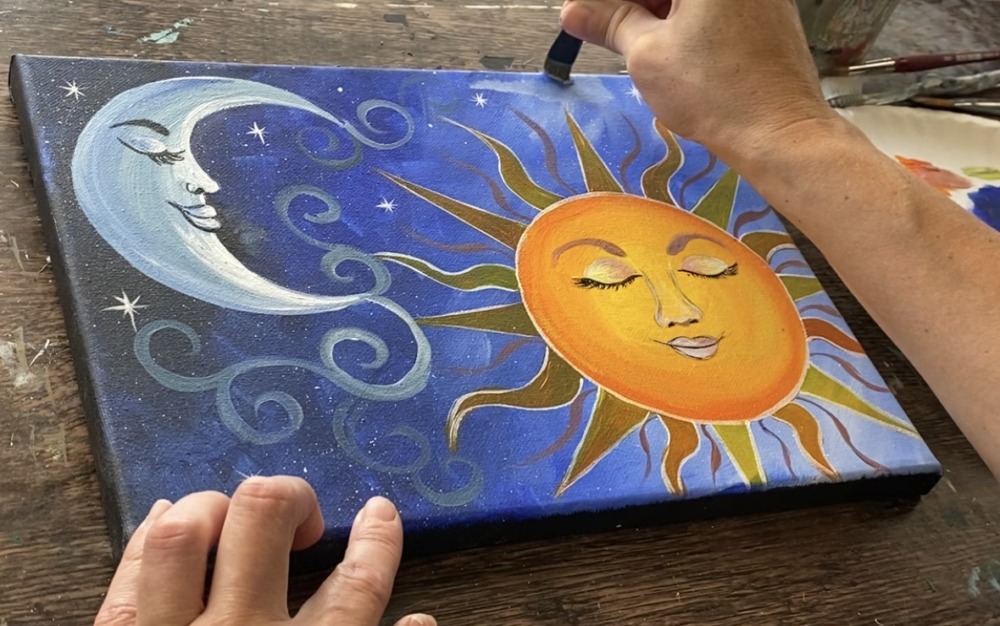
11. Outline Sun Rays (optional)
This adds some pretty contrast and a decorative element to the Sundays. Use the #8 round brush and titanium white to outline the sun rays. I did not outline the smaller/ thinner sun ray (just the larger triangles and wavy triangles).

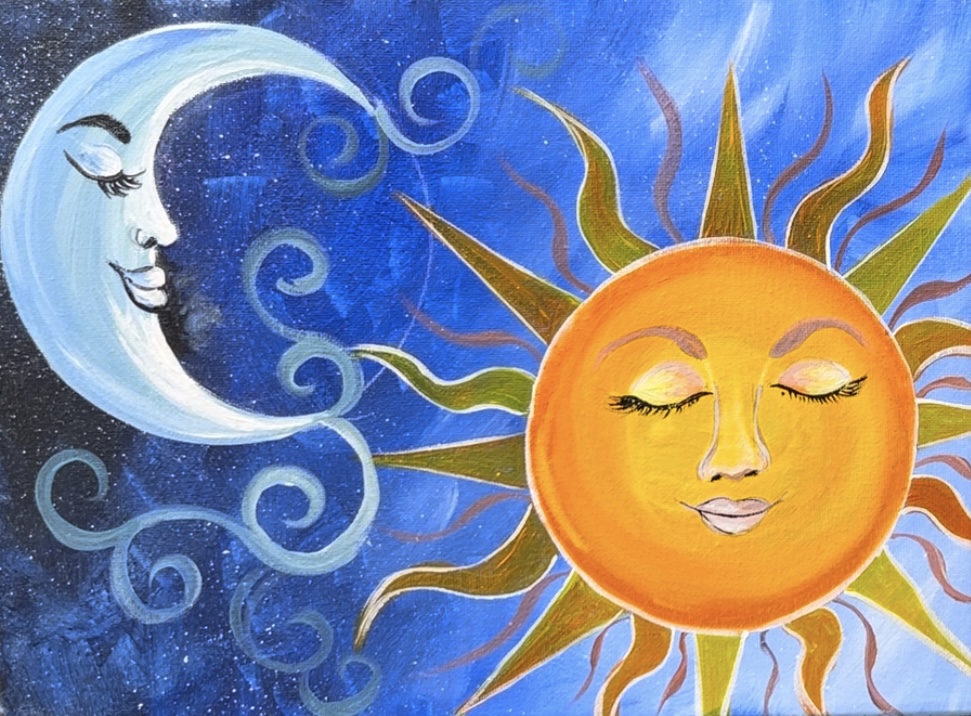
12. Paint Stars
Use the #8 round brush and titanium white to paint stars. What I usually do is paint a tiny white dot first. Then I drag paint from the dot up and down and then left and right to form a +. Then I do a set of diagonal lines for form an asterisk/ star.
Paint various sized stars all throughout the sky area. You can even do stars on the “daylight” side of the sky.

13. Paint Clouds (optional)
The clouds in this painting are optional! I think it still looks good without the clouds but I decided to add them since I didn’t want to stop the painting!
I use a #12 bright brush for clouds and I paint them “dry brush style”. This means only a small amount of paint is loaded on the brush and some of the paint is wiped off for a translucent/ see through look.
Start by mixing white with a small amount of the “aqua color” you used for the moon. This first layer of cloud will look dark because we will add lighter layers on top of it.
Paint a flat cloud on the top right area of the canvas above the sun. Then paint a cloud area in the lower left area of the canvas under the moon. Use the top of the brush to paint rounded paint strokes that form the shape of the cloud.
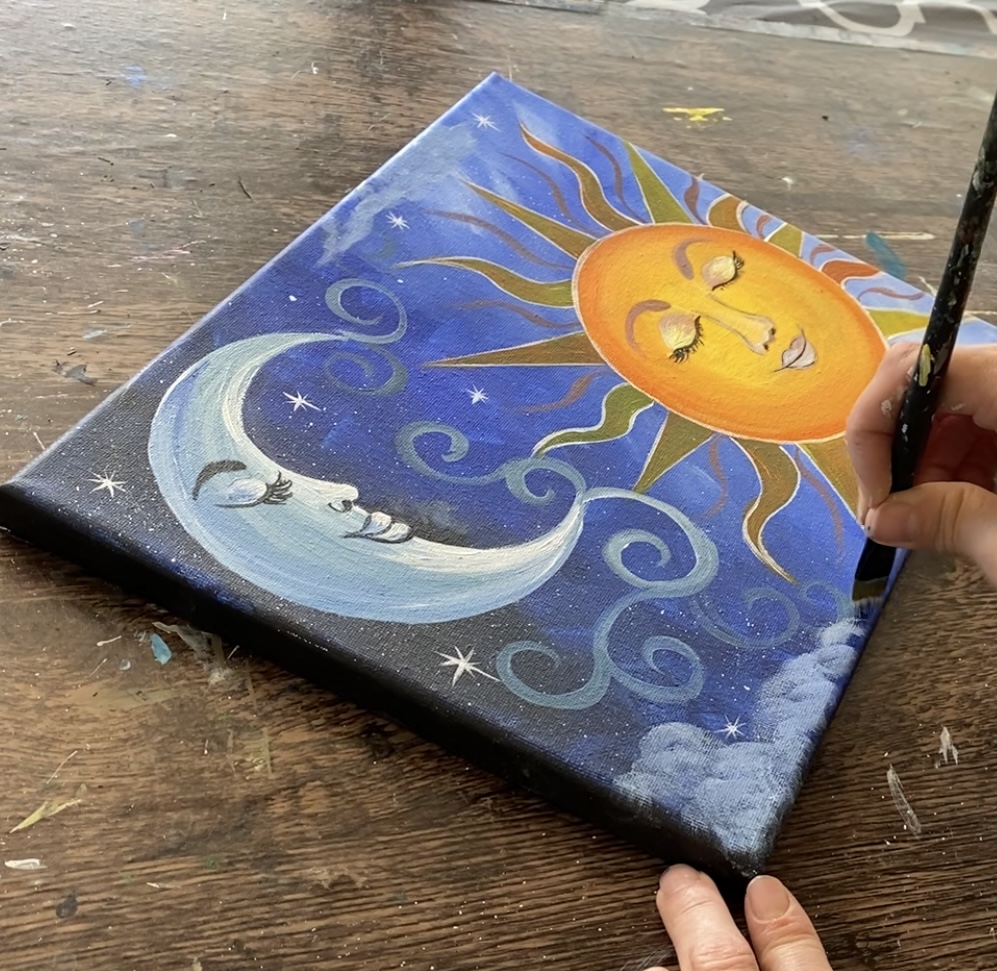
You can still see the first layer (background) through this cloud layer because it is very thin.
Next, highlight the clouds. Load the brush into a tiny bit of white paint (without rinsing the brush). Then paint just the top portion of the cloud on the lower left. This highlights the clouds and gives them depth.

I added a few more flat clouds throughout the background.
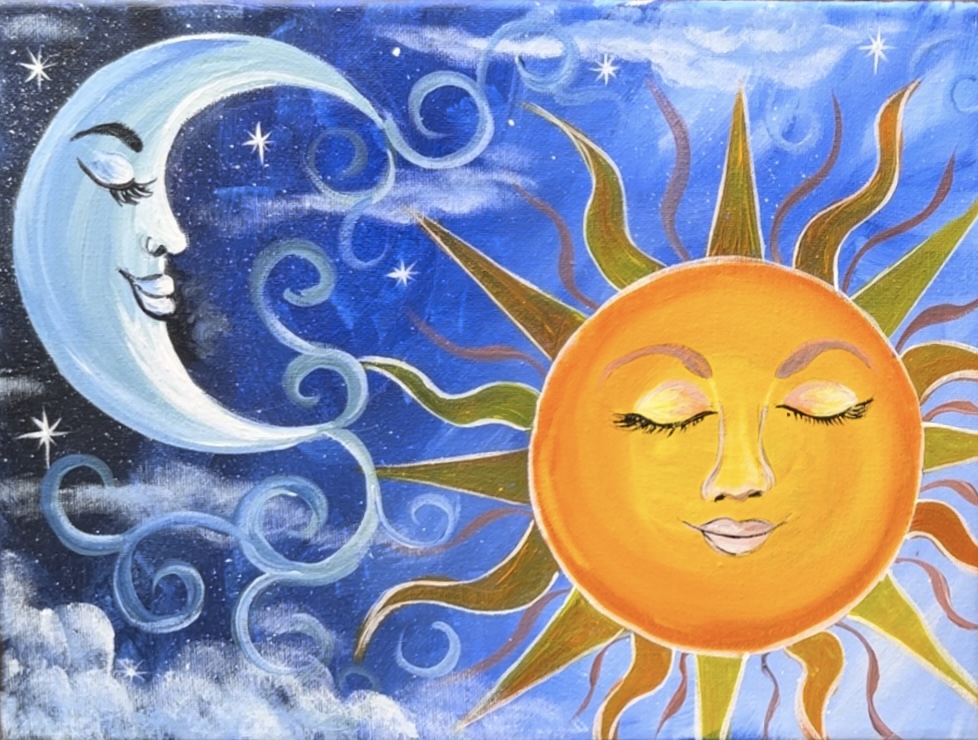
Finished!
Some final touches I did were add more stars and more clusters of little dots throughout the sky. I also added a few more spirals from the moon spirals.