Would you like to save this?
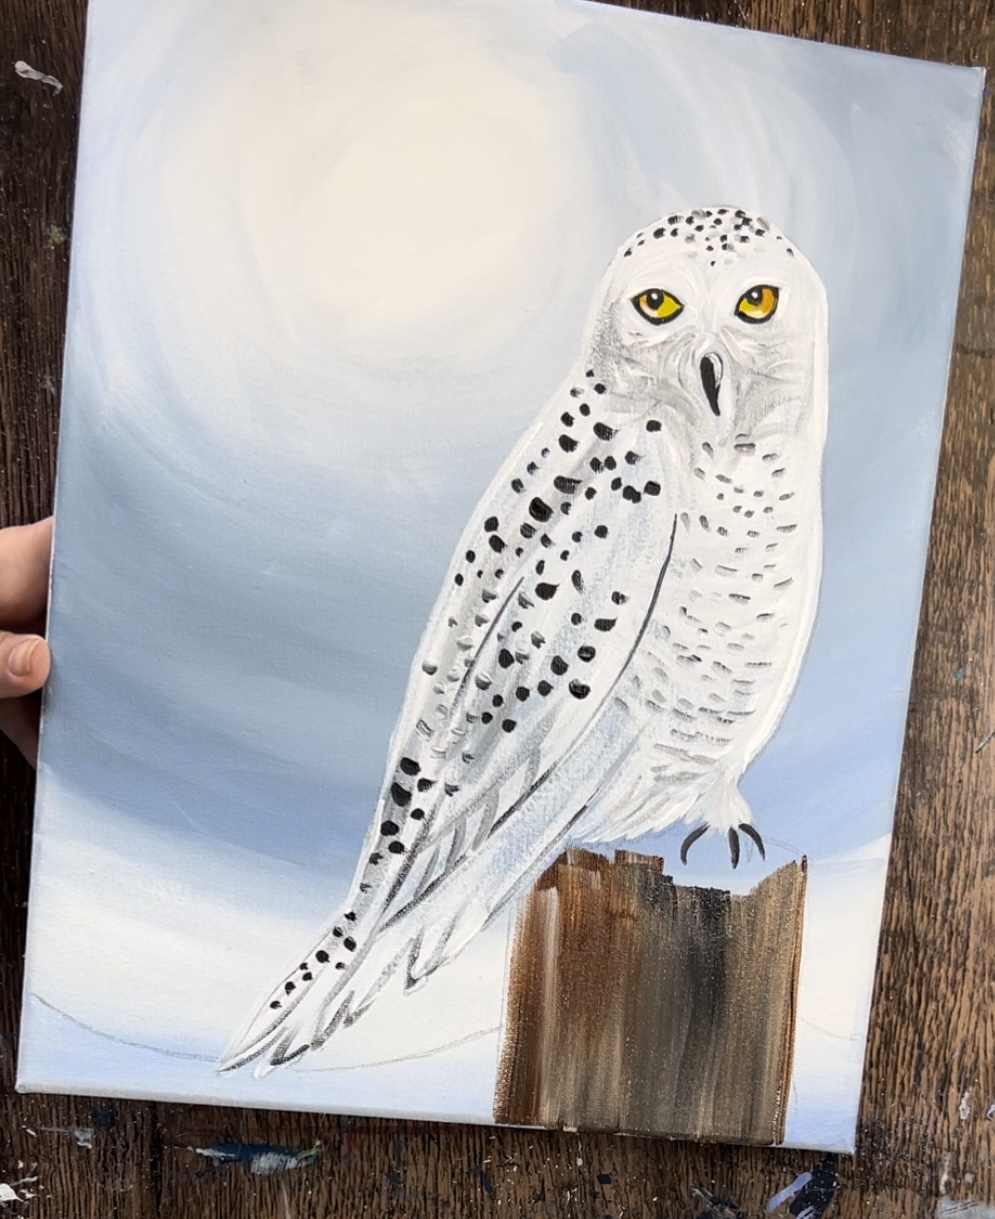
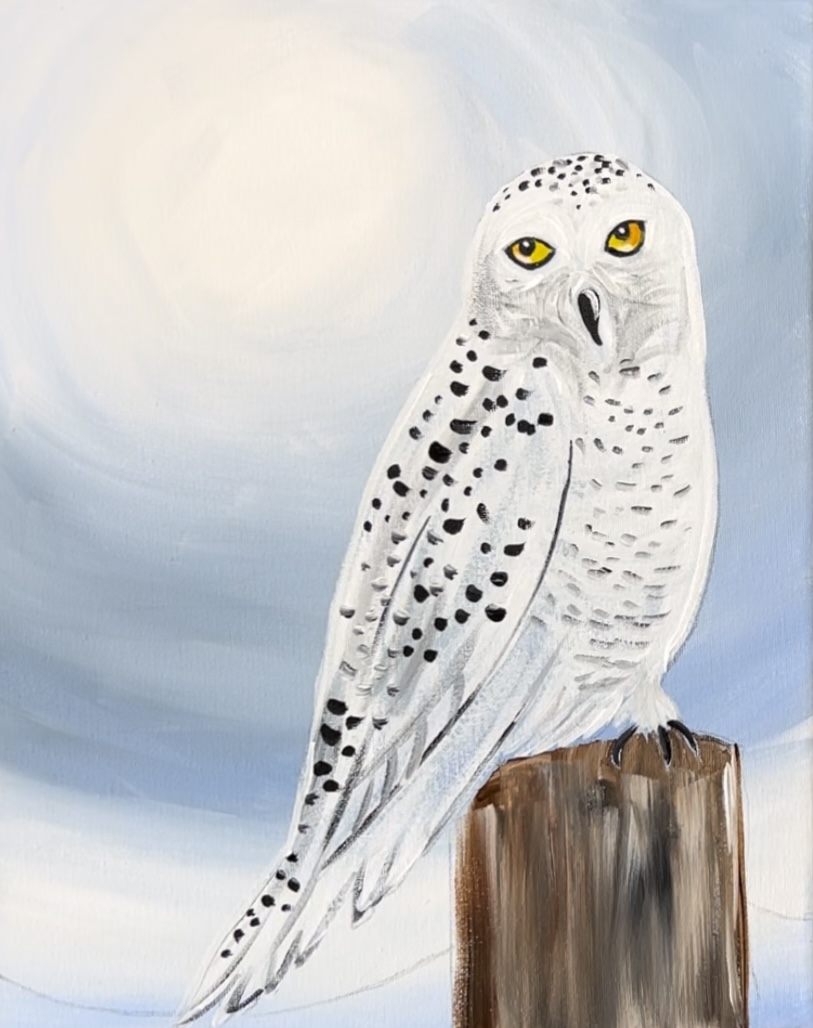
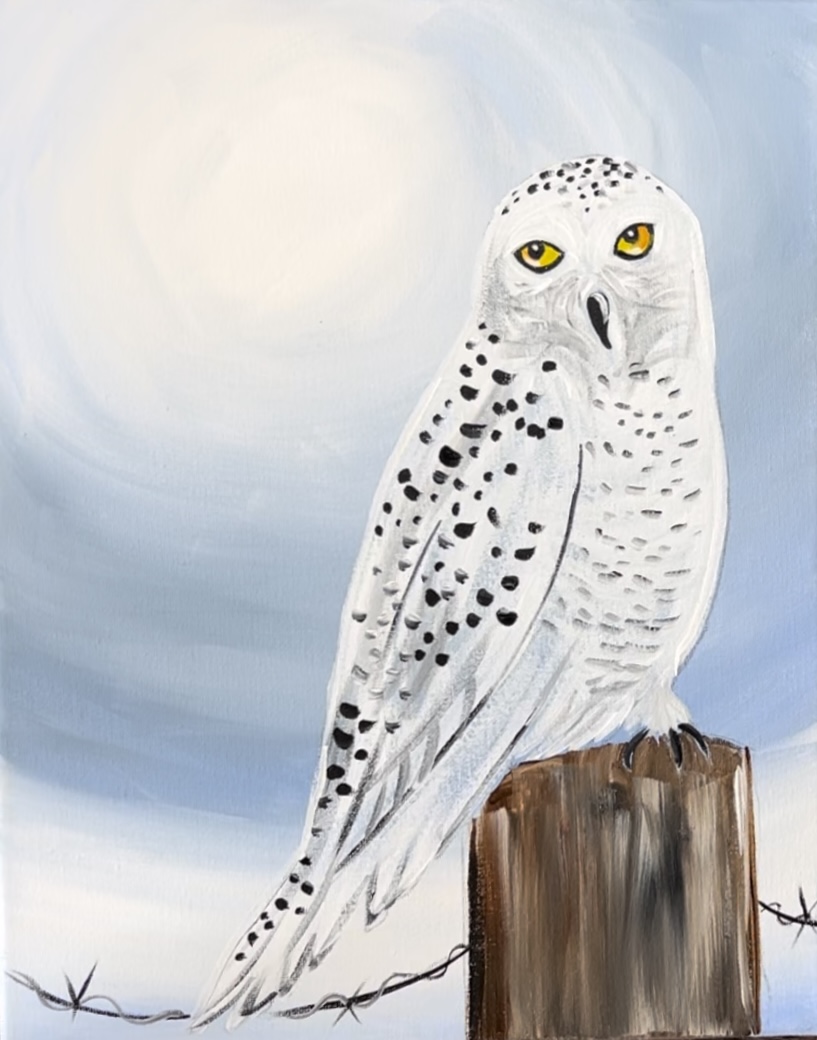
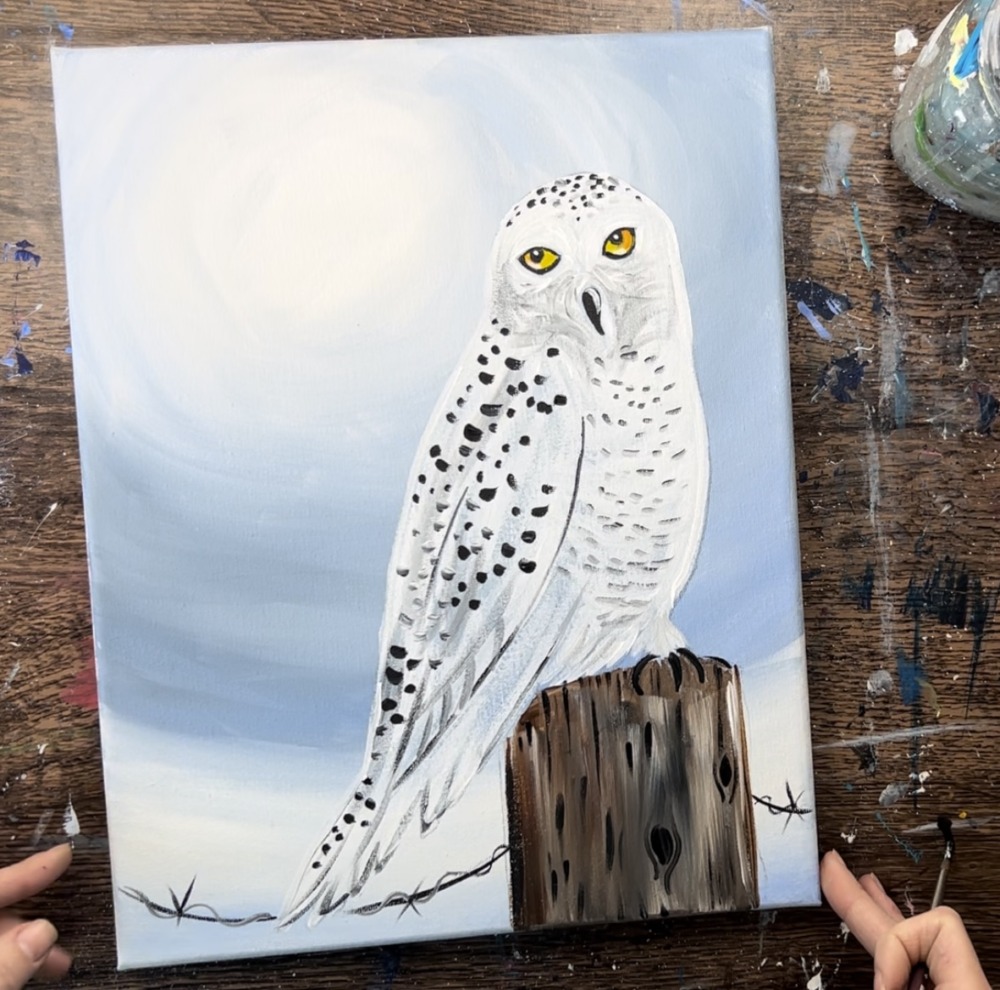
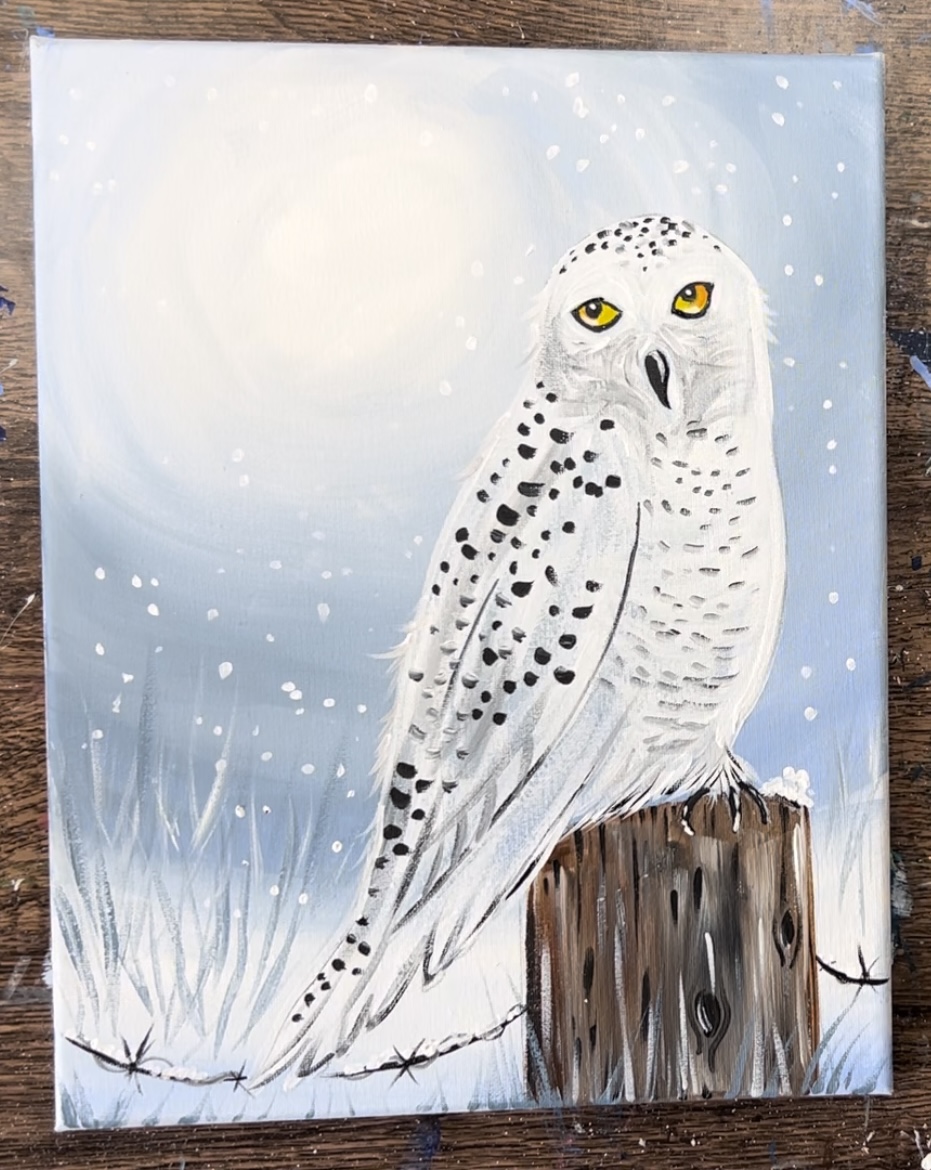
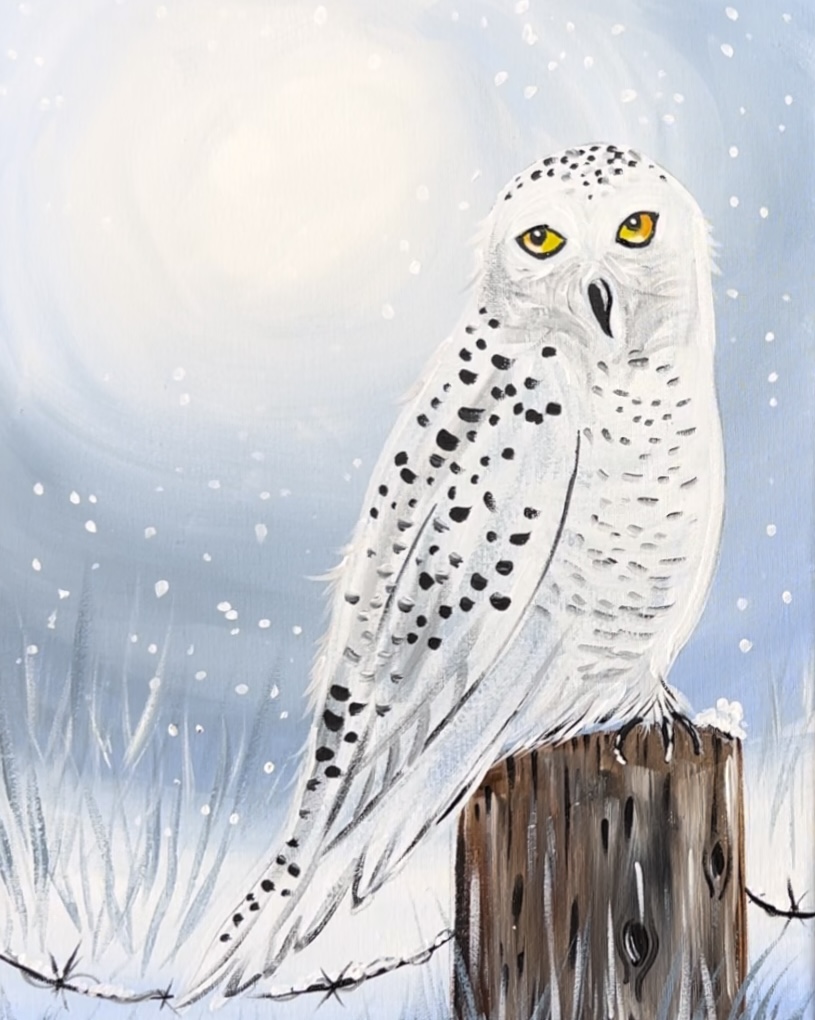
This acrylic painting tutorial demonstrates how to paint a majestic snow owl perched on a rustic wooden post.
The tutorial itself is at an intermediate level as the feather texture may be a little tricky. I am utilizing a traceable template for this tutorial to help with the drawing aspect of the owl!
Enjoy and happy painting.
Materials
How To Paint A Snow Owl
Learn how to paint a snow owl acrylic painting tutorial. This painting is demonstrated on an 11 x 14 canvas and utilizes an owl traceable tempalte.
Materials
- Acrylic Paints
- Brushes
- 11 x 14 Canvas
- Traceable Template
- Graphite Paper
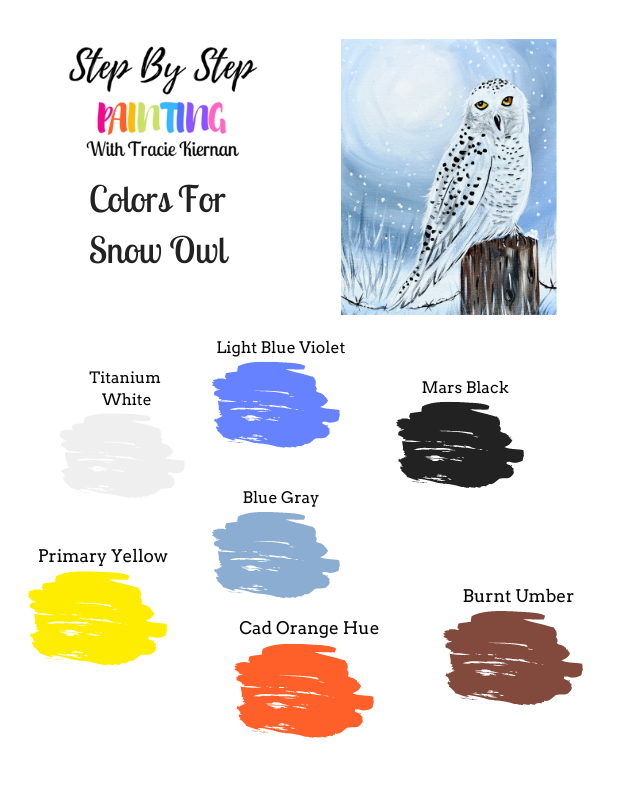
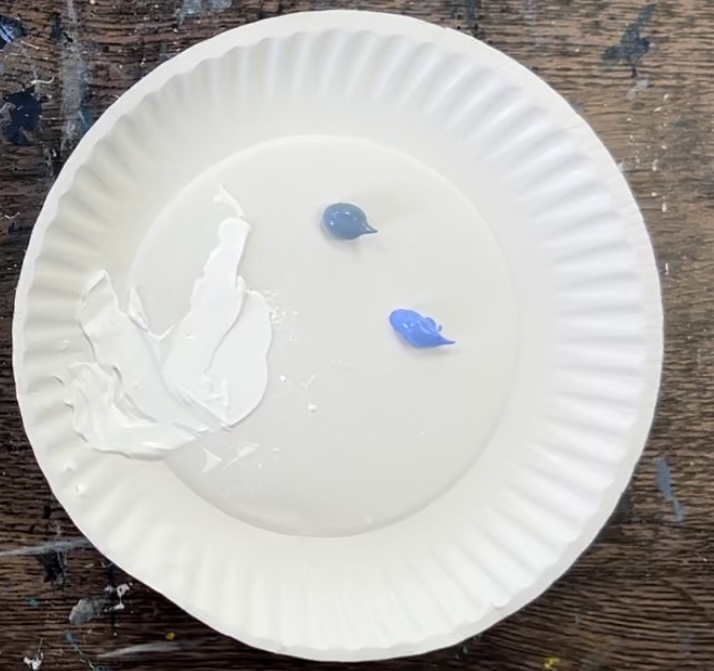
Colors
- Mars Black
- Titanium White
- Light Blue Grey (can sub for neutral gray and add a little blue into it(
- Burnt Umber
- Primary Yellow
- Cadmium Orange Hue
- Light Blue Violet
Brushes
- #4 Round Brush
- #8 Round Brush
- 3/4" Flat Wash Brush
Color Palette
Directions At A Glance
Traceable
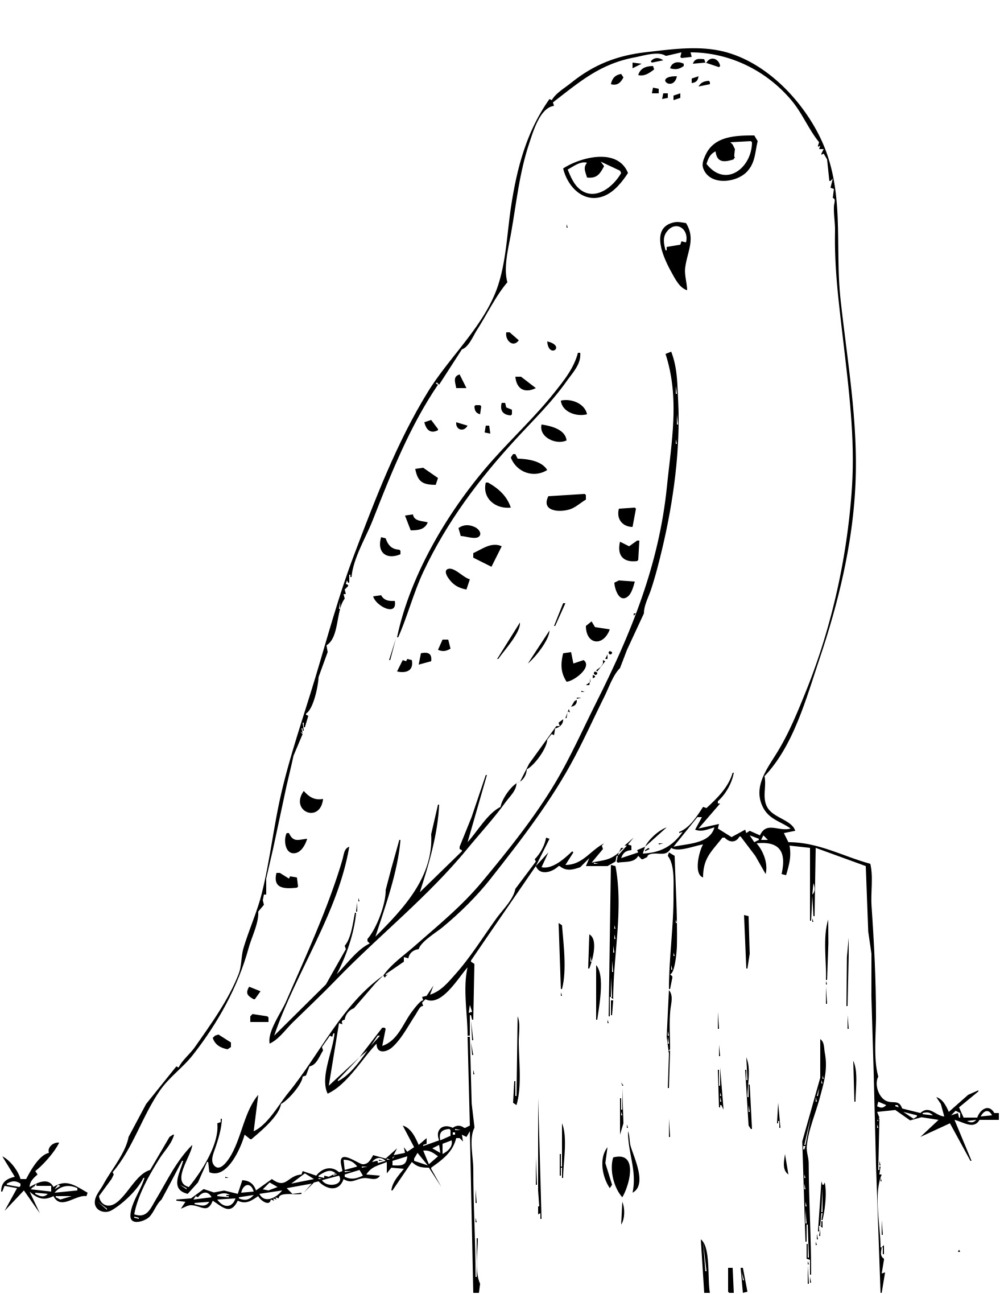
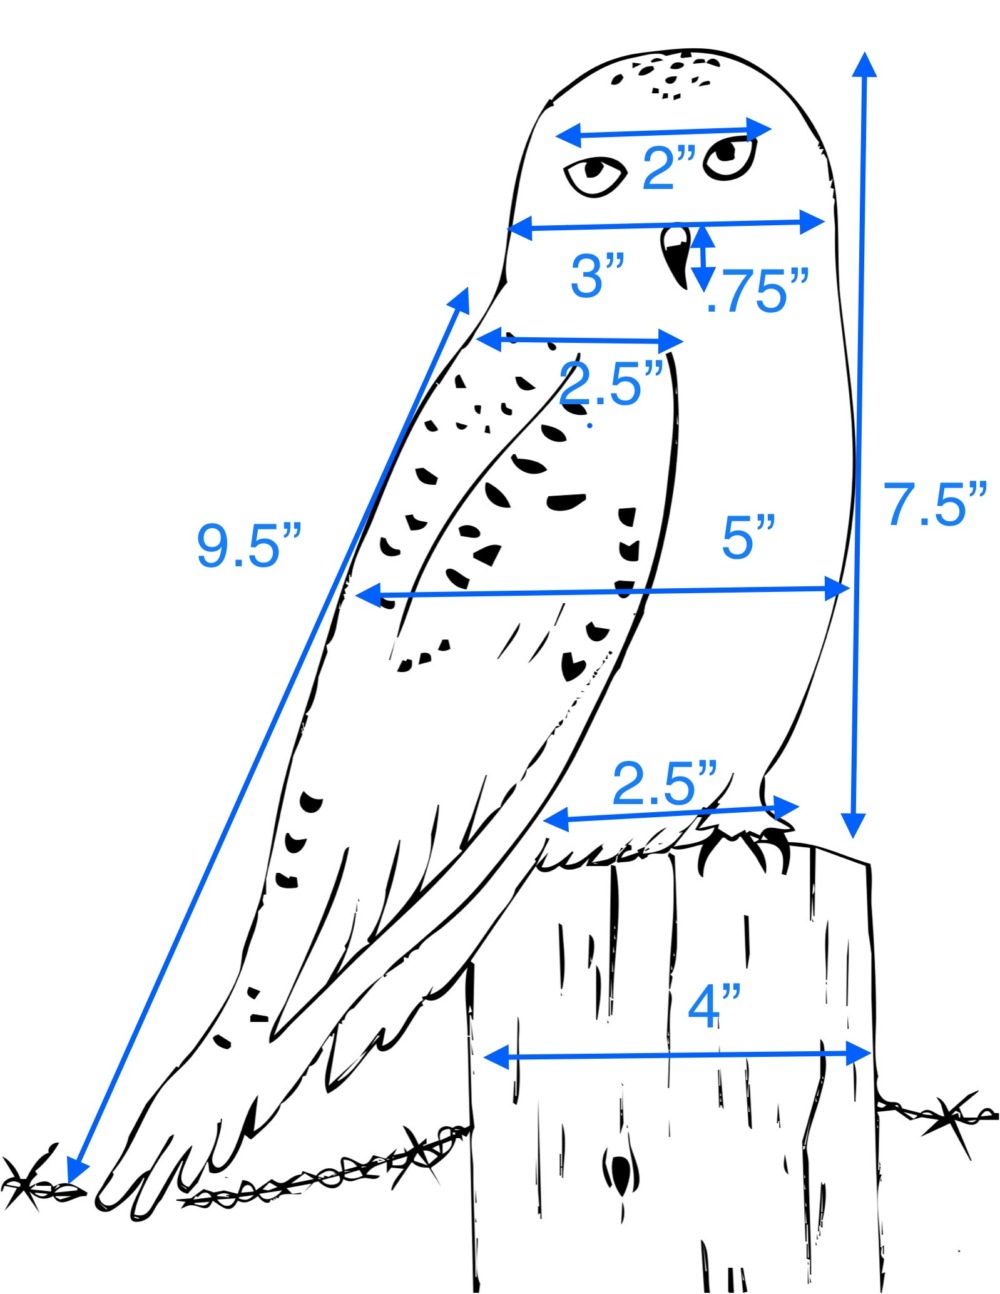
Note: I also added measurement to this owl to help you if you are drawing the owl design on the canvas and not using the traceable. These measurements are approximate and for the 11 x 14 size. They don’t have to be exact.
Video
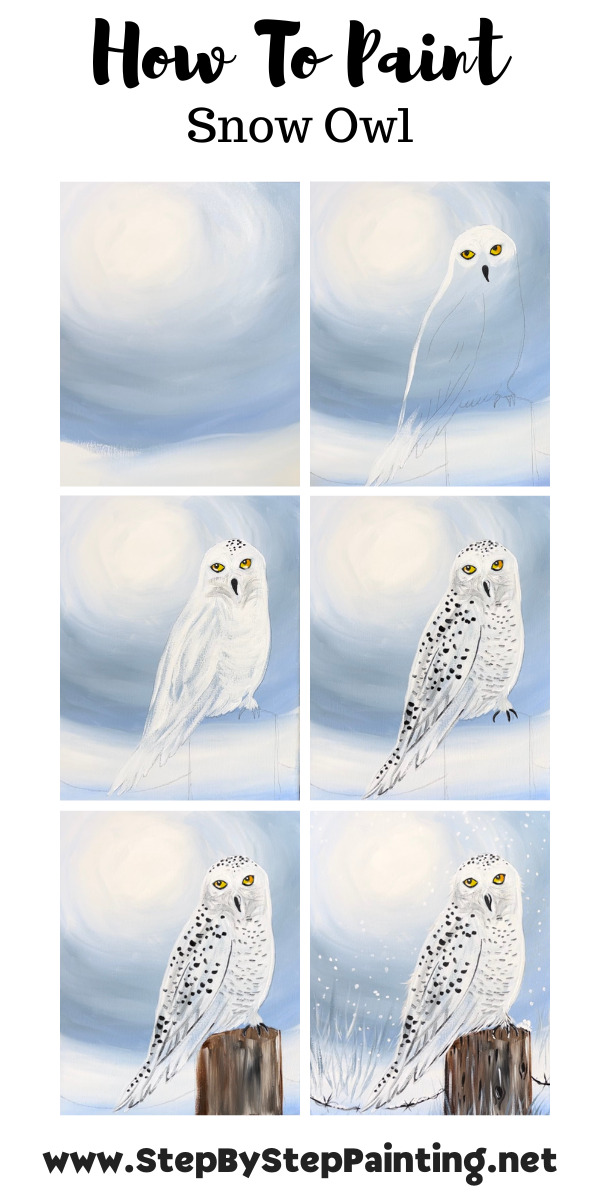
Step By Step Directions
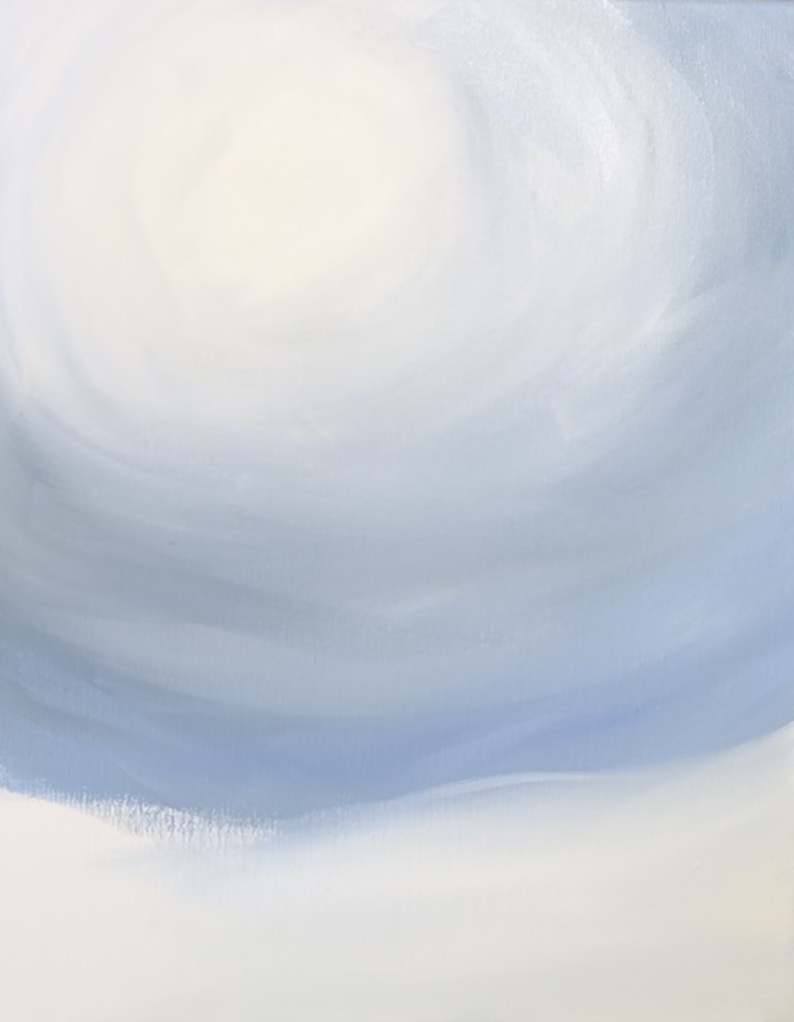
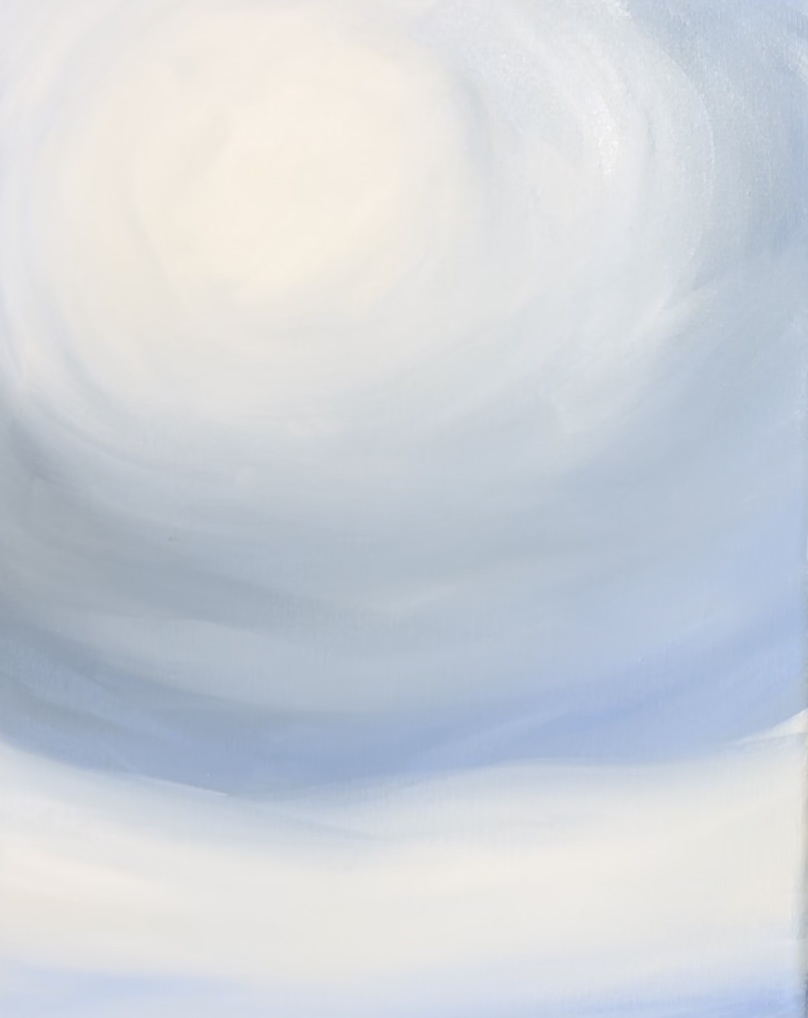
1. Paint The Background (Sky & Ground)
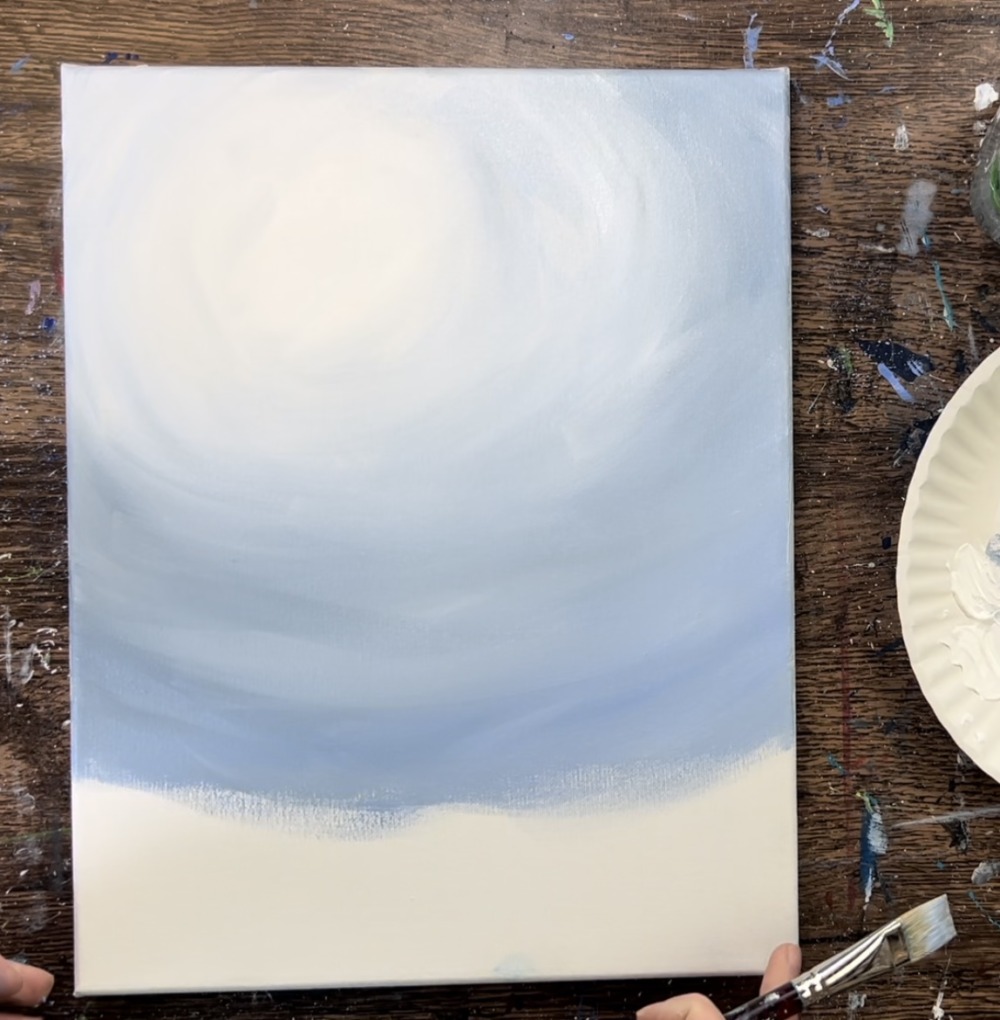
The background in this painting is a blended background using the colors titanium white, light blue violet and blue gray. It radiates around a sun (or moon) and then the bottom of the painting is a snowy ground.
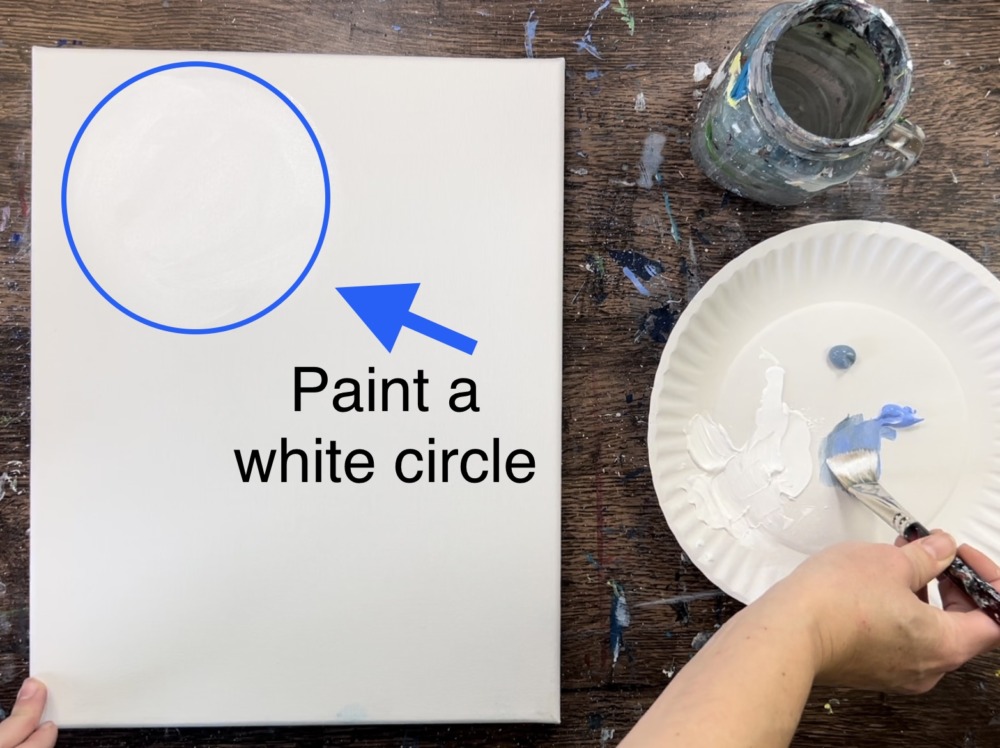
Position your canvas so that it is in a vertical format. Use the 3/4″ flat wash brush to paint a large white circle in the upper left area of the canvas. Paint this about 5-6″ in diameter.
Next, without rinsing the white off your brush, add a small amount of light blue violet and blue gray to your brush and mix it with the white so that this color becomes lighter.
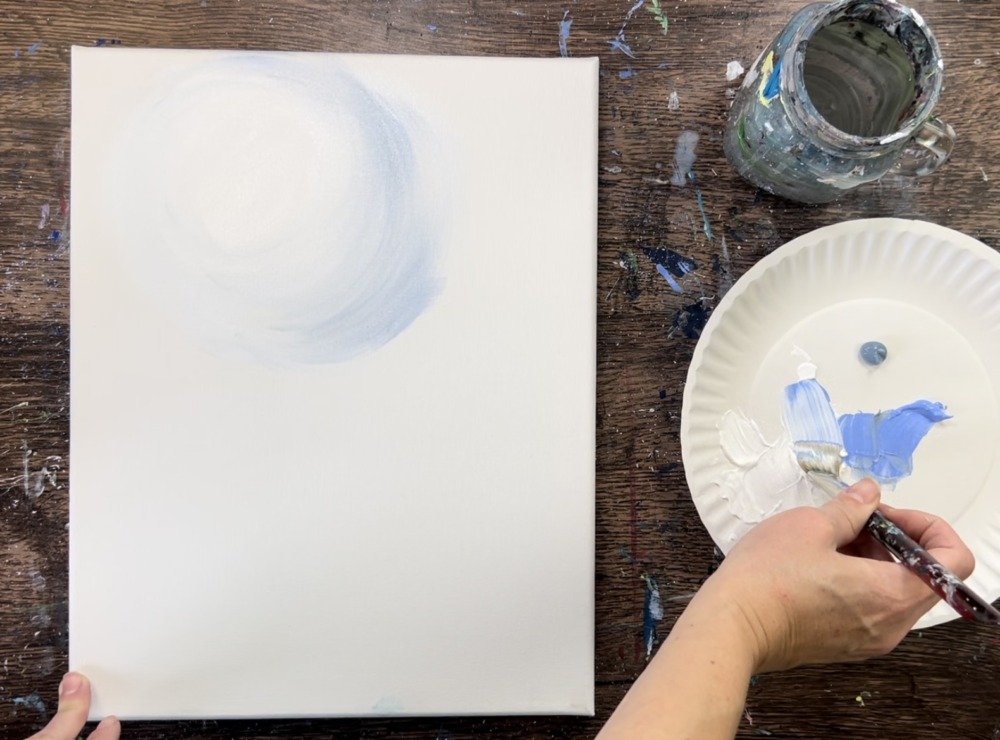
Paint in a circular direction around the white circle but keep the circle bright and white (about 2-3 inches of the circle). Blend your colors so the sky gets gradually darker towards the edge of the canvas.
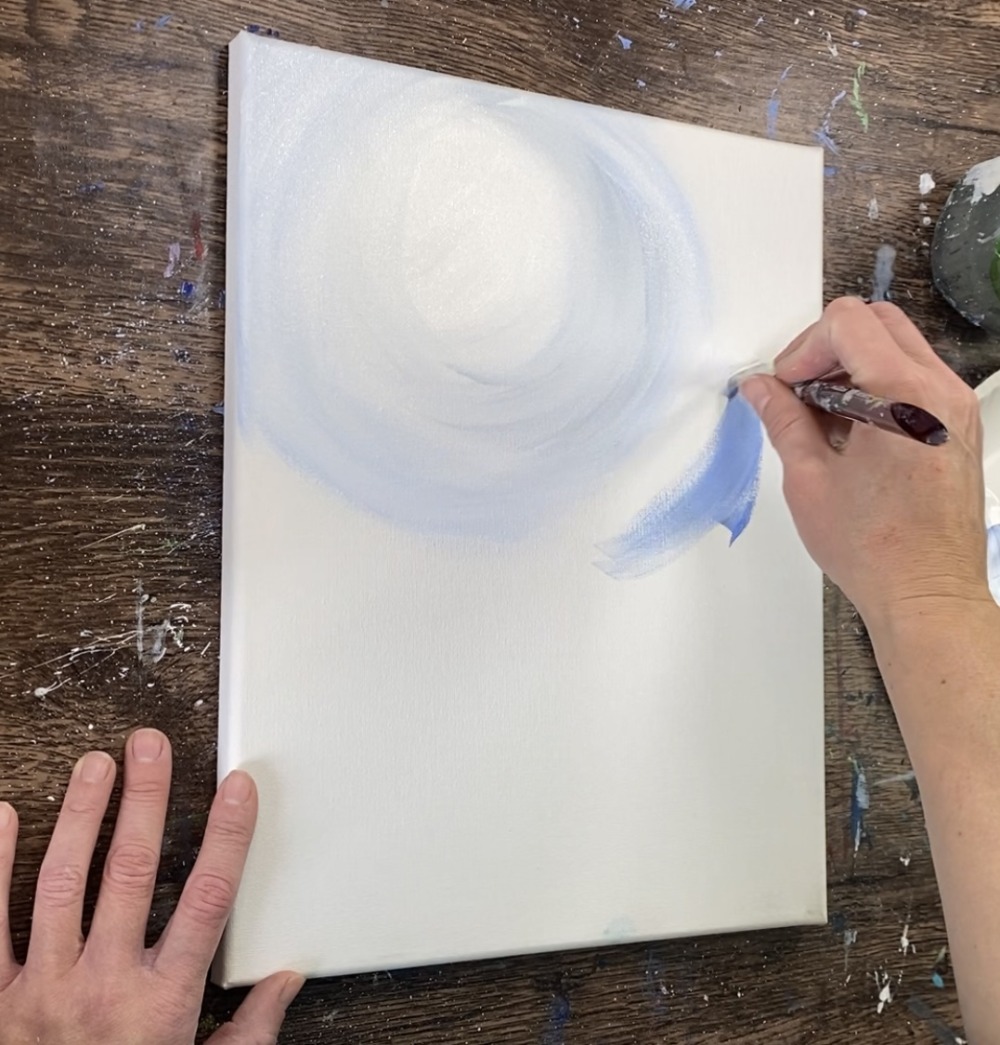
Add a little more of the light blue violet on the outer parts of the sky. Make sure to leave about a 5″-6″ of space on the bottom of the painting for the ground area.
The outer parts of the sky have kind of short textured strokes. You don’t need to stay in a perfectly rounded direction.
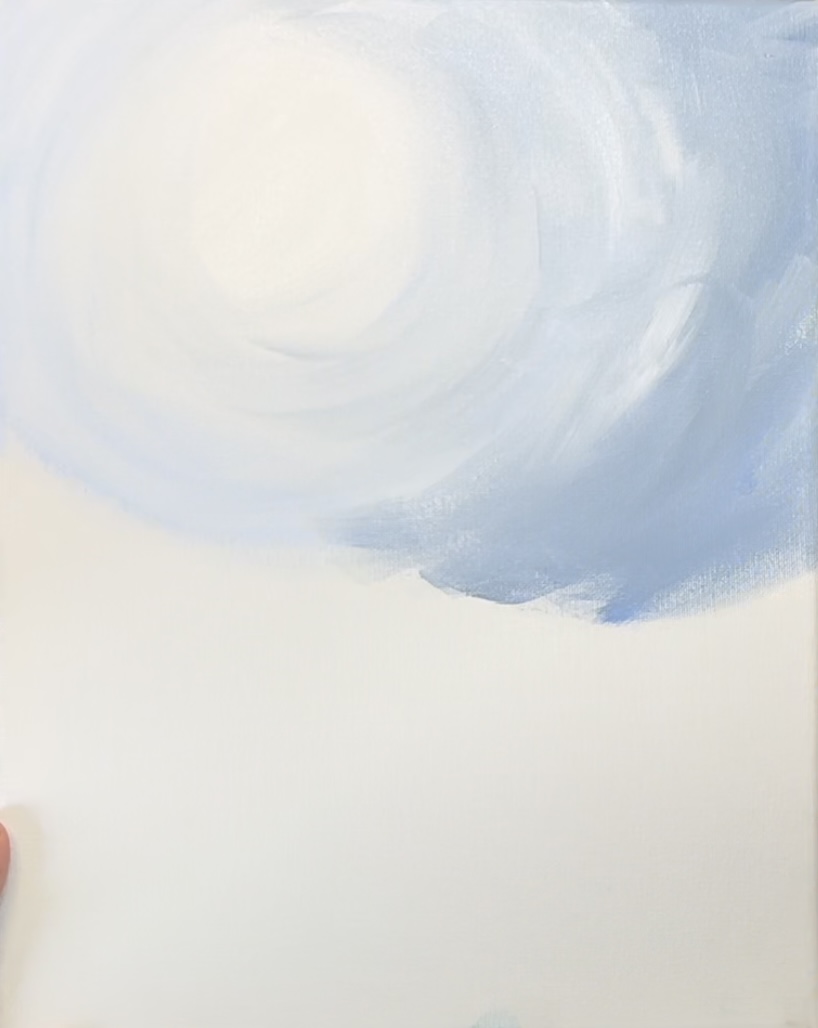
2. Paint Snow Ground
Use a 3/4″ flat brush to paint the ground. Paint the edge of the land area so that is slightly “hilly”.
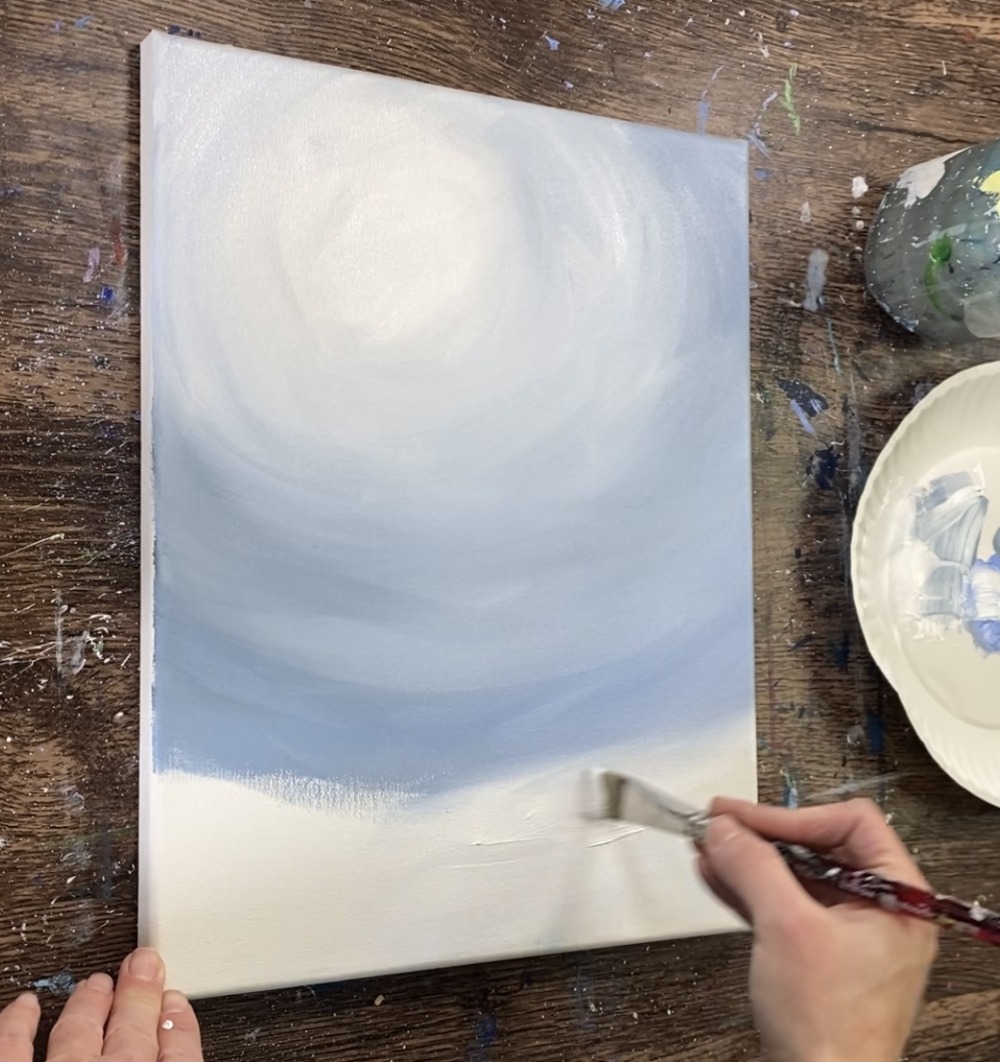
Let some of the color from the sky blend a little with the hill. The top of the hill/ horizon line area will be slightly more shadowy from blending with the sky.
Next, blend a little bit of light blue violet on the bottom of the snow area. Add just a tiny bit of that color to your brush and then blend it up into the white.
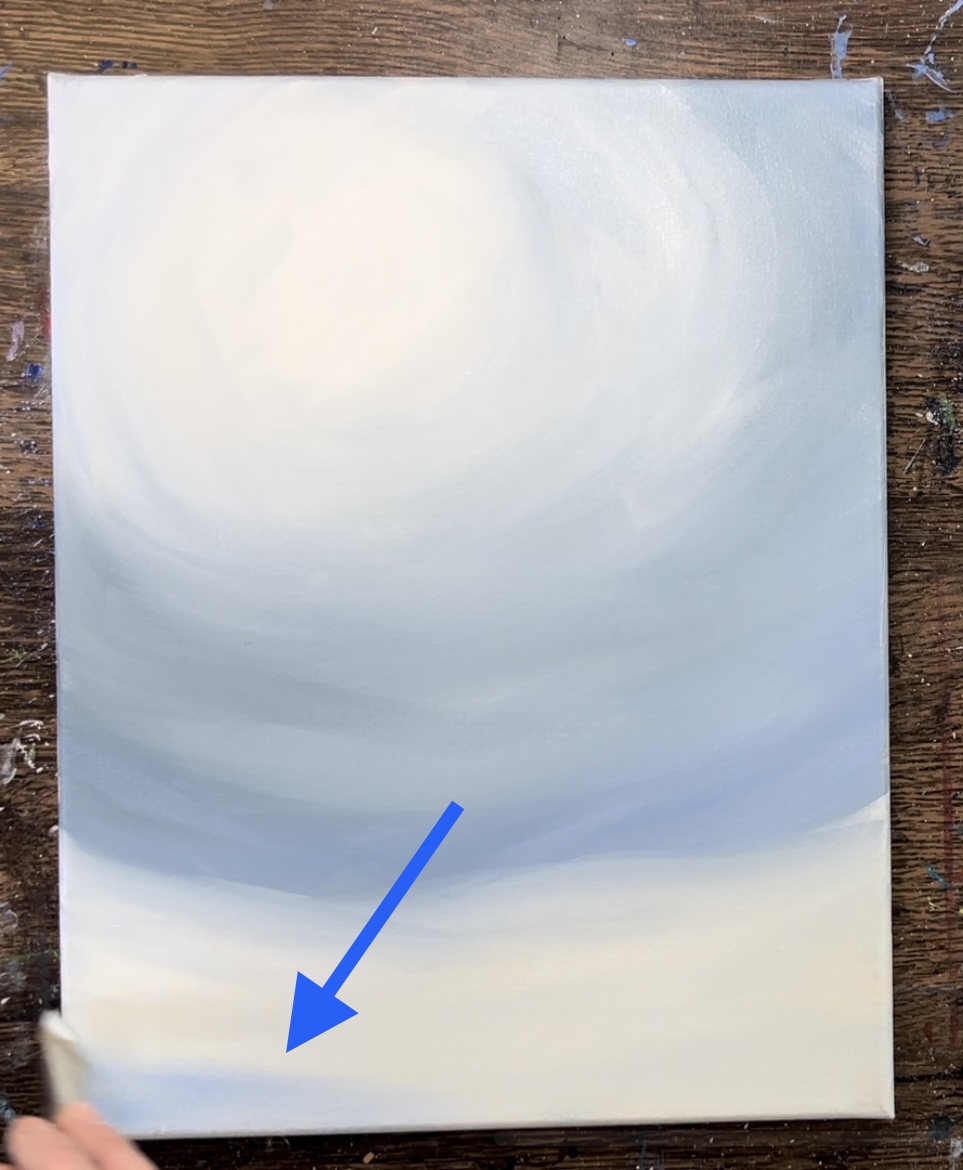
The color on the bottom of the snow area is just slightly more shadowy and the middle part of the snow area is brighter and whiter.
Let this dry before going onto the next step.
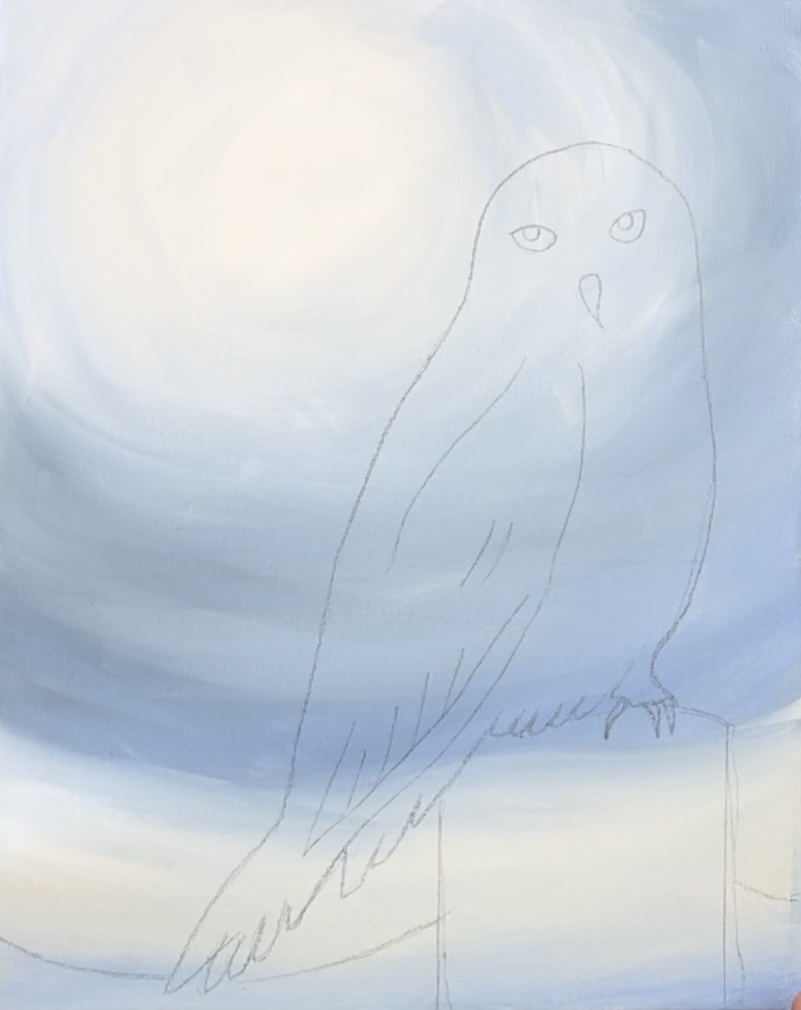
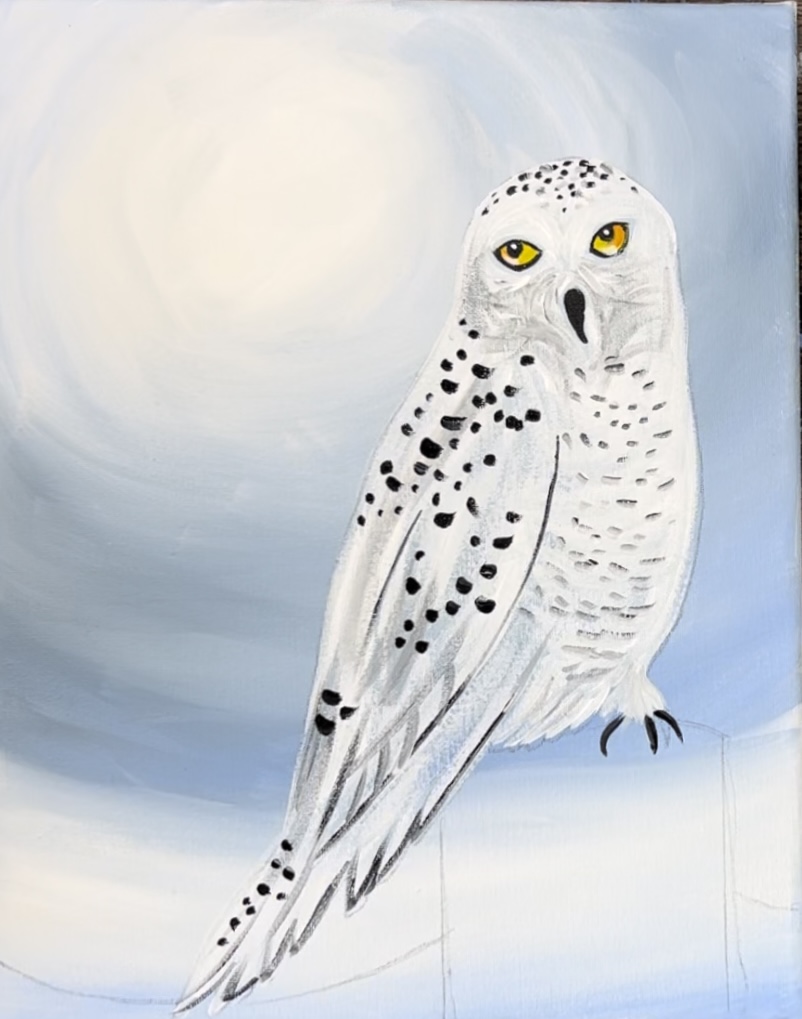
3. Draw/ Transfer Owl Template
Next print out the traceable template and tape the two together. Then place a sheet of graphite paper below the template and trace firmly so the design transfers over the painting.
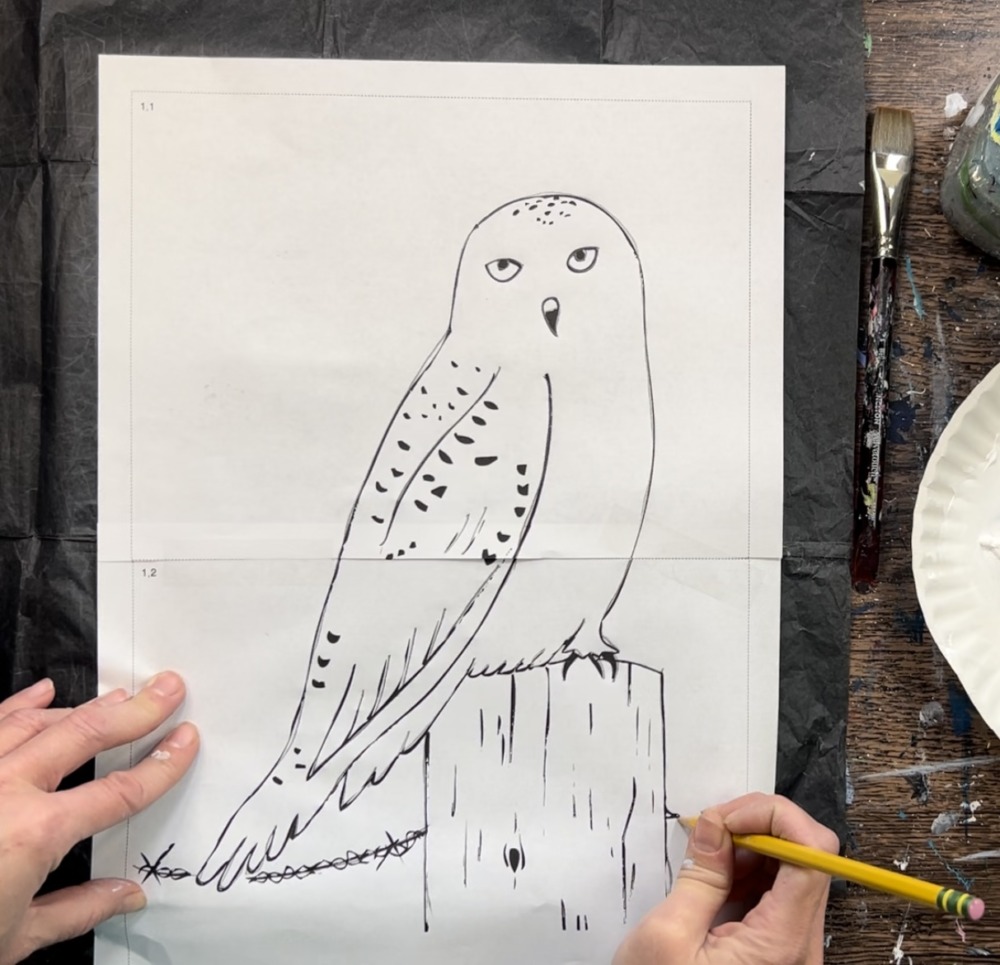
The owl design will transfer to your canvas. If needed, go over the drawing a bit to darken it.
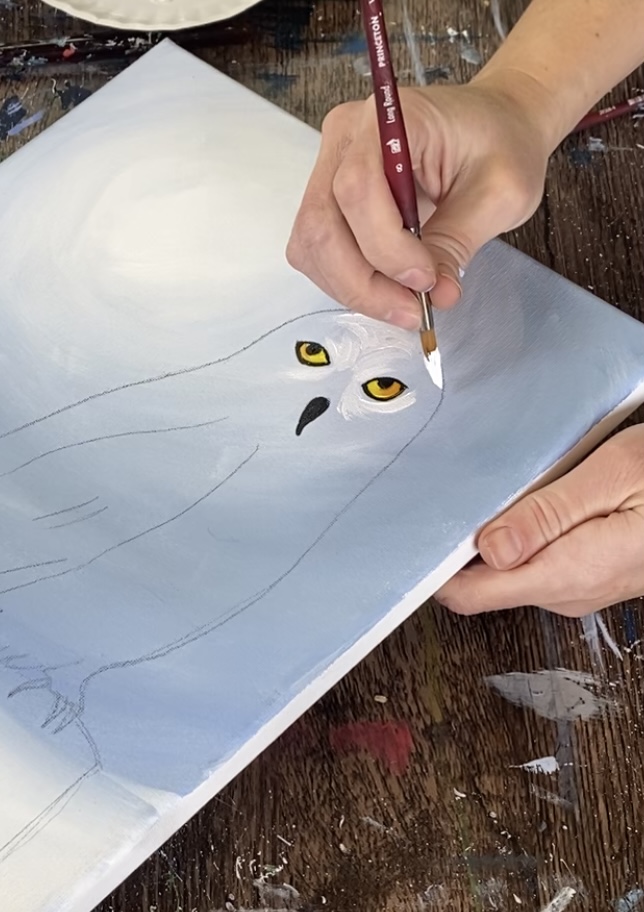
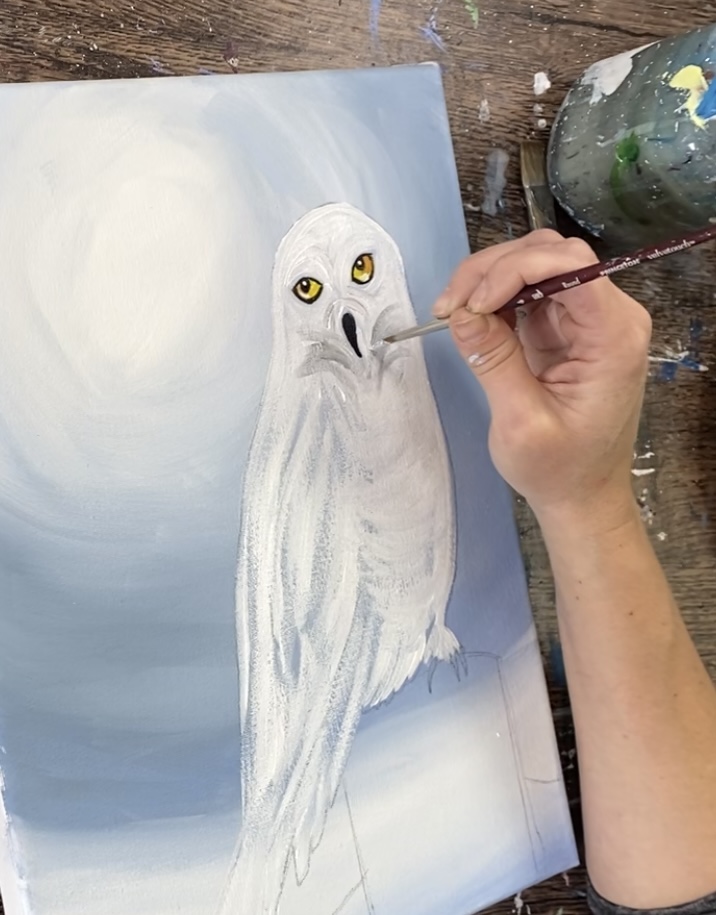
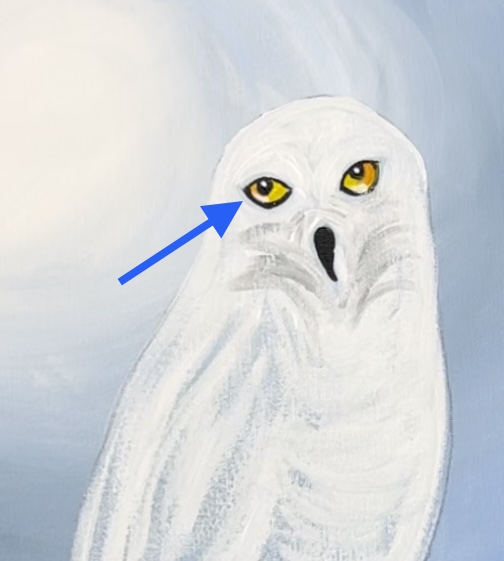
4. Paint Owl Eyes
Load your palette with primary yellow and cadmium orange hue. Use your #4 round brush to paint the inside of the eyes around the black pupil with the yellow.
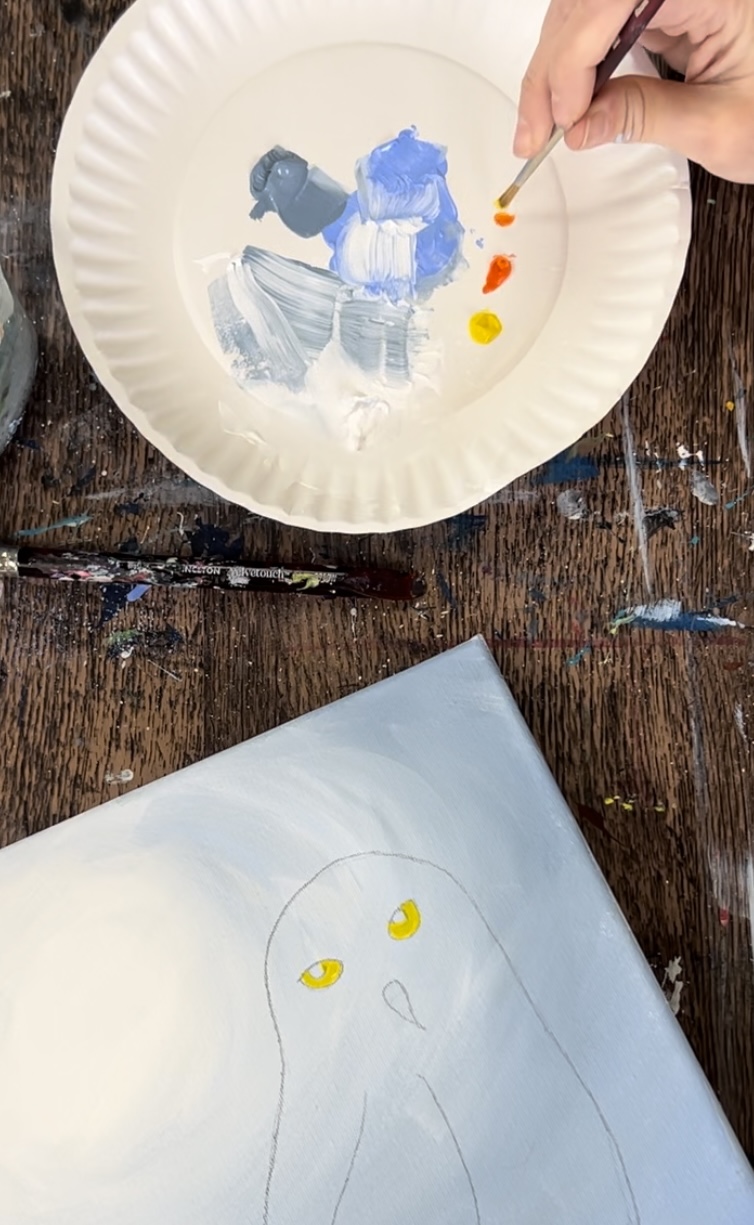
Next, gently blend some orange into the yellow.
Next, load a small amount of mars black onto the tip of your brush. Paint the pupils solid black.
Then paint a very thin line around the border of each of the eyes. Paint on the outside of the eye drawing.
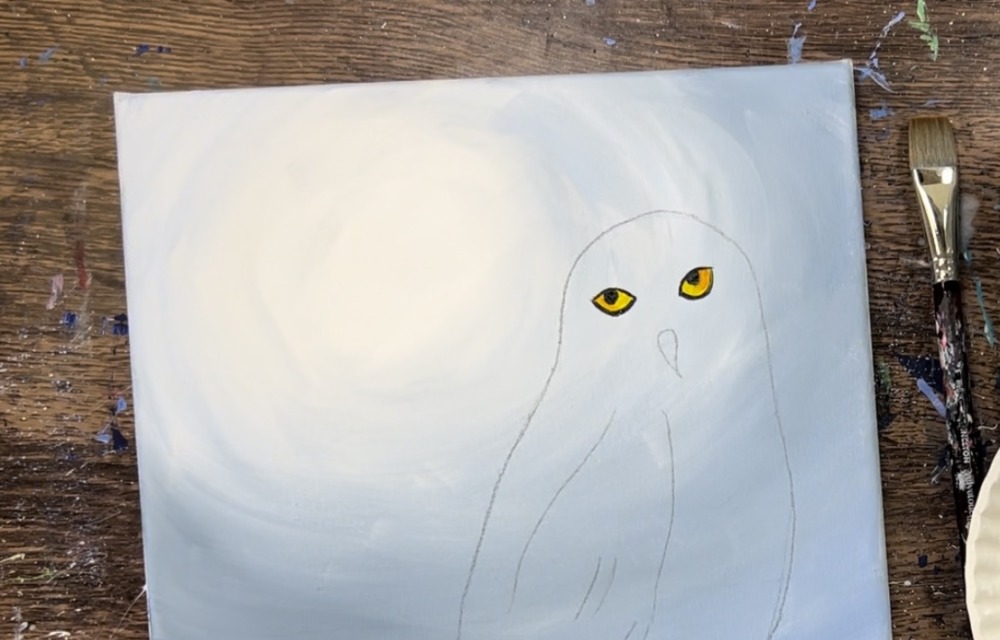
Next, paint the beak solid black.
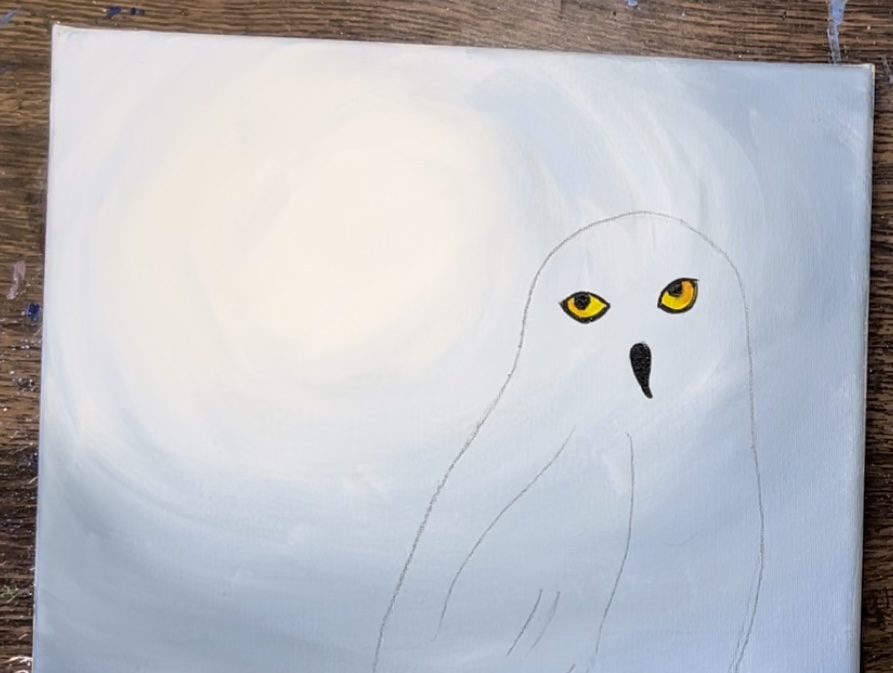
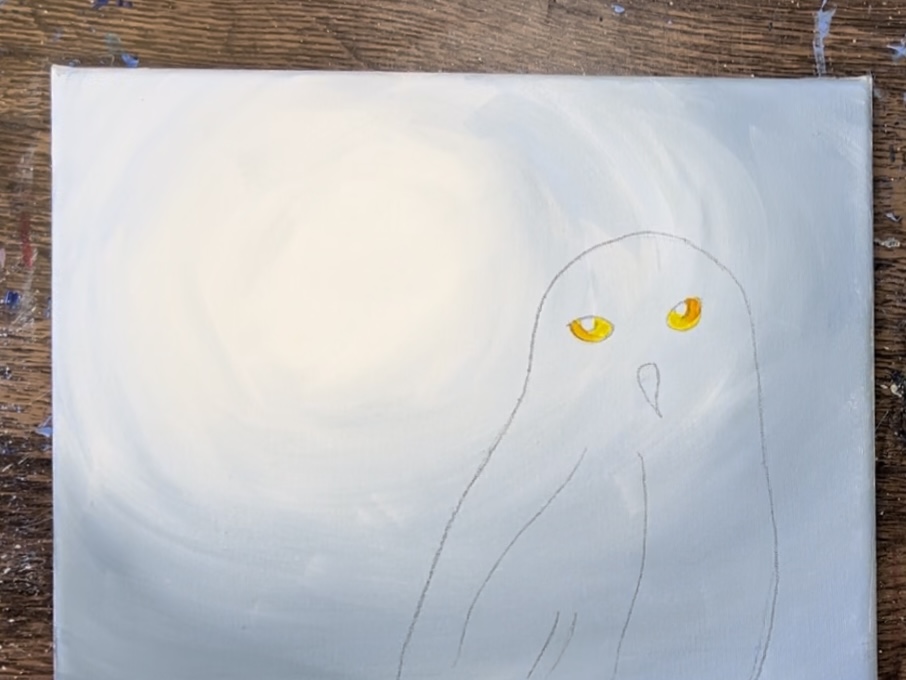
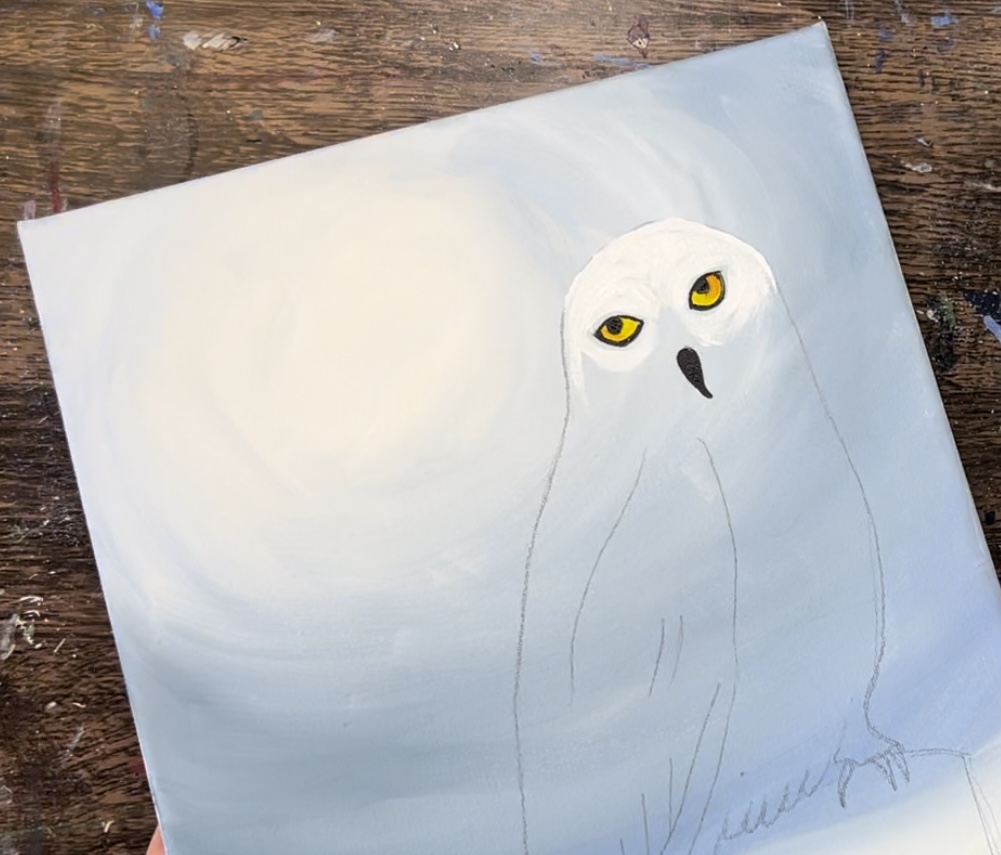
Below is a closeup of the eyes when they are finished. Note: we will add the white highlights in a later step.
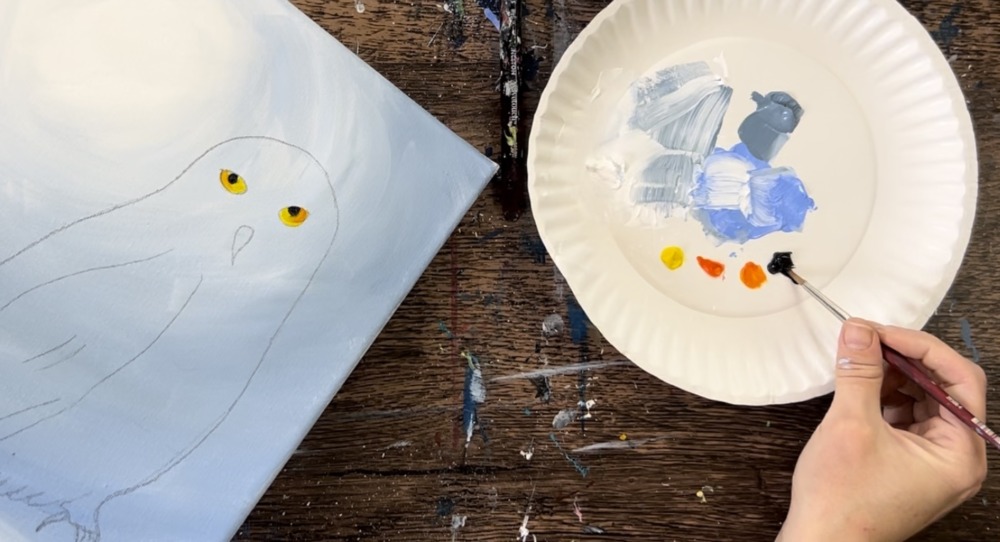
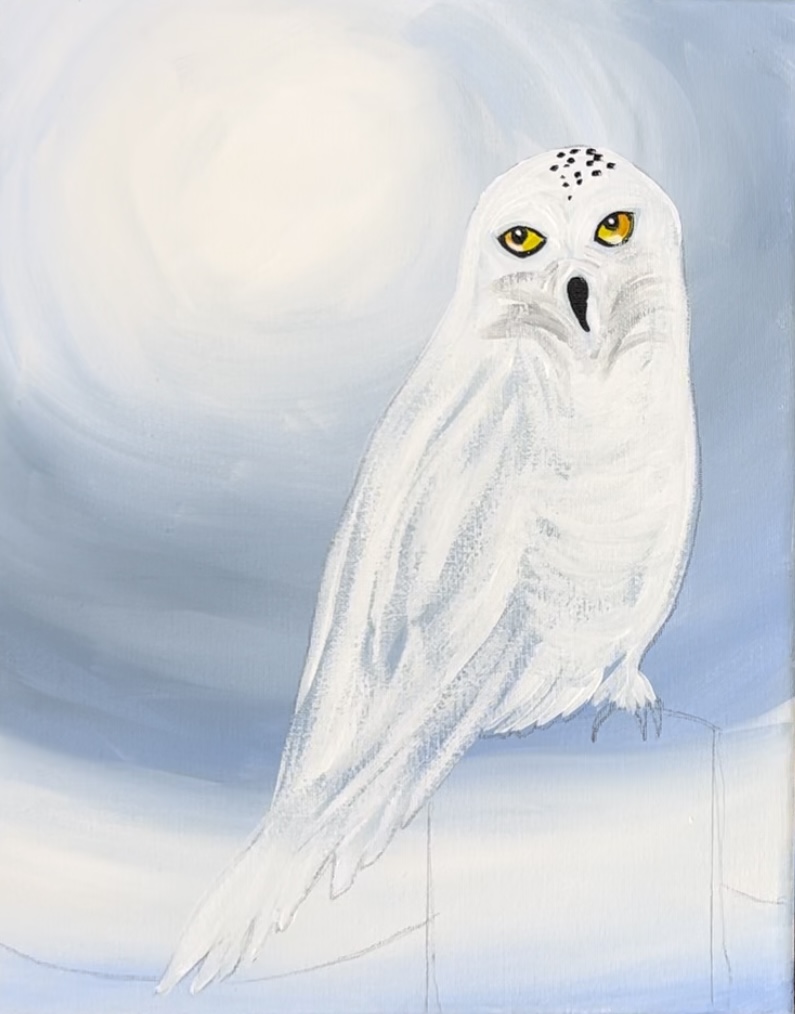
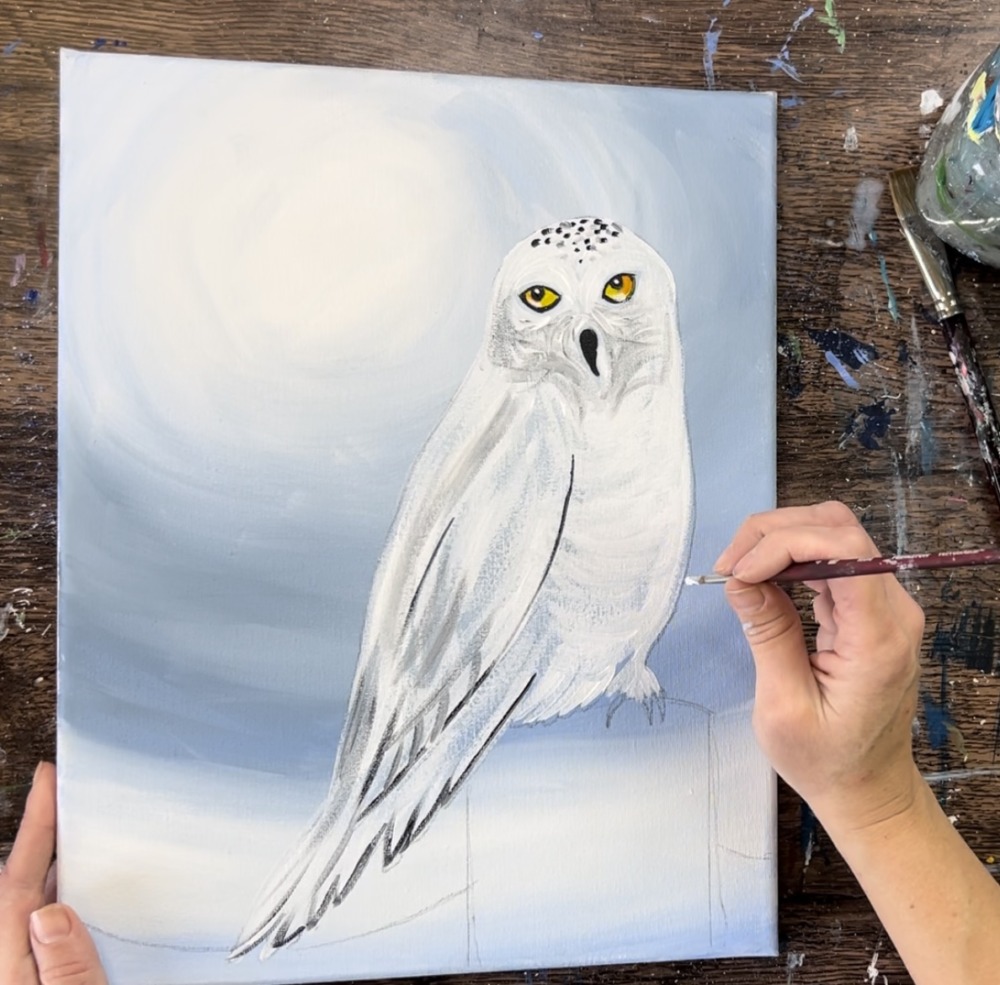
5. Paint Feathers/ All Of Owl’s Body
Use a #8 round brush and titanium white to paint the feather texture. Start above the eyes. Paint small curved strokes using just the tip of the round brush. The direction of the feathers part in the middle between the eyes.
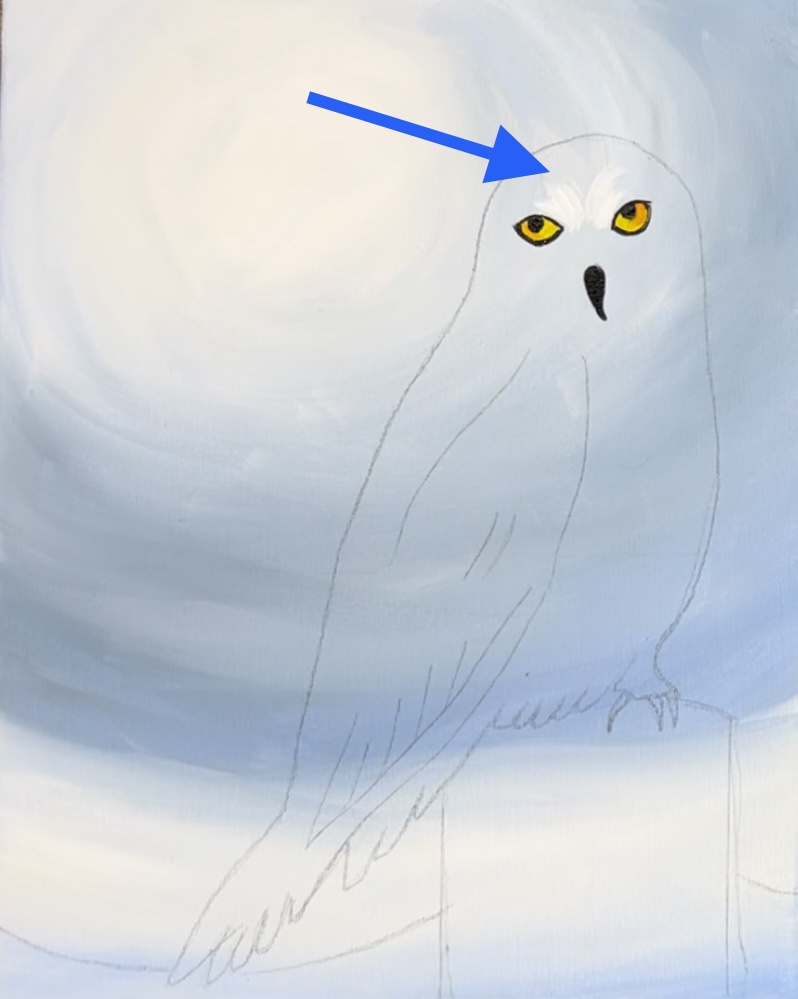
Then curve your strokes under the eyes and around the beak. These are all short, curved strokes.
Fill in the shape of the owl’s head with the white. You don’t have to cover the owl all the way. In other words, if there is gray from the background still showing through, that is okay.
Use the tip of the brush to loosely outline the back and the bottom of the tail feathers.
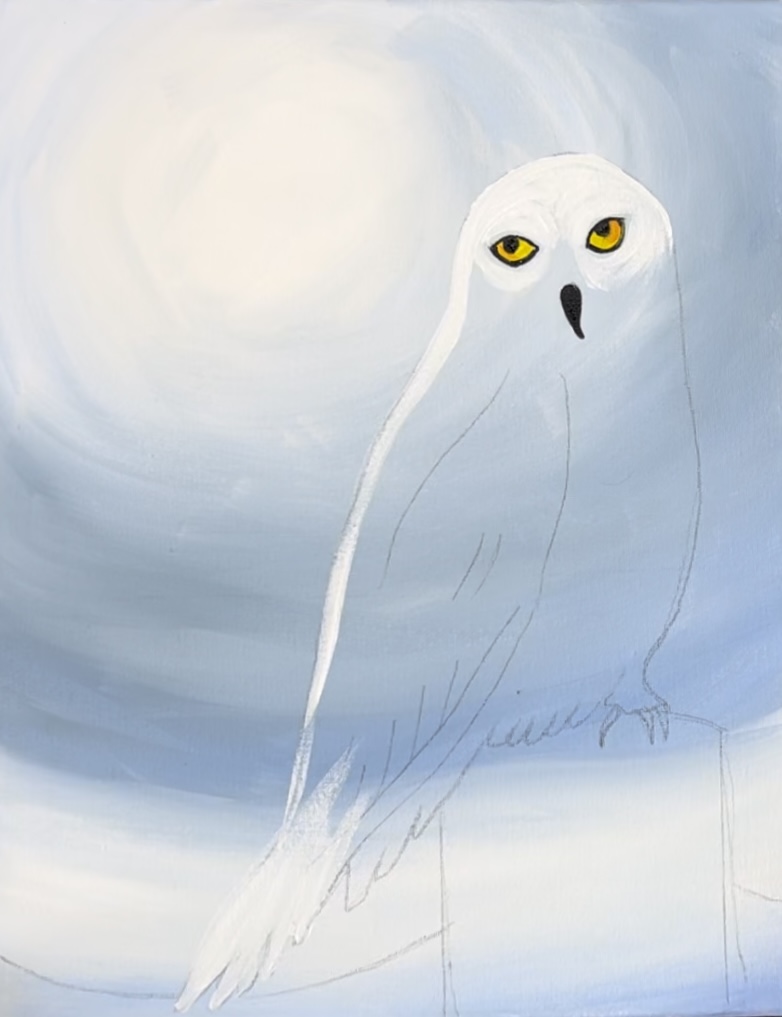
Paint loose vertical strokes that go around the beak.
Use the tip of your brush and the white to loosely outline the shape of the wing.
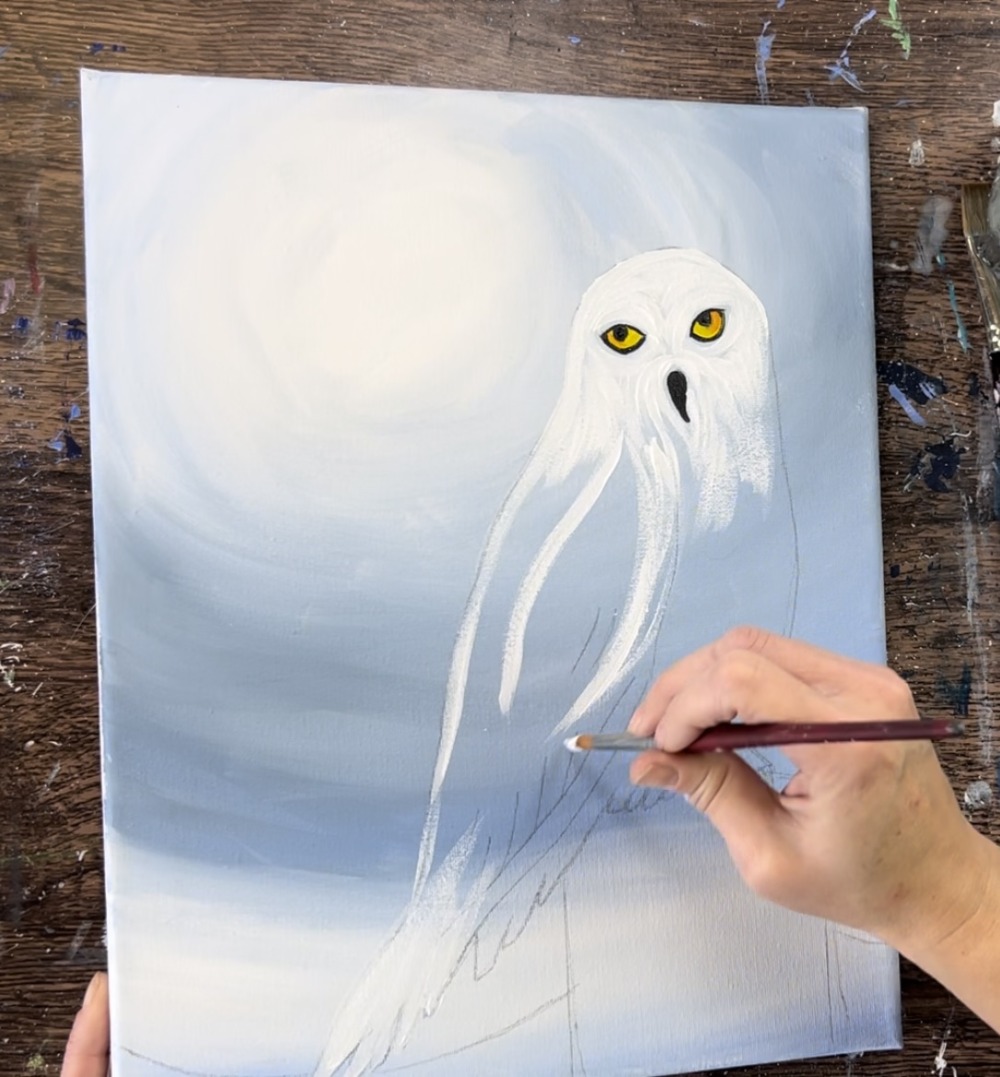
Then start filling in the rest of the owl. Do loose curved strokes in the face area, long curved strokes in the wing area and medium curved strokes going a horizontal direction in the belly area.
When filling the belly region, paint curved strokes going in more of a horizontal direction and stop when you get to the wings. The wing area should be long strokes going diagonally in the direction of the wing shape.

If some of the background is still showing through, that is okay.
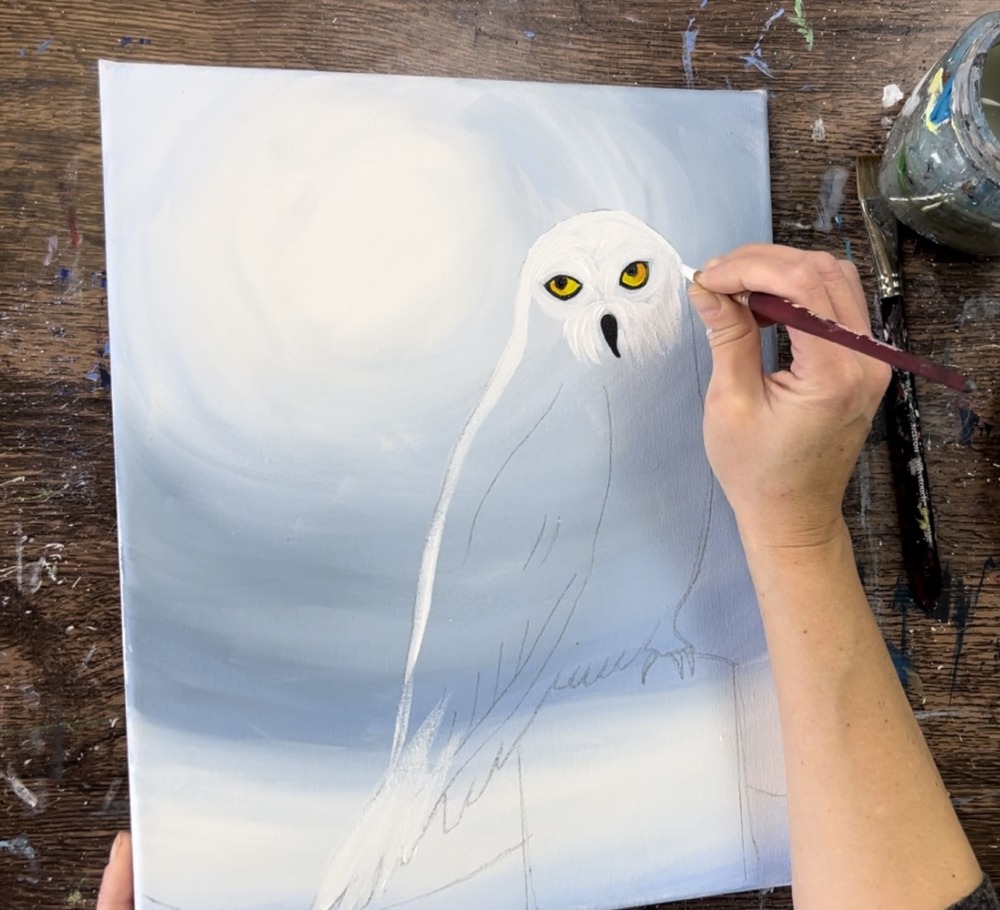
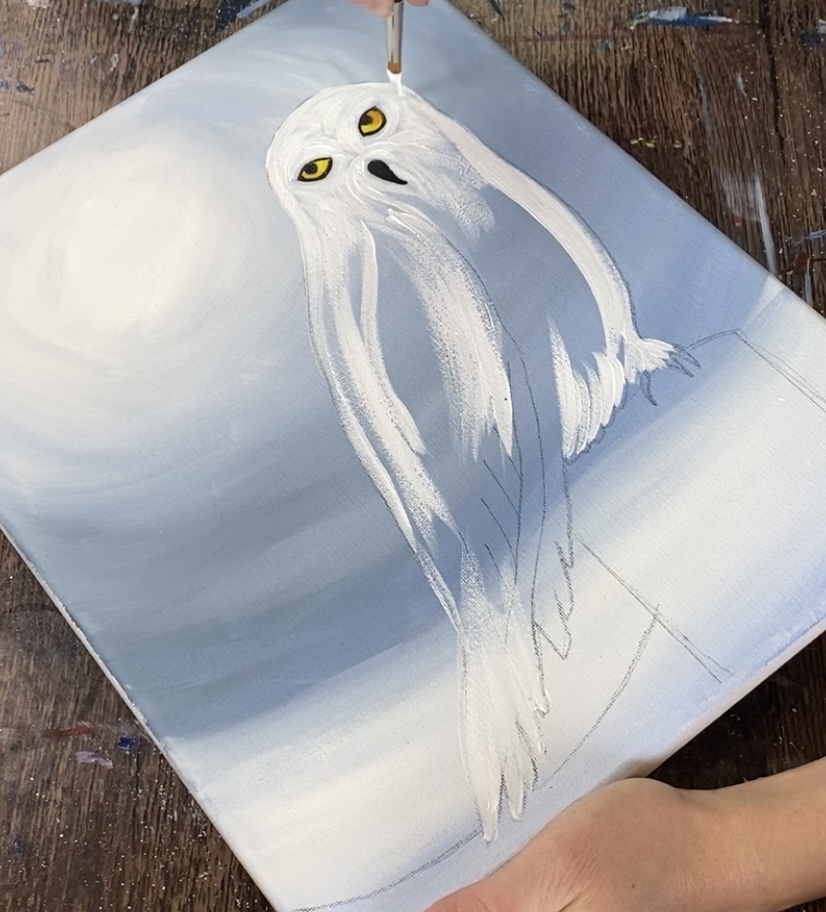
Next, mix some gray on your palette by mixing a little bit of black into white. Then paint some feather texture with the gray going in a curved direction under the beak area.
Also, add a tiny white dot on the black pupil part of the eye. Then add a white curved stroke on the bottom part of the colored area.
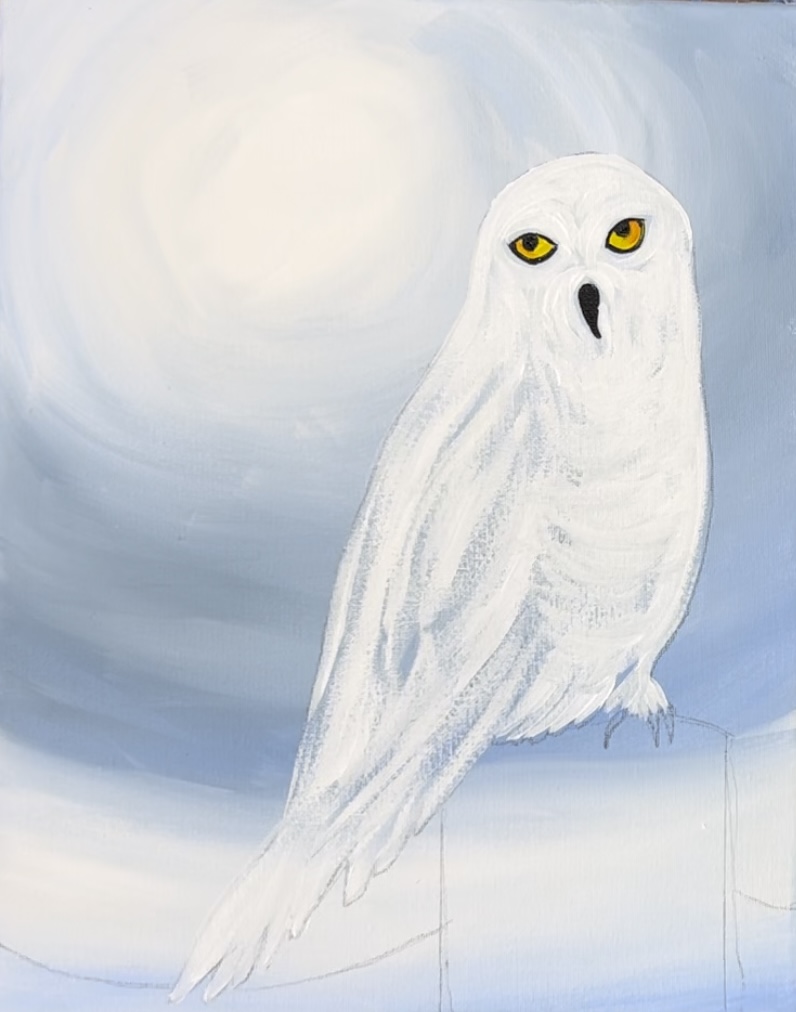
6. Paint Markings
Use the #4 round brush and mars black to paint the markings. Paint small black strokes of varying sizes just on the top part of the head and slightly pointed down.
Add a little bit of gray to your brush as well and add more speckled dots in the head area.
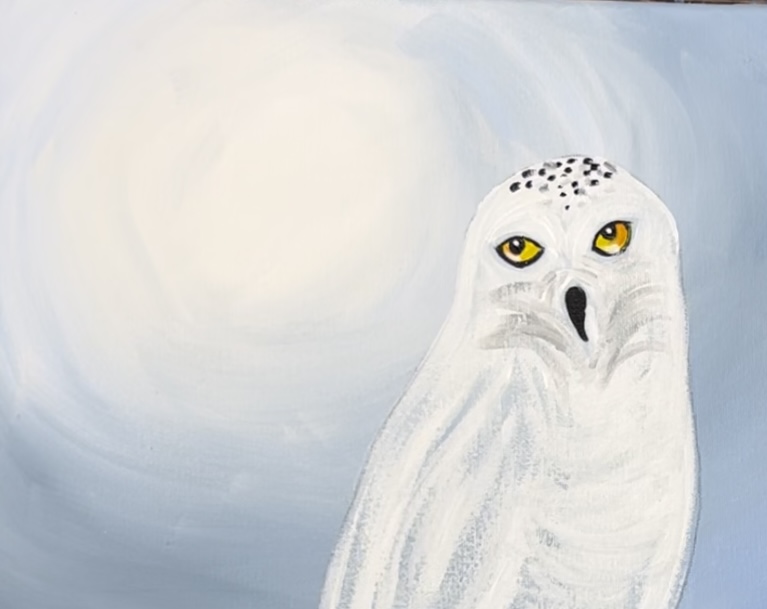

Then use the black to loosely outline the wing and bottom of the tail feather shapes.
Paint the lines that represent the tail feathers using gray.
Then paint more speckles in the chest area of the owl. Add a bit of gray into these speckles. Paint them so they kind of go in a curved direction on the chest.
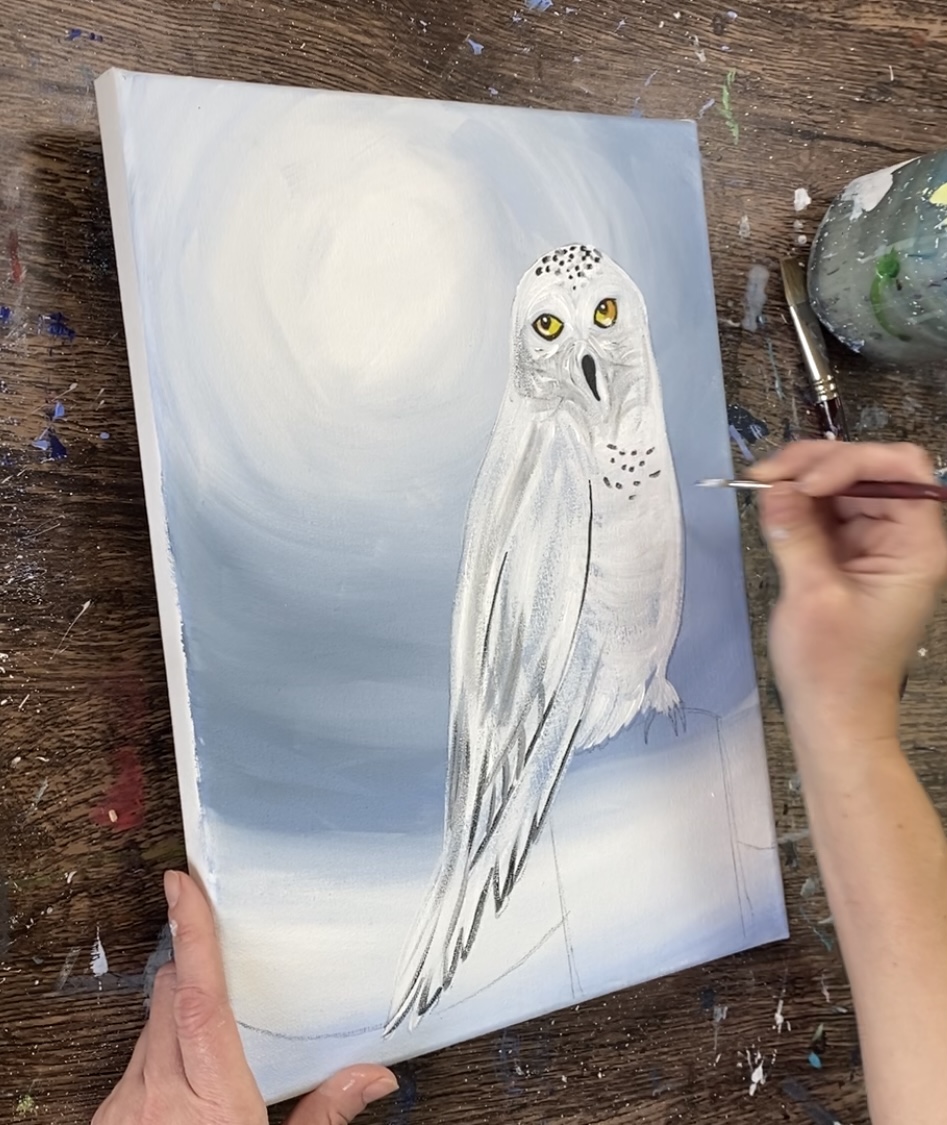
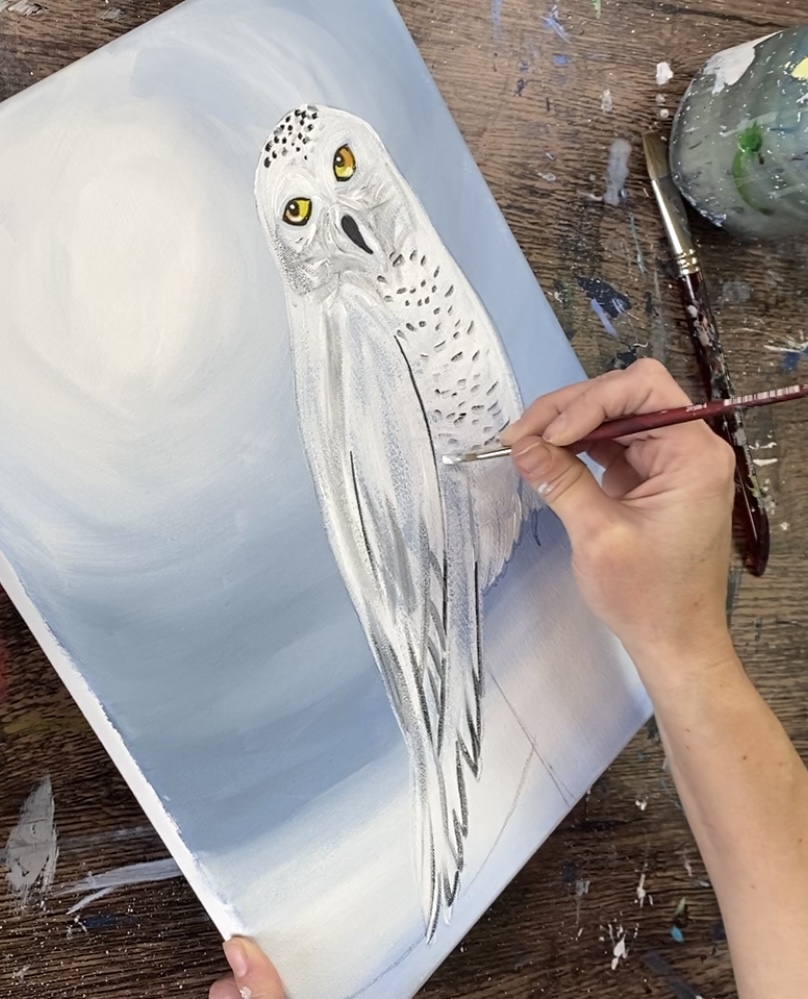
Paint the splotches on the belly area all the way down to the talons.
Next, rinse your #4 round brush and load it into just mars black. Use the 4 round brush to paint the three talons.

Next, paint the splotches that are on the wings. These splotches are slightly bigger and pure black. Each stroke goes in kind of a curved direction.
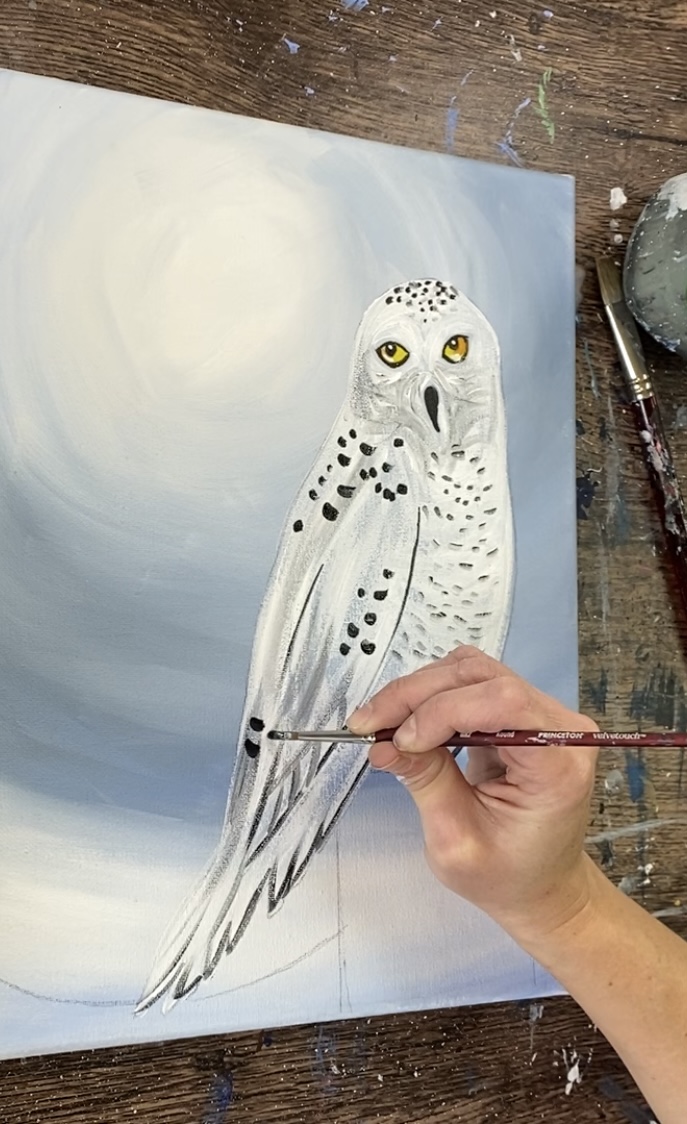
Vary the splotch-like strokes so some are smaller, some are larger.
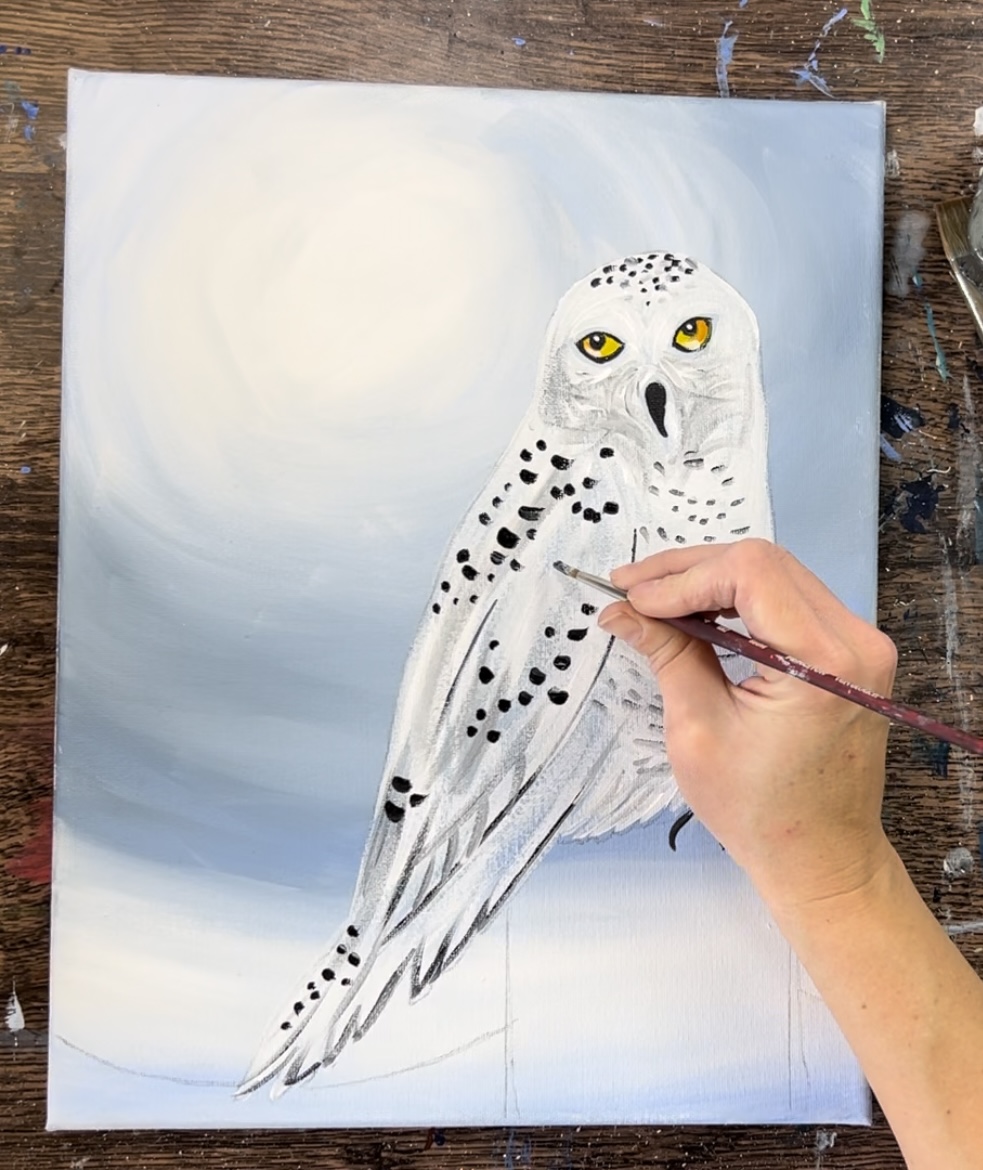
Paint these splotches all the way down to the tail. Note: the difference between the splotches on the wing and the ones on the belly region. The wing spots are darker and larger, the ones on the belly region are more gray, smaller and slightly more elongated.
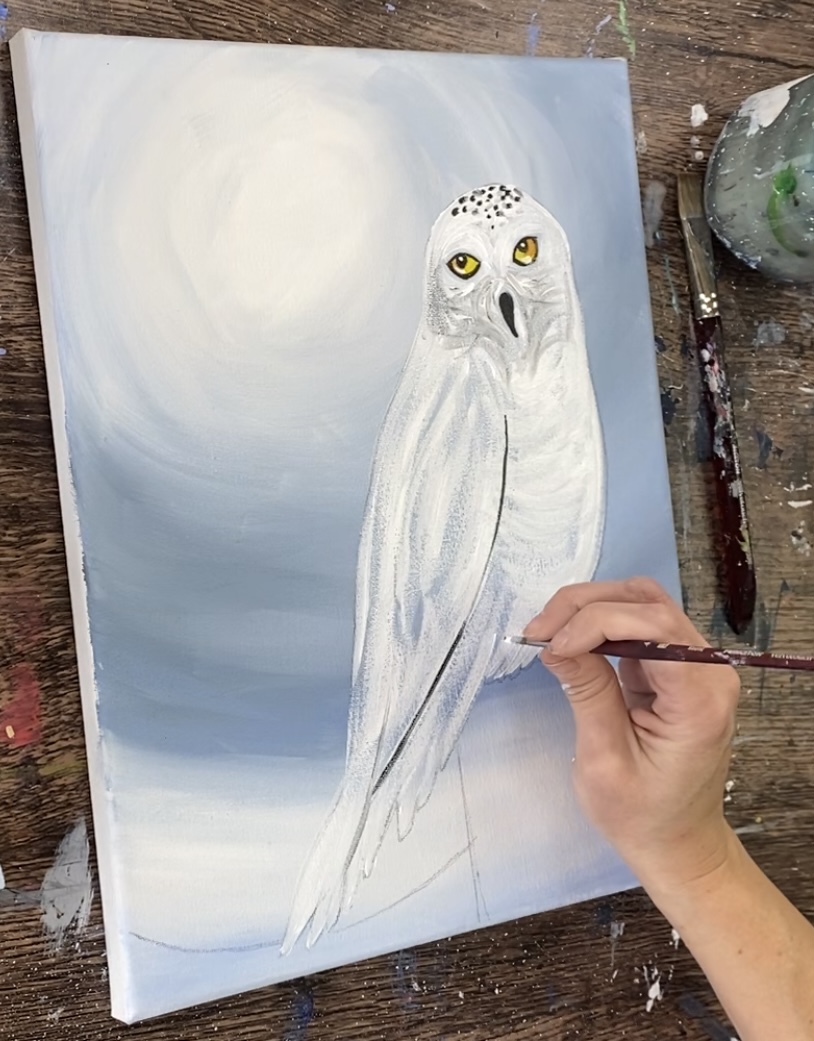
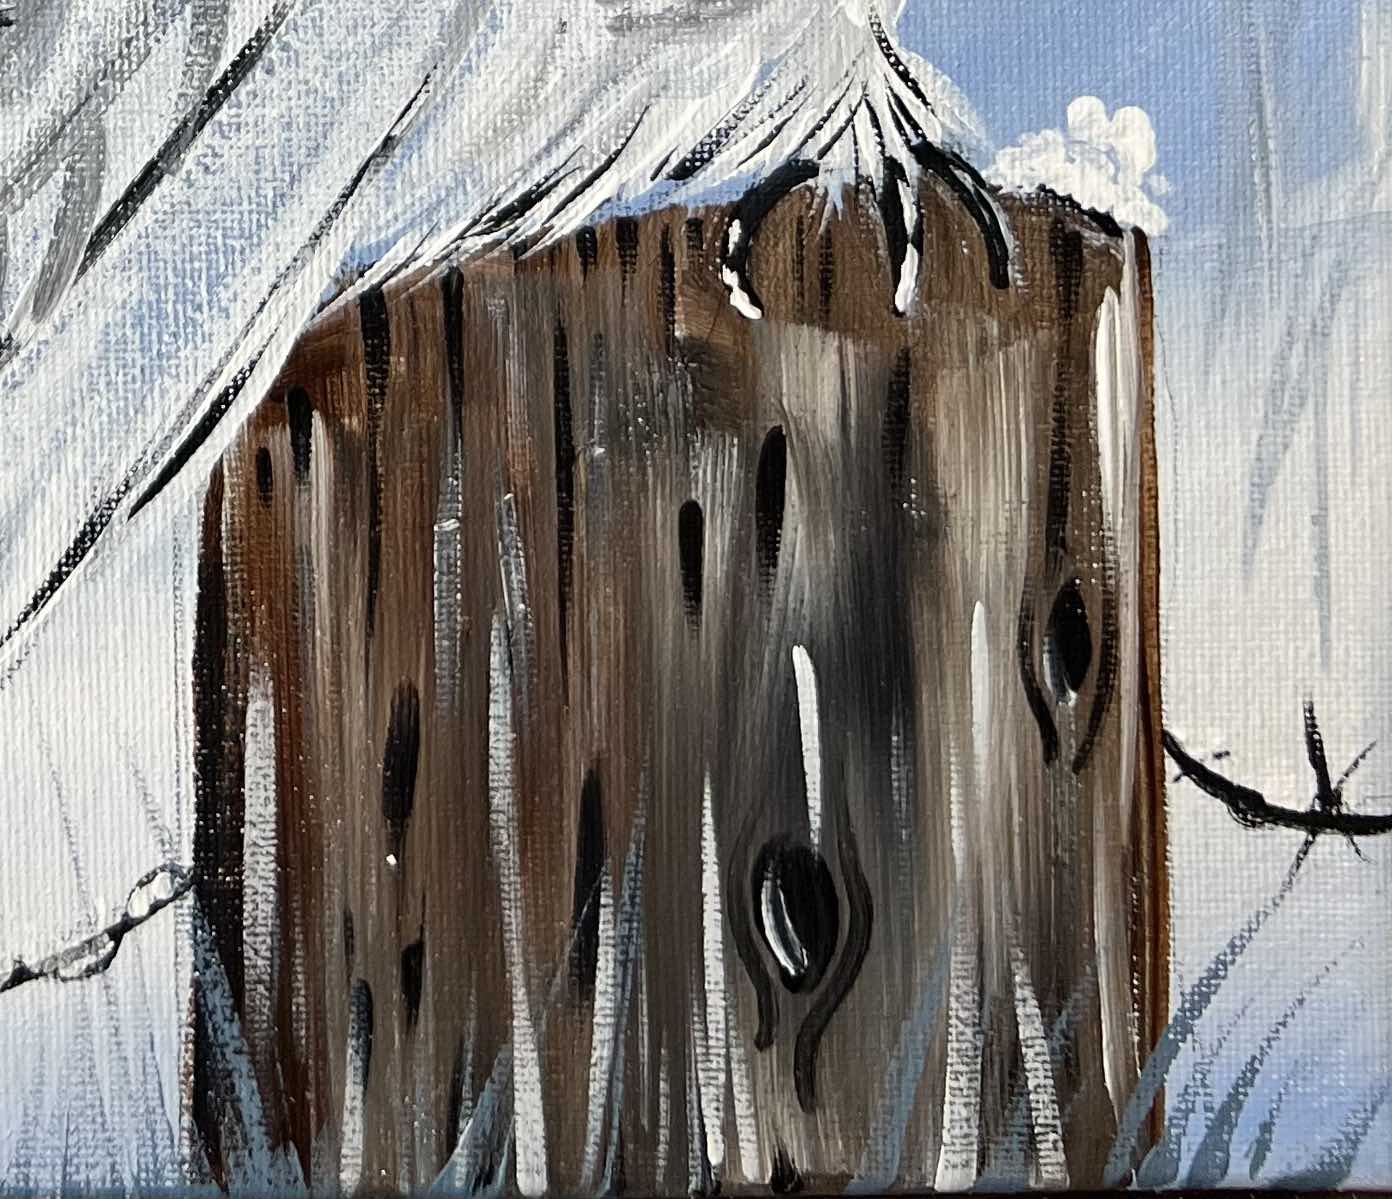
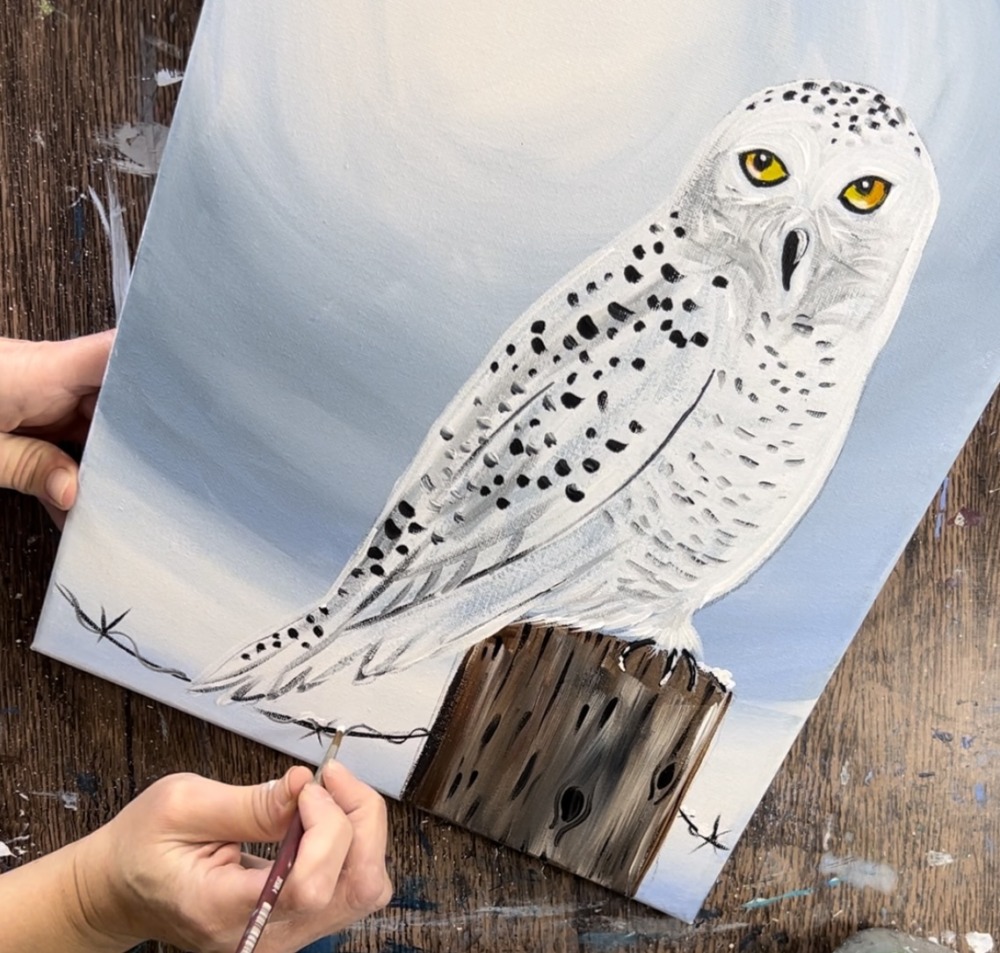
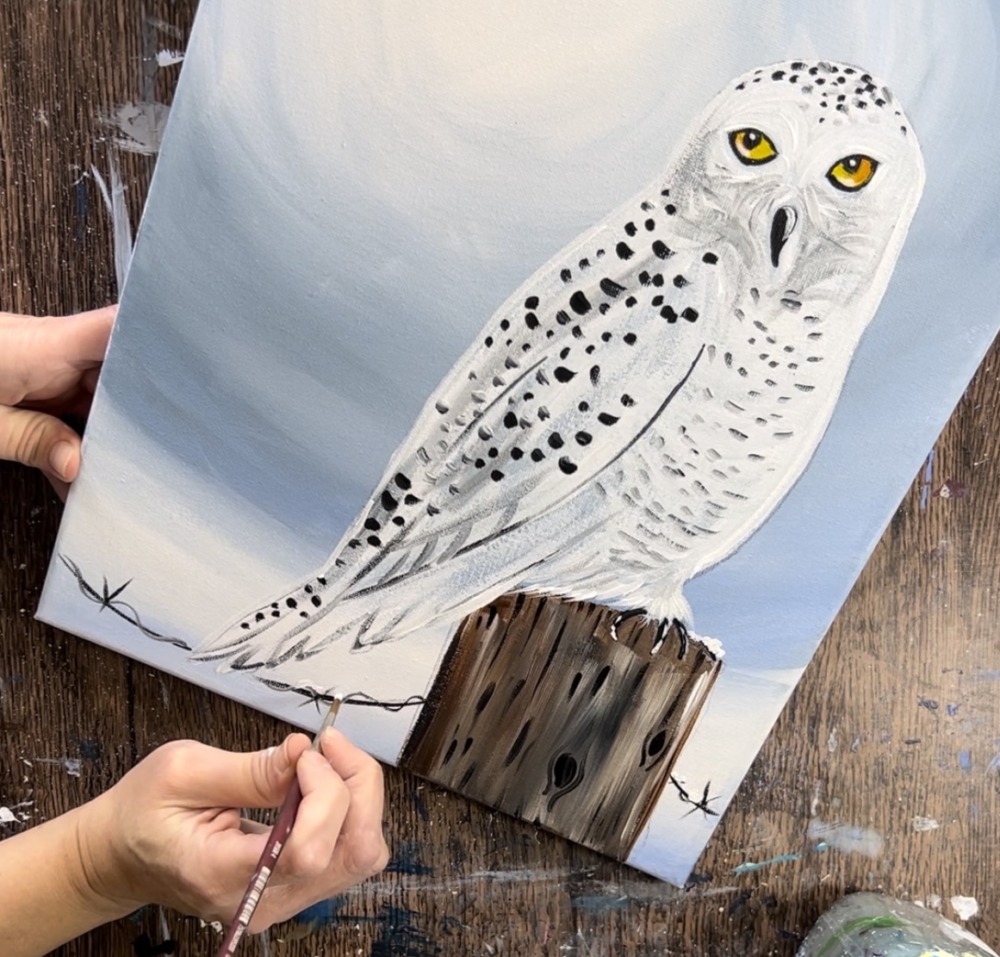
7. Paint Wooden Post
Paint the wooden post next. Use a 3/4″ flat wash brush. Load your palette with: burnt umber, titanium white and a tiny bit of mars black. Triple load the brush on brown and add a tiny bit of black and white on each of the corners of the brush.
Paint the post using the full width of the brush going in a vertical direction.
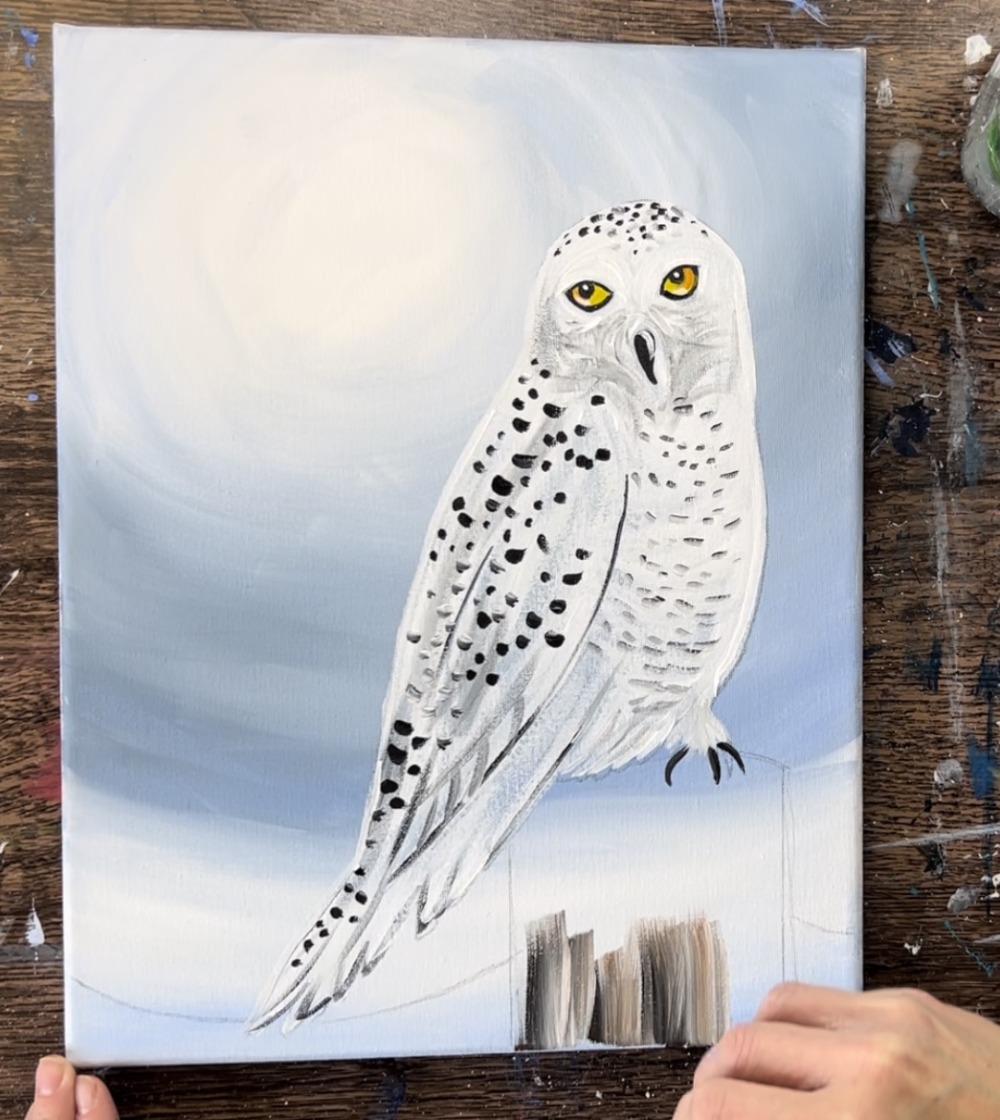
The color of the brown will look “streaky”. Try not to over blend the color all the way. Paint the entire post using this technique and try to go around the bottom of the owl and the talons.
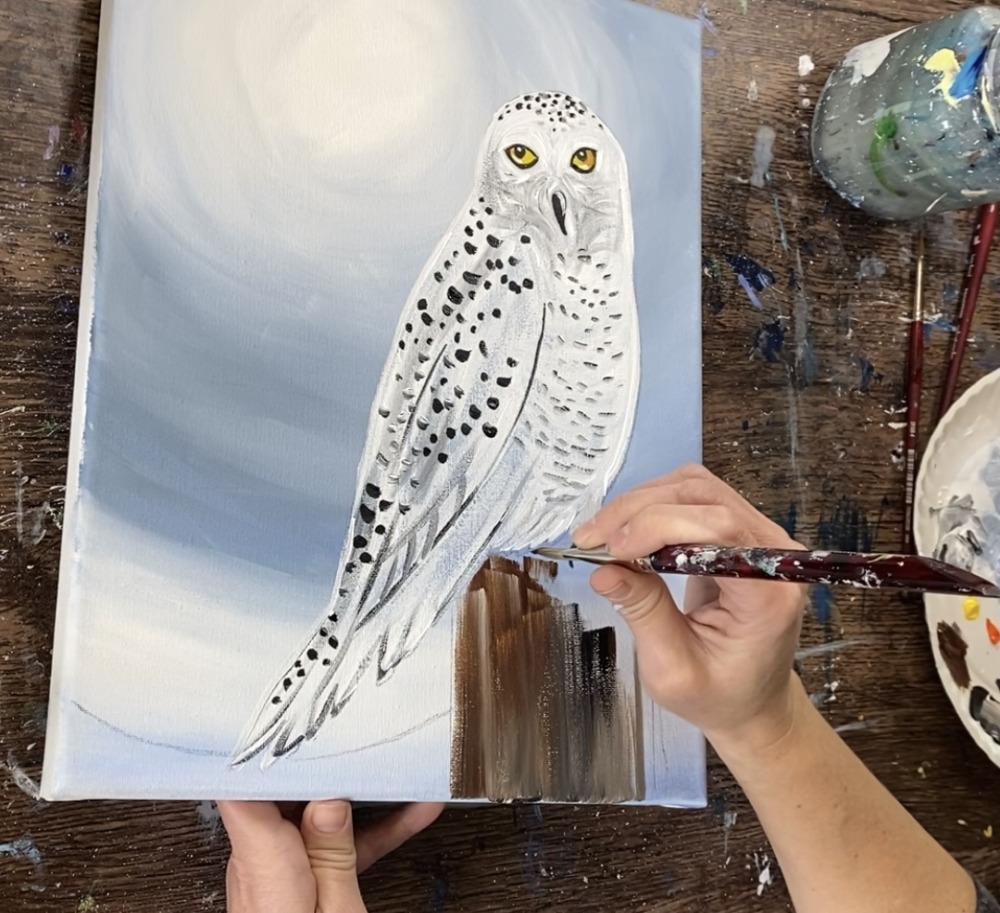
This technique will create a faux wood look.
8. Paint Wire
Next, use either your #4 round or #8 round brush to paint the wire. First load the tip of the brush in mars black and paint the two curved lines that attach to the post.
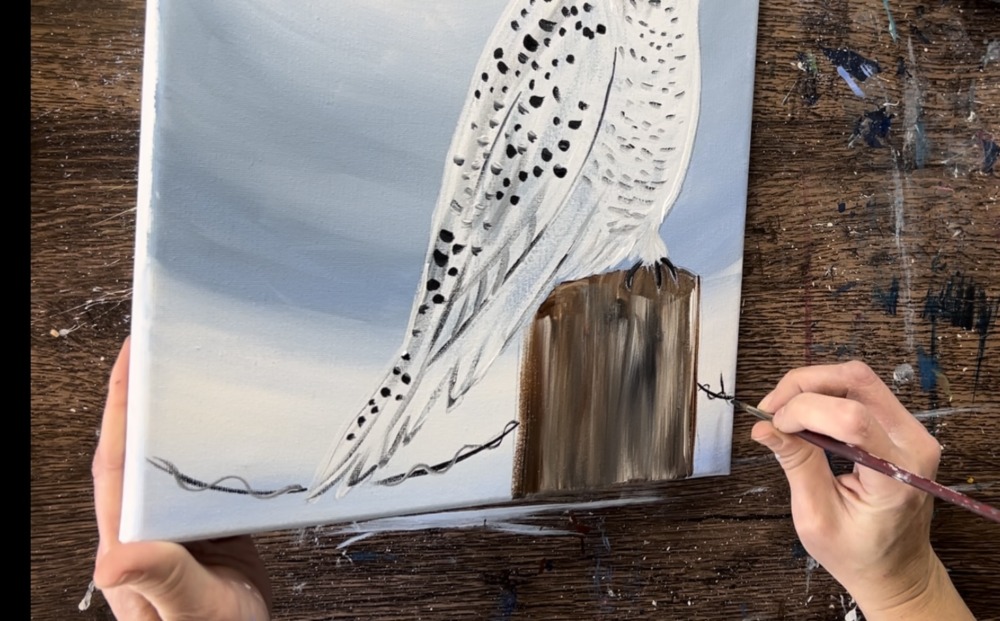
Then paint a wavy line using gray (mix a little white into the black). Do this along the initial curved lines.
Next, paint the spikes on the wire. Paint an “X” using the tip of your round brush. I did three “X’s”. You can do more or less.
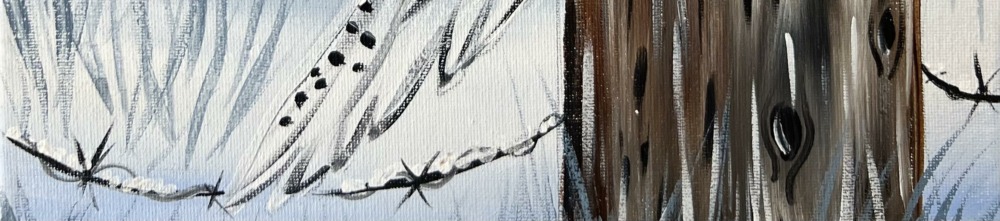
Also, paint the wood texture using your #4 round brush and mars black. Paint small vertical lines. Also paint little oval wood knots and curved lines that contour around the wood knots.
Closeup of the wood post with detailed texture.
9. Paint snow on wire & feathers that overlap top of post
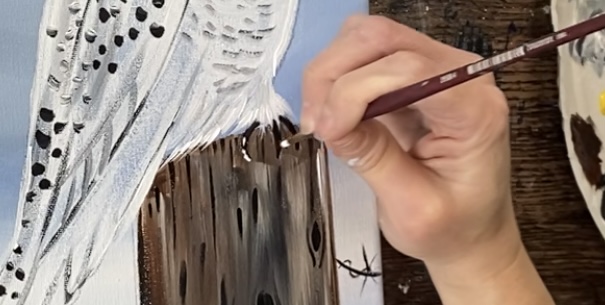
To do the snow on the wood post, load your #4 round brush in titanium white. Paint little dots on top of the post for the little bit of snow piling up. Also, highlight the owl’s talons with the white. Paint a curved stroke on each of the claws.
Then paint little dots of snow piling up on the wire.
Closeup of wire:
10. Paint Snow Falling
Use the #4 round brush and titanium white to paint the snow falling. Paint small dots throughout the sky. Paint these strokes so they are varied. Some are smaller, some are larger. Some are closer together and some are further.
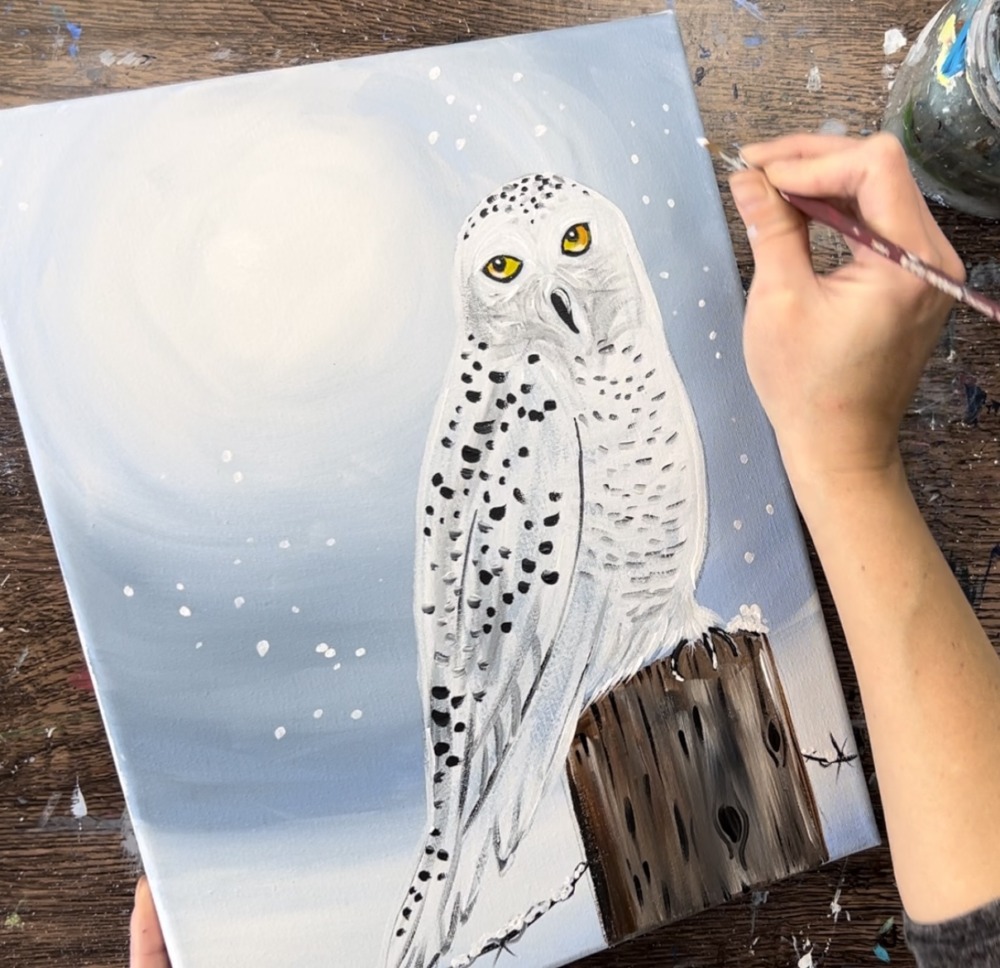
11. Paint Grass/ Foliage In Background
Use the #8 round brush to paint the grass pieces. Mix various grays on your palette using the blue gray and the titanium white/mars black. Slightly water this color down to loosen the paint. Then paint diagonal strokes throughout the land area.
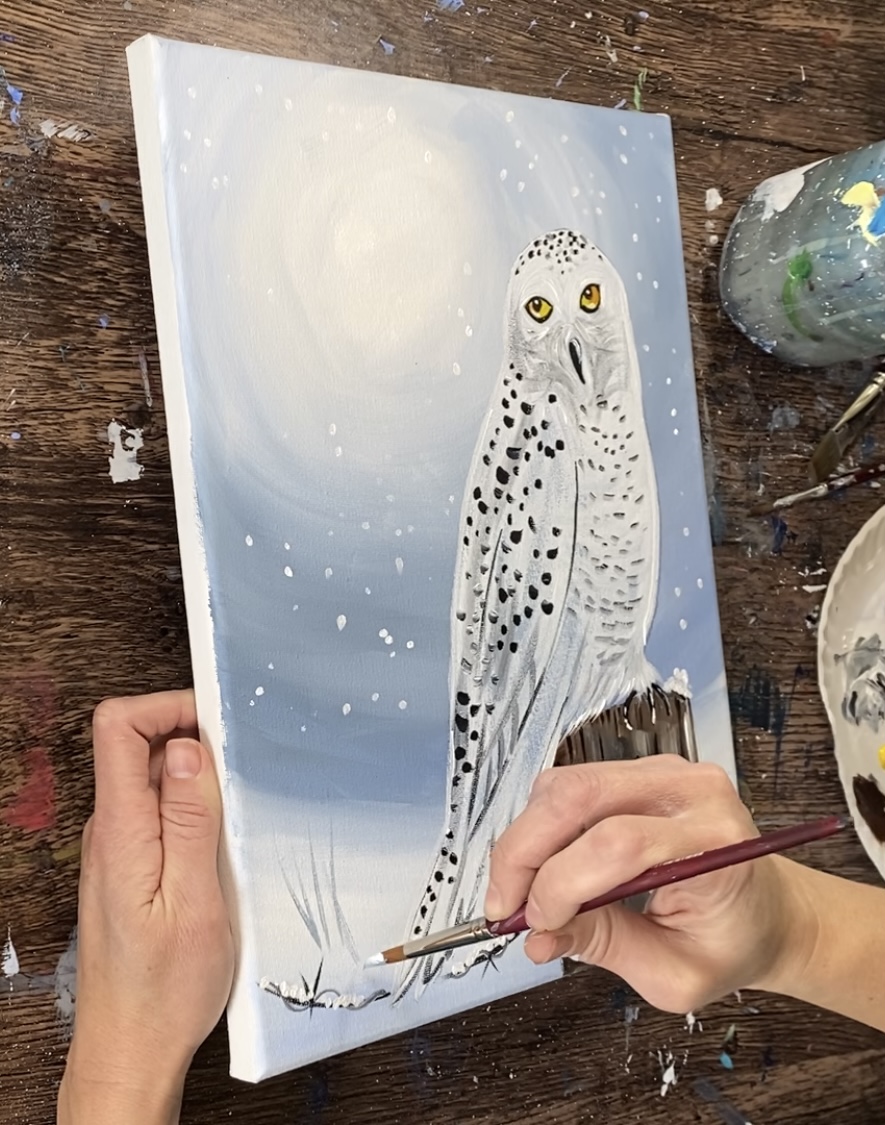
Add some white into some of your gray to lighten the gras strokes.
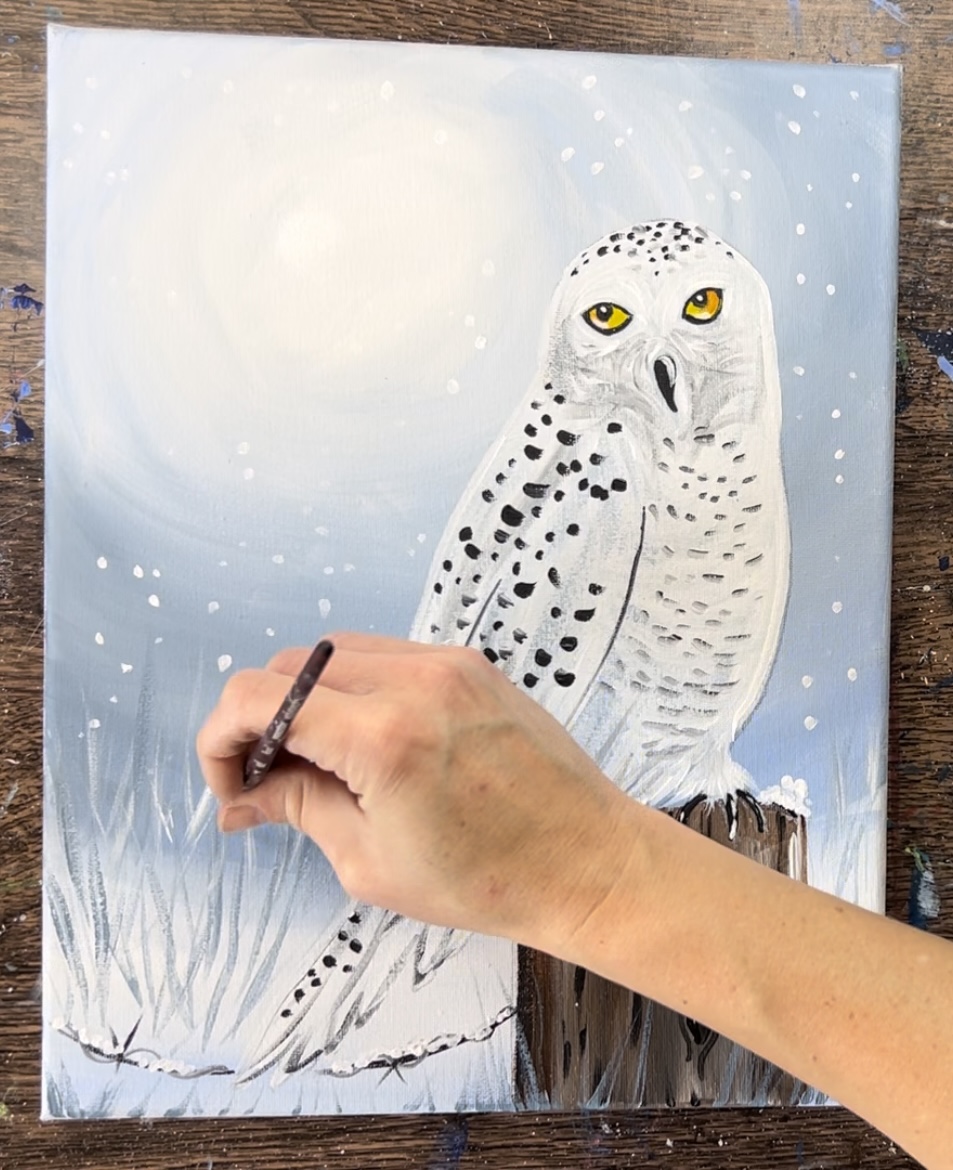
These diagonal strokes are very loose and vary in color in terms of tints of gray.
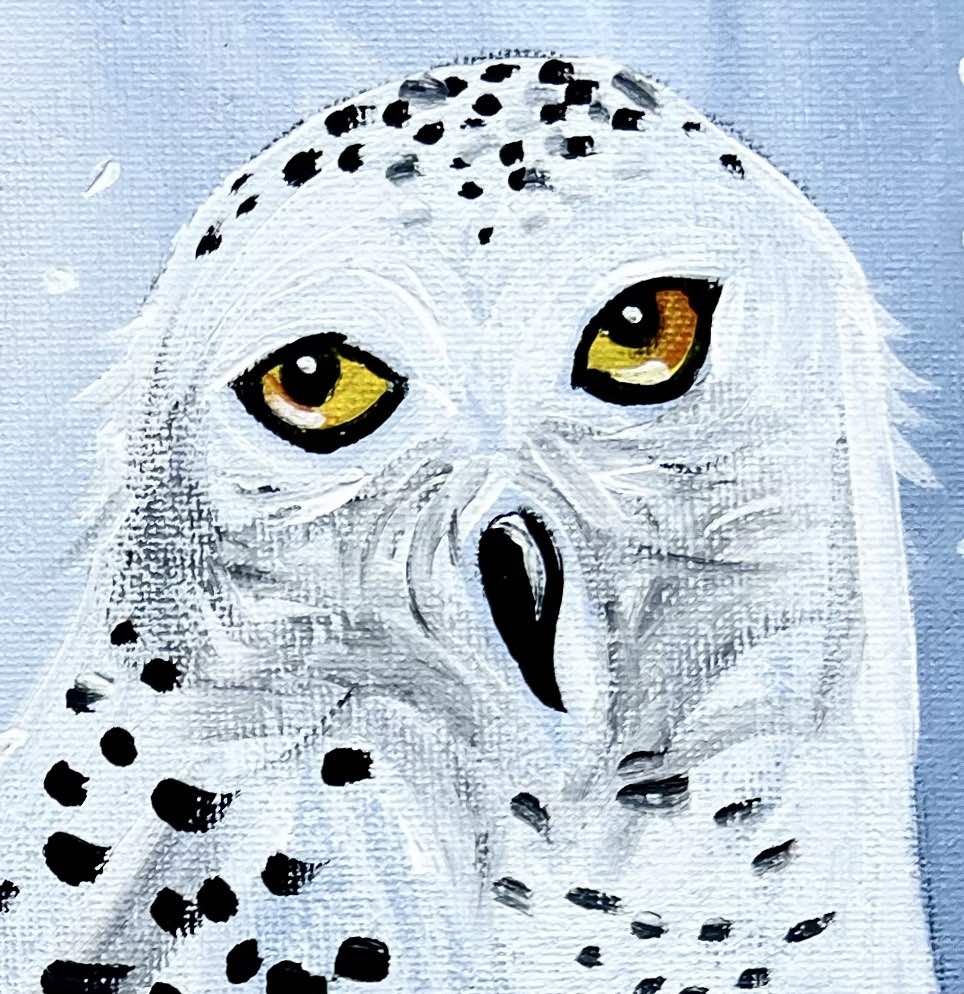
11. Paint Feather Texture (extra)
As an extra detail, use the #4 round brush and titanium white to paint small textured pieces on the edge of the wings.
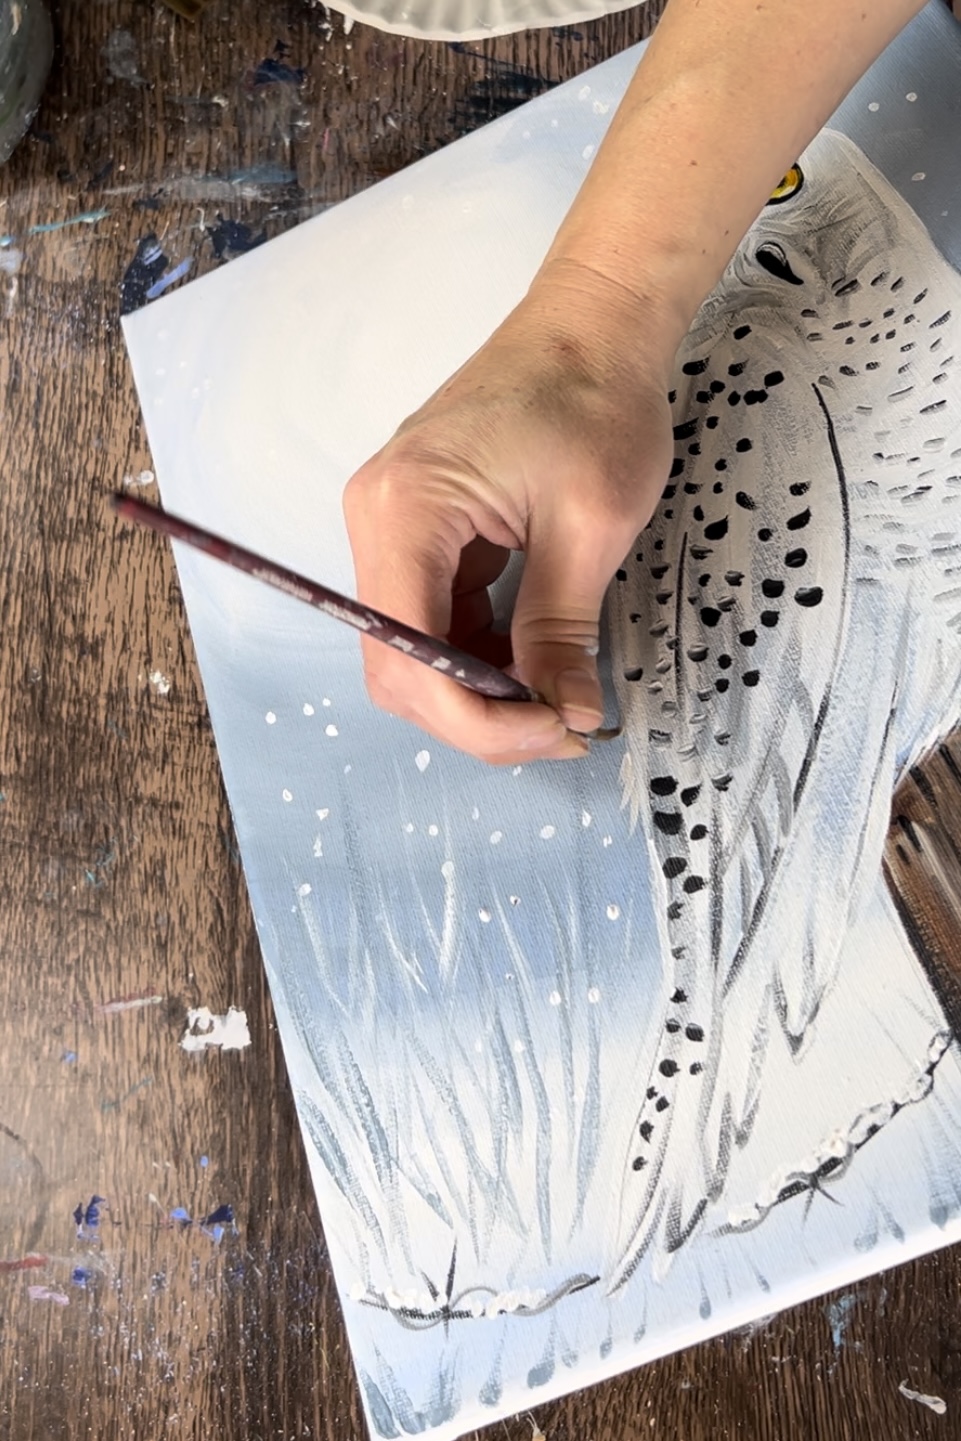
Paint small flaring strokes on the sides of the owl’s head as well.
Closeup of owl’s head:
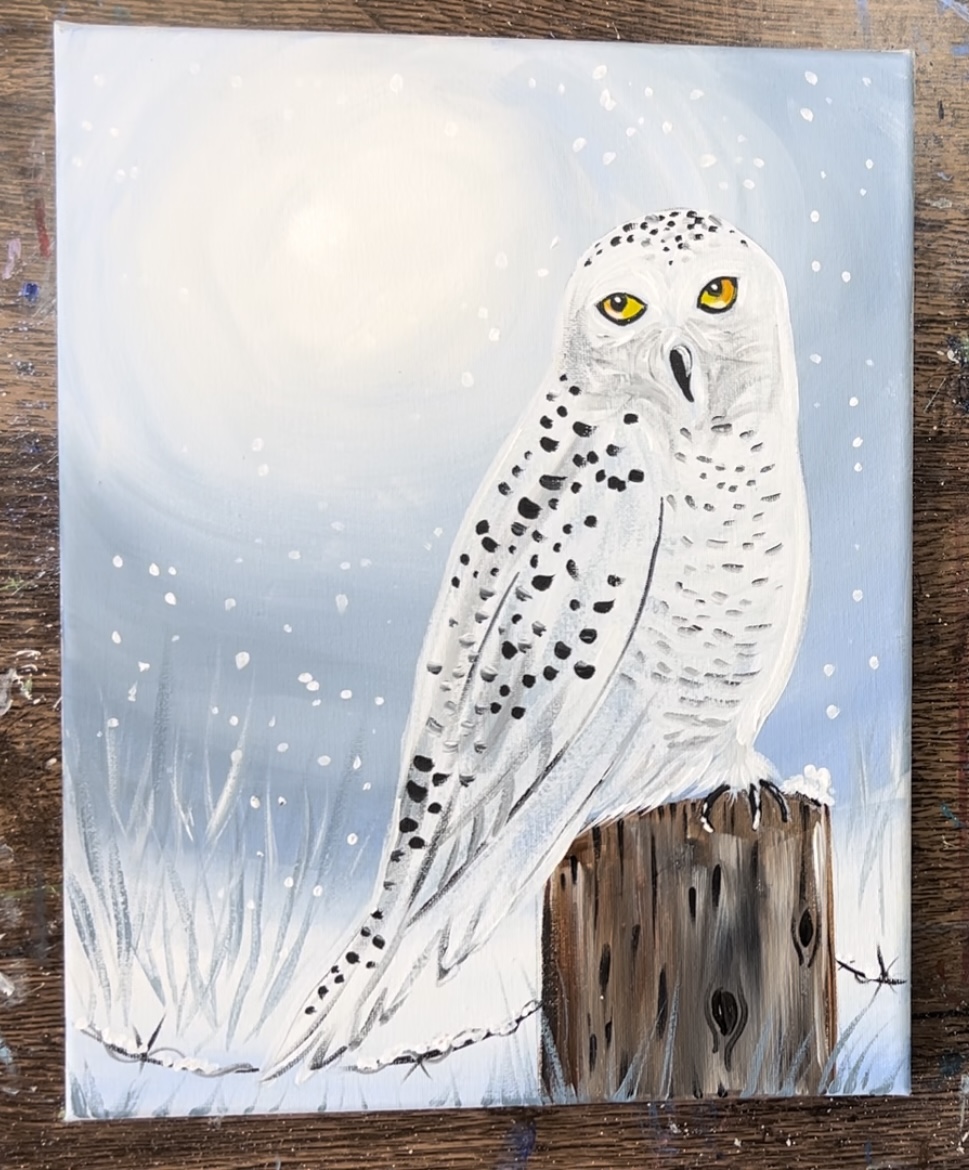
Finished!
See Also…