Would you like to save this?
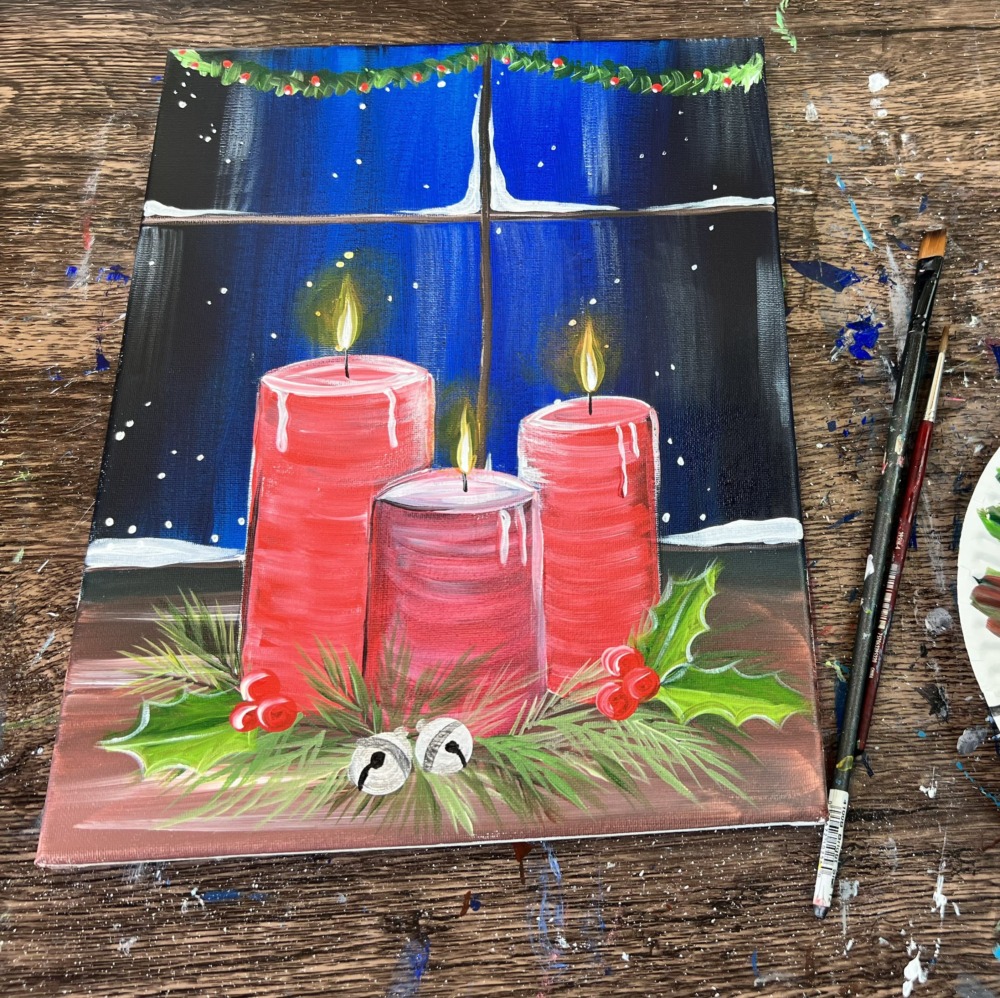
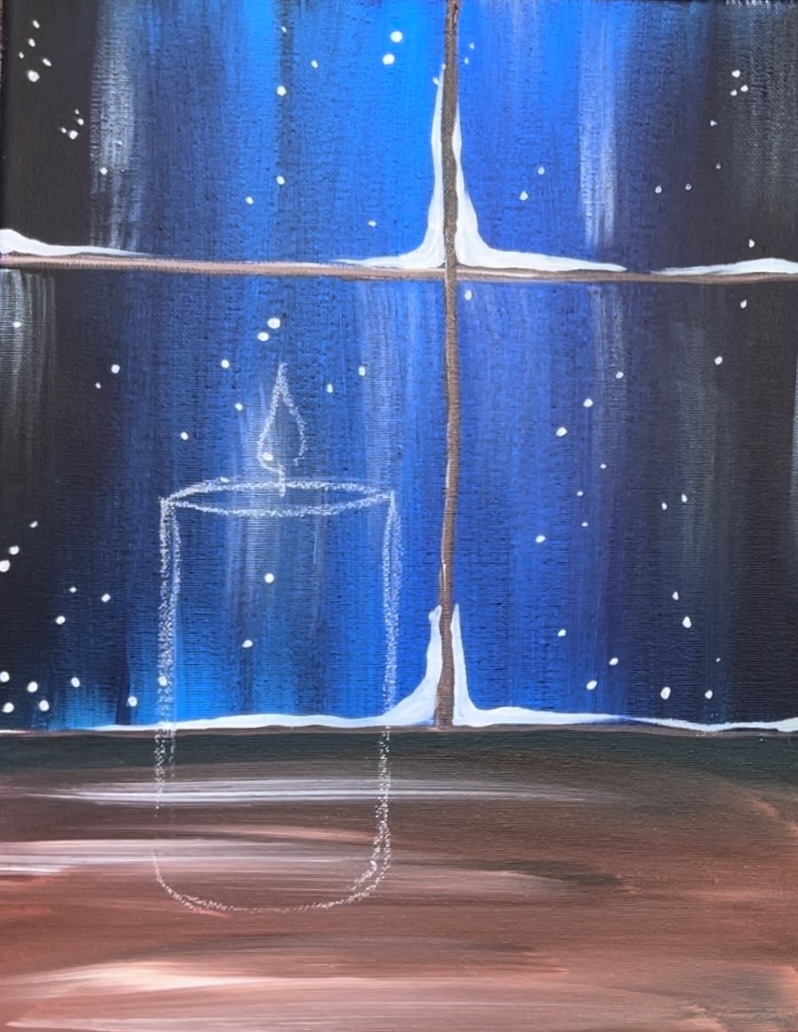
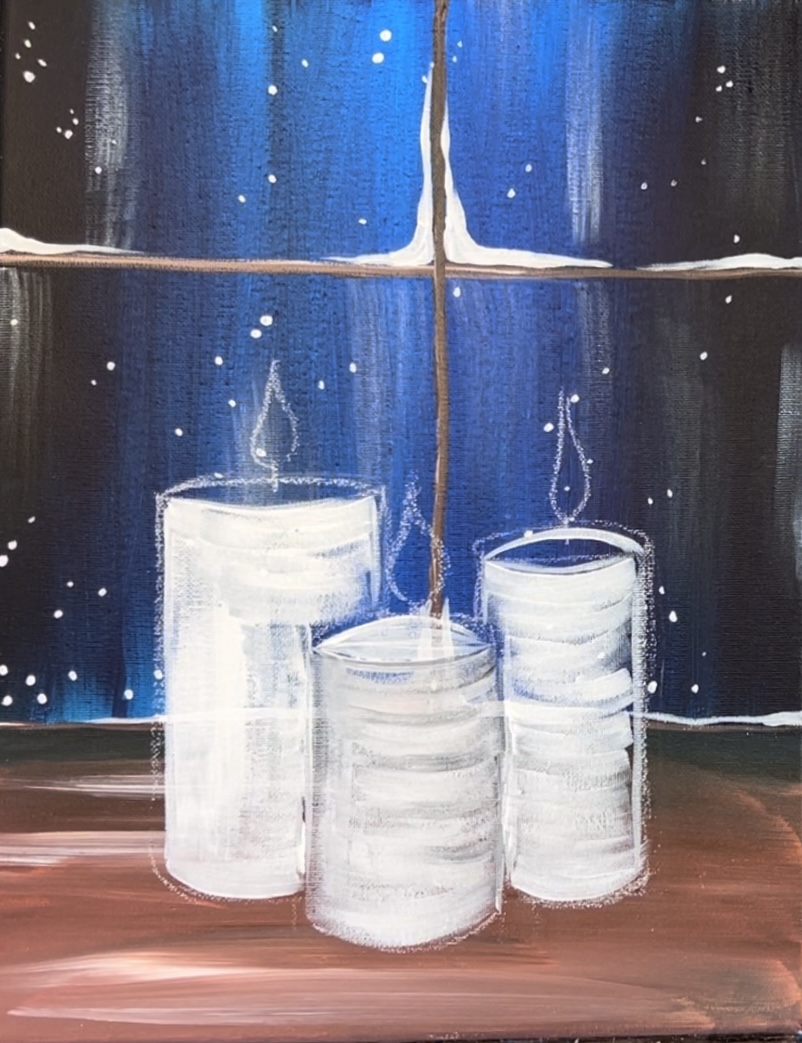
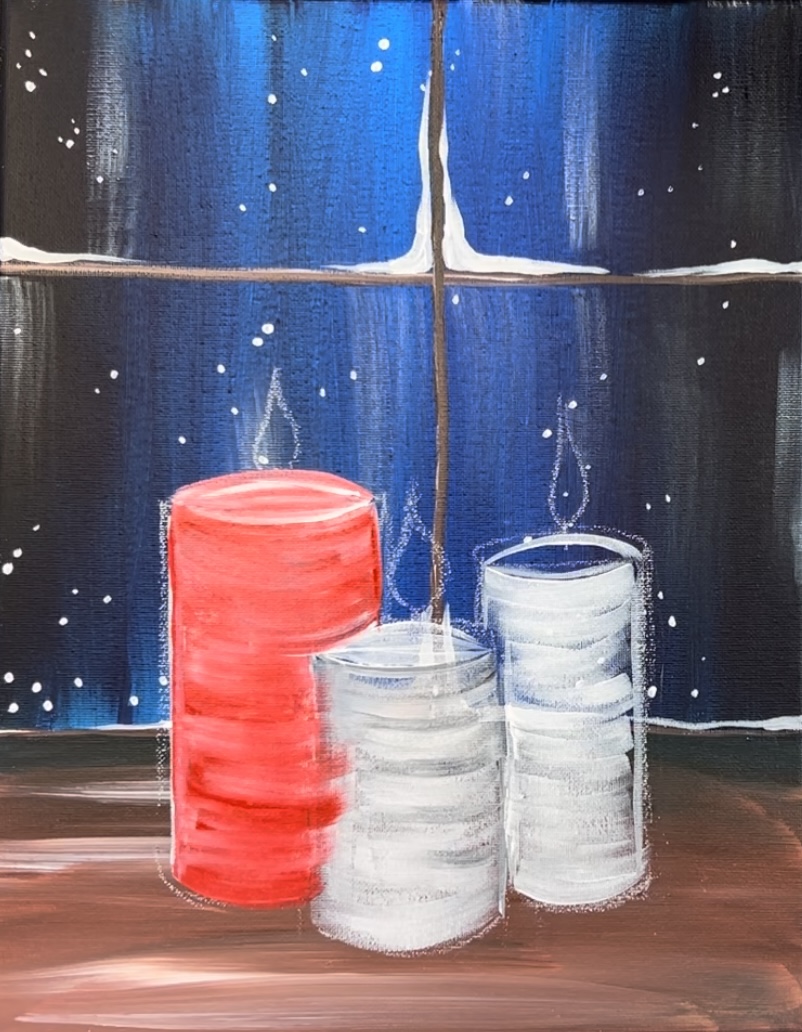
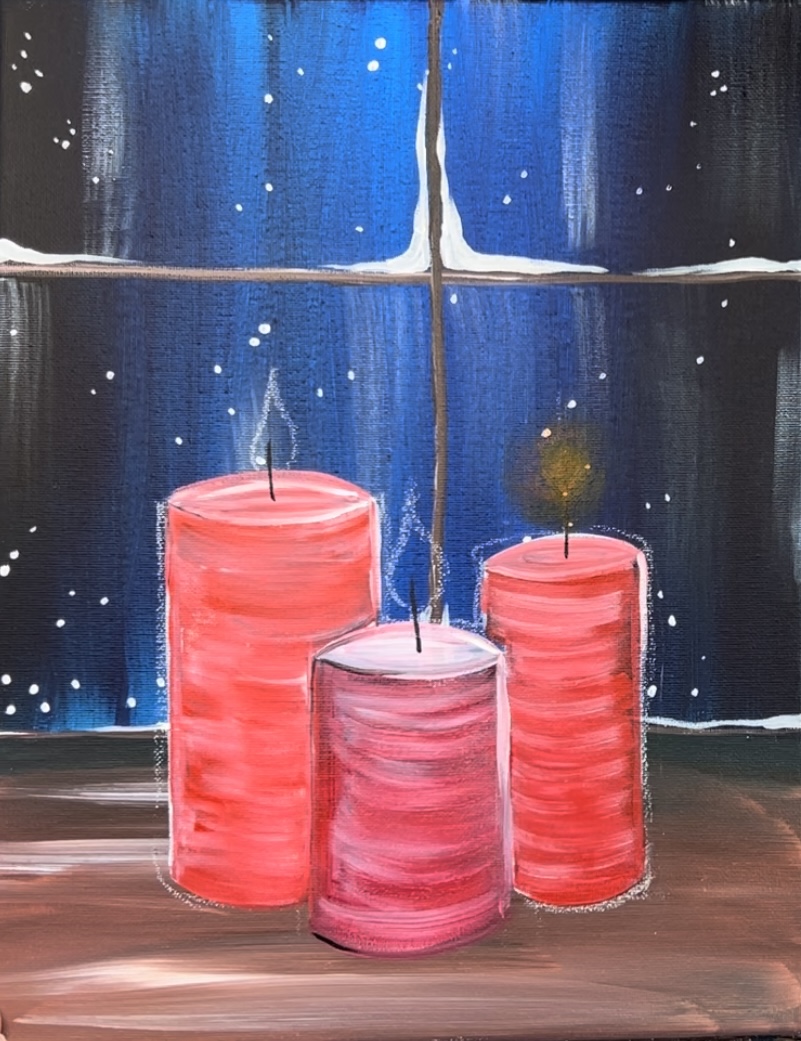
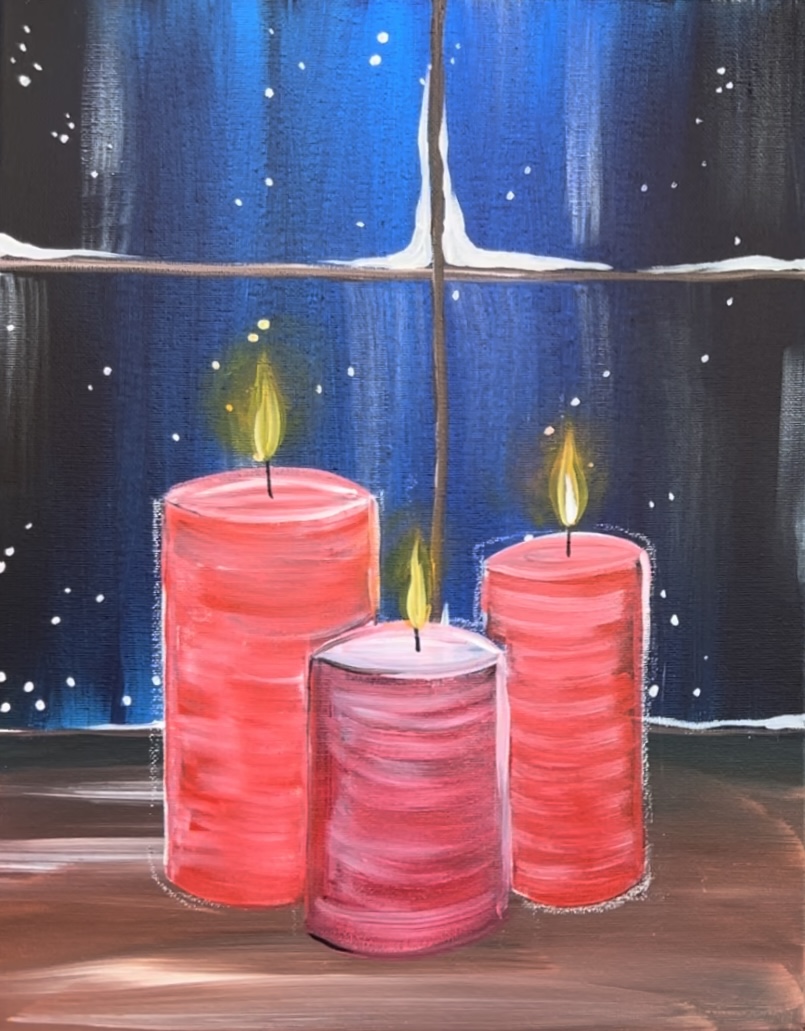
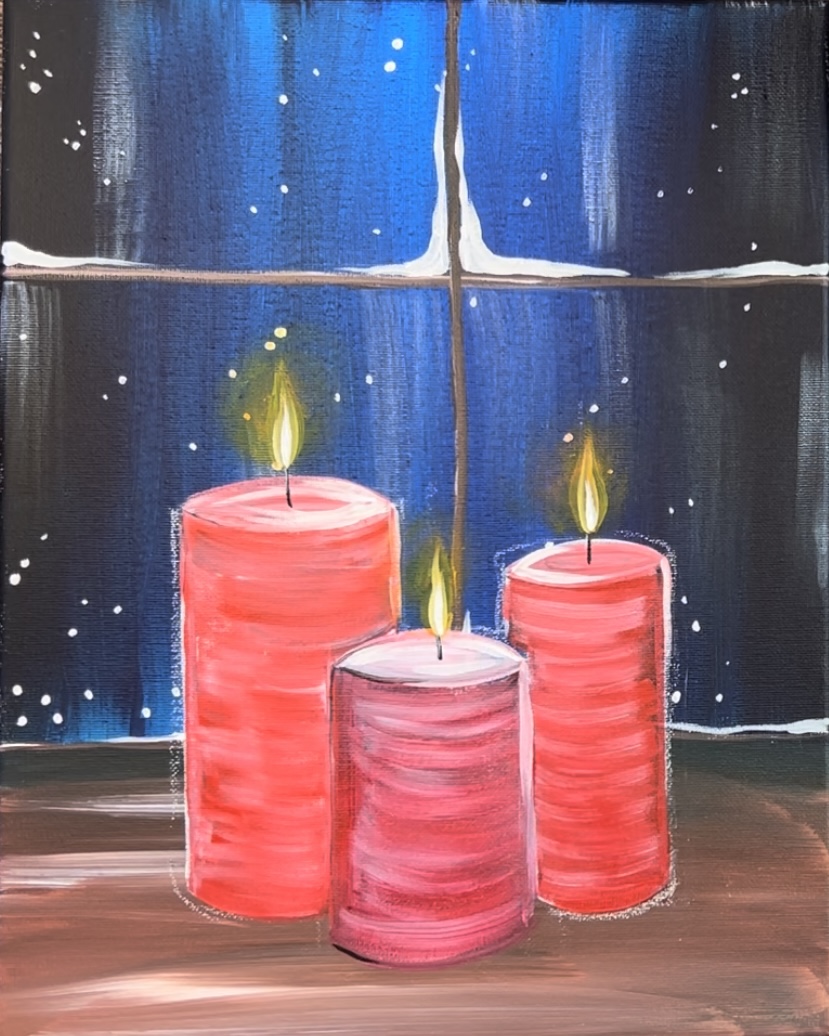
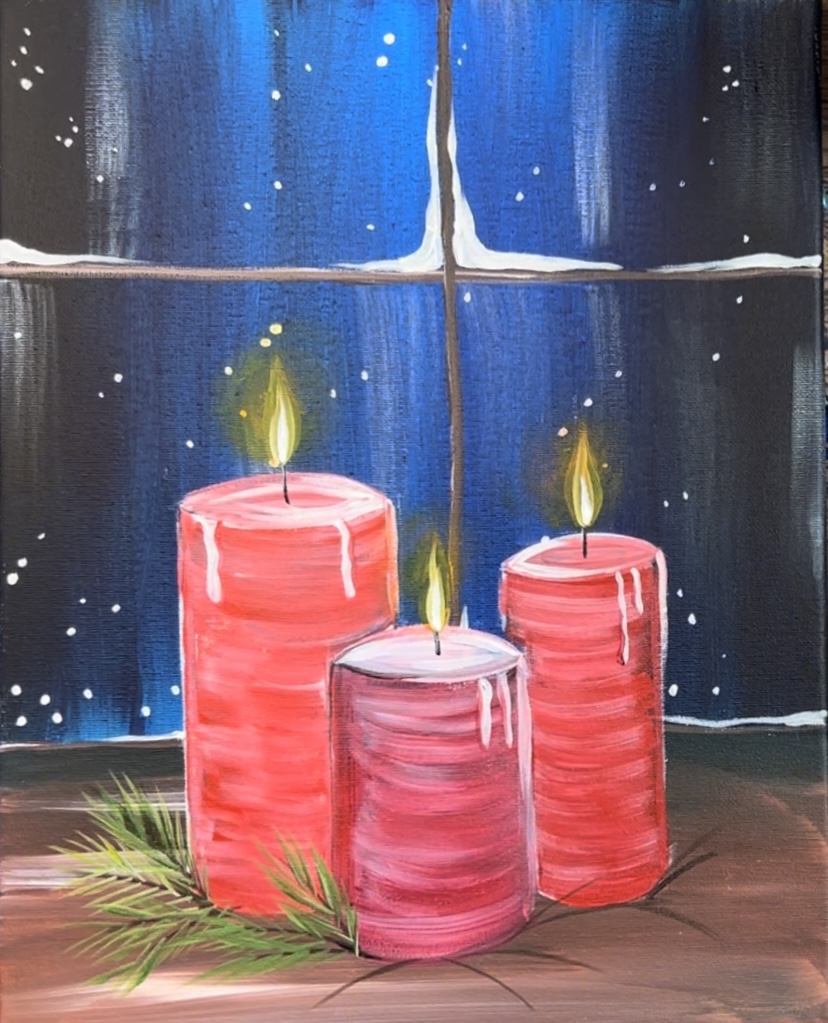
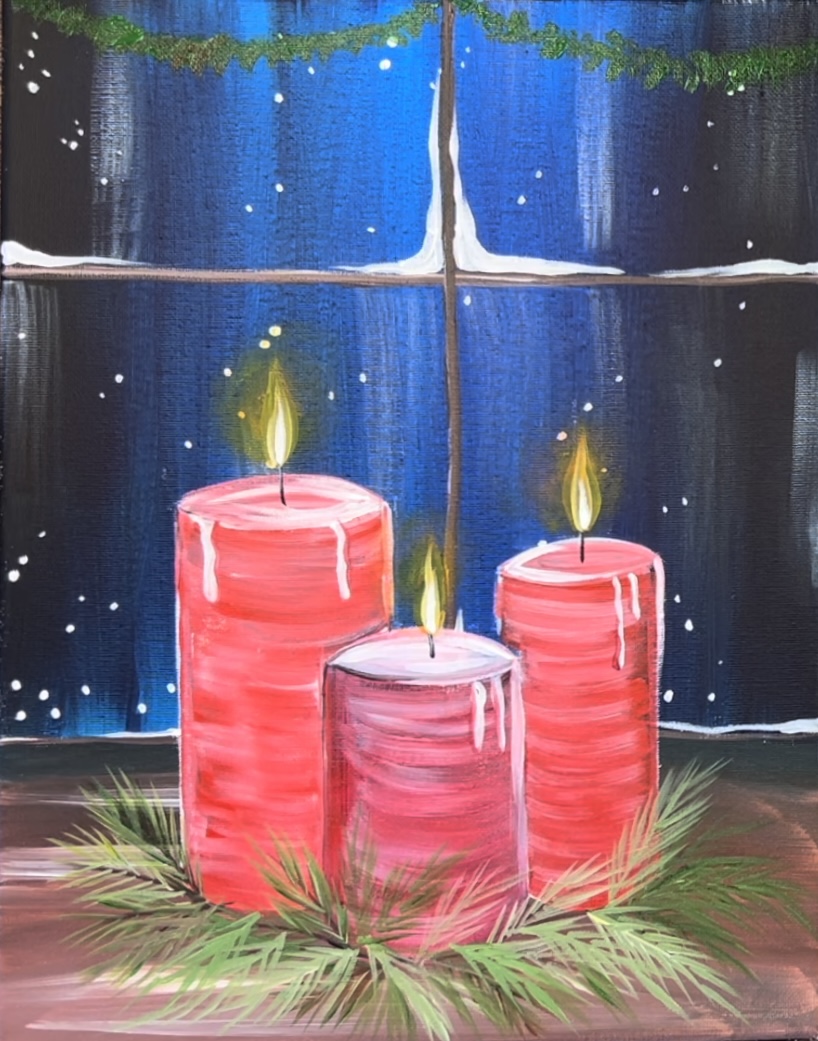
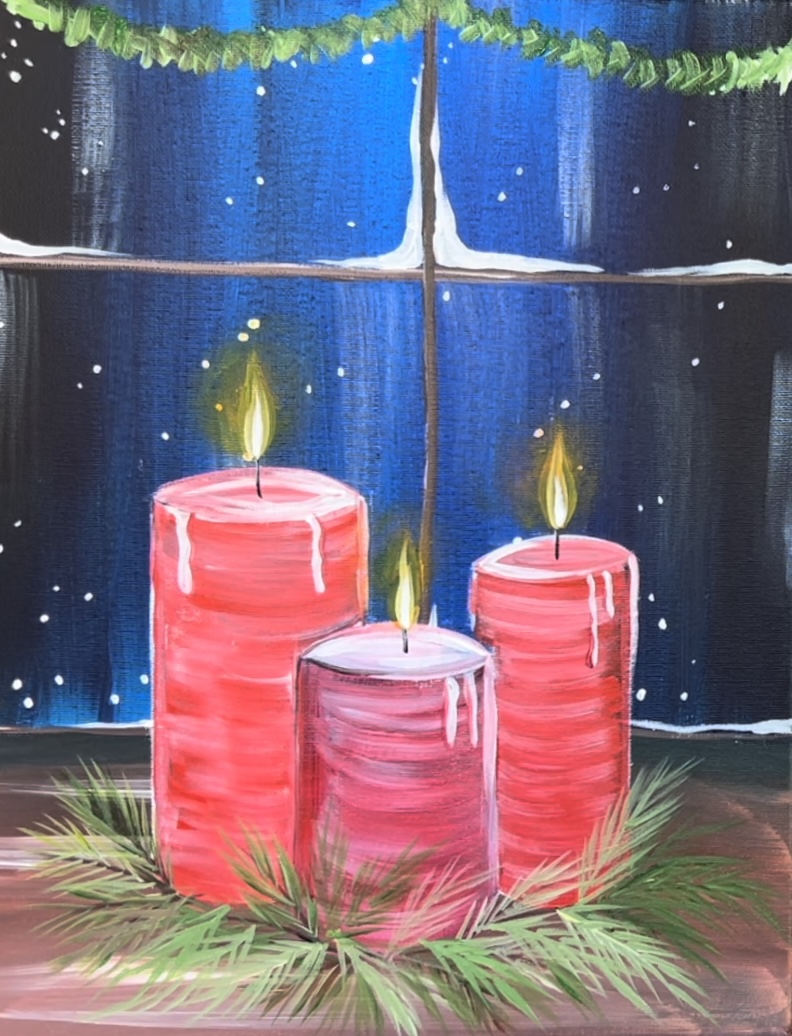
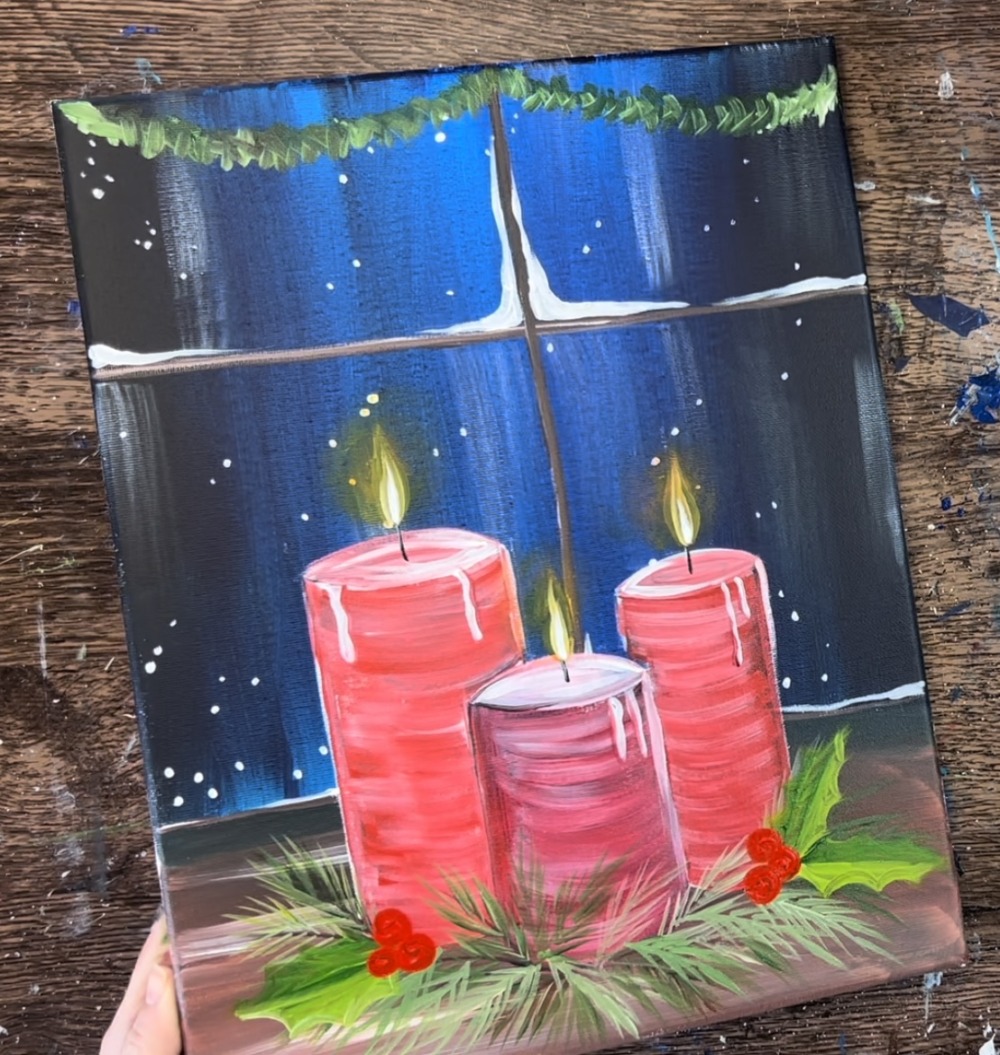
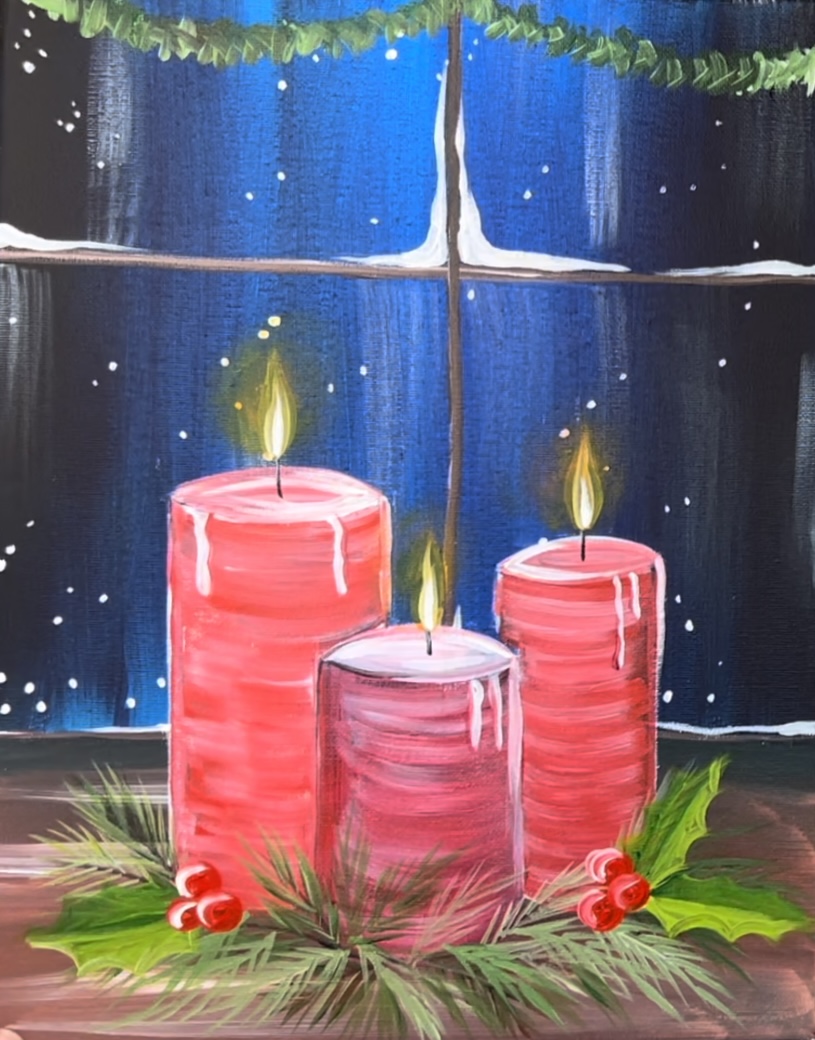
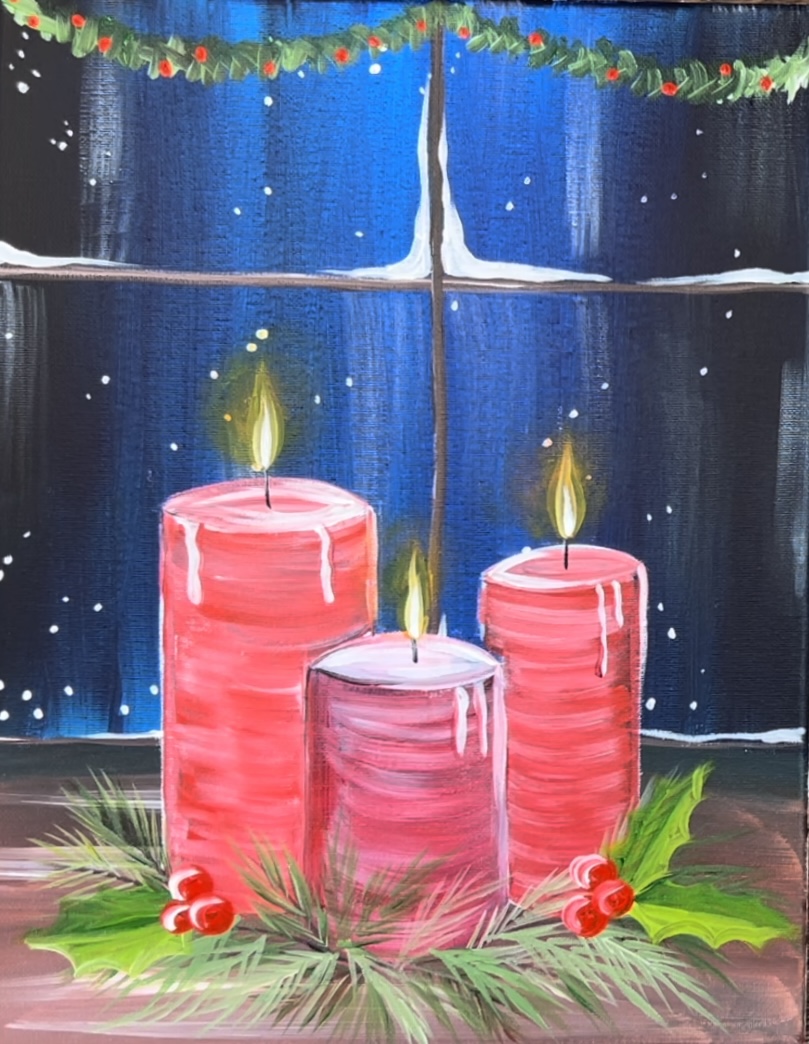
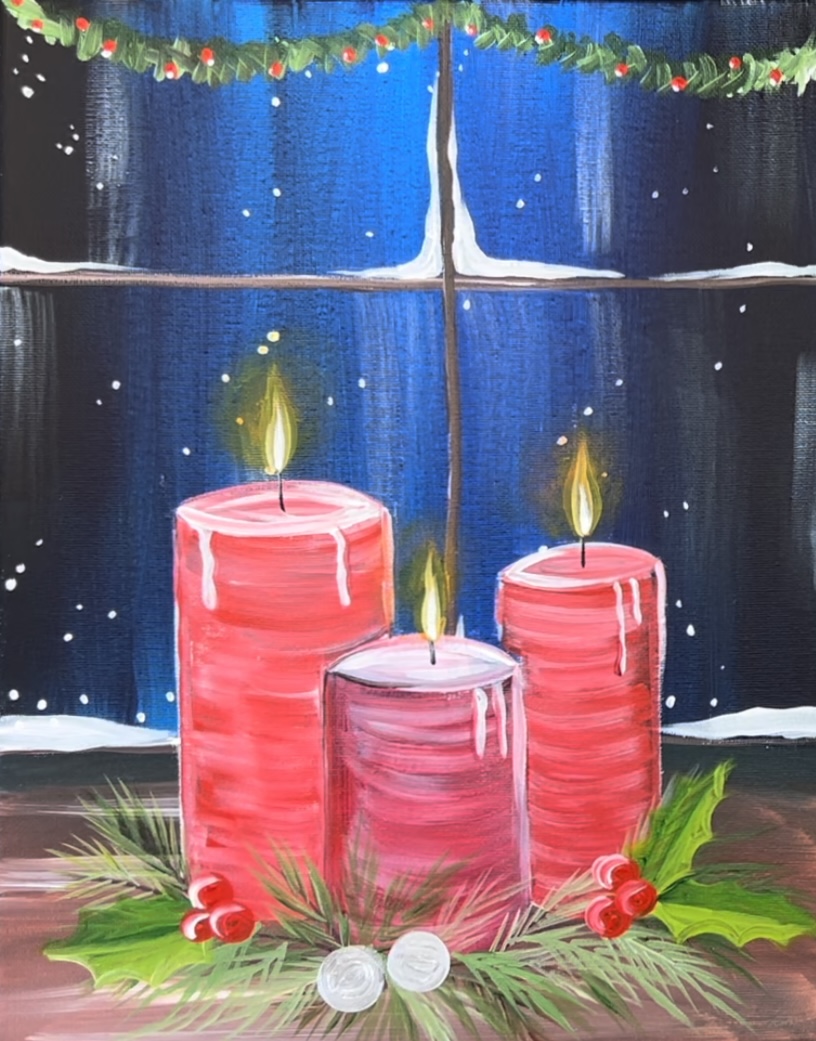
Learn how to paint a set of three Christmas candles with decorative Christmas wreath next to a snow night window.
You can customize the colors of these candles and even add a third one to make it an advent wreath.
Enjoy and happy painting!
Materials Needed
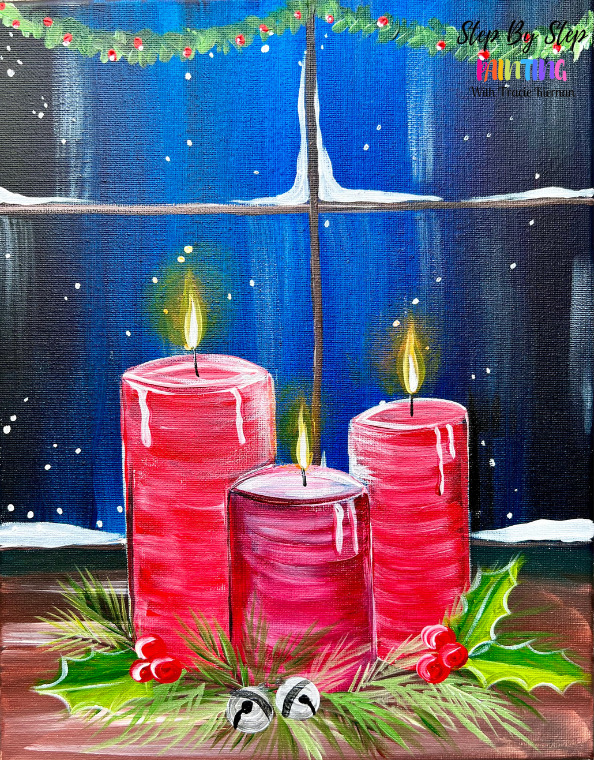
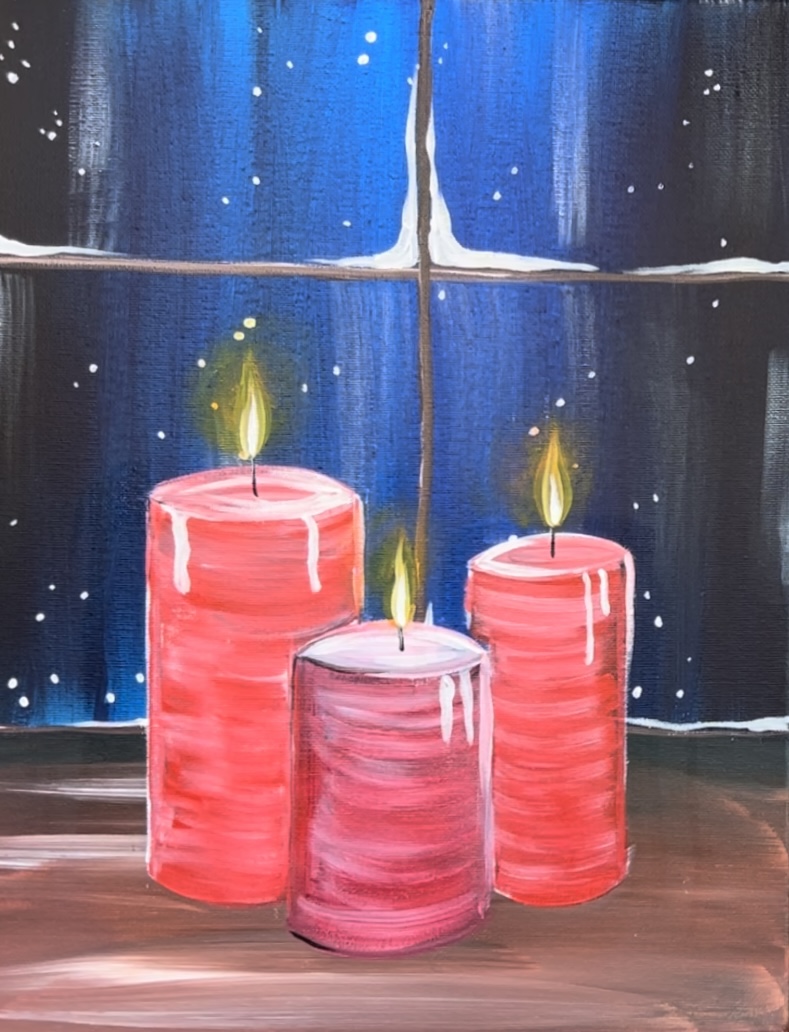
Christmas Candles - Acrylic Painting Tutorial
Learn how to paint candles in front of a frosted snowy window with holly and other holiday decor at the base of the candles.
Materials
- 11 x 14 Canvas
- Acrylic Paint
- Paint Brushes
- Chalk or White Pencil
- Optional traceable template
- Optional graphite paper
- T-Square Ruler
Colors
- Pyrrole Red
- Alizarin Crimson Hue Permanent
- Primary Yellow
- Hooker's Green Hue Permanent
- Phthalo Blue
- Mars Black
- Titanium White
- Silver (optional)
- Burnt Umber
Brushes
- 4 Round
- 3/4 Flat Brush
- 12 Bright Brush
Color Palette
This painting was done using Liquitex BASICS acrylic paints. If you are using a different branch, use the color chart below to help match colors.

Using Craft Paints?
If you are using craft paints such as the Apple Barrel Craft Paints, I would recommend subbing to these colors:
- White
- Flag Red
- Holly Branch
- Too Blue
- Nutmeg Brown
- Silver (optional or any metallic color)
- Black
- Bright Yellow
- Any Dark Red
Directions At A Glance
Traceable

Video
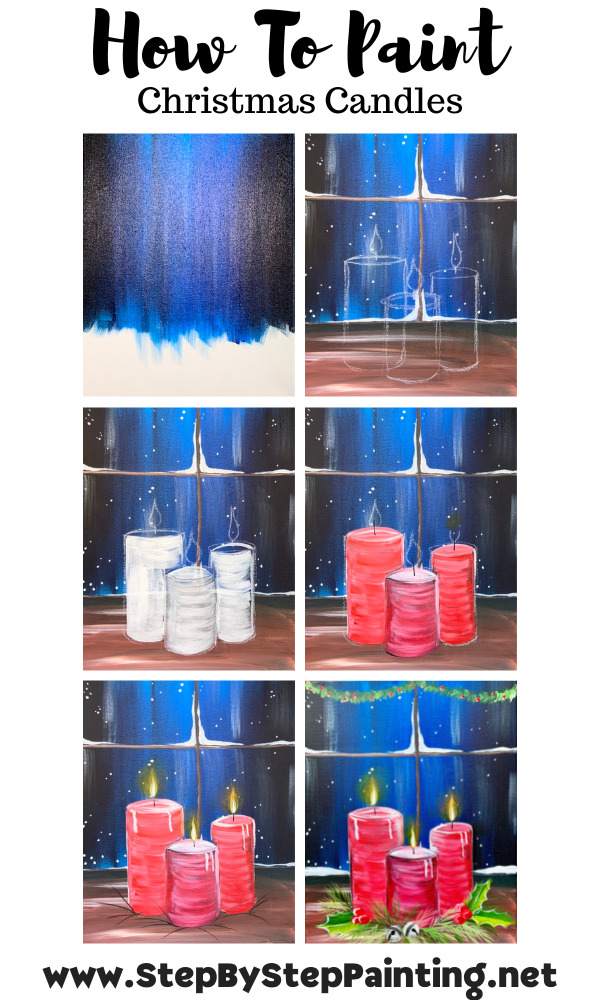
Step By Step Directions
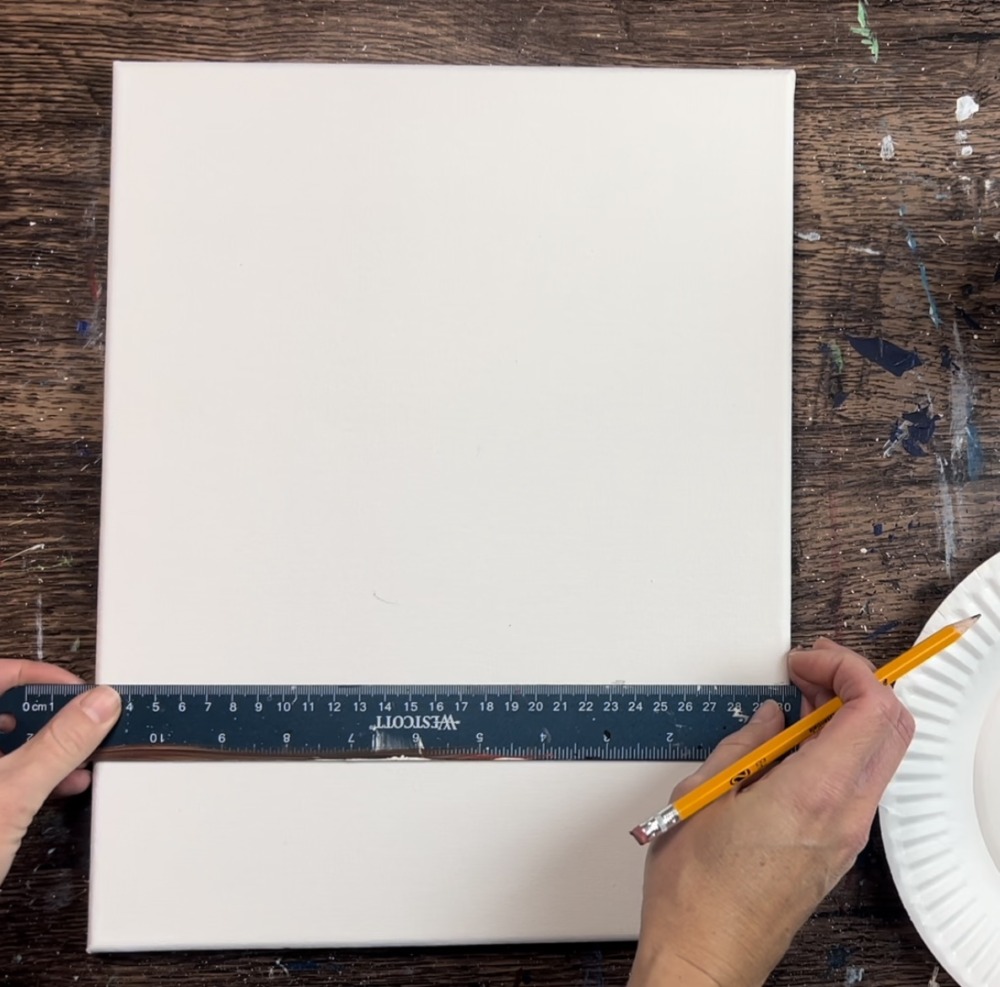
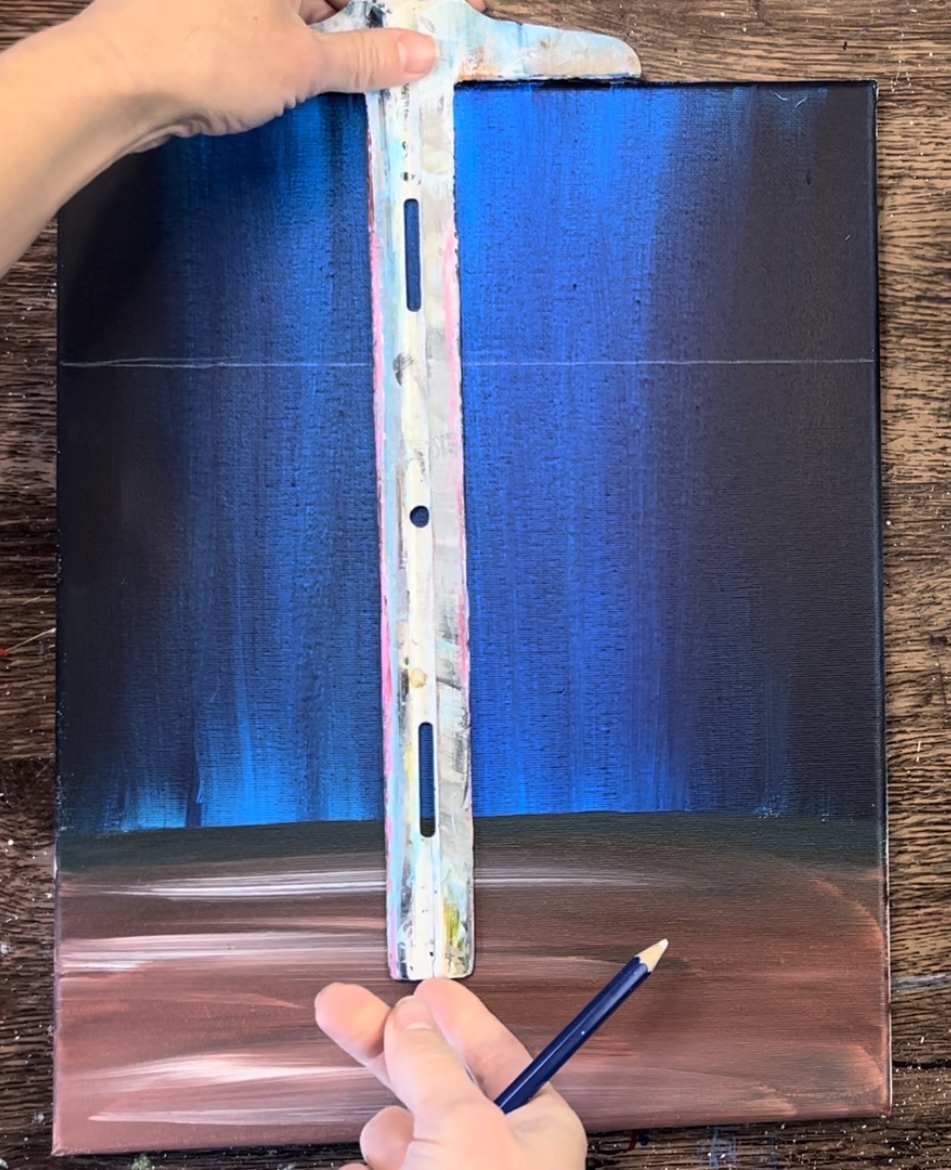
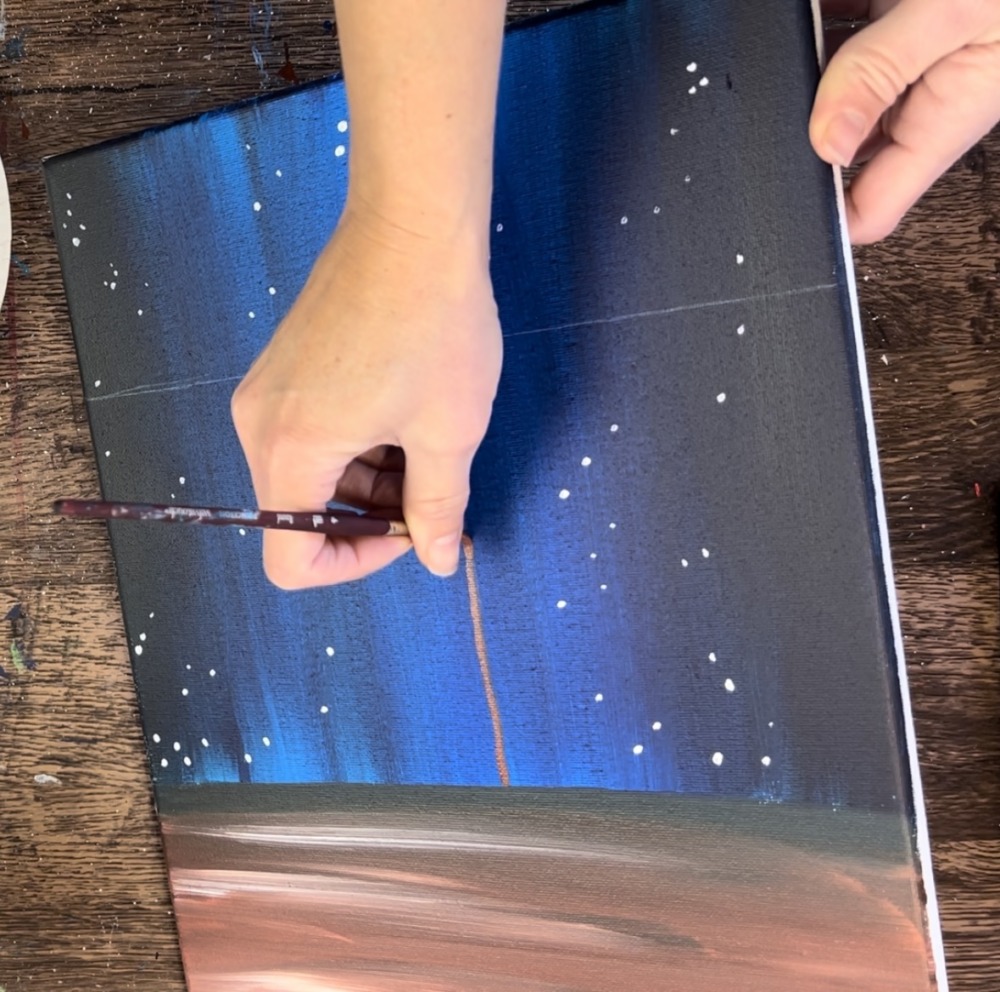
1. Draw Horizontal Line For Table Line/Window
Position your canvas vertically. Then measure about 4″ from the bottom of the canvas. Use a ruler to draw a horizontal line. This line will define where the sky/window ends and where the ledge/table begins.
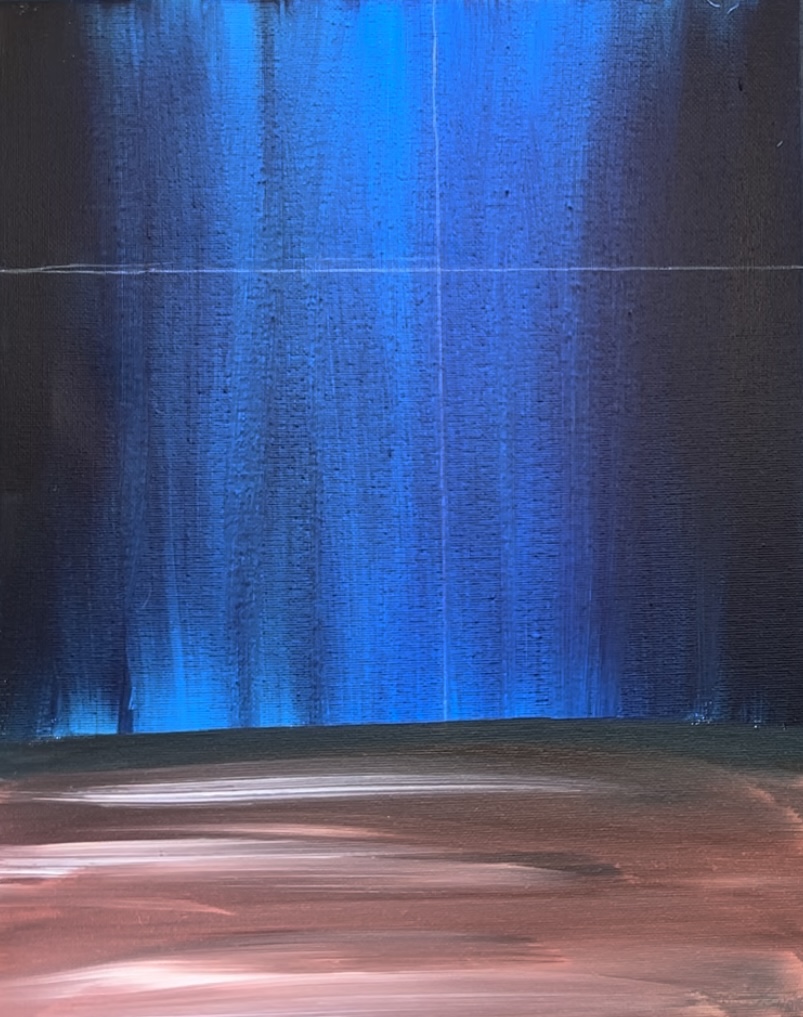
2. Paint the sky
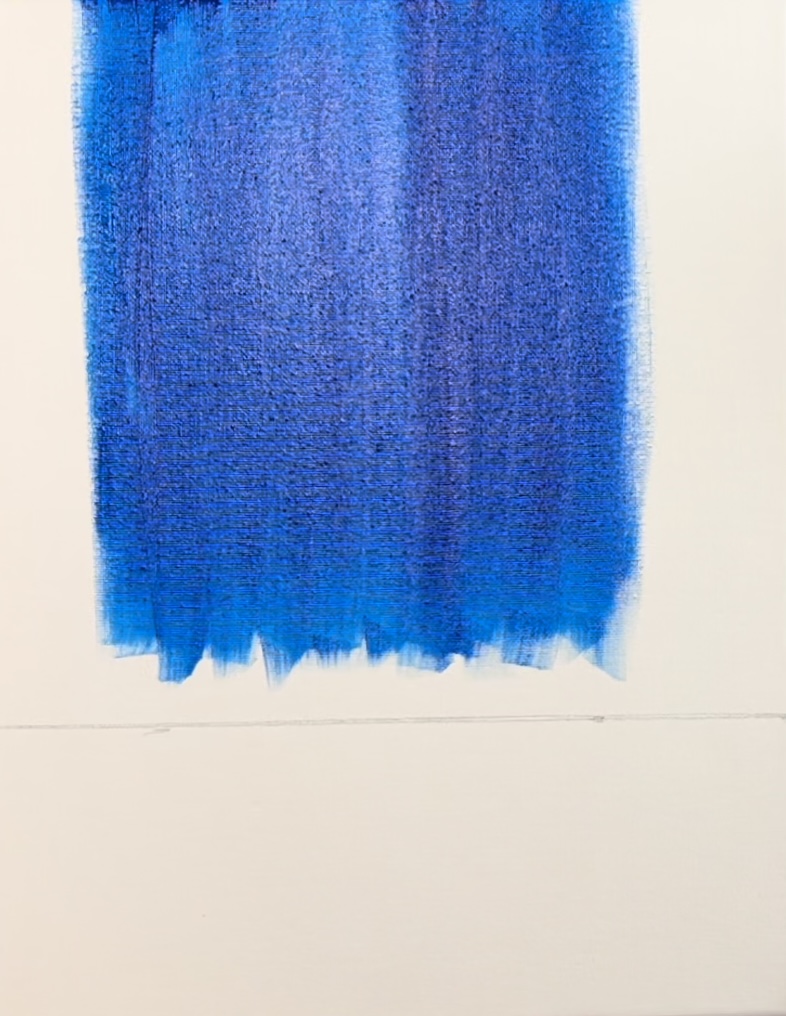
Load your palette with phthalo blue. Use a 3/4 flat brush to paint the upper part of the canvas (above line) with vertical strokes using the full width of your brush.
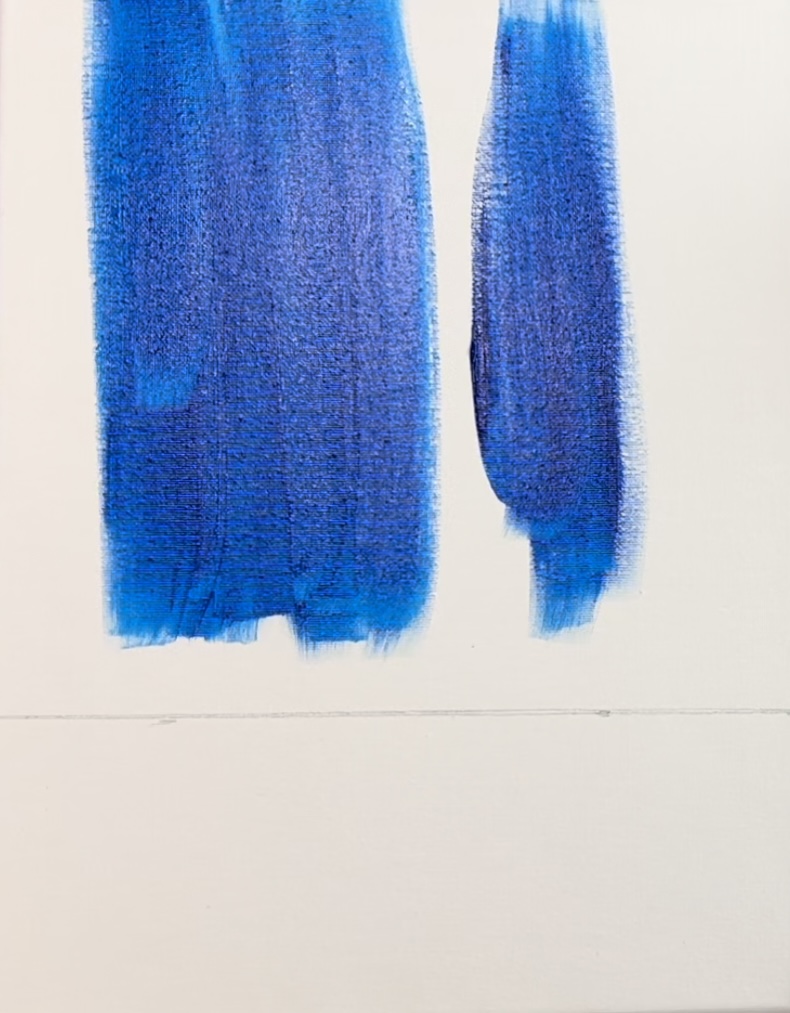
Leave a gap on the left and right side of the canvas.
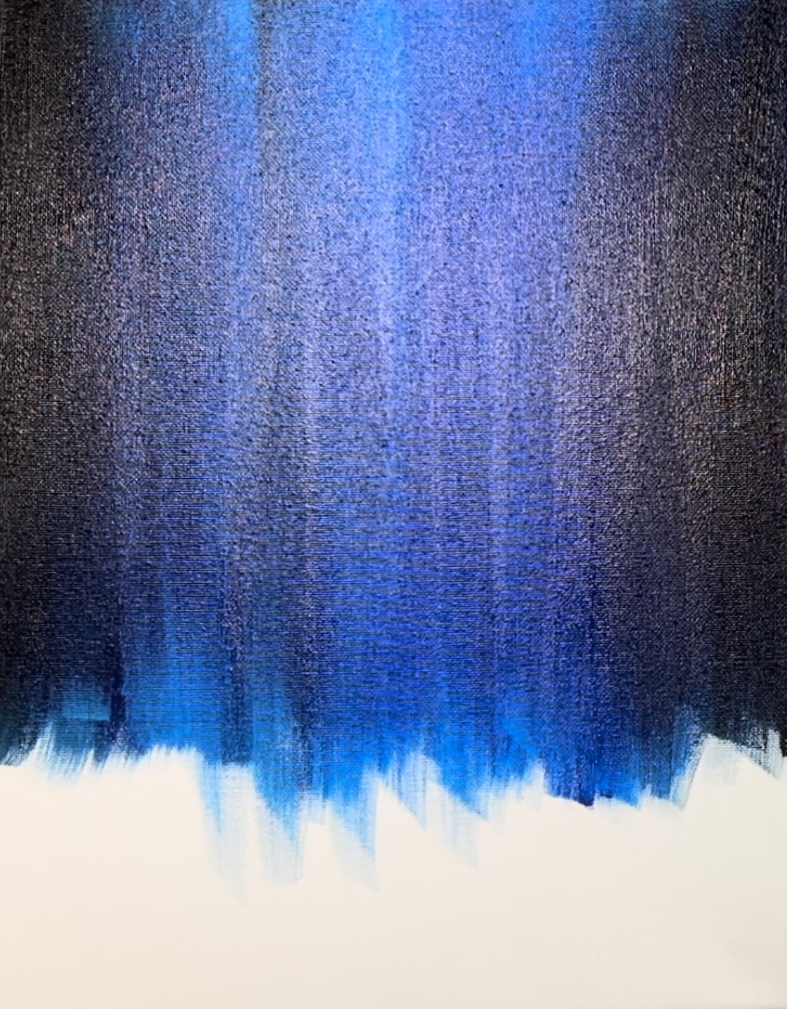
Next, load your palette with mars black. Without rinsing your brush, load a small amount of black onto it. Gently blend black with the blue on the left and right side. Use the same full width vertical strokes.
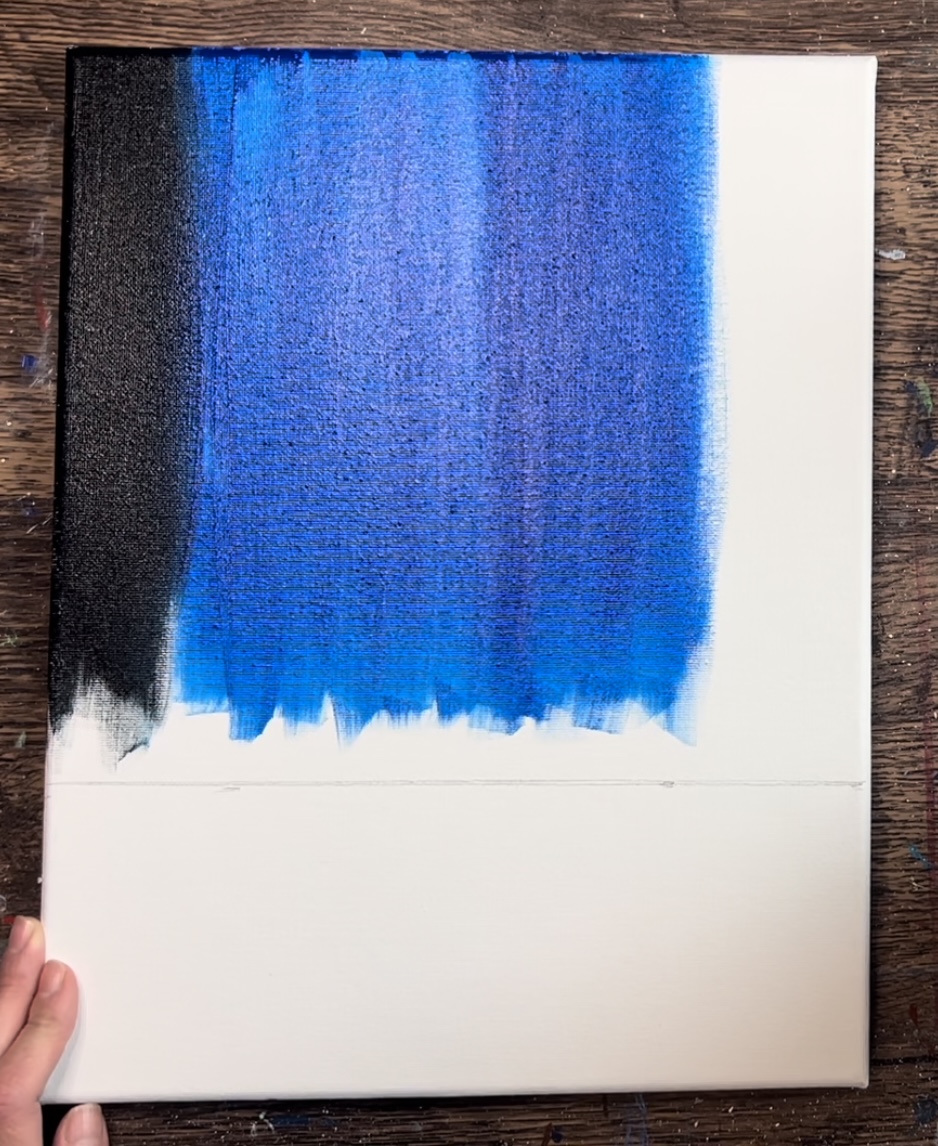
Blend the black on both sides and leave blue lighter and brighter in the center. Note: it’s okay if you go over the line that you drew in step one. Just as long as you still see it, you can paint over it in the next step!
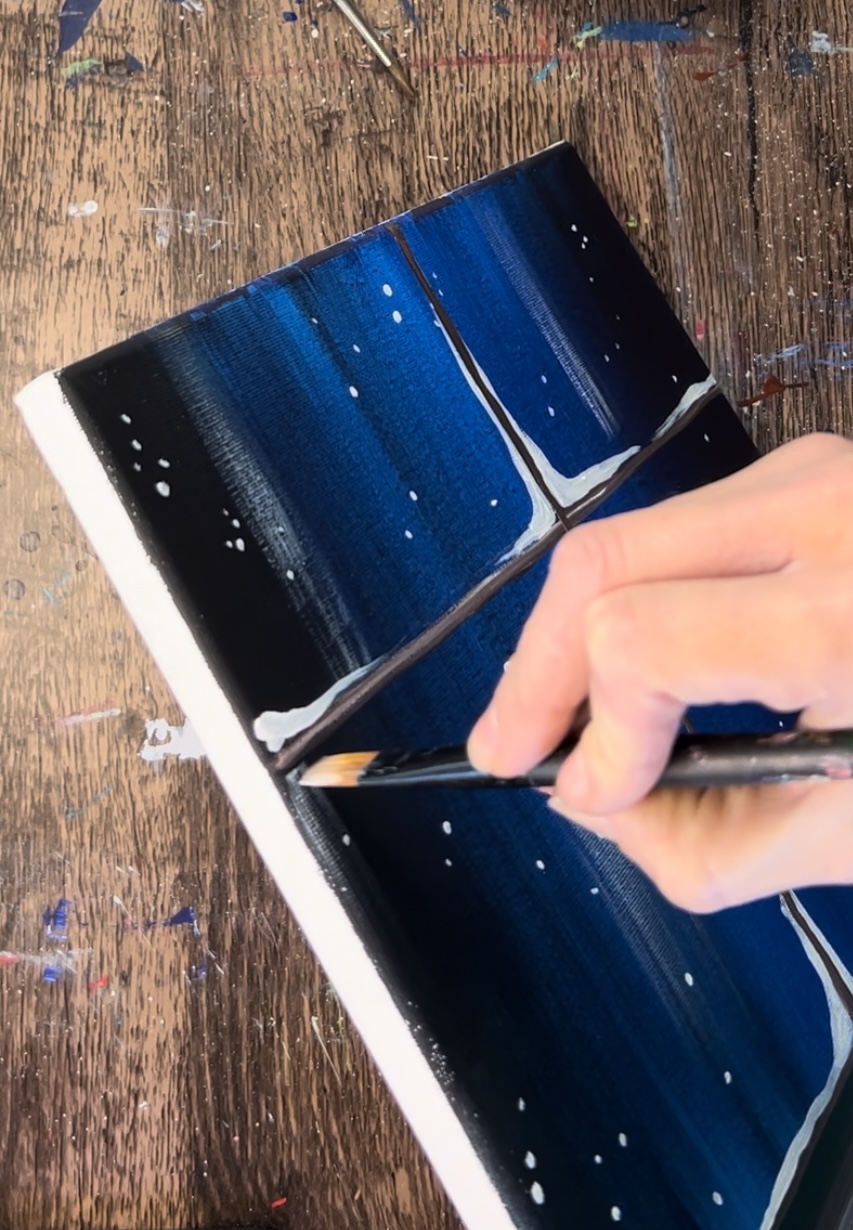
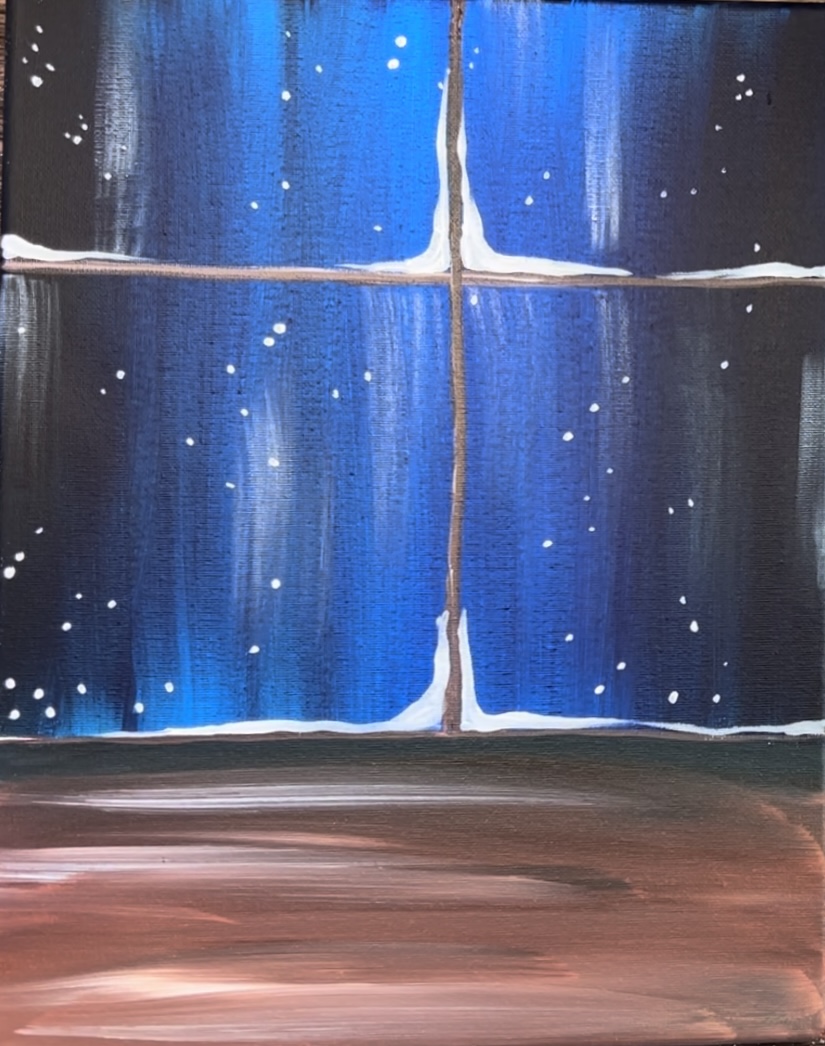
3. Paint The Table/ Window Sill
Load your palette with burnt umber and titanium white. Completely rinse all the black and blue off of your 3/4″ flat brush. Then double load your brush into the brown and white. Paint full width left and right strokes letting the brown and white gently blend together.
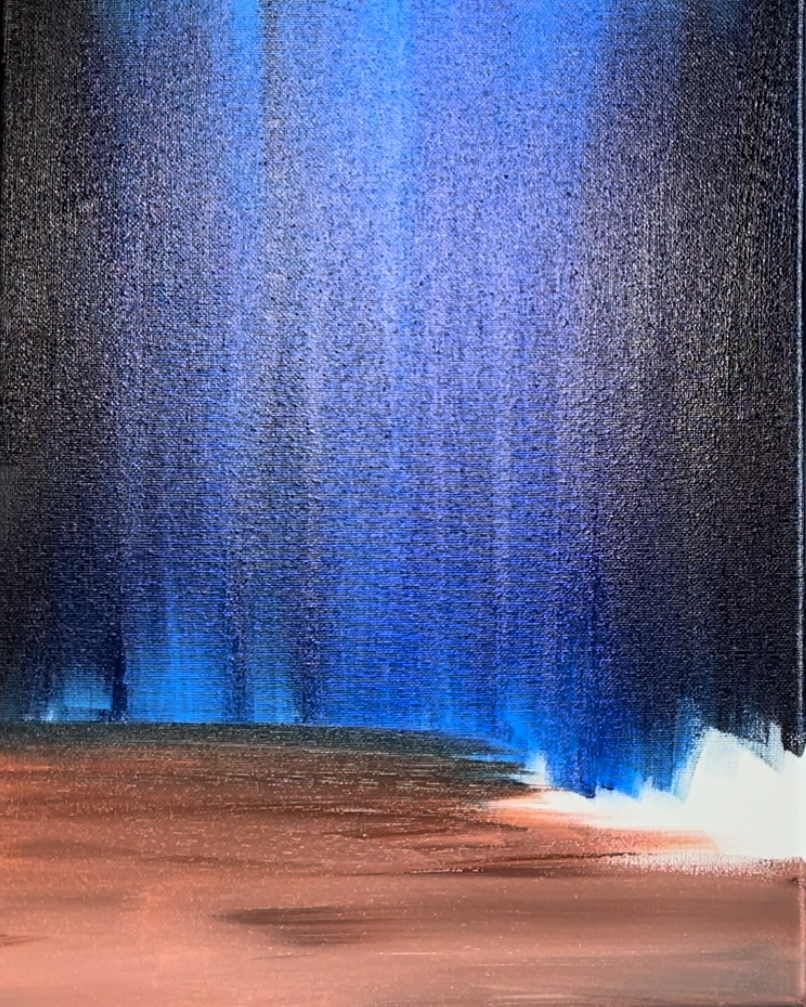
For a more “faux wood” texture look, try not to over blend the colors and leave some darker streaks in this area.
Paint this wood area all the way up to your line. If needed, use a t-square ruler to help you line it up. Also, it’s okay if some of the blue and black from the sky blends with the brown in the upper area.
Optional: before this dries, add a bit more white to your brush and paint a few left and right strokes in the brown area letting it gently blend.
Let this dry before going onto the next step.
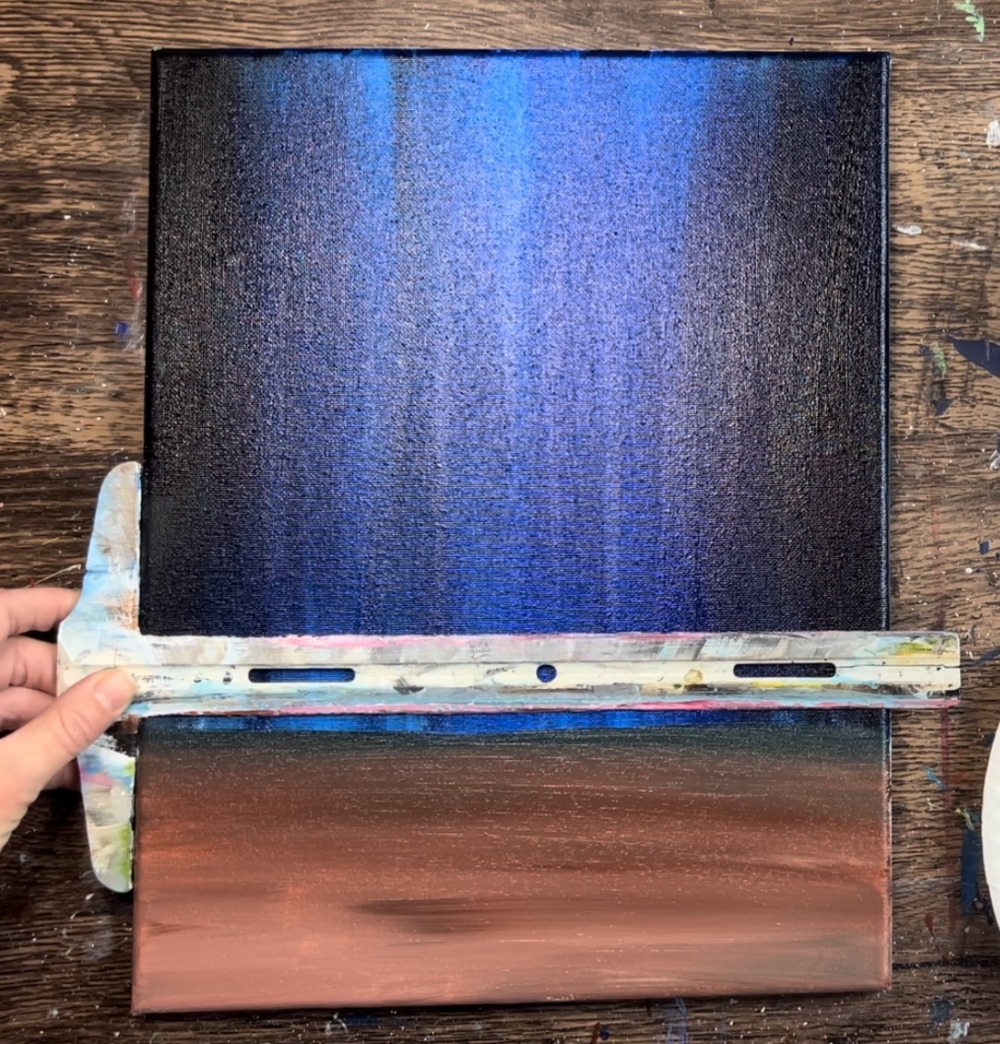
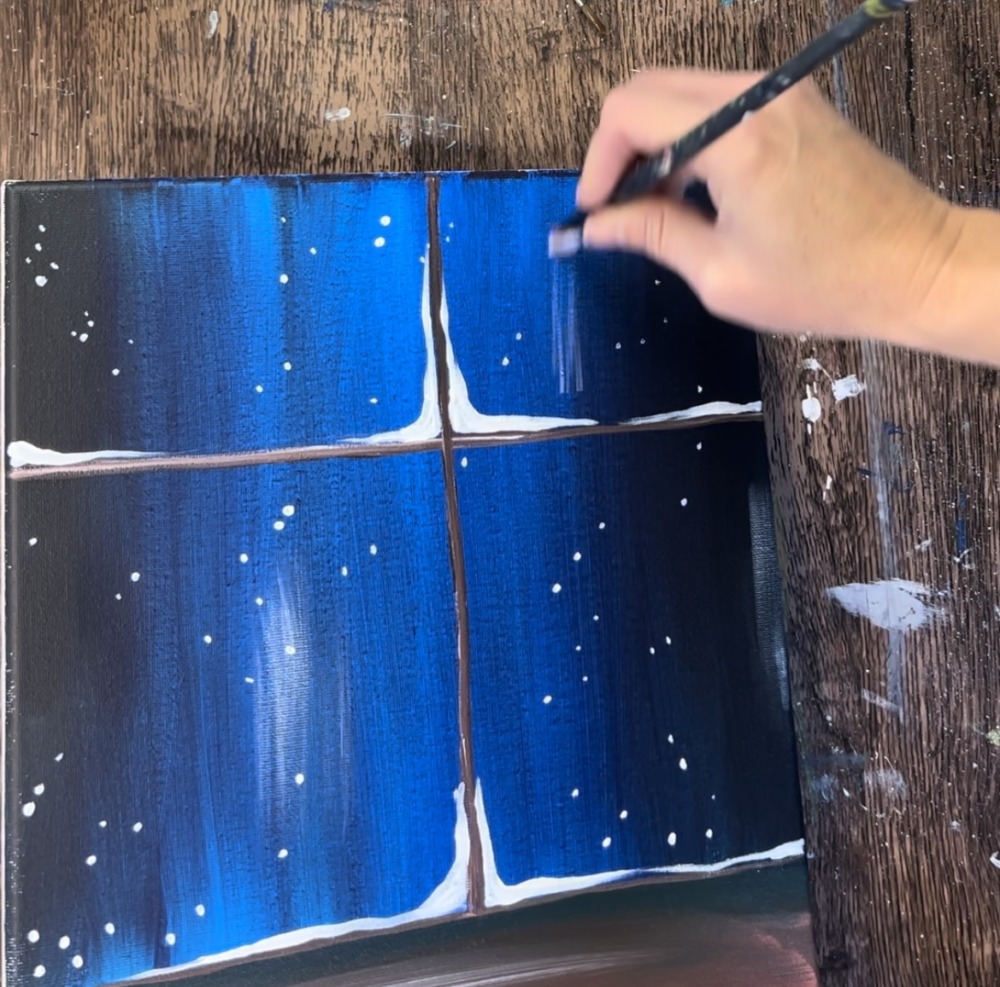
4. Draw Window Pane Lines
Use a ruler to draw a vertical and horizontal line. Position the horizontal line anywhere in the window area. I did mine at about 1/3 from the top of the canvas.
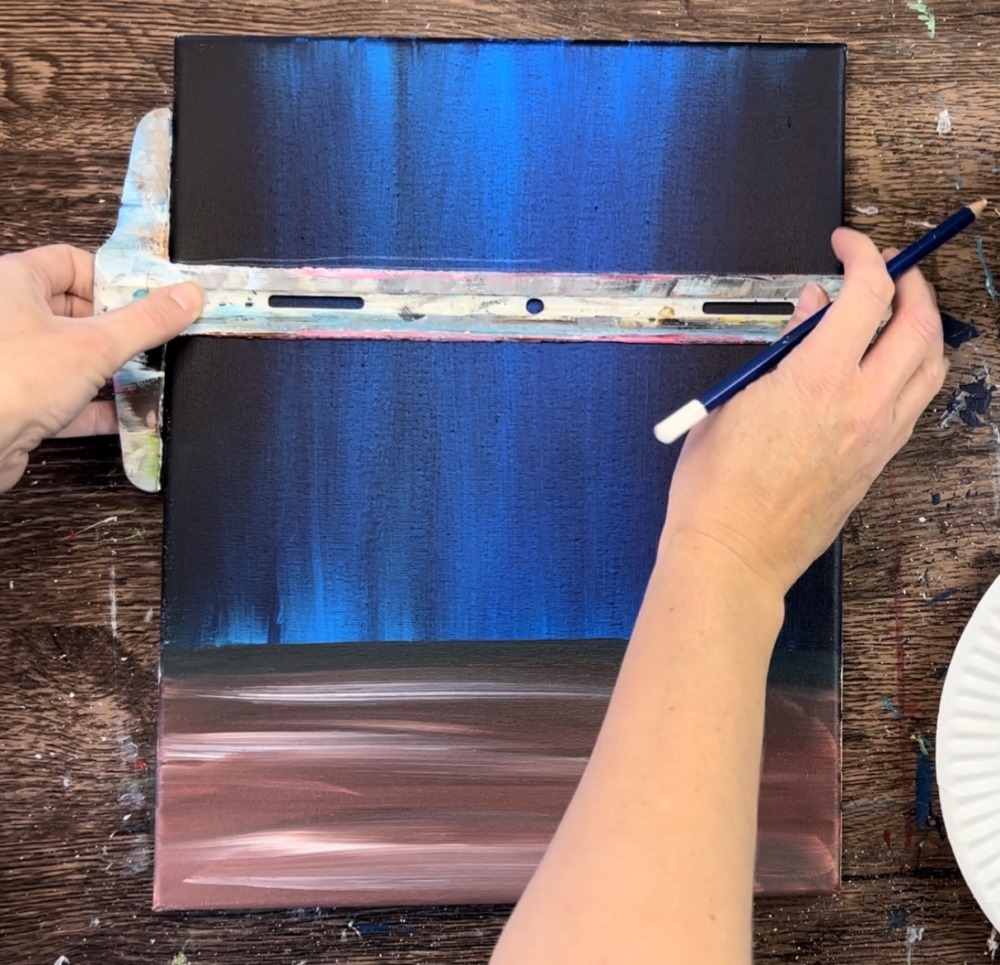
Then do your vertical line. You can also do this vertical line anywhere. I did mine at about the center of the canvas.
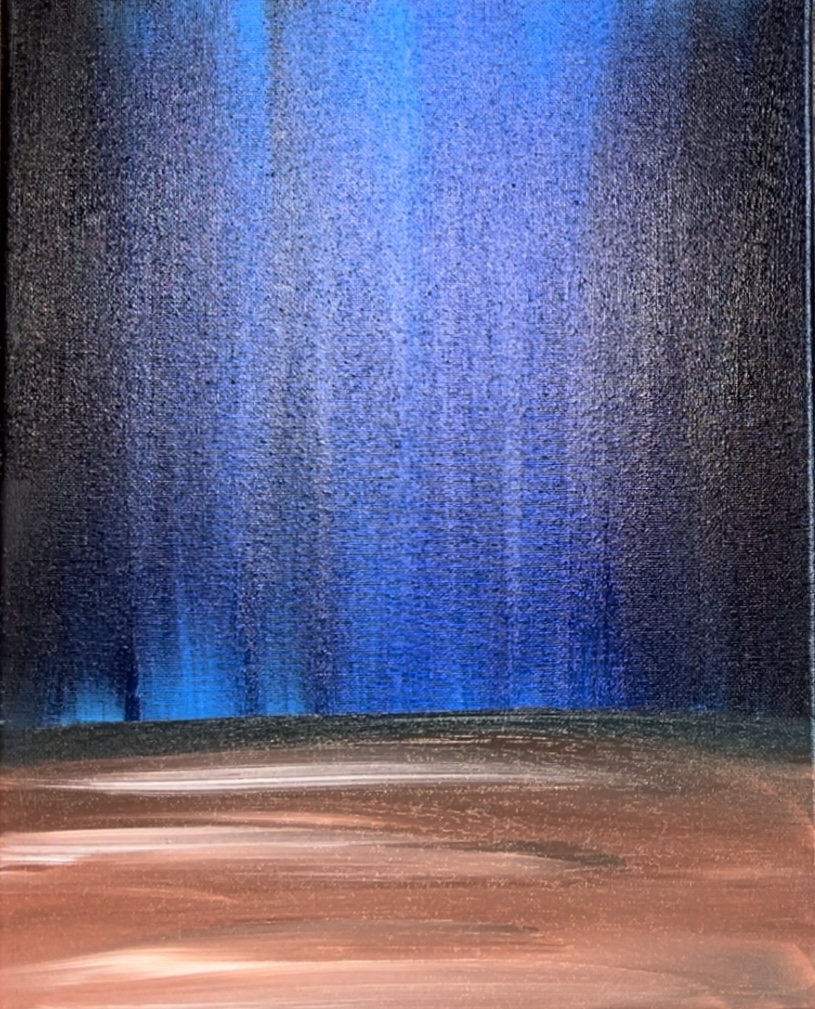
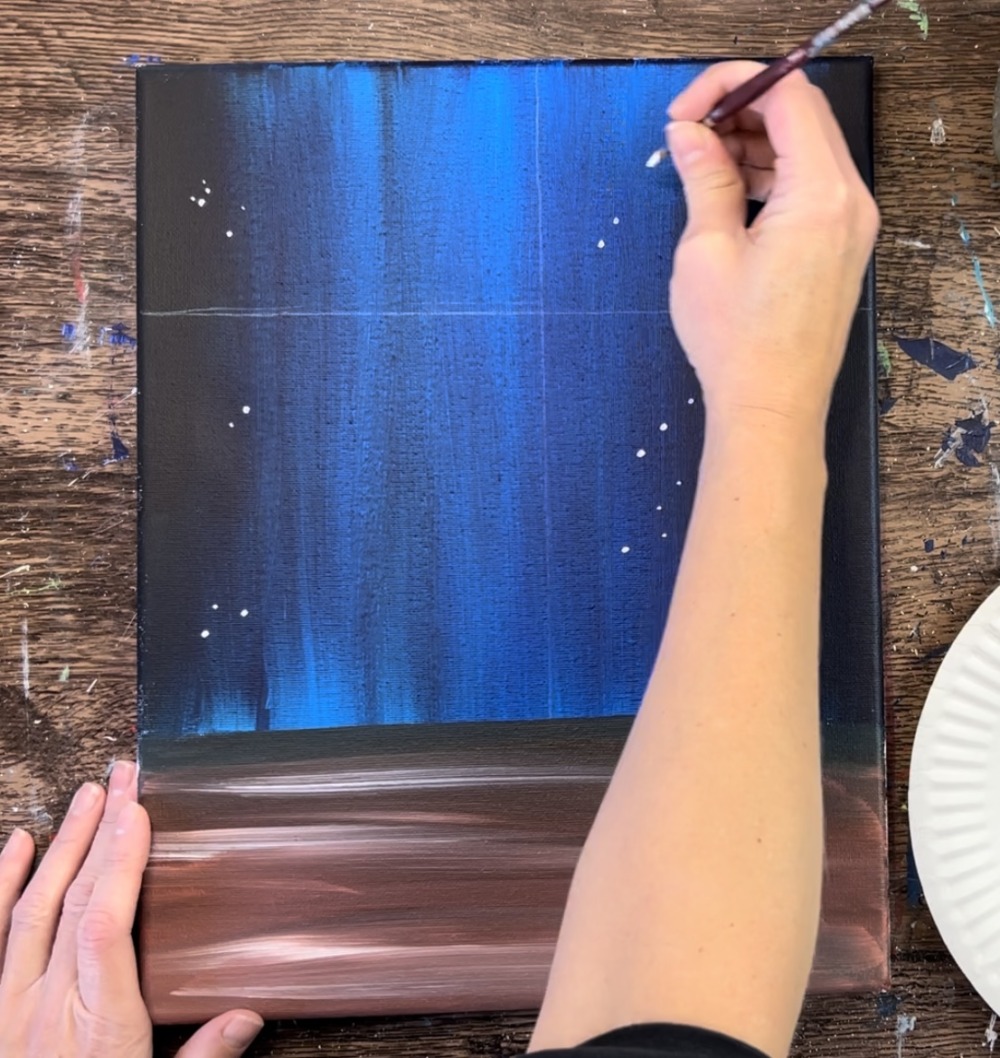
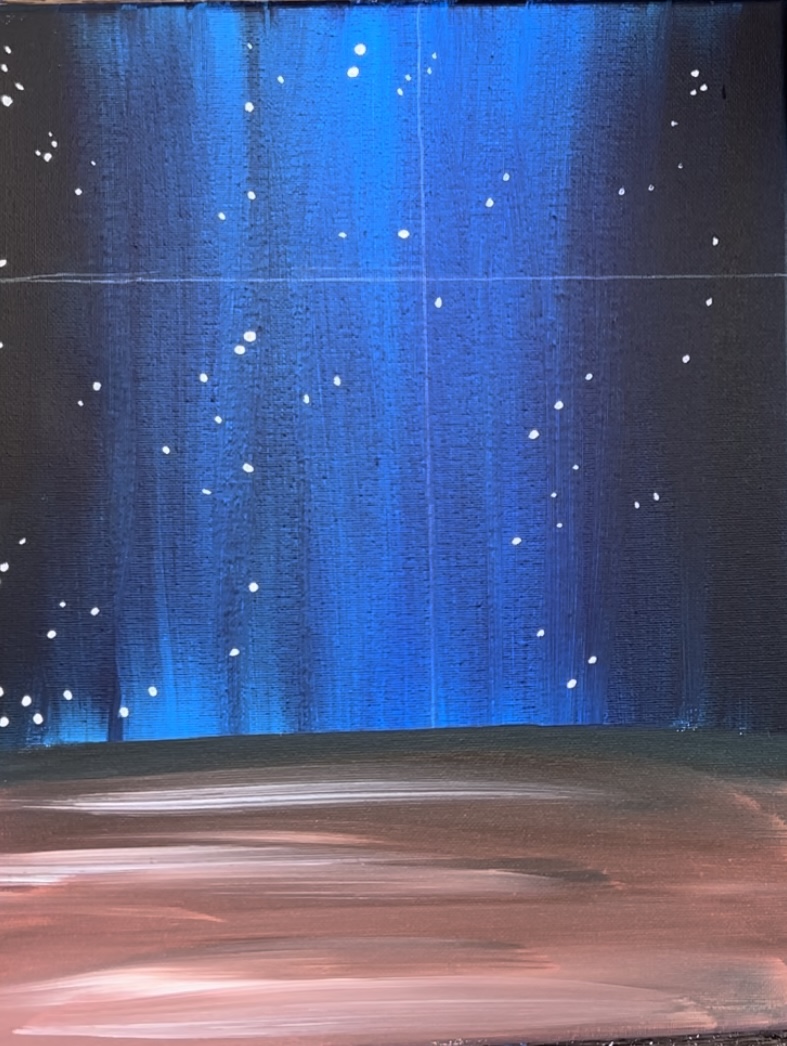
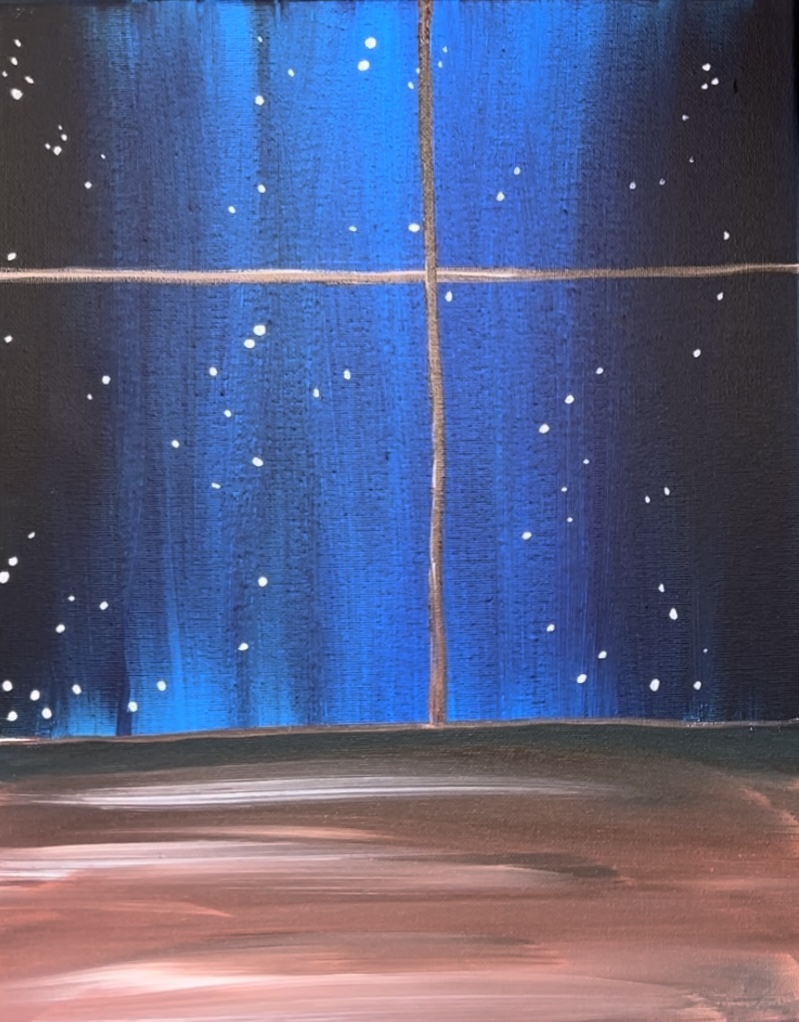
5. Paint Snow
Use a #4 round brush and titanium white to paint snow dots. Paint clusters of white dots all throughout the sky area. Try to vary your snow dots so some are larger and some are smaller.
6. Paint Window Pane Lines
Next, use either the #4 round brush or the 12 bright brush to paint the window pane lines. Load your brush in brown and white. Then paint your vertical and horizontal lines.
If you need the brown to stand out better against the dark background, add a little more white into it.
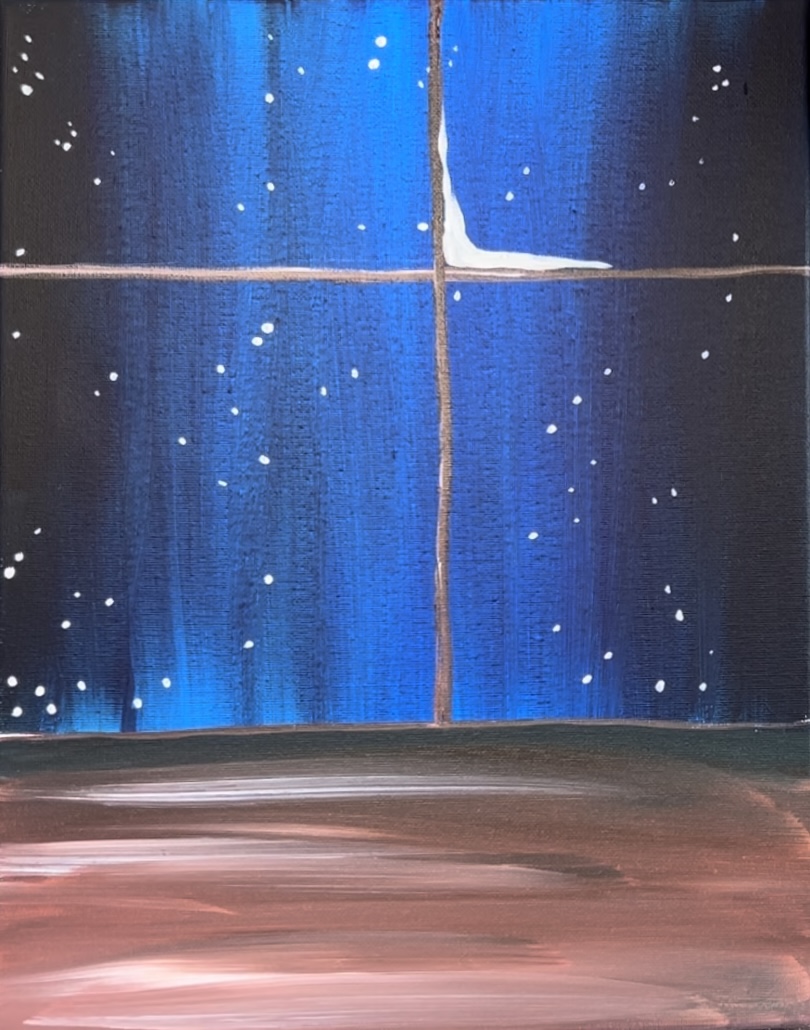
7. Paint snow on window pane lines
Use a #4 round brush and titanium white to paint snow piling up in the window pane areas.
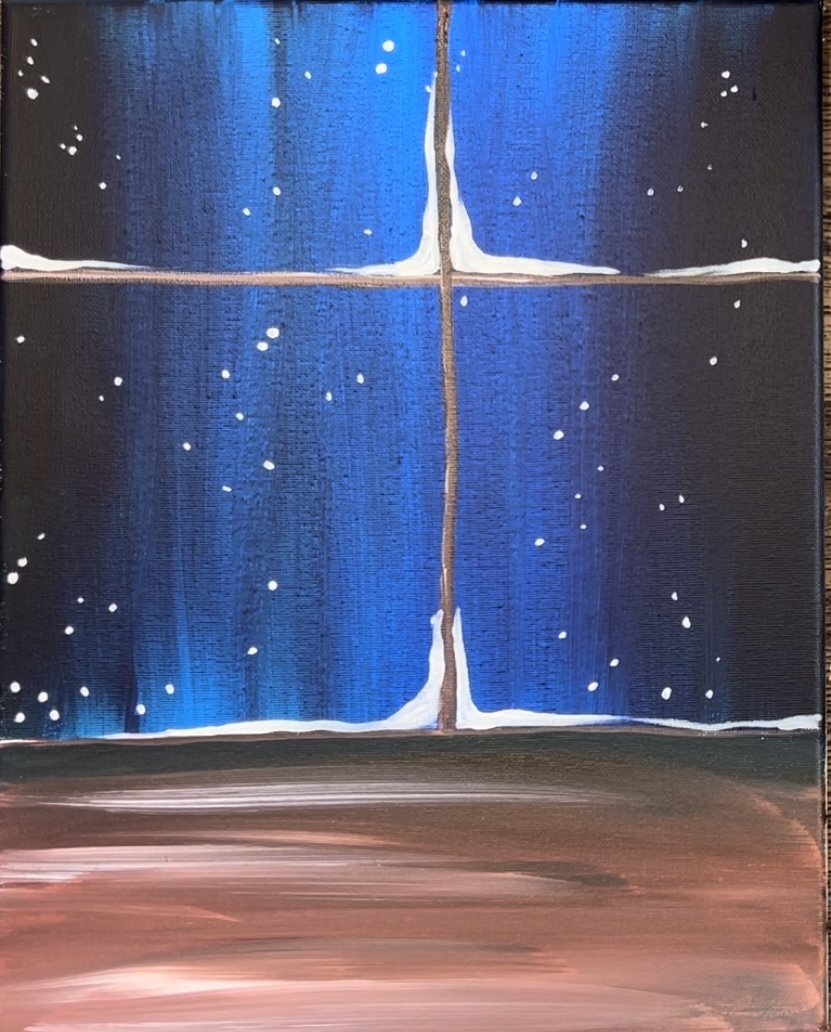
8. Paint glare on window
Next, use either the 12 bright brush or the 3/4 flat brush to “dry brush” the window glare. To do this, load a very small amount of titanium white on the tip of the brush. Then wipe off some of the paint so only a small amount is left.
Next, paint a few vertical marks over the window to create the glare.
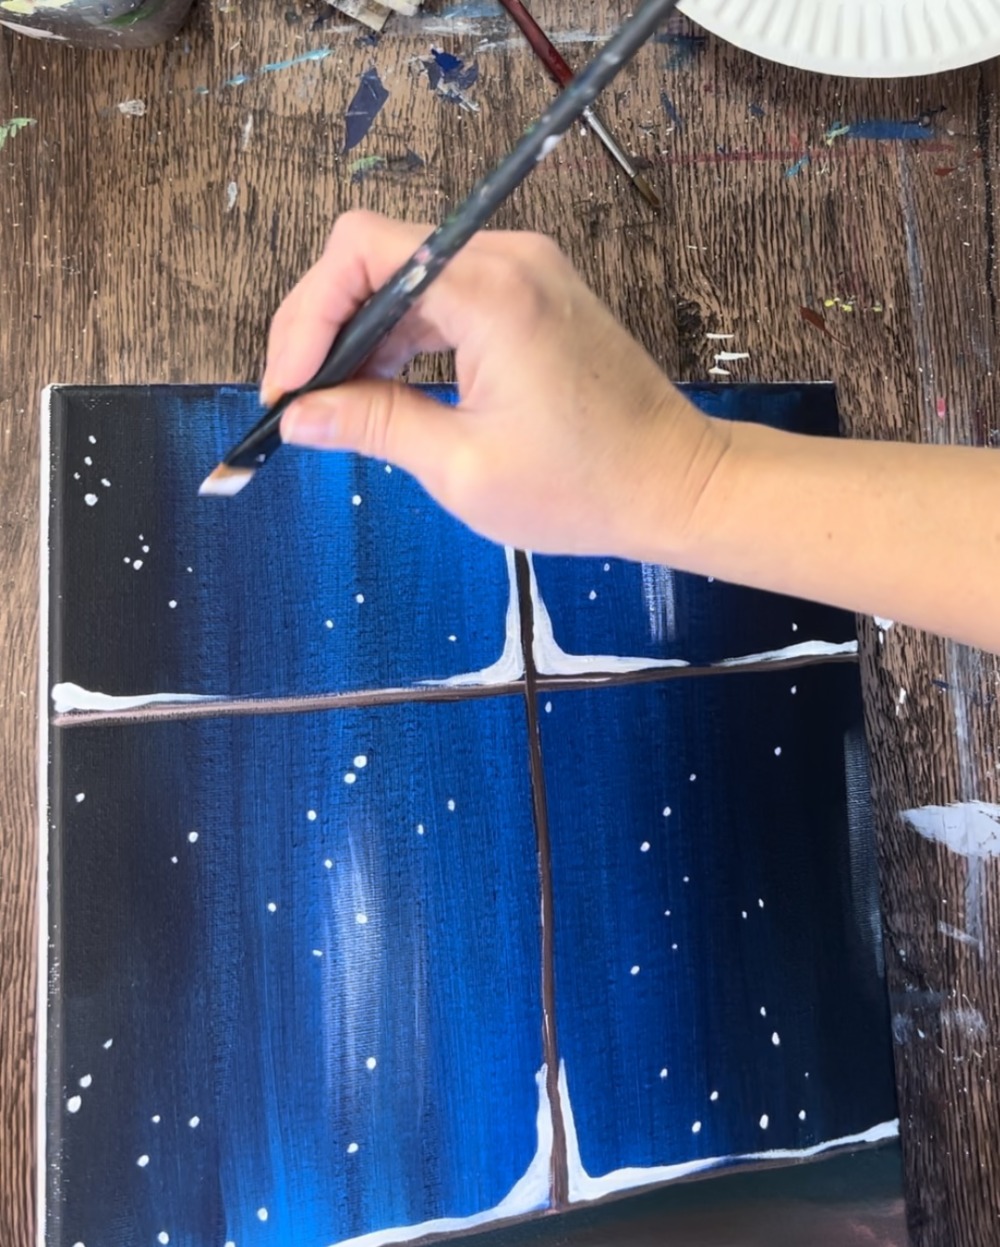
You don’t have to do too many of these glares. Just a few throughout the window area.
This creates the effect that the window is somewhat frosted.
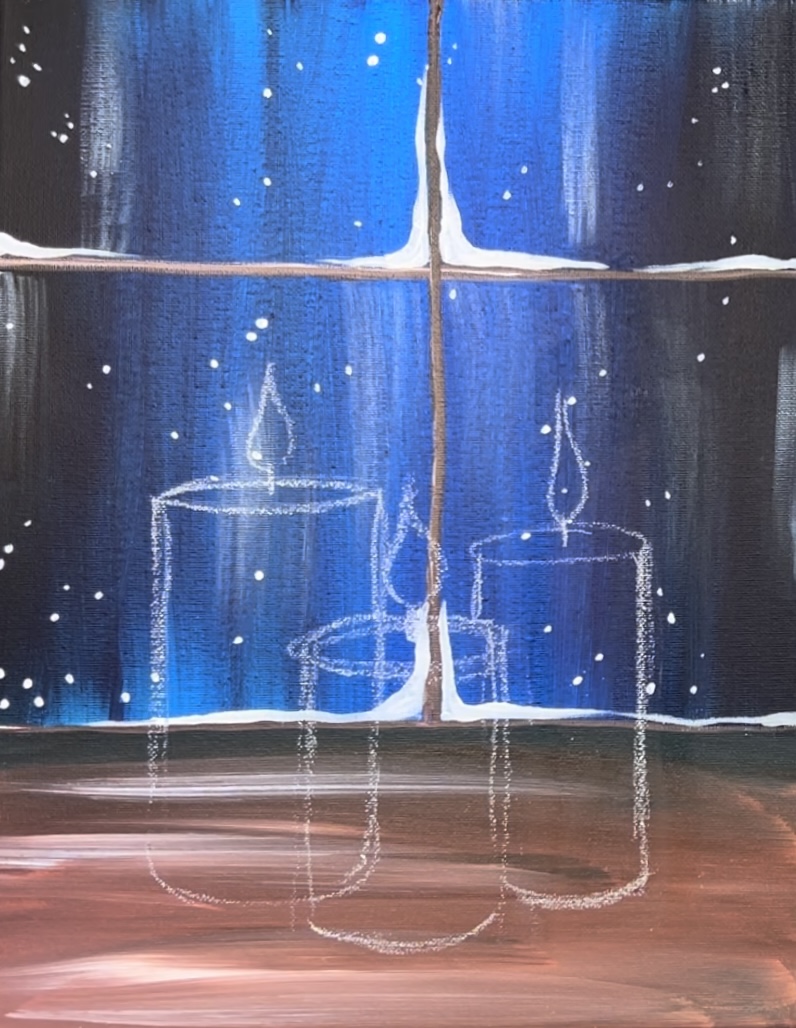
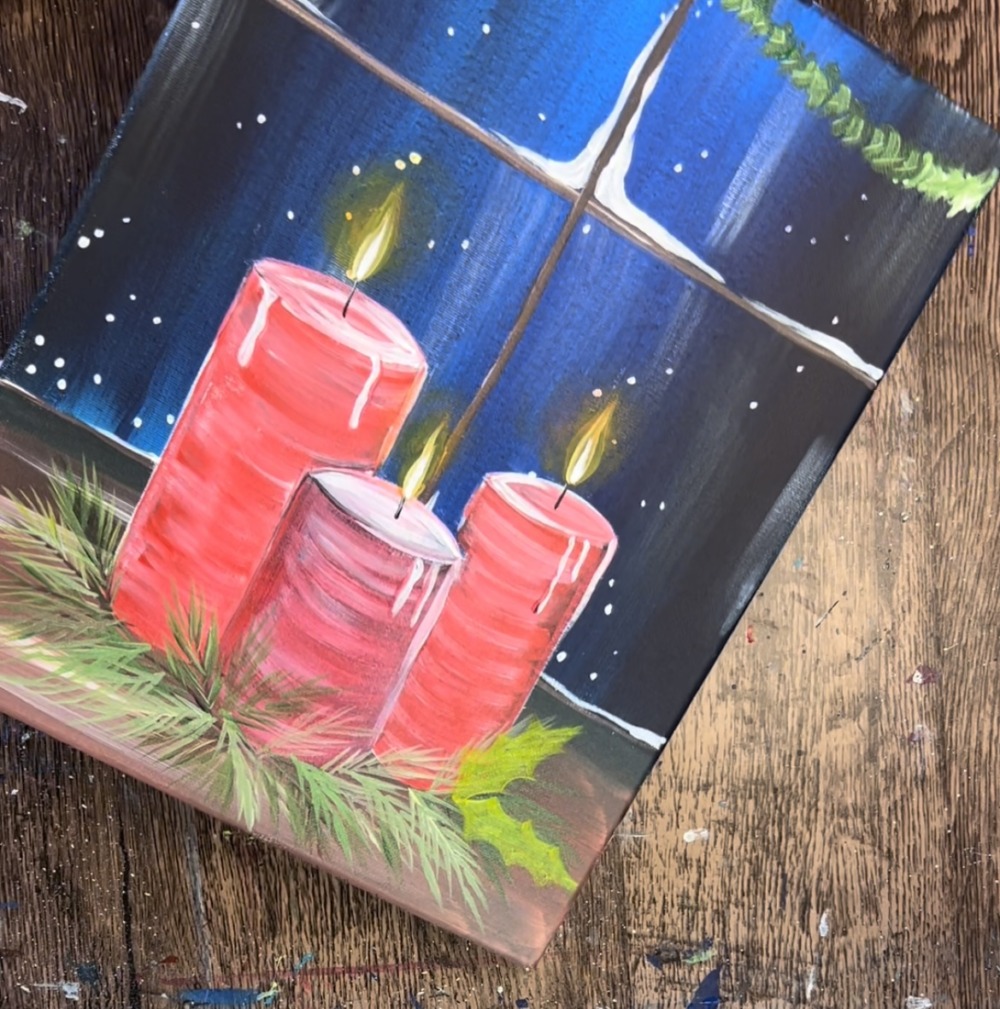
9. Draw candles
Next, use either the printable template or hand draw the candles. If you are drawing the candles, use a piece of chalk to draw an ellipse shape where you want the height of the candle to be. The chalk helps get the placement of the candles right and it can be easily erased with a soft wet-wipe.
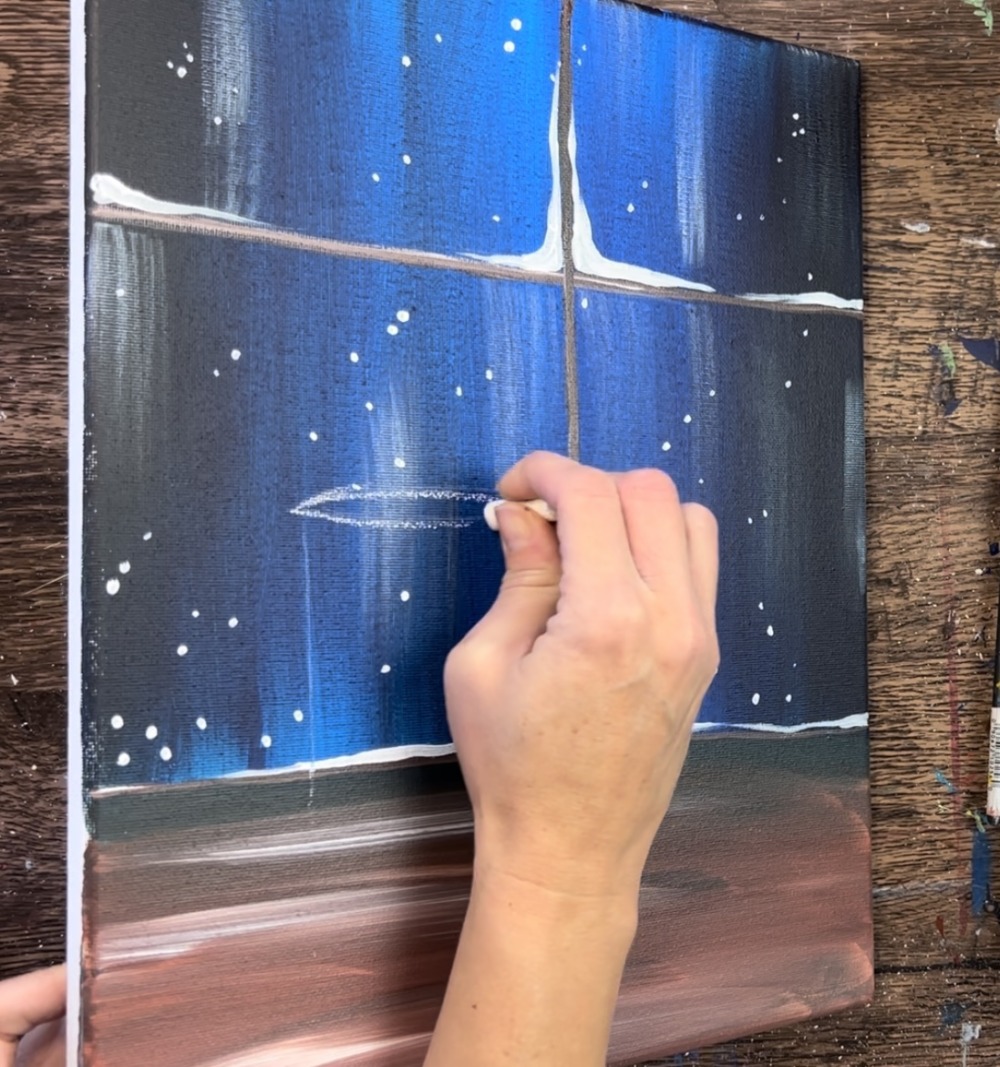
Then draw two vertical lines down to the base of the candle. Draw a small vertical line fore the wick and then draw a small teardrop shape for the flame.

The base of the candle is a curved line. This will help the candle look like it is a 3D shape.
Draw another candle in front of the other one. You can change the height of the candle by making the ellipse shape lower.
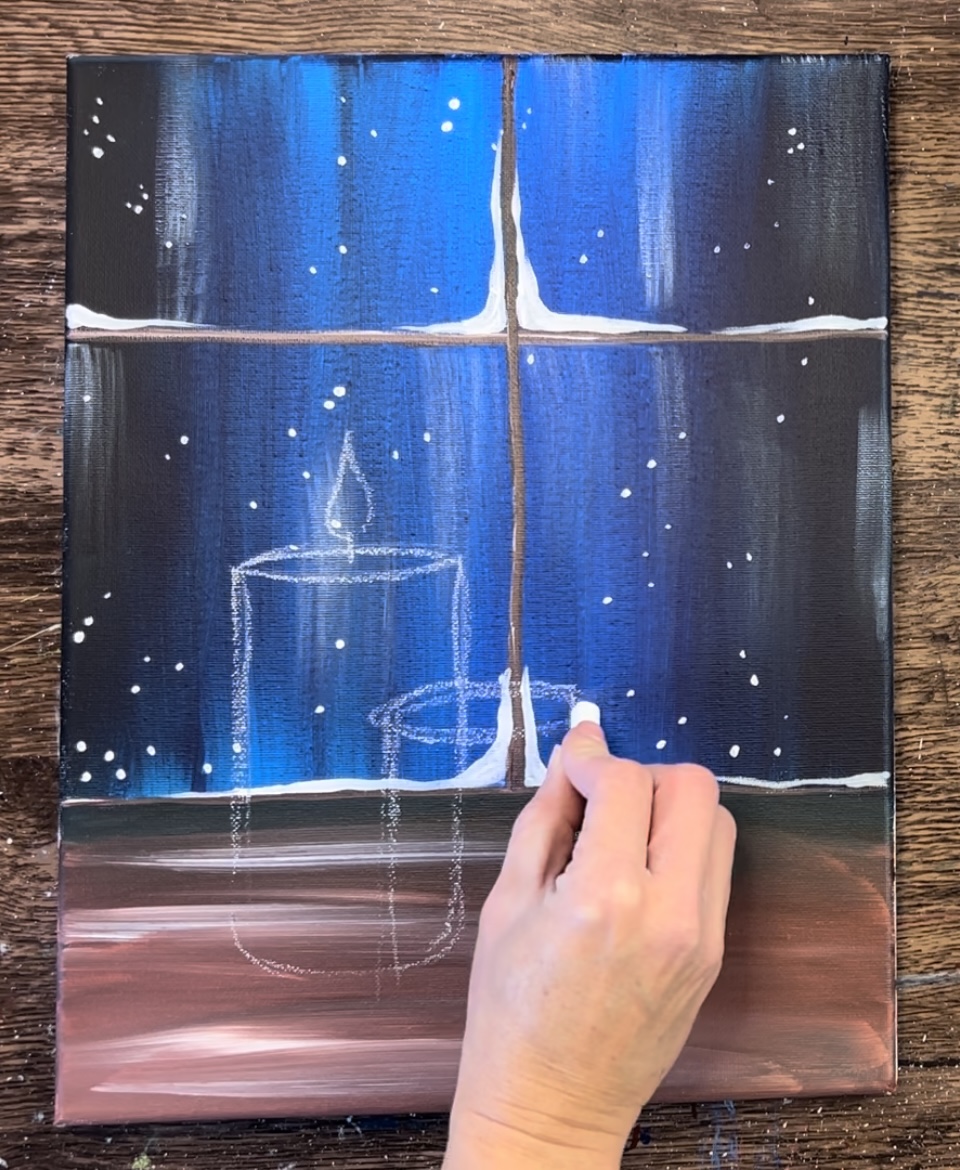
Then draw your third candle. If you are making this an advent wreath, you can also draw a fourth candle.
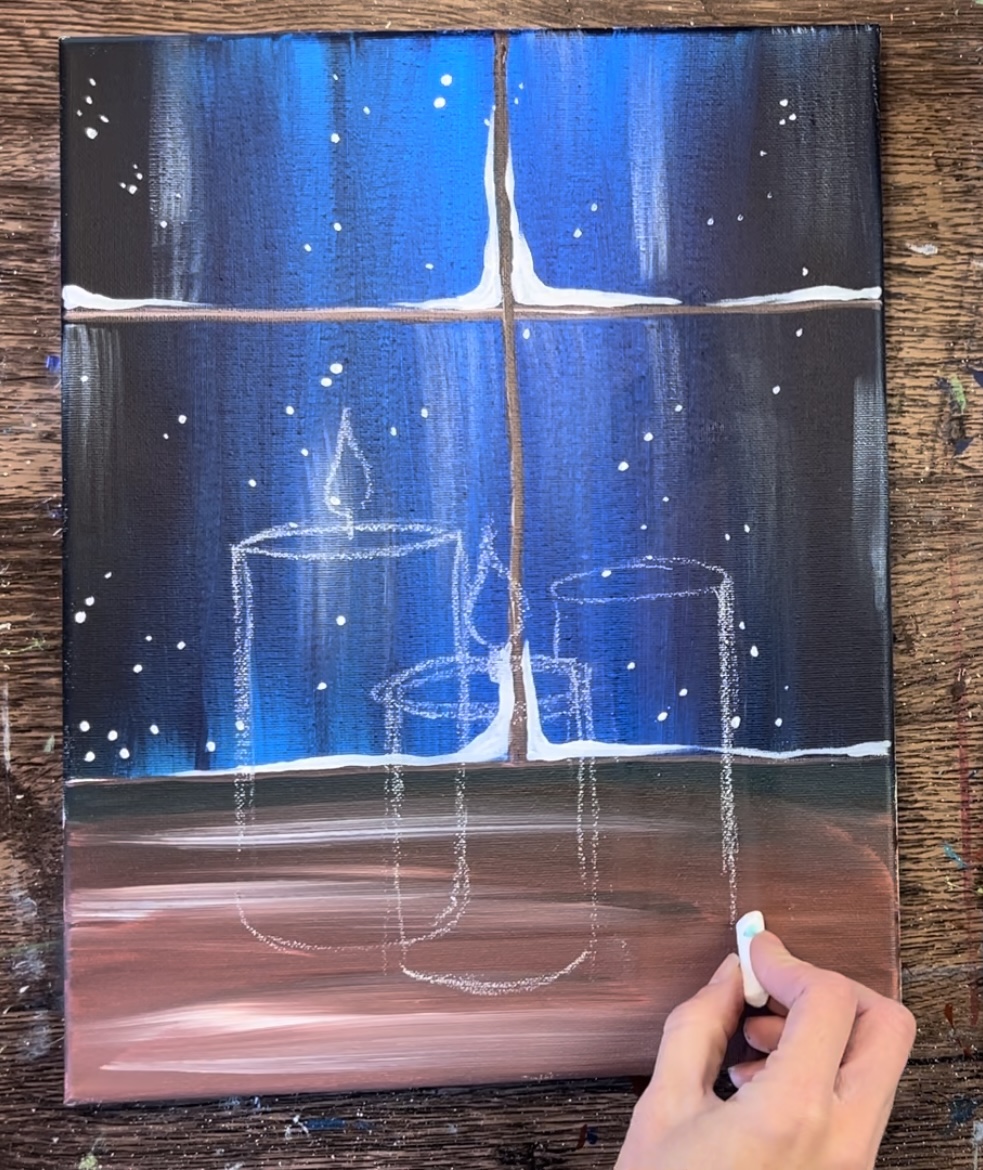
Draw as many candles as you want!
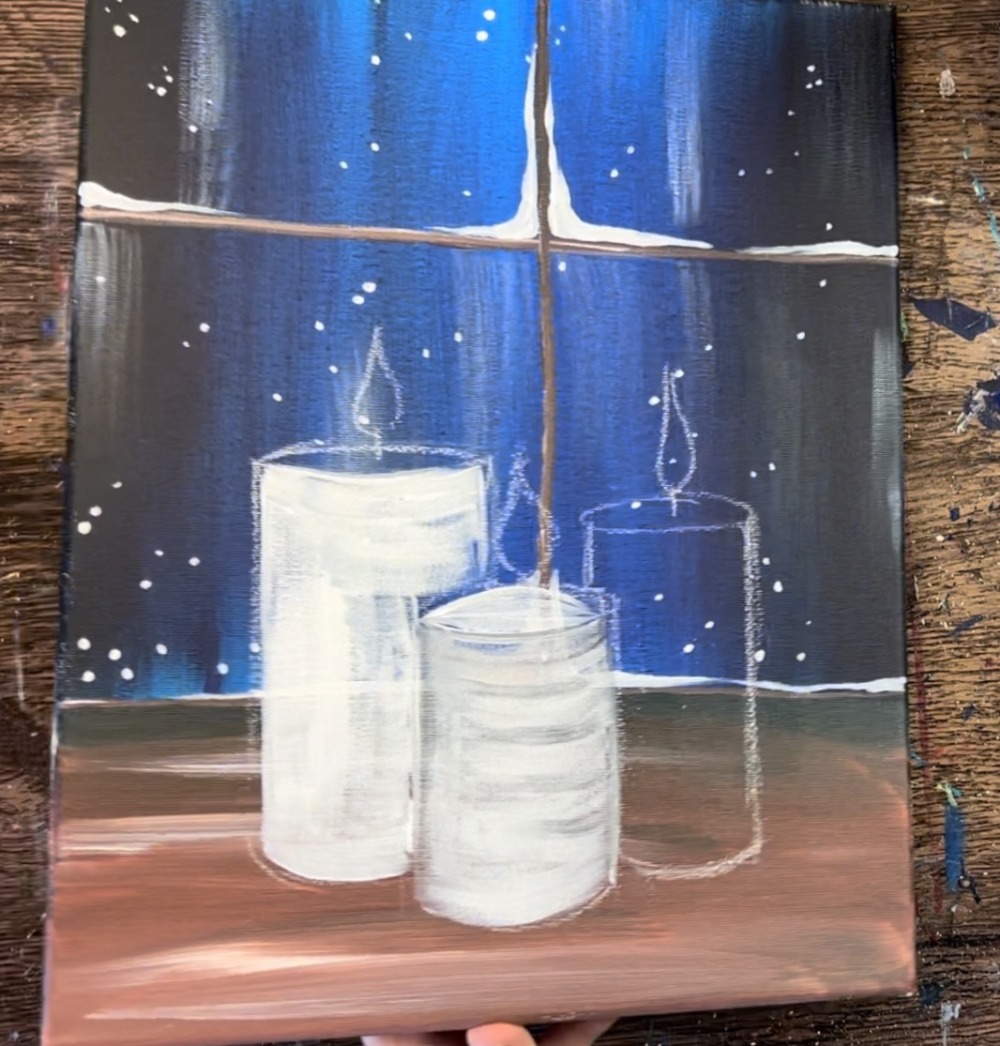
10. Prime first layer of candle color with white
Since we are working with a dark background, it is recommended to prime the candles first before painting them any color. To do this, use your 12 bright brush and titanium white. Paint a thin layer of white on each of the candles.
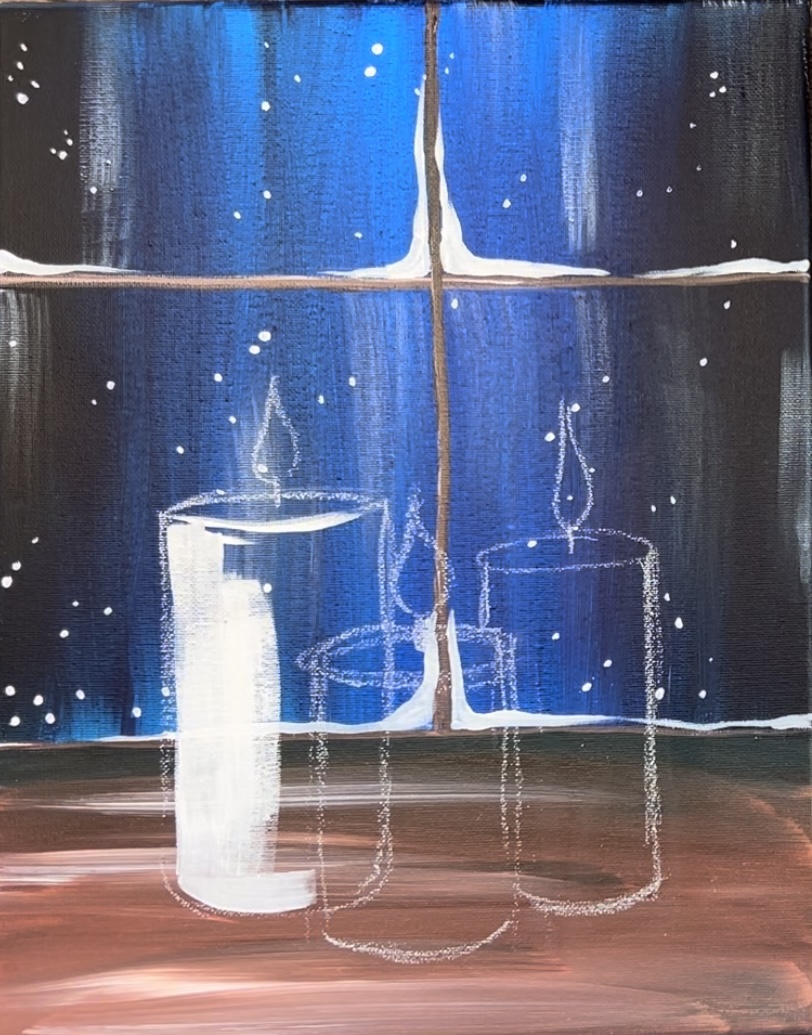
This does not need to be 100% solid white. In fact, it is best if some of the color from the background is still kind of showing through. The thin layer will be enough to allow your color (in this case red) to be bright and opaque.
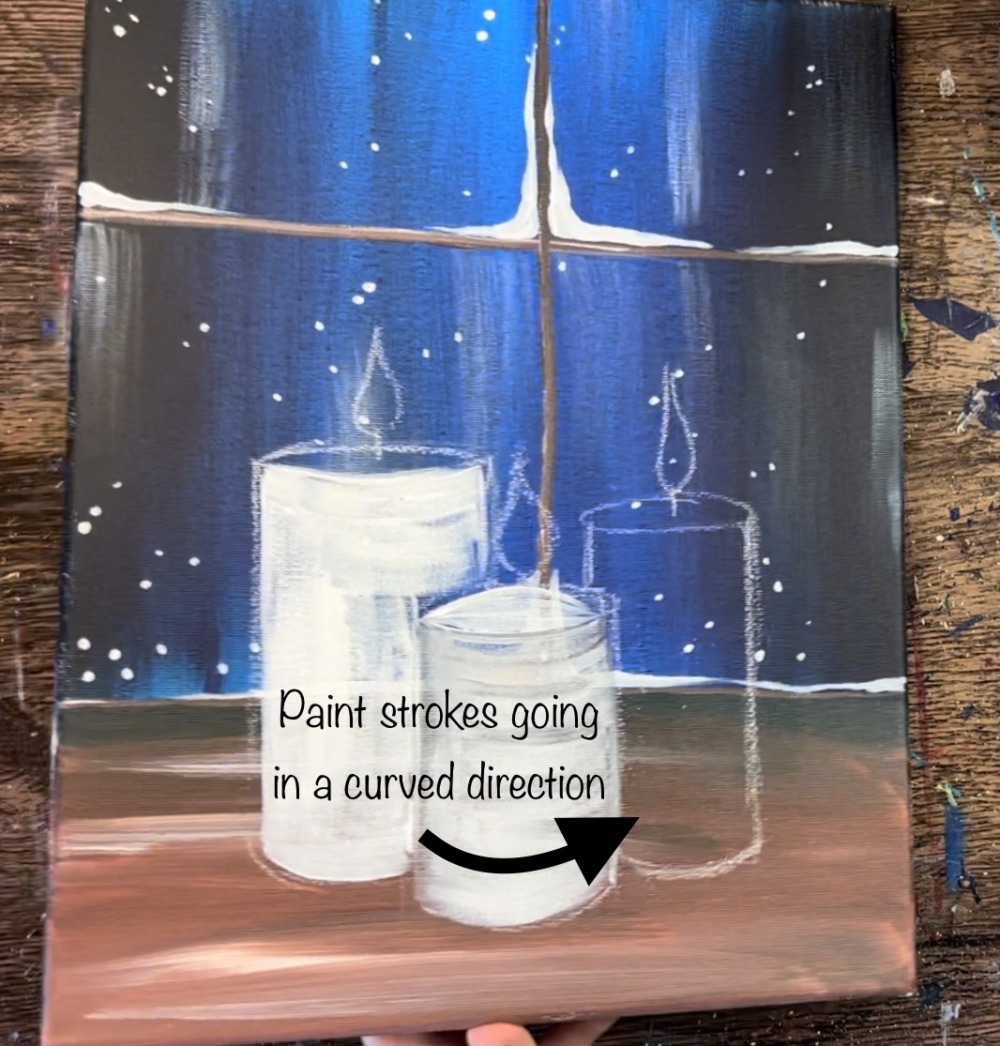
When you do this priming, you need to make sure your paint strokes are going in a curved direction for the shape of the candle. Additionally, you can use the tip of your flat brush to help “cut in” on the shape. These curved direction strokes help form the shape of the candle.
Optional: add a little bit of black to the candle in the center to make it a light gray. This helps it stand out from the candle next to it.
You don’t have to paint the top ellipse of the candle. You can leave that blank for now. If you do want to paint that part white first, I recommend using a #4 round brush for that because it’s a smaller area. Do not paint the wick or the flames yet.
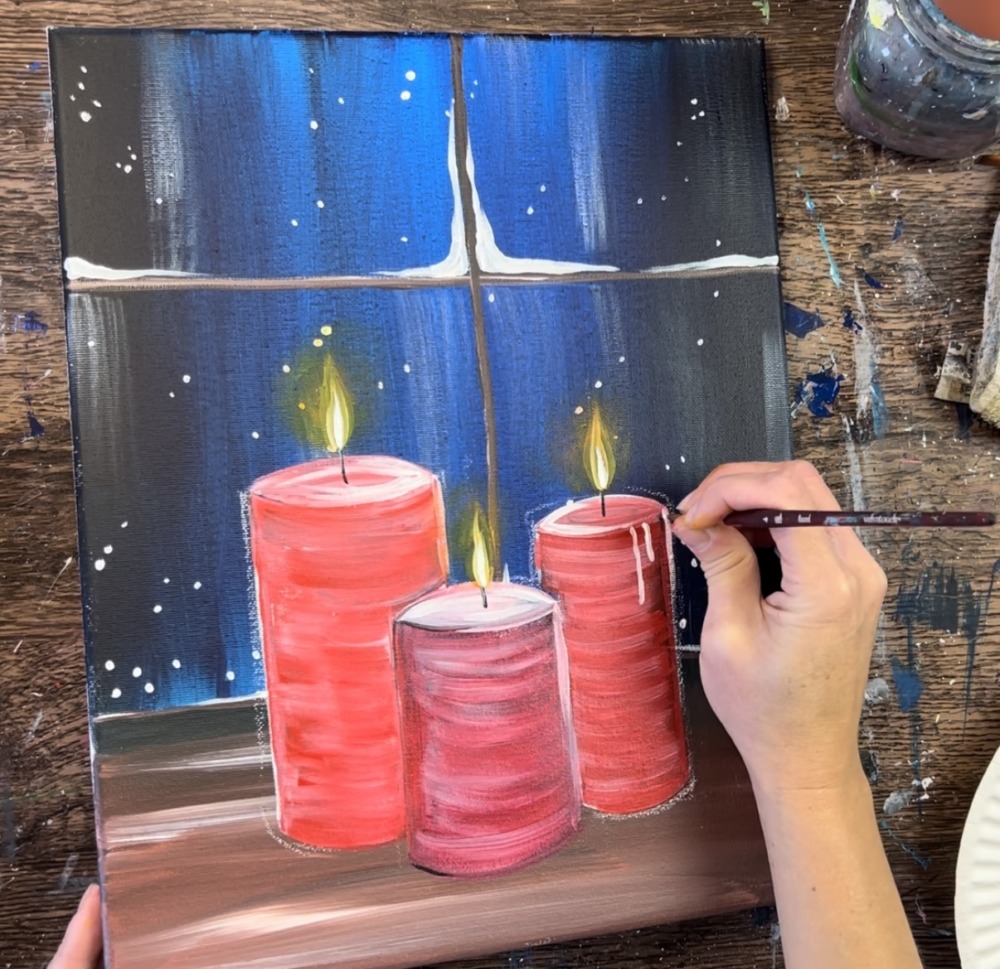
11. Paint candles
Note: you don’t need to wait for the white to dry completely for this next step. However, you also don’t want it to be soaking wet or your color will just mix too much with the white.
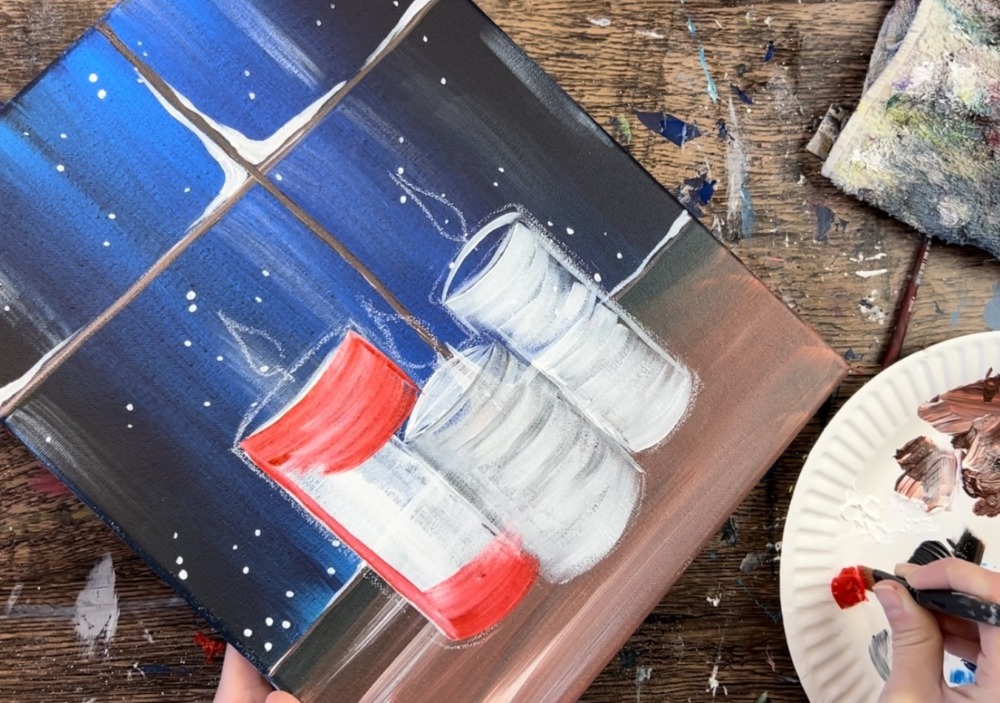
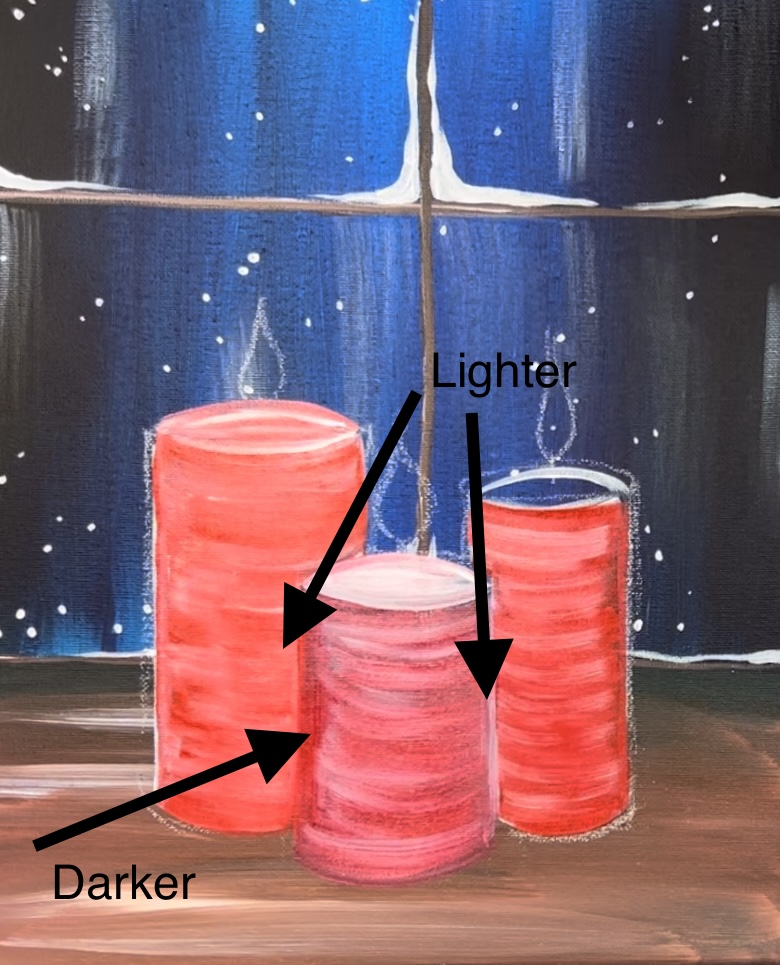
Load your palette with the color you are painting your candles. For this painting, I used pyrrole red and alizarin crimson hue. The alizarin crimson is a darker red and I used that for the center candle so that it would stand out next to the other two candles.
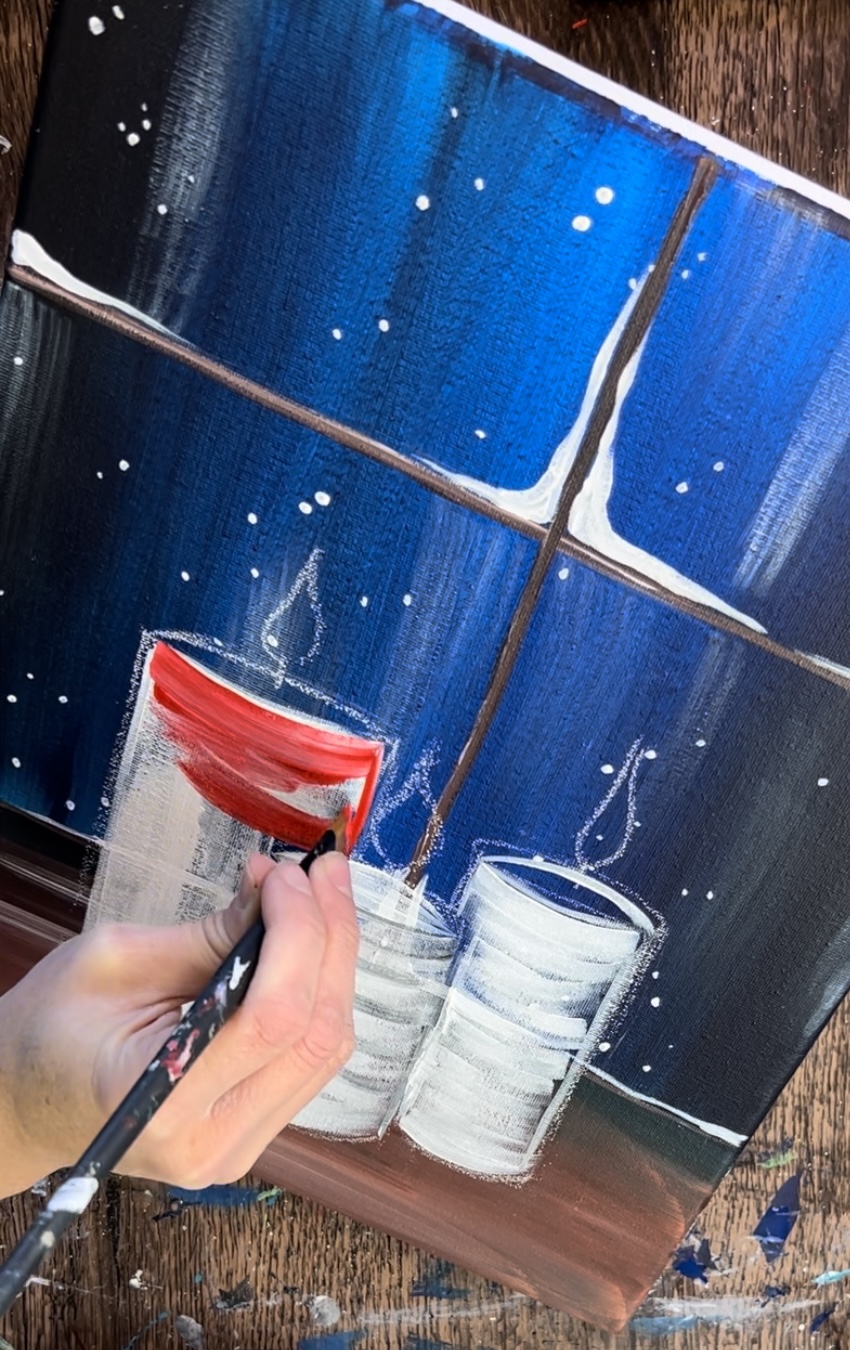
Use your 12 bright brush to paint the candle on the left. Go in the same direction as you did when you painted the white paint strokes. Going in that curved direction will help give your candle form and make it look three dimensional.
Adding a tiny bit of white onto your brush with the red will help create some color variation. You can do this as you are painting the candle and have the colors blend on the canvas.
Use the #4 round brush to paint the top part of the candle. Mix equal parts red and white together. This part is lighter than the rest of the candle.
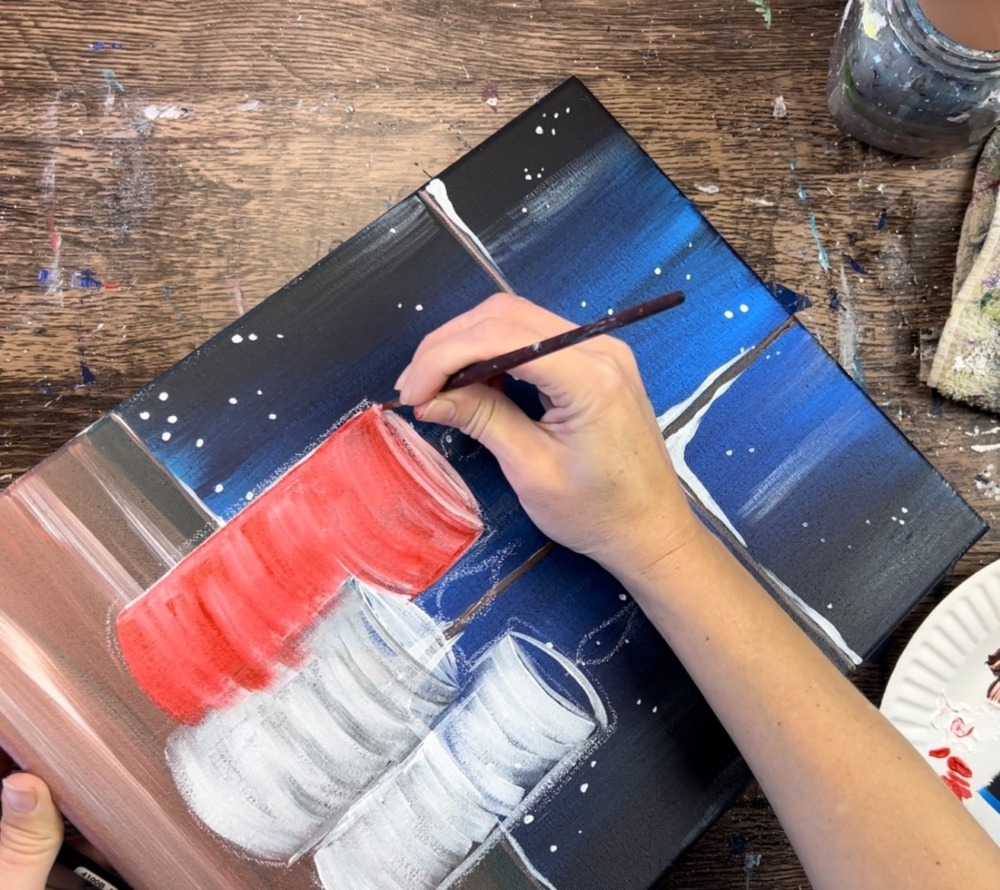
Next, load alizarin crimson hue permanent on your palette (or the next color you are using for your candle). I recommend a slightly darker or slightly lighter color than the candle on the left so that it stands out and doesn’t blend in too much.

Do the same painting technique. Use the tip of the 12 bright brush to paint the shape/ cut in. Then paint the rest of it in curved strokes. Adding a bit of titanium white into the color will help give it that two-toned color look.
Then use the round brush to paint the top part of the candle a lighter color (mix equal parts white with alizarin crimson).
Paint the third candle. I did this one with pyrrole red (the same color as the candle on the far left). Paint this using the same technique used to paint the other two candles.
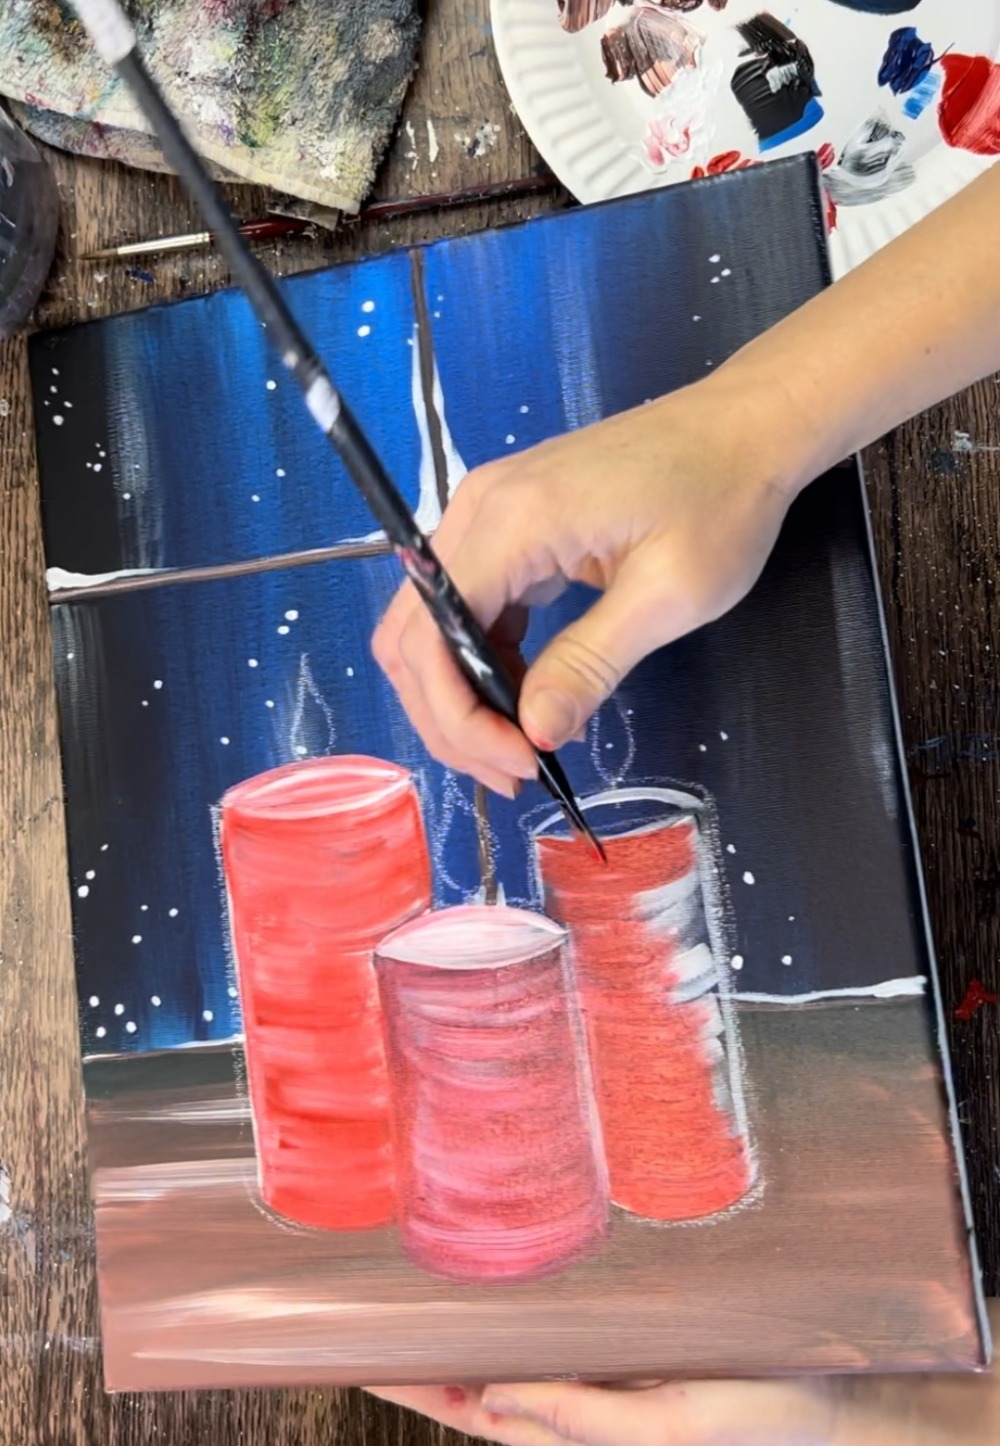
Tip: to create “contrast” with your candles, add darker color on the far left and lighter color on the far left vertical lines of the candles. This will help each candle stand out from each other.
Then paint the top of the third candle using the round brush and the same technique used in the other two candles.
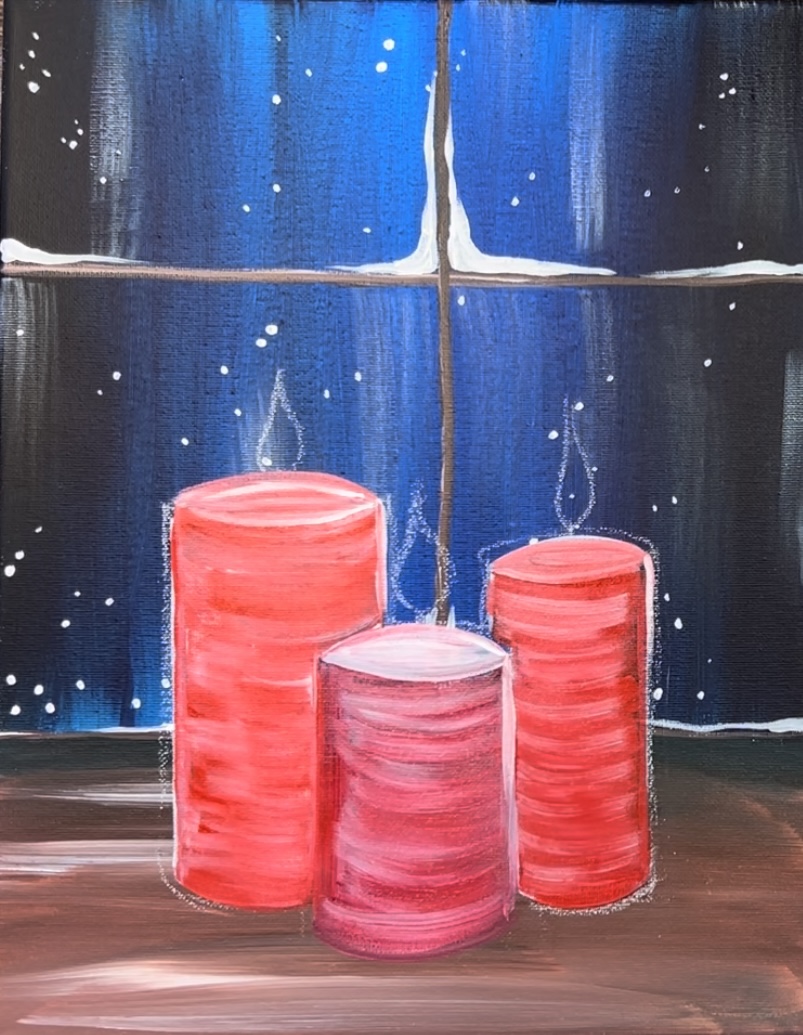
12. Paint wicks
Use your #4 round brush and mars black to paint the vertical lines of each of the wicks.
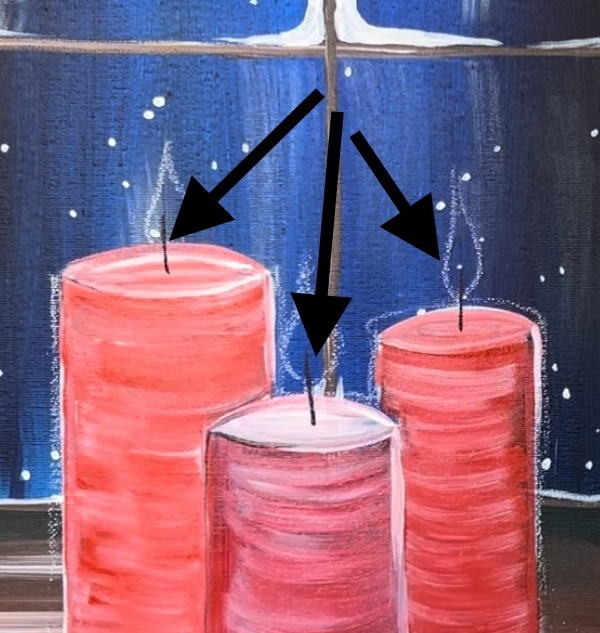
13. Paint flames
These flames were done in 4 layers. It is recommended that you let each layer dry before going onto the next layer.
The first layer is the glow of the flame. I actually did this layer with my finger! On your palette, you will need to mix orange. Mix about 3 parts “primary yellow” and 1 part “pyrrole red”.

Then dip your finger in the orange. Form a circular area around the top of the wick with your index finger and that orange.
It will create an orange translucent glow. This does not need to be the shape of the flame, it is a circle that goes outside the lines of that flame shape. It won’t look bright and that’s okay! This first layer is important because it establishes the “glow” the flame is producing!
Do this to each of the candles. You can add a second layer with more yellow to make it slightly more brighter but don’t make it too bright yet.
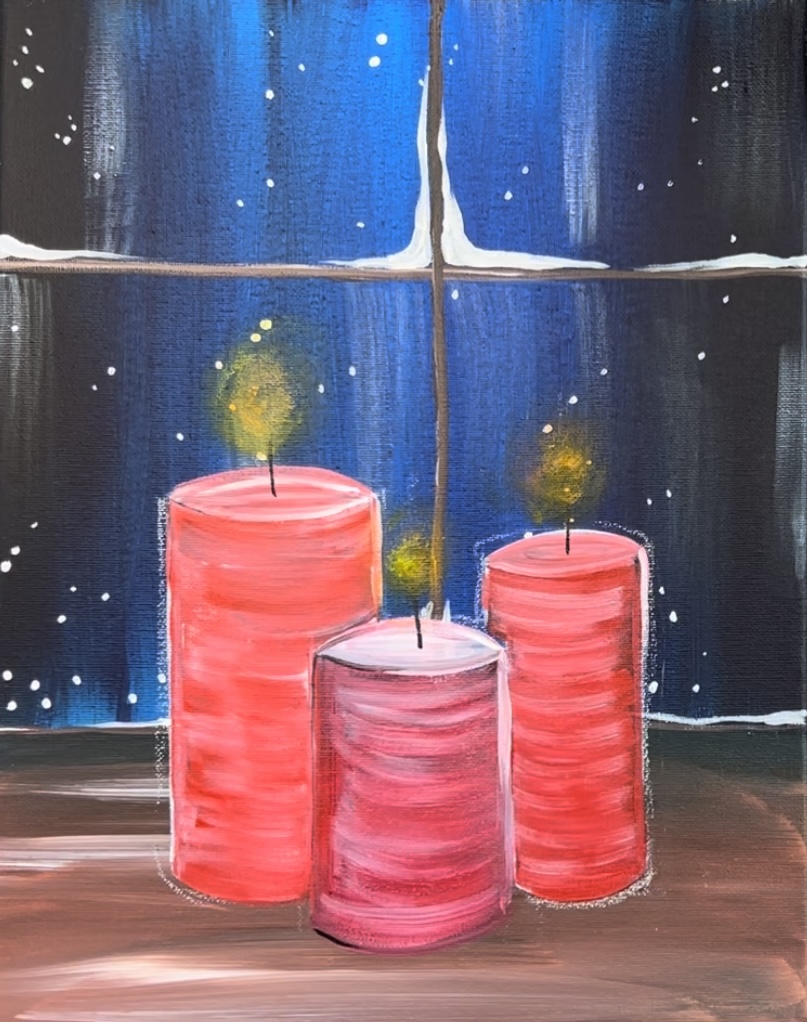
Let this first layer dry.
For the second layer, you will be using the round brush to paint the actual flame shape. Mix yellow into your orange color you used for the flame. Then use your round brush to paint the flame shape on top of each of the candle wicks. Make sure the “glow layer” is on the outside of your flame shape.
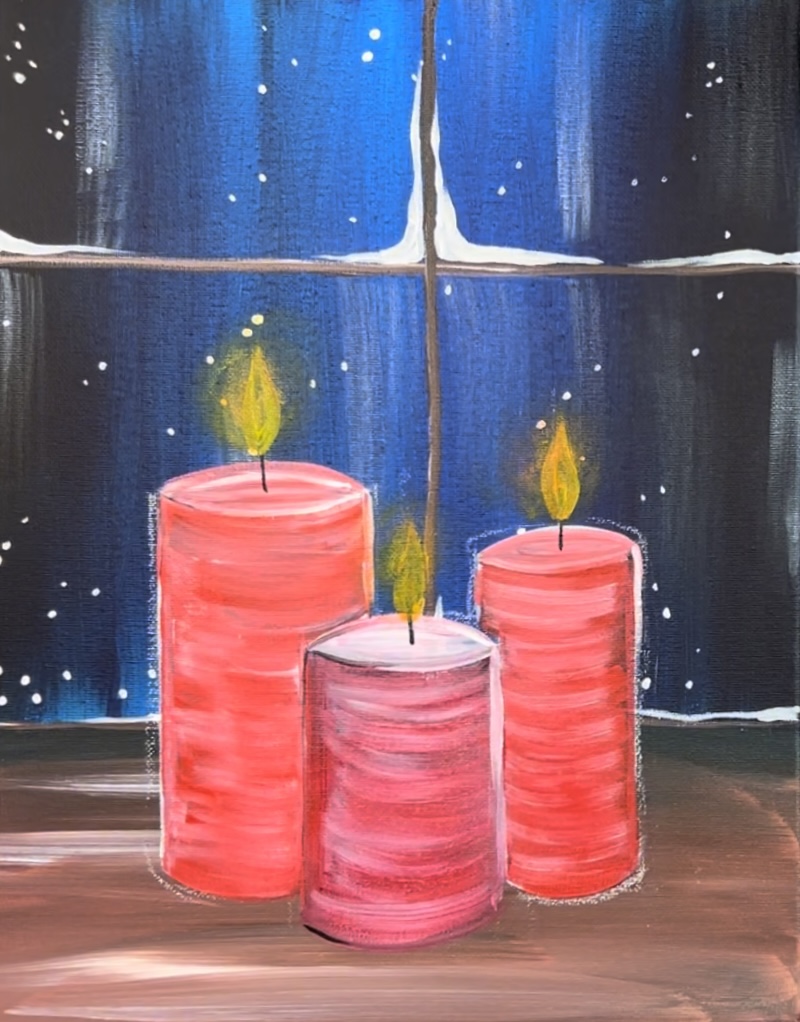
Let layer two dry…
Then do layer three! Layer three is a lighter color for the flame. Mix about 1 part white to 2 parts yellow. Then paint a smaller flame on the inside of your first flame shape. You should have a brighter shape on the inside!
Let layer three dry…
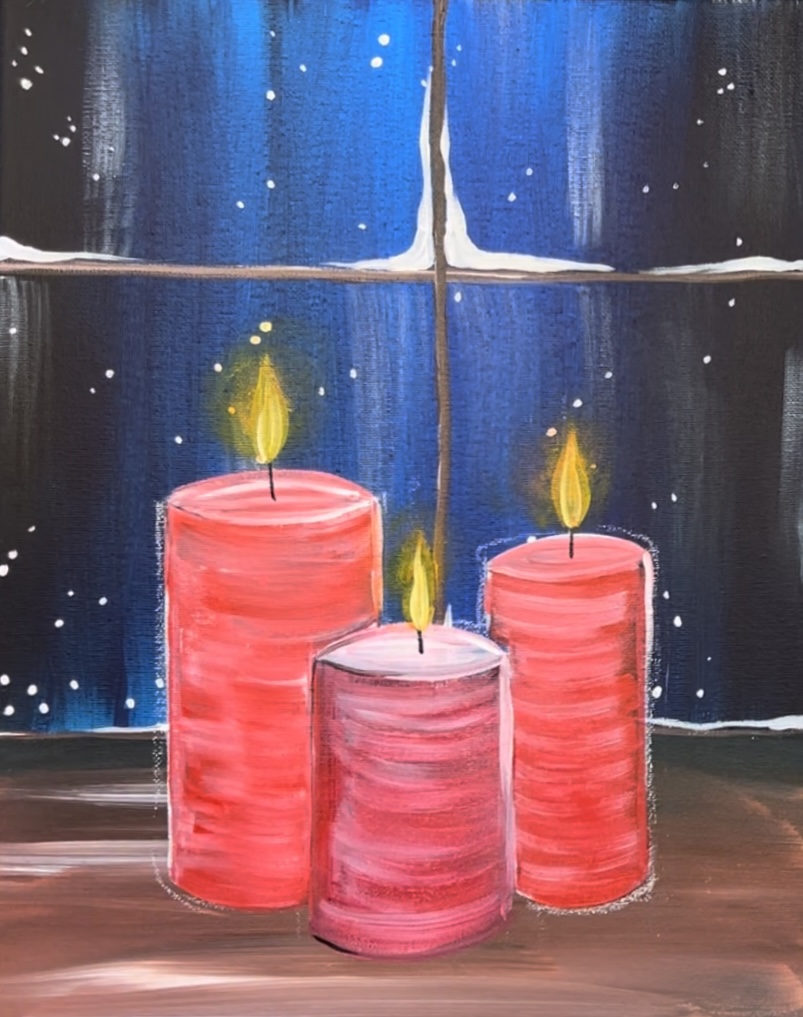
Layer four is solid titanium white and a very thin vertical line in the center of each of the flames. This will help make your flame look very bright! Make sure you completely rinse your 4 round brush off and load it into just the white.
Paint a vertical line on the inside of each of the flames.
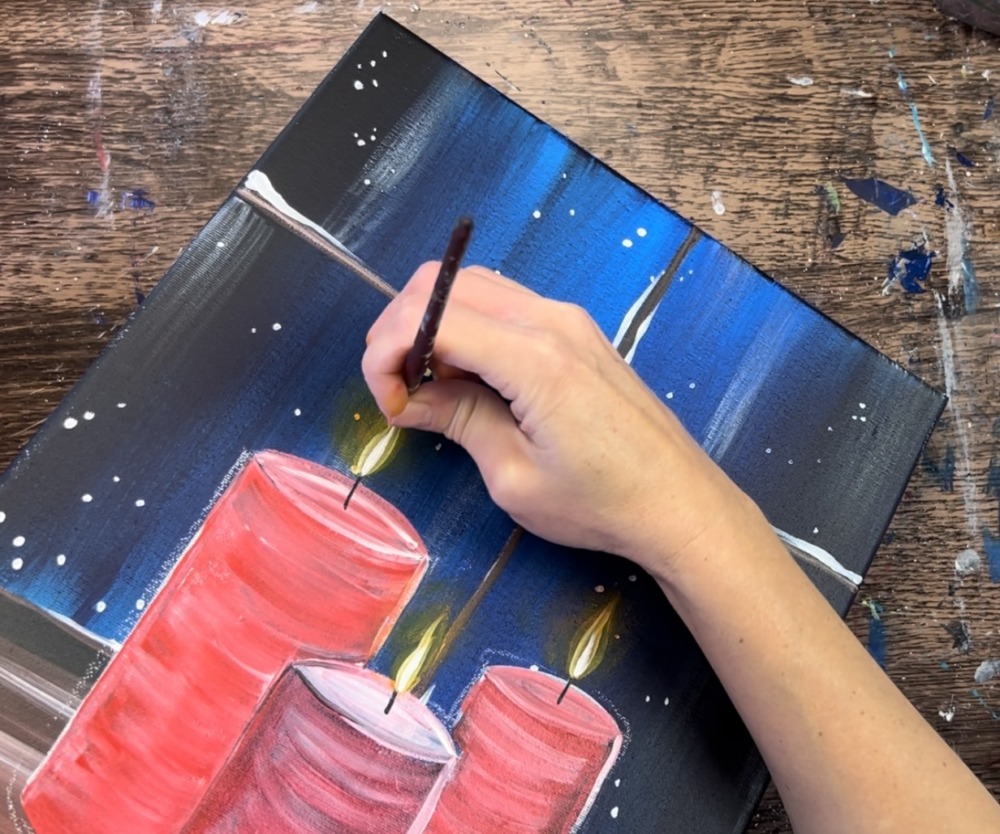
Then, add a very thin slither of white to the left or right of each of the wicks. This will help highlight that part of the wick.
Below is a close up of the flames so you can see the detail of each layer we just did. Note: wax drippings are done in the next step.
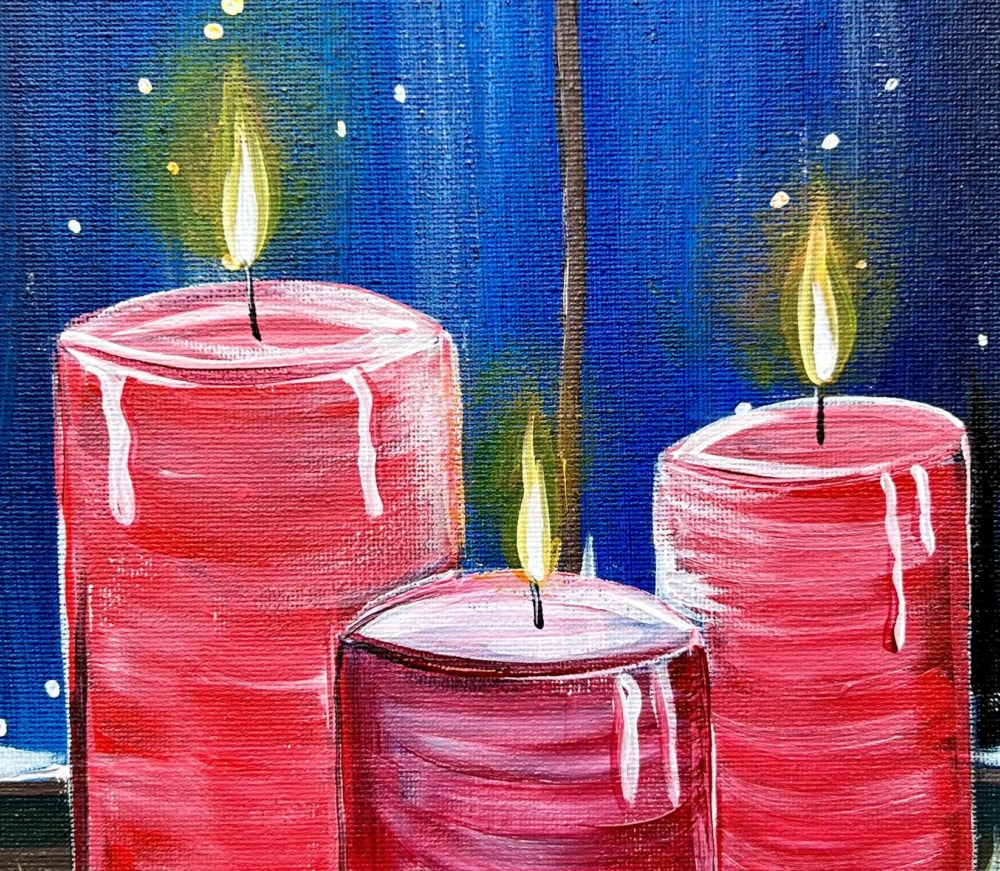
14. Paint wax
The wax drippings are optional. Use the #4 round brush and titanium white to paint the vertical drippings going down from the top of the candle. Make a kind of wavy line. Each candle has 2 dripping (but you can paint more). They also vary in length.
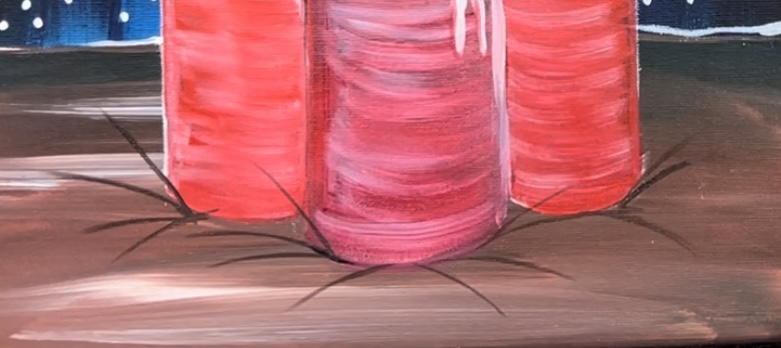
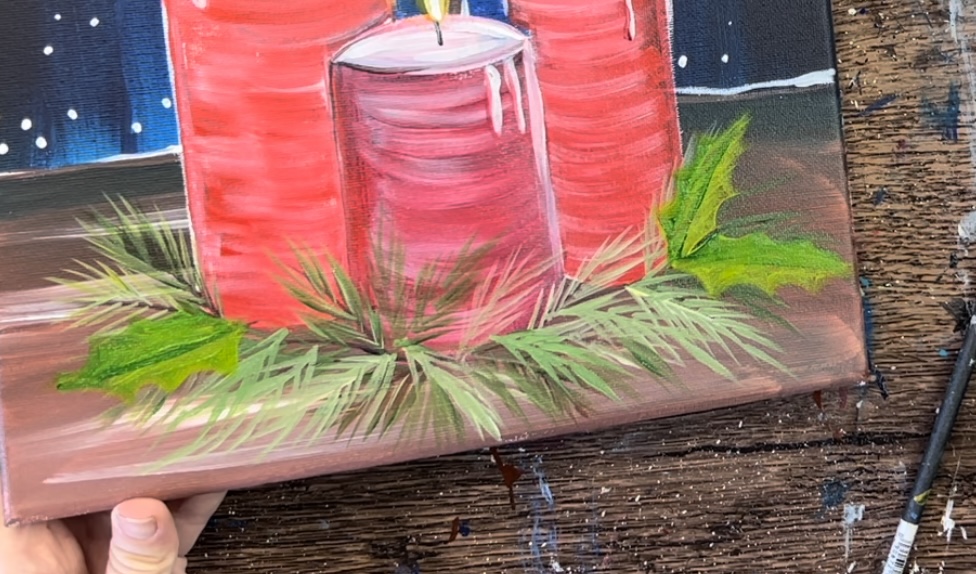
15. Paint pine needles
Below is a close up picture of the pine needle decor on the base of the candles. This part is done in multiple layers, starting with the pine needle branches.

To do the pine needle branches, start with your center stick piece. Use the 12 bright brush and burnt umber. Load paint just on the tip of the brush. Then paint all the individual pine needle branches on the base of the candles. The direction of the sticks go mostly to the left on the left side of the painting and mostly to the right on the right side of the painting.
Next, load your palette with hooker’s green hue permanent. For the pine needles, you will be mixing white and black into the green to make some of the needles darker and some lighter. You can even use your yellow and red and mix those colors into the green to create variations of color in your green.
To start, load the tip of your 12 bright brush into green. Paint each individual pine needle stroke creating thin diagonal lines along the stick line.
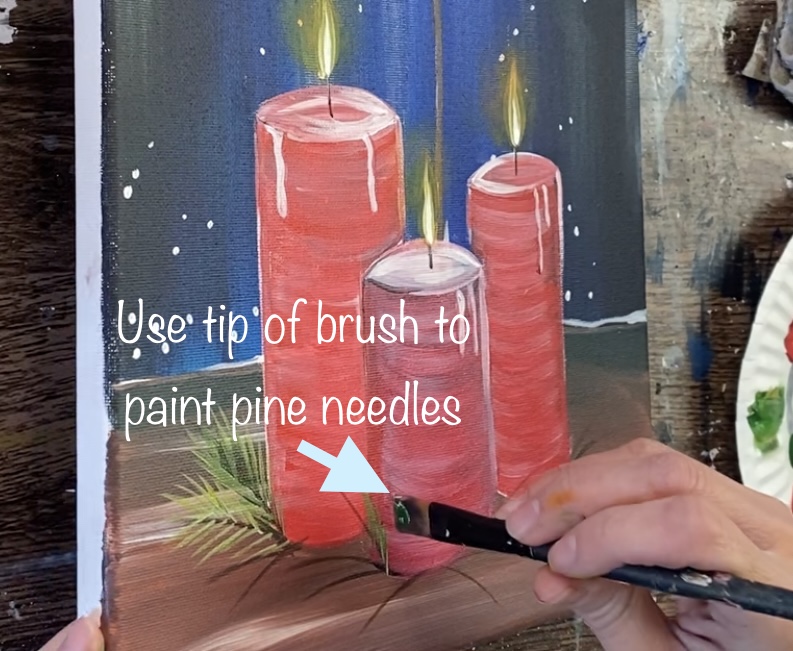

Paint each of your pine needle branches.
Create variations of greens by mixing white, yellow and even a tiny bit of red into your green to make some of the needles darker.

You can make pine needles go up and overlap some of the candles.
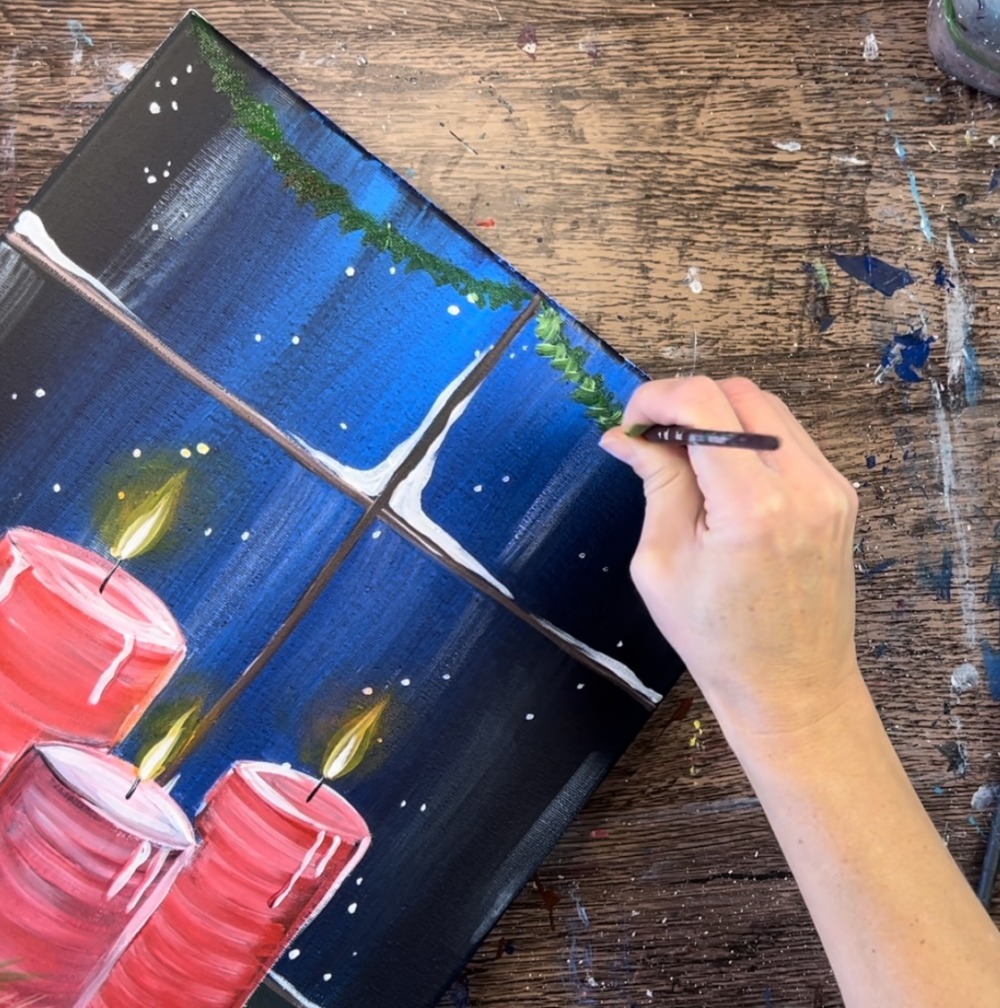
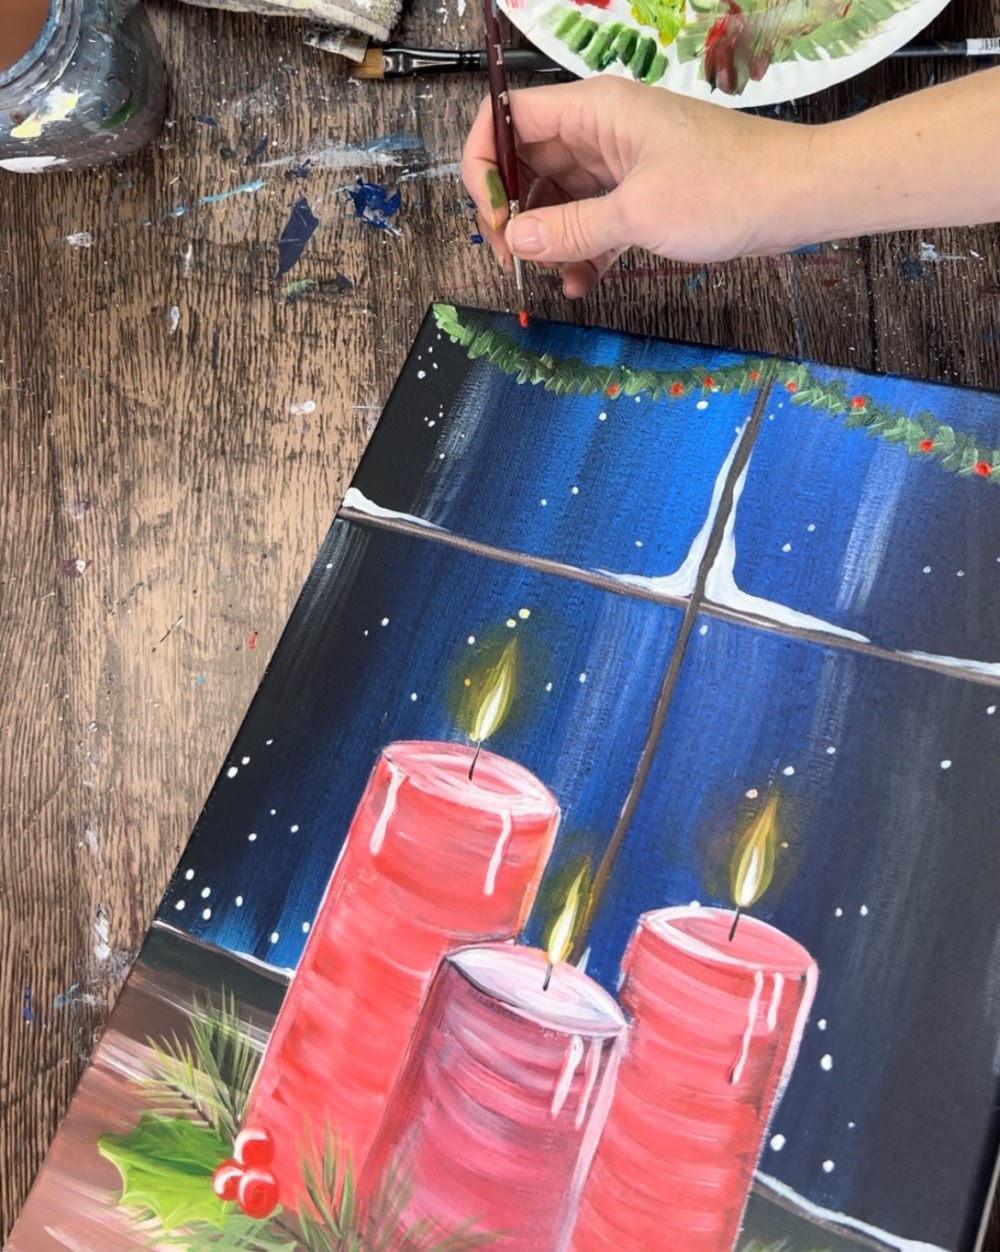
16. Paint garland
Below is a closeup of the finished garland so you can see the details.
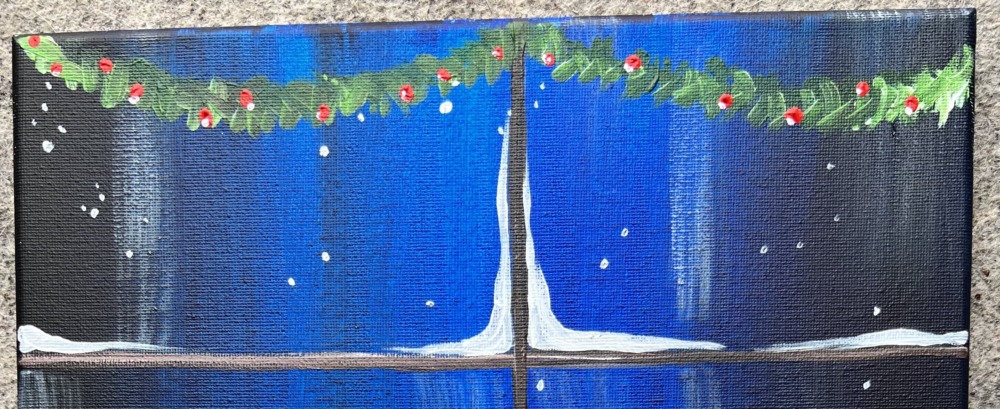
If you are doing a garland, use hooker’s green hue and the #4 round brush to paint two curved lines.
Then add texture to your lines. Use your round brush to paint little “x strokes” along the initial lines you painted.
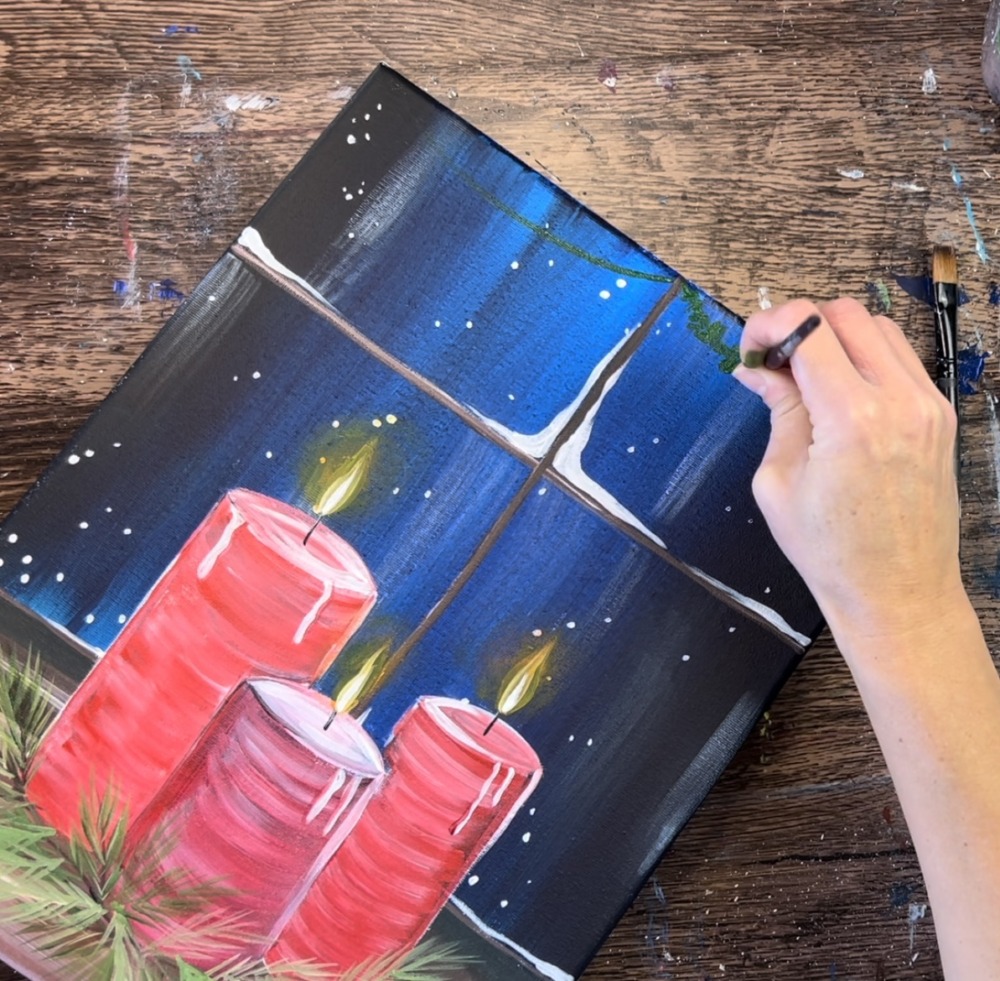
Next, add a small amount of white to your brush without rinsing the green off. Go back and add another layer of “x strokes” along the garland line. This will make the green lighter in some areas and give it more texture and highlight.
After this green dries, you can paint red dots for berries.
17. Paint holly leaves
This is an optional step! You can add more greenery/ decor to your pine needles by painting a few pretty holly leaves! Below is a close up of my finished leaves with their berries.
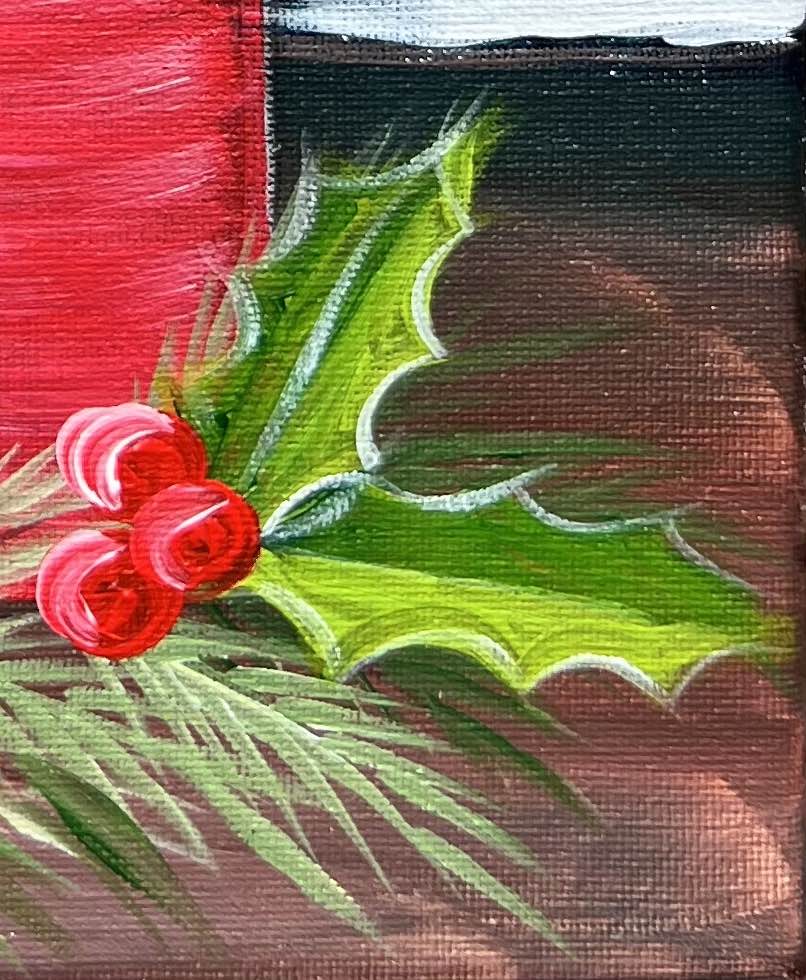
To do this, mix a light yellow-green on your palette. You just need a green that is lighter than your pine needles and enough to stand out.
Use your round brush to paint inverted curves for the edge shape of the leaf.
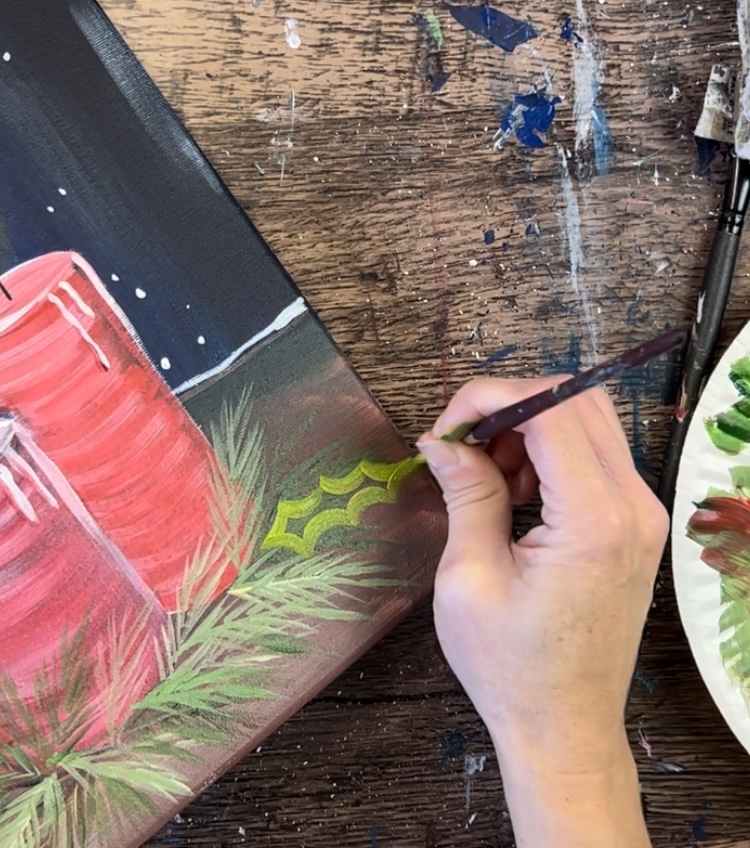
Then paint the leaf in solid.
Repeat for a second leaf. You can do more if you want! I also did one on the left side.
Then on one half of each of your holly leaves, paint a darker green. I did this by loading my brush in just the hooker’s green hue and painting a line down the middle. Then I painted over half of the leaf.
Then after the leaves dry, you can paint the berries. I used the #4 round brush and pyrrole red to paint three small circles on each of the holly leaves (one set on the left and one set on the right).
Then use titanium white to paint one curved highlight line on the left side of each of the berries.
When your garland dries, you can paint little red dots using your 4 round brush.
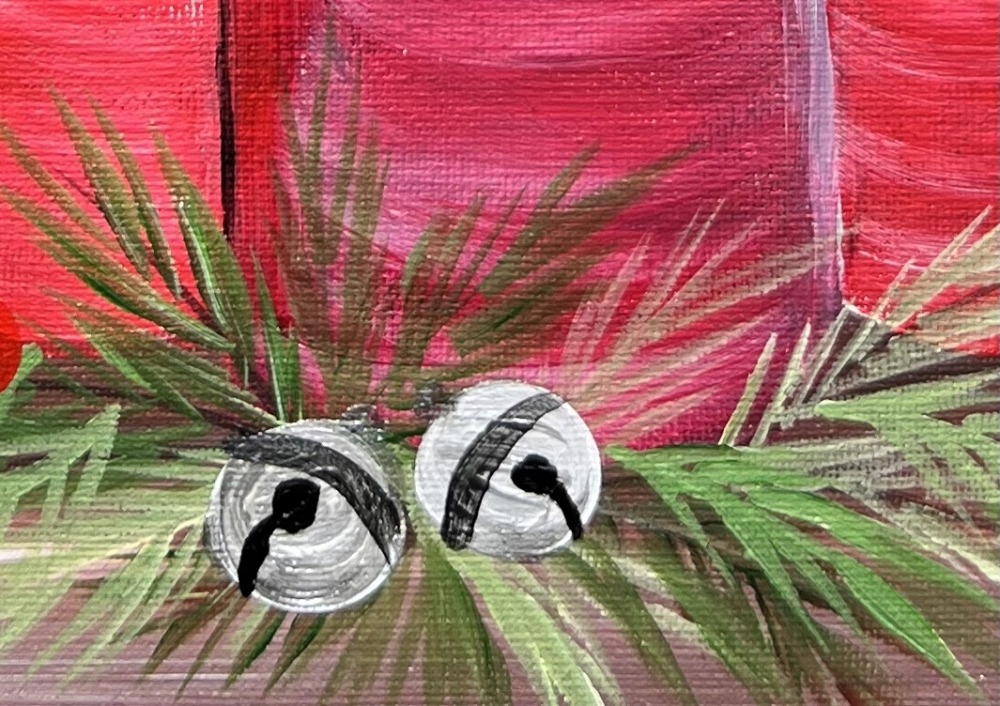
18. Paint bells
If you are painting bell decor at the base of your candles, you can use any color for the bells. I used the color silver.
First you need to paint the circles white to prime the first layer. Then when the white dries, you can paint the circles silver.
Then use mars black and the #4 round brush to paint a little circle in the middle of the bell and a curved line that goes down to the edge of the bell circle.
Then mix a little bit of black into the silver to darken the silver.
As a final touch up, you can lightly outline the edges of the holly leaves so they can stand out a bit better.
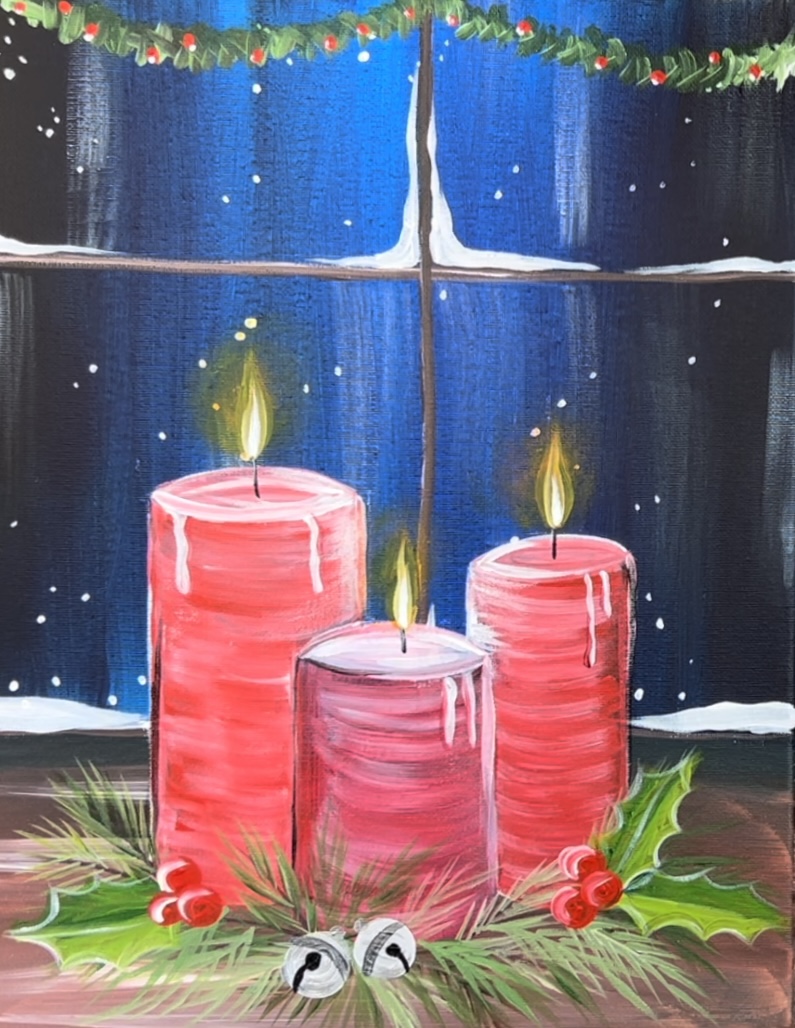
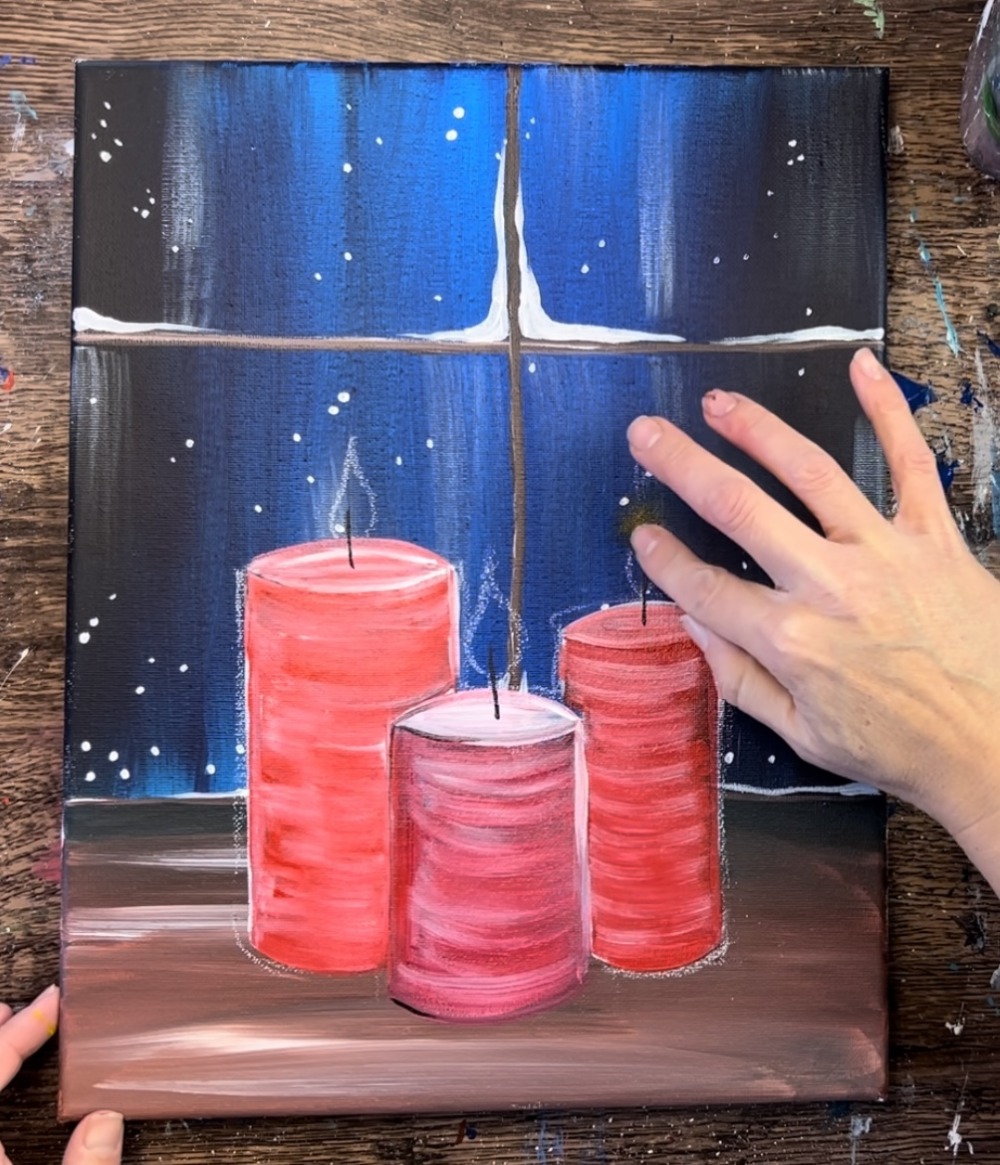
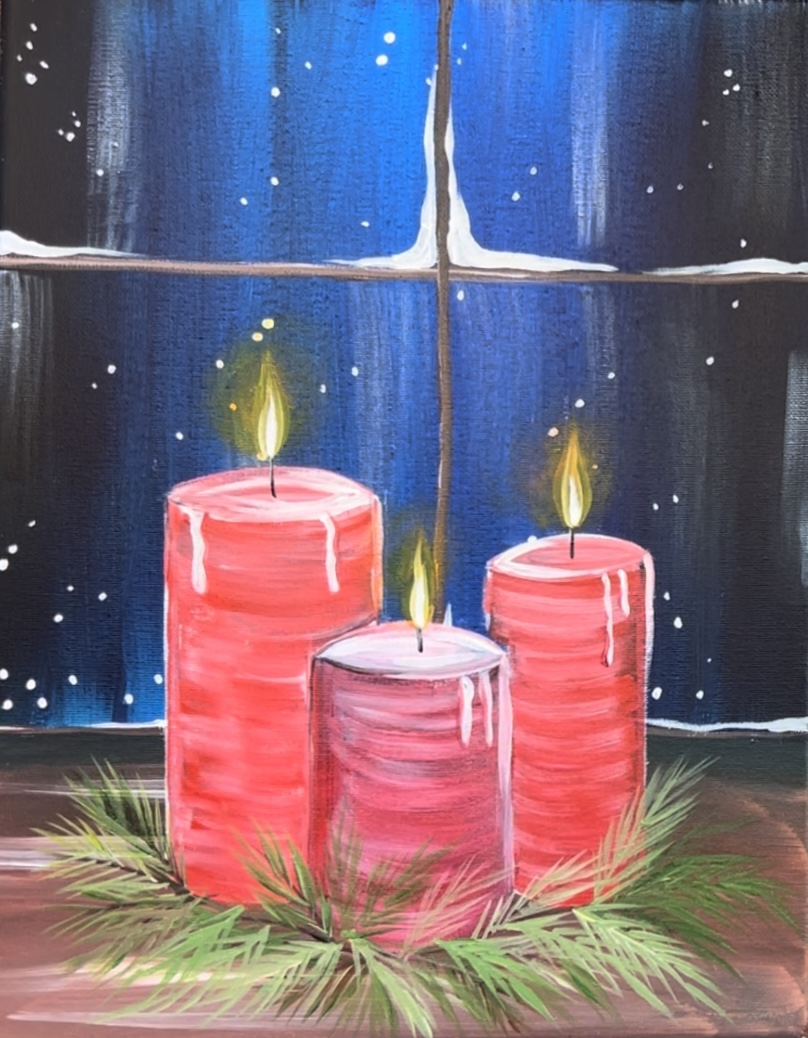
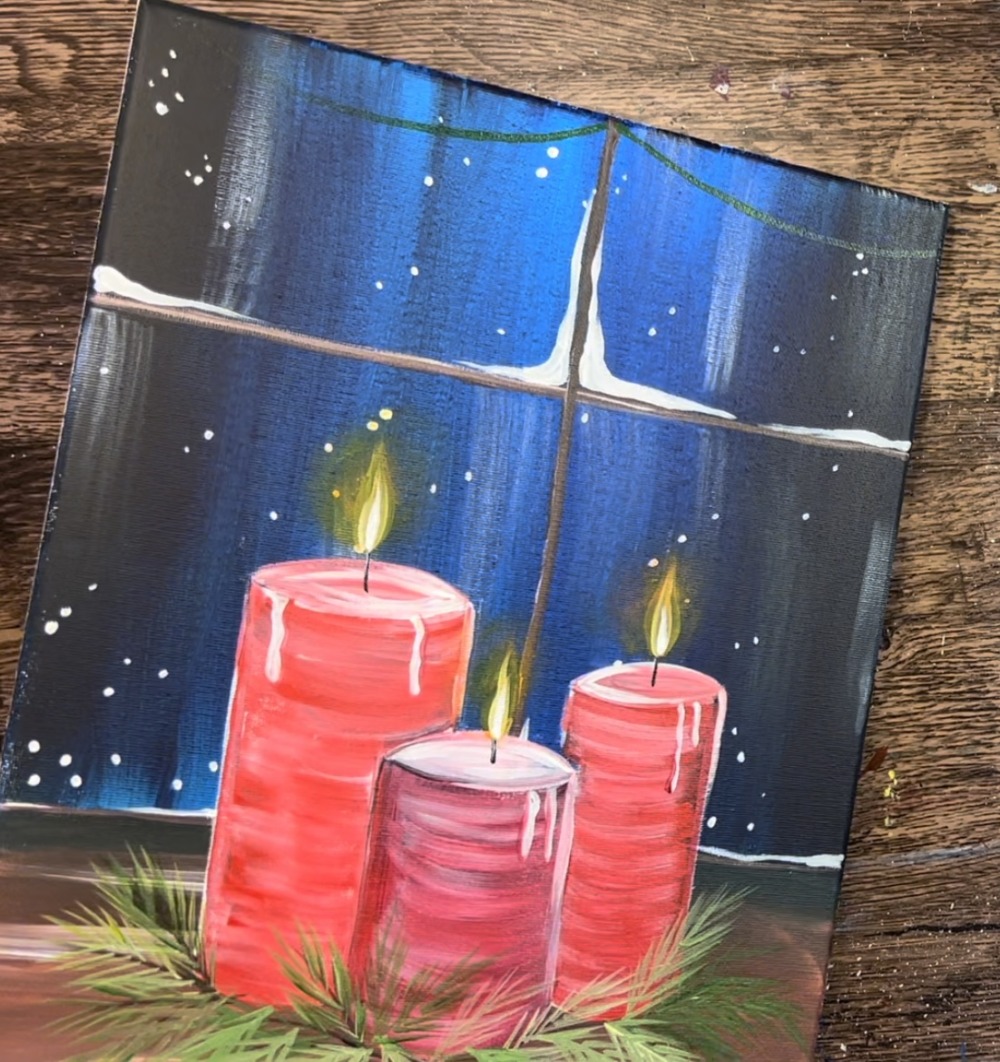
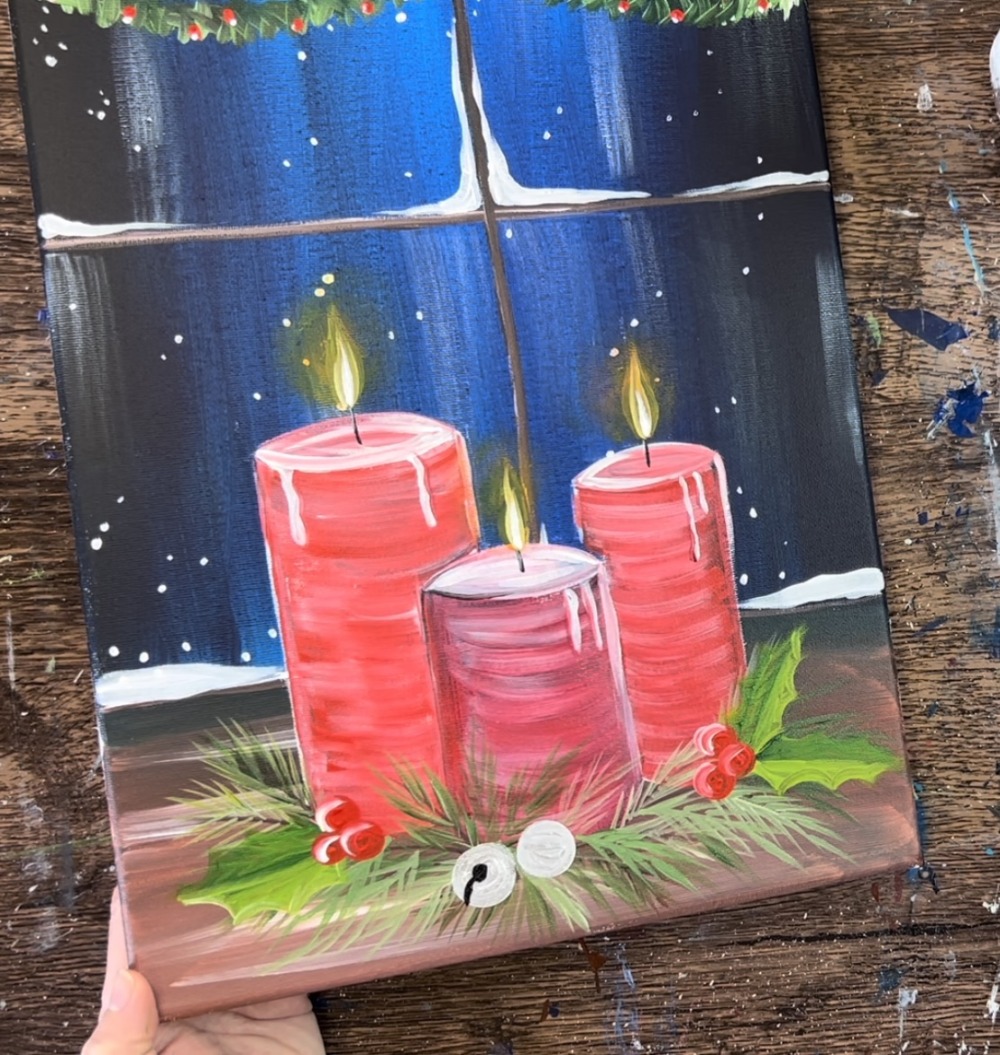
Finished!