
Would you like to save this?
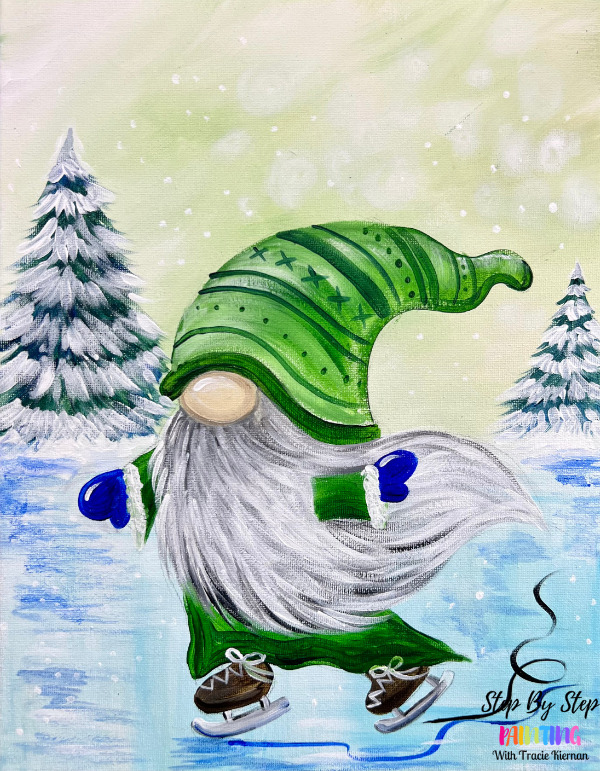
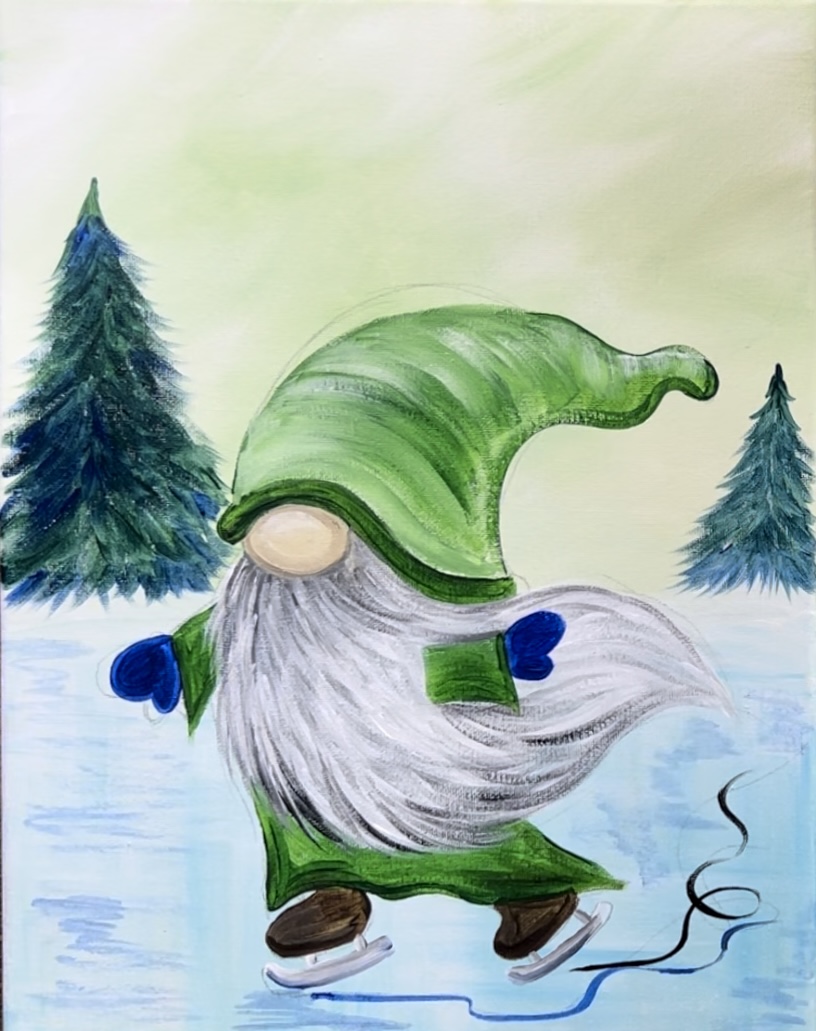
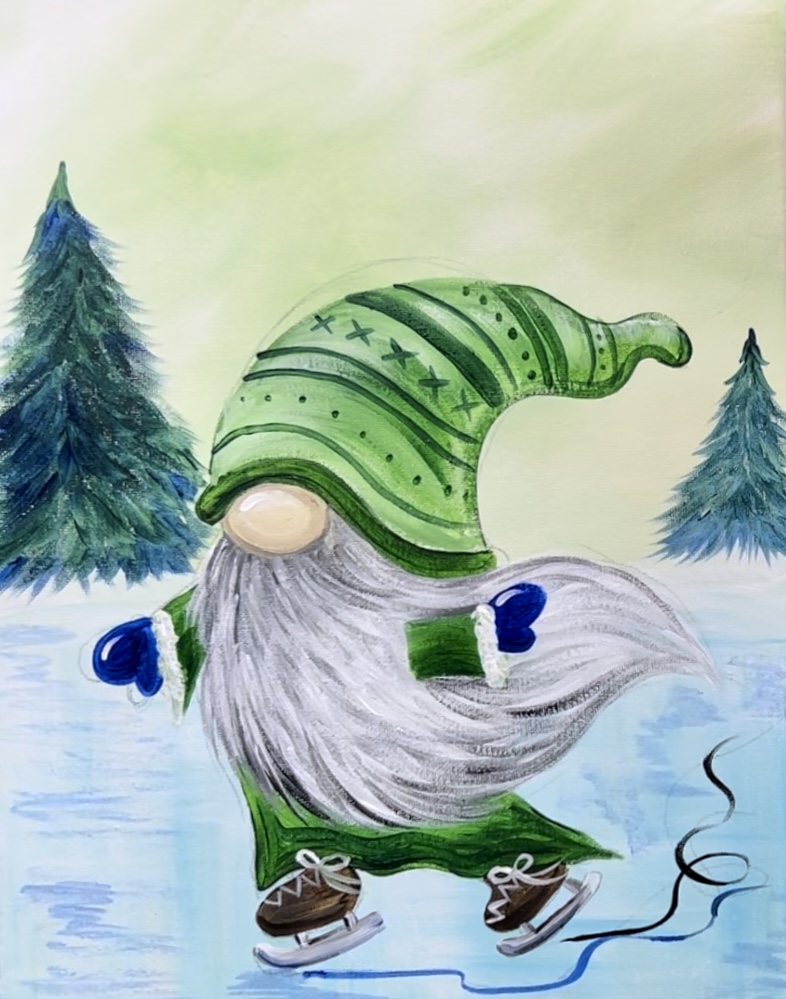
Learn how to paint this adorable ice skating gnome with acrylics on canvas!
This tutorial will show you start to finish how to paint this design including how to draw the gnome. There is also an optional traceable download for this design.
Enjoy and happy painting!
Hey gnome fans! Here is my collection of other gnome paintings!!
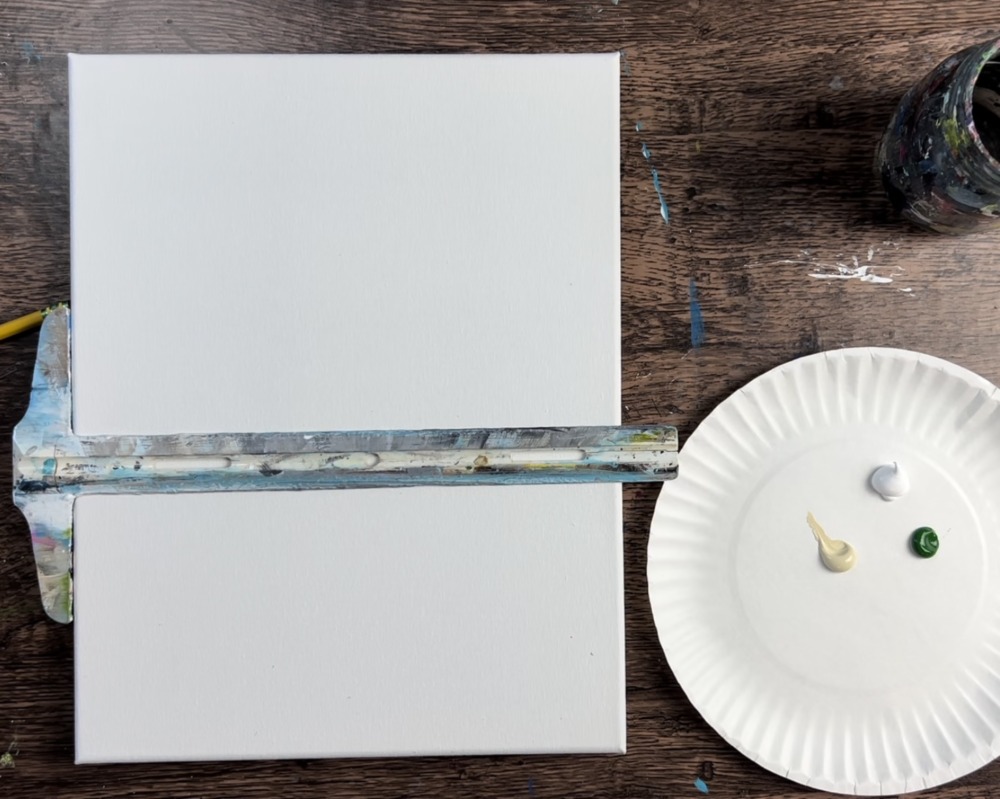
Materials
How To Paint An "Ice Skating Gnome" - Acrylic Painting Tutorial

Materials
- 11 x 14 Canvas
- Acrylic Paint
- Pencil
- Ruler
- Optional Traceable
- Optional Graphite Paper If Using Traceable
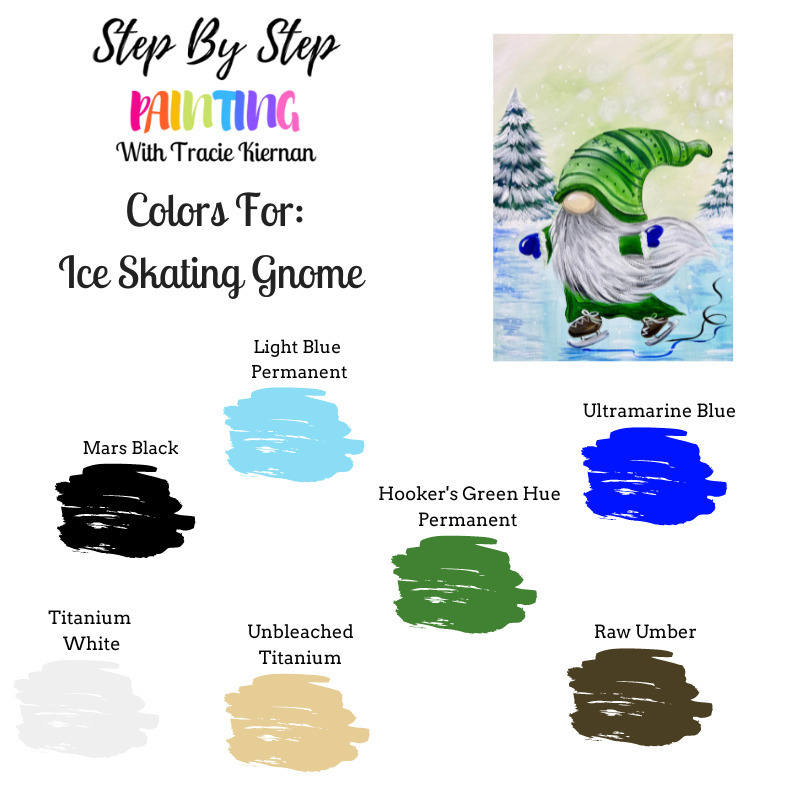
Colors
- Titanium White
- Mars Black
- Hooker's Green Hue Permanent
- Ultramarine Blue
- Raw Umber
- Light Blue Permanent
- Unbleached Titanium
Brushes
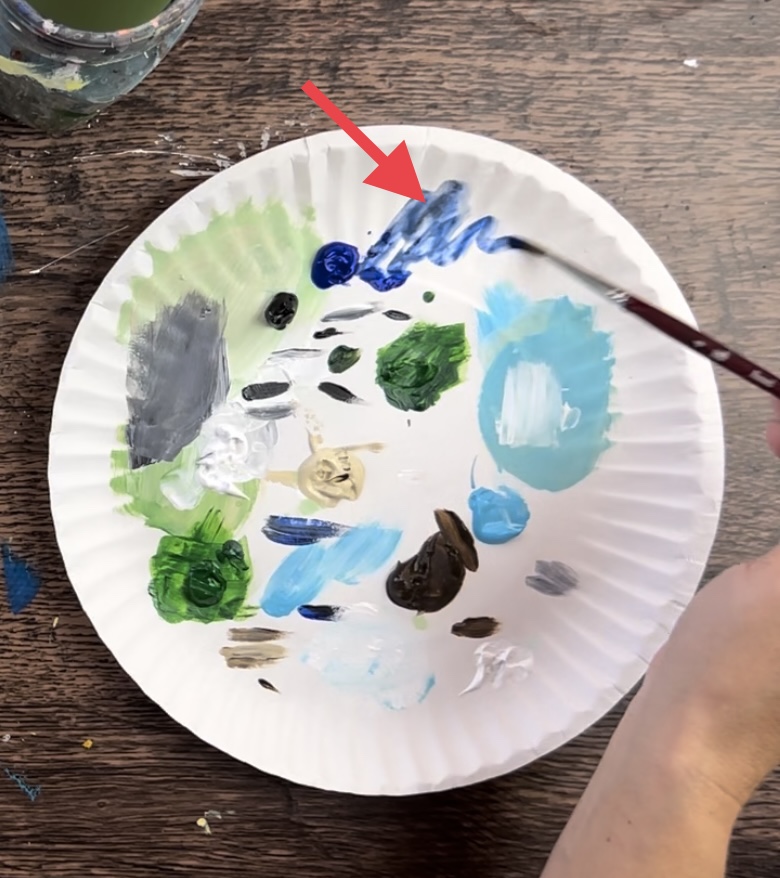
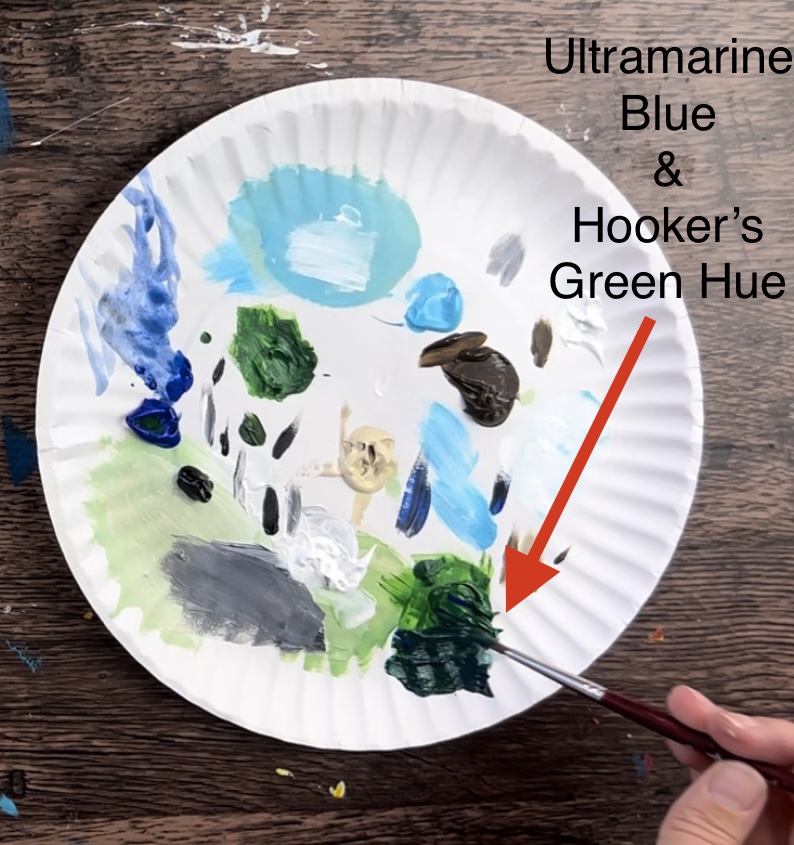
Color Palette
I used liquitex BASICS acrylics for this tutorial. If you are using a different brand, you can use the color chart below to help you match colors.
Using Craft Paints?
If you are using craft paints such as Apple Barrel Craft, I would recommend subbing to these colors:
- White
- Black
- Holly Branch
- Melted Chocolate
- Parrot Blue
- Bright Blue
- Any Beige Color (or mix white with nutmeg brown)
Traceable
This is optional! In this tutorial, I will demonstrate how to draw the gnome using a pencil and then we will paint the gnome in. If you want to skip the drawing portion, you can download this template and use it to trace onto your canvas after you have painted the background in. The transfer paper will go over a painted canvas.

Directions At A Glance
Video
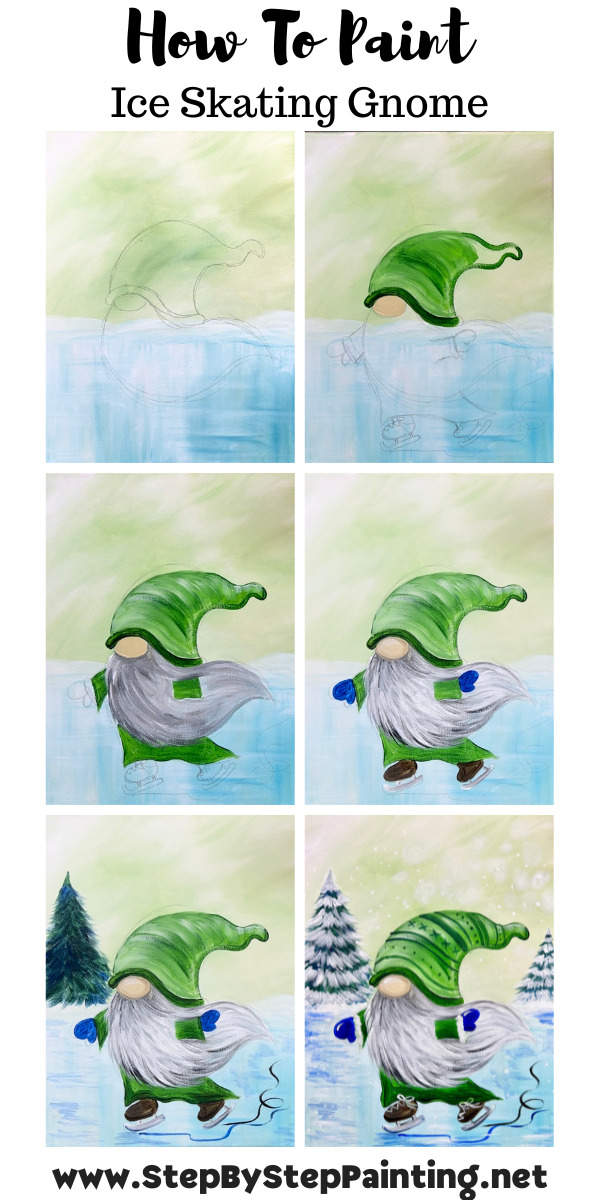
Step By Step Directions
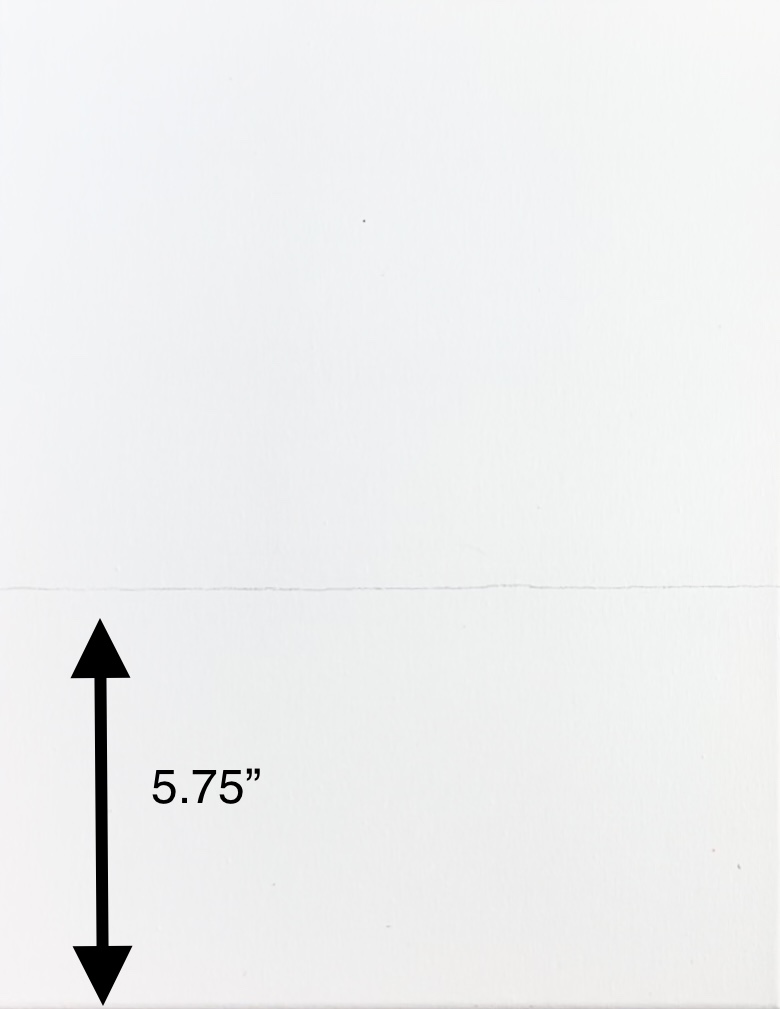
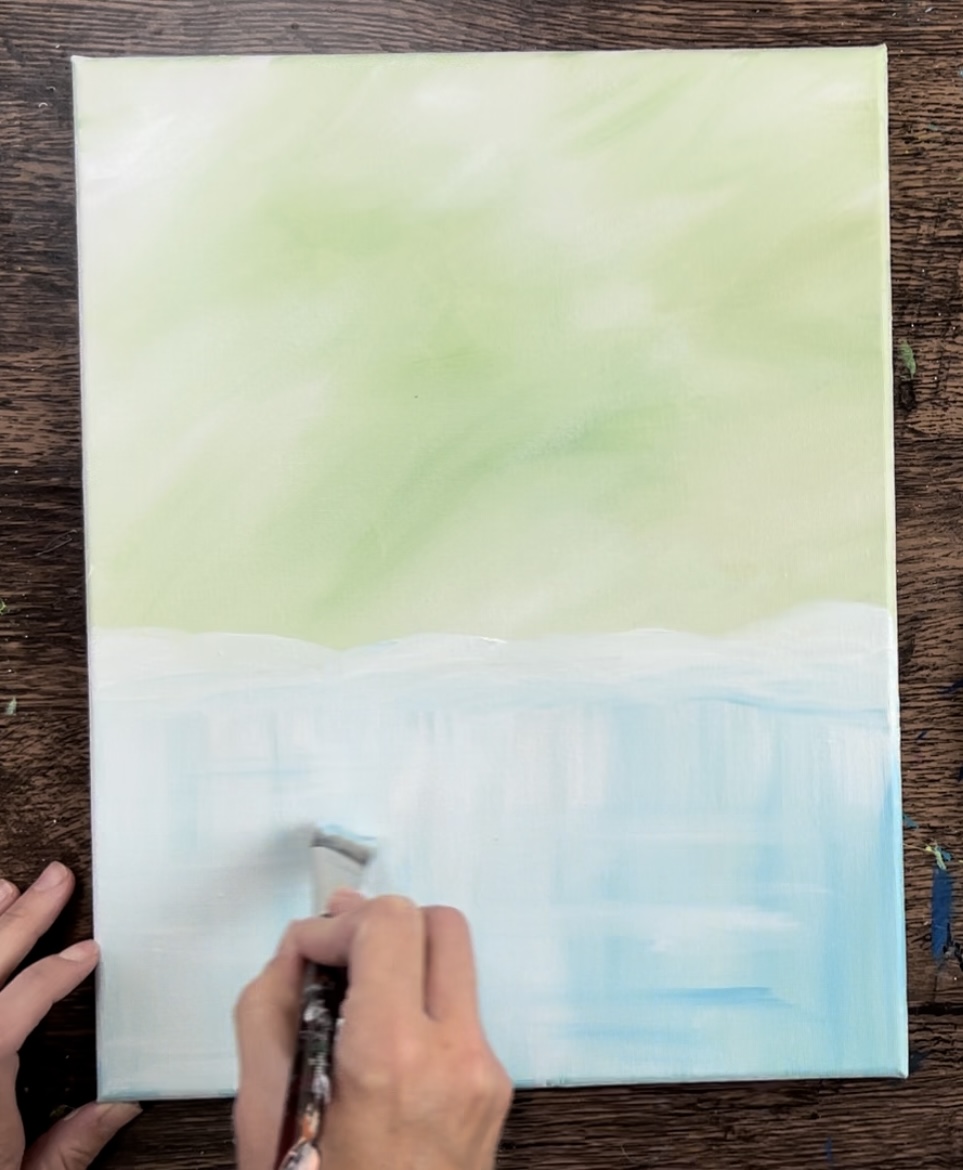
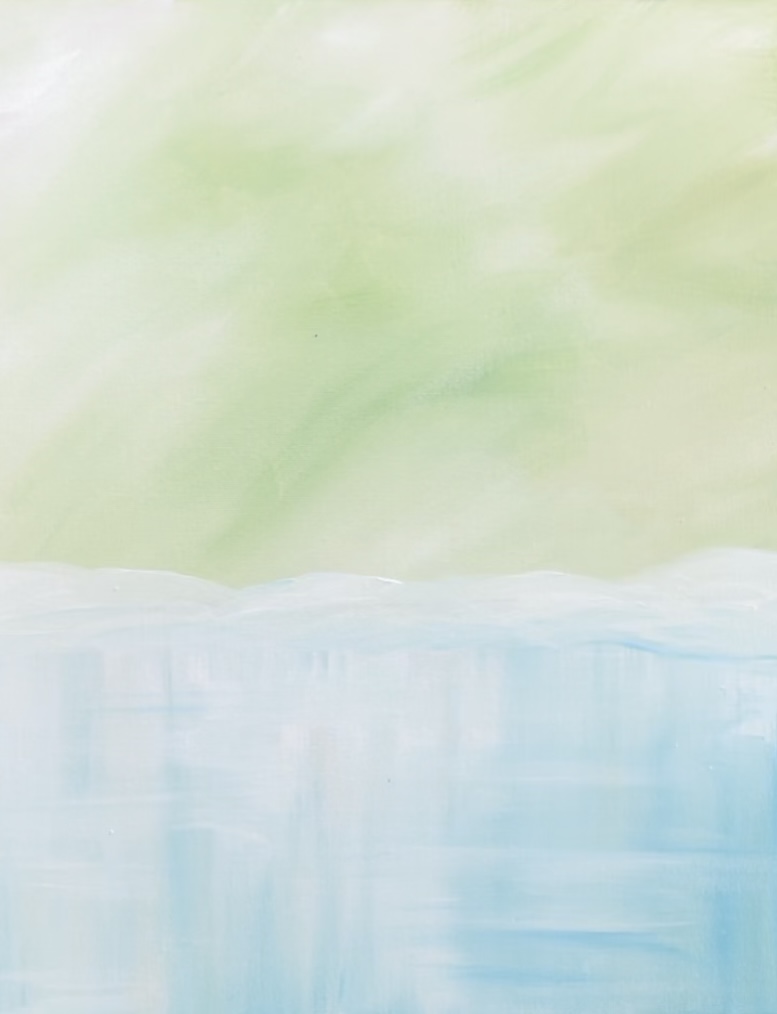
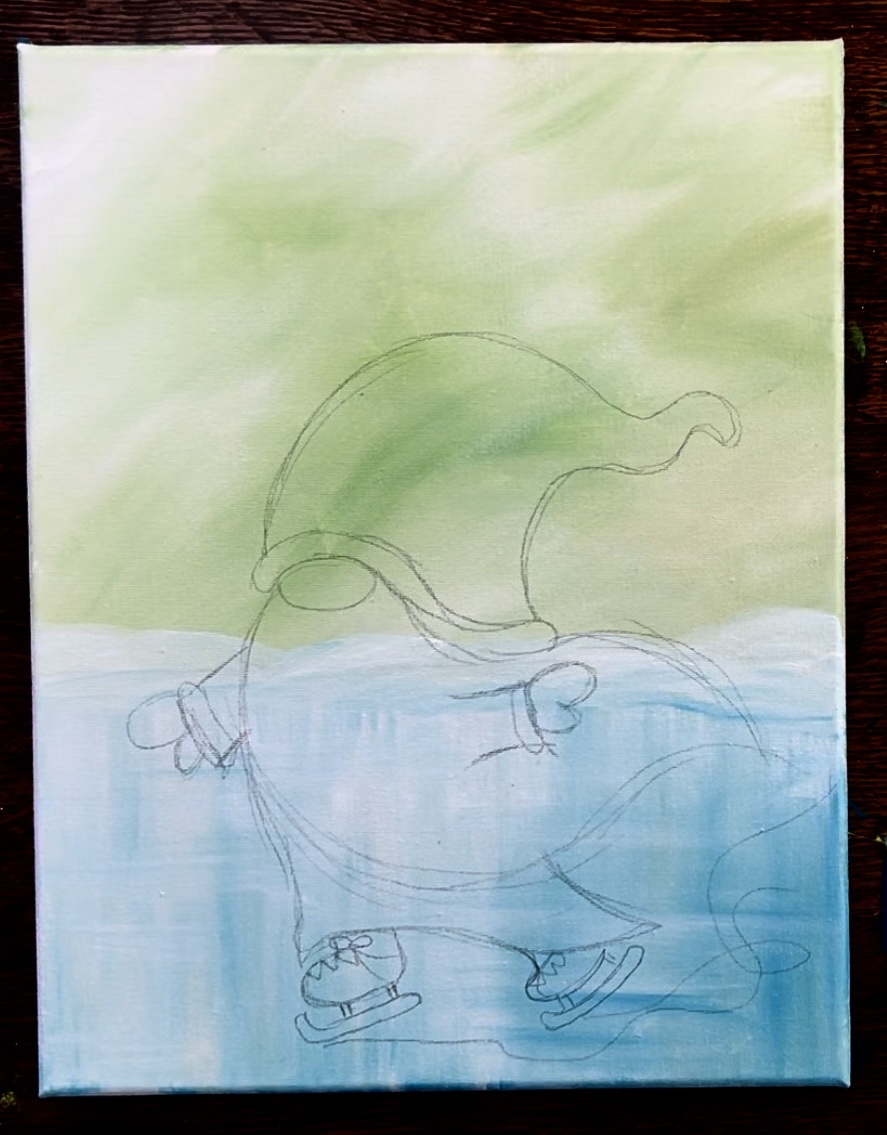
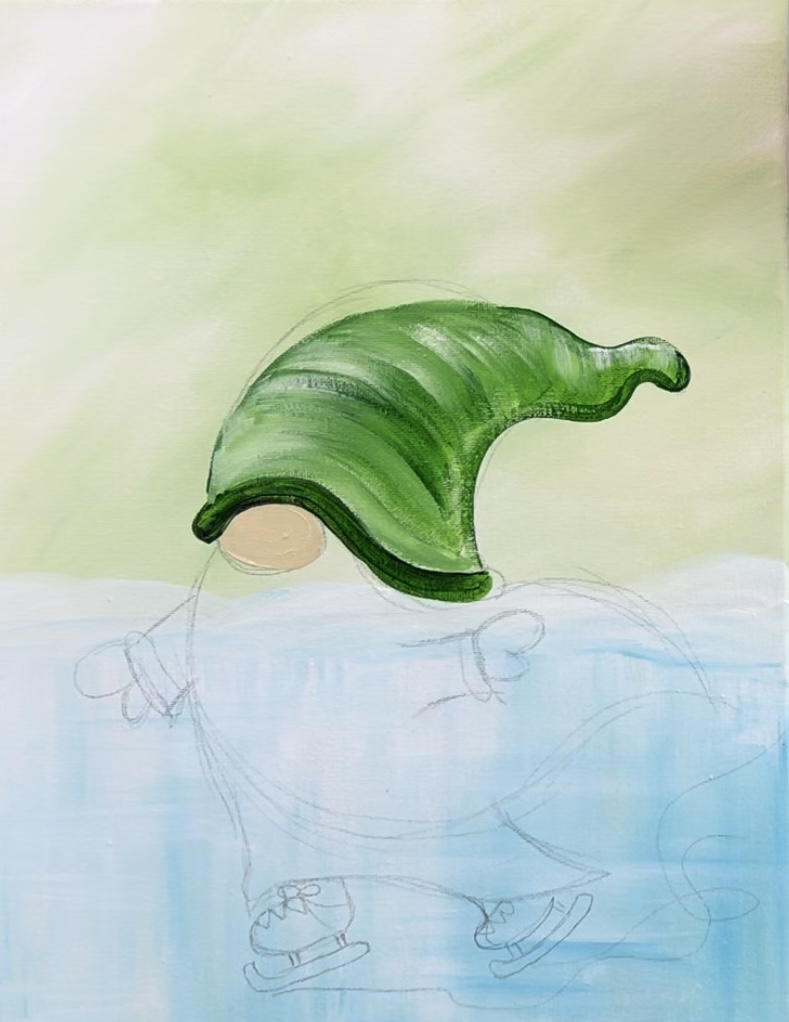
1. Draw Horizon Line
Position your canvas in a vertical format. Then measure about 5.75″ from the bottom of the canvas. Draw a horizontal line.
Note: If you are working on a different size canvas, position your horizon line so that it is below the center of the canvas.
Everything above this line will be sky and everything below will be the ice.
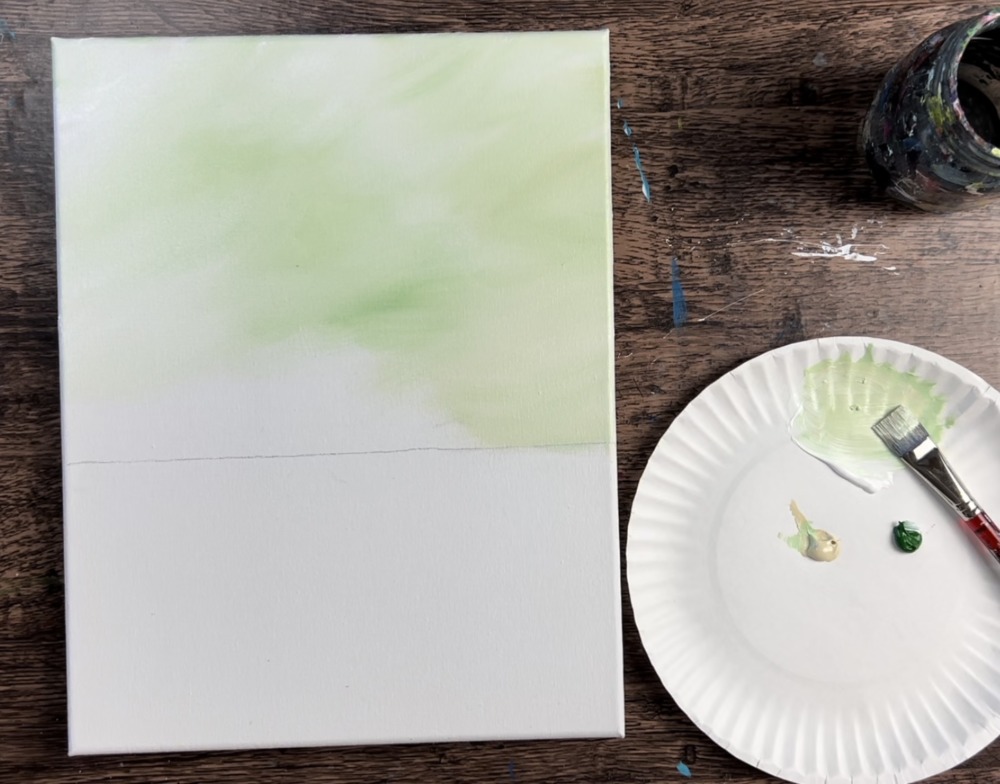
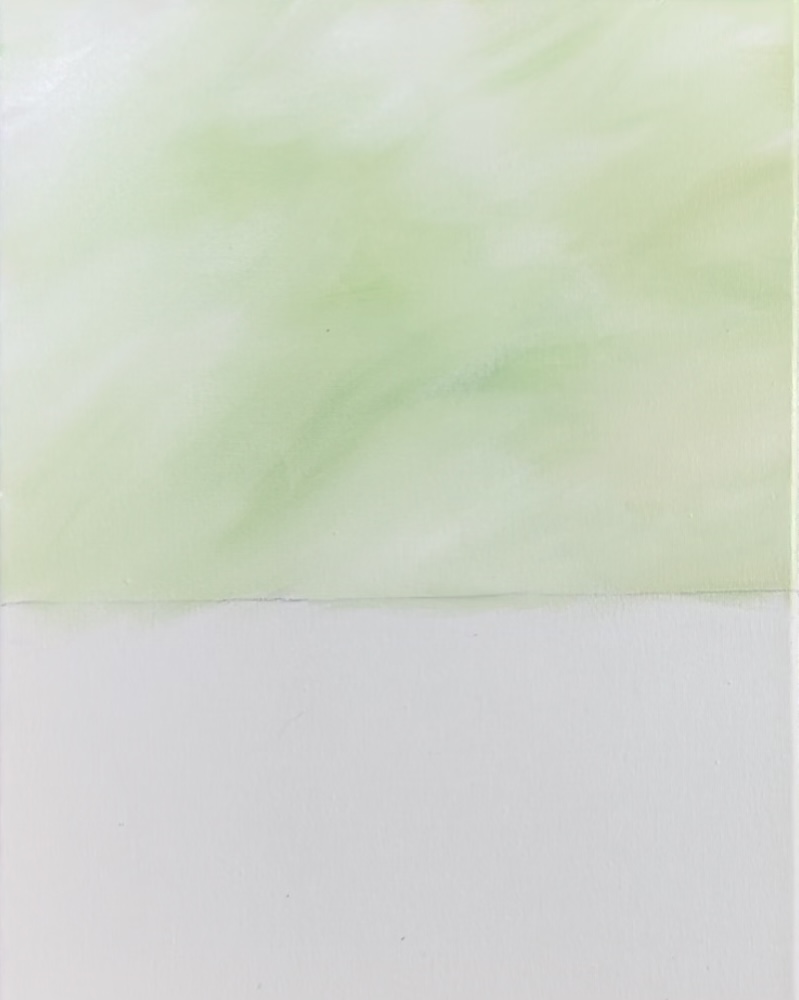
2. Paint The Sky
Load your palette with the colors: hooker’s green hue permanent, titanium white and unbleached titanium (beige).
Mix about 4 parts white, 1-2 parts beige and 1 part green. This will make a very light creamy green color.
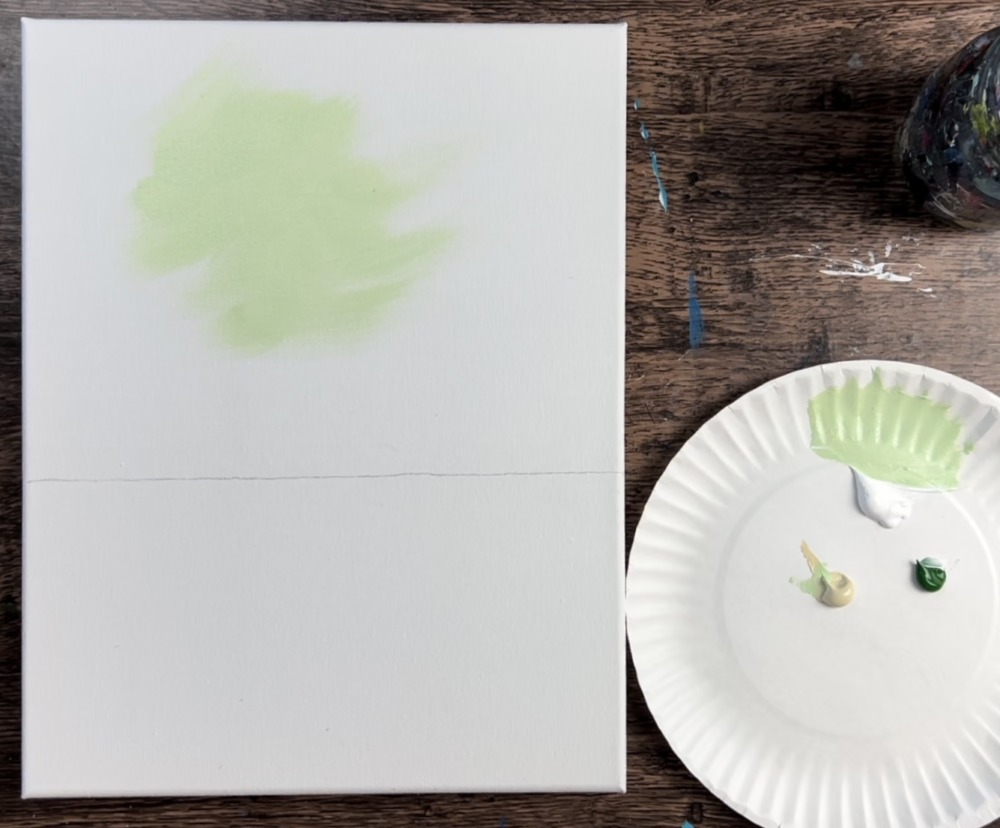
Start in the middle of the canvas and paint criss-cross strokes that blend gently on the canvas. Load your brush in various amounts of the white and the green to create some color variation in the sky.
On the outer parts of the sky (closer to the canvas edges), I did a little more white to make the green lighter. Overall, this sky needs to be very light so that the gnome will stand out.
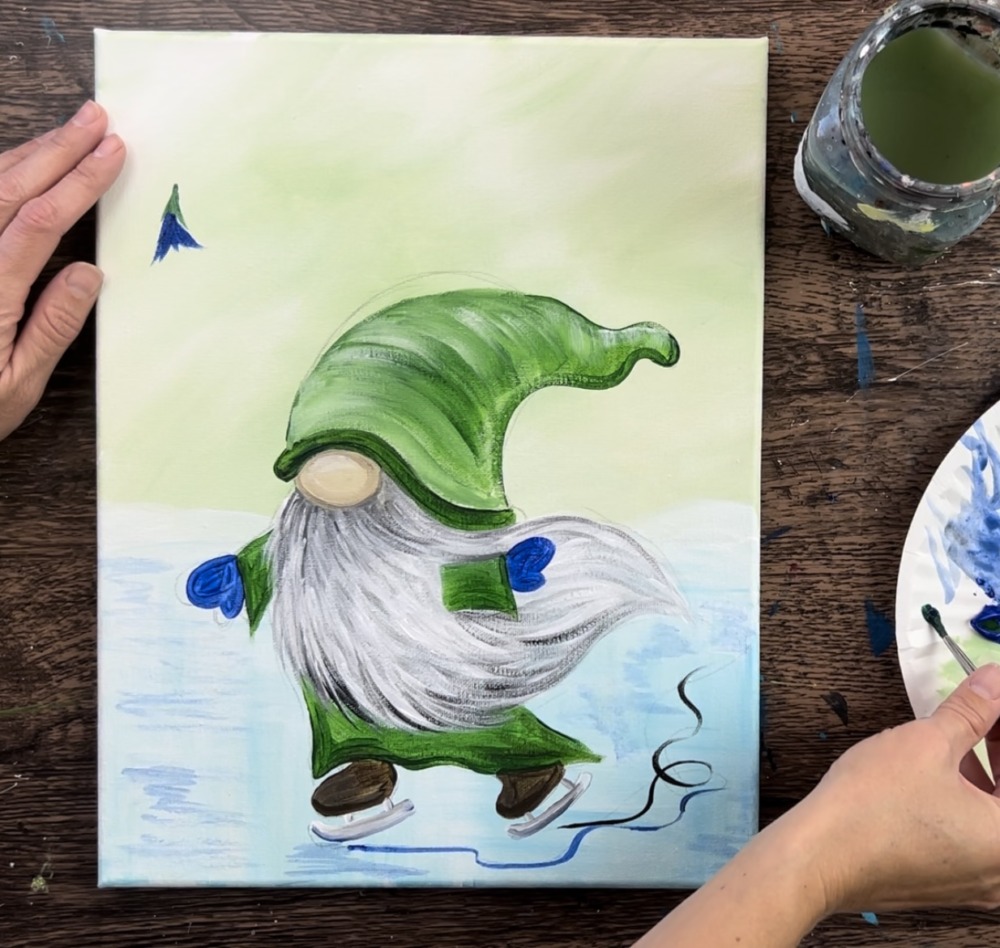
3. Paint The Frozen Water & Snow
Double load your brush into light blue permanent and titanium white (about 2 parts white and 1 part light blue). Paint up and down strokes in the entire area under the line. The paint will gently blend.

Try not to over blend the color. The streaks of white will create an “icy” effect.
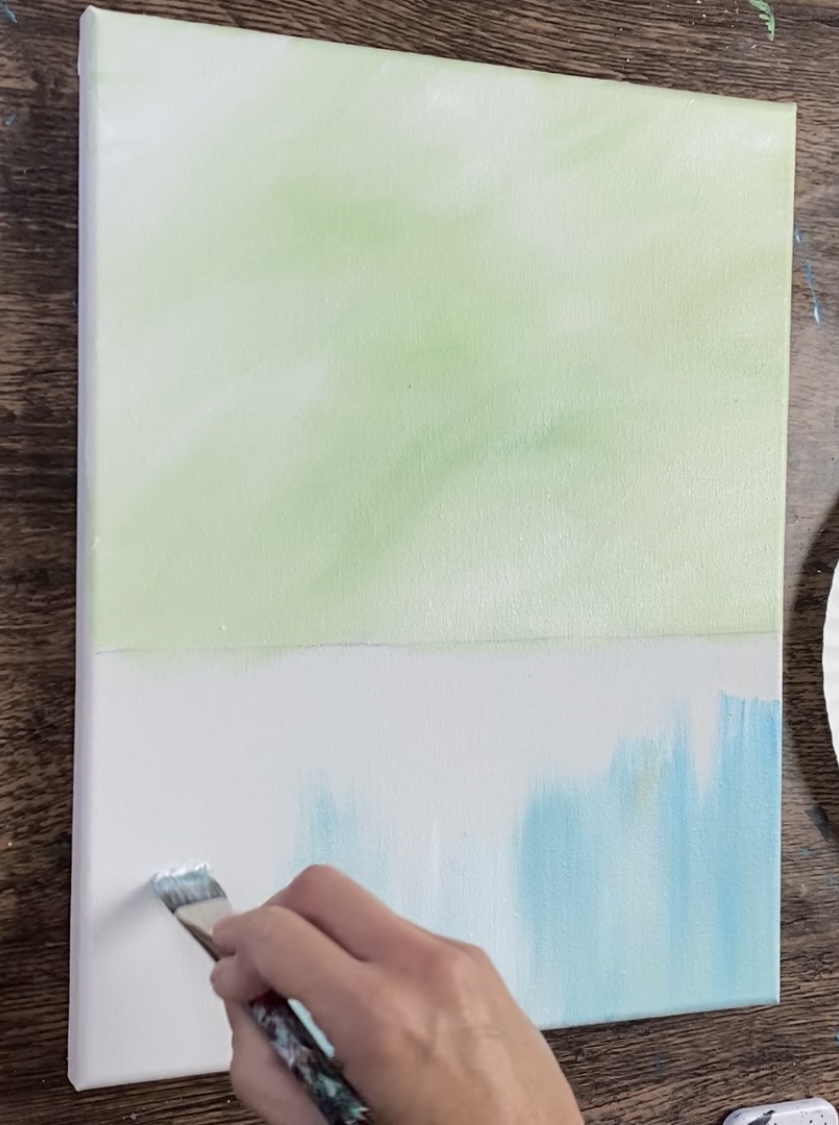
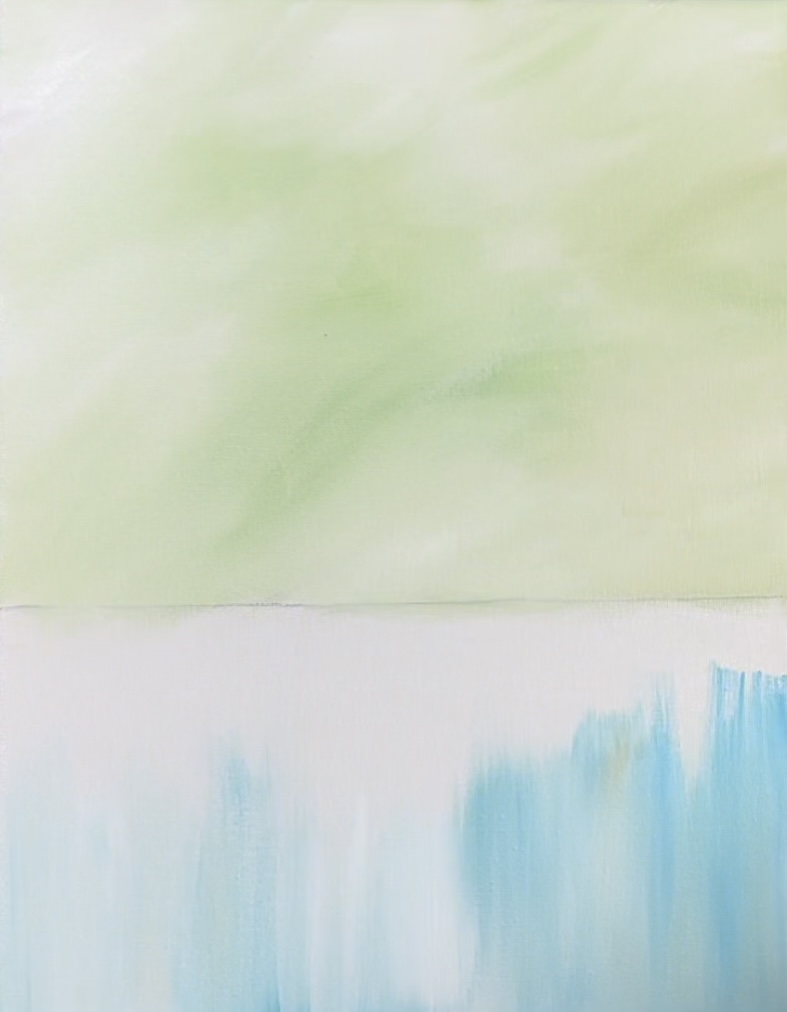
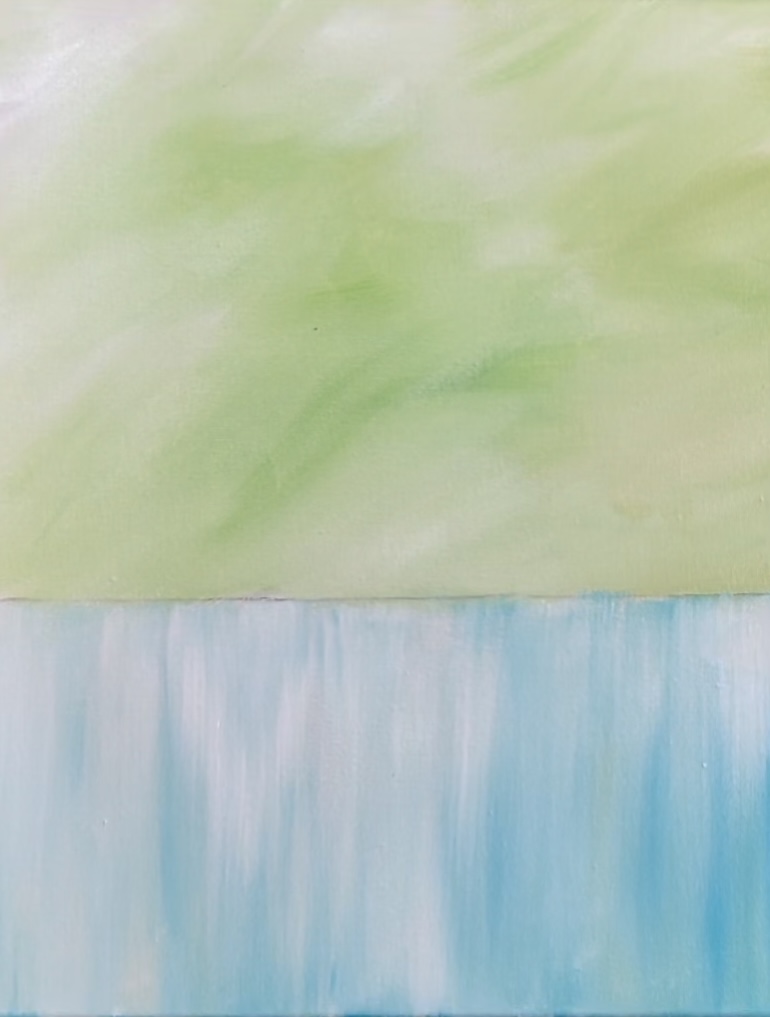
Next, use the 3/4″ wash brush to paint snow along the top edge of your horizon line. Paint a shallow land area with just the titanium white. It can dip below the line and over the water area if needed.
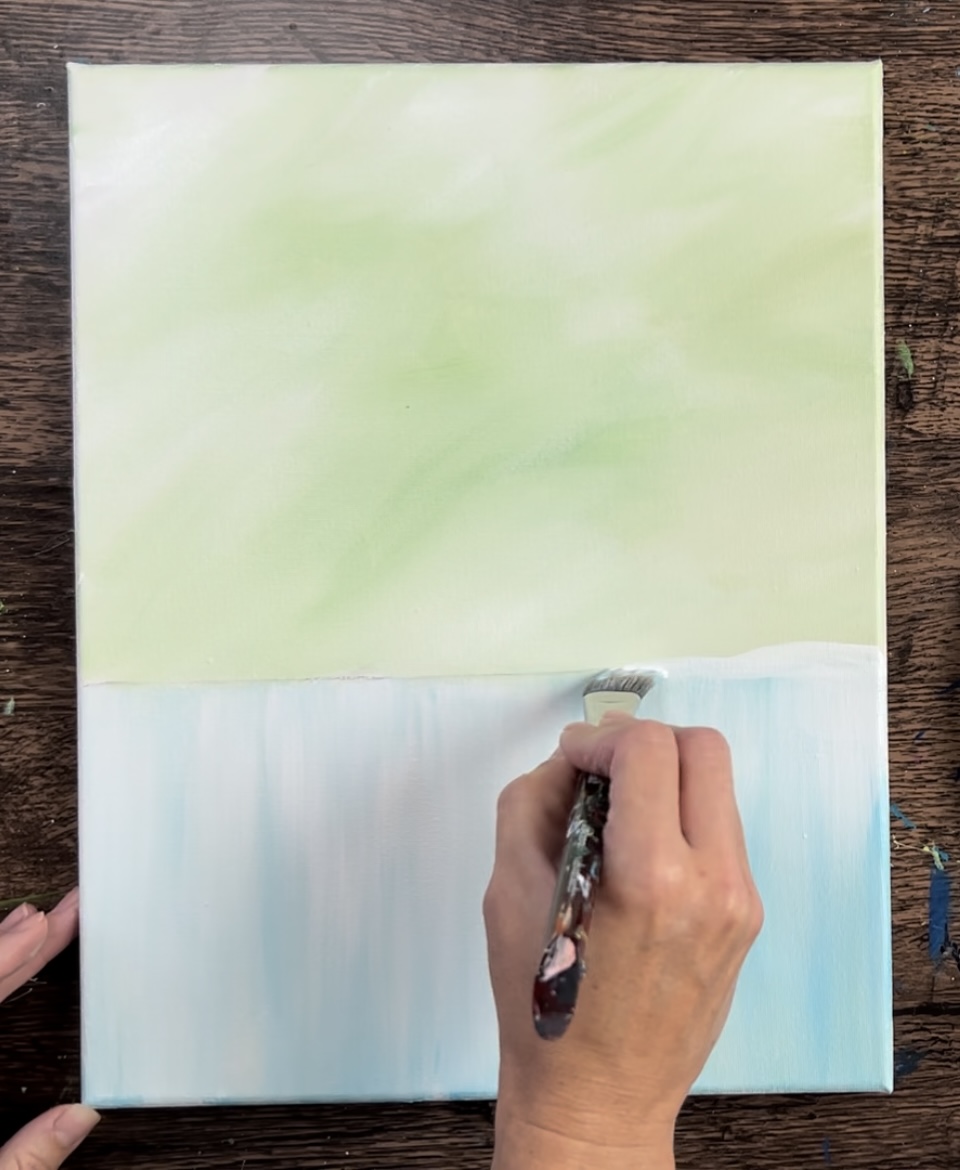
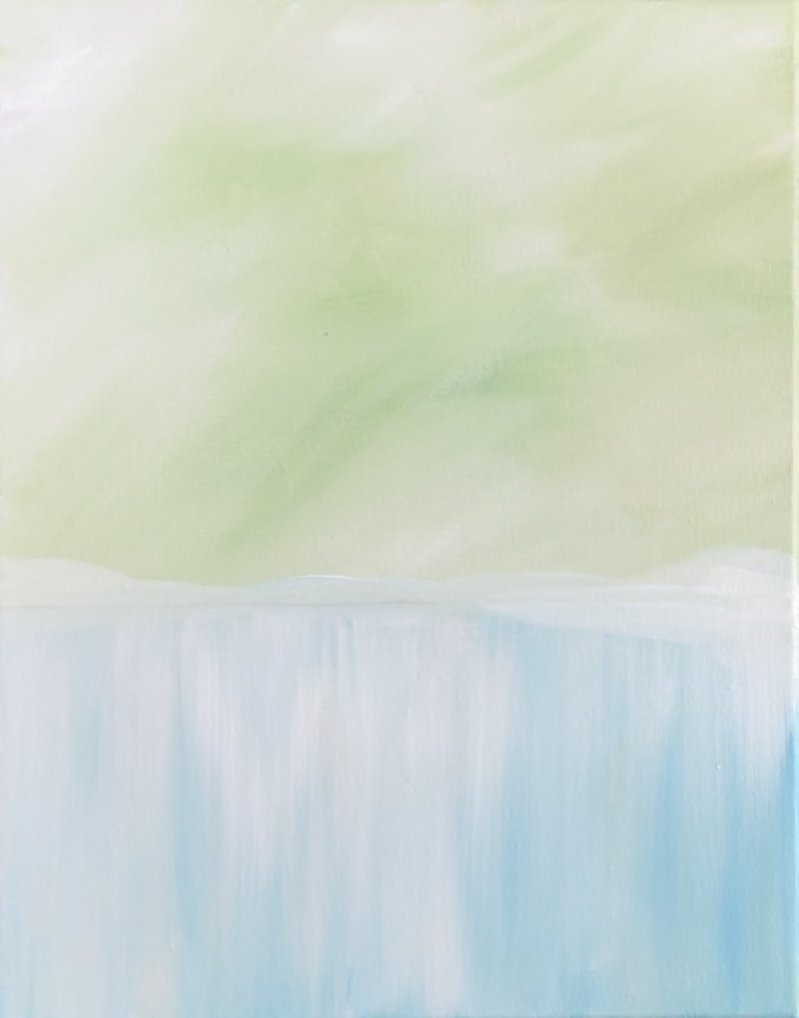
Next, lightly paint some horizontal lines across the water area using the tip of your 3/4 wash brush and titanium white. You can also use the light blue permanent for some of these lines.
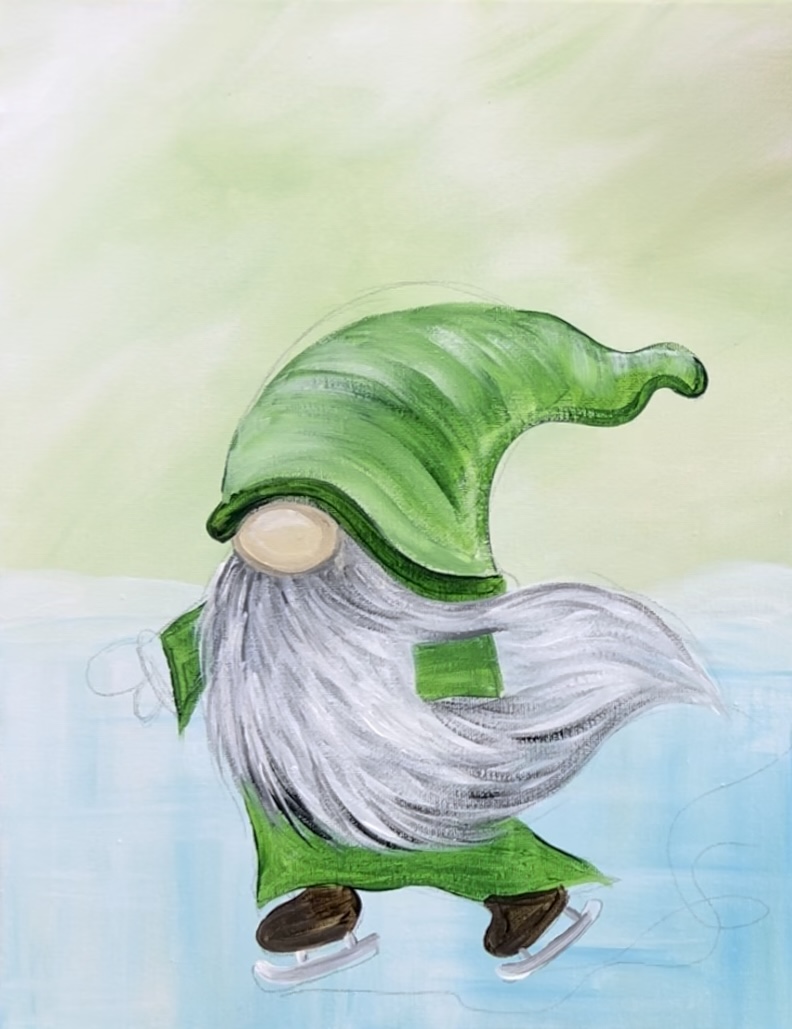
4. Draw The Gnome
Follow the steps below to help you sketch the gnome onto the canvas. You can also print the gnome template and transfer it to your canvas using graphite paper.
Start but lightly drawing the gnome’s nose. The position of this nose is about 3/4″ above the horizon line. Then lightly sketch the base of the gnome’s hat so that it hugs the top of its nose.
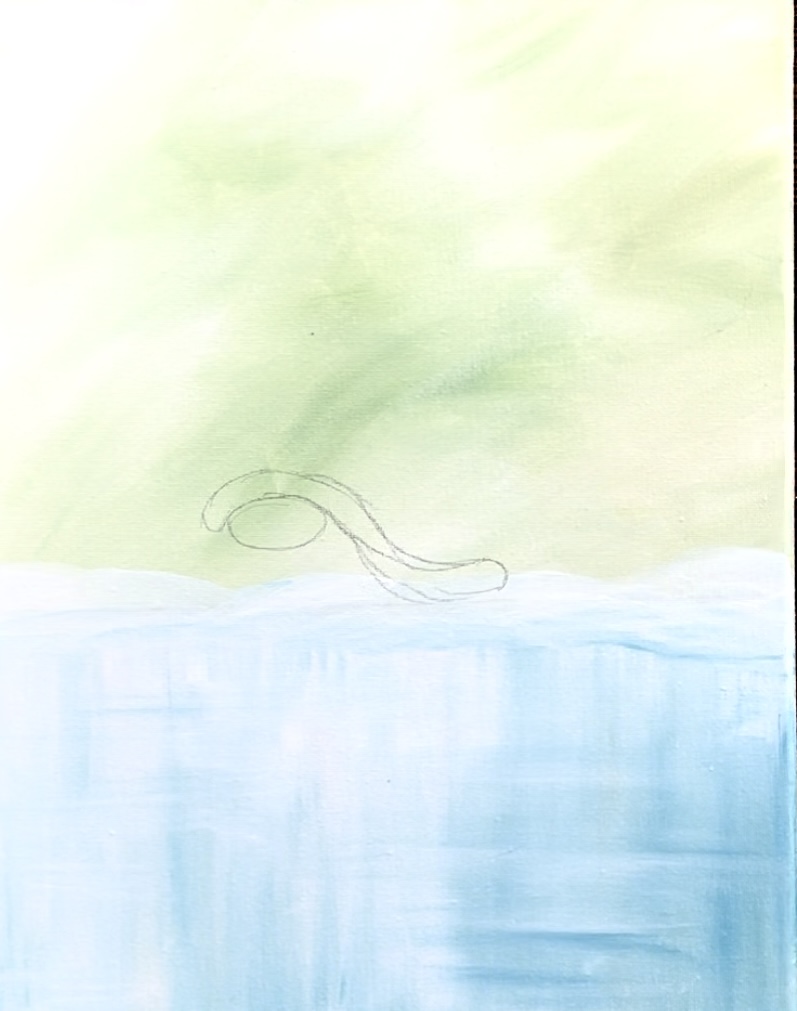
Draw the top edge of the hat so that it curves and flows to the right.
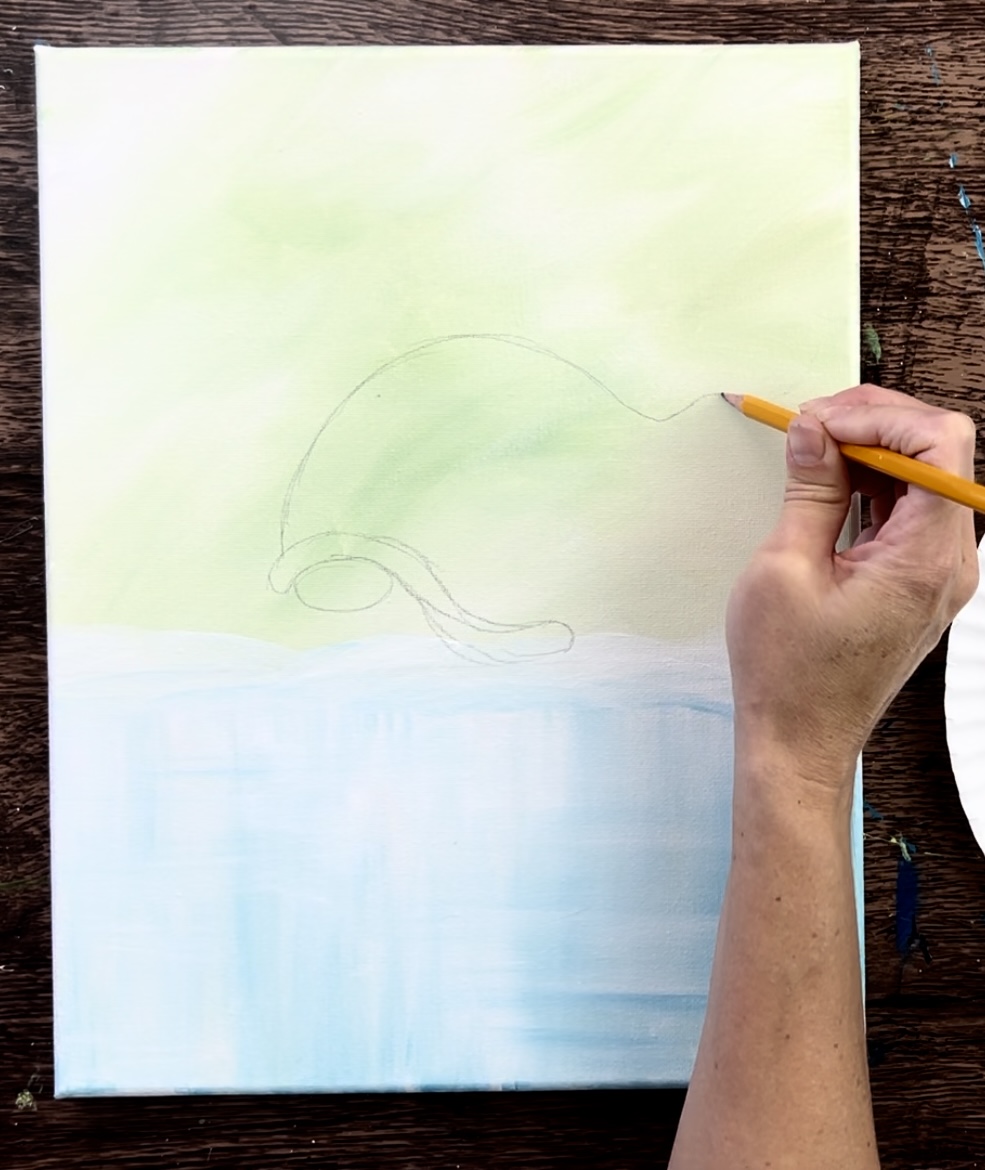
Then draw the bottom right edge. The tip of the hat goes in a curve instead of a point.
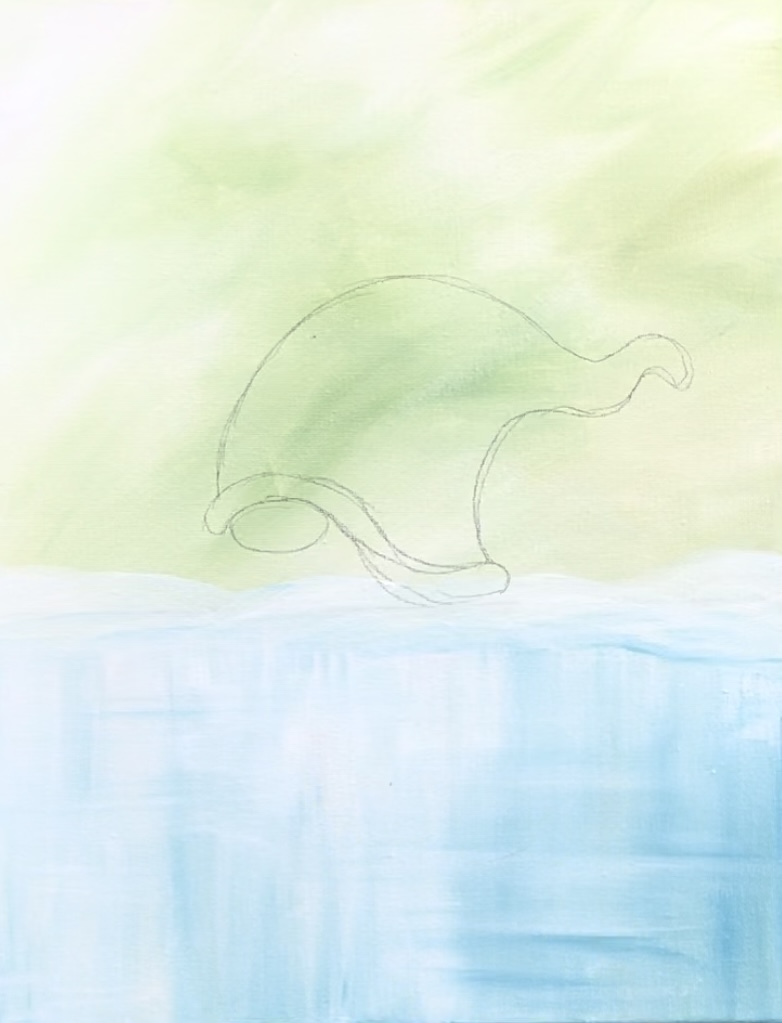
Then sketch the beard so that it is a large circular teardrop shape that sways and flows to the right.
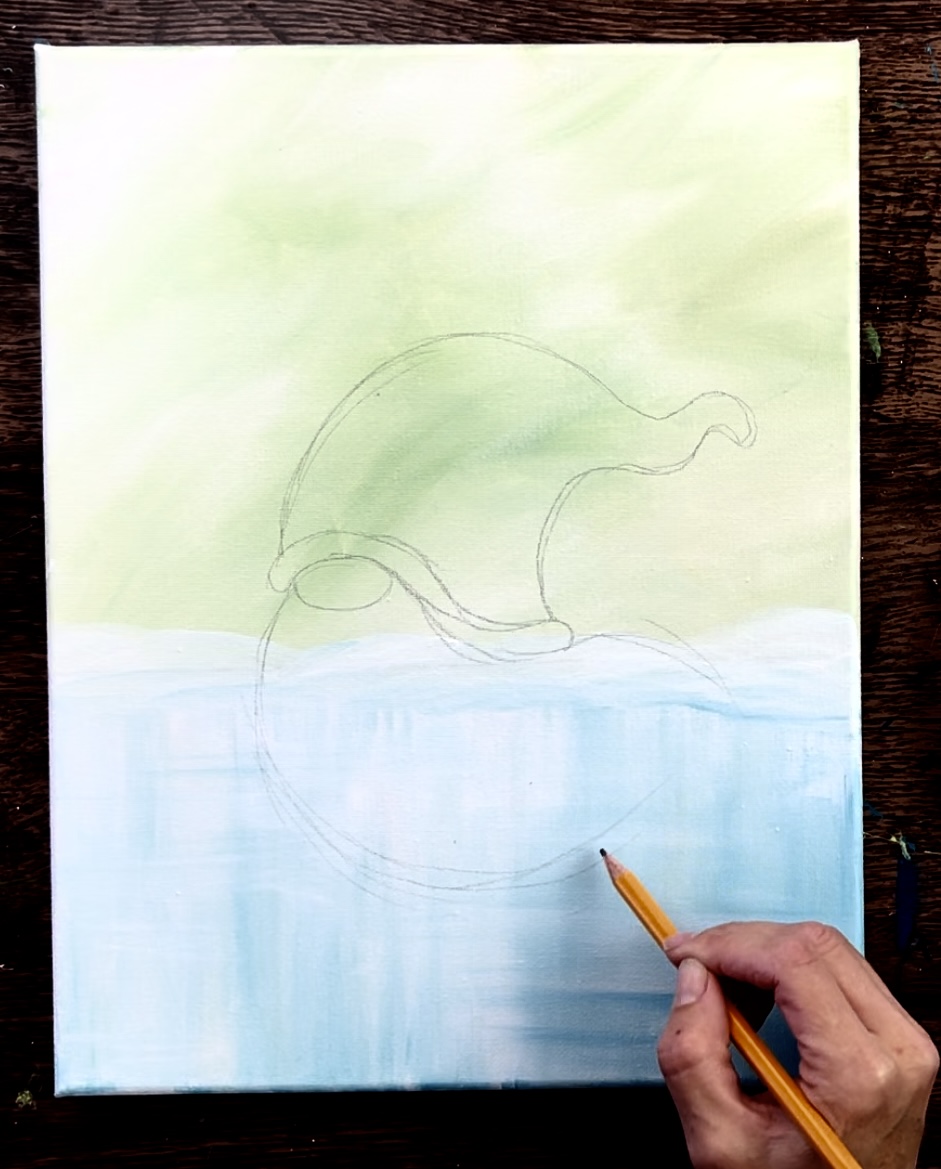
The edge of the beard goes to a point.
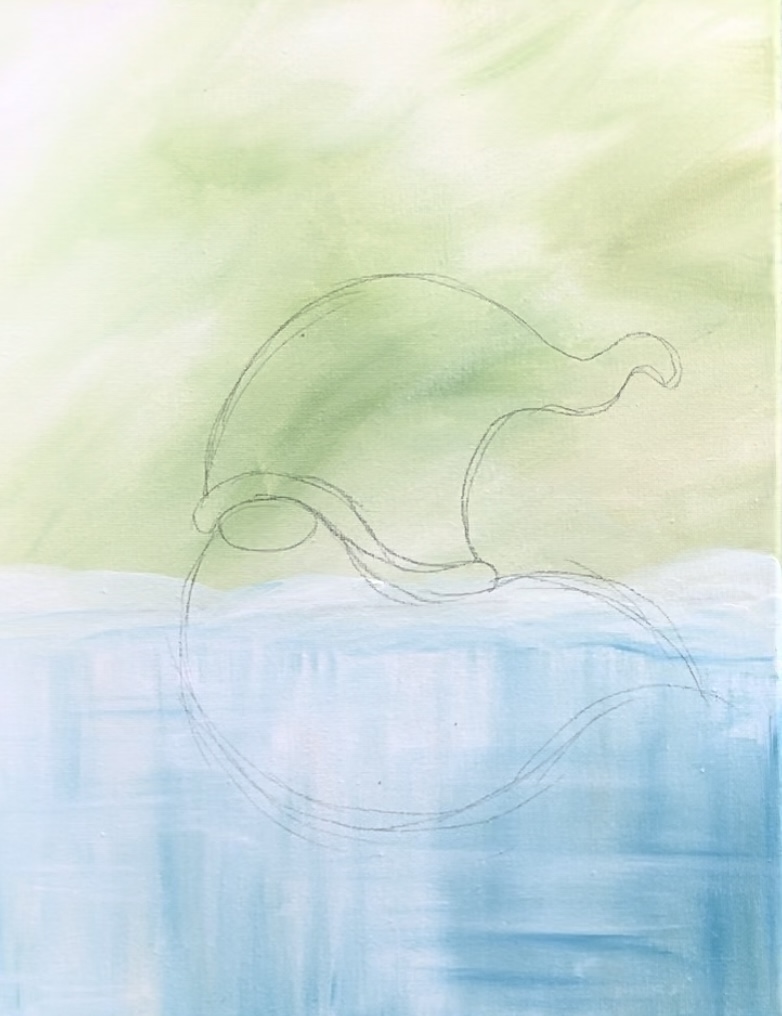
Next, draw the sleeve and mitten hand on the left.
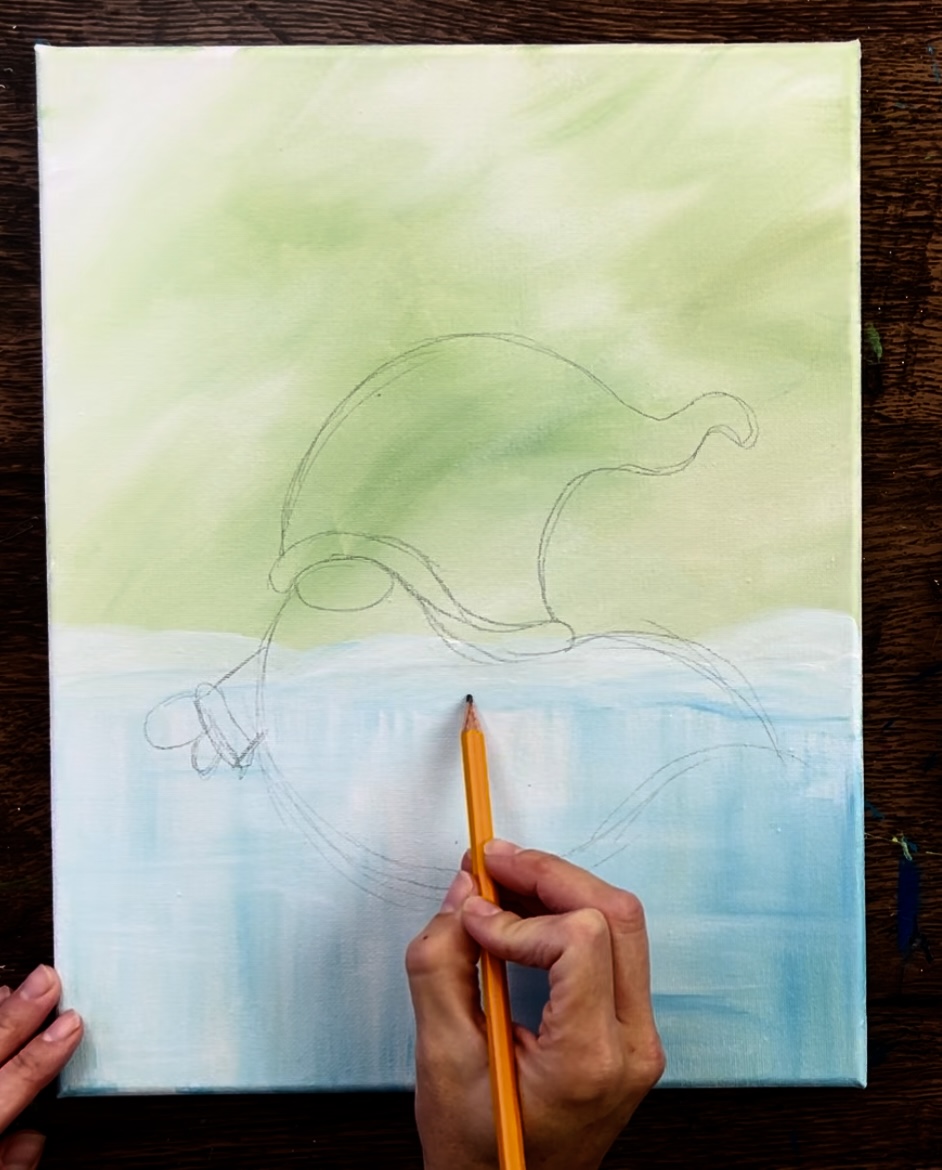
Draw the sleeve and mitten hand on the right
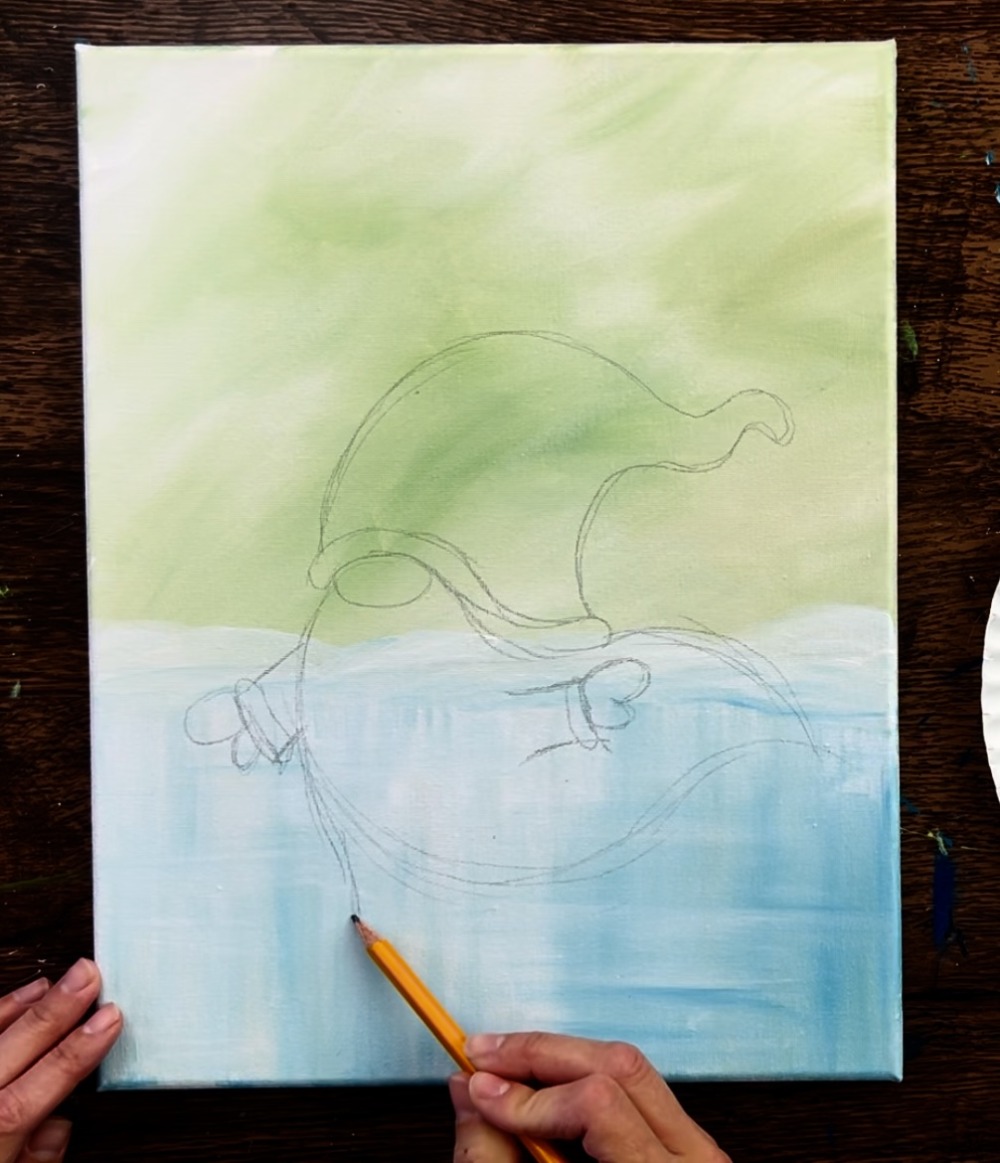
Then sketch the robe so that it is flowing and going to a point on the right. Next, lightly sketch the ice skate boot.
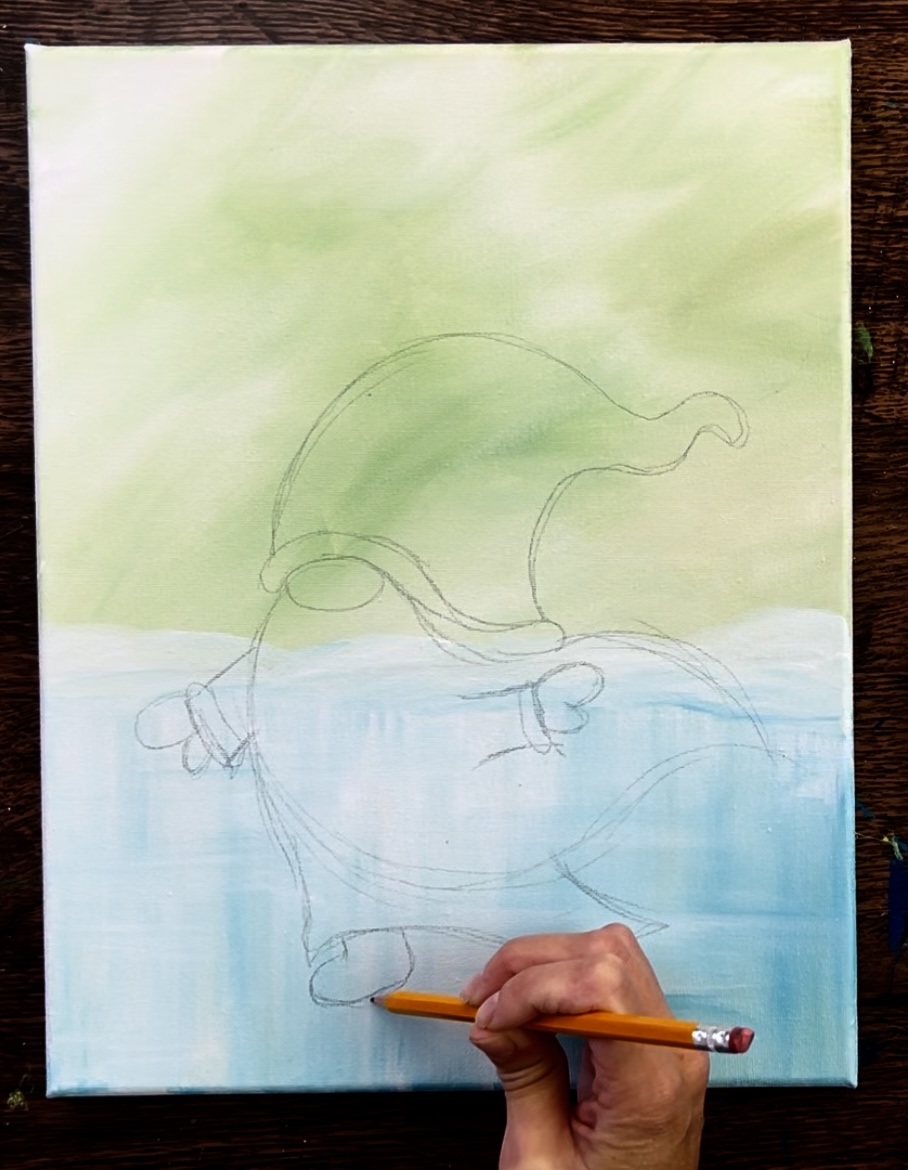
Draw the blade of the ice skate. Then draw the laces.
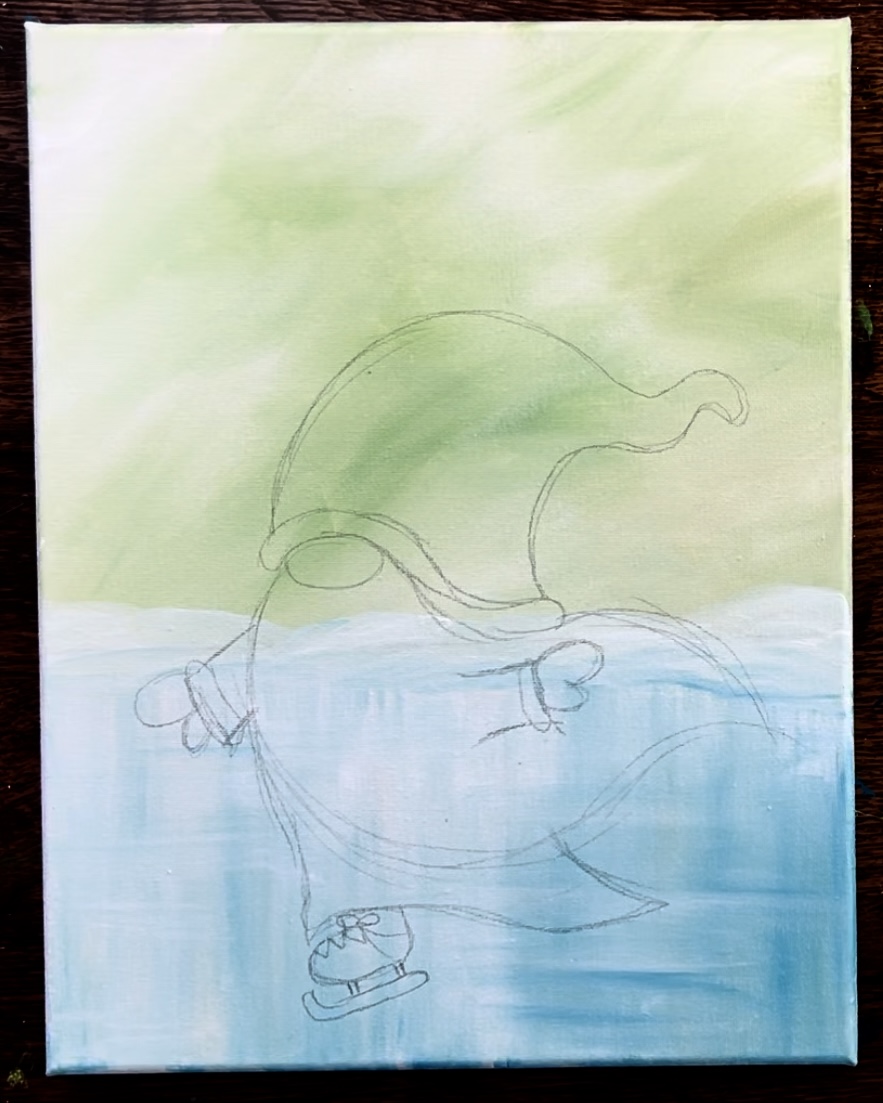
Repeat for the other boot.
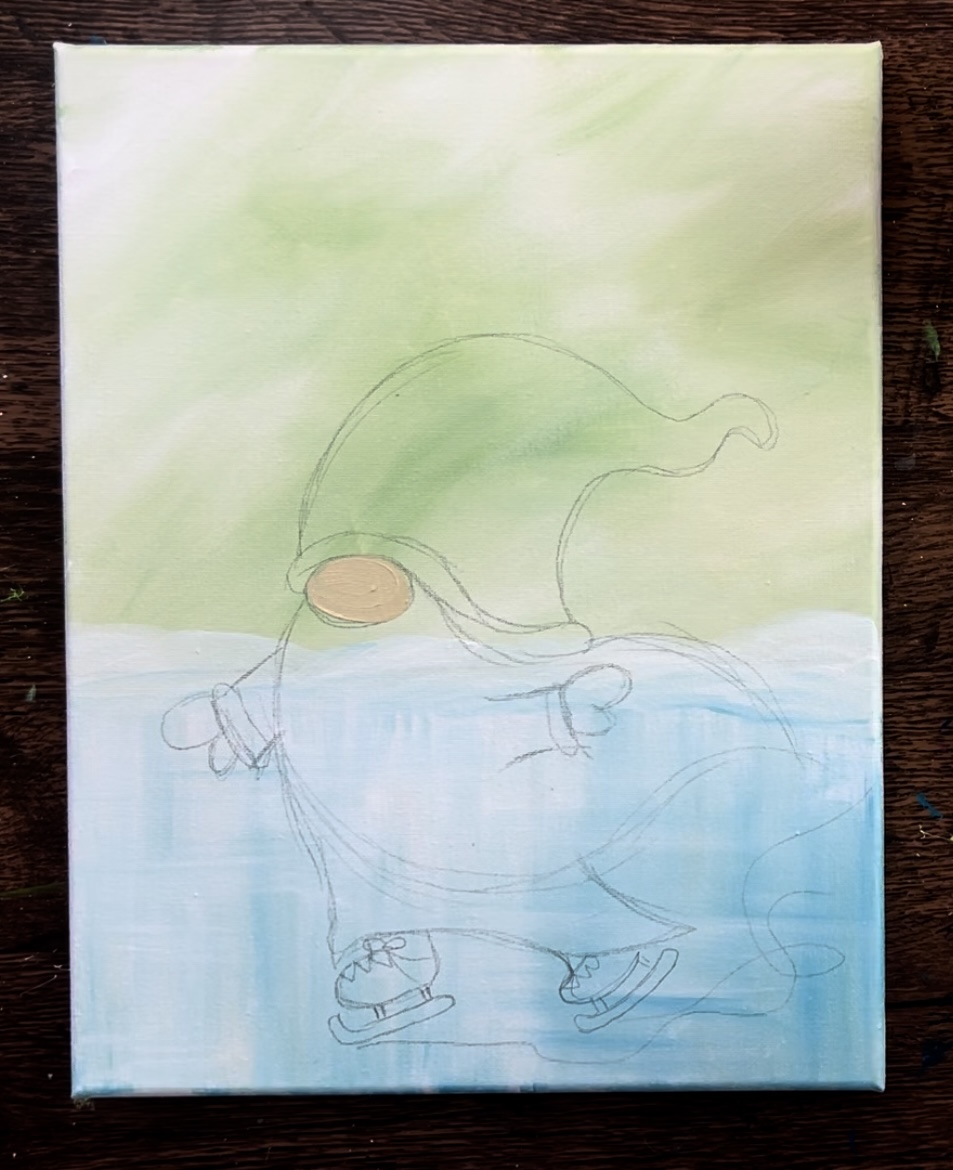
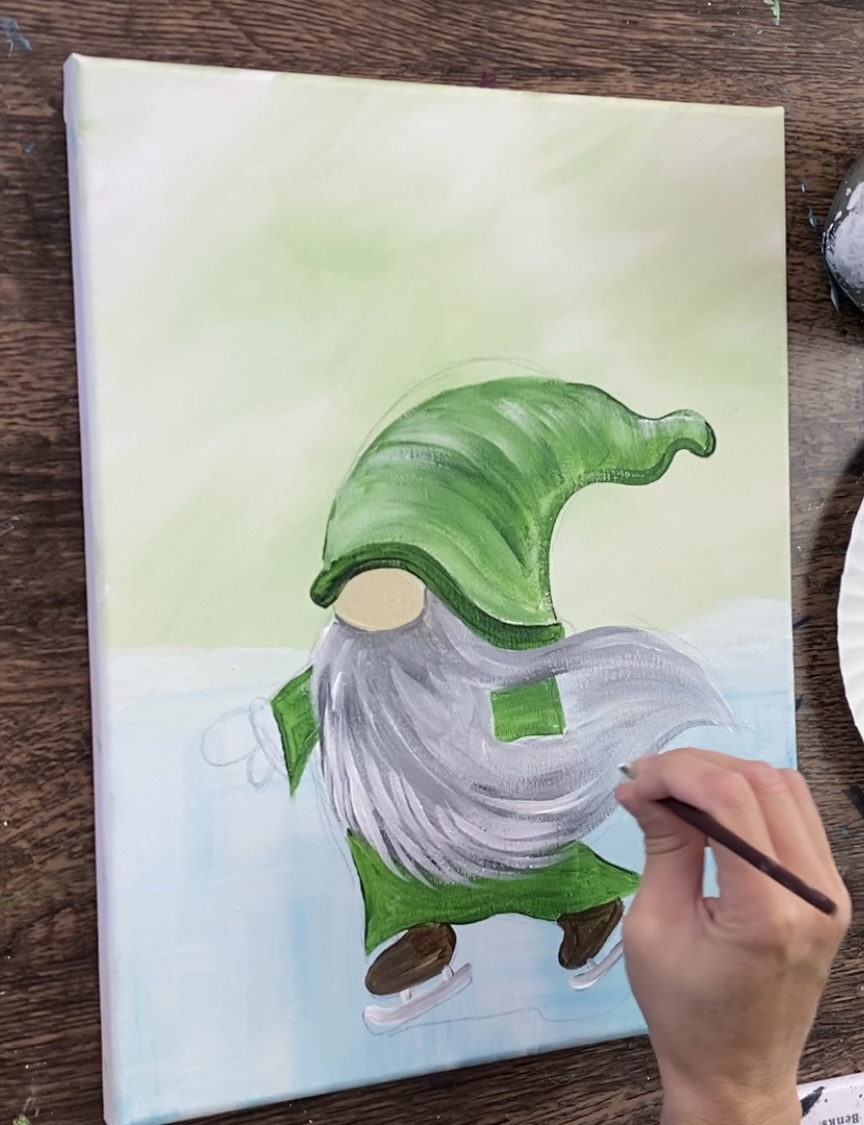
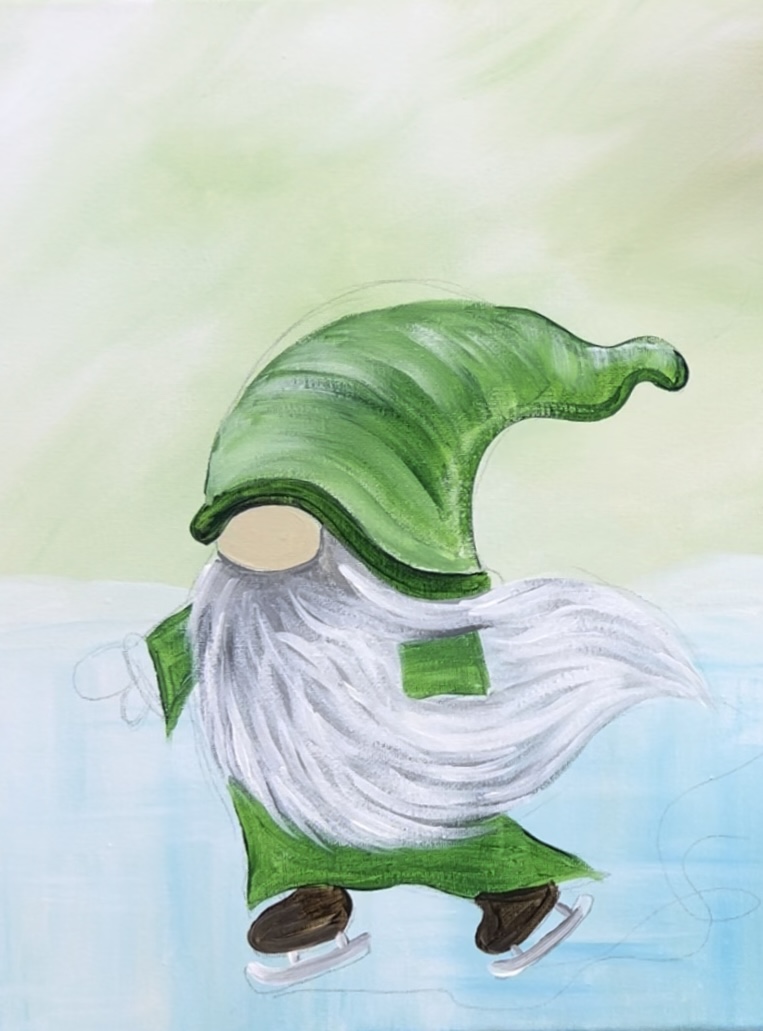
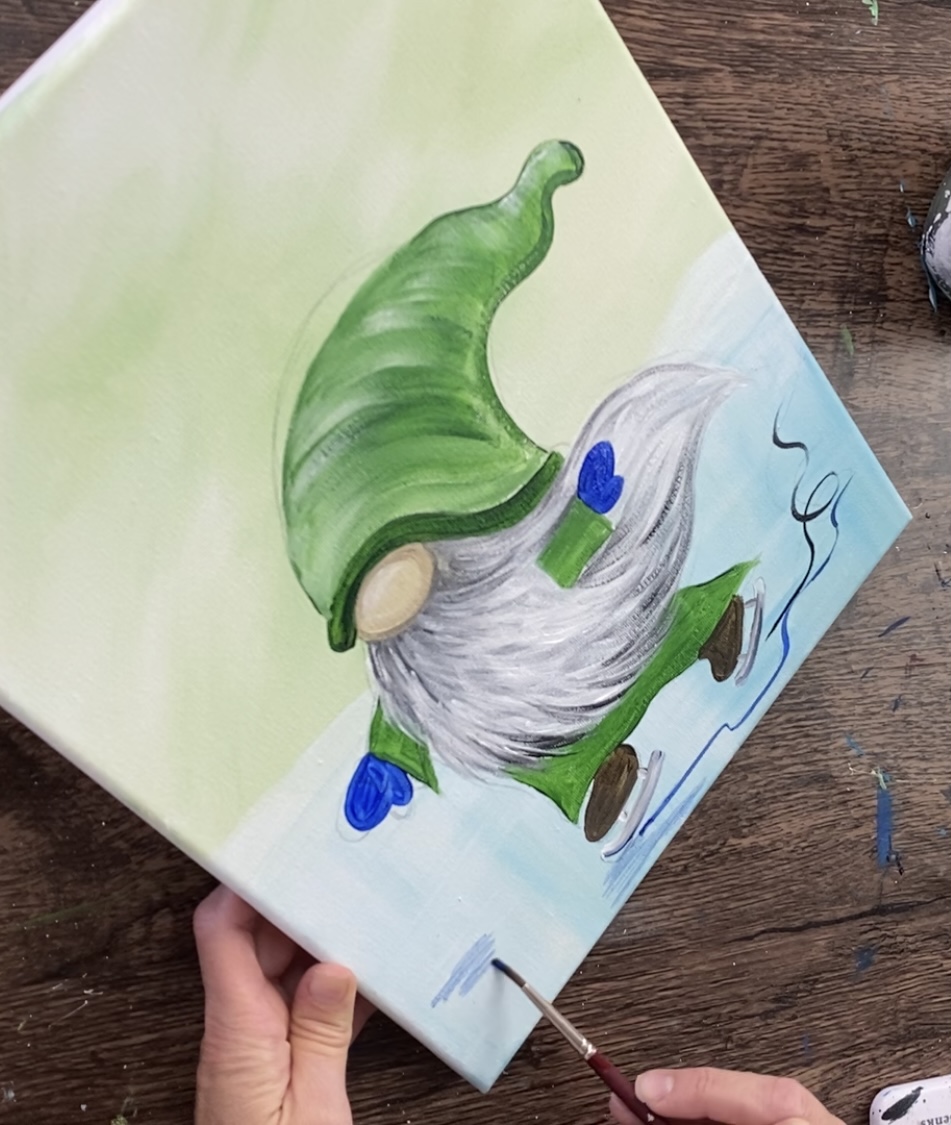
5. Paint The Gnome Nose
Load unbleached titanium onto your palette. Use a #4 round brush to paint the nose a solid coat of this beige color. Later on we will layer on more colors to give it more depth.
6. Paint The Gnome Hat
Use the #4 round brush and hooker’s green hue permanent to paint the bottom edging of the gnome’s hat.
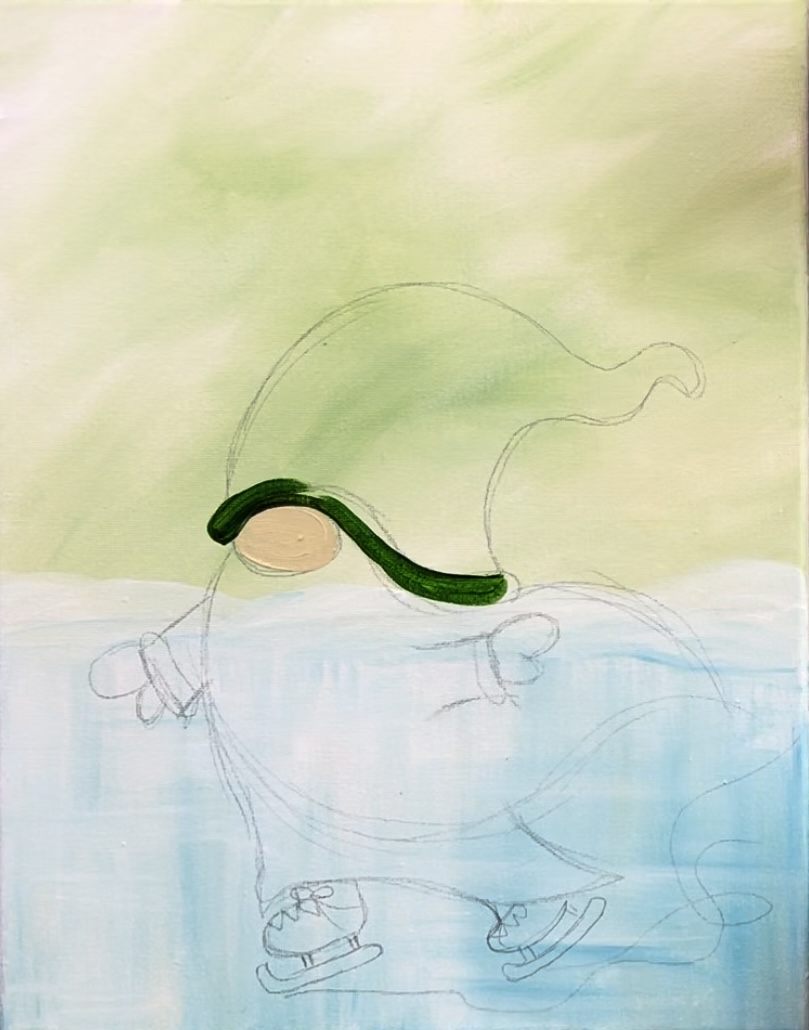
Then mix white into the green to create a lighter green (but still darker than the background). Loosely outline the shape of the hat.
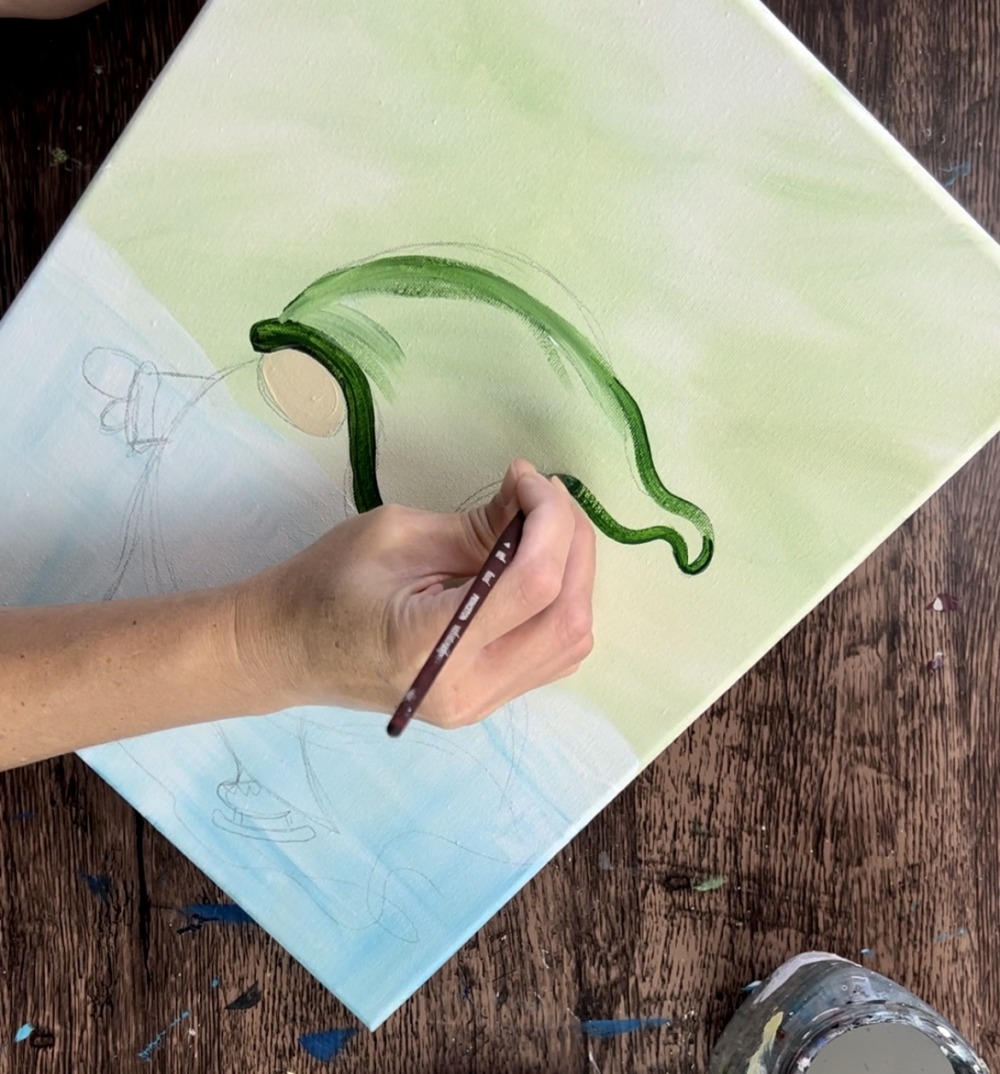
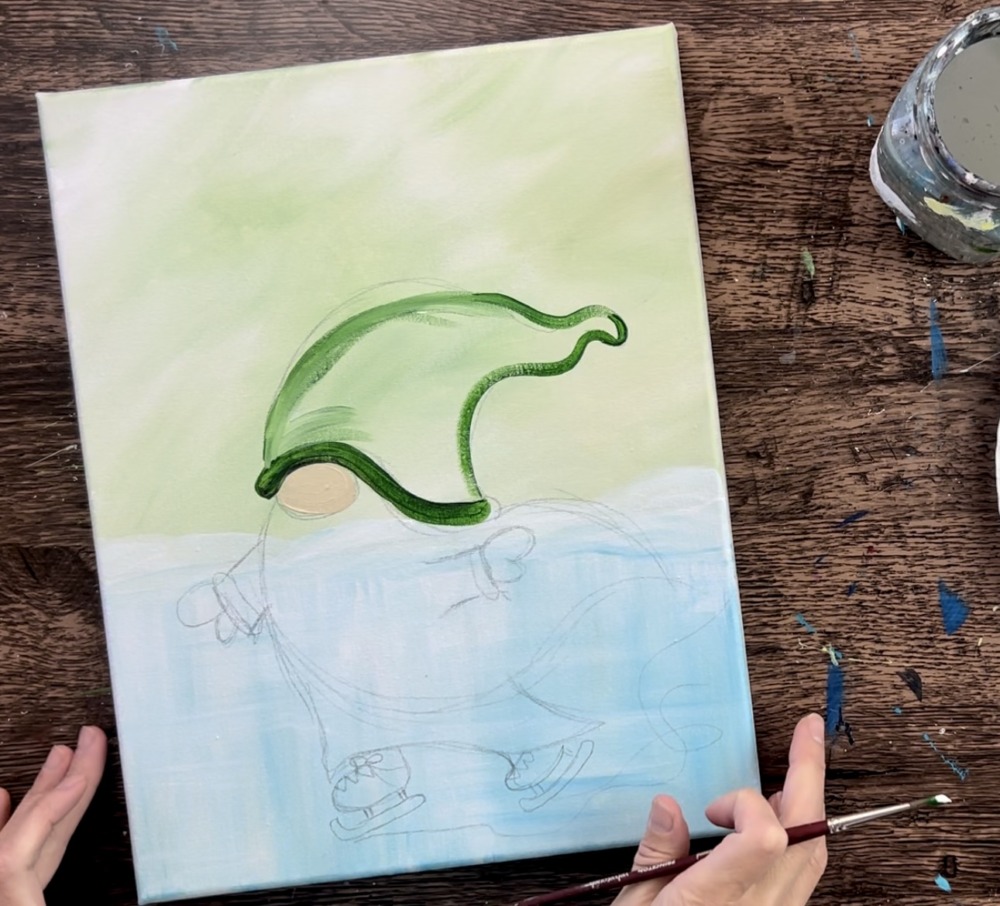
Then use the #12 bright brush to paint the inside of the hat using the titanium white and green. Paint the hat in contouring strokes going in the direction of the shape of the hat.
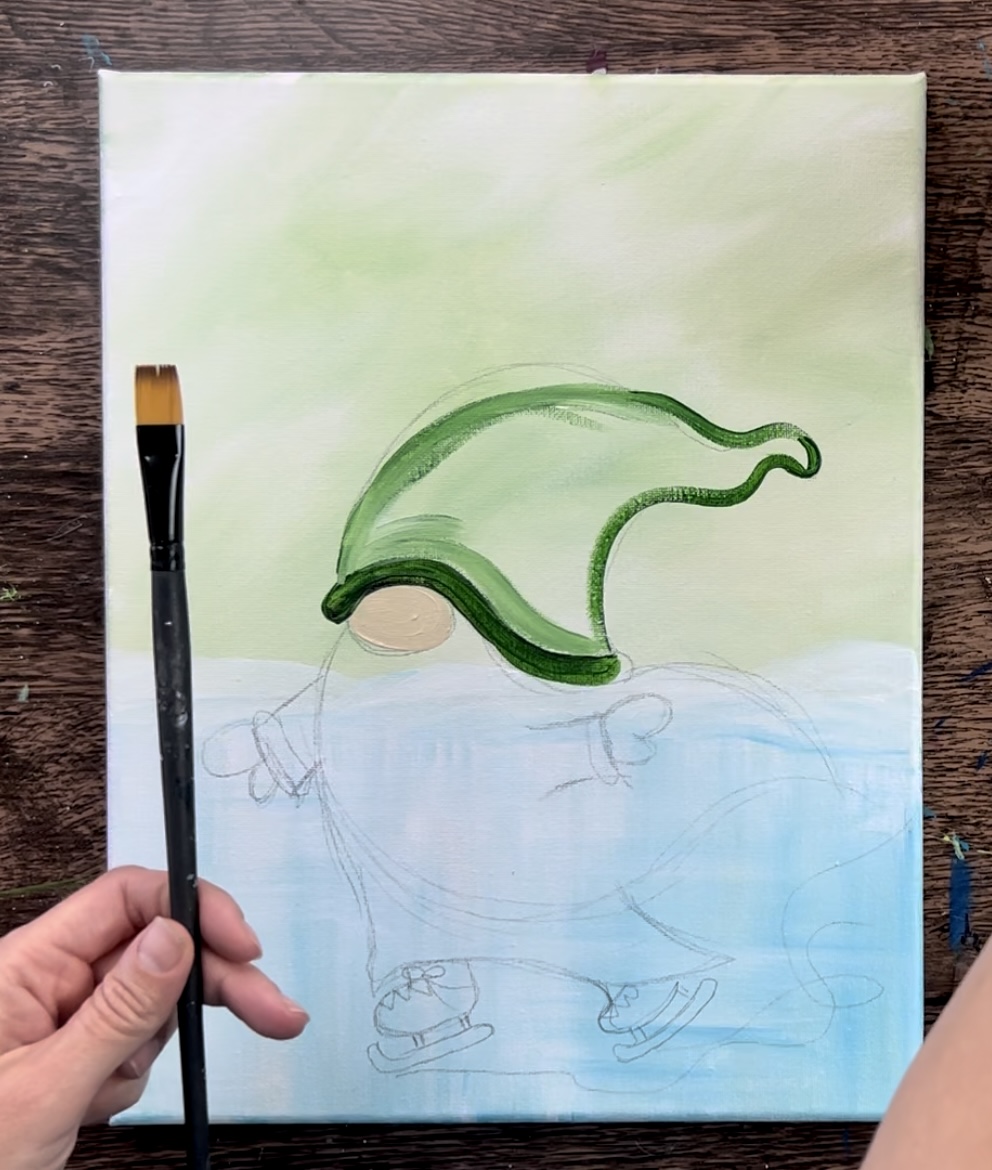
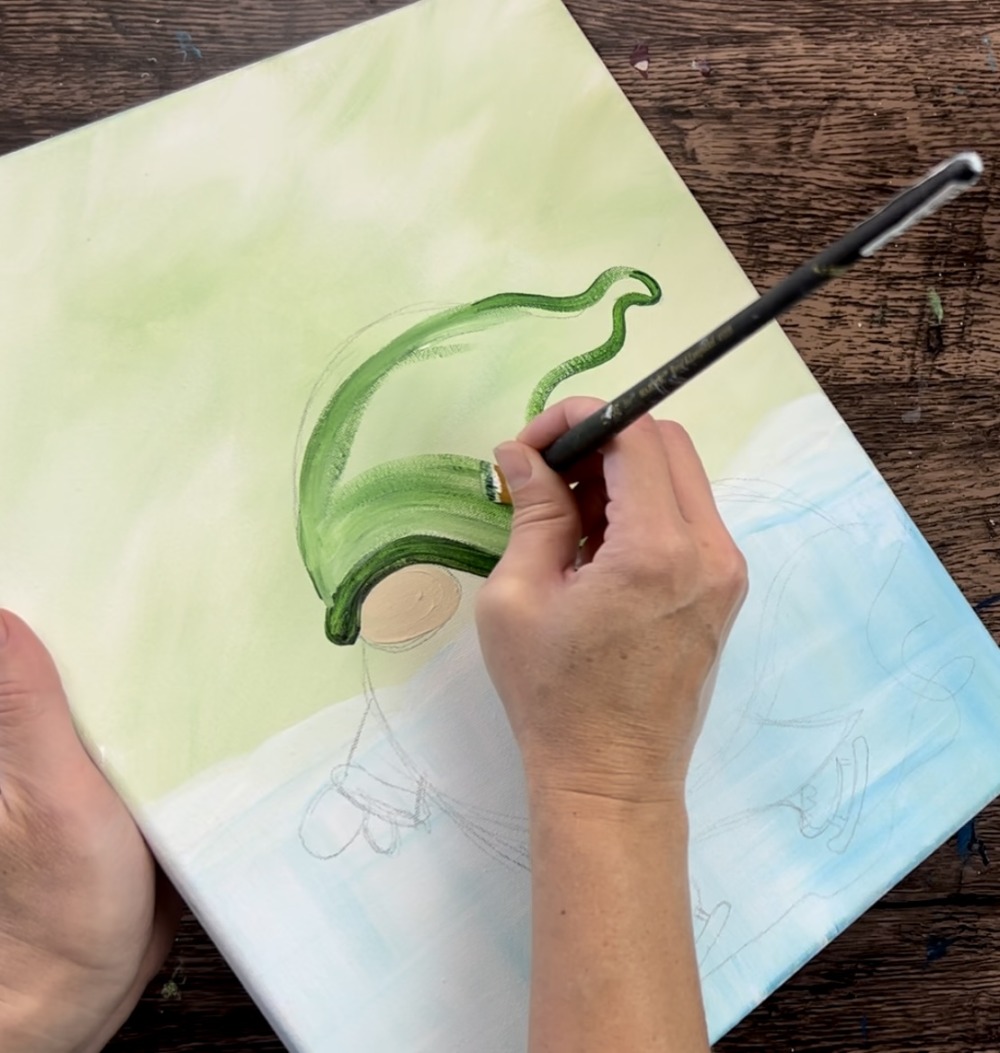
Vary your colors so the green is dark and light and blend gently together.
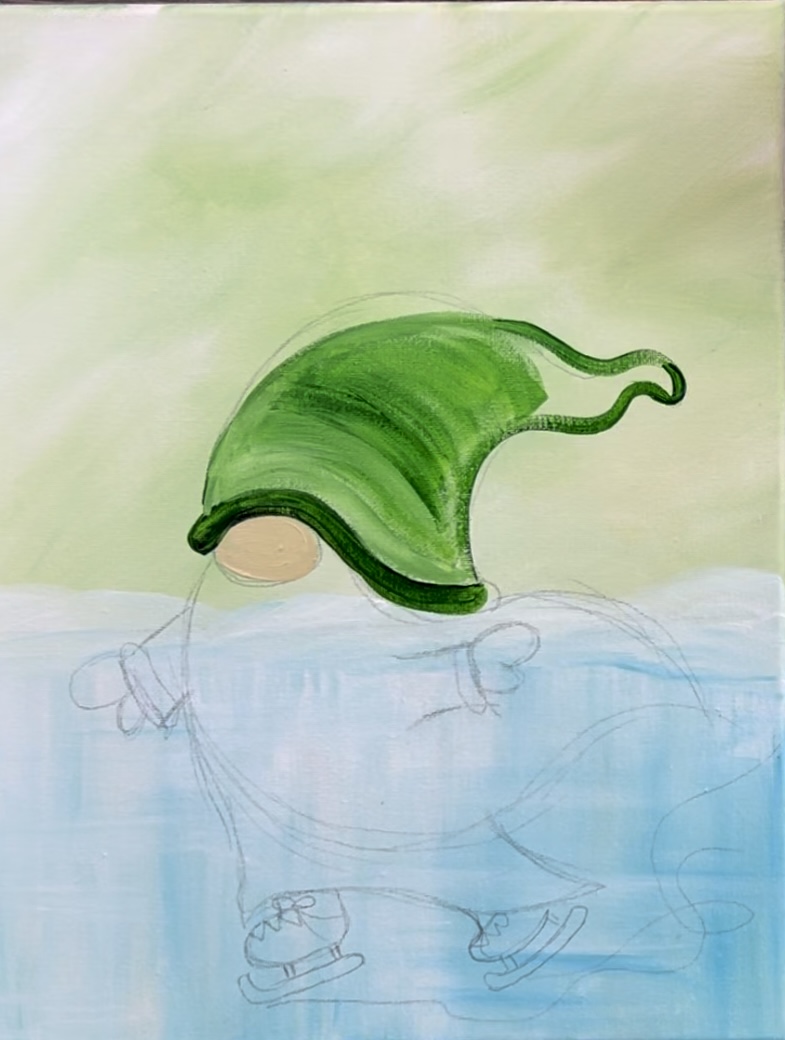
Dry brush some extra white on the left side of the hat
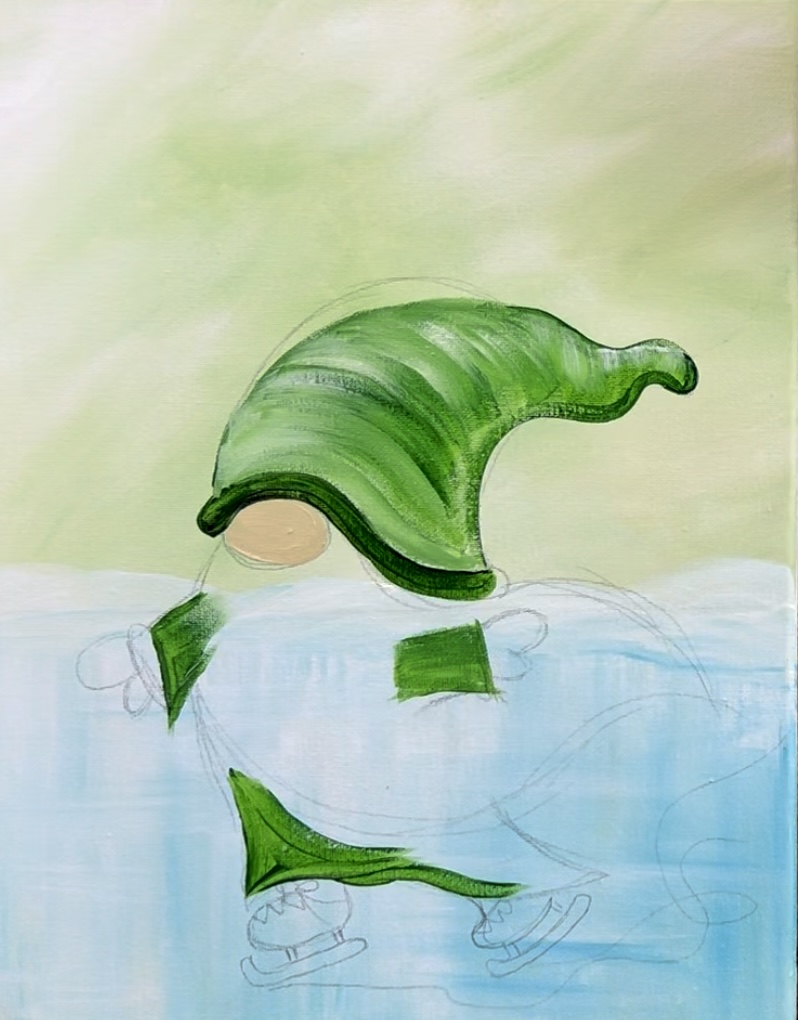
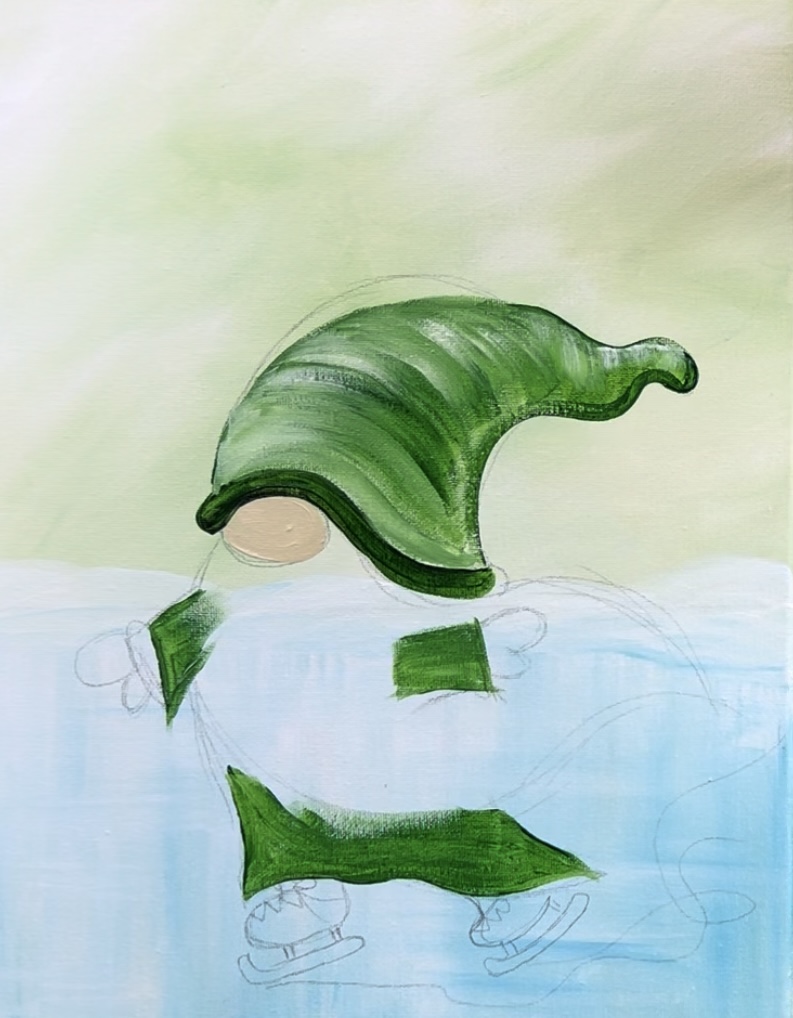
7. Paint Gnome Robe
Next, use either the round brush or the 12 bright brush to paint the robe and sleeves with the same color that you use for the hat (the hooker’s green hue).

You don’t need to do any shading or highlighting on the robe and sleeves. However, you may need to apply a second coat for “coverage” in those areas because the green may not be completely opaque.
8. Paint Gnome Beard
On your palette, mix a light to medium gray color. Mix about 2 parts white to 1 part black.

Then use your #12 bright brush to paint the beard. Paint it with strokes going in the direction of the shape of the beard. You can vary the color a little by adding small amounts of black and white to vary the gray.
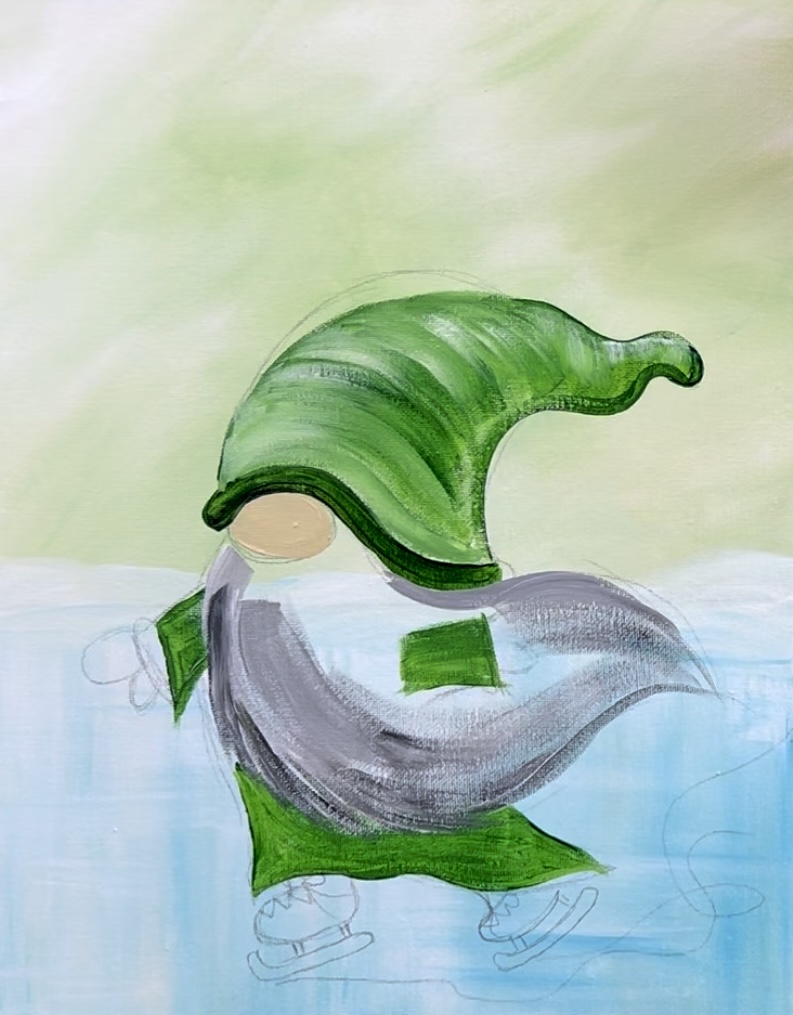
More texture will be added to the beard in a later step.
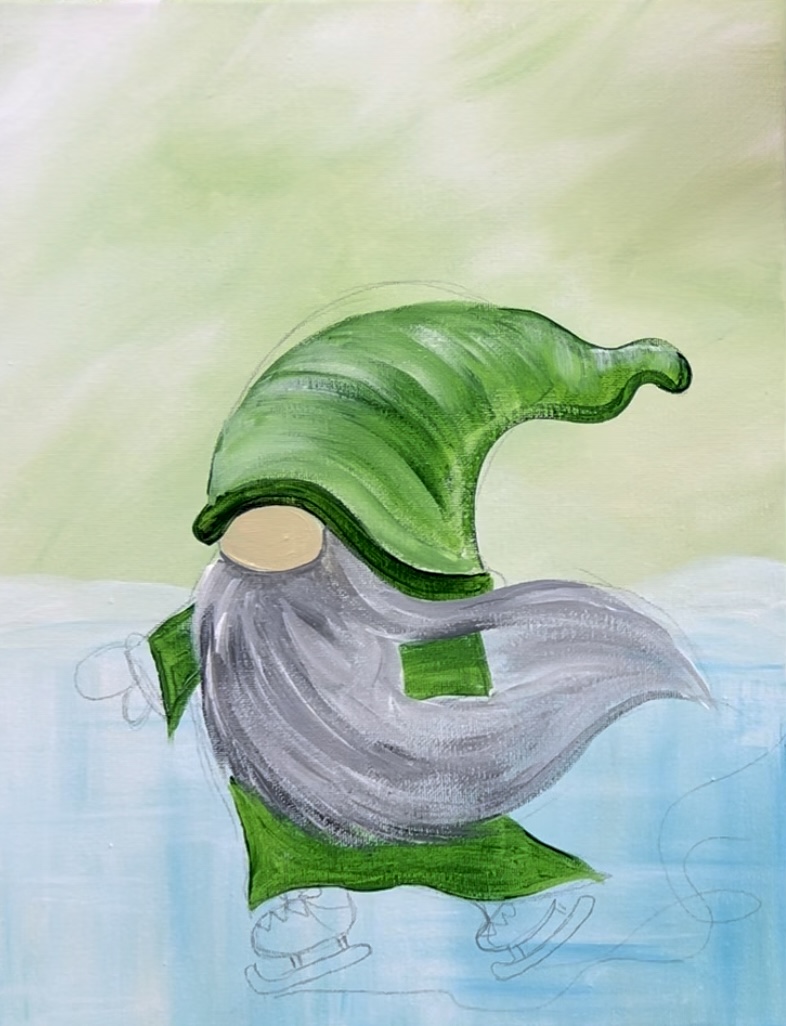
9. Paint Gnome Skates
Use raw umber to paint the skating shoes of the gnome.
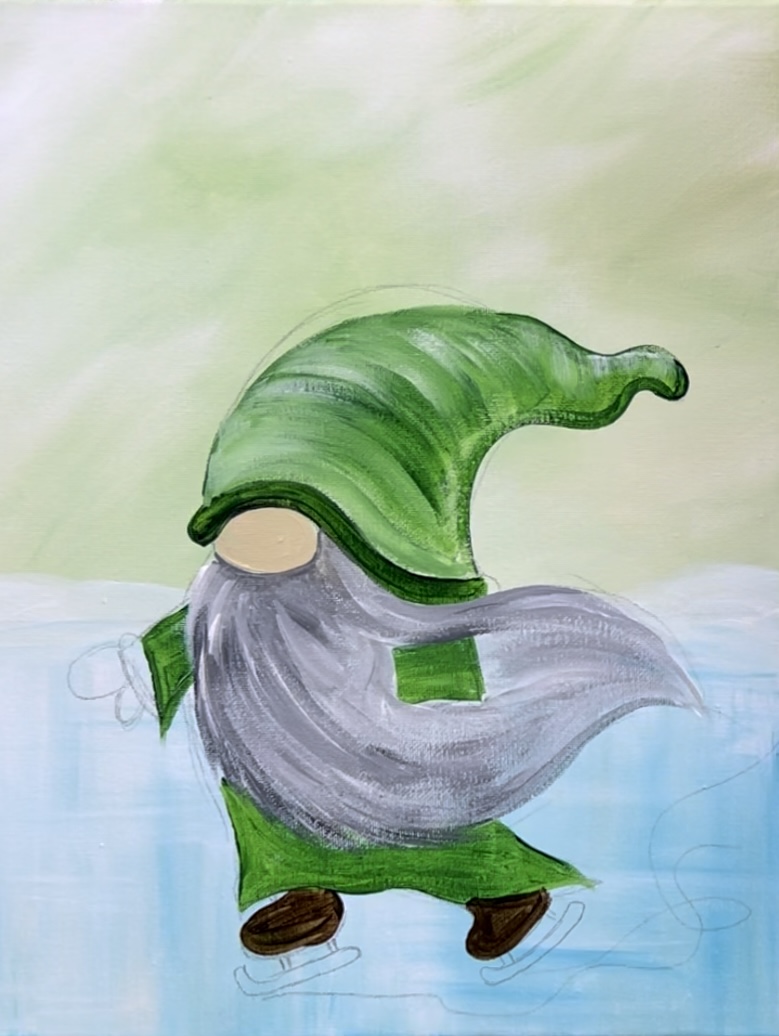
Then mix a light gray color on your palette by mixing about 3 parts white to 1 part black. Use your #4 round brush to paint the blades.

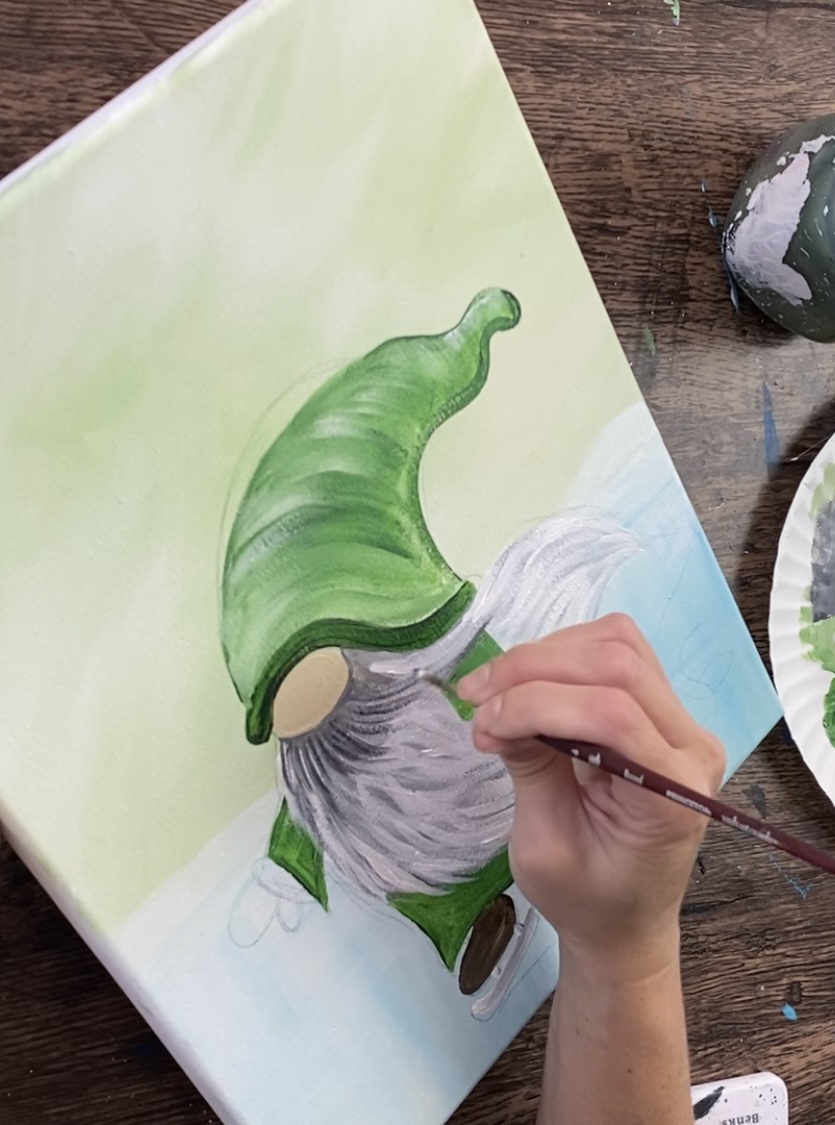
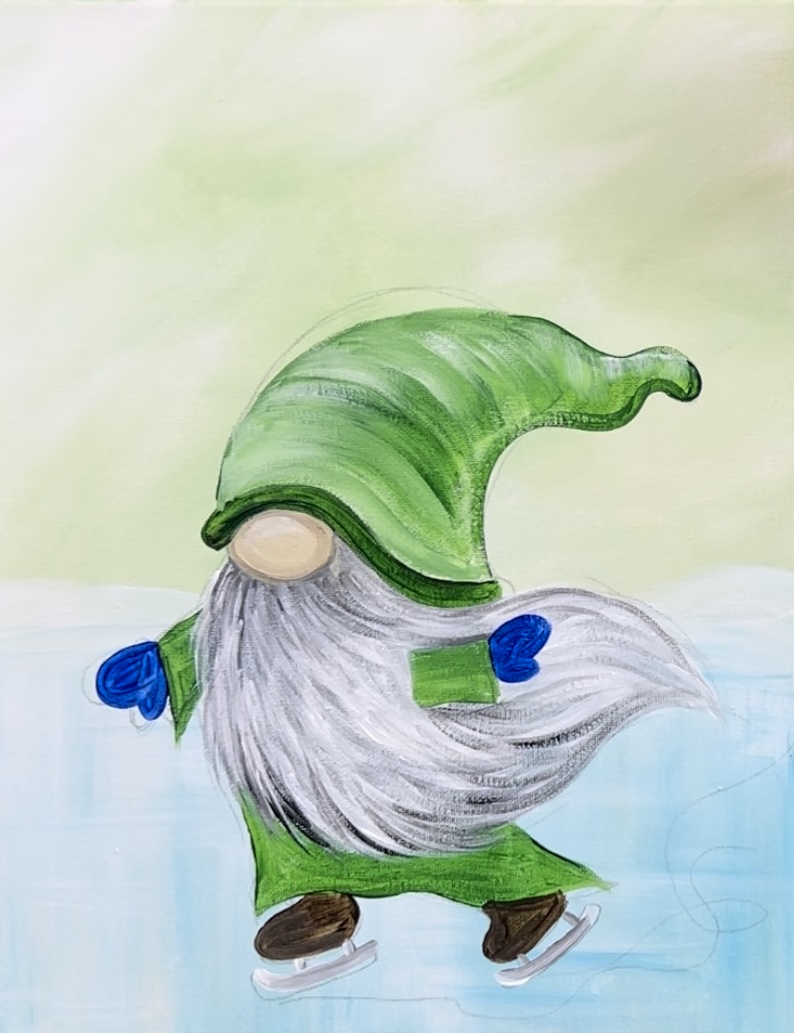
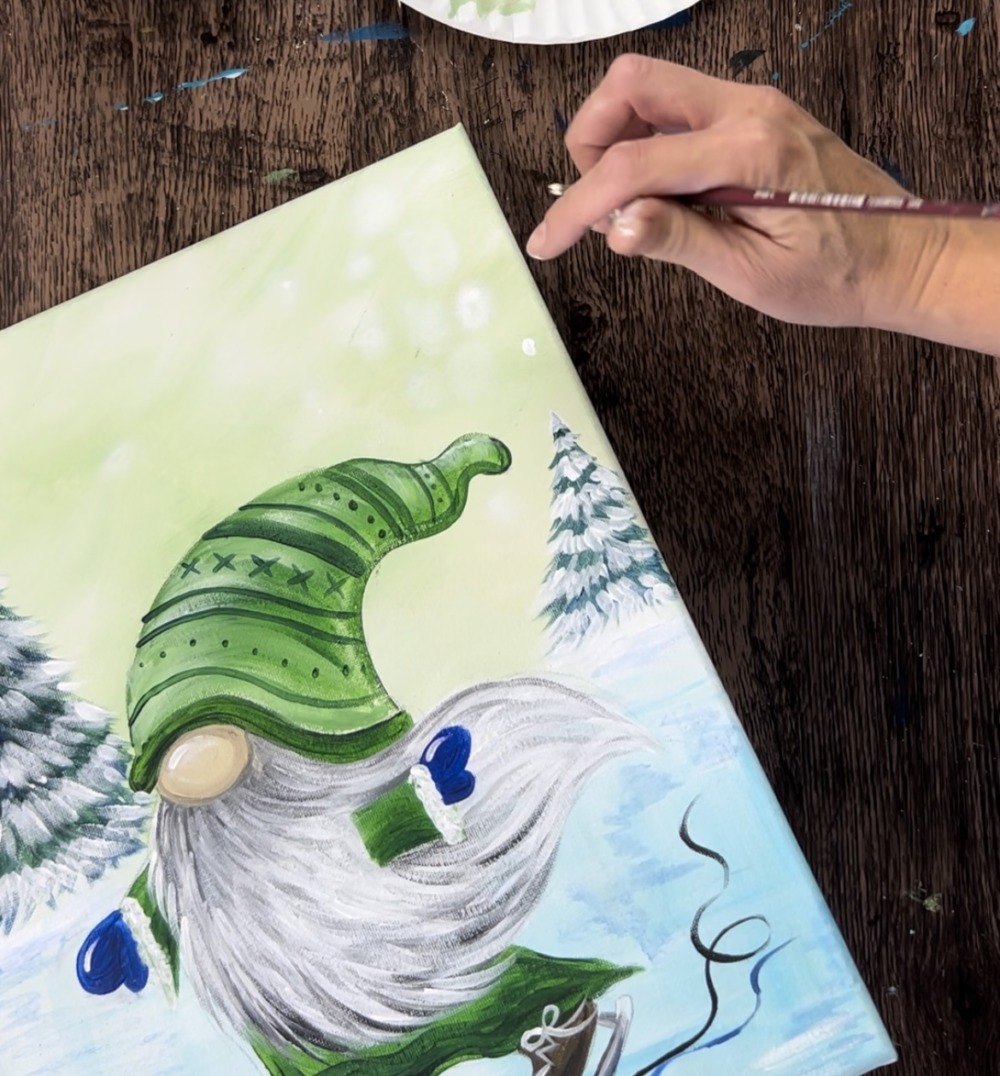
10. Paint Beard Texture
If the first gray layer is dry, you can go back over it with a round brush to create texture on the gnome’s beard. Load your #4 round brush in titanium white. Start at the bottom of the beard. Then paint the hair strands going in a curved direction that flow with the beard shape.
As you add these white paint strokes with your brush, try not to cover all of the darker gray below. That darker color is used for shadowing in the beard hair.
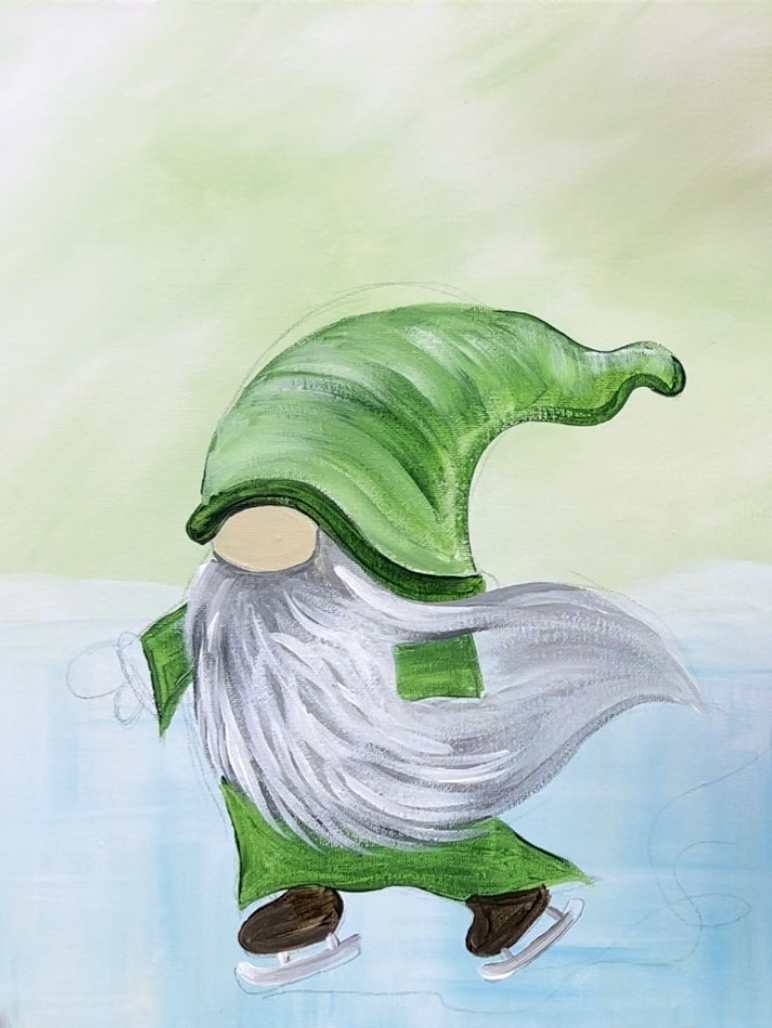
You can also do a few black hair texture strands. I did those towards the bottom of the bead. Also, there are darker gray strands just under the nose.
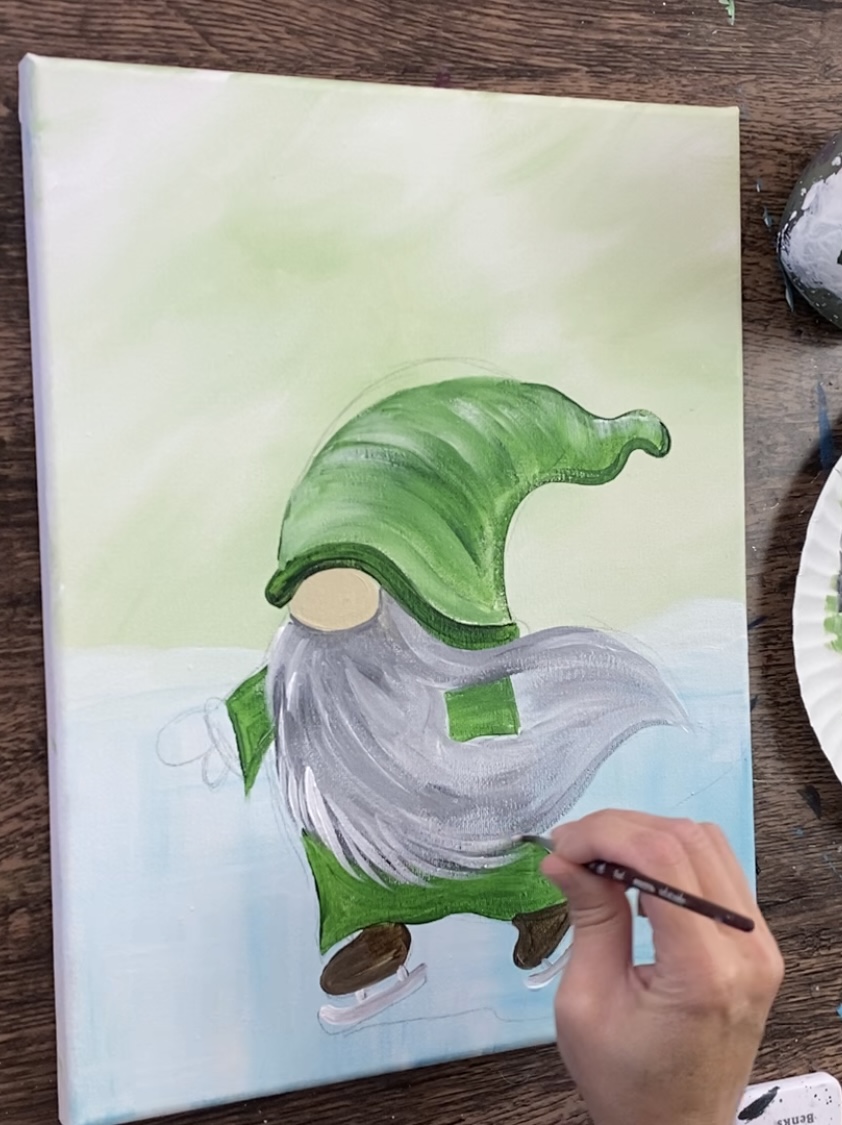
11. Paint Mittens
Use your #4 round brush and ultramarine blue to paint the mittens.
12. Paint Ice Details
Then paint the ice trail use the #4 round brush and ultramarine blue. I did one trail with the mars blue. Make sure you thin this paint down slightly to allow it to be loose and thin.
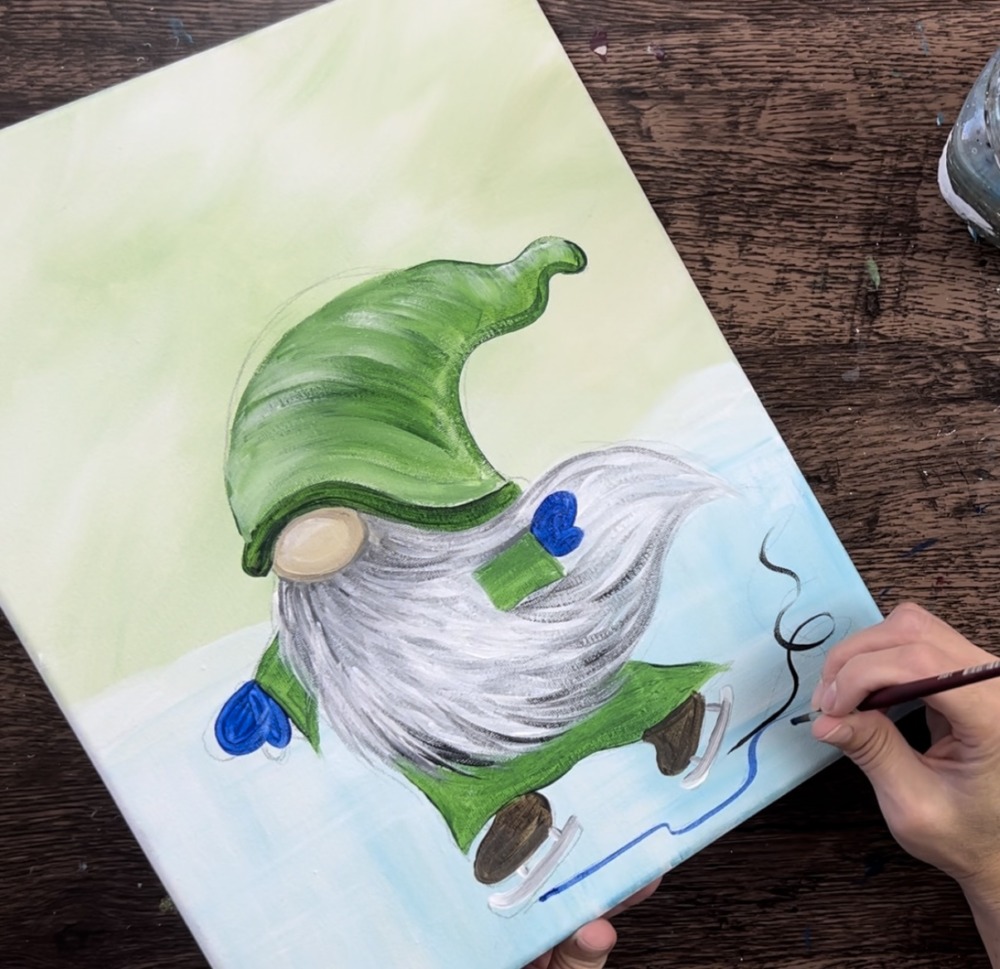
Then water down ultramarine blue to a watercolor consistency. Use the side of your round brush to “smear” this thin blue color in various areas on the ice. This creates different colors and reflections on the ice.
13. Paint Trees
Trees take a bit of practice! If you are a beginner, I have a tutorial that goes more in depth on how to paint these kind of pine trees. You can check that out here!
Mix equal parts hooker’s green hue permanent with ultramarine blue. Then use your #4 round brush to paint a large pine tree on the left.
Start at the top and stroke down to form the top branches. Note: the top of this tree is higher than the gnome’s hat.
Then continue to form a conical tree shape by stroking each row of branches downwards.
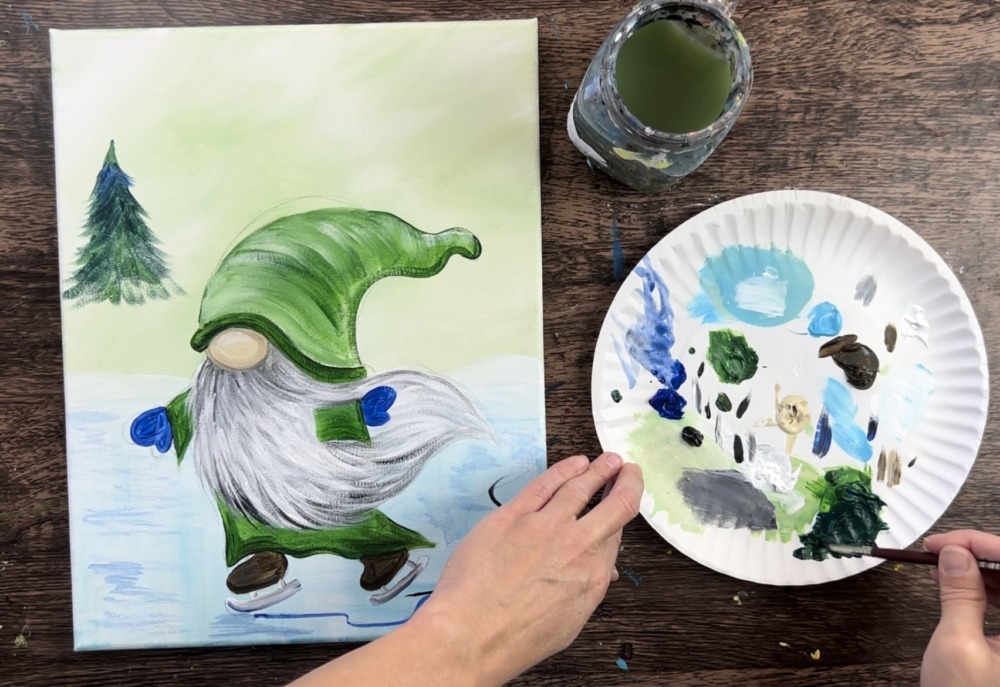
Keep building your tree by painting your branches using the round brush and stroking each branch downwards. As you get close to the base, your strokes may end up being longer and thicker.
Paint another smaller tree on the right using the same techniques. Note: after these trees dry, you will add a layer of snow to them.
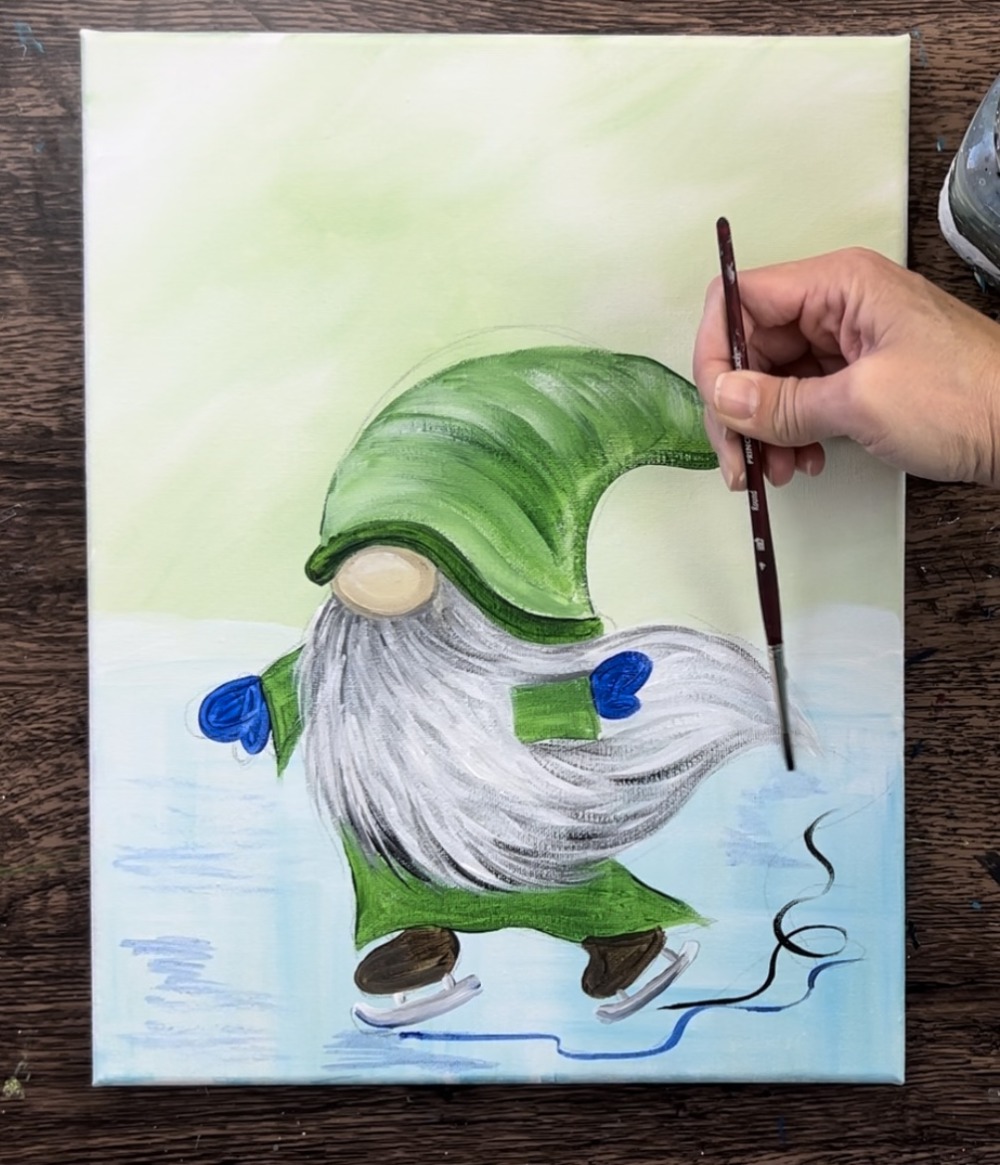
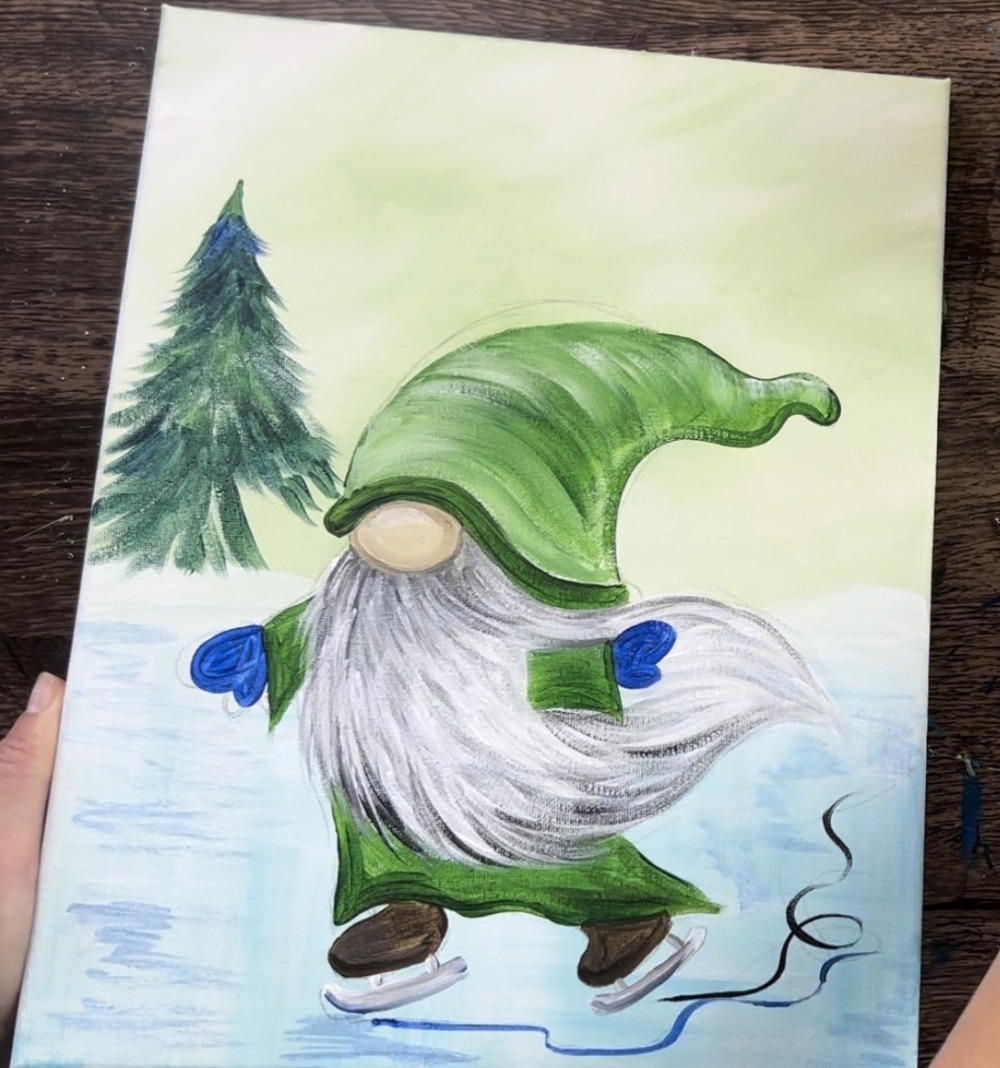
14. Paint Details On Sleeves and Skates
Use your #4 round brush and titanium white to paint texture on the ends of the gnome’s sleeves. Paint small circular strokes.
Next, paint details on the skates by painting white zig-zag lines for the laces and loops.
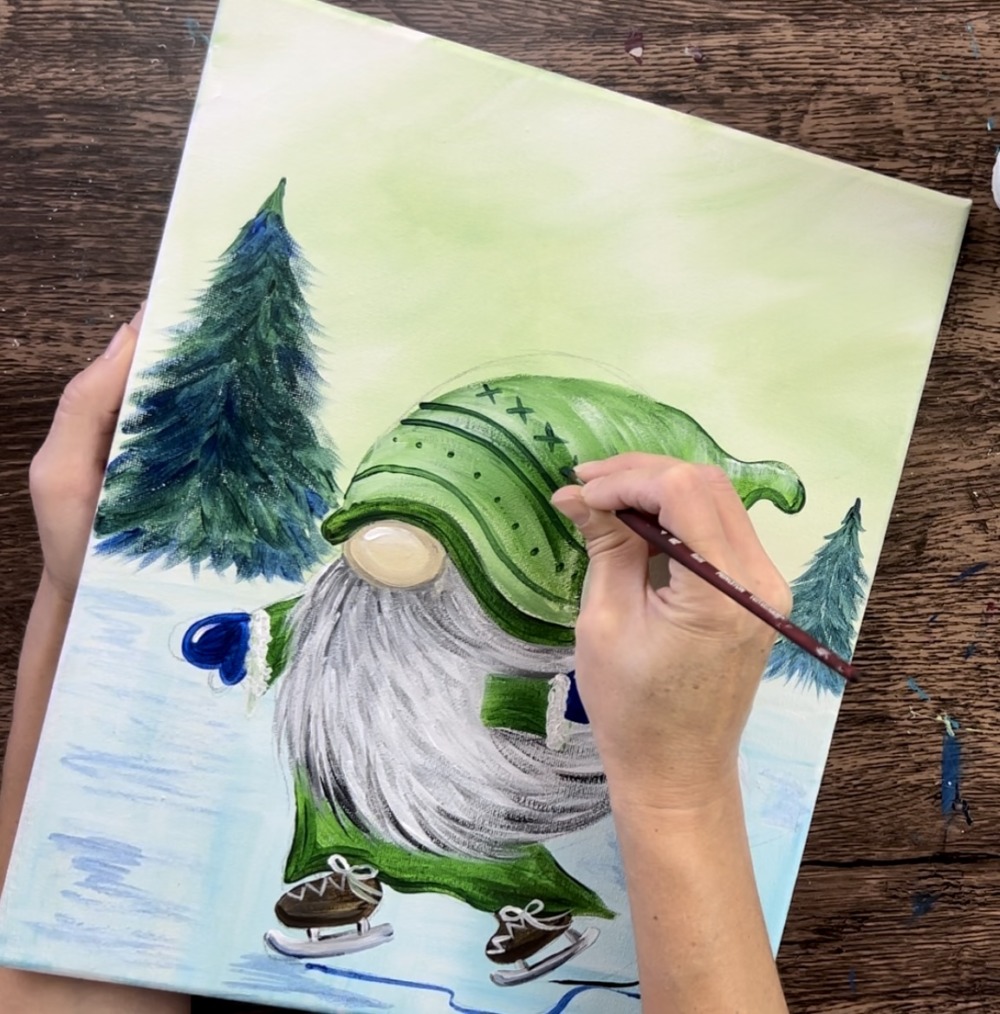
15. Paint Designs On Hat
Then paint designs and patterns on the hat using the #4 round brush and hooker’s green hue permanent.
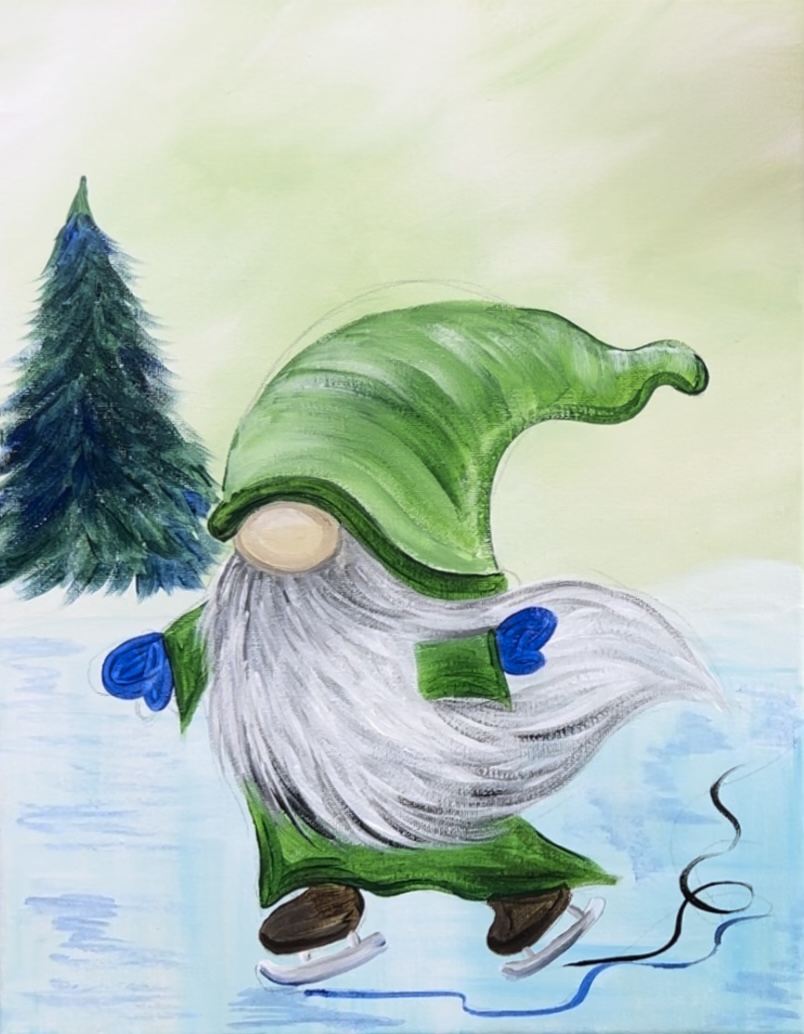
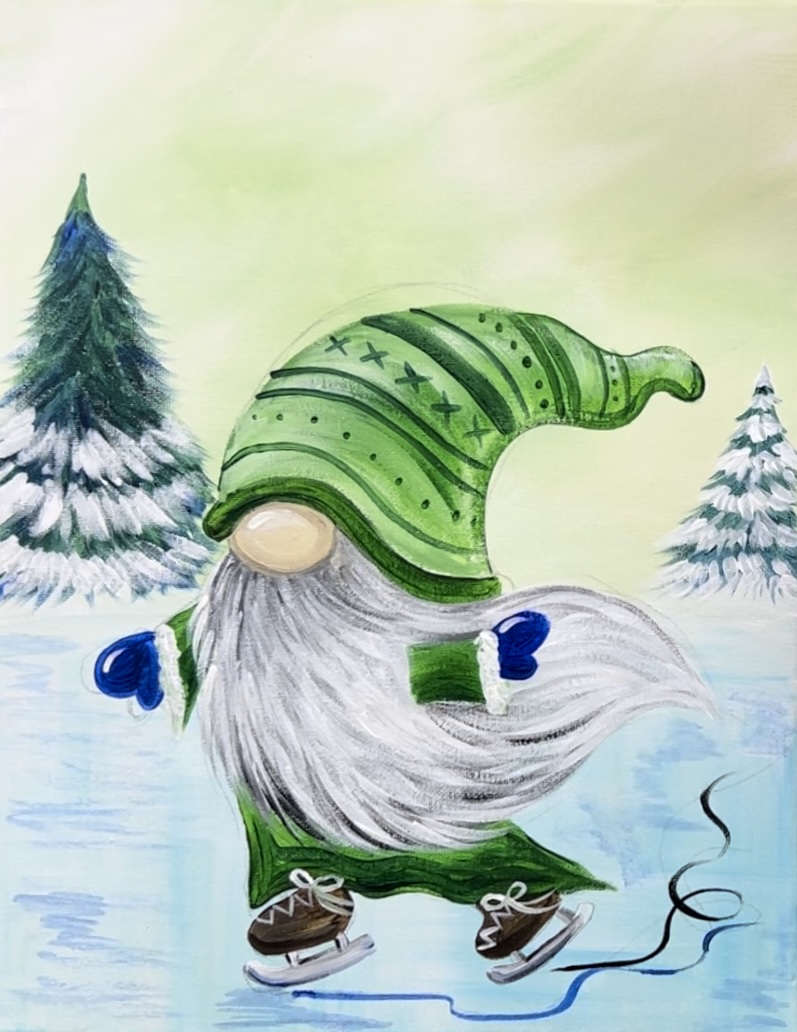
16. Paint Snow On Trees
For the snow, paint white rows of branches starting on the bottom of the tree and working upwards. Skip a row and leave it green and then do another row. Paint each branch just like you painted the branches of the tree initially.
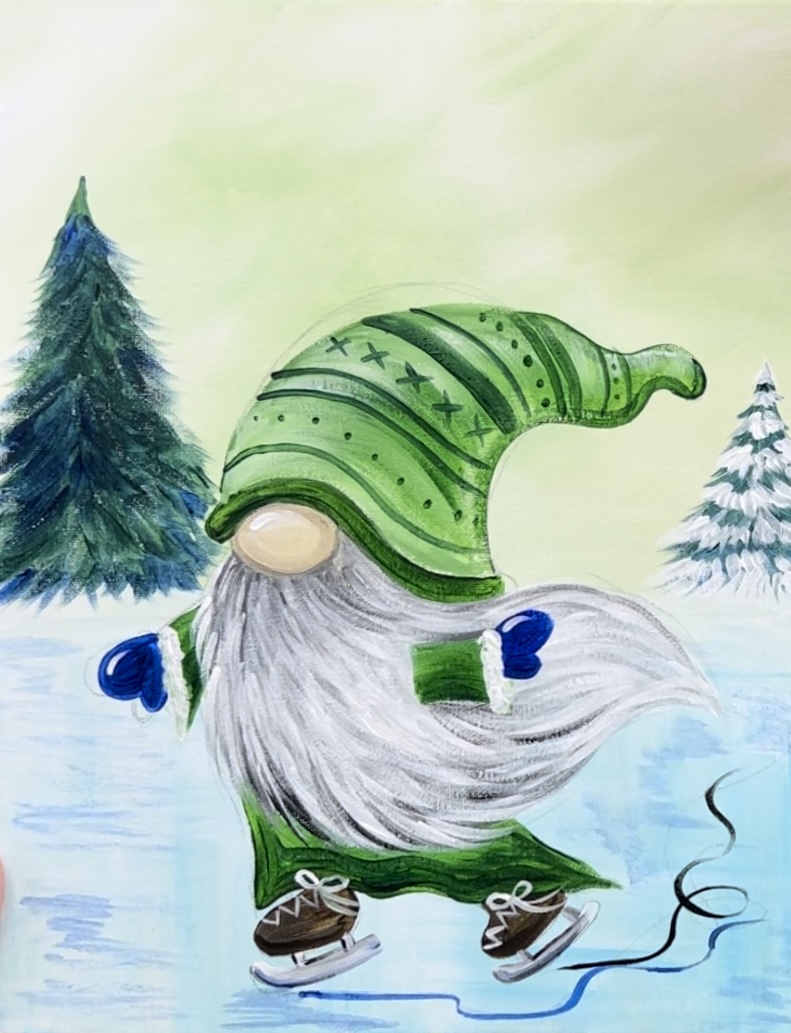
Repeat this for the larger tree.
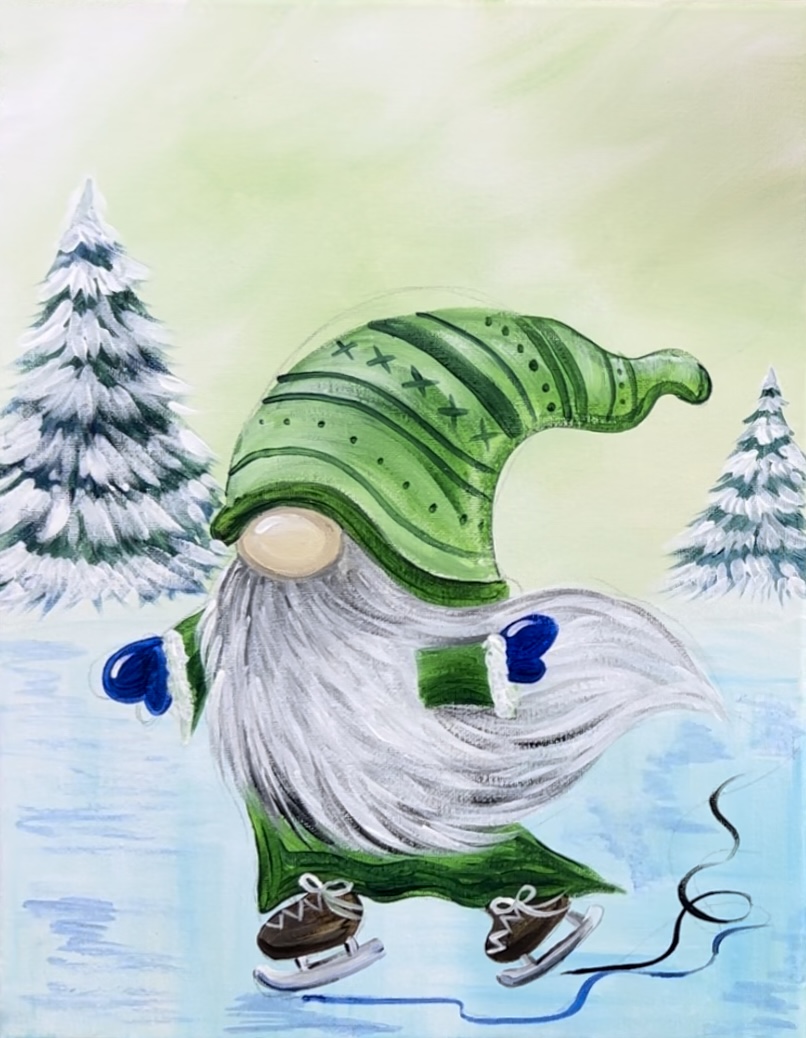
17. Paint Snow Details
Use your #4 round brush and titanium white to paint small dots in the sky and all throughout the painting to represent snow falling. Also, to add more interest in the sky, paint larger snow circles and “smear” them with your finger to make them blurry.
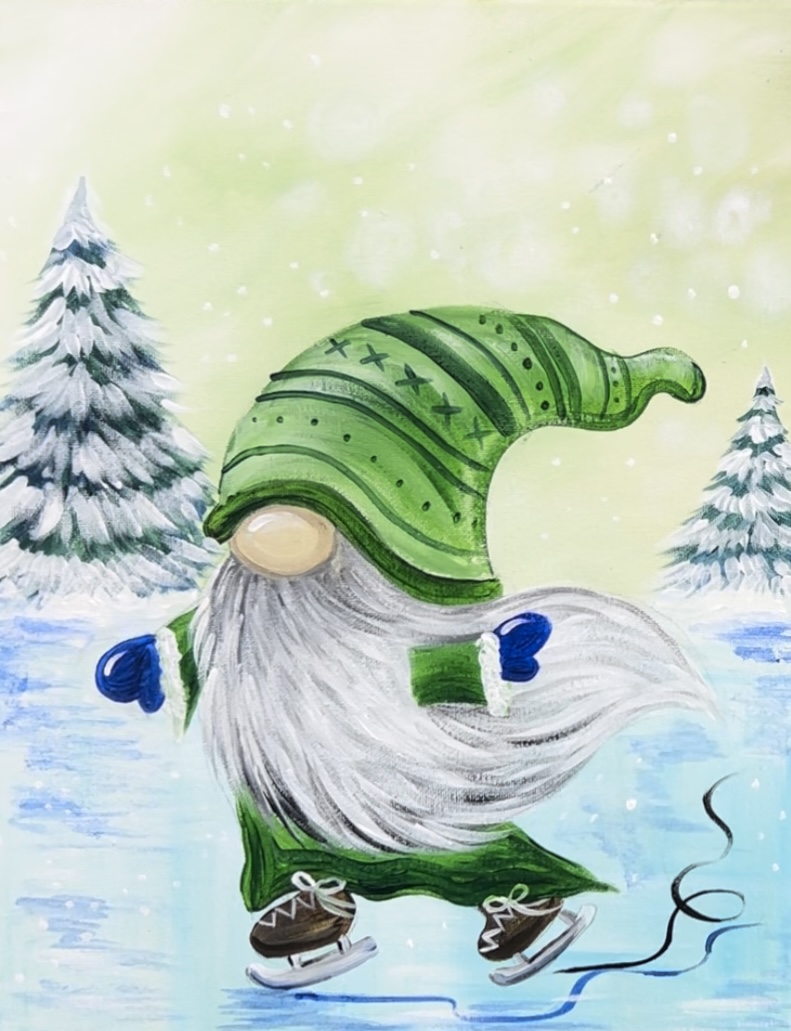
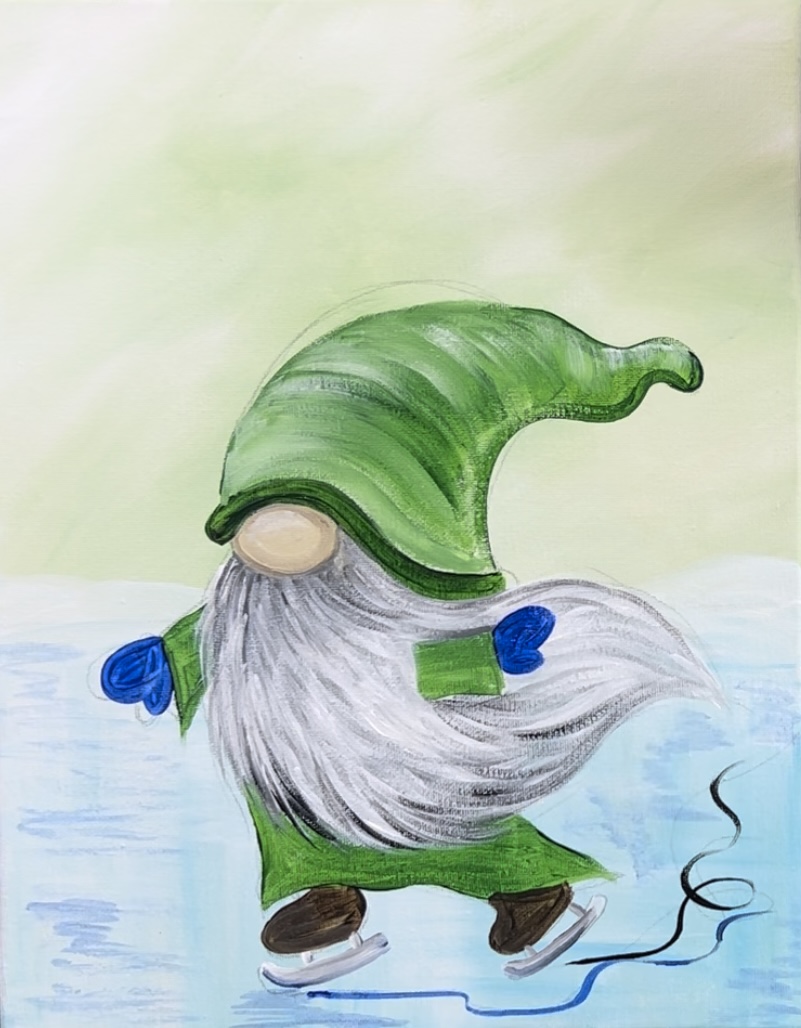
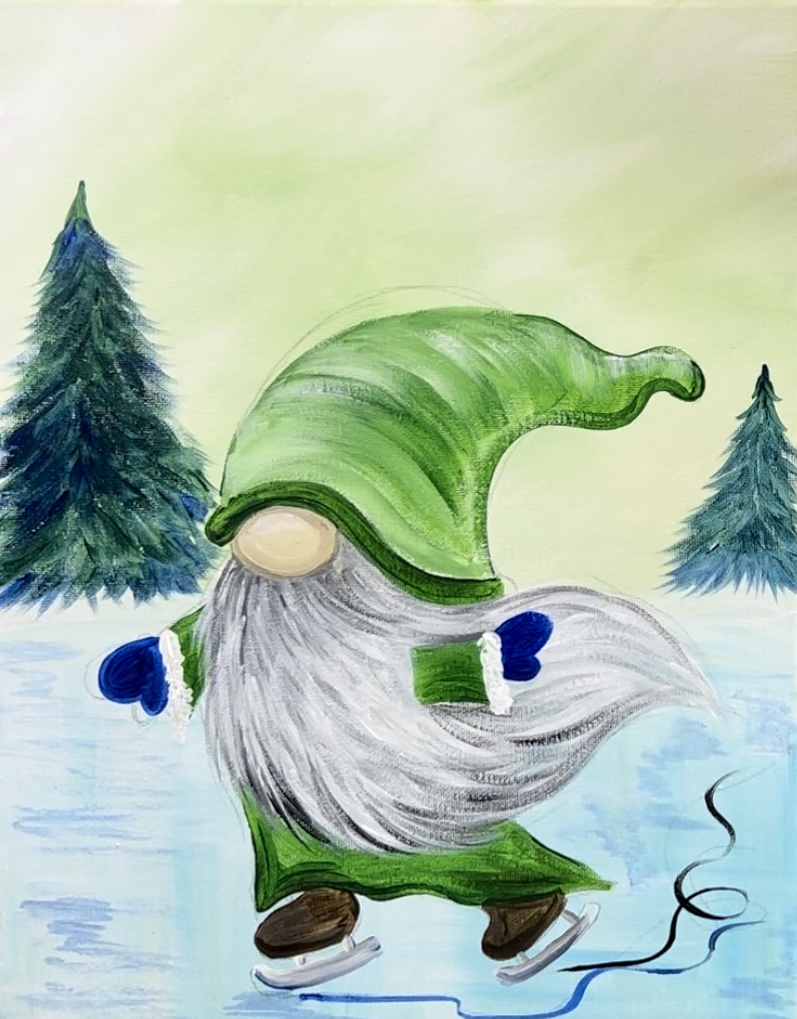
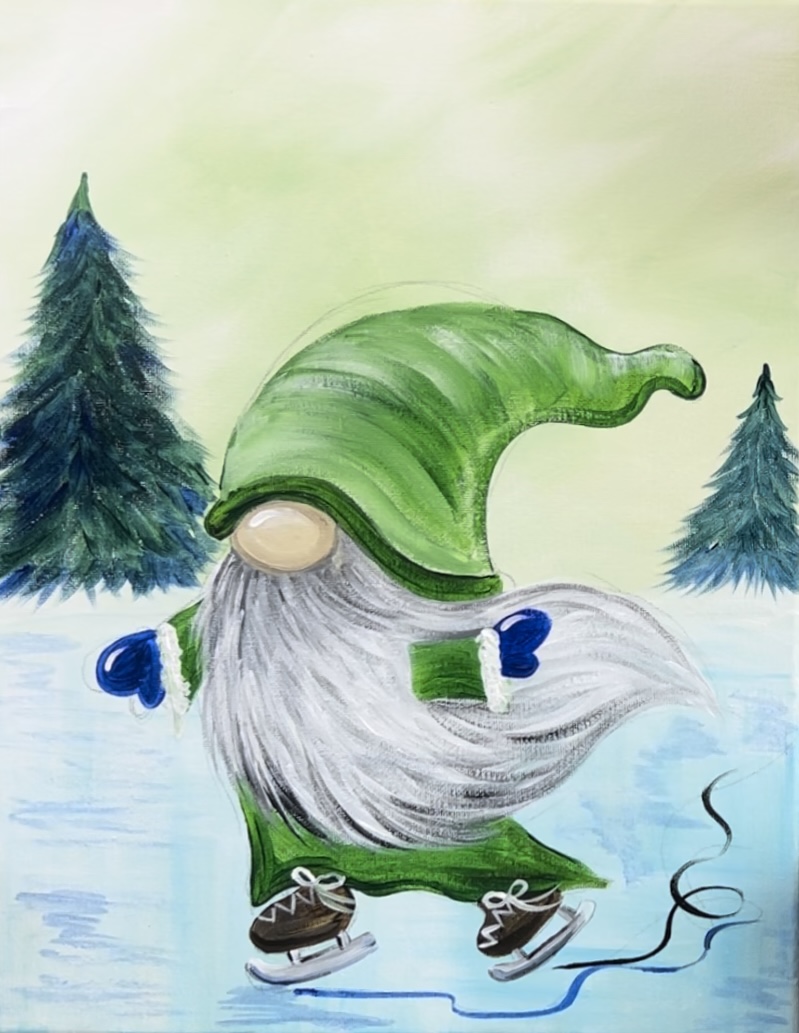
Finished
Share Your Art Here


