

Would you like to save this?
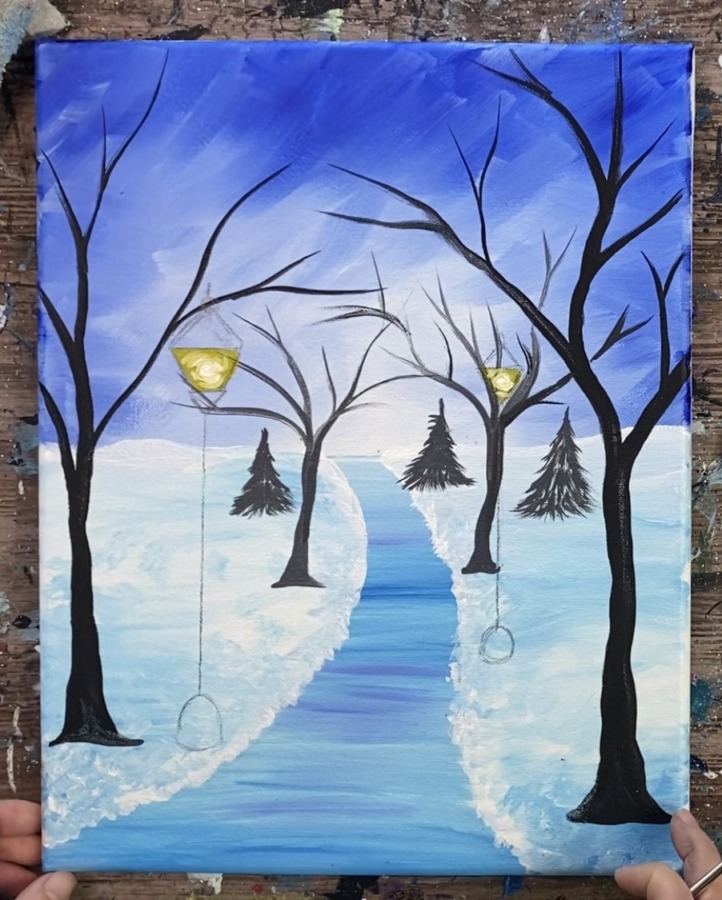
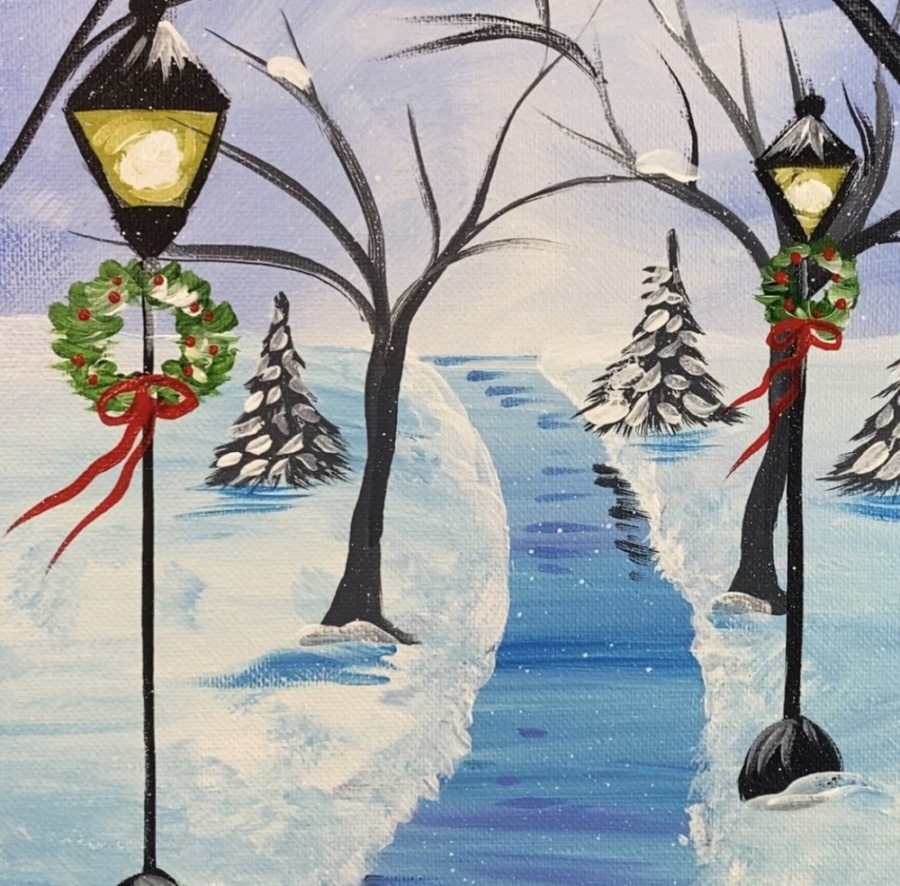
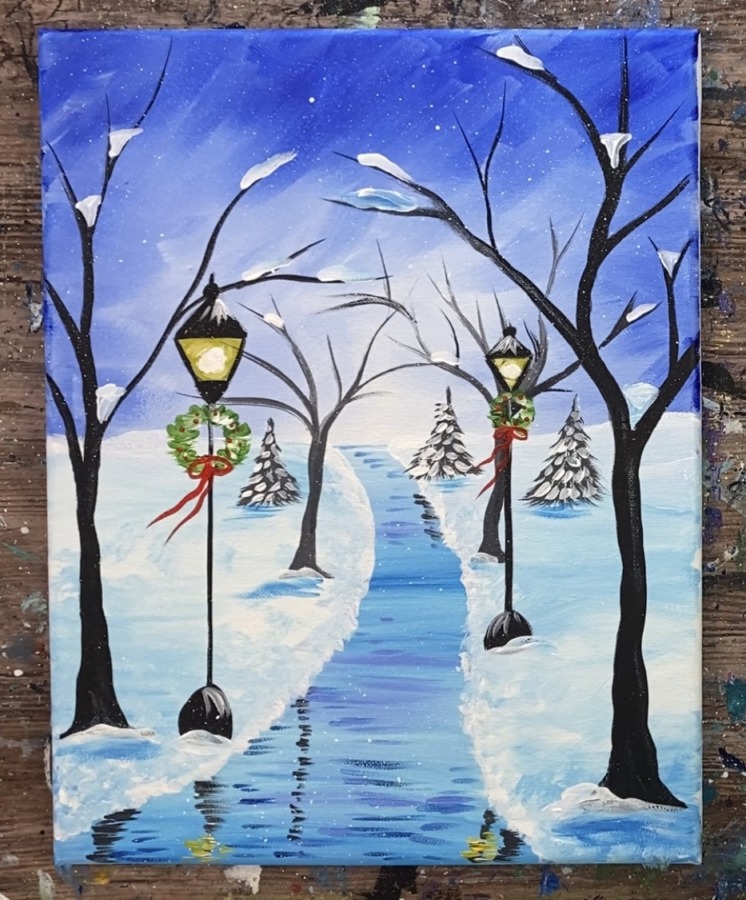
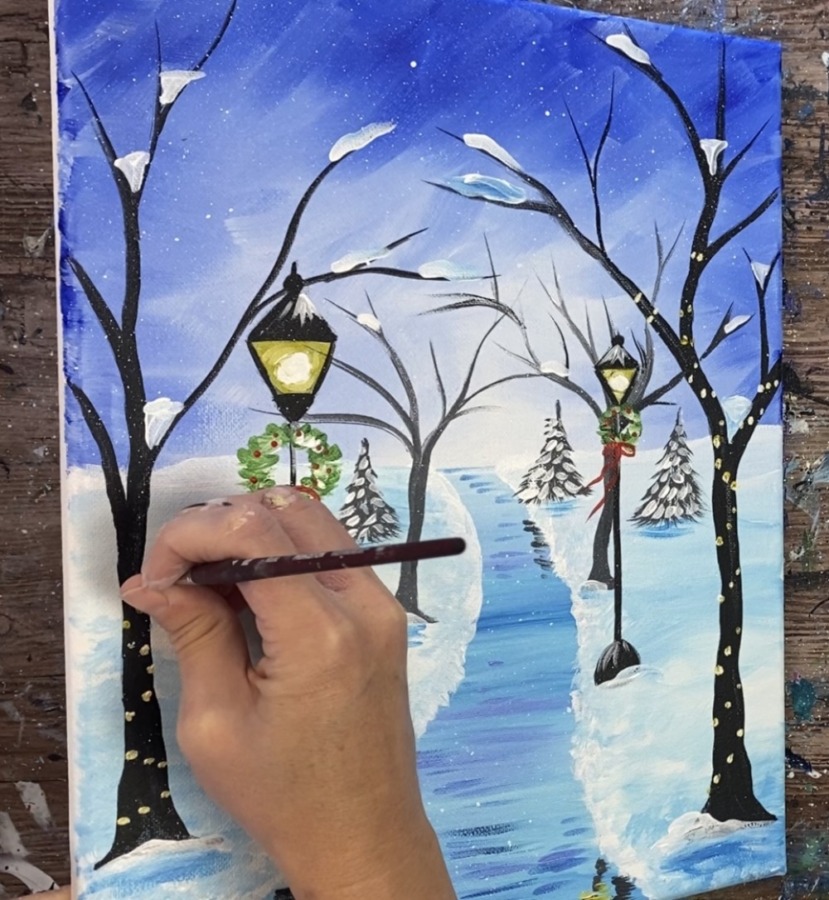
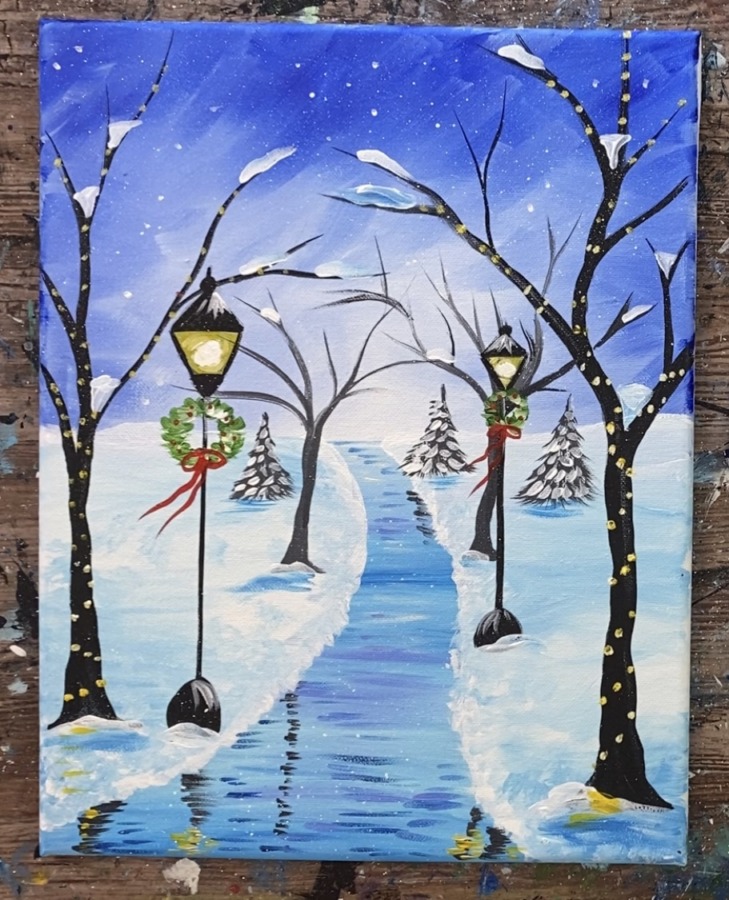
This acrylic painting tutorial will demonstrate how to paint a winter scene path through a park with lampposts and Christmas lit trees.
You may recognize this design from a previous painting called “Harvest Moon Path”, the fall version. This is an icy, wintery version of that design!
I did this on an 11 x 14 canvas, however as with all painting tutorials, you can do this on any size.
Enjoy and happy painting!
Materials
"Christmas Park" Acrylic Painting Tutorial
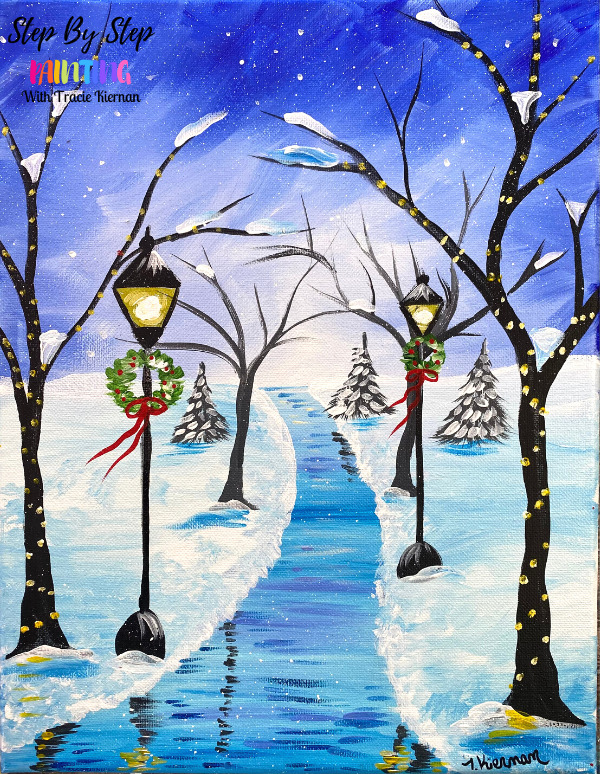
Learn to paint a winter park scene with an icy path, lampposts and holiday trees.
Materials
- 11 x 14 Canvas
- Acrylic Paint
- Brushes
- Ruler
- Pencil
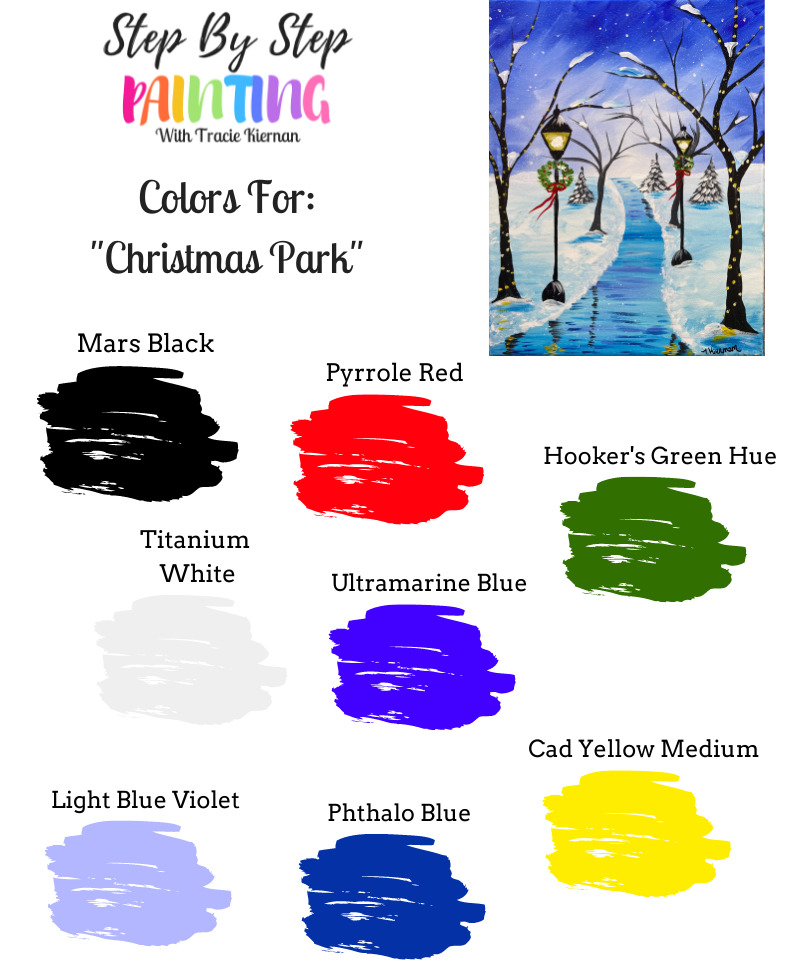
Colors
- Titanium White
- Mars Black
- Pyrrole Red
- Light Blue Violet
- Phthalo Blue
- Ultramarine Blue
- Hooker's Green Hue
- Cadmium Yellow Medium
Brushes
- 3/4" Flat Wash
- #8 Round Brush
- #4 Round Brush
- Toothbrush for splatter snow effect
Color Palette
Using Craft Paints?
If you are using craft paints such as the Apple Barrels, I would recommend substituting with these colors:
- White
- Black
- Flag Red
- Too Blue
- Bright Blue
- Parrot Blue
- New Shamrock
- Bright Yellow
Video
Directions At A Glance
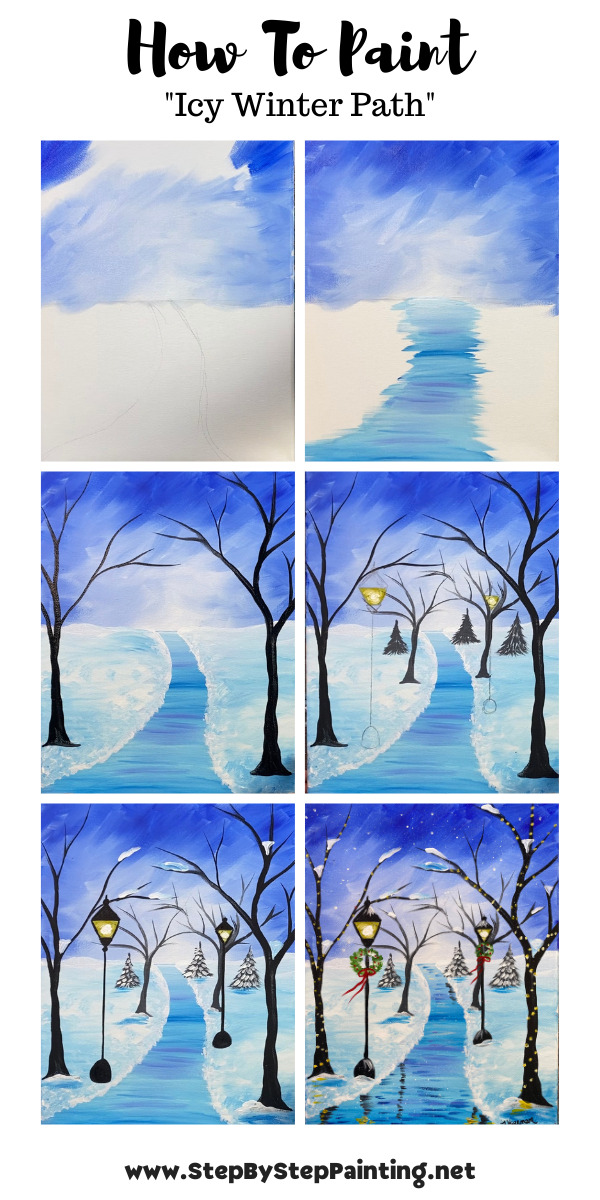
Step By Step Instructions
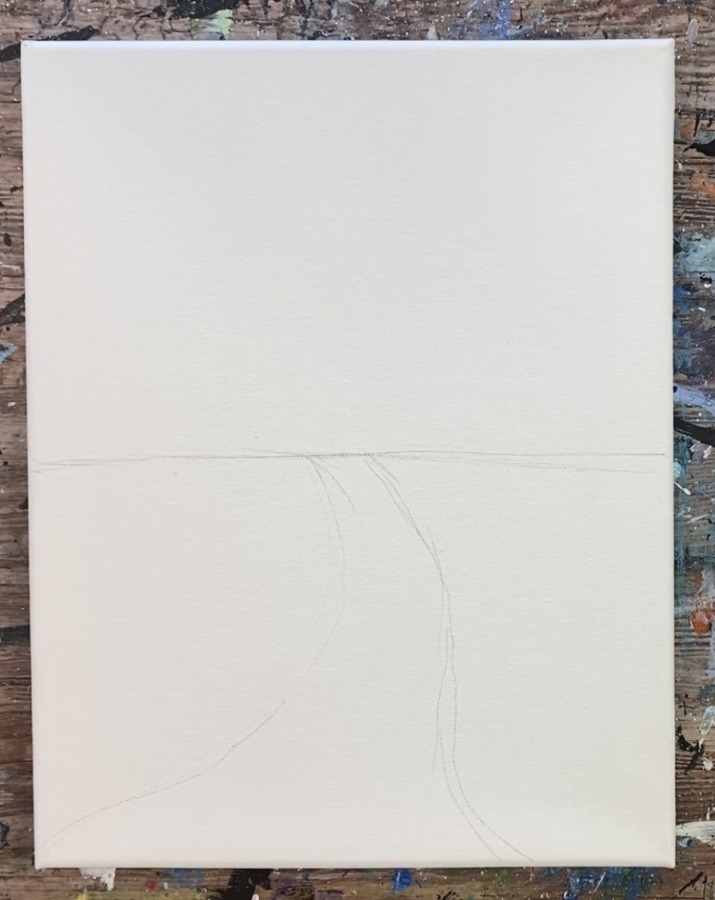
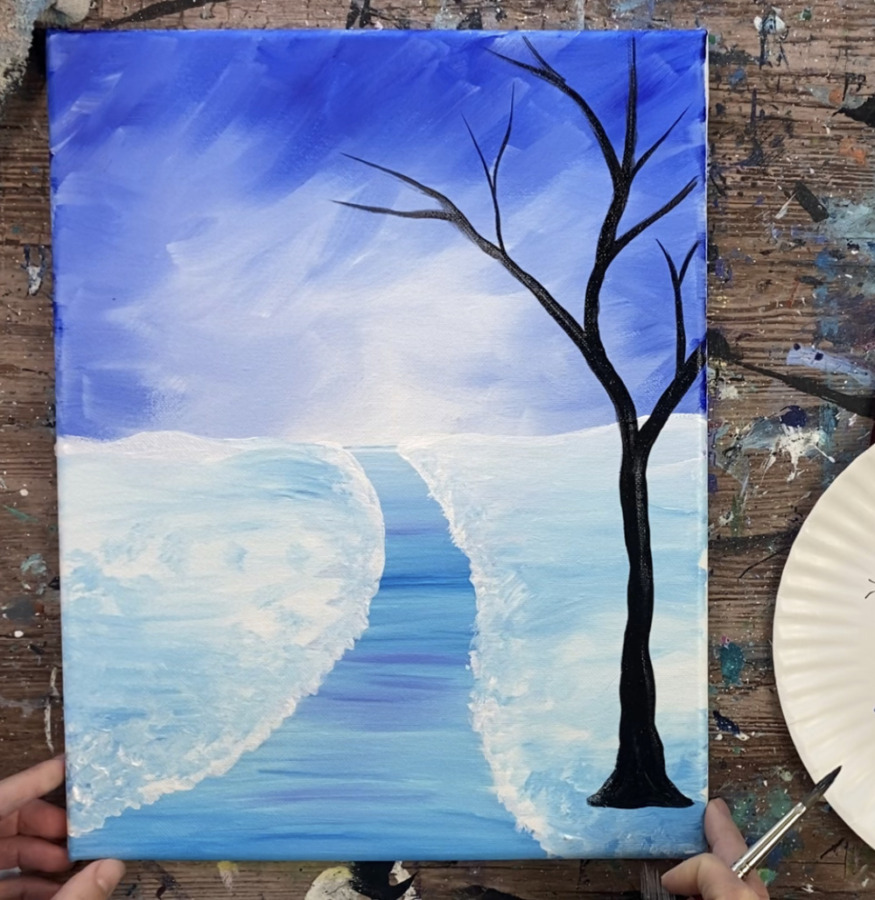
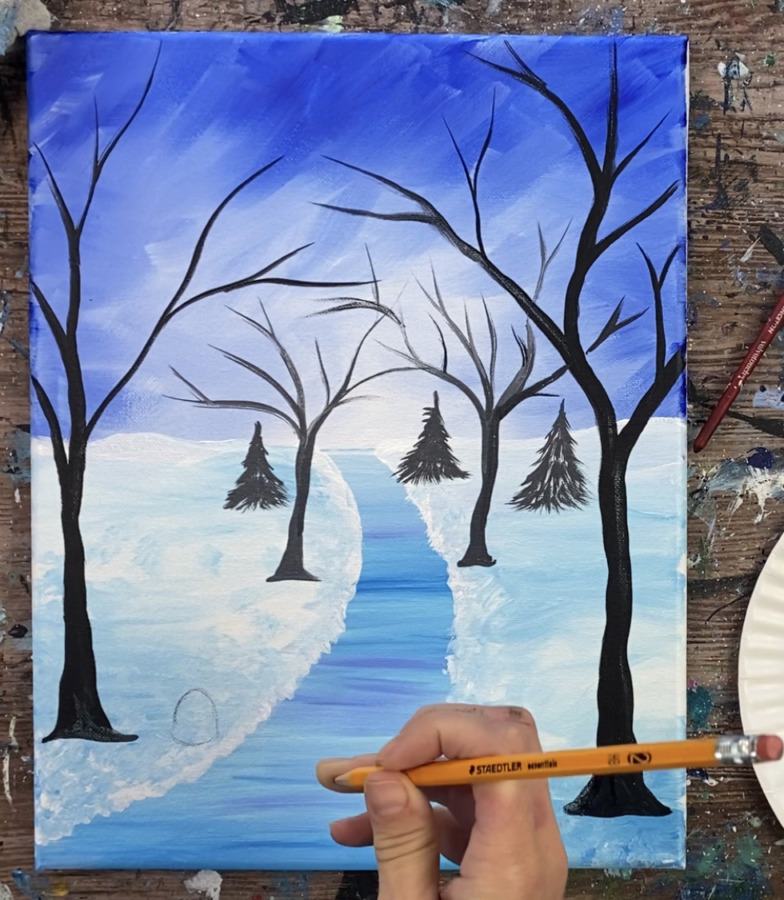
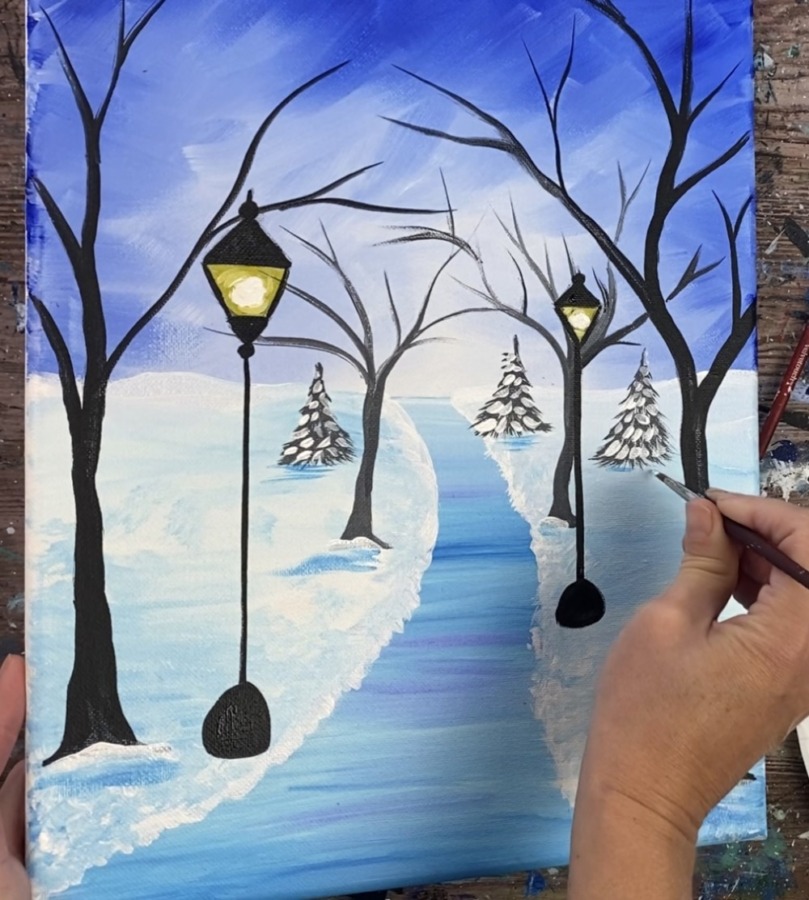
1. Draw the Horizon Line & Path
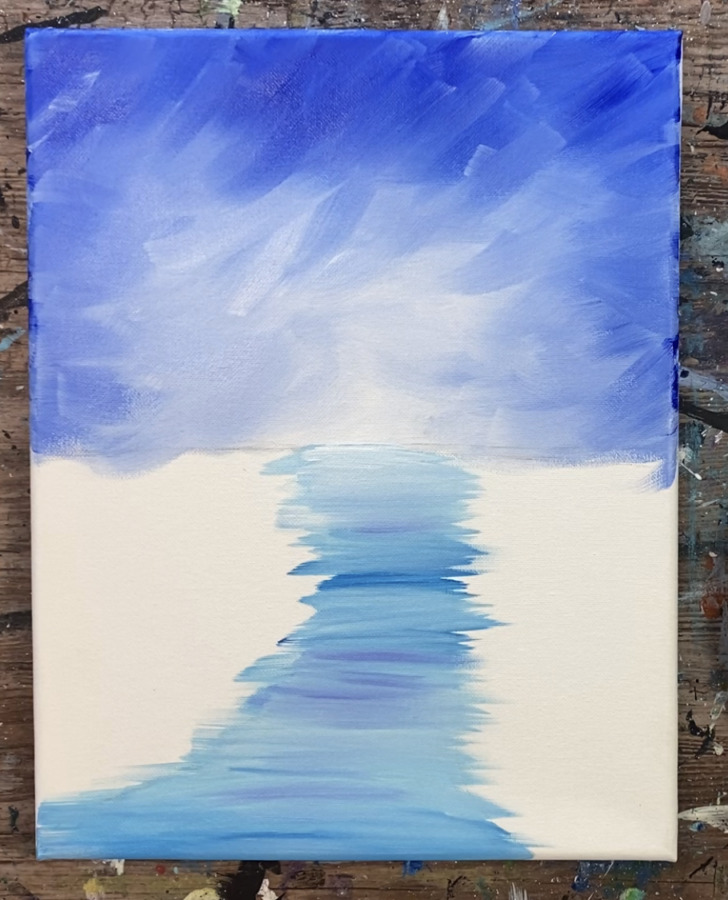
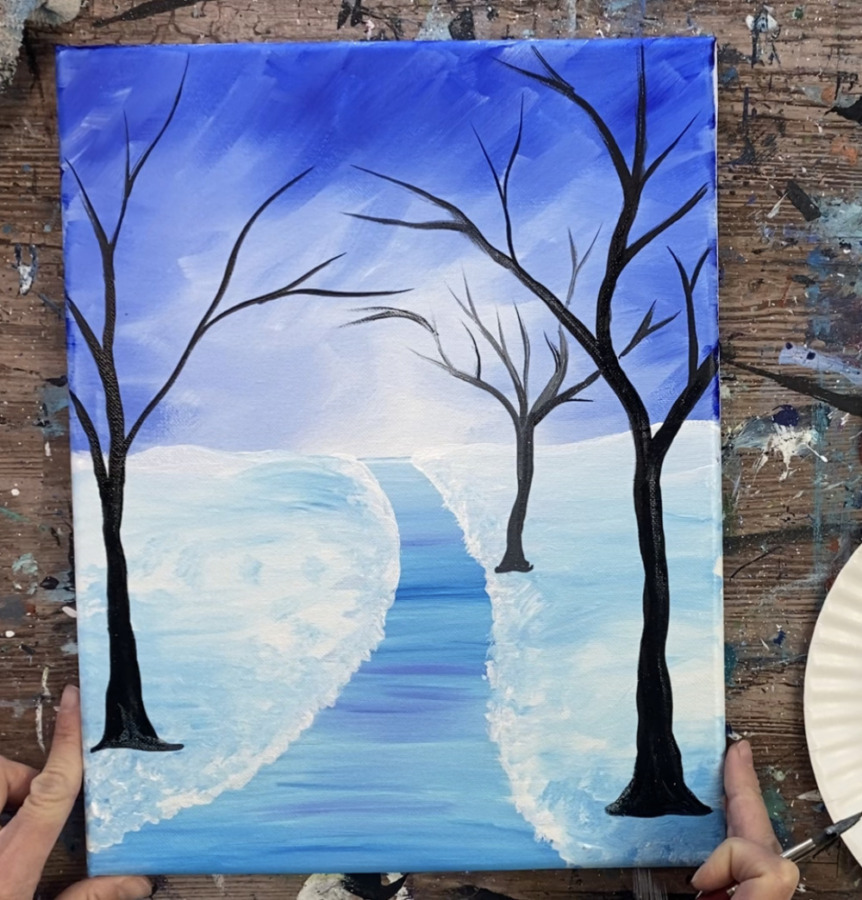
Position your canvas so that it is vertical then find the center of it. Use a ruler to draw a horizontal line down the middle. This will be the “horizon line”.
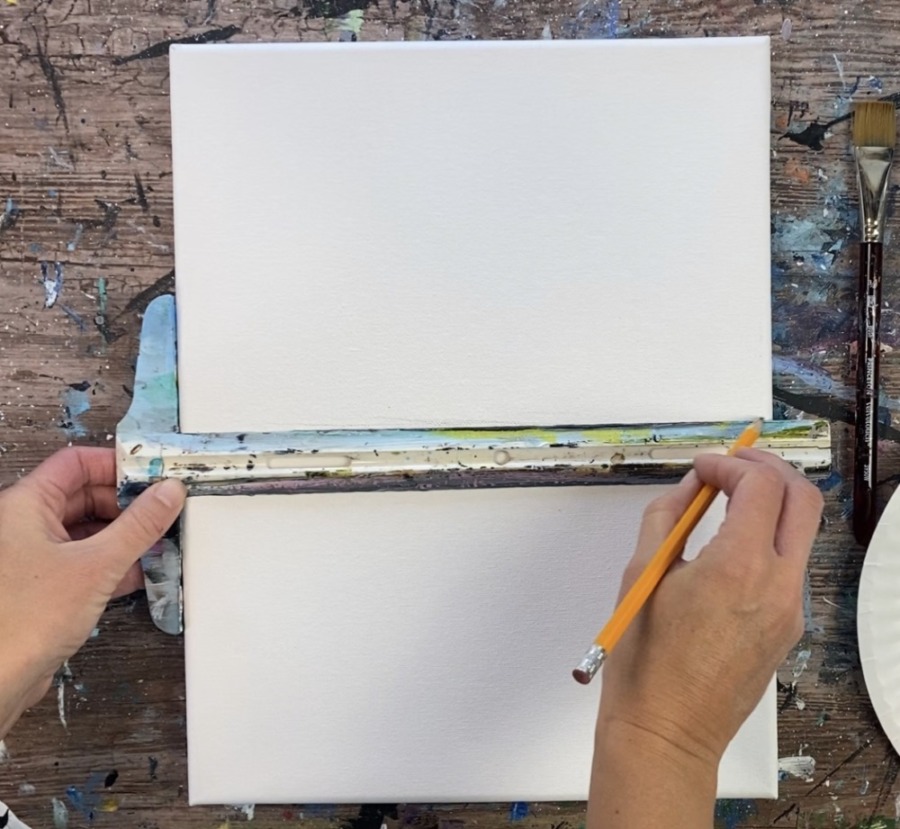
Then lightly sketch the path. The path meets in the middle of the horizon line but does not go to a point (it ends flat). It curves slightly and goes very wide at the bottom.
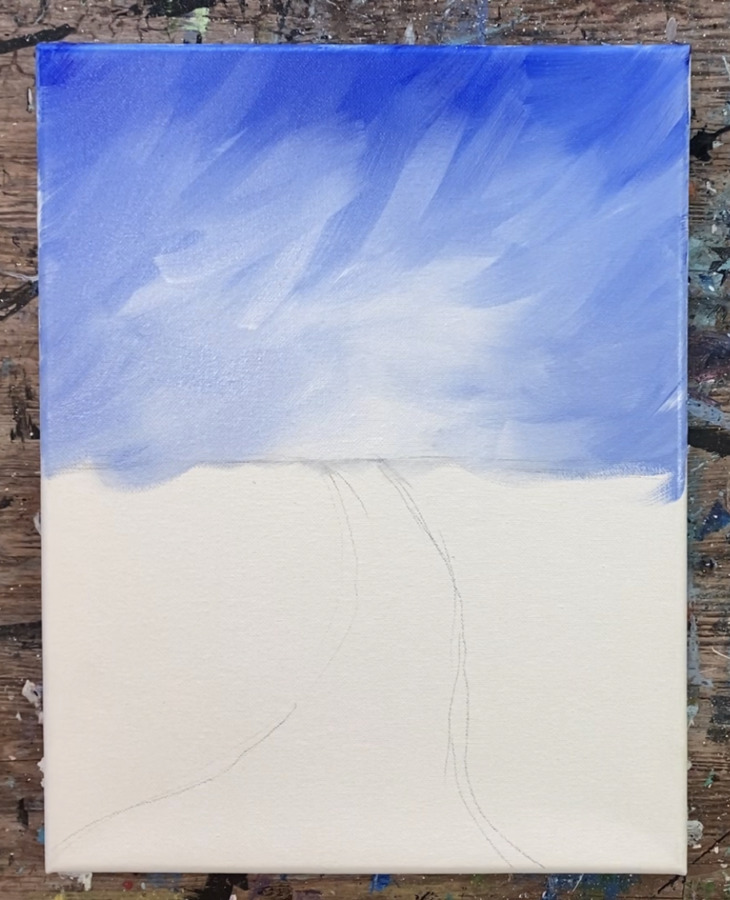
2. Paint The Sky
Then load your palette with: ultramarine blue, titanium white and light blue violet. Use your 3/4″ flat wash brush. Mix about 5 parts white and 1 part light blue violet (the lighter blue color).
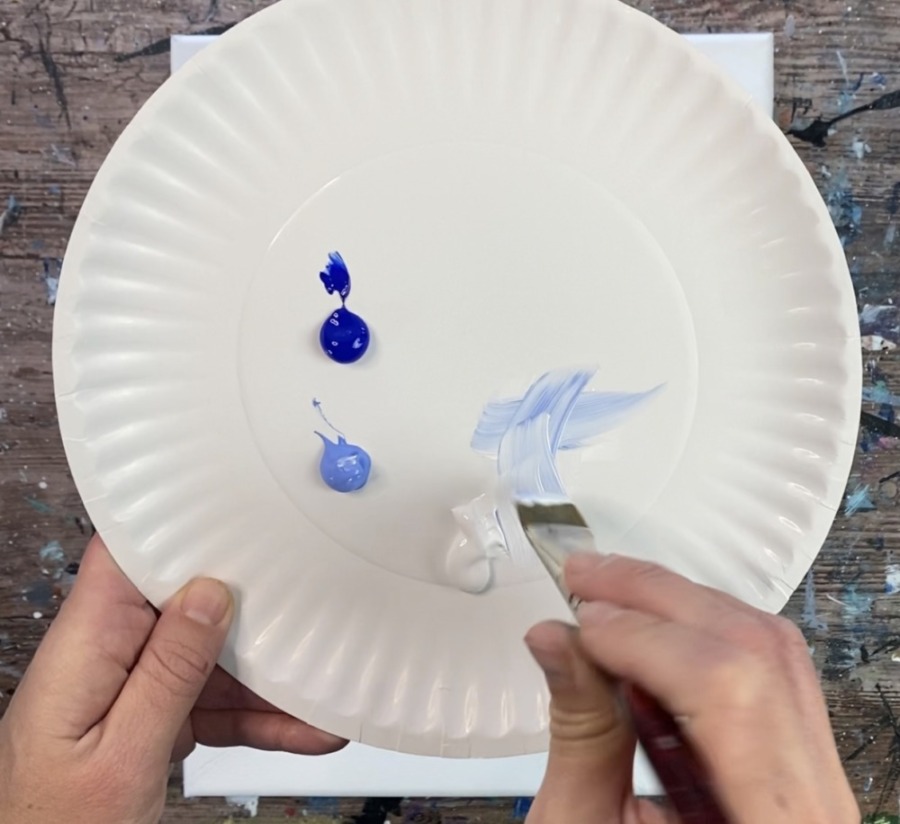
This will make a very light blue color. Start in the bottom middle of the sky just above the horizon line and end of path. Paint a “blob area” with textured strokes.

Then gradually add more light blue violet as you work your way outwards. Basically the sky will be brightest and lightest in the middle area above the path and gradually get darker as you approach the edges of the canvas.
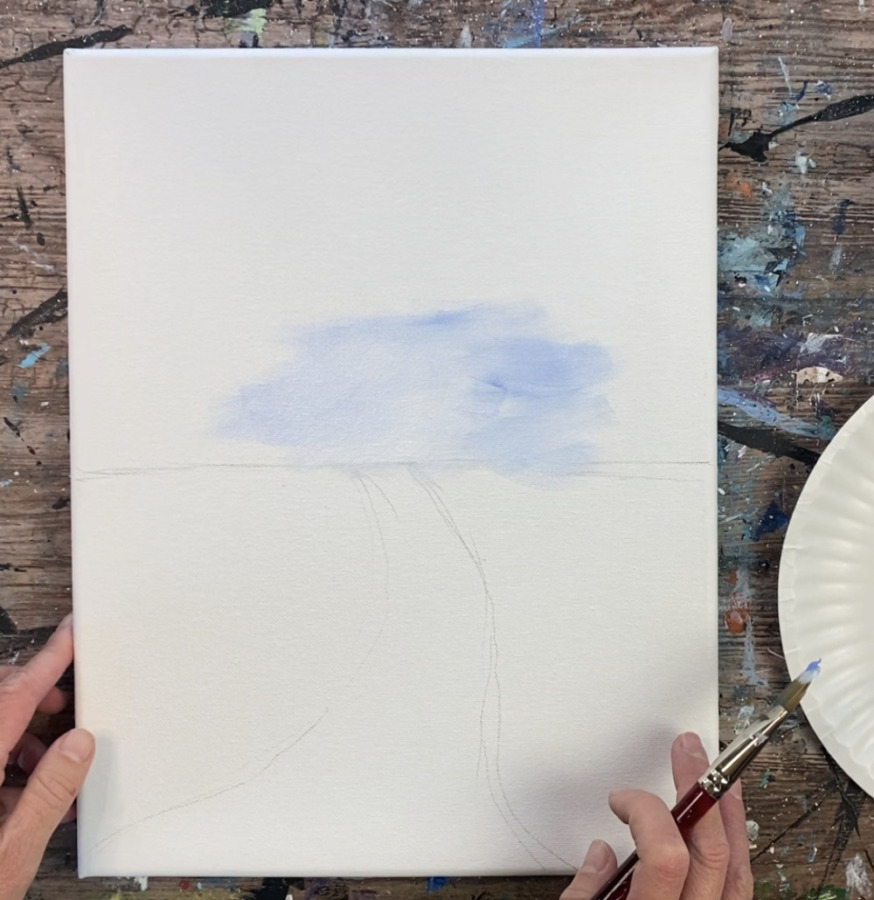
Keep painting in textured “x strokes” with the white and light blue violet. Blend the colors so the sky gets gradually darker.
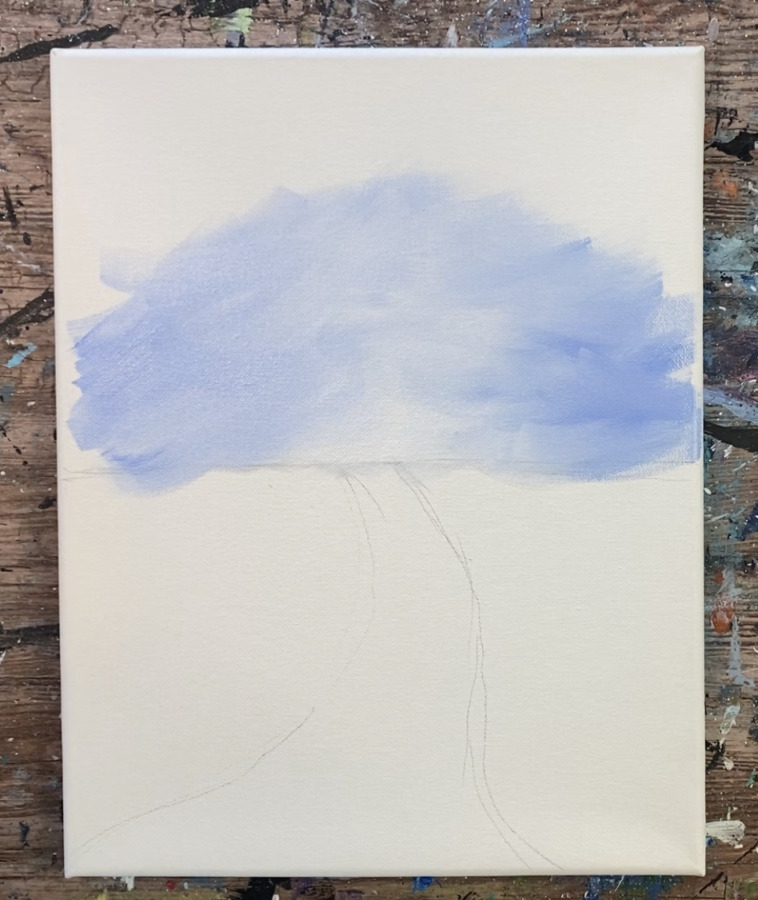
Then add “ultramarine blue” to your brush without rinsing it.
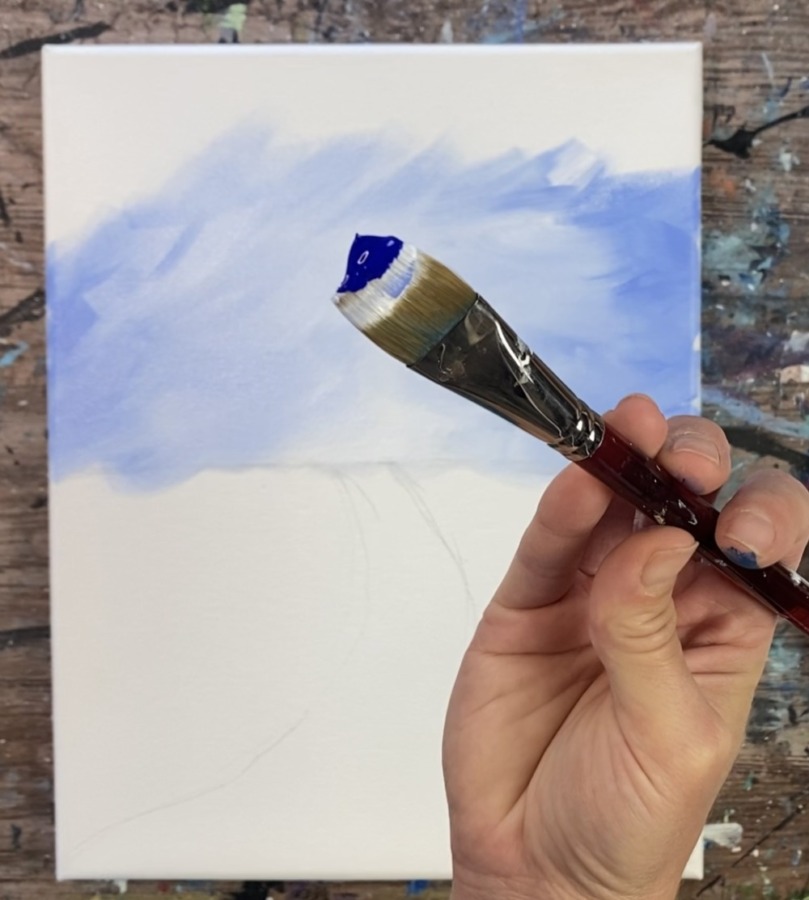
Paint the ultramarine blue on the edges of the canvas and blend it into the light blue violet.
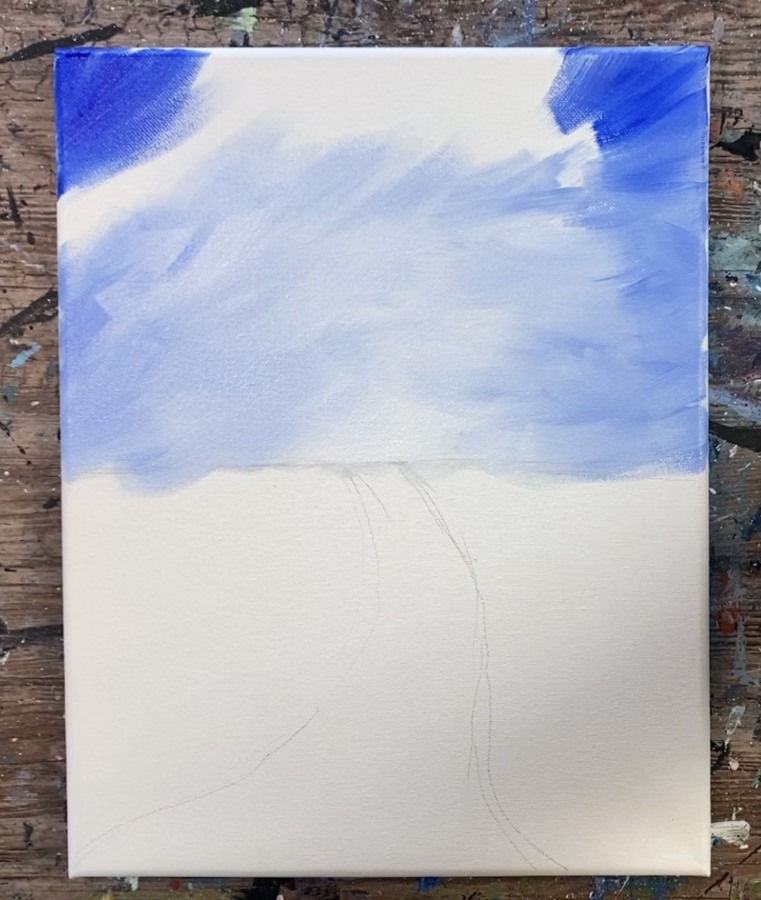
If needed, add more light blue violet to your brush and blend it into the sky. Try not to over blend. It is okay if you see the brush strokes! A lot of this sky will be disguised with trees & falling snow.
3. Paint The Path
Load “phthalo blue” onto your palette. Rinse your 3/4″ flat wash brush. Add water to your 3/4″ flat wash brush and slightly water the phthalo blue down to a thin consistency (but not dripping). Mix some titanium white into the phthalo blue. Use your 3/4″ flat wash brush to paint thin, left and right strokes in the path area.
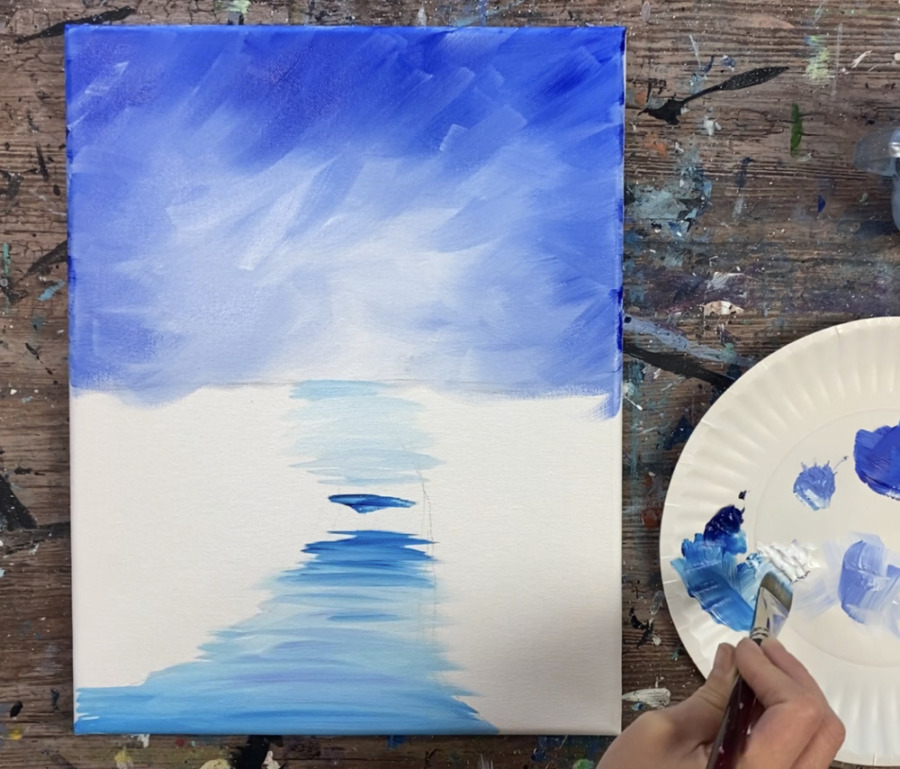
The path is not all the same color. There are streaks of darker blue, lighter blue and some streaks of the “light blue violet”. Paint the left and right, thin strokes all throughout the path using a variety of the colors that blend gently together. It is okay if you go outside the lines of the path.
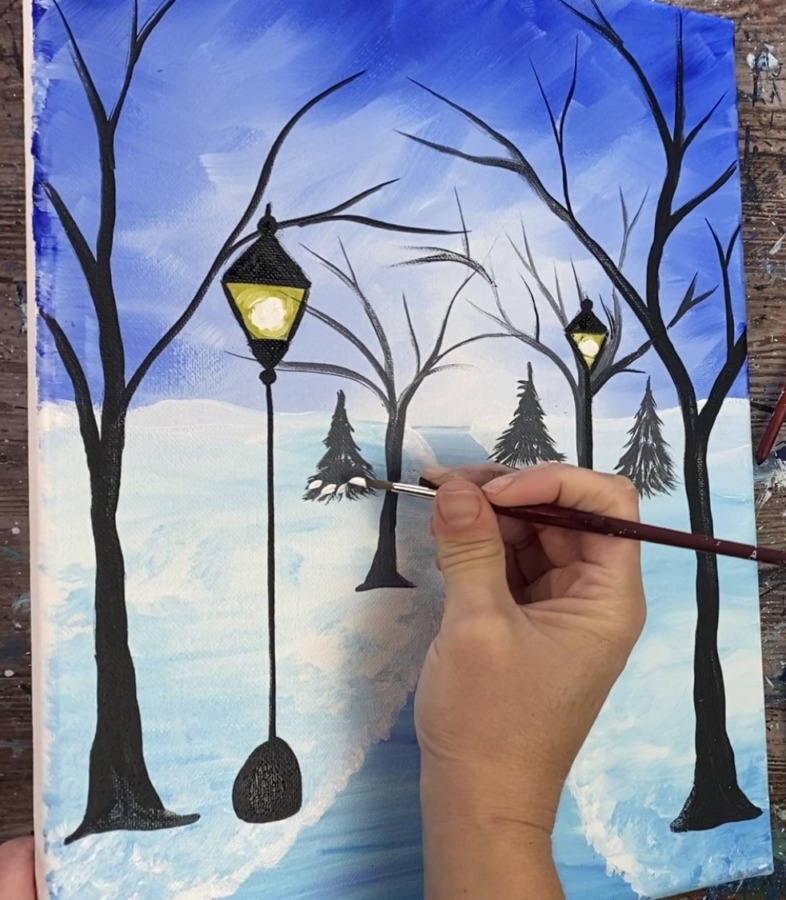
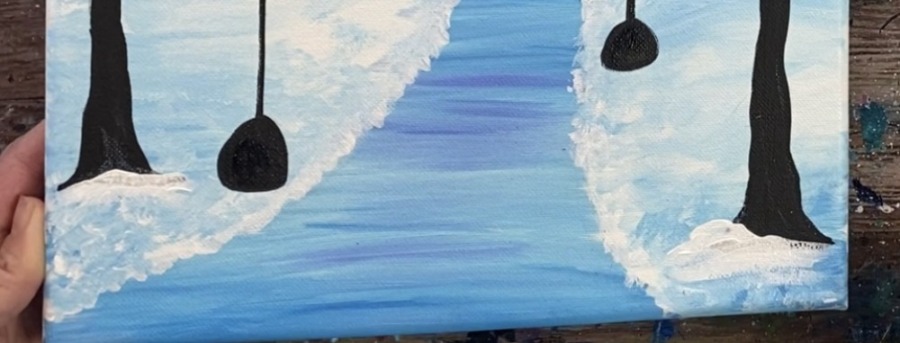
4. Paint The Snow
Wait until your path dries (or use a hair dryer to dry it quickly). Use a #8 round brush and titanium white. Paint the outline of the path to define the shape.
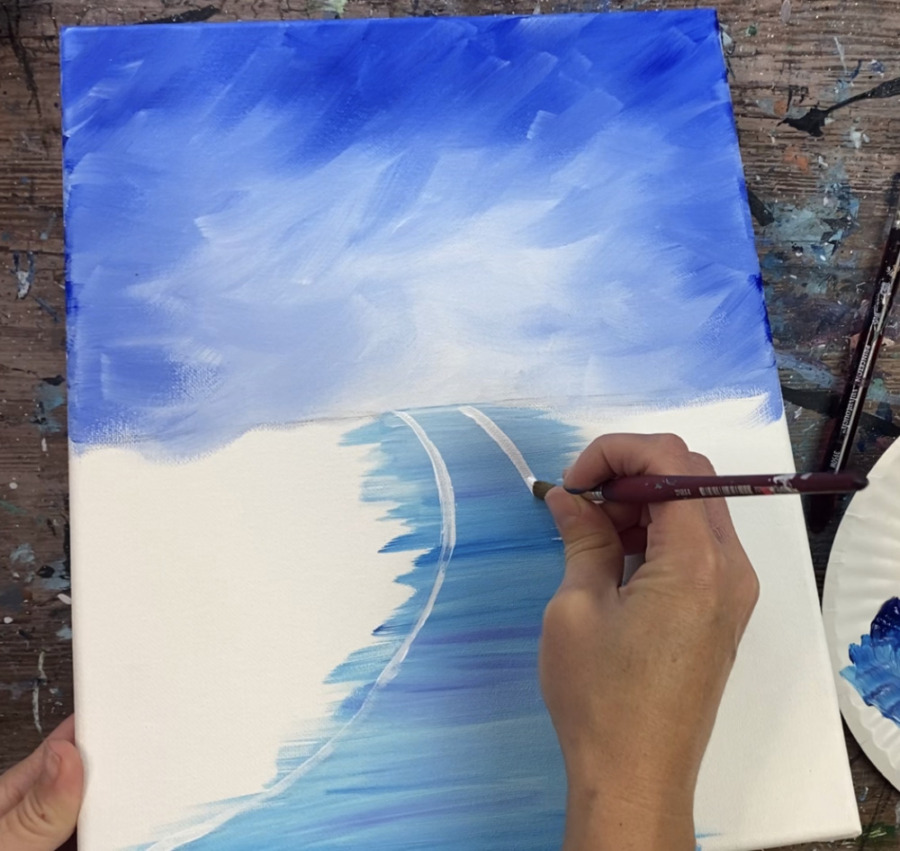
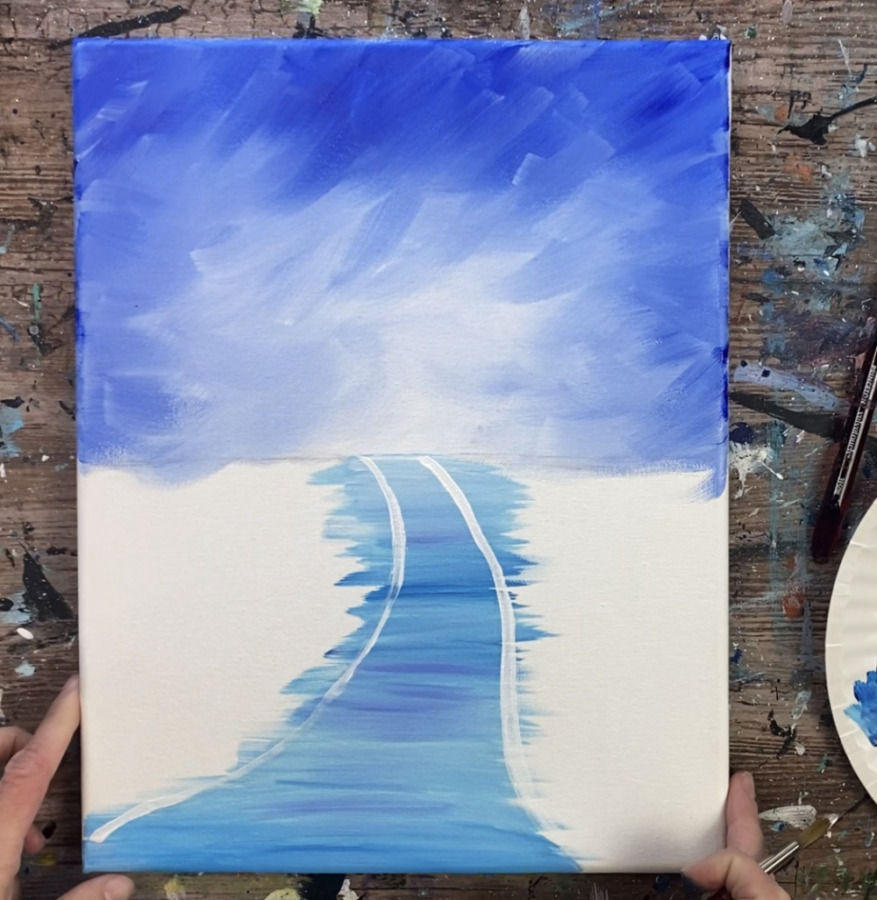
Then paint thick, textured & rounded strokes on the edges of the path. This will represent the snow buildup on each side of the path.
These strokes are thick and not watered down.
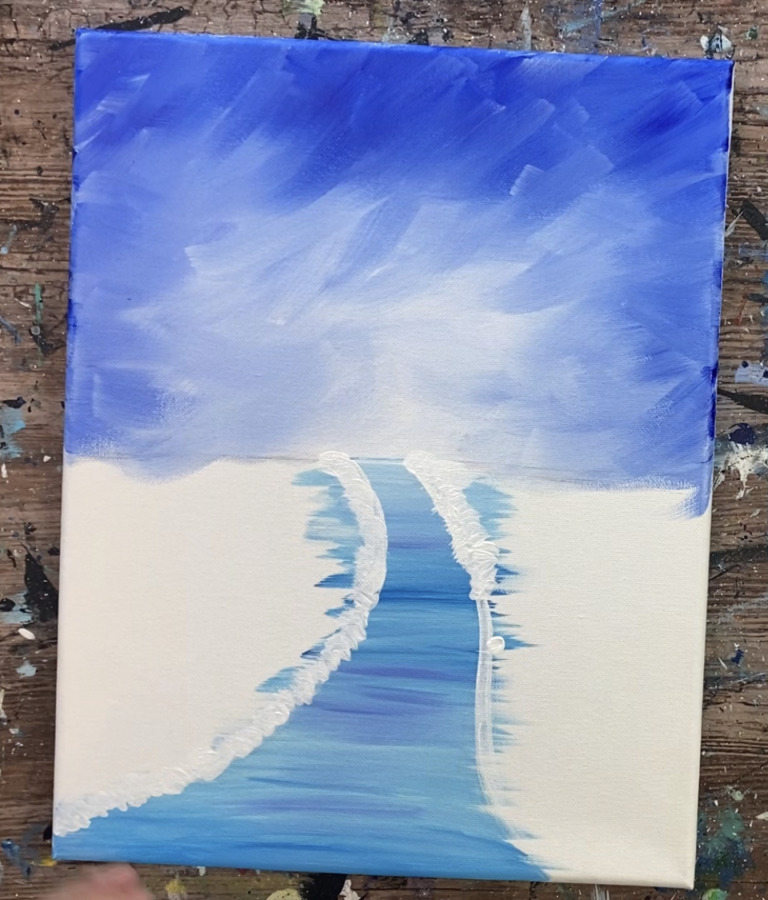
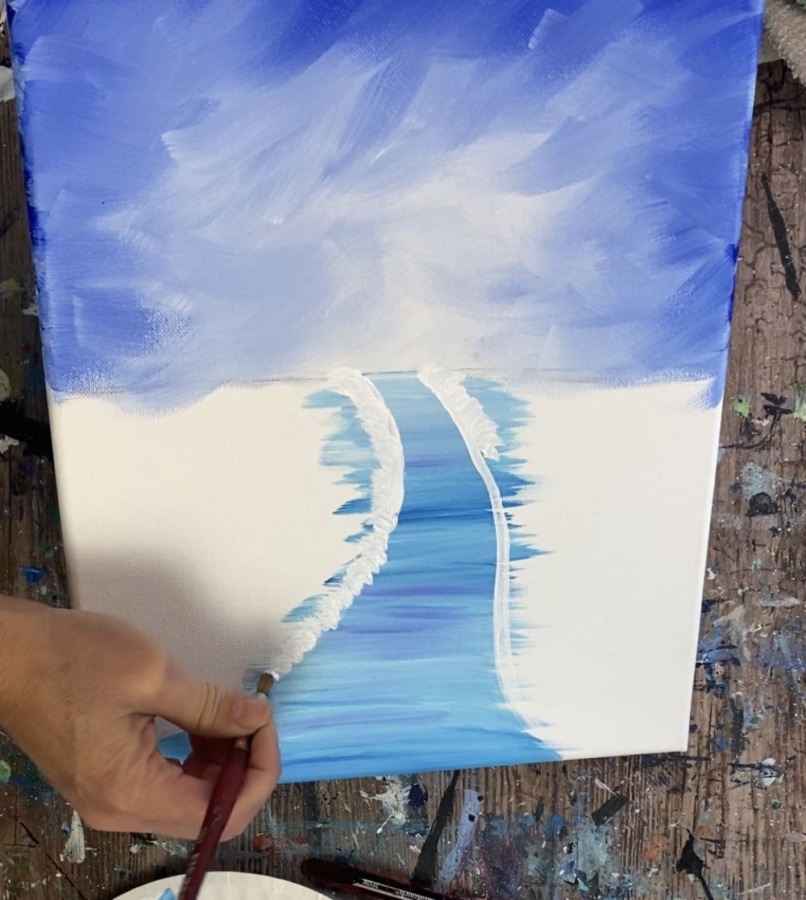
Then start painting the rest of the snow on the left and right of the path. Start along the horizon line. Paint an uneven, slightly wavy land area that goes slightly above the horizon line. Then add a small amount of phthalo blue to the white. Paint long wavy and thick strokes with the light blue. Add different amounts of white and light blue to your brush as you paint the land.

The snow is a combination of pure white and some light blue (use phthalo blue). This will allow the snow to look like it has different shadowy areas throughout the landscape. Add a little extra blue towards the bottom of the landscape and blend it up.
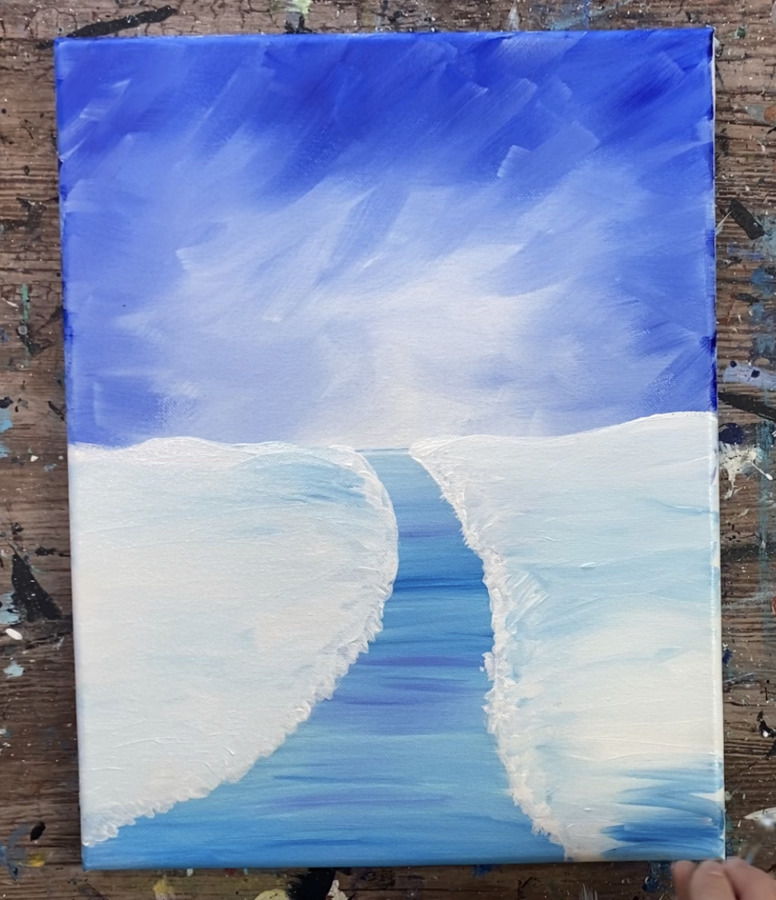
Use the tip of your brush to “stipple” some textured areas throughout the snow area.
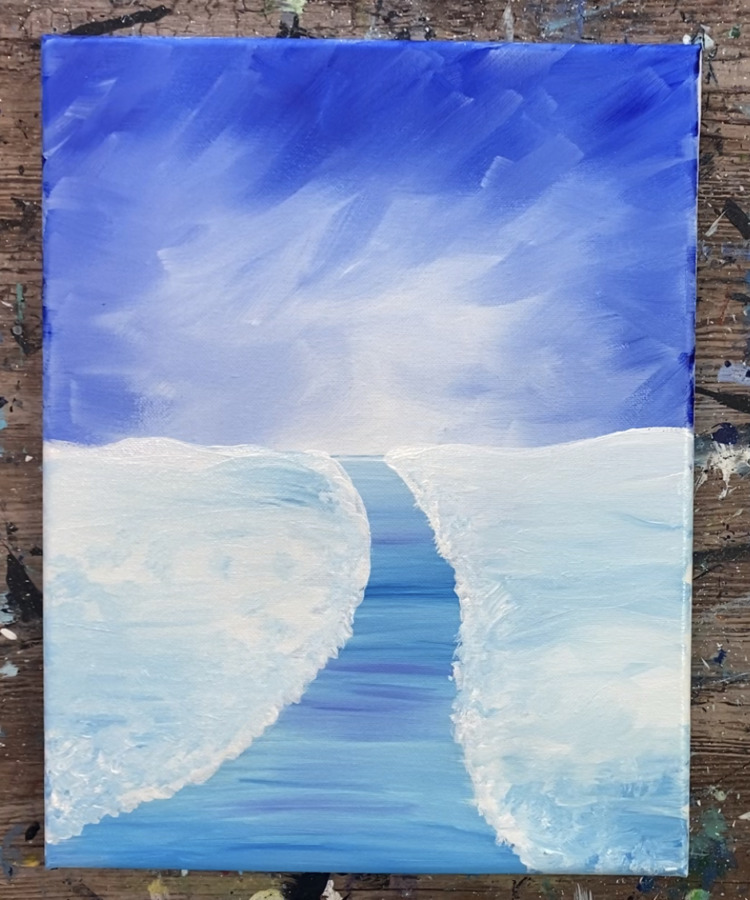
Wait for your painting to dry or use a hairdryer to dry it real quick before going onto the next step.
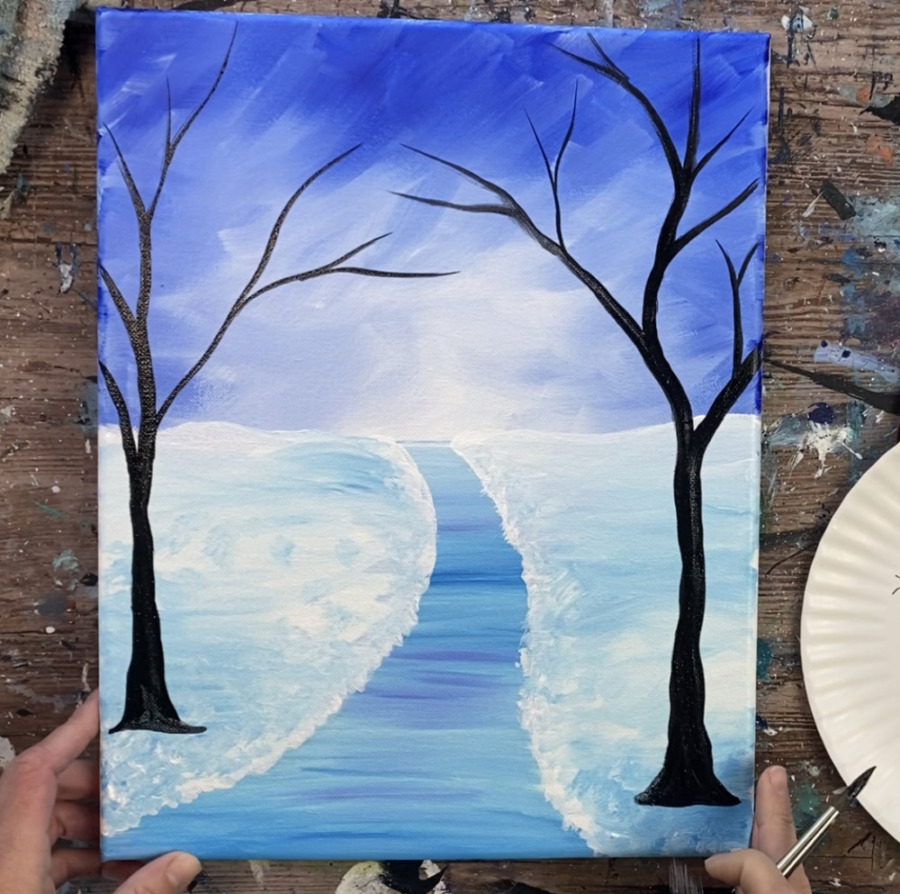
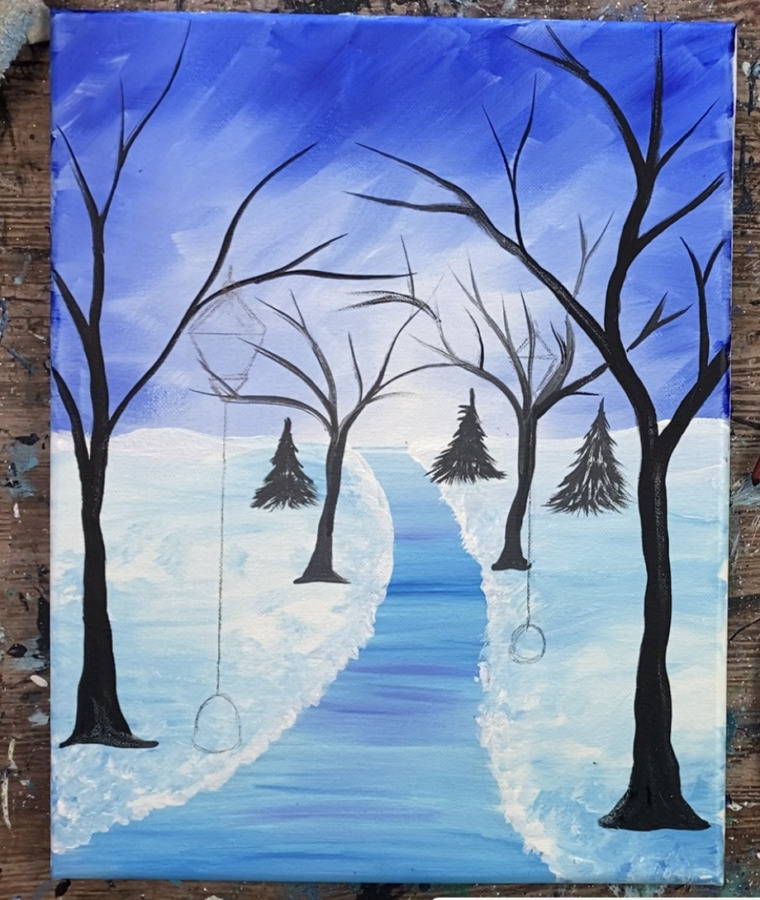
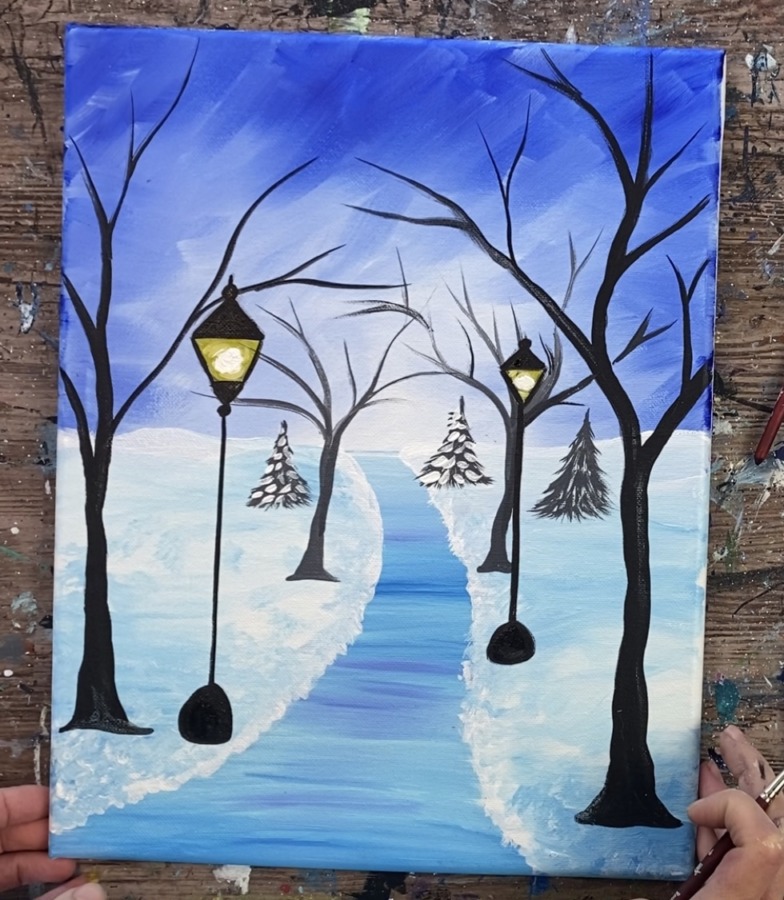
5. Paint The Trees
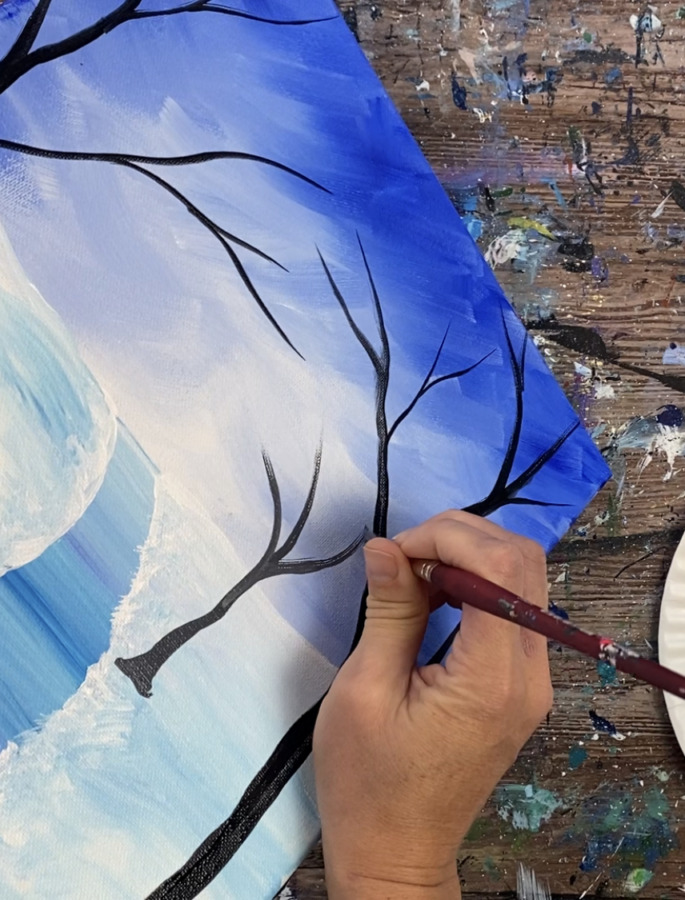
Load your palette with “mars black”. Use your #8 round brush (or preferred brush for branched trees). Slightly water the black down. Paint the trunk of the tree so that it starts out wide on the bottom.

Then paint the tree so that the branches start branching out above the horizon line. Paint 2-3 main branches. Then paint smaller branches. To get your branches to go thin and to a point, release the pressure of the brush and use only the very tip of the bristles so the stroke is thin.
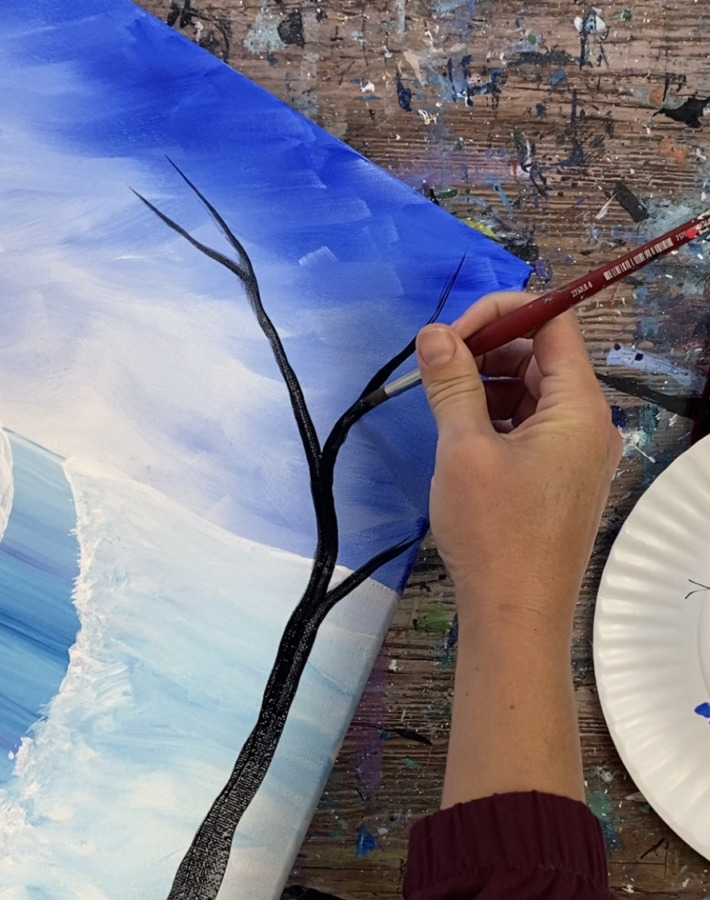
You can paint as many branches as you want to. Make sure at least one of the main branches goes over the path.
Then paint another large tree using the same technique on the left side of the path. Make sure the branches go well up into the sky and at least one of the main branches overlaps the path.
Then mix titanium white into the mars black to make a dark to medium gray.
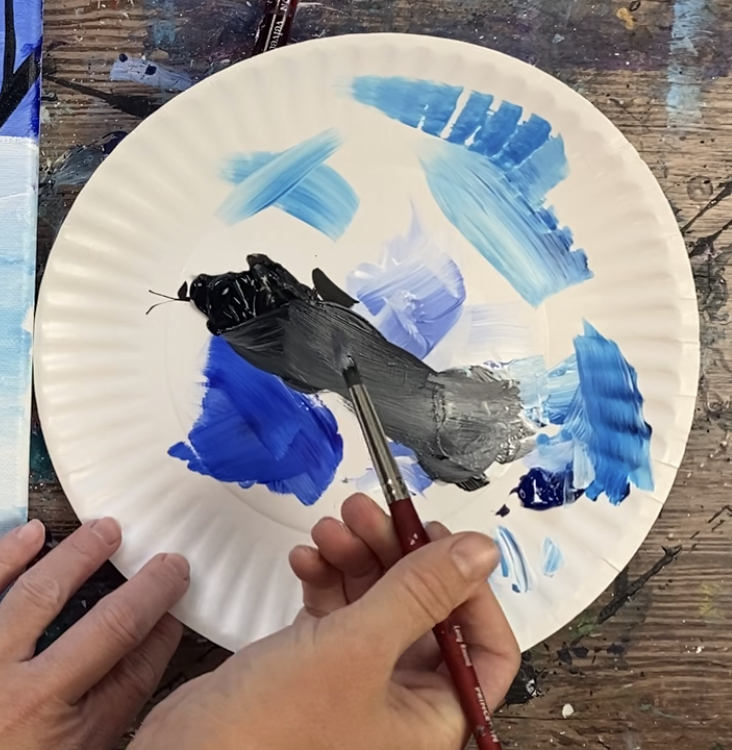
Use the dark gray to paint two smaller trees further down the path. The tree should be shorter with branches that do not go up as far as the two larger trees in the front.
Paint another similar smaller tree on the other side of the path.
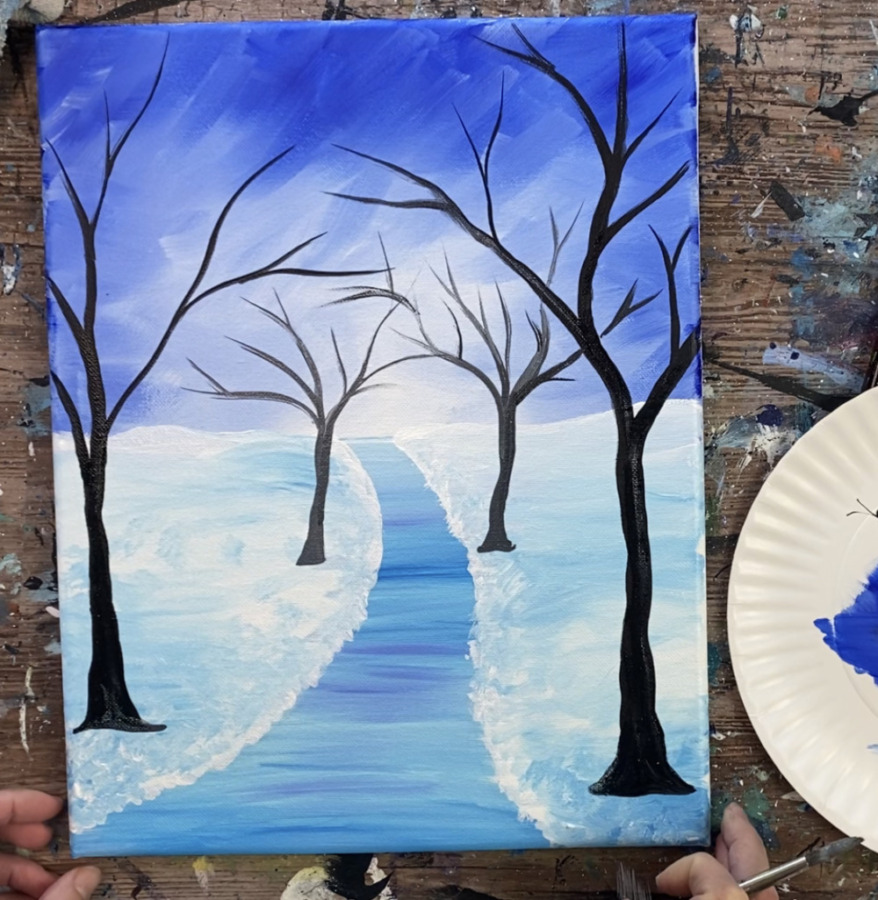
Then paint a small pine tree further down the path just below the horizon line. Use the dark gray color and either the #8 round or a #4 round.
Start at the top and paint the point of the tree. Then stroke each of the branches downwards forming a conical shape tree. You can do this with a smaller round brush if needed.
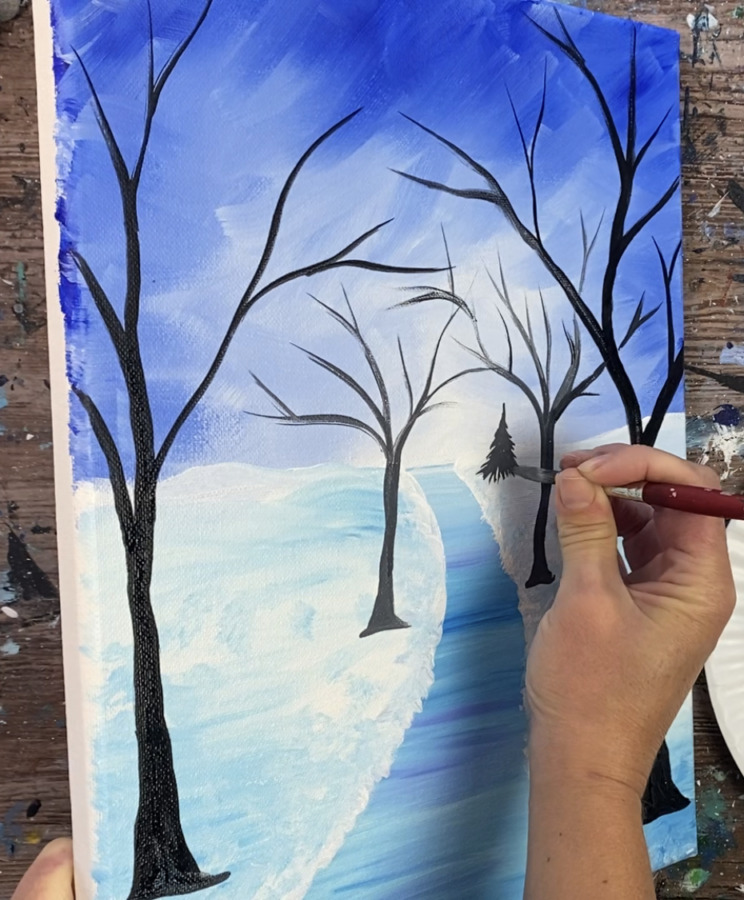
Paint another small pine tree on the other side of the path.
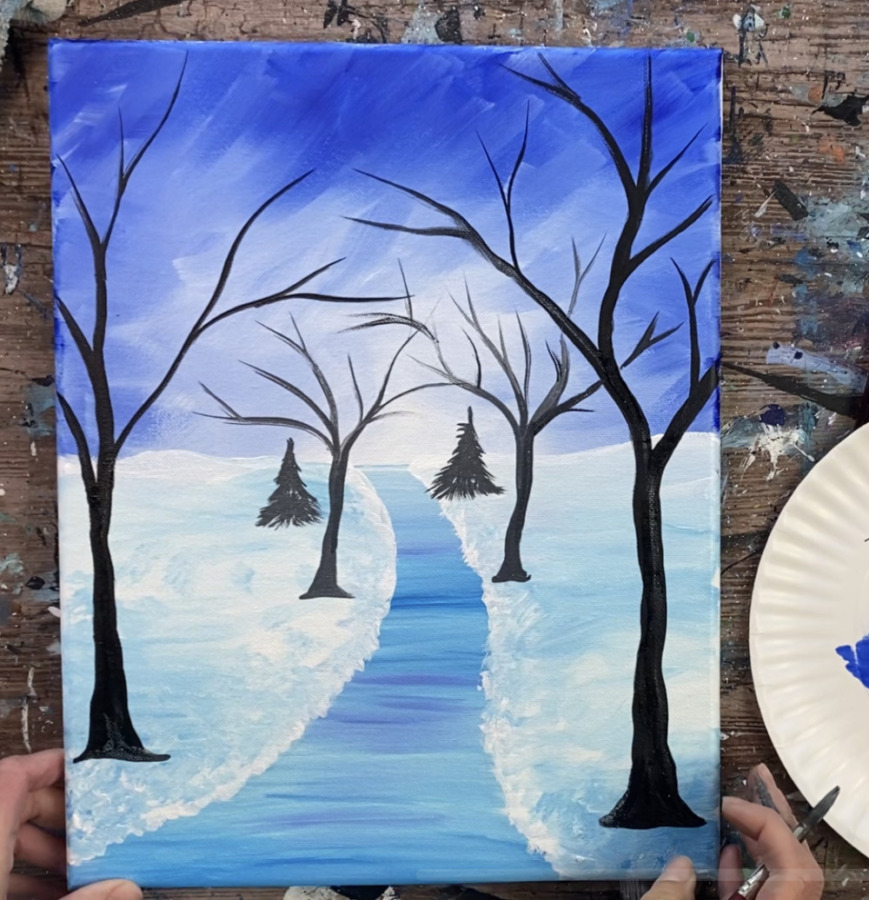
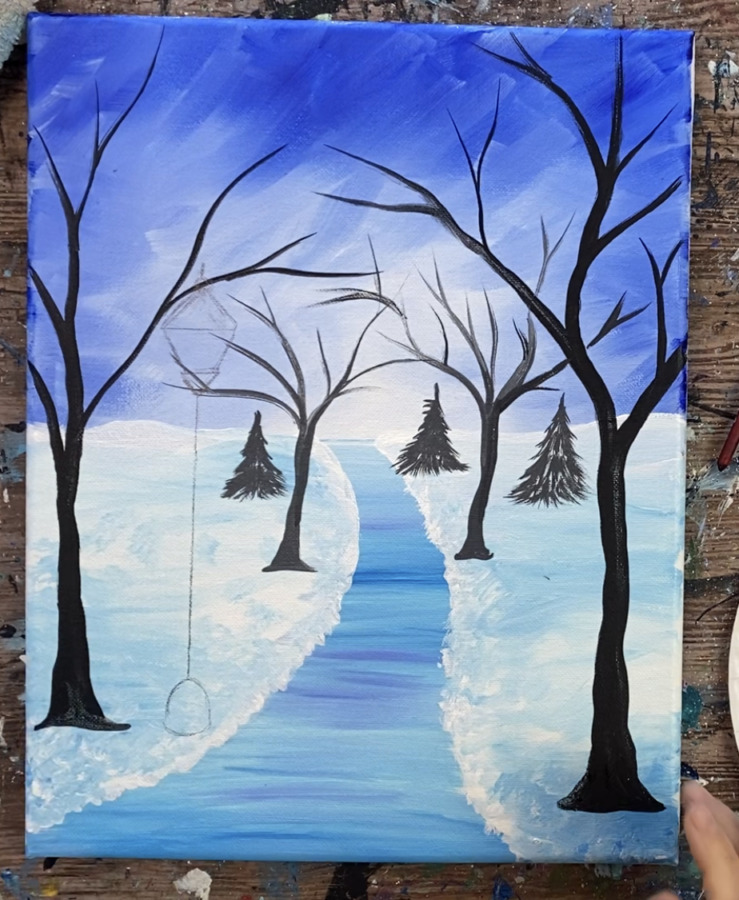
Then paint a third tree slightly bigger and closer. You can paint more pine trees if wanted, however, keep in mind that there should be room left for the two lampposts.

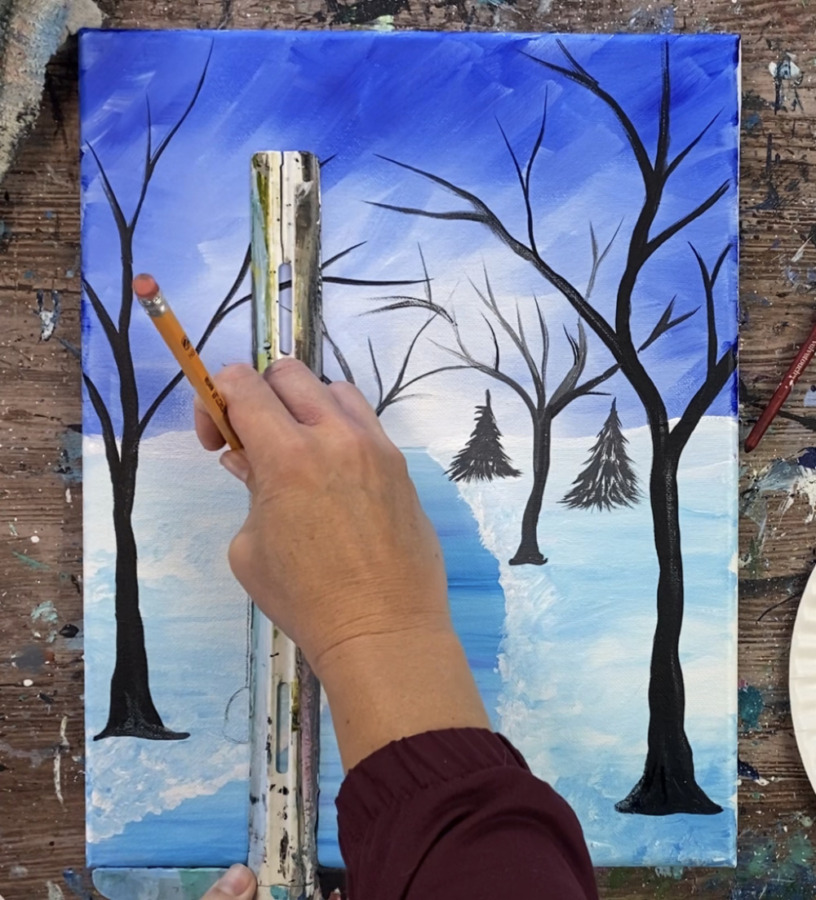
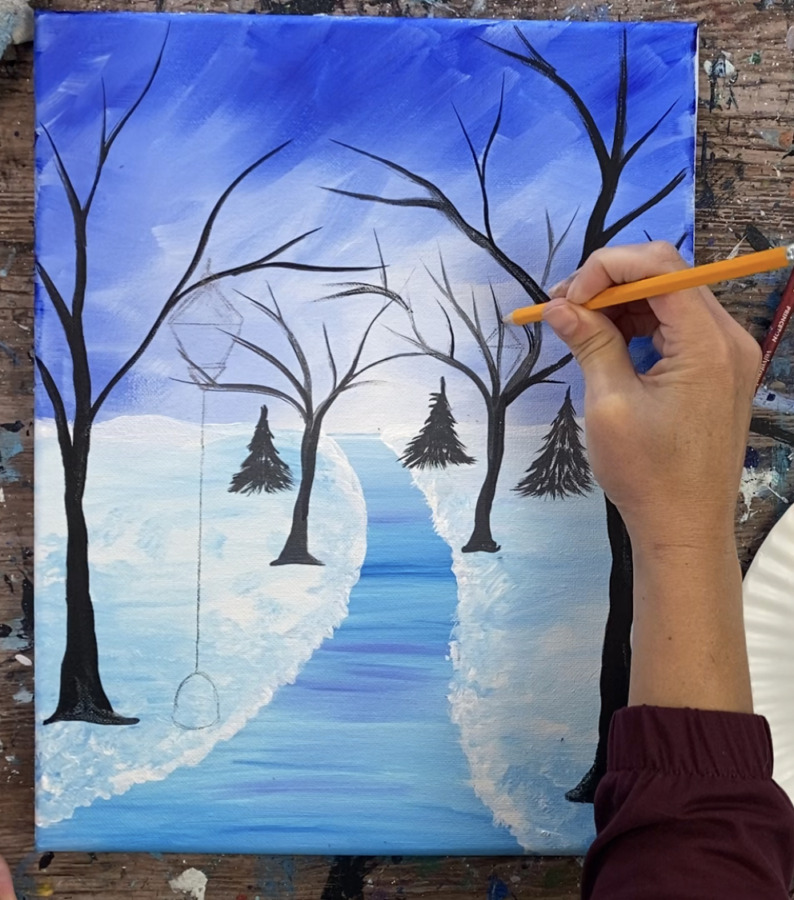
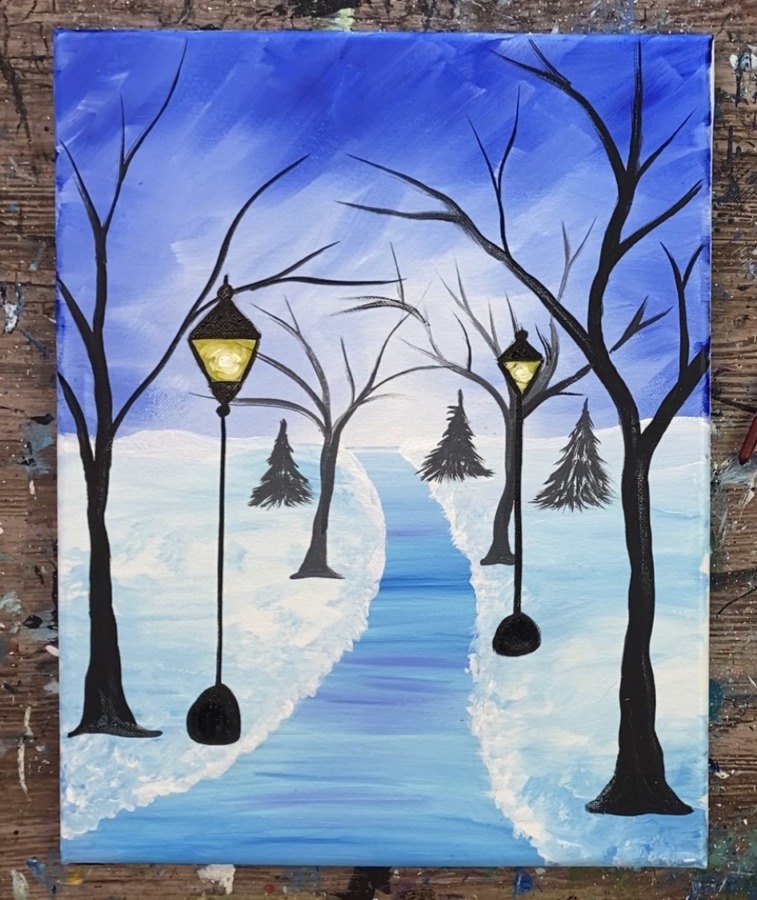
6. Draw & Paint Lampposts
Draw the base of the lamppost with a pencil.
Then use a t-square ruler to draw a vertical line for the pole of the lamp.
Then draw an upside down small triangle for the base of the lamp. Draw two lines going vertical outwards.
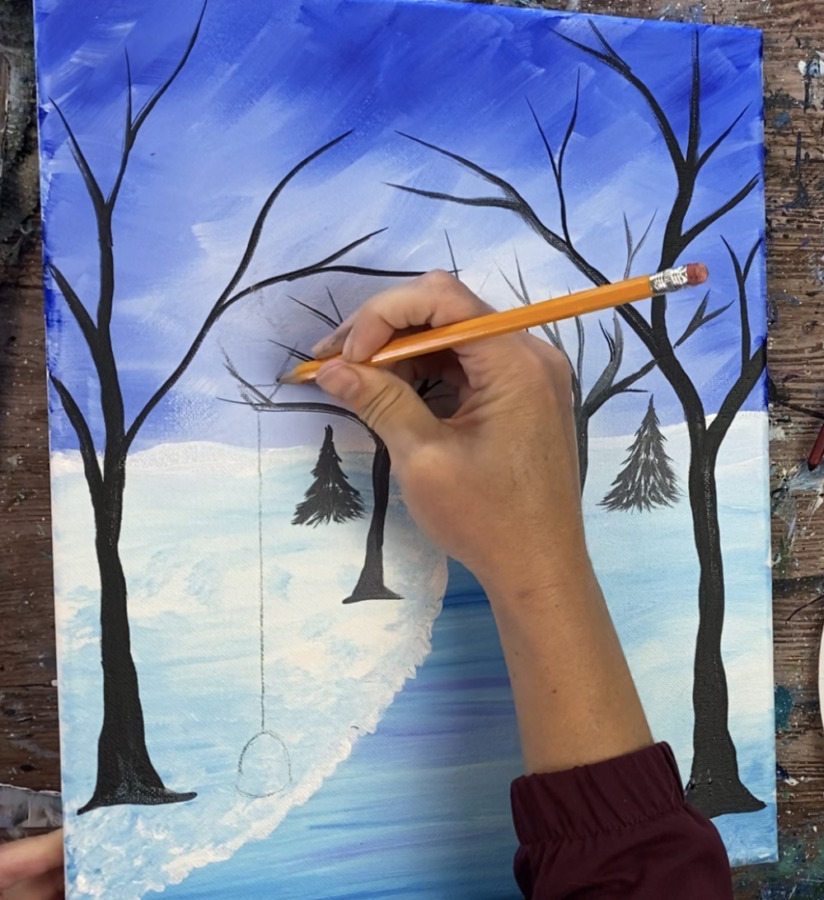
Draw a triangle on top of that. Then draw a small circle and a small notch on the very top of the lamp.
Next, draw the smaller lamppost using the same technique. This lamp is further down the path so it should be slightly smaller.

Use a #4 round brush and paint the inside shape of the lamp with cadmium yellow medium.
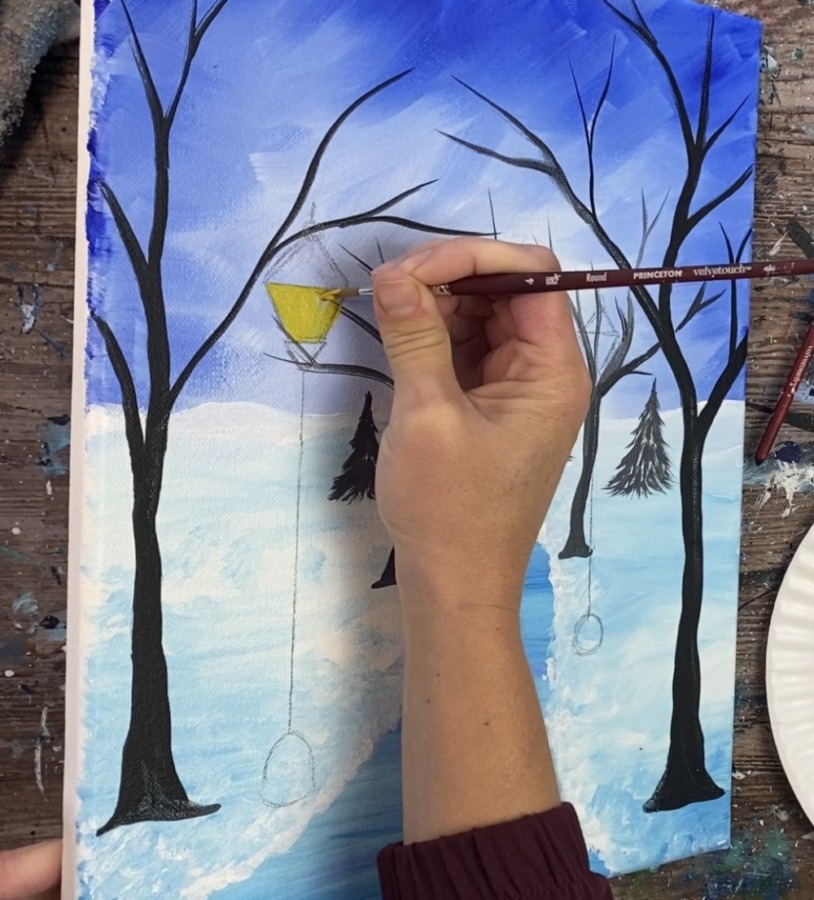
Repeat for both lamps.
Then paint a small white circle on the inside. Blend that white a little bit with the yellow.

Paint curved white strokes on the outer part of the white and blend with the yellow. Do not go outside the shape/lines of the lamp.
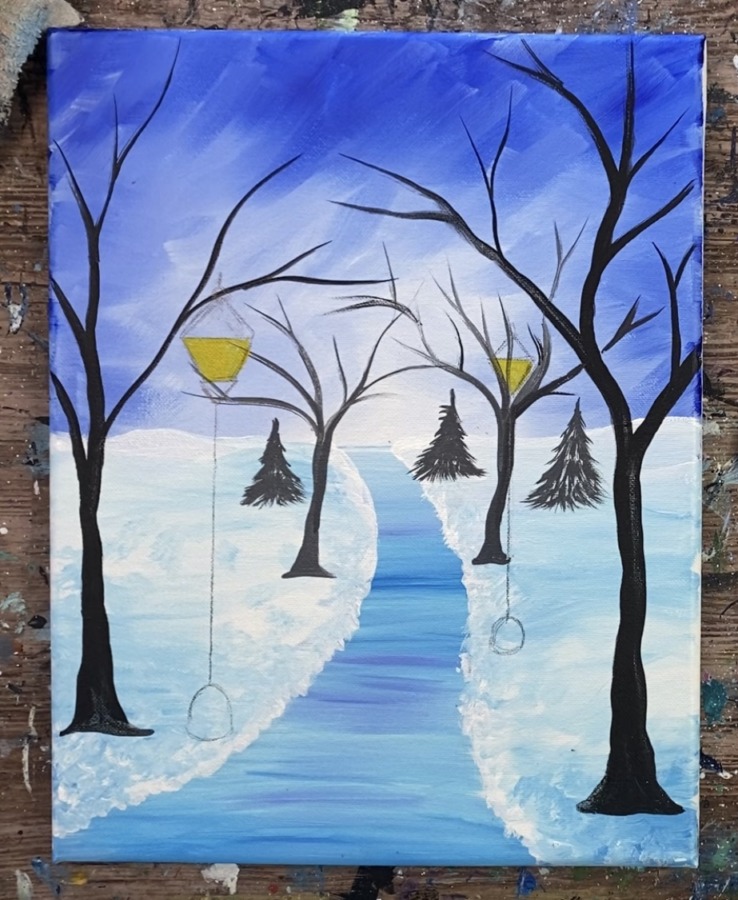
Then use the #4 round brush and mars black to paint the lamp pole, base and base of the lamp.
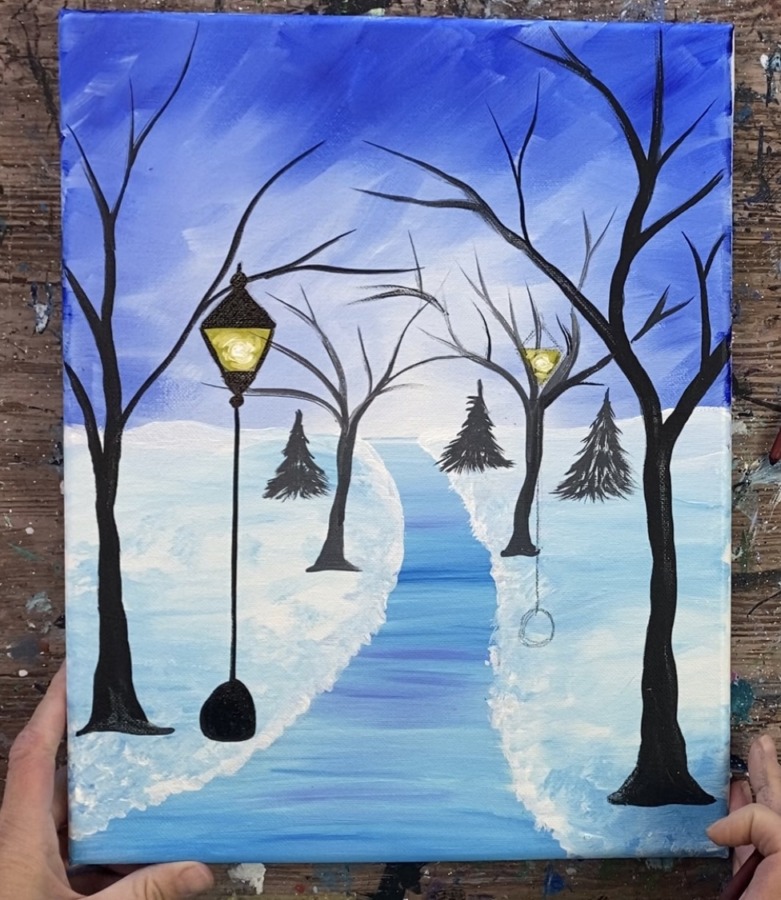
Then paint the other lamp black lines.
7. Paint Snow On Trees
Paint the snow on the branches using the #4 round brush and titanium white. Start at the bottom and paint small white strokes. Then work your way up. Do not cover all of the pine tree, leave a lot of the dark gray showing through.
Repeat for each of the pine trees.
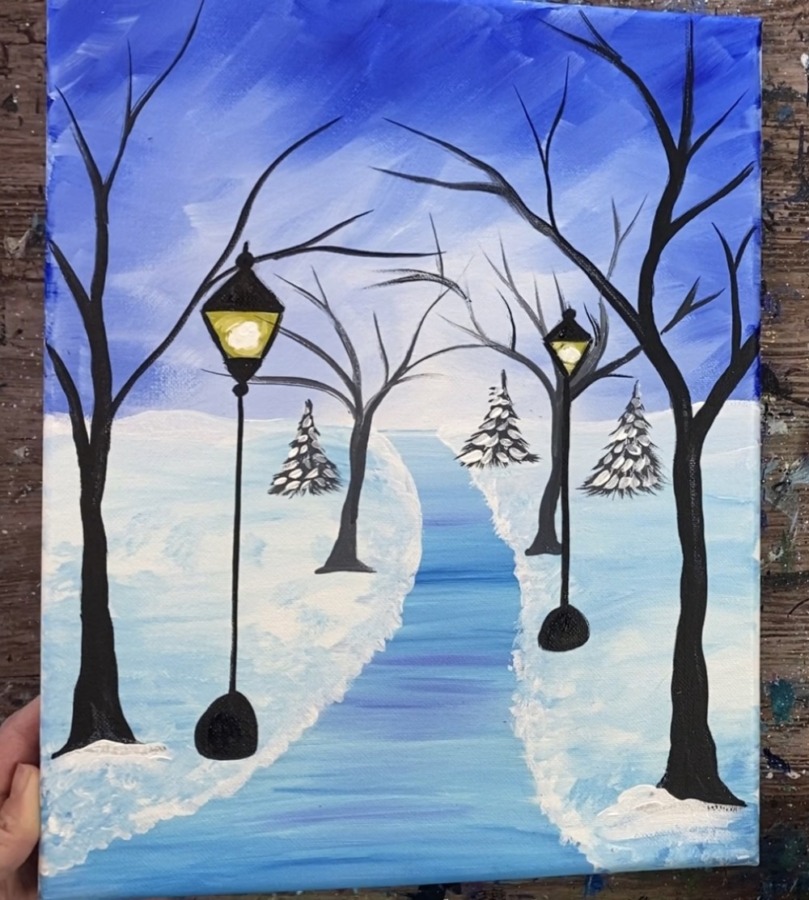
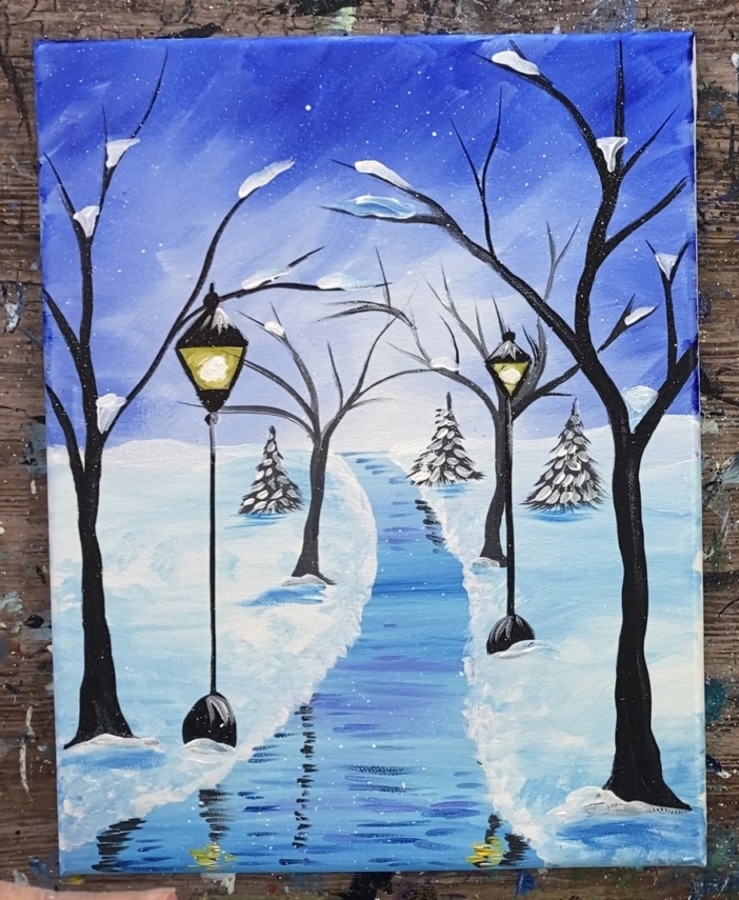
8. Paint Snow On Bottoms Of Trees, Shadows & Reflections
Use the round brush to paint a thick white area on the base of each of the tree trunks.
Then paint a watered down phthalo blue shadowy area under the pine trees. Do very subtle horizontal lines under the trees.
Then use a #4 round brush to paint thick white areas on some of the branches high up in the trees. You can add a little blue to some of the snow for shadow and color variation.
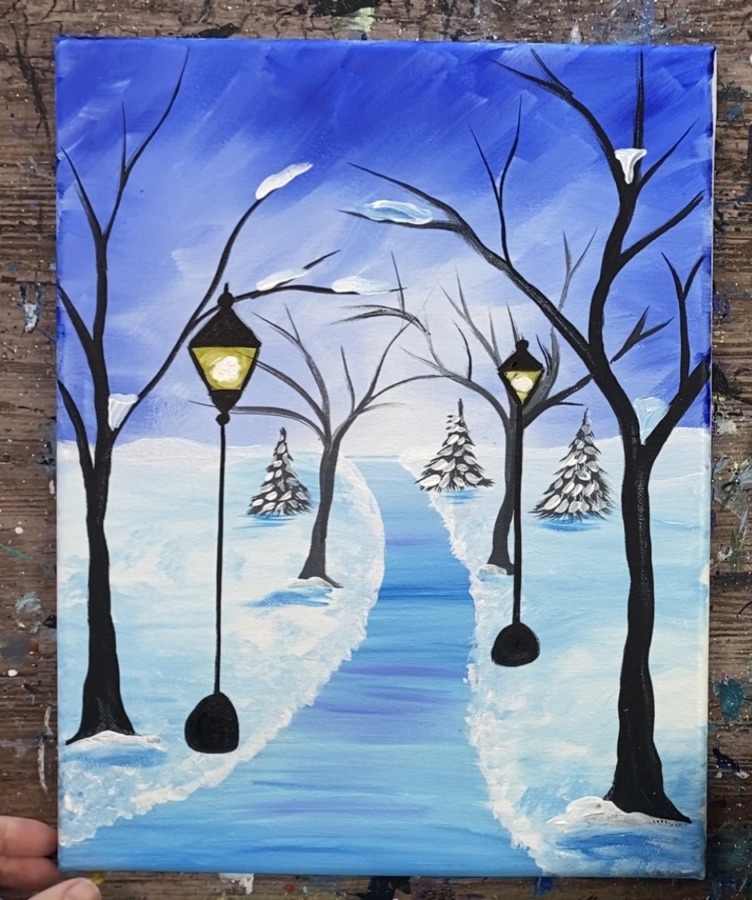
You don’t have to add snow to all of the branches.
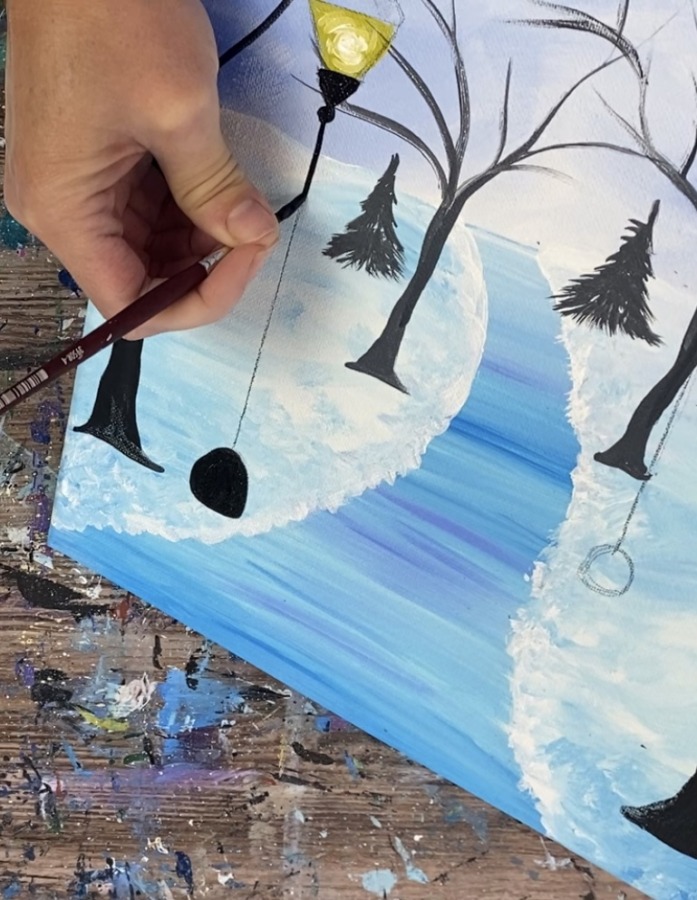
Then add snow piling up on the base of the lamps. Paint little diagonal lines on the top triangles of the lamps for ice and highlight.

Then use your #4 round brush and mars black. Water the mars black down to an ink consistency. Paint reflections under the lampposts and trees that go vertically down onto the path.

Paint small horizontal marks forming a vertical area of the reflection.
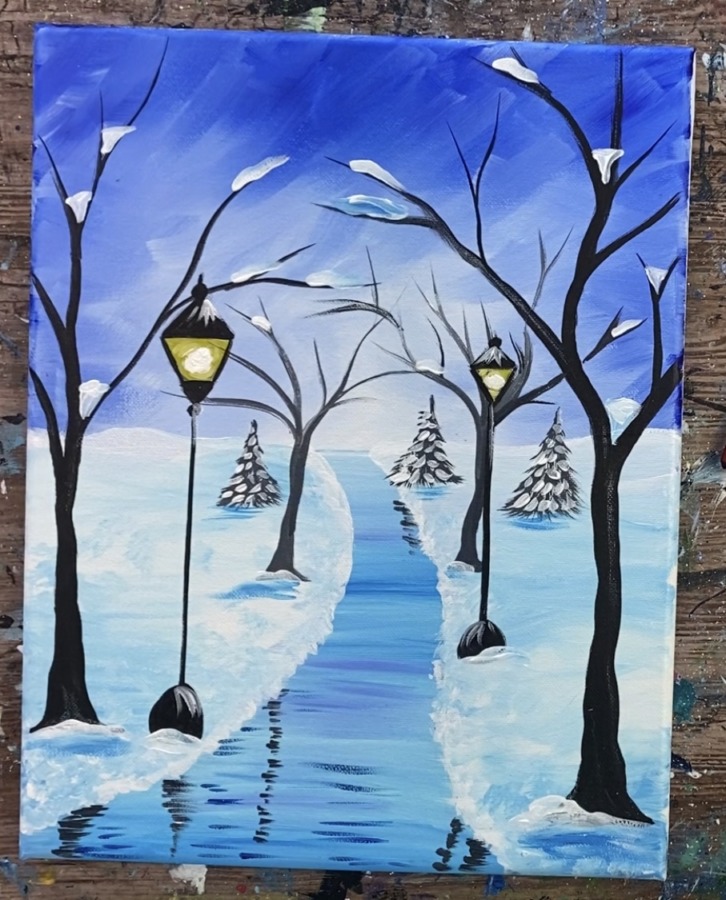
Do this wherever a tree or lamppost may be reflecting on the path. Then paint small horizontal marks with the phthalo blue to add more color to the path. Paint some horizontal marks with light blue violet as well.
Paint some yellow and white reflection on the bottom where the light from the lampposts may be reflecting.
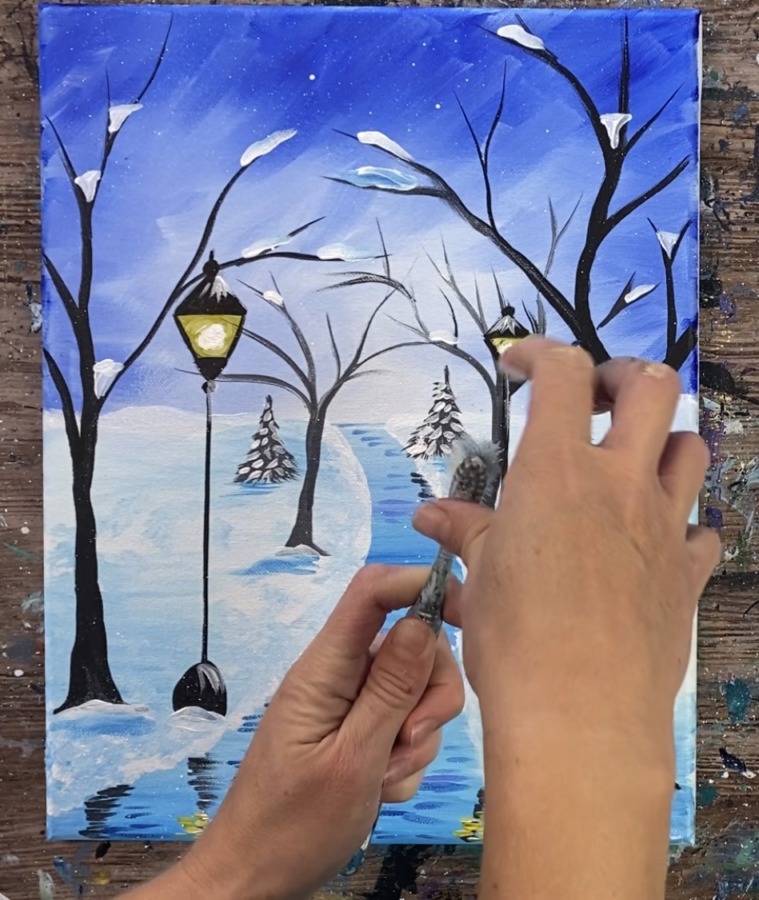
9. Paint Falling Snow
Use a toothbrush and titanium white to splatter little tiny dots of snow all over the landscape.
10. Paint Wreaths
Use your #4 round brush and hooker’s green hue permanent to paint the wreaths on the lamps. Start out by painting a circle towards to top of the pole of the lamp.

Then paint small little “x strokes” along the circle to create the texture of the wreath. Add some titanium white on top of that green.
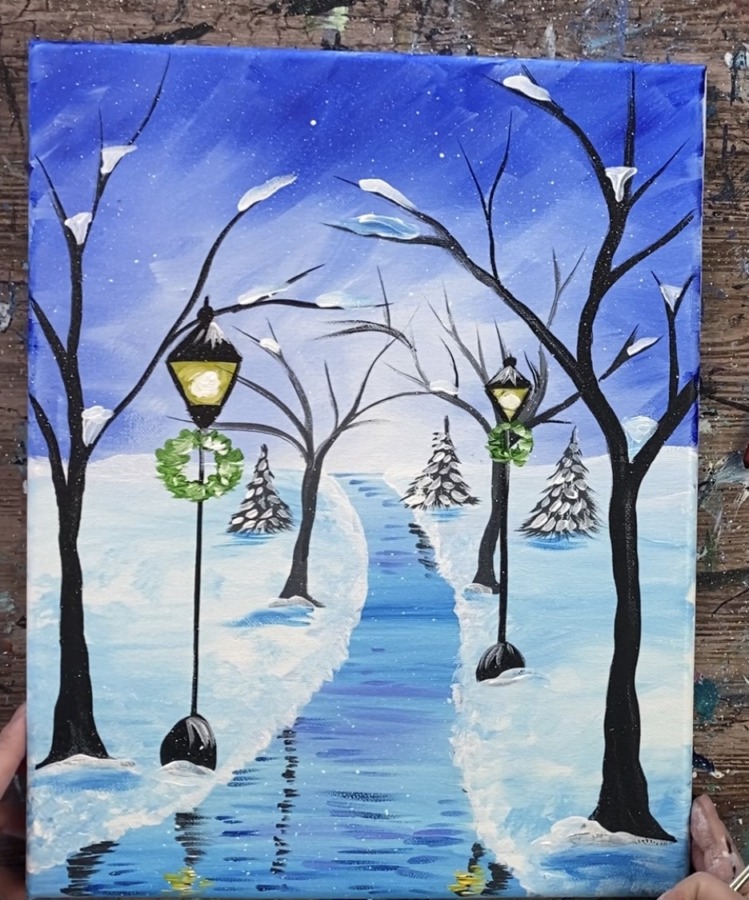
Then use your #4 round brush to paint small little berry dots on the wreath with pyrrole red. Use the tip of your brush to paint the dots.
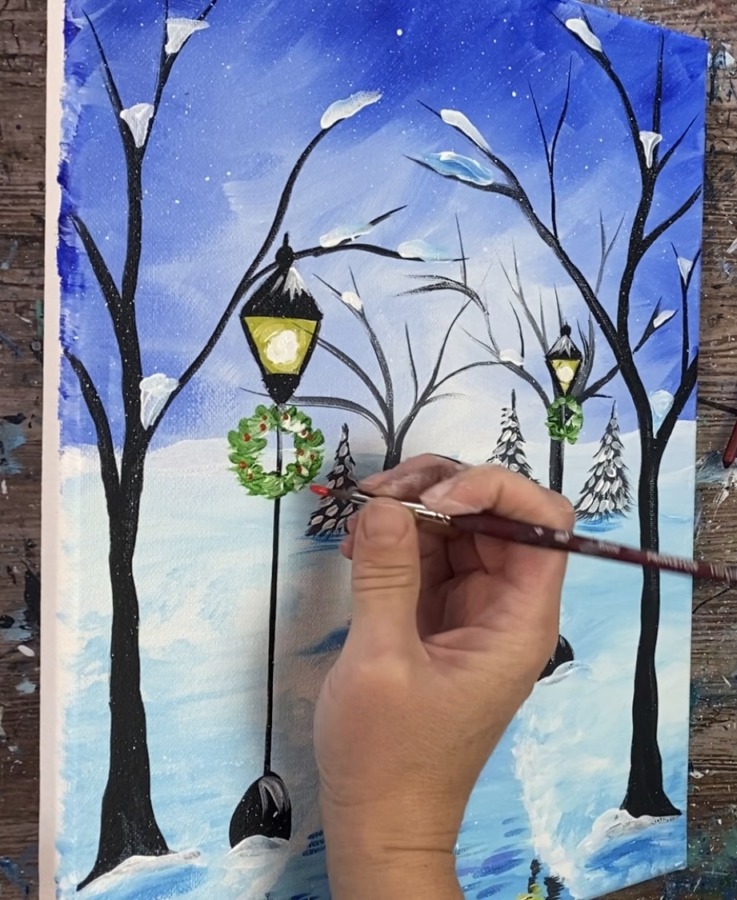
Then paint two bows on the bottom of each of the wreaths. Paint the string from the bow to look like it is blowing to the left.
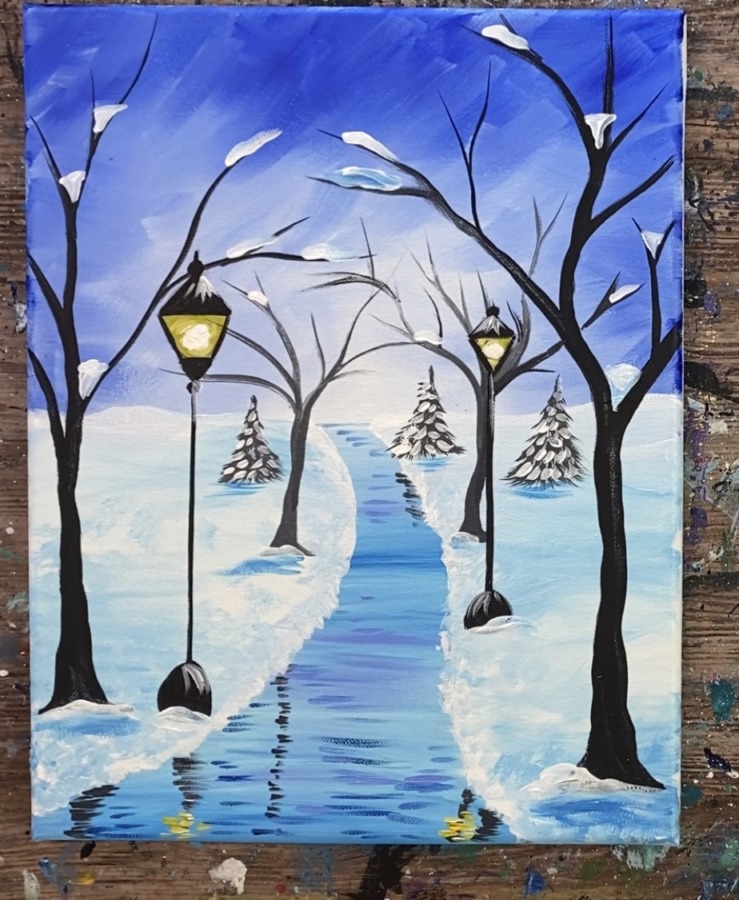
11. Paint Lights On Trees
To do the lights, mix titanium white with cadmium yellow medium. Use the tip of your round brush to paint small dots along the trunk of the tree.
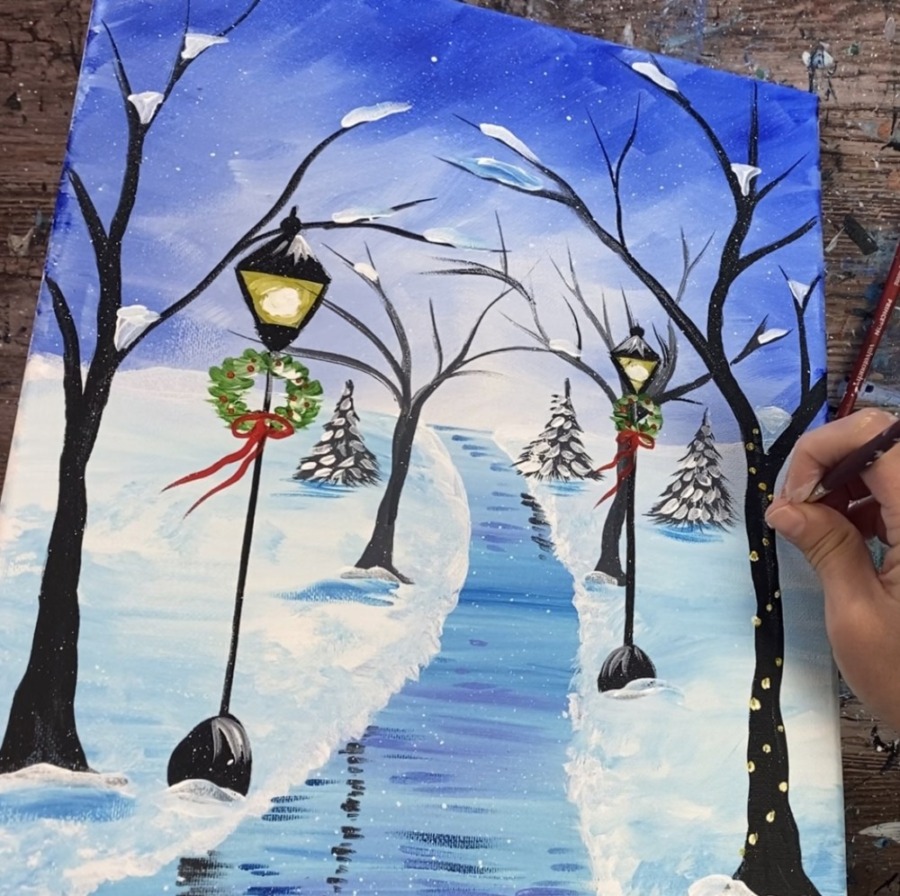
Then add small yellow dots to the smaller branches towards the top.
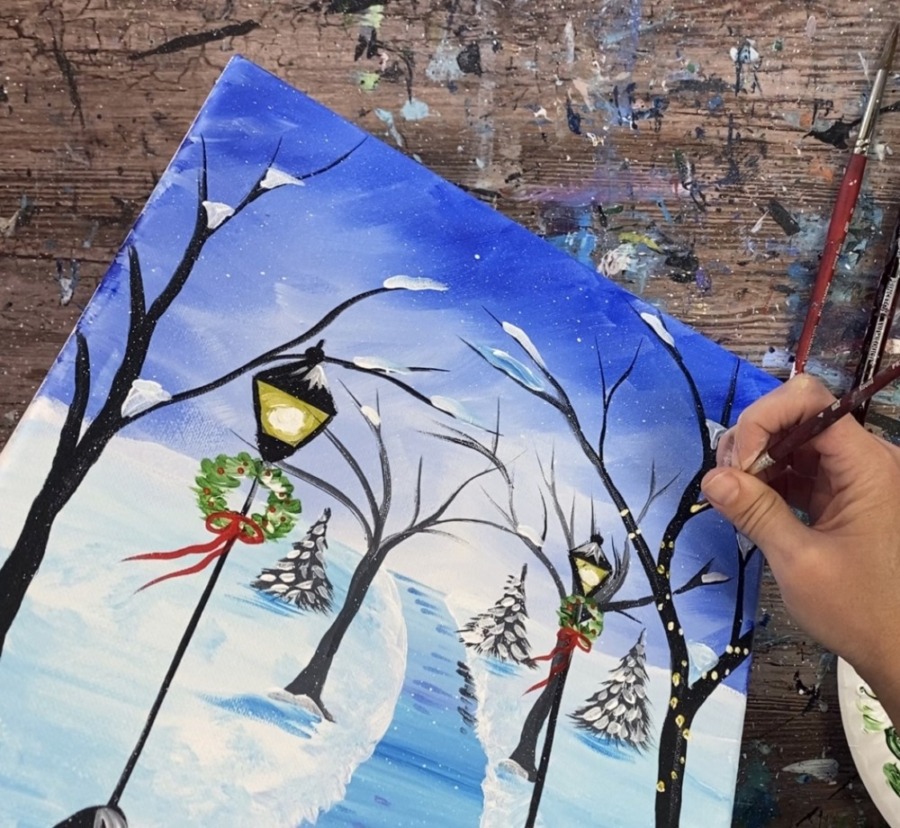
You don’t have to cover all the branches with lights.
I chose to only do lights on the front two trees. You can add lights to the other trees if wanted.
Paint some reflections with the yellow in the snow under the two trees and a little bit of the reflection on the path.
Finished!
That’s it! Sign your name and show it off!
Share your art here:
Did you do this painting? You can share on one of the social media outlets below!


