

Would you like to save this?
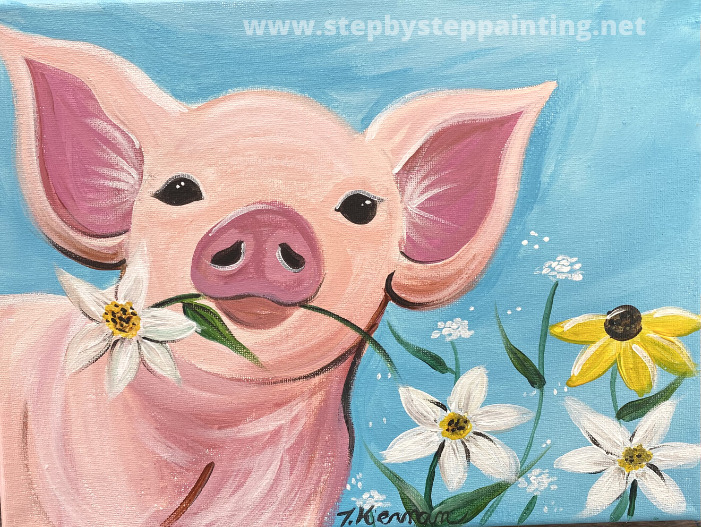
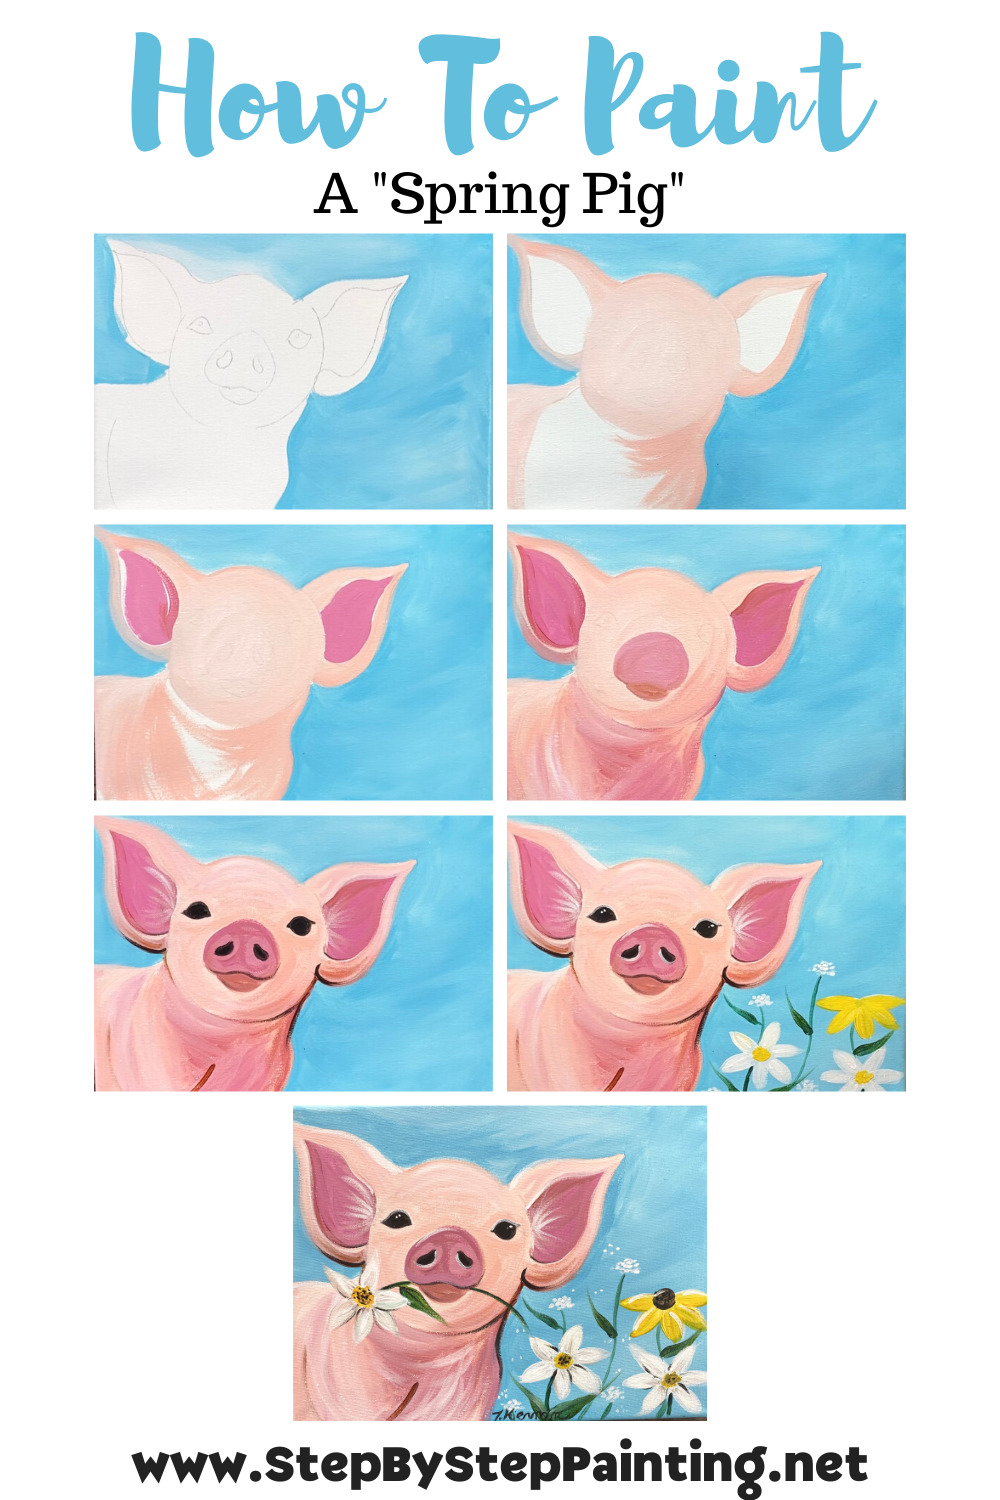
Learn to paint an adorable spring pig painting on a 9″ x 12″ canvas (or any similar canvas size).
This pig painting tutorial is placed at an “intermediate level” because of the blending of the different pinks in the pig. It can, however, be simplified and you do not have to render the pig with that much detail & shading.
When you paint this, use my tutorial more as a guideline. If your colors blend differently that is okay! This painting is meant to be more expressive & illustrative and not realistic.
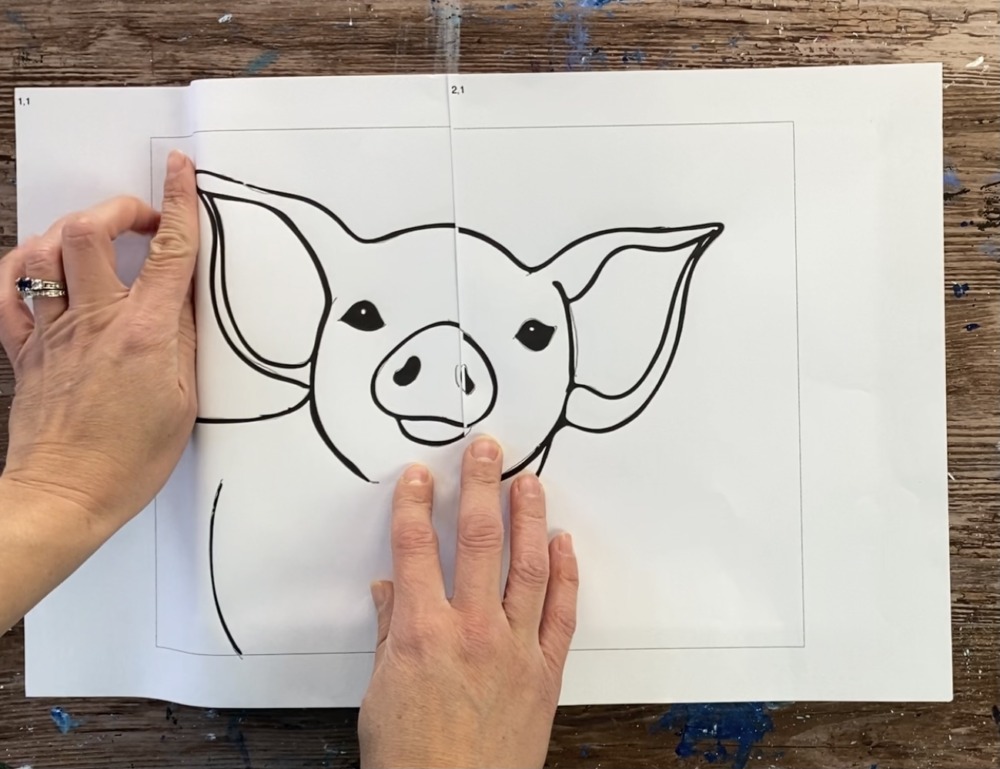
I am also providing you a free traceable template in a 9″ x 12″ size and an 8″ x 10″ size. I will also show you step by step in this tutorial blog post how to draw the pig if you prefer to draw the design and not use the traceable.
Enjoy and happy painting!
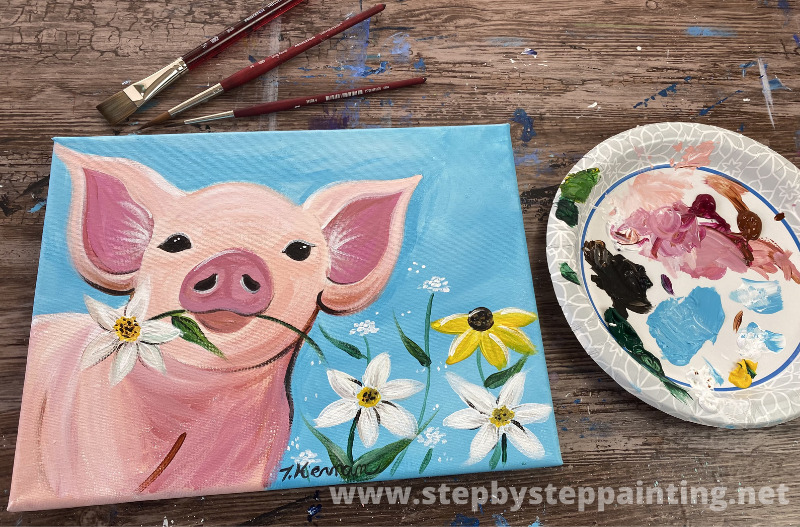
Materials For Pig Painting
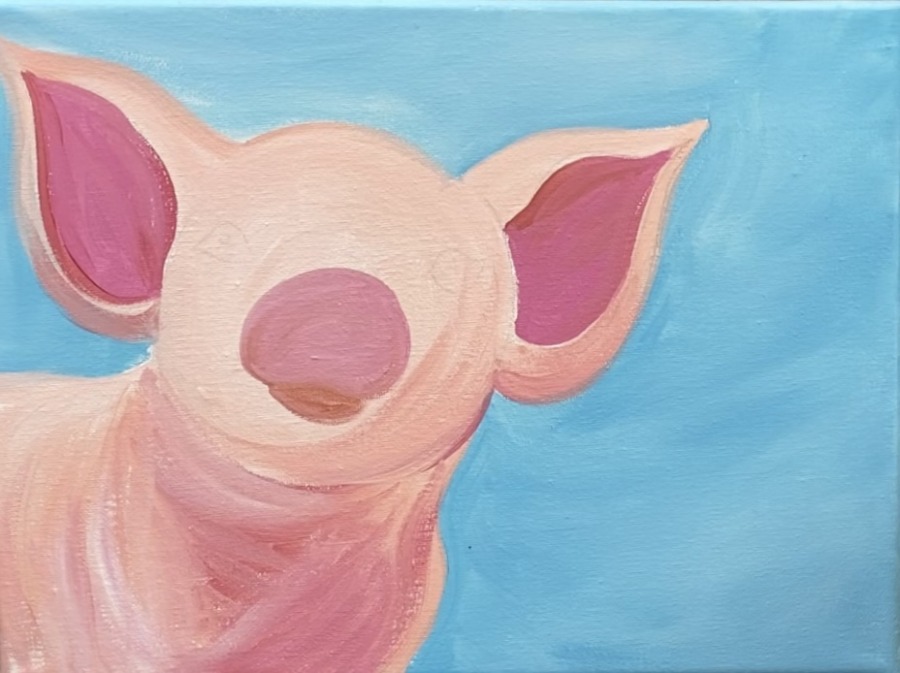
Spring Pig Acrylic Painting Tutorial
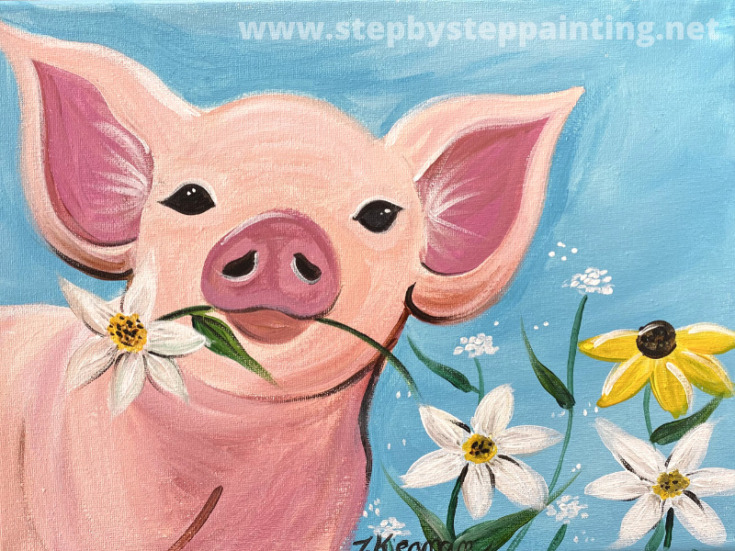
Learn to paint a spring pig acrylic painting on canvas.
Materials
- Acrylic Paints
- 9" x 12" Canvas
- Paint Brushes
- Palette
- Water Cup
- Graphite Transfer Paper
- Traceable
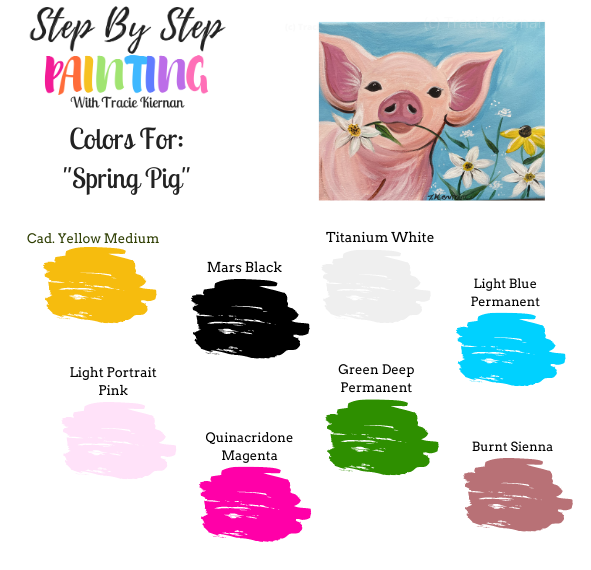
Colors
- Titanium White
- Mars Black
- Deep Green Permanent
- Cadmium Yellow Medium Hue
- Light Blue Permanent
- Light Pink
- Burnt Sienna
- Quinacridone Magenta
Brushes
Instructions
- See tutorial on www.stepbysteppainting for full tutorial!
Color Palette For Pig Painting
Directions At A Glance For Pig Painting
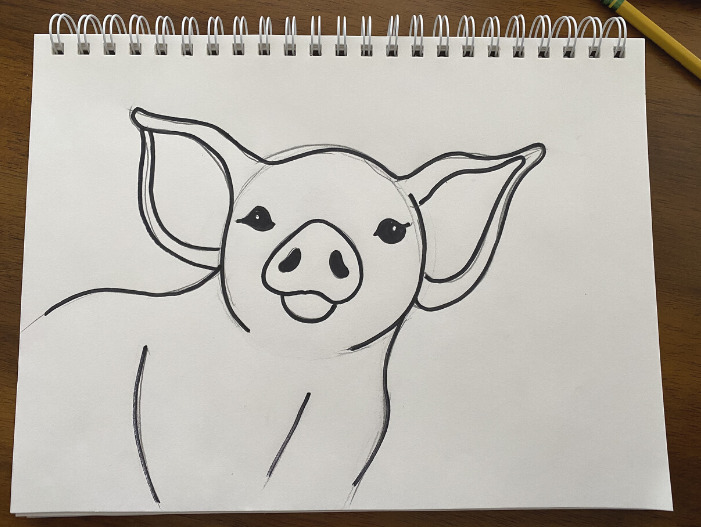
Traceable

Drawing
Sketch lightly at first. If you want, you can practice in your sketchbook before drawing on the canvas. Or you can make your drawing on the sketchbook and transfer it to the canvas.
The thing with this pig drawing is it may look like an alien at first! That is okay, once the details are painted in, especially details in the eyes, it will look more like a pig.
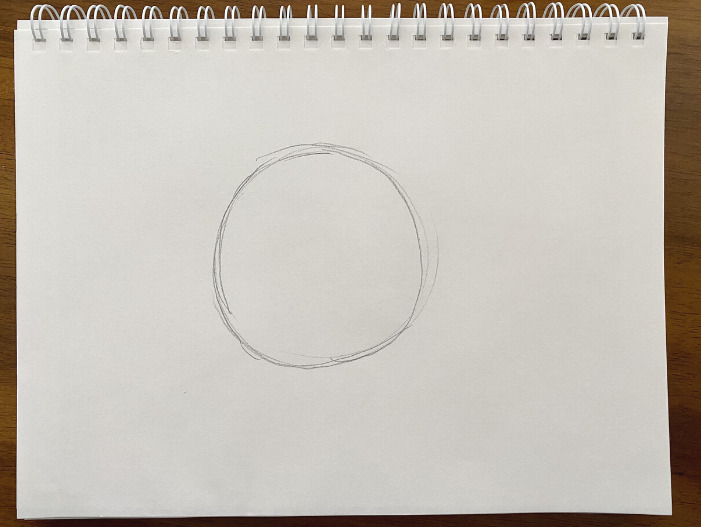
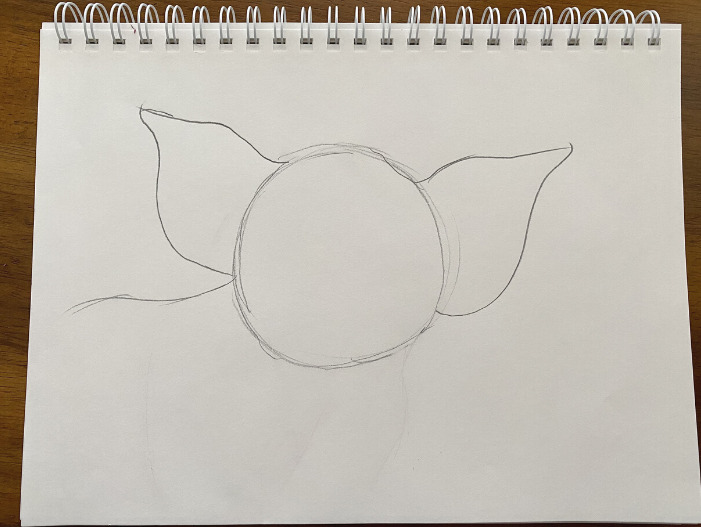
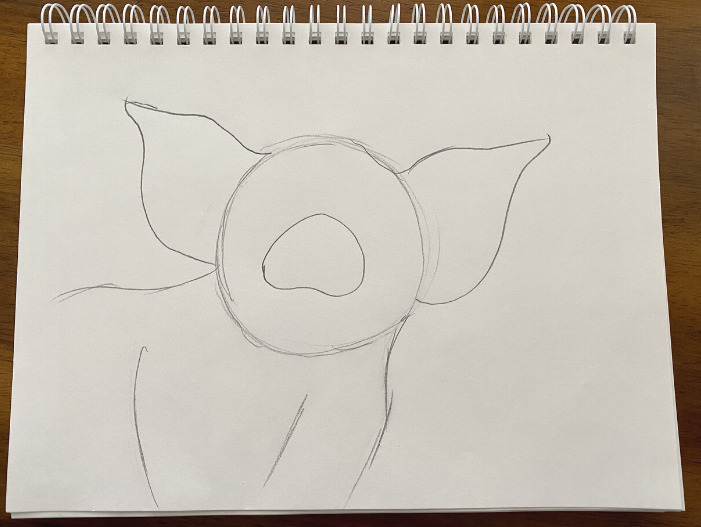
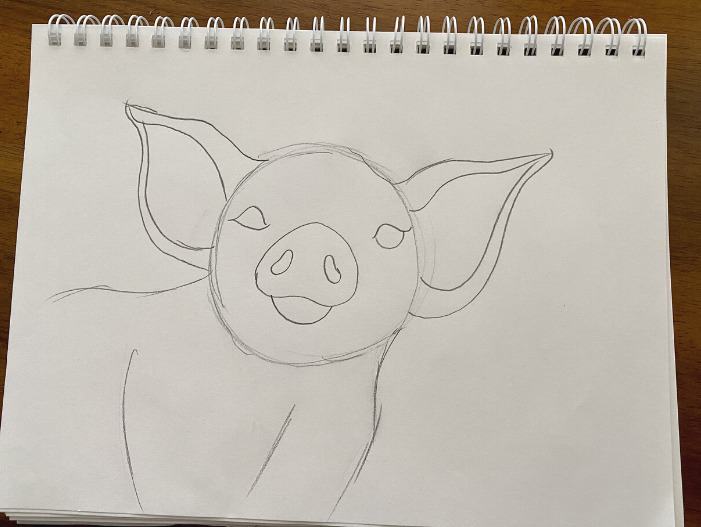
Tip: the eyes are not much higher than the top of the pig’s snout. The ears are very large and take up the whole side of the pig’s head!
Video For Pig Painting
Step By Step Instructions
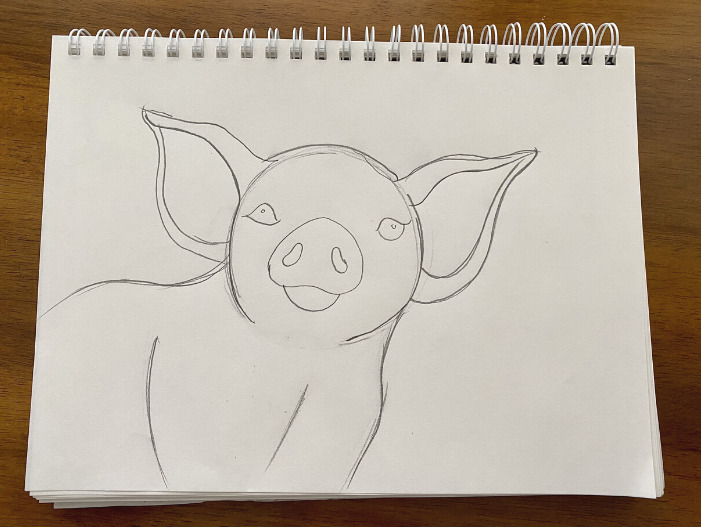
1. Draw or Transfer The Pig To Canvas
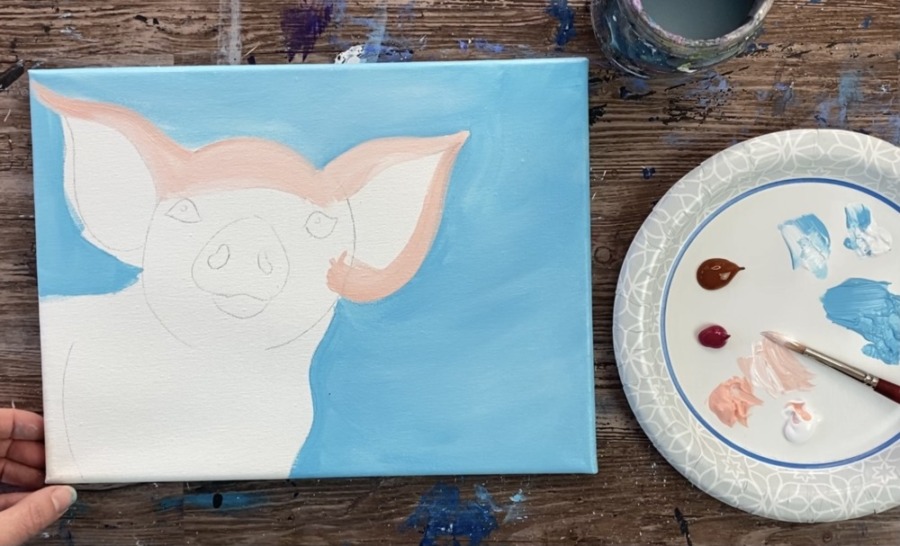
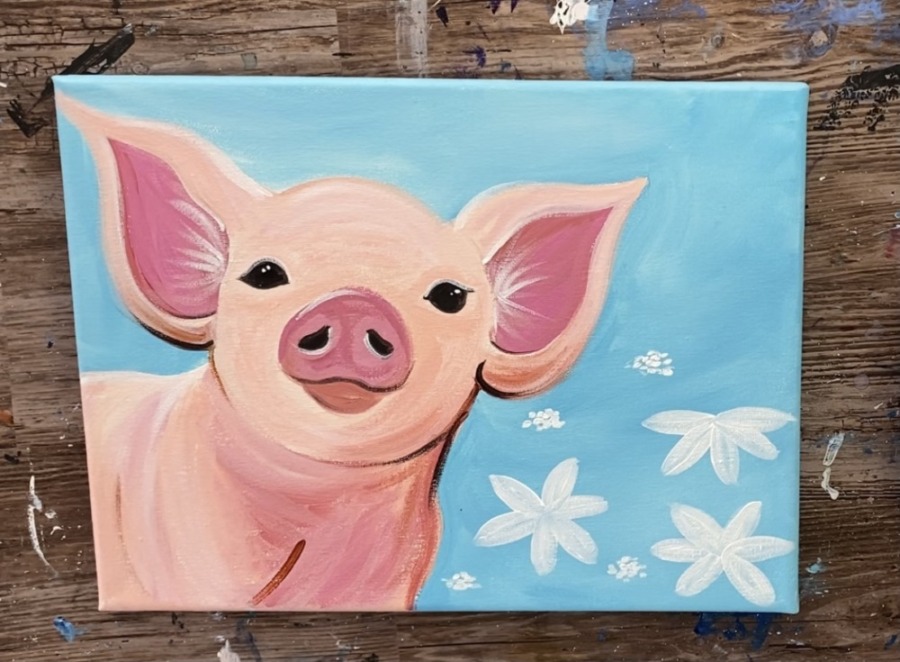
Use my traceable or freehand the pig onto the canvas. Note: I positioned the pig so the left ear touches the left side of the canvas.
Tip: make the facial features slightly darker with your pencil so it will show through the first layer of paint.
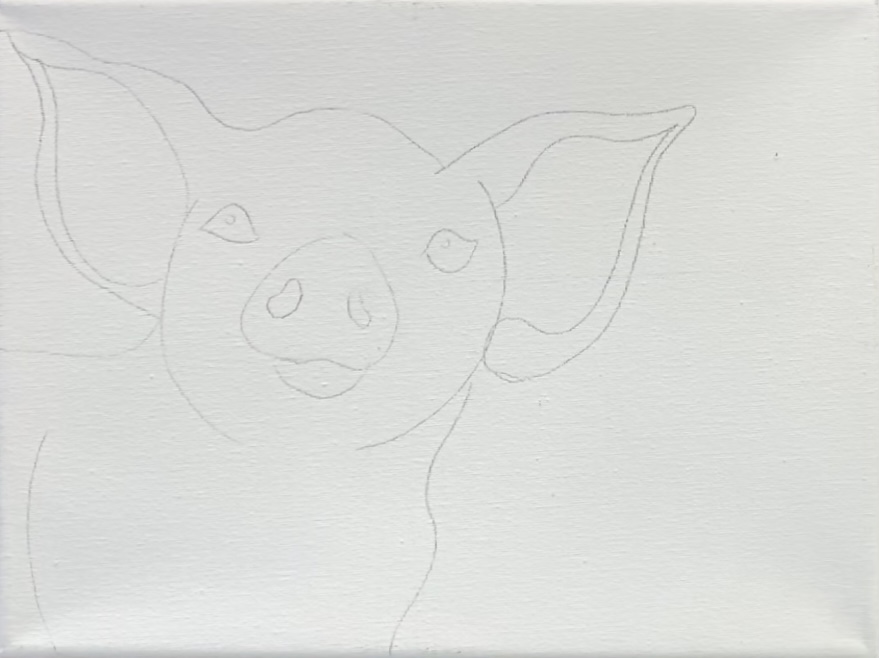
Also, fair warning, your pig will look more like an alien for awhile until we get all the details painted in, especially the eyes and snout!
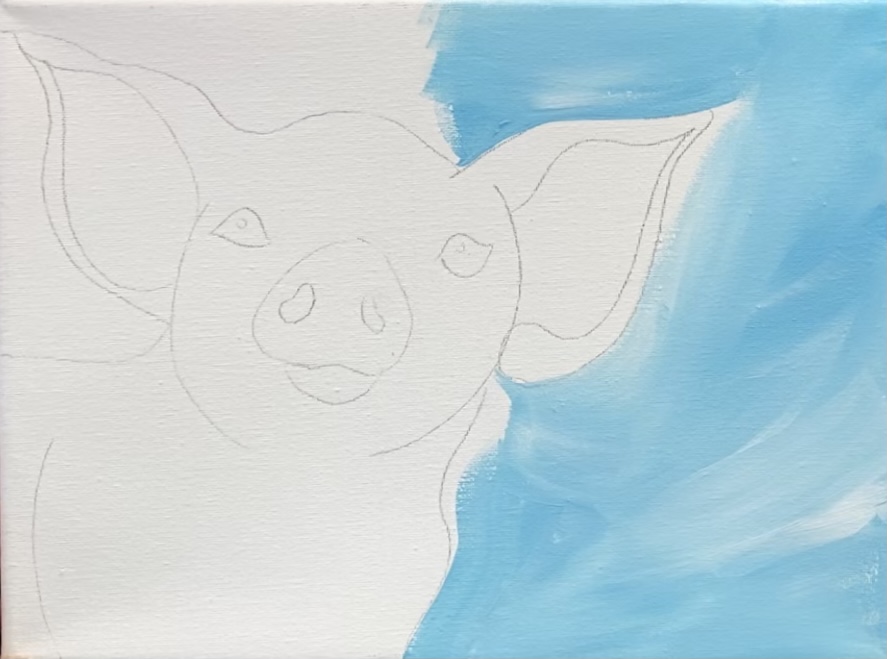
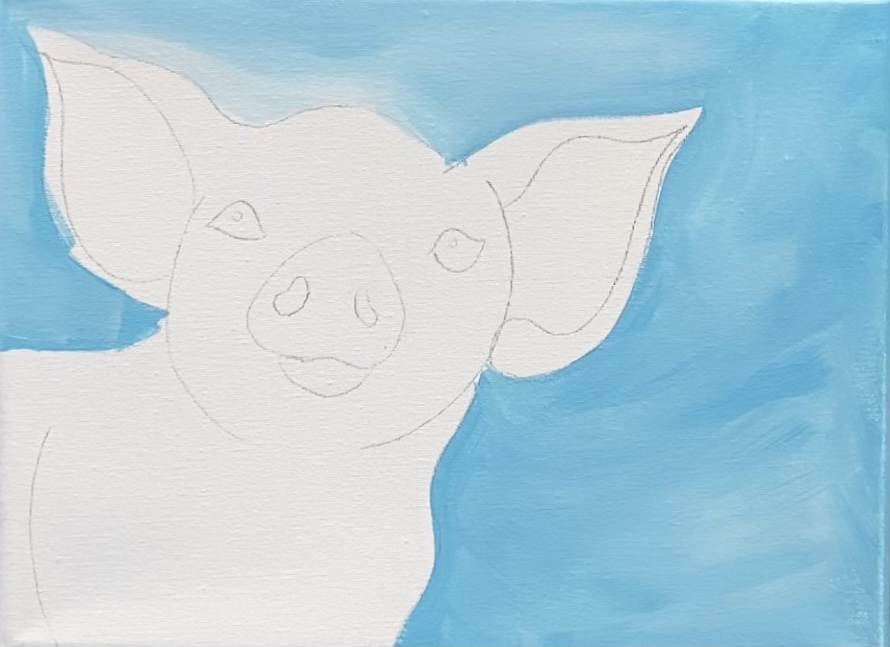
2. Paint The Background
Use a 3/4″ Flat Wash Brush and the colors: light blue permanent and titanium white. Double load the brush in both colors.
Paint the background all around the pig drawing. Go in angular strokes in all directions. You do not have to mix all the white and blue together, you can leave it unblended.
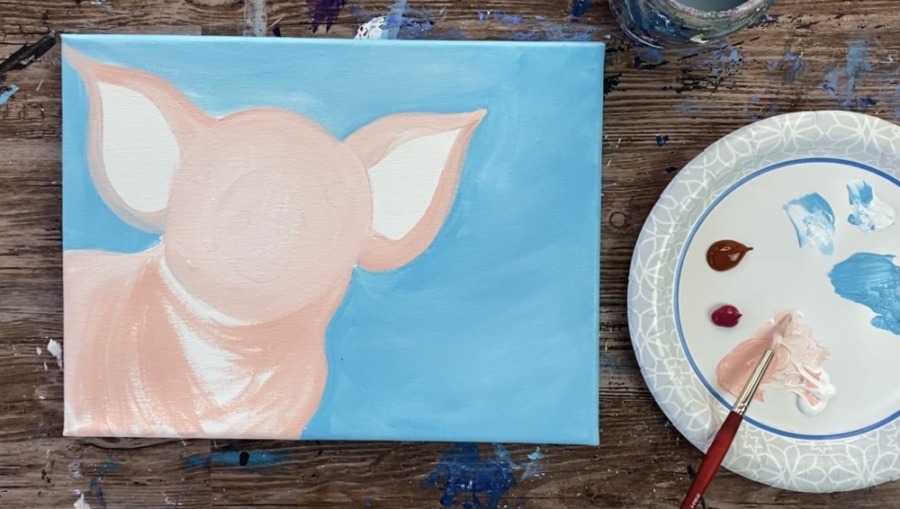
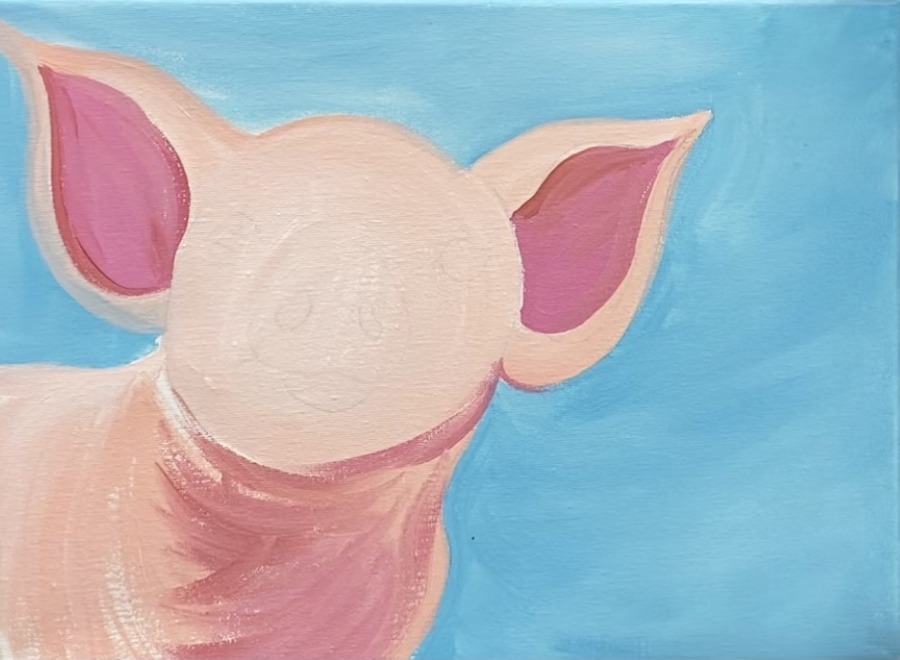
3. Paint Light Pink Layer On Pig
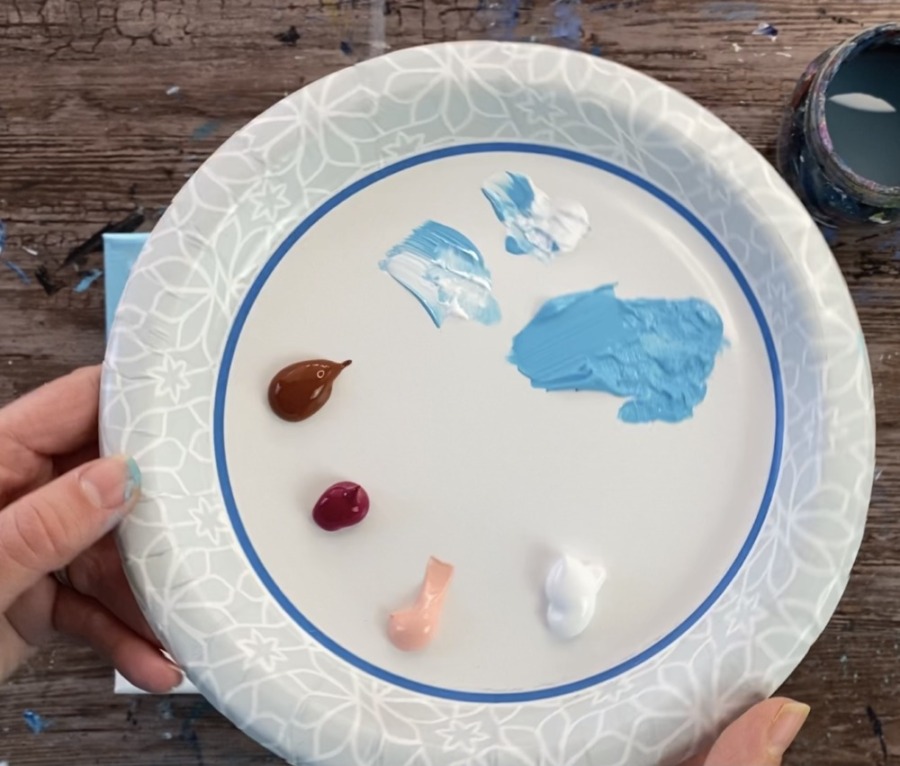
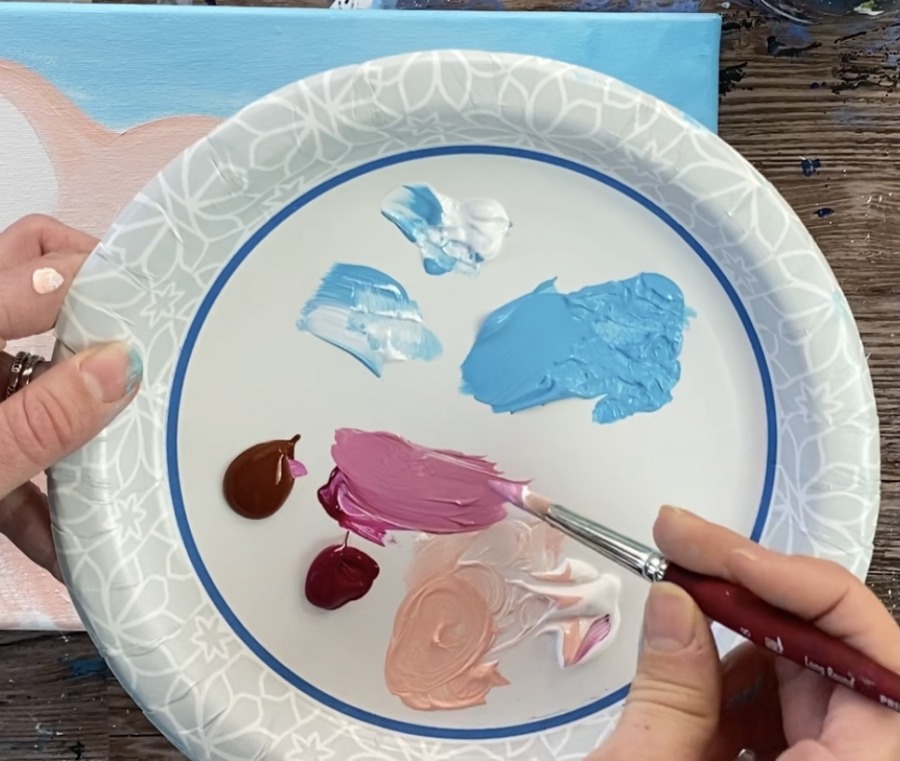
Load your palette with the colors: burnt Sienna, quinacridone magenta, light portrait pink and titanium white. You will be using a combination of these colors to mix and blend to make the different tones of pinks on this pig.
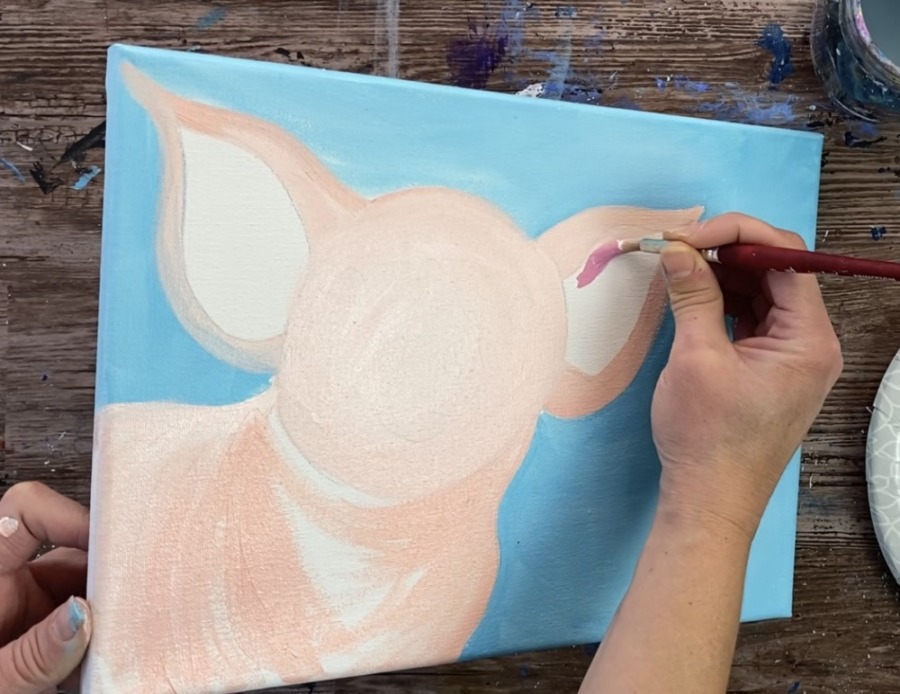
Use your #8 round brush and mix about equal amounts of light portrait pink and titanium white. Start at the top of the pig’s head and paint in curved strokes. Then fill the outer parts of the ears in.
Your strokes should go in the direction of the shape. You can also vary the white and the pink and not let the two colors blend all the way. Let the colors blend on the canvas. Yours will look and blend differently than mine and that is okay!
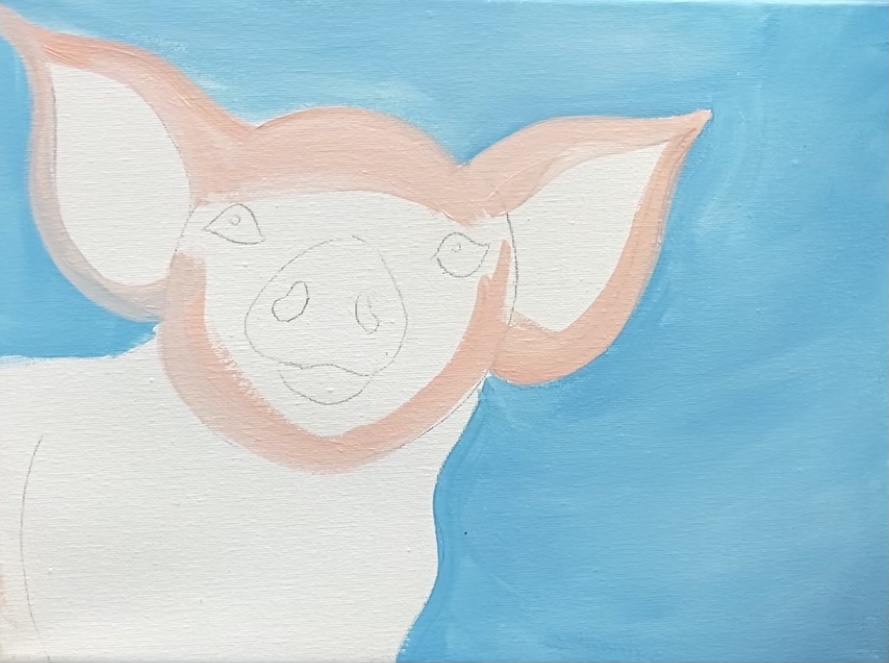
Paint the area under the pig’s head with more pure “light portrait pink” than white. This will allow that area to be darker. Paint that area in angular strokes going in a curved direction.
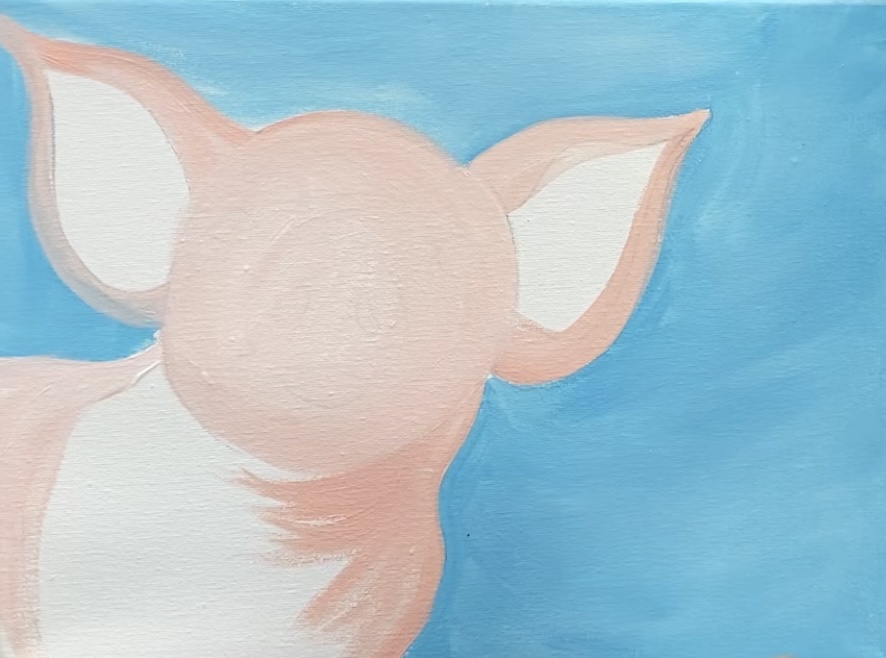
Paint the entire head. I was still able to see the pig drawing through this first layer of paint.
The pig’s back is slightly lighter. I did not paint the chest area in all the way but let my strokes sort of define how that area would look with the angle of the strokes.
4. Paint Inner Ears
Mix on your palette a sort of “mauve color”. I’ll be referring to this color as “mauve” because this will be used in other parts of the pig too. To do this mix 2 parts quinacridone magenta, 1 part burnt Sienna and 1 part titanium white (doesn’t have to be exact).
This color was used to paint the inner part of the pig’s ear.
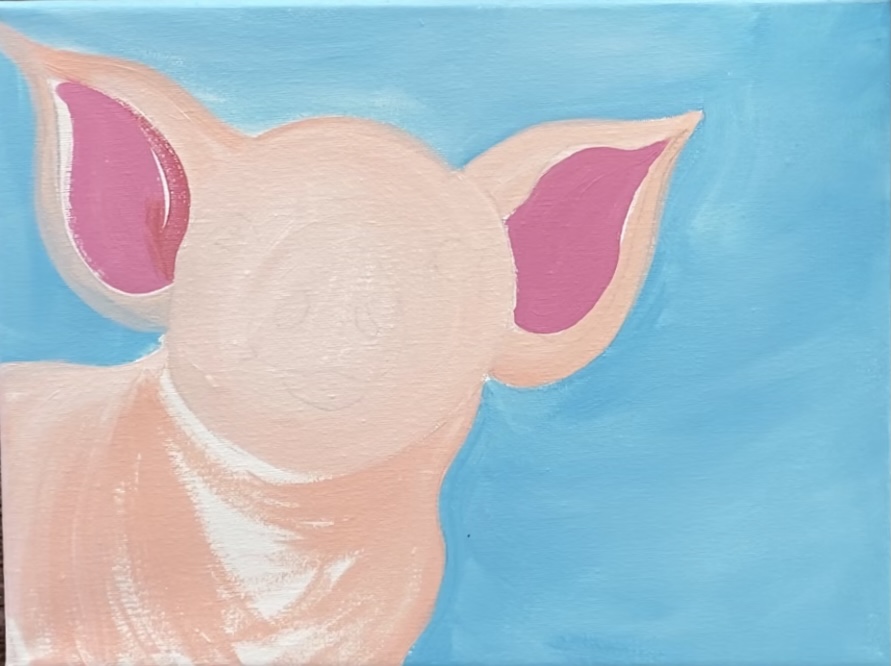
If you want you can add a little bit of brown to the outer part of the inner ears.
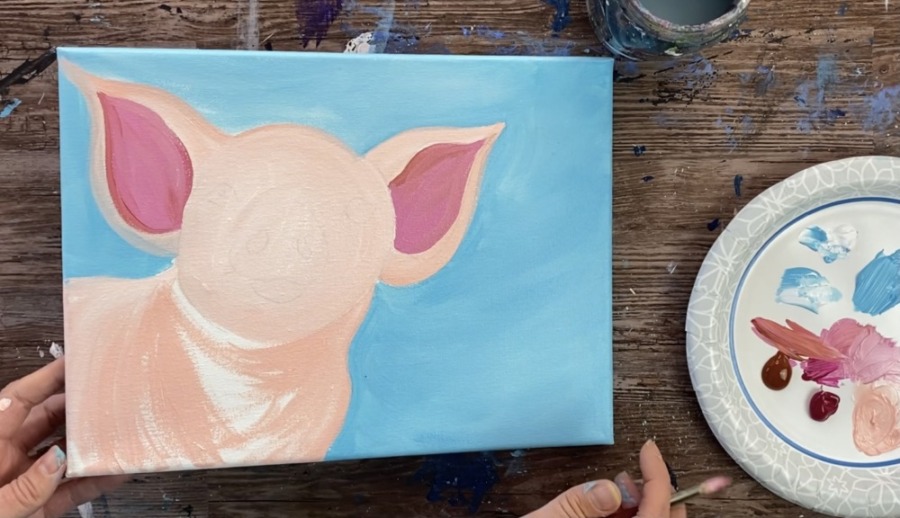
Tip: the next steps get a little challenging! If you want to simplify this pig, you do not have to do the “shadowy area” with the dark pink tones that are under the head.
5. Paint Shadowy Area Under Head
Next use that color that you used for the ears to paint the area of the chest. This area is a darker, shadowy area. Fill that in with contouring/ expressive strokes. I still used the #8 round brush for this step.
Add some lighter pink in there if it gets too dark. Then I added some lighter pink into that “mauve color” and painted the bottom part of the head as well as the bottom part of the ears.
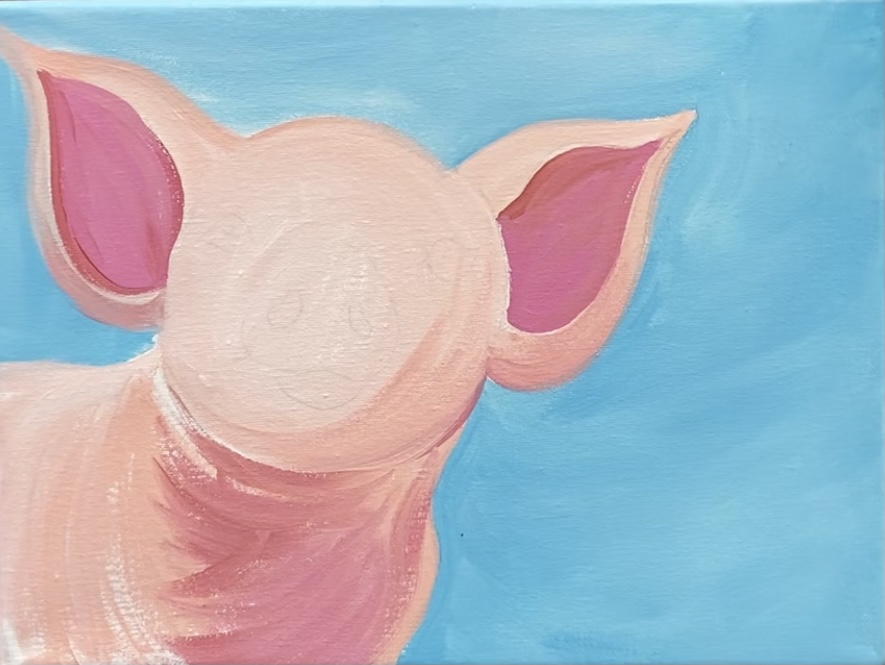
6. Paint Snout
Then I painted the snout the same color of the inner ears (only slightly lighter because I added some white into that color). Use the #8 round brush to outline the shape of the snout and fill it in solid.
Then the under part of the snout (bottom of mouth). I did this with a slightly more brown color. Basically I mixed more of that burnt Sienna into my “mauve color”.
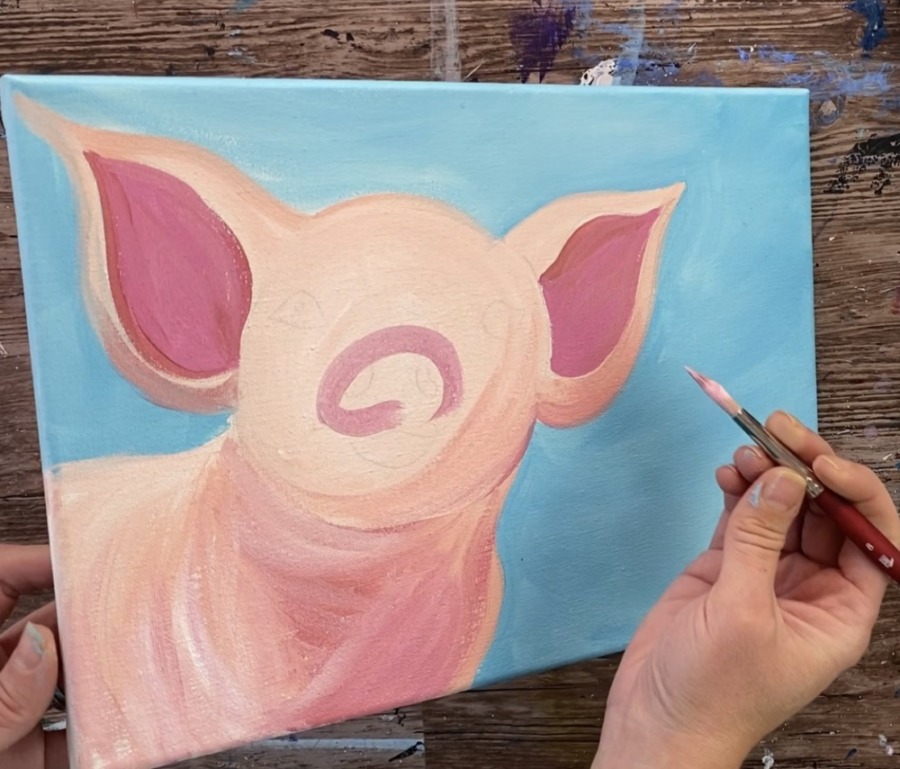
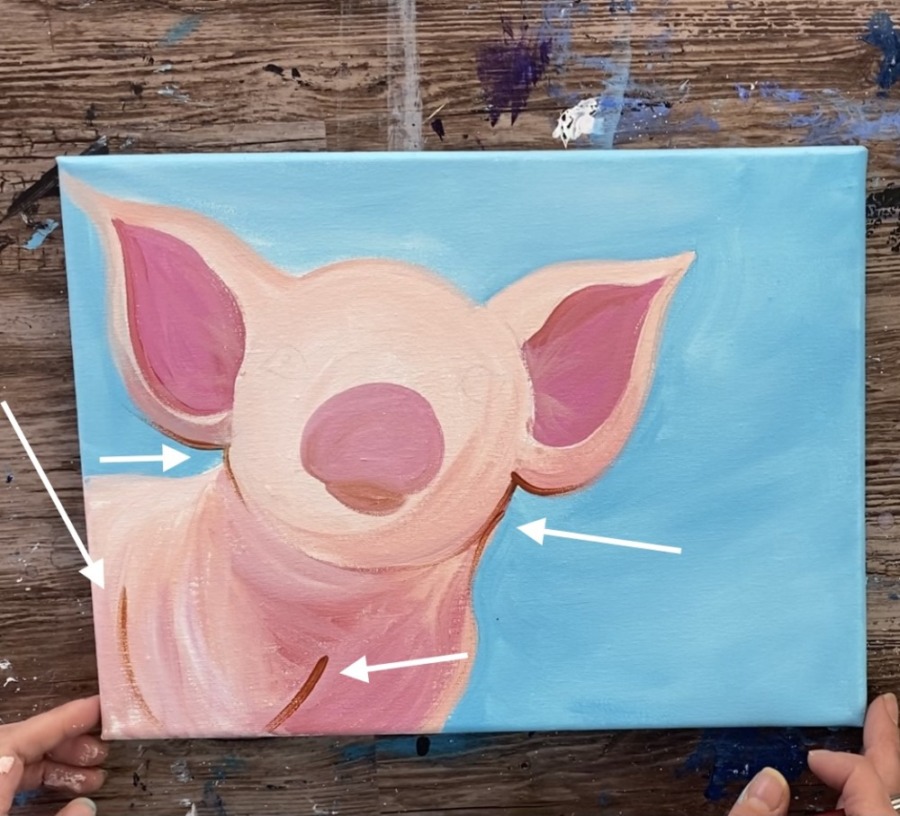
7. Paint Dark Lines On Right Side & Under Ears
These dark lines were done with just burnt Sienna. Use the #8 round brush to slightly outline the under part of both ears, under the head and the right side under the head. There are also two diagonal/ curved lines in the bottom region of the pig.
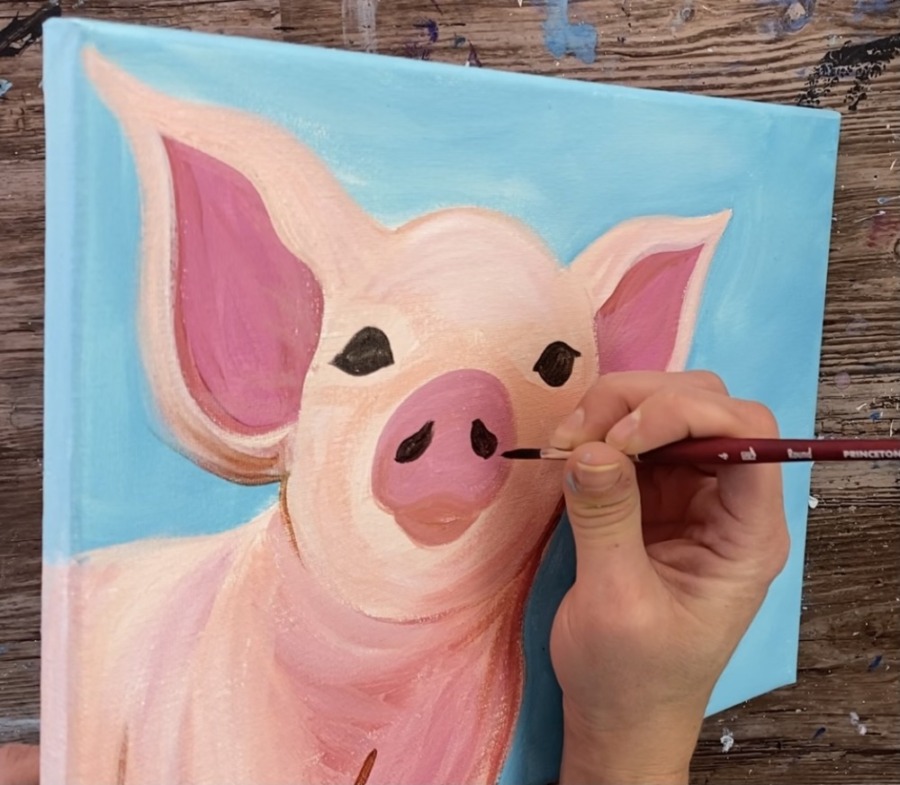
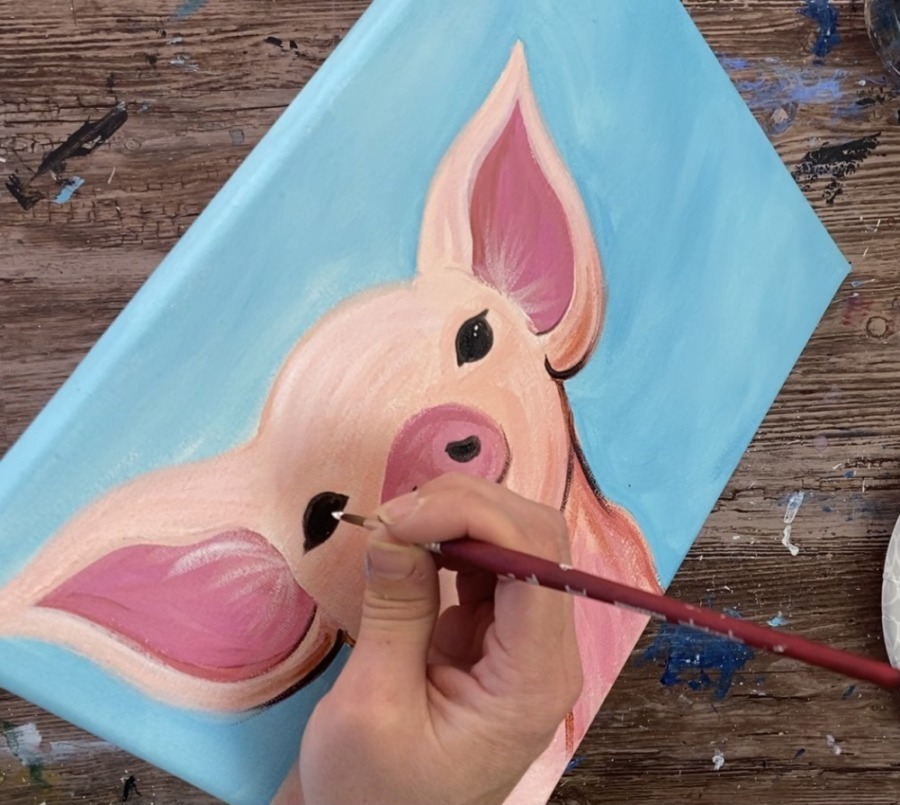
8. Paint Eyes & Nostrils
Switch to a #4 round brush (which is a smaller round brush). Use slightly watered down mars black to paint the eyes. I outline the shape first and then fill it in.
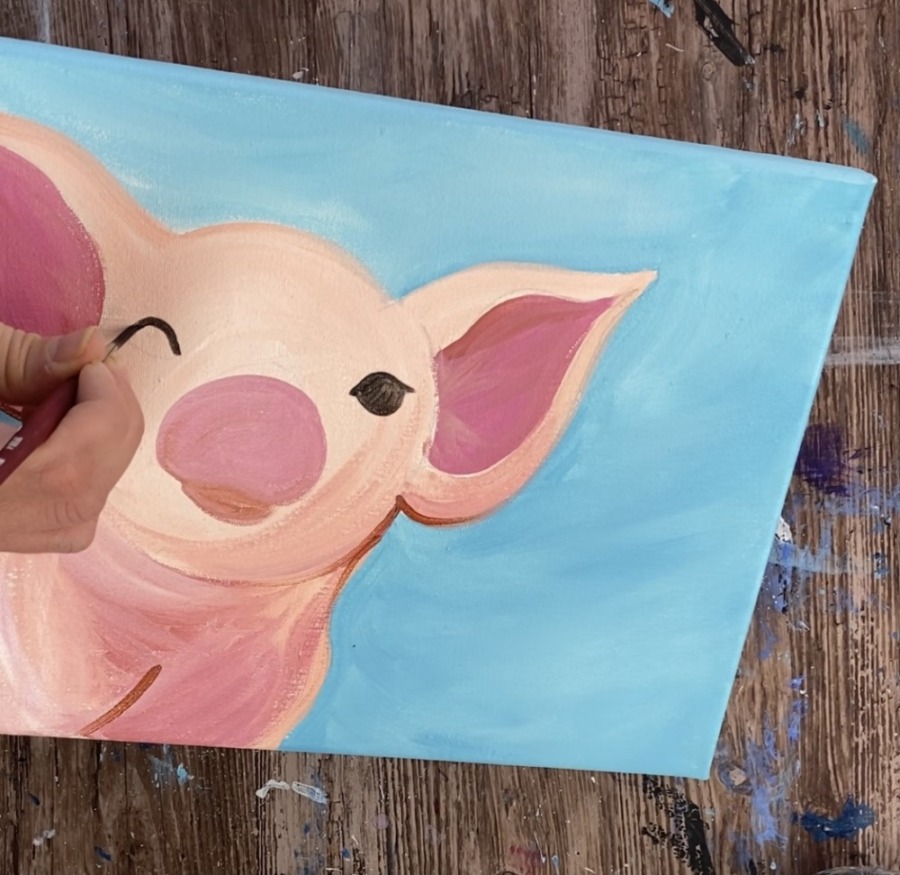
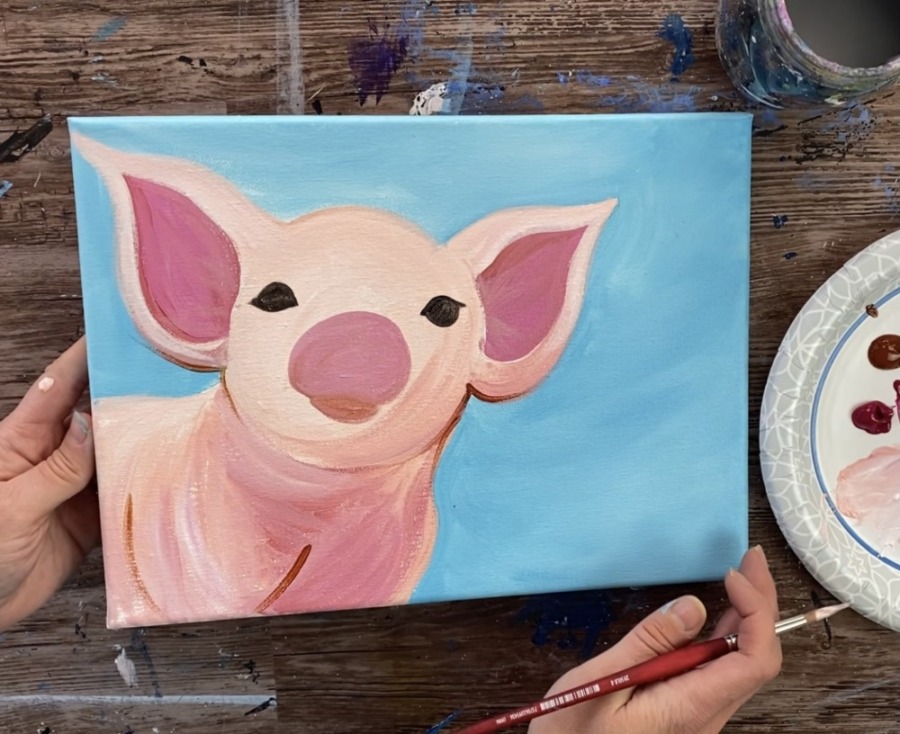
Then fill the nostrils in. At this point I couldn’t see my original drawing anymore so I just guessed where those shapes would be. They are basically a kidney bean shape.
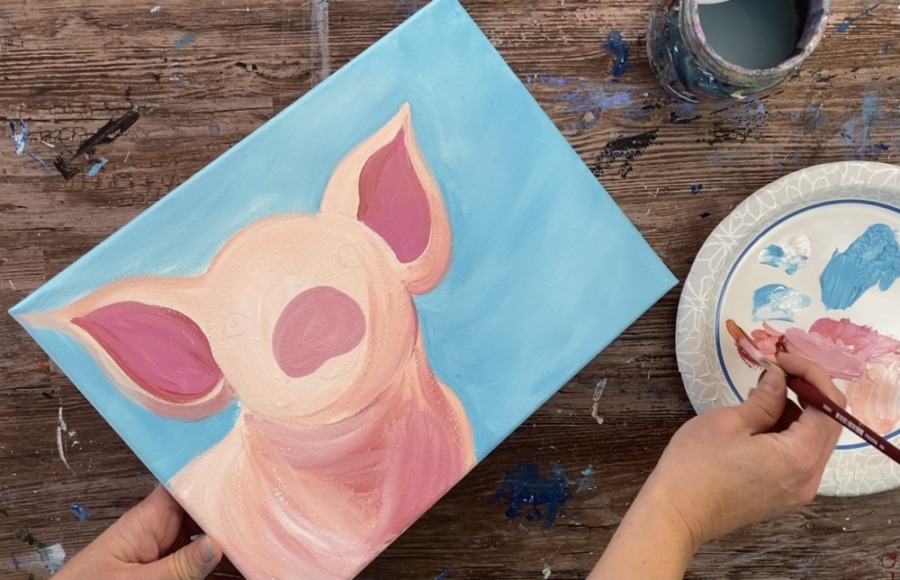
9. Paint Under Ears & Under Head
Then I continued with that black and outlined the under part of his snout. I also did some slight outlining on the bottom part of his ears and the bottom inner parts of his ears. I also took that outline just slightly under the right side of this head and right side of the front chest area.
10. Paint Hair Inside Of Ears
Use your #4 round brush and titanium white mixed with a little light portrait pink. Pain the inside hairs of the pig’s ears. Do very light sort of diagonal strokes, almost like dry brush strokes.
11. Paint Highlight Dots Inside Eyes
If the eye is dry use your #4 round brush to paint two small little dots on the pig’s eyes.
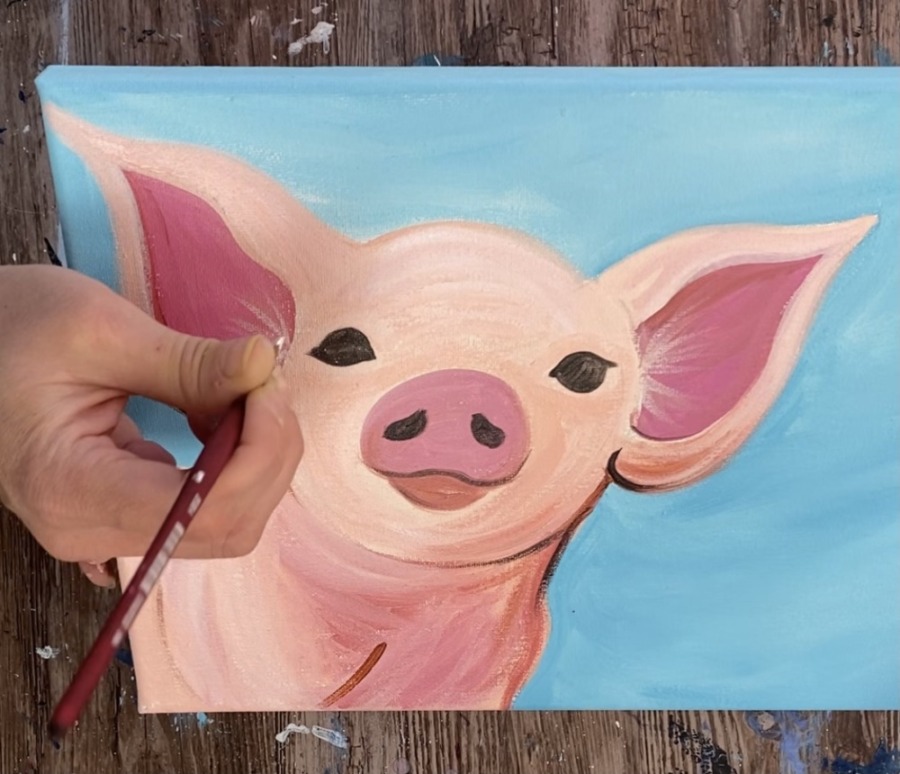
12. Paint Highlight On Snout & Outline Top Of Eyelids
Then paint a very faint white line above the pig’s eyes (eyelids). Add a small rounded highlight line on the top left of the pig’s snout. Paint two white lines on the bottom part of the black “kidney bean shaped nostrils”.
Then add some white lines on the top of the pig’s back and a few rounded lines going downwards from the back.
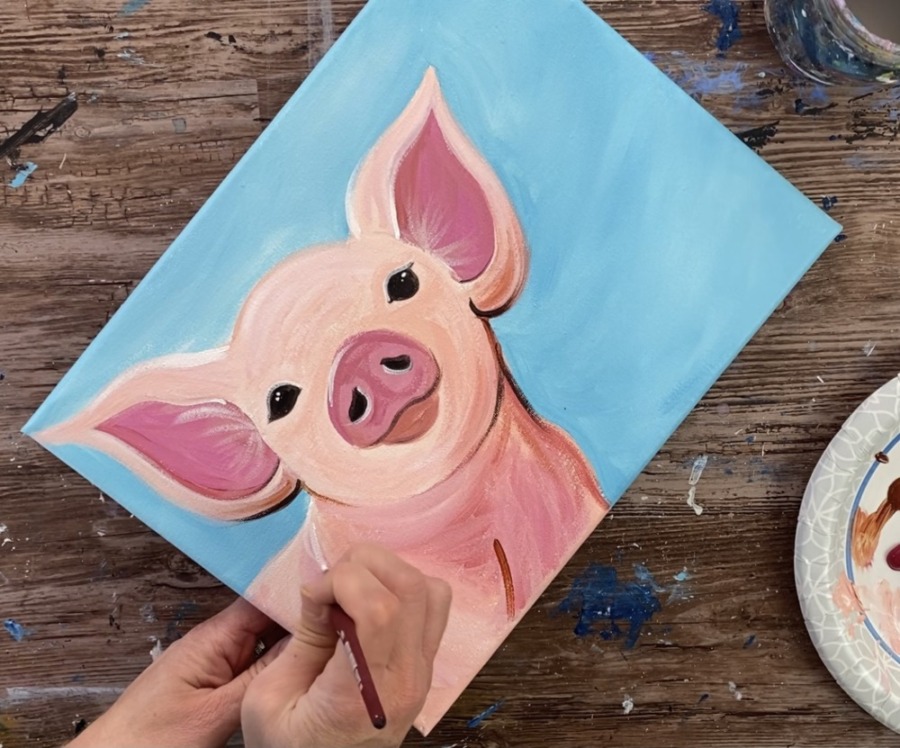
I also did another layer of fur on the inner part of the ear with the titanium white.

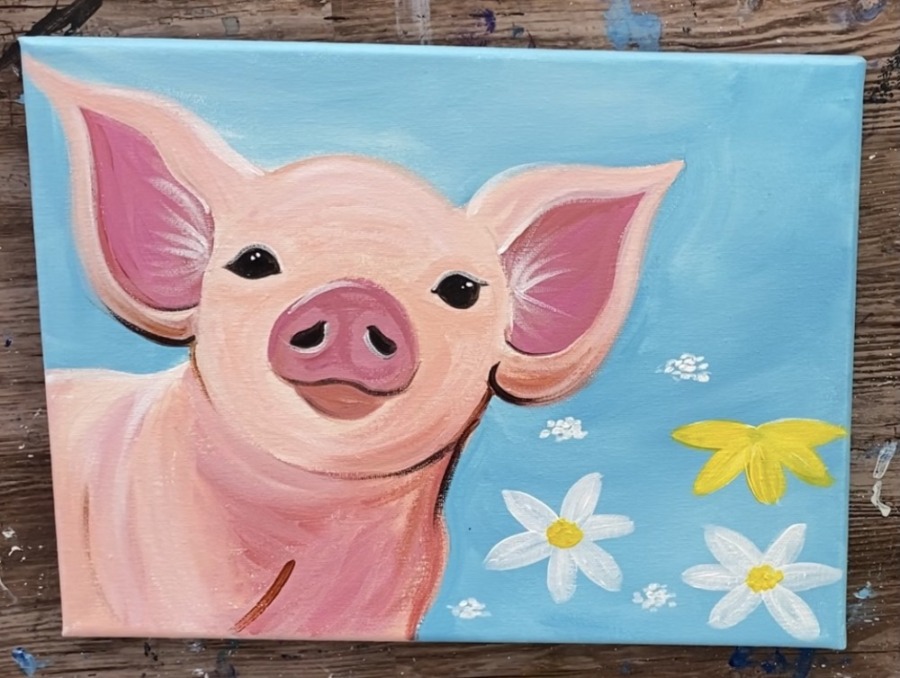
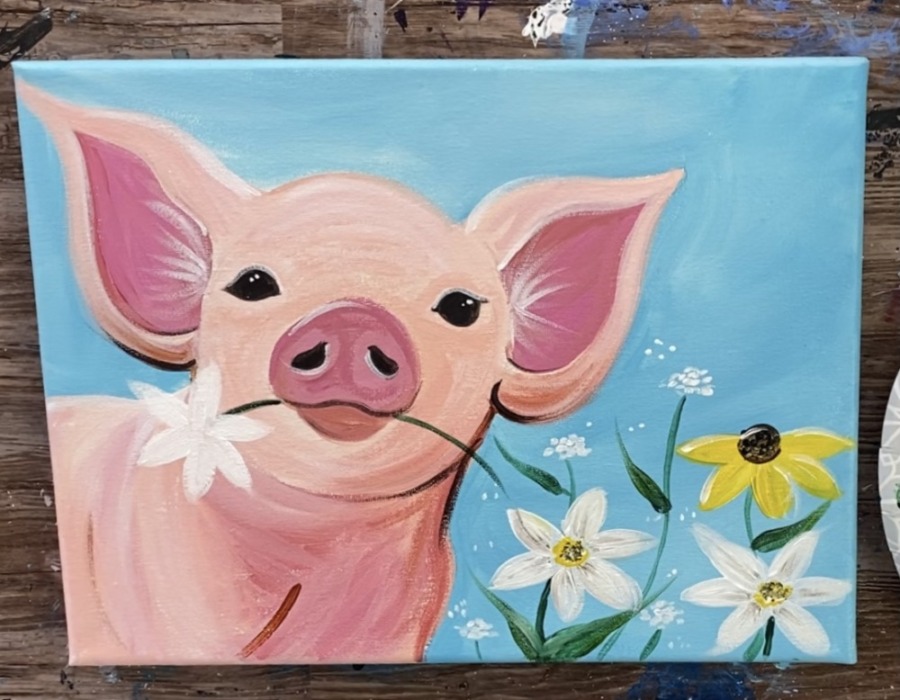
13. Paint Flowers
I started out by painting basic flowers and then went into a little too much detail with them. You can go into detail too or simplify them!
Use either the #8 round or the #4 round to paint the petals. I two did 6 petal flowers.
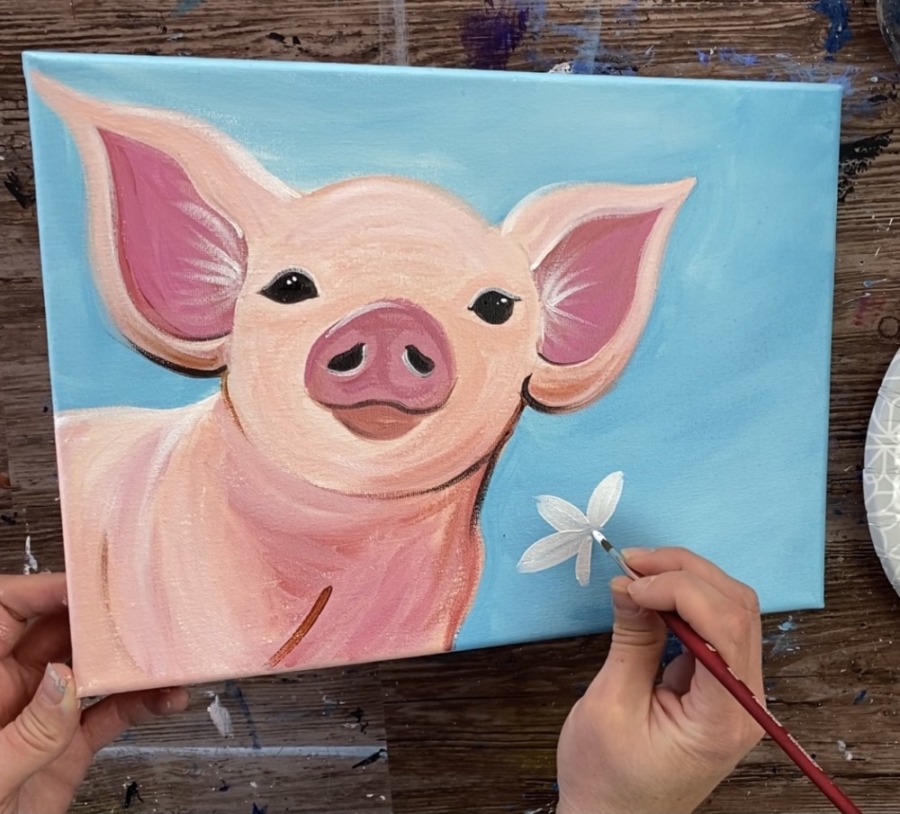
One flower has 5 petals because it is on its side. I also did little dots of clusters.
Then I painted a cadmium yellow medium hue coat of paint on one of the flowers. Then the inside middle of the other two flowers were painted with yellow dots.
For the stems I used deep green permanent mixed with a little bit of black to darken the green. Use a #4 round brush (or any brush you feel comfortable using for these thin lines). Paint the stems going in different directions and attached to the flowers.
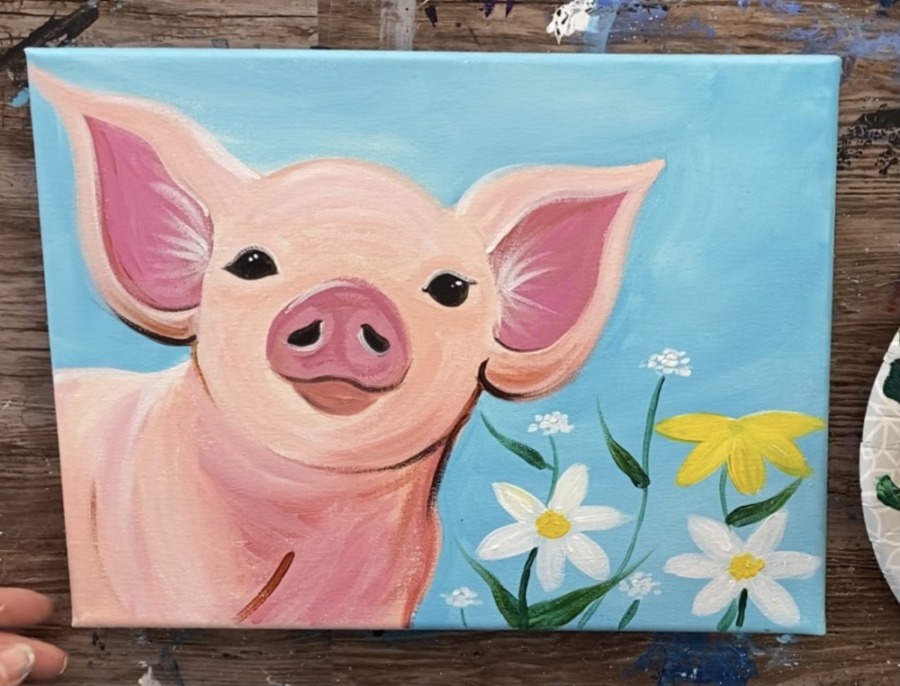
For the leaves, I used a round brush. To make the leaf, press kind of firm at first with your round brush and then release the pressure of the brush so it goes to a point.
Then I did more details on some of the white flowers. I used brown to paint some lines on the bottom inner parts of the white petals. I also did black dots in the centers.
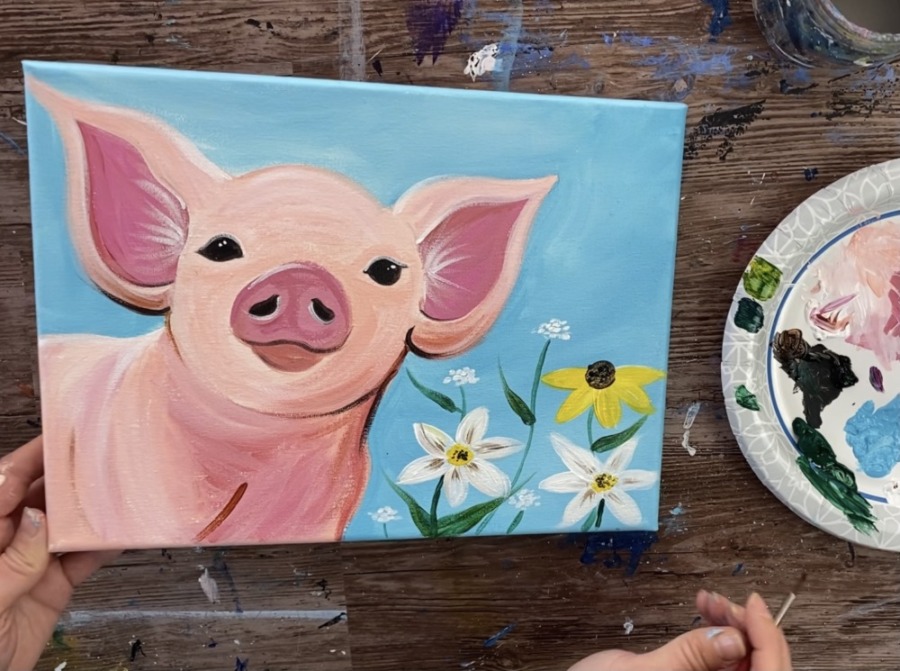
There are small little white dots scattered in the flower area as well.
Then if you want your pig to be holding a daisy, paint the stem just under the snout.
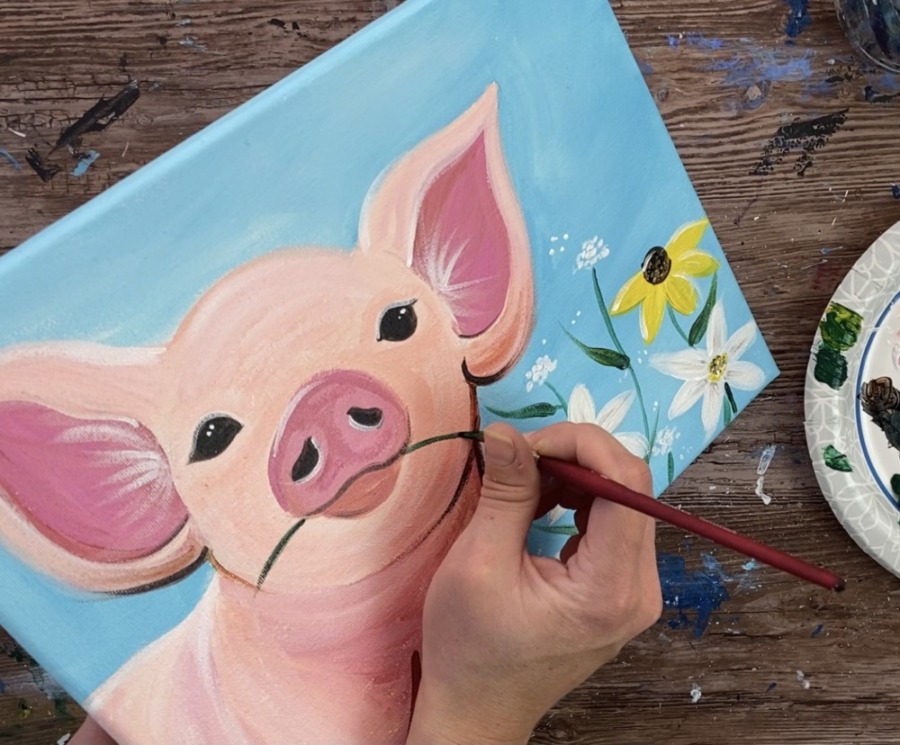
Paint the white petals of the flower.
Then add some details to the flower. I did a white center and little brown dots. I also painted a leaf attached to that stem.
Then I did a few more details on the flower! I did some very slightly black outlining on the white petals so they would stand out. I also did some white highlight lines on the yellow petals.
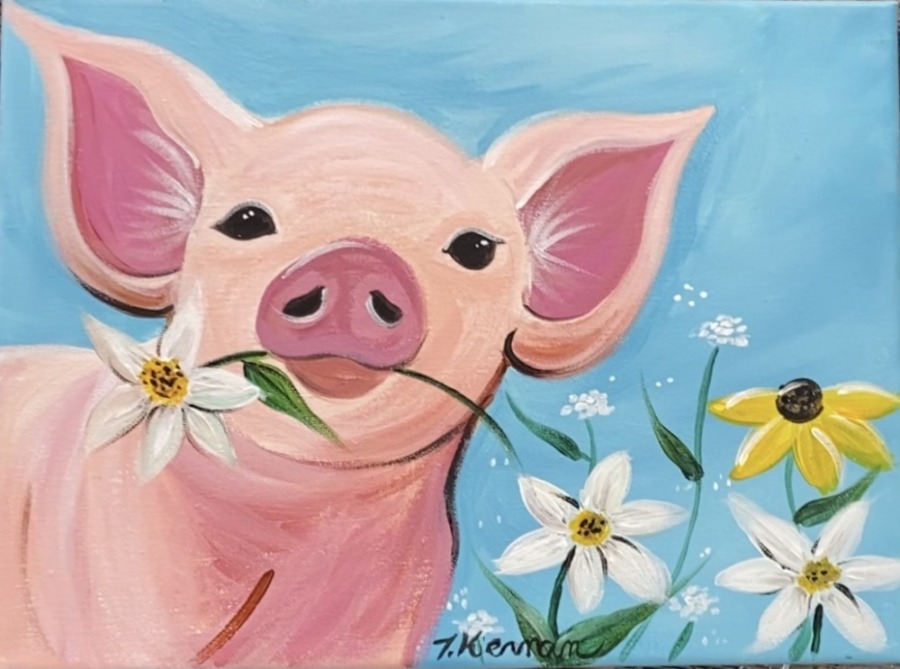
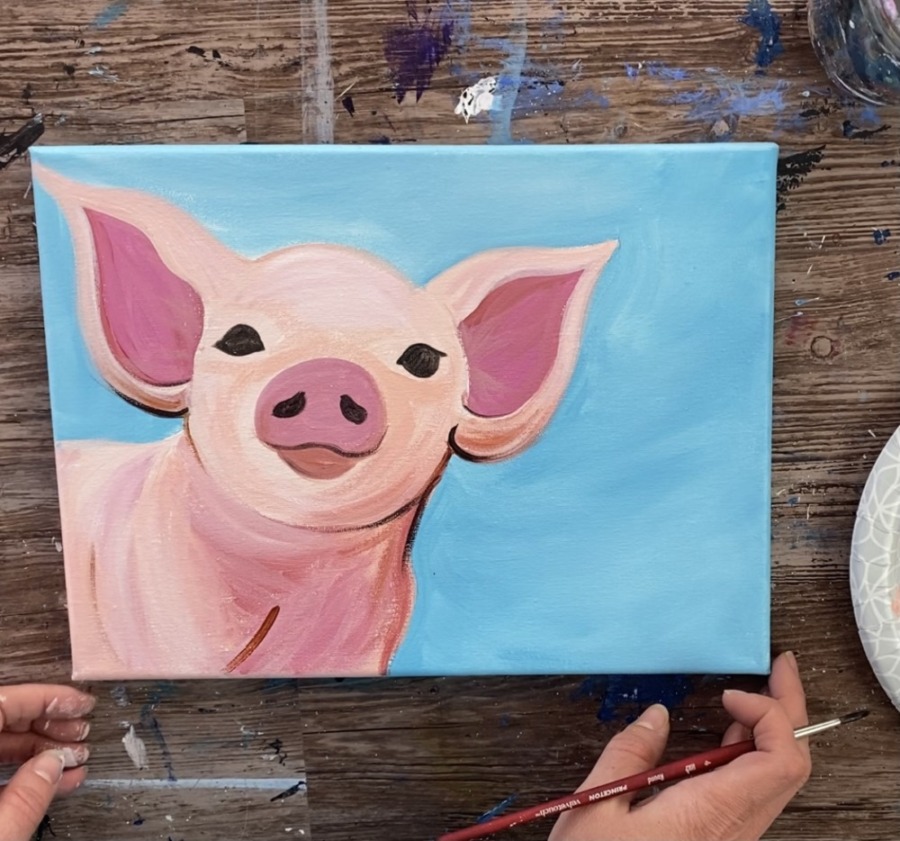
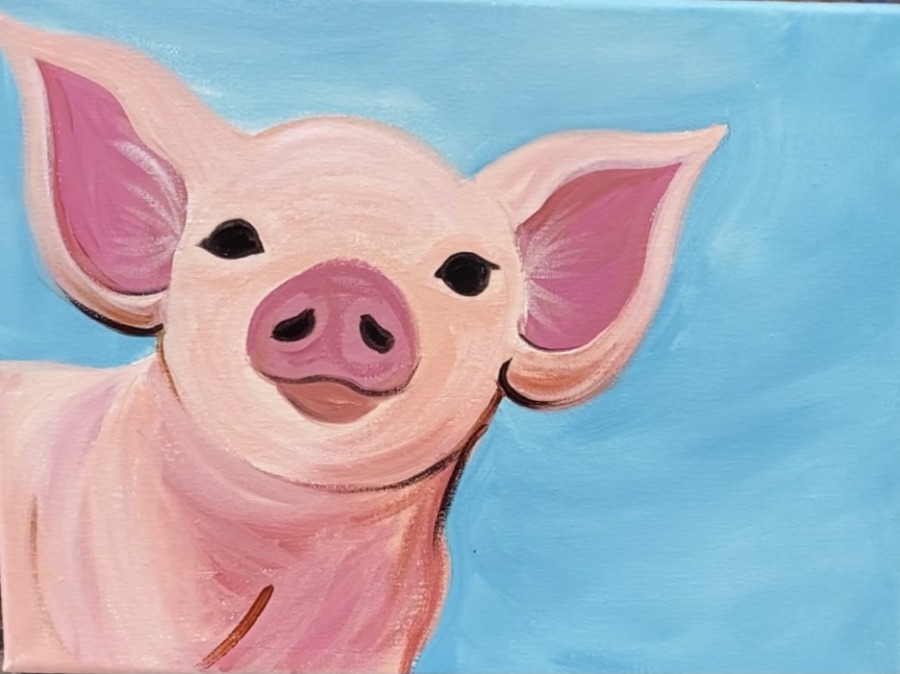
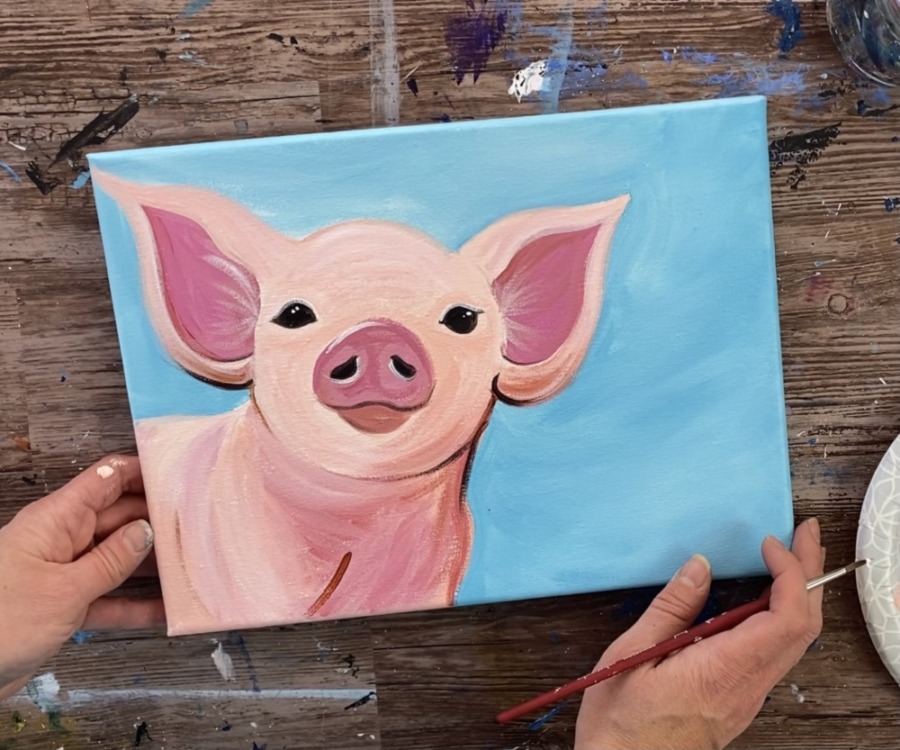
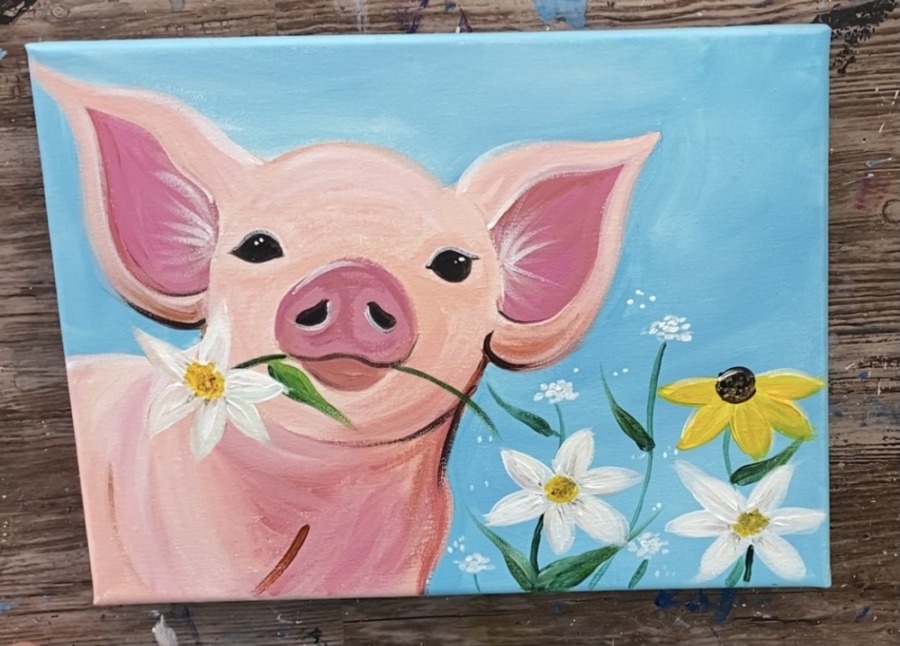
Finished!
Sign your name and show it off!

Share your art here!


