
Would you like to save this?
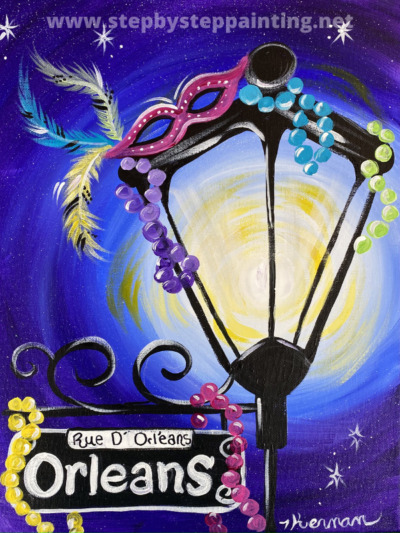
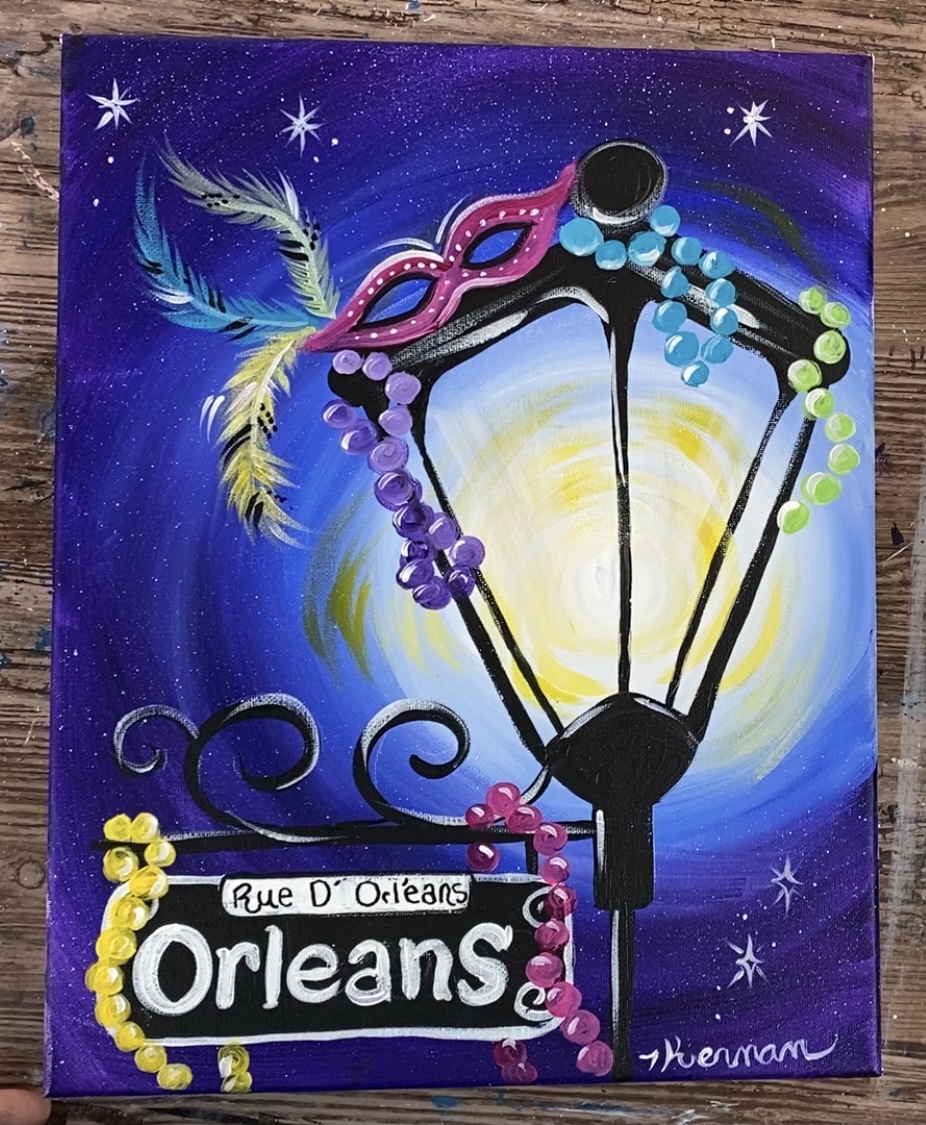
This year I have gotten a lot of requests for a Mardi Gras theme painting! Fat Tuesday (Mardi Gras) this year is February 16, 2021.
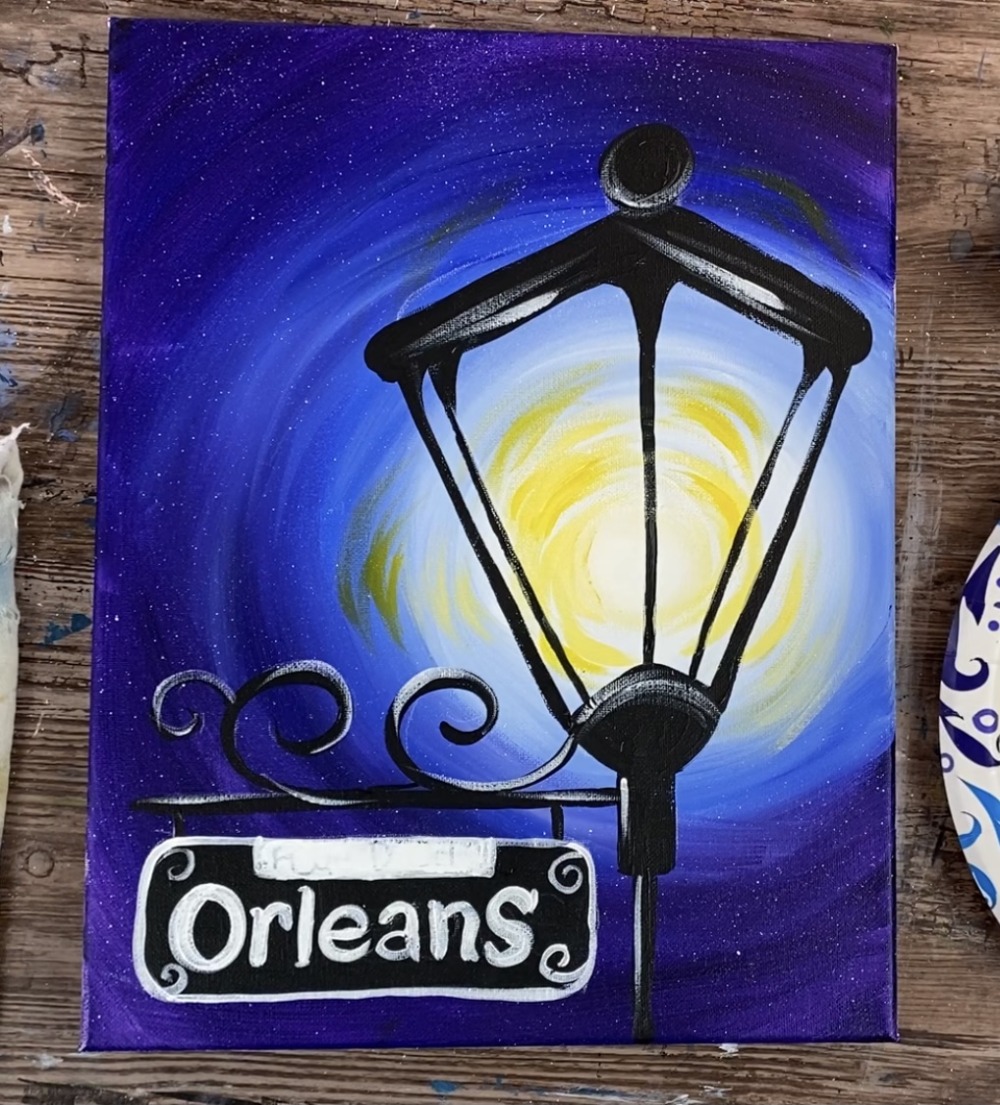
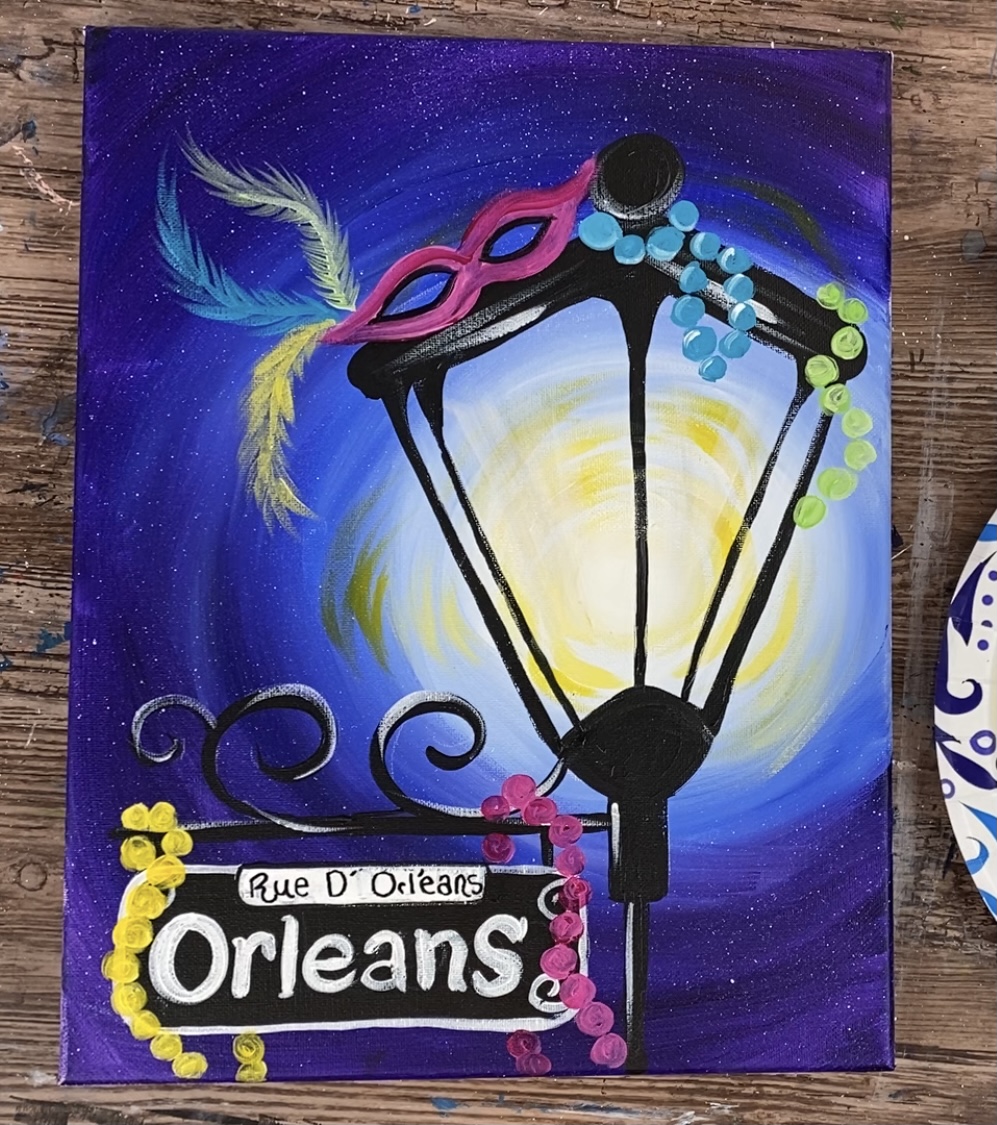
This was a fun painting to design. I originally wanted to do just a pretty Mardi Gras mask with the feathers & beads but I decided to do the lamppost since I do not have a tutorial for a full lamppost + sign yet.
This painting can be changed around if you just like the lantern idea without the Mardi Gras decorations on it. You can customize the wording to a different street name, a last name, etc.
I love the background of this design and how it creates that “glow”. It is very similar to my Owl on a Lamppost Painting, only the colors in the background of this one are different.
Enjoy and happy painting!
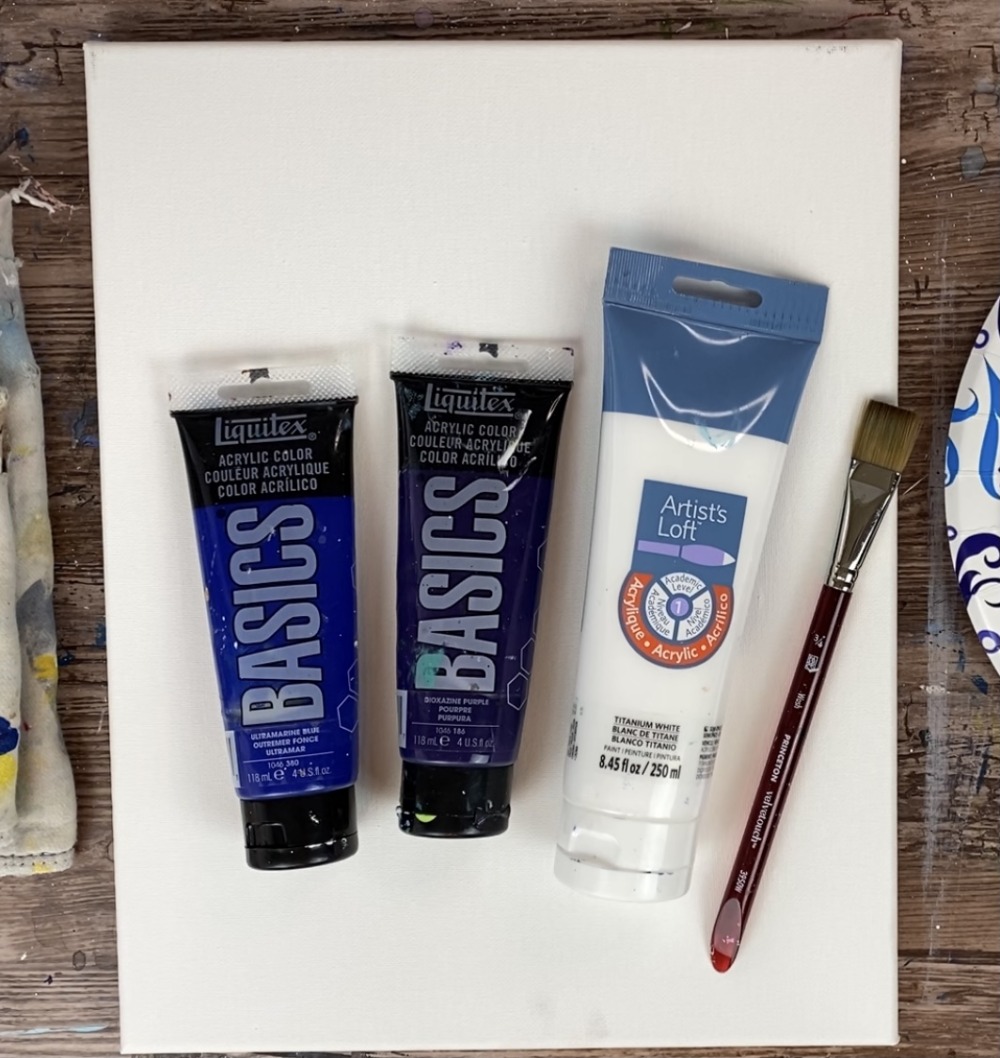
Materials
Mardi Gras Painting With Lantern
Learn to paint a Mardi Gras Theme painting with a glowing lantern adorned with Mardi Gras costume decor.
Materials
- 11 x 14 Canvas
- Acrylic Paint
- Brushes
- White Chalk Pencil
- Optional Traceable
- Optional Graphite Transfer Paper
- Black & White Paint Pen For Lettering
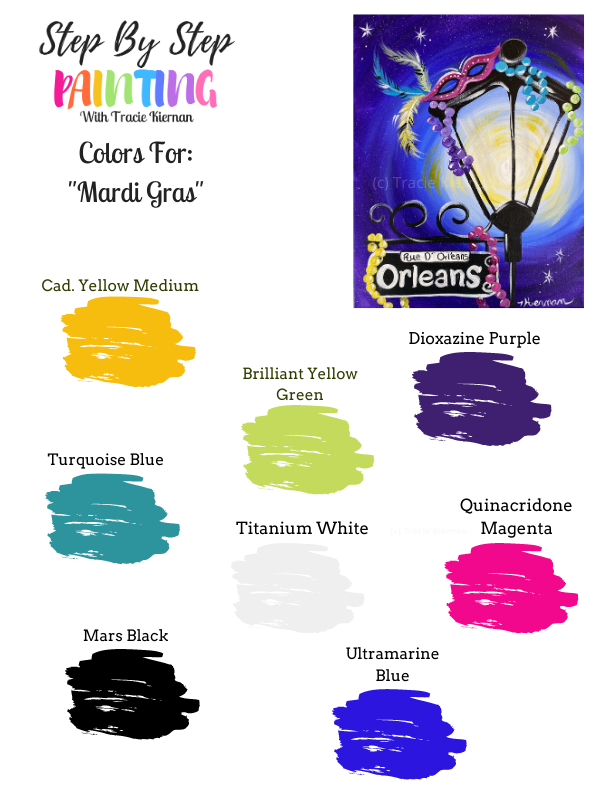
Colors
- Titanium White
- Mars Black
- Ultramarine Blue
- Dioxazine Purple
- Quinacridone Magenta
- Cadmium Yellow Medium
- Turquoise Blue
- Brilliant Yellow Green
Brushes
- 3/4" Flat Wash Brush
- #4 Round Brush
- Toothbrush for star splatters
Instructions
- See instructions on www.stepbysteppainting.net for full tutorial.
Color Palette
Traceable
Directions At A Glance
Video
Step By Step Directions
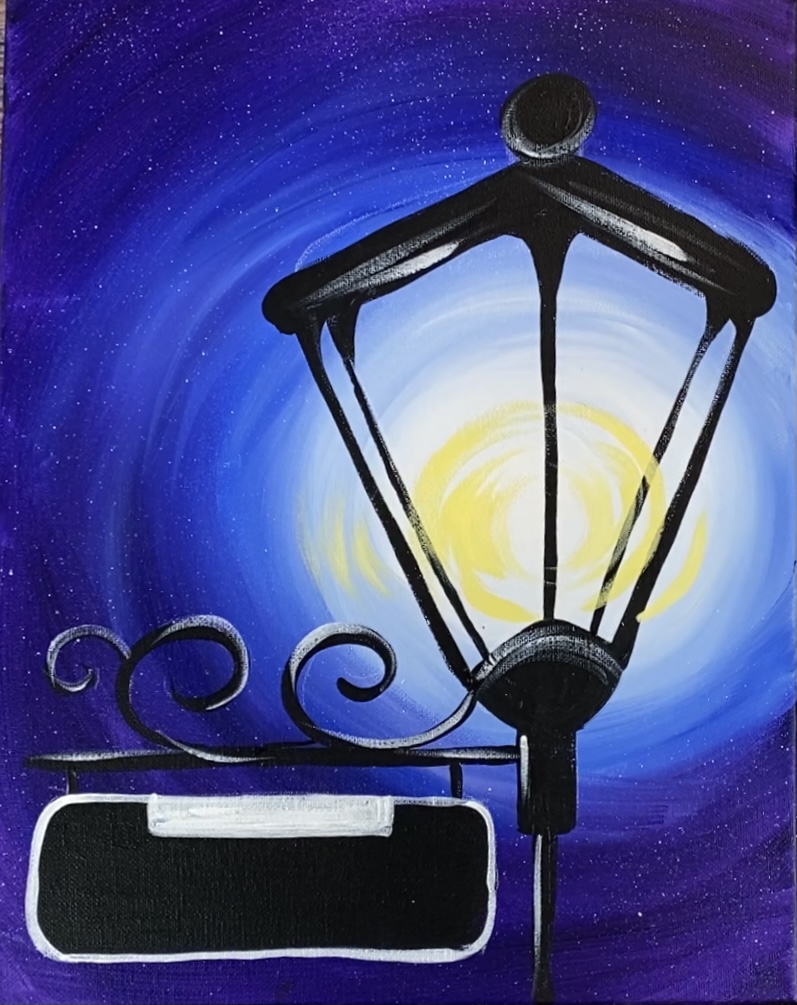
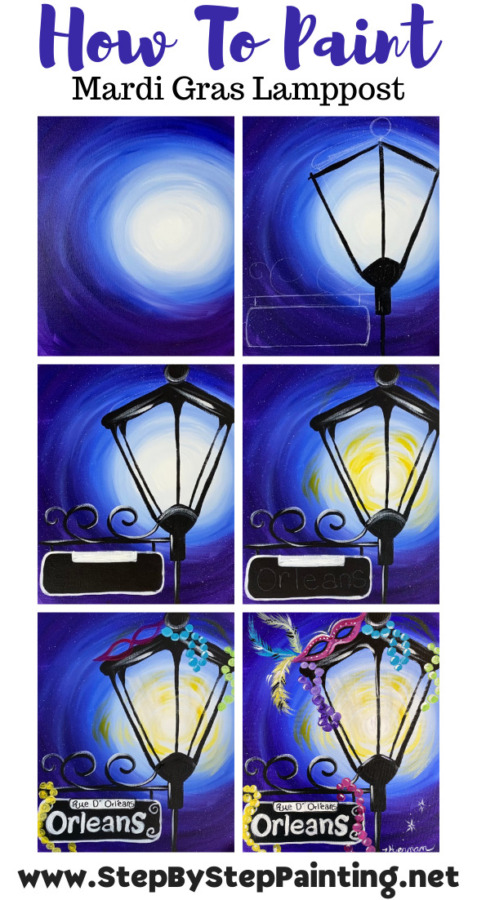
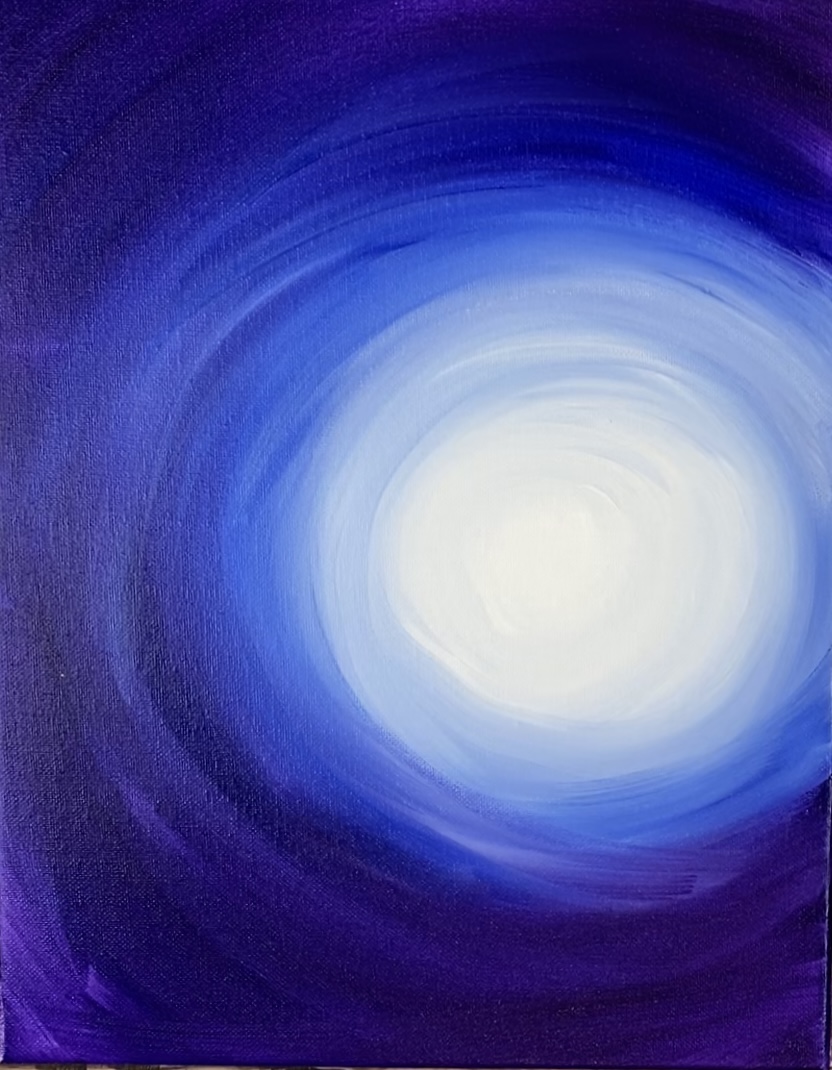
1. Paint The Background
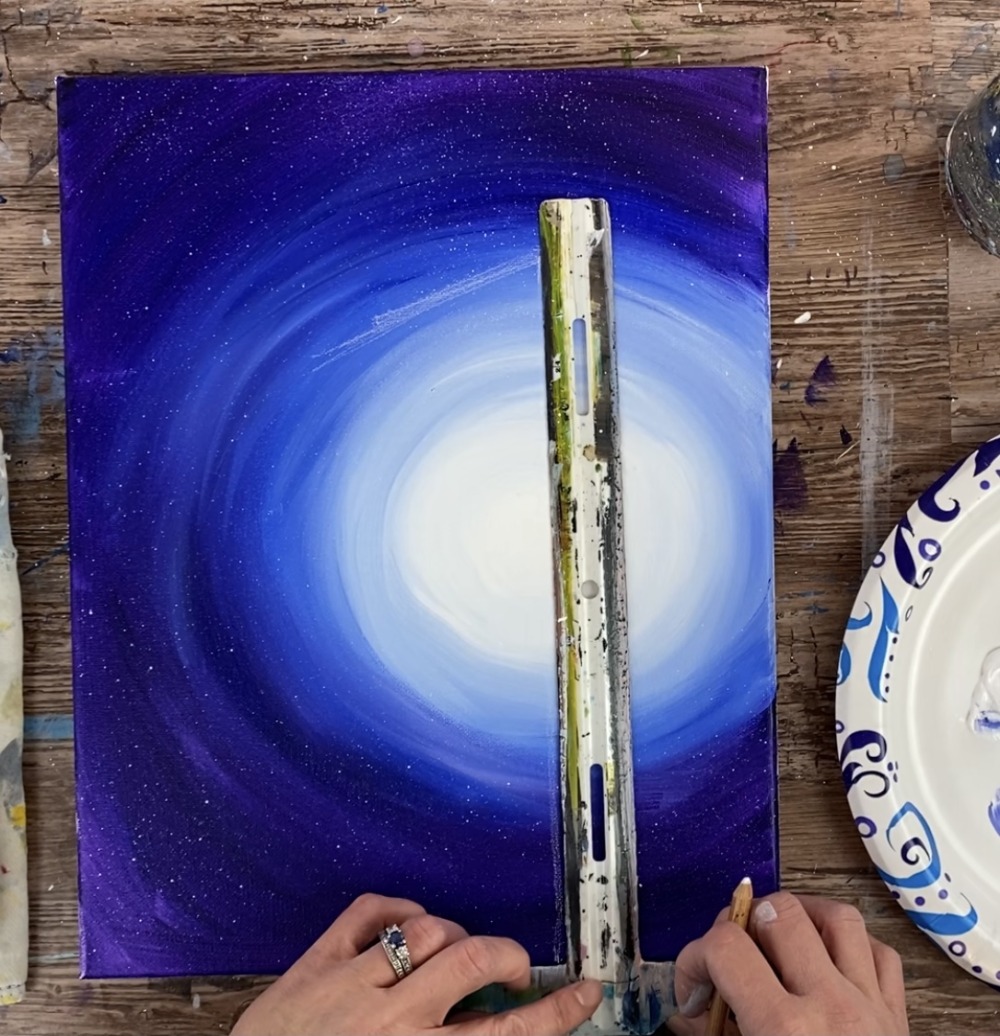
The background consists of three colors: titanium white, ultramarine blue and dioxazine purple. It is a blended background with a bright white circle in the center right that blends to a light blue and eventually the dark purple on the edges.
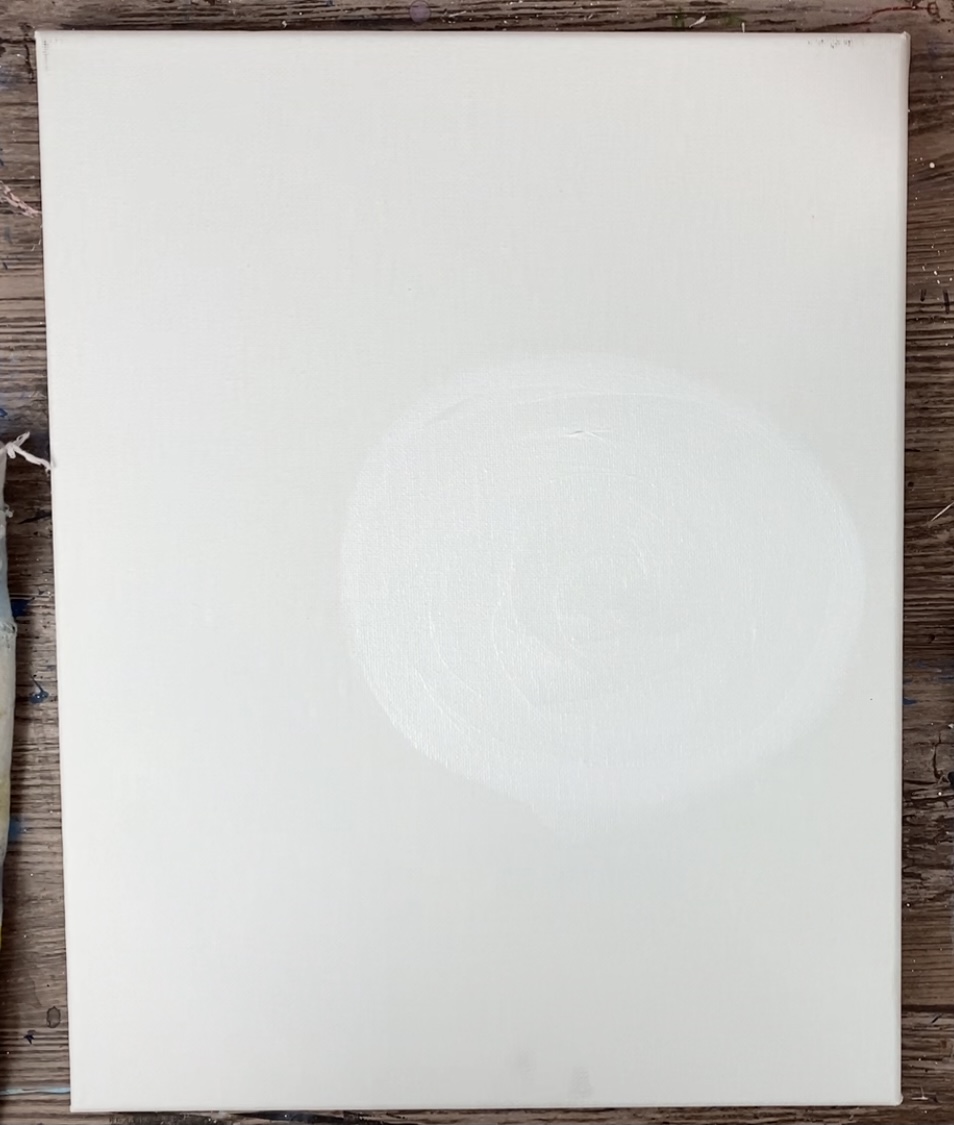
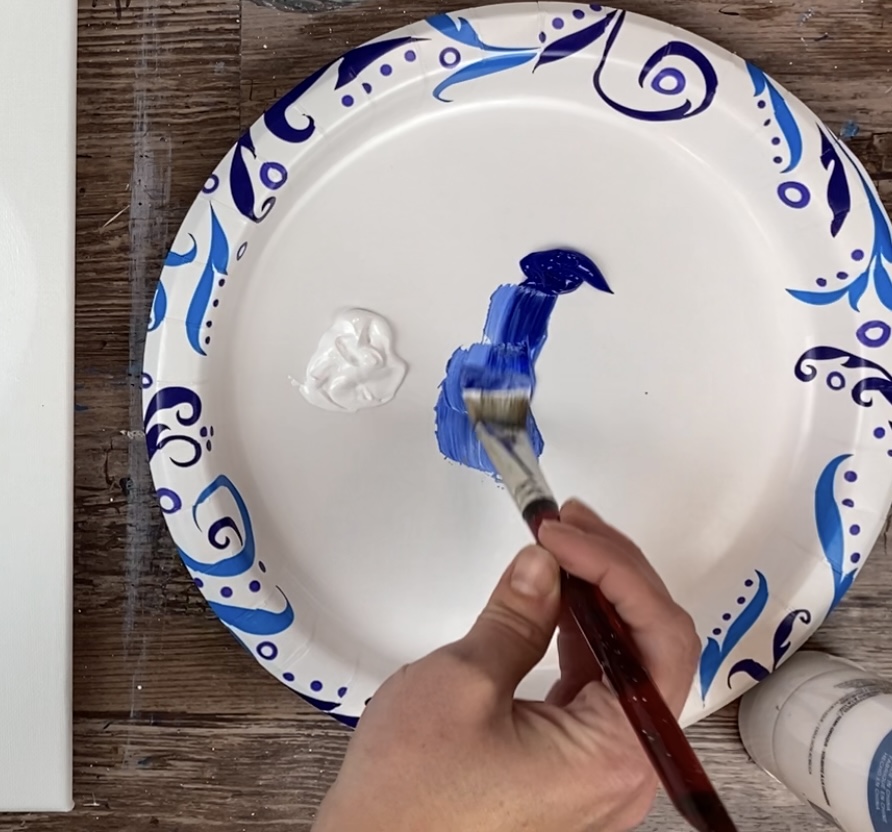
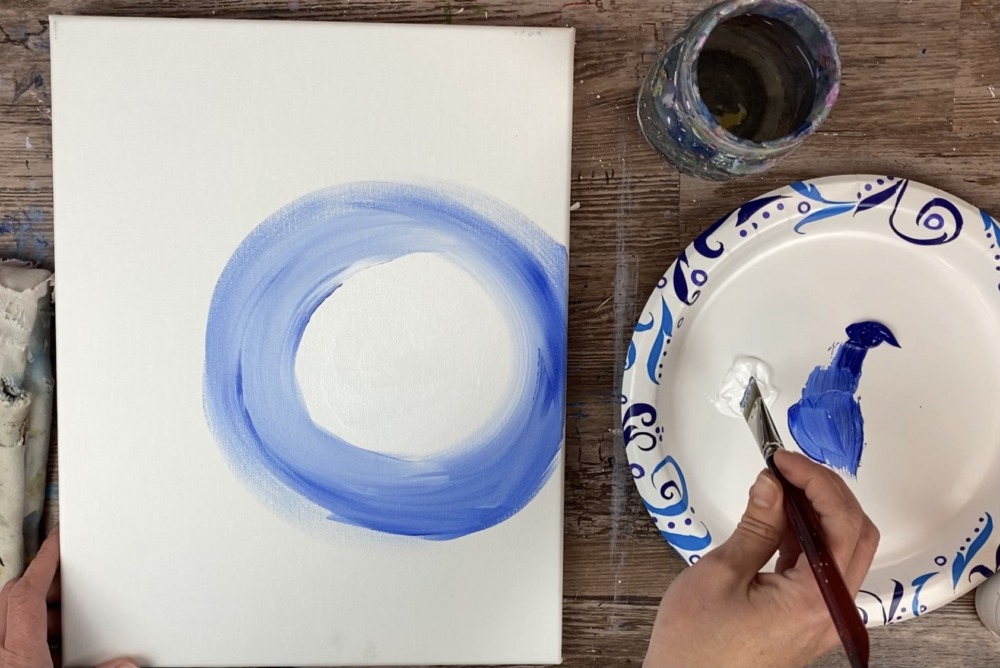
Use your 3/4″ flat wash brush and load it into titanium white. Start in the center middle and paint a large circle.
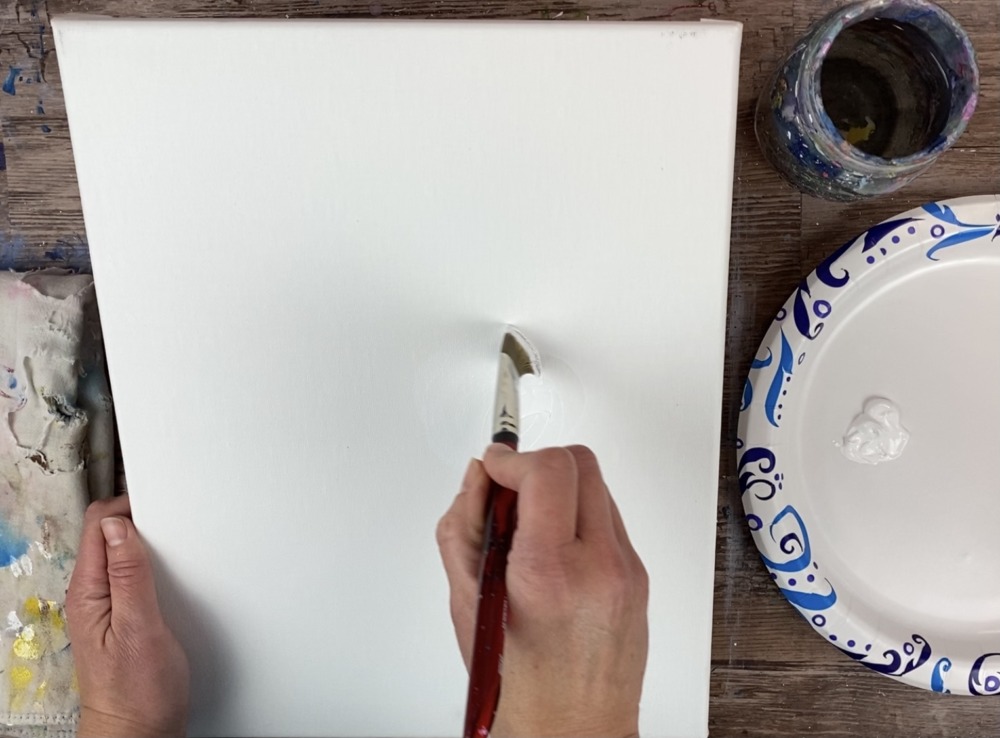
Paint a very large white circle about 6-8 inches in diameter. This has to be very large because it will be blended with the blues and purples.
Next, do not rinse your brush but load it into some ultramarine blue. Mix the leftover white with the ultramarine blue on your palette to make a lighter blue.
Apply the light blue to the canvas but leave the center circle white. Blend the light blue with the white. You may need to load your brush in more titanium white to get it to blend. Paint in large circular strokes.
Then gradually add more blue to your brush. Continue to paint in circular strokes blending the blue outwards so that it gets darker and darker. Remember to keep the middle circle bright white.
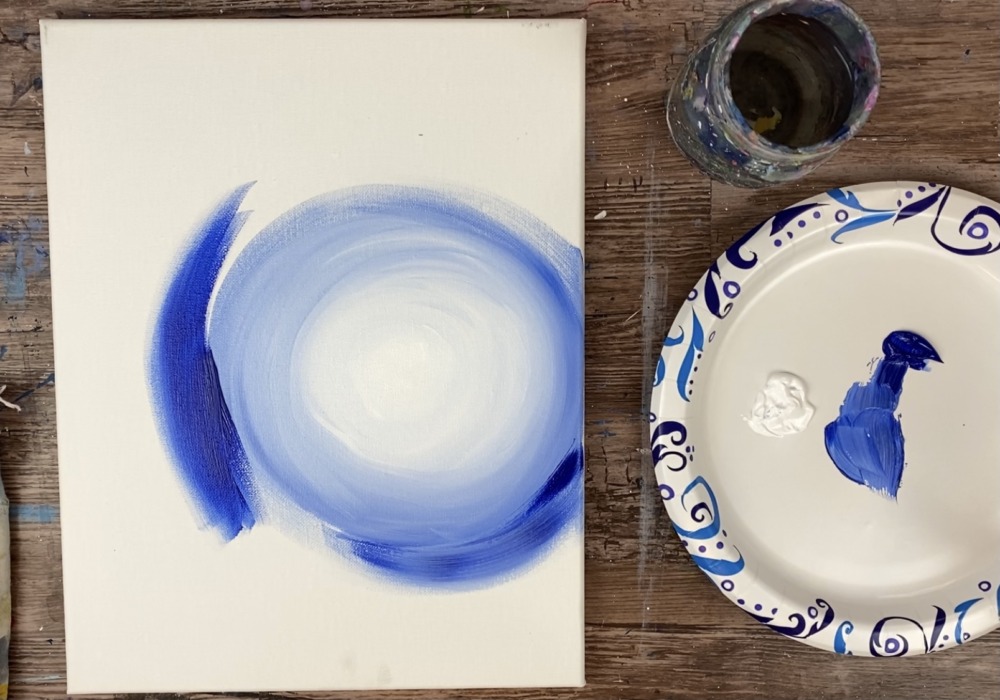
Tip: adding a little bit of titanium white to your brush helps the colors to blend a little more smoothly.
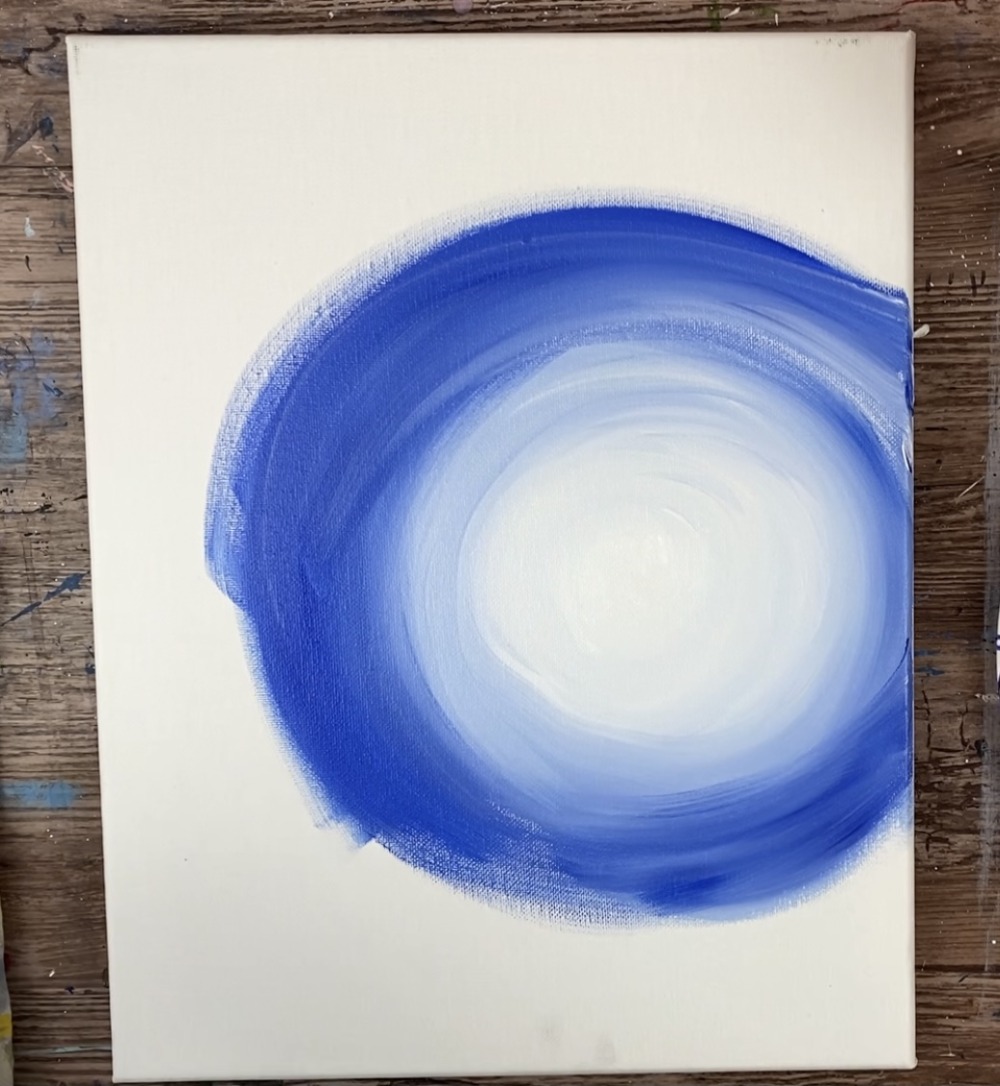
Then wipe the paint off your brush and load it into dioxazine purple. Blend the purple into the blue. Then continue to paint in circular strokes. The far edges of the canvas are more pure purple which will look really dark.
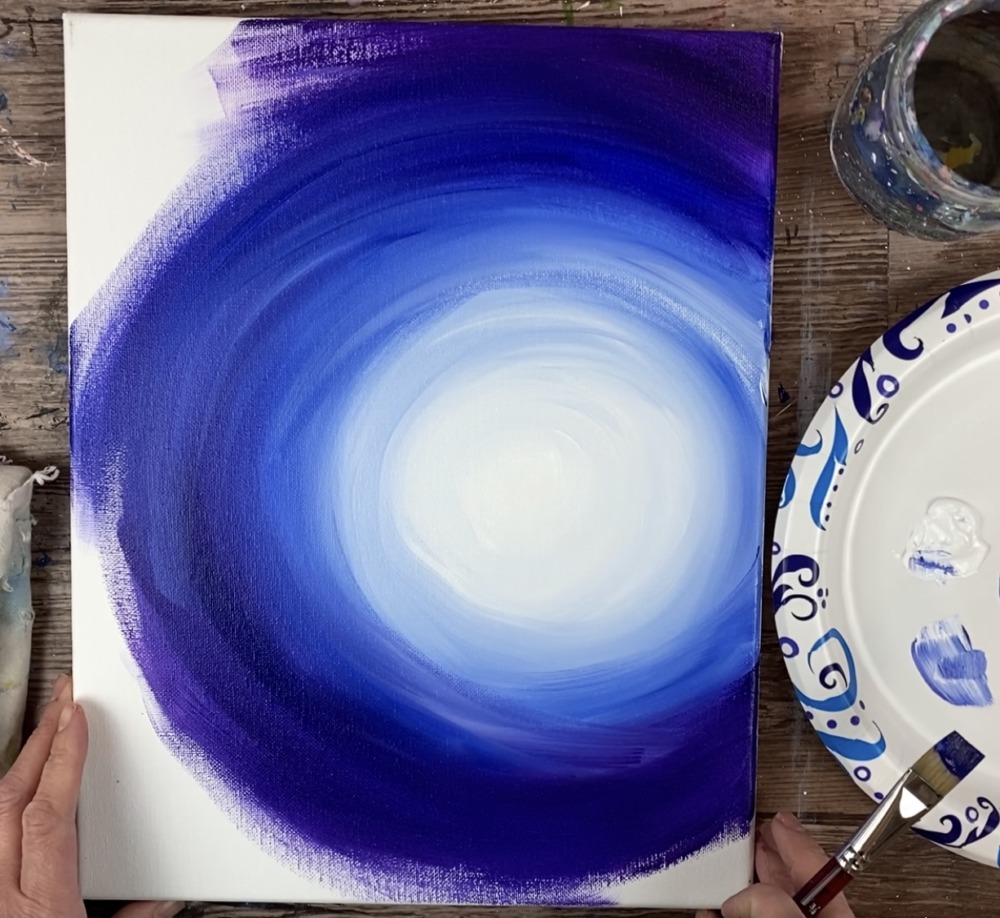
Tip: adding a bit of water to the brush will help keep the paint from drying to fast when you are blending.
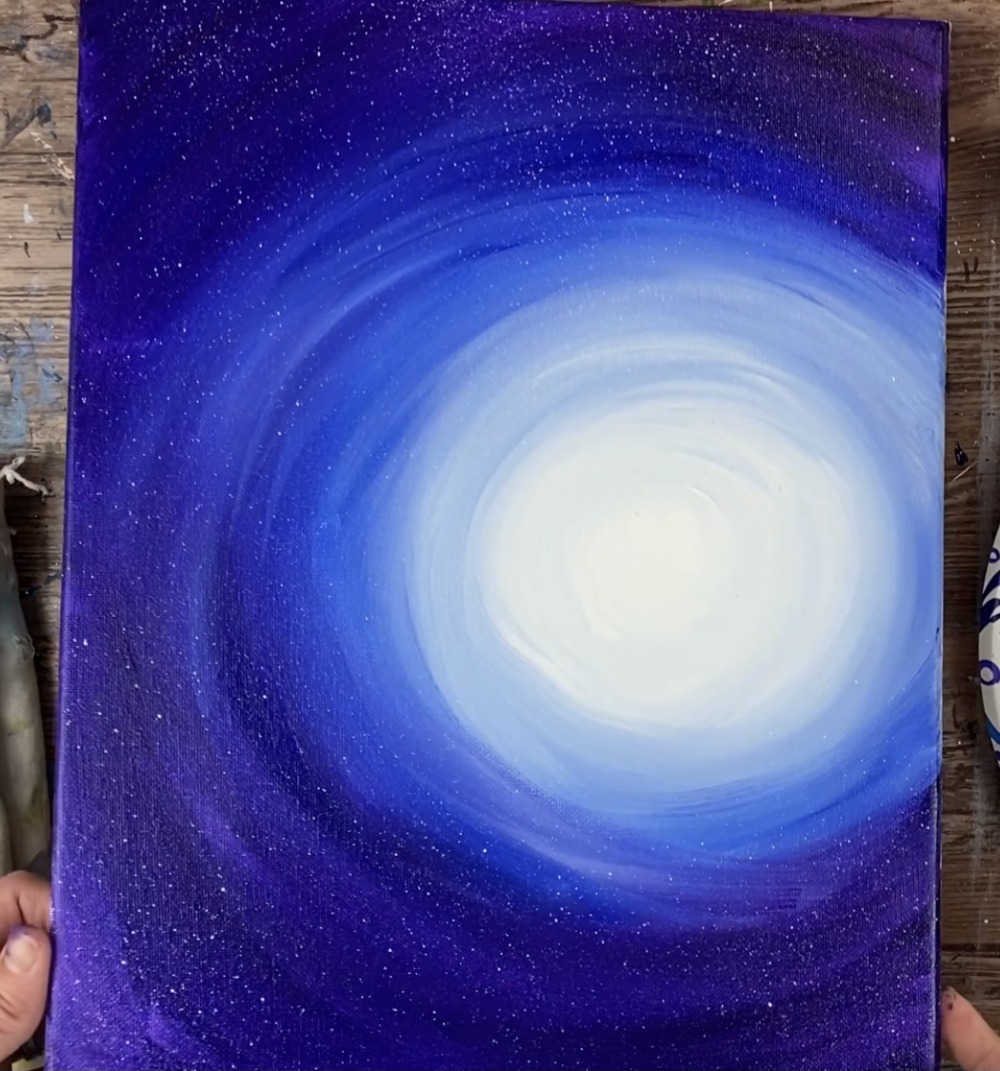
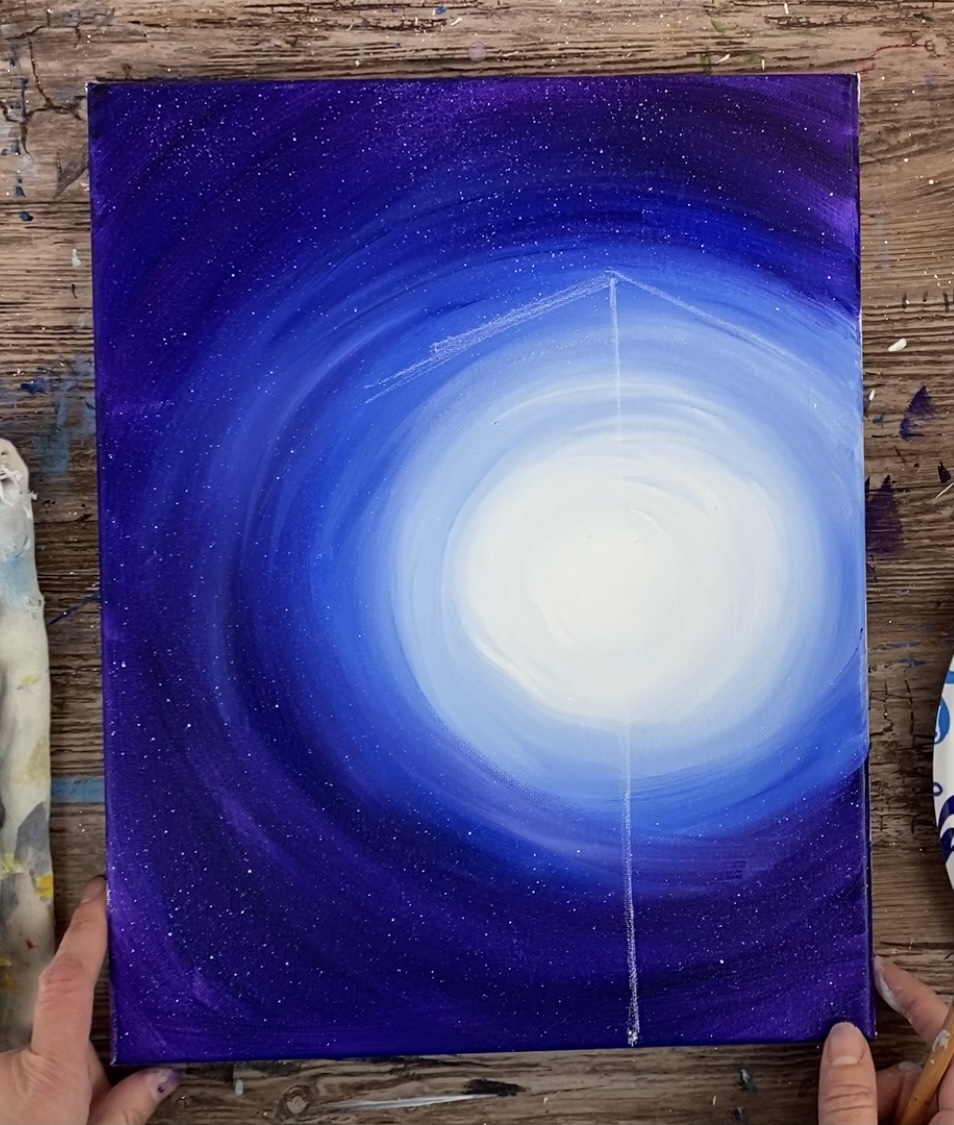
2. Splatter Paint Stars
Next use a toothbrush to splatter stars. The trick with this technique is to slightly water down the white to a consistency that is not too thick but not too thin.
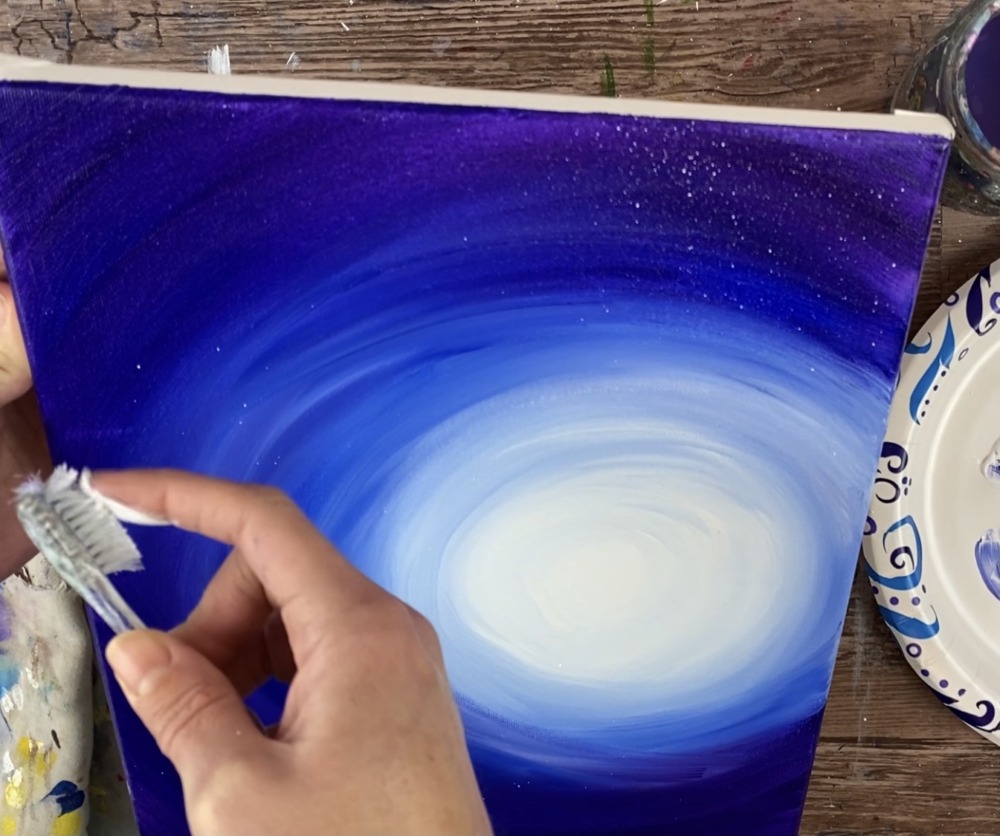
Wait for this to dry before going onto the next step (which will be drawing the lamp post or transferring it to the canvas).
3. Draw the lamp post
Use a chalk pencil for this step (or the traceable & graphite paper).
Use a t-square ruler and line it up to the bottom of the canvas. Find the center of the white circle and draw a vertical line from the bottom of the canvas. Draw this vertical line about 10″-11″ high.
Then draw two diagonal lines for the top of the lamppost on each side of that vertical line.
Then draw a small circle on top of the middle point. Then about 3-4″ up from the bottom of the pole, draw a horizontal line for the top part of the street sign.
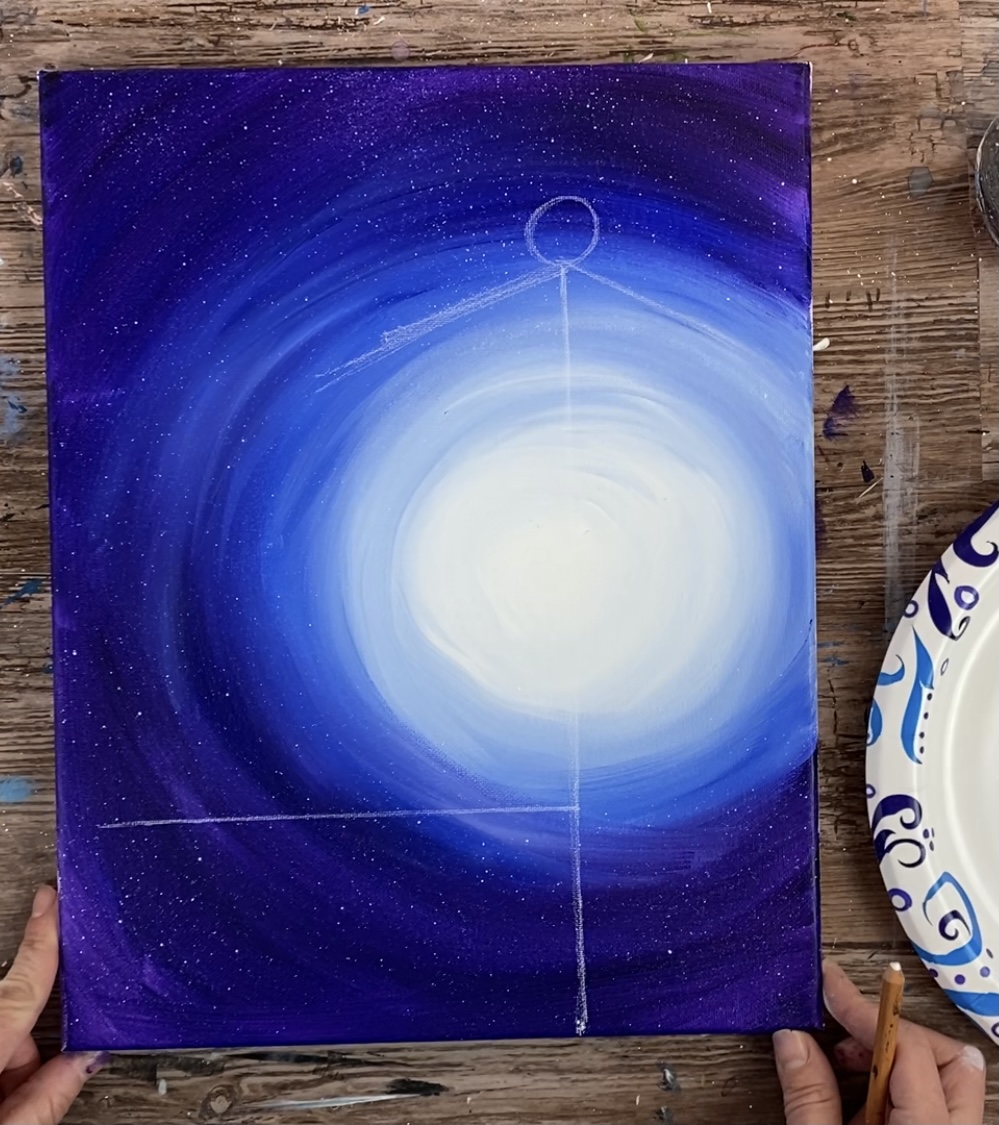
Next draw the street sign. Draw two vertical lines hanging down from the horizontal line. Then draw the sign shape as a large rectangle with curved corners.
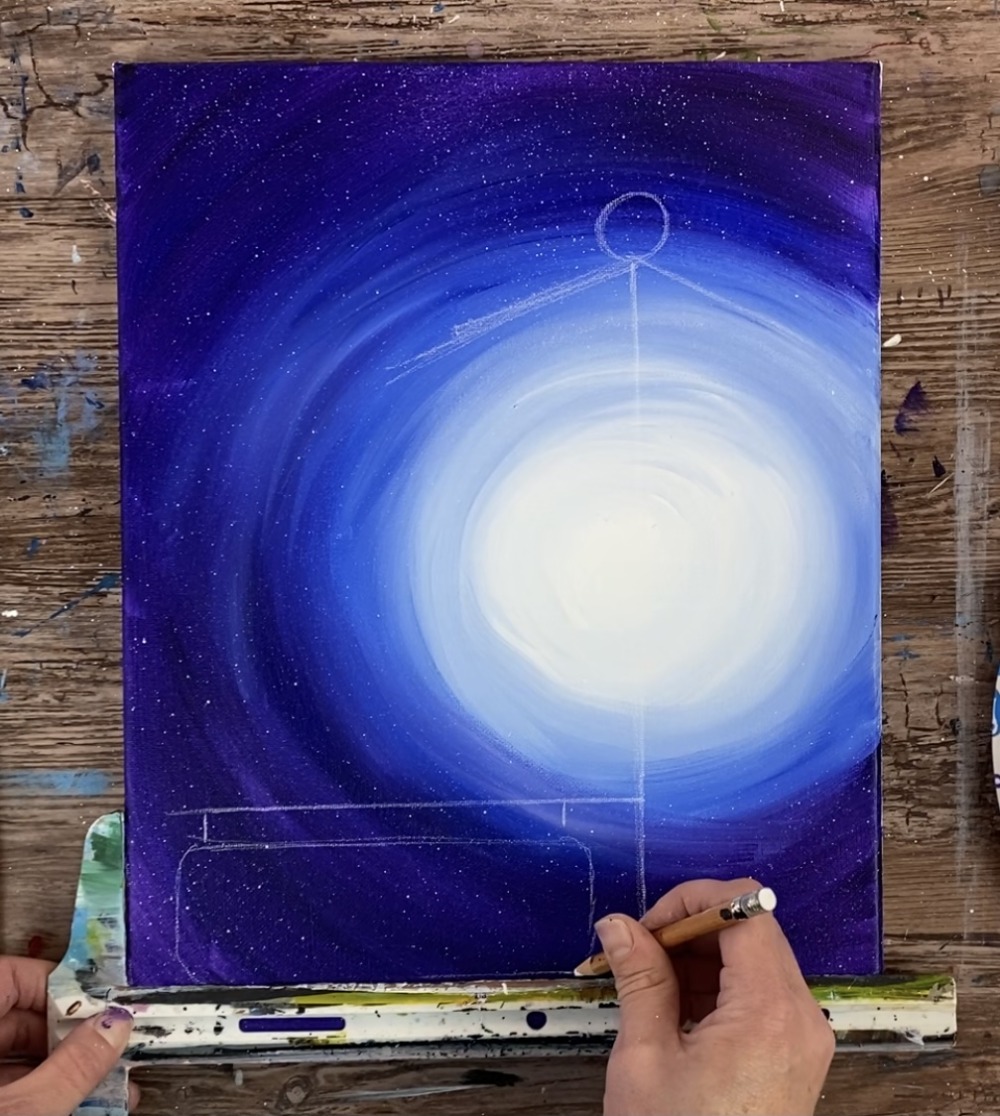
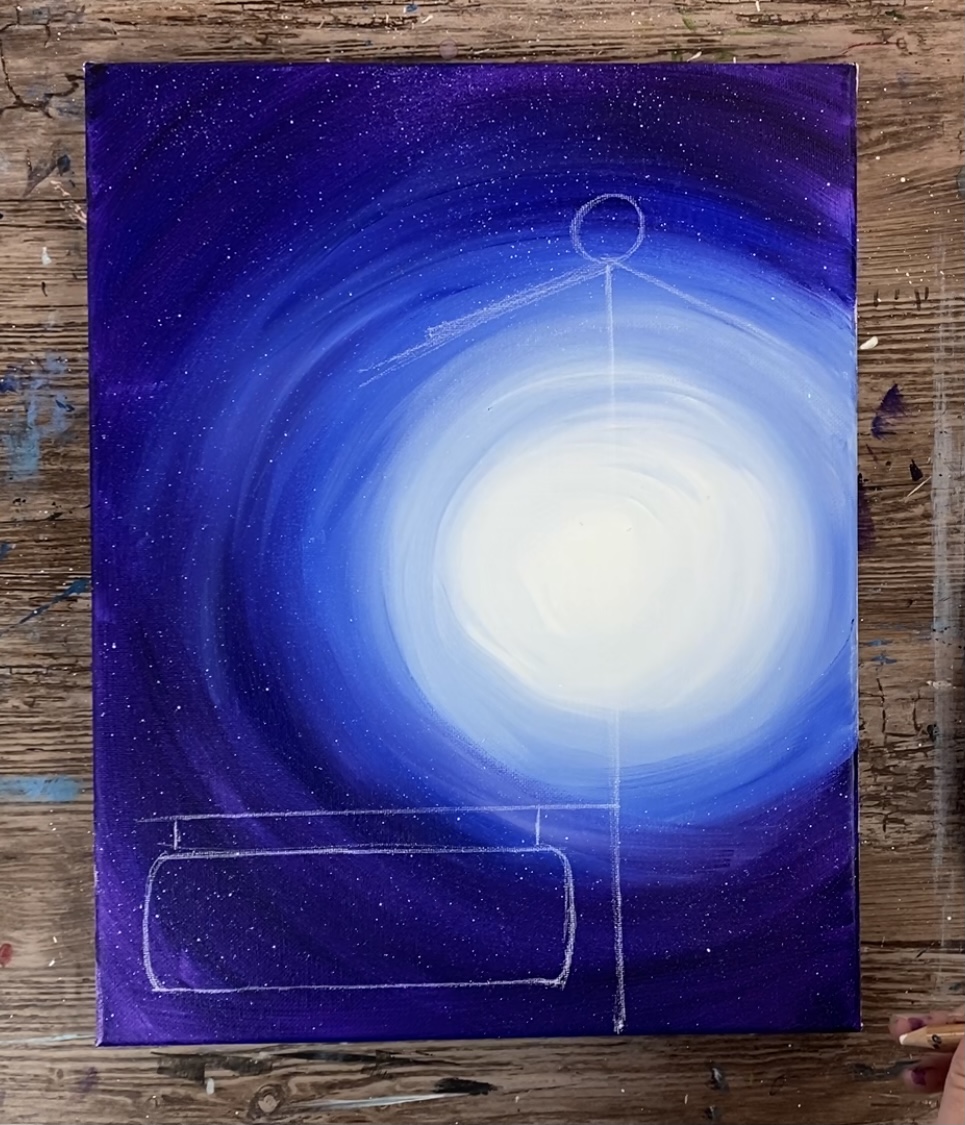
Draw the top of the lamppost as two diagonal rectangular shapes. Then draw the base of the lamppost on the top of the pole as a small oval area.
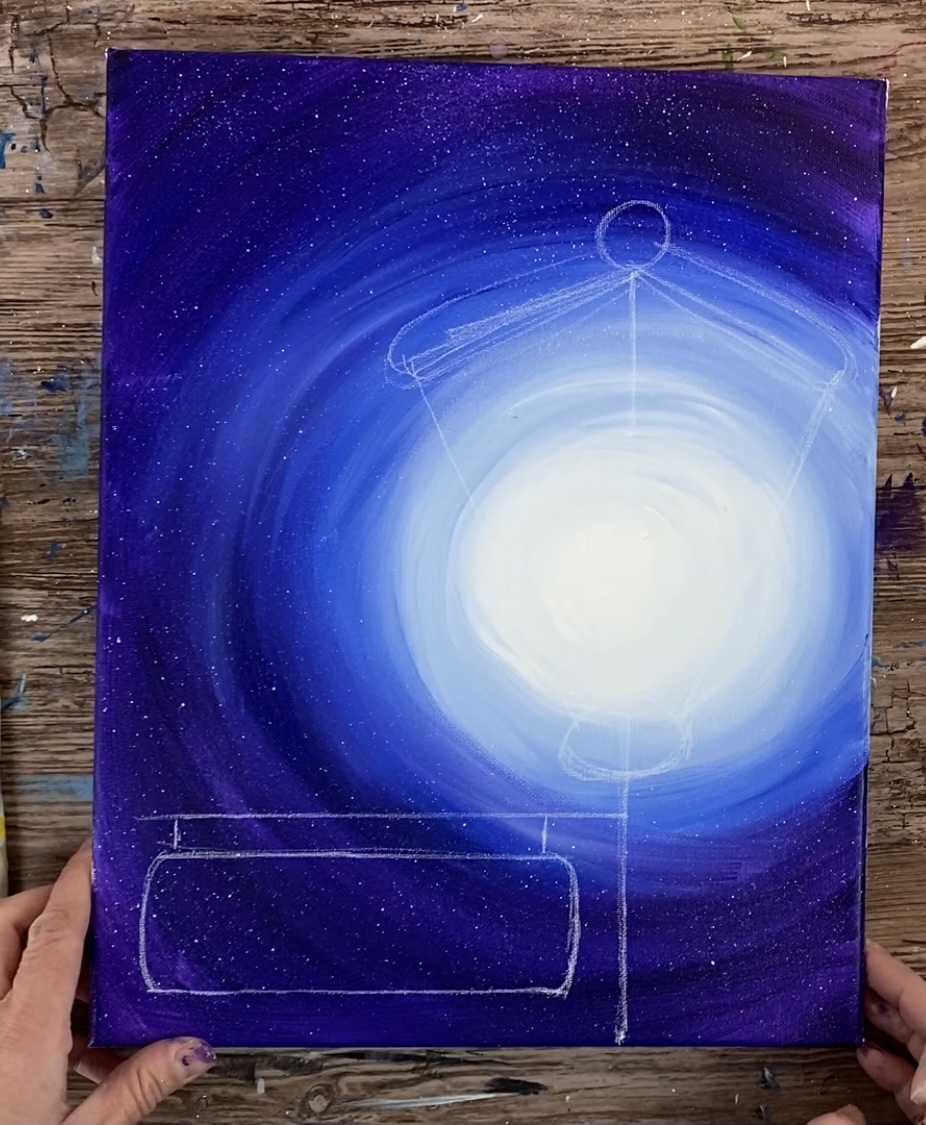
Then draw a smaller vertical rectangle under the base of the pole.
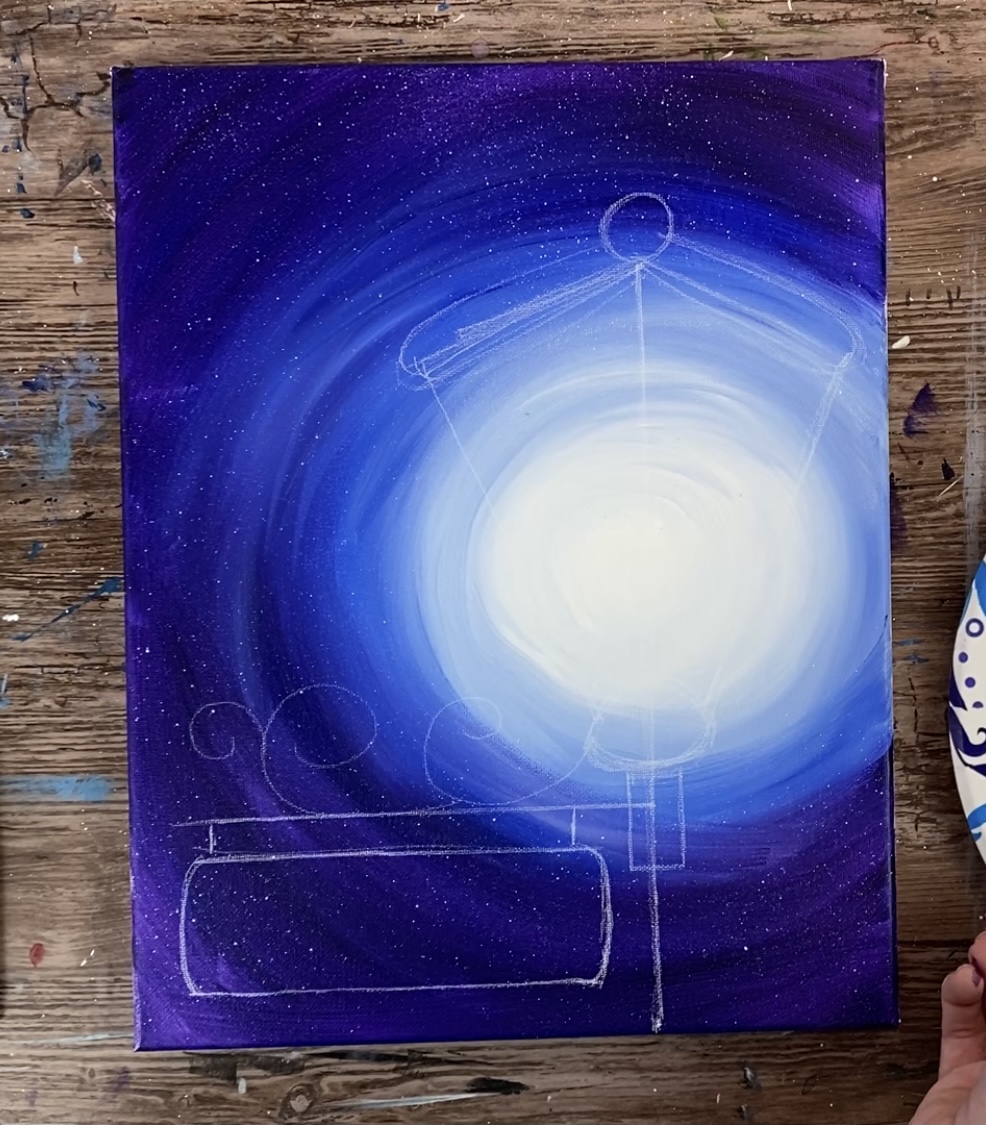
Lastly, draw the spiral designs that are on top of the hanging sign.
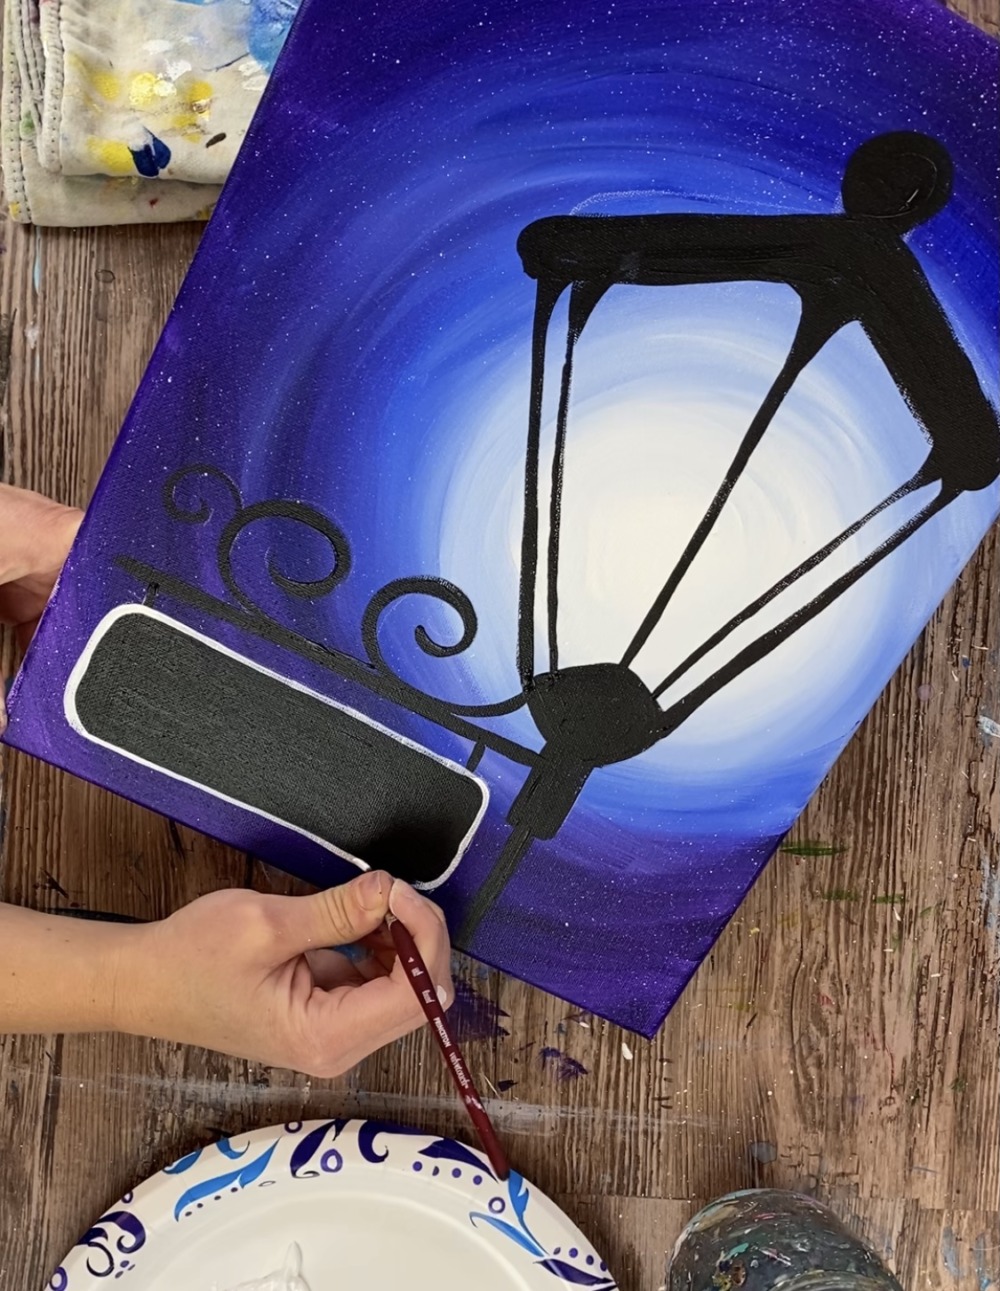
4. Paint The Lamppost Black
Use a #4 round brush and the color “mars black” to paint the lamppost. Start anywhere and paint over your lines with the black paint. Fill the objects in solid black.
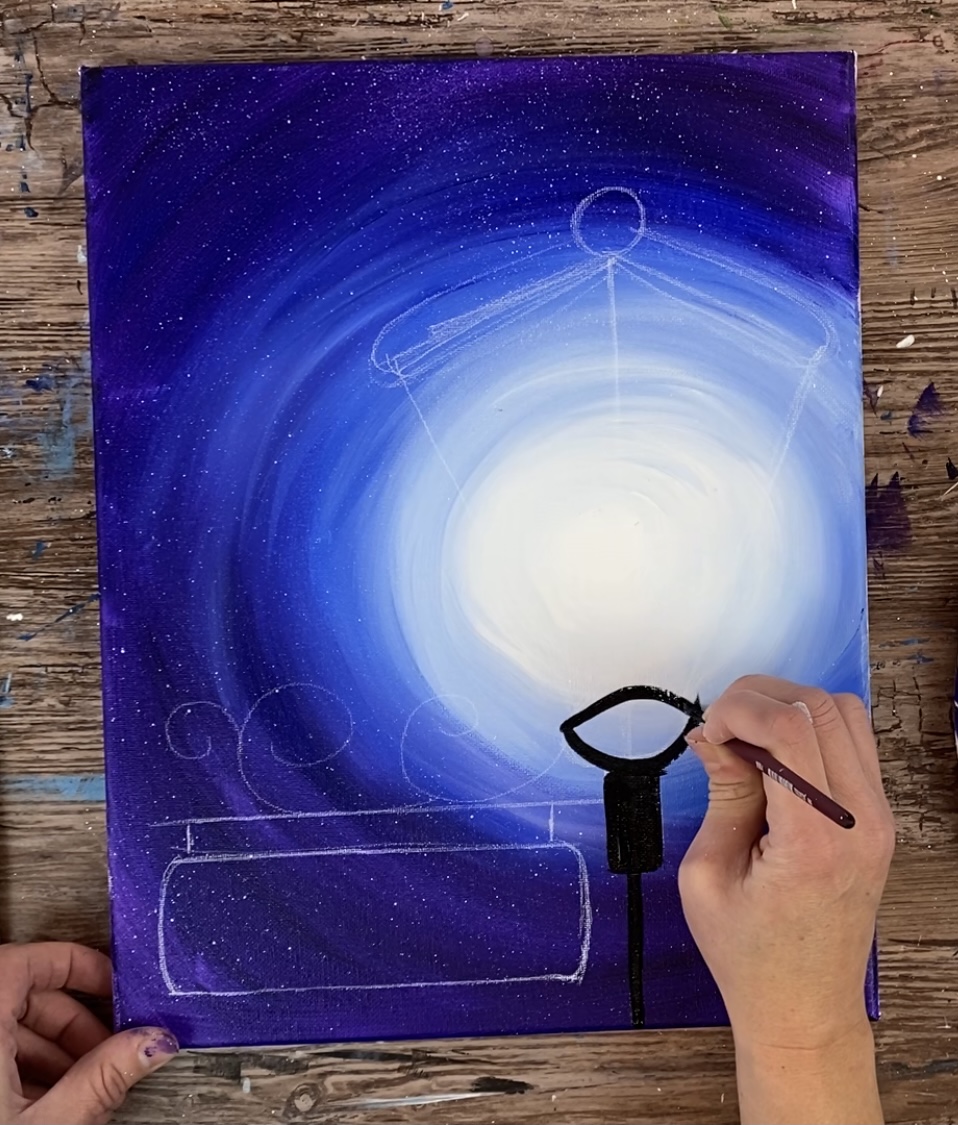
Tip: it helps to water the black down slightly to help with the “flow” of the paint especially when filling in smaller more intricate lines.
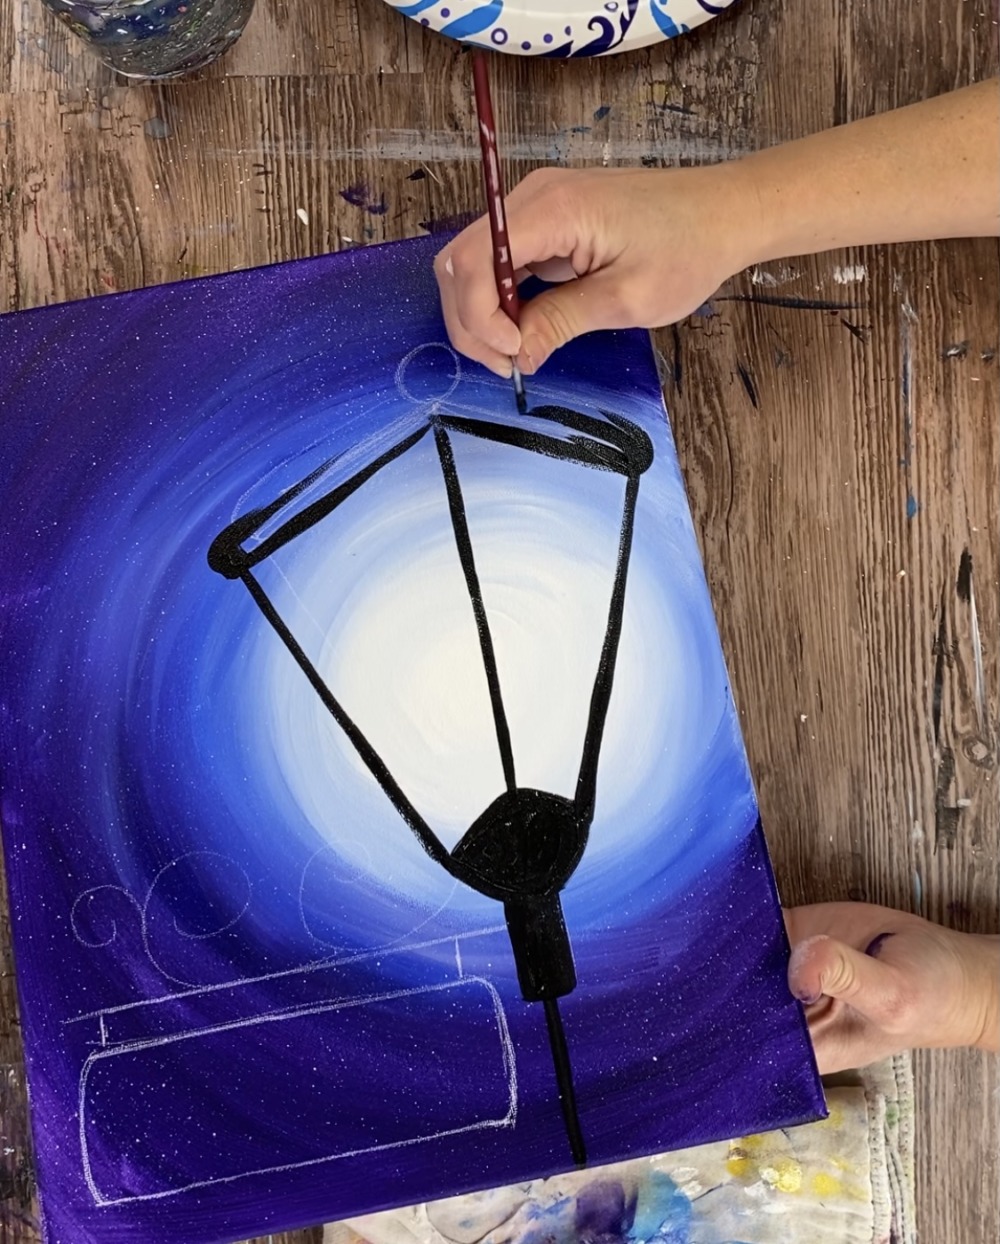
I added two more diagonal (thin) lines to my lamppost as shown below.
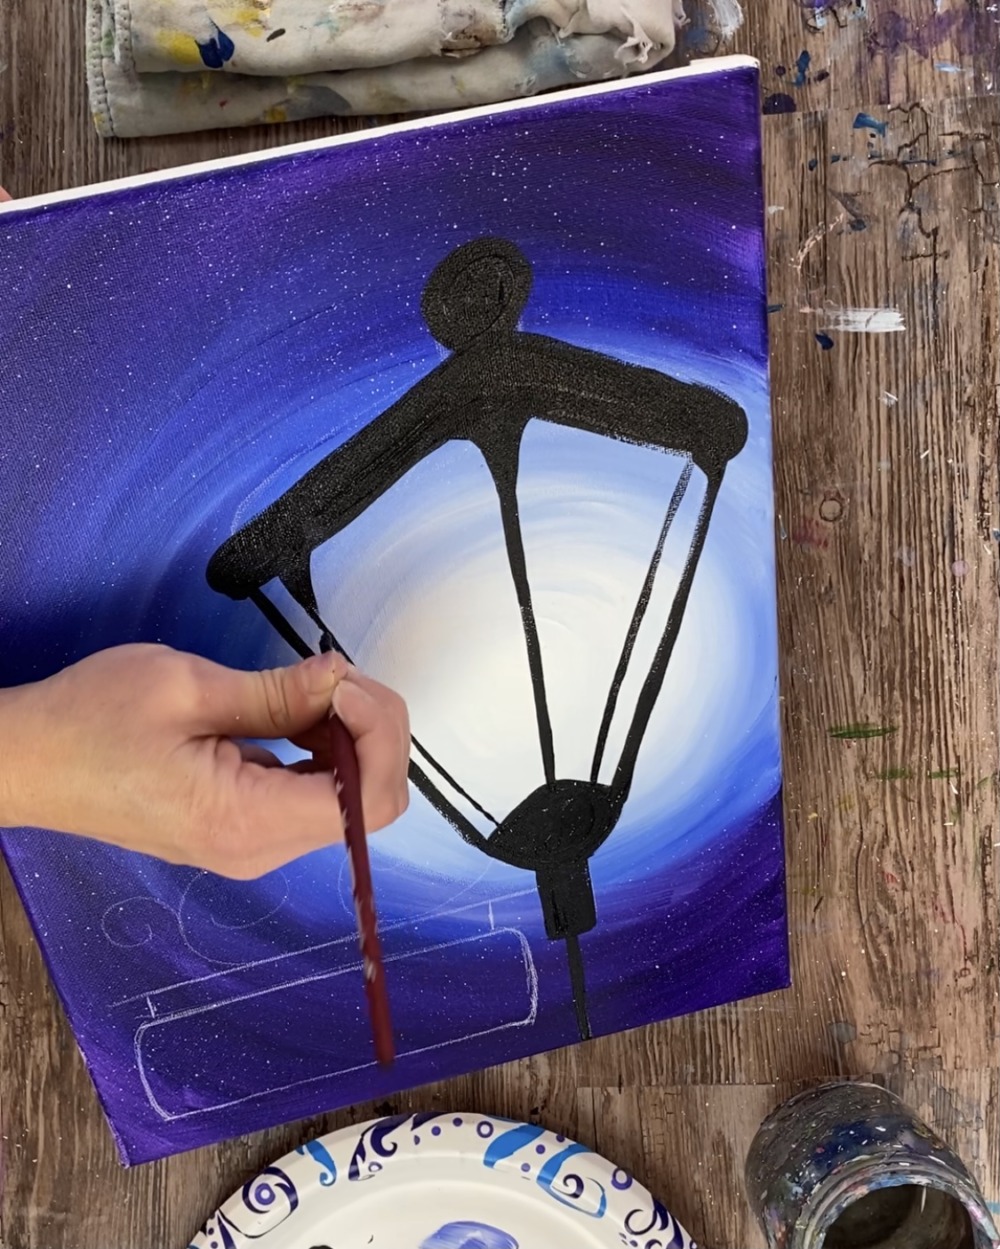
Fill in the sign solid black for now. When it dries, you will be able to do the lettering and white detailing.
After this dries, you can erase any white chalk lines that are still showing.
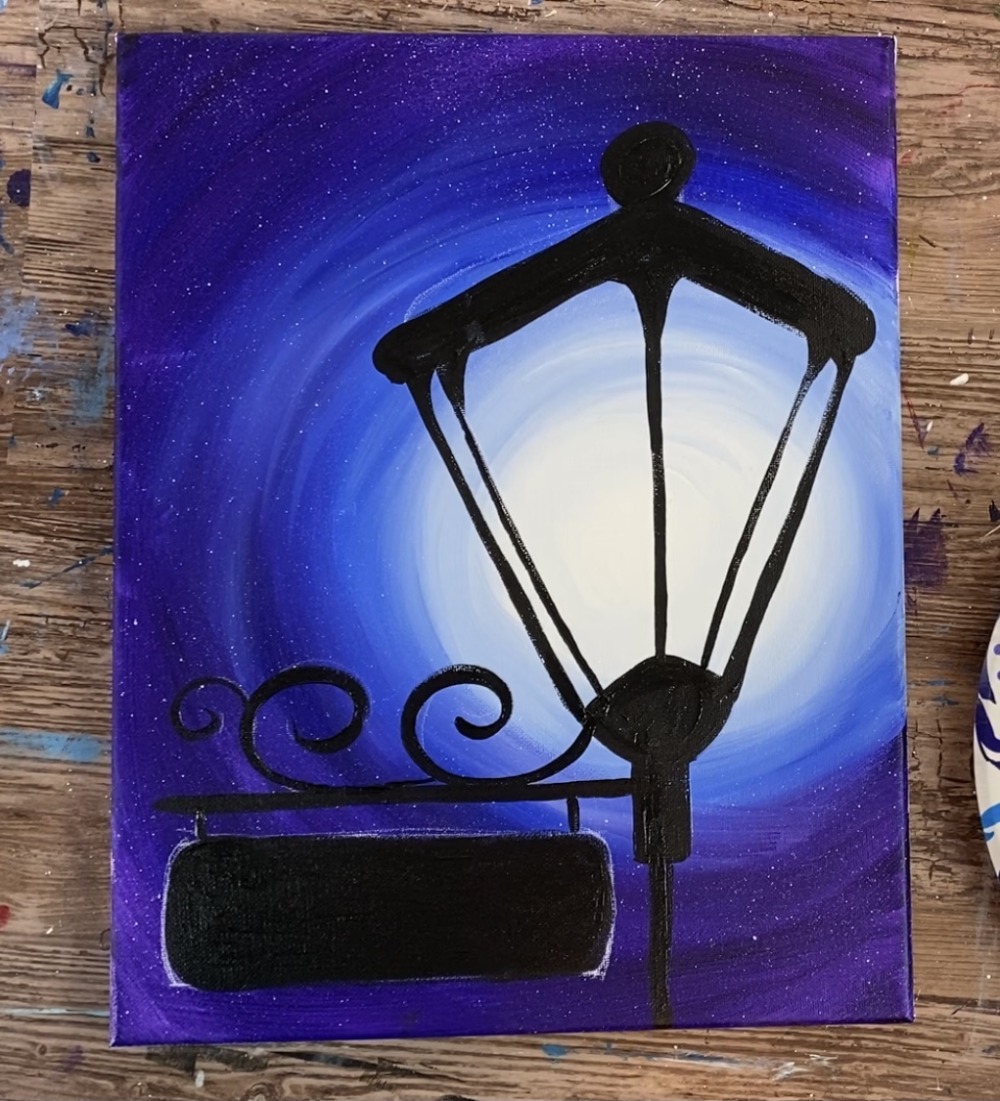
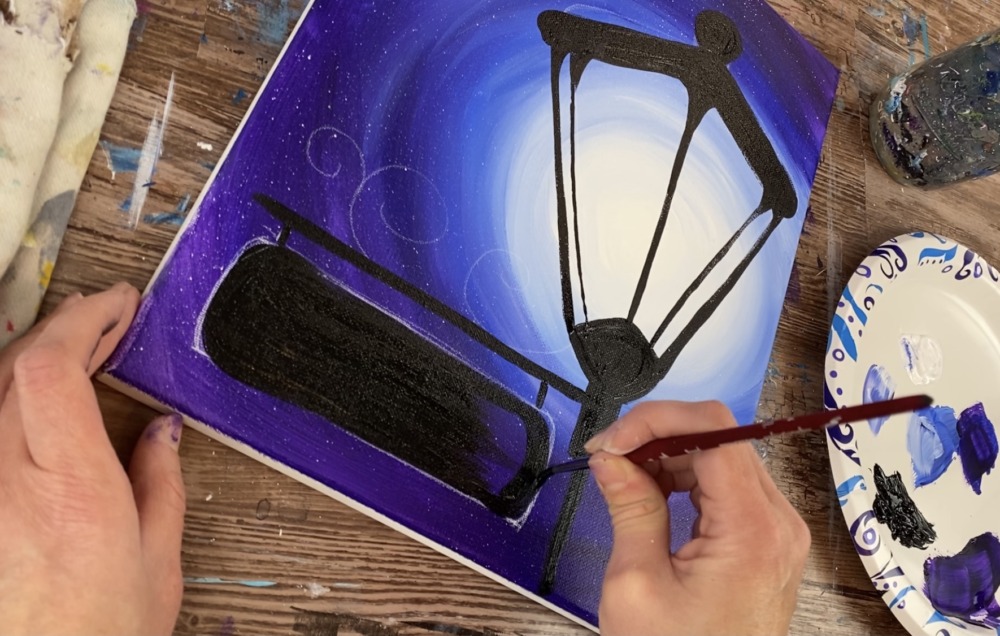
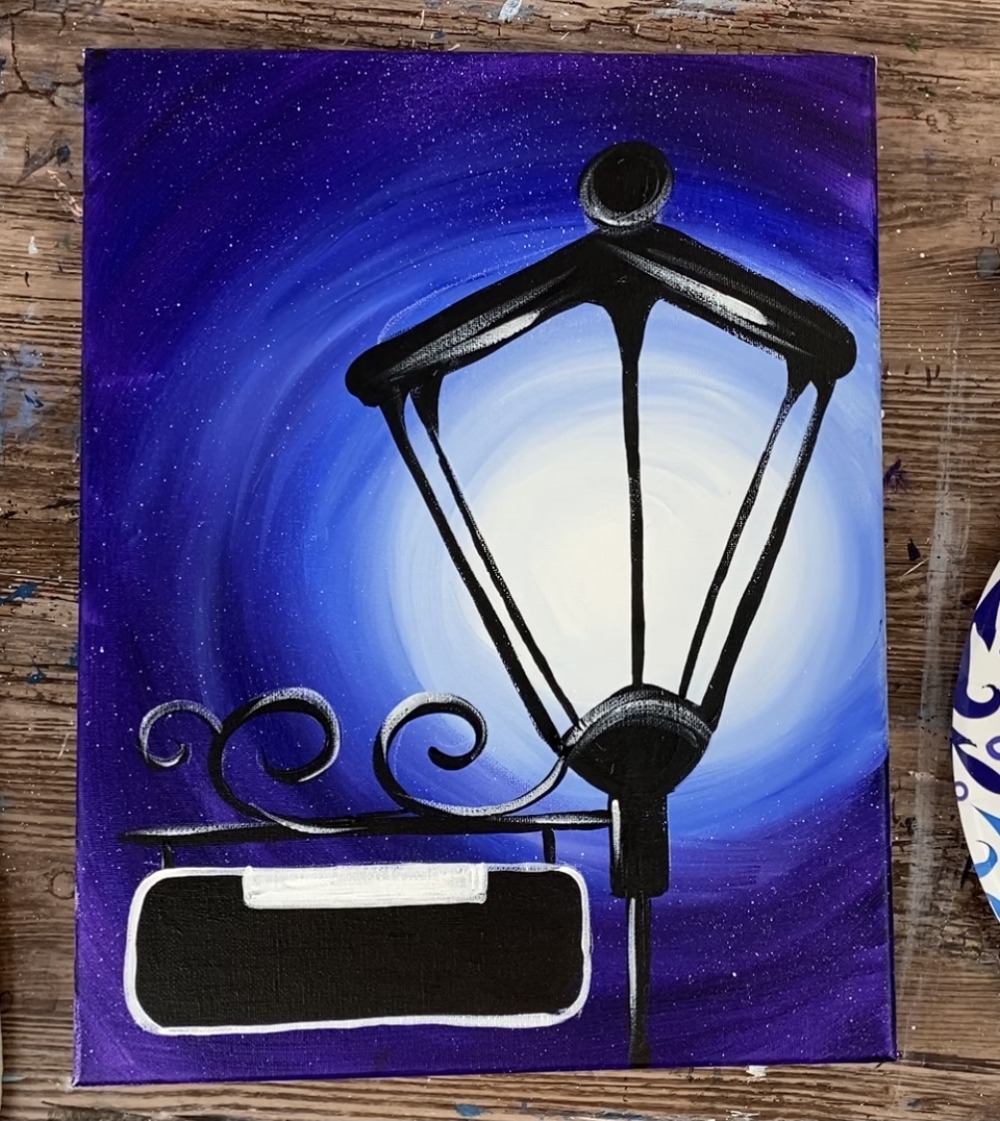
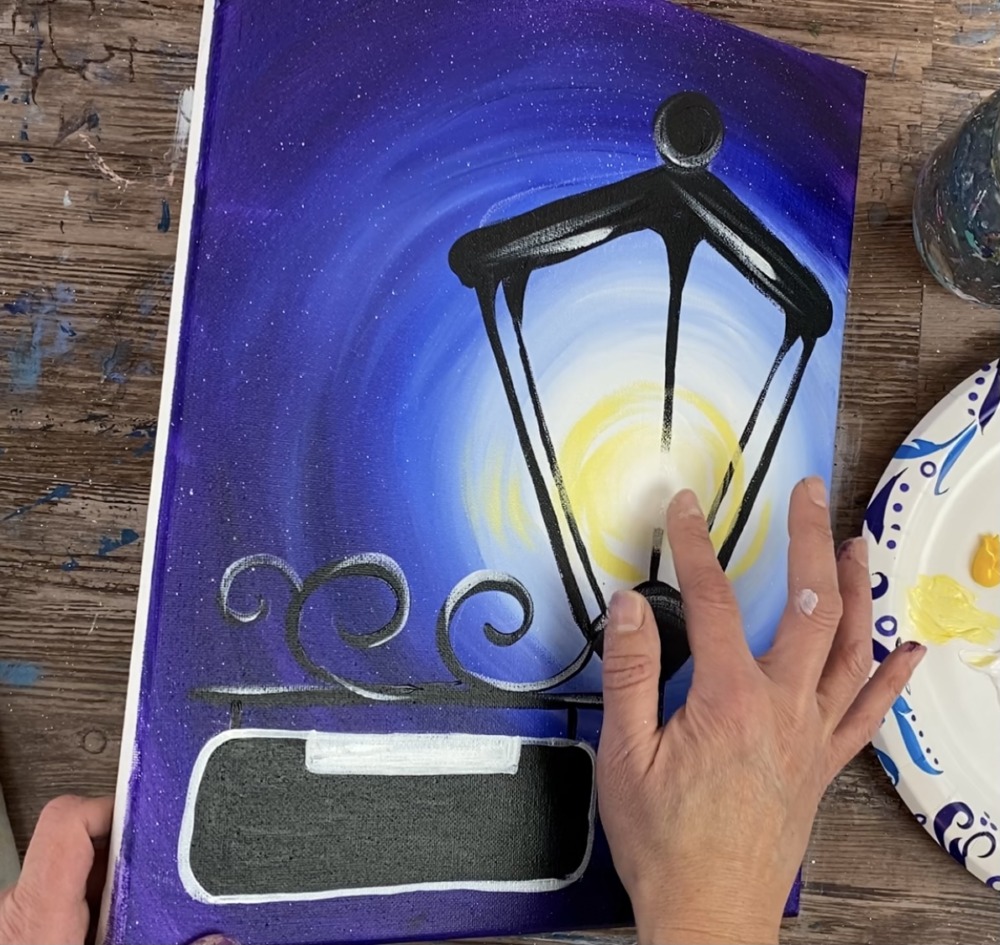
4. Paint the white detailing on the sign & highlights
Make sure the black is all dry before doing this step. Use your #4 round brush and titanium white to outline the outer edges of the street sign.
Then use the “dry brush” technique to paint white highlight marks on different areas of the lamp. When you do the “dry brush” technique, you load your brush in the paint and then wipe some of it off with a paper towel. This will make your strokes look “feathery” and “translucent”.
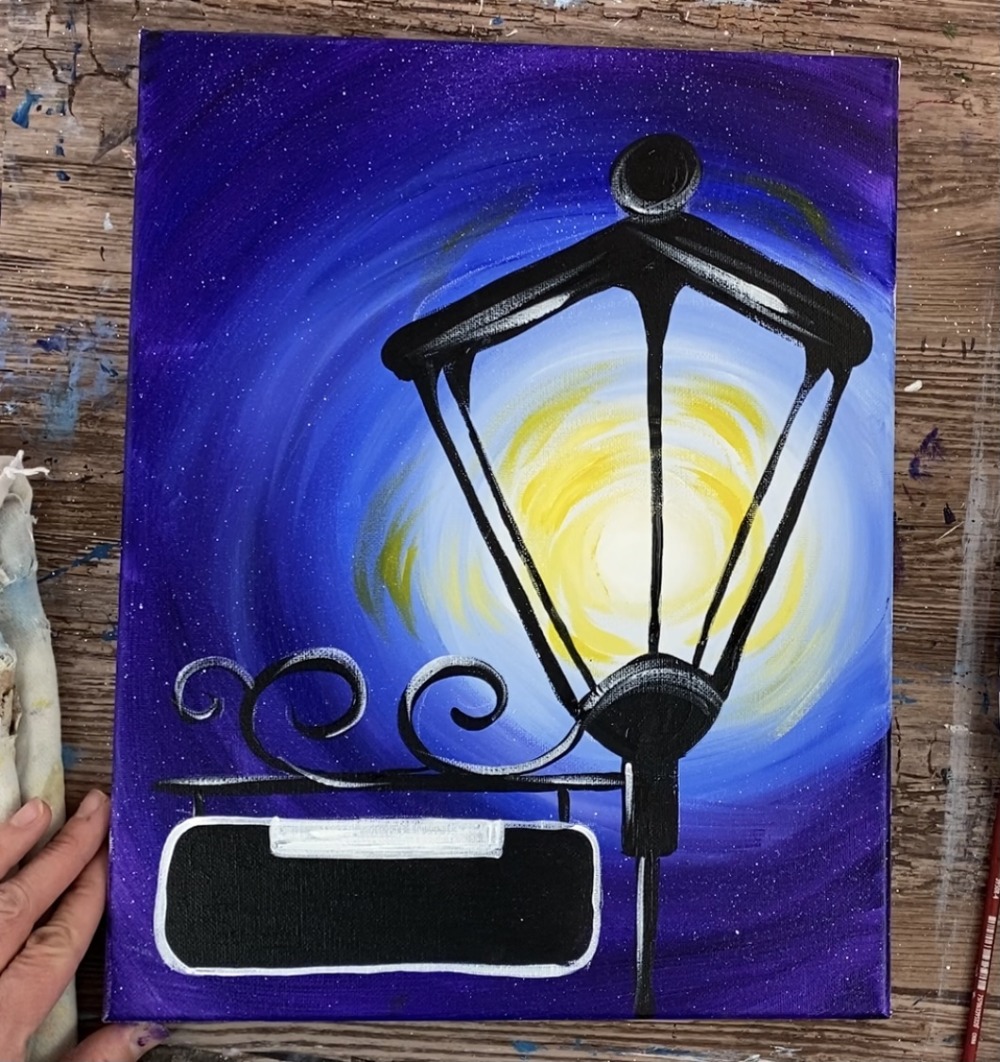
5. Paint yellow glow
Mix on your palette with cadmium yellow medium to create a light yellow. Then use your #4 round brush to paint circular strokes of yellow around a center white circle.
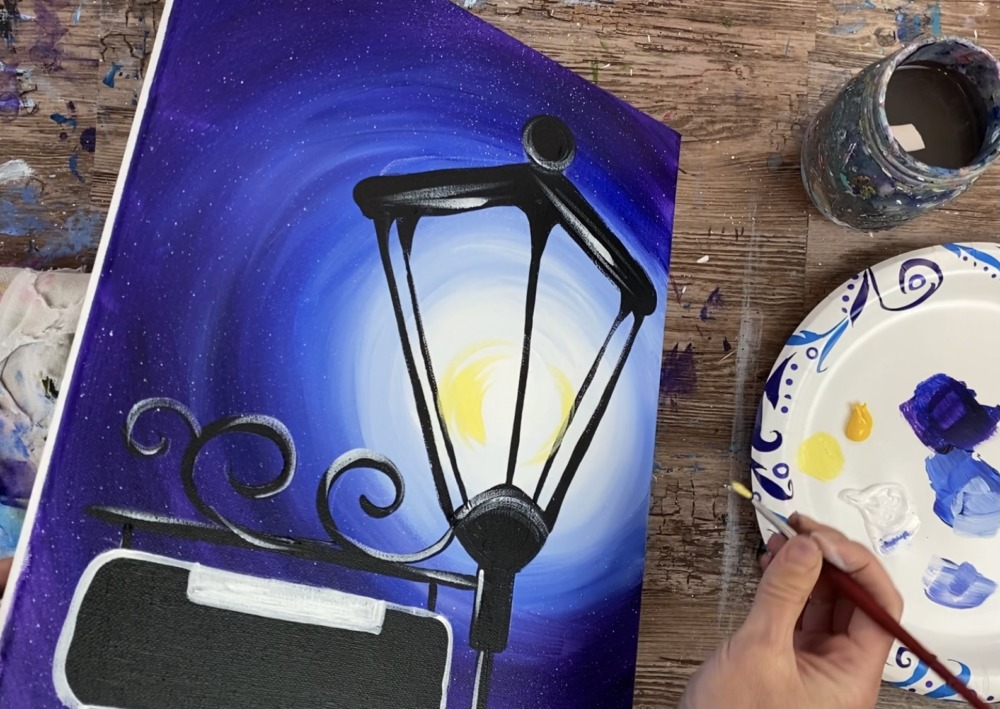
Paint these yellow circular strokes radiating out from the middle. It is okay if you paint over the black parts of the lamppost because you can always paint over them again. You can also have yellow strokes going on the outside of the lamp.

Then load your index finger in just titanium white. Smear a very bright white circle right in the middle of that yellow glow. You can use your finger to blend some of it into the yellow but try to keep the very center super bright and white.
Next paint a few more radiating strokes with just cadmium yellow medium (not mixed in white). This will make for some color variation in that yellow. I went further up with this yellow and painted a few strokes above the lamp as well.
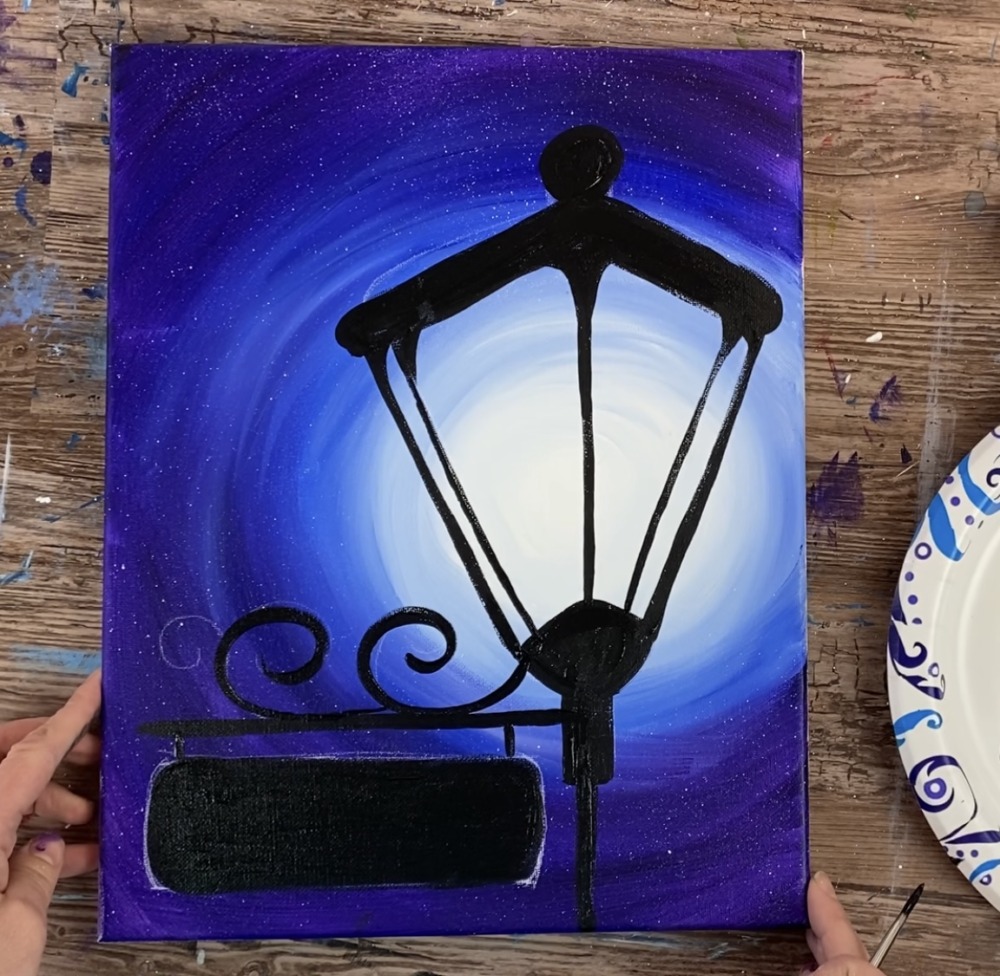
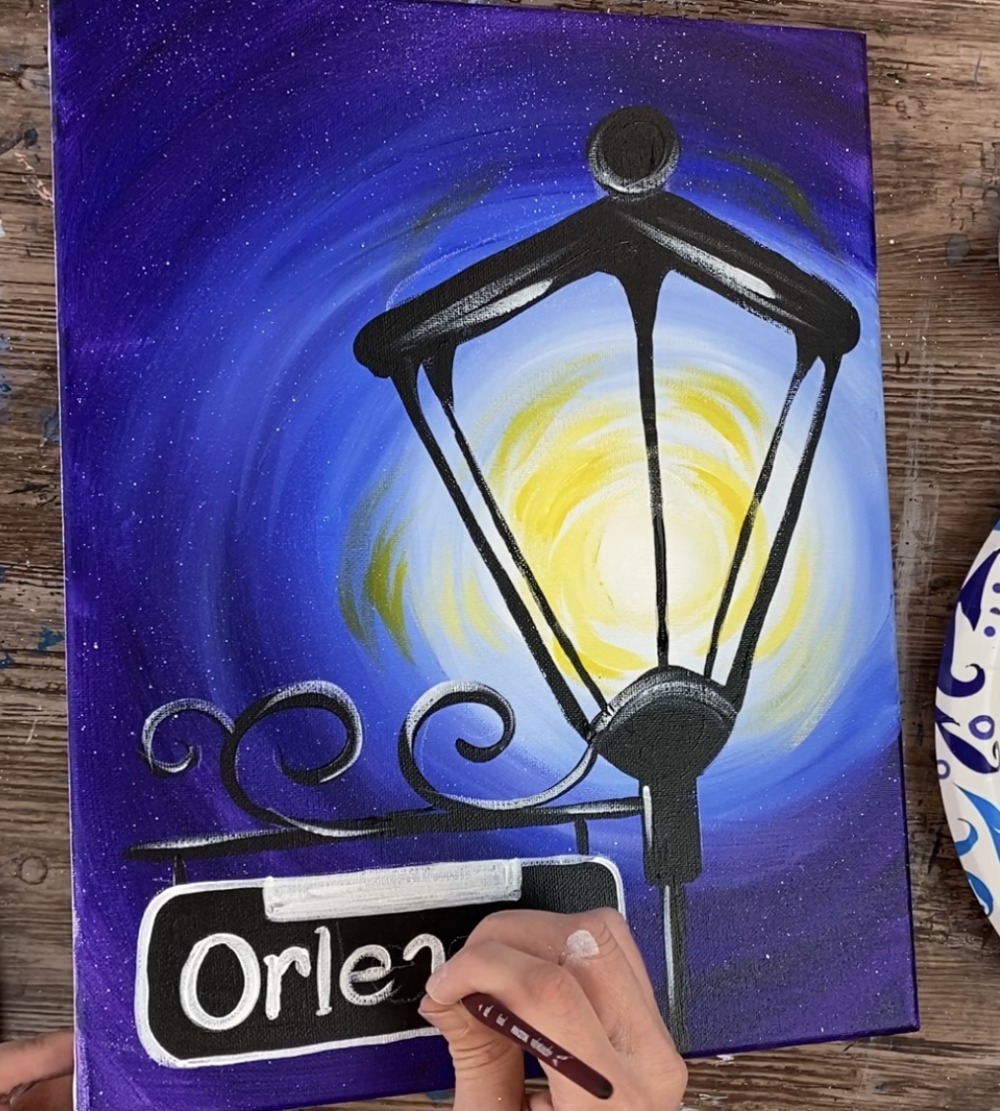
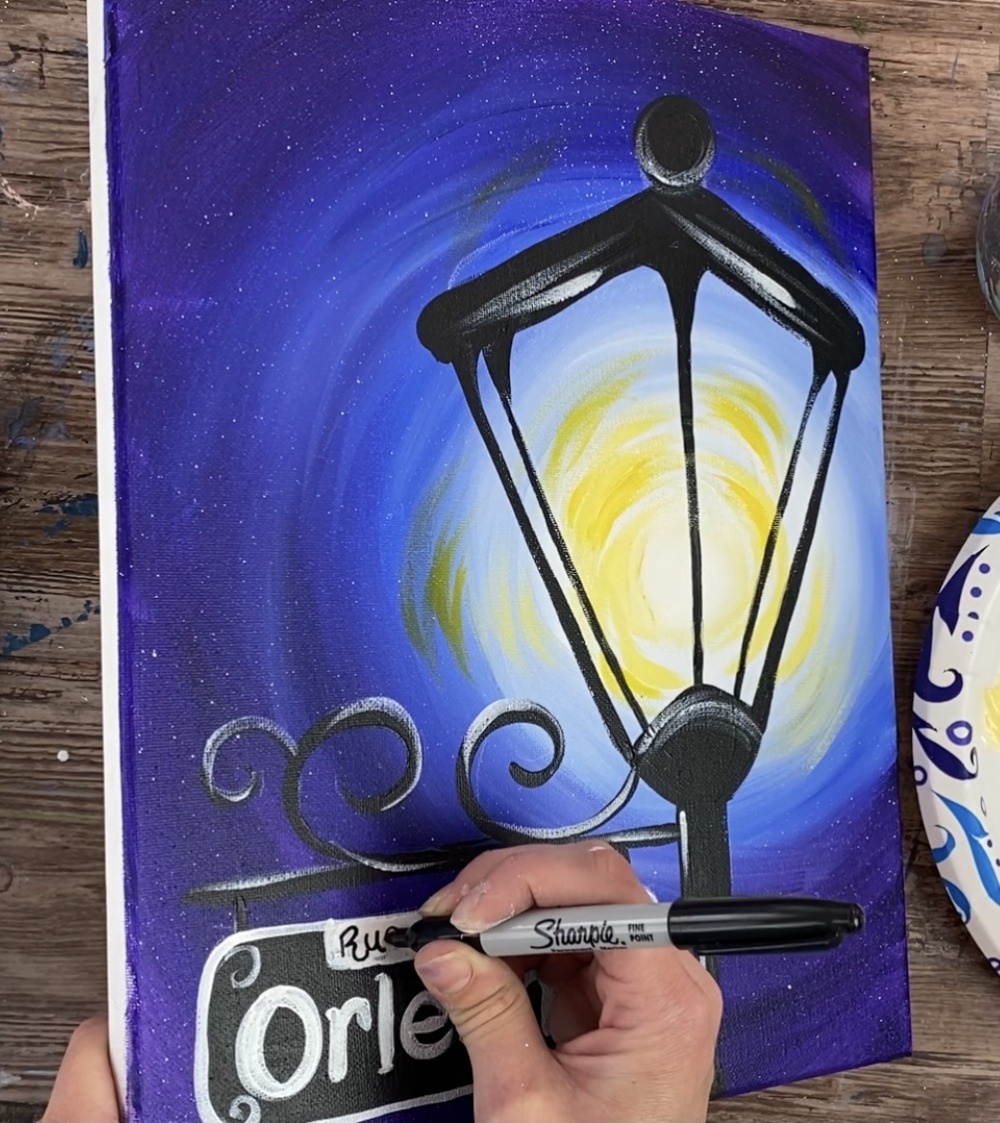
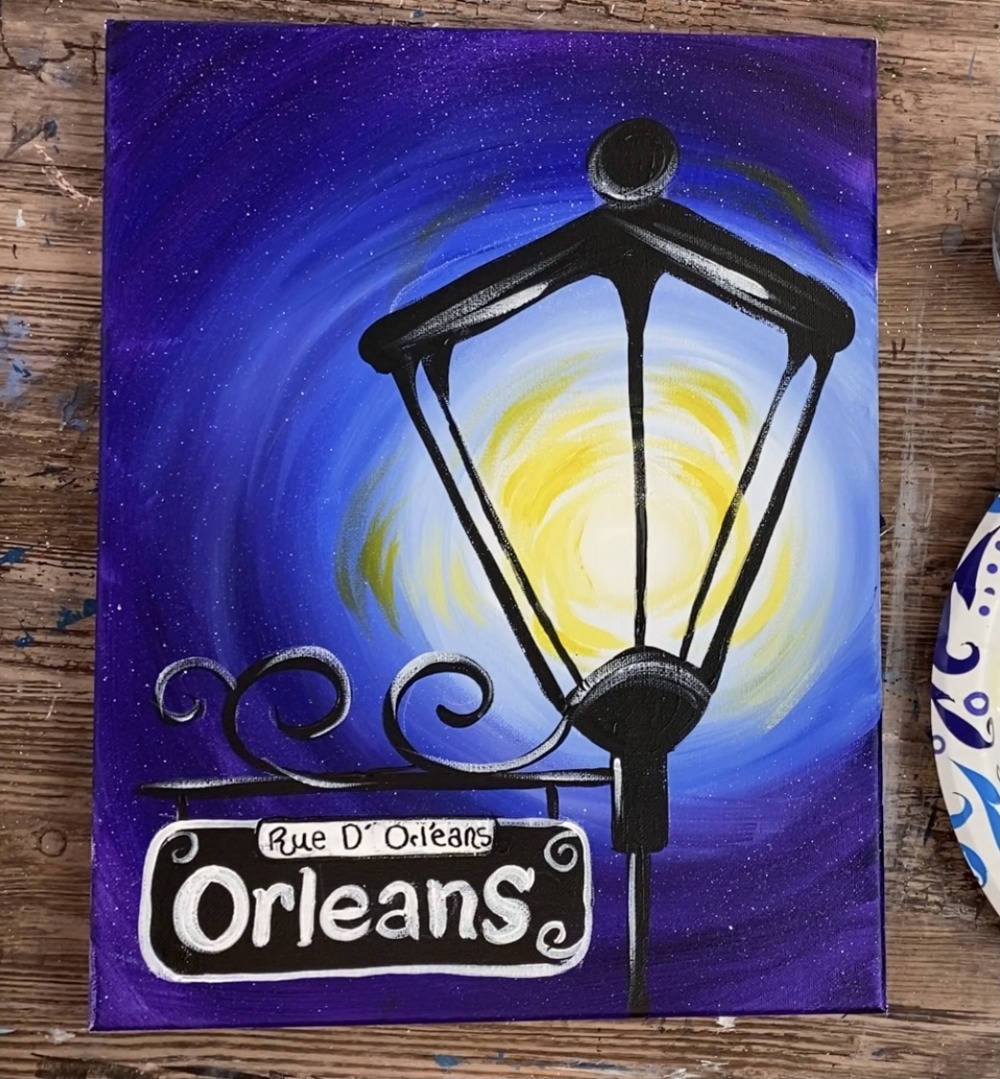
6. Draw/ Paint the Street Name
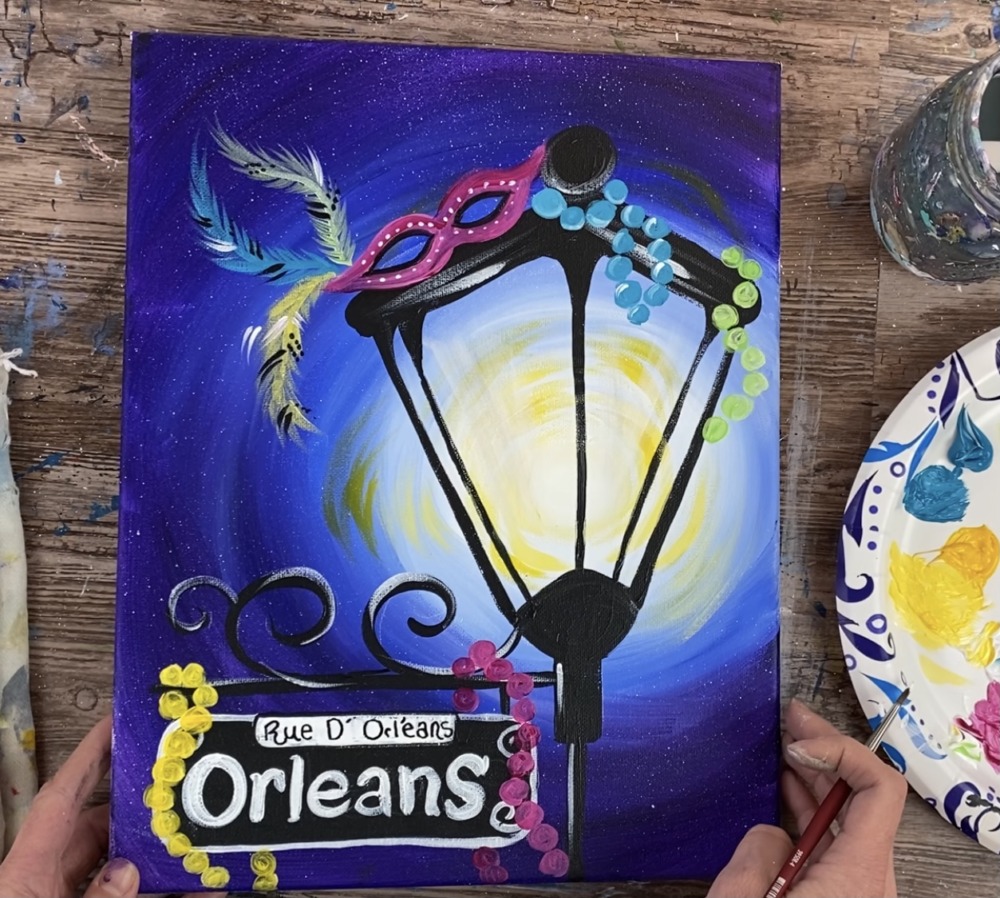
Use a chalk pencil to draw out the lettering for the street name. This is where you can customize the name. I wrote “Orleans” in white.
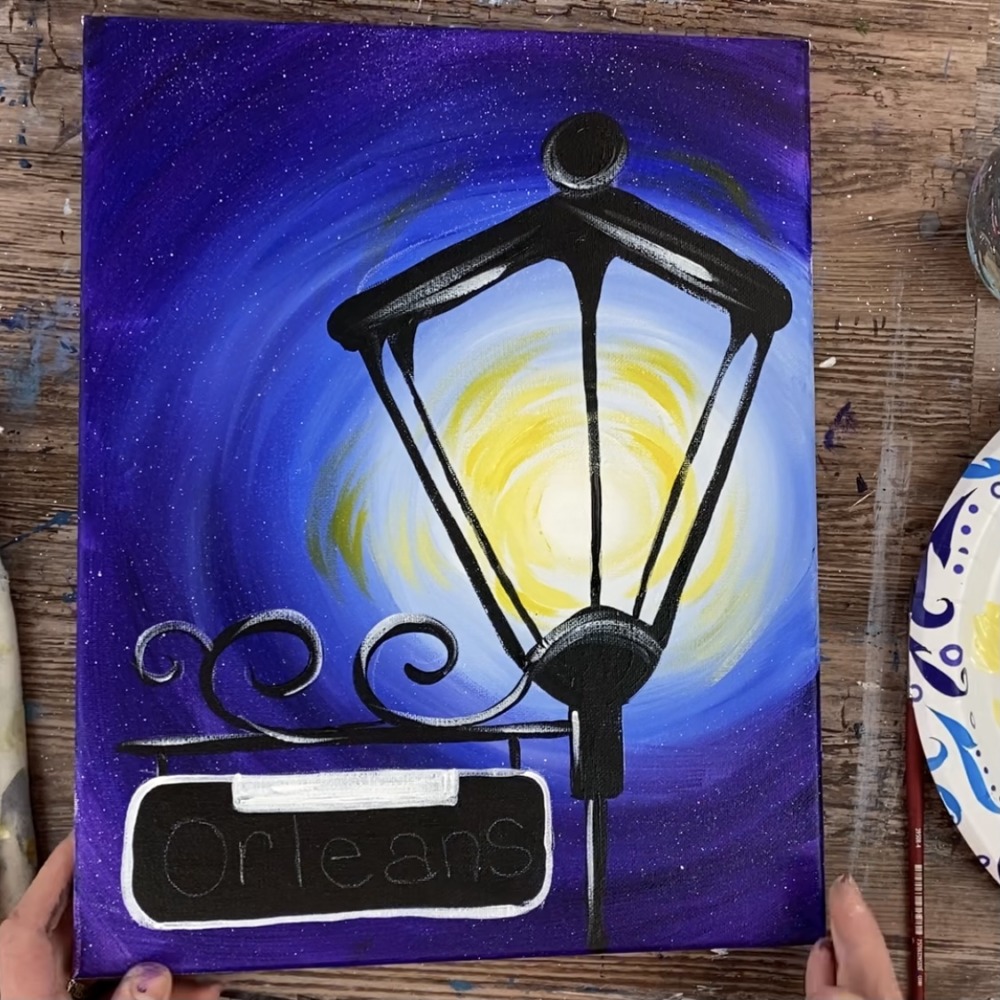
Then use a small round brush and titanium white to paint the word.
For the top part “Rue D’ Orl’eans”, I used a black sharpie. You can do this, or use a paint pen or small round brush with mars black (whichever you prefer).
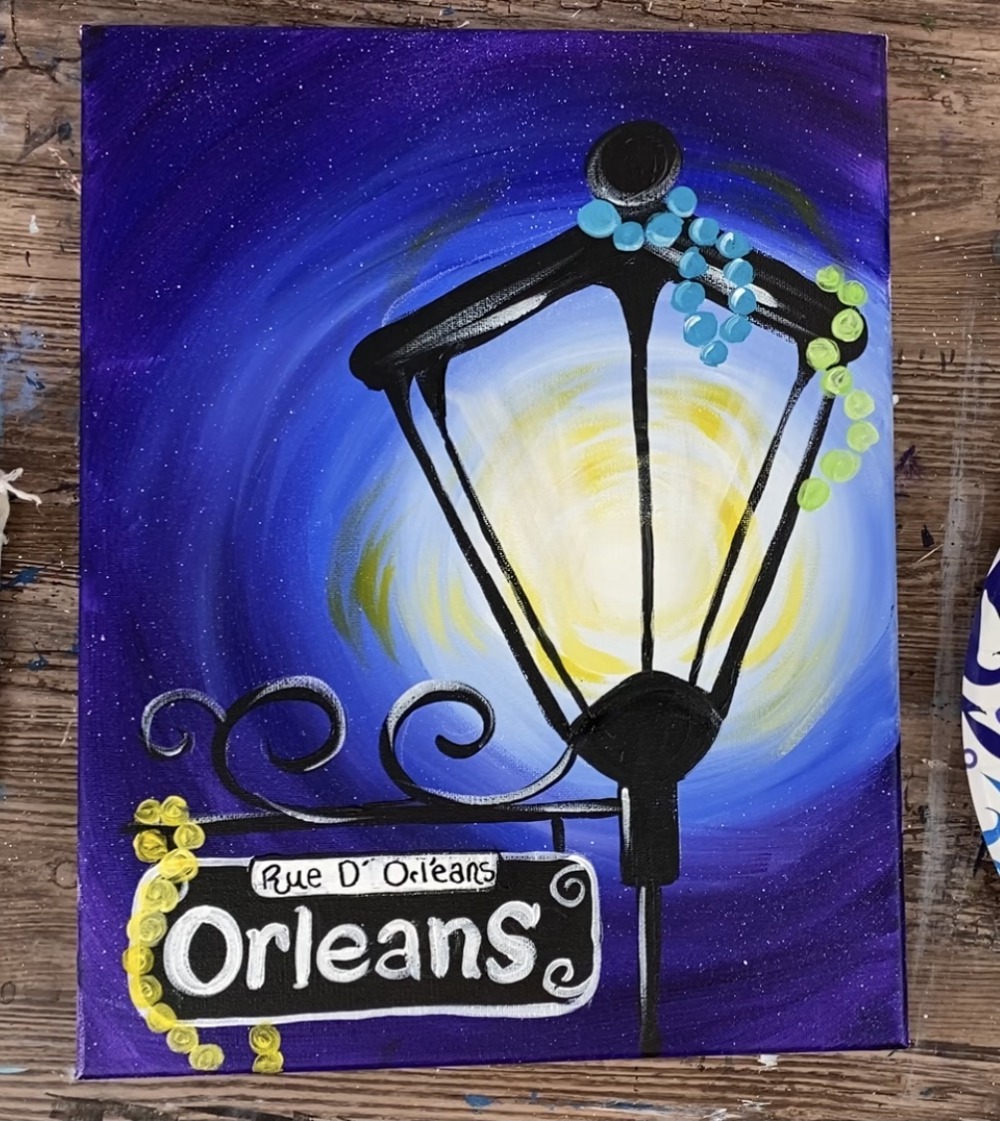
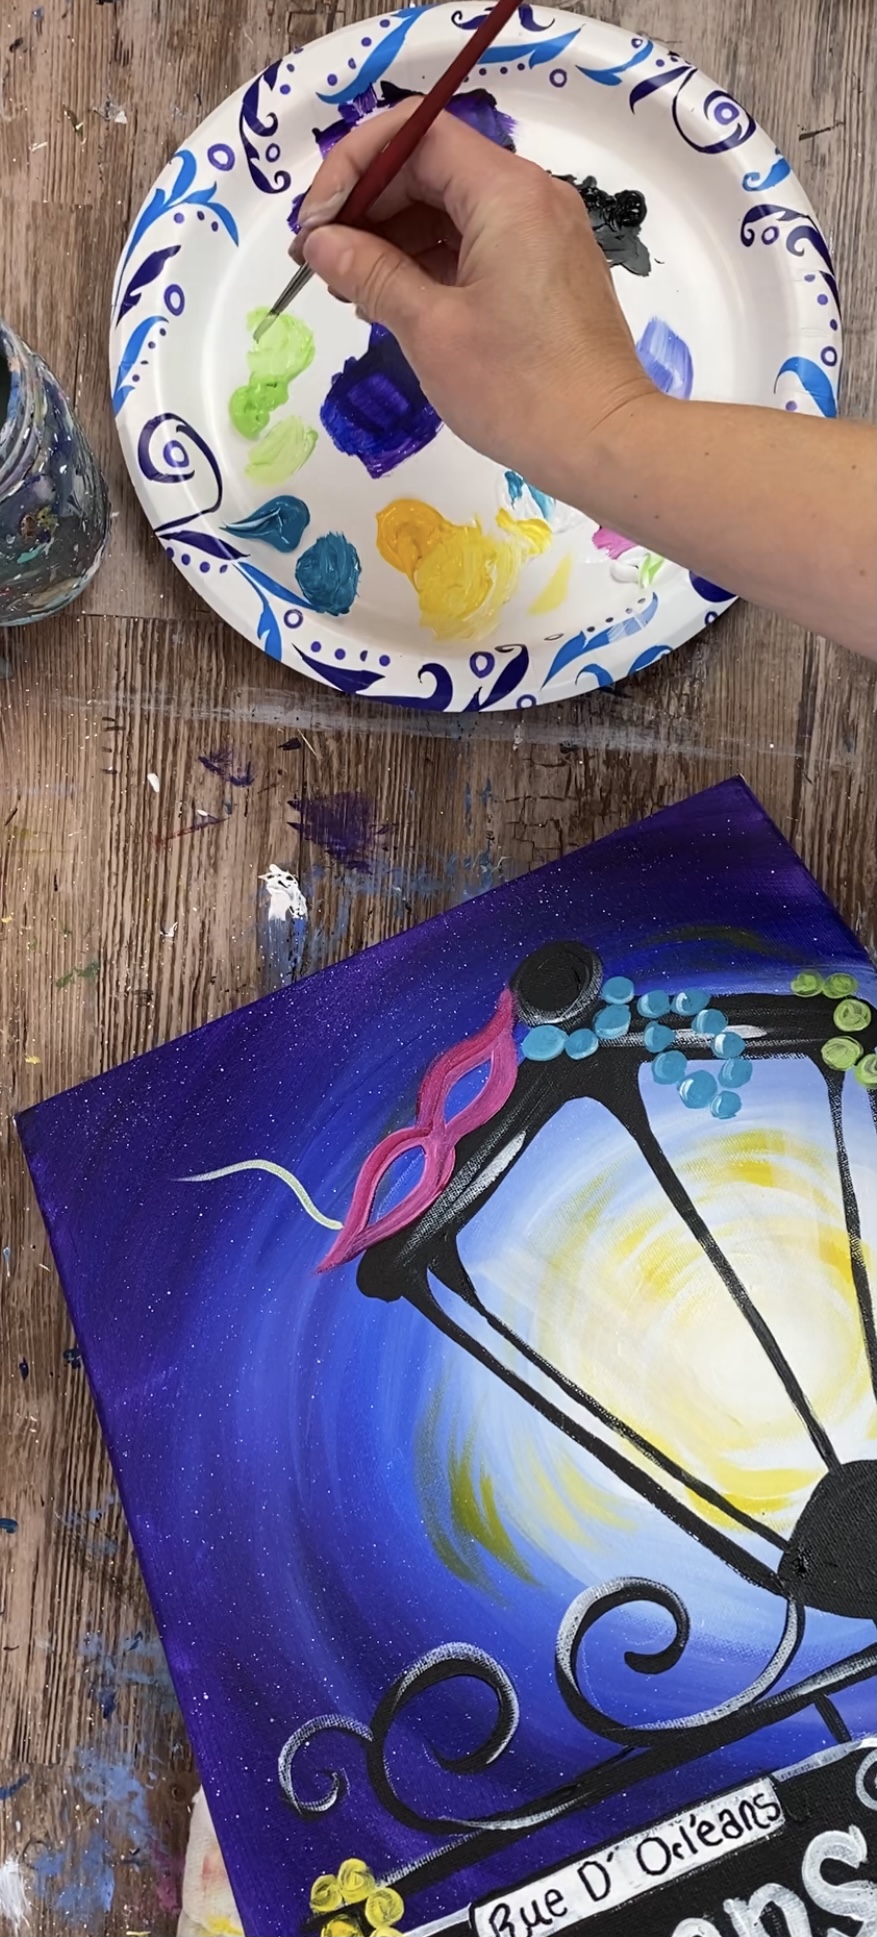
7. Paint the mardi gras beads & decor
Use a #4 round brush for this step. It is super simple! Just paint small circles that form the shape of the beads that are hanging on the lamppost. For the first set of beads I did “turquoise”. If your color isn’t showing up “opaque” you can mix a little white into it.
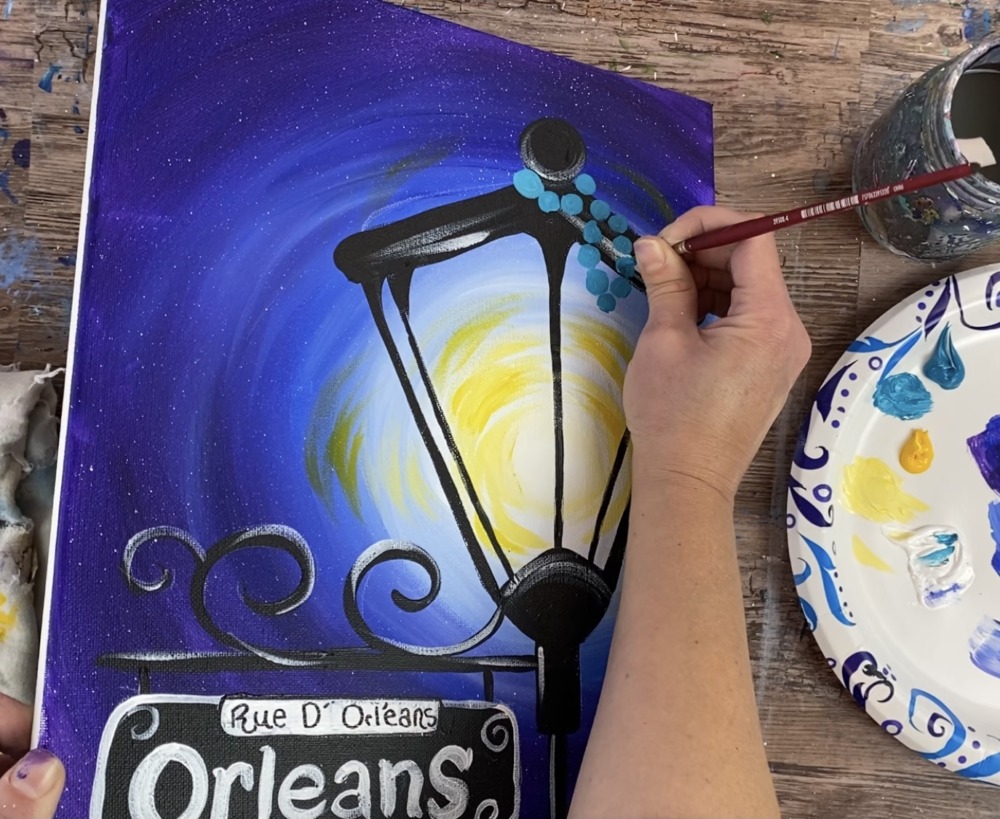
I did brilliant yellow green for the second set of beads. When the first circle dries, you may need to paint a second coat to get the bead circles to be more opaque. Also, paint a white highlight line on all the circles after the color dries.
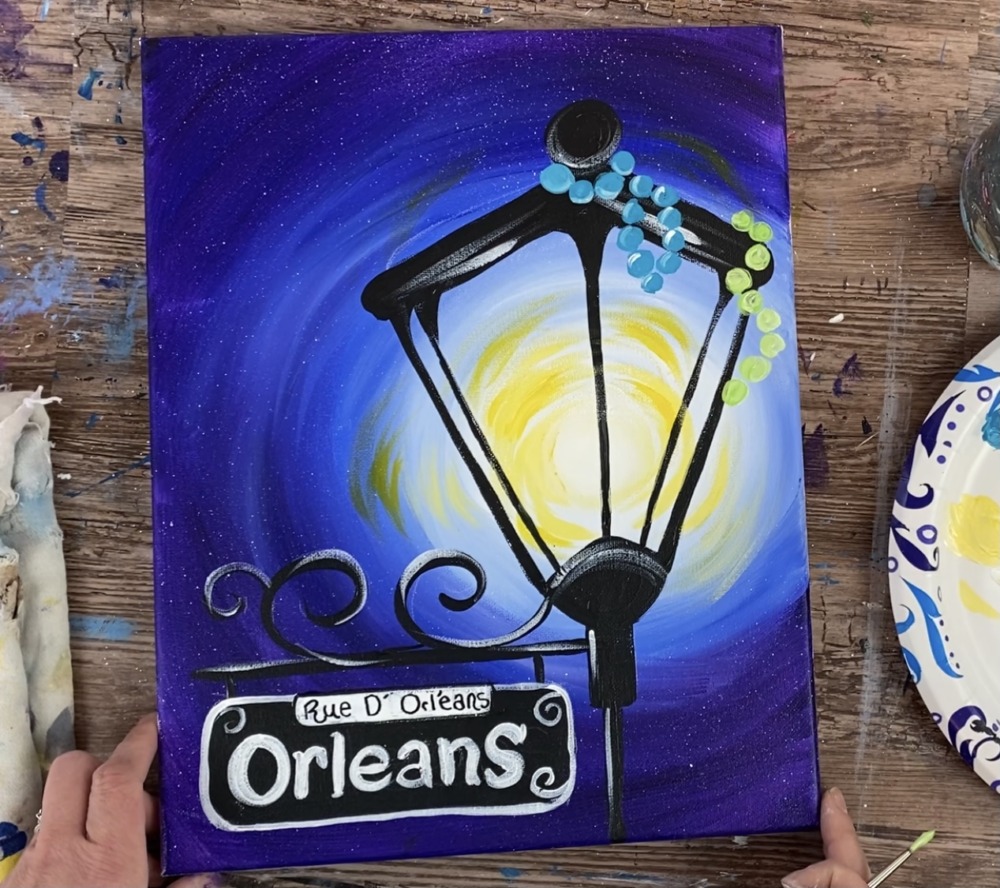
Cadmium yellow medium was used for the third set of beads.
For the Mardi Gras Mask, I painted the overall shape with quinacridone magenta.
Then I mixed a little titanium white into the magenta and formed the shape of the mask. I kept the magenta “unblended” so it looked like it had two colors in it (the quinacridone magenta and the white). The white also helps the magenta stand out more.
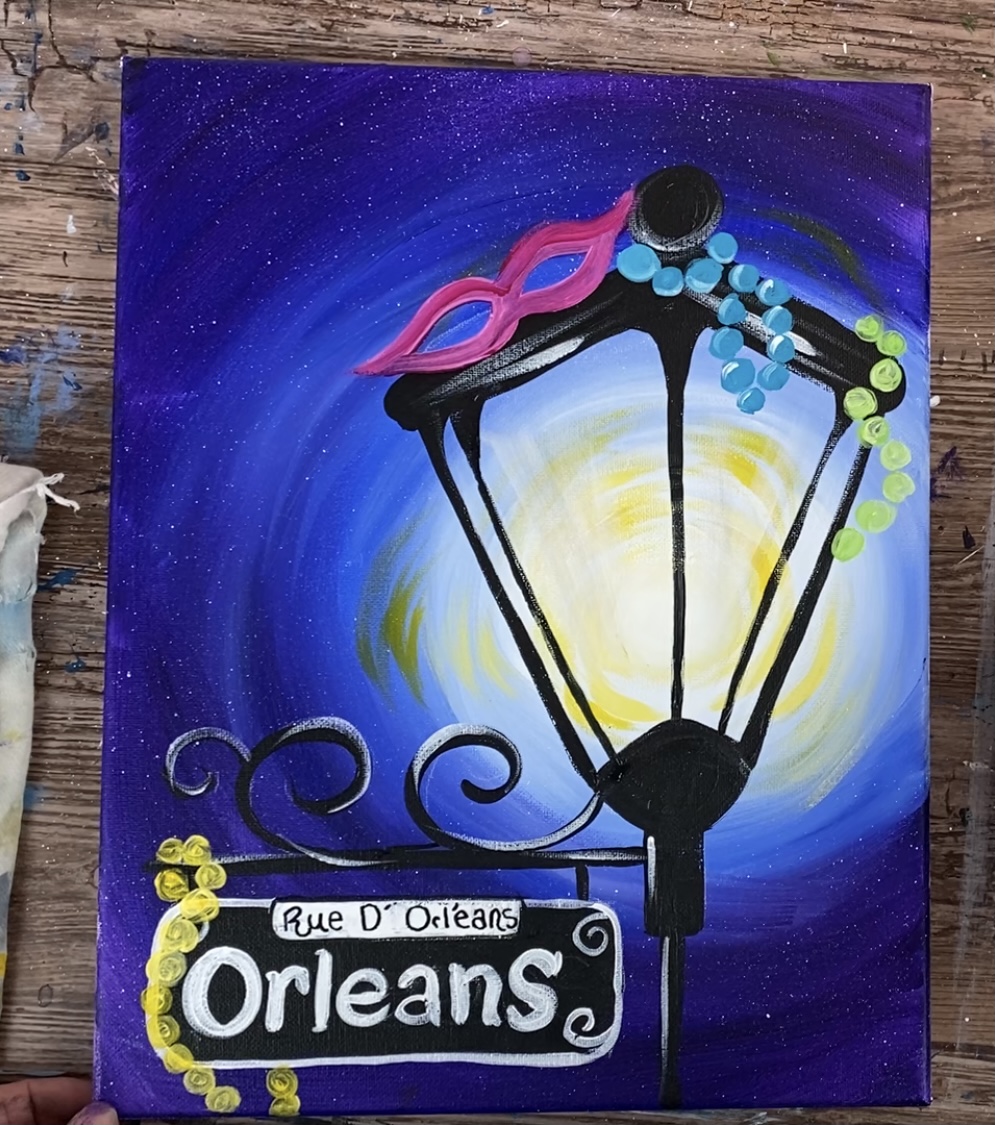
For the feathers I also used my #4 round brush. Load it into brilliant yellow green and paint a thin line for the middle part of the feather.
Then paint the feather marks the stem out from the middle line. Have them go out diagonal in the same direction.
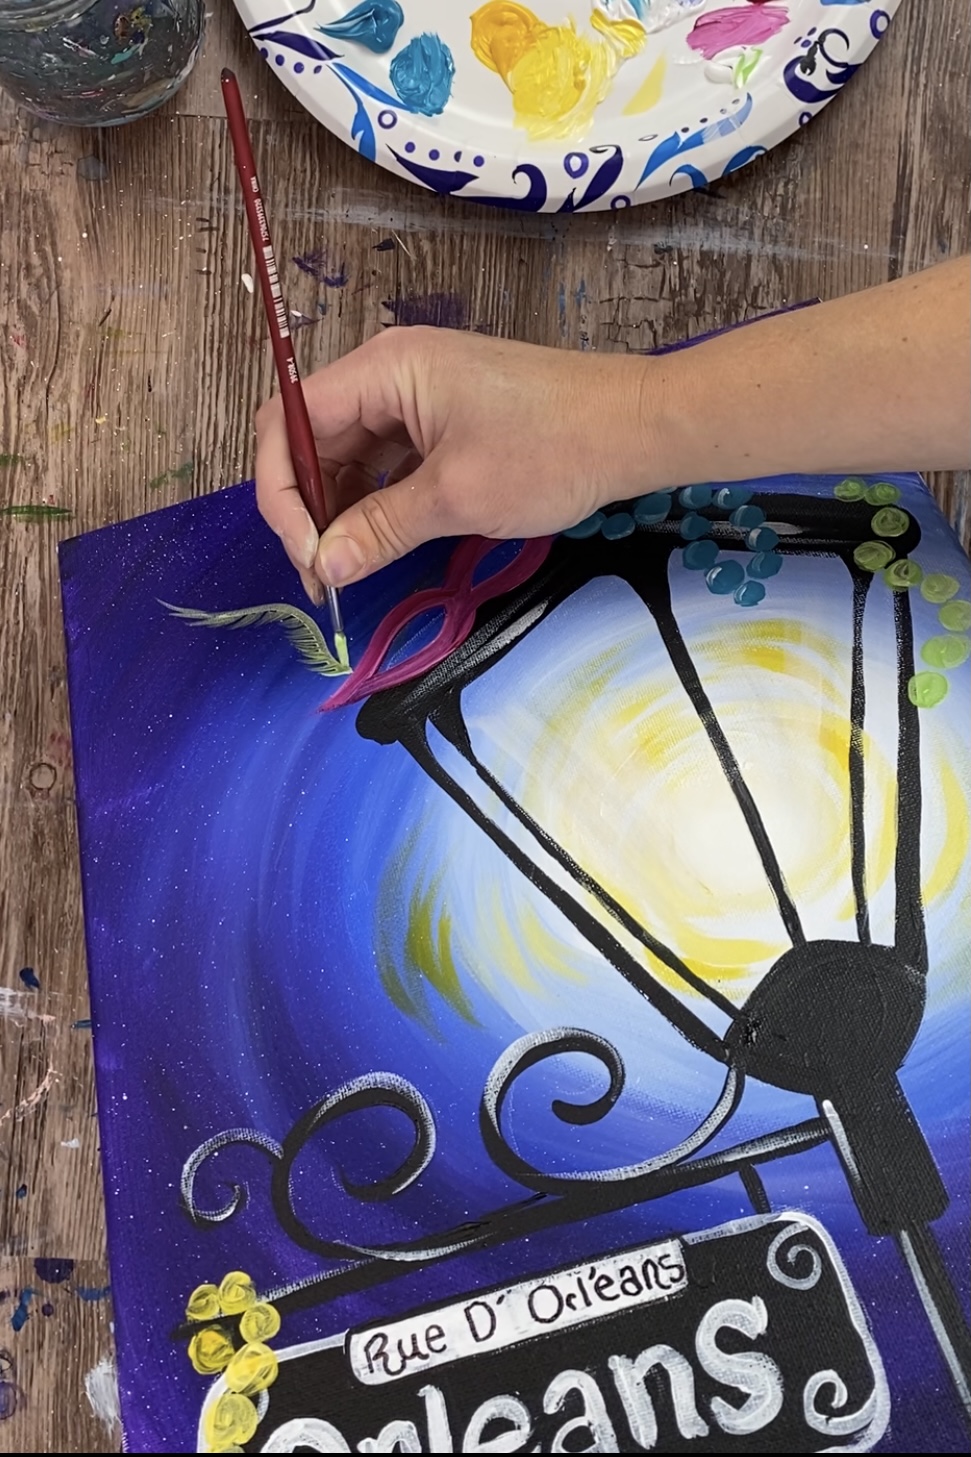
When you do the feather strokes try pressing slightly harder with you brush at first and then releasing the pressure a bit to get the stroke to fade out. Painting feathers is very similar to painting palm tree fonds and pine needles!
I did a brilliant yellow green feather, a turquoise feather and a cadmium yellow medium feather.
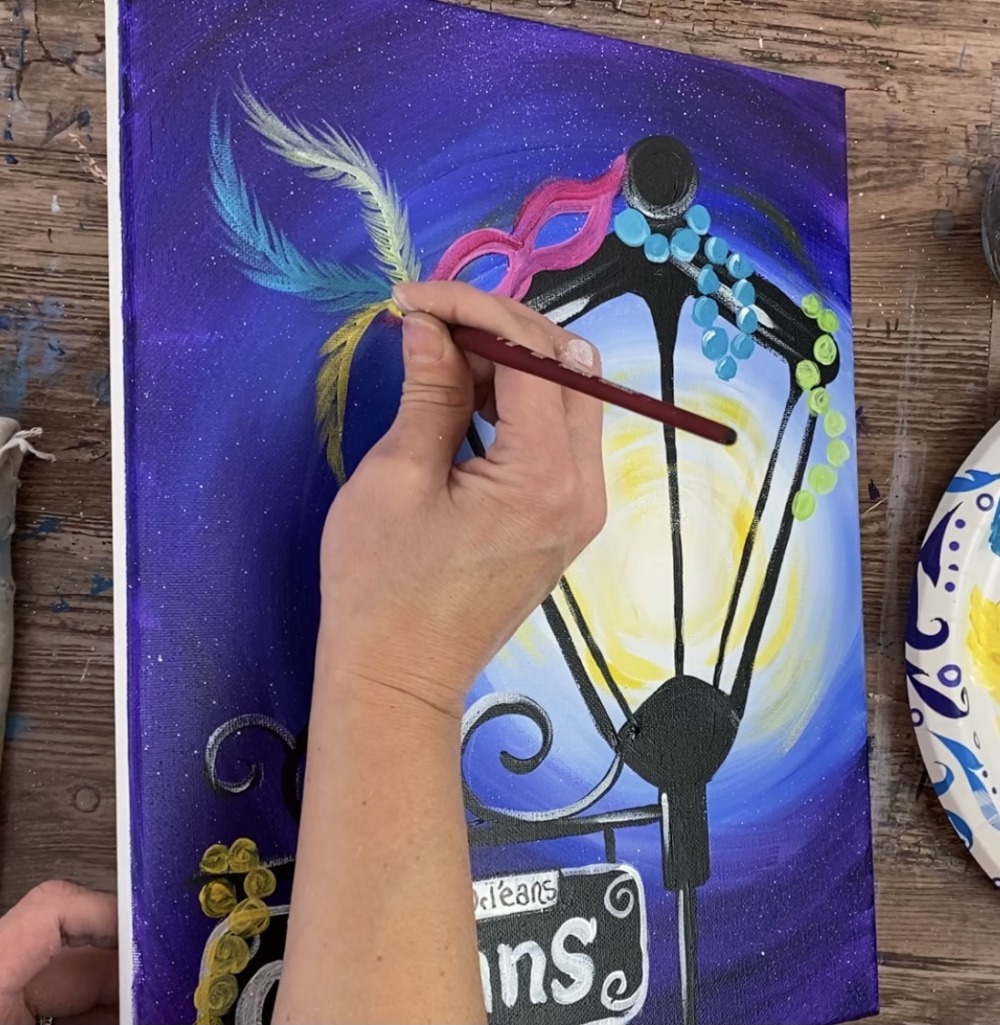
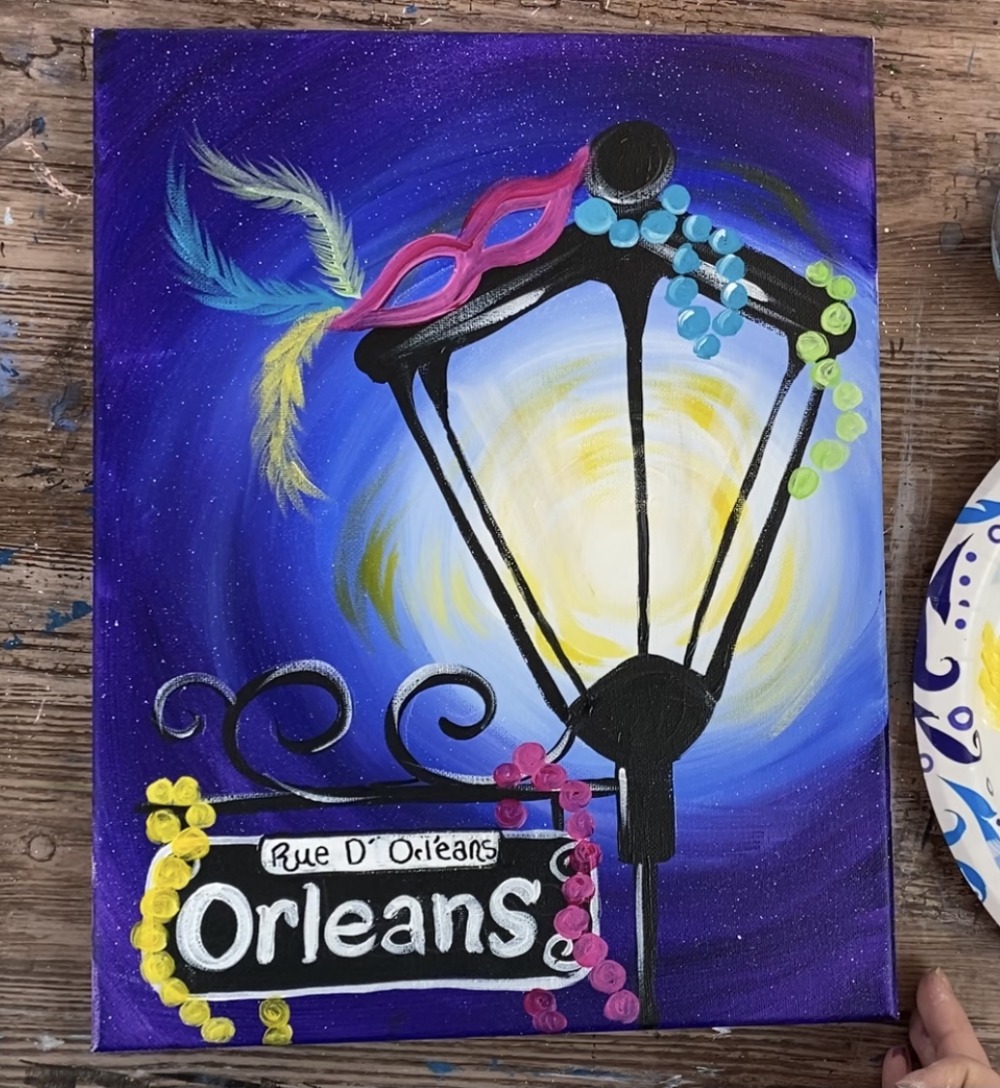
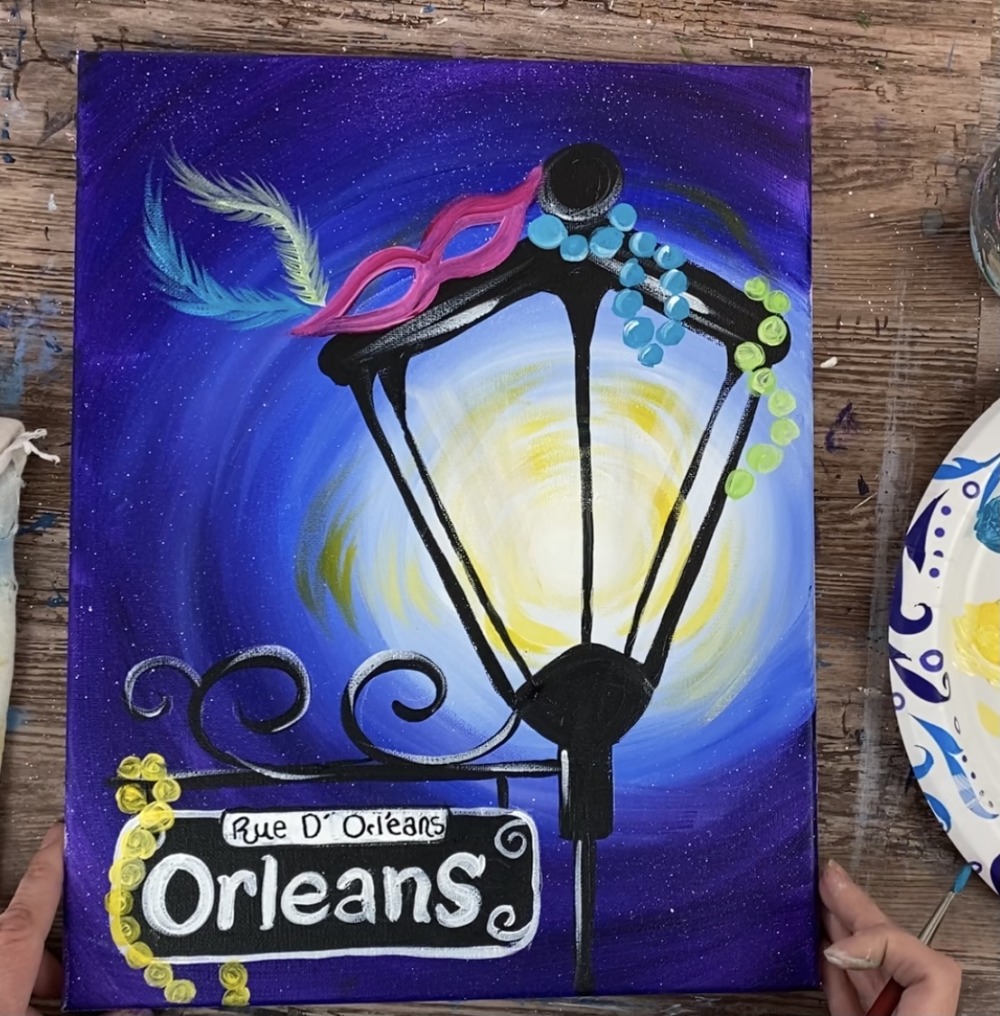
Then I added more detail into the mask. The center part around the eyes was outlined with black.
There are white dots that go around the eyes.
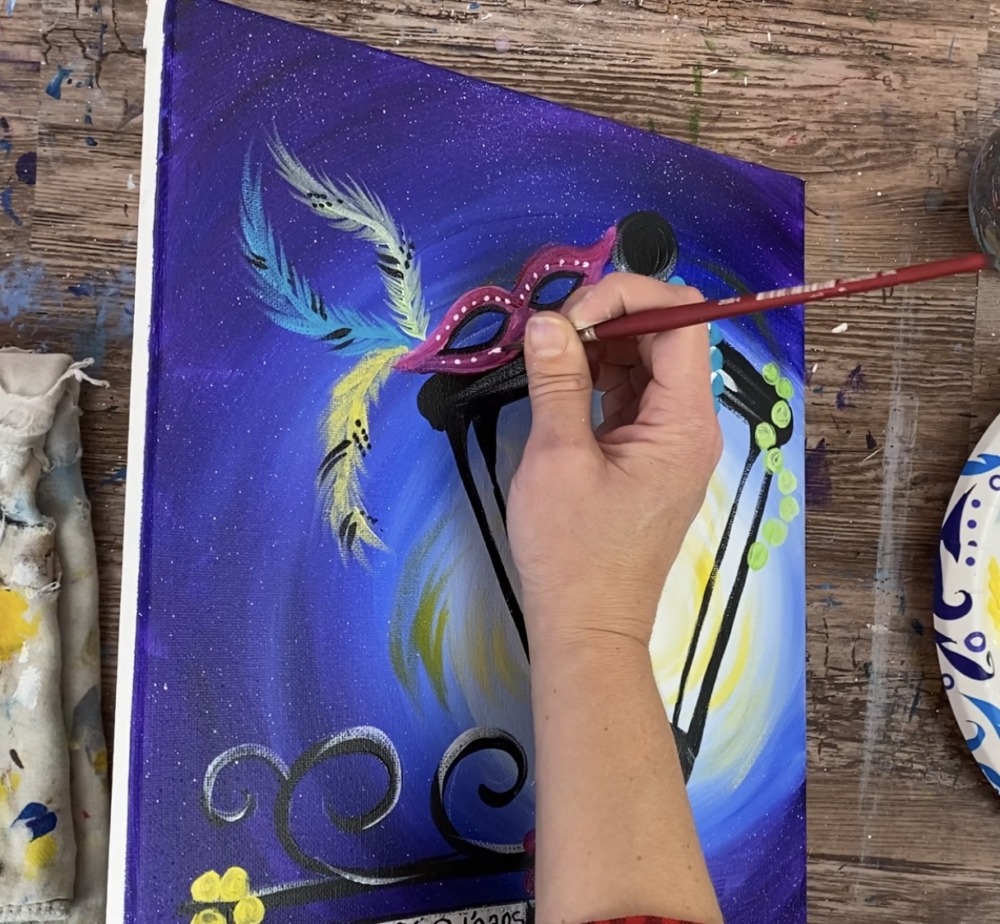
I also added more details onto the feathers. There are black dots and some small black feather line marks.
Then I did more stars in the sky! These are larger stars painted with white and using that #4 round brush. Paint little asterisk marks and small little white dots. A few other details include highlight lines on all the beads and another set of beads on the sign.
And that is it! Sign your name and show it off!
Share Your Art Here!


