
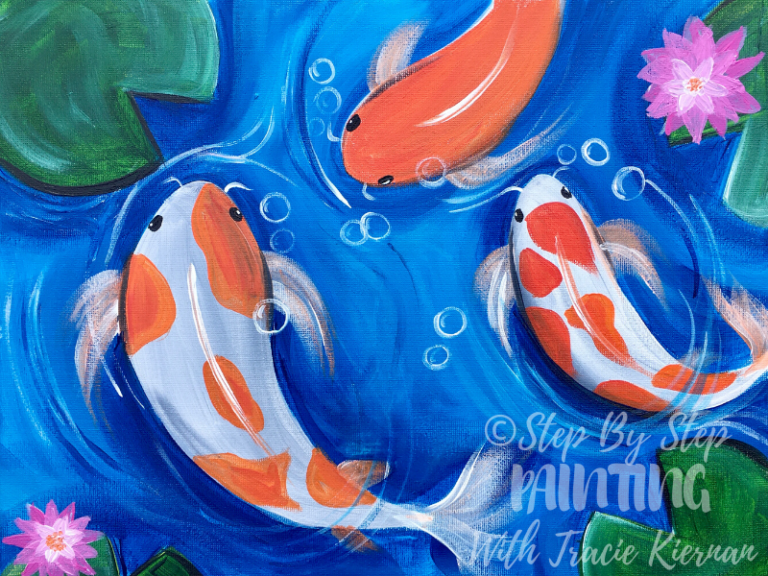
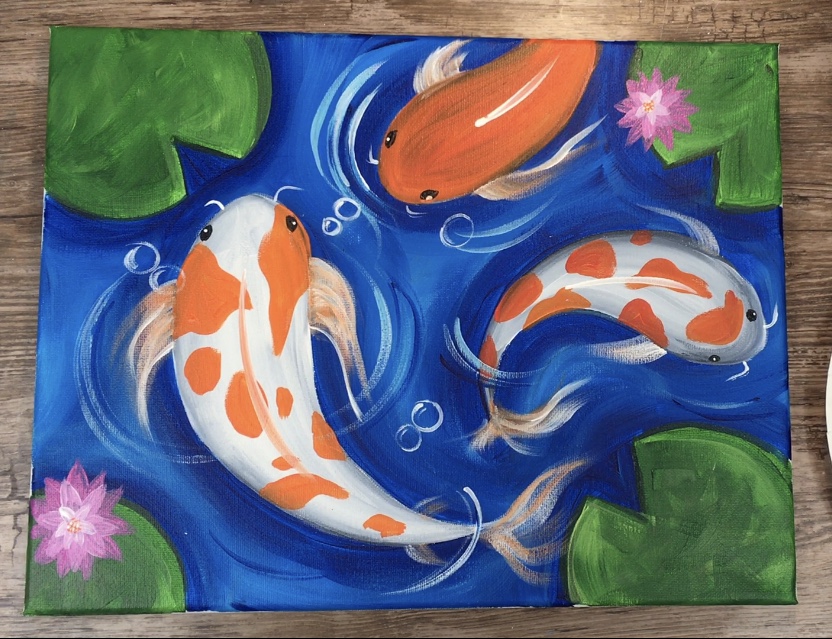
Koi Fish Painting Tutorial
Learn to create an easy, simple koi fish painting with this in depth tutorial.
Would you like to save this?
I found doing this painting extremely relaxing! It’s an easy painting that lends a high success rate and you can use my traceable.

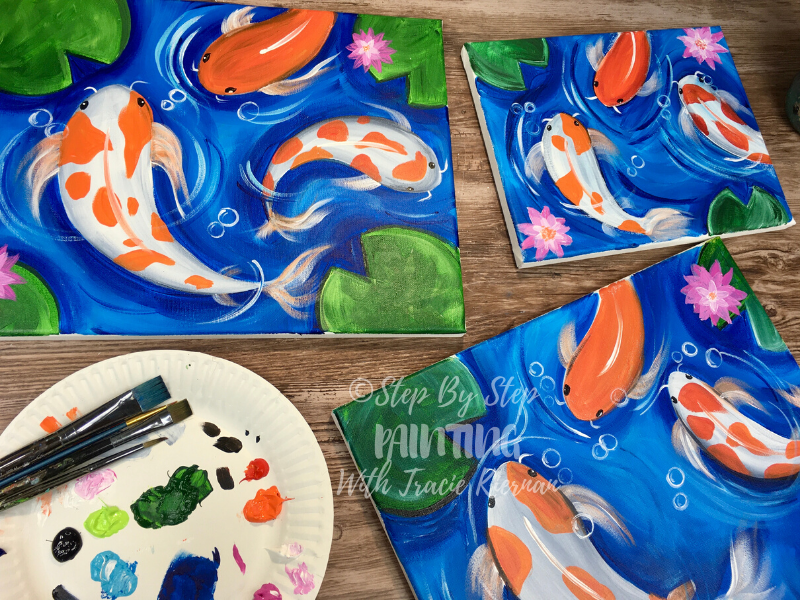
The design can work on any size canvas. I did it twice on an 11 x 14 and once on an 8 x 10.
I think they would look lovely lovely hanging up side by side.
You can easily change up this painting using different colored fish and patterns. You can also change the position and direction of the fish.
If you are doing this painting with your child, its a great opportunity to learn all about this type of fish. Here is a fun article about 15 fun koi fish facts!
Koi fish have all different kinds of markings of orange and black. Some are solid colors of orange, yellow, gray and black.
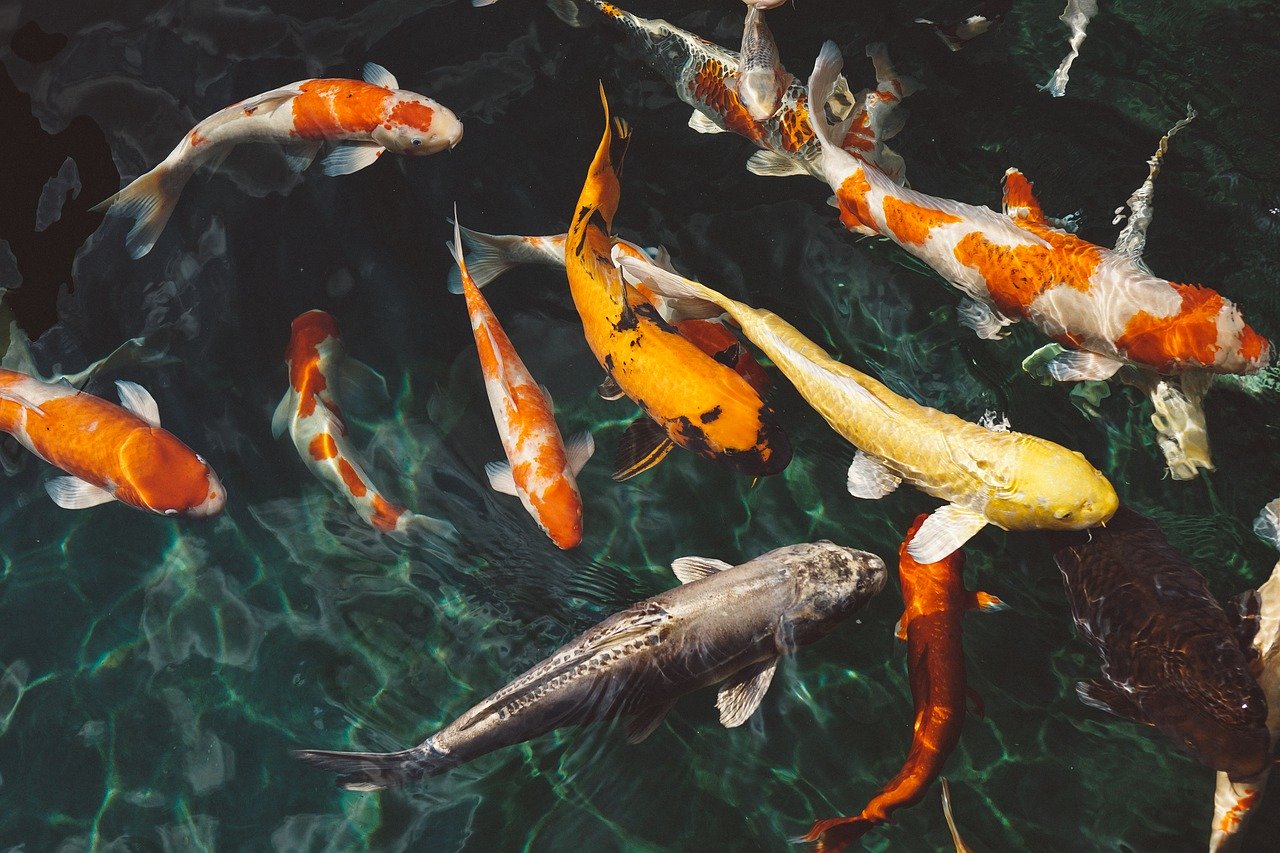
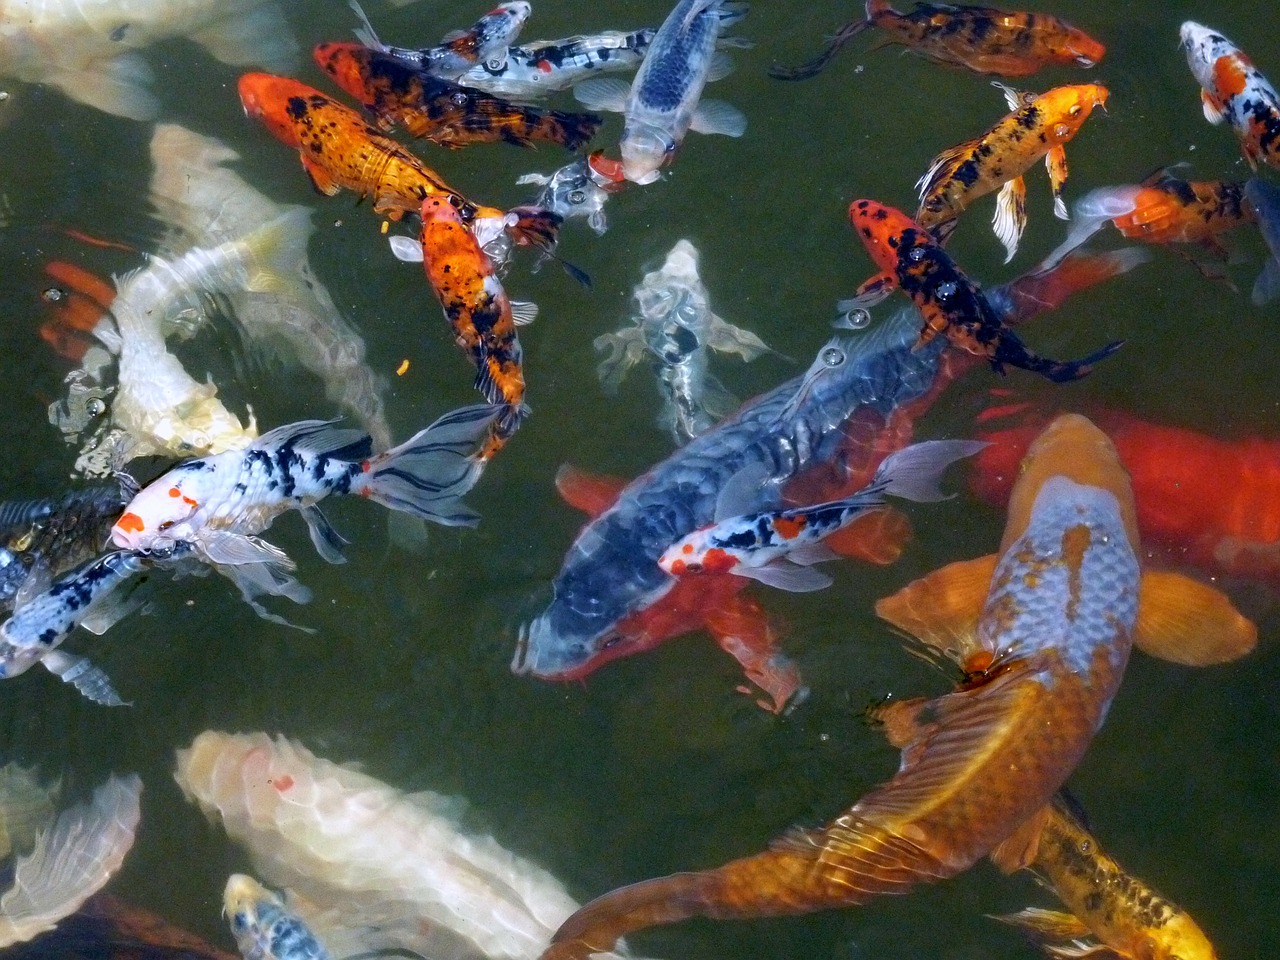
Before doing this painting, it’s fun to look at various reference photos of koi fish in a pond.
Study the markings, the colors and how the water looks.
Enjoy and happy painting!
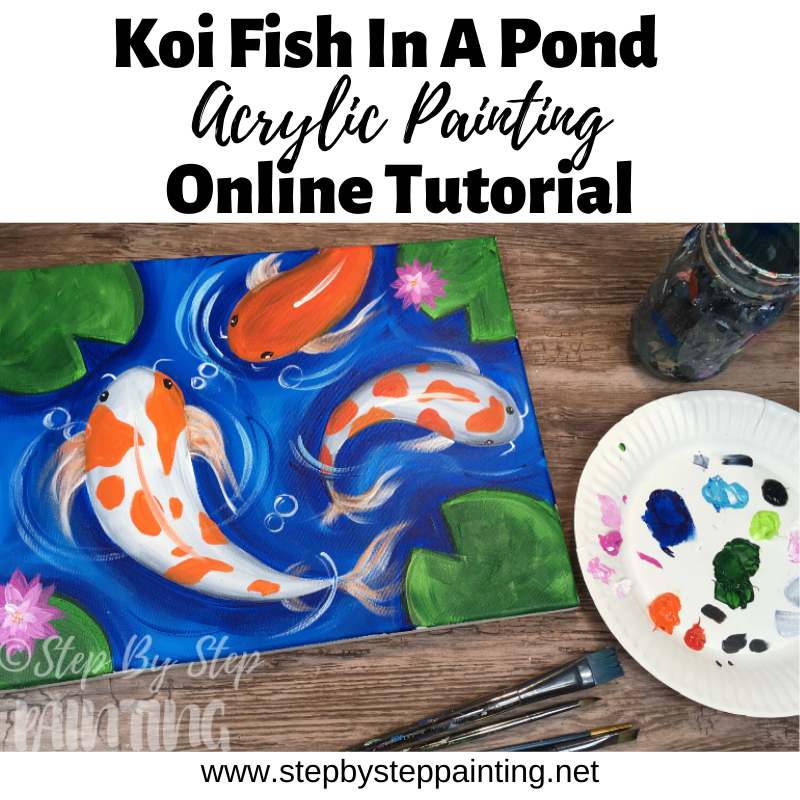
Materials Needed For Koi Fish Painting:
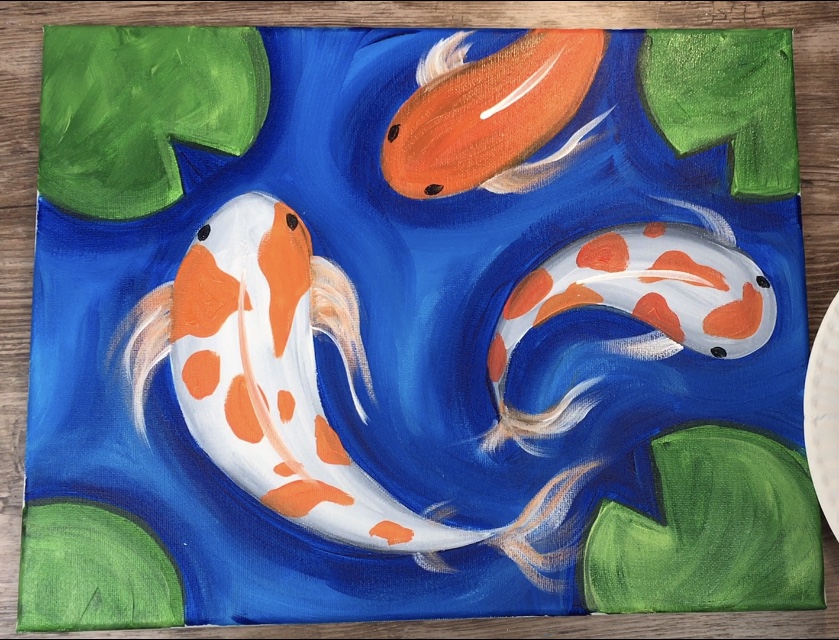
Koi Fish Painting
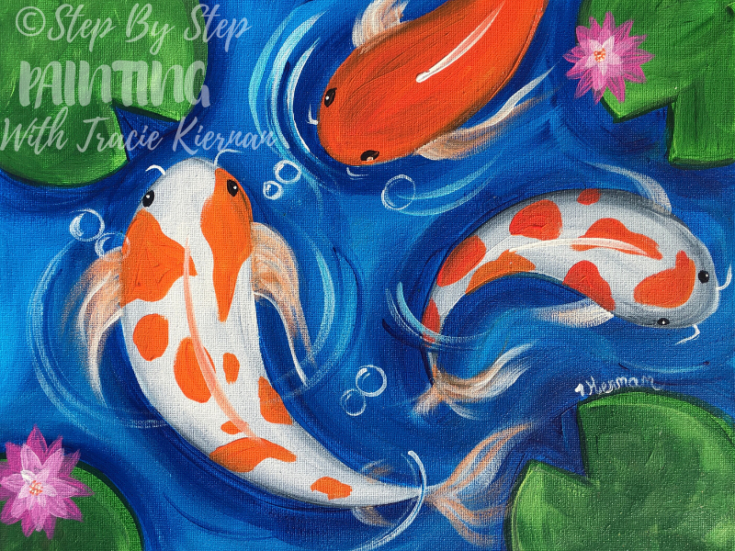
Relax and unwind to your very own koi fish painting. This step by step tutorial will guide you through the techniques.
Materials
- Acrylic Paint
- Canvas
- Traceable
- Graphite Paper
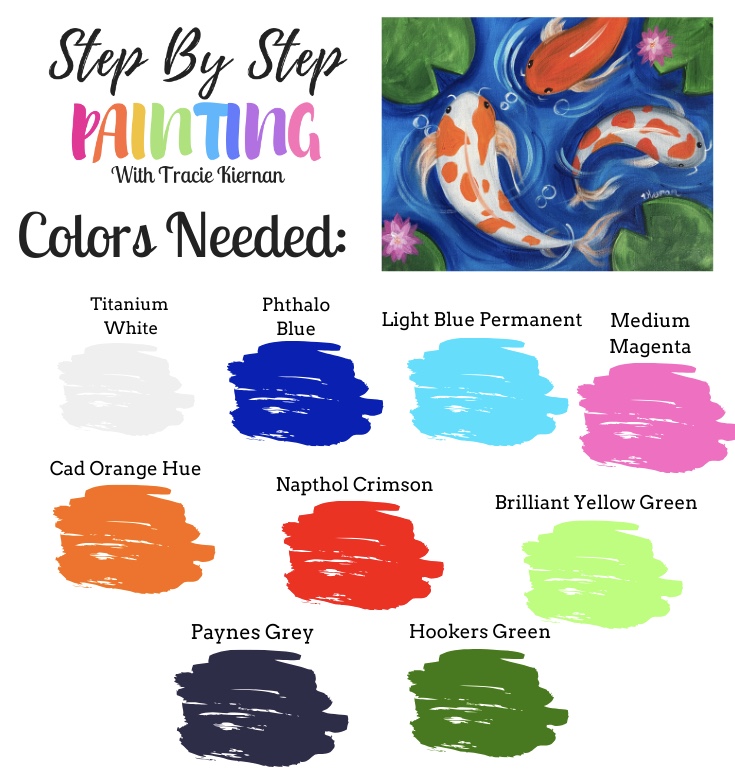
Paint Colors
- Phthalo Blue
- Light Blue Permanent
- Naphthol Crimson
- Cadmium Orange Medium
- Titanium White
- Payne’s Grey (or black if you don’t have it)
- Hookers Green
- Brilliant Yellow Green
- Medium Magenta
Brushes
Instructions
- Draw the koi fish on the canvas or use my traceable and a sheet of transfer paper to draw the design.
- Use a 3/4 flat brush and phthalo blue to paint the negative space around the fish and the lily pads. Leave the bodies of the fish white but you may paint over the tail and fin areas of the fish.
- Before the phthalo blue dries, blend in light blue permanent. Paint in a contouring direction so that areas of the water look lighter but areas of the water closer to the fish and lily pads look darker.
- Dry your painting or take a short break and come back when all the blue is dry.
- Paint the first layer on the fish with a mix of Payne’s gray and titanium white. Double load your 12 flat brush with titanium white and a little spot of Payne’s gray. The edges of the fish should be slightly darker and the center of the fish is lighter.
- Paint a layer of hookers green onto the lily pads.
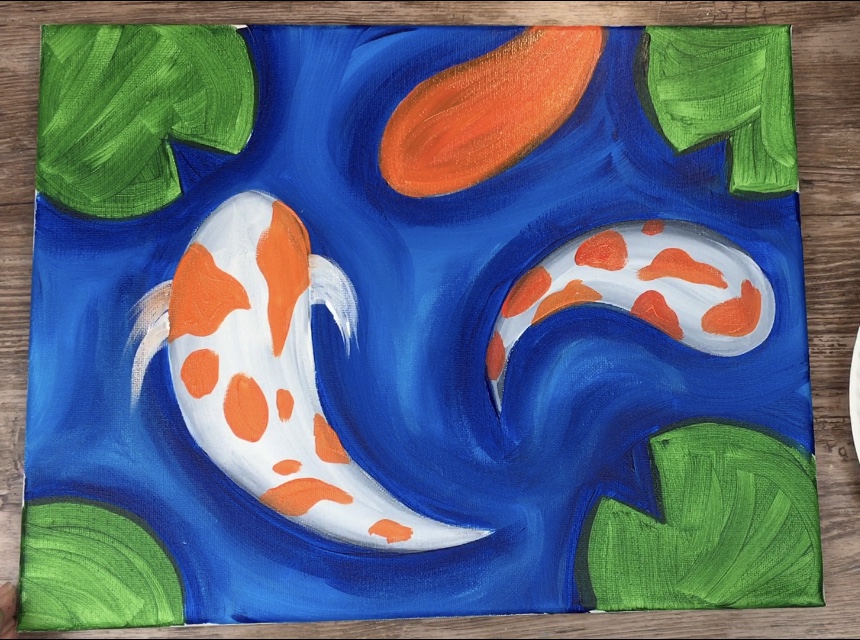
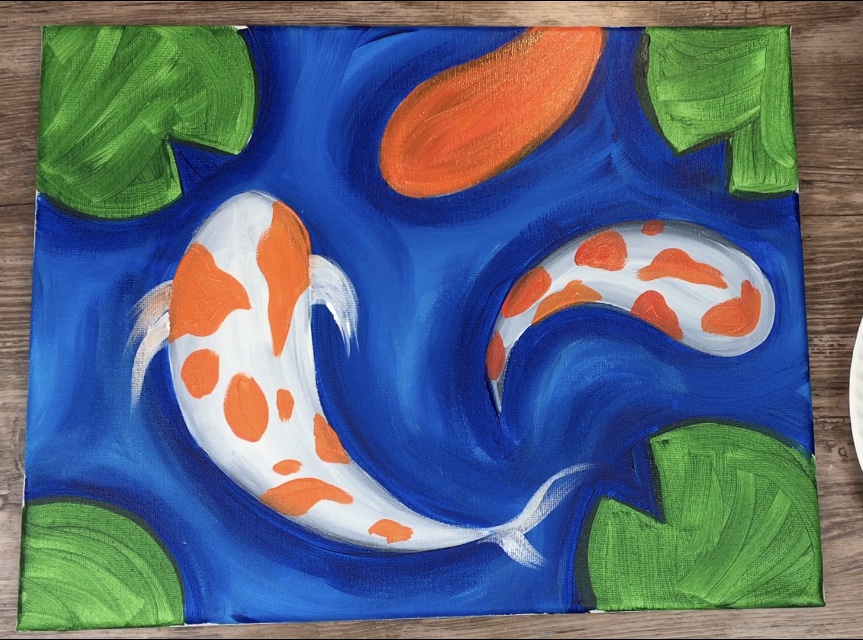
- Use a round brush and the colors cadmium orange and Naphtol crimson to paint the spots on the bodies of the fish.
- Paint one fish solid orange and red.
- If needed, go back with your 3/4 flat brush and phthalo blue and light blue permanent to add a second coat to the water and really define the shape of the fish.
- Use a 12 bright brush to lightly “feather” or “dry brush” the fins and tail of the fish.
- Paint the white spine line on each of the fish’s back.
- Use a round brush to paint the eyes black and then a white dot on the eyes after the black dries.
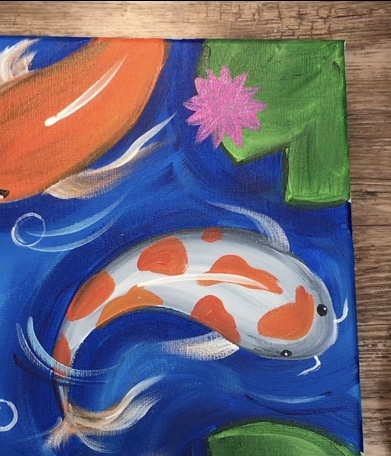
- Use a round brush to paint the ripples. This should be a very light sort of dry brush stroke style. Don’t load too much paint on your brush when painting the ripples. Use titanium white, light blue permanent and phthalo blue for the ripples.
- Use a 10/0 round brush and titanium white to paint bubbles.
- Keep in mind that the ripples and bubbles can overlap the fish because the fish are under water.
- Paint the second coat on the lily pads with brilliant yellow green mixed with hookers green.
- To paint the lily pad flowers, use medium magenta and titanium white. Paint the base outer shape of the flower with medium magenta. Wait for that layer to dry and then paint another layer with a medium magenta mixed with titanium white. The inner part of the flower is the lightest. Then paint little orange and white dots in the middle.
Notes
This design works on any size canvas!
Color Palette
Traceable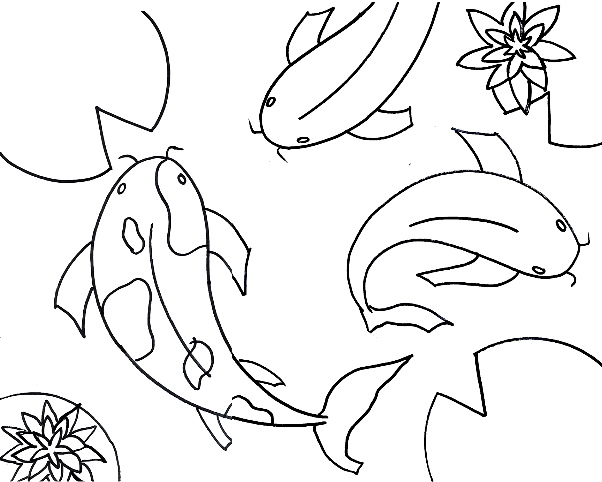

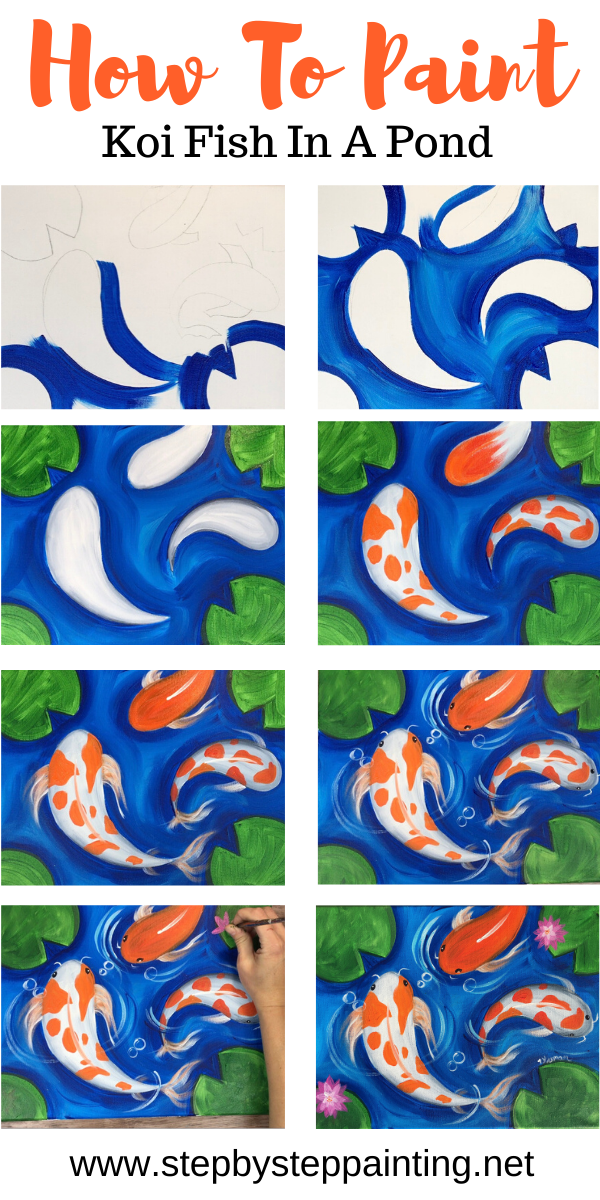
Directions At A Glance
Video:
Step By Step Directions:
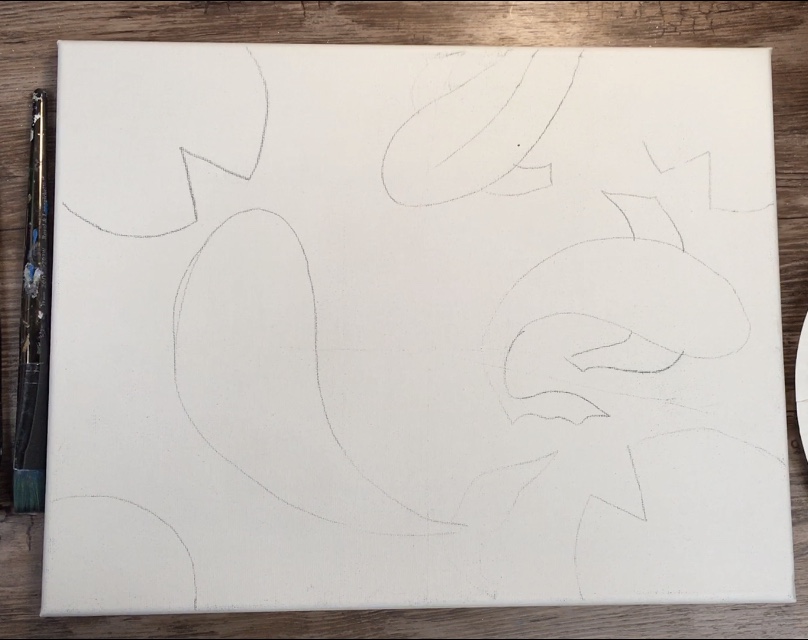
1. Draw the Koi Fish On Canvas
Draw the koi fish on the canvas or use my traceable and a sheet of transfer paper to draw the design.
My traceable is two 8.5” x 11” sheets that you will need to tape together. This will fit on an 11 x 14 canvas.
When you trace, do so on a flat surface.
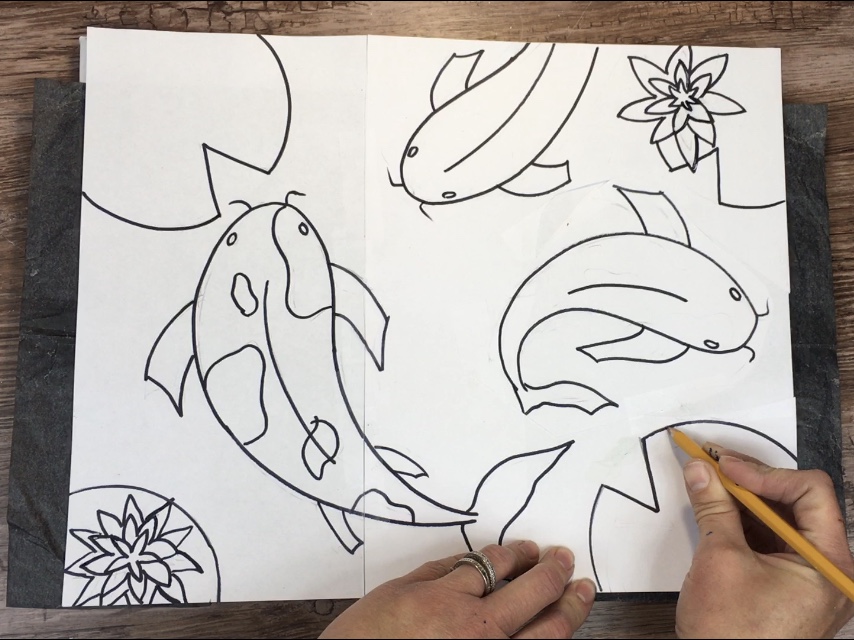
Note that I did not trace the lily pad flowered or all the fins. This is because those areas will be painted over.
You may wish to trace everything or just the fish bodies and lily pad circles. Press firmly so the design comes out nice and visible on the canvas.
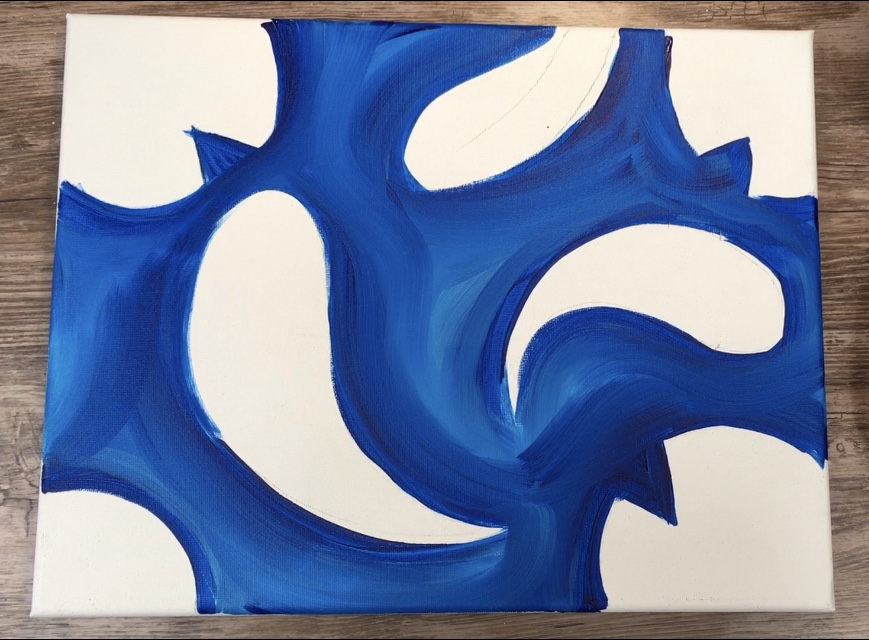
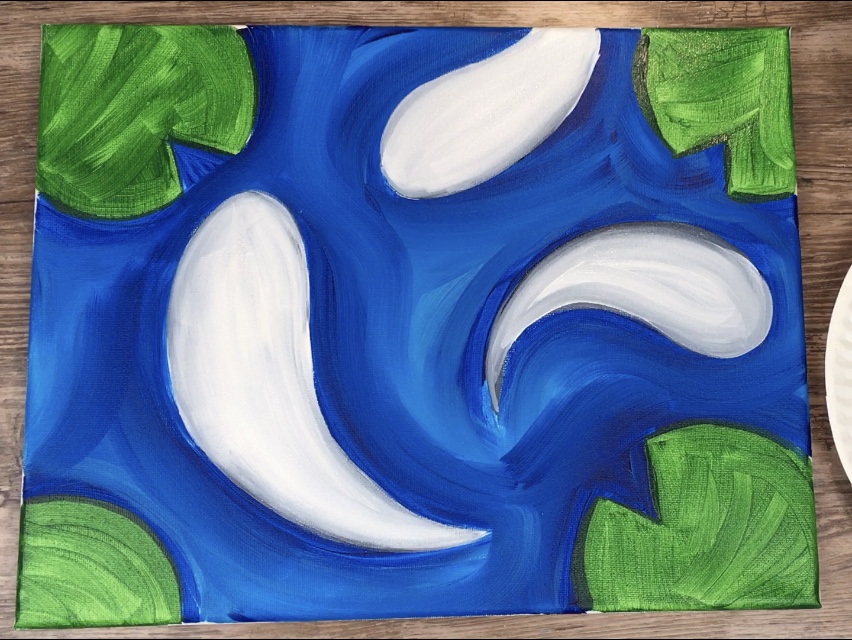
2. Paint The Water
Use a 3/4 flat brush and just phthalo blue to paint the negative space around the fish and the lily pads.
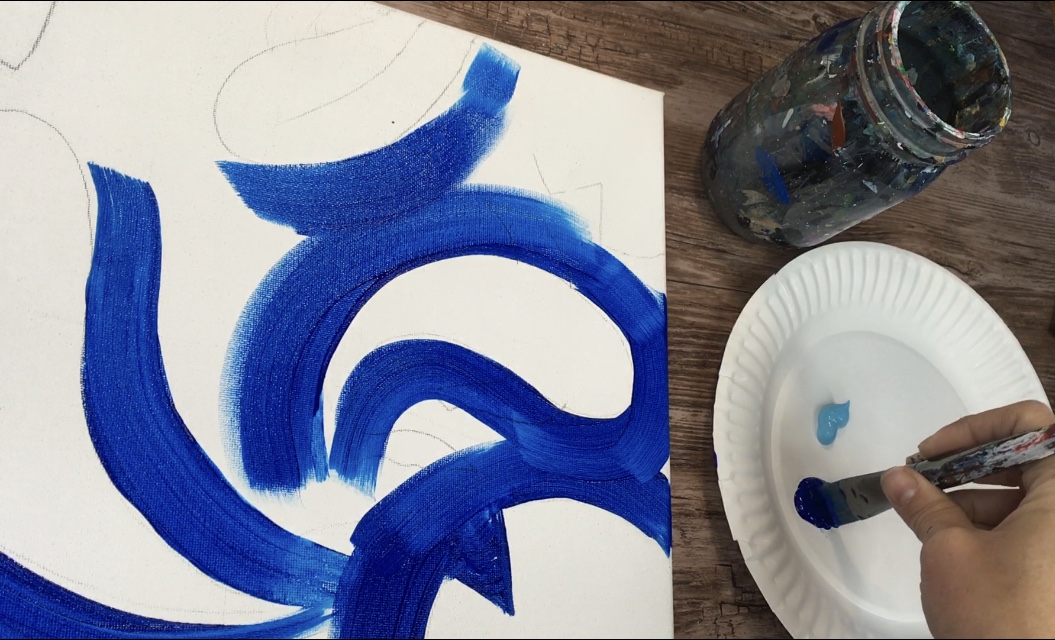
Use the full width of the brush to paint contouring strokes.
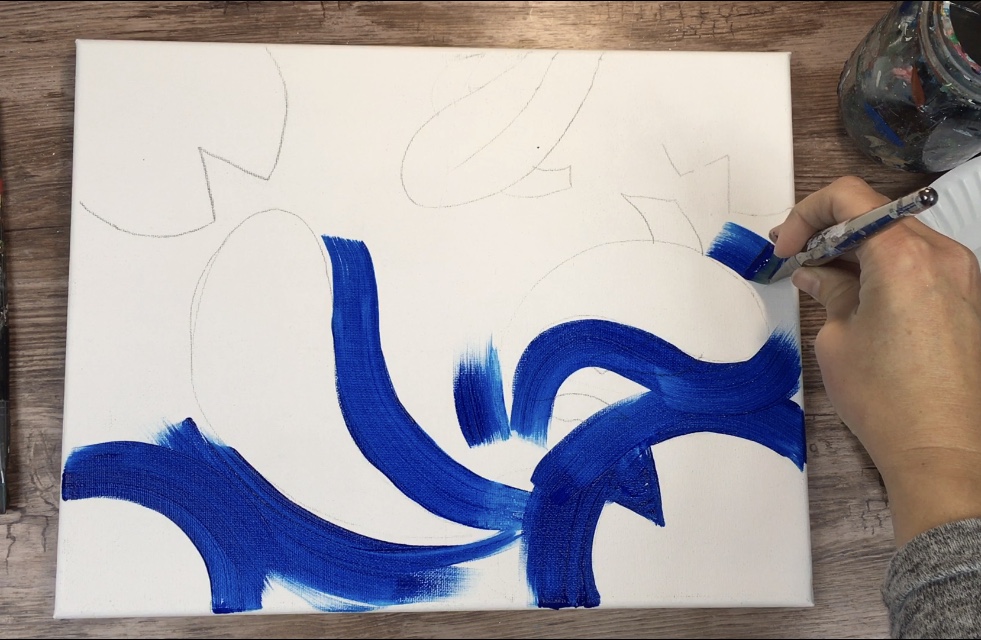
Leave the bodies of the fish white but you may paint over the tail and fin areas of the fish.
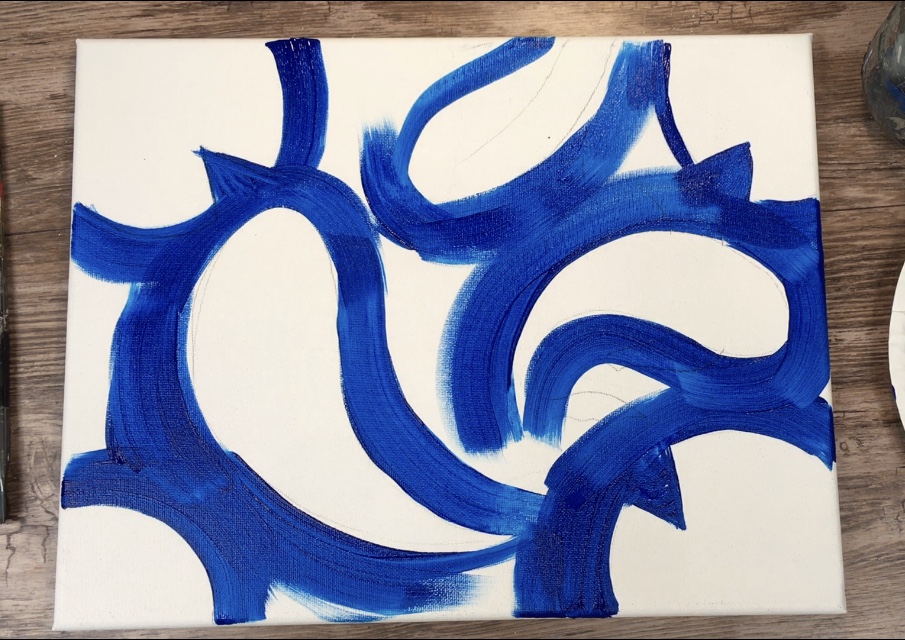
Before the phthalo blue dries, blend in light blue permanent. Load the light blue on your brush without rinsing off the phthalo blue.
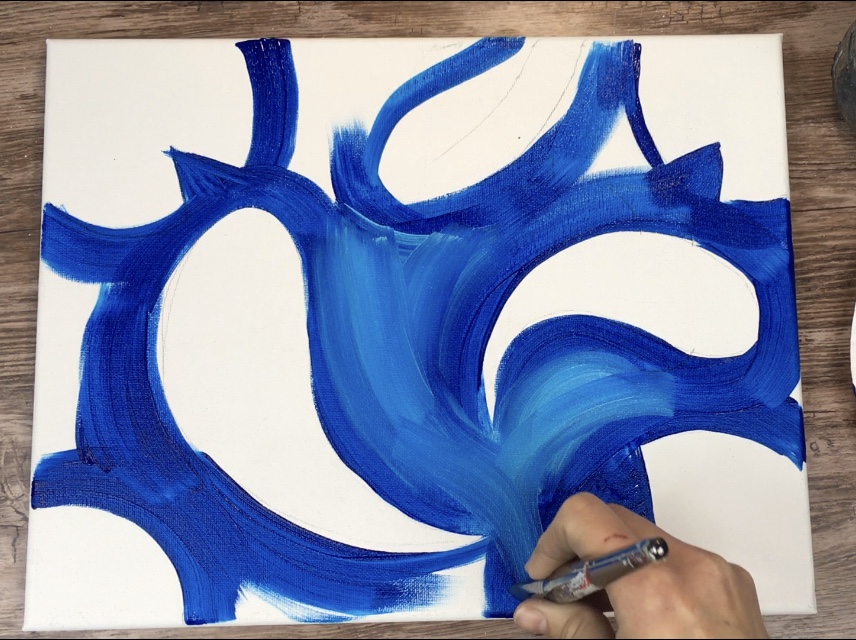
Paint in a contouring direction so that areas of the water look lighter but areas of the water closer to the fish and lily pads look darker.
Fill all the water area with this light blue and phthalo blue combo leaving the fish bodies and lily pad shapes white.
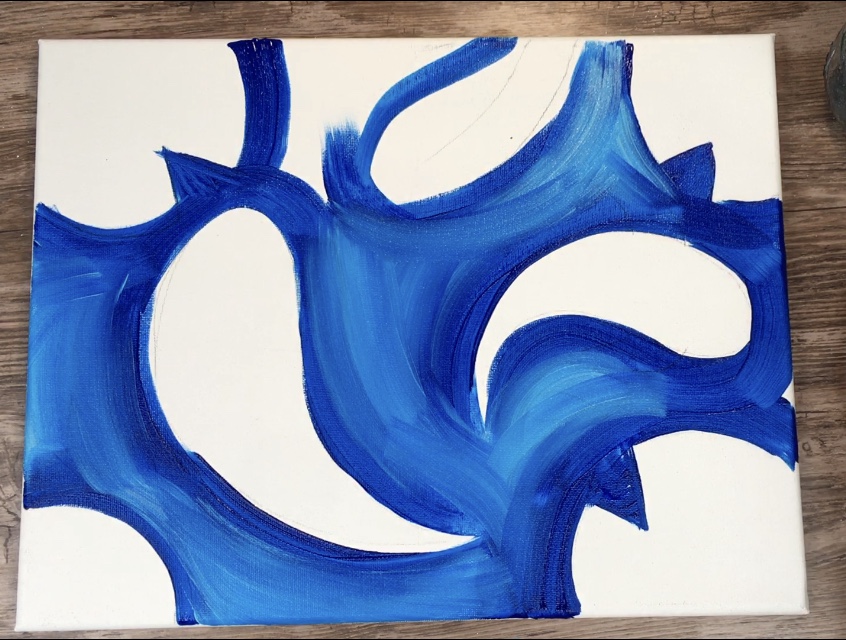
Dry your painting or take a short break and come back when all the blue is dry.
3. Paint the base layer of the fish with a 12 bright
The first layer of the fish is painted with titanium white and a little Payne’s grey.
I used a 12 bright brush for this step.
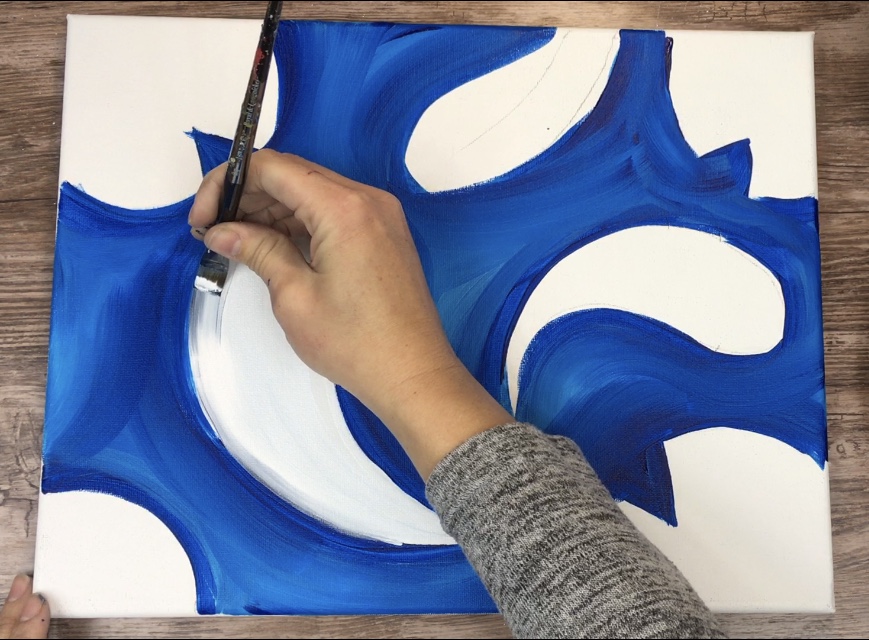
To give the fish bodies some “depth” paint the very edge of each of the shapes with a little Payne’s grey the blends to titanium white in the middle.
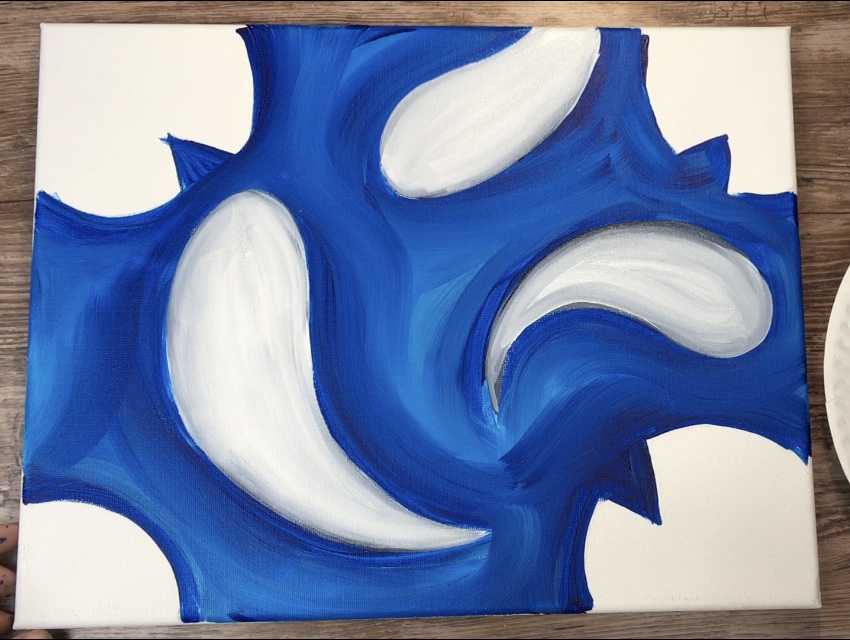
When you load your brush with titanium white and the corner on Paynes Grey, you will create a natural way of blending the colors.
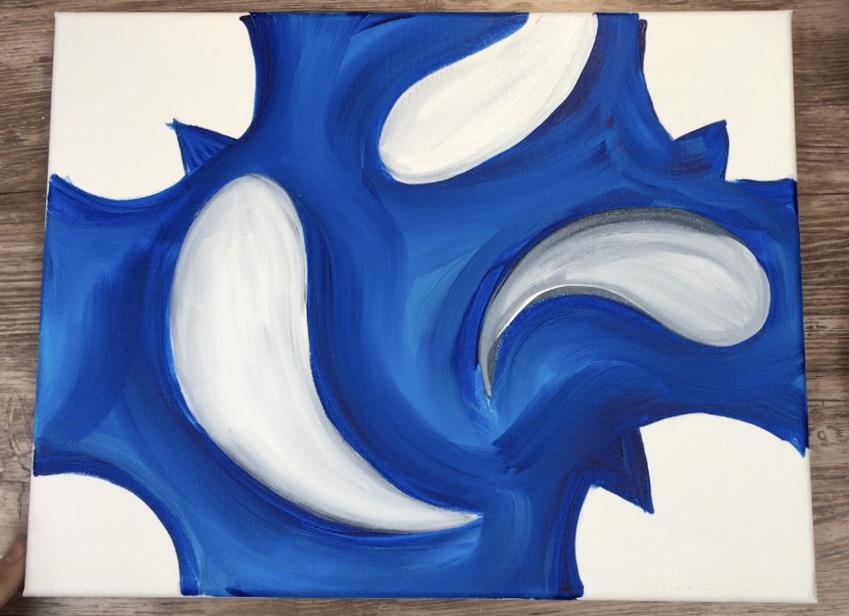
The fish bodies can vary in the amount of gray you use. For example, one of mine ended up looking slightly darker because I used more Payne’s grey.
If needed, go back with your 3/4 flat brush and phthalo blue and light blue permanent to add a second coat to the water and really define the shape of the fish.
4. Paint the first layer of the lily pads
Paint a layer of hookers green onto the lily pads.
You can use either the 12 bright or the 3/4 flat for this step.
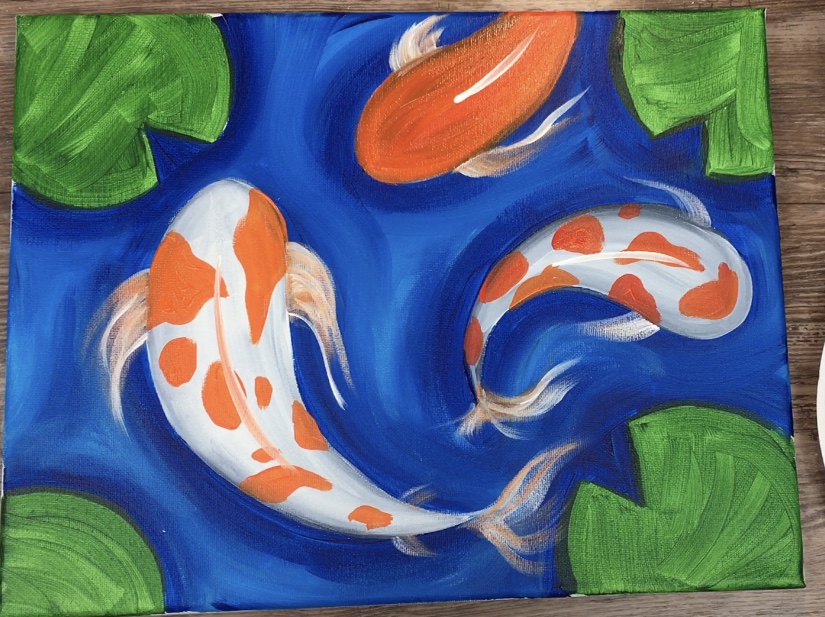
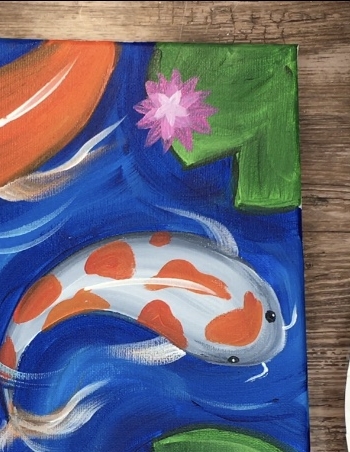
5. Paint the markings on the fish
Use a round brush and the colors cadmium orange and Naphtol crimson to paint the spots on the bodies of the fish.
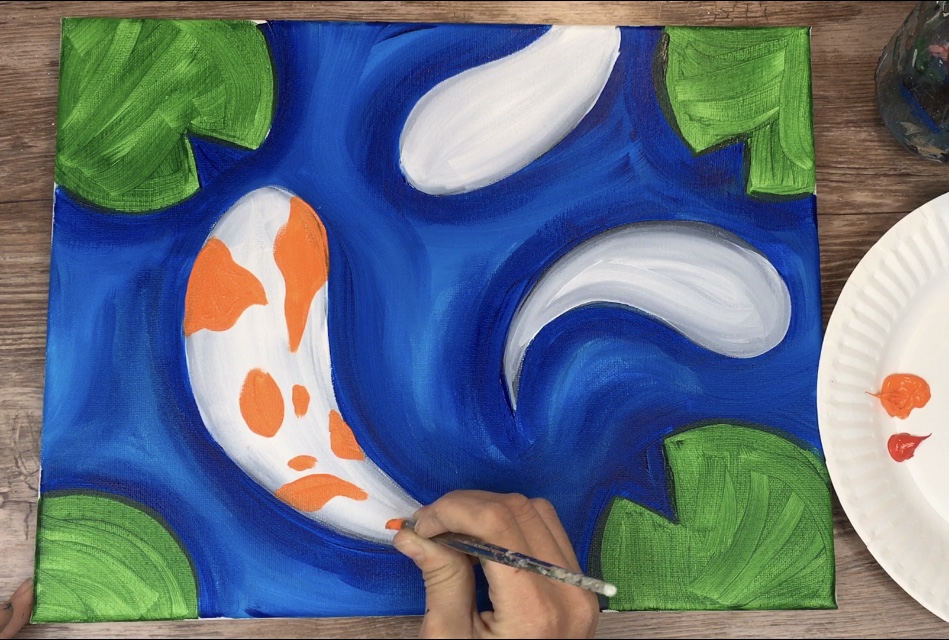
I started with just cadmium orange and painted the markings on one fish.
Then I mixed orange and red together to paint the spots on the other fish.

One fish was painted solid orange and red.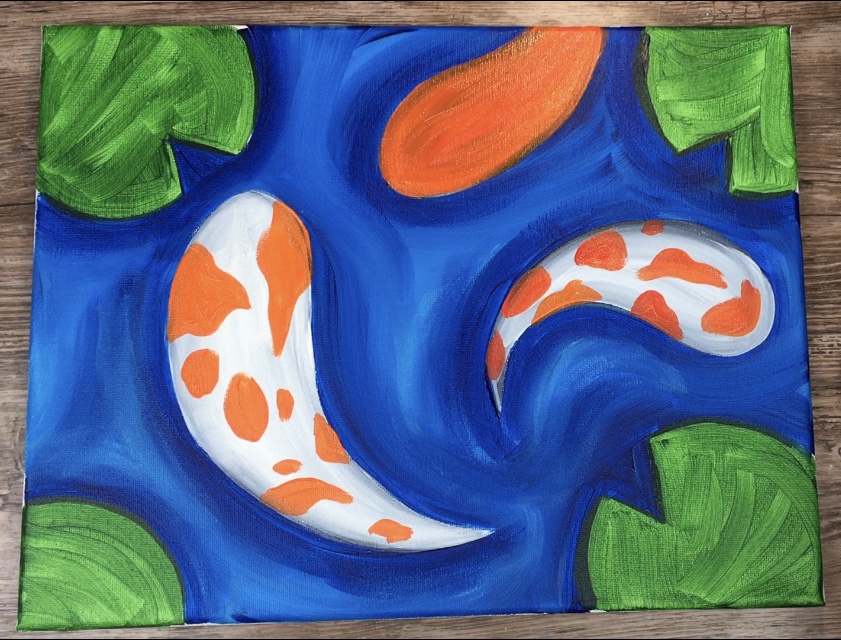
6. Paint the tails and fins of the fish
Use a 12 bright brush to lightly “feather” or “dry brush” the fins and tail of the fish.
Load your 12 bright in a tiny bit of titanium white and stroke out to create the fin stroke.
It should be somewhat translucent.
Then you can add a little bit of orange to your brush.
Stroke over the fins several times but keep in mind that only a little paint should be on your brush so the stroke shows up thin and feathery.
Do the same for the tail. Create a flowing light, feathery stroke. It helps to hold the brush lightly and not firmly.
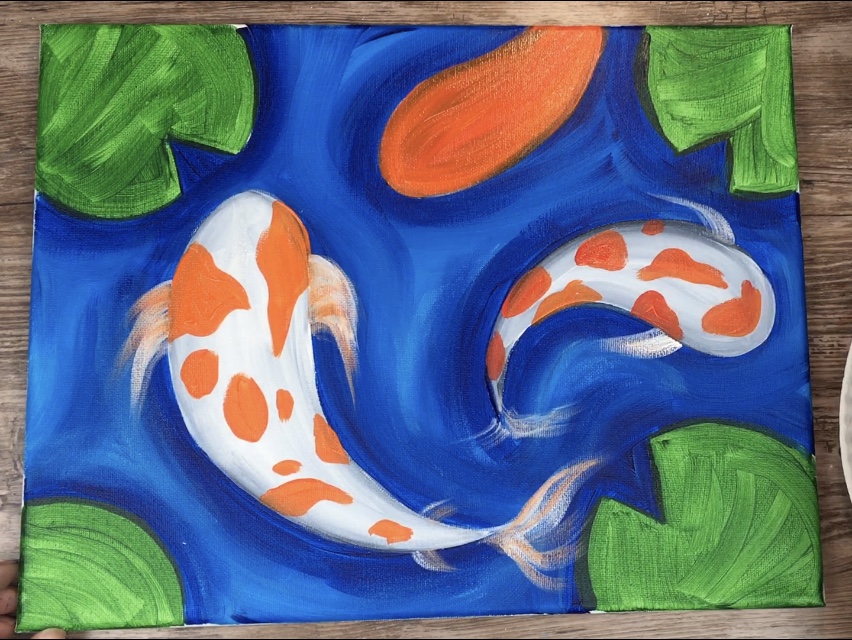
The flow of the fins can go in the direction of the water or any direction you chose.
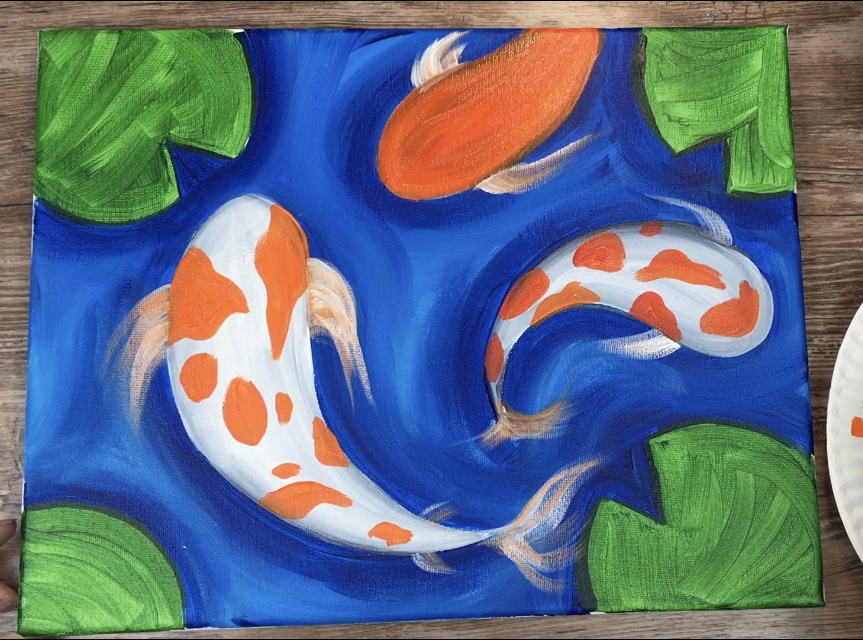
7. Paint the line on the fish
Paint the white spine line on each of the fish’s back.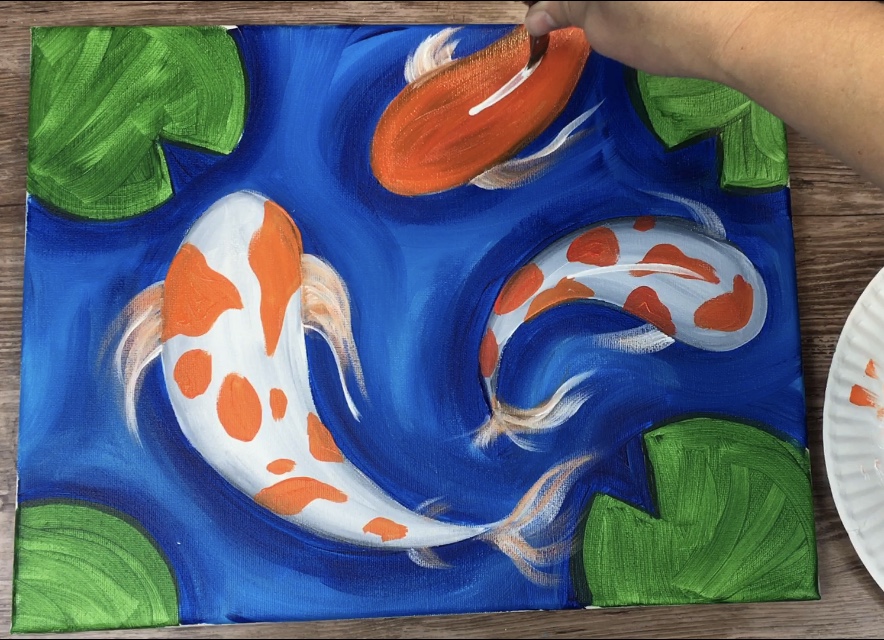
To do this I used the tip of my 12 bright brush to stroke a thin line. Some of the white caught a bit of orange.
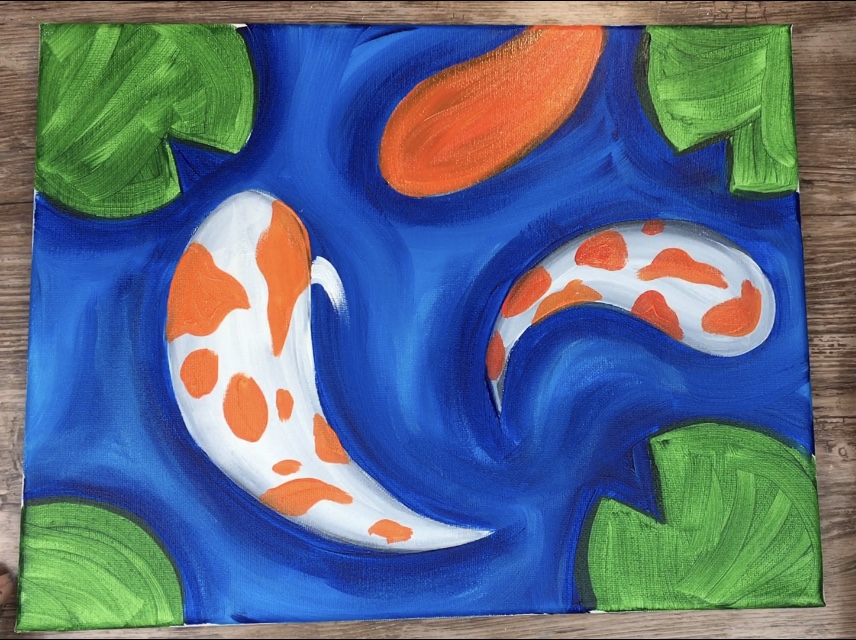
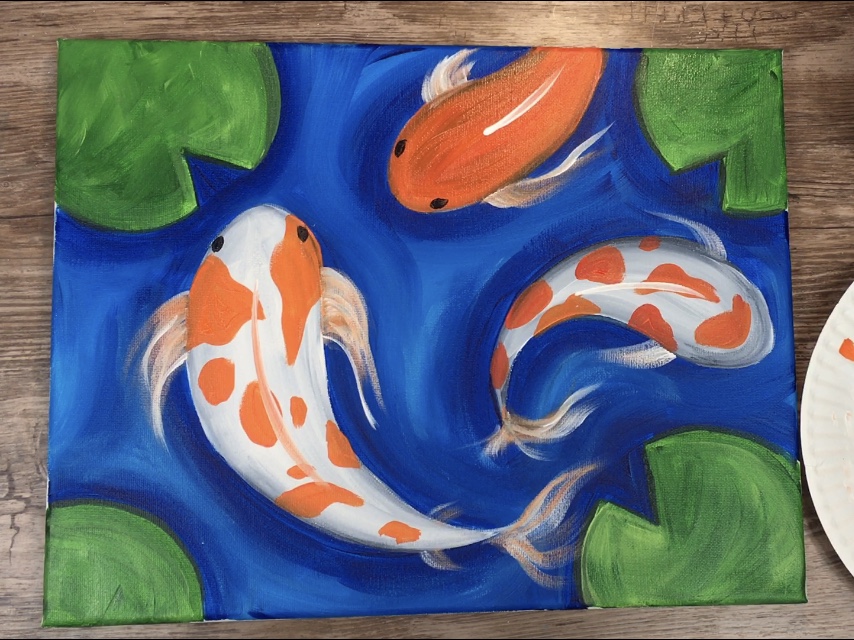
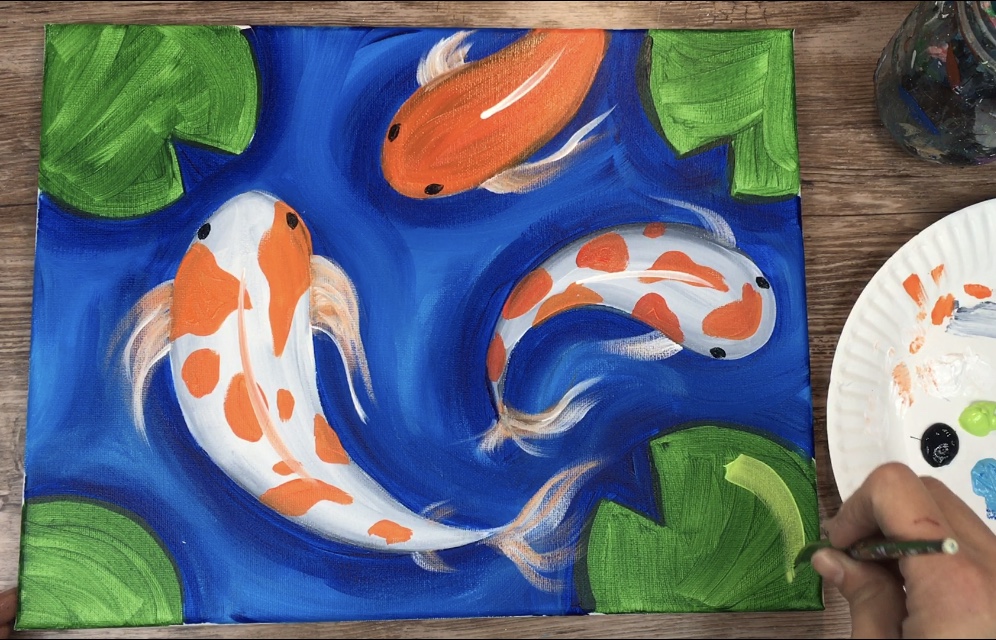
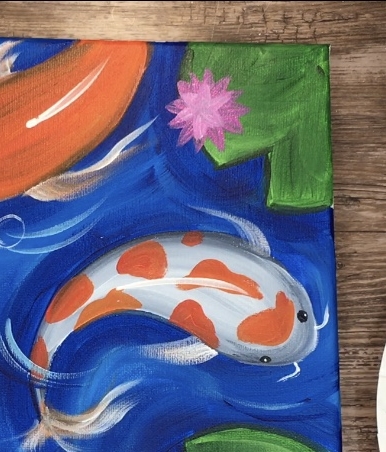
8. Paint the eyes & second coat on lily pads
Use a round brush to paint the eyes black and then a white dot on the eyes after the black dries.
To do the second coat on the lily pads, use any flat brush and brilliant yellow green mixed with hookers green.
I basically double loaded my brush in both the greens and let the colors mix onto the lily pad to create a varied green look.
Also as you paint the white dots on the eyes, you can also paint the white tiny lines that come forth from the fish’s mouth area.
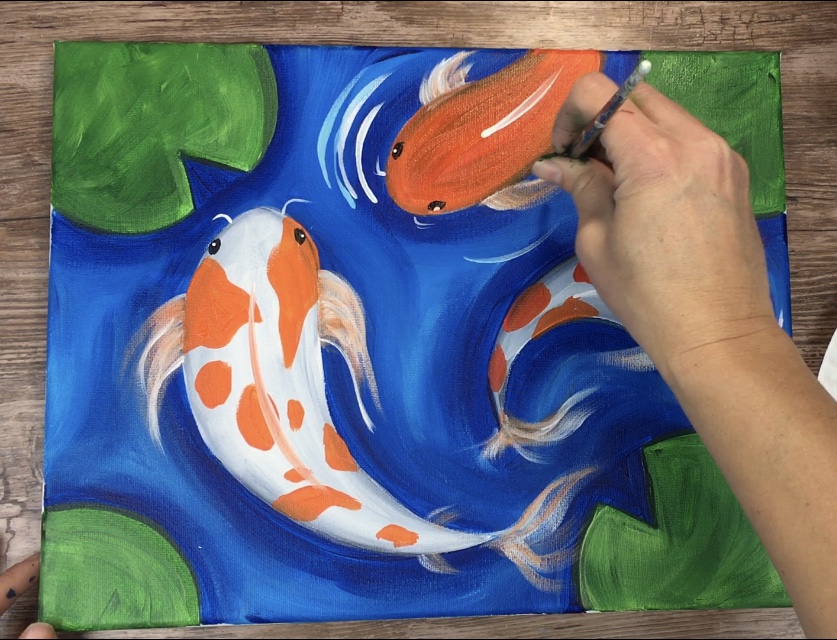
9. Paint the ripples
Use a round brush to paint the ripples. This should be a very light sort of dry brush stroke style.
Don’t load too much paint on your brush when painting the ripples.
Start with titanium white and paint a few curved lines. 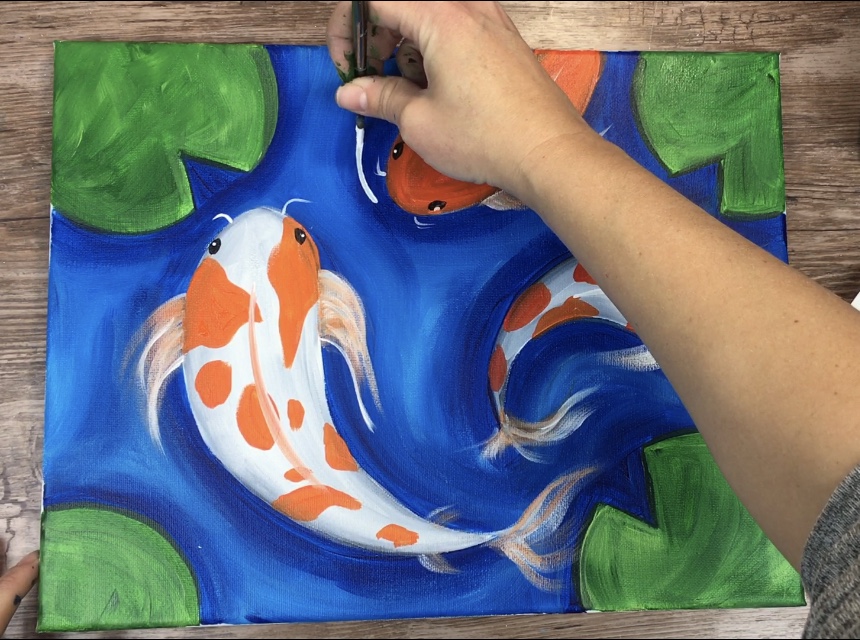
I repeat, do not load too much paint on your brush. Just a little bit on the tip will do.
A few of your ripple lines can overlap some of the fish.
You can also load a tiny bit of phthalo blue and then a tiny bit of light blue permanent to your brush to create color variation with the ripples.
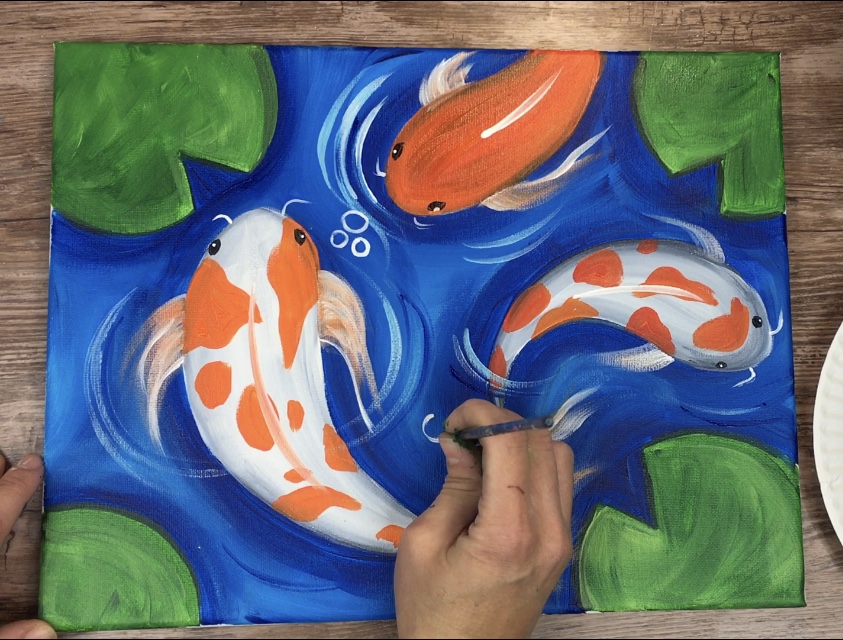
Use a 10/0 round brush and titanium white to paint bubbles.
Simply paint a few circles in various sizes then paint a little highlight line on the circles.
Keep in mind that the ripples and bubbles can overlap the fish because the fish are under water.
Also it is easy to want to paint too many lines and bubbles. I recommend keeping that to a minimum to make the painting look less busy.
10. Paint the lily pad flowers
To paint the lily pad flowers, use medium magenta and titanium white. Also use a 4 round brush.
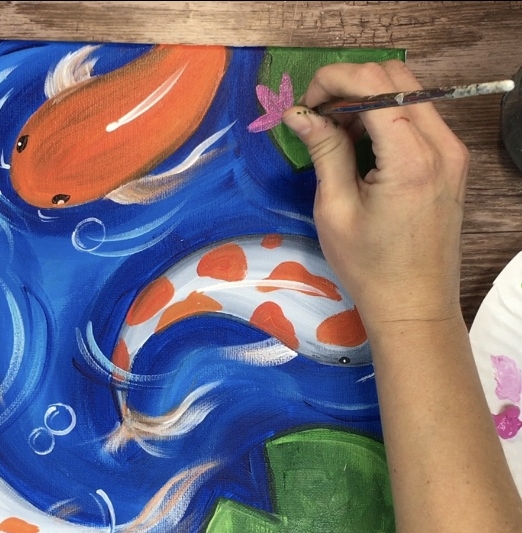
Paint the base outer shape of the flower with medium magenta.
Wait for that layer to dry and then paint another layer with a medium magenta mixed with titanium white.
The inner part of the flower is the lightest tint of pink.
Tip: to dry each layer faster, use a hair dryer.
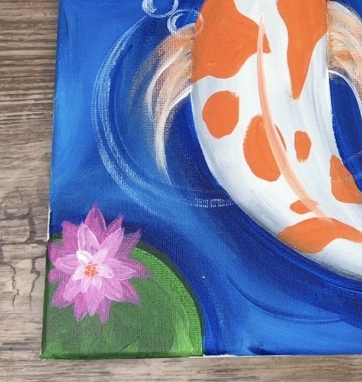
Then paint little orange and white dots in the middle. I did two lily pad flowers.
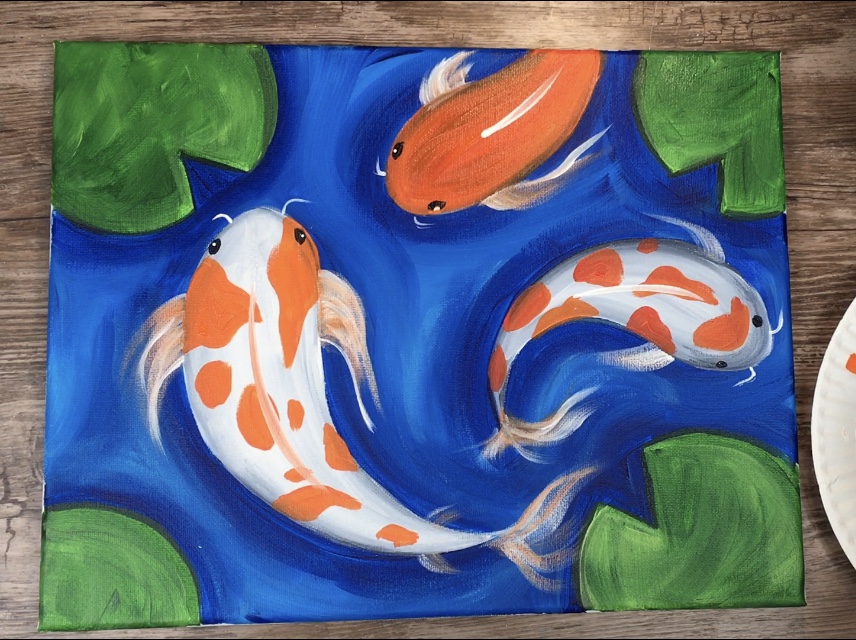
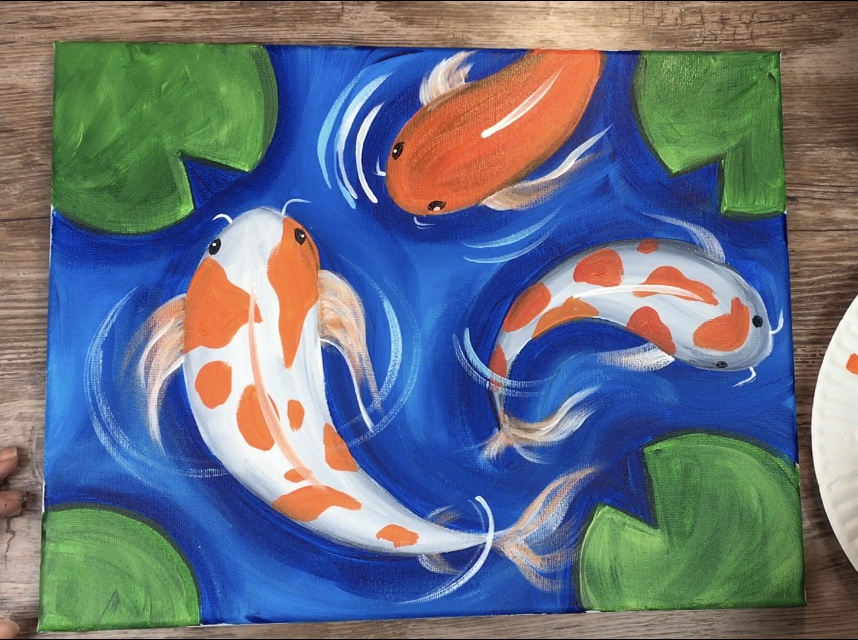
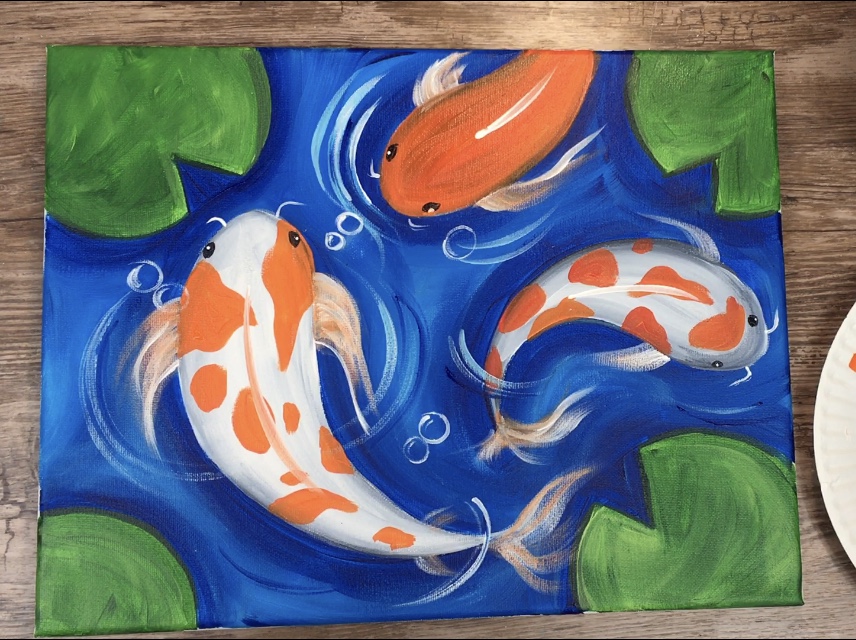
Finished!
Share your art!


I love this painting! My grandparents used to have this type of fish when I was little. It’s like painting my childhood. Thank You for helping to recreate my childhood and for all of the wonderful and easy paintings that you do!
Isn’t that a great feeling when something takes you back like that! Thanks for the comment and you are welcome!
Such a great project, thanks for sharing this. Can I use apple barrel paints for this instead of liquitex?
Yes you can! I would use Too Blue, Parrot Blue, Bright Magenta, Jack O Lantern, White, Black, Flag Red and New Shamrock ?
Beautiful! I made a huge one that had 20 fish on it. I paint badly but now everyone loves the paintings I do. ❤️❤️❤️❤️
❤️❤️❤️
Thx tracie u are my idol
Wow I did it on this huge canvas and now I am super famous for it. THX
I have a koi fish tattoo and have been wanting to paint this one for awhile. I finally did and love it!!
OMG. The ripples are stressing me out!! I finished everything except the bubbles and ripples. I’m pretty pleased with it now. Oh well, I’ve committed and made a few ripple strokes…. stress! haha!
Ripples tend to be stressful, I was doing a new painting today with ripples and got pretty stressed myself lol ? You can always take a break and come back when you’re ready. Glad you like the rest of the painting!
I needed a simple Koi to paint on a rock for an outdoor landscaping project. It was relatively easy except I struggled with the wispiness of the fins & tails. I am by no means an artist but the Koi rock painting turned out quite well. Thank you for this tutorial. I appreciate the step by step instructions.