

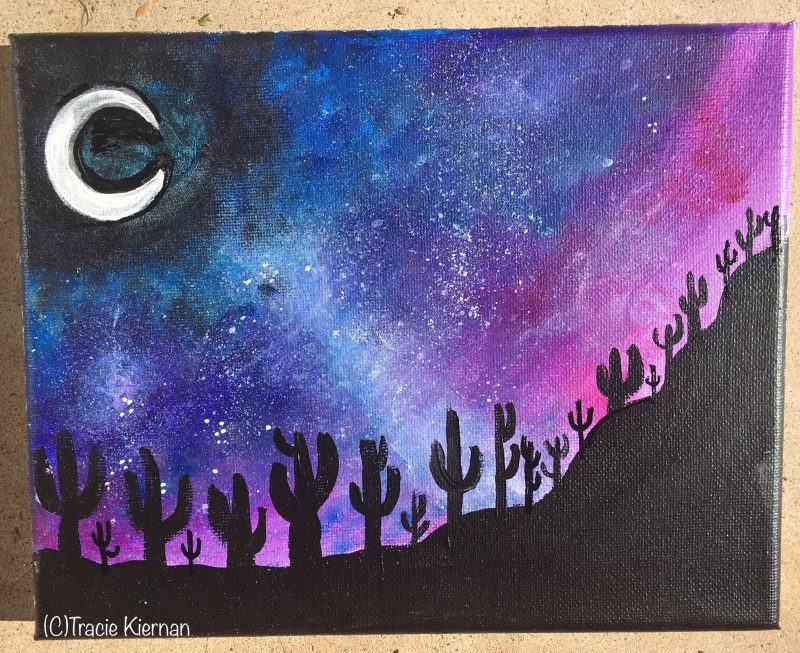
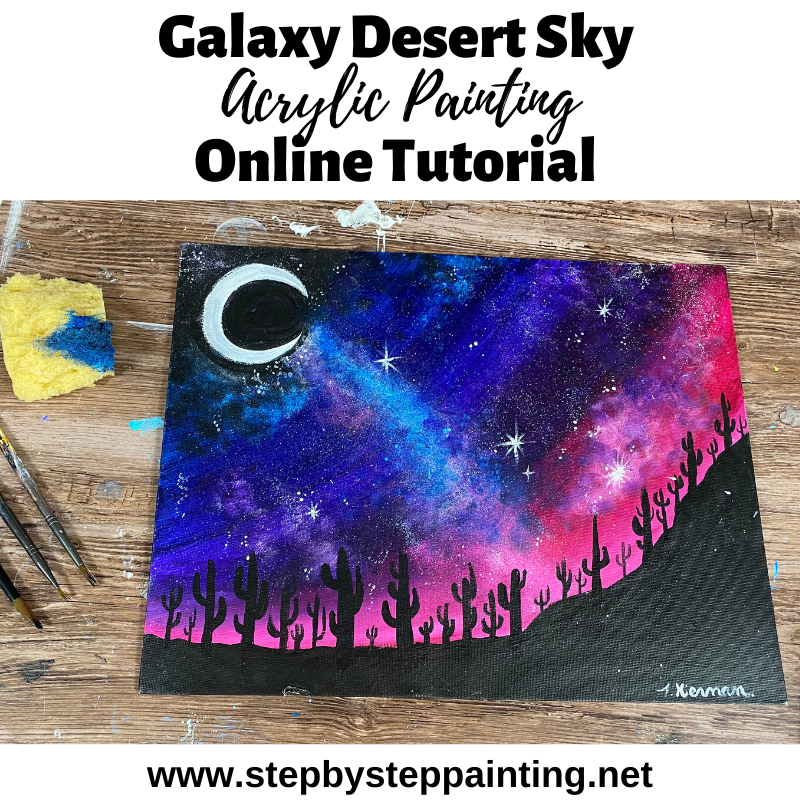
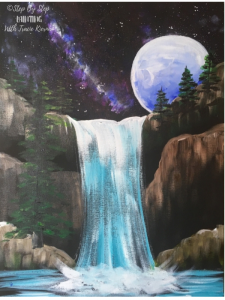
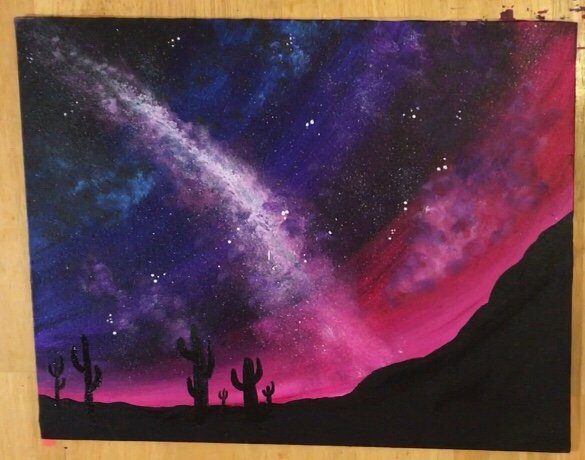
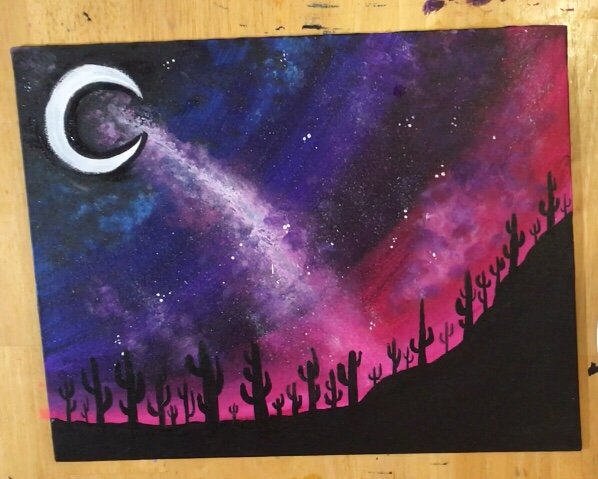
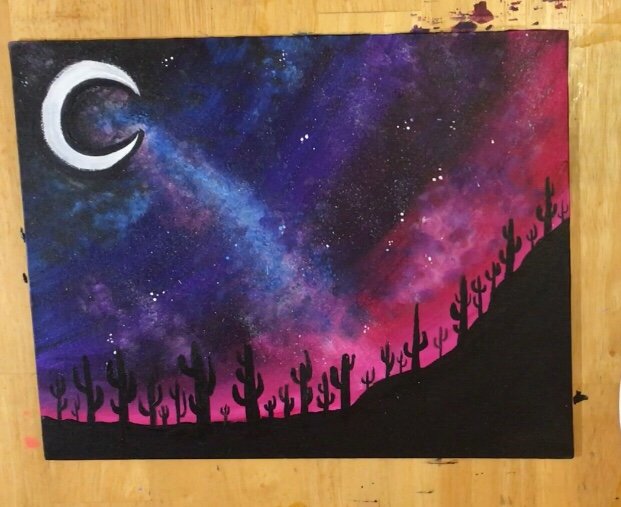
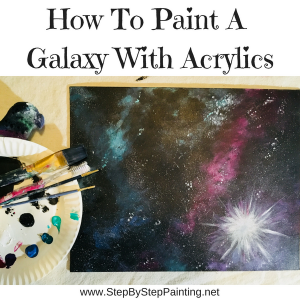
How To Paint Desert Night Sky
This desert painting is absolutely gorgeous and easy to do! Learn how to paint a desert night with a galaxy star filled night sky. This step by step acrylic painting tutorial is for the novice painter.
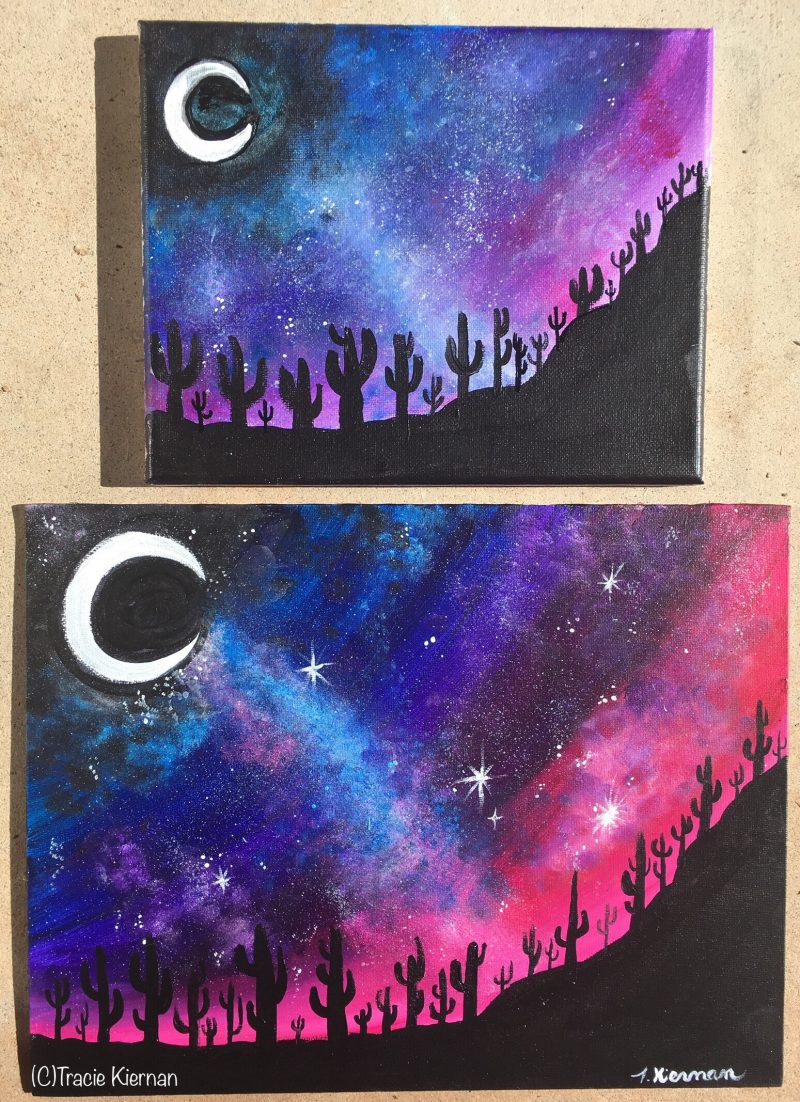
The inspiration for this painting comes from the very fact that I’m an Arizona girl! Although the sky may seem a little “fantasy-like” it is true that one can easily drive out in the undeveloped desert areas and see the site of thousands of saguaro cacti under a star filled sky!
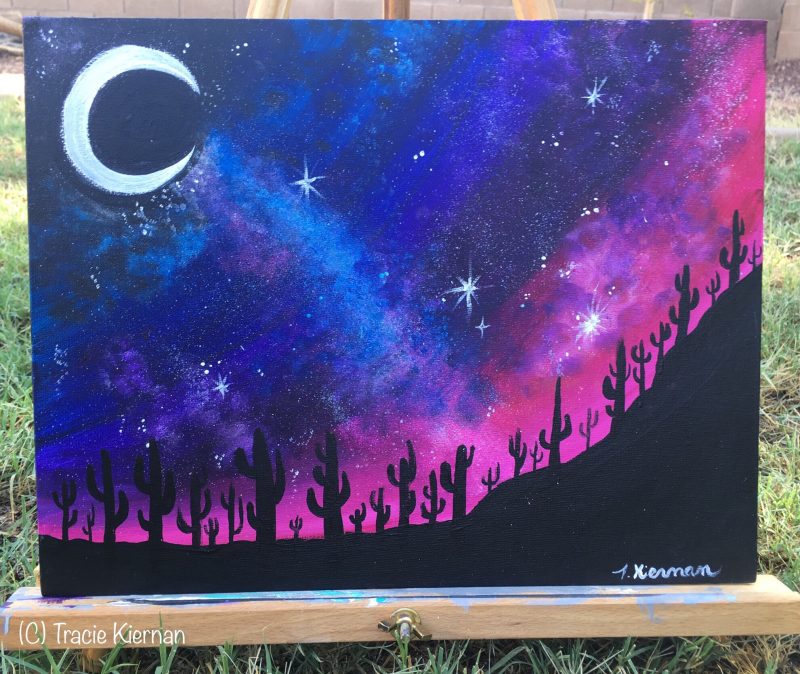
Actually the “galaxy clouds” on the bottom kind of remind me of our “monsoon” storms that we get in the summer! The summer afternoon thunderclouds in the late evening against the sun setting sometimes creates this beautiful sort of ominous looking sky!
Anyhow, no matter how you interpret it, I think this is a very easy painting. If you don’t want to do the galaxy effect, yo can actually leave the sky with just the solid colors.
Enjoy this painting tutorial, it’s a fun one!
Other Galaxy Paintings:


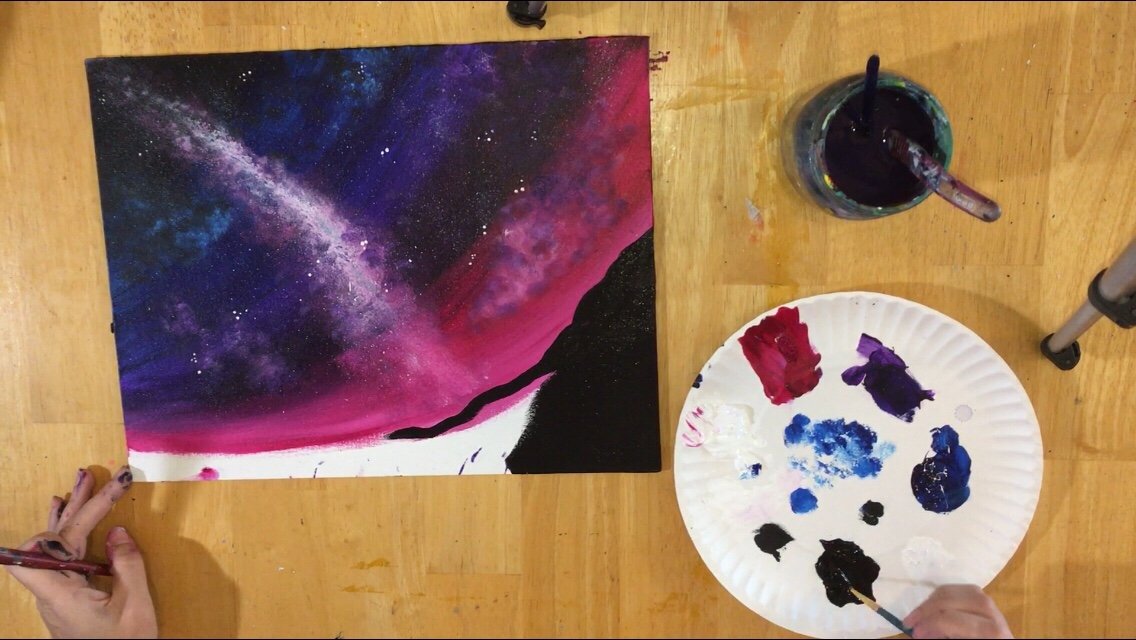
Materials
- 11″ x 14″ Canvas Or Any Size
- Acrylic Paint (I’m using Liquitex BASICS. Try to round to the nearest color if you’re using Apple Barrel or another brand)
- Mars Black
- Titanium White
- Quinacridone Magenta
- Phthalo Blue
- Dioxazine Purple
- Brushes
- 3/4″ Flat (Or a large flat/ bright)
- #4 Round
- #0 Round
- Sponge (Any shape or size) I used a basic synthetic craft sponge.
- Black Paint Pen (optional but it does help if you don’t have a steady hand for the cacti)
Directions At A Glance:
Video:
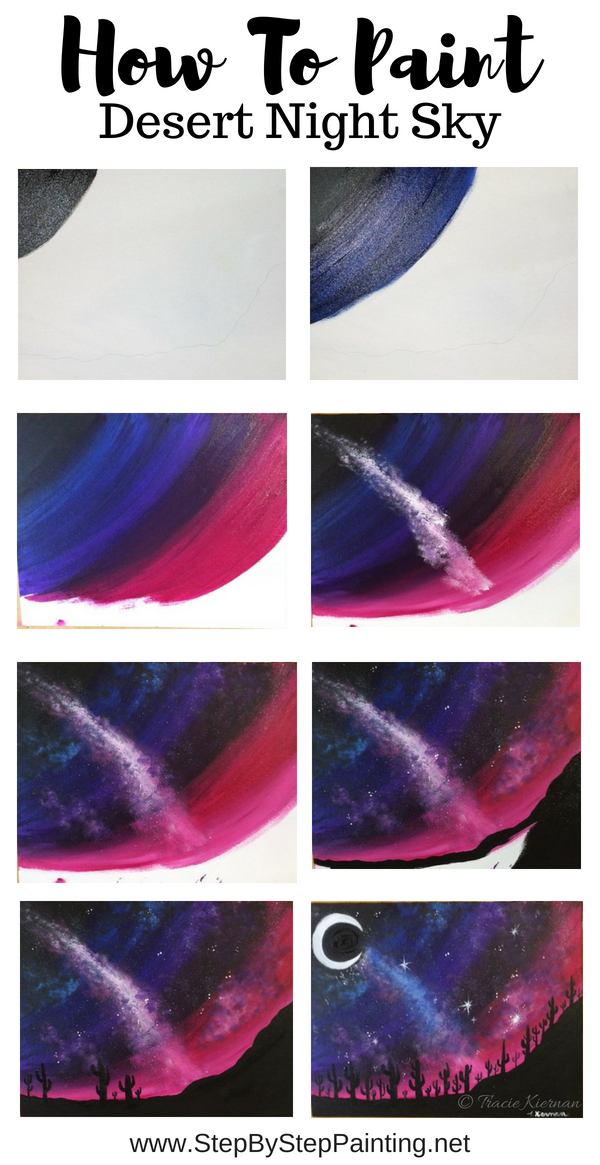
Step By Step Pictures:
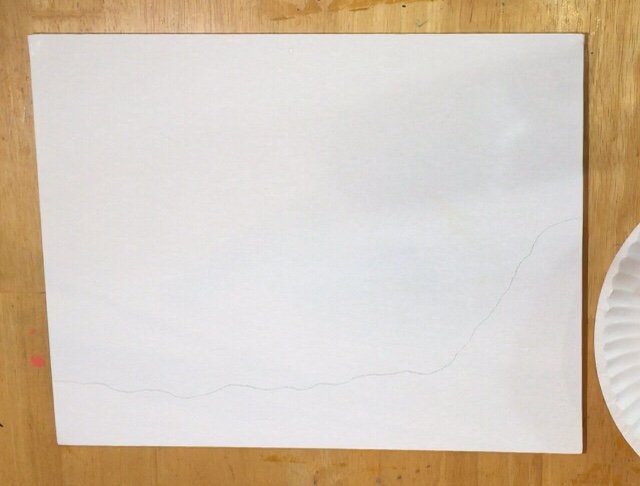
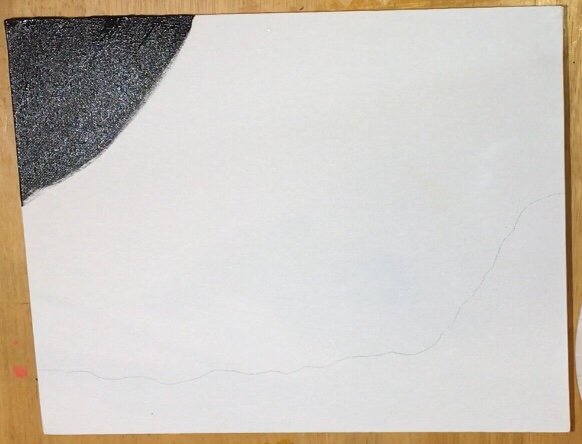
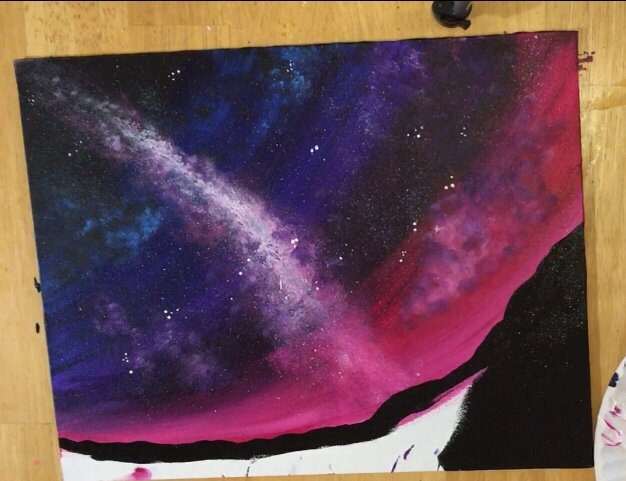
1. Draw a rugged horizon line lightly with a pencil.
Define the line that the cacti will be resting upon. This is a rugged line that starts out low on the bottom and then on the right it turns into sort of a desert cliff. We won’t paint this in just yet, it is only a guide for now.
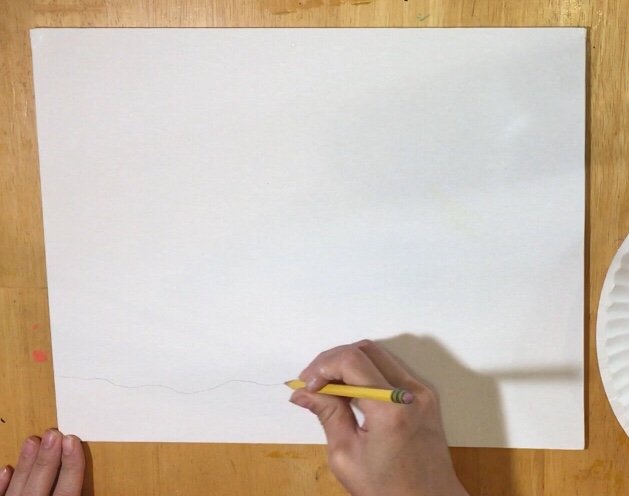
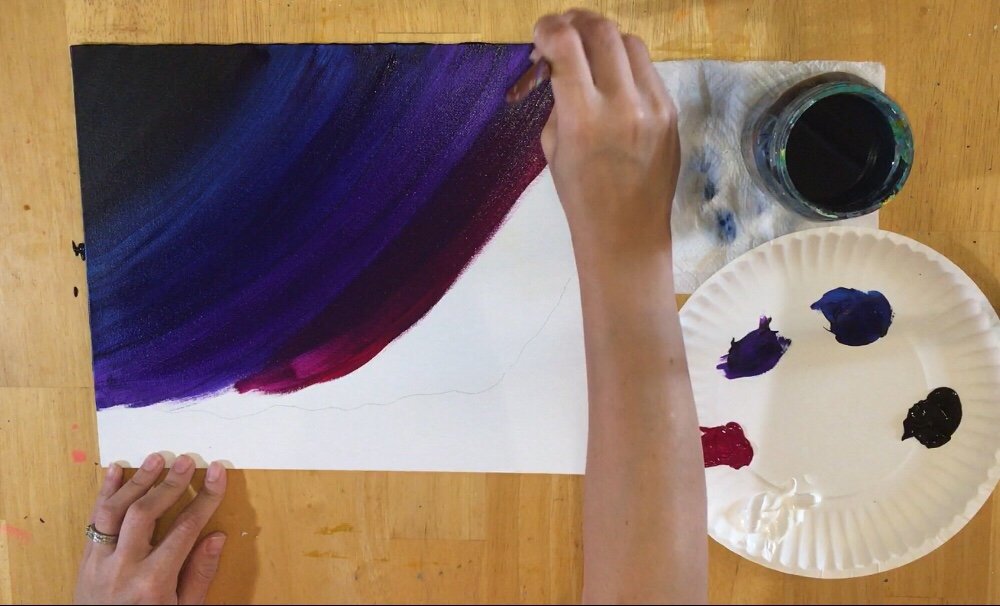
2. Use a 3/4″ Flat Brush and Mars Black.
Start at the upper left corner of your canvas and paint curved strokes. I went probably about 5-6 inches down but just estimate!
3. Don’t rinse brush. Add Phthalo Blue.
Continue your way down and add phthalo blue into the black. Paint over the black area to blend the blue in. It will be a very dark blue at first and then it will turn into more of a pure blue as you blend that black out. 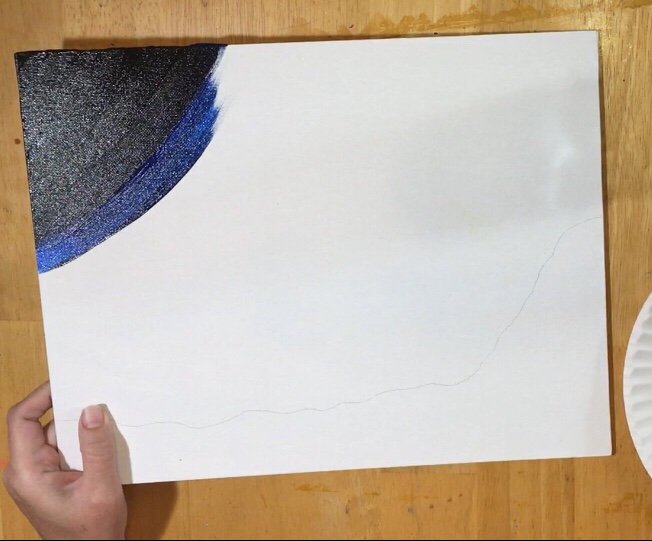

4. Rinse brush this time! Now add Dioxazine Purple.
I rinsed the brush this time because I didn’t want any black or blue in that purple. Dioxazine purple is very dark. Blend the purple back in with the blue and then blend out to pure purple.
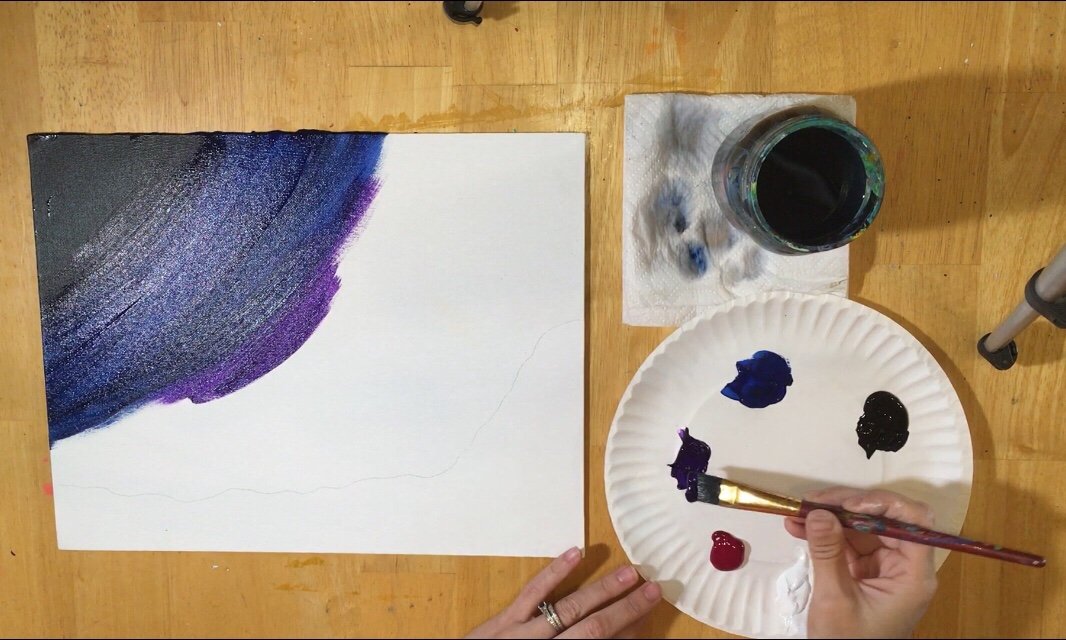

5. Now add Quinacridone Magenta and blend in the next layer in the sky.
(At this point you may want to rinse the brush off if you have residue black still on it) That magenta will be very dark at first when you blend it with the dioxazine purple. Keep adding it and blend out until your magenta gets brighter. You should be very close to that mountain line now! Try not to paint over those lines you drew in the beginning.
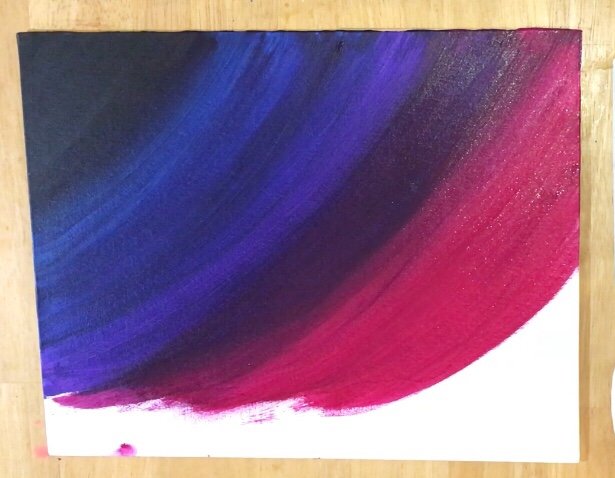
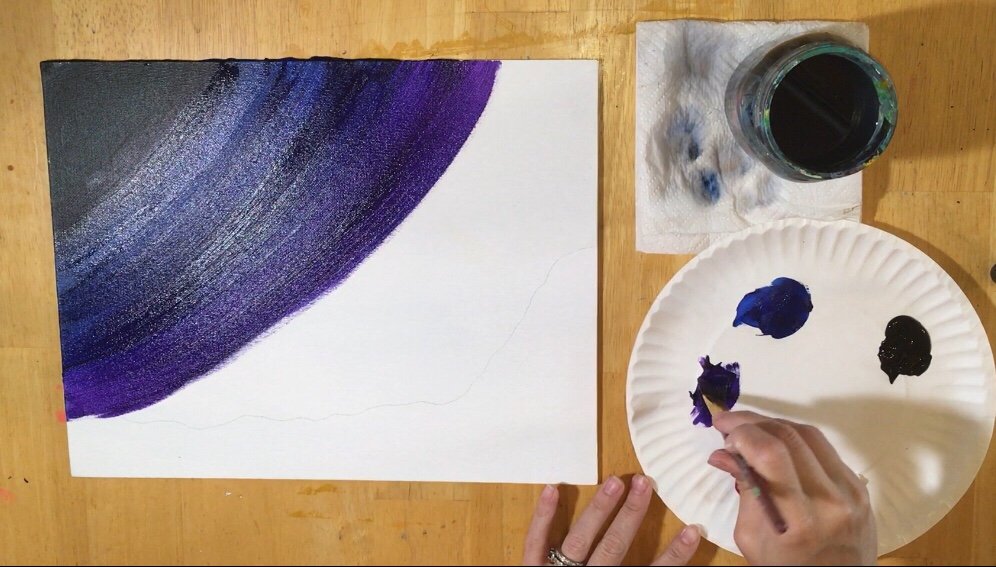
6. Add White into the edge of the magenta.
I rinsed my brush to make sure all the added colors were off. Add titanium white next! Blend white into just the edge of the magenta. This part is important because it gives the mountain edge that “glow”.
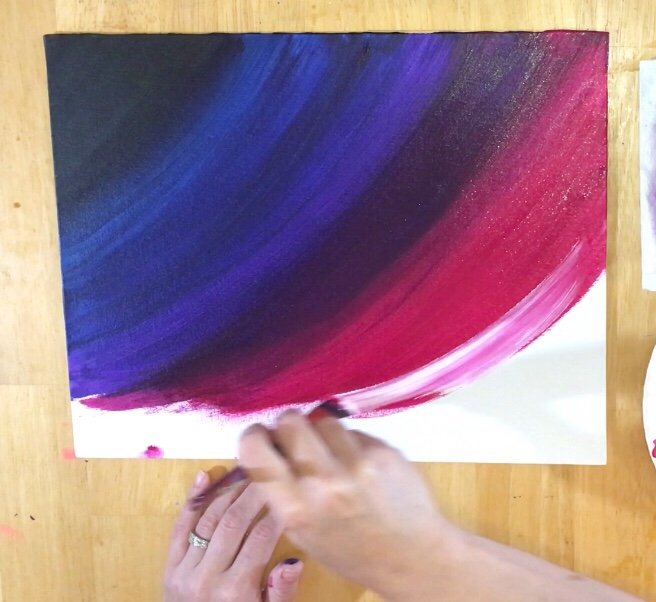
7. You can stop here and skip to the cactus shadows if you’d like!
The next few steps are a little challenging because we will use a sponge to paint in a galaxy sky. If you don’t feel comfortable doing those steps yet, you can leave your sky the way it is. It’s a beautiful sky! You can splatter stars with a toothbrush and a tiny #0 round brush. 
8. Get your sponge and dab on white on your palette.
To make the paint less “strong”, I dabbed it on my palette first so there wasn’t as much paint on the sponge. 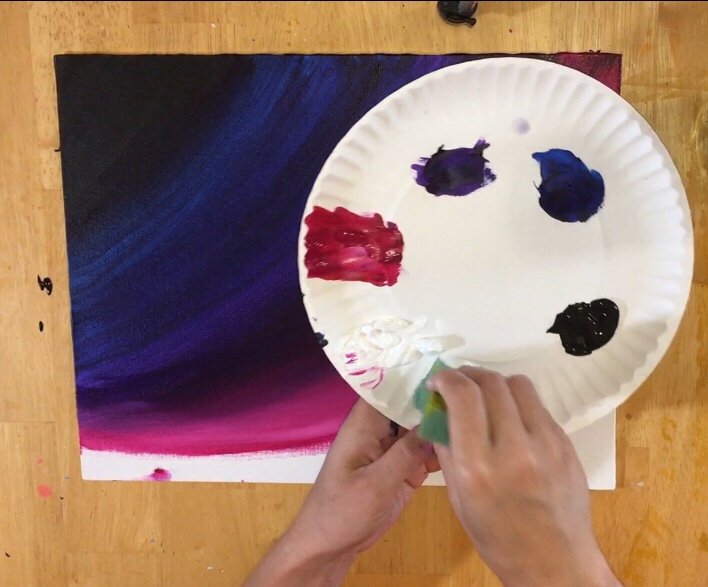
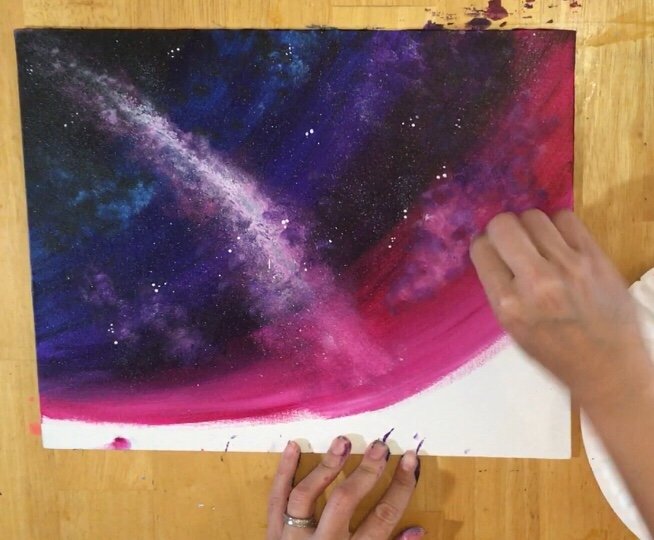
9. Sponge a diagonal line in the sky.
This line went from the upper left to the bottom right. I looks like a jet trail at first.
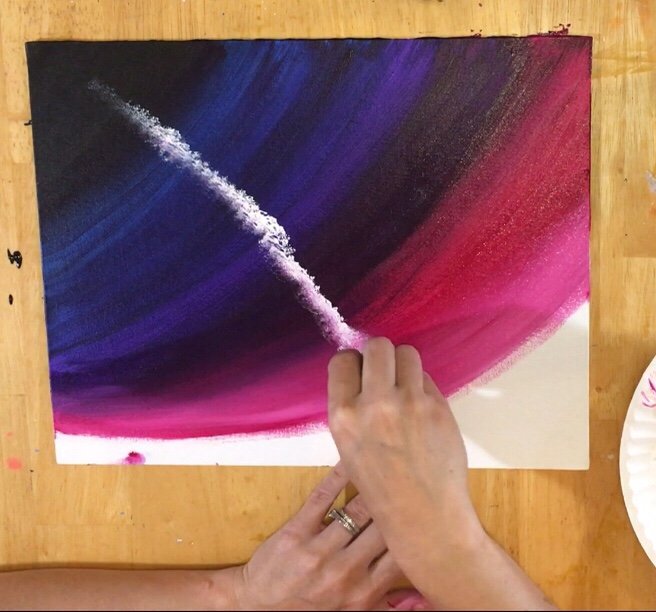
10. Blur the line using a dry part of your sponge.
You want to keep the very center of that sponge line “bright” but blur the edges so they blend in with the rest of the sky. Work FAST so your white doesn’t dry. Sponge it “out” into the rest of the colors. When you “blur the line” don’t add more color to your sponge, just use the sponge to dry and sort of drag the paint and get it to be lighter.
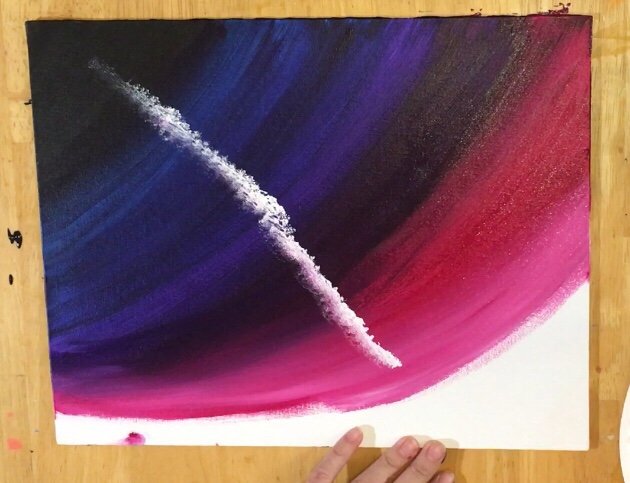
11. Paint other sponged areas “here and there” with white then sponge dioxazine purple over the white.
These sponge areas aren’t as profound as that first line. They are subtle. First I dabbed on white lightly. Then I dabbed dioxazine purple back over the white to make them look more subtle.
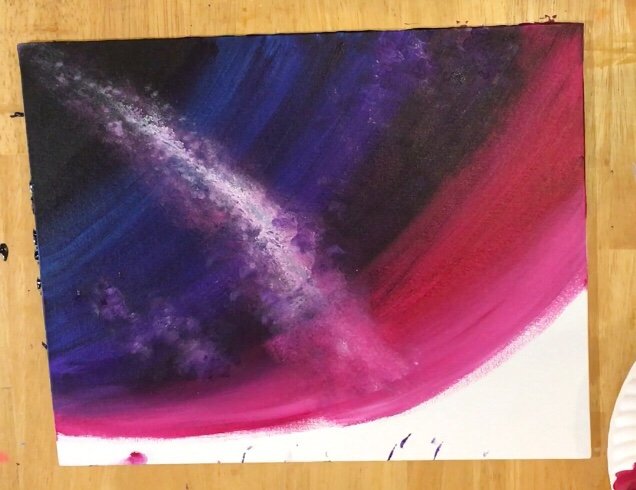
12. Sponge white in the phthalo blue area.
Again, sponge on some more galaxy clouds in the phthalo blue area. Sponge the white first and then apply phthalo blue over the white to make it more subtle. 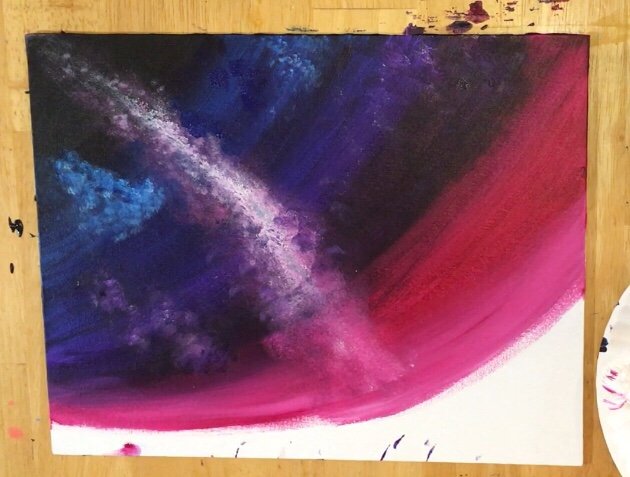
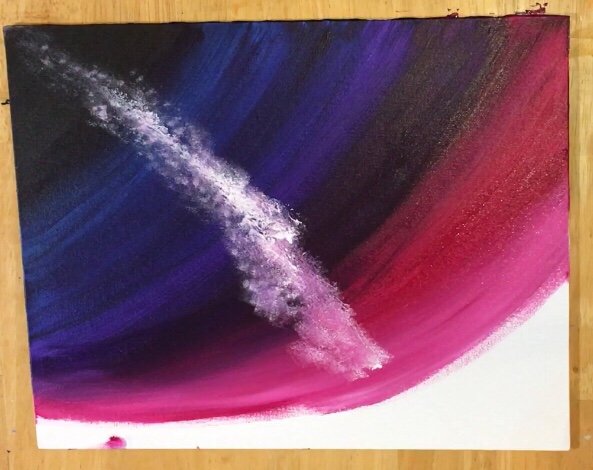
13. Splatter stars with the toothbrush.
Use your old toothbrush to splatter on white stars. I always like to wet the brush slightly before I splatter but make sure it’s not “dripping”. Flick stars all over your sky! To get denser stars, flick the brush closer to the canvas. I made denser stars on the diagonal line. 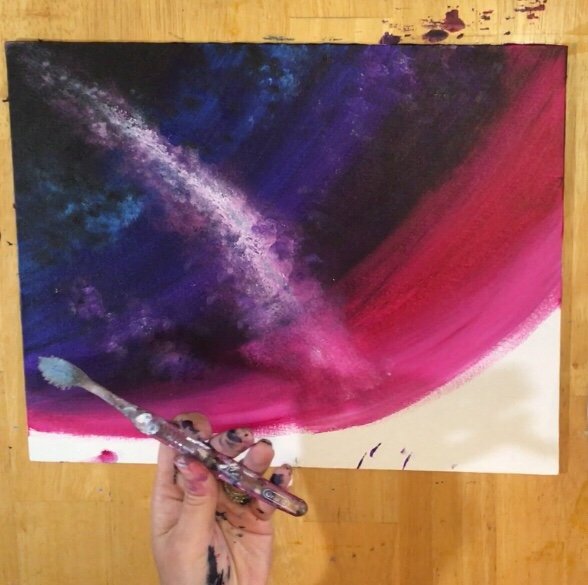
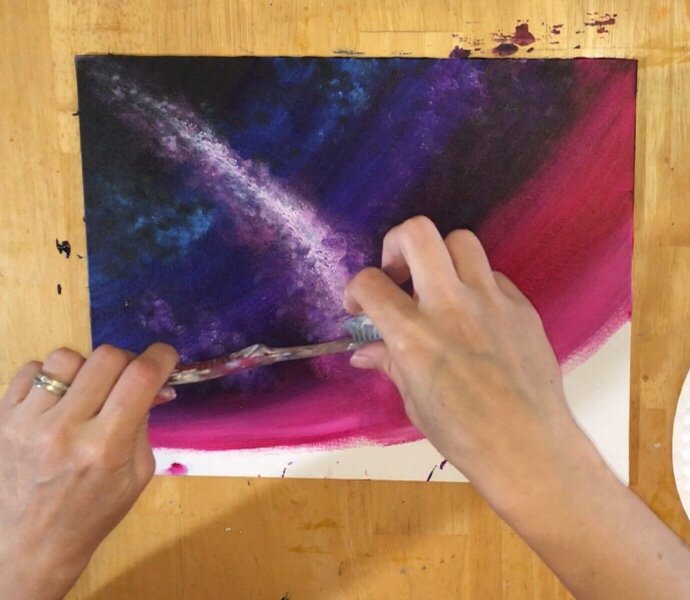

14. Use a #0 Round brush to paint star dots.
Paint little dots here and there but group them close together in areas. Make sure you’re using a very small brush to do this.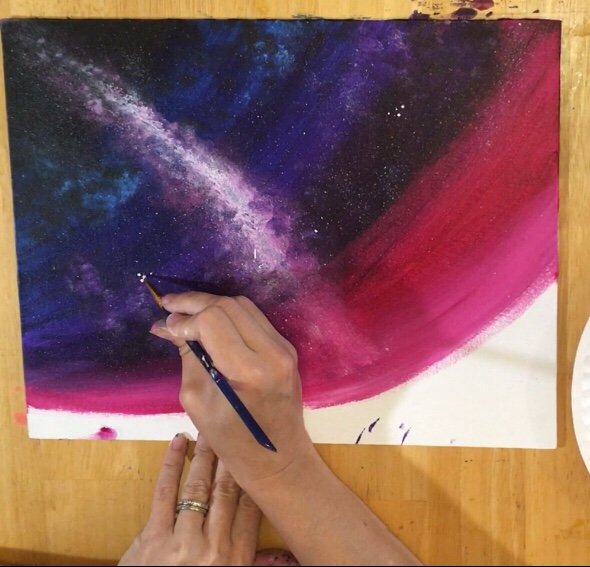

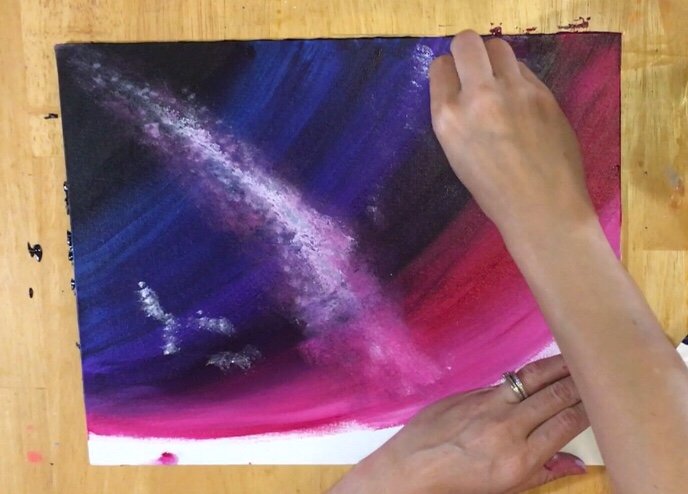
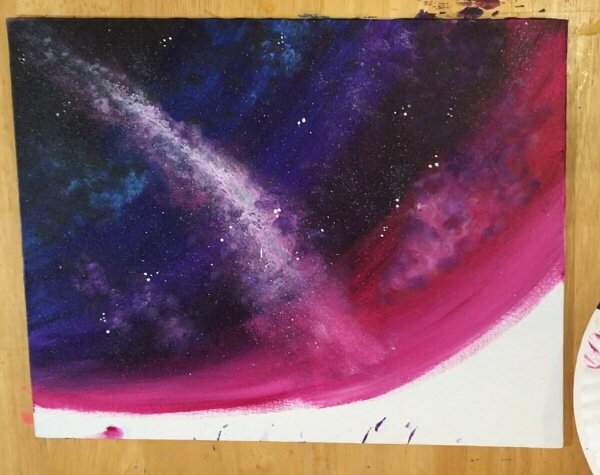
15. Paint another “galaxy cloud” in the magenta area.
Start with white and sponge on a cloud shape. Then blend it away by adding magenta to your sponge and sponging over that cloud again. THEN add a little bit of dioxazine purple to the sponge and sponge it onto that cloud.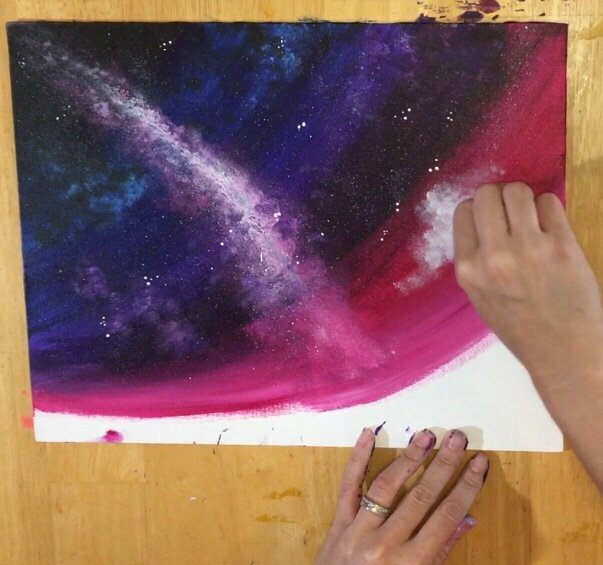
Sponge on white to form the cloud.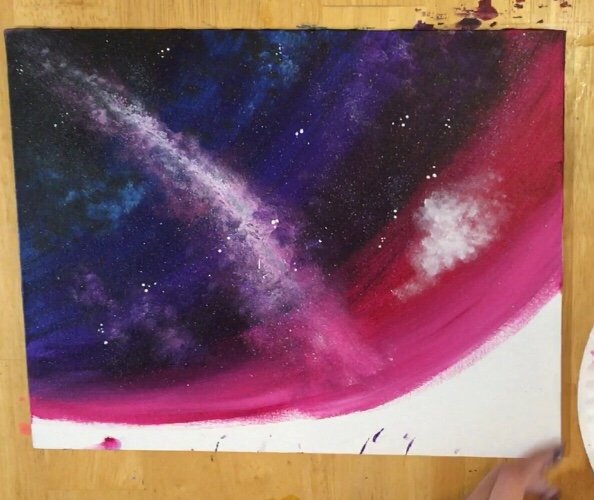
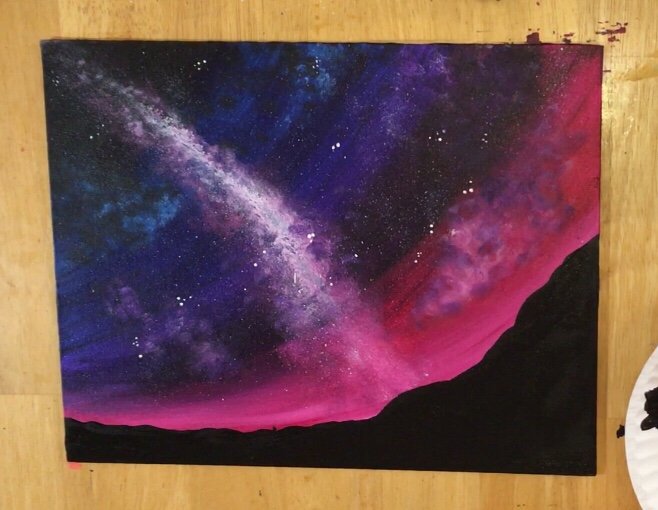
16. Paint the mountain land line with mars black and a flat.
I started with a larger 3/4″ flat but switched to a smaller #4 round to help define that line. Paint the entire land area solid black.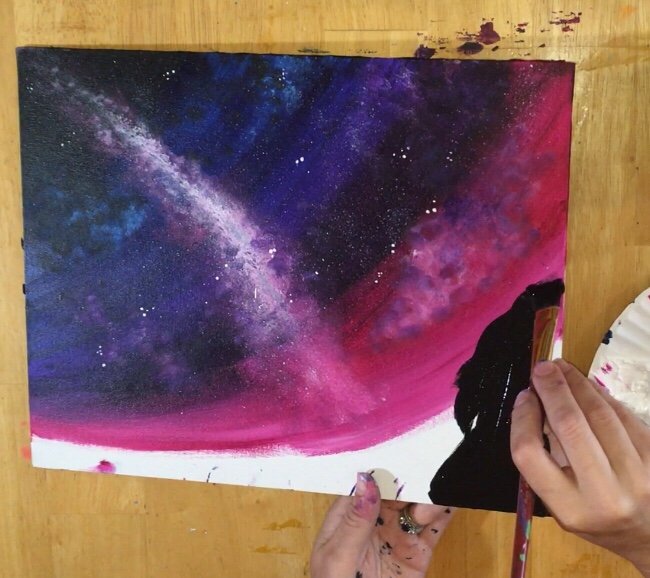
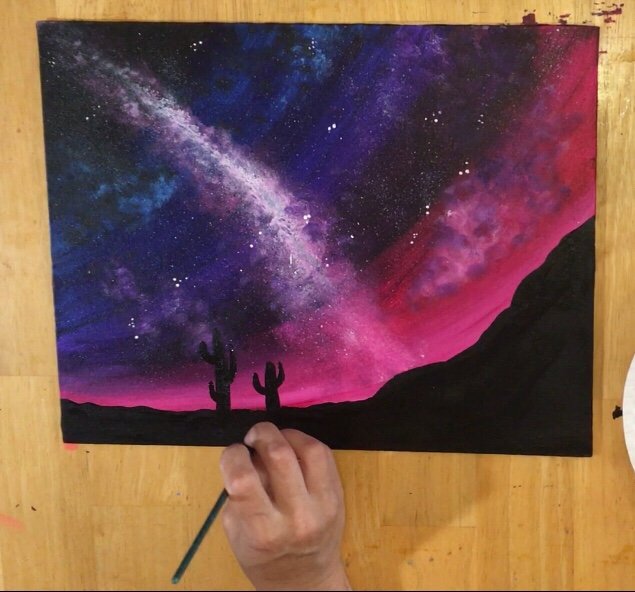
17. Paint your cacti shadows with a #4 round and a #0 Round (or paint pen).
When I paint saguaro cactus silhouettes, I start with the tall middle part and then paint the arms. Make sure you’re using a round brush for this so you can get those thin “rounder” lines. Paint a VARIETY of shapes and sizes. Some are tall, some small, some thin and some thicker. The smaller ones were done with the smaller brush.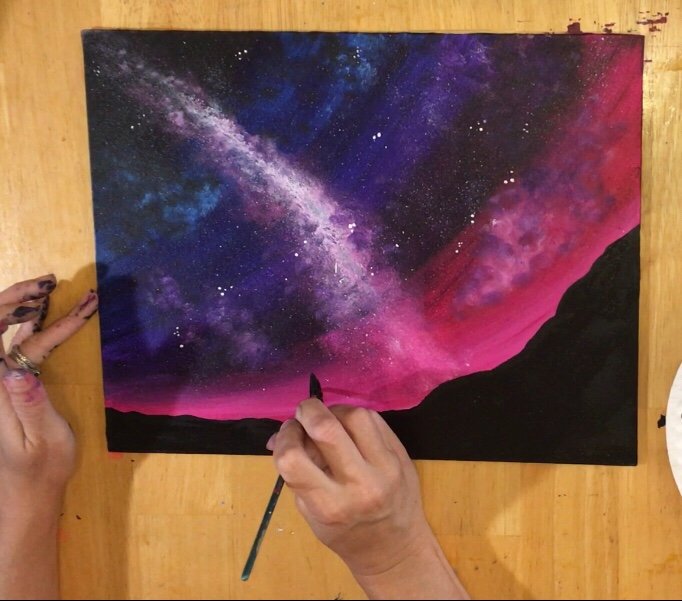
18. Draw the moon with chalk!
I always mess up on my crescent moons for some reason! I find it easiest if you use chalk first to draw a circle and then the crescent inside the circle. 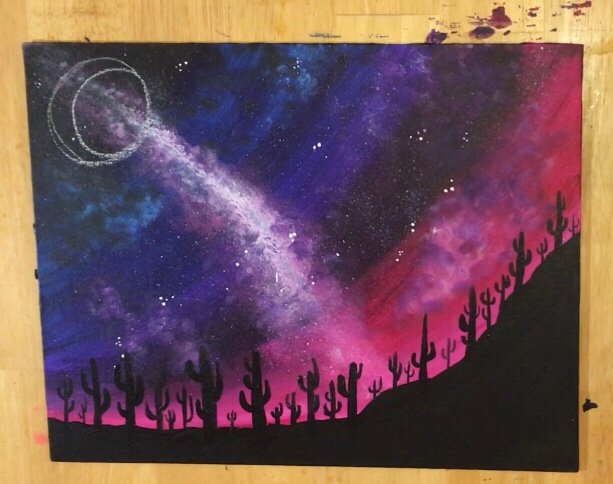
19. Paint the moon titanium white.
Use a small round brush. I used a #4 to paint it in. Then I outlined it slightly with black to help define the shape more. 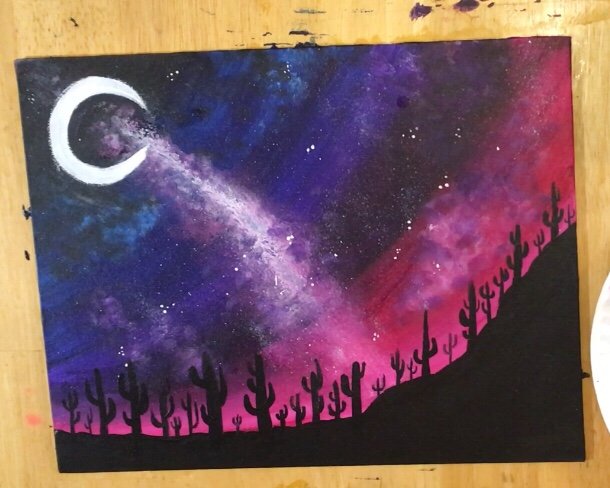
20. Sponge on Phthalo Blue over that white line.
You can keep that line the way it is but I wanted to dime it by sponging phthalo blue over it. I only added a LITTLE bit of phthalo blue to my sponge. Too much and that line may disappear. Lightly sponge the blue over that line. 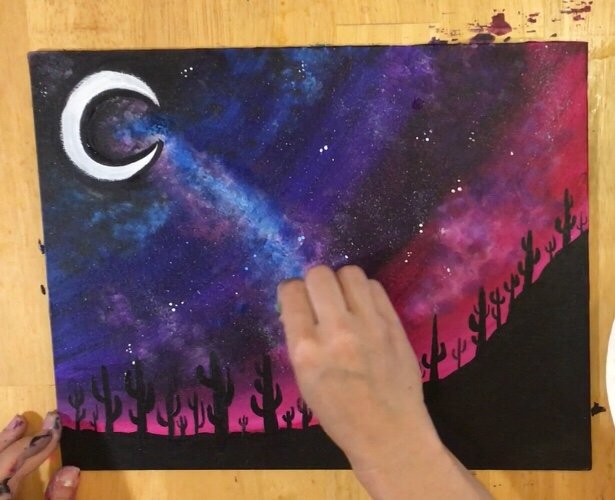
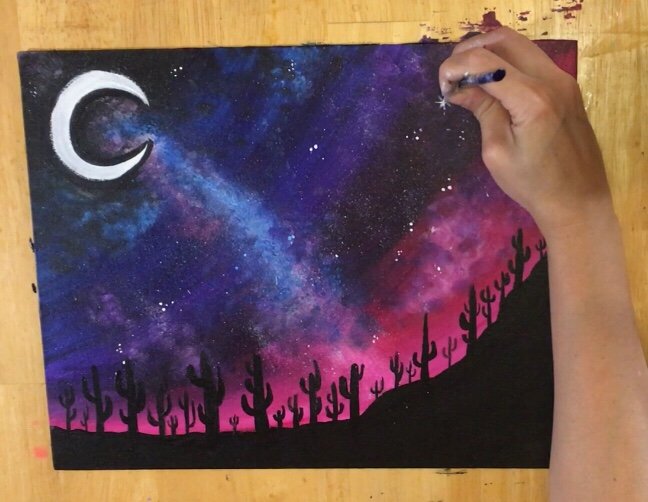
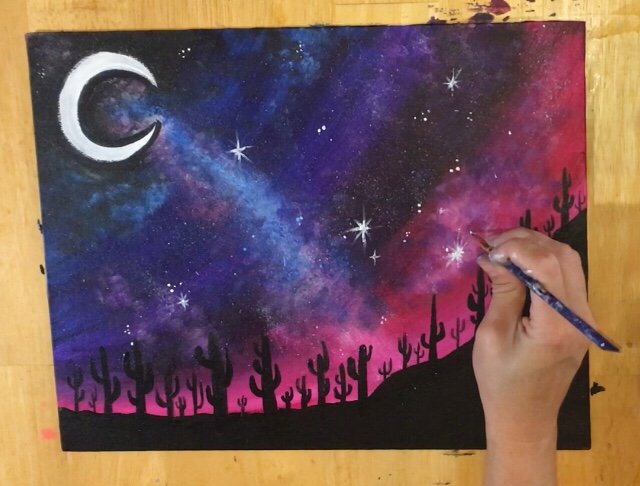
21. Use a tiny #0 round brush to paint sparkling stars.
Paint diamond-like sparkling stars of various sizes around the sky. I painted a “+” first and then added diagonals stemming out from that plus.
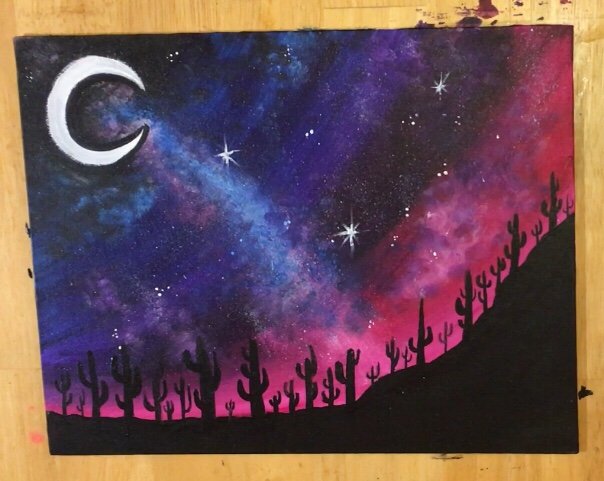
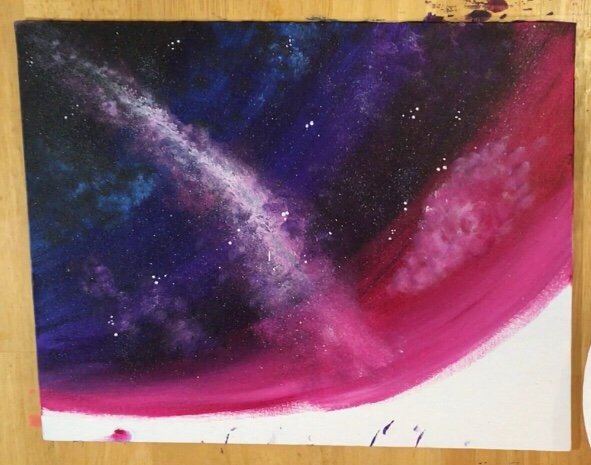
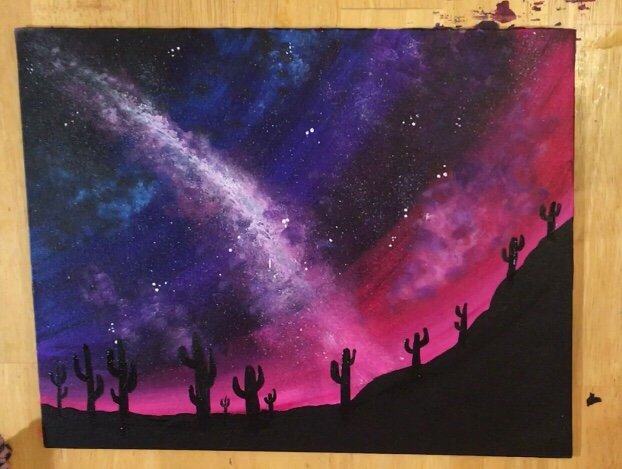
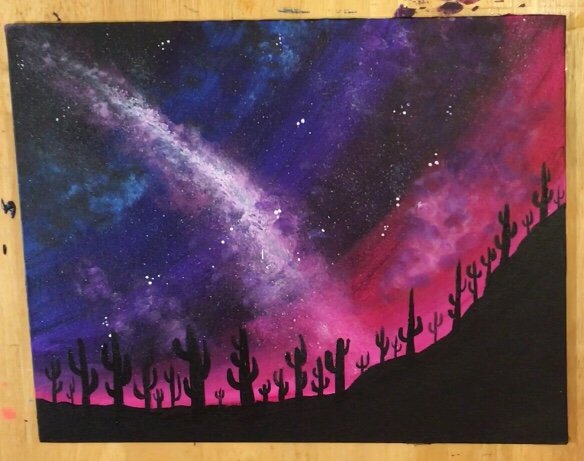
Finished!
You can add a few touches here and there! More splatters or star dots, it’s up to you! 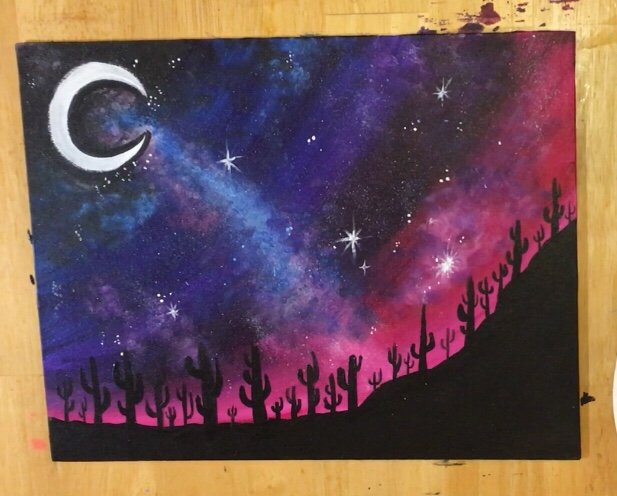
Thank You For Viewing! If you liked this tutorial, please share!


See Also:
Hi Tracie! Thank you so much for your awesome website and extremely helpful “Paint Night” instructions! I’m hosting one for my birthday in a few weeks and you have helped me out a TON.
I was wondering though, for this desert painting, if one wanted to place a saying (in my head it is with white paint) over the dark landscape on the bottom of the painting, what type of paint (or chalk?) would one use?
Thanks for your help!
Thanks Tara! So glad I helped sigh yoke birthday paint night. To answer your question about the quote, I would use a white acrylic paint pen or even a silver/ metallic sharpie. I think they might even make white sharpies. But both options will give you permanency and will be opaque enough to show up on the dark area on the bottom.
Hiya, followed this tutorial on the back pocket of a pair of jeans ? very small and weird shaped canvas compared but it came out alright considering I’m really not an artist so thank you ❤️
You’re welcome! That’s pretty awesome you did this on a pair of jeans pocket. So cool!