
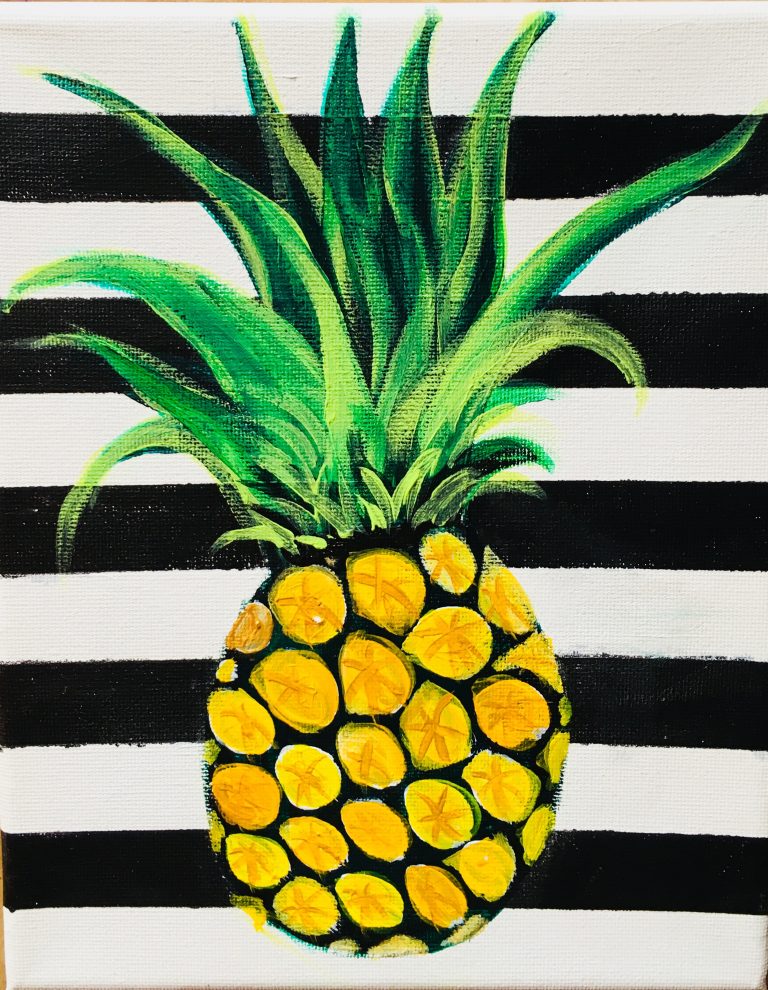
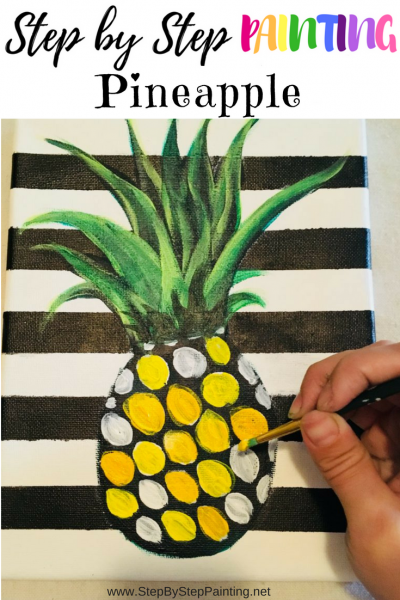
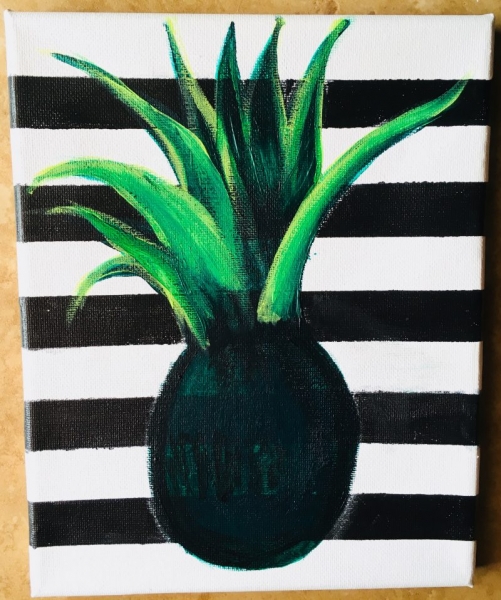
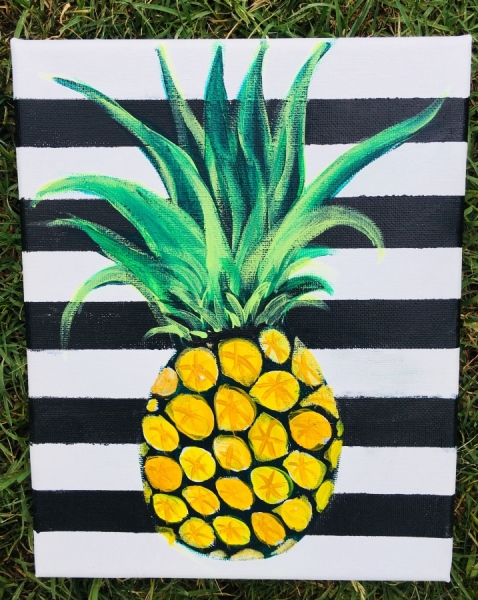
Pineapple Painting
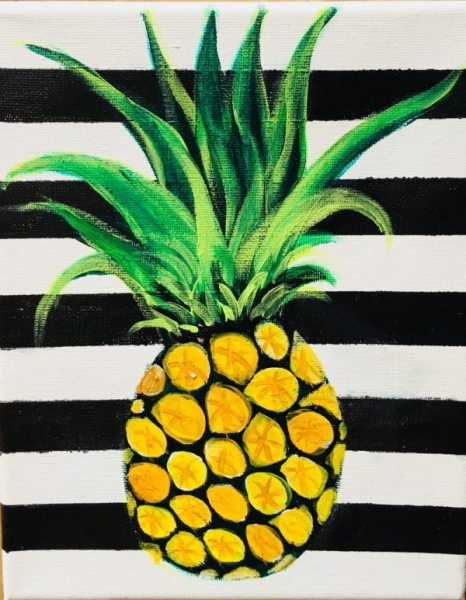
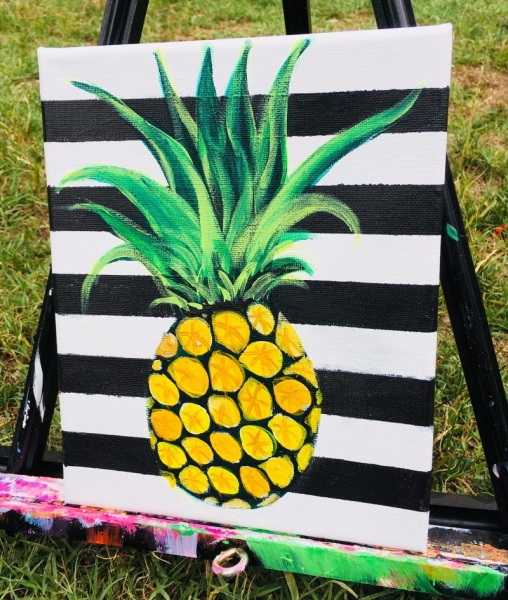
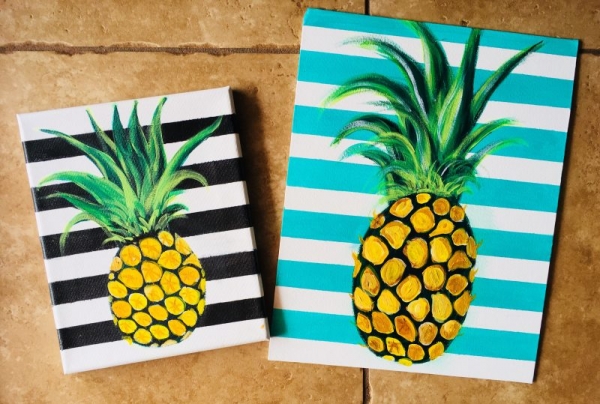
How To Paint A Pineapple
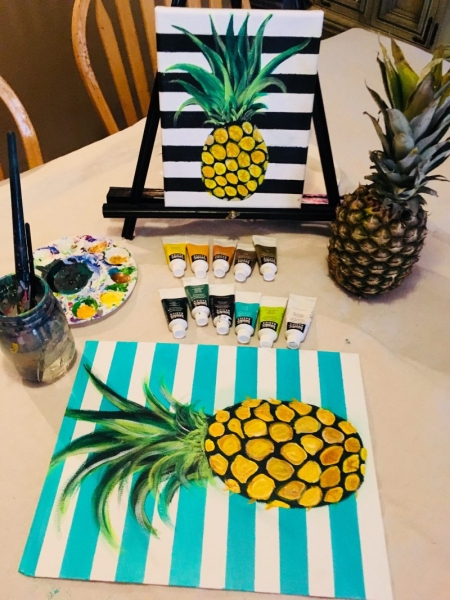
Hello artist friends I’m going to teach you how to do a pineapple painting! This is such an easy and fun painting you can do with your kids or for a fun summer themed party. The background stripes are super fun and customizable! I did those with painters tape.
Painting a bold stripe background is tricky when you need an object to go in front of the stripes. Do you paint the object first or the stripes? How do you block out all that black when you need to paint a light color object over them? Those are some questions I had to figure out when planning this painting!
In this tutorial there is a materials list, full detail video and step by step process pictures! I will also be providing you a traceable if you have a hard time drawing the pineapple,
I had a lot of fun with this because it’s so different from all my other stuff. Enjoy and happy pineapple painting!
See Also:
This post contains affiliate links to Amazon.com.
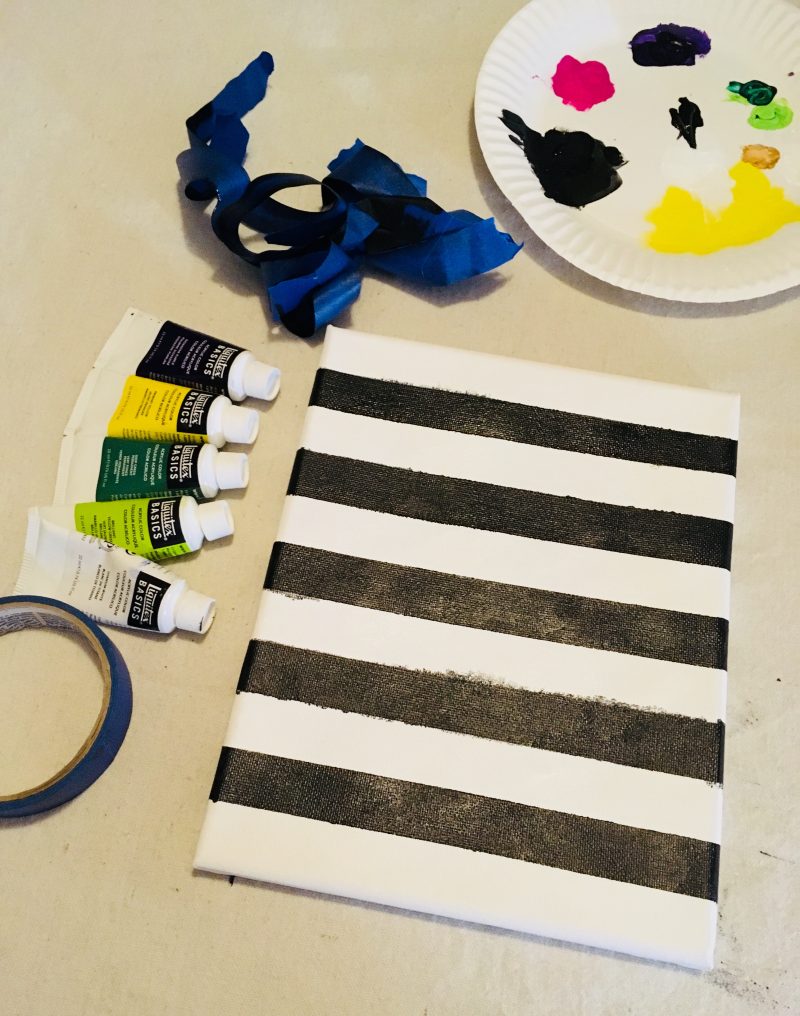
Materials
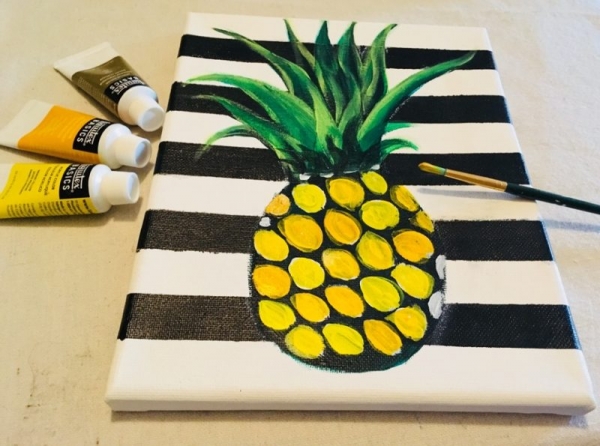
- Canvas (I used an 8 x 10 and an 11 x 14 but this design works for any size)
- Acrylic Paint (I used Liquitex BASICS)
- Primary Yellow
- Cadmium Yellow Deep Hue
- Yellow Oxide
- Phthalo Green
- Dark Green Permanent
- Brilliant Yellow Green
- Gold
- Mars Black
- Titanium White
- Brushes
- 5/8″ Flat (Or similar size large flat)
- #7 Round (Large Round)
- #4 Round (Small/Medium Round)
- #1 Round (Tiny Round)
- Painters Tape
- T-Square Ruler (Optional to help with leveling the tape)
- Chalk

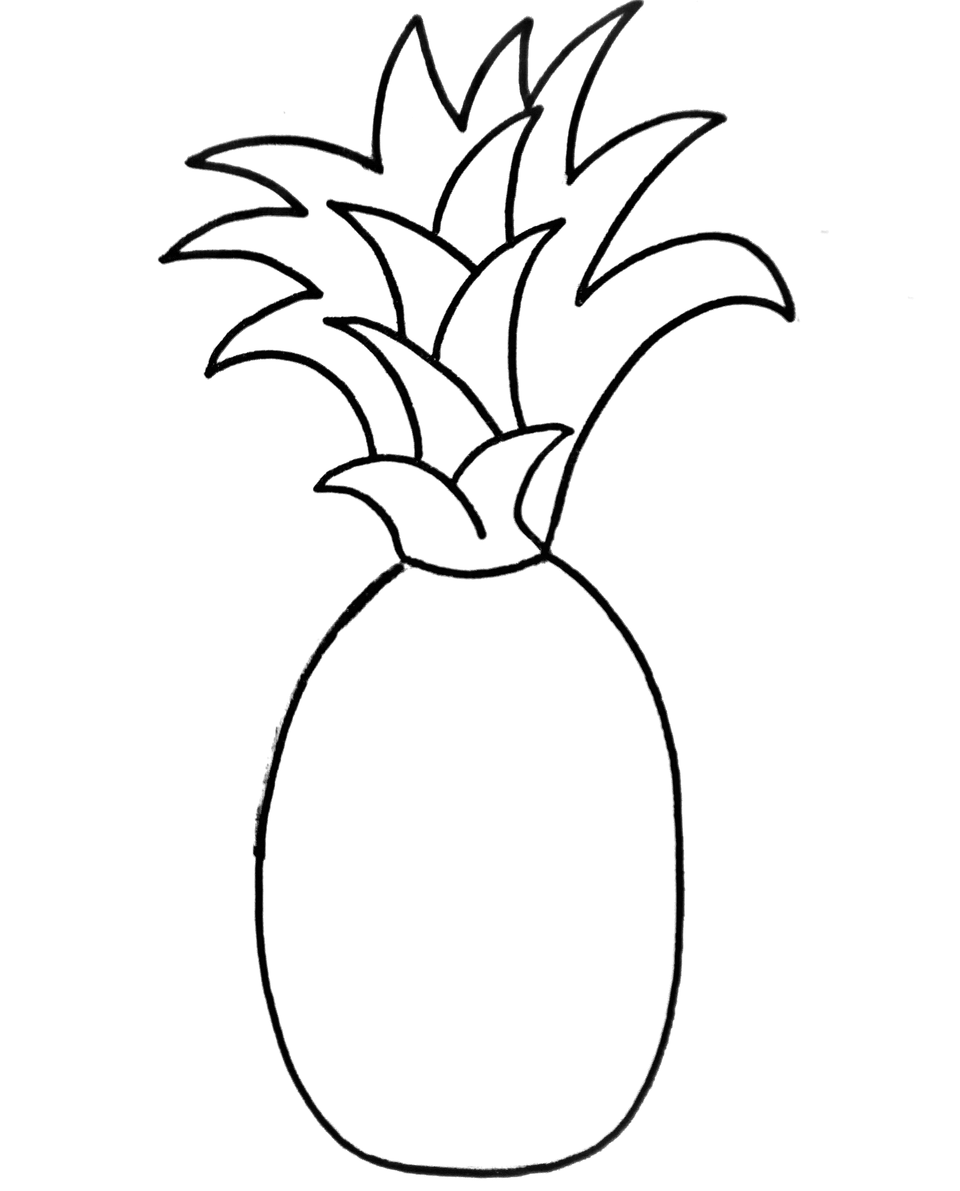
Traceable
The traceable is totally not necessary because the pineapple is easy to draw! However, if you tried the drawing and just couldn’t get it down, I totally understand! No worries because I provide a traceable! Save the image below for printing or go to my PDF library for the PDF version.
Directions At A Glance:
Video (view also on YouTube):
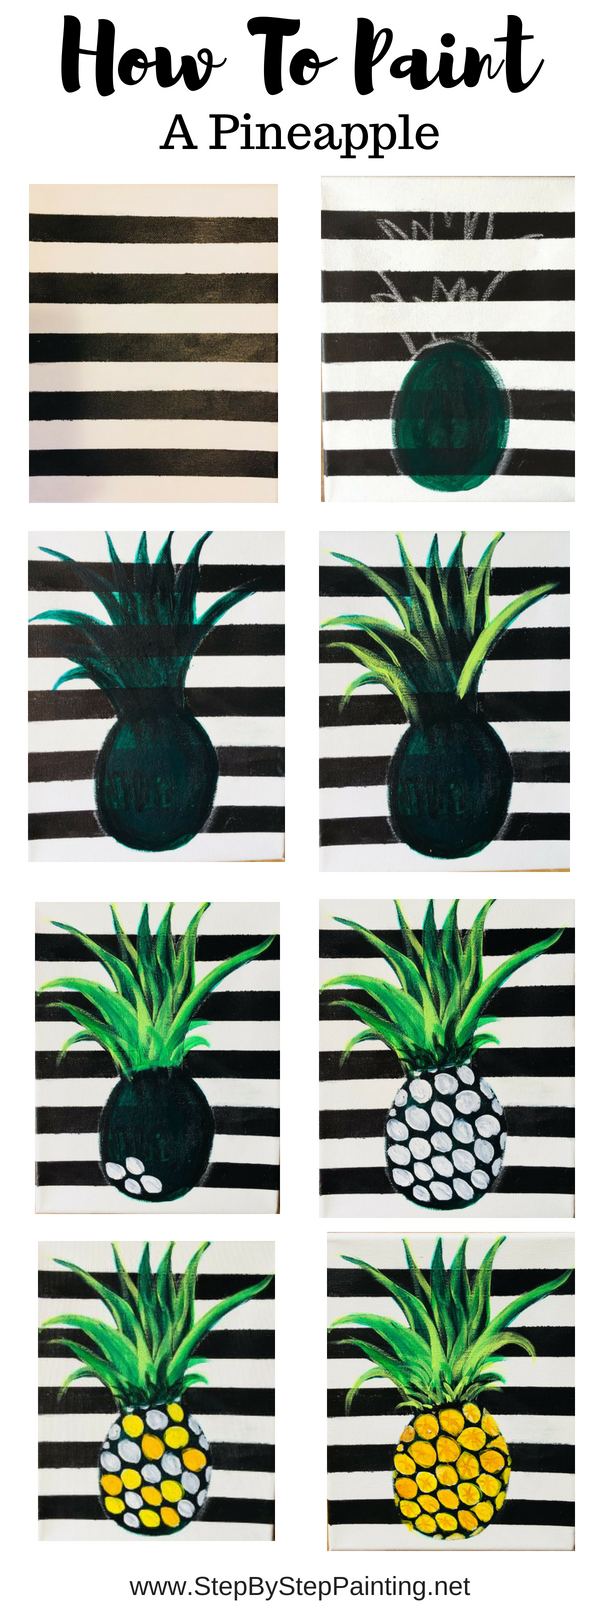
Step By Step Process Pictures
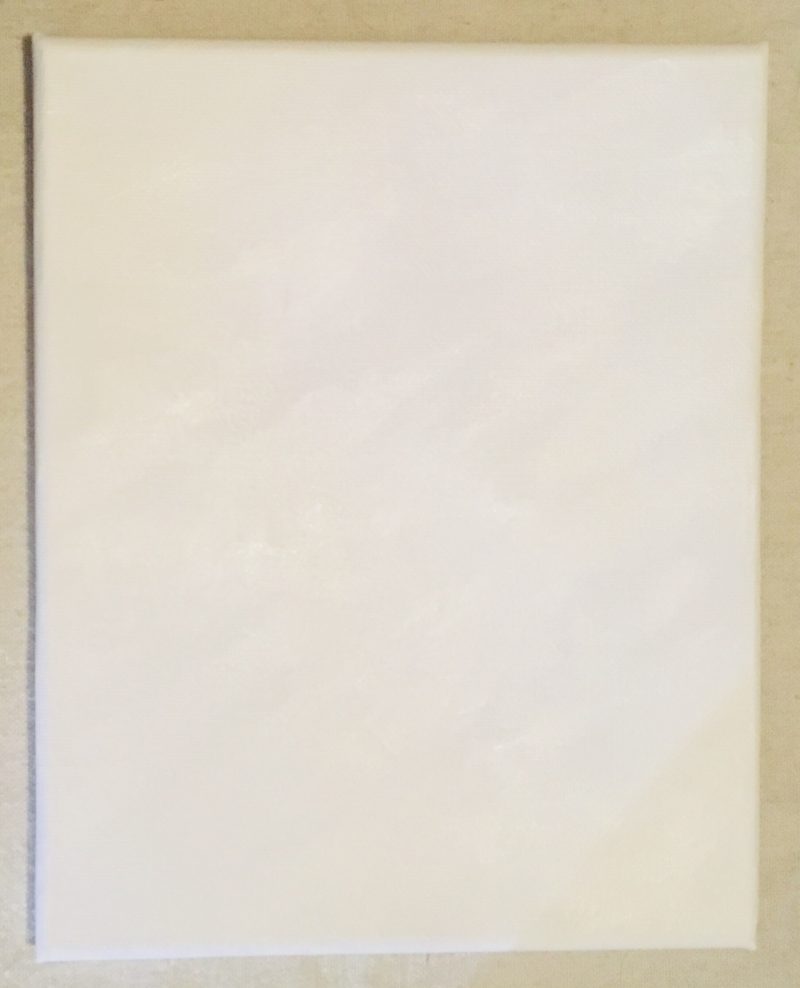
1. Paint the canvas titanium white using a 5/8″ flat brush. (I’m using an 8 x 10 canvas for the photos in this post)
I painted the canvas all white using a 5/8″ flat brush. This might be kind of odd but I didn’t want blank canvas stripes. You can make your strokes go any direction at this point. 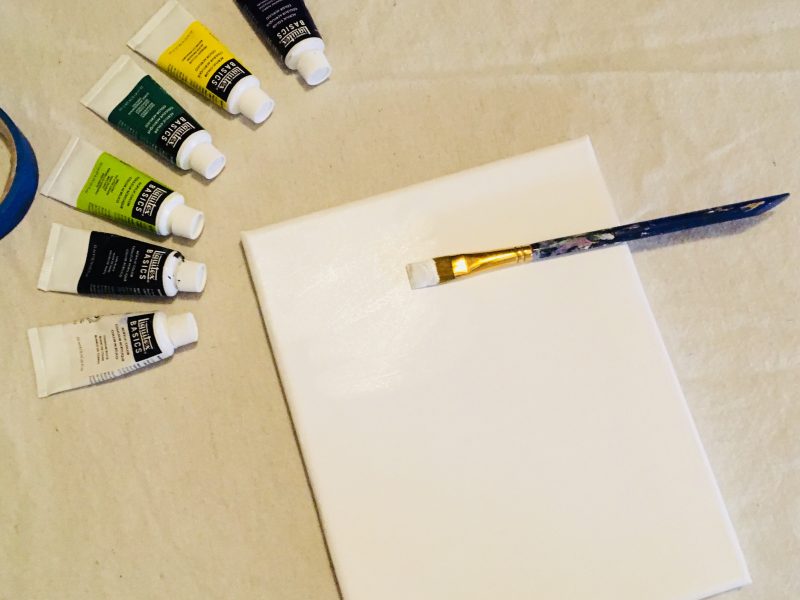

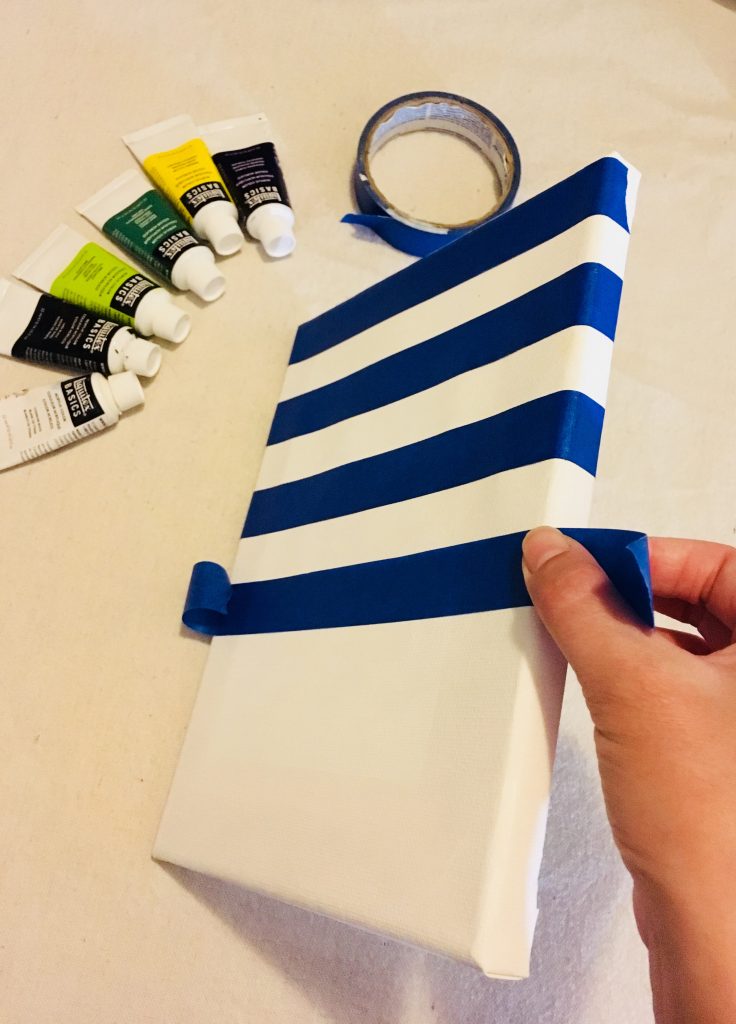
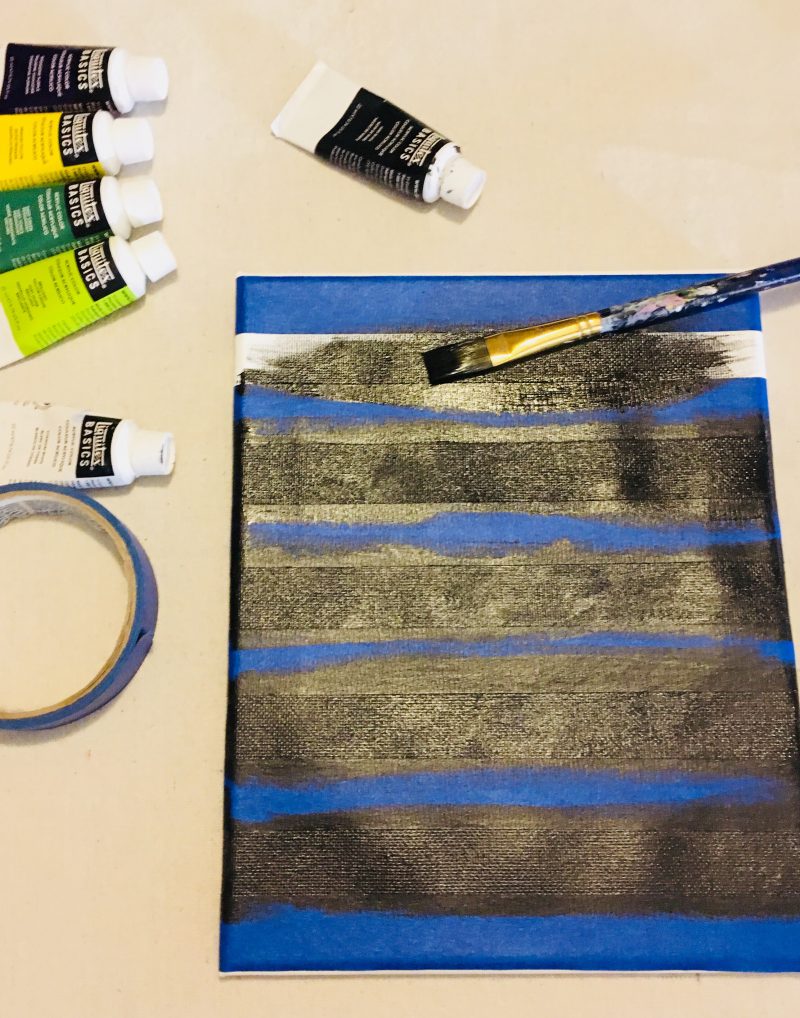
2. Wait for the white to dry then apply horizontal painters tape lines to the canvas.
After your white dries, get your painters tape and apply the tape lines. I made my lines spaced apart the same width of the painters tape. I also used a T-Square Ruler to help make all the tape lines level. The painters tape can be wrapped all the way on the sides of the canvas if you are using a stretched 3D canvas.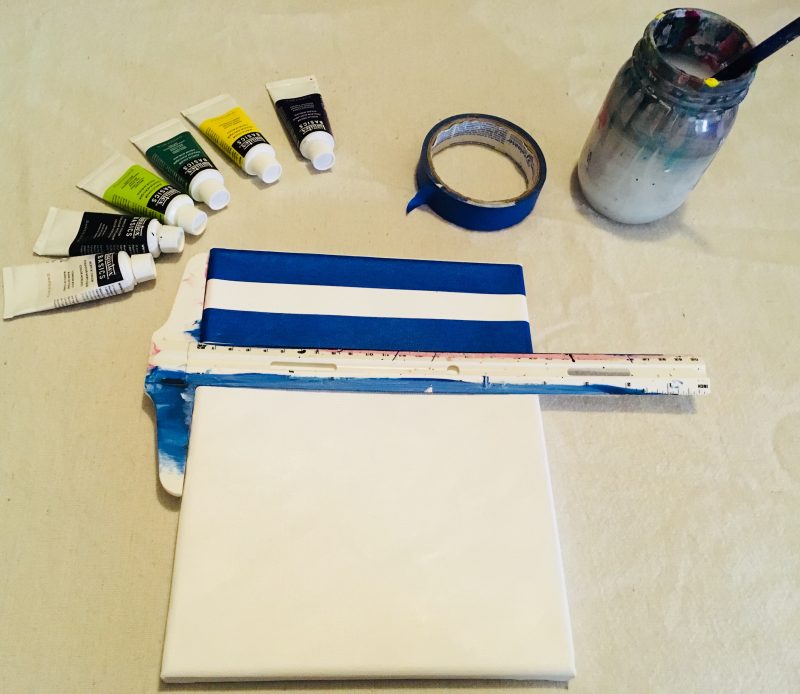

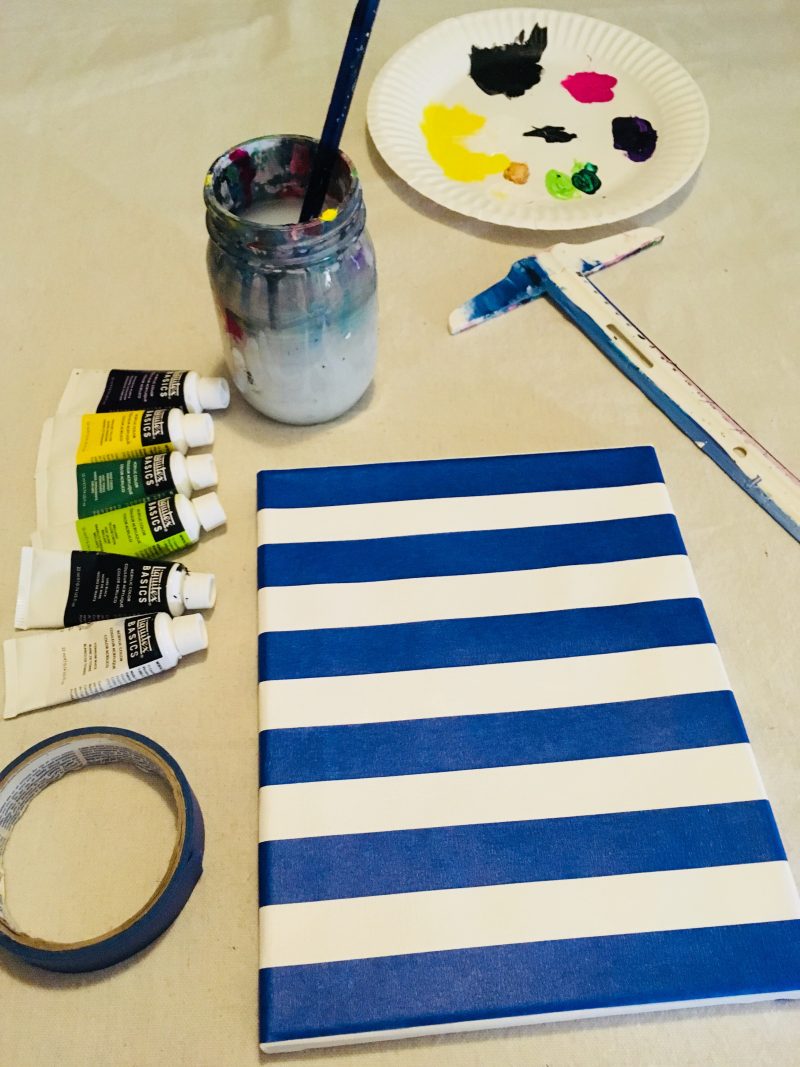
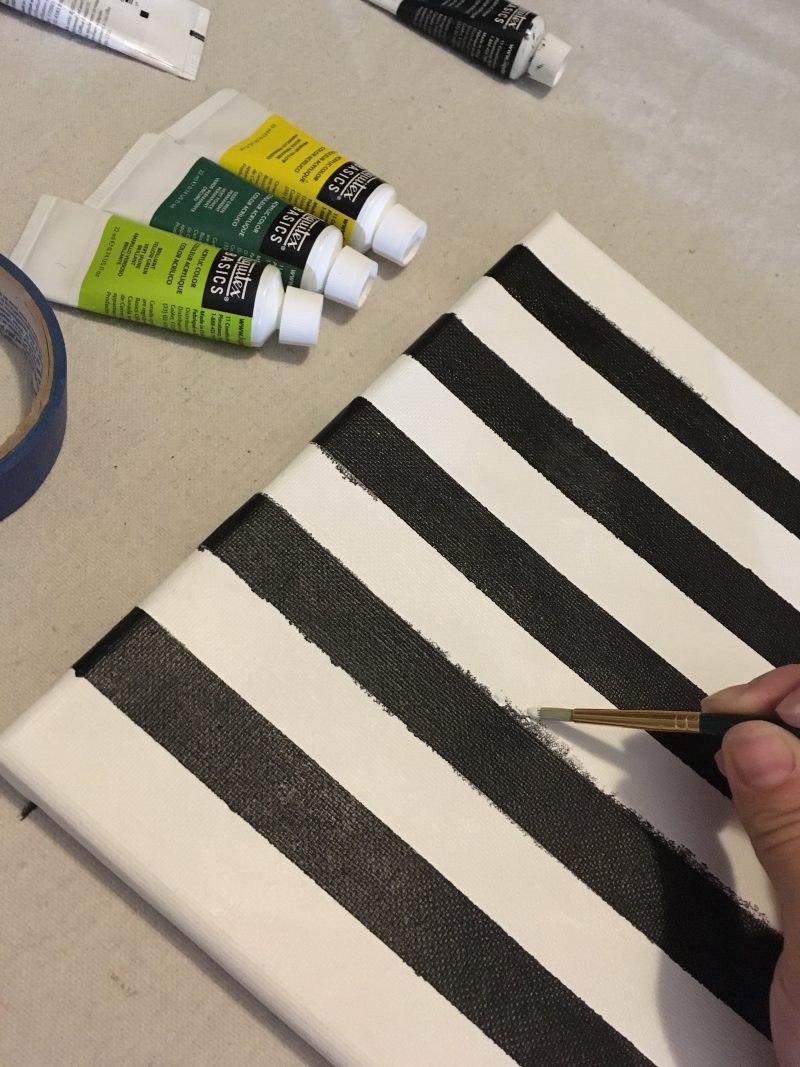
3. Paint Mars Black in between the paint lines.
Use a 5/8″ Flat to paint in between the lines and on the sides of the canvas! Don’t add water to the paint! Doing so will make the paint “run” under that tape. 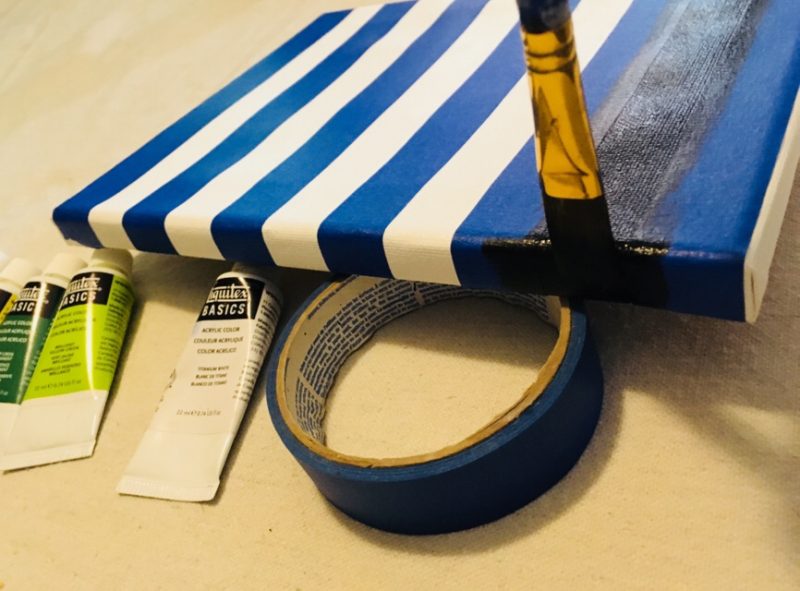
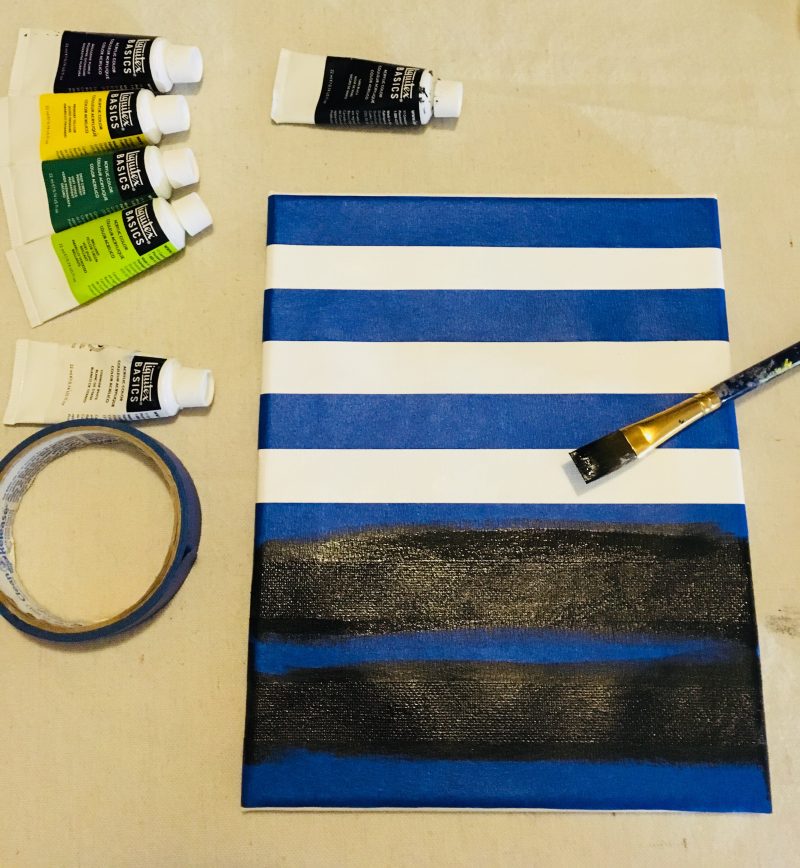
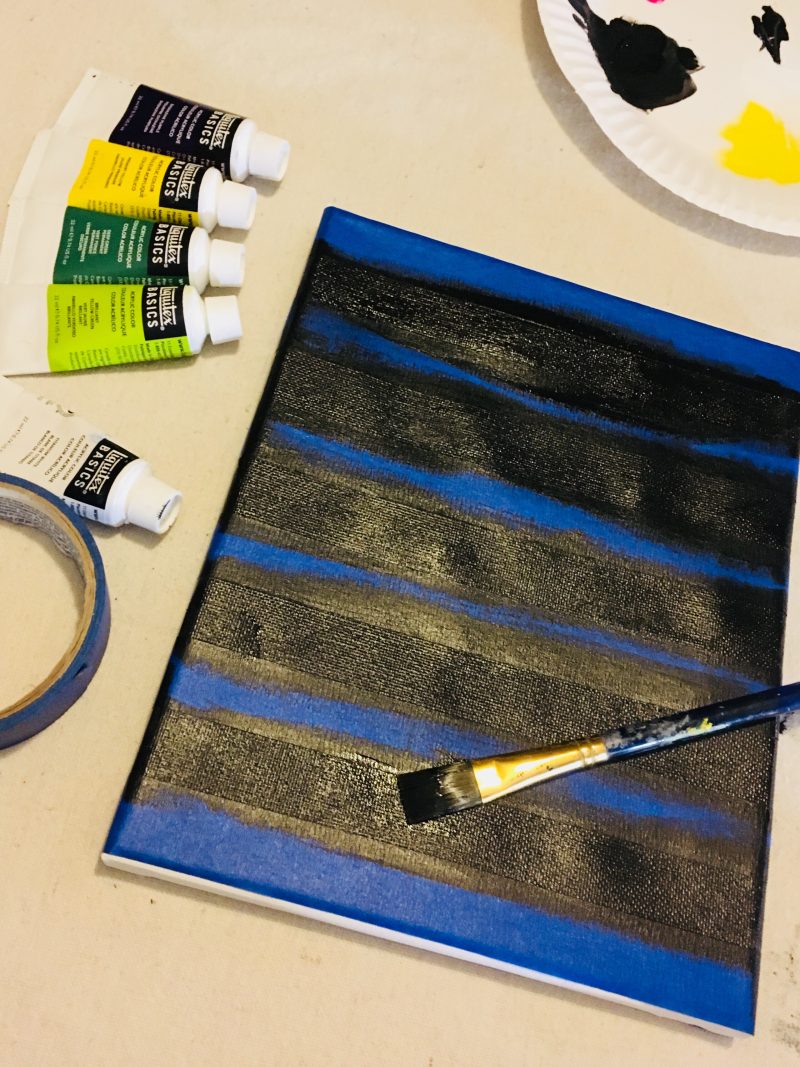
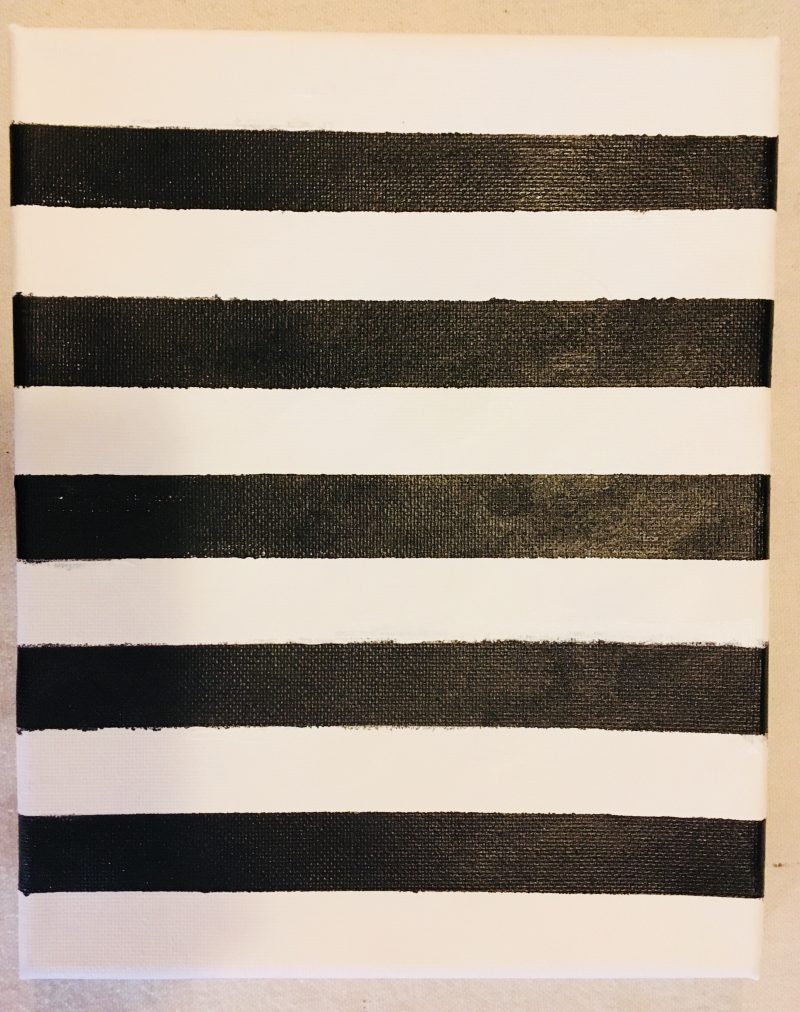
4. Wait for the black to completely dry and then remove the tape.
Remember when I said don’t add any water to the black paint? Well I did and that’s how I know it will run under the tape! If this happened to you (even if you didn’t add any water) then no need to worry! You can always get a small brush and paint white back over any of the mess ups from the tape.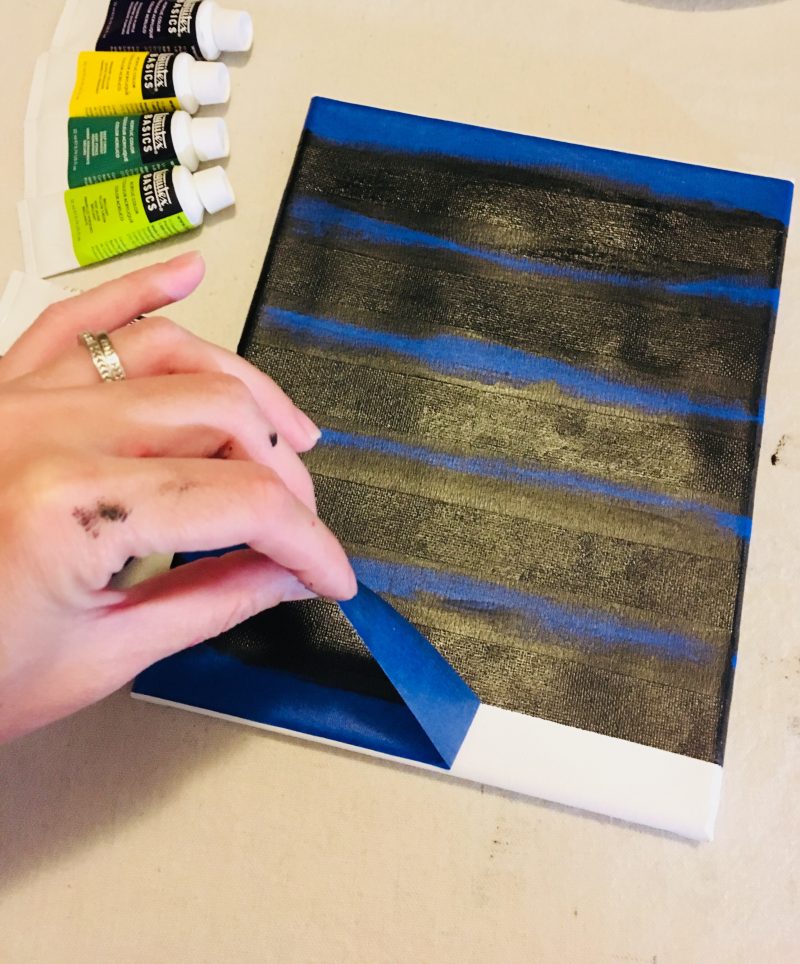
5. Find the exact center of the canvas and make a little mark. Then draw a little curve with chalk to represent the bottom of the green stem.
The leaves of the pineapple are almost exactly the height of the fruit. With that knowledge, I marked the middle of my canvas because this is where the bottom of the stem will be. Make a little mark with pencil. Then with a piece of chalk, draw a curved line to represent the top of the fruit/ bottom of the stem. 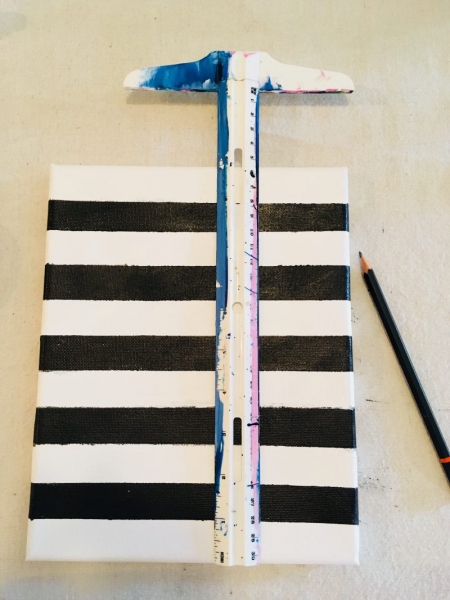
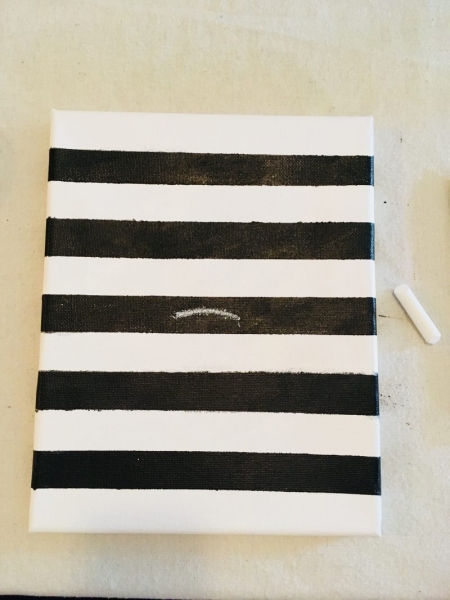
6. Draw the rest of the fruit part with chalk.
Keep in mind that you will not be able to see the drawing well on the white part of the canvas. It should be enough to see when we paint the pineapple in. Draw an oval shape with a flat bottom. 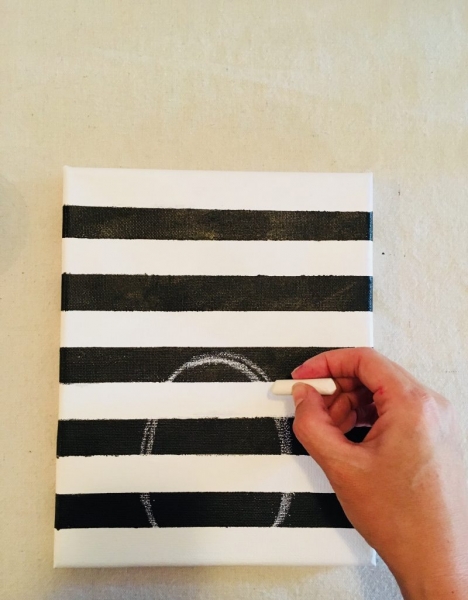
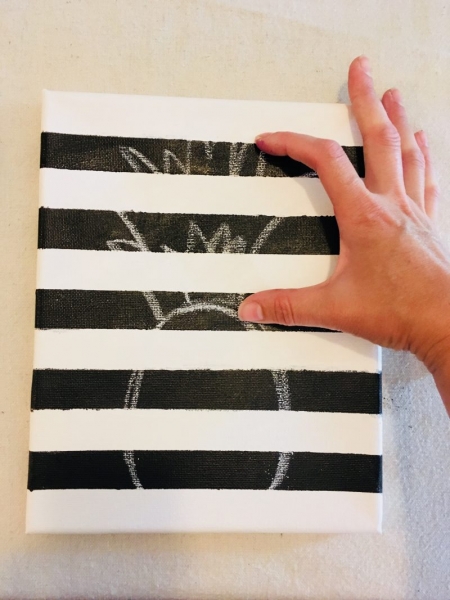
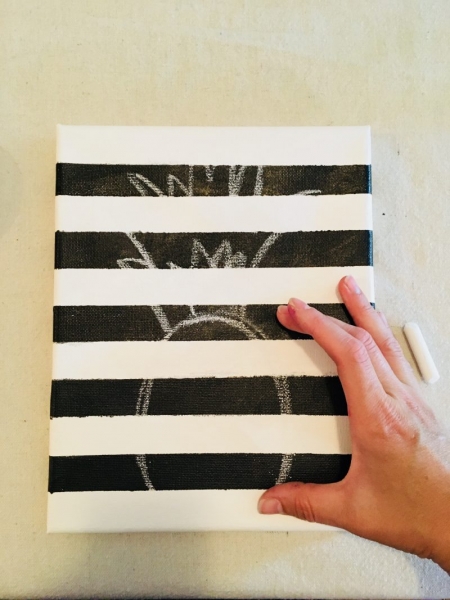
7. Draw the stem leaves with chalk.
Using a piece of chalk, draw a curved line that goes up to almost the same height as the fruit. Then draw loose zig-zag leaf lines for the top of the stem. Then draw some loose lines on the inside of the pineapple stem. Remember that the stem should be almost the same height of the fruit of the pineapple. See my example below. 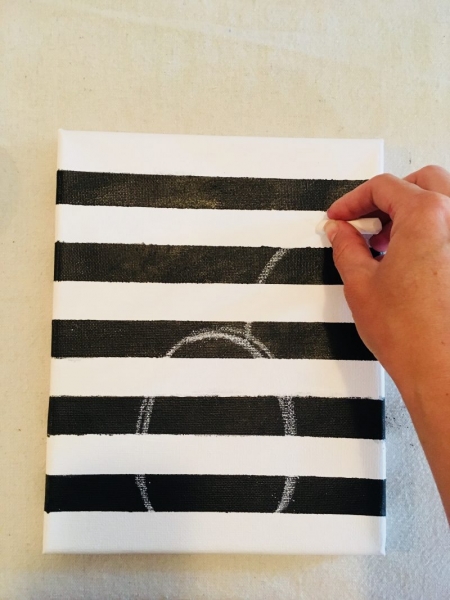
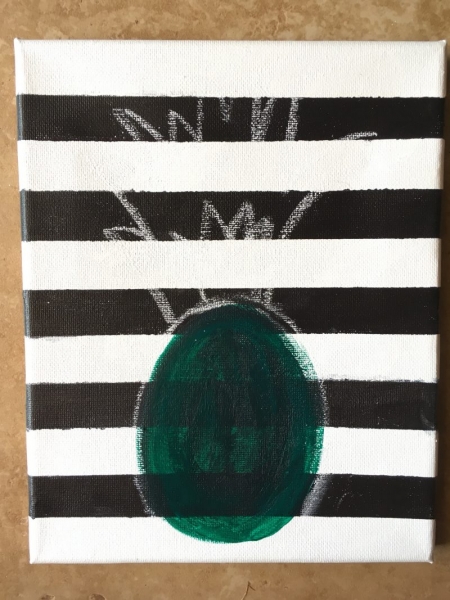
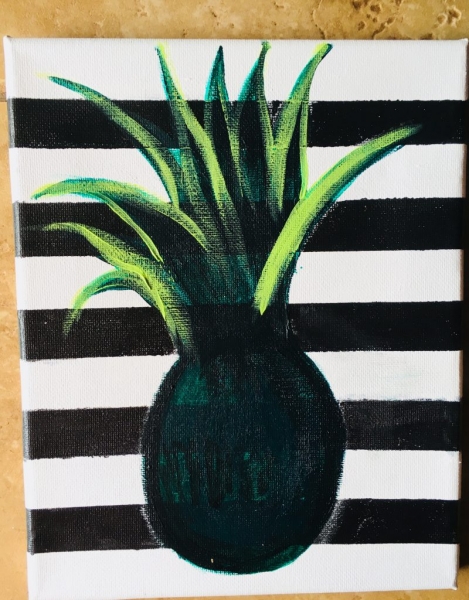
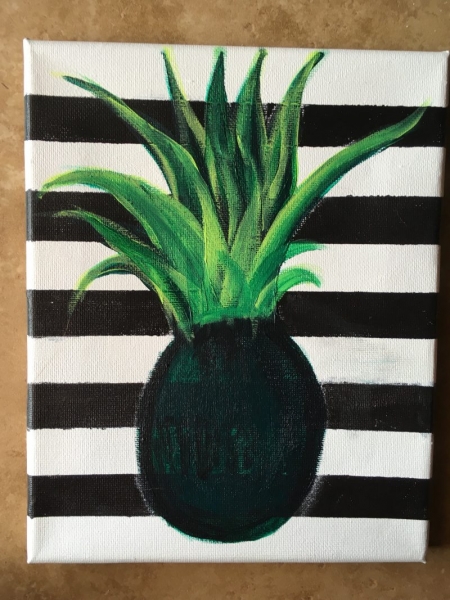
8. Paint in the entire shape, both the stems and leaves a solid 2-3 coats of phthalo green + mars black.
This will be our “under-painting” of the pineapple. I mixed a little bit of phthalo green with mars black to create a very dark green. Use a medium size round brush to get most of the shape and then switch to a smaller round brush to get the stems to point at the tips. You don’t have to disguise all those stripes yet! 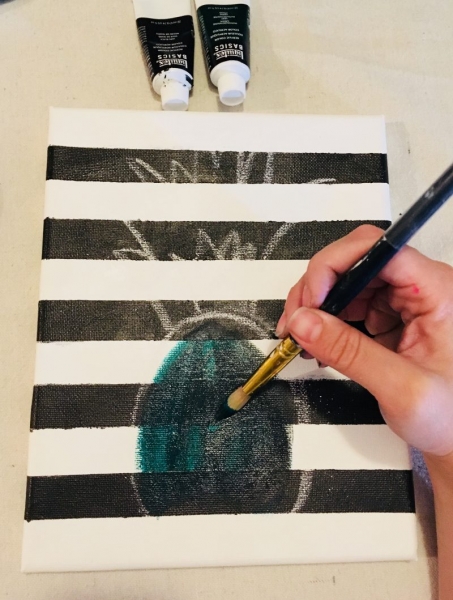
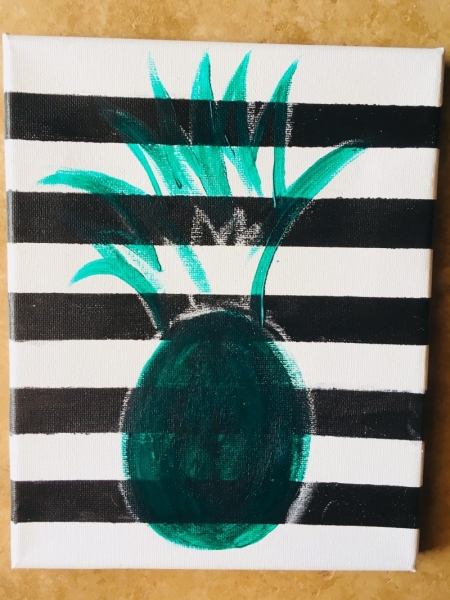
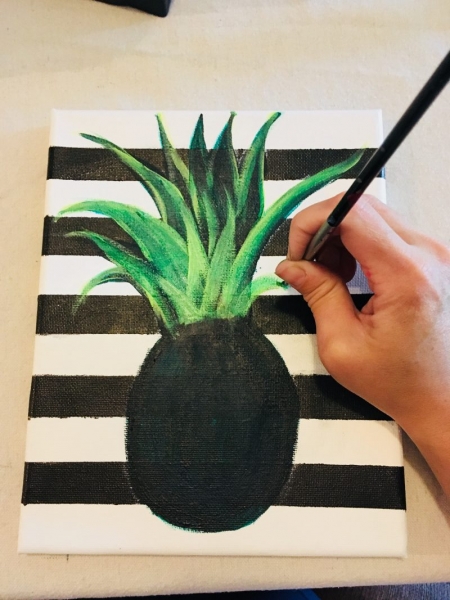
9. Paint Brilliant Yellow Green On the Leaves with a #4 round brush.
That brilliant yellow green will show up against the dark phthalo green/black that you painted on the base layer. It’s opaque enough. Basically, use that round brush to paint the sides of the stems like you are painting highlights on grass or leaves. Don’t get intimidated by this part! You can always “expressively” paint the leaves without making them look realistic. 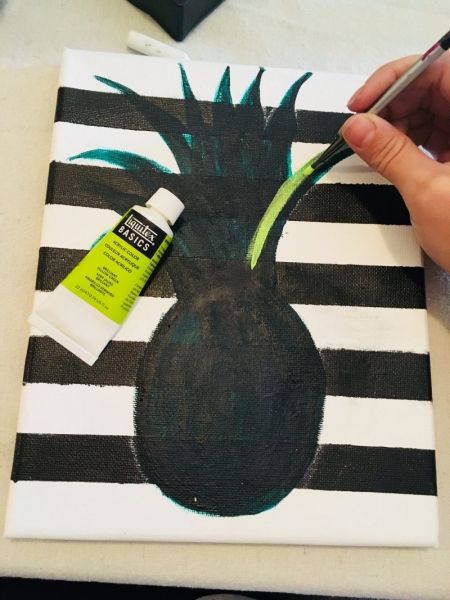
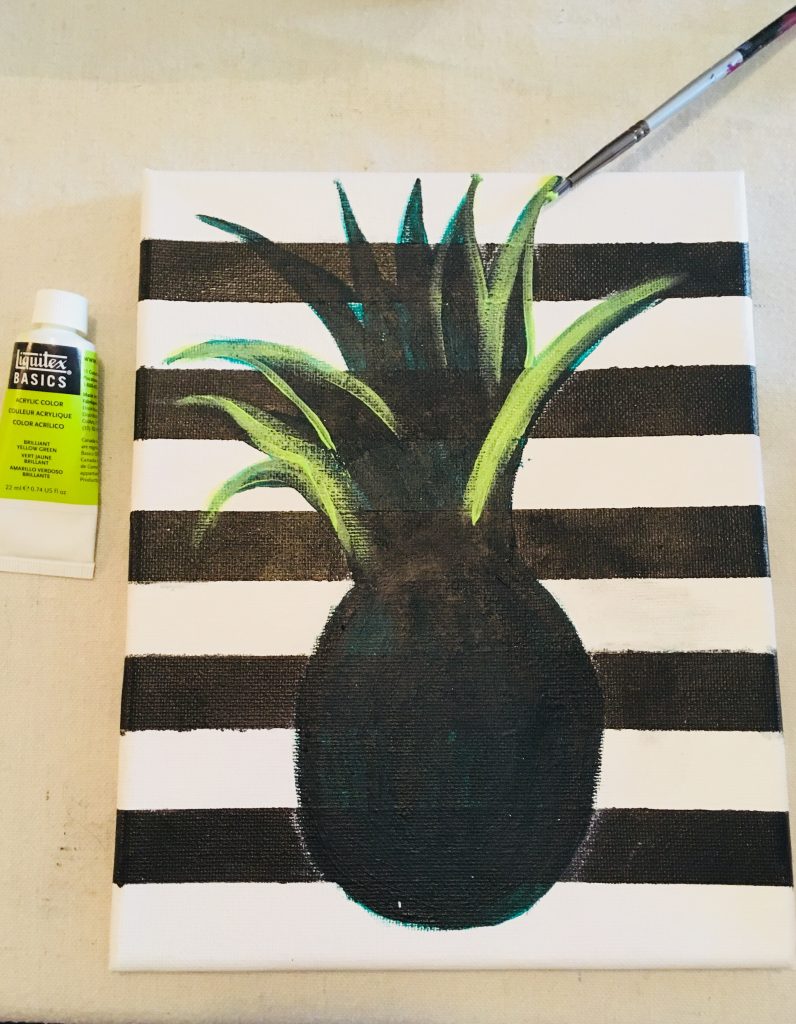
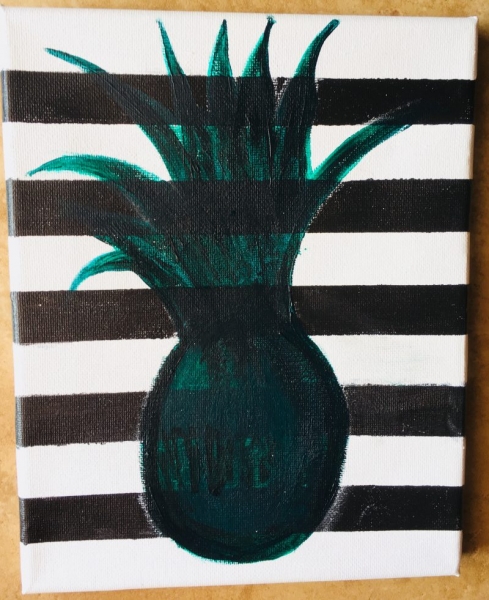
10. Paint Dark Green Permanent on the Leaves
Next to where you painted the brilliant yellow green, paint dark green leaf lines. Work your way from the top to the bottom. To create a layering effect, add more brilliant yellow green on the bottom area and paint smaller leaves. Use a smaller round or detail brush as needed for the tips.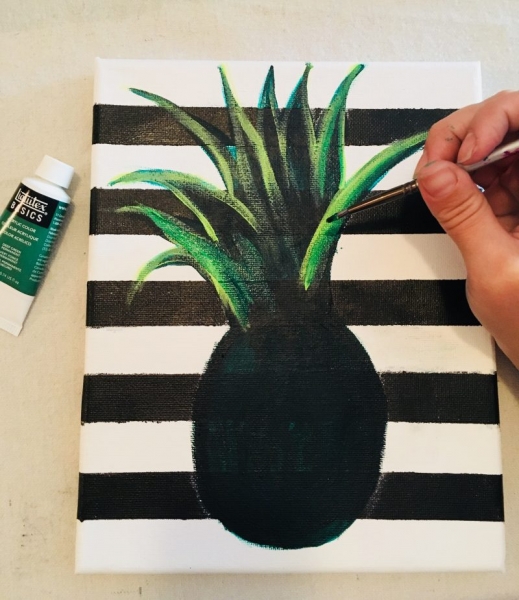
11. Use a large #8 or higher round brush to paint white “blobs”.
I positioned these “blobs” in a checkerboard pattern. Basically, I started on the lower left and went diagonally as I worked my way to the top. These blobs can be irregular shape, diamond shape or oval shape. I started with oval shape and then when I added color, I ended up making them more irregular.
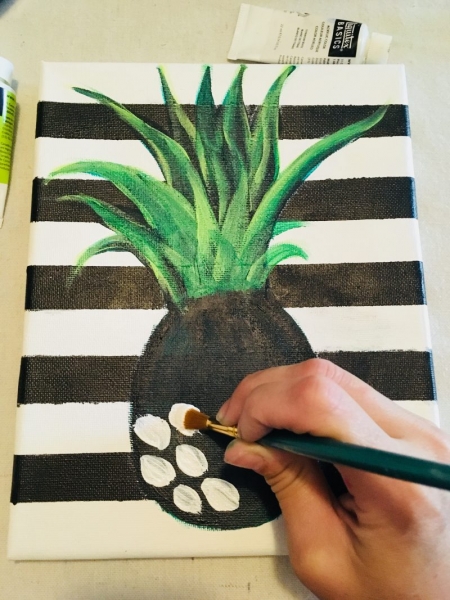
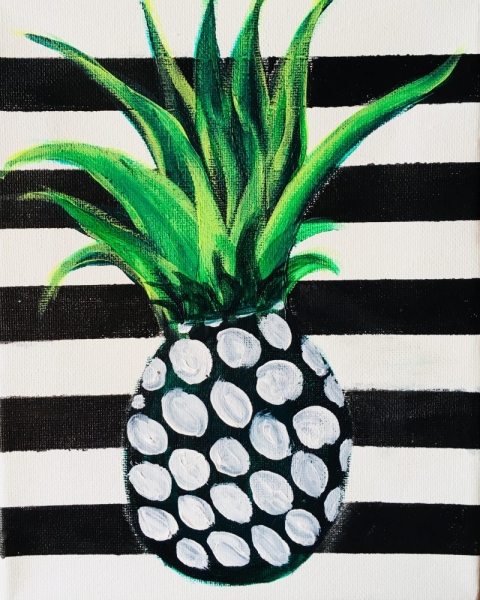
12. Paint the white areas a combo of primary yellow, cadmium yellow deep hue and gold.
Use a #4 round brush (which is kind of a small/medium size) to paint each of the oval/irregular shapes with a different shade of yellow. Some of the white areas were painted with a mix of the yellows and gold. I also painted outside of the lines slightly to give it a more natural and not so geometric look. You don’t need to rinse your brush off when switching yellows. It’s okay to blend them together. 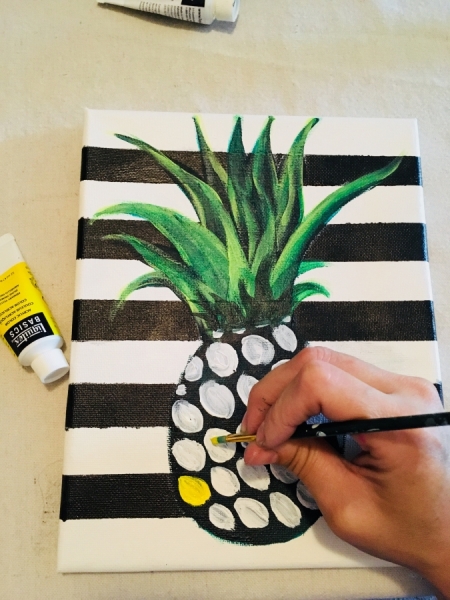
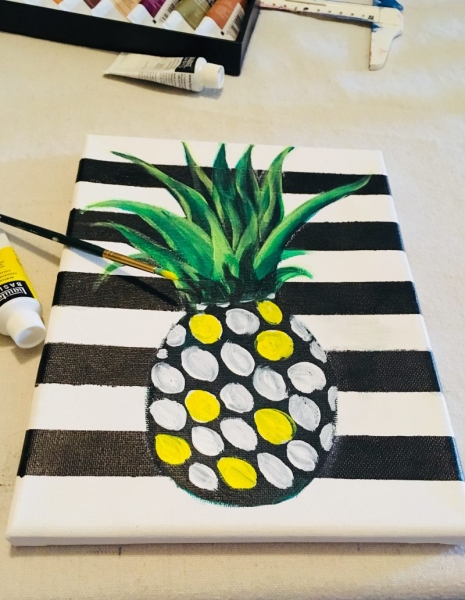
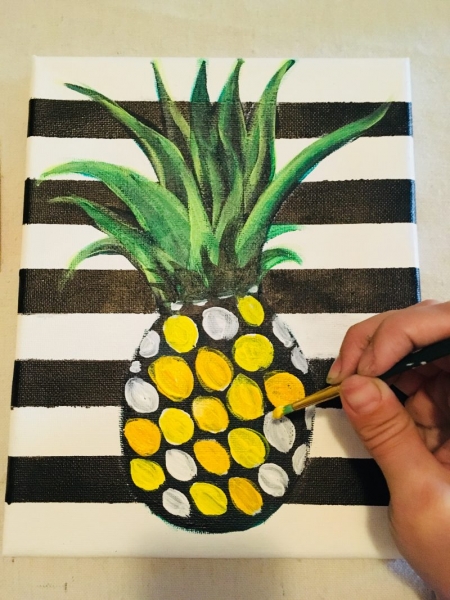
13. Use Yellow Oxide and a tiny round brush to detail little asterisks in each of the yellow areas.
If you observe a real pineapple, they have this texture thing going one. I used a very tiny brush and yellow oxide to paint little asterisks on the pineapple so that it would subtly show. Also, I went back to the bottom area of the stem and added more of the brilliant light green to paint some smaller leaves. 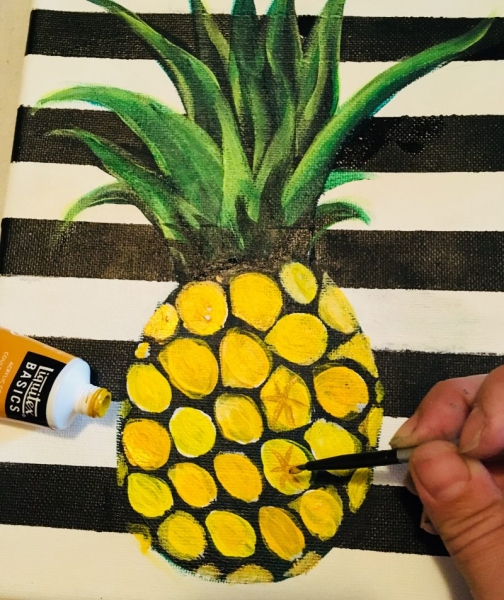
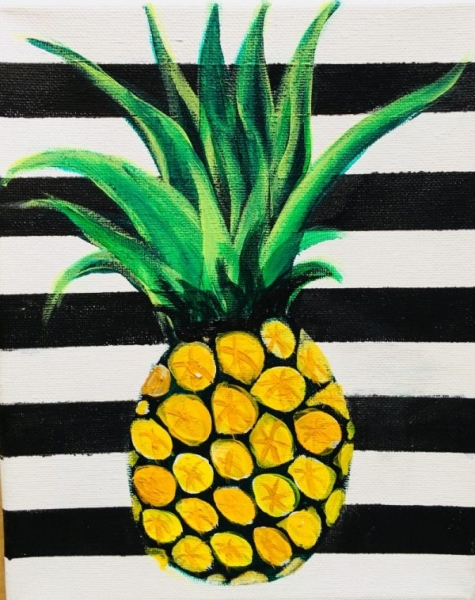
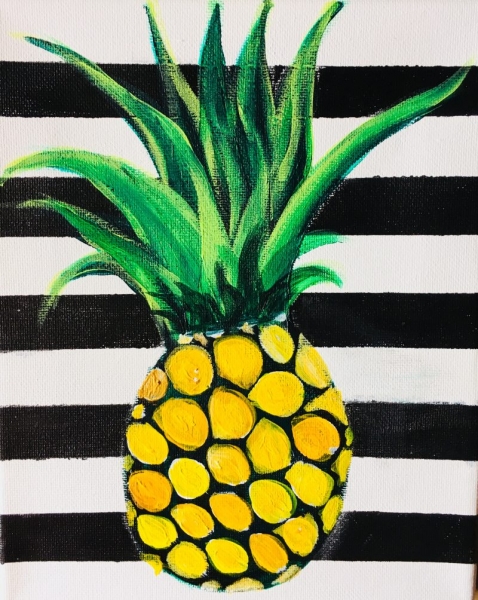
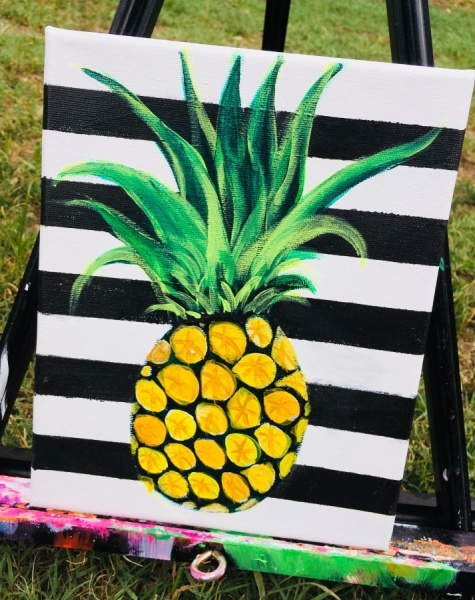
Finished! Such a fun painting and definitely a statement maker no matter what size canvas you paint it on! Be sure to view the video to see me demonstrating on an 11″ x 14″ canvas!
Share Your Art!


Good morning,
Hi,
I am very impressed with the website and excited to do the paintings. I am finding it difficult to find the traceables for the painting I would like to do. such as the pineapple.
Please advise. Thank you.
Ellie
Hi Ellie! A lot of my older tutorials (such as this pineapple) doesn’t have the direct link to the traceable. For the pineapple you can go to my traceable library and hit “control f” to search for pineapple. Or here is that direct link to the pineapple: https://i0.wp.com/stepbysteppainting.net/wp-content/uploads/2018/06/2018-06-15-13.21.17_preview.png?ssl=1 and https://stepbysteppainting.net/wp-content/uploads/2018/03/2018-06-15-13.20.54-1.pdf