DIY Coffee Painting
Would you like to save this?
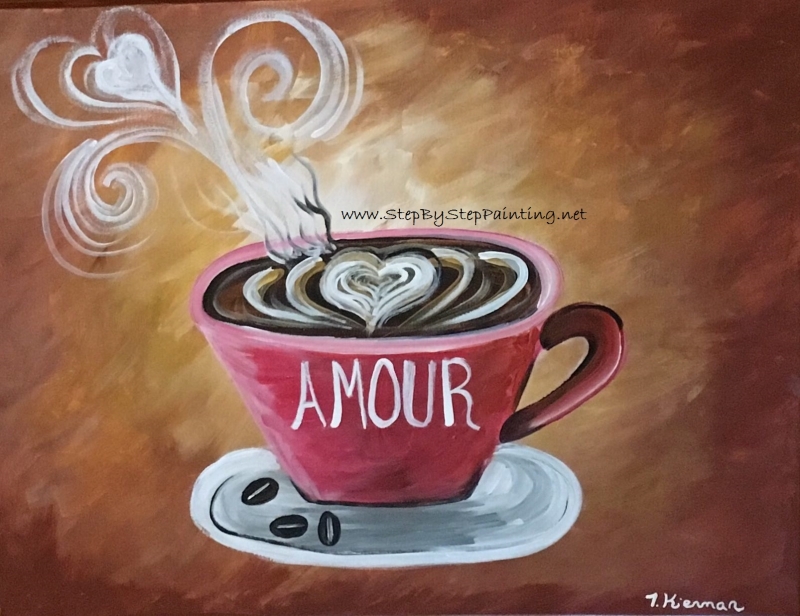
Beginners can learn how to paint this DIY coffee cup painting with acrylic paints on canvas!
You will be guided with step by step process pictures and a video!
If “Amour” means a secret love affair or lover, then that word fits right there on my coffee cup! Coffee is my chosen drink any time of day!

Actually I used to be a Barista at a coffee house and I’ve always admired coffee themed artwork, coffee shop music, the concerts and just the overall “chill” vibe you get from hanging out at a coffee house!
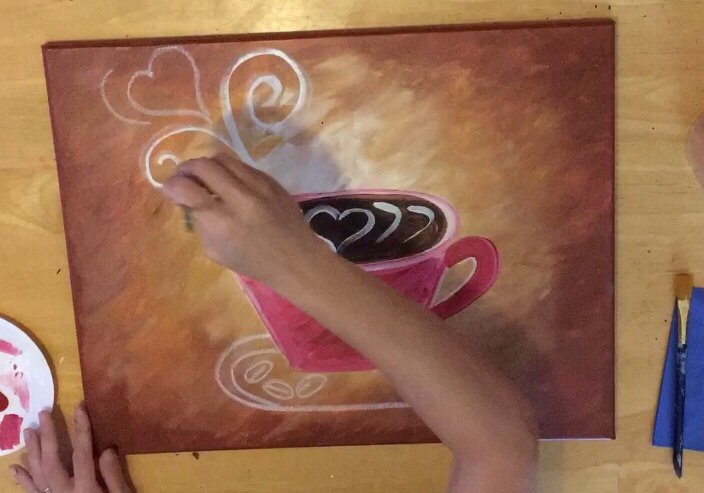
Definitely put some coffee shop music on if you want all the feels!
In this tutorial, you will be guided step by step through the process of painting a unique glowing coffee colored background, how to draw (or trace) a coffee cup and then how to paint it in red.
The steam spirals are probably my favorite part!
This painting has a very unique and eye catching background and I hope that I can teach it to you to make it easy!
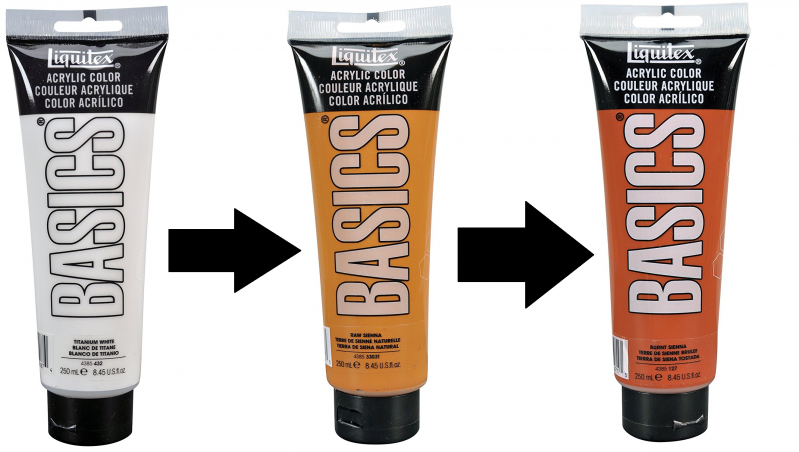
I used titanium white, raw sienna and burnt sienna to create the effect. I thought about adding a table under the coffee cup but decided that the background really needs to be showing throughout because it is just so pretty!
There is a traceable provided in this tutorial as well as steps for how to draw the coffee cup!
Enjoy and happy painting artists!
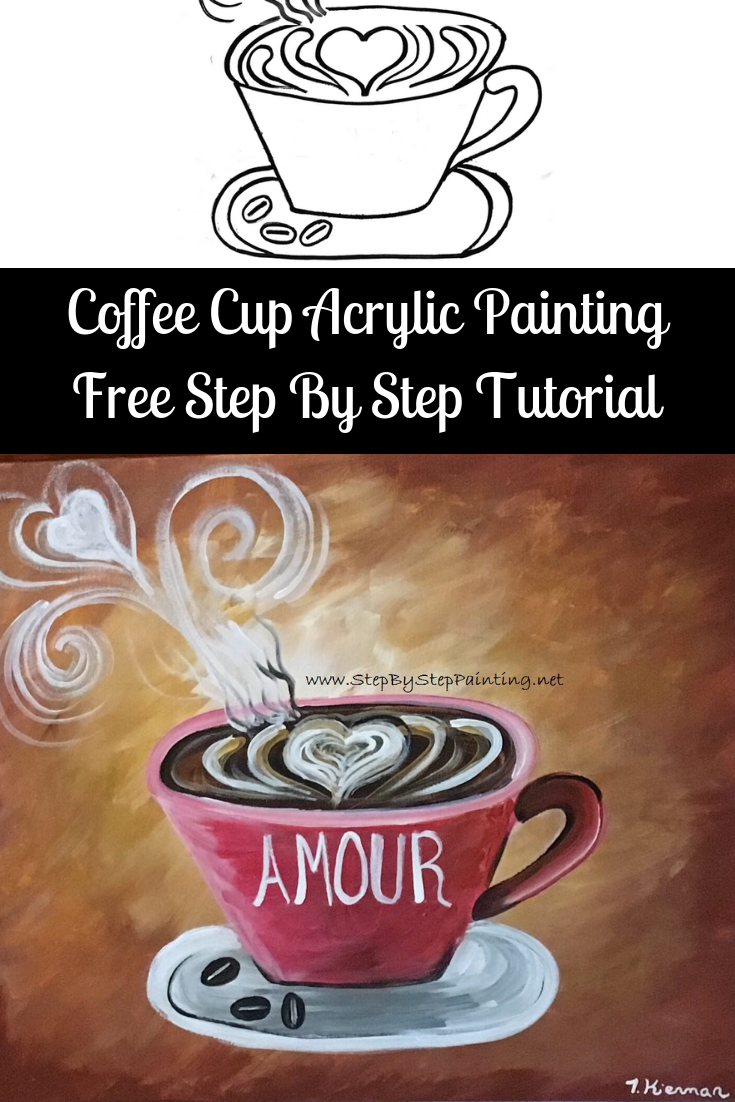
Materials
How To Paint A Coffee Cup
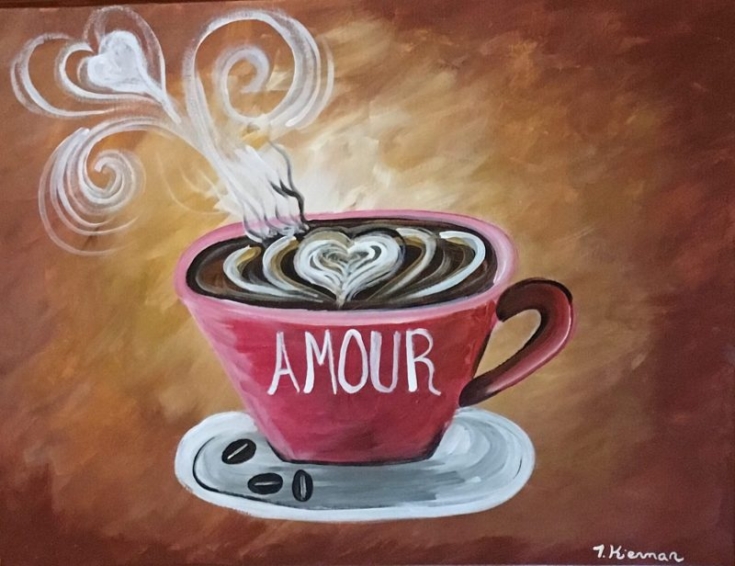
Learn how to create your own coffee cup painting on canvas with acrylics.
Materials
- 16 x 20 Canvas
- Acrylic Paints
- Brushes
- White Chalk
- Traceable
- Graphite Transfer Paper
- White Paint Pen (Optional)
- Pencil
- Ruler
Colors
- Cadmium Red Medium
- Cadmium Red Deep
- Red Oxide
- Raw Sienna
- Burnt Sienna
- Titanium White
- Mars Black
- Burnt Umber
- Neutral Gray
Brushes
- 1” Flat
- 12 Bright (1/4 flat)
- 3 Round
Instructions
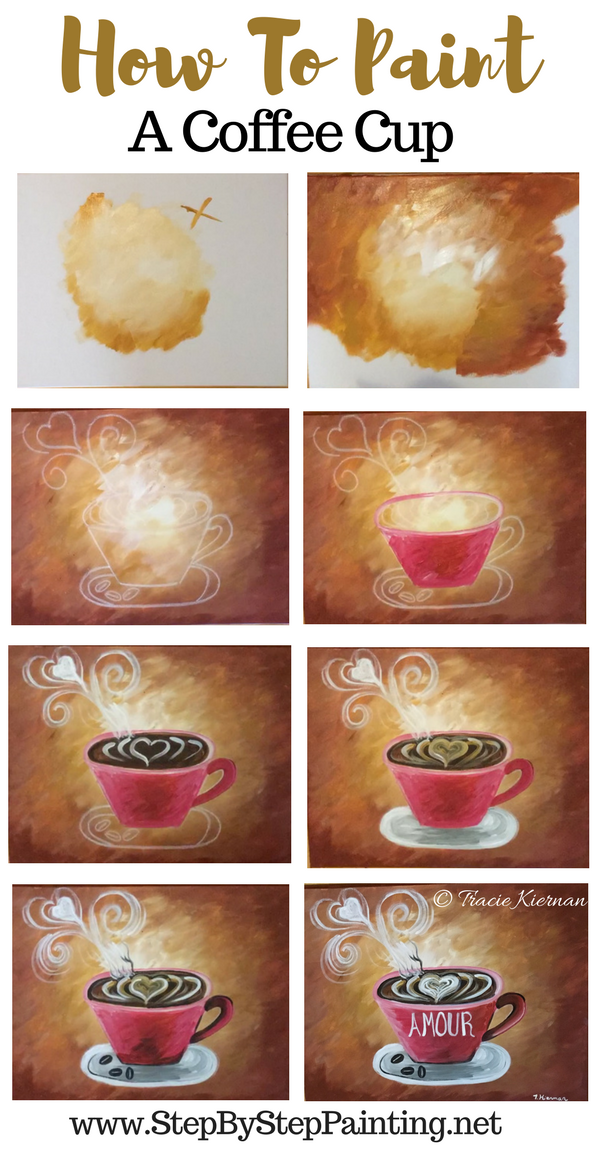
- Paint the background with a combo of titanium white, raw sienna and burnt sienna.
- Transfer or draw the coffee cup onto the canvas.
- Paint the coffee cup with a combo of cad red medium, cad red deep and red oxide as well as titanium white.
- Paint the inside of the coffee with burnt umber and raw sienna.
- Paint the coffee steam with a round brush and titanium white.
- Paint the plate with neutral gray and titanium white.
- Paint the espresso beans using a round brush and burnt umber.
- Write the word AMORE on the cup with a white paint pen.
Traceable:

How To Draw Coffee Cup:
You can see a separate tutorial for how to draw this coffee cup here.
It’s a really simple drawing that you can do on paper and transfer it to the canvas or draw directly on the canvas.

Directions At A Glance:
Video:
Step by step pictures:
1. Paint The Background
The background is a gradual progression of white in the middle turning to raw sienna and then turning into burnt sienna.
This is an expressive background, try not to think too hard about blending the colors.
Just apply them on the canvas, allow them to blend and do their “thing”.
Use a 1″ Flat Brush and Titanium White. Start in the center and paint a “blob” area of white.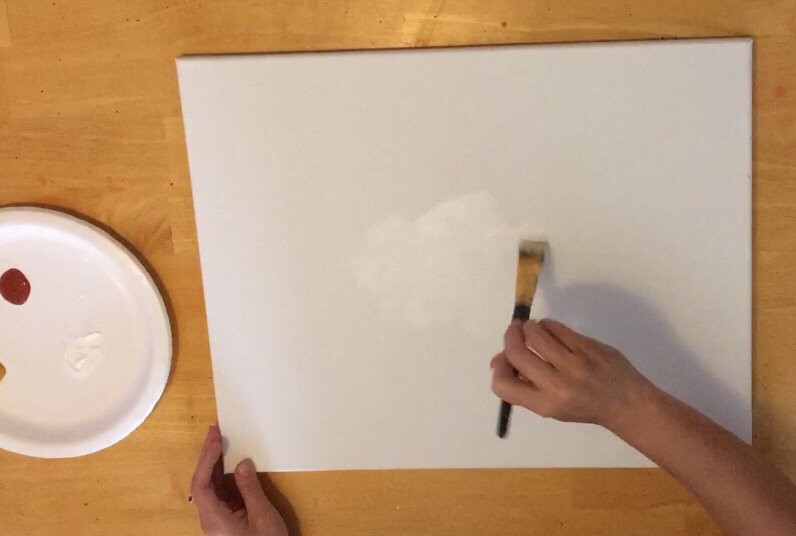
This was probably about 6″ in diameter but definitely estimate!
Also, you will need to paint in “X” strokes.
This is a cross-hatching technique that artists use to blend colors together to make them look “blurry”.
Basically, all my strokes are going in short diagonal lines in both directions.
As you work your way out, add “raw sienna” to your brush without rinsing.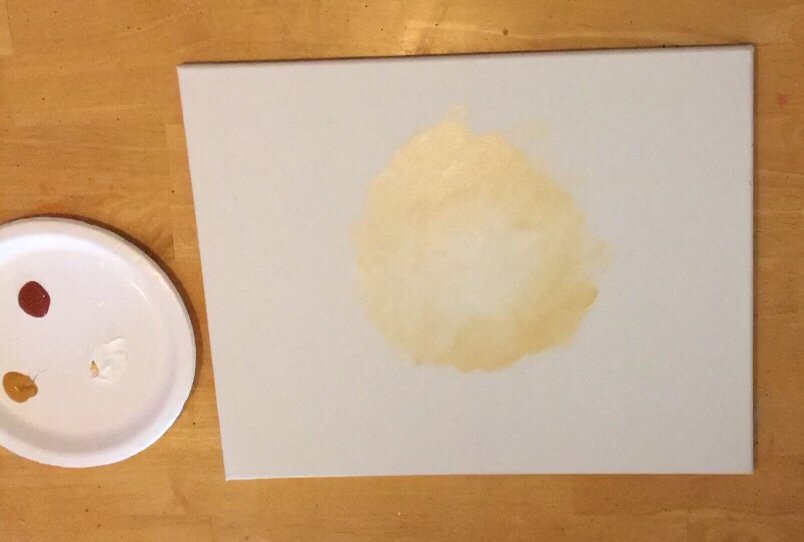
Don’t add it to the middle, that should be white. Allow the raw sienna to blend with the white. If it is not blending, add a little white in the raw sienna.
Keep adding raw sienna and blending it out.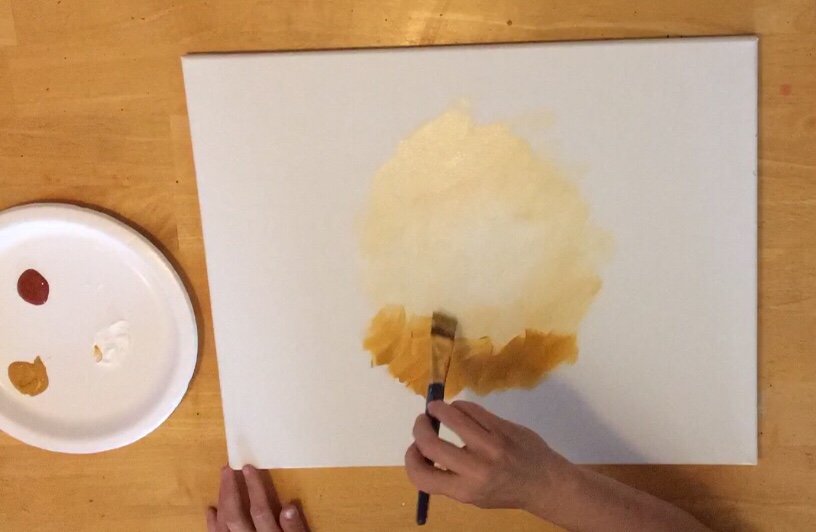
Keep adding colors, blending them out.
Theses are all “X” strokes. Use the tip of the brush then the sides of the brush to make all those “X’s” turn blurry.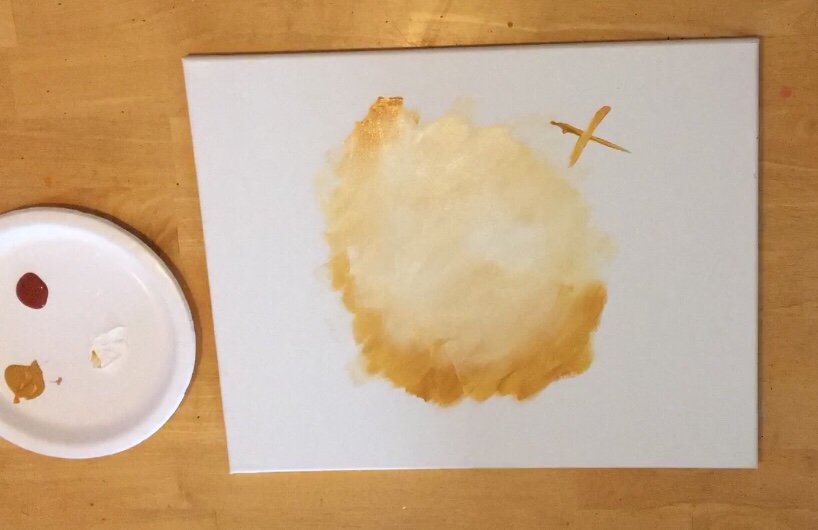
More raw sienna!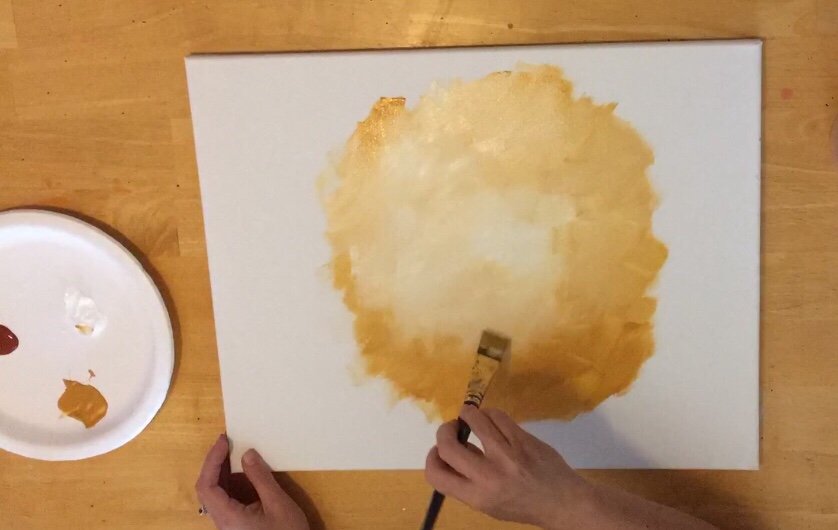
As you approach the edges, add “burnt sienna” to your dirty brush.
Allow it to mix with the “raw sienna”.
You may need to load your brush with both raw sienna and burnt sienna so that the transition flows more smoothly between the two colors.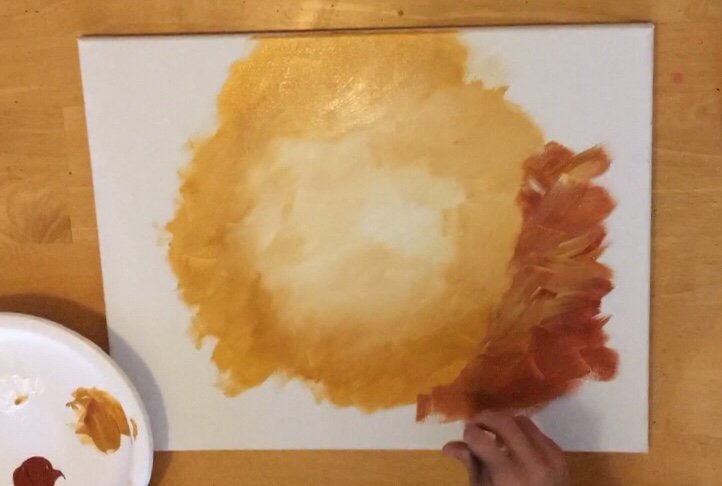
Keep adding both raw umber and raw sienna. Be careful not to loose your bright center.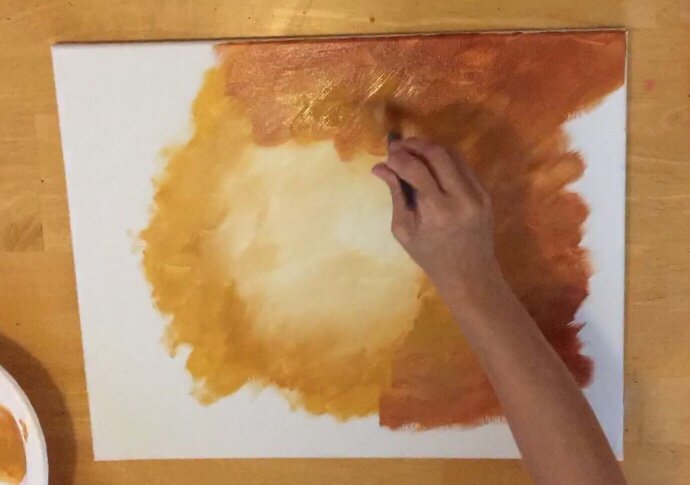
If you get too much dark close to the white center, just add in some more white.
I find that this burnt sienna takes over quick so be careful not to get it too close to the center!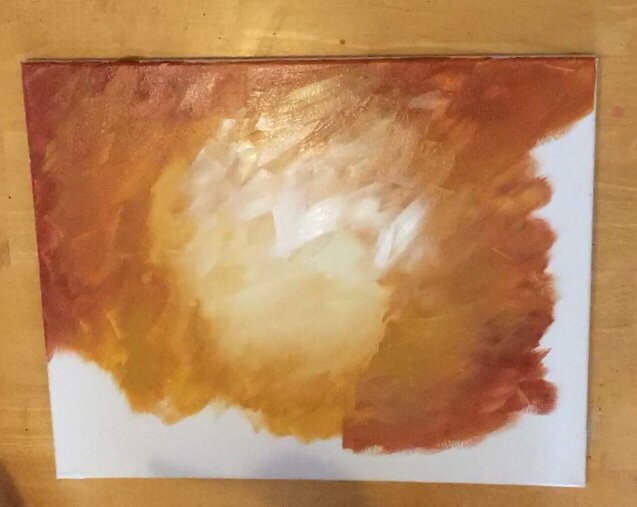
Keep working your colors and blending them with cross-hatching strokes!
Try not to blend it all too much because you don’t want the entire thing to be one solid color.
We want a bright center and a dark border.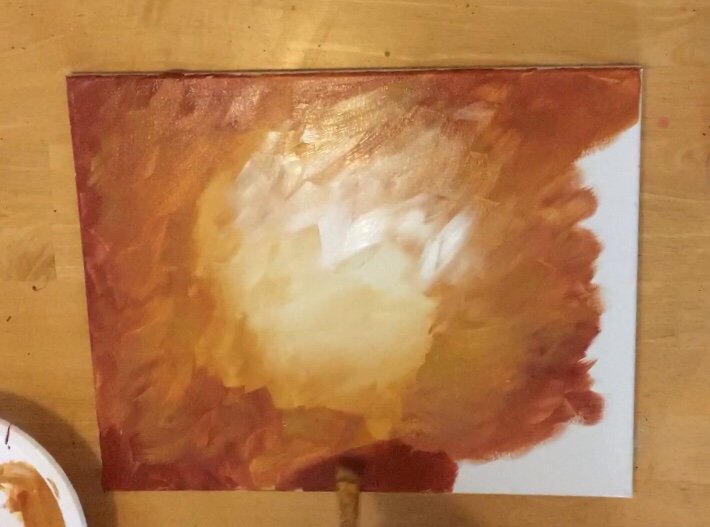
As you approach the edge of the canvas, paint the sides of the canvas “burnt sienna” (or whatever color you like to paint the sides).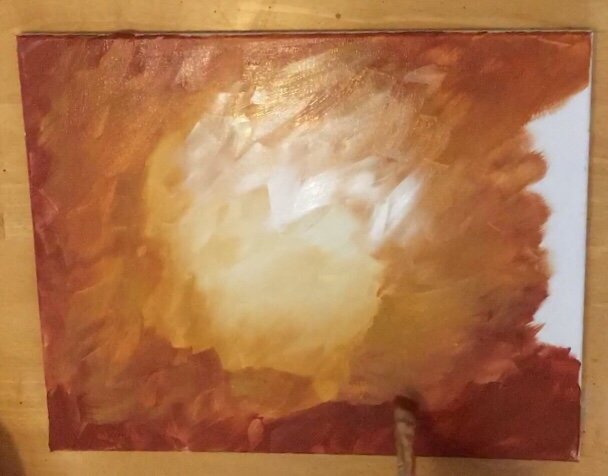
Since the background is very “stroky”, I know it is nearly impossible to smooth these strokes!
But if you see any hard visible stroke lines where the canvas is showing through, try to smooth those out.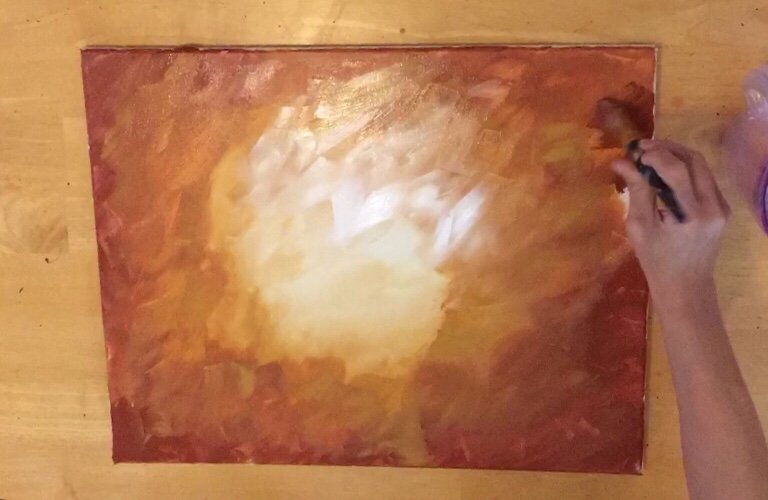
Go back and add some more color where you think it is needed.
I went in and added more raw umber because I lost that color from blending all that raw sienna.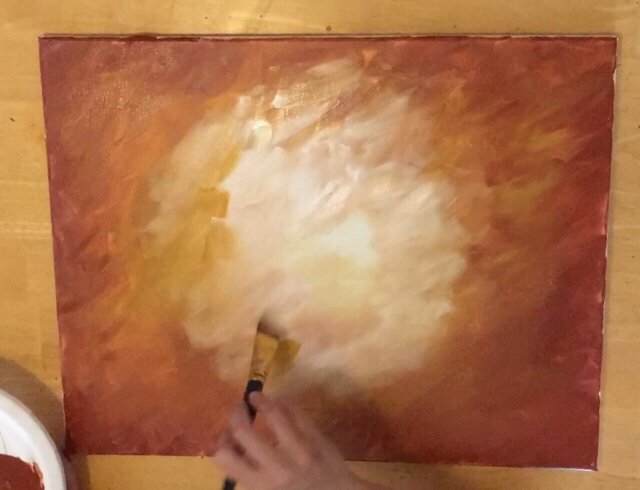
And viola! A beautiful coffee expressive background! It looks like I spilled coffee all over my canvas!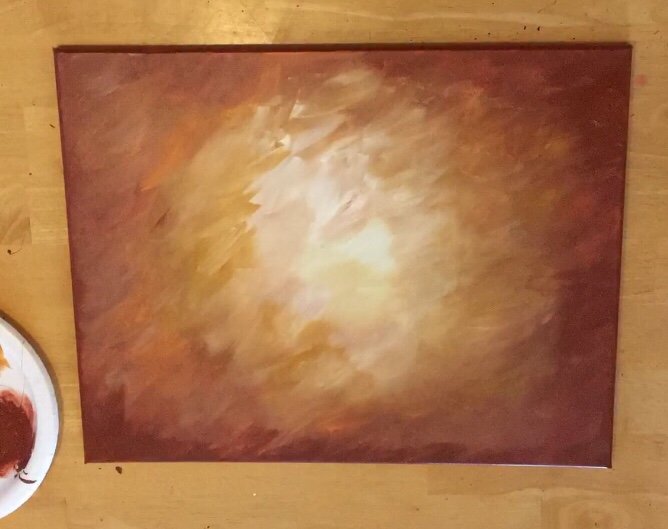
2. Transfer or Draw the Coffee Cup On The Canvas

Use the print out to transfer the coffee cup onto the canvas.
I recommend you use white graphite paper but regular graphite paper works too.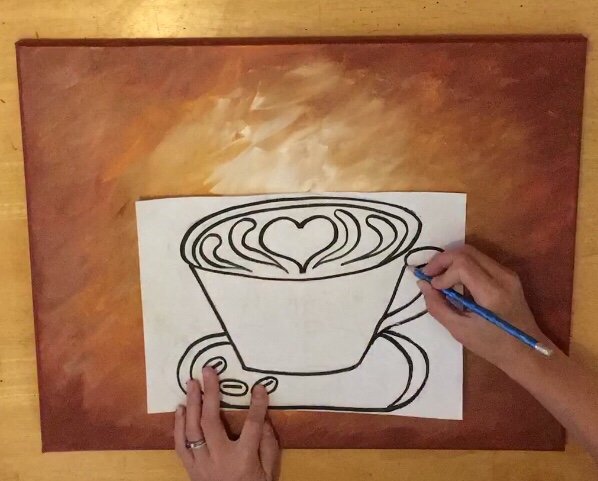
Also, you can rub chalk on the back of the printout and then transfer it that way.
If you want to draw your own coffee cup, refer to the steps I provided for how to draw!
After you do the transfer, I highly recommend that you trace the whole thing over with chalk again so you can see the drawing nicely!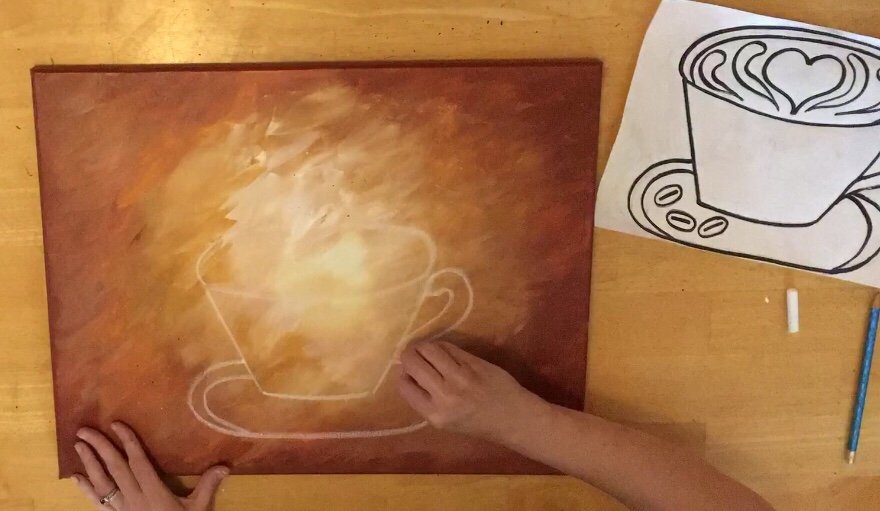
The chalk will erase as you paint in the picture.
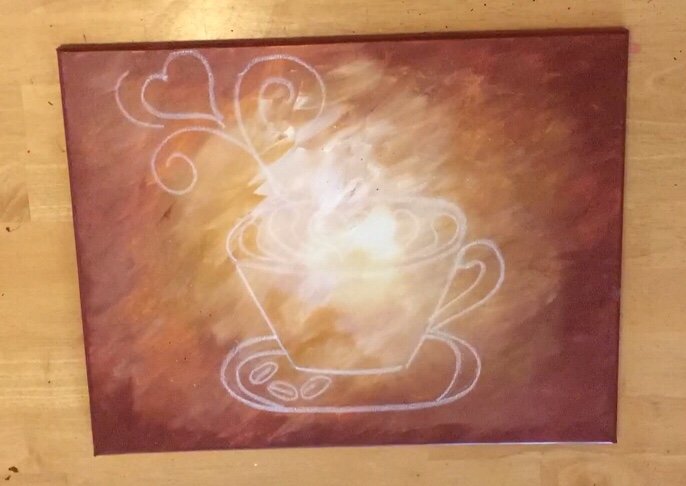
Then draw spirals coming out of the coffee cup!

3. Paint The Coffee Cup
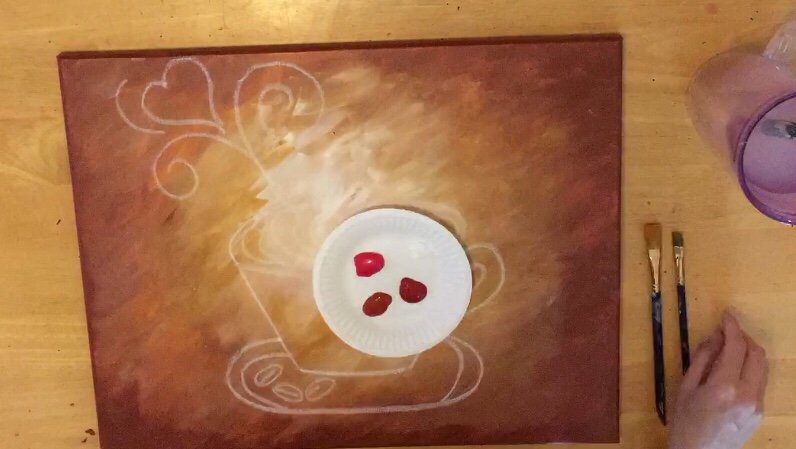
I chose red for my coffee cup!
To give it more depth and interest, I used three different shades of red: cadmium red medium, cadmium red deep and red oxide.
I also used titanium white.
You can use any three shades that you have on hand! The idea is to get the lighter shades on the sides of the cup and the darker in the middle.
Cadmium Red Medium + Titanium White & 1/4″ Flat
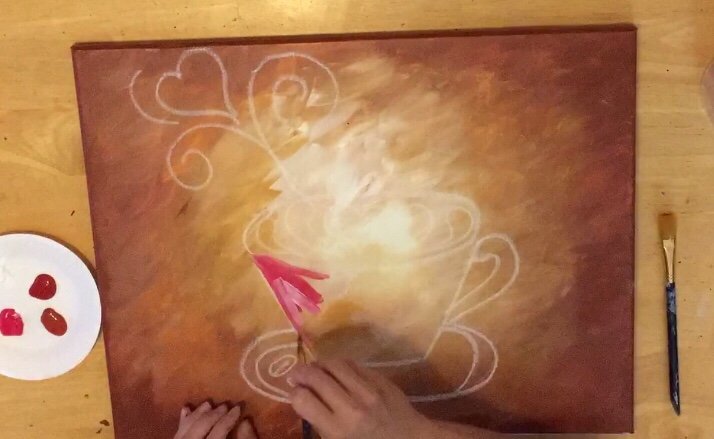 I started with my lightest shade of red: cadmium red medium.
I loaded a 1/4″ flat brush with that red as well as white and painted the left and right edges of the coffee cup.
The white and red mixed on the canvas to make almost a pink shade.
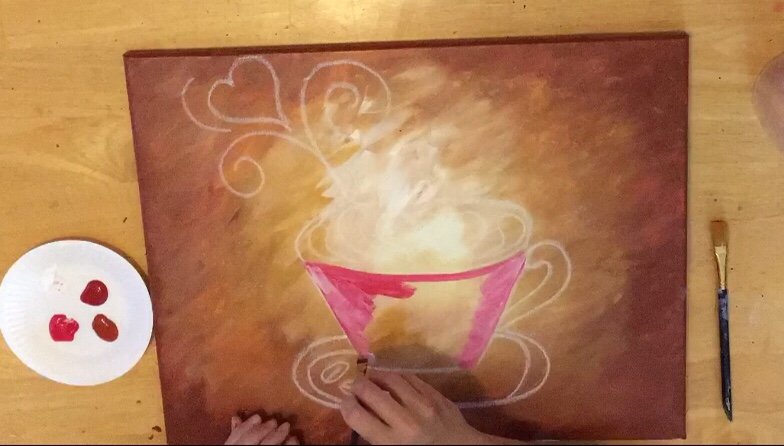 These strokes are also going in angular directions just like the background.
Cadmium Red Deep & Red Oxide
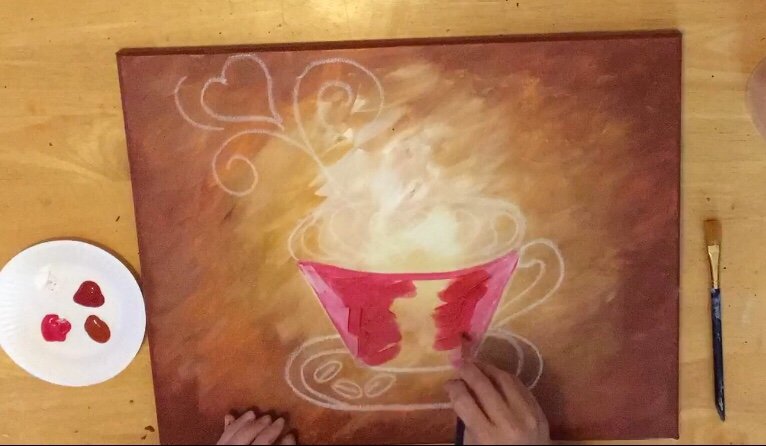 As you work your way to the middle, add the darker shades of red (cad red deep).
Again, these are all angular strokes. The Very middle of the cup is red oxide.
Cadmium Red Medium + Titanium White For Rim
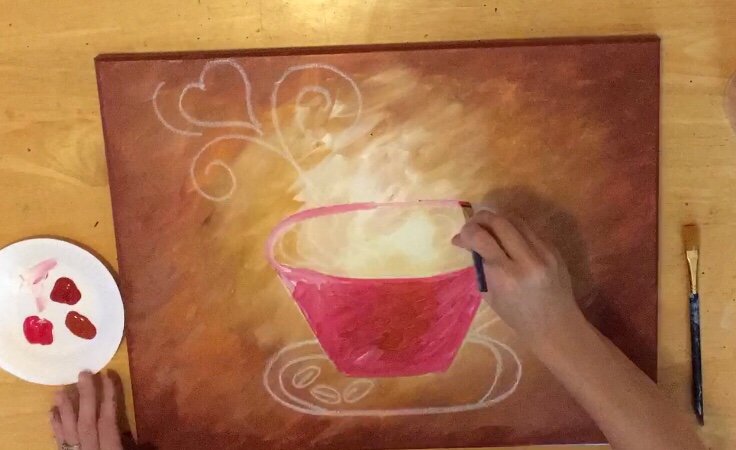 The rim of the cup was painted with cadmium red medium and titanium white (double loaded brush).
Red Oxide & 1/4″ Flat
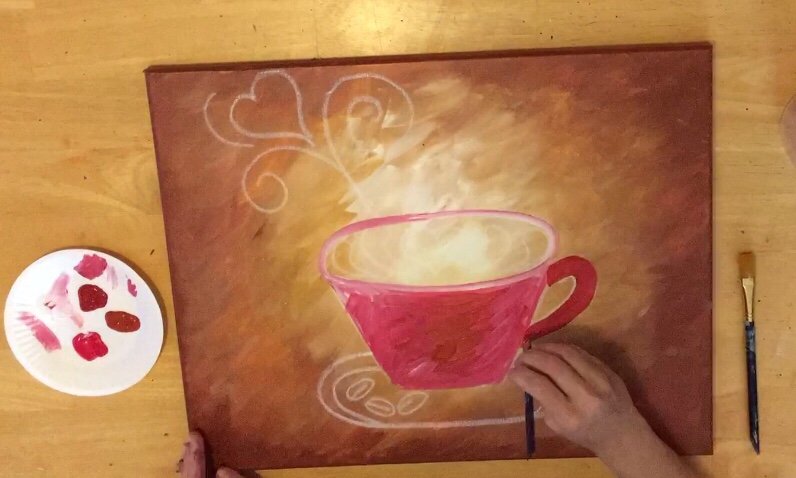 The handle was painted with my darker red oxide color.
4. Paint The Coffee Inside Cup
Burnt Umber & 1/4″ Flat
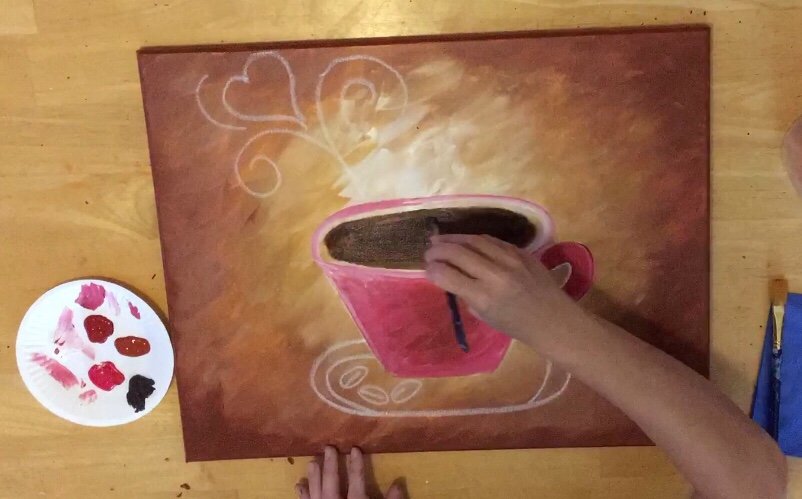 I used burnt umber and a 1/4″ flat. Basically, paint the entire oval in one solid color! Easy peasy on this step!
Titanium White & #3 Round
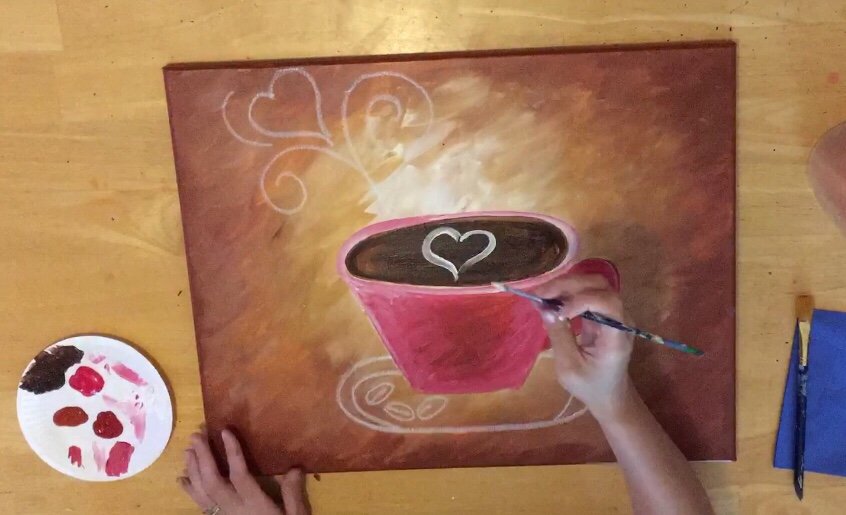 Next I switched to a #3 round brush and titanium white.
Paint a heart inside the oval.
It helps if that burnt umber isn’t dry yet because the white will mix with that brown nicely!
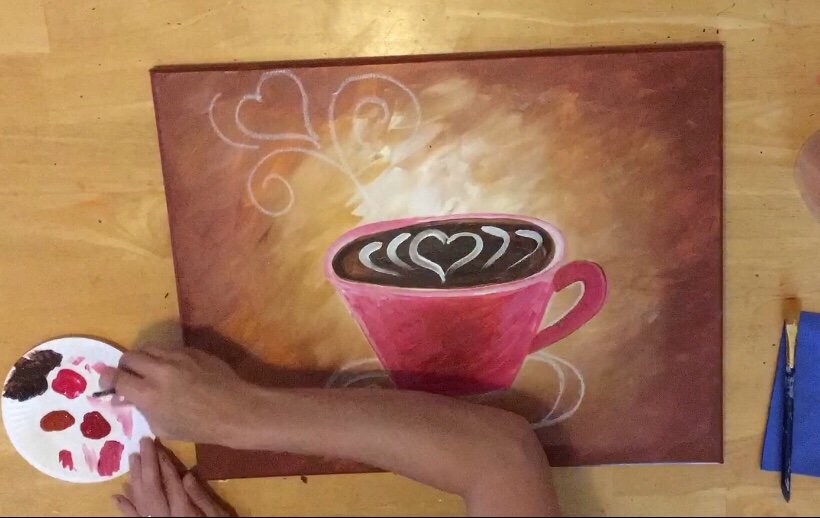 Then I painted some curved lines to both sides of that heart!
5. Paint The Coffee Steam
Titanium White + #3 Round Dry Brush
 I used a #3 round brush and titanium white.
This was a dry brush.
I didn’t add any water to it. I wanted the steam to look light and feathery so my strokes are a bit translucent.
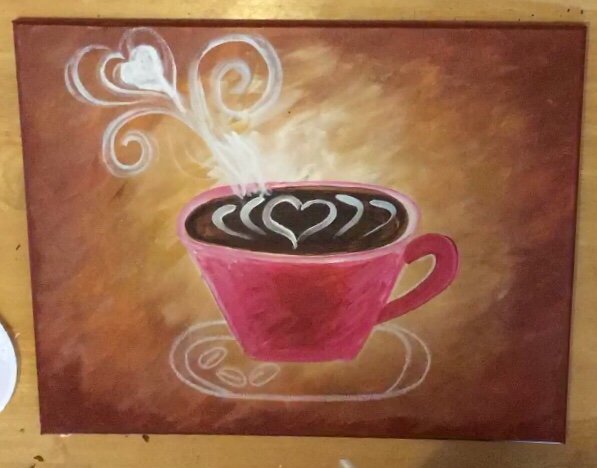 The heart in the steam was filled in solid.
I also did some more dry brush strokes coming out of the cup.
I love how the background white area blends so nicely behind the cup like it is also steam!
6. Add Some Raw Sienna In The Coffee
Raw Sienna & #3 Round
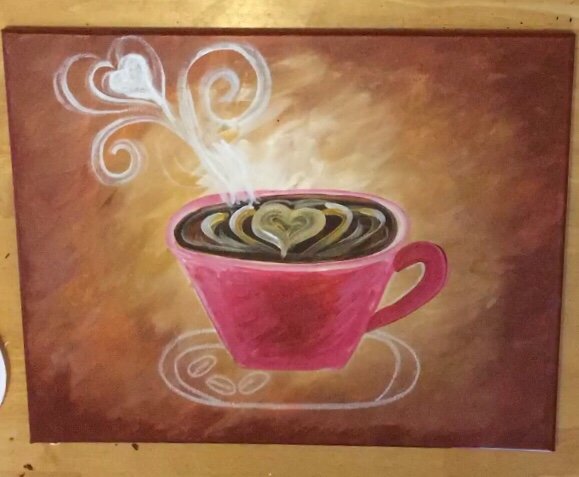 I suppose you can leave it as is but I wanted the inside to look more like a cappuccino.
So I added raw sienna into the shape of the heart and along the white lines.
I also added a few more lines radiating from the heart.
7. Paint The Plate
Titanium White + Neutral Gray # 1/4″ Flat Brush
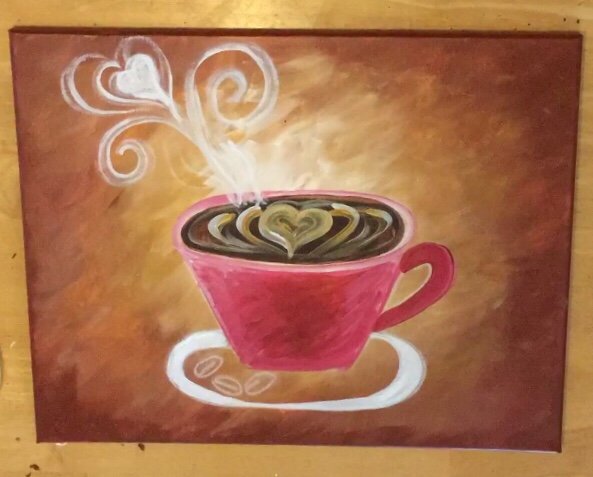 The plate is a bit tricky so don’t get frustrated! I first painted the rim titanium white.
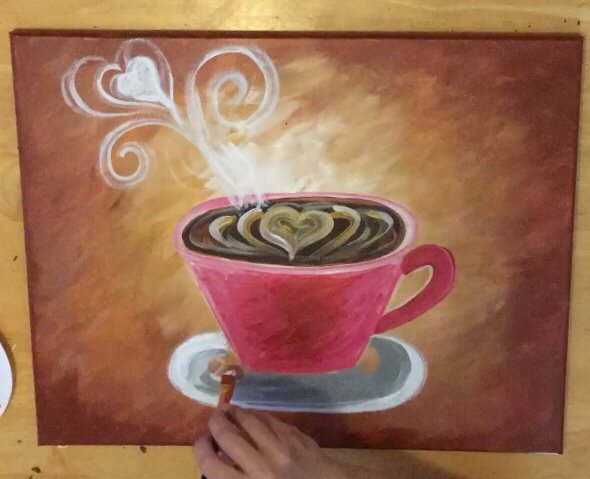 Then I painted the rest of the inside with neutral gray.
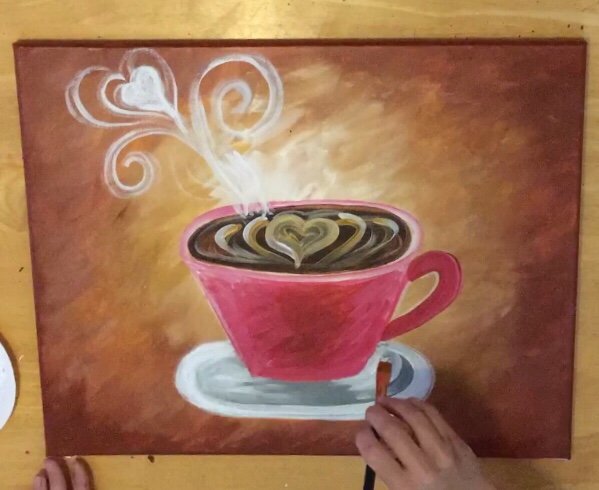 Then I went in and added white in some areas on the right and left, leaving the middle to be mostly gray.
8. Paint The Espresso Beans
Burnt Umber & #3 Round
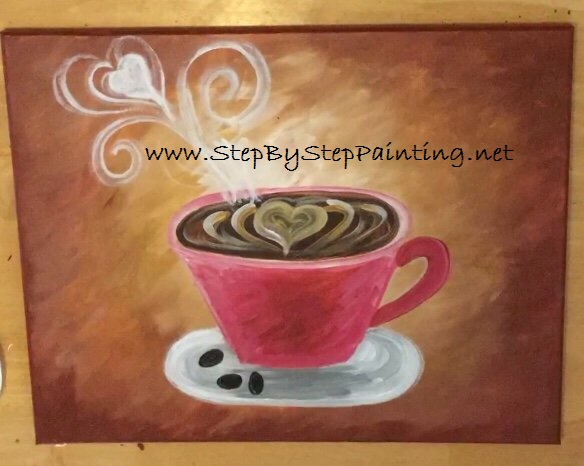 Basically paint three ovals with burnt umber.
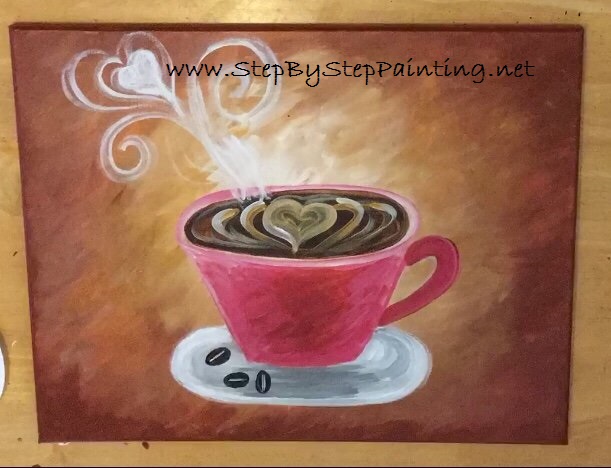 Then add a white or gray line in the middle of them!
9. Add some black here and there
Mars Black & #3 Round
This step is totally optional!
I added some dark areas to the cup on the handle, right on the bottom of the cup and a little on the rim of the plate.
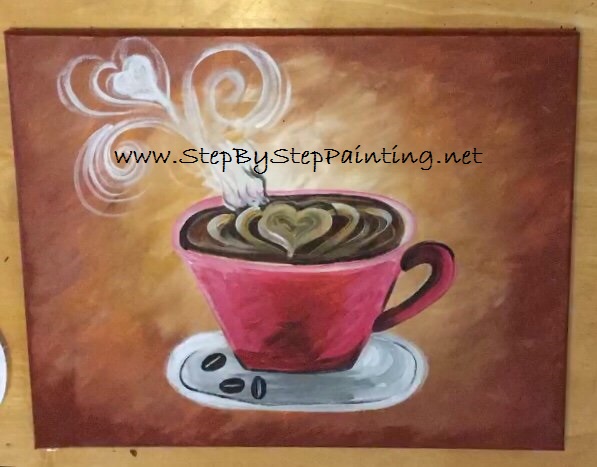 There’s also a little bit of black on the steam and on the lower area of the cup. Again, totally optional!!
10. Write AMOUR
Chalk, Ruler and White Paint Pen
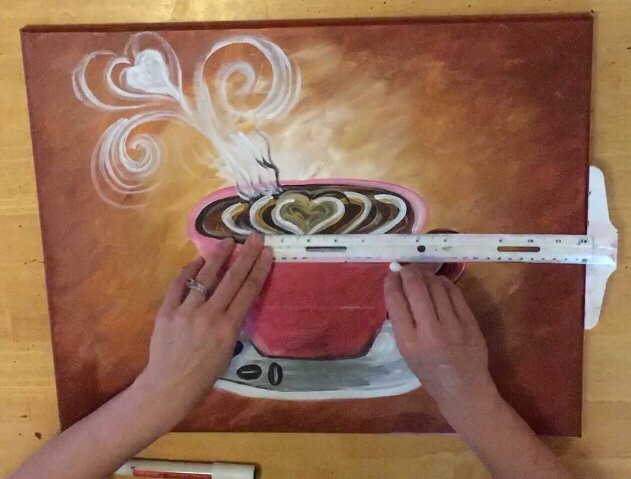 I used a ruler to mark a chalk line of where I was going to write. This helped to keep the letters from going crooked.
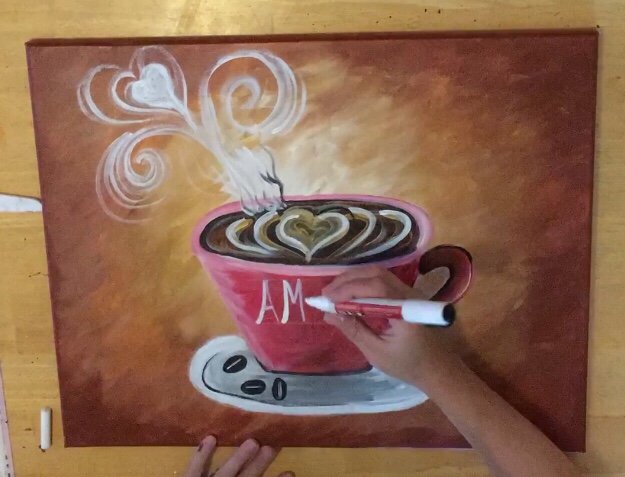 Then I used a white pen to write out the word AMOUR.

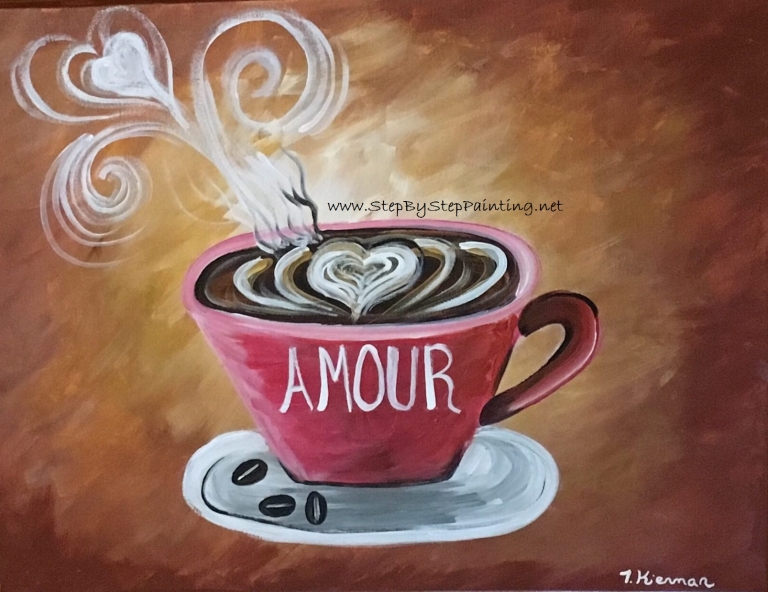


I did a copy of this for my husband. I have only been painting a couple of months but I found this one fun and relatively easy to follow. You have a subscriber for life. Thank you.
Thanks! So glad you liked doing this painting!