

Would you like to save this?
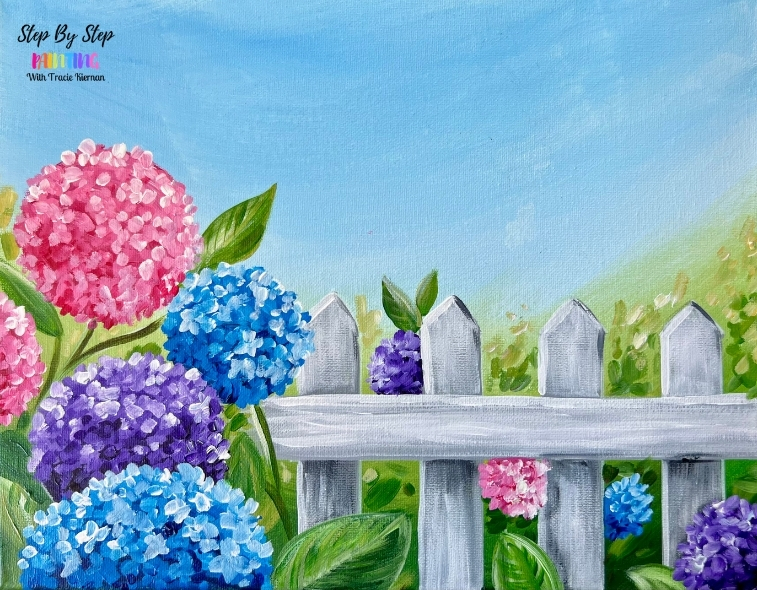
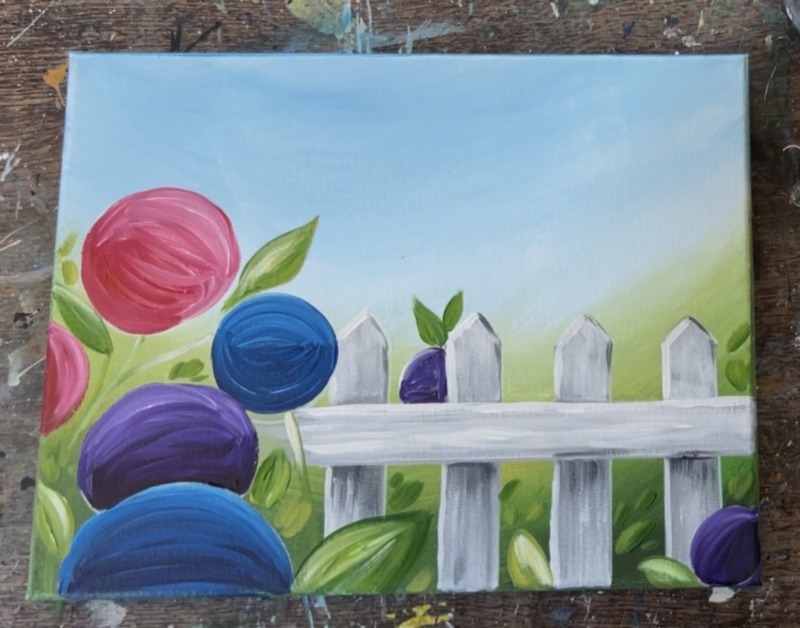
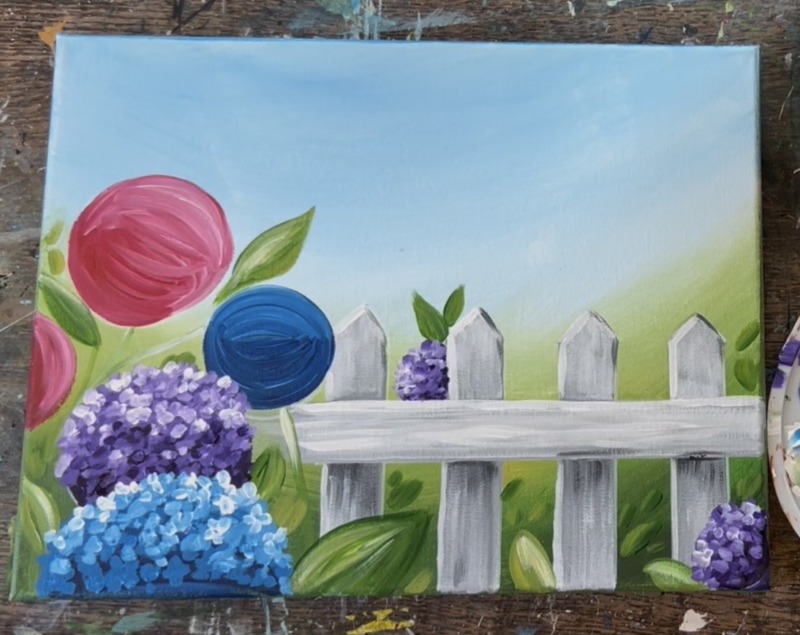
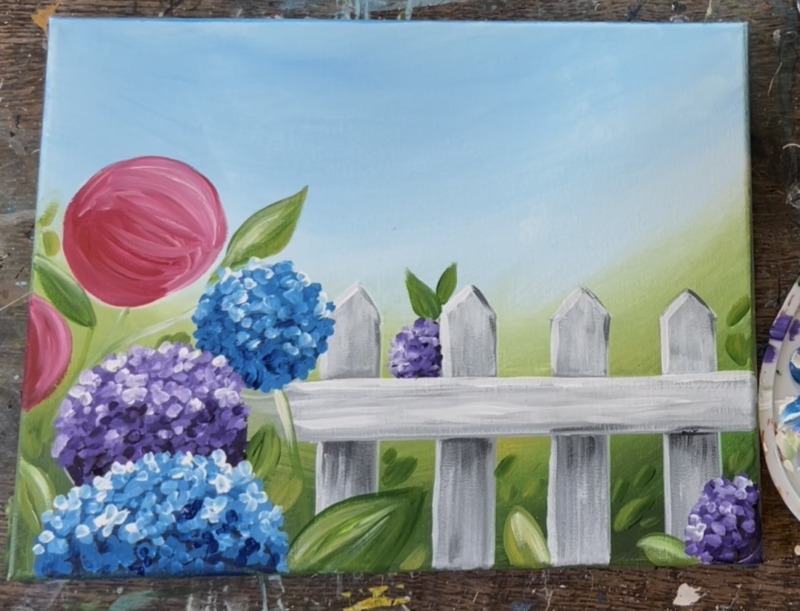
Welcome to this cheerful hydrangea fence painting tutorial—perfect for beginners who want to create something bright, relaxing, and full of summer charm! In this step-by-step lesson, we’ll paint a beautiful white garden fence surrounded by vibrant pink, blue, and purple hydrangeas set against a soft blue sky.

This painting is designed with simplicity in mind, making it approachable even if you’re new to acrylic painting. We’ll focus on easy brush techniques, layering soft background colors, and creating textured flower clusters using simple dabbing methods that give hydrangeas their signature fluffy look.
For a more advanced look, you can add clouds in the sky, a butterfly or even a friendly bee visitor! The blank sky area would also be a perfect place to add a quote if you love adding lettering to your paintings.
Enjoy and happy painting!
Love this tutorial? You can purchase the download in my PDF shop! This includes the ability to download the video and different size traceables. Find out more here!
Materials Needed:
- 11 x 14 Canvas (or any size)
- Paint Brushes (see sizes below)
- Acrylic Paints (see colors below)
- White paint pen (optional but helps with drawing the fence)
- Pencil (if not drawing with a white paint pen)
- T-Square Ruler
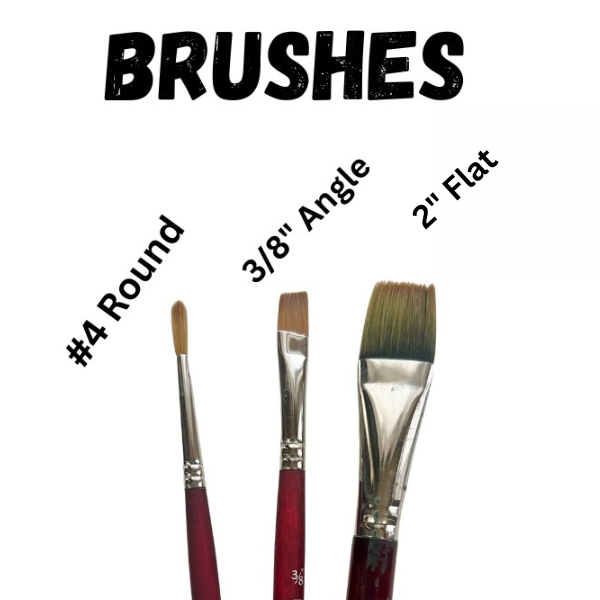
Brush Sizes:
- 2″ Flat Brush (or 3/4 flat)
- #4 Round Brush
- 3/8″ Angle Brush
Note: if you don’t have the 2″ flat brush, use any large flat brush you have! It’s only going to be used for painting the background color. The bigger brush helps to fill color faster with bigger brush strokes.
Colors:
- Titanium White
- Mars Black
- Primary Red
- Naples Yellow
- Hooker’s Green Hue
- Phthalo Blue
- Cerulean Blue
- Dioxazine Purple
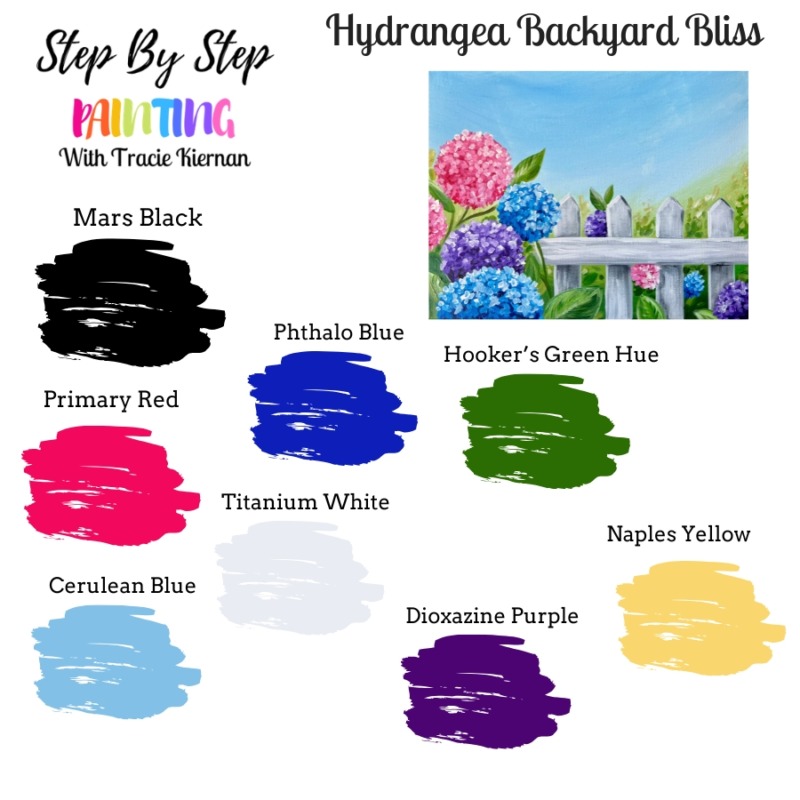
Note: if you don’t have “primary red”, sub with “quinacridone magenta”. If you don’t have “Naples Yellow”, sub with “primary yellow” or any pale yellow (add white to primary yellow).
Directions At A Glance

Step By Step Instructions
1. Paint Background
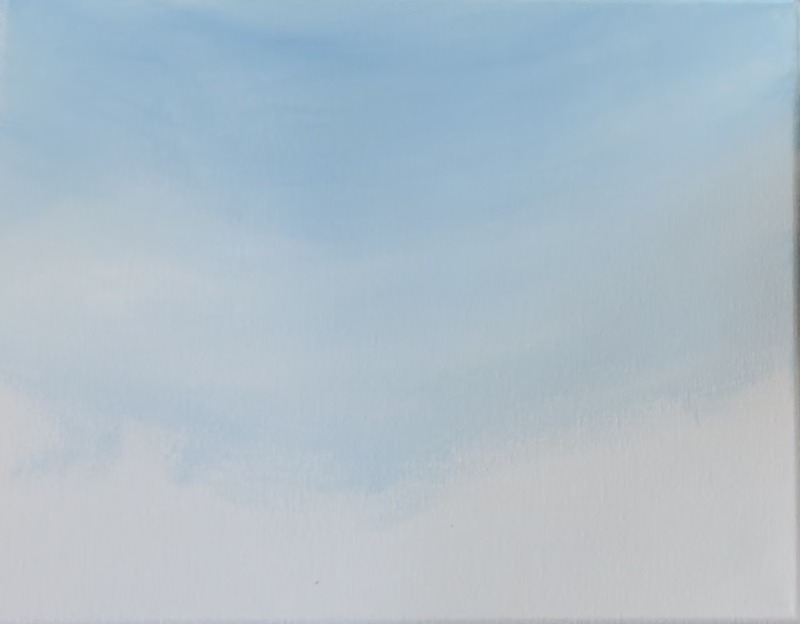
Use the last 2″ flat brush for the background in this painting. Start by loading the brush into water and squeezing out excess water. Then double load the brush into both colors “cerulean blue” and “titanium white”.

Start at the top and paint large paint strokes that quickly fill the top half of the canvas. Paint in a curved direction with the curve going downwards.
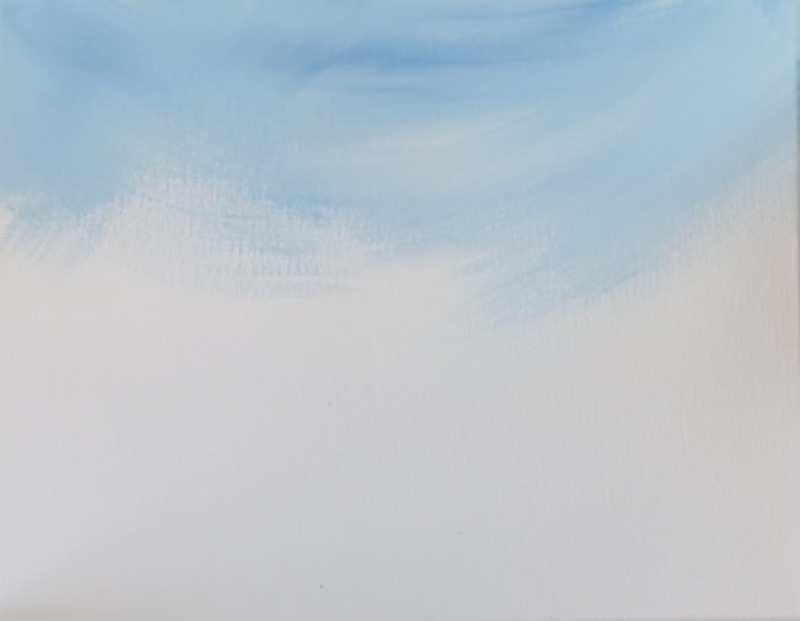
As you work your way to the middle part of the canvas, blend more white into the blue so that it becomes lighter. Add darker blue towards the top of the sky and blend so the top of the sky is slightly darker. I went down about 2/3 with this blue and stopped.
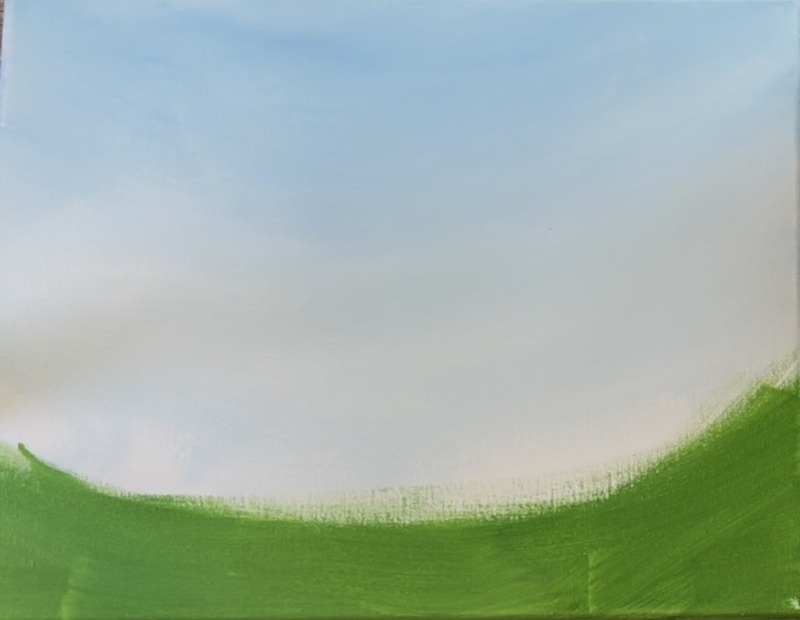
Then paint the bottom half of the canvas green and also going in that curved direction! Start by loading your brush into just “hooker’s green hue”. Start on the bottom of the canvas and paint in a curved direction. Go up about 3-4 inches with this green.
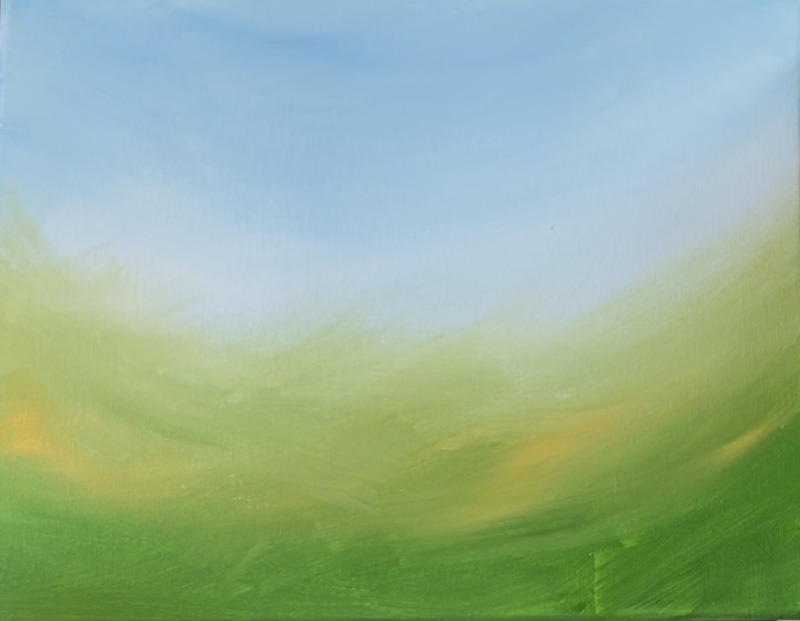
Next load “naples yellow” onto your palette. Load this color onto your brush with the green (without rinsing the green). Then blend this yellow color at the top of your green. Your paint strokes should go in that same curved direction but you can paint them very loosely and “expressively”. It’s easy to do this with the big paint brush!

As you work your way up, add only small amounts of “naples yellow” onto your brush and blend it so that it becomes “blurry” at the top. It can also blend a little with your sky if the sky isn’t dry. If your sky is dry, simply “dry brush” the color so that it is very light at the top of the green area. Keep that same general “curve” in your green.
Next, wipe the brush but don’t rinse. Load “mars black” onto your paint palette. Mix a very tiny dot of black into “hooker’s green hue” on your paint palette to make a very dark green. Use the 2″ flat brush to paint the bottom of your green area with this very dark green color and blend it up into the rest of the green. It also goes in that curved direction.
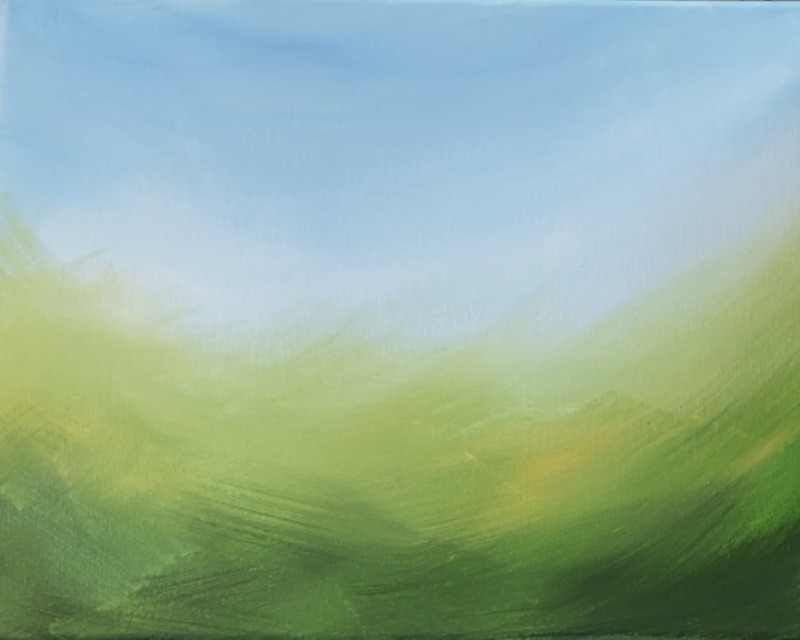
Let this dry before going onto the next step.
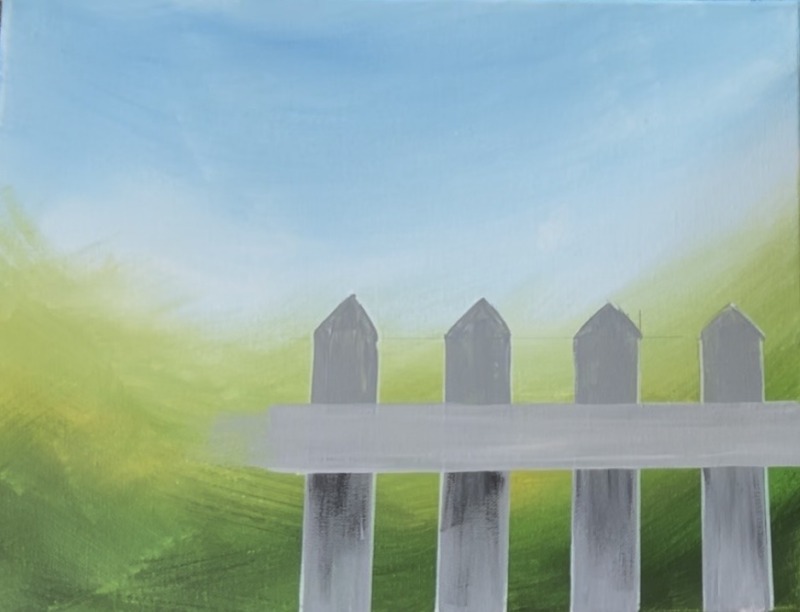
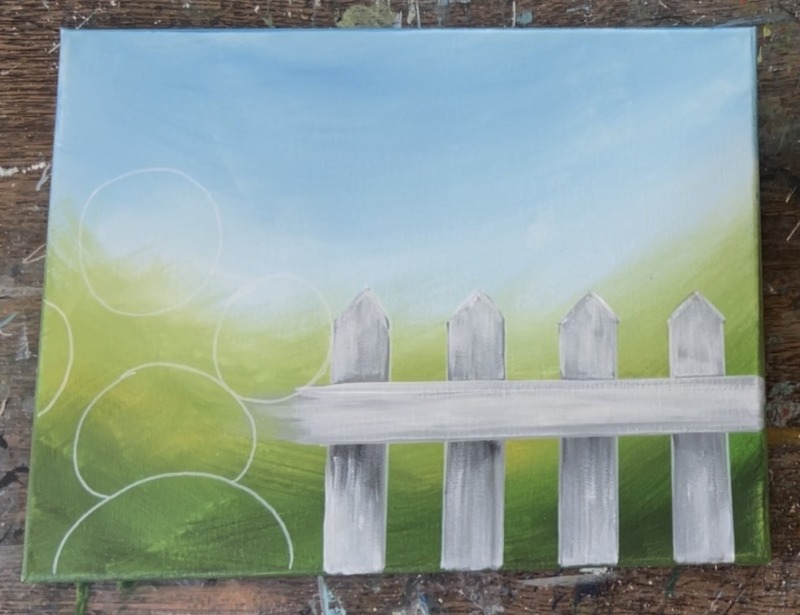
2. Draw & Paint Fence
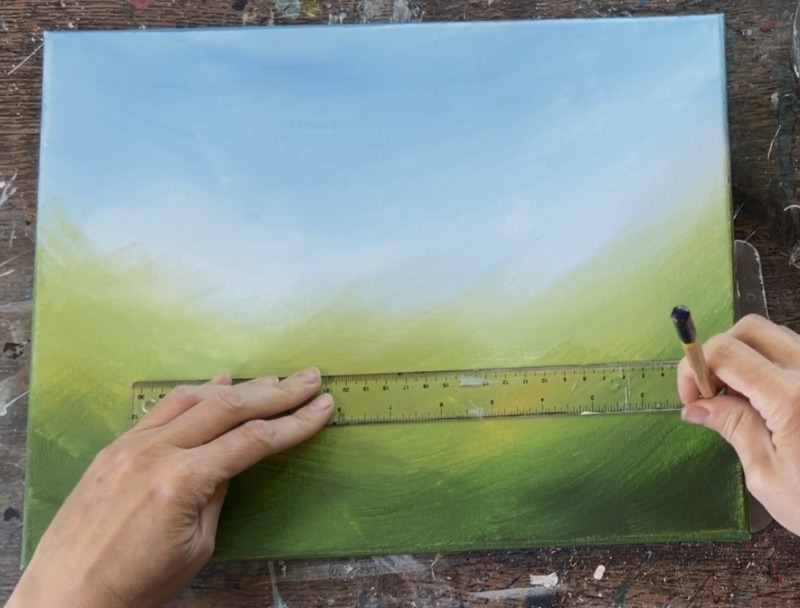
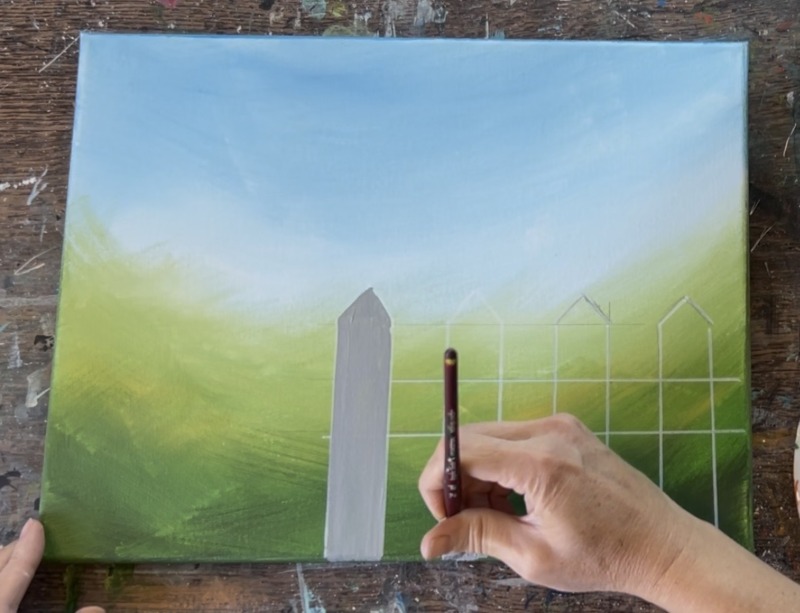
Use a ruler (preferably a t-square) and a pencil to draw the fence. The fence posts are 1″ wide and exactly 1″ apart! The horizontal beam is also 1″ thick. Since my ruler is 1″ wide, it was easy to use it as a template for each of the posts and the beam! Note: if you are working on a different size canvas, you may want to change the proportion of this fence to higher or lower. For example: a 16×20 canvas might look best with a fence that has 2″ wide posts. An 8×10 canvas could be 3/4″ wide posts.
Start by measuring 2.5″ from the bottom edge of the canvas and making a mark. This is going to be where the horizontal beam of the fence will be! Use your ruler to draw a horizontal line.
Use the width of the ruler (or measure 1″) and draw the second horizontal line for the beam. This doesn’t need to go all the way across the canvas (I went a little more than halfway to the left). The left side of the fence will be disguised by the large hydrangeas!
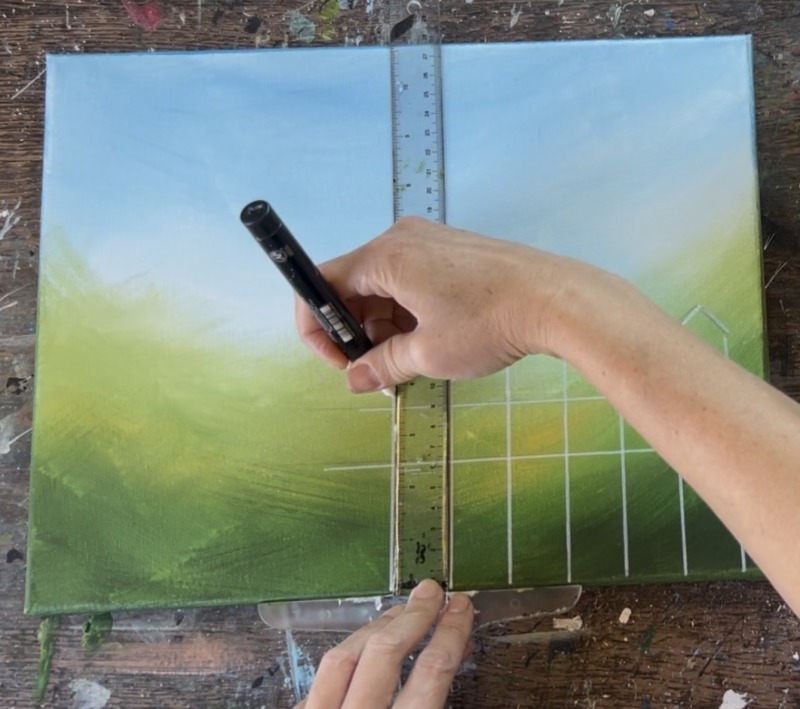
Next, use your ruler to draw vertical posts. Line the ruler up to the bottom edge of the canvas and draw two vertical lines. Note: the height of each of my fence posts are about 5.25″ but you can estimate this if you want! At the top of your “rectangle shape” draw two little diagonal lines to create the point of the post. Repeat this for each of the posts. They are 1″ apart and you can use the width of your ruler for spacing!
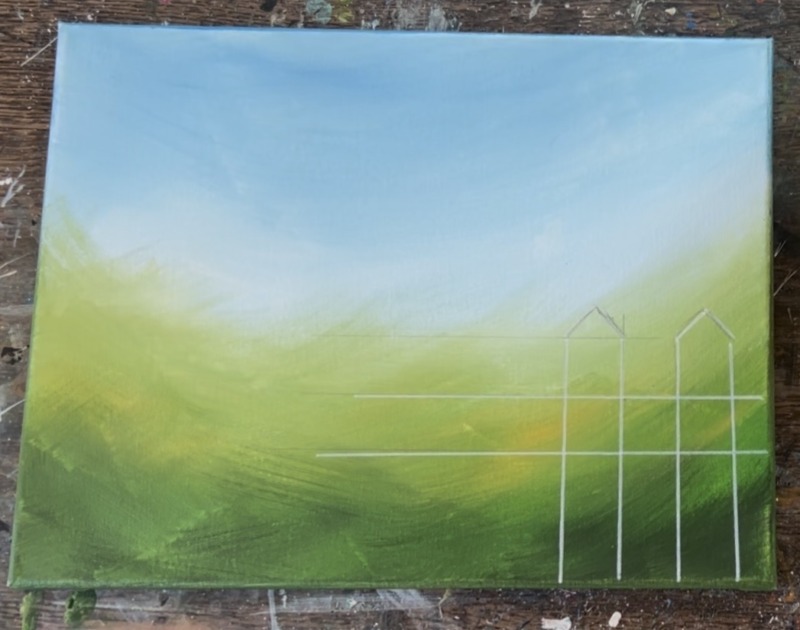
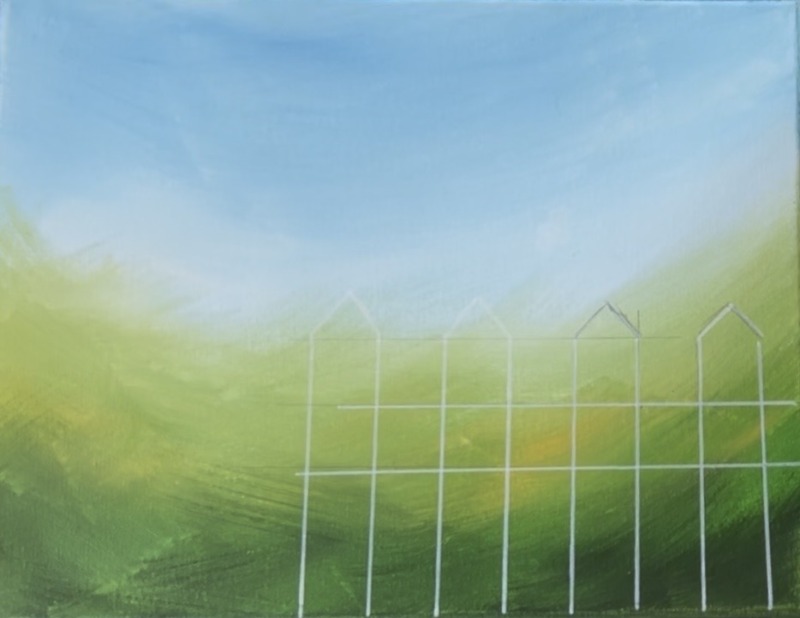
Repeat this to draw a total of 4 posts (or more if you want!). I stopped at four because I knew the whole left side of the painting is going to be covered by hydrangea flowers.
I did my drawing with a white paint pen so the lines would be visible! You can draw this with pencil (or paint pen). Either are fine!
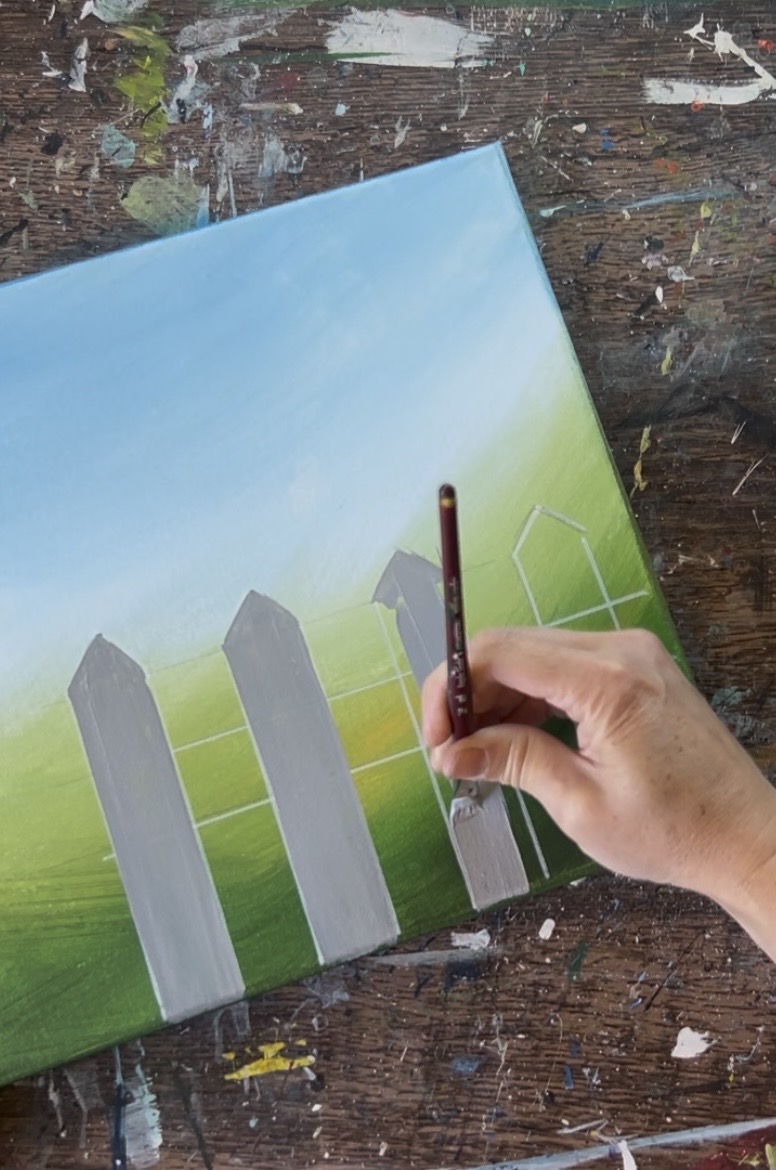
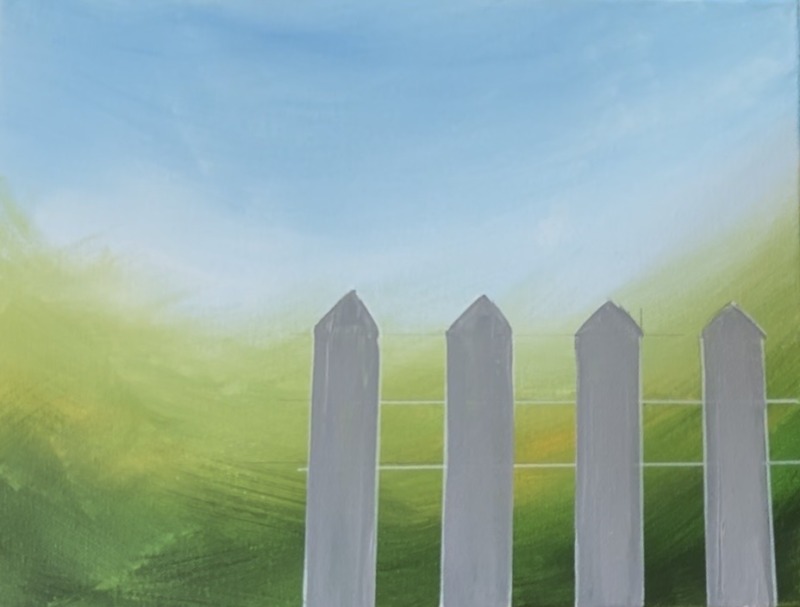
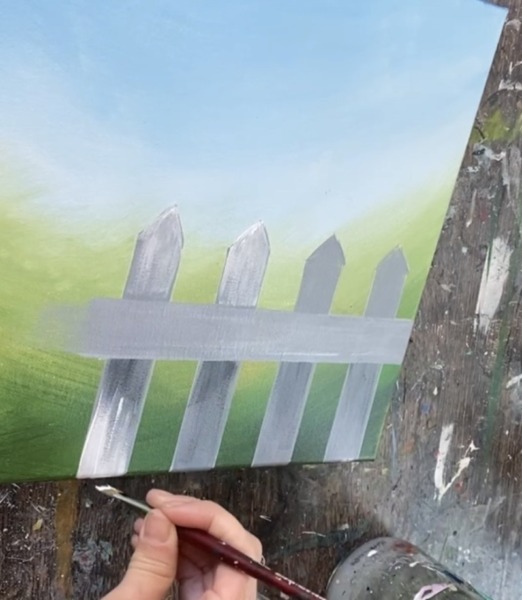
Next, mix a medium gray on your paint palette by mixing 1 part “mars black” to 2 parts “titanium white”. Use the 3/8″ angle brush for this! The angle brush really helps you to “cut in” on the lines and make them look nice and crisp! Start by painting the vertical posts and make sure your paint strokes all go in a vertical direction. It helps to outline the shape first and then fill it in solid.
Tip: add a little bit of water into the gray for more flow of paint.
Also, you can paint over the horizontal beam for now! We will paint the beam to overlap the vertical posts later.
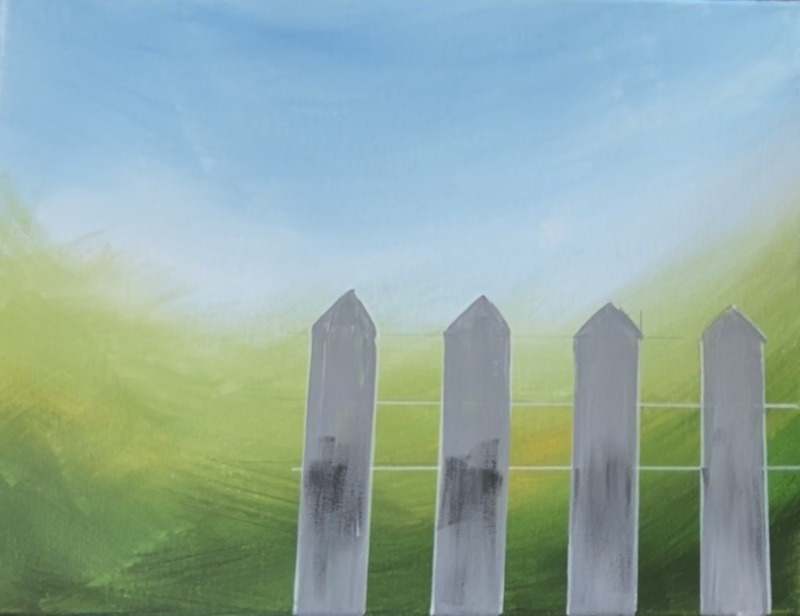
Next, paint shadows below where the future beam will be. This is going to look super pretty and will give our fence a 3D look! Load your brush in a small amount of “mars black” paint. Wipe the brush so only a small amount of paint is left on the brush. Then “dry brush” the black to create dark “smudges” under the horizontal beam of the fence. You want this to look dry brush style/ dark. You also want to make sure it’s going in a vertical direction. Only do this in this middle area of each of the posts.
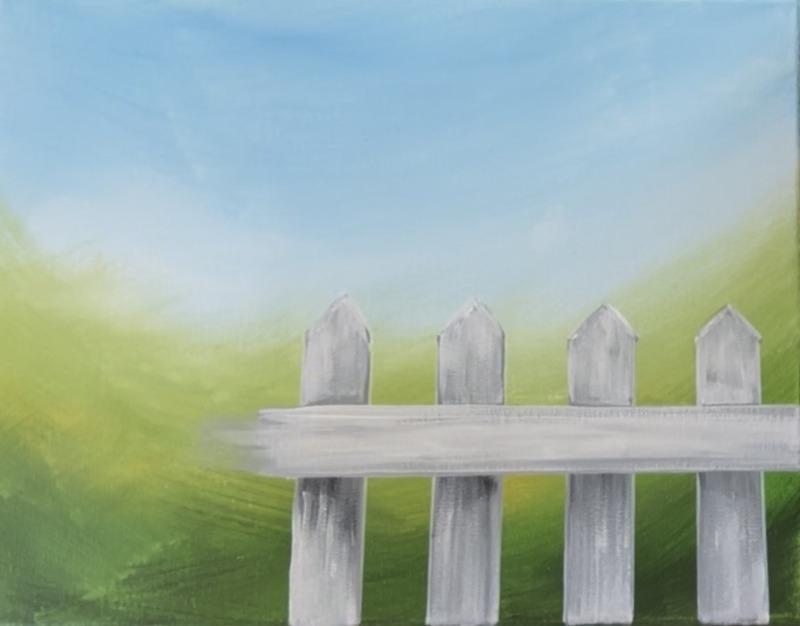
Next, paint the horizontal beam! This time mix a little bit of white into your “medium gray” color so that it is a few tints lighter. Paint the beam with the 3/8″ angle brush and go in a horizontal direction.
This looks super pretty and three dimensional now! Next we are going to layer on white over our fence. You want to make sure the gray is dry or almost dry. If it is too wet, the white will blend too much with it. Use a clean 3/8″ angle brush and load into white. Wipe off some of the excess paint. Then paint over your posts using the dry brush technique. “Glaze over” your dark gray but don’t cover it all! You want to see that darker gray through this layer of paint. You especially don’t want to paint over the “shadow smudges” below the horizontal beam.
Paint over the horizontal beam as well. Since this part of the fence is in front, you can paint it lighter than the vertical posts! Simply add more white to your brush and paint left and right paint strokes. For texturing, leave a little bit of your gray under layer still showing through!

For the top part of the posts, I recommend outlining the angles with white then dry brushing white in a vertical direction. Leave the part that is touching the horizontal beam a little bit more dark gray so that it stands out and doesn’t become the same tint of white.
3. Draw & Paint Hydrangeas (first layer)
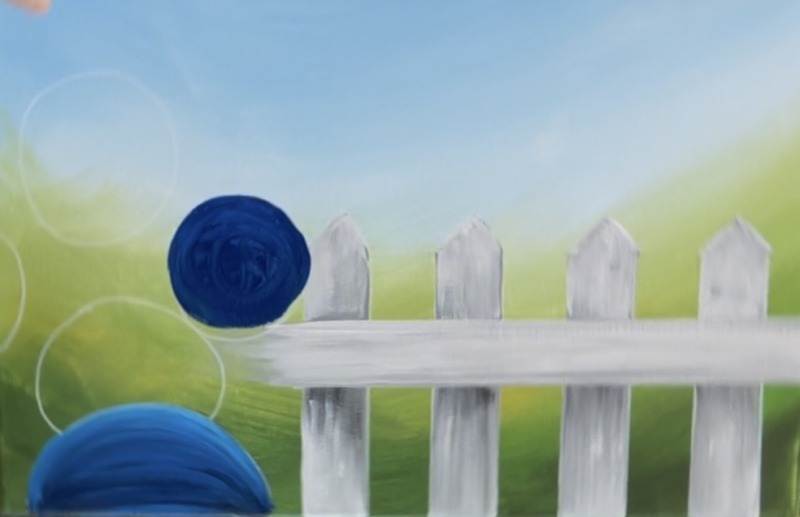
I drew my flower shapes with a white paint pen so you can see them, however, I recommend drawing with a pencil so you can erase if needed. Start by drawing the large circles that represent the shape of the hydrangea flowers!
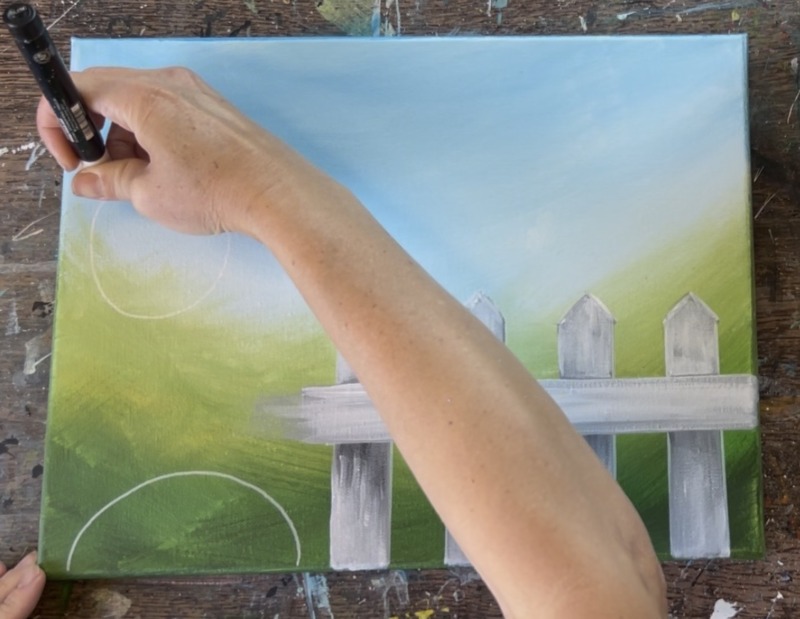
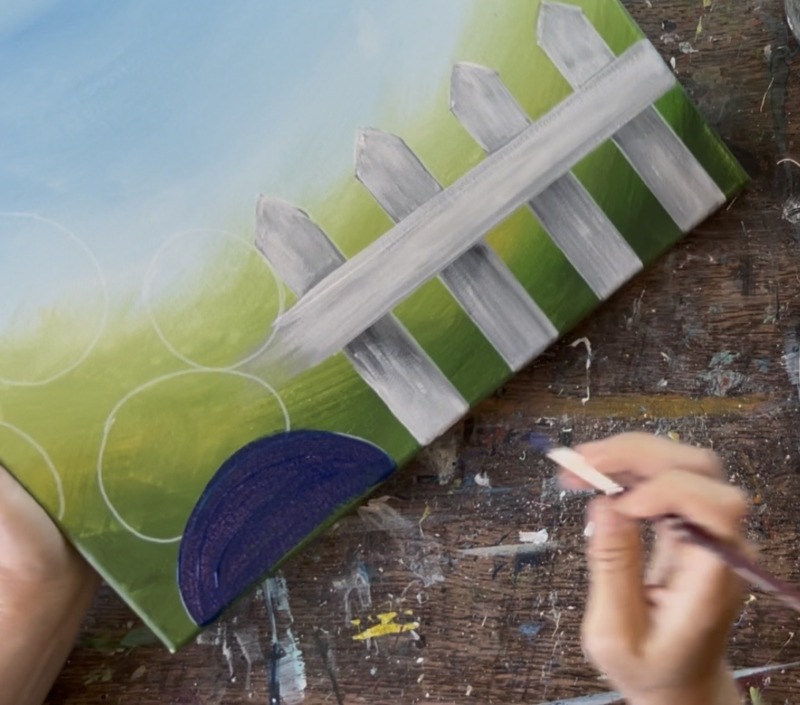
Draw a large half circle on the bottom left of the canvas. This nearly fills the area! It will be a large blue hydrangea! Then draw a medium circle higher up on the left! Don’t worry about the stems or leaves. Just focus on where the main circle shapes will be.
Draw a total of 5 circles. Some are overlapping each other and a few go off the edge of the canvas. You are welcome to draw more if you want! This is enough to get us started with learning the technique for painting the hydrangeas in.
Next we are going to paint all of the circles in a solid color and highlight the tops of each of the circles! Load your paint palette with the three colors: “phthalo blue”, “dioxazine purple” and “primary red”. These will be the three “base colors” for the flowers!
Use the #4 round brush and “phthalo blue”. Start by painting the bottom large flower that goes off the bottom edge of the canvas. Paint it a solid layer of blue.
Then you are going to blend white at the top. Wipe the brush but do not rinse. Load into “titanium white” and paint a white arc at the top of the circle (it will turn light blue because it’s being painted over the wet dark blue color).
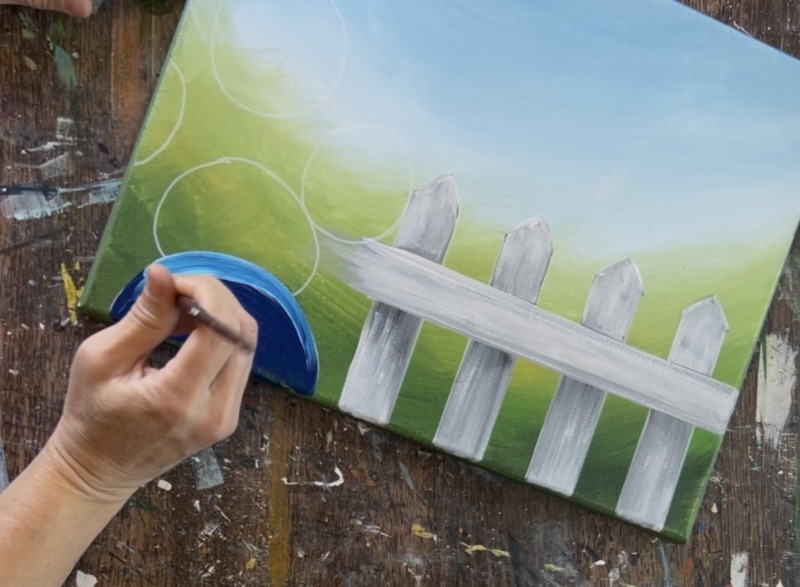
Wipe the brush and use the dry brush to blend your white into the rest of the blue so that the circle is light at the top and dark on the bottom.
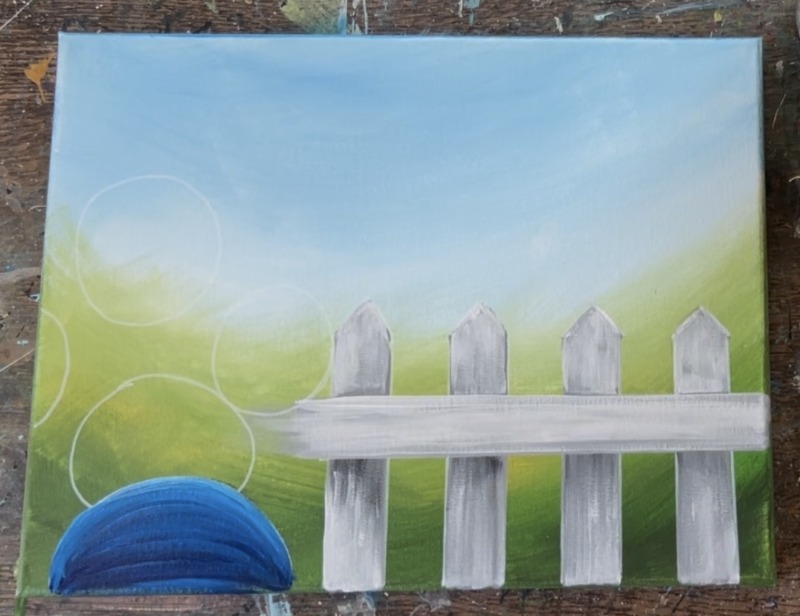
Repeat this technique for each of the circles! Paint each of them the solid dark color first and then blend your white at the tops of each of the circles.
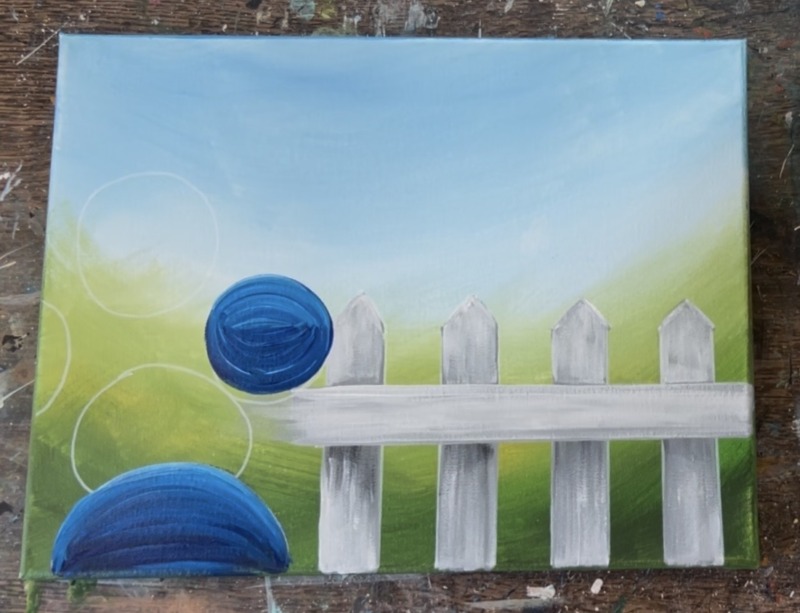
For the purple flowers, start with a solid coat of “dioxazine purple”. Then blend your white at the top!
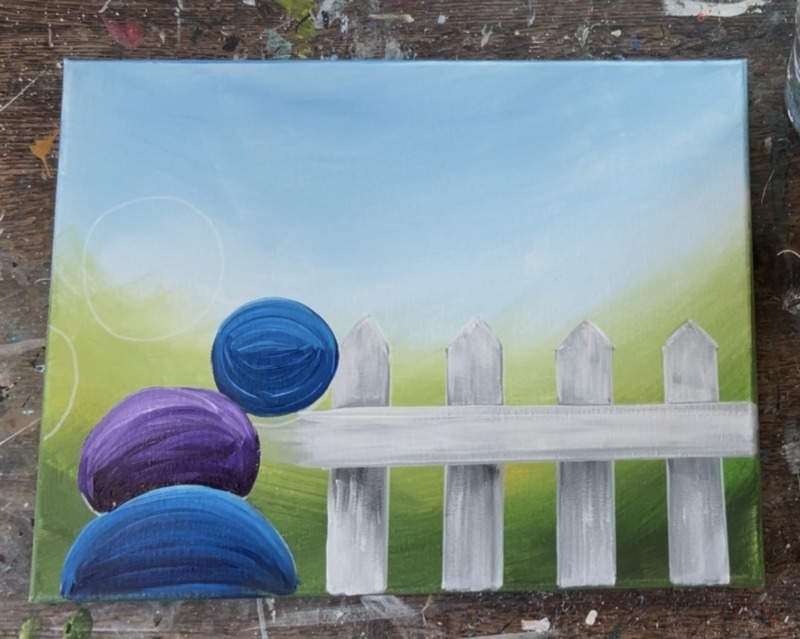
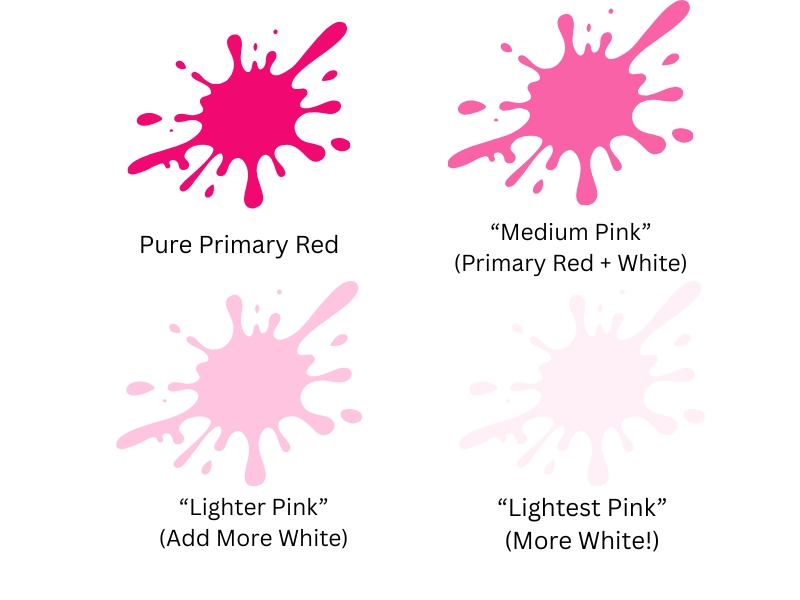
Repeat this for the “primary red” flowers. They will turn “pink” when white is added to this color. If you aren’t using “primary red”, use any kind of dark magenta color such as “quinacridone magenta”.
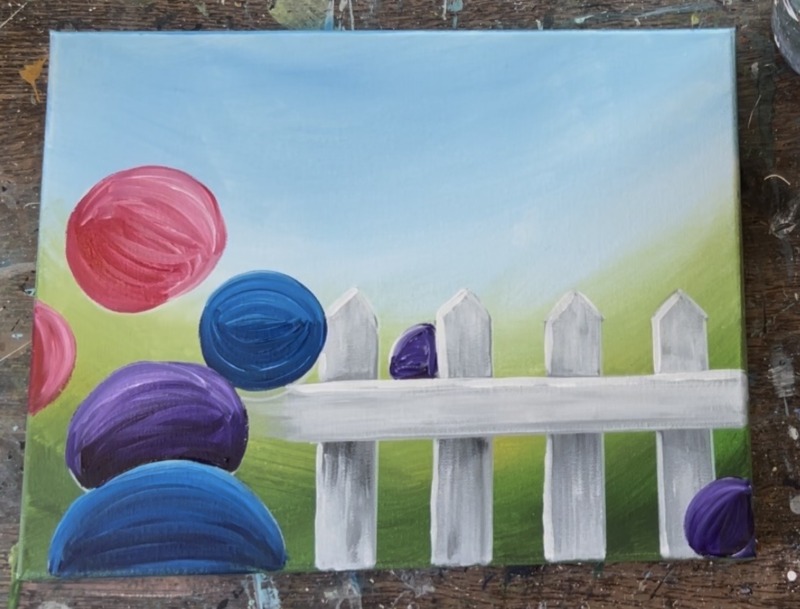
After painting the large circles, you can add a few more smaller ones on the right side of the painting. I decided to paint a small purple circle on the lower right corner.

Then I added another purple circle peaking through the fence.
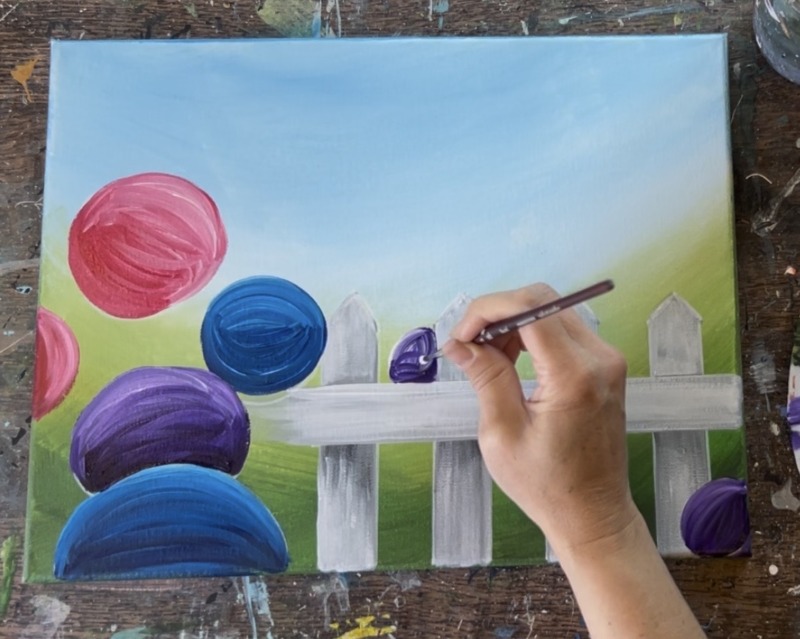
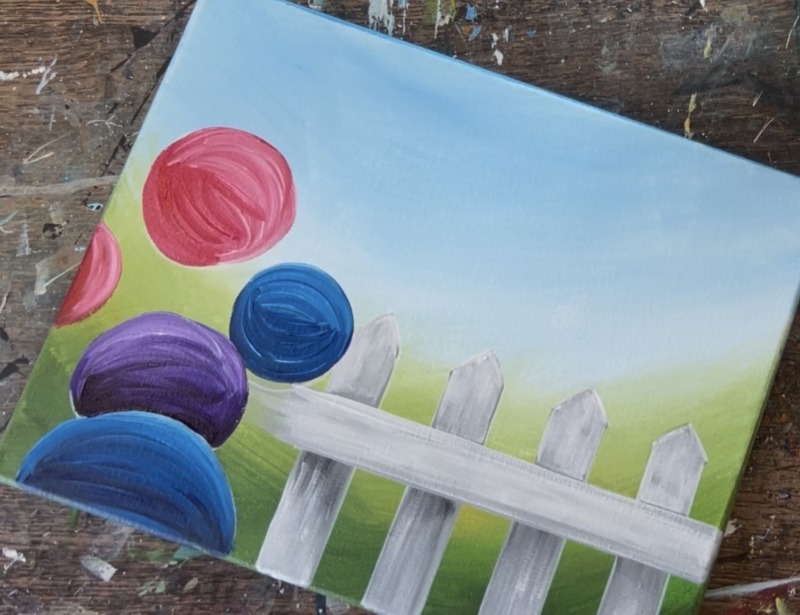
We can add more flowers later but that is it for now! Before we can paint the little petal texture on these balls, we need to let this dry!
While those are drying, we can paint the leaves!
4. Paint Leaves
Use the two colors “hooker’s green hue” and “naples yellow” to paint leaves and stems! Hydrangeas have branchlike stems. So in the open areas between the flower balls, use the #4 round brush and the green mixed with yellow to paint stems that loosely connect some of the balls of the flowers. I did one stem on the left under the pink flower and another to the right under the blue flower. Your stems can overlap the fence if needed.
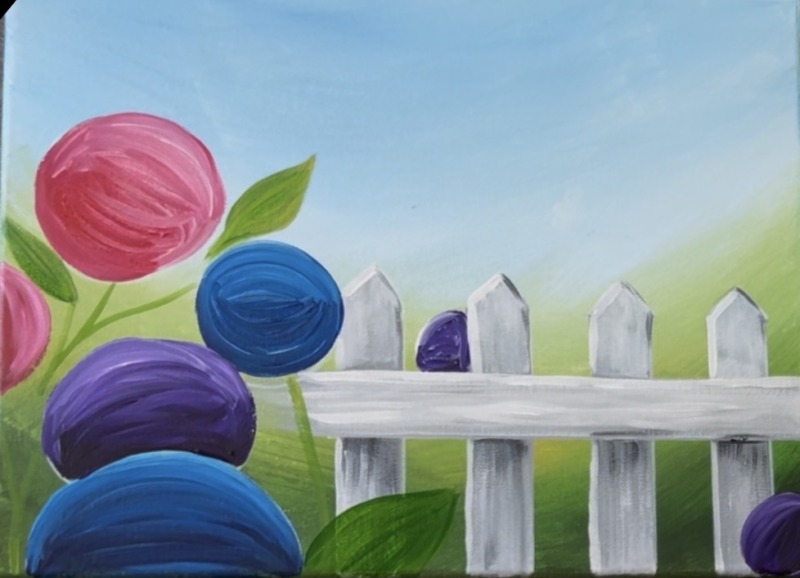
Then paint leaves! Use the #4 round brush and a combination of both the yellow and green. Paint larger leaves around the larger flowers and smaller leaves around the smaller flowers. For now, just paint a basic leaf shape (rounded and pointed) and fill in solid with the green. Note: mixing the yellow into the green lightens it and makes the green a little more opaque if you need to overlap parts of the fence.
Some leaves that are further away could be little brush marks. I painted these to fill in some of the spaces between the flowers.
After doing the first layer of green leaves, load your brush and a tiny bit of “titanium white” (without rinsing the brush). Then layer on lighter colors over the leaves to highlight them. I like to do this on one side of the leaf so one side looks brighter and “shinier” and the other side remains dark.
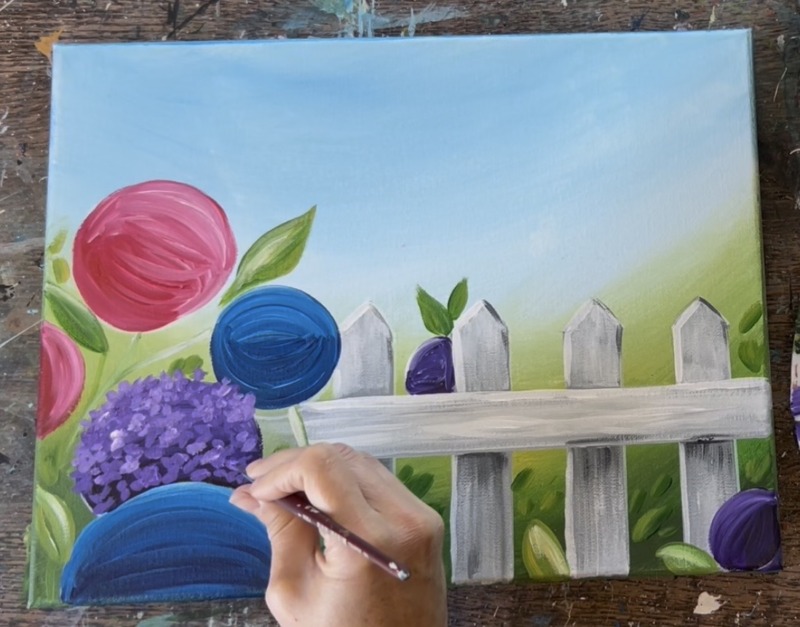
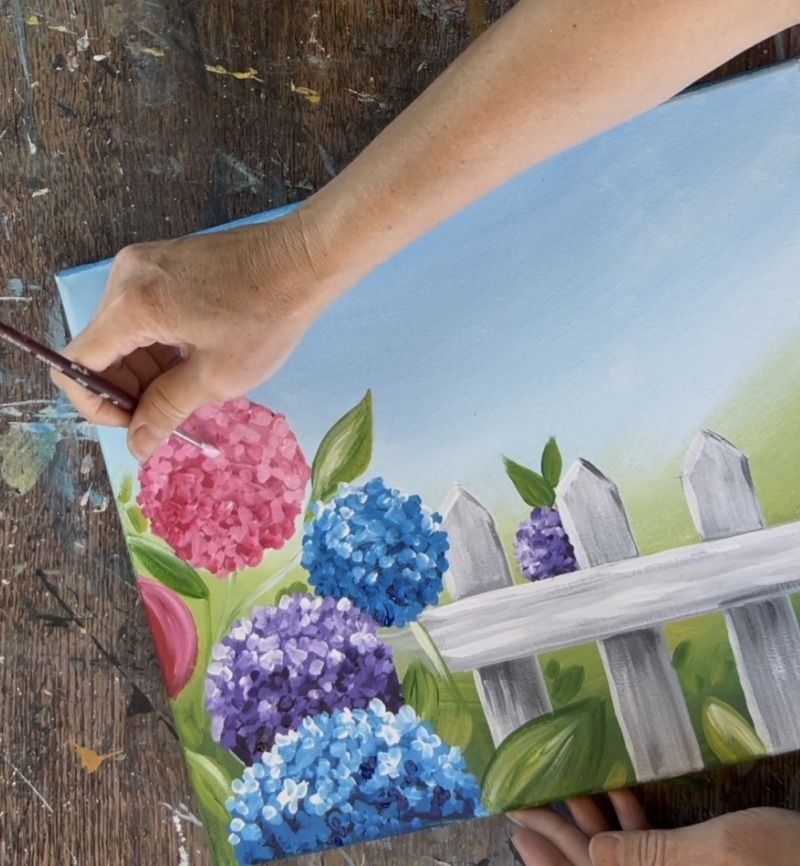
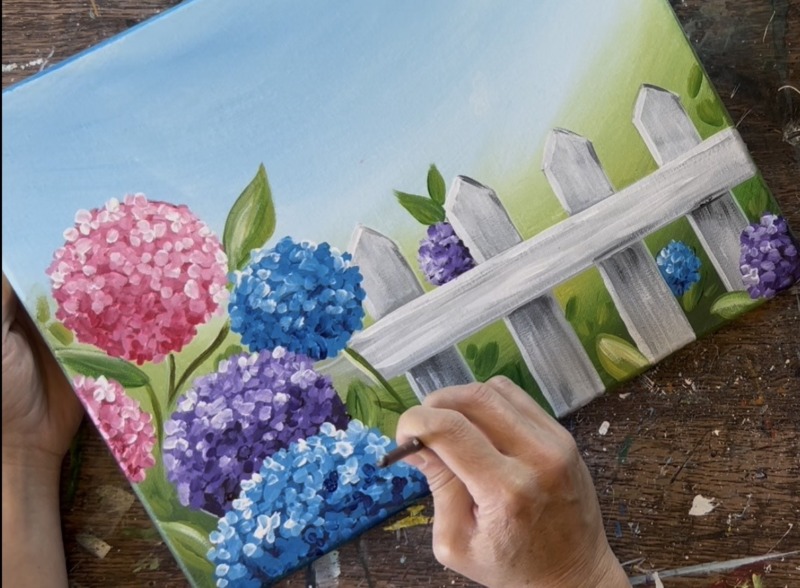
5. Paint Petals On Flowers
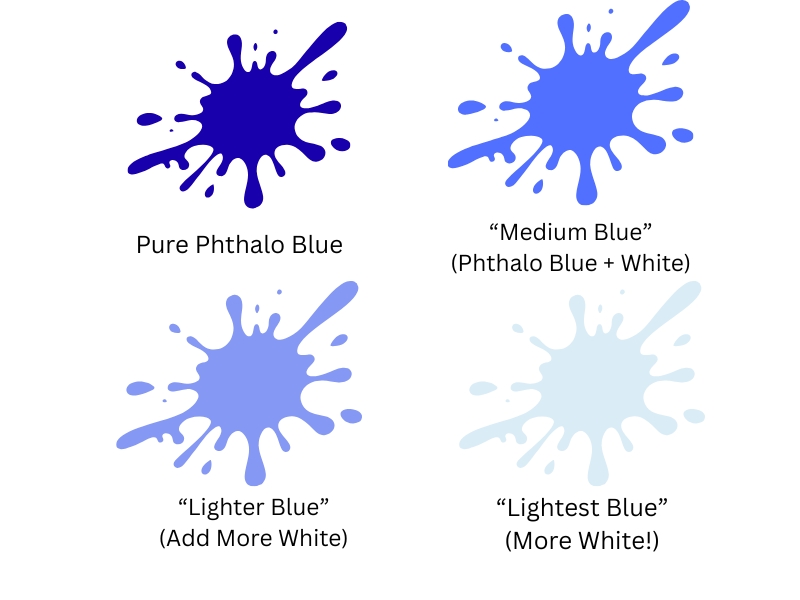
In this next step, we will be using four different purples to layer our hydrangea petals. On your palette, you will be mixing 4 different tints of purple (including the pure form of dioxazine purple). This same thing will happen with the blue and pink flowers!
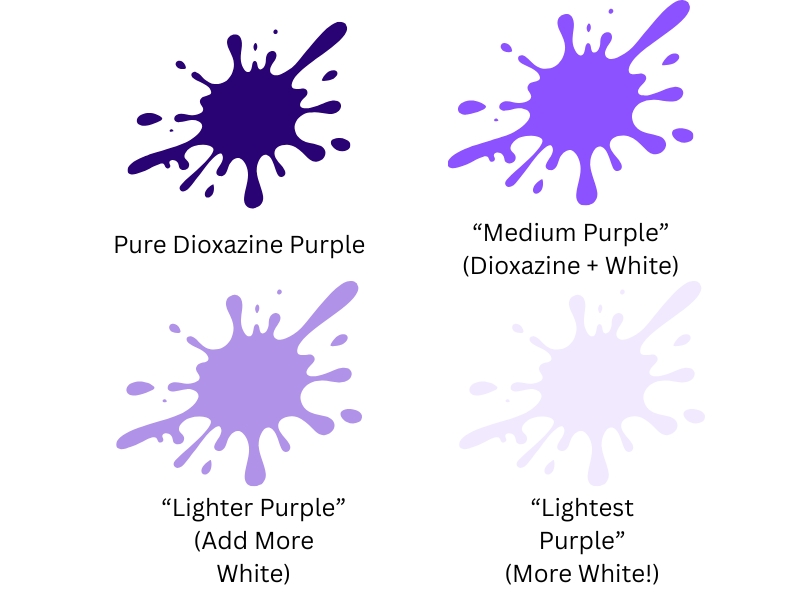
Start with “Medium Purple”. This is created by mixing equal amounts of white and dioxazine purple together. Use the #4 round brush and start painting little 4 petal marks with the round brush over your purple ball. There won’t be much contrast right now and that is okay! Some of your little marks don’t have to be flower shapes, they can be individual marks or marks in clusters of 2 or 3. Change the angle of the brush to create different angles in your marks.
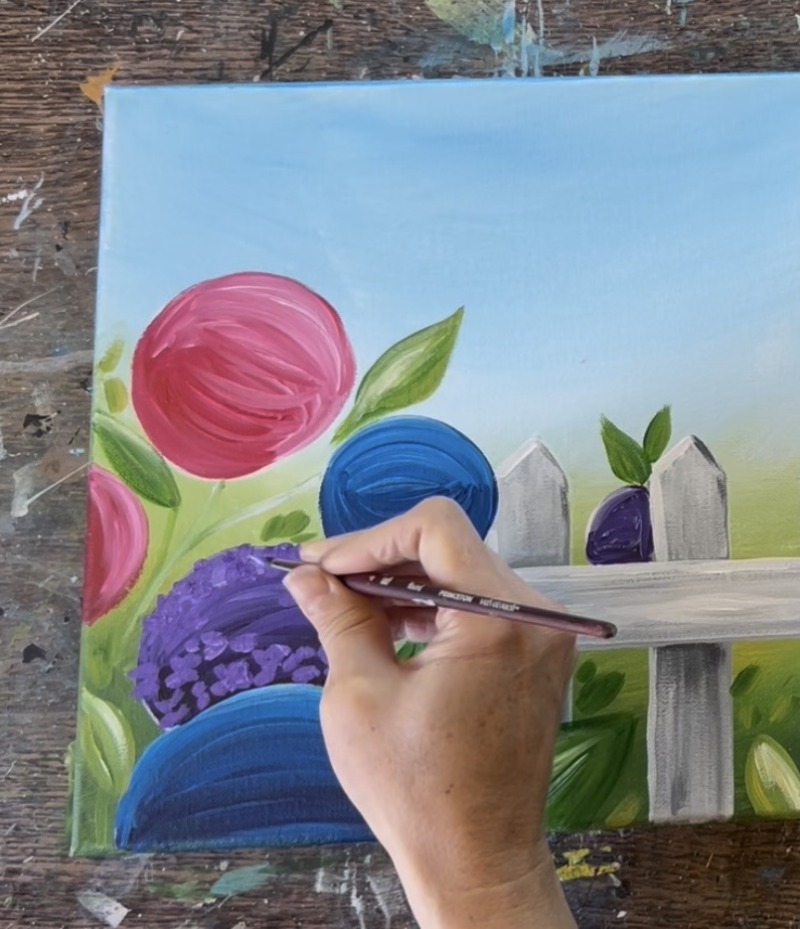
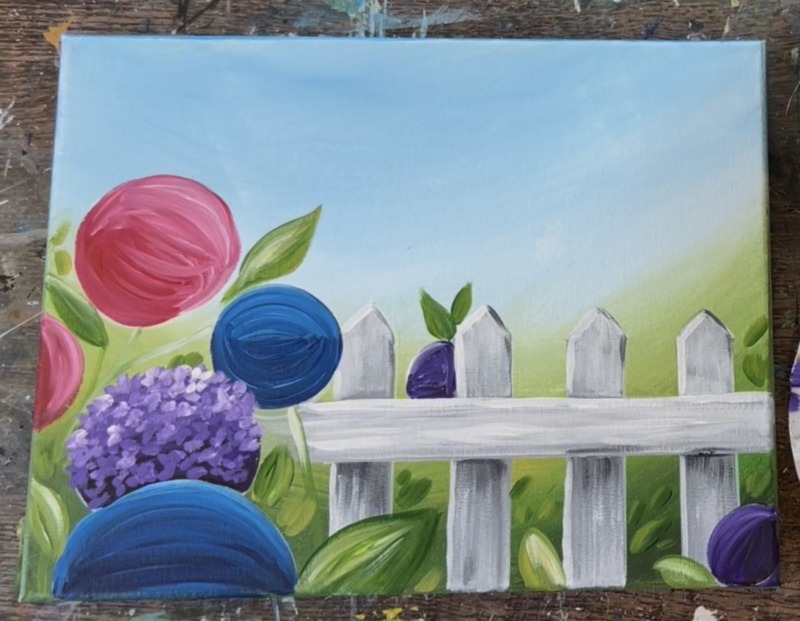
Below is what my first layer looks like on the purple flower! Notice how there is still a lot of “negative dark space” on the bottom of the flower. That is important for shadowing! Don’t cover all of your “ball”, especially the dark area.
Next, wipe the brush but do not rinse. Mix more titanium white into your “medium purple” color to create a “lighter purple”. Go over your petals with another round of marks with this lighter color. You can do actual flower shapes or just random marks everywhere! It’s okay that you paint over your first medium purple layer as the paint will blend “wet on wet” to create different variations of color. It’s also important to go outside the lines of your circle! This helps to create more texture/ ruffled edges to the flower.
Do not add too much of this lighter purple on the bottom of the flower! That is to remain dark and shadowy. In other words, as your purple becomes lighter, the more concentrated it is in the upper part of the flower and the lighter marks are rare on the lower parts. This creates a 3D look and added texture!
Next mix your lightest purple ever! This is like a little dot of purple and a lot of white! Paint your next layer of little petal marks with the round brush. This time it is important not to add too much of this lightest color! Don’t add any on the bottom of the flower and add a lot on the top edge of the circle! Then wipe the brush. Go back with pure “dioxazine purple” and add little dark marks on the bottom of the flower for extra shadowing!
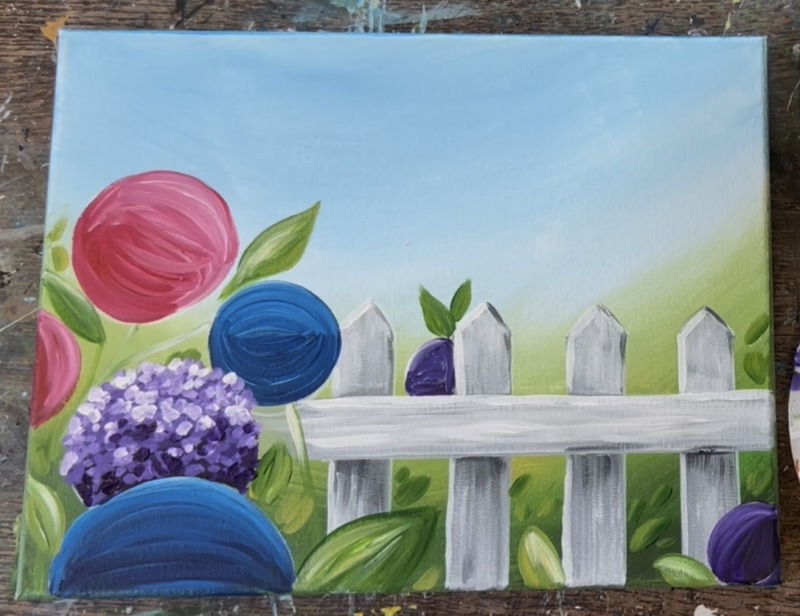
Repeat this step for all of the purple flowers! You will find that the smaller flowers go a lot quicker because there is less space to fill. With the smaller ones, you can just do little dots for the marks instead of petal shapes!
Tip: for an extra bright effect, add a few “pure white” marks on the very tops of your flowers!
Next you are going to repeat this same technique for the blue flowers. Start with “phthalo blue” mixed with “titanium white” (equal parts) for your medium blue color.
Repeat the same types of marks on the blue flowers. You are going to find that it starts going a lot faster! Your marks can be very loose and don’t have to all be flower shapes! Remember to leave space/ dark blue showing through your marks.
Then mix your lighter blue by adding more white into the color! Make your marks on the top of the flower! This will especially be stunning because the purple flower behind this one is nice and showy on the bottom.
Then do your lightest blue layer and a few pure white marks after that! If needed, go back with your pure “phthalo blue” to add more darker petals on the bottom of this flower.
Repeat for the other blue flower!
Repeat all of this for the “primary red” flower! Start with the middle color of “primary red” and build it lighter and lighter!
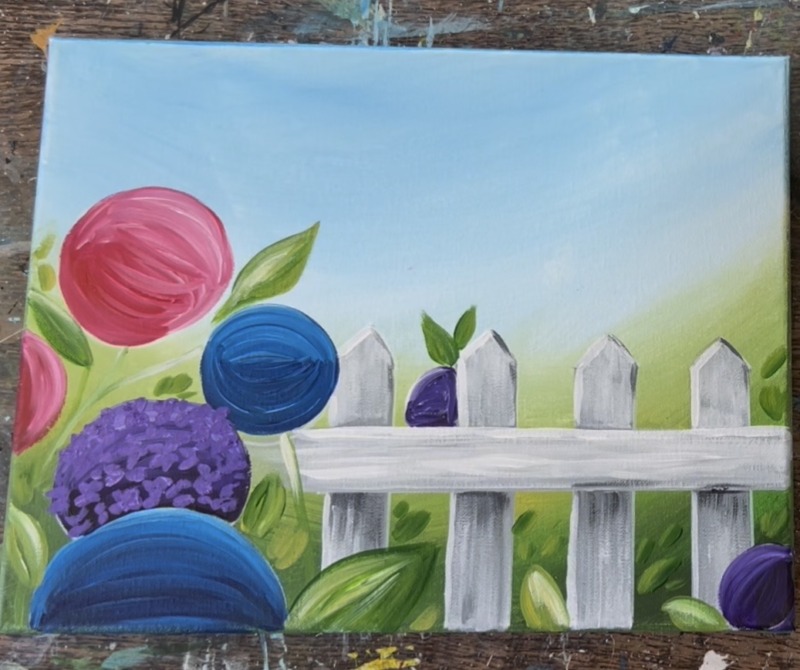
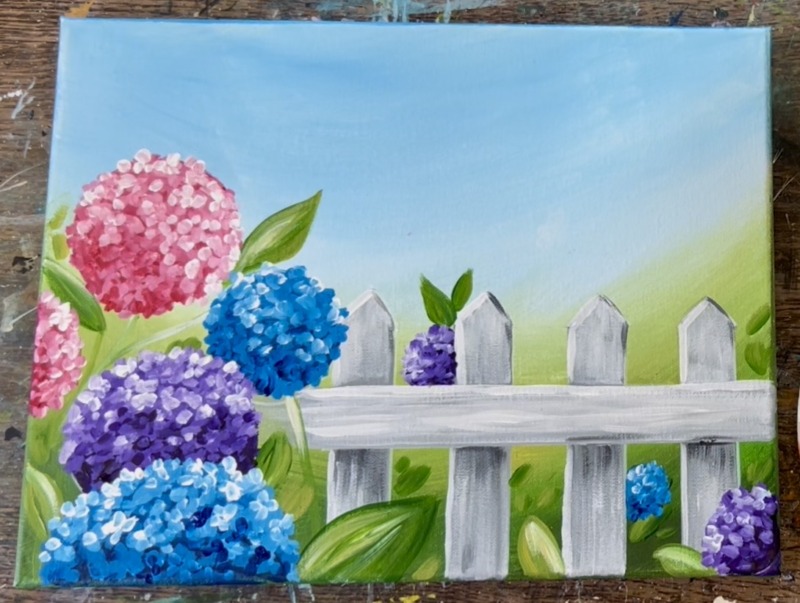
You can add more flowers if you want! I added another blue flower between the fence and then another small pink flower between another fence post later!
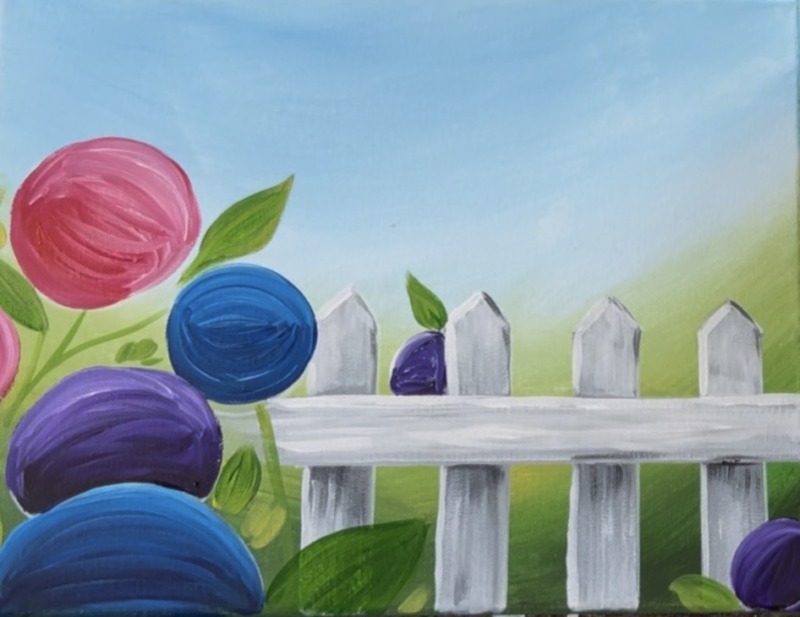
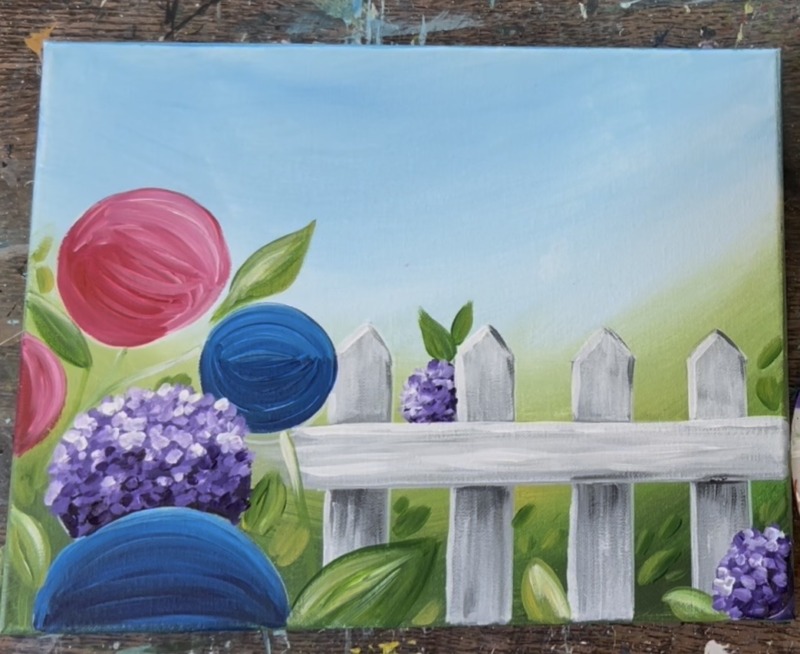
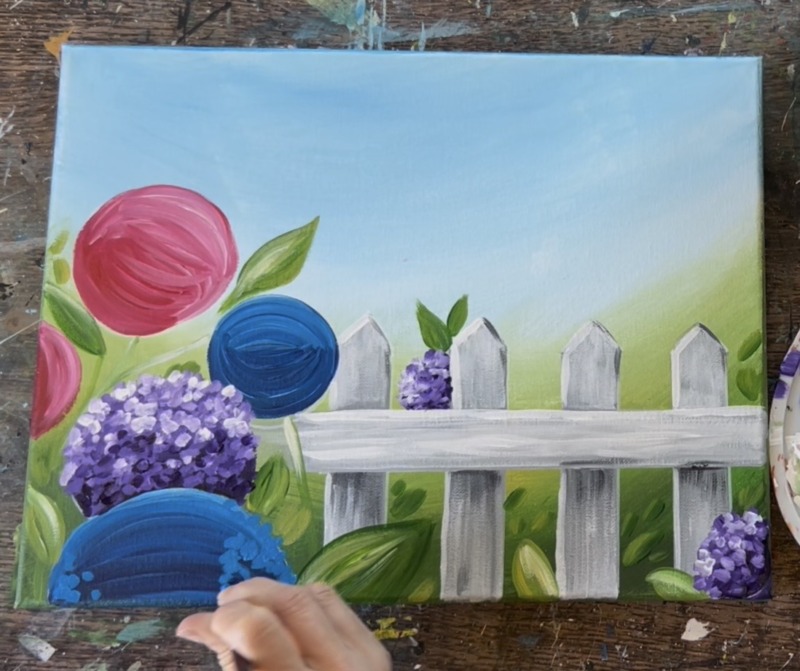
6. Re-Paint Stems/ Leaves
Next paint another coat of paint over the stems. I decided to mix a darker green this time! Mix a little “primary red” into “hooker’s green hue” and add a tiny dot of “mars black”. This will make a very dark, natural green color. Paint over the stems to darken them.
Then paint more leaves throughout the spaces between the fence posts and around the flowers.
Paint leaf vein lines on some of the bigger leaves! You can use a tiny detail brush for this or the #4 round brush (bristles gathered to a fine point). Paint a very thin line down the middle of the leaf with either a darker or lighter green (depending on how dark the leaf is). Then paint little diagonal lines going out from the center of the leaf. Since this is a tricky step, I only did the line textures on the bigger leaves and left the other leaves simple!
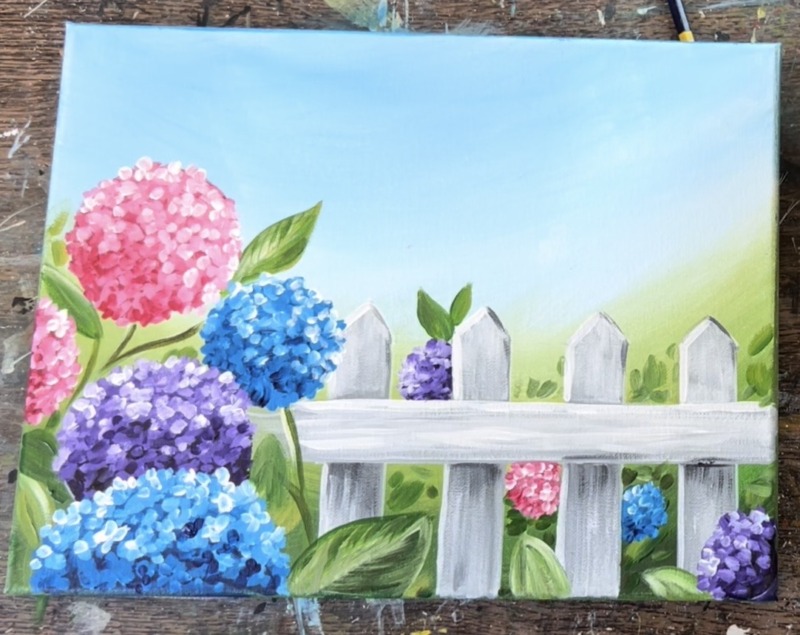
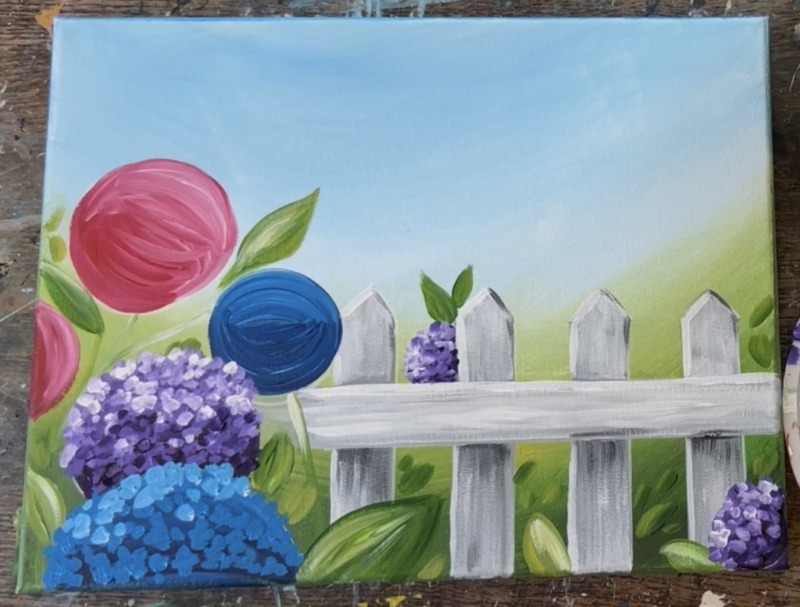
Final touches to this painting could be adding more hydrangeas between the fence posts (I added another pink flower), painting more leaves in the distance and layering on more petals on your hydrangeas! You may decide you want another layer of your lighter color because when the first layers dry, paint will darken. To brighten the flowers further, try adding your lightest color and a few dabs of bright white (not too much). Just a little bit of the brighter colors are enough to make the flowers pop even further!
