

Would you like to save this?
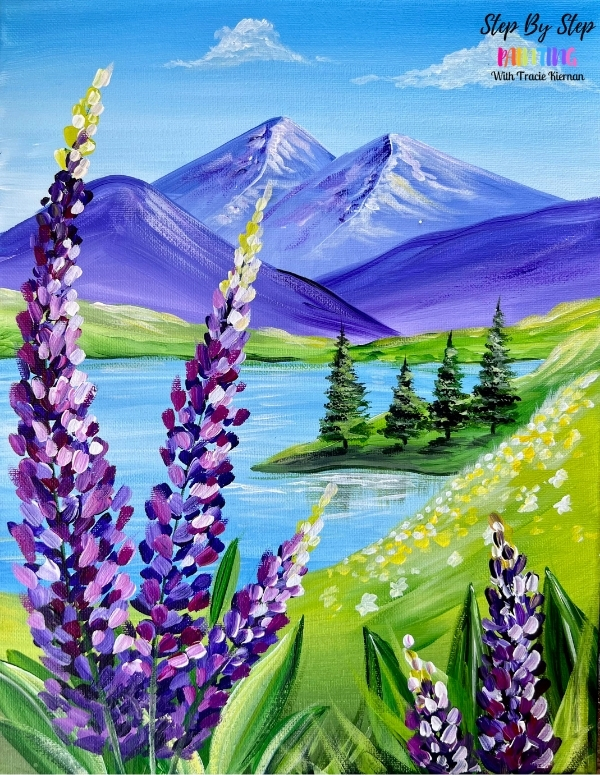
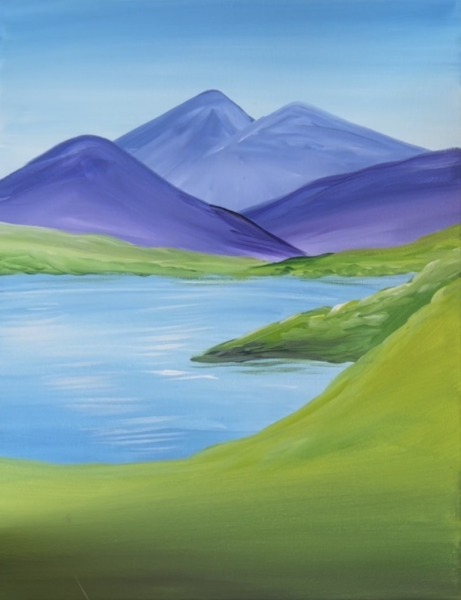
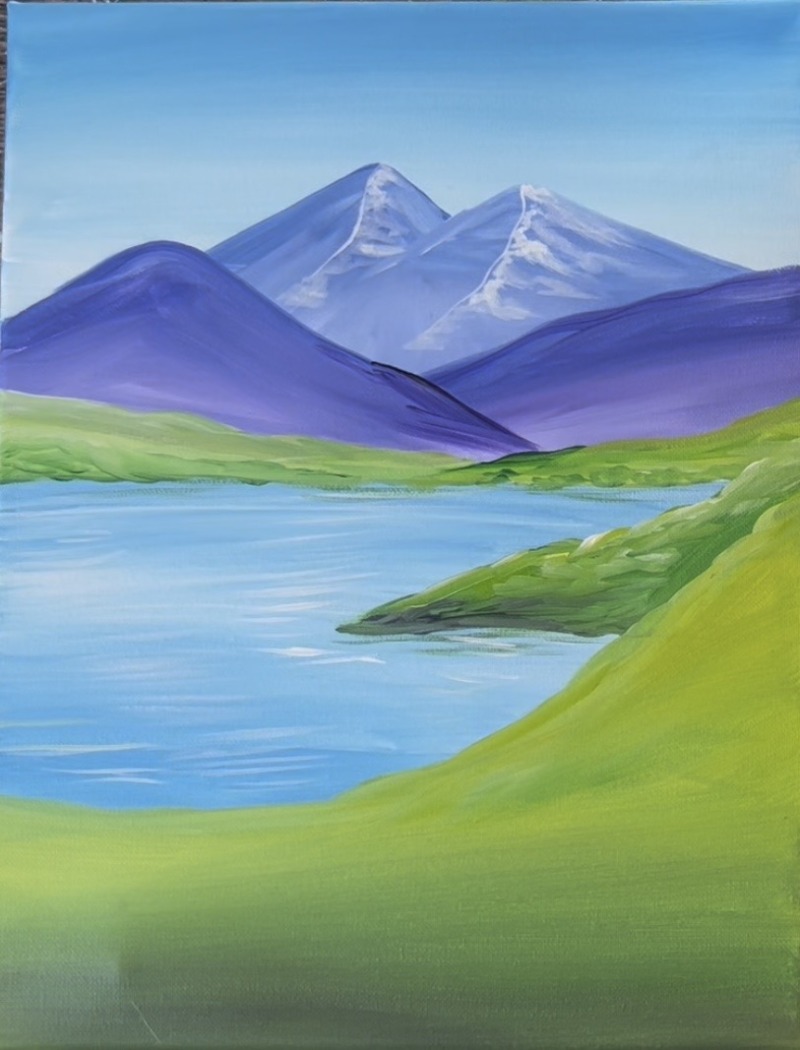
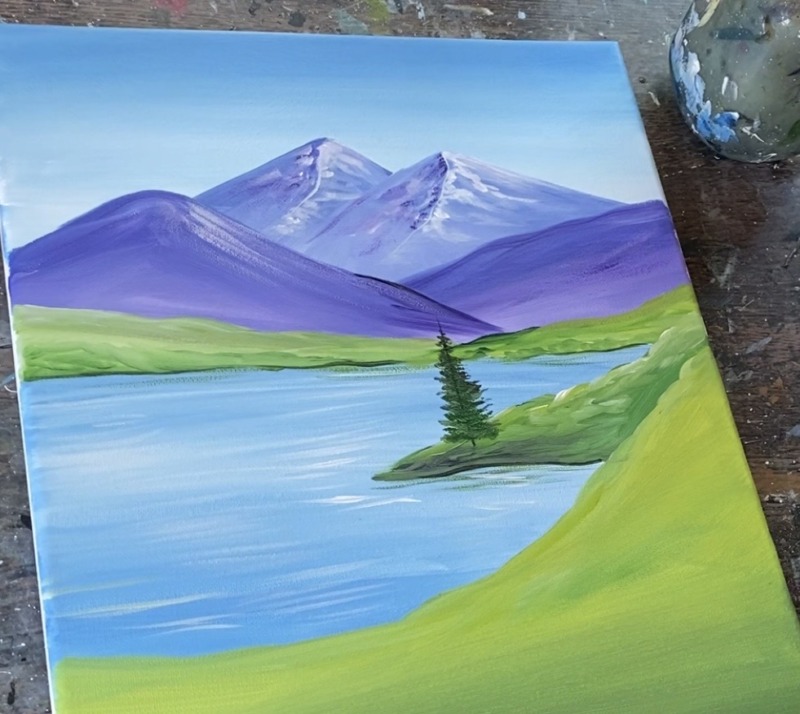
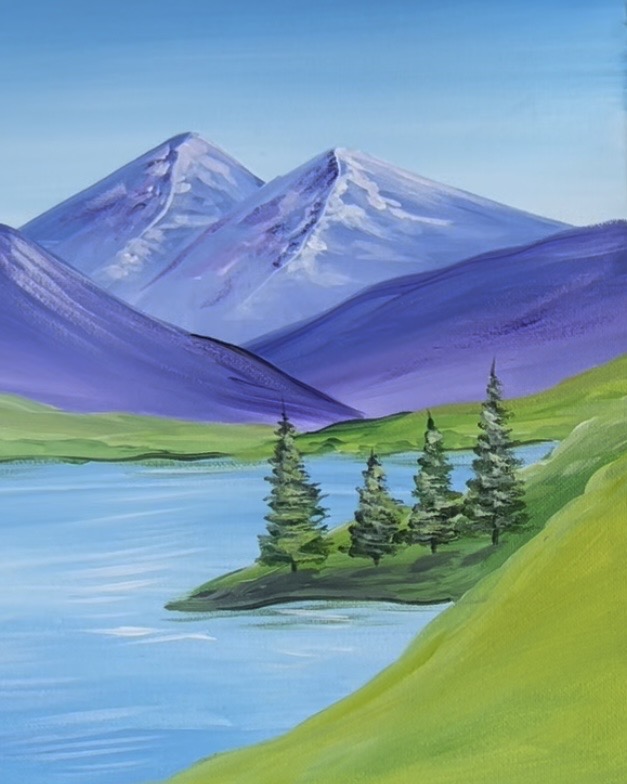
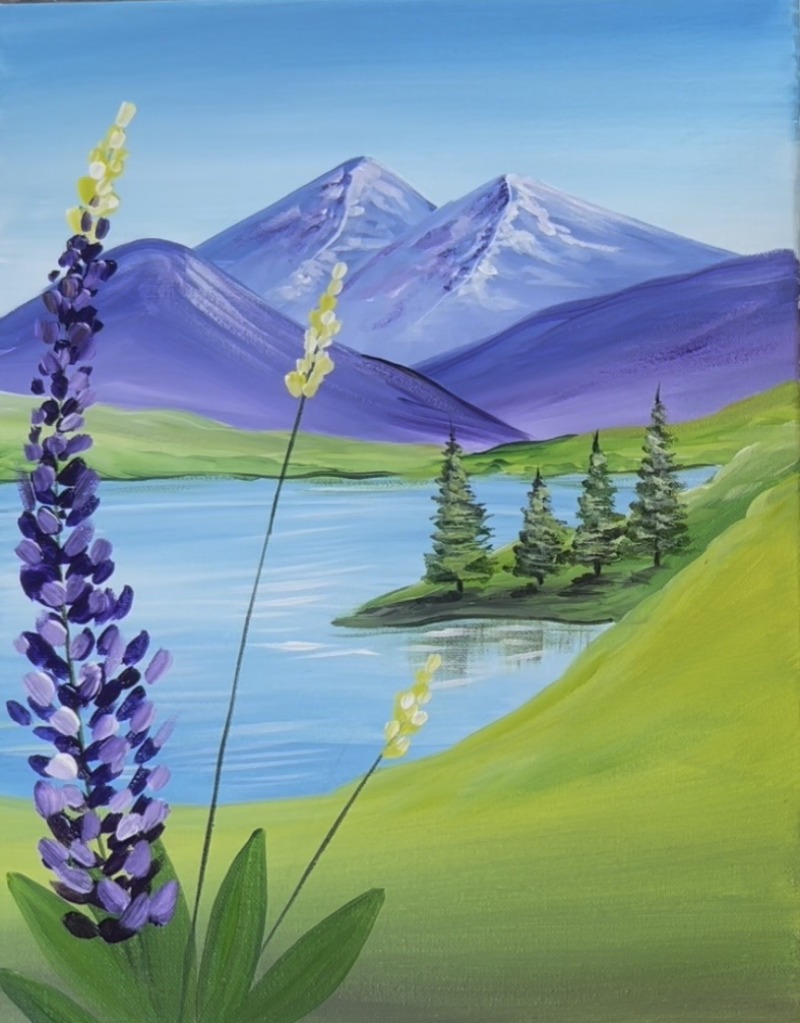
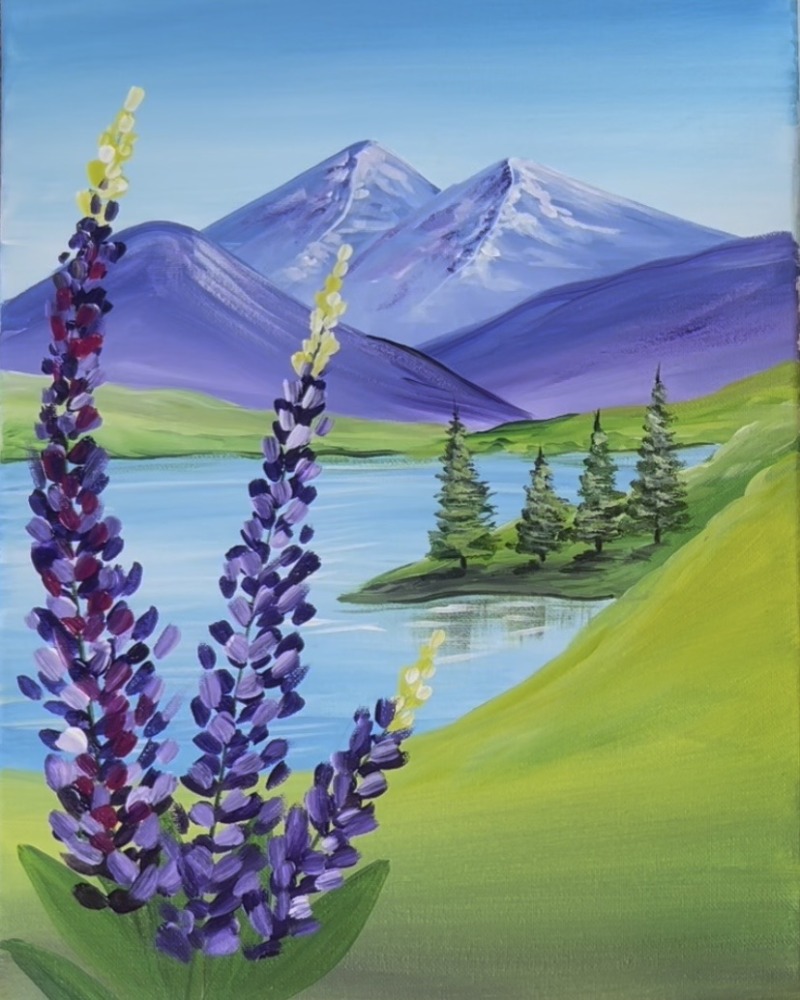
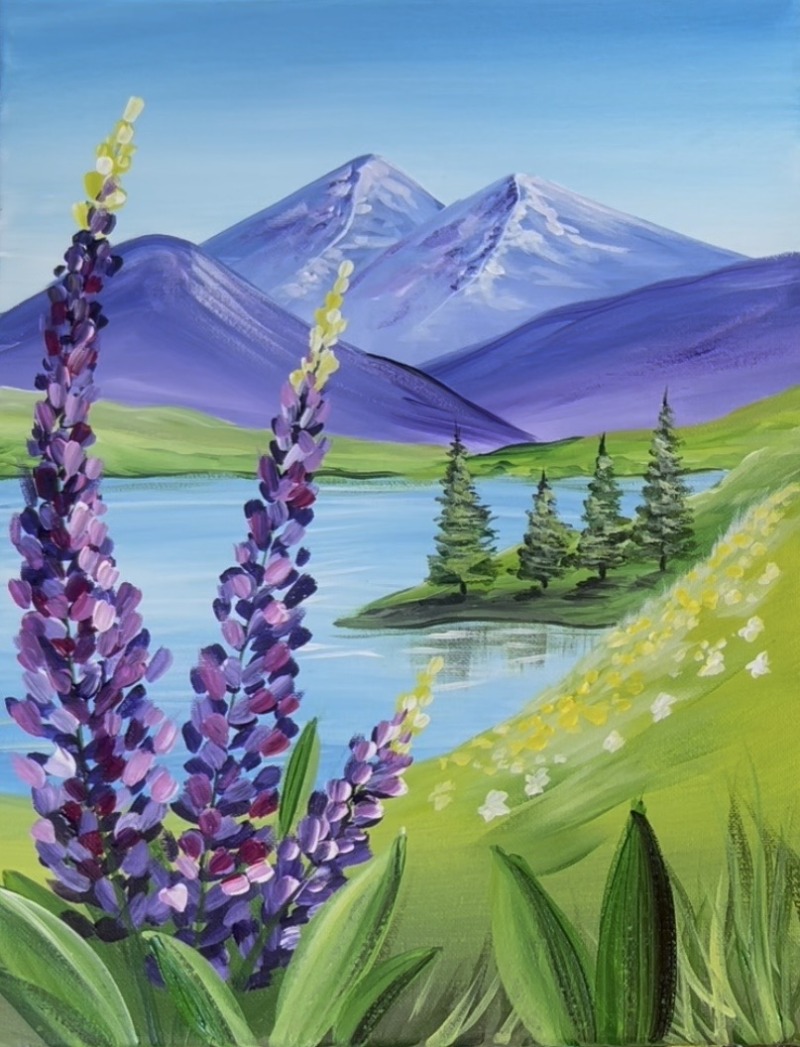
Create a vibrant and beginner-friendly landscape painting featuring purple lupine flowers, rolling green hills, a peaceful lake, and snow-capped mountains under a bright blue sky.
What you’ll learn:
- How to paint a soft gradient sky
- Easy mountain layering techniques
- Creating depth with overlapping elements
- Simple methods for painting lupine flowers
- Adding highlights and shadows for dimension
Enjoy and happy painting!
Materials
- 11×14 Canvas
- Acrylic Paint
- Brushes
- Ruler
- Pencil
Colors :
- Titanium White
- Mars Black
- Quinacridone Magenta
- Primary Yellow
- Hooker’s Green Hue
- Dioxazine Purple
- Cerulean Blue

Brushes
- 3/4″ Flat
- 12 Bright
- 8 Long Round
- 4 Round

Directions At A Glance
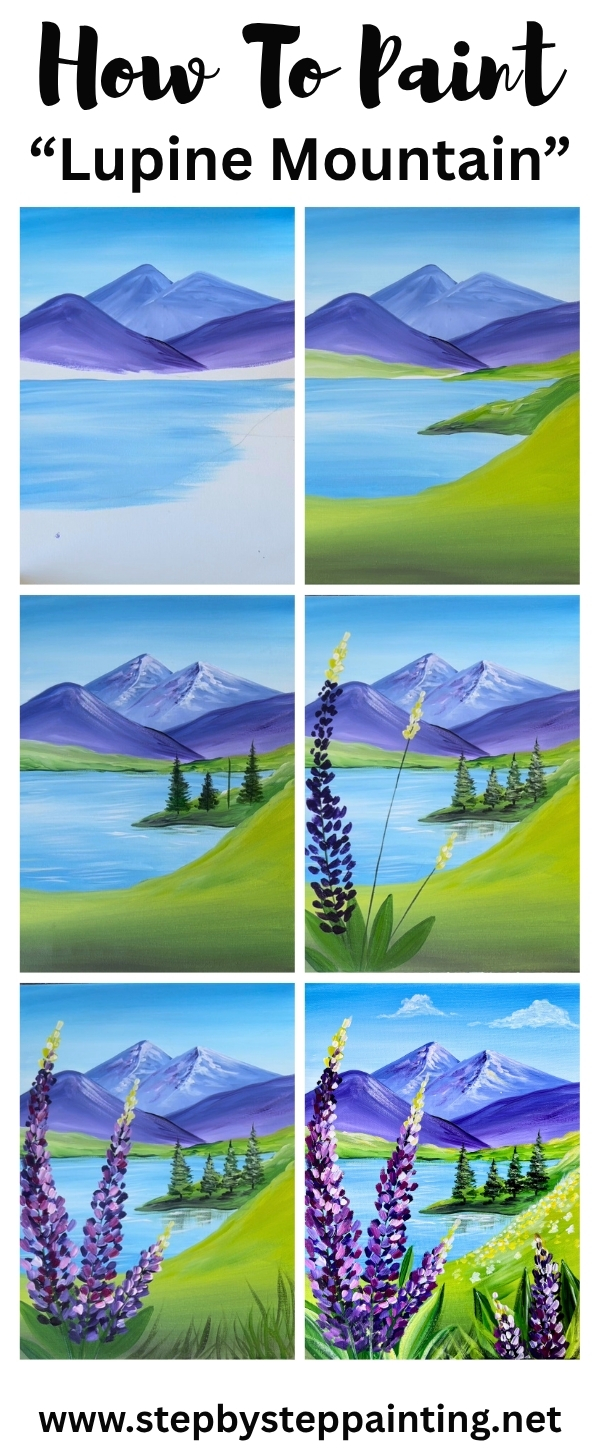
Step By Step Directions
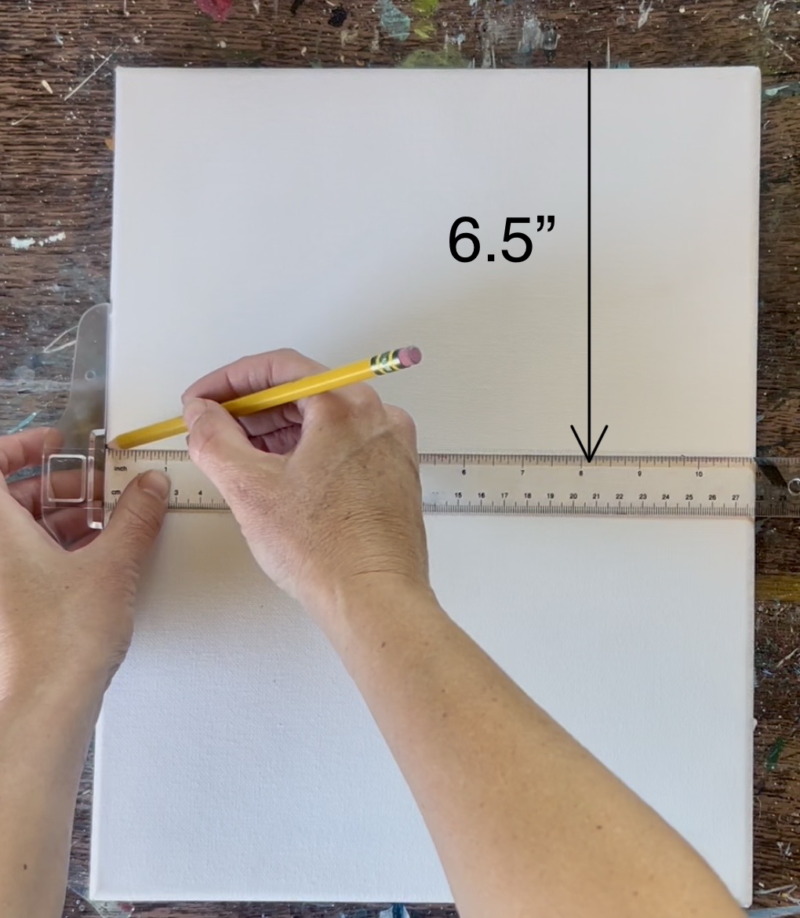
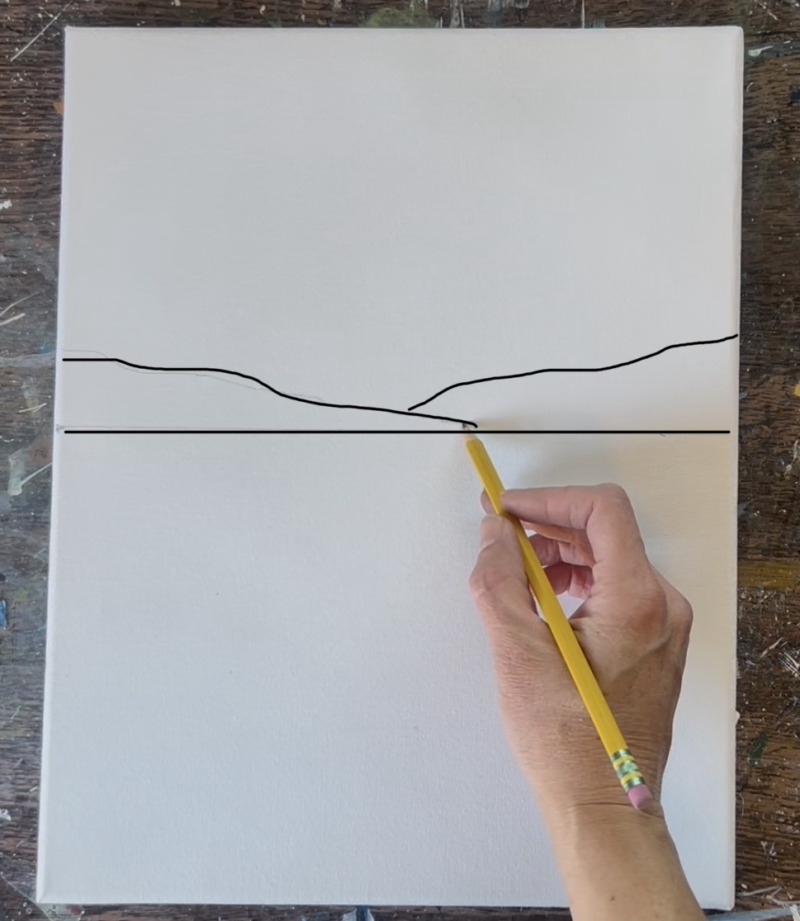
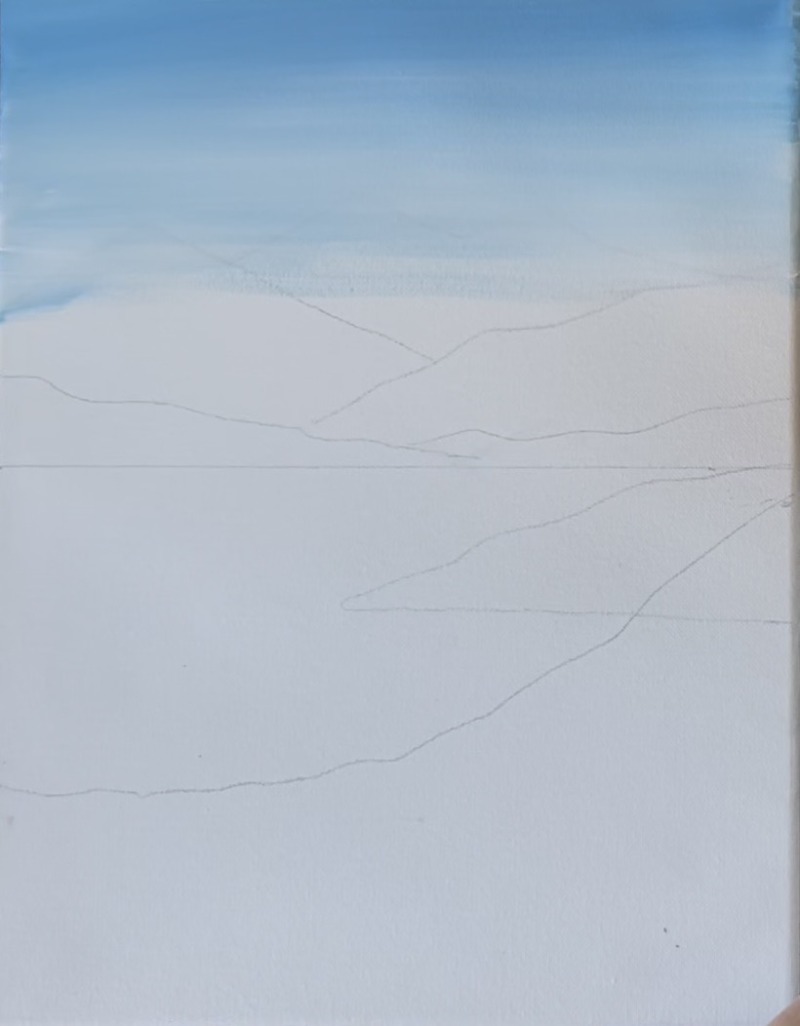
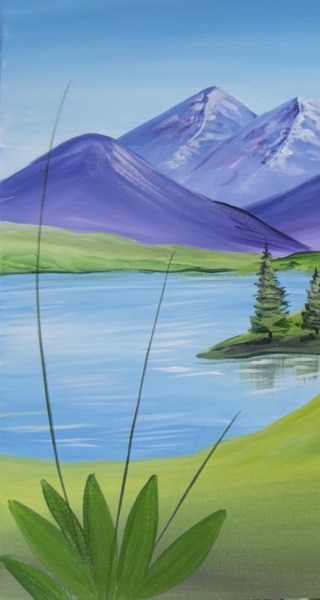
1. Draw Landscape Composition
Position your canvas so that it is vertical. Then locate 6.5″ from the top edge of the canvas for the “horizon line”. Note: if working on a different size canvas, the “horizon line” is roughly half the size of the canvas plush about .5″ – 1″ higher than half the size. Use a ruler and pencil to draw a horizontal line.
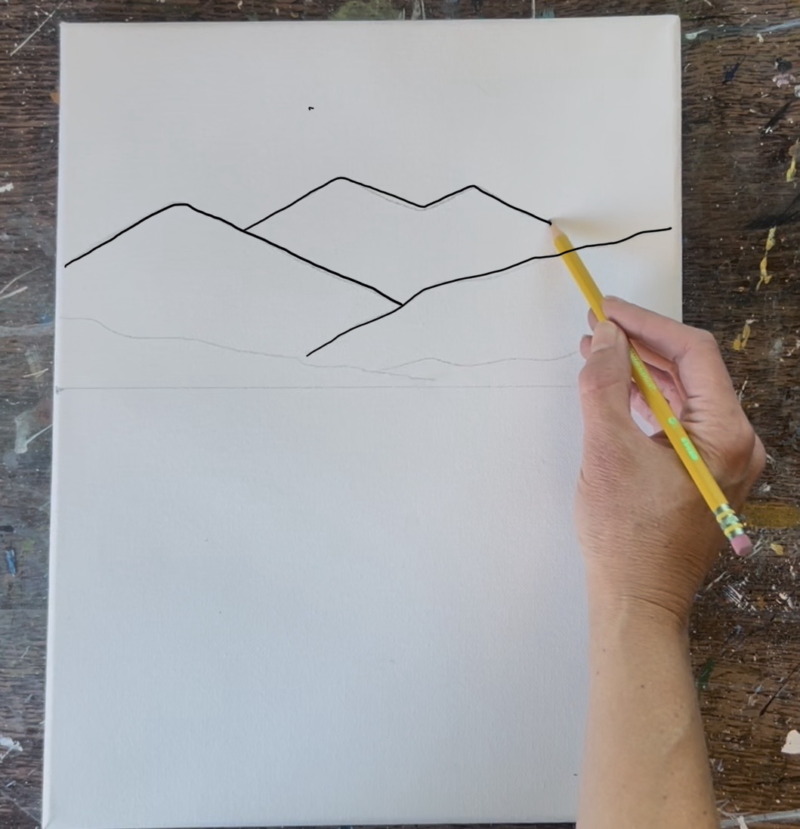
Next, about an inch above the horizon line, draw two sets of low hills that slightly overlap each other on both sides of the canvas.
Then draw the mountain range behind those two lower hills. Start by drawing two larger mountains that slightly overlap each other and one “M” line mountain shape between those mountains.
Draw a “peninsula” under the horizon line that sticks out overlapping the lake (the lake is everything below the horizon line except for the front hill area). This peninsula can be slightly higher than the horizon line if needed and it is mostly flat on the bottom.
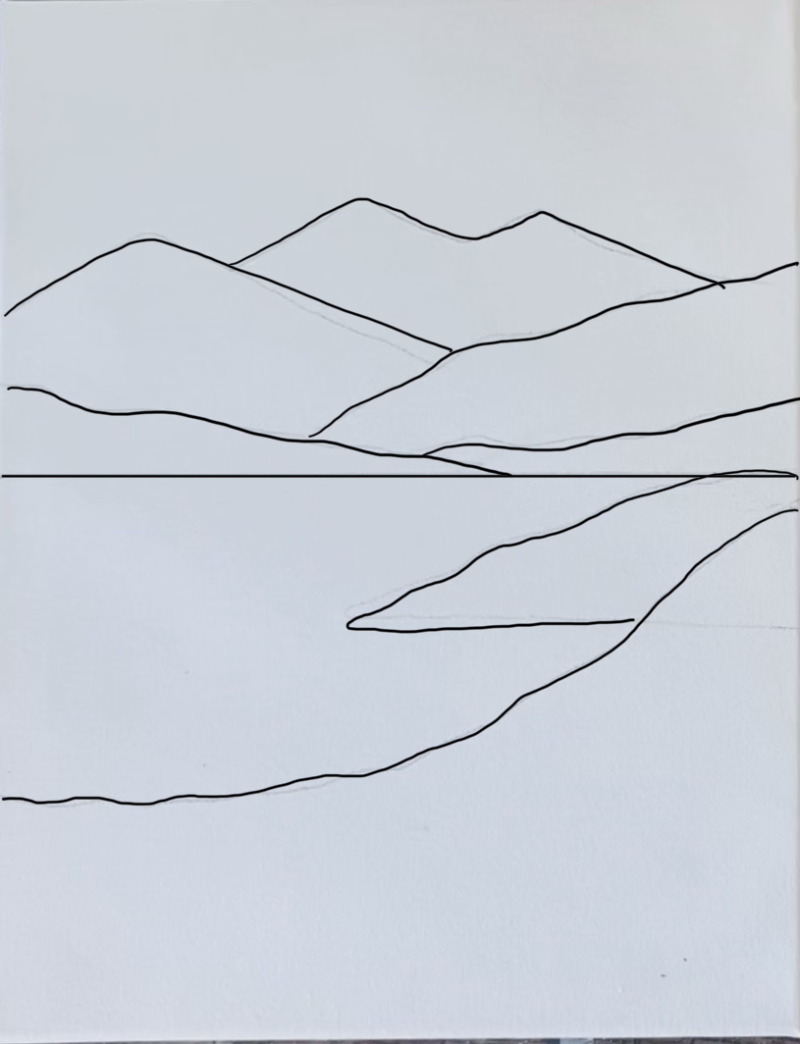
Then draw your front “hill” area. This is where the lupine wildflowers will be! This needs to be a large area. Start it at almost the halfway point between the horizon line and bottom of the canvas and draw the hill curving up sharply to the right of the canvas. The height of this on the right is about 7″ (half the canvas height).
Now that you have your landscape “composition” drawn out, it makes it simpler to paint! In the next steps, we will paint one section at a time starting with the sky…
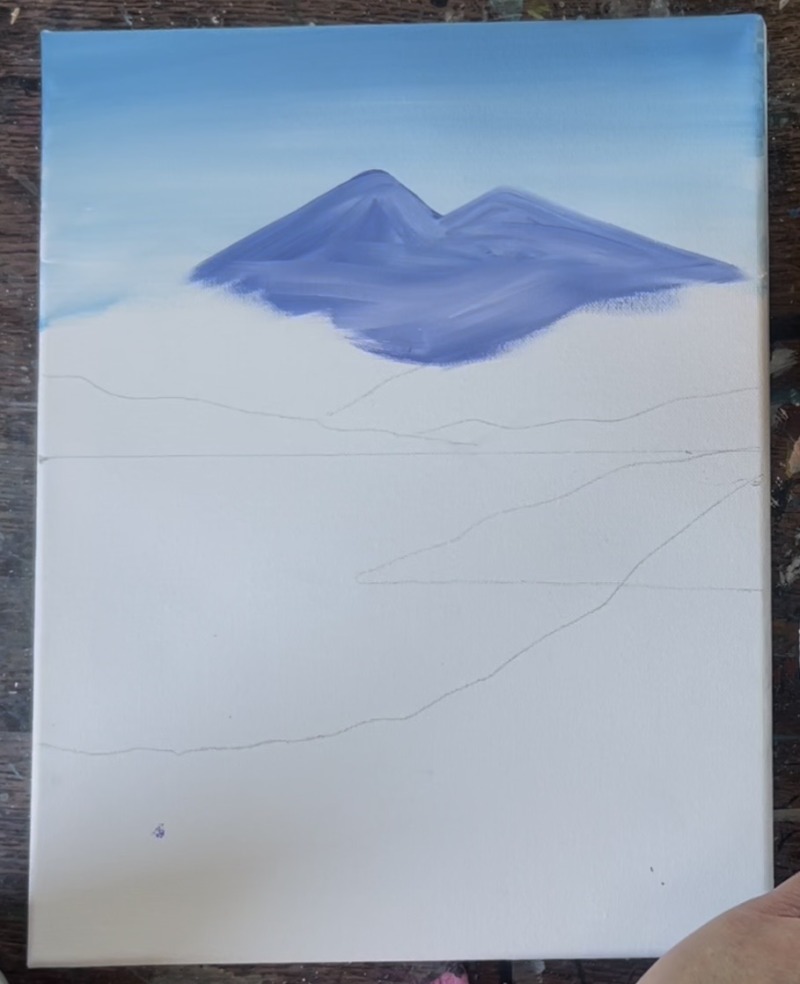
2. Paint Sky
Load your paint palette with the two colors: “cerulean blue” and “titanium white”. Use the 3/4″ flat wash brush and mix both the blue and white together to make a medium blue color. Use the full width of the brush to paint left and right paint strokes across the top of the sky.
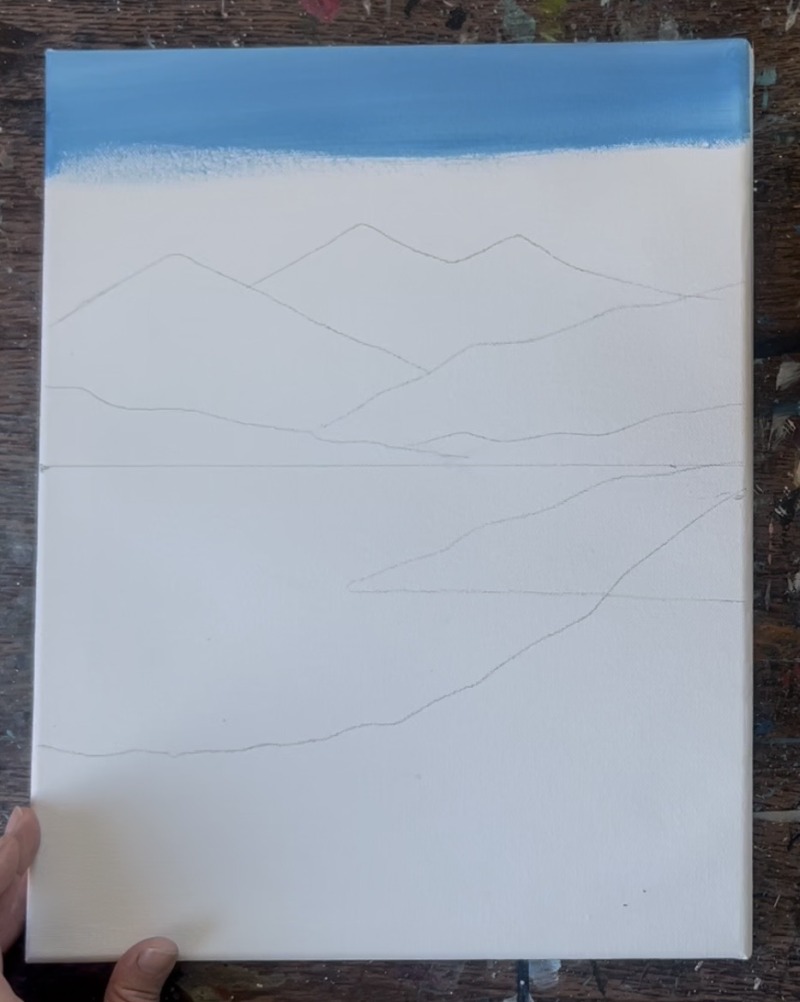
As you work your way down, add more “titanium white” to your brush and blend the sky so that it becomes lighter on the bottom. Create a gradient of dark at the top and light on the bottom. It’s okay to paint over parts of the mountain range.
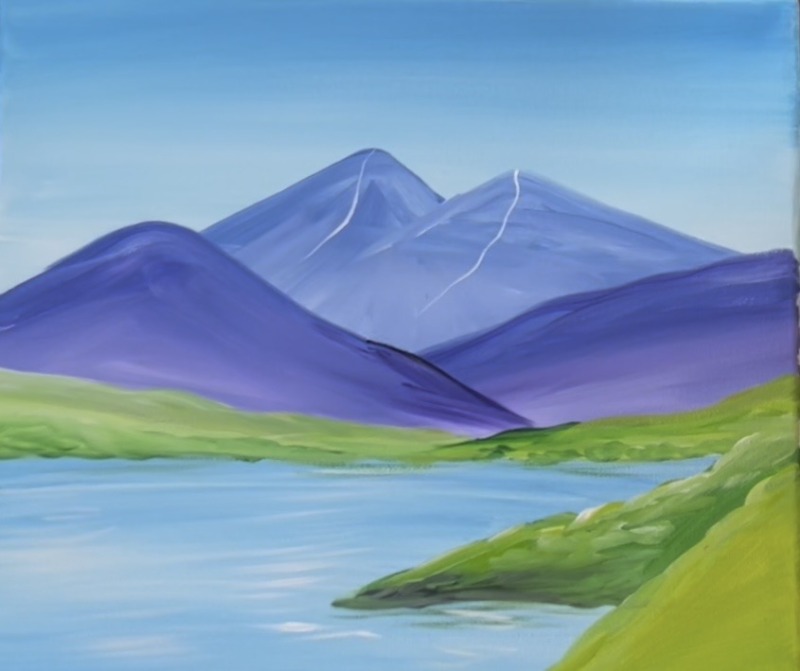
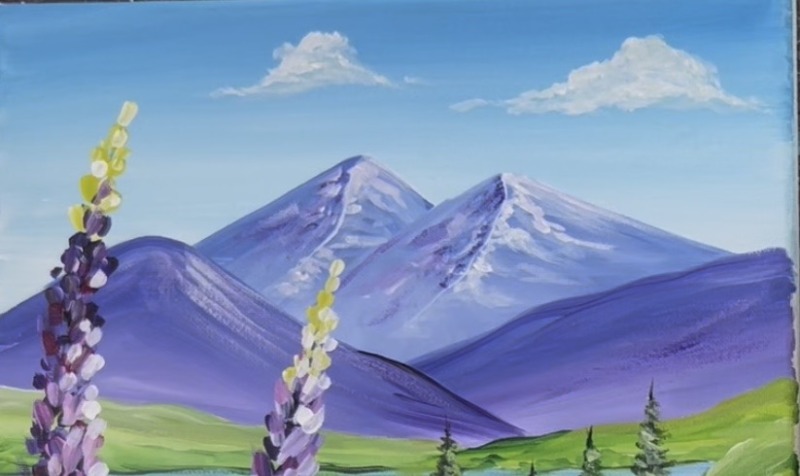
3. Paint Mountain Ranges
Load your paint palette with the two colors: “dioxazine purple” and “cerulean blue”. Mix equal parts purple, blue and white together. Use the #12 bright brush to paint the furthest away mountain range. Add a little bit extra white towards the bottom of the mountain and blend it up so the mountain is slightly lighter on the bottom and slightly darker on the top. Tip: outline the shape of the mountain first and then drag your paint strokes down to fill the shape.
Use the same color you just used for the far away mountain peaks but add just a little bit more “dioxazine purple” into the color so that it is slightly darker. Paint the next two lower mountain ranges with this darker color. Then blend white on the bottom so the mountain ranges become slightly lighter towards the bottom.
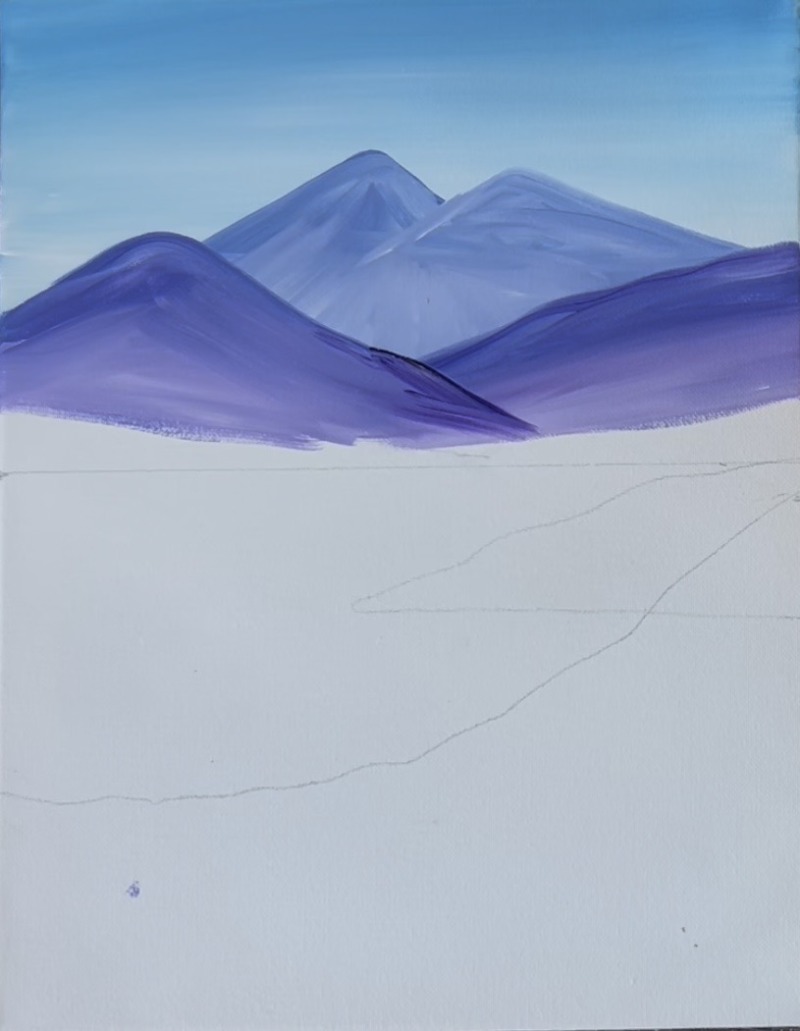
4. Paint Water/ Lake
Use the 3/4″ flat wash brush and use the same colors as the sky (the cerulean mixed with titanium white). Paint left and right paint strokes and fill the lake area up. Gently blend more “titanium white” into the blue to make streaks of white in the water area that don’t blend all the way. It’s okay to paint a little over your front hill line and over the peninsula lines.
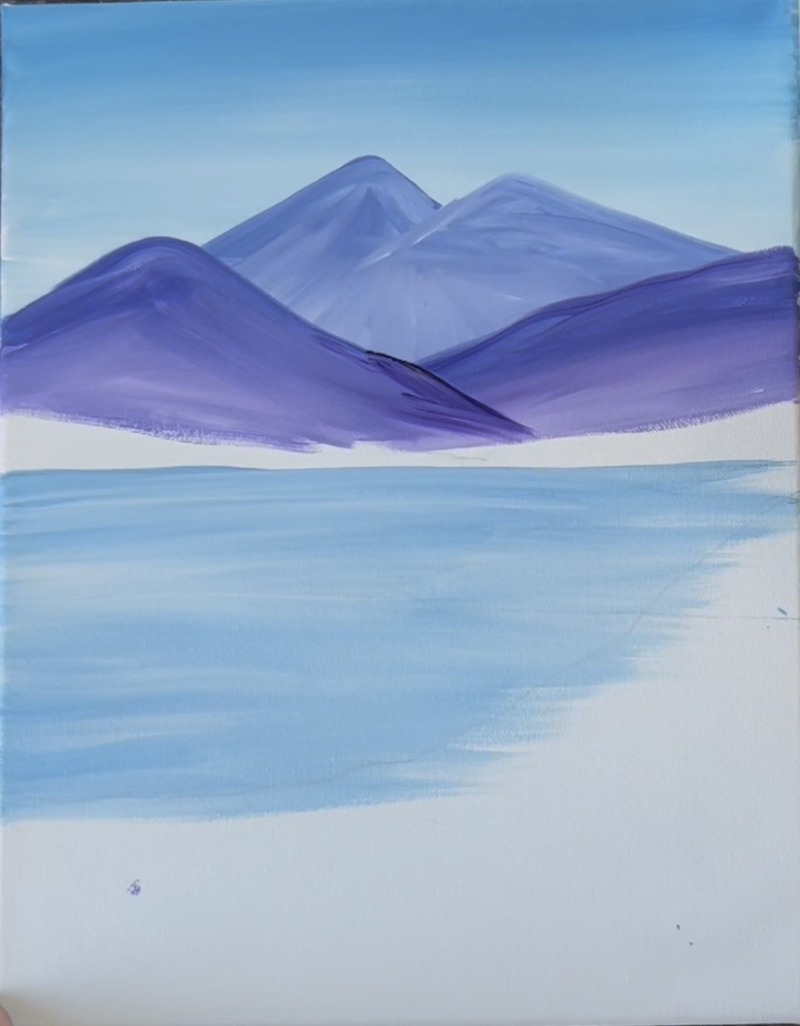
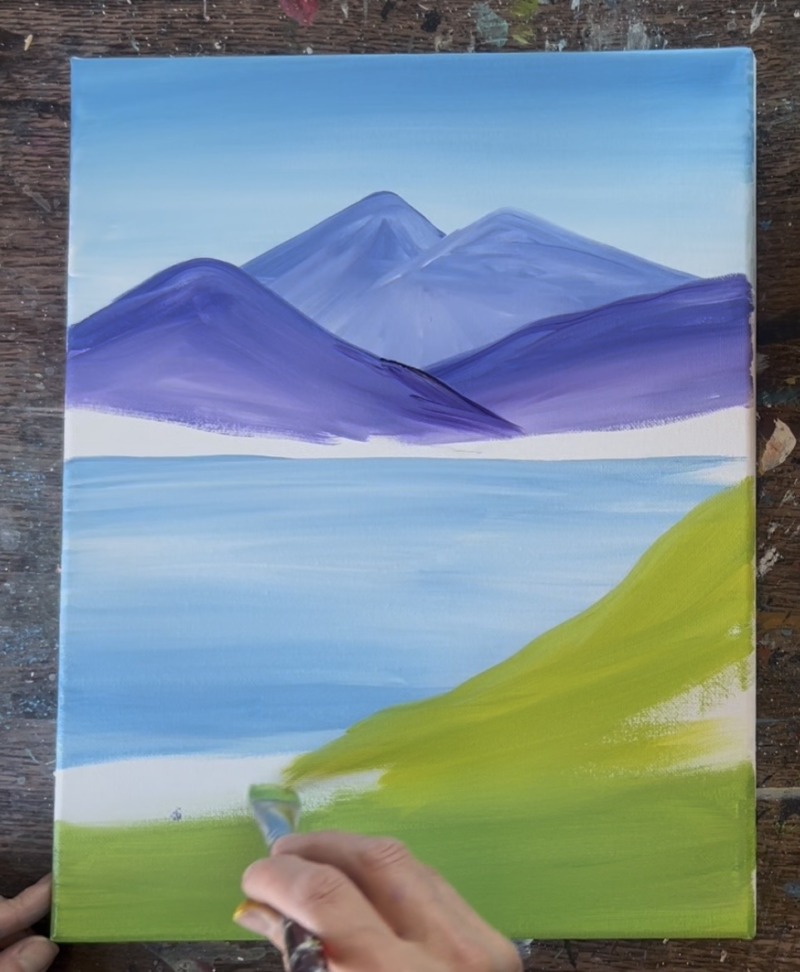
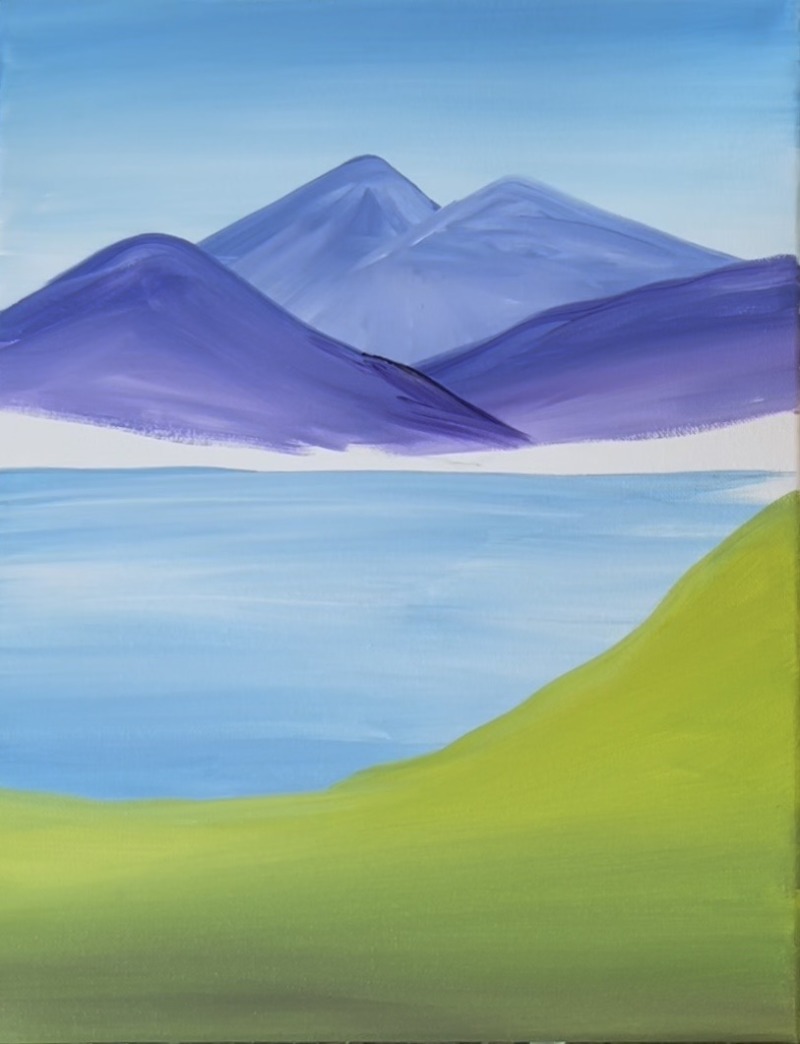
5. Paint Foreground Hill
Mix a light spring green on your paint palette by mixing one part “hooker’s green hue”, one part “titanium white” one part “primary yellow” and add just a small dot of “dioxazine purple” into the mix. This will make the green look a little more natural/ muted. Then paint the entire front hill area with this green.
At the top of the hill, blend a little more white and yellow into it to make it slightly lighter and at the bottom, blend a little more “hooker’s green hue” and “dioxazine purple” into it to make it slightly darker.
6. Paint Peninsula And Land Behind Lake
Use the #12 bright brush to paint the “peninsula” part of the land that sticks out over the lake on the right side of the landscape. Use the same green you just used for the front hill but add more “hooker’s green hue” into it to darken it. This needs to be darker so that it stands out from the front part of the landscape. Paint short textured paint strokes to create more texture in this area. Add a touch of “dioxazine purple” at the bottom for shadowing and yellow/ white at the top for highlights.
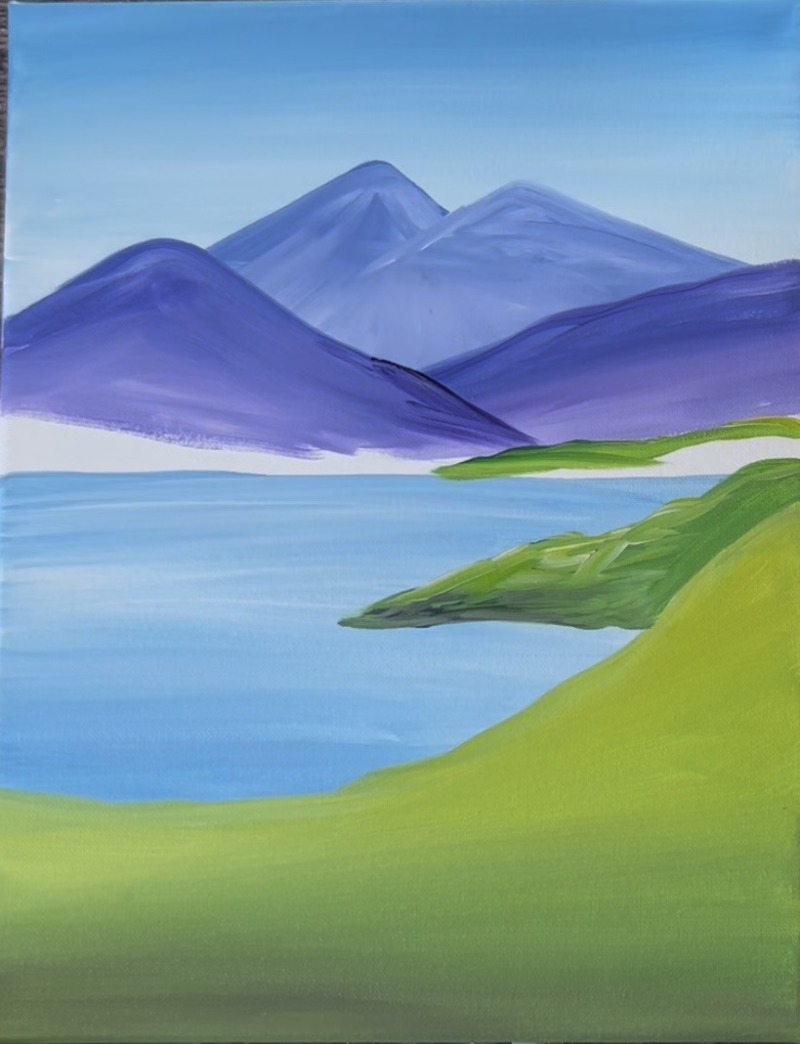
Repeat this for the land that is way in the distance under the mountain ranges.
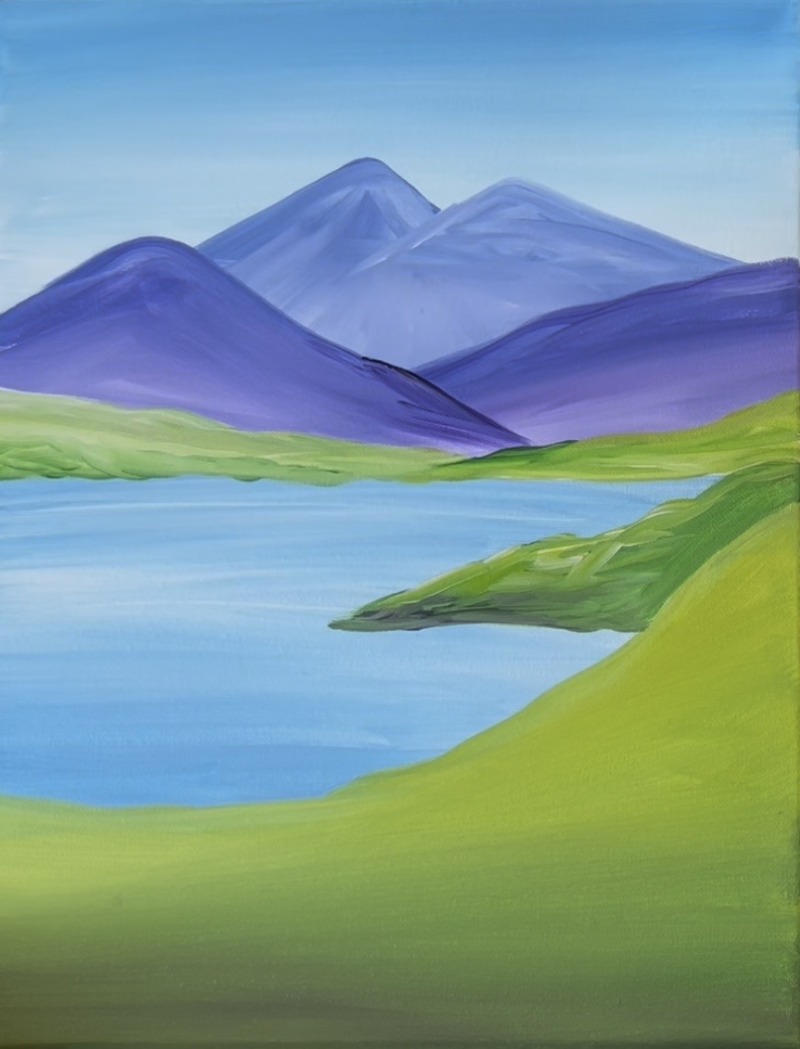
7. Paint Water Reflection Lines
Use the #8 long round brush and “titanium white” to paint loose, thin horizontal white lines throughout the lake. You can also add a little bit of dark green lines below the peninsula in the water for darker reflections under that area.
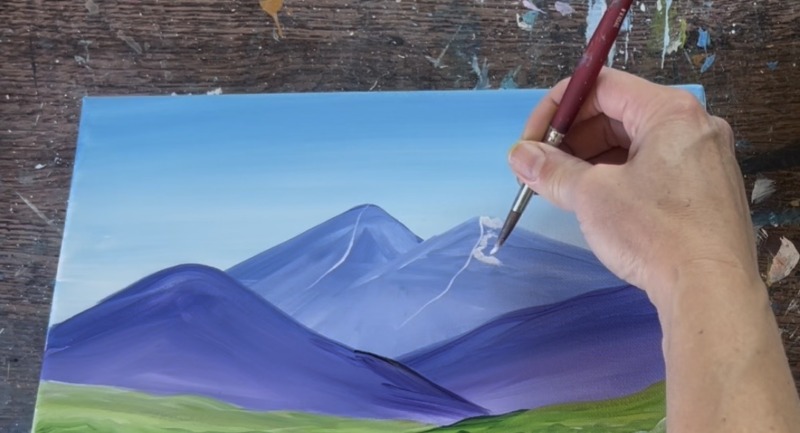
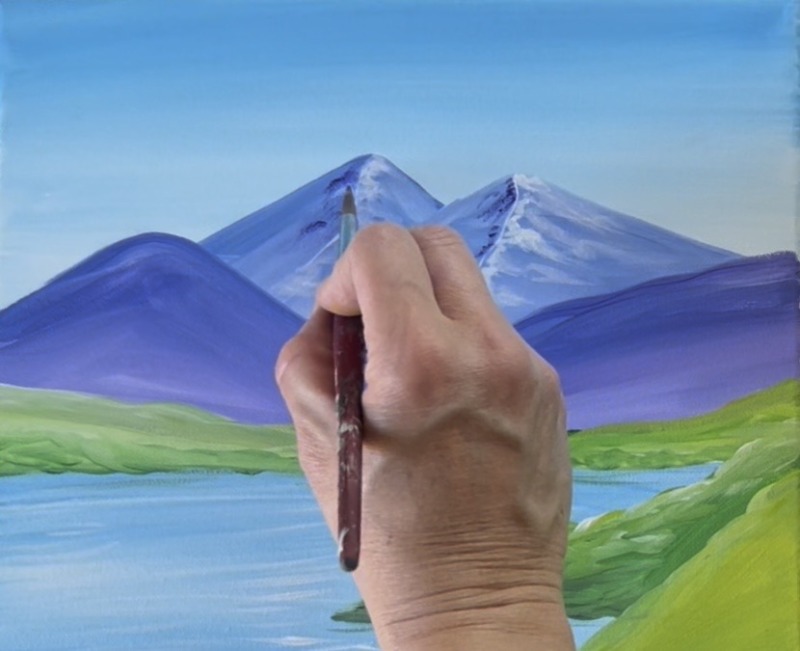
8. Paint Snow Cap On Mountains
Use the #8 long round brush (the tiny point of the bristles) to paint two lines on both of the mountain peaks in the background. These lines start at the top “apex” of the peak, go slightly vertical down and then “sway” to the left. These lines will help divide the mountain in half to create the snow effect.
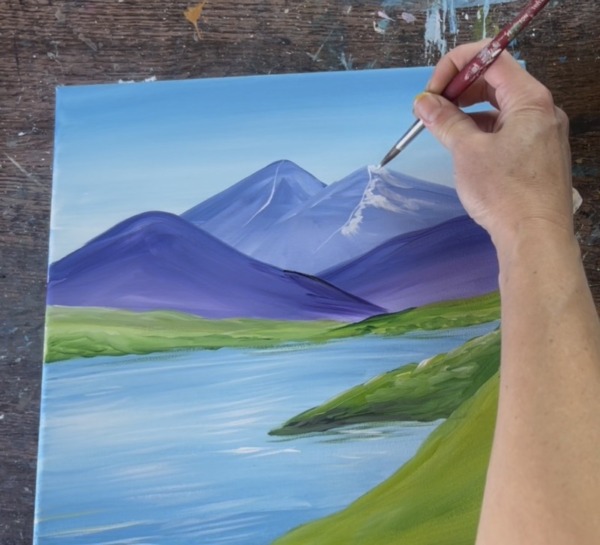
On the right side of each of those lines, you are going to paint snow texture. You can do this with just about any brush. I used the 8 long round brush but used more of the larger bristles/ held the brush more at an angle. Load more “titanium white” on the brush and lightly paint “blotches” going down at an angle.
You want to do this very lightly. The layer of paint is not very thick, it’s thin/ almost “dry brush style” and translucent. Your “blotches” are more bright and visible closer to that mountain line and just sort of disappear in the lower parts of the mountain.
Repeat this for the left mountain peak.
This next step is optional! You are going to add “shadowy snow” on the left side of these mountains. Start by double loading the same brush you used for the snow on the right into “dioxazine purple” and “titanium white”.
Repeat the same type of texturing on the left side of the line and make sure it is going the opposite direction from the bright white snow (diagonally to the left). It’s also darkest closet to that line.

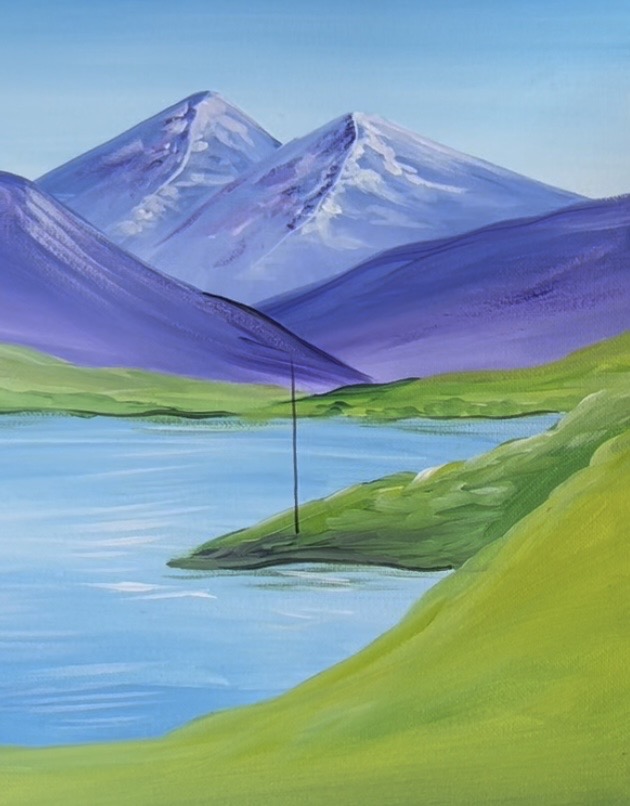
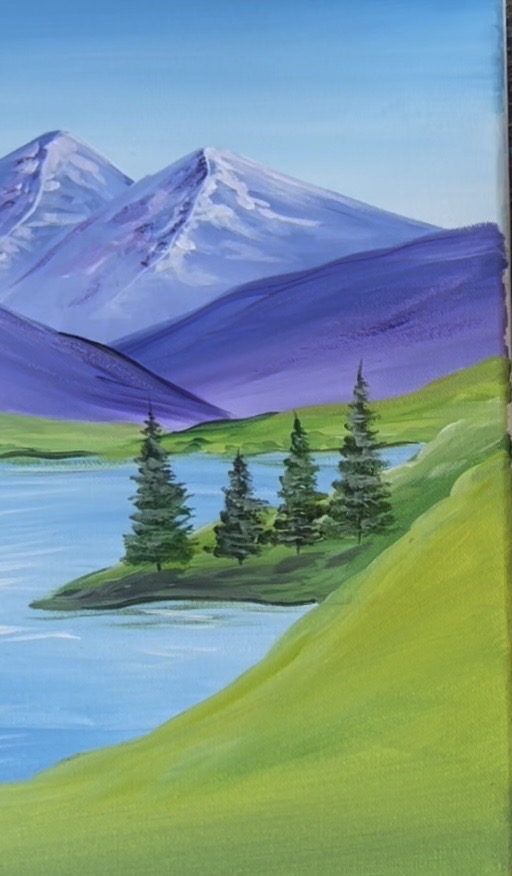
9. Paint Trees
Mix equal parts of “hooker’s green hue” and “dioxazine purple” together to make a very dark green. Then use the #8 long round brush to paint a vertical line on the “peninsula”. This will be the trunk/ center of the tree.
Switch to the “#12 bright” brush (1/2″ flat brush). Load it into the same dark green color. Start at the top of the tree line and use just the corner of the bristles to paint smaller branches at the top of the tree. “Stamp”/ “tap” the brush lightly and work in a zig-zag, left and right direction. Work your way down the line and make your lines wider as you go down to form a triangular shape of the tree.
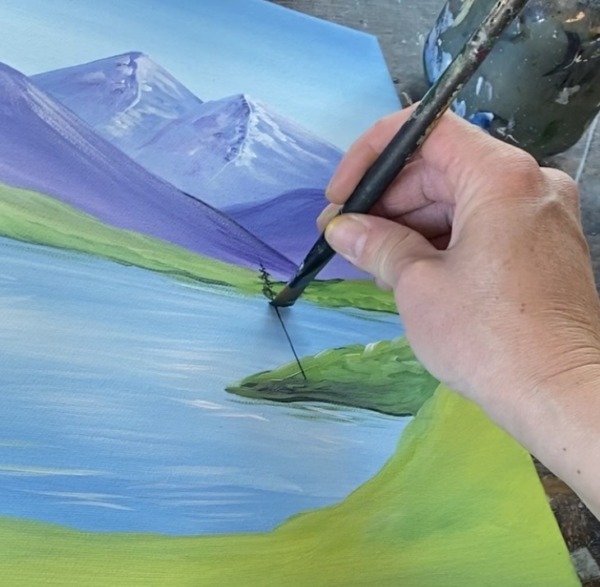
Repeat this to create a row of 4 pine trees of various heights. Tip: for the vertical line, you can use a ruler to help it be vertical and not slanted.

After painting the set of trees, you can add lighter colors over the branches. Add a little bit of “titanium white” into your darker green color to make it slightly lighter. Then go back over your branches using the same technique. Don’t cover all of the dark layer, only add little bits of this lighter color to the branches. This will highlight the branches.
You can go back and add a lightly lighter layer over that layer. Add just a little more white to the color and repaint more of the branches. The lighter you go, the less you need to add! Also, be careful not to let the trees blend too much into the hills in the background. These trees should be darker than that hill so they stand out.
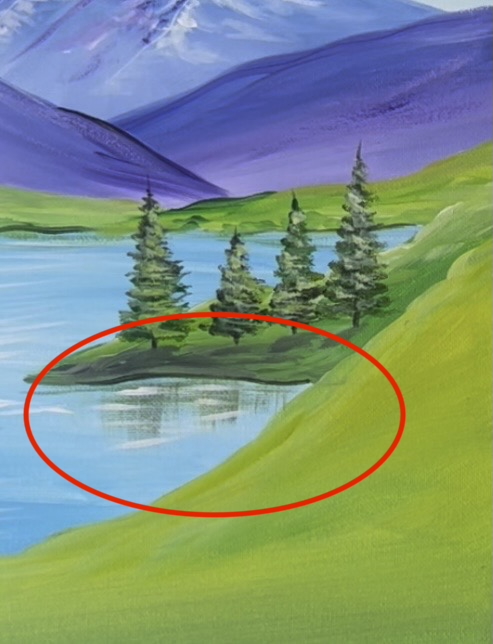
Optional: paint some reflection of the trees in the water by taking that dark green color you used for the base color of the trees and dragging the #12 bright brush down in a vertical direction in the water just under the trees. Do this “dry brush style”. The paint color should be thin and translucent. Then go back over this with a few white horizontal lines.
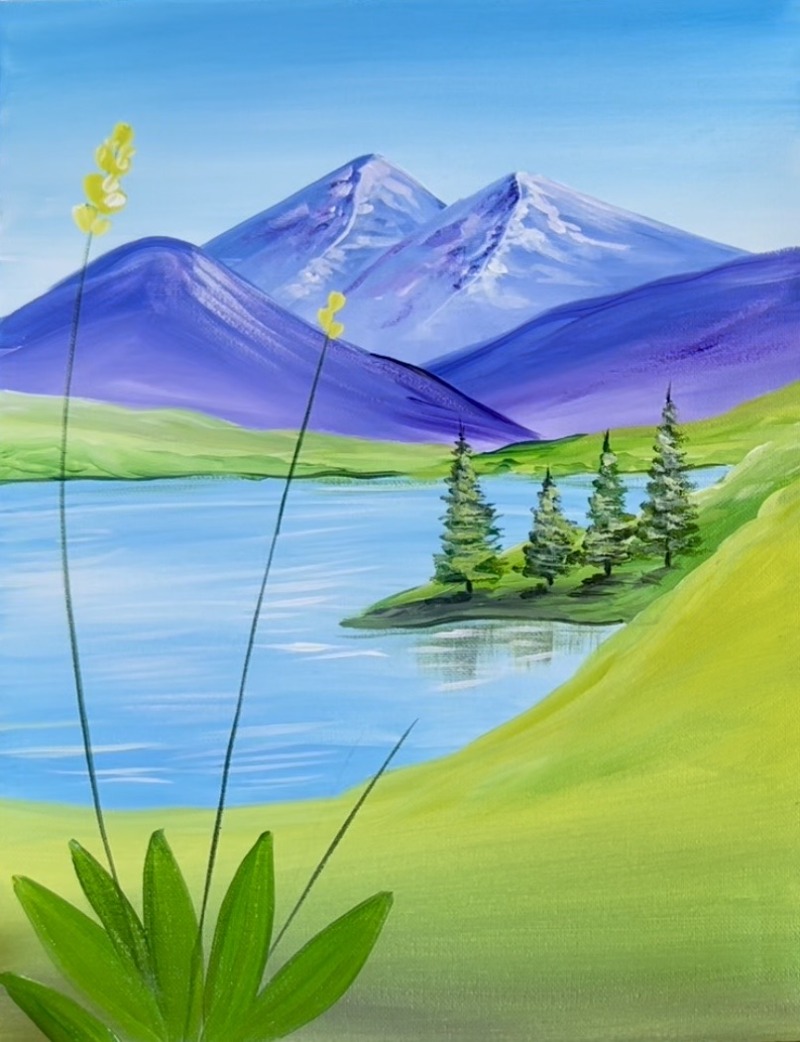
10. Paint Lupine Flowers
Use the #8 long round brush and the very dark green (green mixed with purple that you used for the trees). Paint three very tall and thin lines. These represent the stem/ center of the lupine flowers. The flower on the far left is the tallest and it goes almost as high as the tallest mountain peak. It also slightly curves. The other two lines are shorter and they go more straight/ not curved. The center line goes only a little bit above the horizon line and the third line on the far right only overlaps the lake a little bit.

Before painting any of the petals, I recommend painting a few leaves at the bottoms of the stems. Lupine leaves are narrow, elongated and pointed at the end and they fan outwards in small clusters. Use the #8 long round brush and a dark green (mix a green that is slightly darker than the green hill background). Paint several oval/ pointed leaves that fan outwards on the bottom edge of the canvas. Use the pointed tip of the brush to create the narrow point of the leaf and then apply more pressure on the brush to form the larger base of the leaf.
Next paint the petals! We will start at the top and apply yellow colored petals first before transitioning to purple petals. Use the #4 round brush to paint thick, oval shaped paint strokes for the petals of these flowers. Start at the end of the line/ top of the flower. Mix yellow and white together. Then paint little oval marks that go diagonally upwards on each side of the line. Each of the flowers have a small “tip” of yellow petals on the top before they transition to purple petals.
Then rinse the #4 round brush. Load it into “dioxazine purple”. Paint the same type of oval paint strokes going diagonally outwards from the center stem of the flower. Towards the top of the flower, the petals form a more narrow shape but as you go down, make the petals go outwards to make the flower wider towards the bottom.
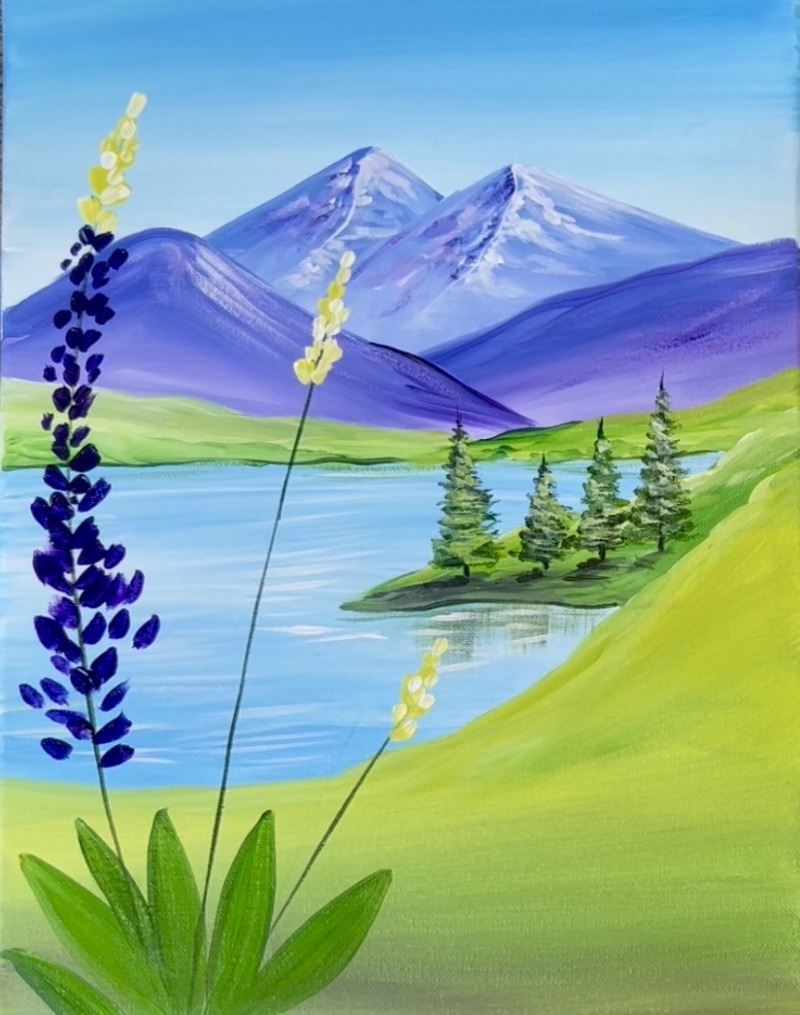
Bring these dark purple petals all the way down to the bottom and slightly overlap the leaves of the lupine.
Without rinsing the brush, load it into “titanium white” (or mix white and purple on your palette). Go back over your flower from the top and work your way to the bottom painting light purple oval petal marks. Don’t cover all of the dark purple layer.
Repeat this step for the other two lupine flowers. Start with the dark purple and then layer on the light purple.
Layering on lighter colors over darker colors is what creates “depth” in these lupine flowers.
Next, use “quinacridone magenta” to layer on more petals. You don’t need to wait for this to dry to add the magenta. This magenta adds a more warm purple tone to these flowers and helps them stand out more with the rest of the landscape.
After layering on the magenta, double load the brush into both magenta and white and then layer on this lighter pink color throughout each of the flowers.
11. Paint Grass / Little Flowers in the distance
Use the #8 long round brush and “hooker’s green hue” mixed with some “dioxazine purple” to paint dark colored grass lines on the bottom right corner of the landscape. These are long grass lines because they are closer in distance. Use just the fine tip of this brush to create lines that are thicker on the bottom and then go very thin at the top. You can “sway” the grass different directions and/or mix different colors in the green (such as white and yellow) to create color variation in the grass. Also, be sure to add different heights to the grass for a more natural look.
After painting the grass, use the #4 round brush to add tiny yellow and white flowers in the distance along the hill area. Start by using yellow mixed with white and paint little dots very close together along the hill. As you work your way down, spread the dots out further apart and paint some to look like they have 4-5 petals.
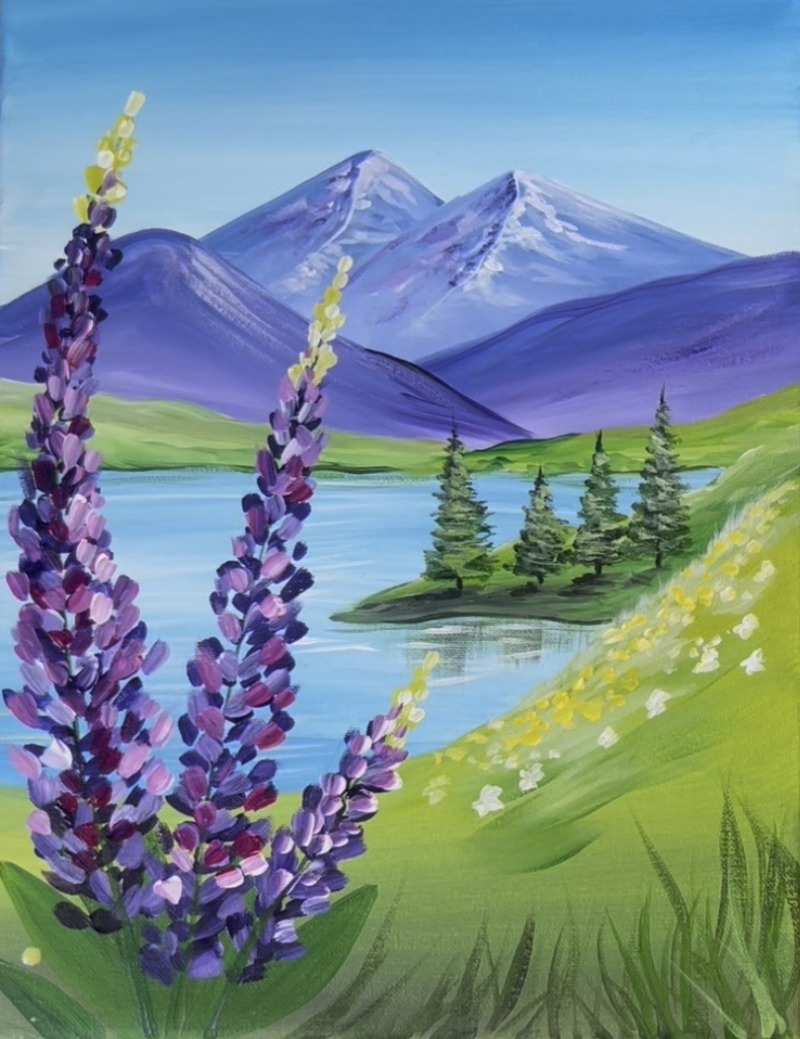
12. Paint More Lupines & Paint Clouds
In the lower right part of the canvas (over the grass), I decided to paint more lupine leaves and then more lupine flowers. This is an optional added detail to the painting! You can definitely leave it as is with just the tree large lupine on the left.
Also, paint a few leaves that overlap the lupine flowers on the bottom. These leaves are painted using a lighter green (mix white and yellow into “hooker’s green hue” to make it lighter). Also, paint one side of the leaf slightly darker and one side slightly lighter. This gives the leaf some depth!
After painting a new round of lupine leaves, paint another lupine flower in the lower right corner using the same technique as the other flowers (only much smaller and shorter).
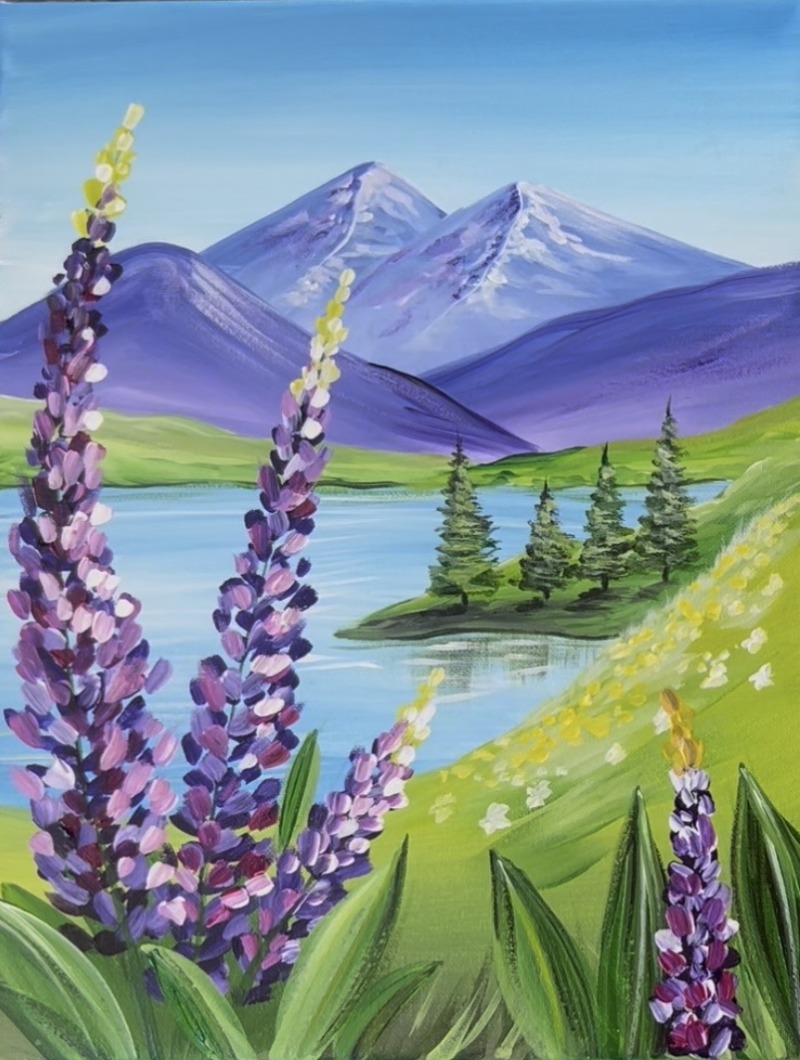
Paint a 5th final lupine flower to the right of that one. This one is the smallest and shortest one.
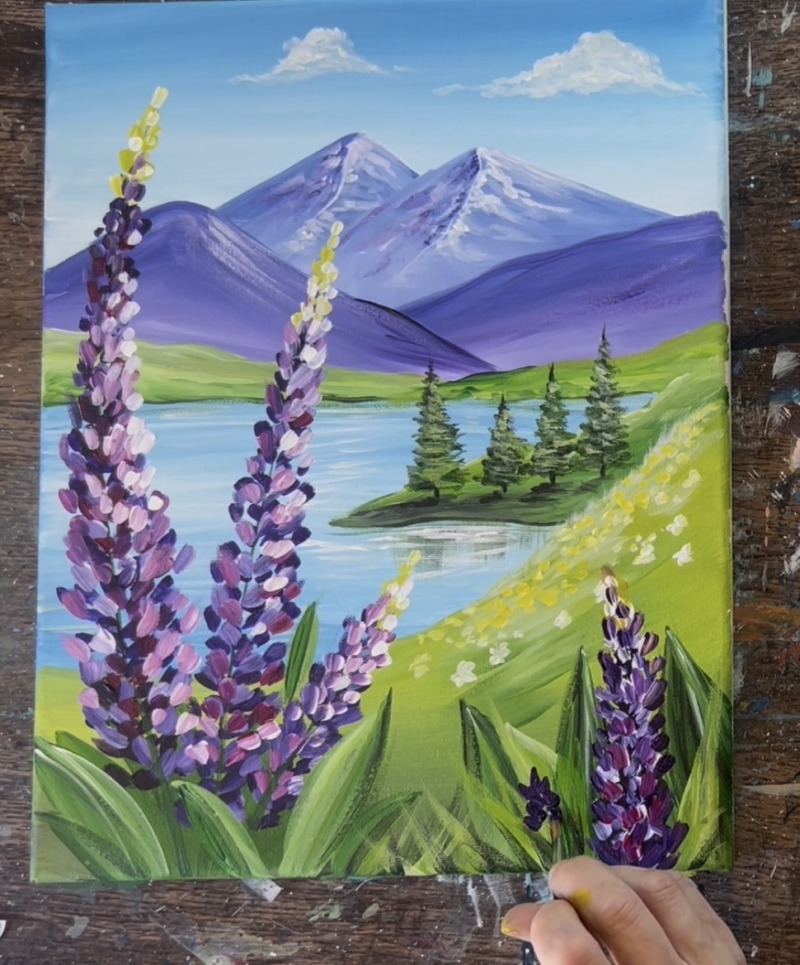
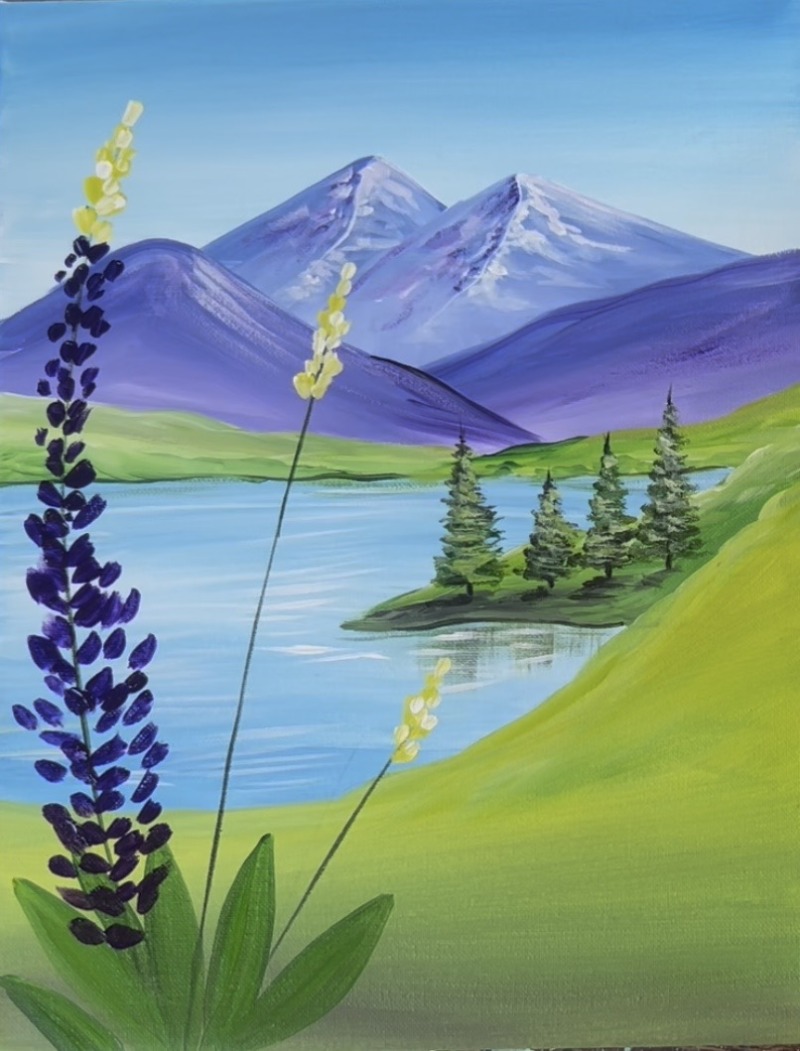
A final touch for this painting can be painting clouds in the sky! I did two simple clouds in the upper right of the sky. This helps to balance the painting out a little more since the lupin on the left side are so large and visually heavy!
Top paint clouds, I like to use the #12 bright brush and “dry brush” the initial cloud shape on the canvas. Load the tip of the brush into white but wipe off excessive paint so only a small amount is on the brush. Paint the cloud shape starting with the top “lofty part” of the cloud and form it so the bottom part of the cloud becomes mostly flat. After the first “dry brush layer” of the cloud, load more white on the tip of the brush and highlight the tops of the clouds so the white is brightest at the top.
Finished! This painting looks great if you paint the sides black!