
Would you like to save this?
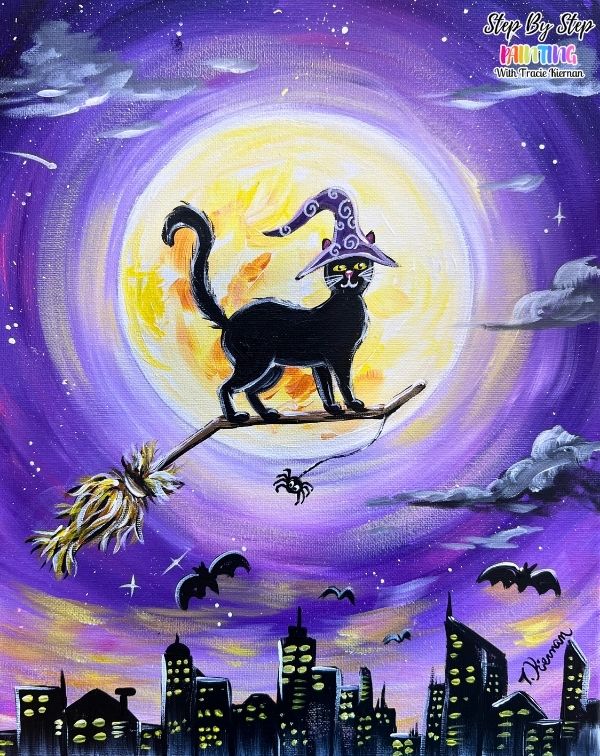
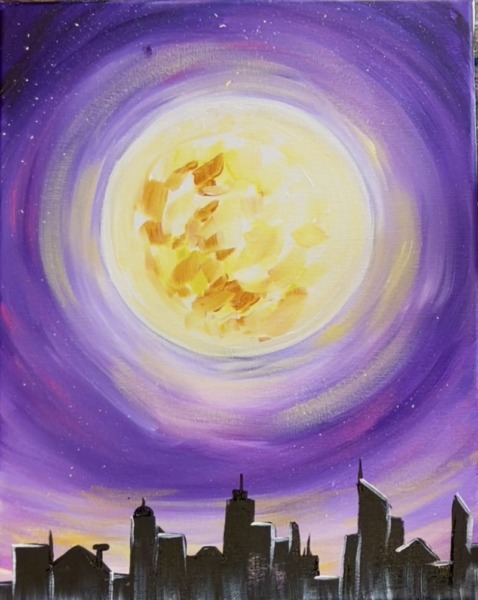
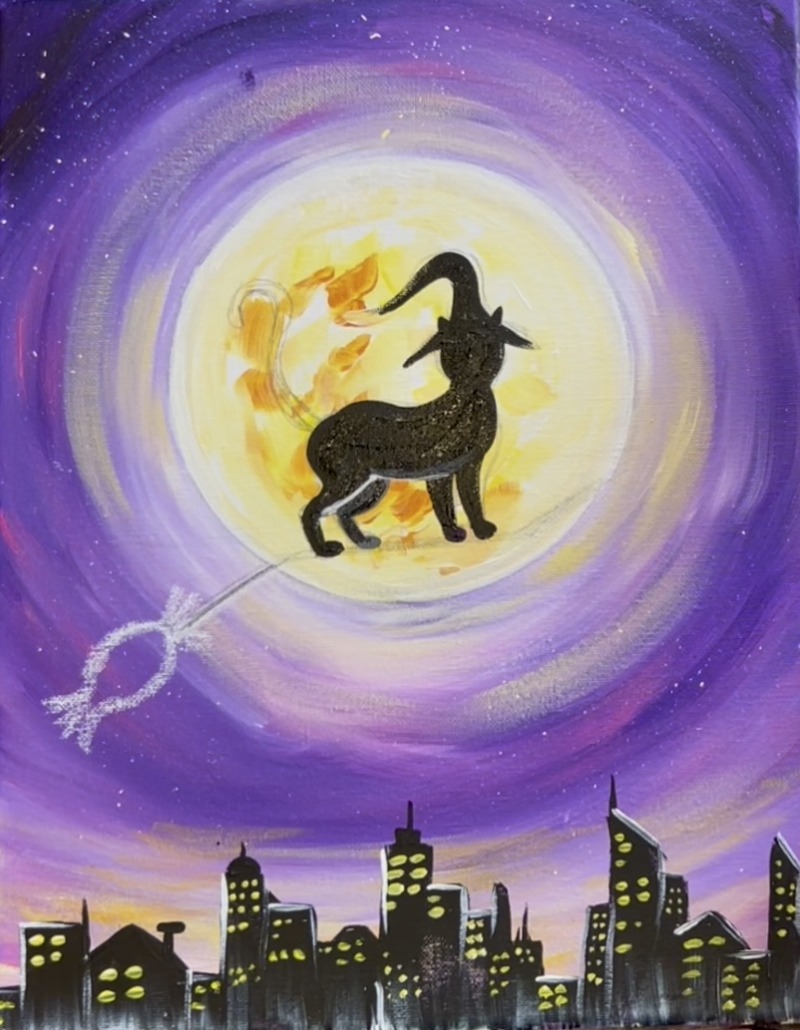
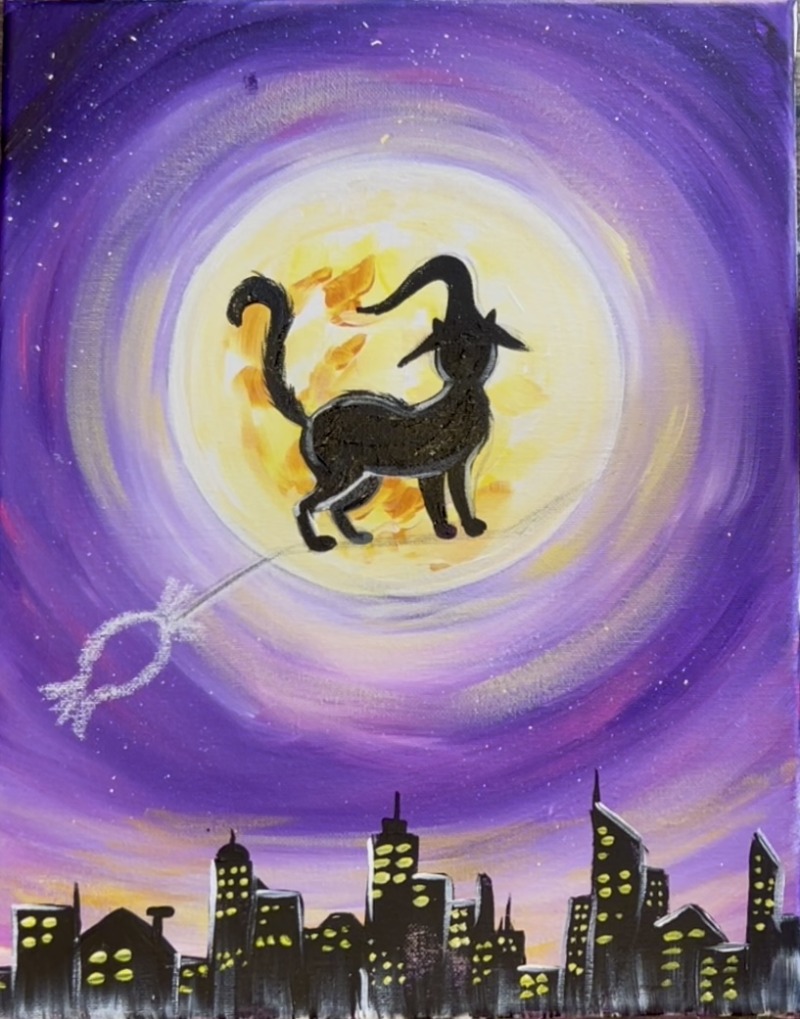
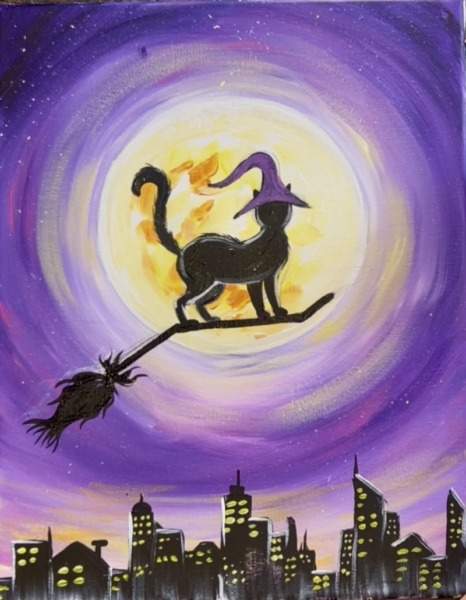
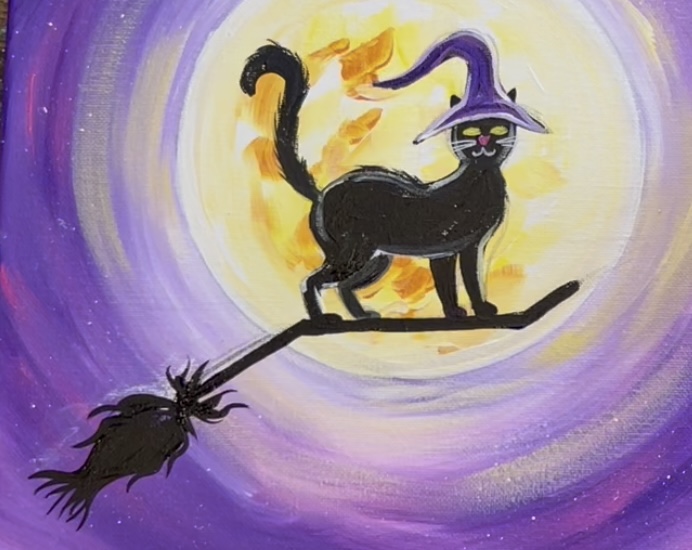
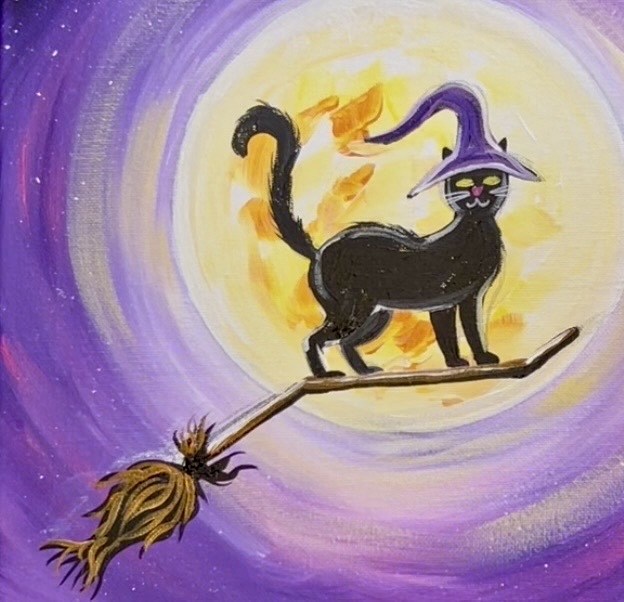
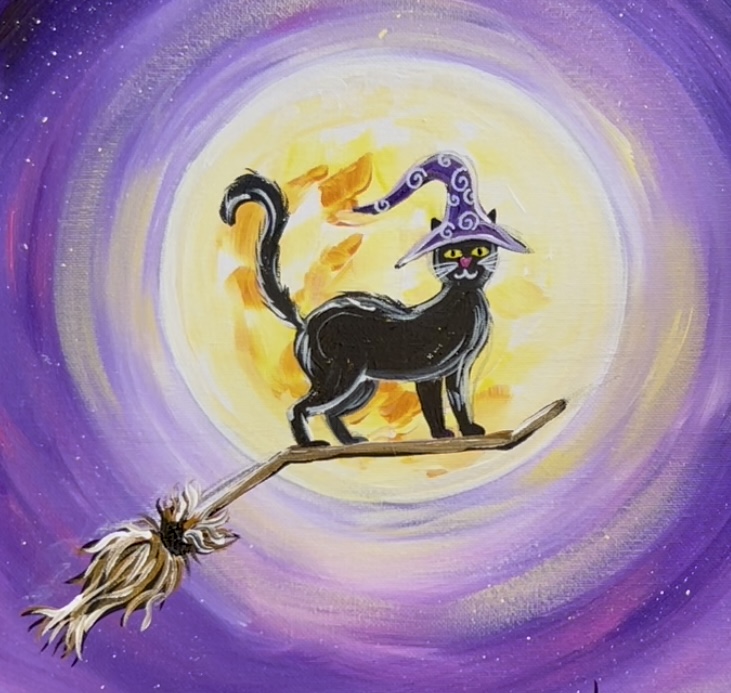
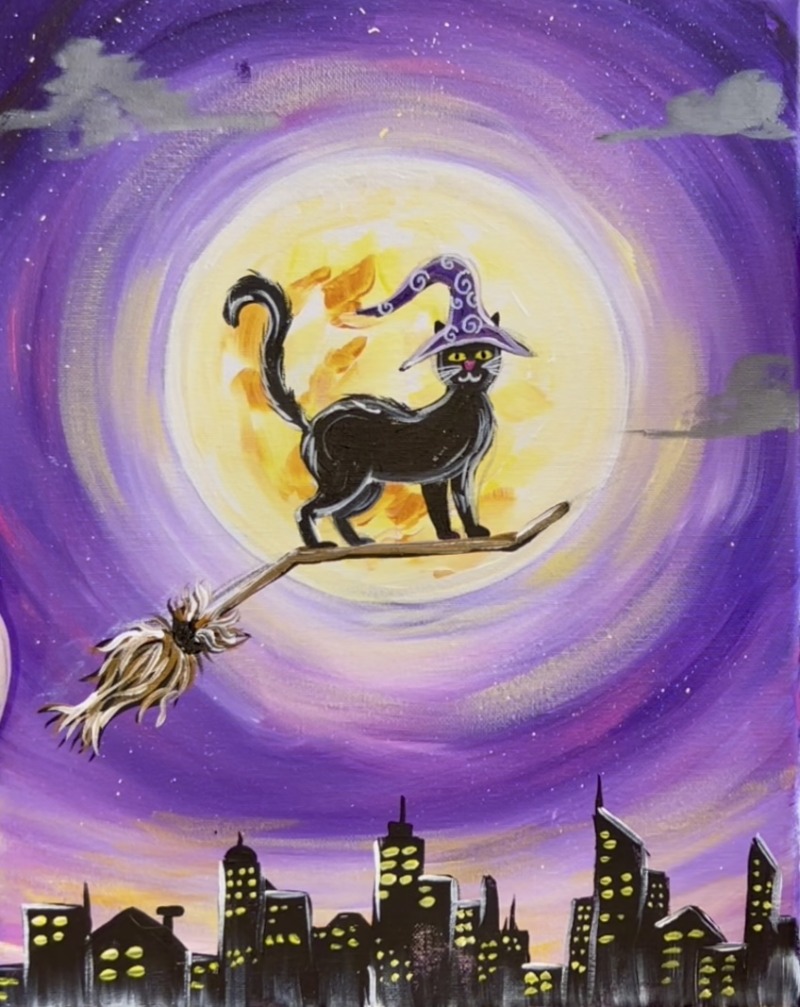
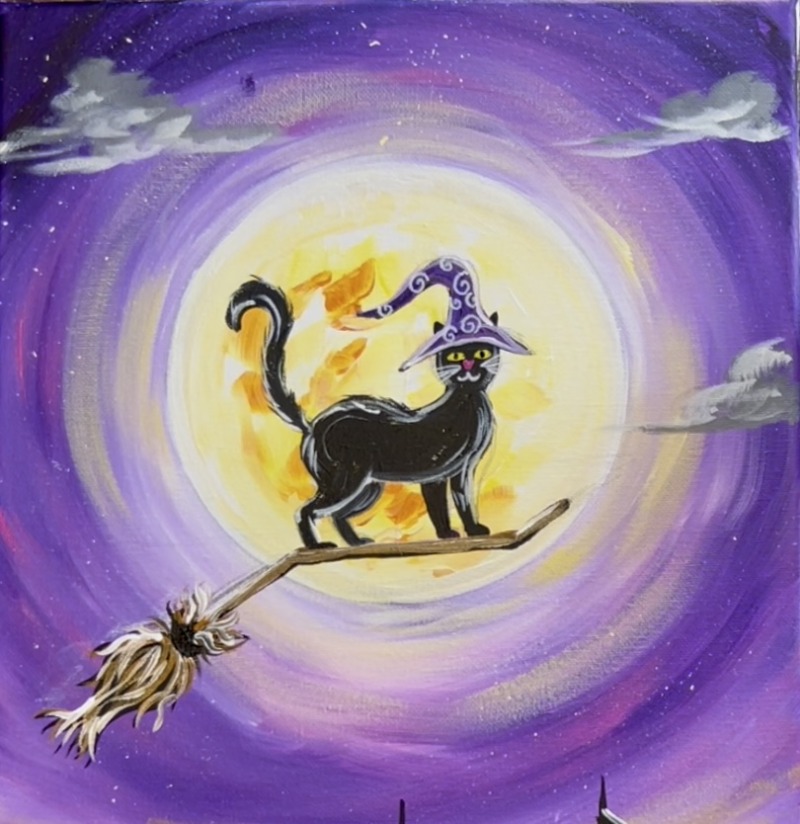
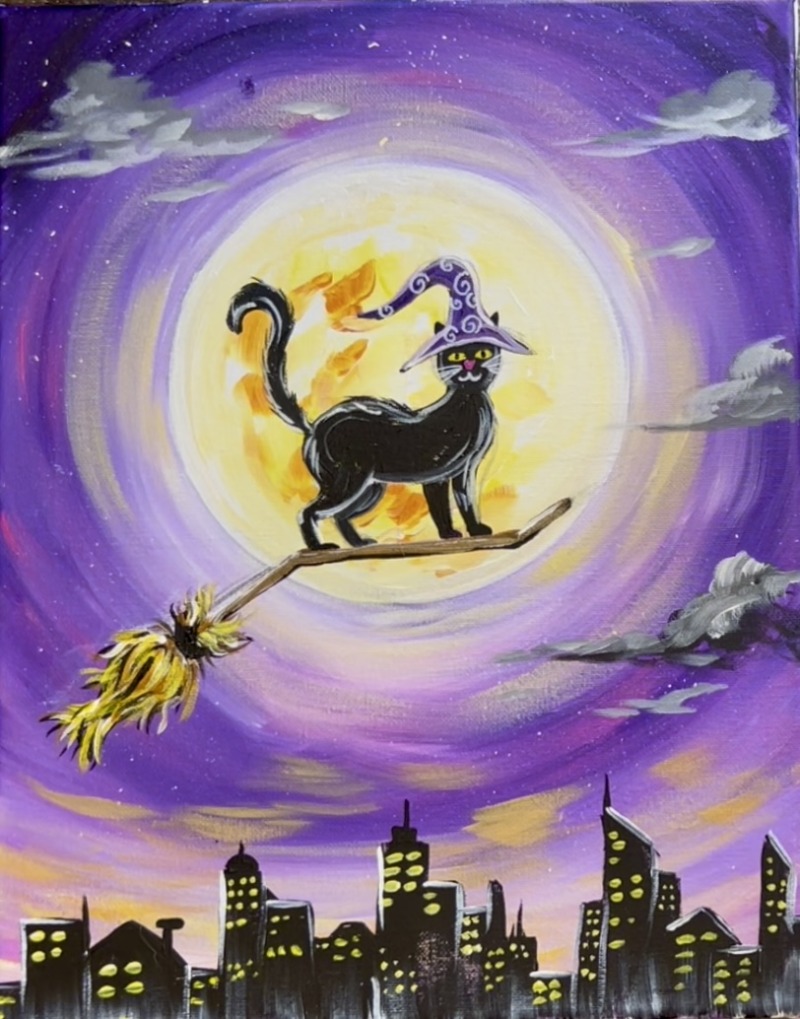
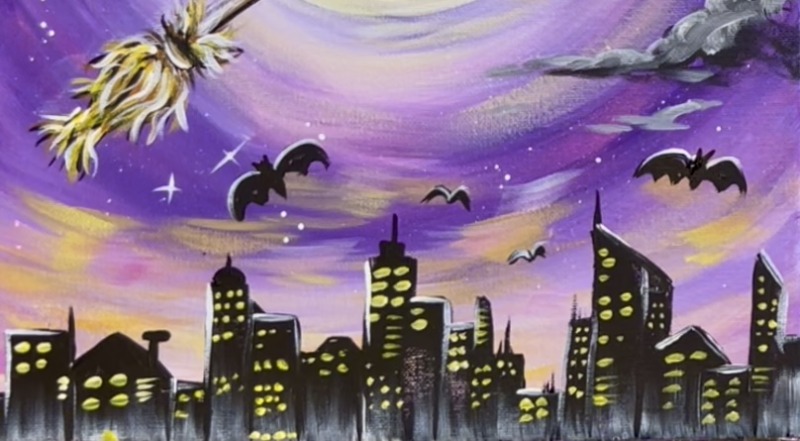
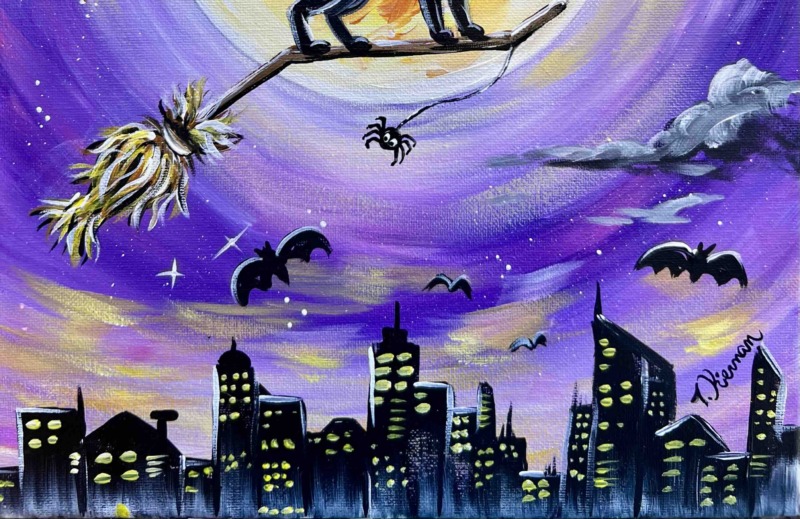
Learn how to paint this fun and whimsical Halloween scene step-by-step! Moonlight Mischief features a playful black cat wearing a purple witch hat, balancing on a broomstick in front of a glowing full moon. The colorful night sky swirls with purples, yellows, and soft clouds, with bats flying over a glowing city skyline below.
This beginner-friendly acrylic painting tutorial will guide you through easy techniques for blending the moonlight, creating depth in the sky, and painting simple Halloween details like bats, clouds, and a cat silhouette. Perfect for a fall DIY paint night or seasonal home décor project!
Enjoy and happy painting!
Materials Needed
Moonlight Mischief - Acrylic Painting Tutorial
Halloween painting tutorial, black cat painting, witch cat art, acrylic painting for beginners, step-by-step online painting class, moon painting, fall art project.
Materials
- 11 x 14 Canvas
- Acrylic Paints (I use Liquitex BASICS)
- Chalk (optional)
- Pencil & Eraiser
- White POSCA Paint Pen (optional)
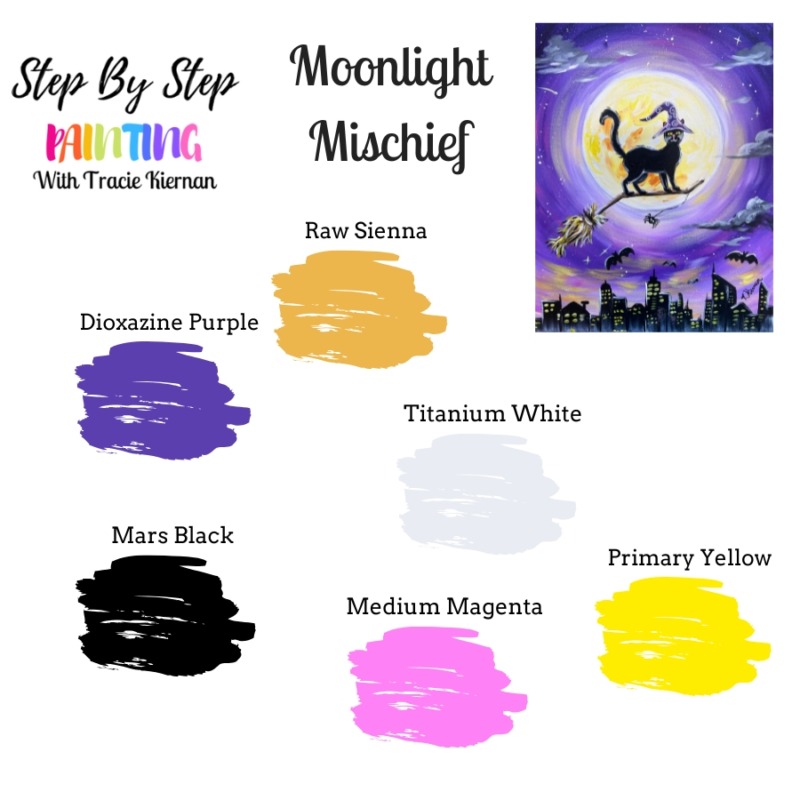
Colors
- Primary Yellow
- Dioxazine Purple
- Medium Magenta
- Titanium White
- Mars Black
- Raw Sienna
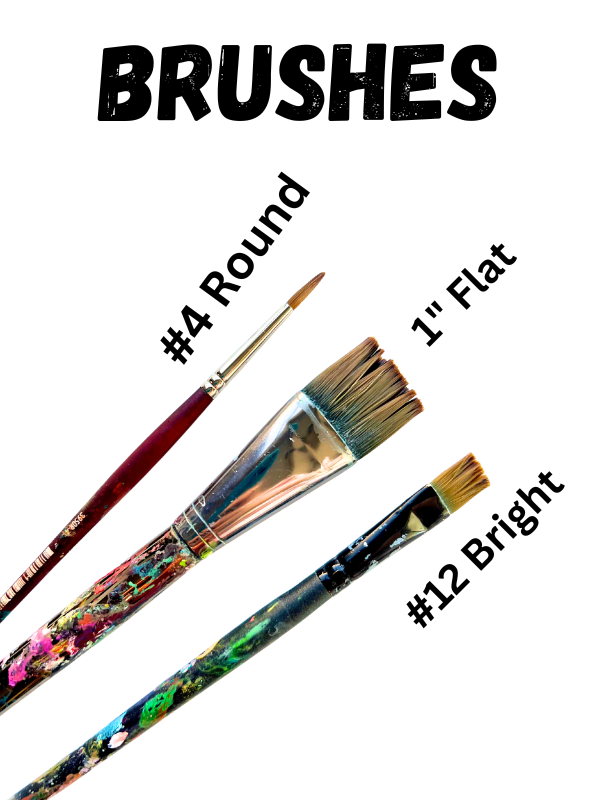
Brushes
Color Palette
Optional Traceable:
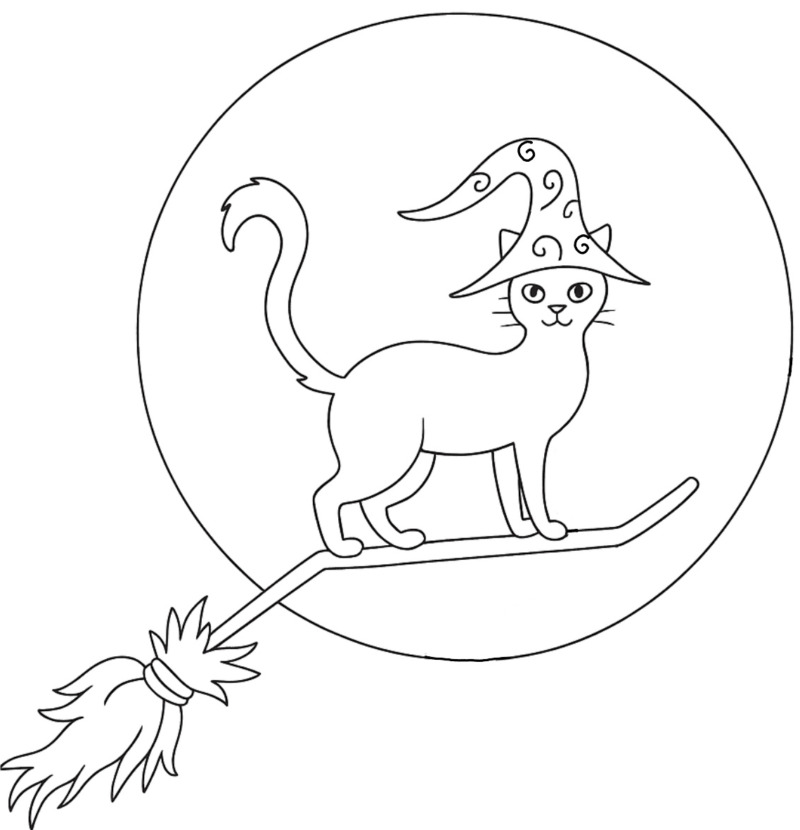
This template is to help you draw the cat in this painting! Place a sheet of graphite paper below the printable and trace onto the canvas.
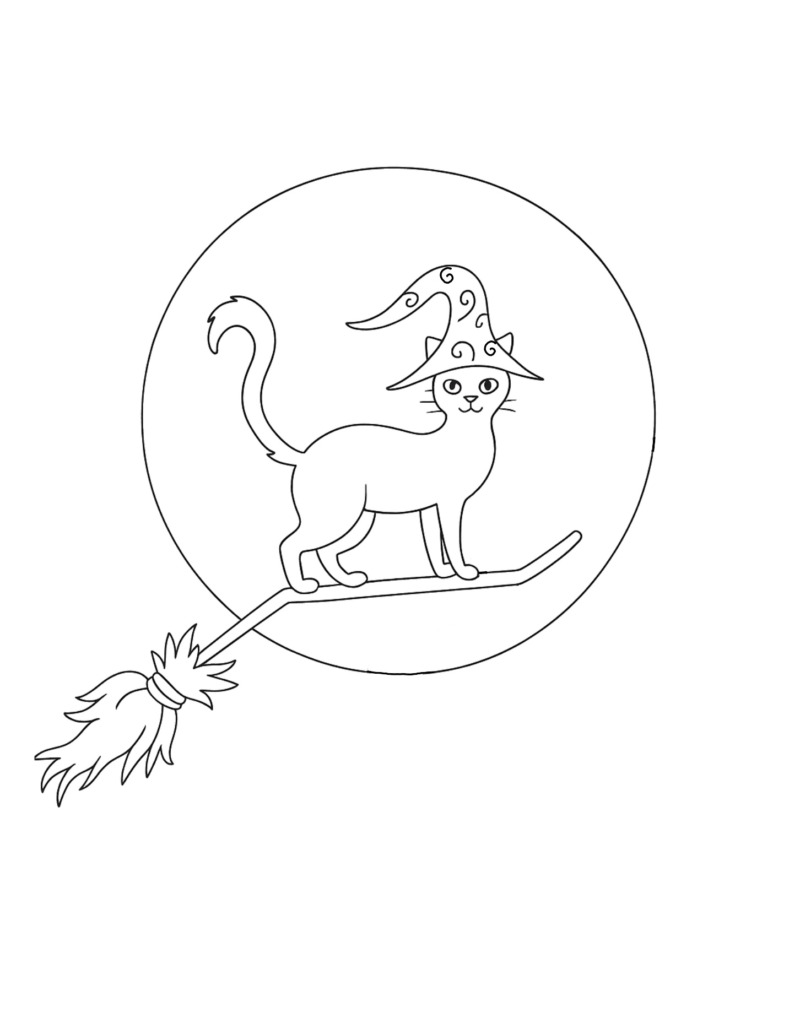
I have a full template for this and PDF instructions in my download shop! Get that here!
Directions At A Glance

Video
Step By Step Instructions
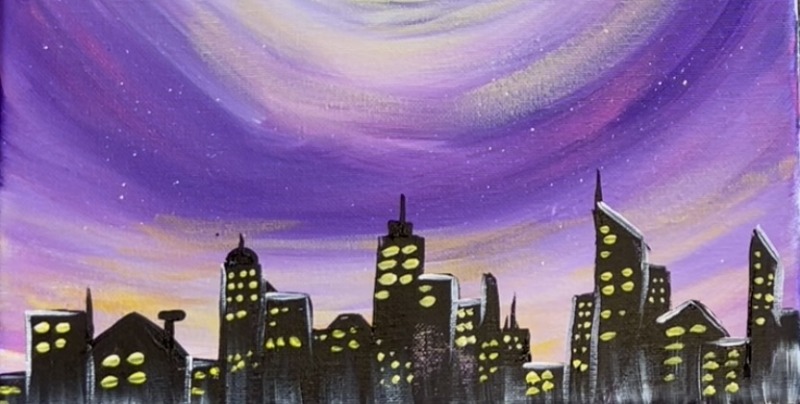
1. Paint Sky
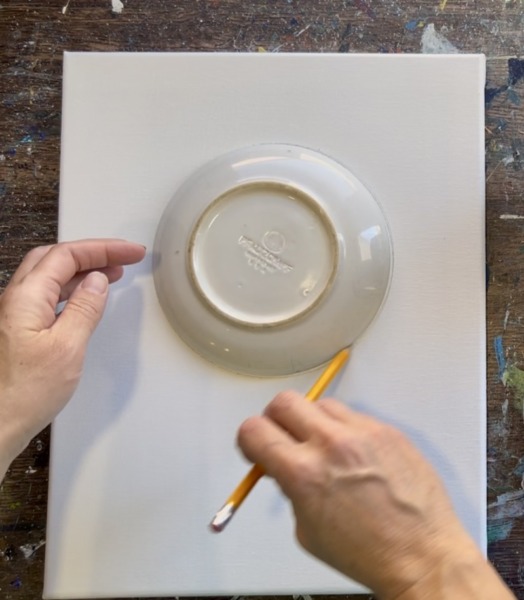
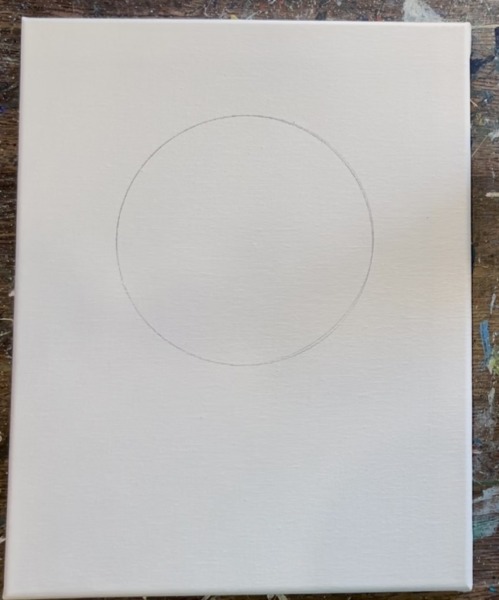
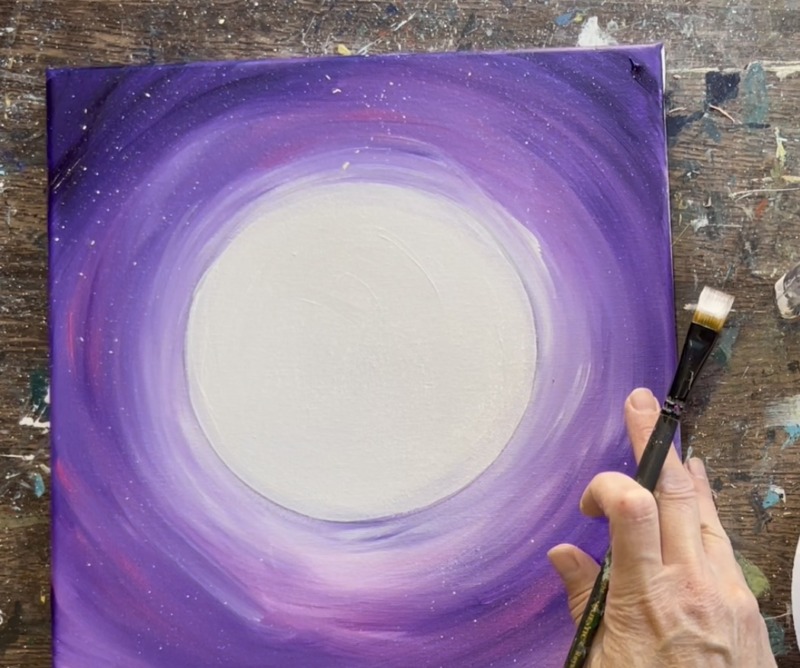
Trace a circle that is about 6″ wide. I used a ceramic plate for this but you can use a lid, bowl, compass, etc. to trace this circle! Place it in the center top area of the canvas.
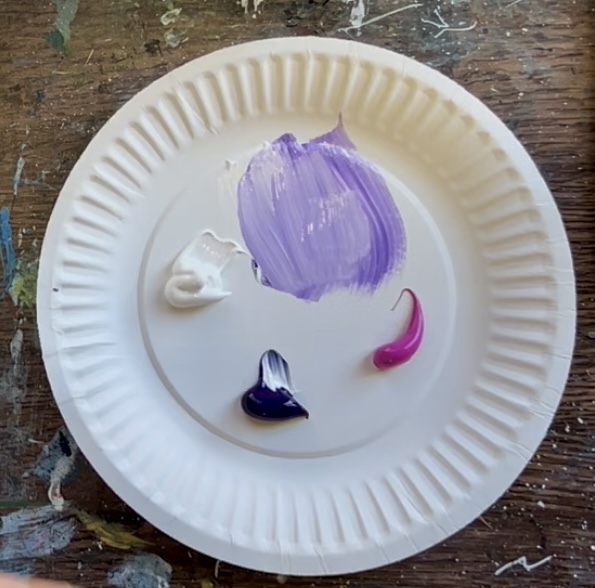
Load your paint palette with the colors: “titanium white”, “medium magenta” and “dioxazine purple”. Mix 1 part purple with 3 parts white. Use the 3/4 flat brush to paint around the moon circle. As you paint this, blend more bits of white into the color to make it look a bit “streaky” and “unblended”.
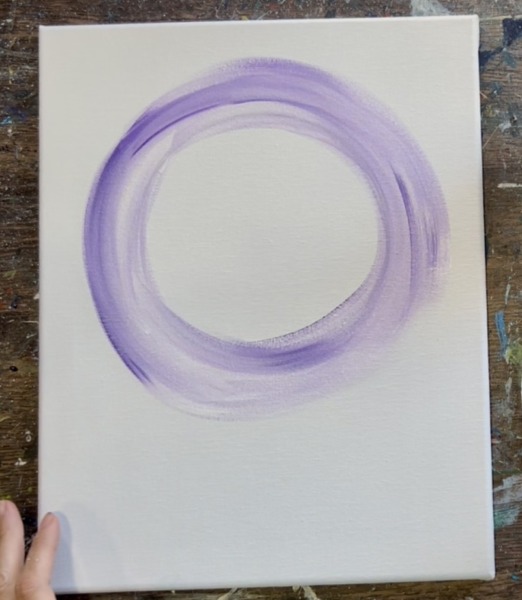
We are going to paint this entire sky going in a circular direction! Go out a few inches with this light purple. Then load your brush into “dioxazine purple” not mixed with white. Blend this darker purple outwards from your lighter color ring. Then load your brush into “medium magenta”. Blend this pink in with the colors of your sky.
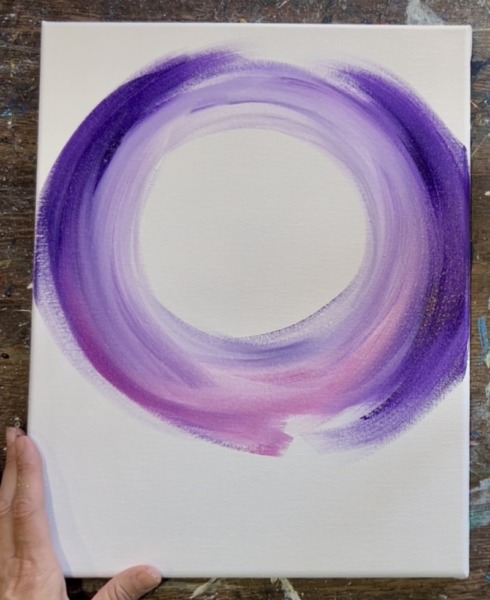
Continue to paint colors going in a circular direction outwards from the moon. As you approach the upper left and upper right corners, add pure “dioxazine purple” to make those areas very dark. Then blend more bits of pink in the sky! Try not to over blend your colors.
Add lighter colors on the bottom of the canvas using white and the light purple. This is because the city skyline will be glowing brighter colors in this area. When you paint the bottom area, you can make your paint strokes go flatter and parallel with the bottom edge of the canvas. Then the strokes go up and in a circle direction closer to the moon shape.
Go back and add more white in the area around the moon and blend to ensure that area is bright as well.
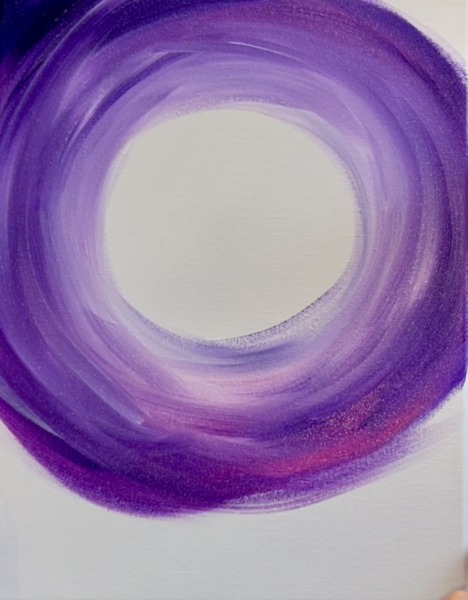
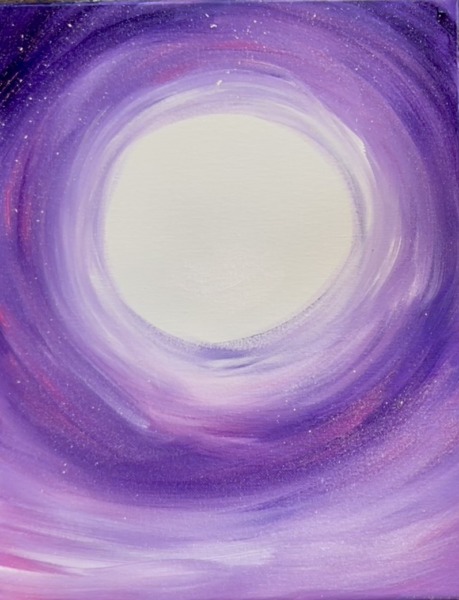
Before this dries, use a toothbrush to splatter white and yellow paint dots all throughout the sky! Make sure to test out a surface first before splattering the paint.
2. Paint Moon
You may need to re-trace the circle to define it again, especially if some of your purple paint got inside the circle.
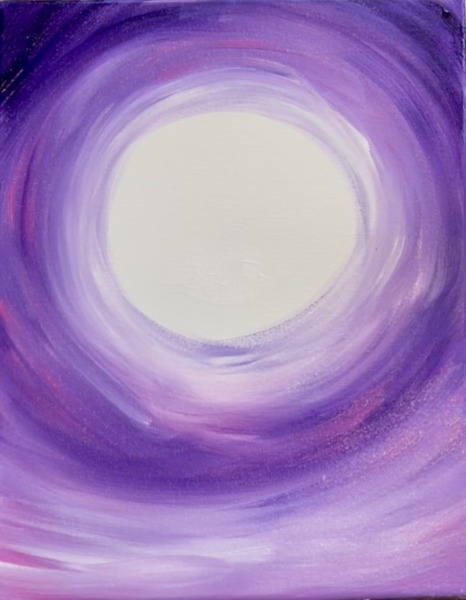
Use the #12 bright brush. Paint the circle a solid coat of “titanium white”. We will be using that white layer to help with the blending of the moon craters so don’t let that white dry yet!
Then load your #12 bright brush in some “primary yellow” paint (without rinsing the white off of your brush). Apply blotches of yellow on the moon. Apply it in the center but don’t add any craters on the edges. This will look very “abstract”. These are short, angle paint strokes.
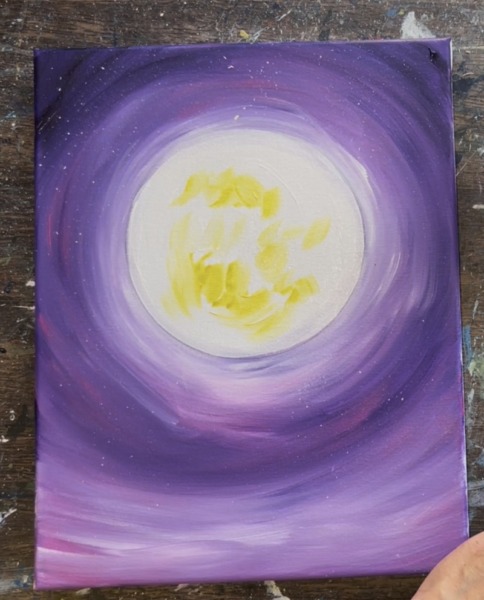
Then mix an orange on your palette. Mix equal parts “medium magenta” and “primary yellow”. Use the orange to paint more splotches but not as many as the yellow.
Then add more yellow to your brush and add some yellow mixed with orange craters.
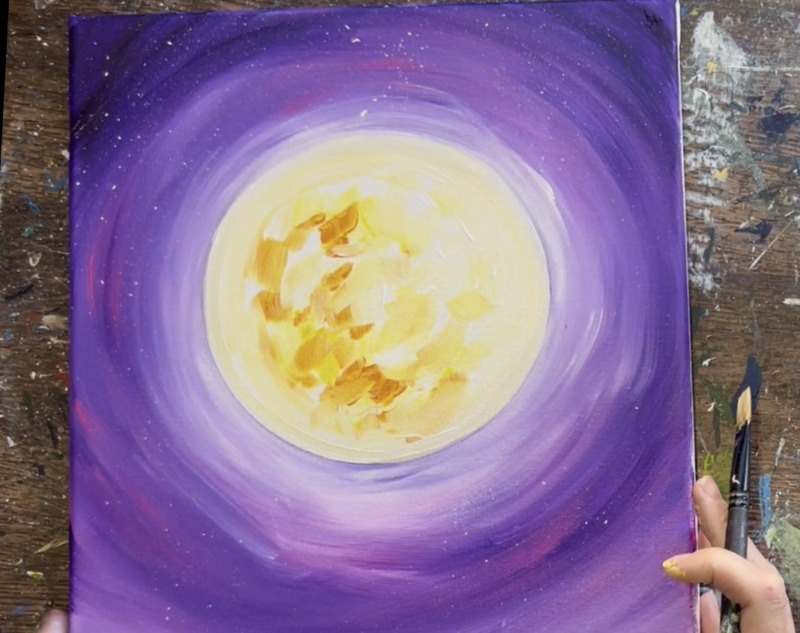
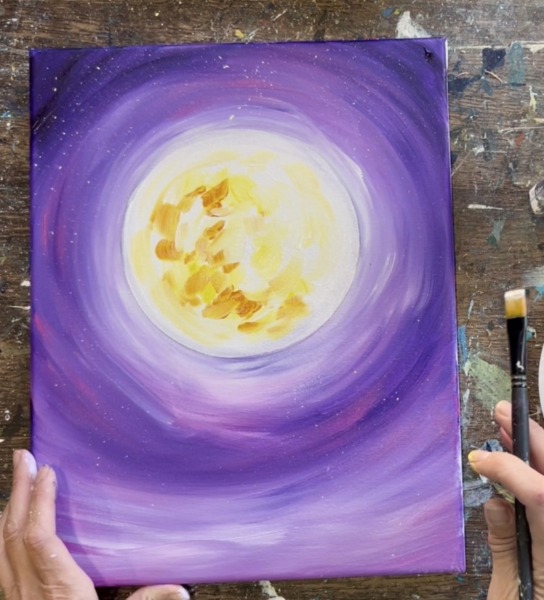
Dry brush yellow paint strokes around the moon next! This is going to look super pretty against the purple sky! When you “dry brush”, load your brush into the yellow and white but then wipe it off. Then paint circular paint strokes around the moon. You should be able to see purple through the paint strokes. Go outwards about a few inches and stop. Don’t add any yellow dry brush strokes in the dark purple area.
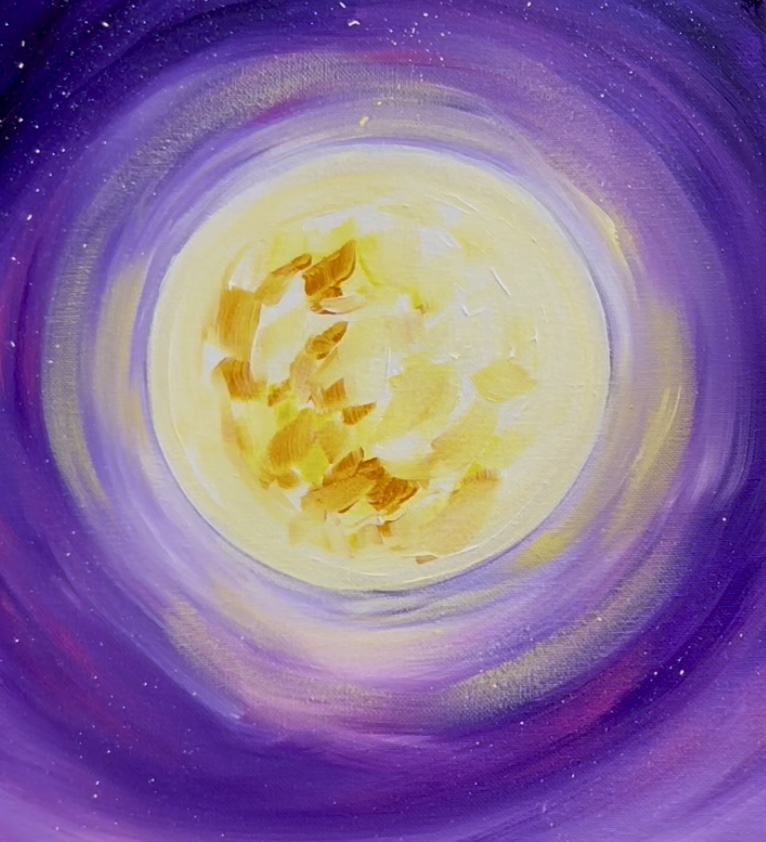
Then dry brush more yellow along the bottom of the painting where the city skyline will be. Add a bit of orange to this too! These dry brush strokes on the bottom go in more of a horizontal direction instead of a circular direction.

Tip: to make your moon really bright, use a #4 round brush to outline the inner edge of the circle with titanium white.
3. Paint Buildings
Use the #12 bright brush and “mars black” to paint a variety of shaped buildings. Some of the buildings are short, some tall. Some have diagonal roofs, some straight! I started on the left and worked my way to the right. Fill in all the shapes solid black.
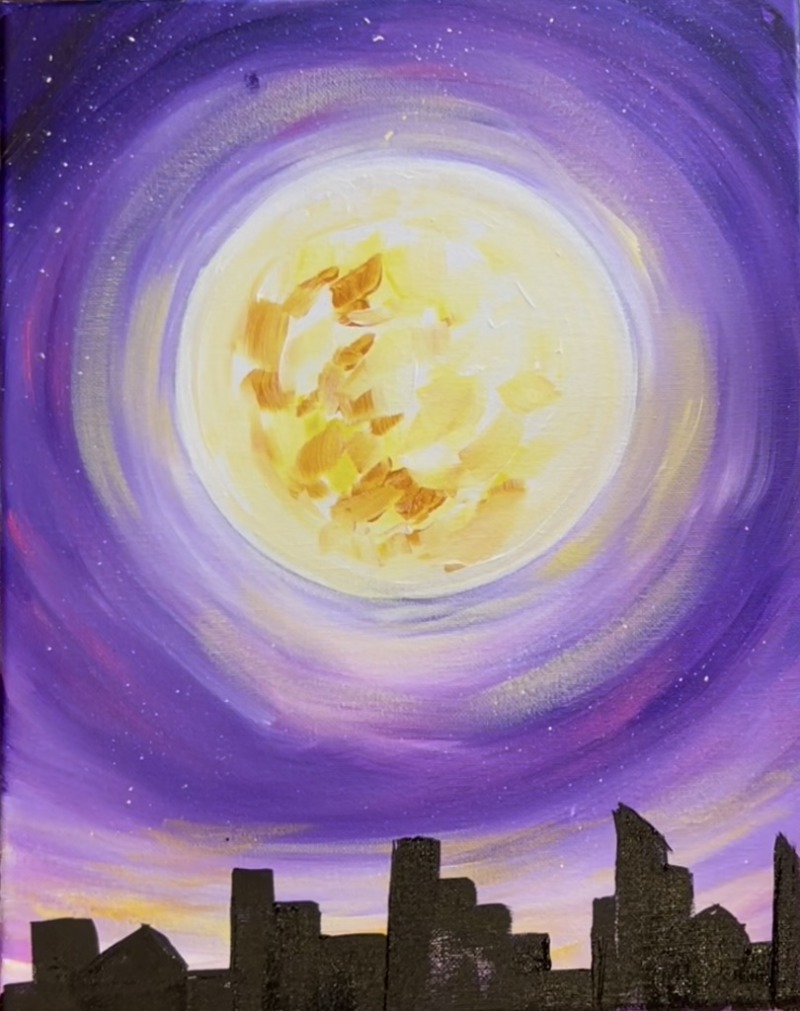
Optional: dry brush some white on the bottom of the buildings. Do this with the #12 bright brush. Load the brush into some titanium white but wipe off excess paint. Then use the full width of the brush to drag white paint strokes up about halfway up the buildings. Do this only on the bottom to create a soft glow on the bottom edge of the canvas.
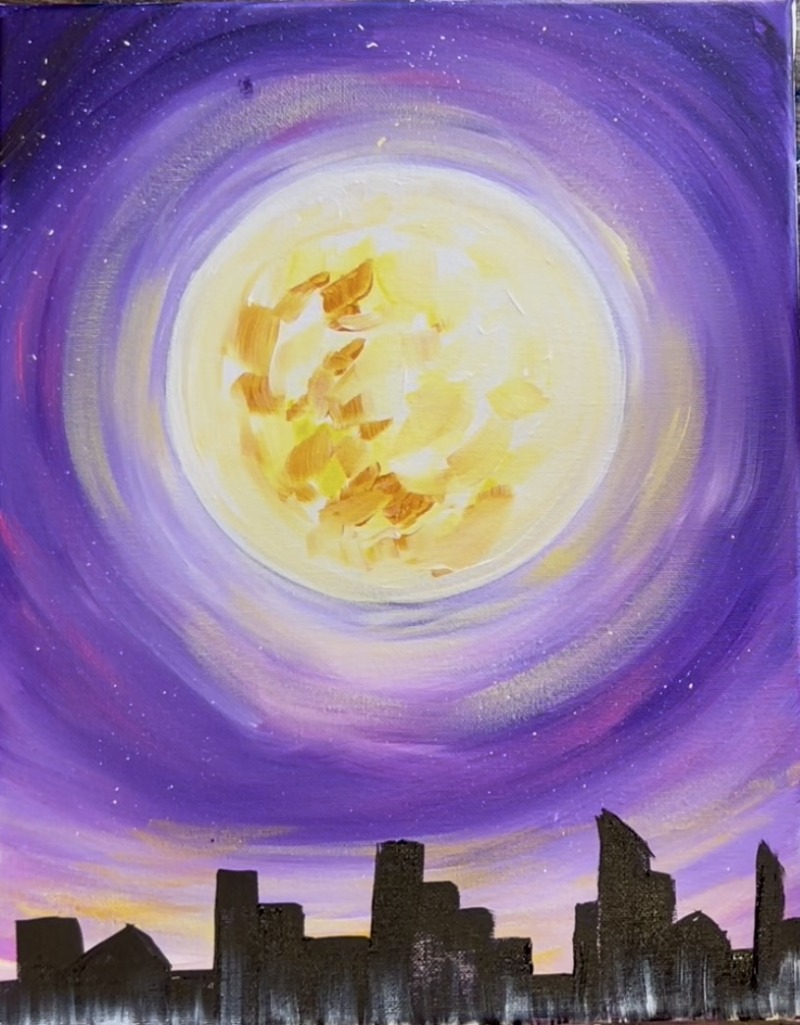
Then use the #4 round brush and “mars black” to create more details on the tops of the buildings. Paint little radio towers, chimneys, and different angles and smaller shapes on the buildings to create more detail.
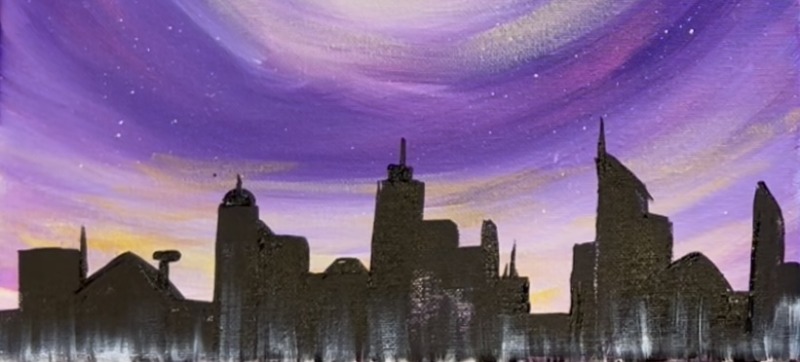
Then use titanium white to lightly outline some of the top edges of the buildings and some of the sides of the buildings. This creates more depth in your silhouette!
Paint the windows on the buildings next. Use titanium white mixed with yellow. Then use the #4 round brush to paint little dots and little dashes on all of the buildings. You can change the size of the windows to create variety. You also don’t need to paint all the windows because some of the buildings would have the lights off.
4. Draw and Paint Cat
You can use the template to trace the cat onto the canvas! Use a sheet of graphite paper below the printable and trace to transfer the design.
If you want to hand draw this…
- Note: I found drawing the cat first and then the broom to be easier! Start by drawing an oval shape for the head and two ears. The placement of this is in the upper right quadrant of the moon circle.

2. Draw a circular shape in the back of the cat for the tail base/ hind legs. Draw a front oval shape for the cat’s forelimbs. Then draw the front leg and front paw extending down from the cat’s head.
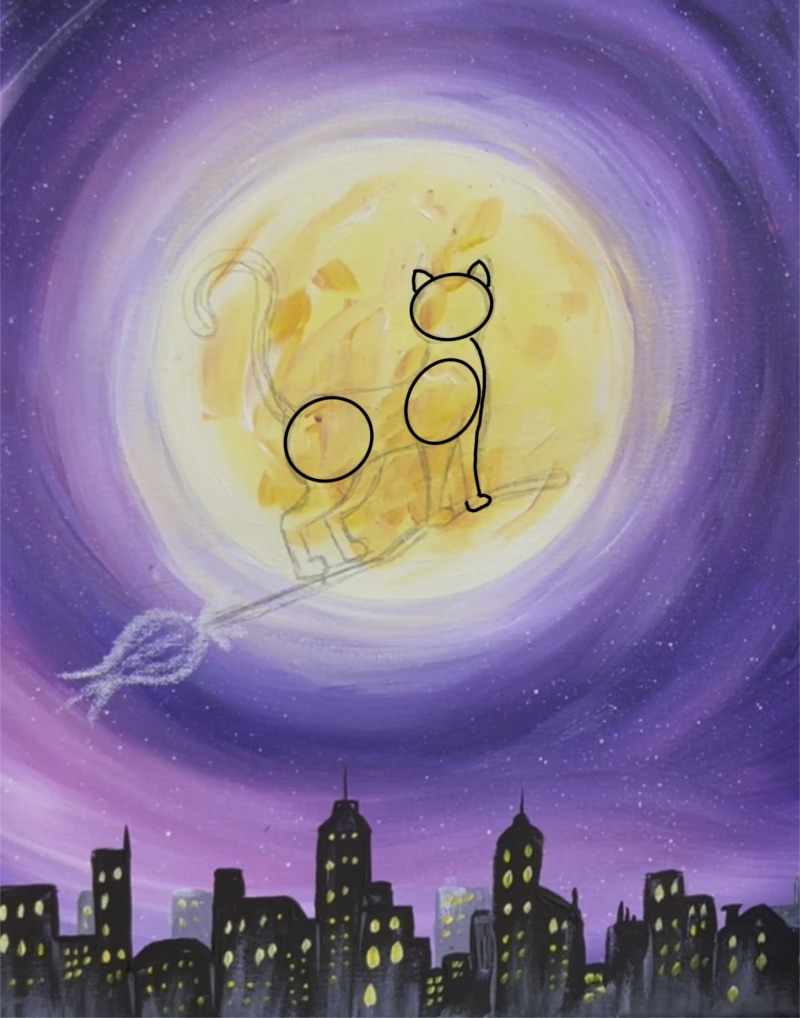
3. For the tail, draw a curved line extending upwards and spirally downwards. Start with just a single line before turning it into a shape. Then draw the two front legs and paws extending down from the front oval.
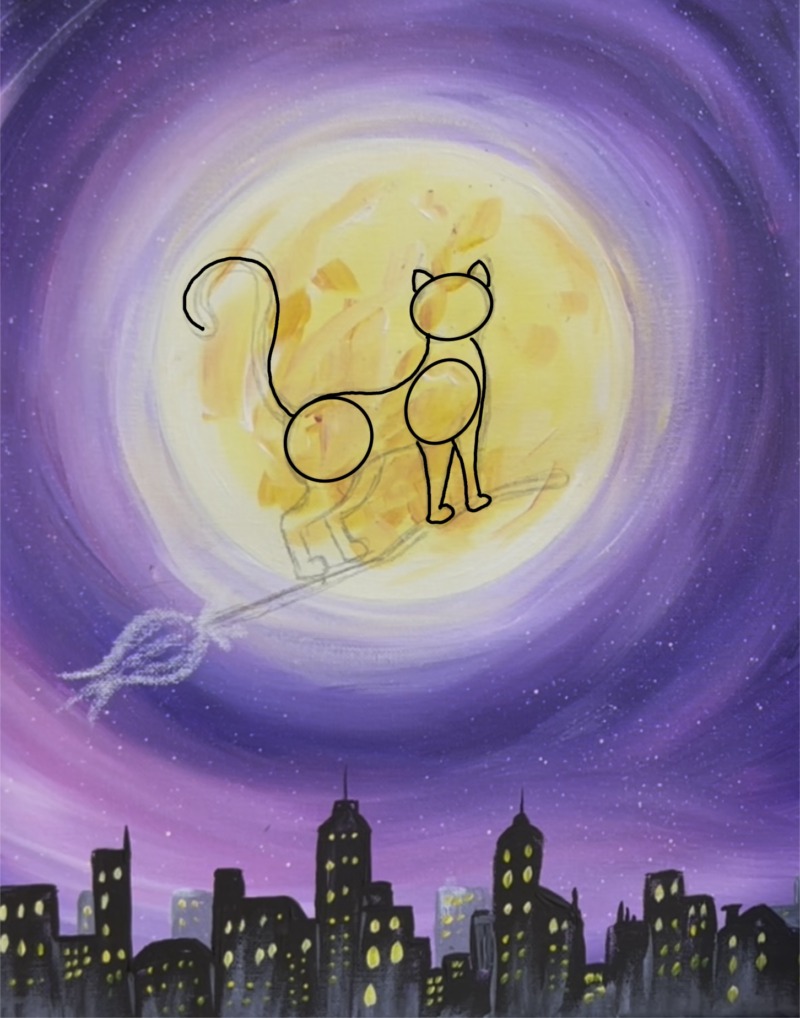
4. Then draw the two hind legs. These both curve backwards and then bend down. Be sure to draw the “hock”. This is a segment on the back leg that bends backwards and then down.
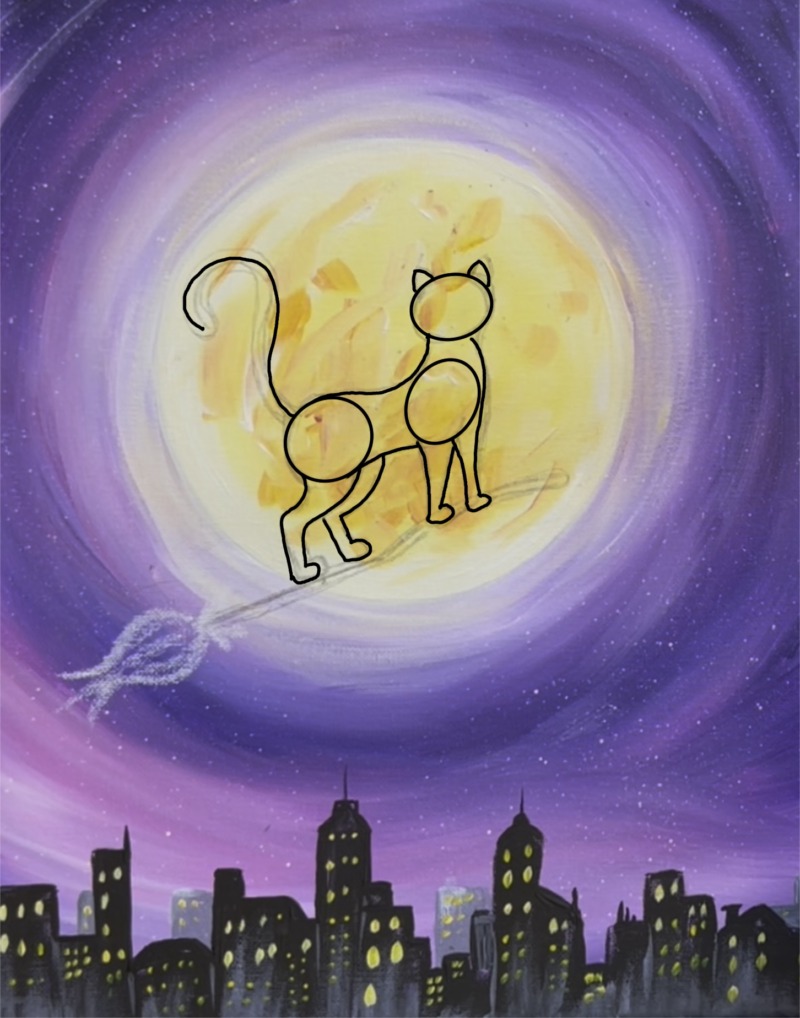
5. Then draw the rest of the tail as a shape by drawing a second line next to the first line and connecting the two at the end. Draw the broom stick. You can segment the lines of the stick to line up with the position of the cat’s bottom paws. Draw the end bristles of the broom. Then draw a line that cuts the top of the cat’s ears (for the bottom of the witch hat).
6. Finish the witch hat but ensure some of the cat’s ears are still showing. You can also erase some of your “guidelines” inside the cat (or leave them). Since everything will be painted black in the next step, it’s okay to leave the guidelines inside the cat.
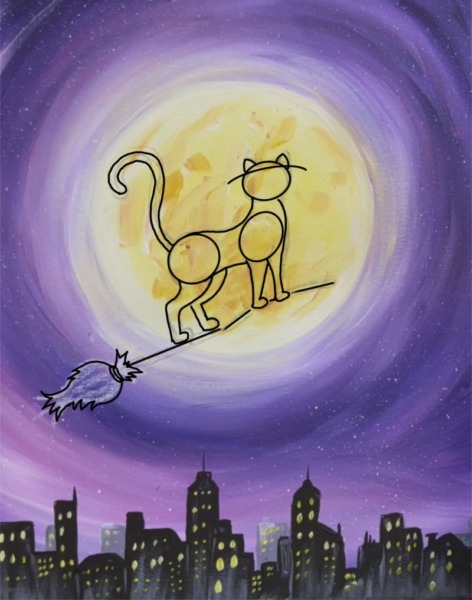
Use the #4 round brush and the color “mars black” to paint the entire shape of the cat including the witch hat and the broom. Everything gets painted as a “silhouette”!
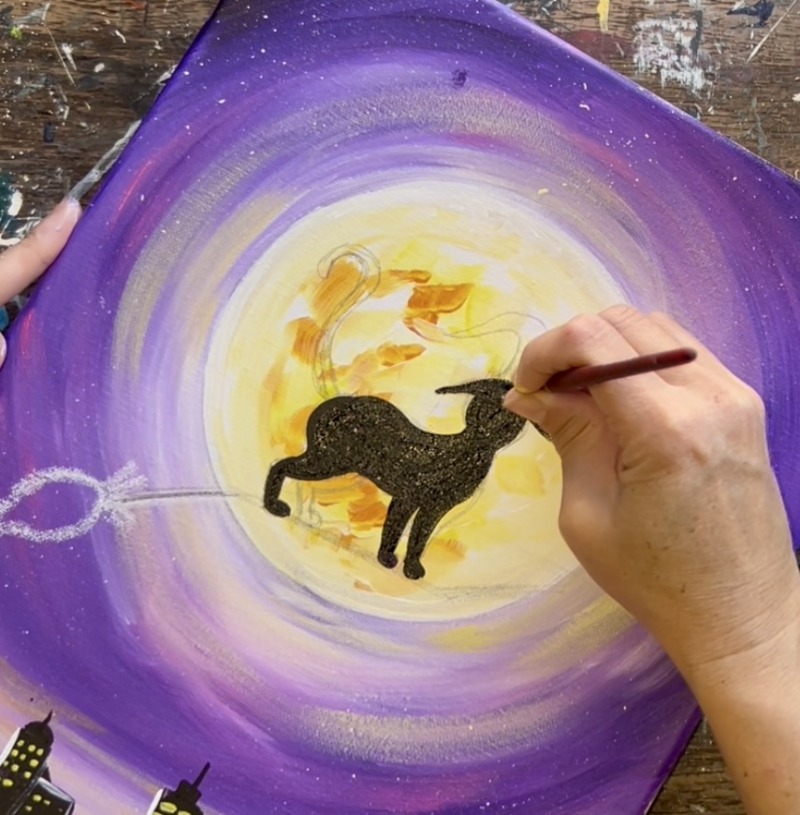
For some of the edging of the cat silhouette, you can use “titanium white” for light outlining. This helps some areas stand out such as where the division of the two hind legs are. You can also outline edges on the back of the cat and around the paws to add extra dimension to your silhouette! We will do this more in a later step.
Fill the hat and tail in. Then add some texture fur sticking out along the edging, such as the tail and back. (This is optional, you can leave smooth edges if it makes things easier).
Next, paint the hat purple. Mix “dioxazine purple” with “titanium white” to make a lighter purple. Fill the hat in with this lighter color.
5. Detail Cat & Broom
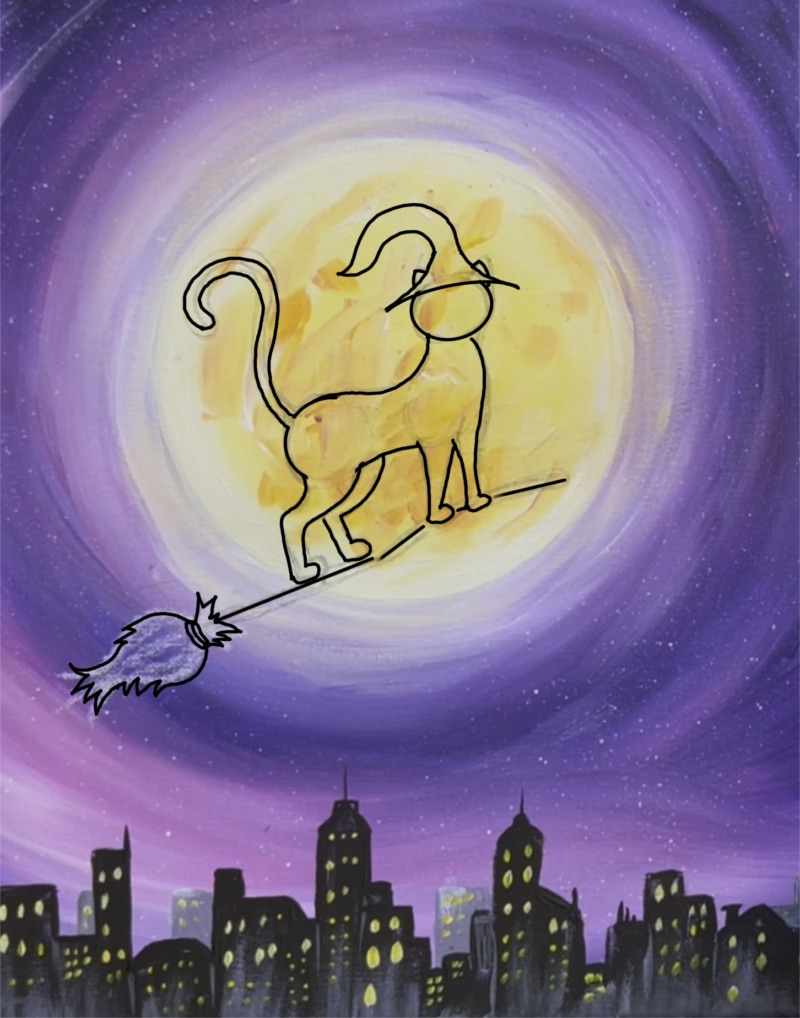
A tiny detail brush may be recommended for this step! I used the #4 round brush and a paint pen plus a steady hand to do these details.
Use the color “primary yellow mixed with white” to paint the two eyes of the cat. Use the color “medium magenta” to paint a tiny triangle for the nose. Then use a white paint pen (or titanium white) to paint whiskers and a mouth.
Then use the color “raw sienna” to paint the broomstick and bristles on the broom. Use the #4 round brush for this. When you paint the bristles, paint curved strokes that curve and twist in the direction of the shape of the broomstick bristles. Paint a few wavy lines fraying outwards for a more whimsical look! When you paint the stick, leave the bottom edging of it black with no color. Also, leave a lot of black still showing through on the bristles.
Then use titanium white to paint another layer of bristles over your light brown layer. This will highlight this area and really make things “pop”. Remember to leave some of the black showing through.

Detail the cat more! Add black dots in the middle of the yellow eyes. Note: if you need to make the eyes brighter, add a second coat of yellow and white paint to the eyes first.
Use the white paint pen to draw little spirals on the witch hat.
Then paint some fur texture using the #4 round brush and titanium white paint. Do this along the inner edging of the cat silhouette shape, especially on the tail. These are loose, fur like lines. This helps to create more depth to the cat!
6. Paint Clouds (optional)
Use the #12 bright brush. Mix on your palette equal amounts of “mars black” with “titanium white”. Load the medium gray color on your brush but then wipe off excess paint. Dry brush clouds in the sky. Do this with paint strokes going in circular directions to form “loft” of the cloud but make the clouds flat on the bottom and somewhat stretched. This layer should be a bit translucent.
Wipe the brush. Then load the brush into a lighter gray. To make this lighter gray, mix a bit more titanium white into your medium gray. Then load the brush into a small amount of that color and “dry brush” a layer on the cloud on the side that faces the moon. For example, top clouds get lighter color on the bottom of the cloud because that part faces the moon. The opposite is for the lower clouds in the sky where the highlight is on the top. When you apply this “highlight”, do so only on the edging but leave the darker color still there on the opposite side. Do this “dry brush” style so it shows up translucent. You can also use your finger to “smudge” the cloud to help blend it a little.
Add more clouds! I did a few smaller stray clouds with the lighter color. Then I did another larger cloud closer to the bottom (this one ended up being slightly darker for the base). If desired, add more “orange dry brush” paint strokes around the city buildings.
7. Bats, Spider & Final Touches
Paint stars in the sky by using the #4 round brush and “titanium white”. Paint little clusters of dots scattered around the sky. Then paint some “diamond sparkle” stars. To do this, paint a dot. Then drag the paint from the dot upwards and outwards to create the little diamond points.

Then paint bats! Use the #4 round brush and “mars black” to paint bat shapes. Fill them in solid with black. Then lightly outline the tops of the wings with titanium white.
Some final details you can add to this painting include painting a cute spider dangling from the broom! Do this with the paint pen or #4 round brush and black paint.
Finished!
Sign your name and show it off!
