Would you like to save this?
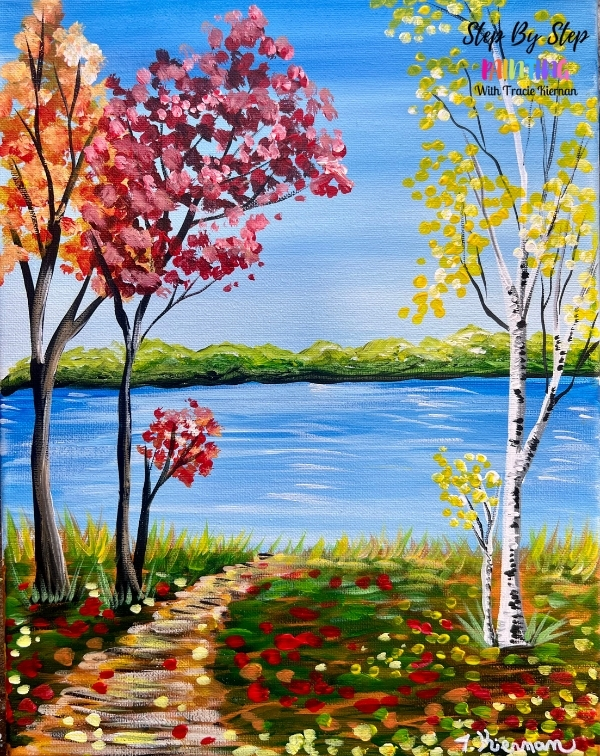
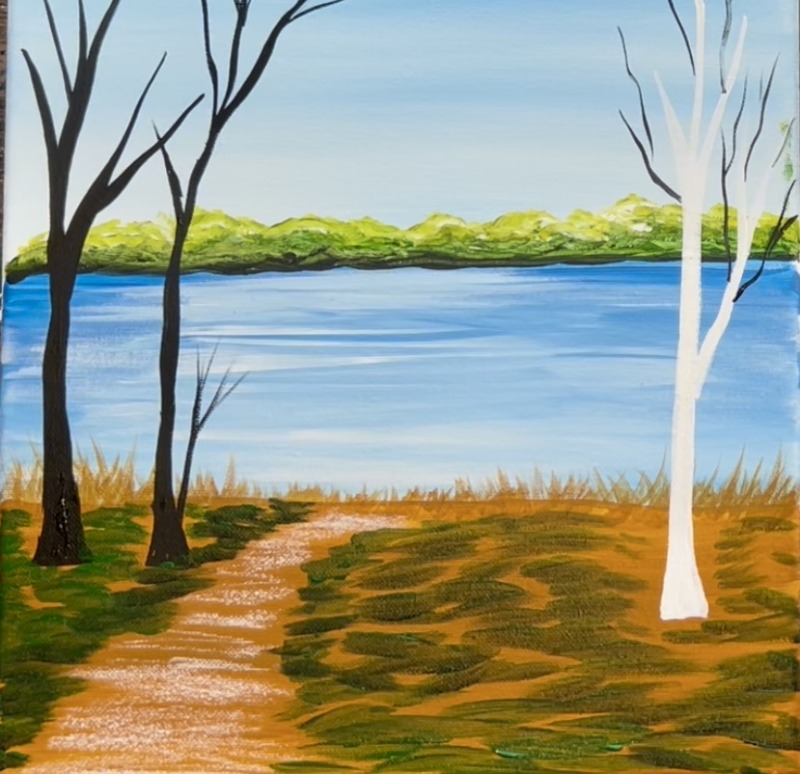
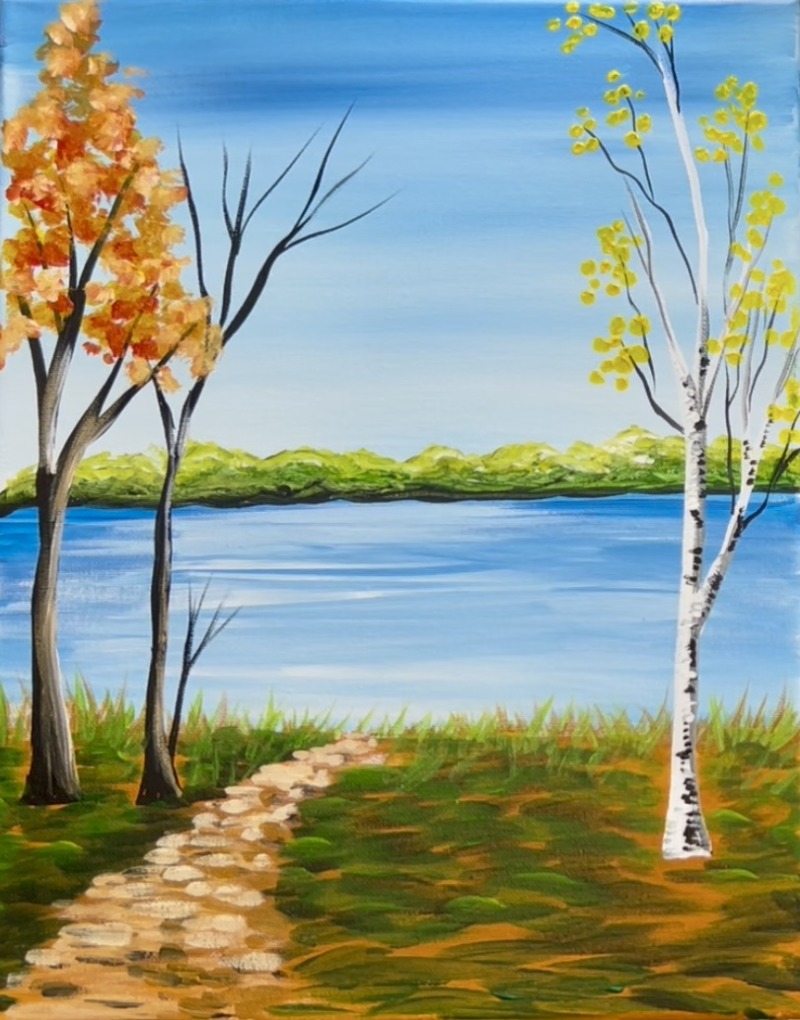
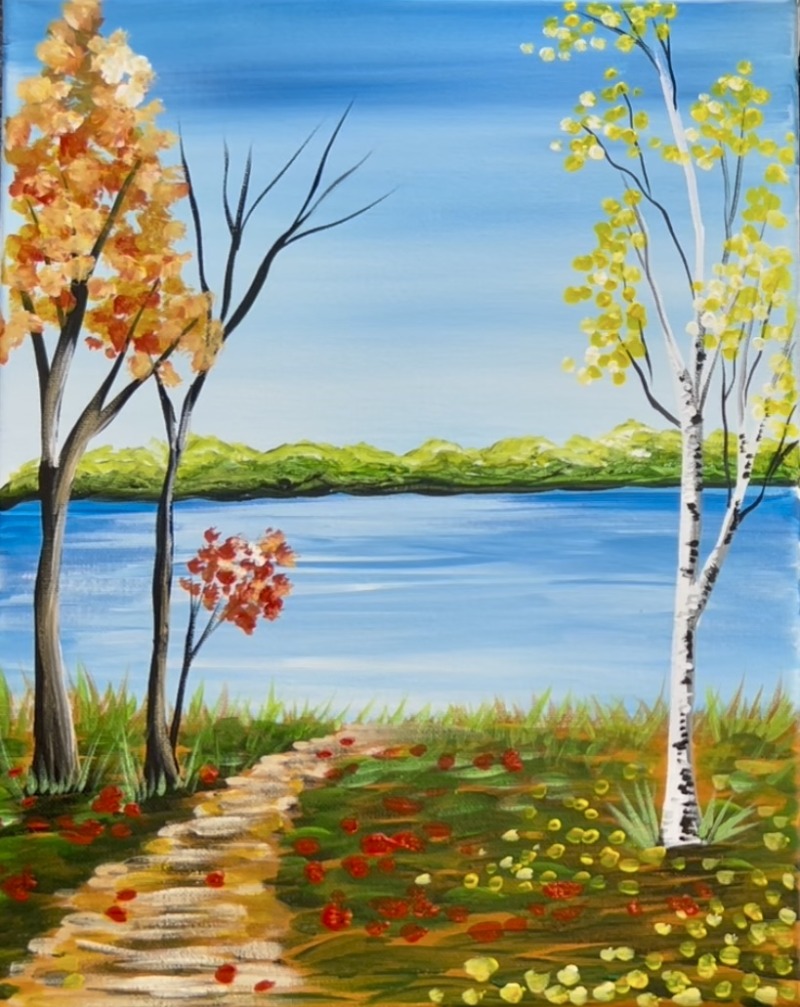
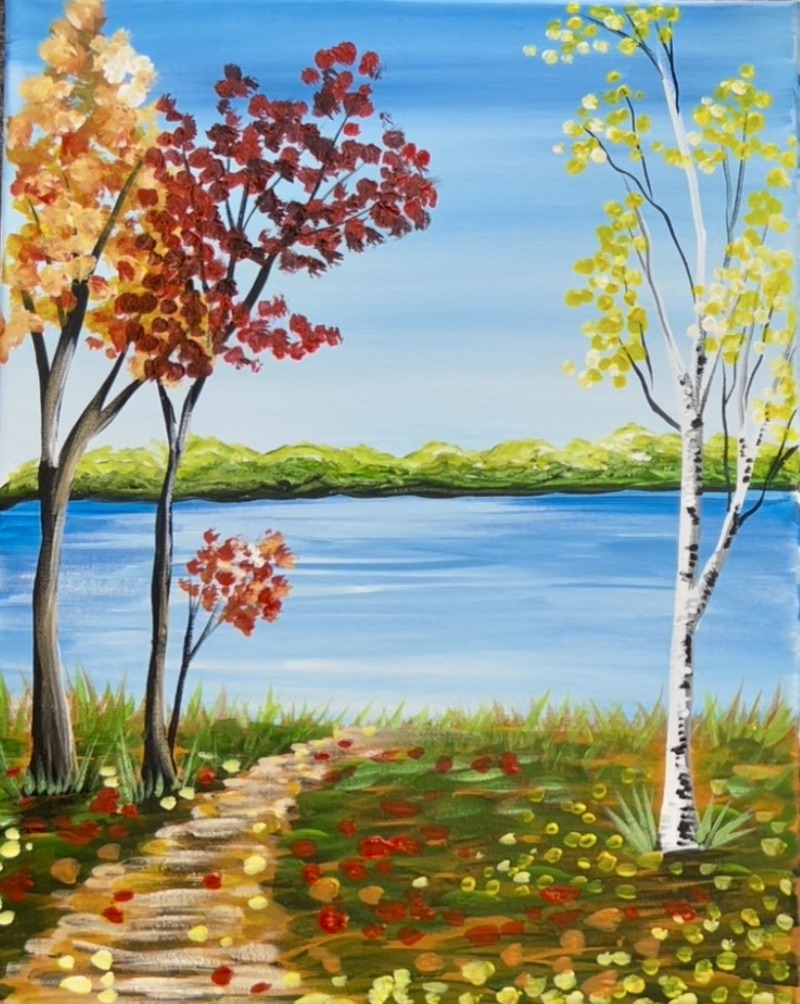
Step into the beauty of autumn with this relaxing acrylic painting tutorial! In this lesson, we’ll create a vibrant fall scene featuring a colorful lakeside path lined with trees in crimson, gold, and orange. You’ll learn how to paint simple yet striking reflections on the water, blend a bright blue sky, and layer fall foliage to bring depth and movement to your painting.
Enjoy and happy painting!
Materials
- 11 x 14 canvas (or any size!)
- Acrylic Paints
- Paint Brushes
- Pencil
- Ruler
- Chalk (optional)
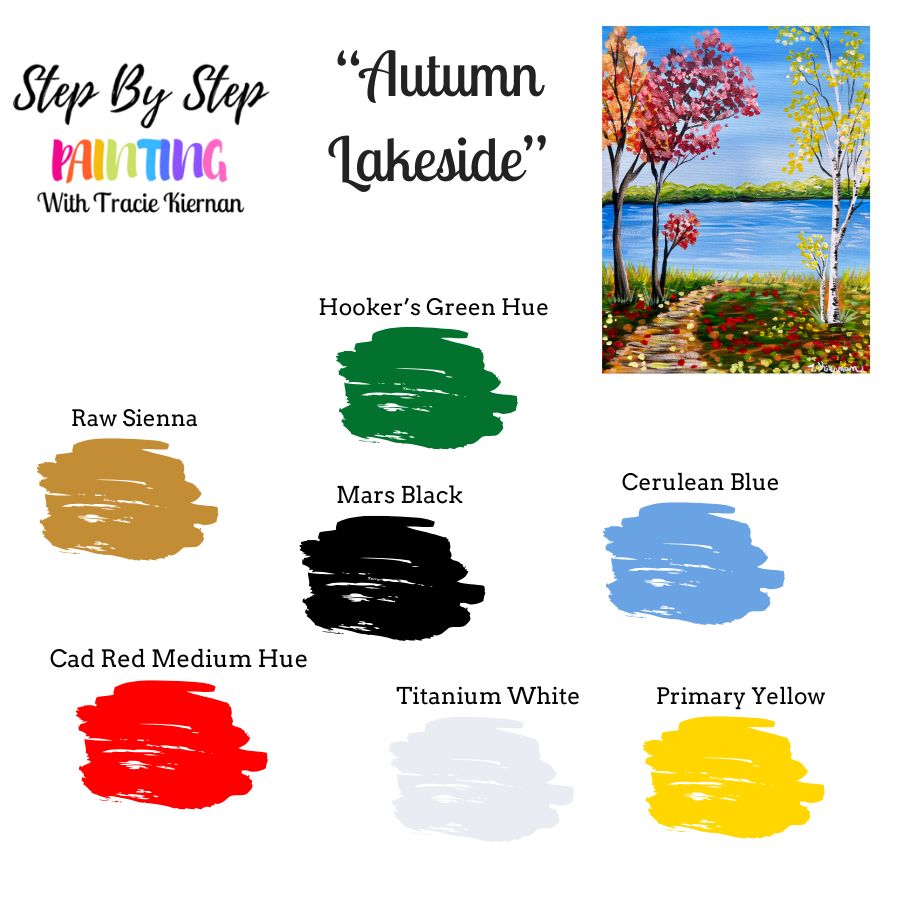
Colors
- Titanium White
- Mars Black
- Raw Sienna
- Cadmium Red Medium Hue
- Primary Yellow
- Hooker’s Green Hue
- Cerulean Blue
Brushes
- 3/4 Flat
- #8 Long Round
- #4 Round
- #12 Bright

Color Palette
Directions At A Glance
Video
Step By Step Directions
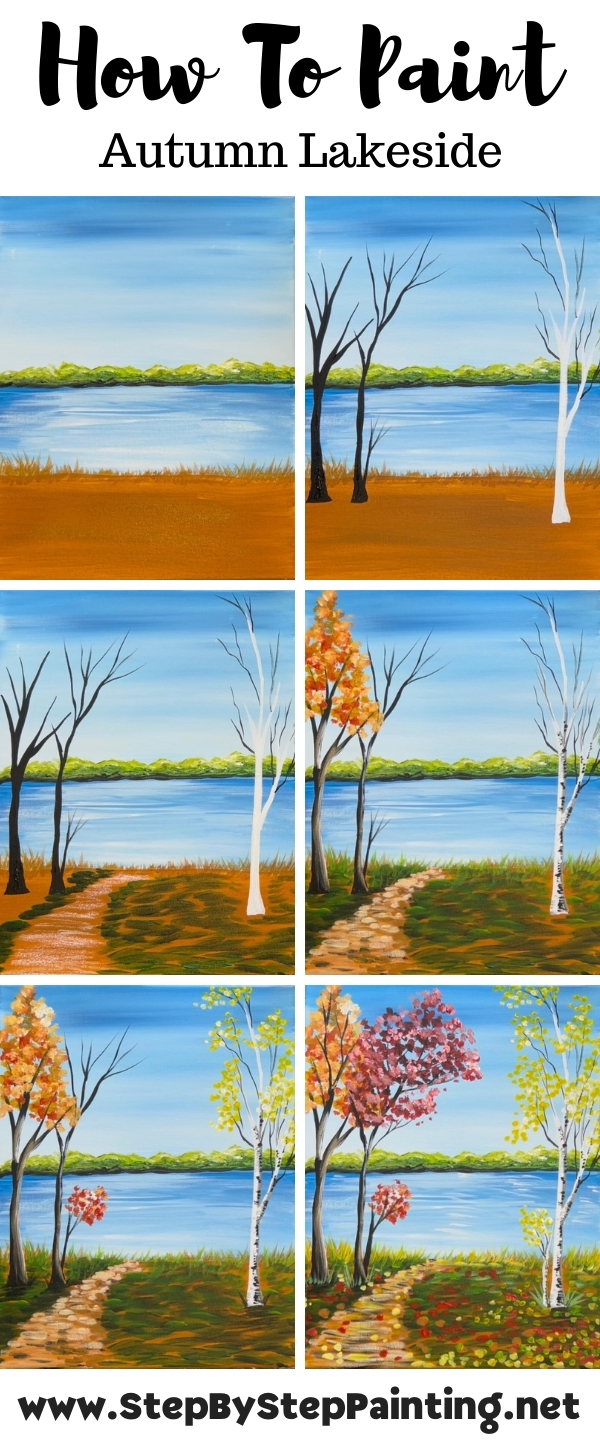
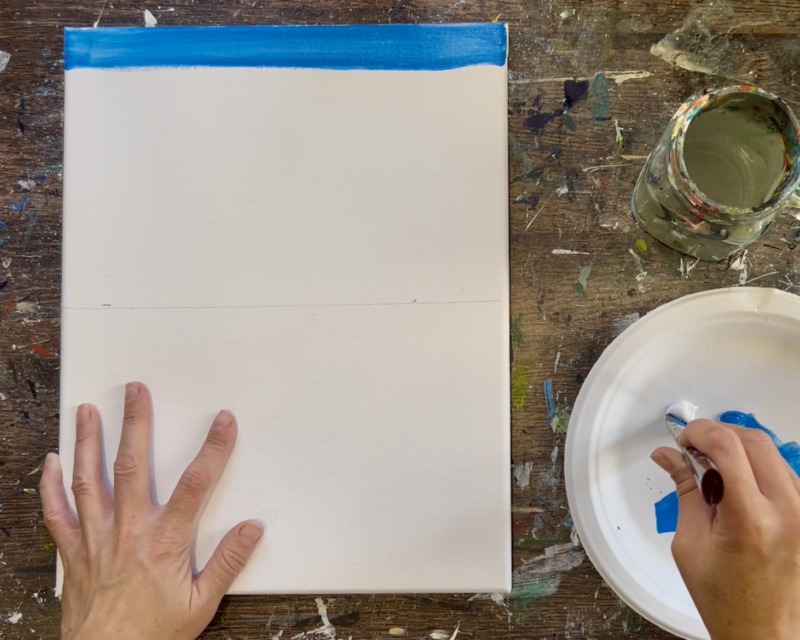
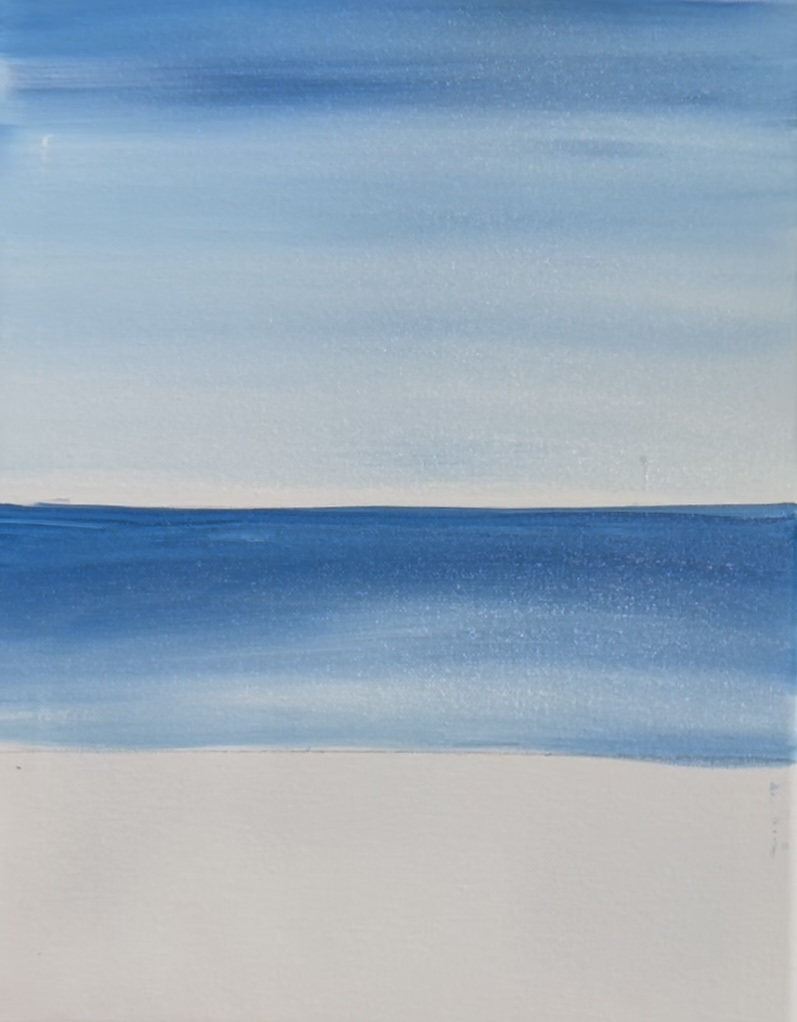
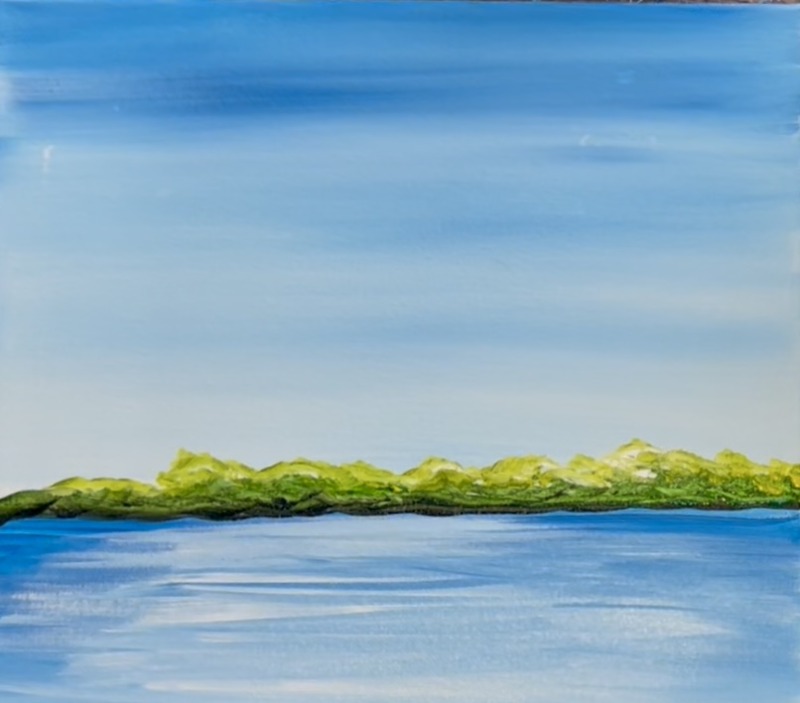
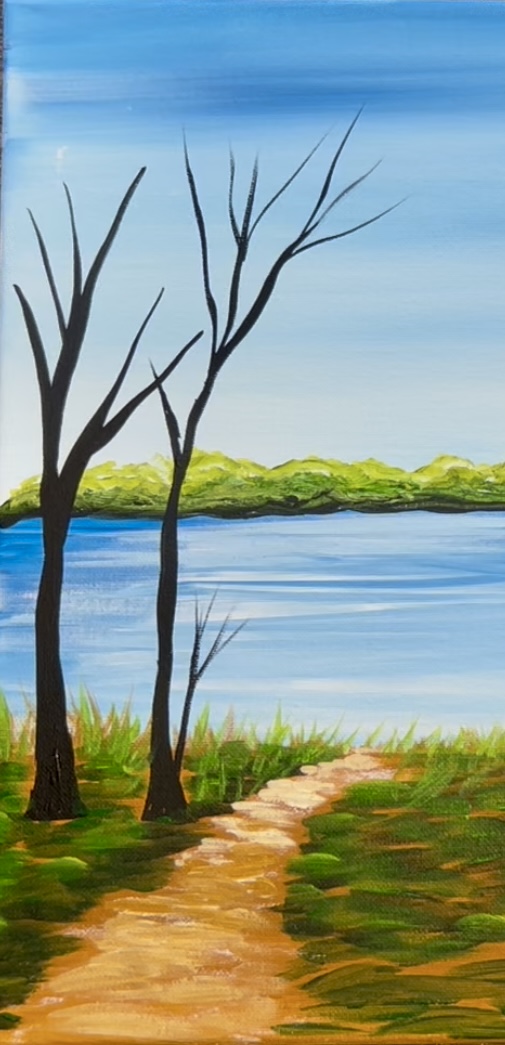
1. Draw Horizon Line & Paint Sky
Use a pencil and ruler to draw a horizontal line down the very center of the canvas. Note: the canvas is placed vertically.
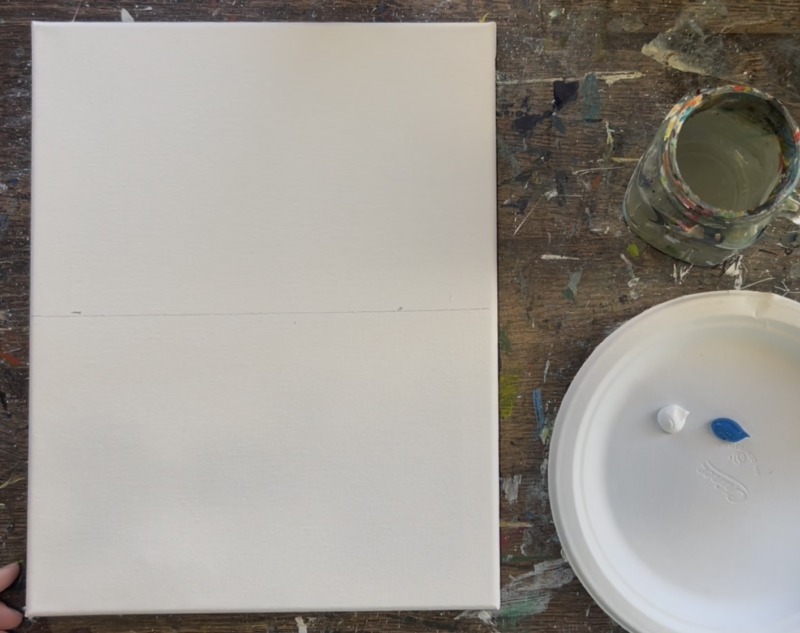
Load your paint palette with the two colors: “titanium white” and “cerulean blue”.
Use the 3/4″ flat brush. Load it into just the “cerulean blue”. Start at the top of the canvas and paint about 1″ down using left and right horizontal paint strokes.
Then load your brush into “titanium white” without rinsing the brush. Blend the white with the blue so that you create a “gradient” of darker blue at the top and lighter blue on the bottom. Brush over your blue area several times until it blends and continue painting left and right paint strokes.

Add more white to your brush and work your way down to the horizon line.
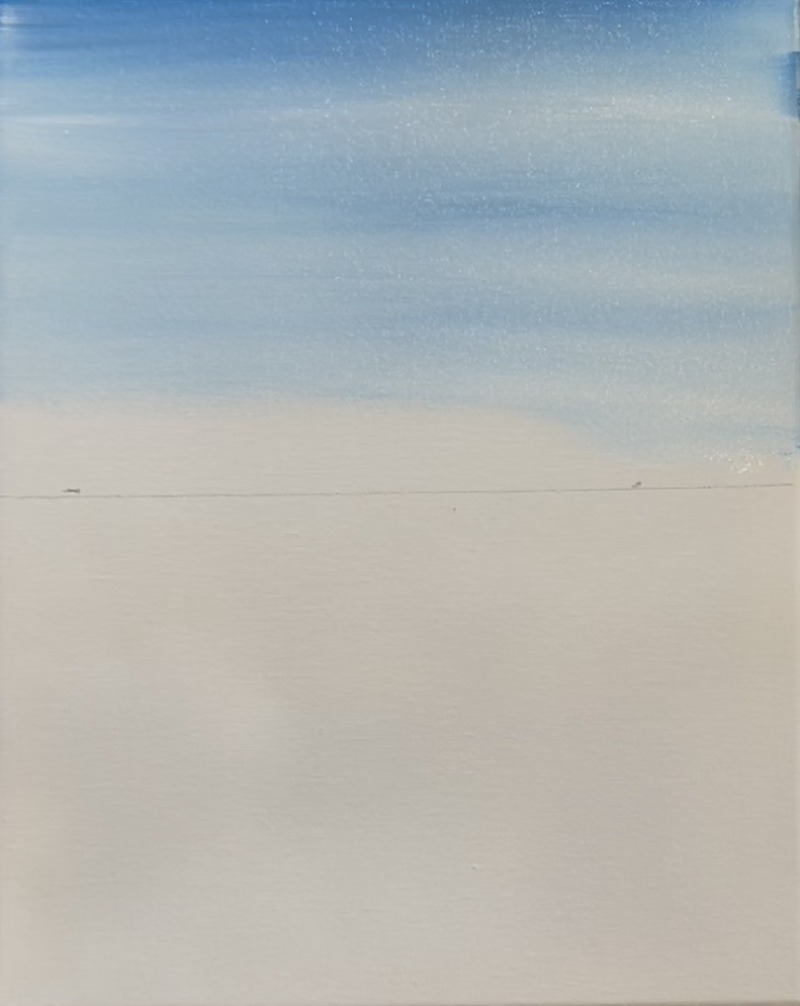
Go all the way down to the horizon line and keep blending this lighter color blue. The sky ideally is darker on the top and lightest on the bottom above the horizon line.
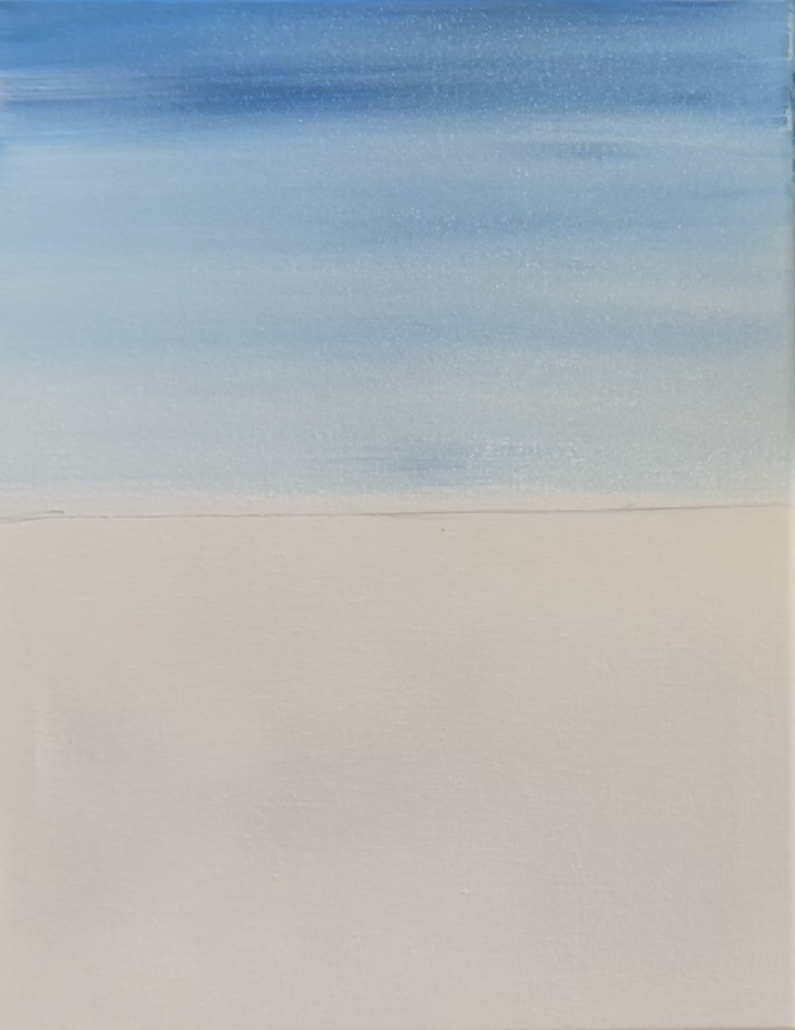
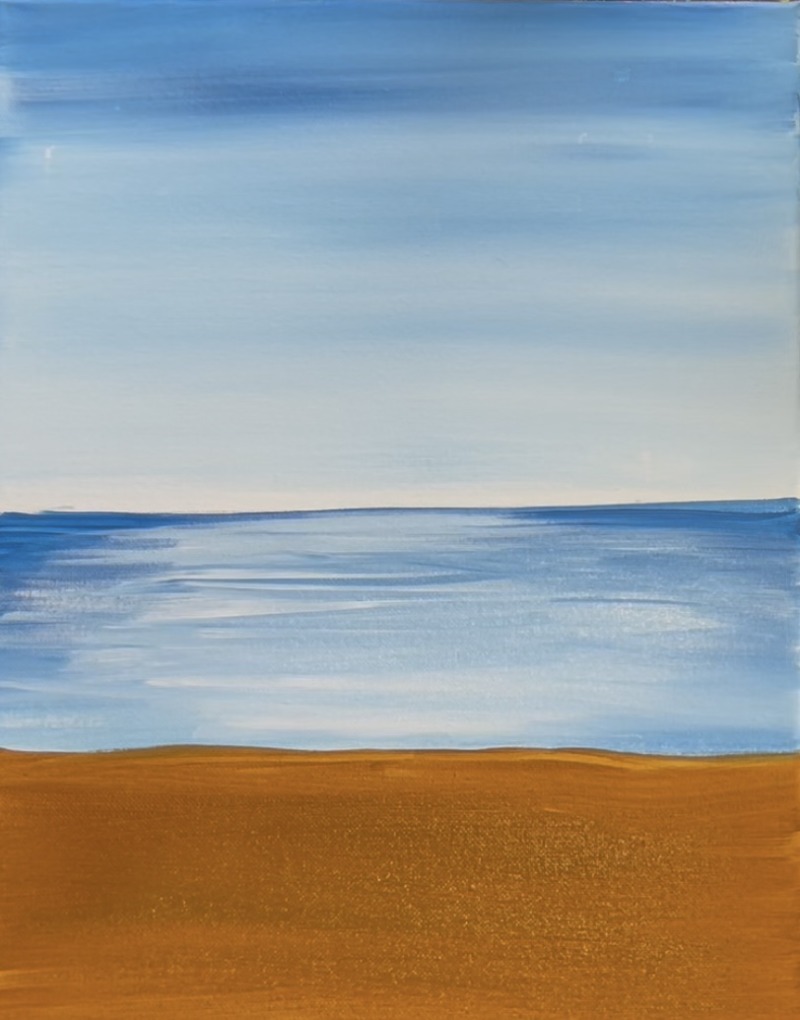
2. Paint Lake
Draw another horizontal line that divides the bottom area of the painting in half. The top half will be the lake and bottom half will be the land area.

The lake is done using the same two colors and same technique! The only difference is that the lake is slightly darker than the sky. Start just below the horizon line. Use the color “cerulean blue” just below the horizon line and go almost all the way down with it to paint the lake. Leave about a 1″ gap. Then load your brush into “titanium white” and blend the white up into the blue.
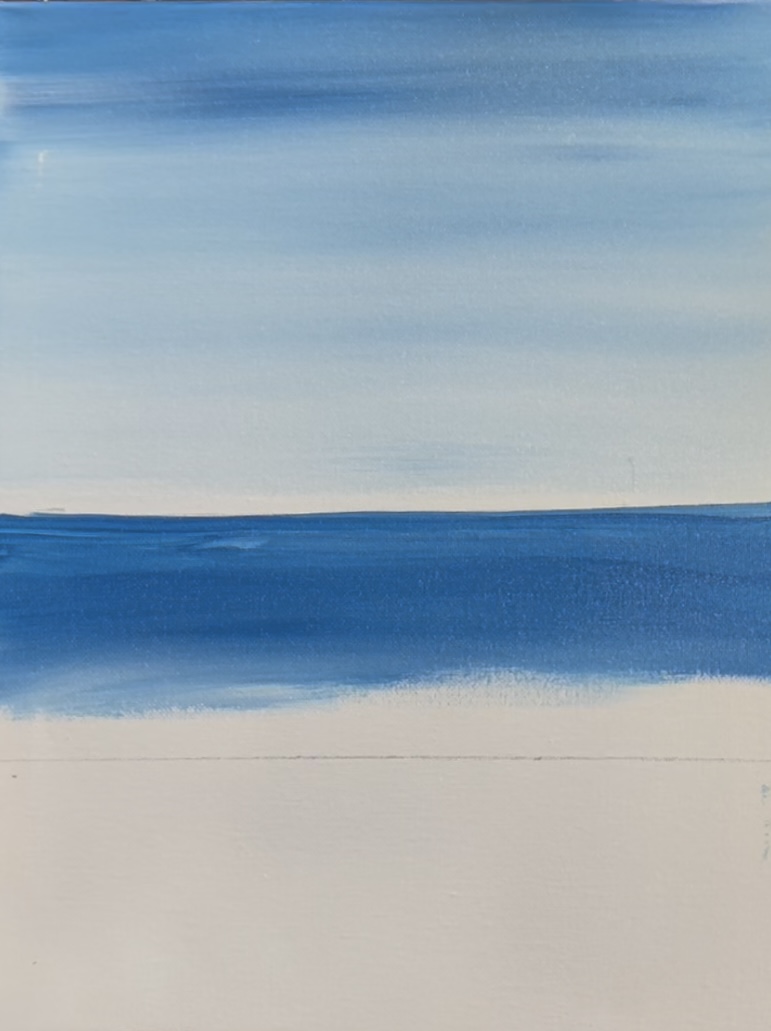
The lake will be lighter on the bottom and darker further in the distance.
3. Paint Ground (first layer)
Load your paint palette with “raw sienna”. Use the 3/4″ flat brush to paint the bottom area a solid coat of “raw sienna”. No blending is needed right now but make sure you are painting in left and right paint strokes.

4. Highlight Water
Load your clean 3/4″ flat brush into “titanium white”. If the blue of the water is dry, thin the white down slightly so the white shows up somewhat translucent. If the water/ blue is still wet, load the brush into white as you would normally do.
Lightly brush white in the center area of the water to lighten the water. Do left and right paint strokes just in the middle of the lake area. Leave the far left and right sides of the lake dark.
5. Paint Shrubs In Distance
Use the #12 bright brush. On your palette mix about 1 part “mars black” with 3 parts “hooker’s green hue”. Start by outlining a line just above the horizon line.
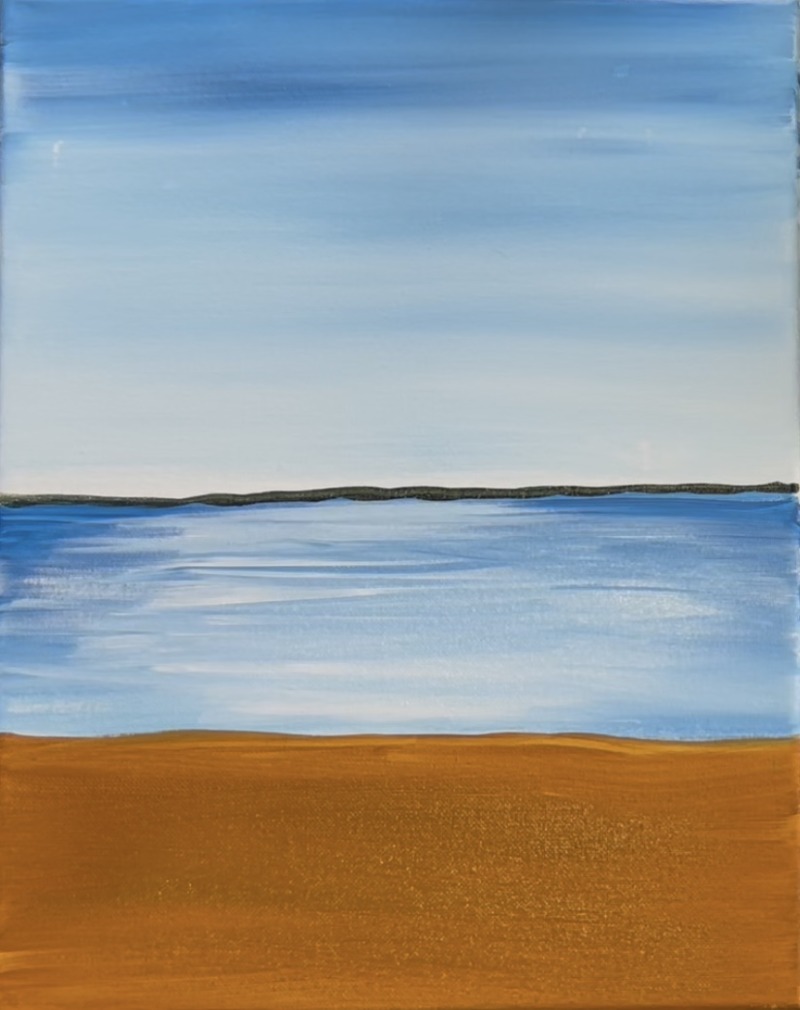
Then “dab” the brush to create a textured area to create “shrubs” way in the distance. Create differing heights to this “bush line”.
After creating this first layer, add “primary yellow” to your brush without rinsing. Blend some yellow-green at the top by dabbing your brush.

Then add a bit of “titanium white” to the brush without rinsing. “Dab” more textured paint marks at the very top of this bush line. This will brighten and “highlight” the top.
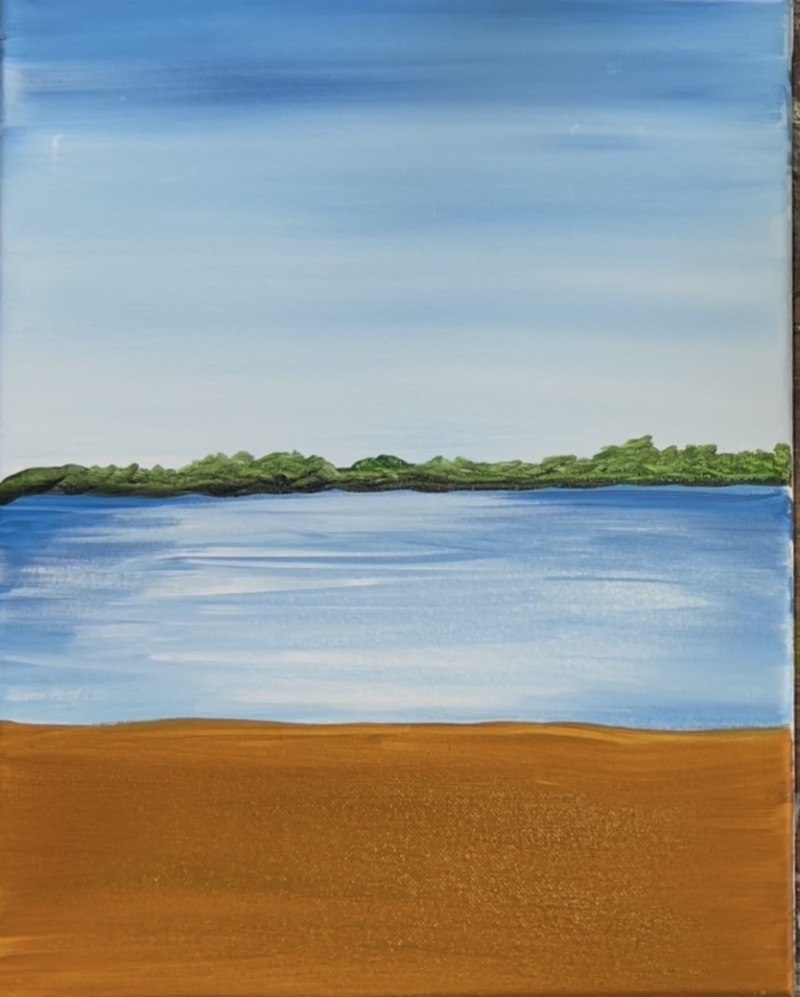
6. Paint Grass (first layer)
Use the #4 round brush and “raw sienna”. Paint thin grass marks on the top edge of the land area that overlaps part of the lake. Drag the brush upwards to create different angles. Keep in mind that there will be a path in the middle left of the ground area. Paint shorter blades of grass in this area.

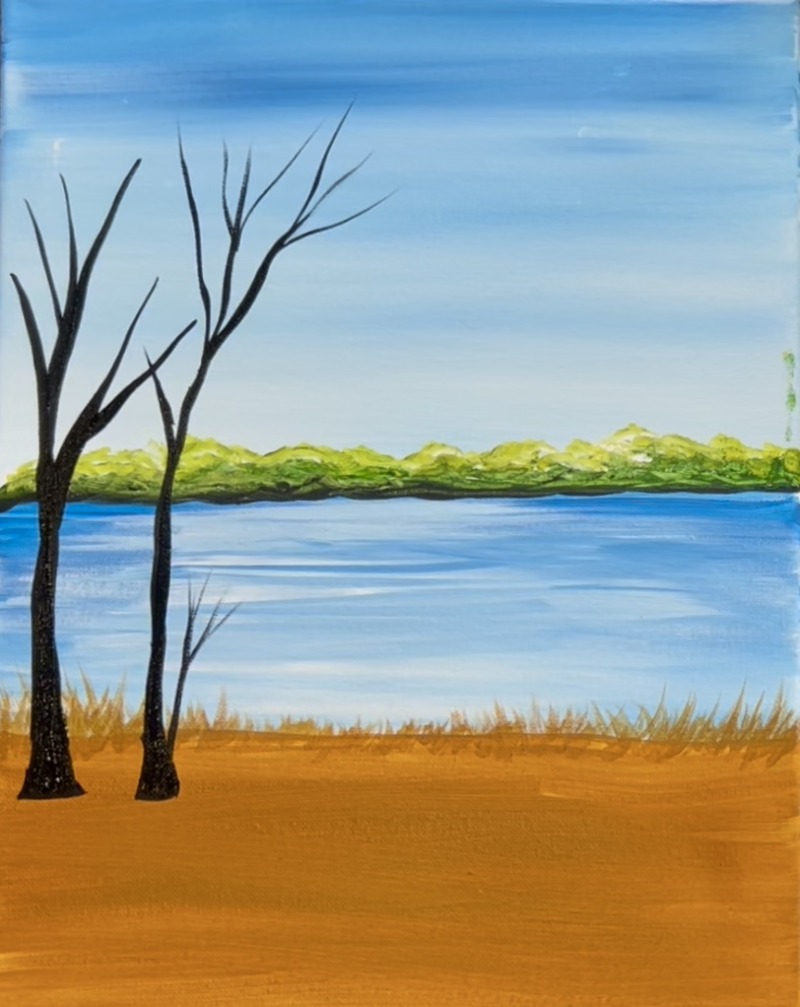
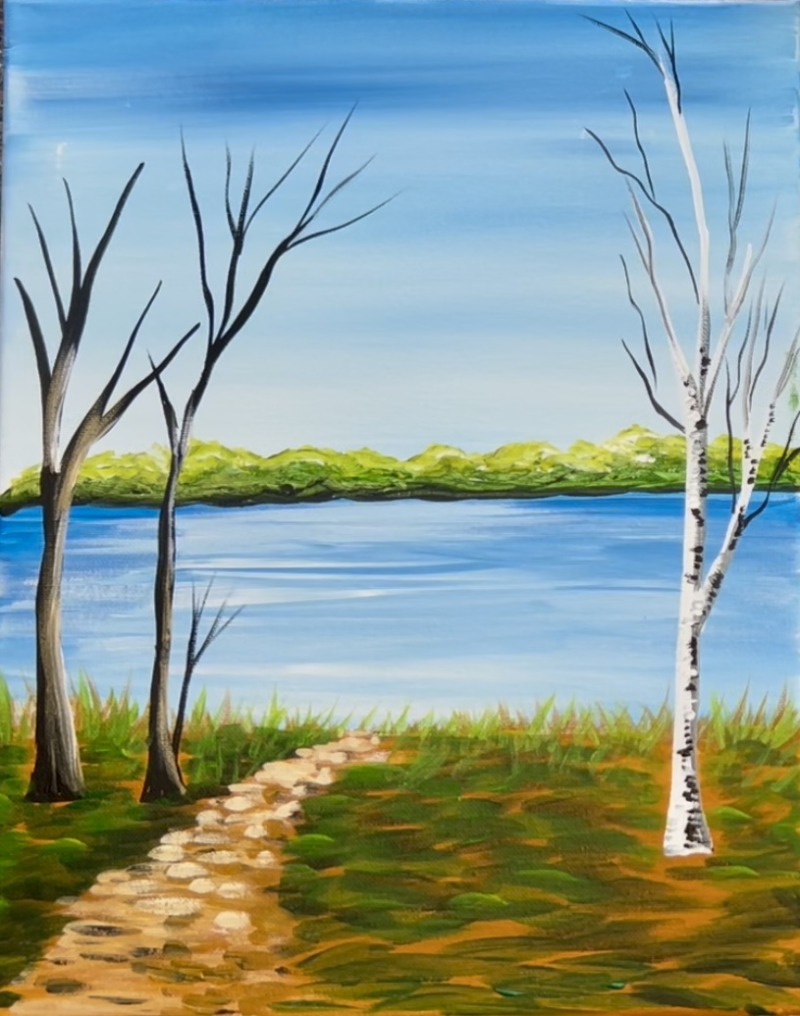
7. Paint Trees & Branches
Use a #8 long round brush for this step. Start by slightly watering down a little bit of “mars black” paint. Paint the first tree on the far left higher than the mid area of the ground (about 1 inch below the edge of the lake). Start with a trunk that flutes out wide and then becomes narrow and branches out into multiple small branches.
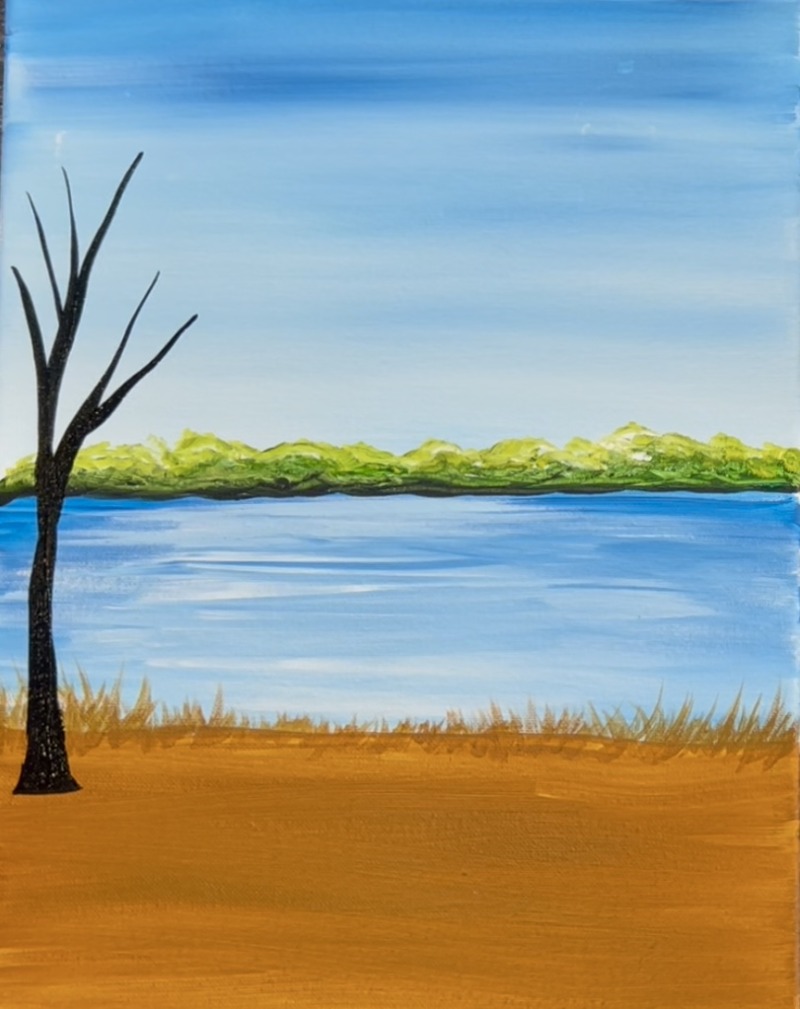
When you use the “8 long round brush”, try applying more pressure on the brush for thicker paint strokes and then apply lighter pressure for thinner paint strokes. Paint a similar tree just to the right of the tree you just painted. This one, I made slightly different. The branches are smaller, the tree is slightly taller and there is a smaller branch on the lower part of the trunk. Try not to make too many branches overlap each other.
Repeat this technique for the aspen tree on the right. This time use “titanium white” for the tree branches. This aspen tree also starts lower on the ground area (about in the middle) and the branches are more upright and taller.
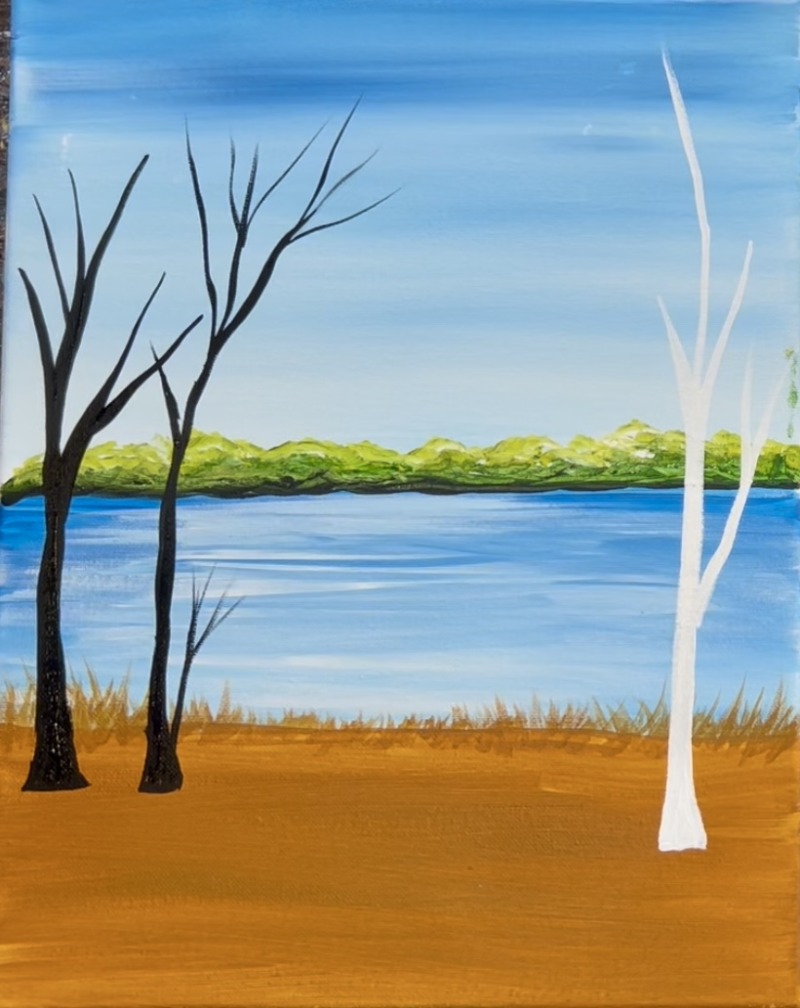
Then load your #8 long round brush into “mars black” and paint black branches extending from the white branches that are thin and upright.
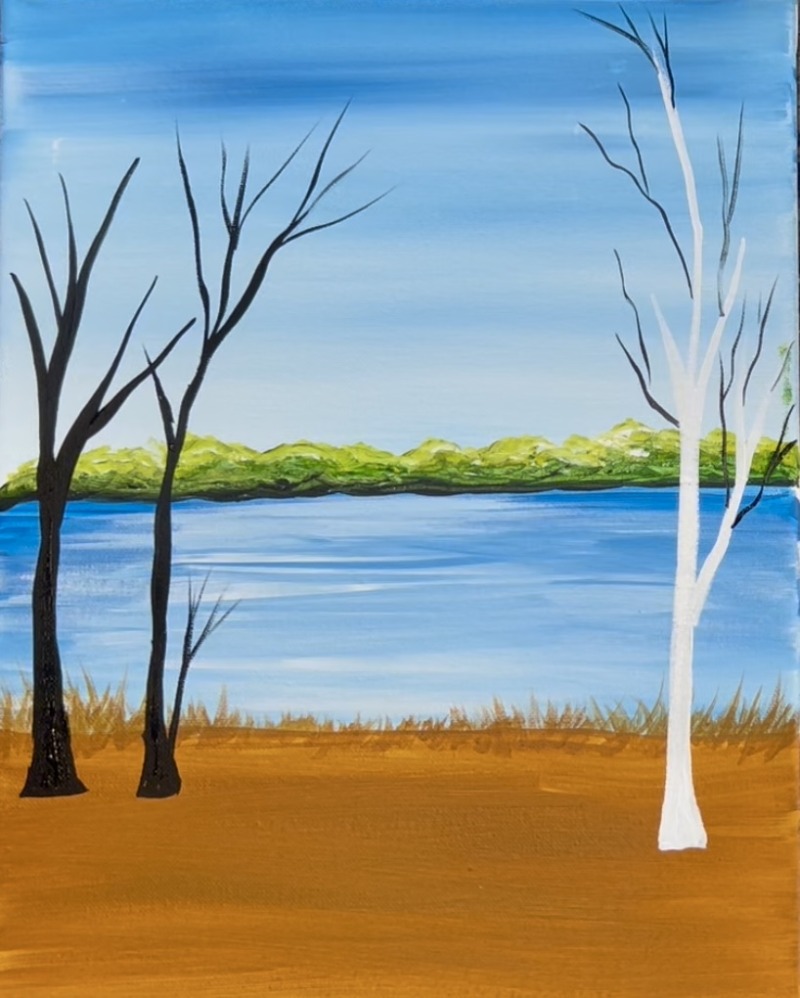
8. Draw Path With Chalk
Use a piece of chalk to lightly sketch where you want the path. I drew my path on the left. Start it out very narrow where it meets the lake and then sketch left and right sketch marks and make the path go wide and slightly curve on the bottom of the painting.
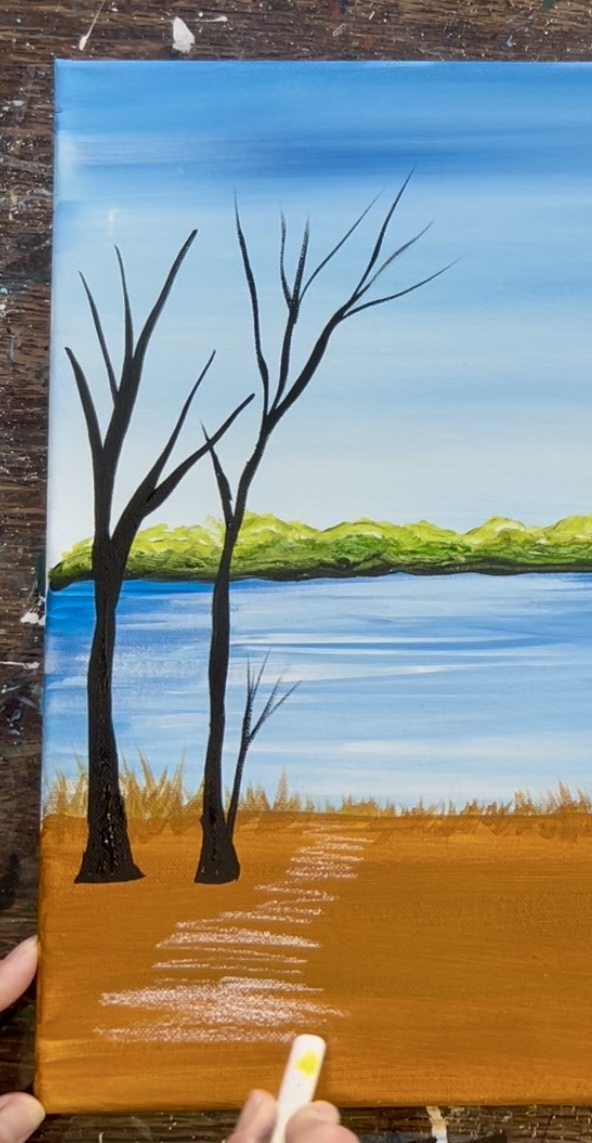
9. Paint Ground (second layer)
Use “hooker’s green hue” mixed with a tiny amount of “mars black”. Use the #12 bright brush to paint little left and right paint, slightly curved marks to fill the ground area on both sides of the path. Don’t cover up all of the brown layer, there should be gaps of brown showing through your green marks.
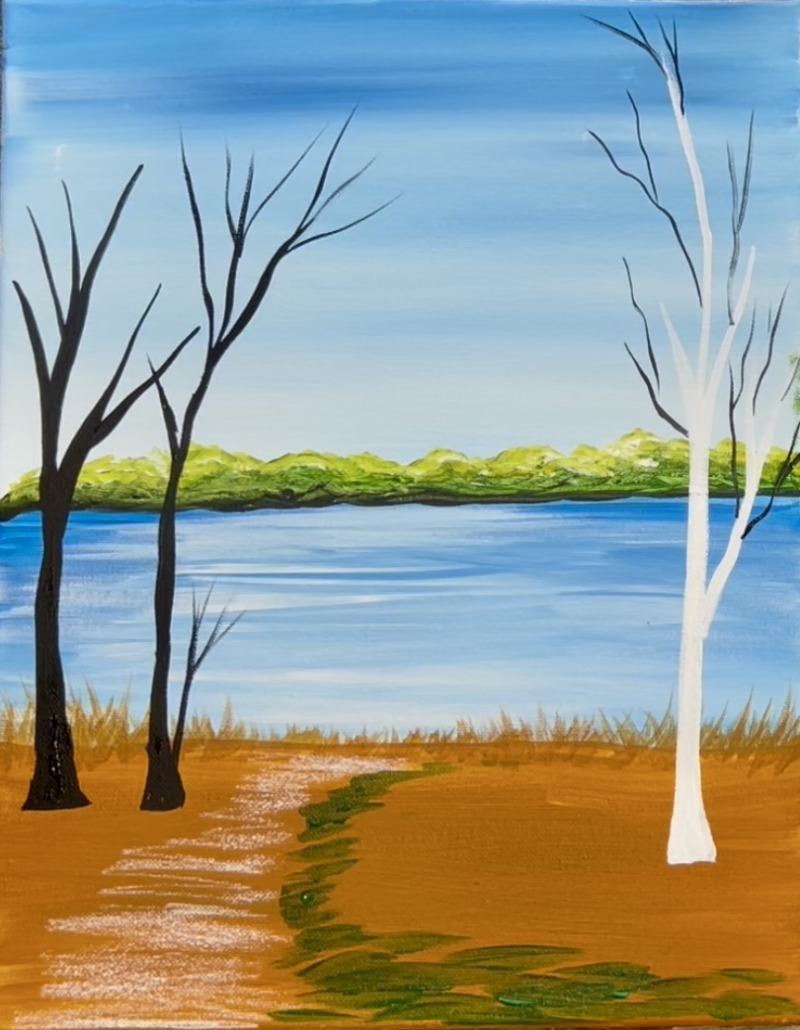
Go around the path and around the trees.
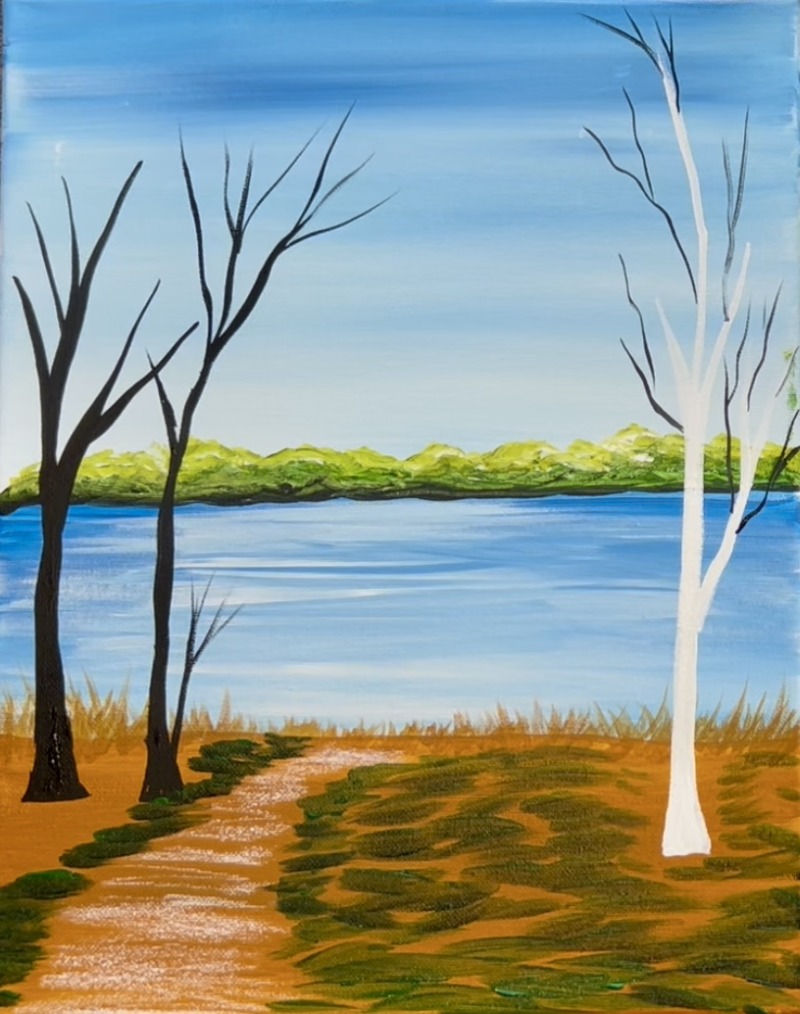
After doing an initial “dark layer” on the ground, mix “primary yellow” with “hooker’s green hue” to make a lighter yellow-green. Use this yellow-green color to add another layer over the first dark green layer. Do this with the same type of brush marks but don’t cover up your previous layers.

Next, use the #4 round brush to paint another layer of green grass over the brown grass layer you painted earlier. Use the “yellow green” color you just used. Paint grass blades along the edge of the lake and a few down toward the middle of the ground area. You do not need to fill the entire landscape with grass!
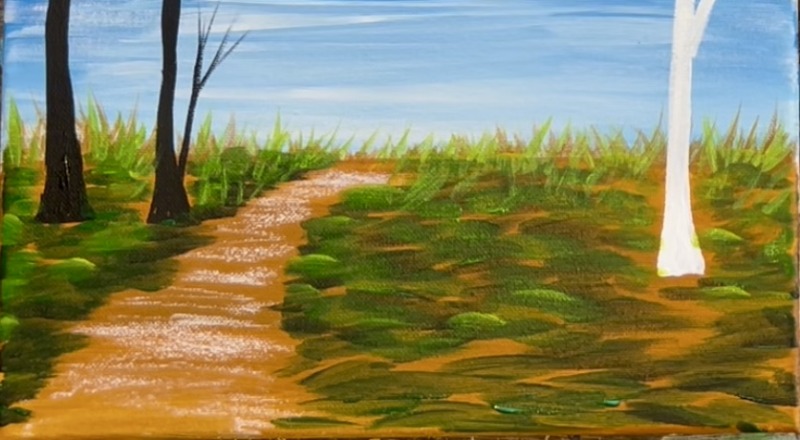
10. Paint Path
Use the #12 bright brush for this step. Mix equal amounts of “titanium white” with “raw sienna”. Use the same type of horizontal paint marks and paint this light brown color on the path. Paint about halfway down the path starting at the back. When you get to the middle area, add more “raw sienna” to your brush (without the white) and continue to paint more horizontal marks. The bottom of the path is slightly darker than the top (part closer to the lake).
Then add a little bit of “mars black” to your brush (without rinsing). Add a few little black marks throughout the path.
11. Paint Black Marks On Tree
Use the #8 long round brush for this step. Mix black and white together to make gray. Start by outlining the right side of all the main white branches on the aspen tree with this gray. Then use “mars black” to paint little horizontal marks over the white tree trunk/ branches.
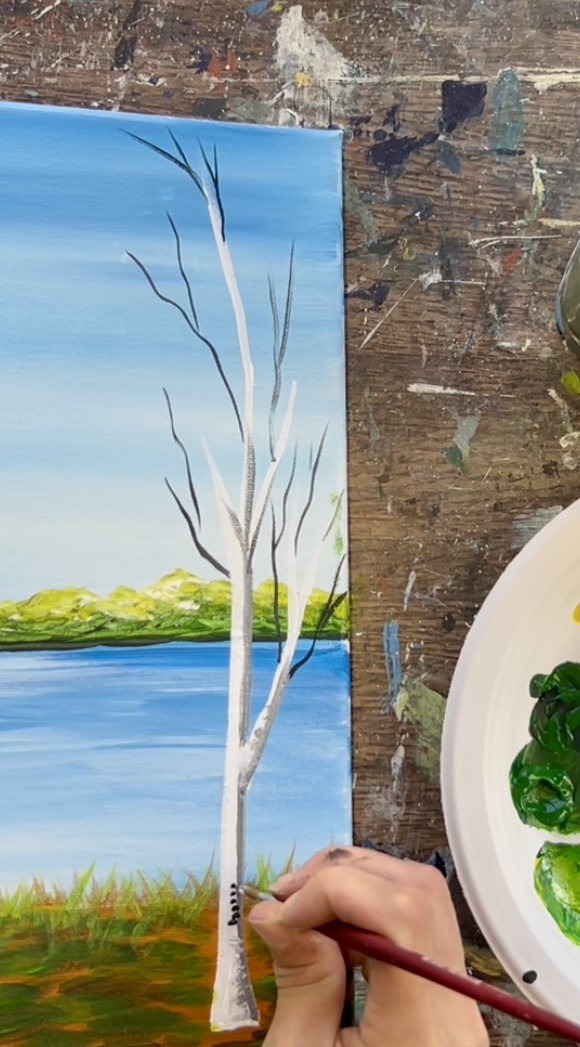
Do a variety of dash marks all up the right side of the aspen tree trunk on all the major branches. Some of the marks are larger and some tinier.
12. Paint Leaves On Trees
Mix an orange on the paint palette. Use the #4 round brush to “dab” little orange leaves on the tree on the left.
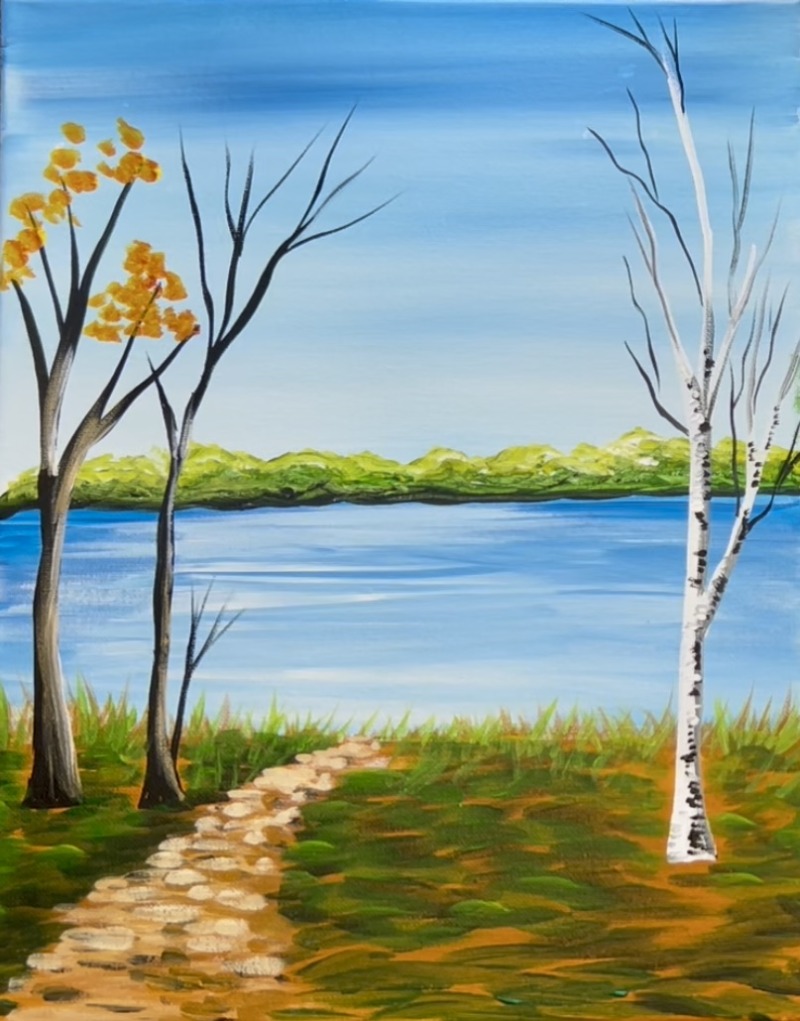
Fill the tree up in a triangular shaped column. Vary your paint colors by adding bits of red into the leaves for darker/ shadowy leaves and then adding bits of white into the leaves for brighter golden leaves.
Then do the leaves on the aspen tree. Aspen tree leaves are more rounded. Therefore, when we make these paint strokes, we are going to paint little circles by “dotting” the end of the paint brush. Load your #4 round brush into “primary yellow” and paint little individual dots on the ends of the branches. Create little bunches clustered together.
After your first yellow layer, add “titanium white” into your yellow for brighter leaves! This will create the look of the leaves “shimmering” with the light (like a quaking aspen tree).
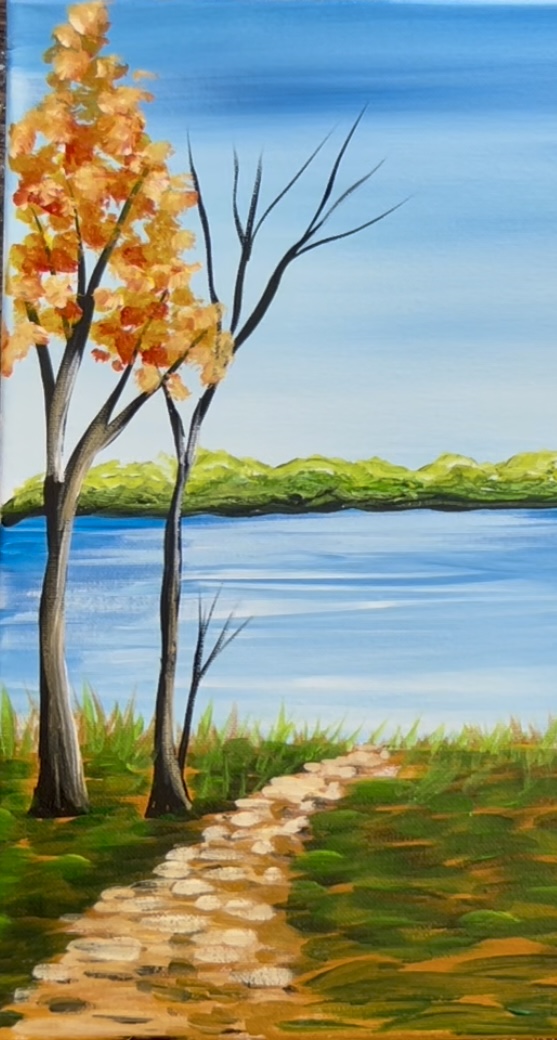
For the next tree, I recommend waiting for the orange leaf tree to dry. In the meantime, use “cadmium red medium” to add little dabs of leaves on the little branch tree towards the bottom. Add little bits of white into the red for light variations of color on the leaves.
13. Paint Leaves On Ground
Use the “yellow” to paint rounded leaves on the ground.
Then paint red leaves on the ground. The red paint strokes were larger and a little elongated. Do this throughout the landscape!
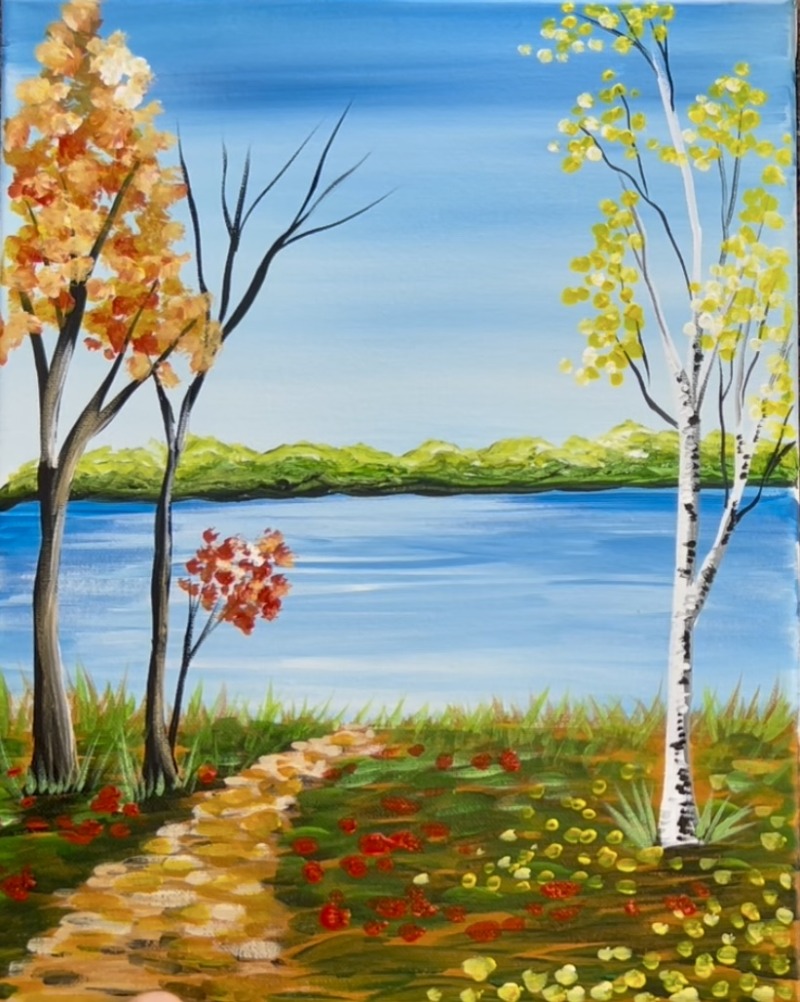
Add a few leaves on the path (but not too many to where the path starts to disappear).
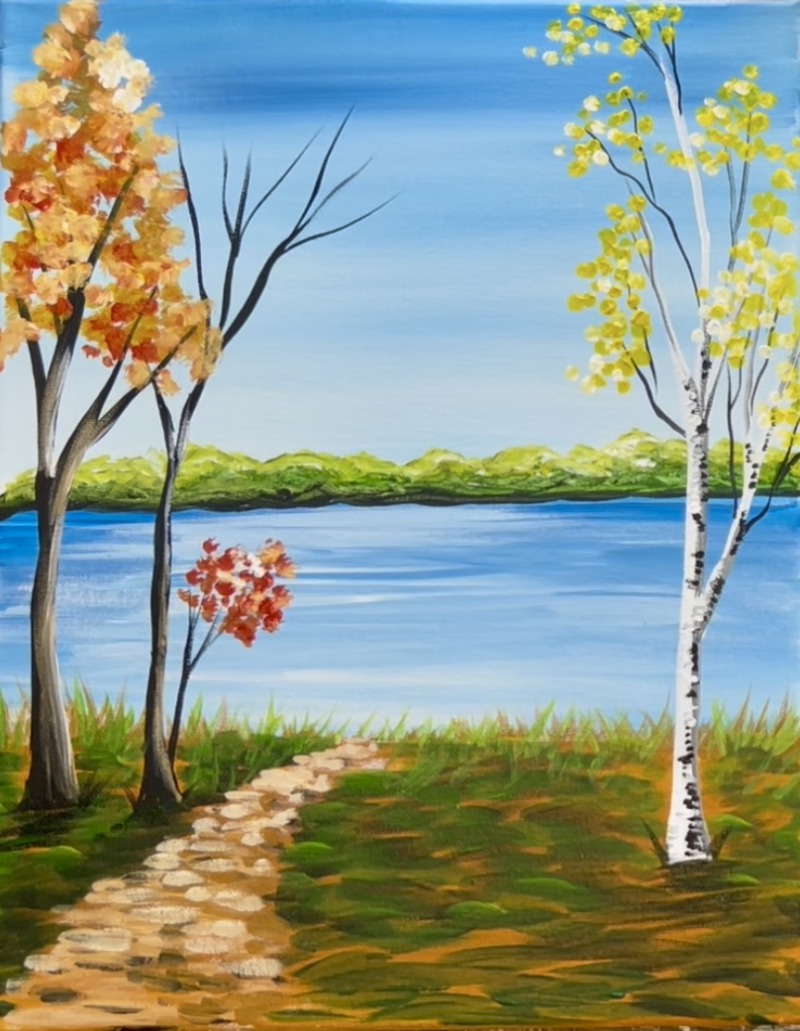
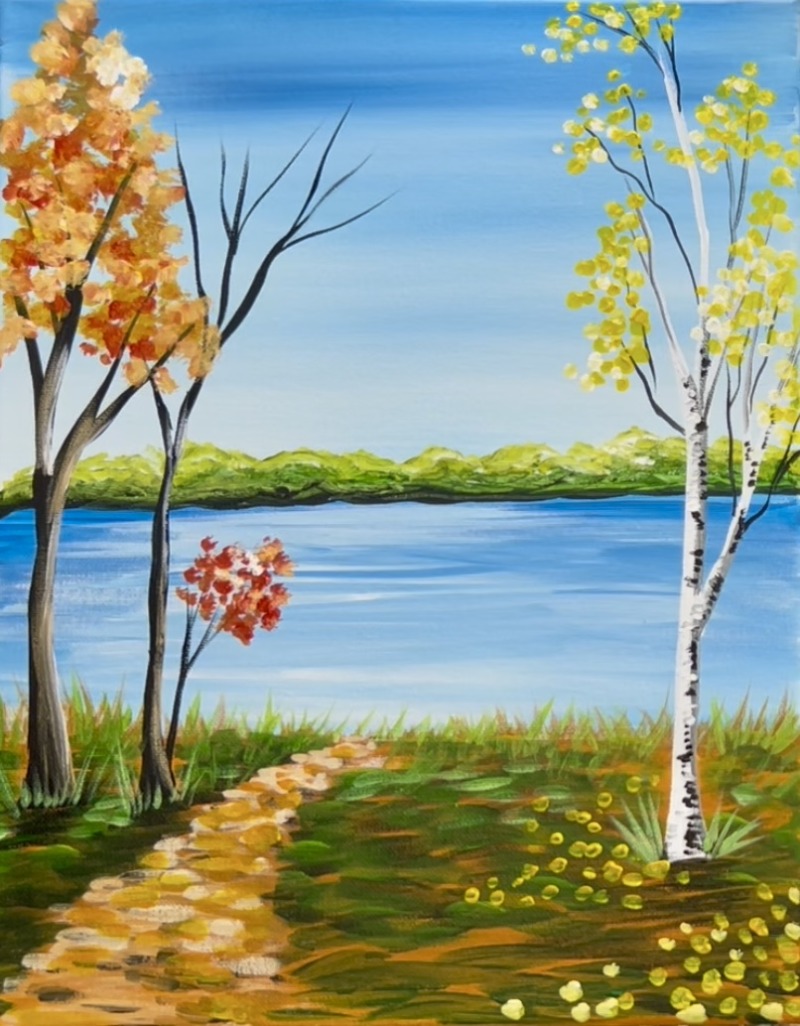
14. Paint the dark red tree & final touches
When the orange tree dries, paint the dark red tree. To make this “dark red”, mix a tiny bit of “mars black” into “cadmium red medium hue”. Paint these dark red marks first. This will overlap the orange leaves on the tree on the left (unless you want the orange tree to be in front). Then add a layer with just the red not mixed with black. This creates color variation in your leaves.
Add a bit of “titanium white” into your red and paint lighter red marks on the top. Layering leaves from dark to light will create depth in your trees!
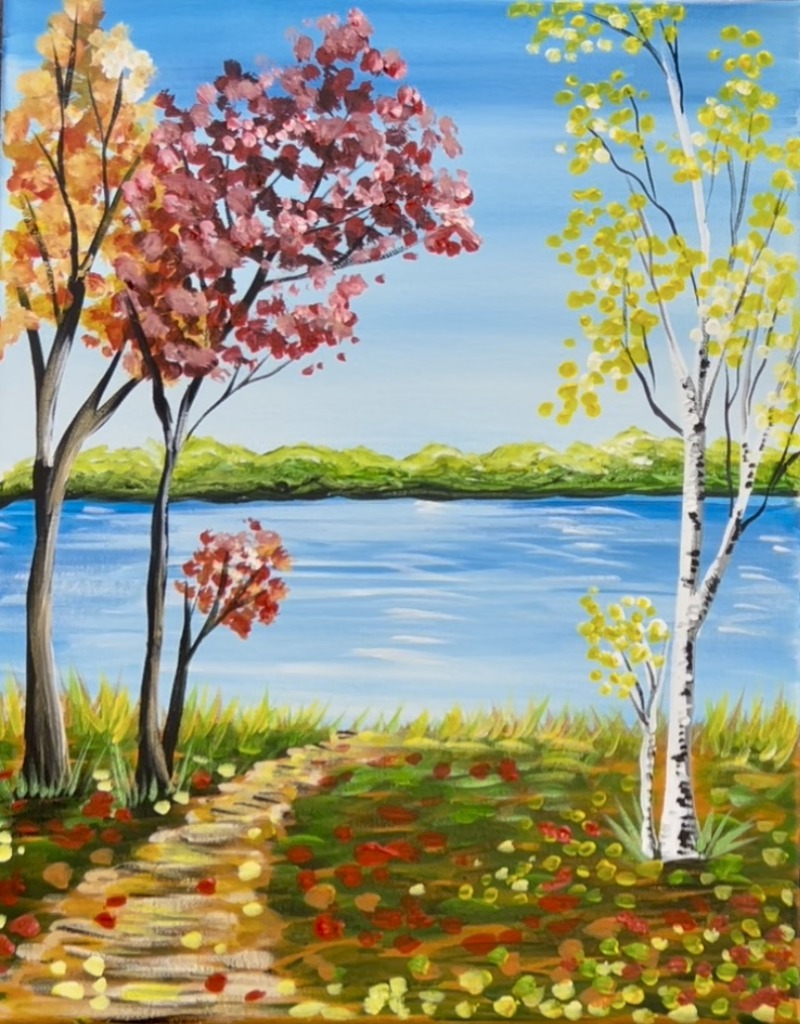
Finished!
Some final touches for this painting could be:
- Adding white water lines using the 8 long round brush in the lake. These lines were adde throughout the lake. Lines in the background are smaller and lines closer are wider.
- Adding more leaves on the ground! You can add as many leaves as you want in this painting or simplify it and add minimal leaves!
- Adding another “baby aspen tree” just to the left of the large aspen tree.
- A yellow layer over your grass at the edge that meets the lake. Do this with the #4 round brush and paint little yellow grass blades over your darker green grass.