
Would you like to save this?
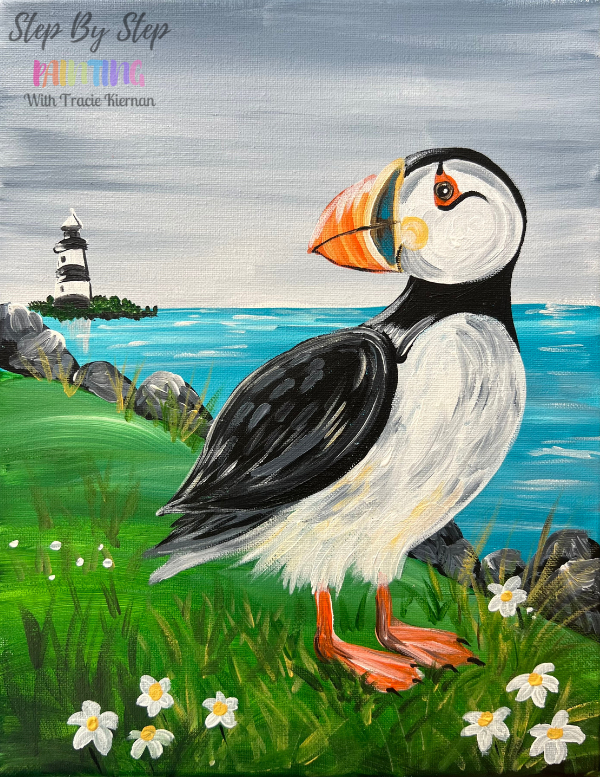
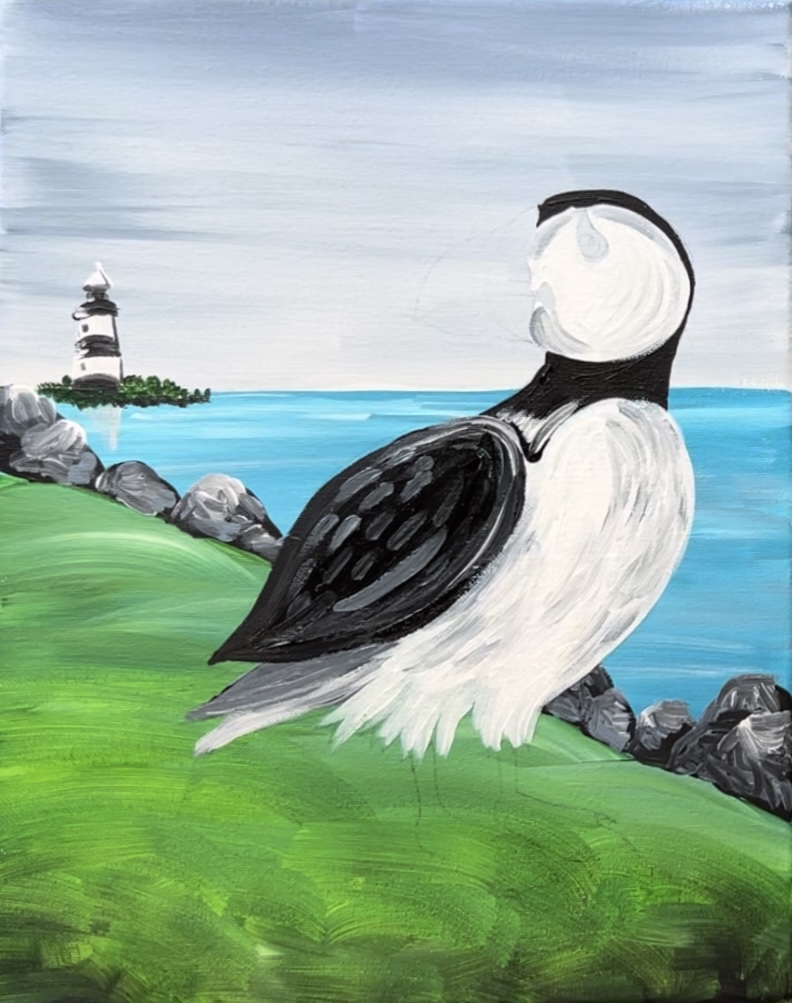
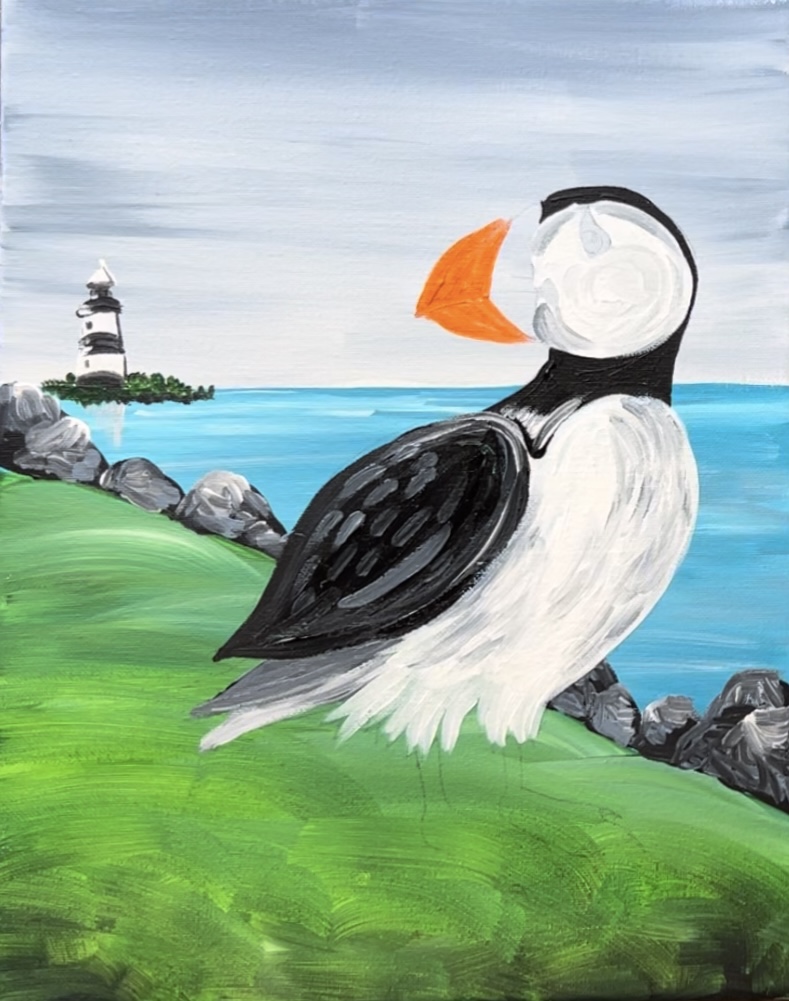
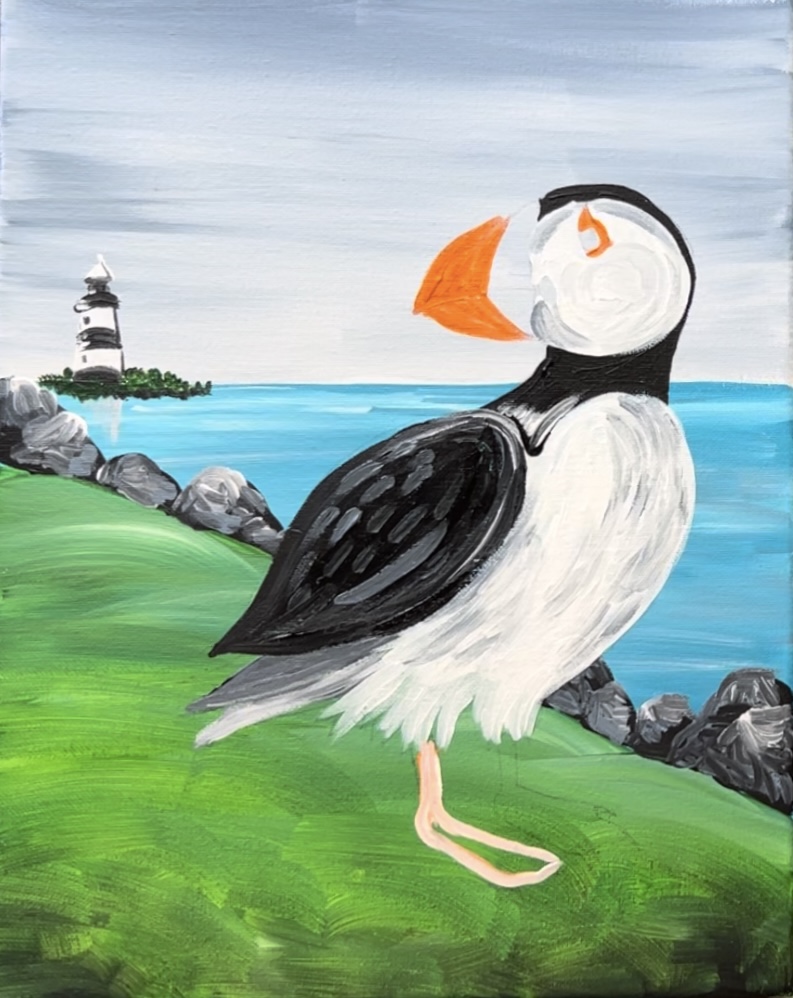
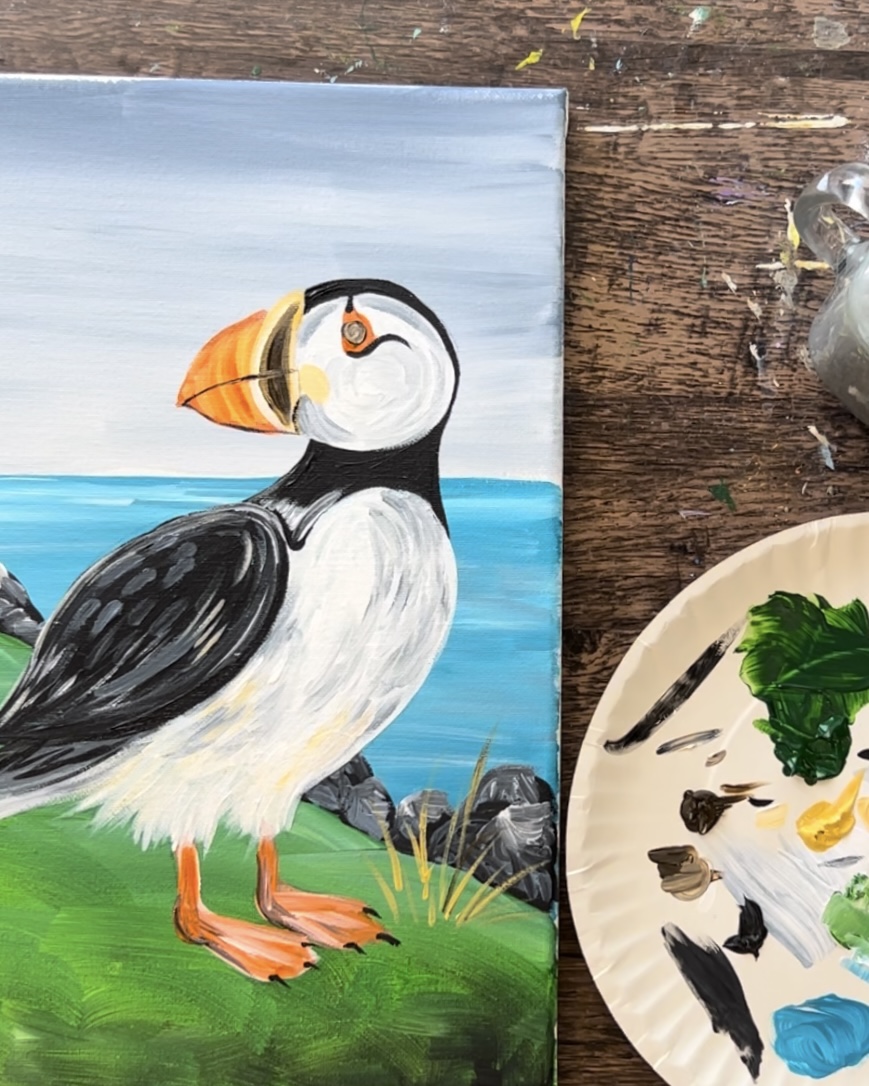
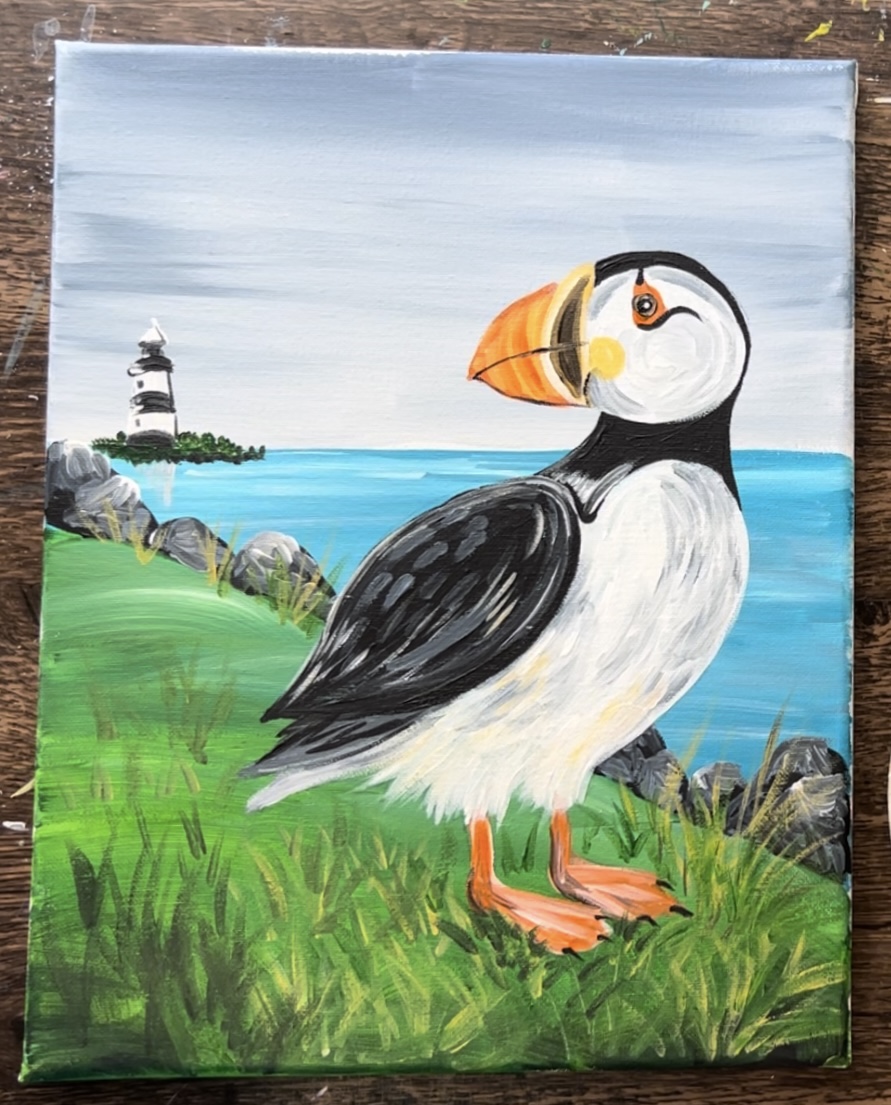
Learn how to paint a puffin! This tutorial shows you how to paint a closeup detail view of a puffin with lighthouse in the distance.
The lighthouse in this painting is actually inspired by a real lighthouse located in the UK. The “Trwyn Du Lighthouse” is located by an actual island called “Puffin Island”.
Puffins can be found in many places in the northern hemisphere throughout the world. I love the beautiful markings on their beaks which make for a fun painting!
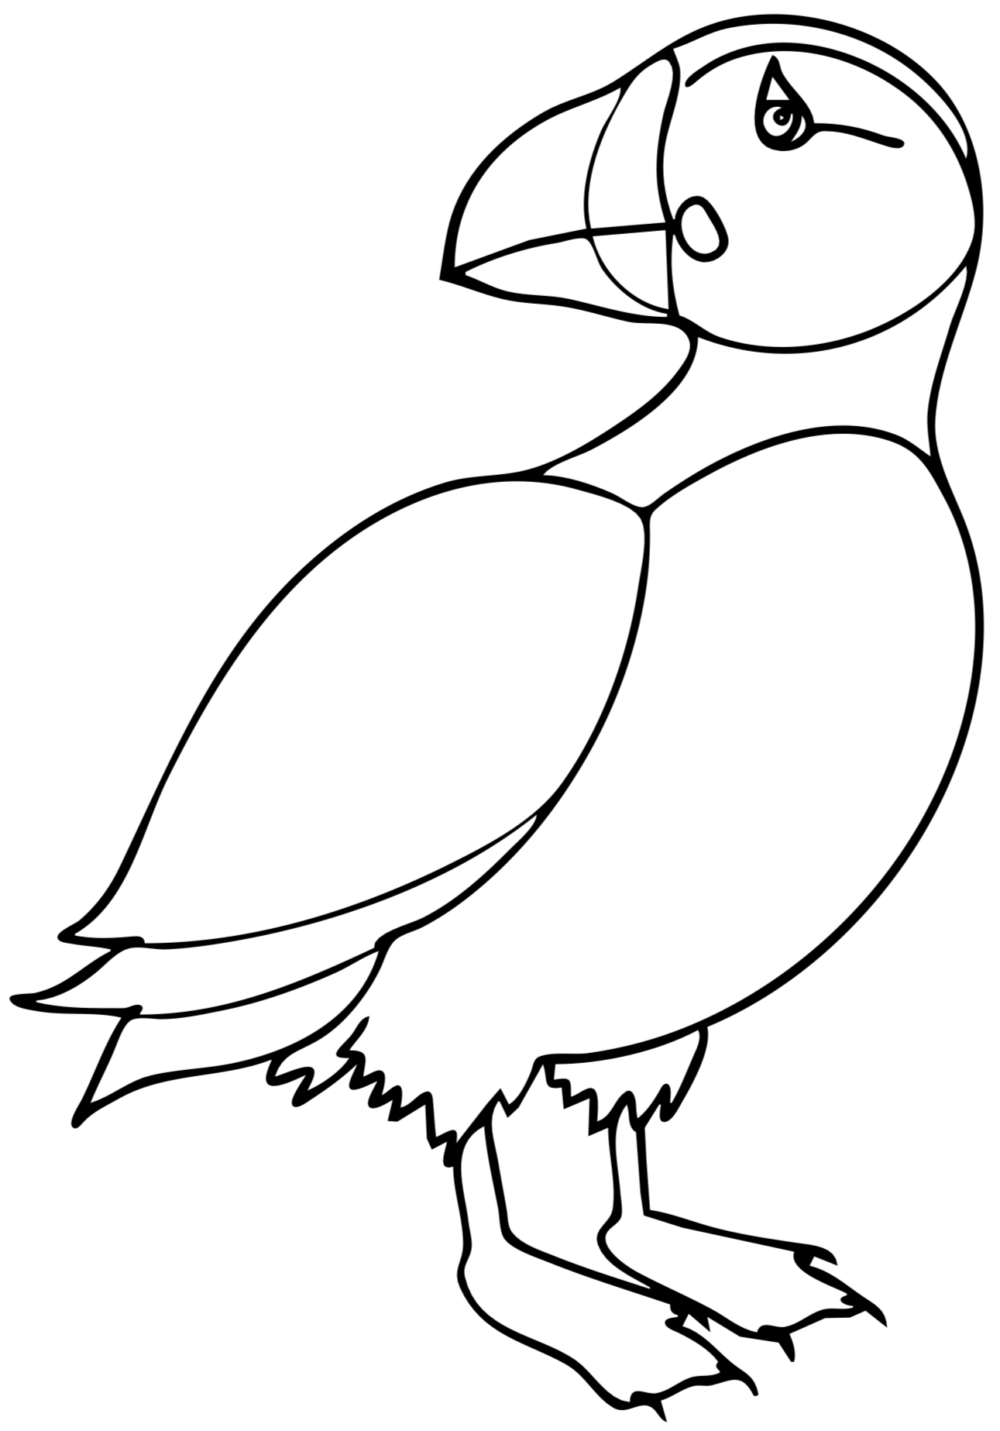
This painting does go into a lot of detail especially with the texture on the bird. You are welcome to simplify this! There is also a traceable template for this that I will be using in the tutorial.
Enjoy and happy painting!
Materials Needed:
"Puffin Island" - Acrylic Tutorial
Materials
- 11 x 14 Canvas
- Acrylic Paint
- Graphite Paper
- Traceable Template
- Pencil
- Brushes
- Ruler
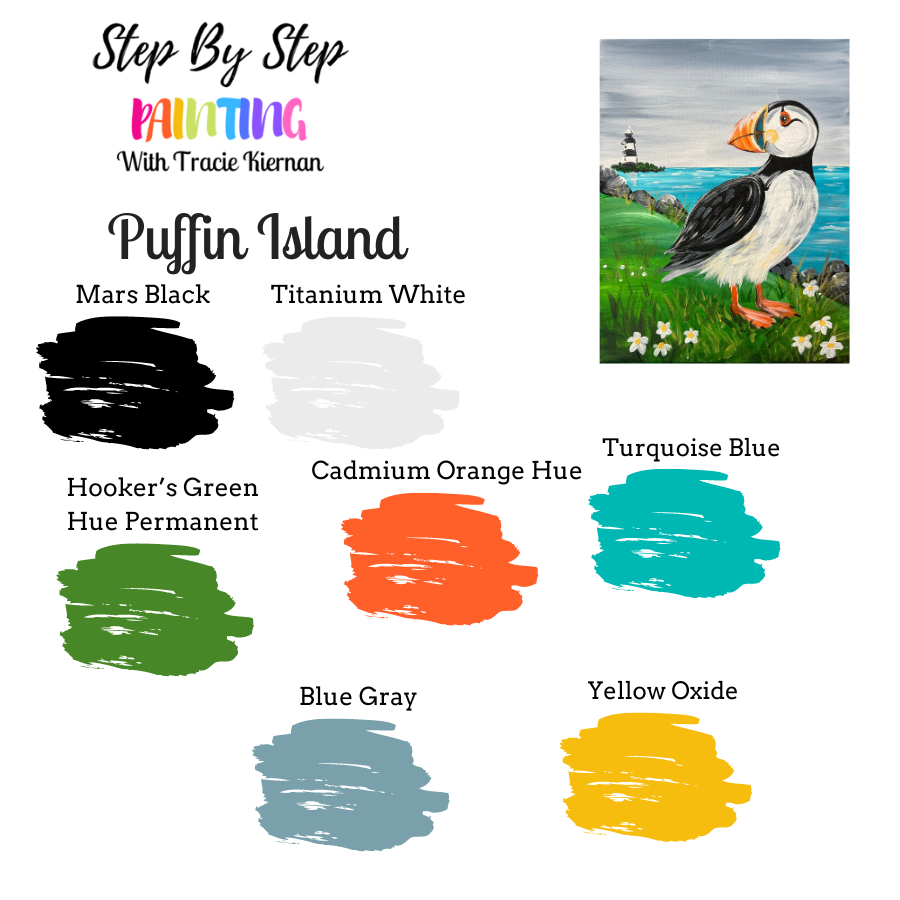
Colors
- Titanium White
- Mars Black
- *Blue Gray
- Cadmium Orange Hue
- Yellow Oxide
- Turquoise Blue
- Hooker's Green Hue Permanent
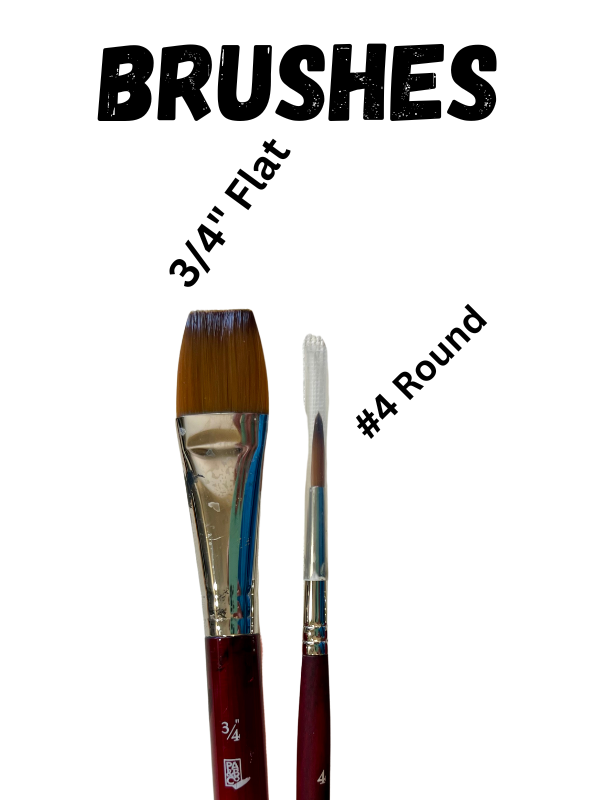
Brushes
Notes
*Blue gray does not come in the Liquitex BASICS large pack of paints. It has to be bough separate. If you don't have blue gray, you can use "Neutral Gray Value 5"
Traceable
Color Palette
Brushes:
Directions At A Glance:
Video:
Step By Step Instructions:
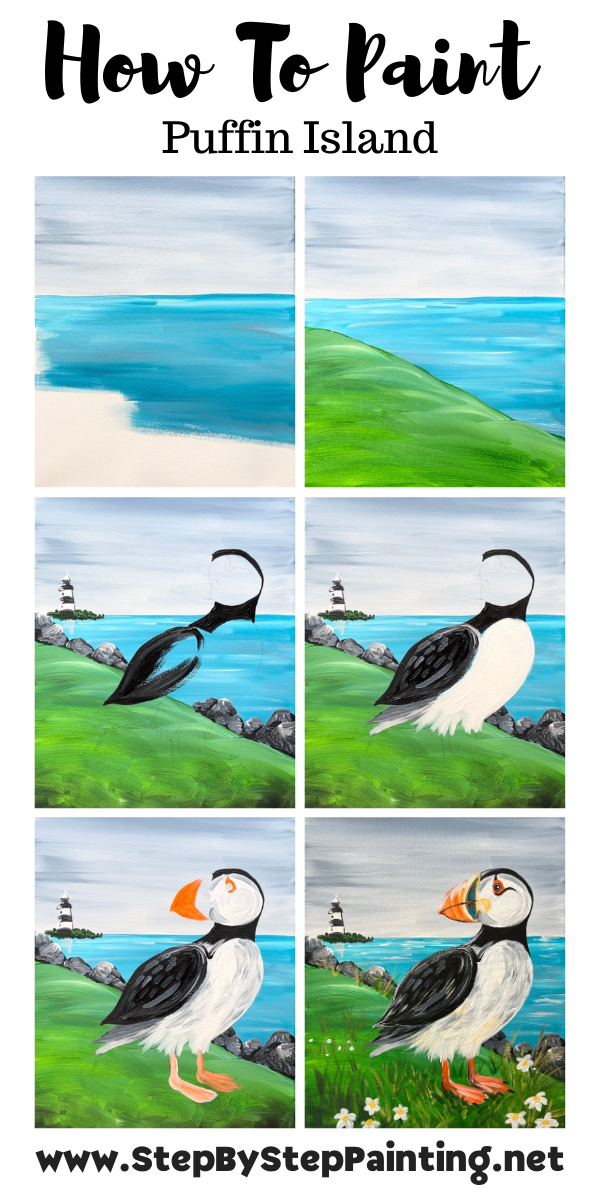
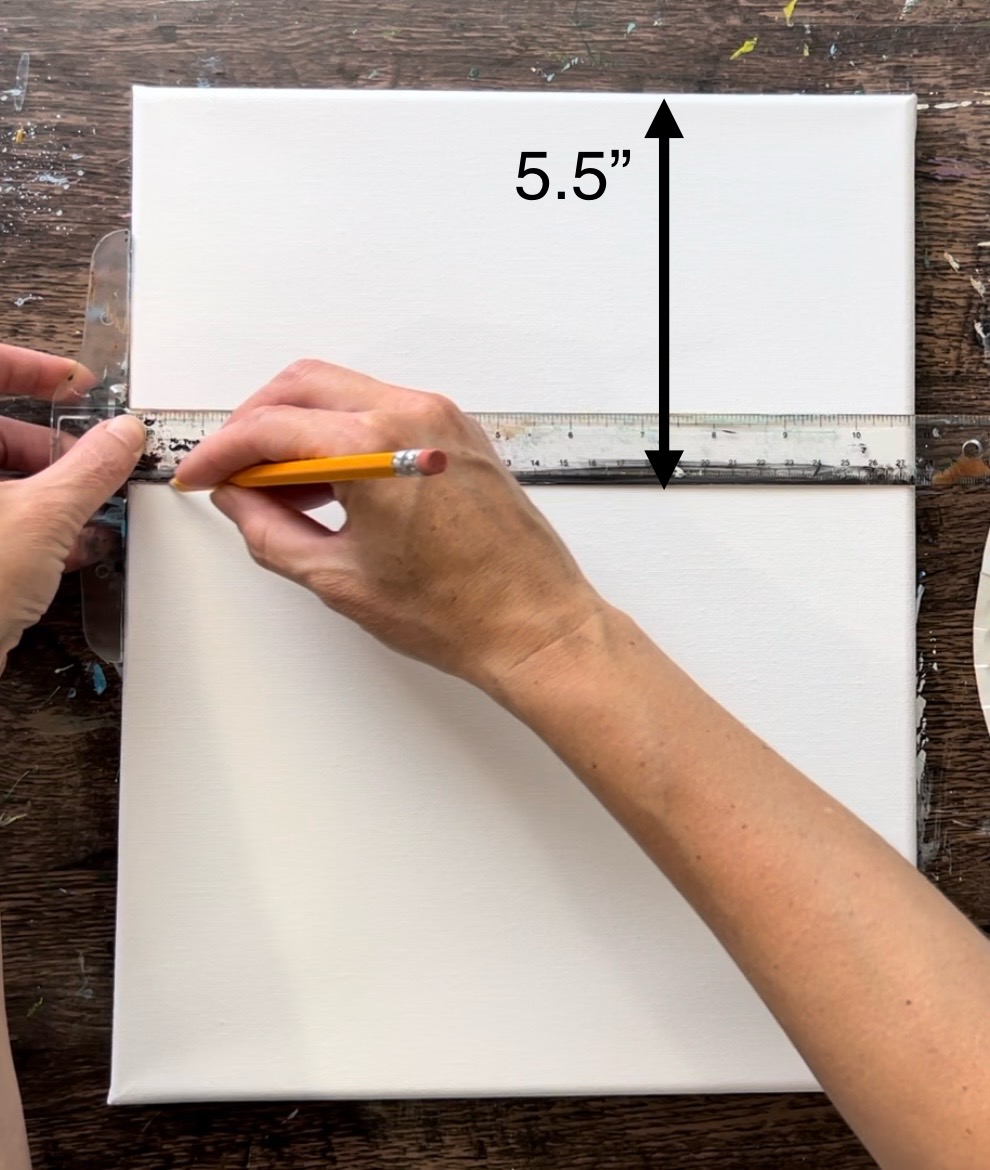
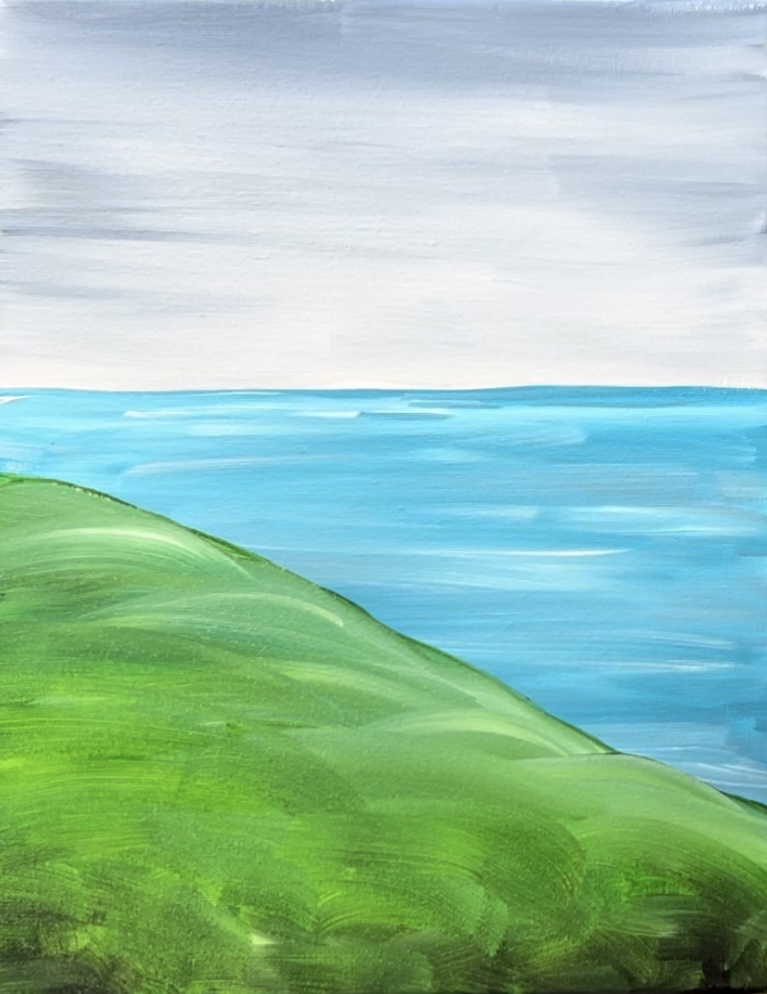
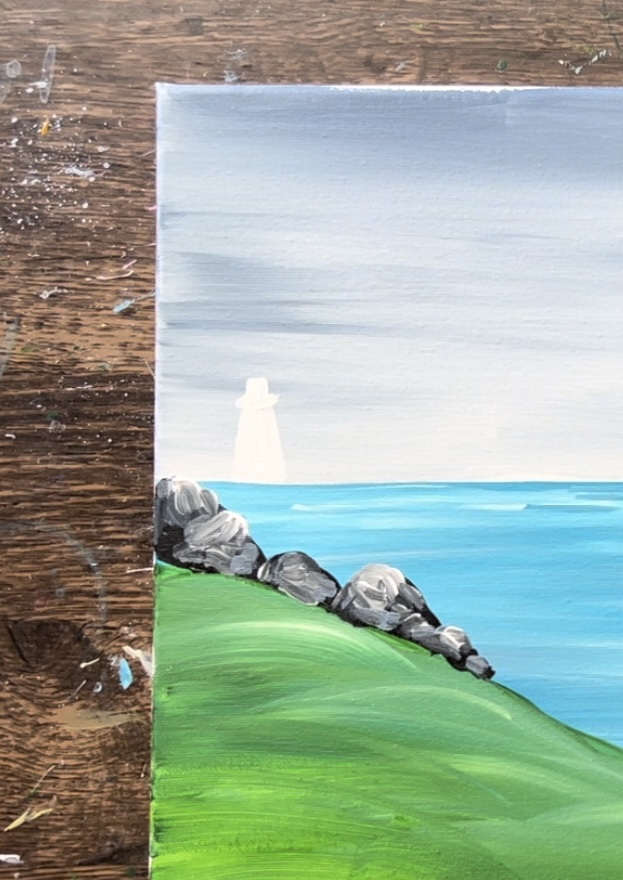
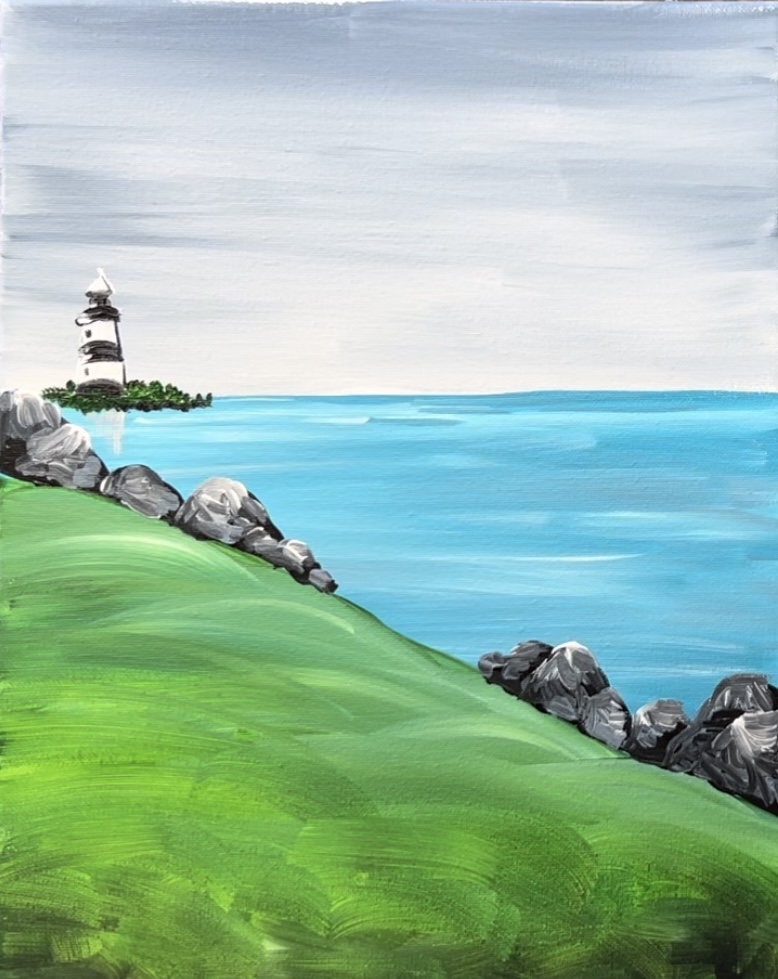
1. Paint Sky
Position your canvas vertically. Measure 5.5″ from the top edge of the canvas. This will be the “horizon line”. Use a ruler to draw a horizontal line across the canvas.
Load your paint palette with: blue gray and titanium white.
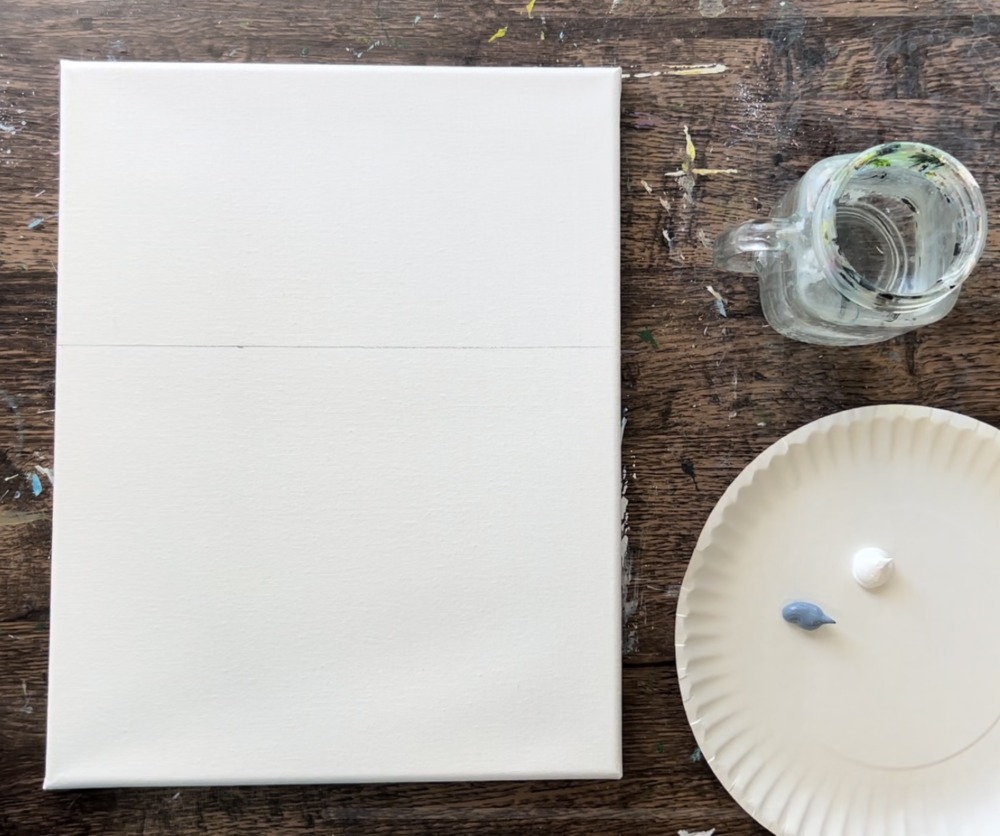
Load your 3/4″ flat brush in water and squeeze out excess drippings. Then load your brush into just the blue gray color. Start at the top edge of the canvas and paint left and right paint strokes.
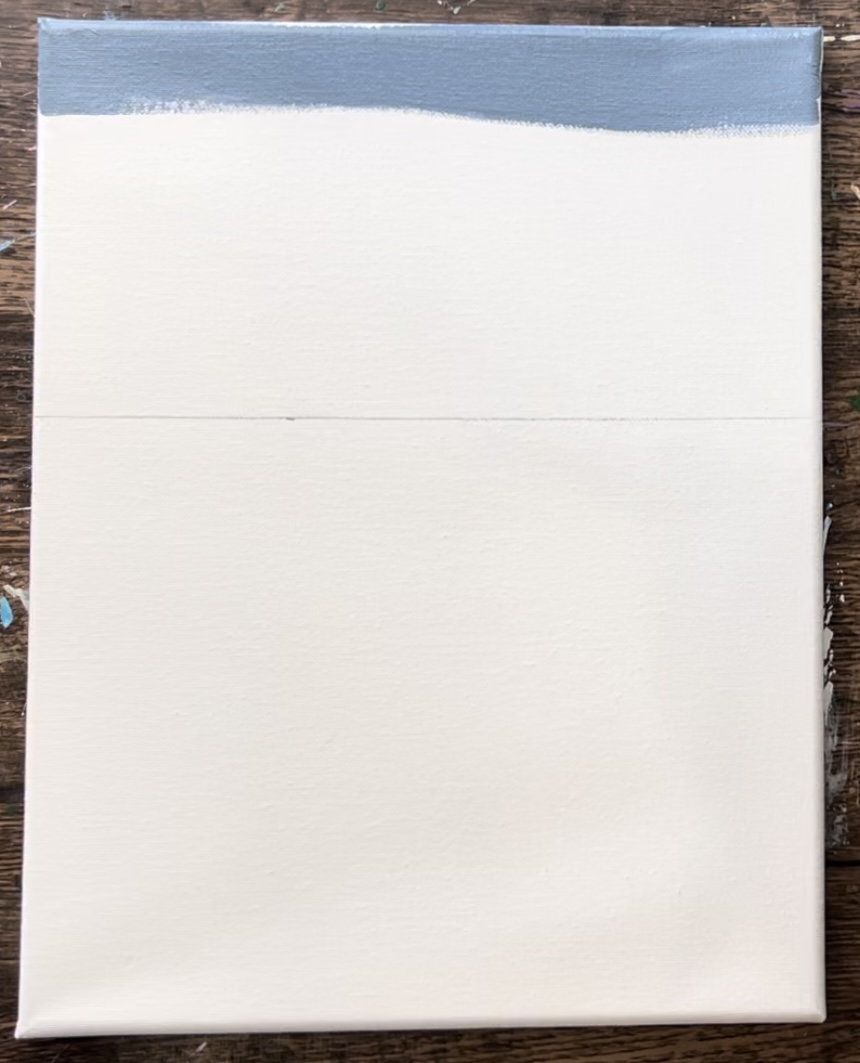
As you work your way down, gradually add more white into the gray so the sky gets gradually lighter as it approaches the horizon line.
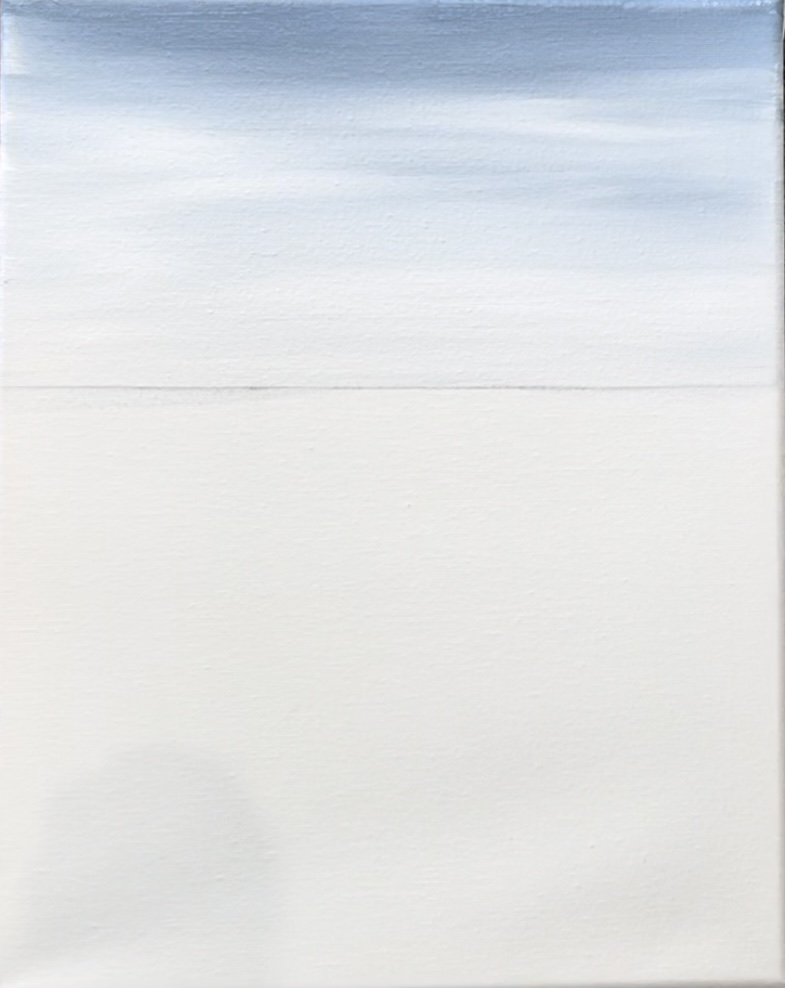
Make sure the bottom area of the sky is light gray but not too light. When we add the white lighthouse later, there should still be enough contrast for the white to show up.

2. Paint Ocean
Load your paint palette with turquoise blue. Double load your 3/4″ flat brush into the turquoise and titanium white. Start below the horizon line and paint large horizontal paint strokes blending the turquoise with the white.
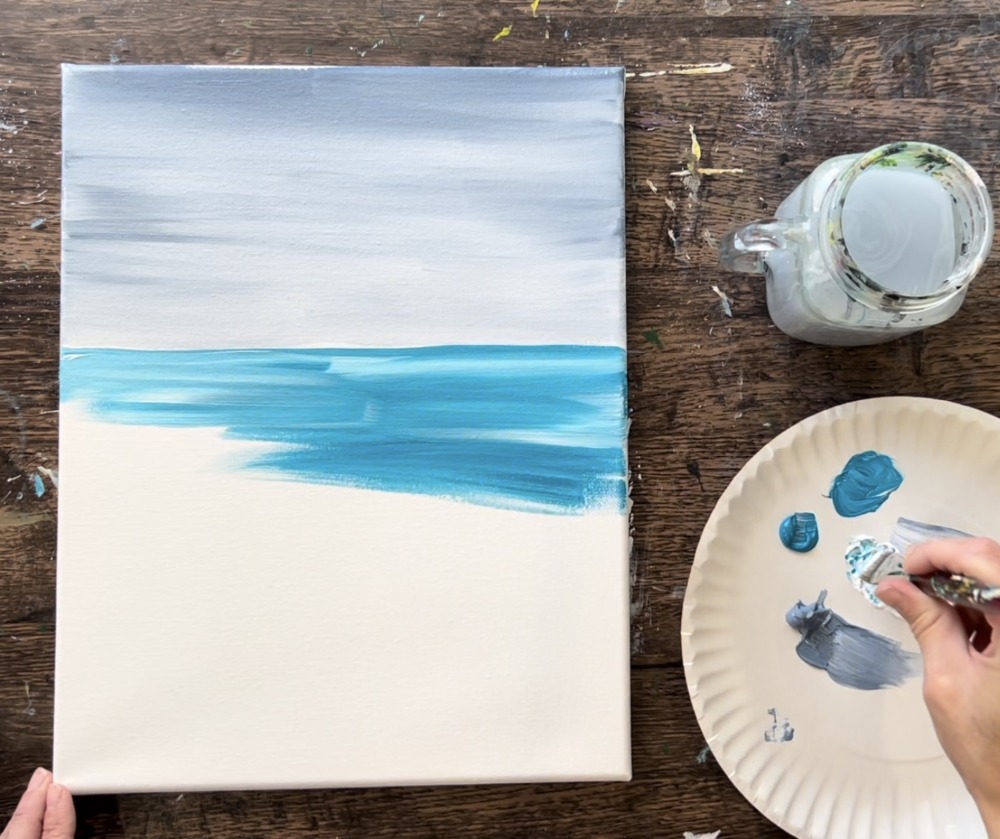
As you work your way down, you can add bits of the “blue gray” onto your brush and blend that into the turquoise. Leave an angle area on the left side of the painting blank.
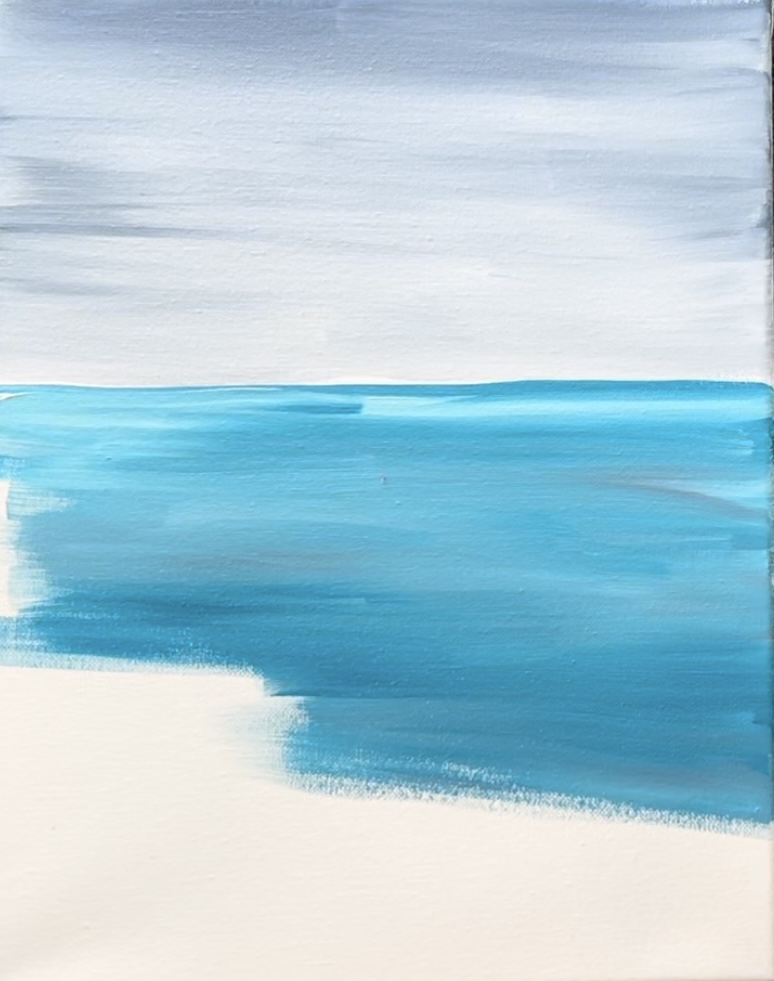
That blank area is where the cliff will be. Alternatively, you could paint all the way down and just paint the green area over the ocean.
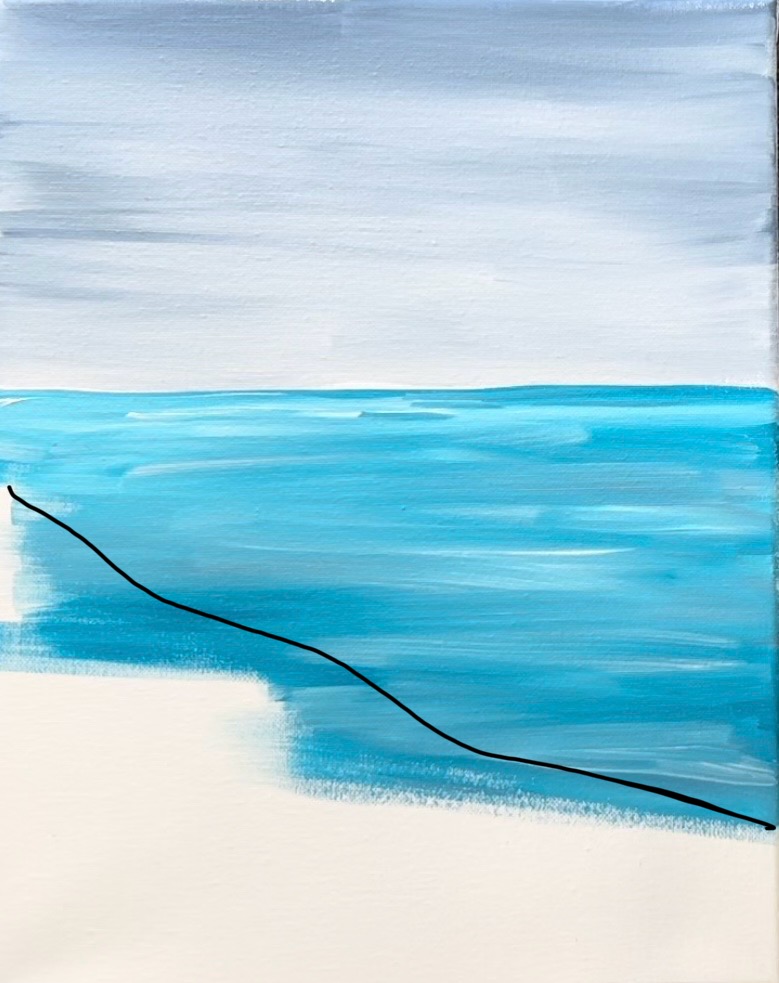
3. Paint Cliff/Greenery
Load your paint palette with “hooker’s green hue”. Use the 3/4″ flat wash brush to define the edge of the green land area. This starts at about 1.5″ on the left below the horizon line and goes down to the lower right area of the canvas.
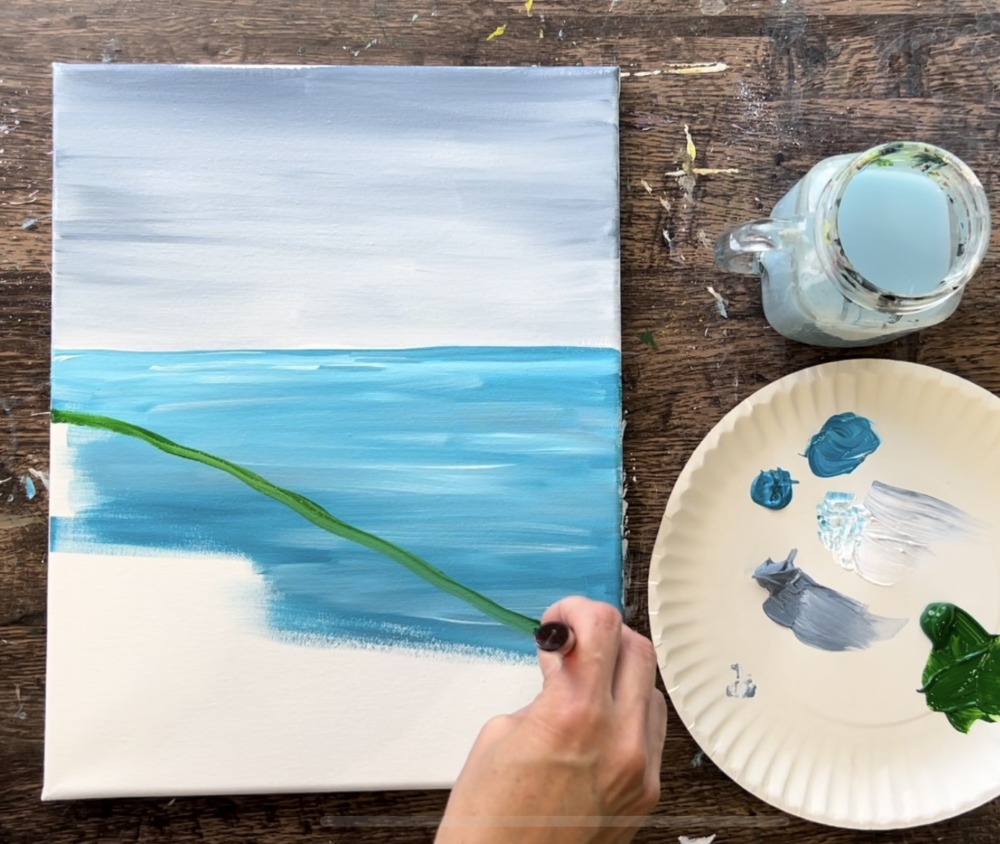
Then start filling this area in with the green. Use large, full width paint strokes that go in a sort of wavy direction.
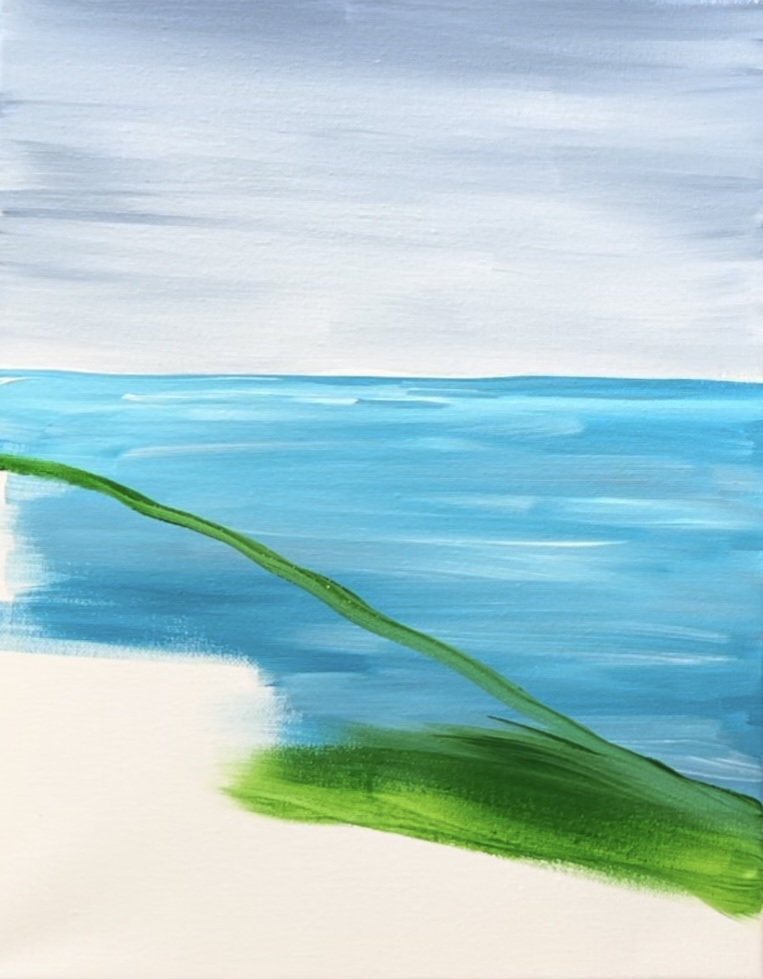
Add a little bit of “titanium white” on the top of the green hill area and blend it down so the “hill” is a little lighter on the top edge.
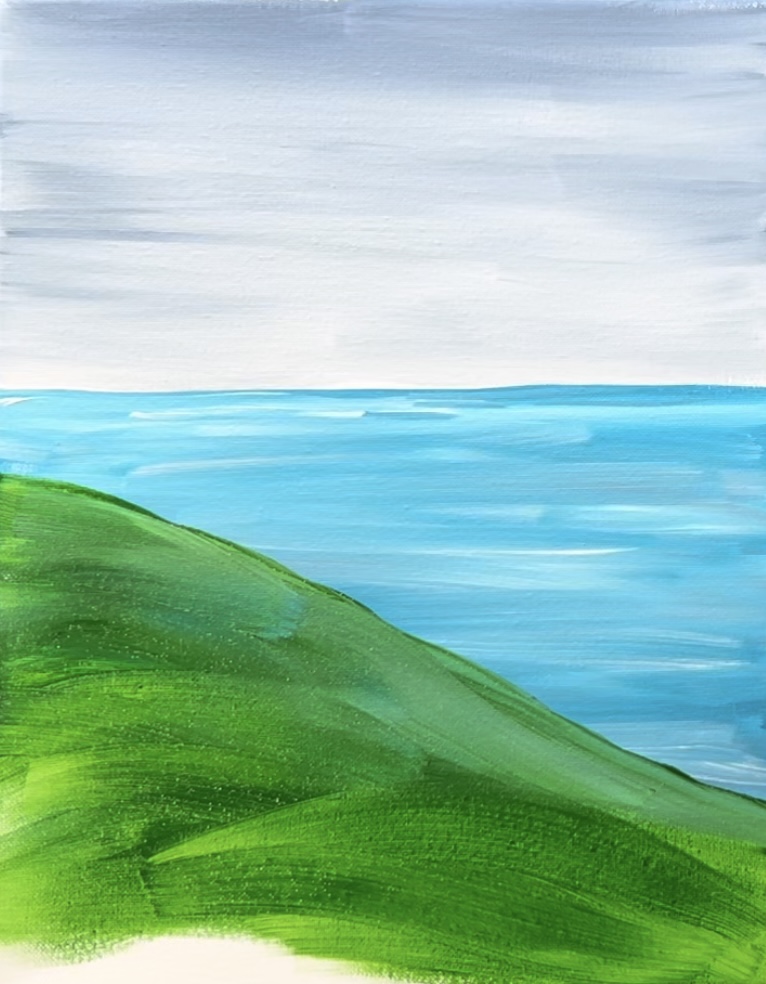
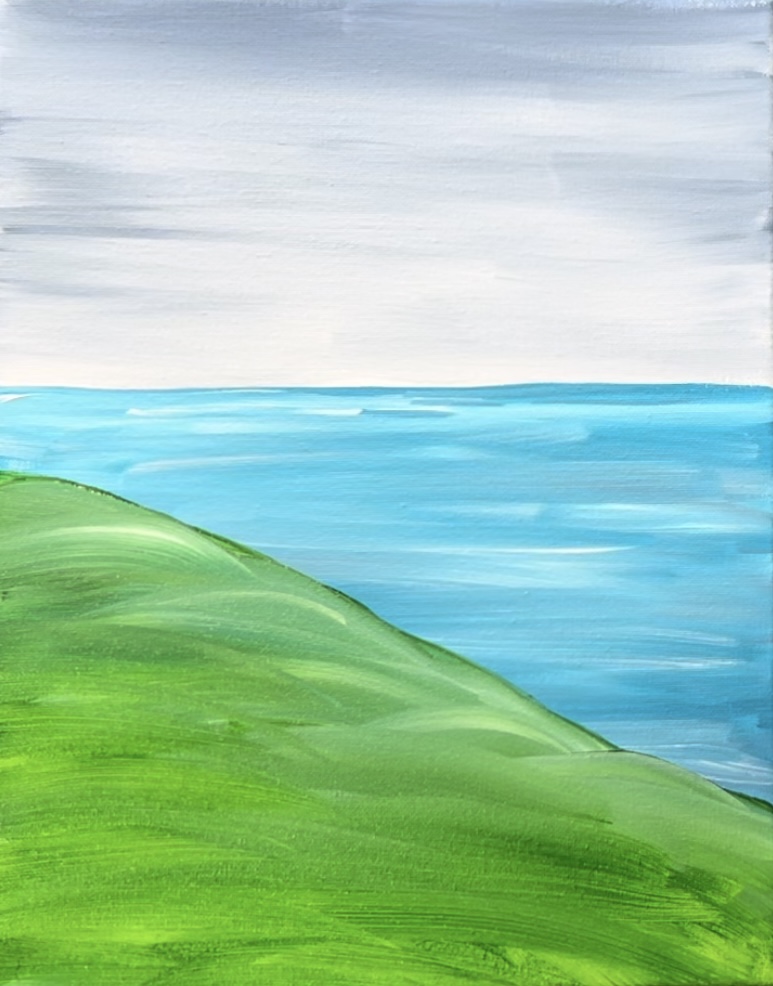
Rinse the brush. Then load it into green and a tiny bit of “mars black”. Blend this dark green color on the bottom of the hill area so that it appears slightly dark on the bottom.
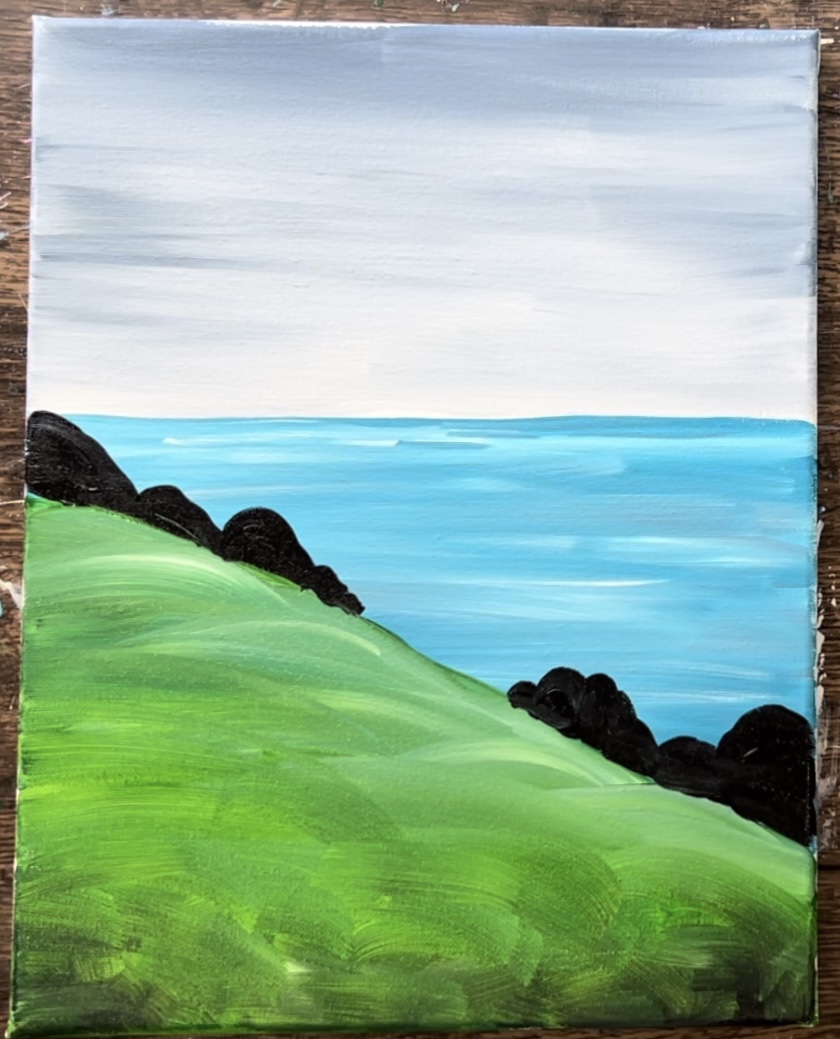
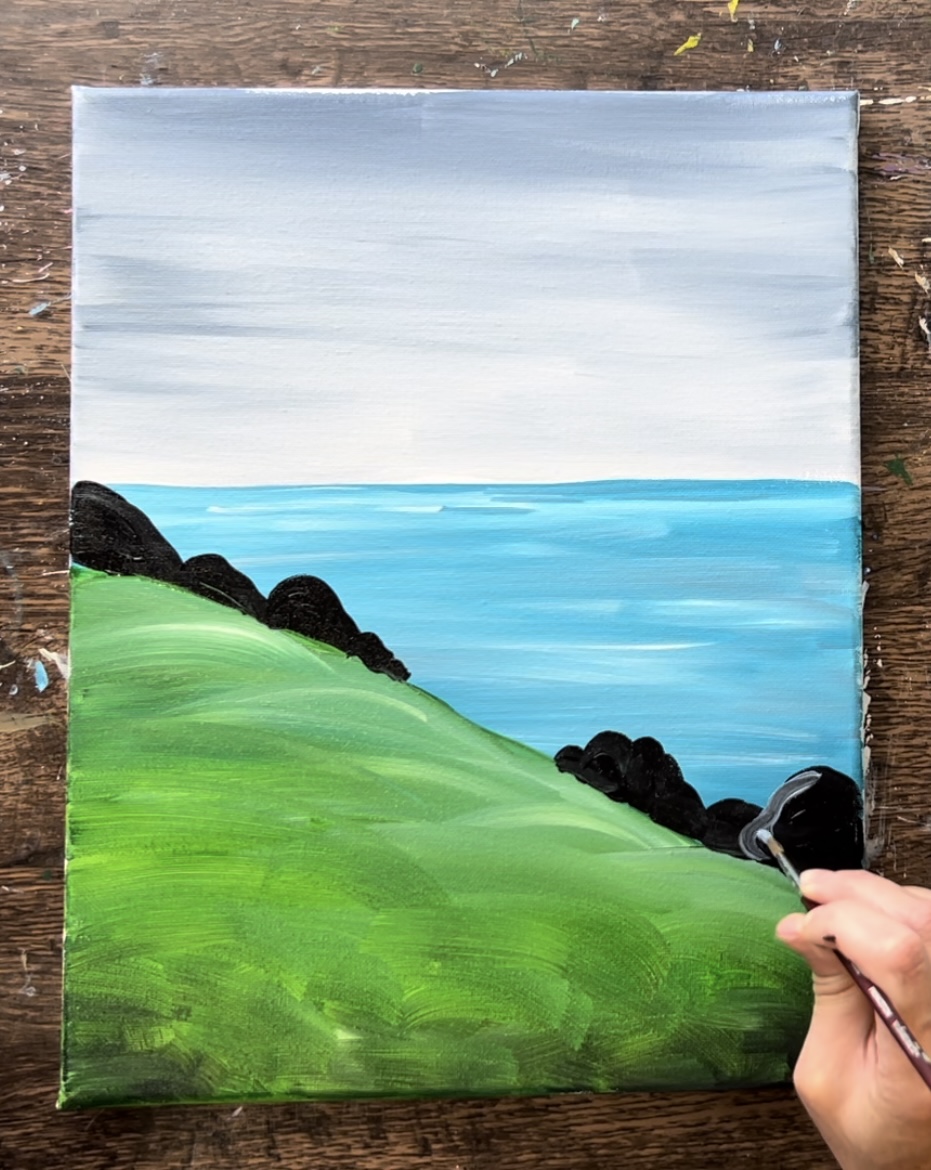
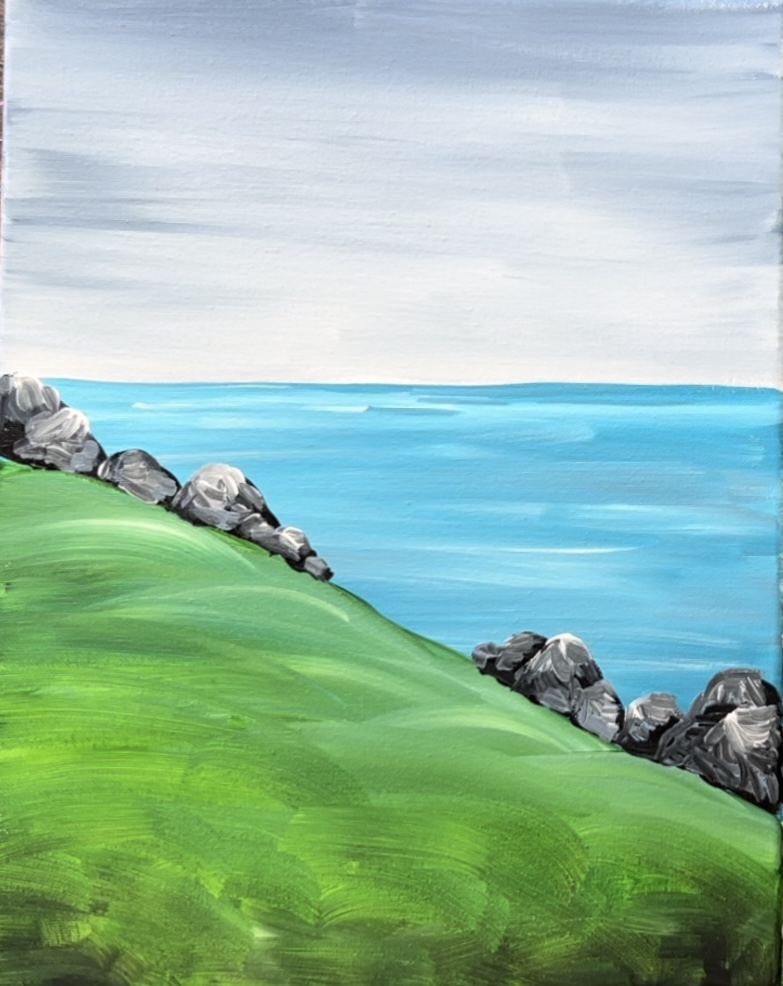
4. Paint Rocks
Use a #4 round brush to paint rock shapes that appear just slightly behind the green hill. Paint a variety of sizes and shapes and some that appear to overlap each other. For now, they will look like shadows!
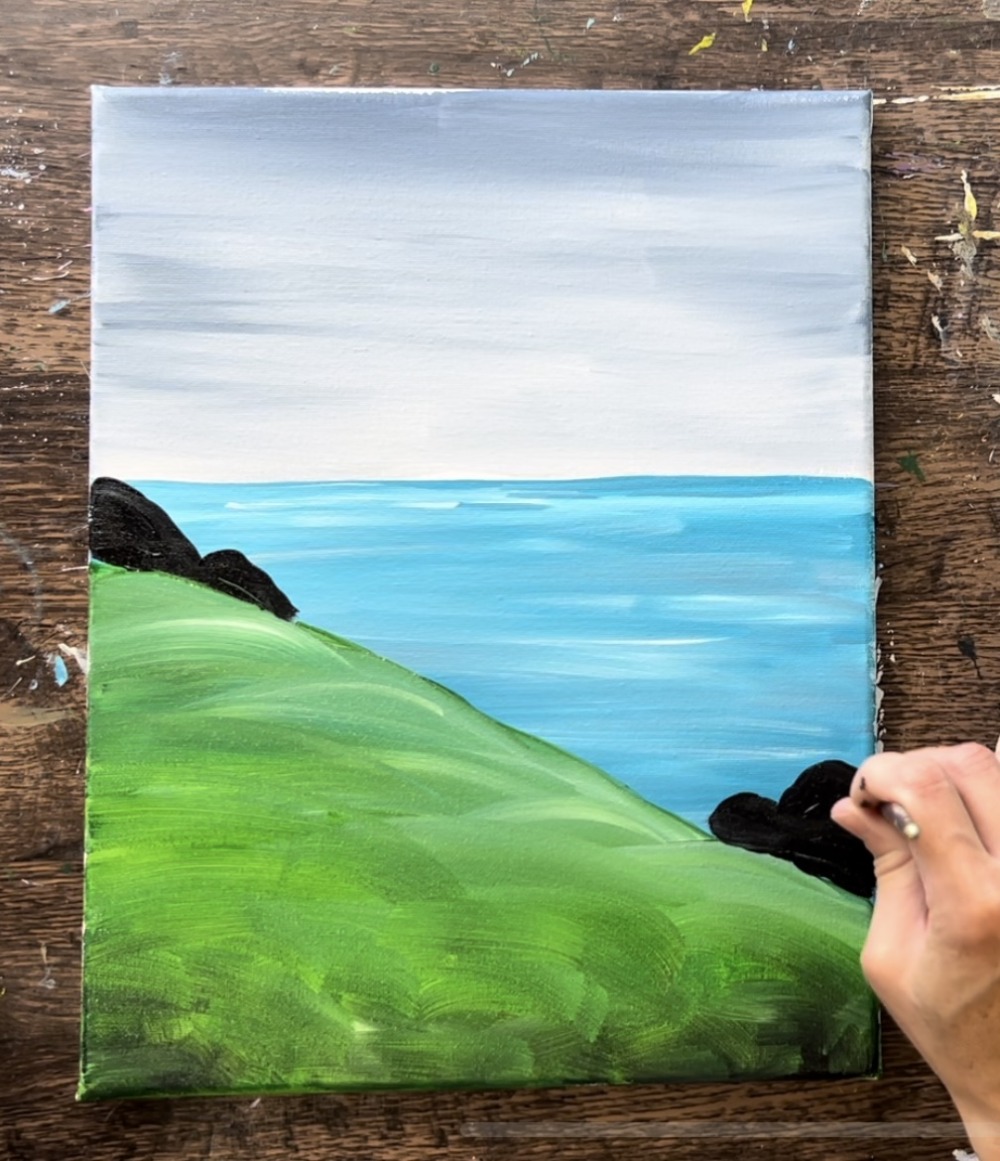
Leave a gap in the center where there are no rocks. This is because the puffin will be covering up a lot of the middle area anyway.
Do this next step before the black on the rocks dries. Load the #4 round brush into “blue gray”. Then paint this blue gray on the left and top sides of each of the rocks. This will start to highlight the rocks.
As you highlight the rocks, don’t cover all of the black layer up. Leave the right side and bottom sides of the rocks black.
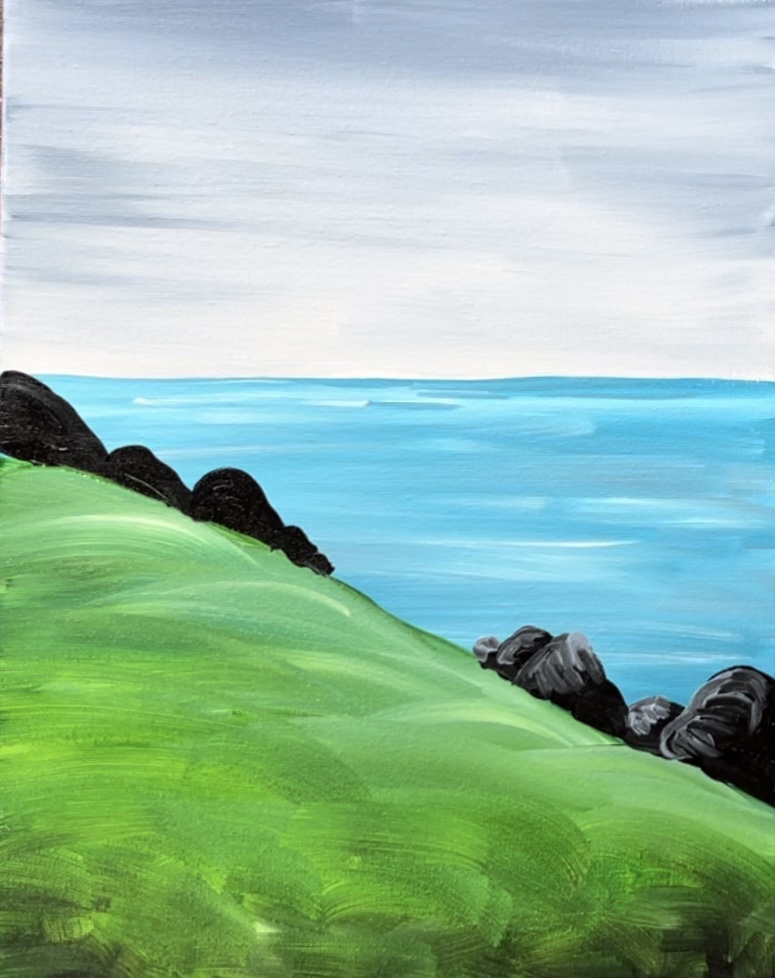
Next, add “titanium white” to the brush. Note: you can either rinse the brush and then add the white or add the white to the not rinsed brush. It just depends on how loaded the brush is.
Add little bits of white on the top and left edges of the rocks. Blend it down into the “blue gray” layer but don’t cover all of the gray.

Your rocks now look highlighted on the top and left and then should still be shadowing on the right and bottom.
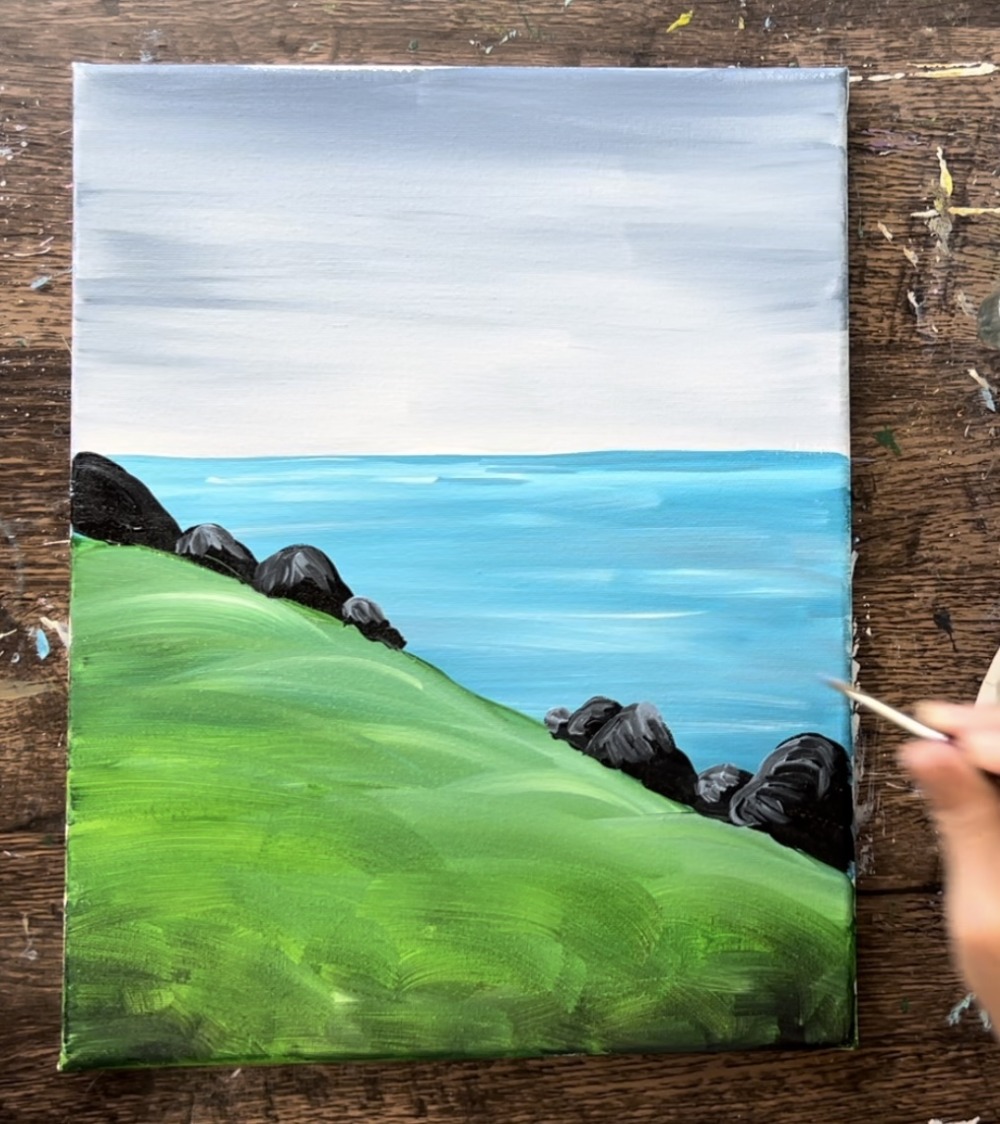
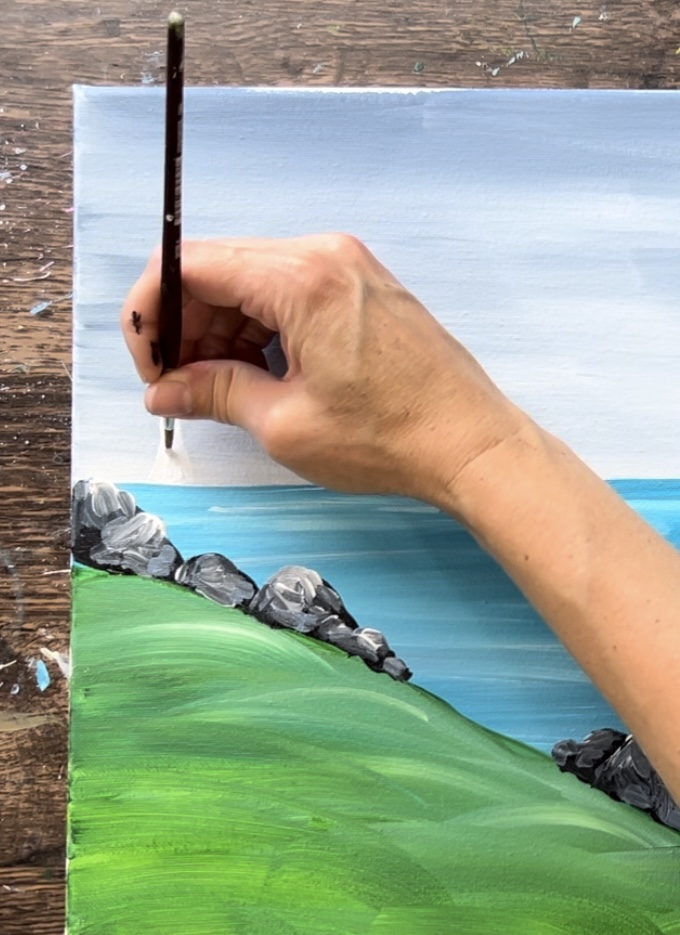
5. Paint Lighthouse
Use a #4 round brush to paint a lighthouse shape. This lighthouse is only about 1.5″ to 2″ tall because it is much further away.
Paint a watch tower and little square/ rectangle at the top for the light box.
Then paint a little triangle and point on top.
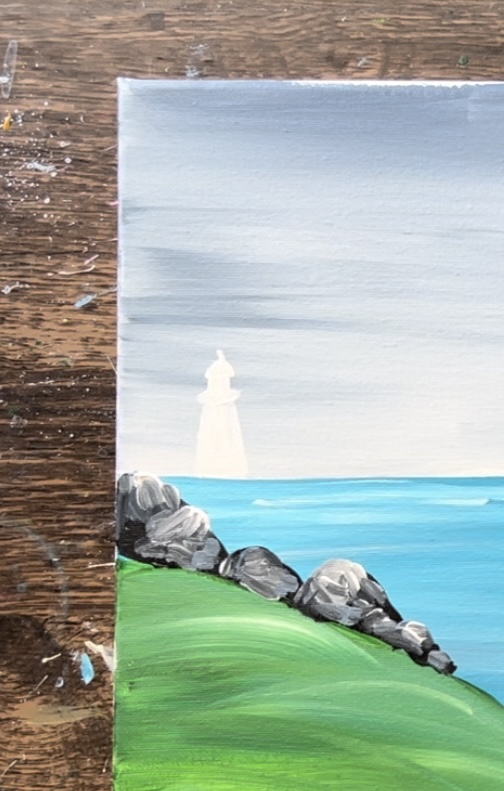
Next, paint little black stripes on the lighthouse. Start on the bottom. Use “mars black” to paint a curved stripe area.
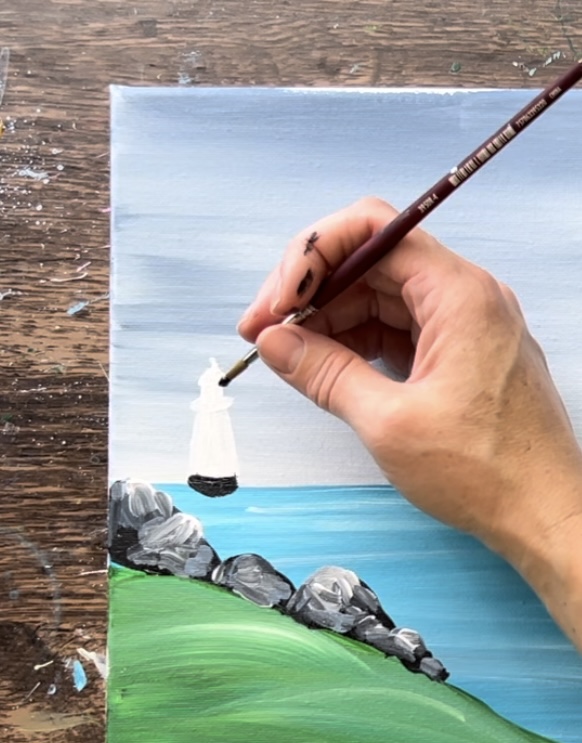
Repeat this for a total of three stripes. The next two stripes are curving downwards.
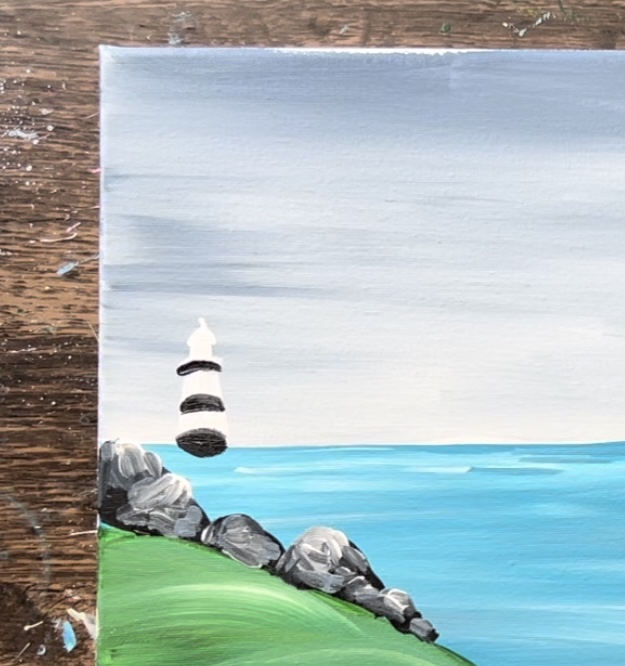
Paint little black windows and paint the square of the light box black.
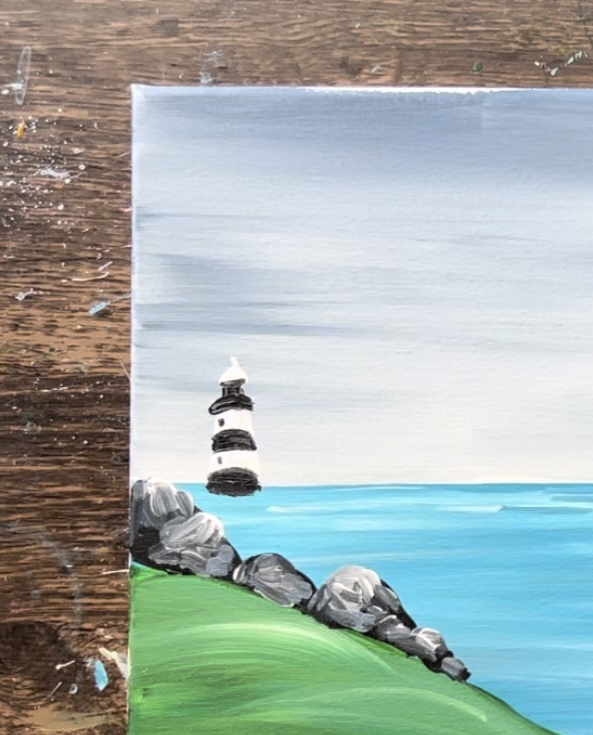
Loosely outline the left side of the lighthouse with a thin black line. Then use “hooker’s green” to “dabble” a little island under the lighthouse. You can do this by just dotting the brush. Remember this area is very far away so it doesn’t have to be really detailed.
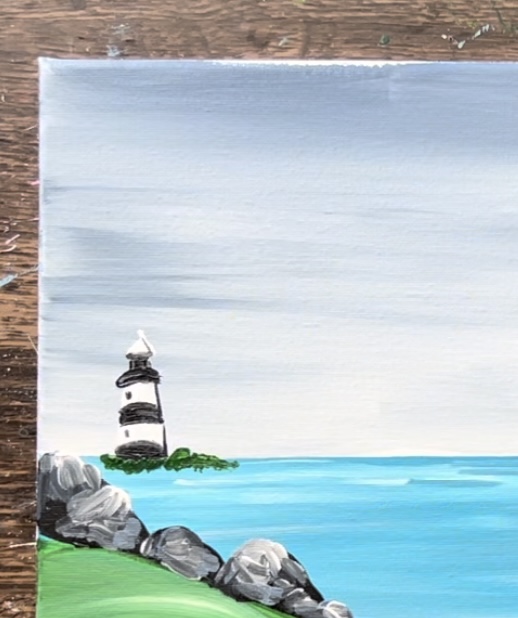
Add little bits of mars black under the green for shadowing. Take the green and make it go all the way to the left and behind the rocks.
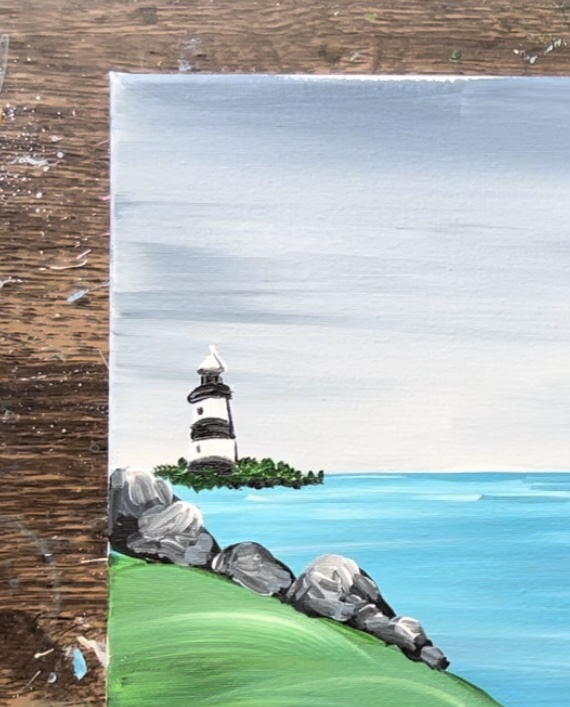
Next, add a little reflection in the water. Rinse your #4 round brush and add a very small amount of titanium white to your brush. “Dry brush” this below the lighthouse so that it appears very translucent. You want to paint just a “hint” of a reflection of the lighthouse in the water and drag this down in a vertical direction. You don’t need to paint the stripes reflecting in the water (unless you want to).
Wait for this to dry before going onto the next step.
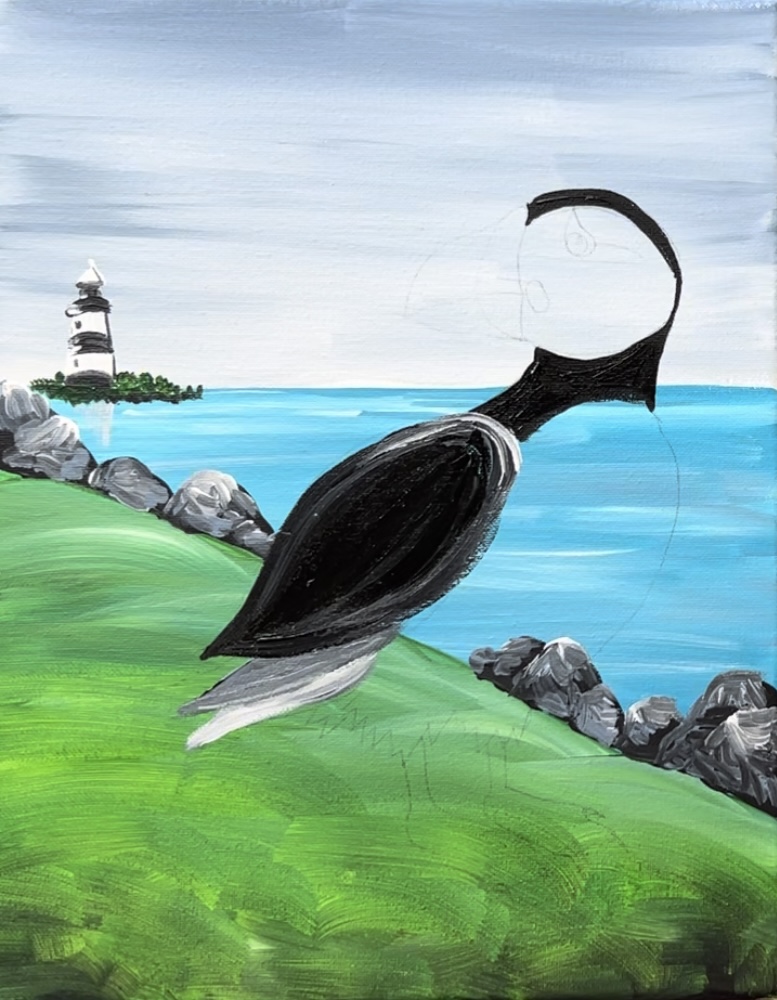
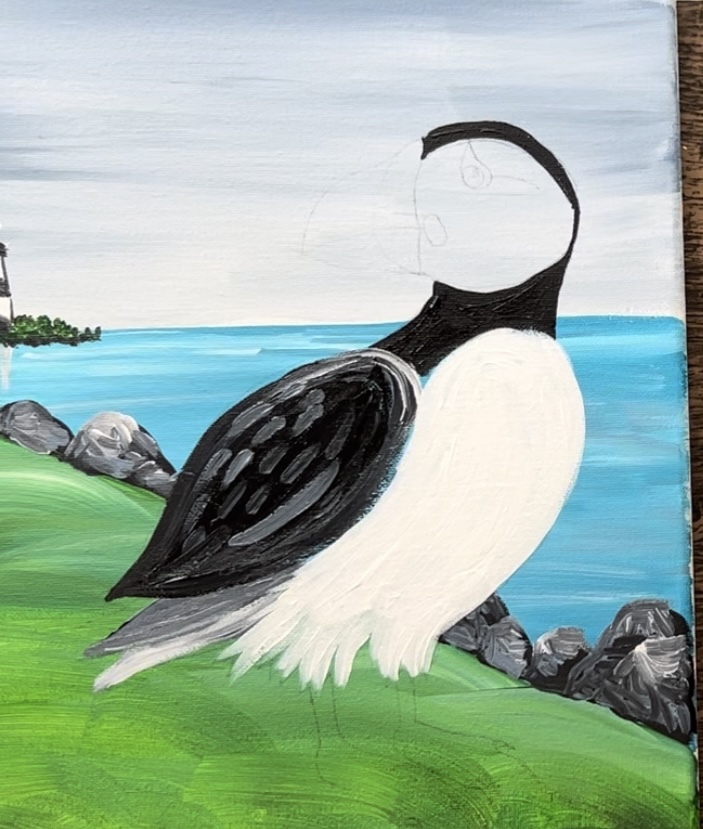
6. Transfer Puffin Drawing
Place a sheet of graphite paper below the puffin. Trace the puffin lines so that it transfers to the canvas.
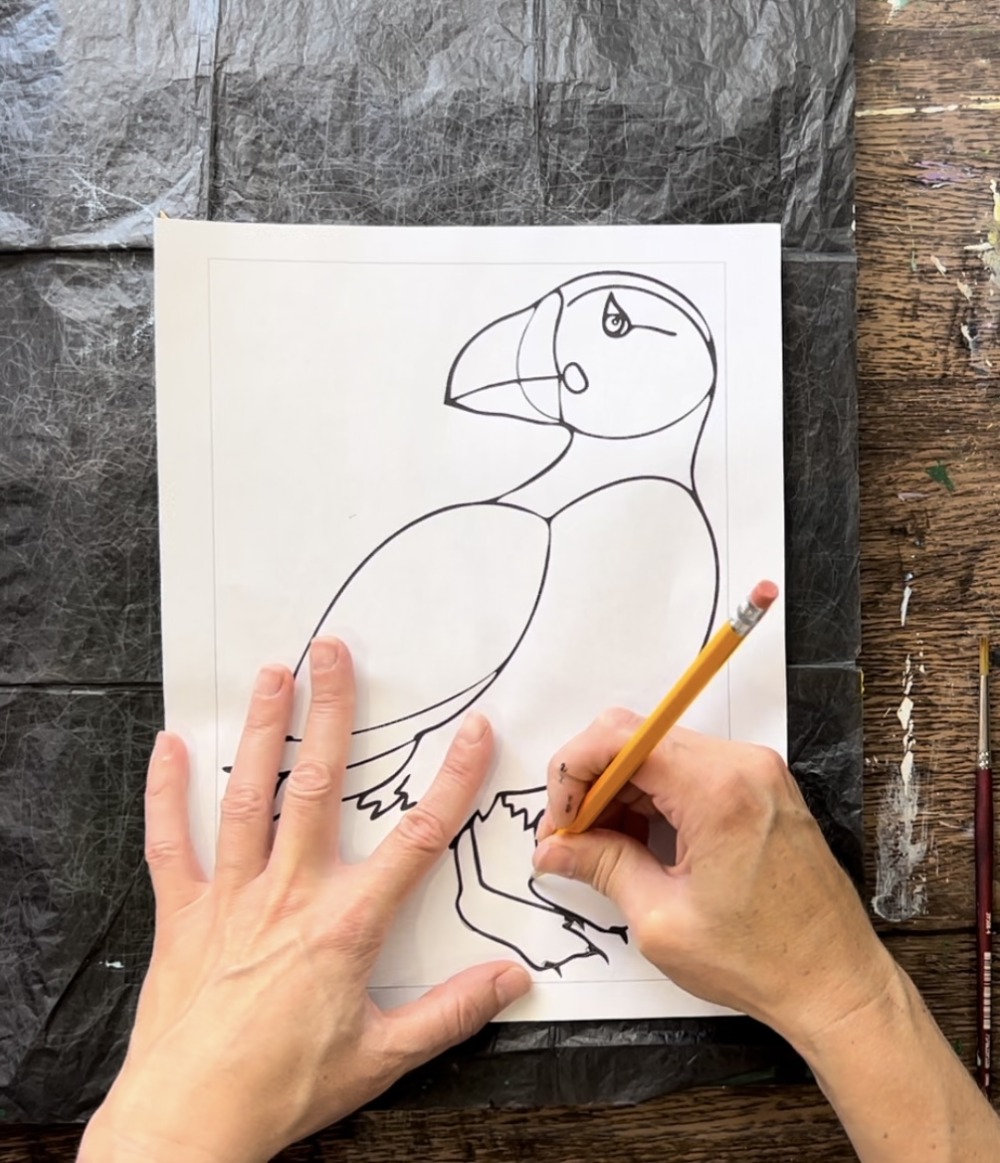
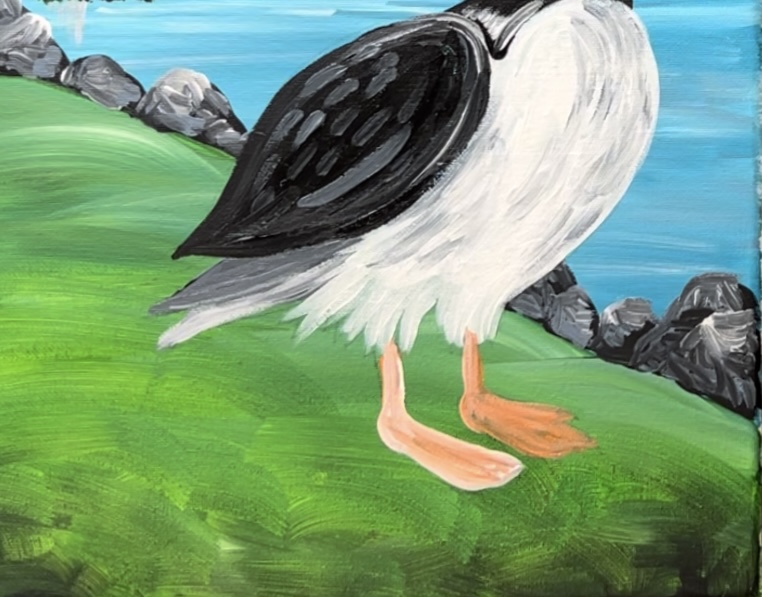
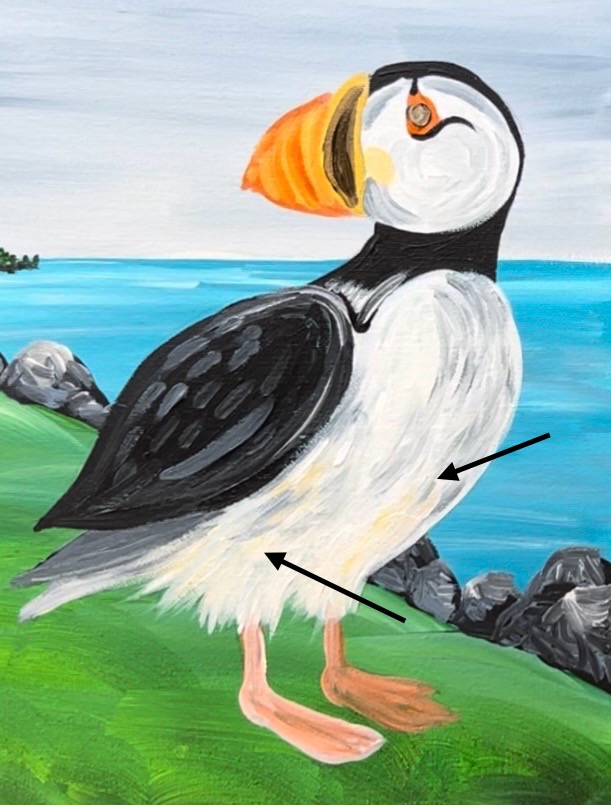
The positioning of your puffin will vary depending on your rocks/ cliff size/ lighthouse, etc. I recommend placing the puffin more towards the right but still leave about an inch gap from the far right of his head. From the bottom of his feet to the bottom edge of the canvas, it is about 1.5-2″.
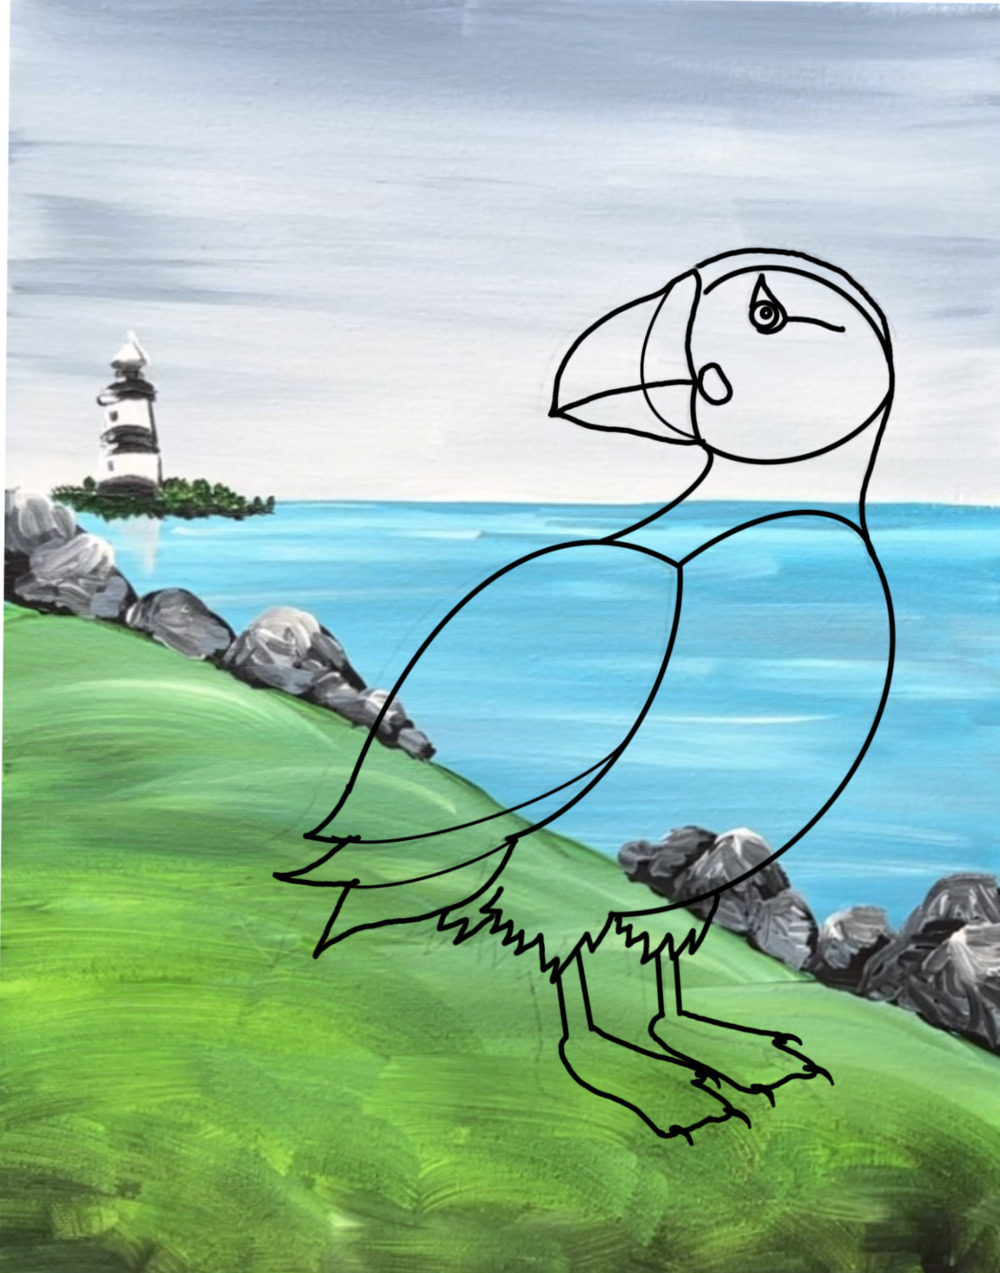
I do recommend that you press firmly so the design will transfer. Your lines will show up relatively light but still enough to see them. You could go back over the drawing to make it darker.

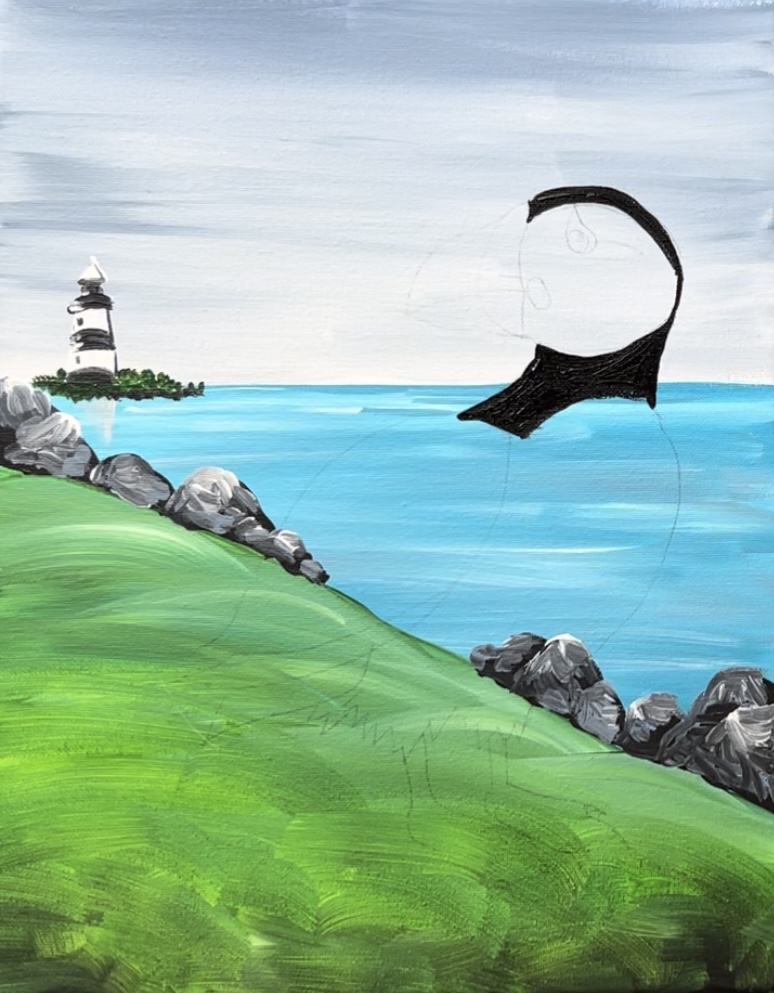
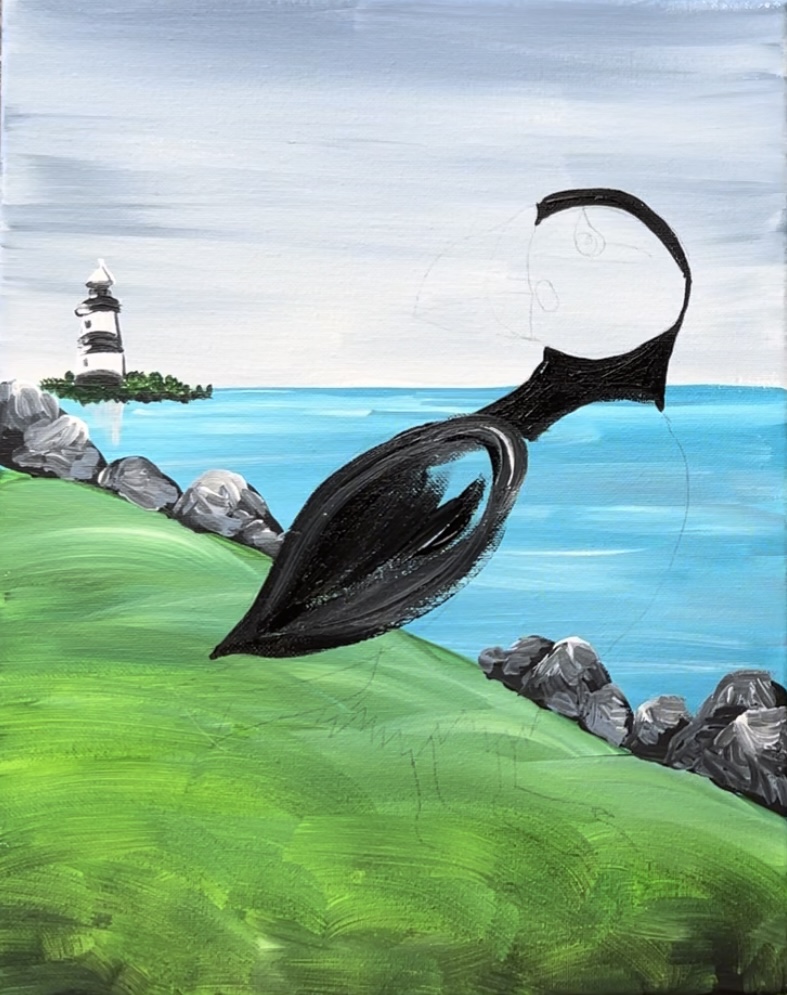
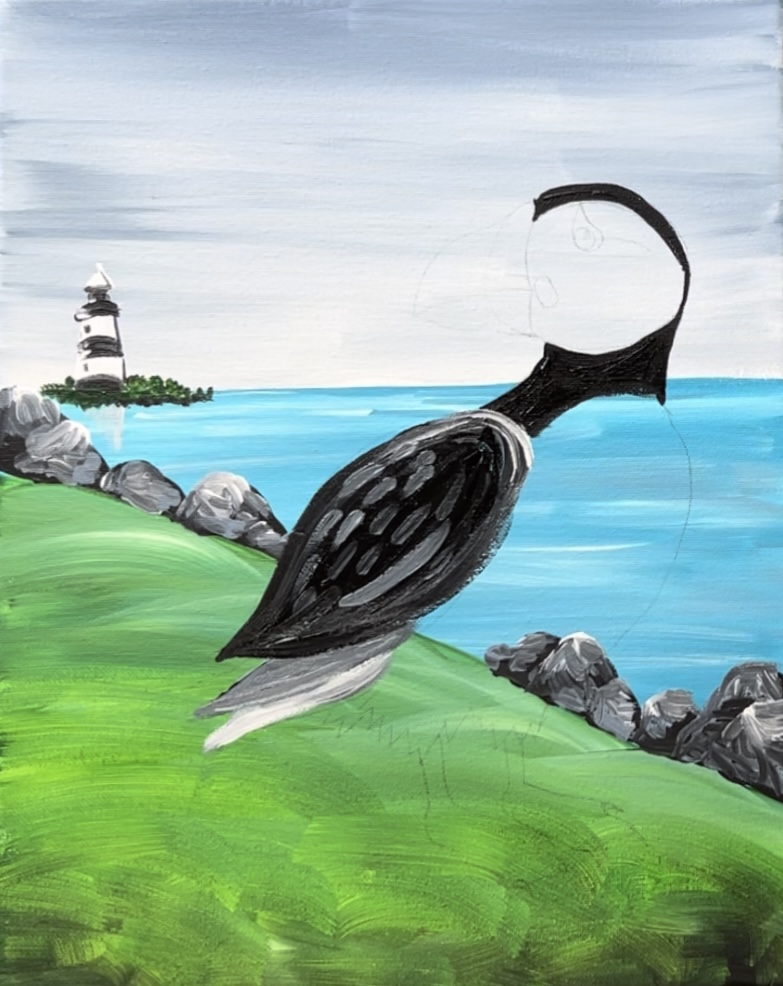
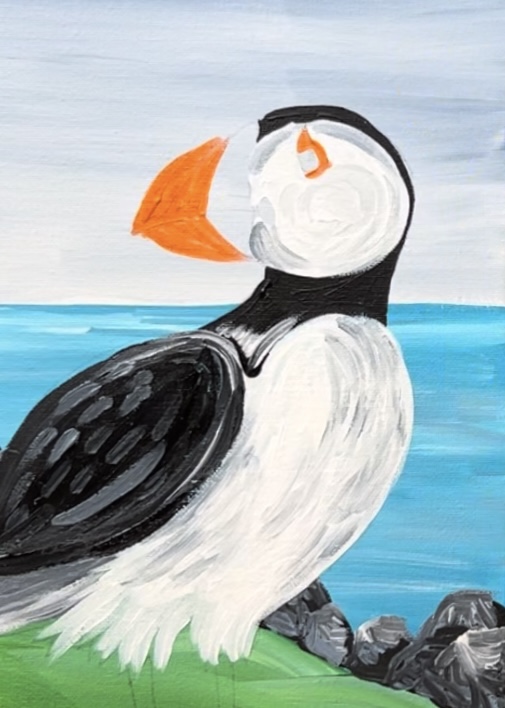
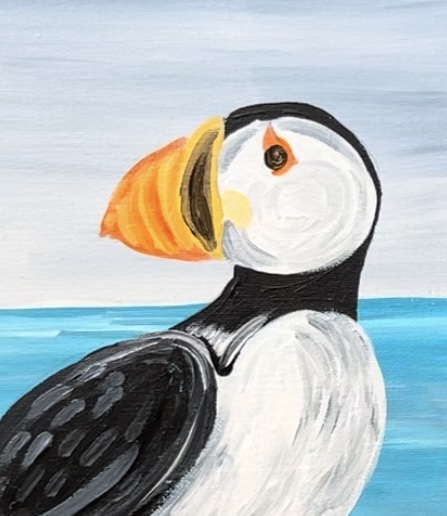
7. Paint Black Areas Of Puffin
Use a #4 round brush and “mars black” to paint the head of the puffin (the black areas as shown below). Because there are some thin areas, I recommend using just the tip of the brush and watering down the black just slightly for better control of the paint.
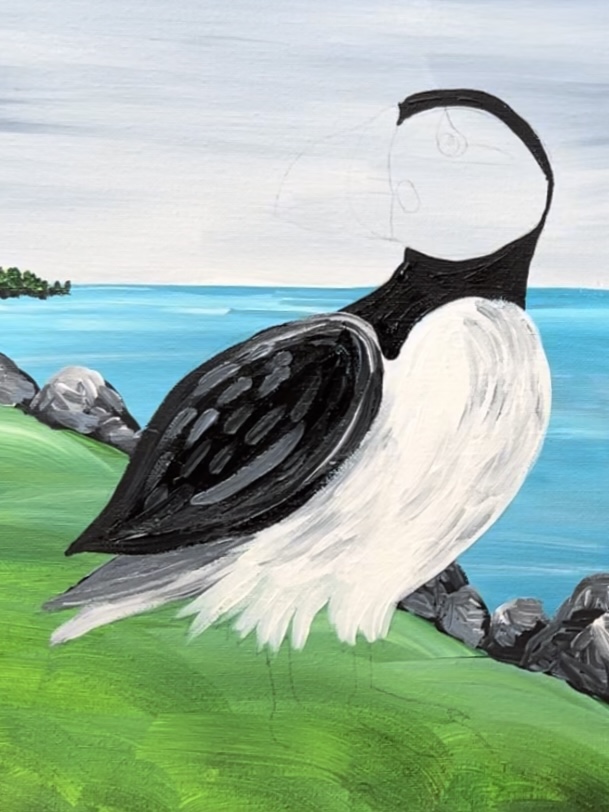
Then start filling in the side wing area. This time, add a bit of “titanium white” to the brush along with the black. You want to create a slightly lighter area on the wing so that it stands out. Outline the shape of the wing and then fill it in with angle paint strokes going in the direction of the wing.
Paint the tail feather areas. When you paint these in, use the “blue gray” on your brush (you don’t need to rinse the brush off). Paint the tail area that’s just under the black side wing. Then add “titanium white” to your brush and paint the bottom tail area.
Next, go back and paint “blue gray” diagonal marks on the side of the wing. This will help give this a little bit of “feather texture”.
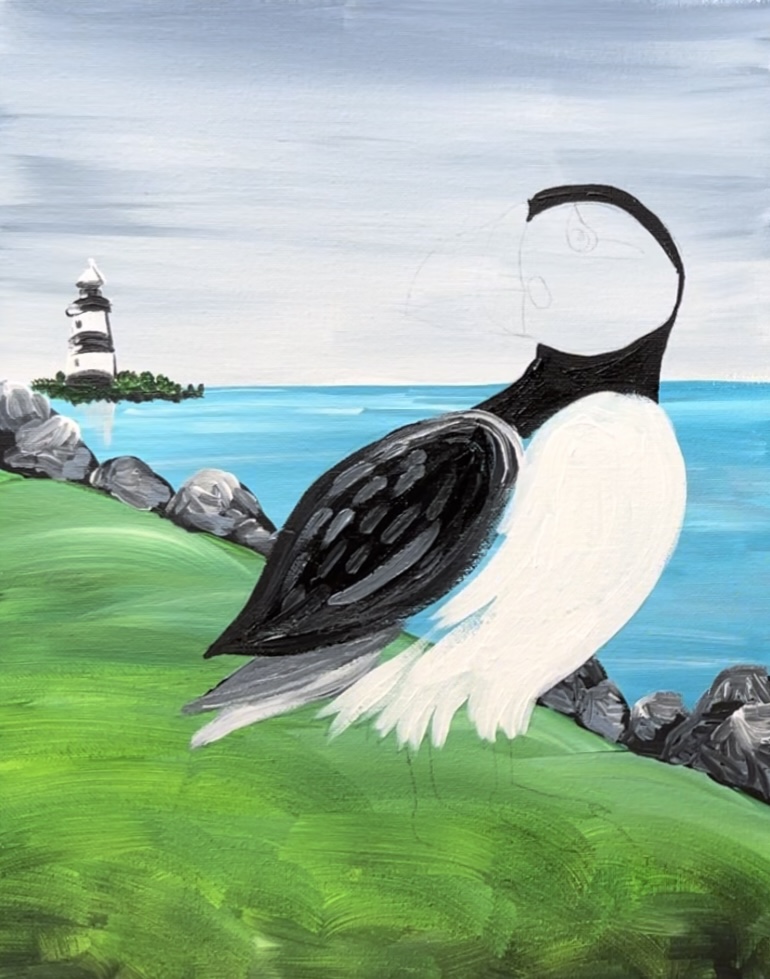
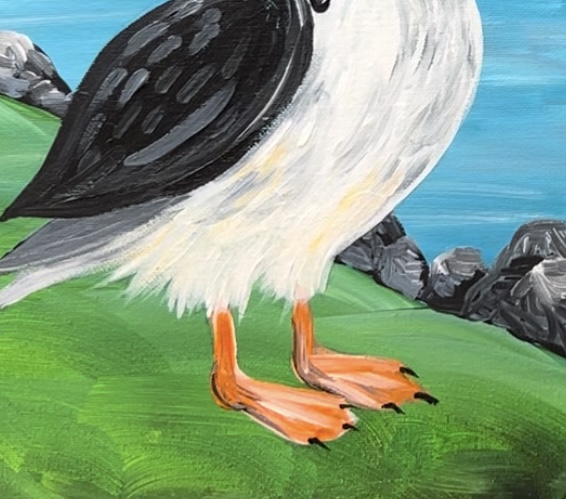
8. Paint White Areas Of Puffin
Rinse the #4 round brush. Then load it into titanium white. Paint the belly area and feather areas above the legs. Start by outlining the shape and then filling it in with paint strokes that curve and go in the direction of the shape.
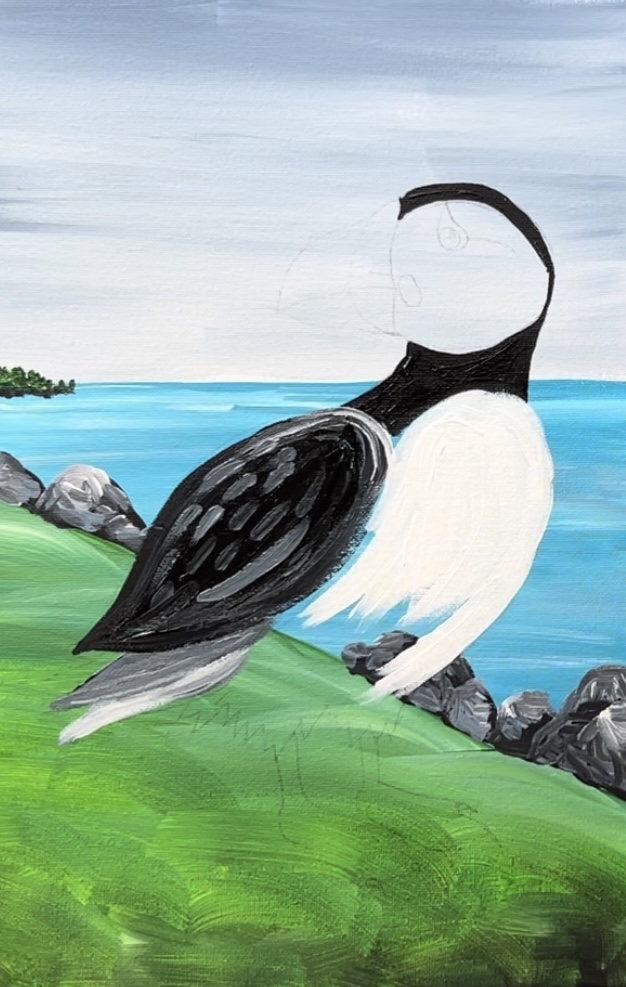
As you paint the bottom feather area above the legs, paint curved marks and “release the pressure” of the brush so the paint strokes look more “feathered”.
Optional: add some “shading” on the white belly area of the bird. Do this before the white dries. Double load your “#4 round brush” into both the “blue gray” and “titanium white”. Paint little curved feather strokes mostly on the right side of the bird’s belly and a little on the bottom just under the side wing.
Then, use the white to add a little bit of highlight just above the wing on the bottom part of the neck. Gently stroke small titanium white strokes up in a slightly curved direction.
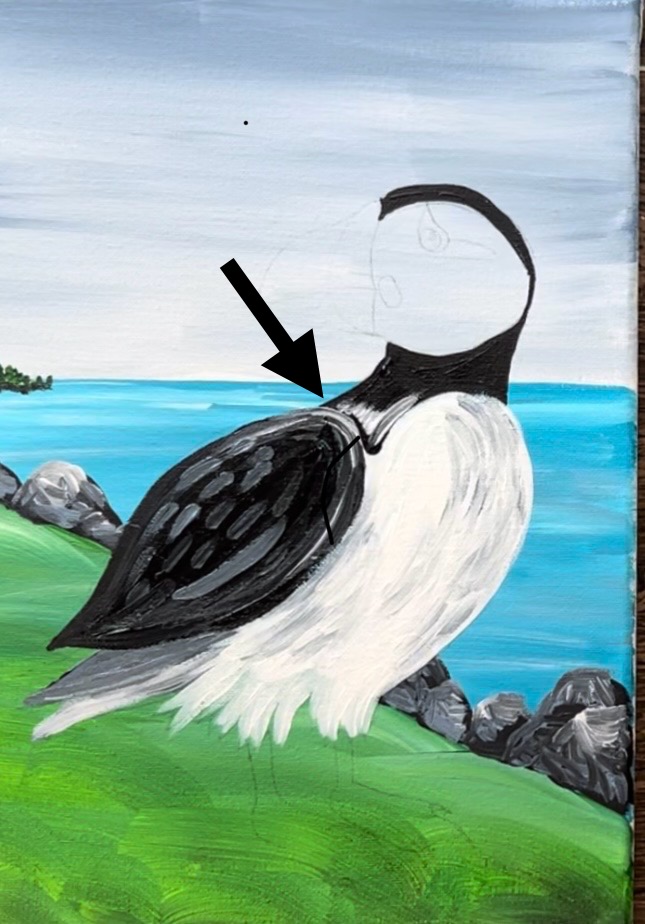
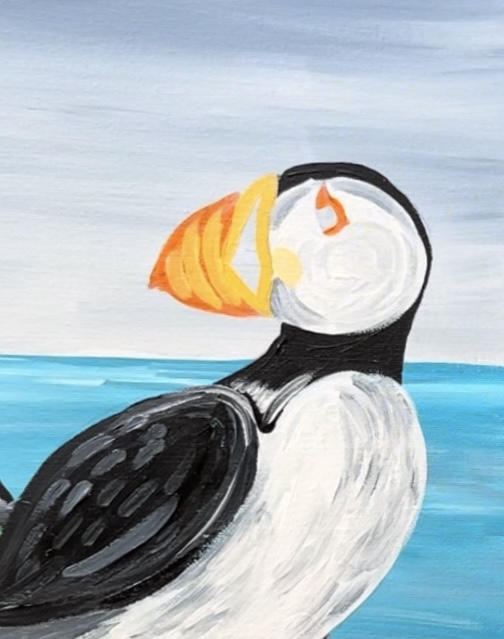
Rinse the brush. Then load it into just titanium white. Paint the circular head area of the bird. Paint around the eye shape so it doesn’t disappear.
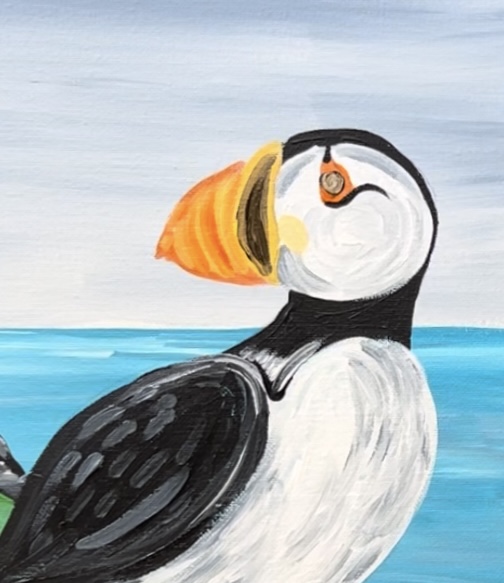
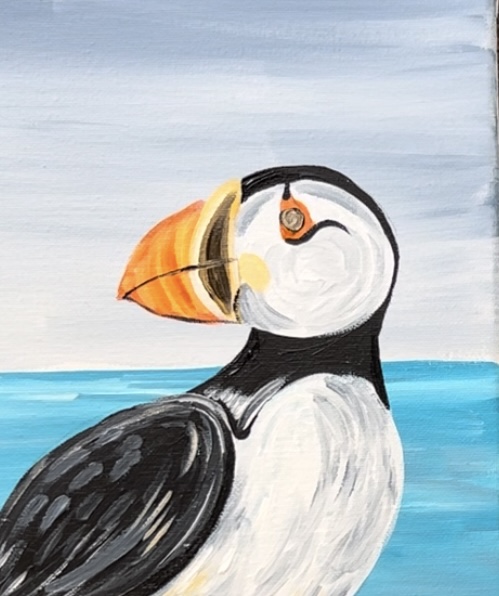
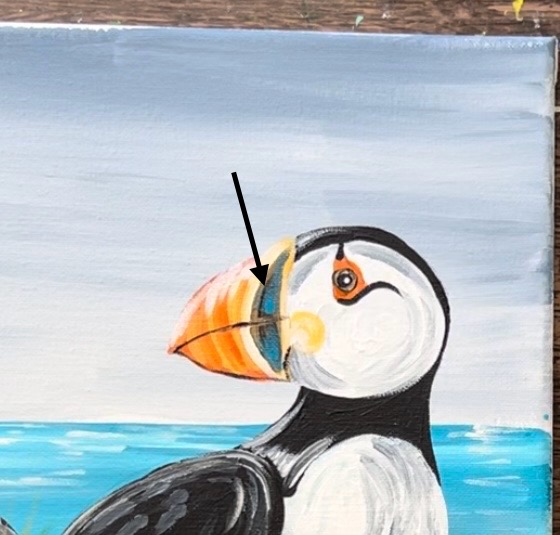
9. Paint Beak , Eye & Leg/ Orange Areas
Load your paint palette with “cadmium orange hue”. Use a #4 round brush to paint the beak shape on the left. This area is orange but leave the right side of the beak (that sort of crescent shape on the right) blank for now.
Next, paint the eye marking with orange. This is a “teardrop” shape that goes around the circle of the puffin’s eye. Leave the circle blank and unpainted for now.
Paint the foot of the puffin using the #4 round brush. I recommend mixing white with orange so that you can get good “coverage” over the dark green area. Outline the shape of the foot and then fill it in solid.
10. Paint Yellow Area Of Beak & Cheek
Load your paint palette with “yellow oxide”. Use the #4 round brush to outline the outer part of the shape of the beak on the right side. Leave the middle part blank for now.
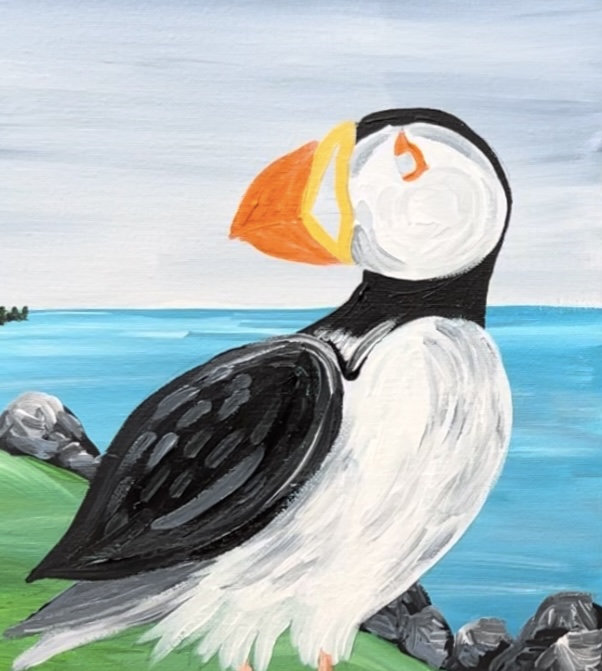
Paint a small yellow circle on the face area just to the right of the beak. Then paint three curved lines with the yellow oxide over the orange area of the beak.
Touch up any of the orange parts of the beak if needed.
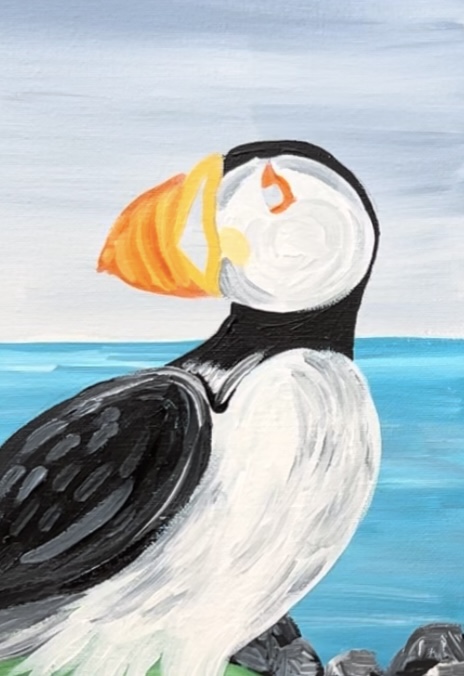
11. Paint Brown Part Of Eye & Beak
Load your paint palette with “raw umber”. Paint the inner part of the beak (crescent shape) on the far right. Then paint a solid brown circle within the orange marking part of the eye. Note: I mixed white with my brown for the eye to lighten it so that later the black part of the eye will show up when we paint it.
12. Paint Black Parts Around Eye
Next, use “mars black” to paint a curved mark just under the orange part of the eye. This mark creates a curve that helps to form the bird’s side cheek bone/ makes it look rounded. Also, there is a little black more on the top of the eye.
13. Add Light Yellow Feather Texture (optional)
This is optional but does help to add a little texture and color variation on the bird. Use “yellow oxide” and “titanium white” double loaded on the #4 round brush. Paint very thin feather strokes on the bottom of the puffin just above the legs. This is very subtle and doesn’t cover all of the white layer.
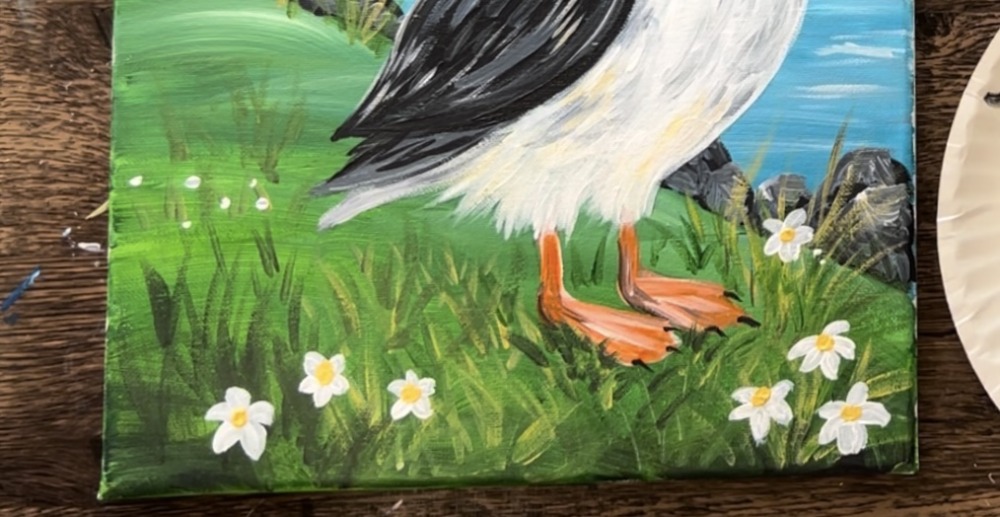
14. Paint Detail On Legs/Feet
Use a combination of orange and white mixed together to paint three diagonal lines on each of the feet.
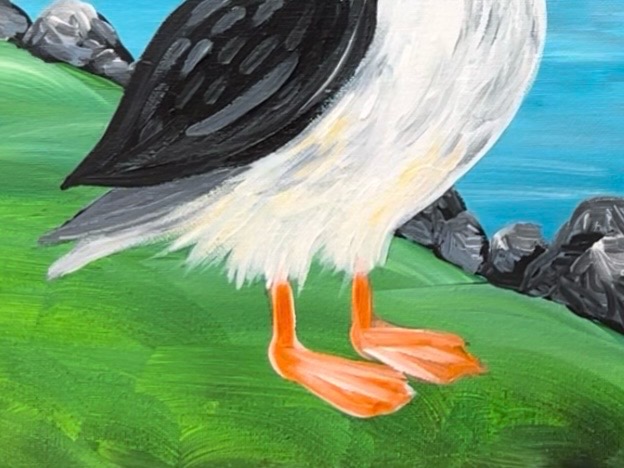
Then paint the claws with mars black. Paint three little curved lines that go to a point on each of the feet.
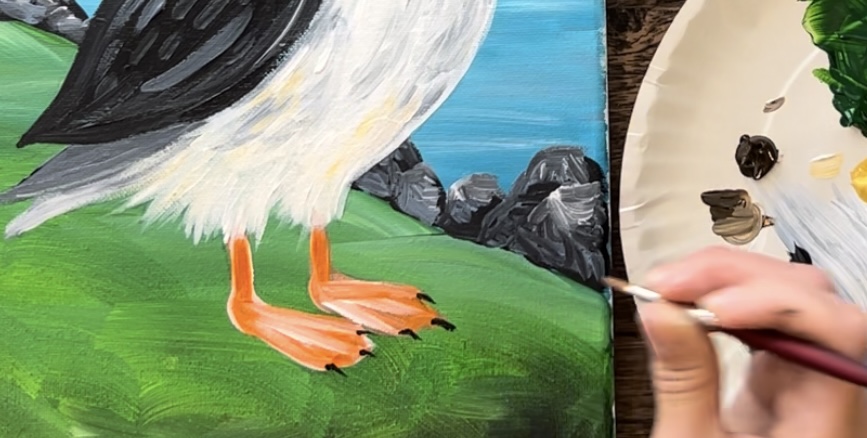
Add some “shading” on the bottom and left side of the feet. Do this with orange mixed with a little bit of black.
15. Paint Black Middle Line and Bottom Outline of Beak
Use “mars black” and the #4 round brush to paint a line across the middle of the beak where it divides top from bottom.
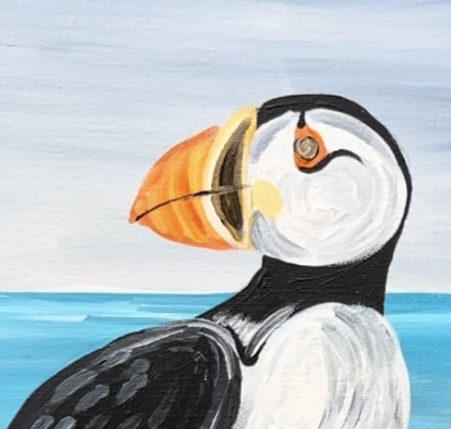
Then outline the very bottom of the beak with a very thin black line.
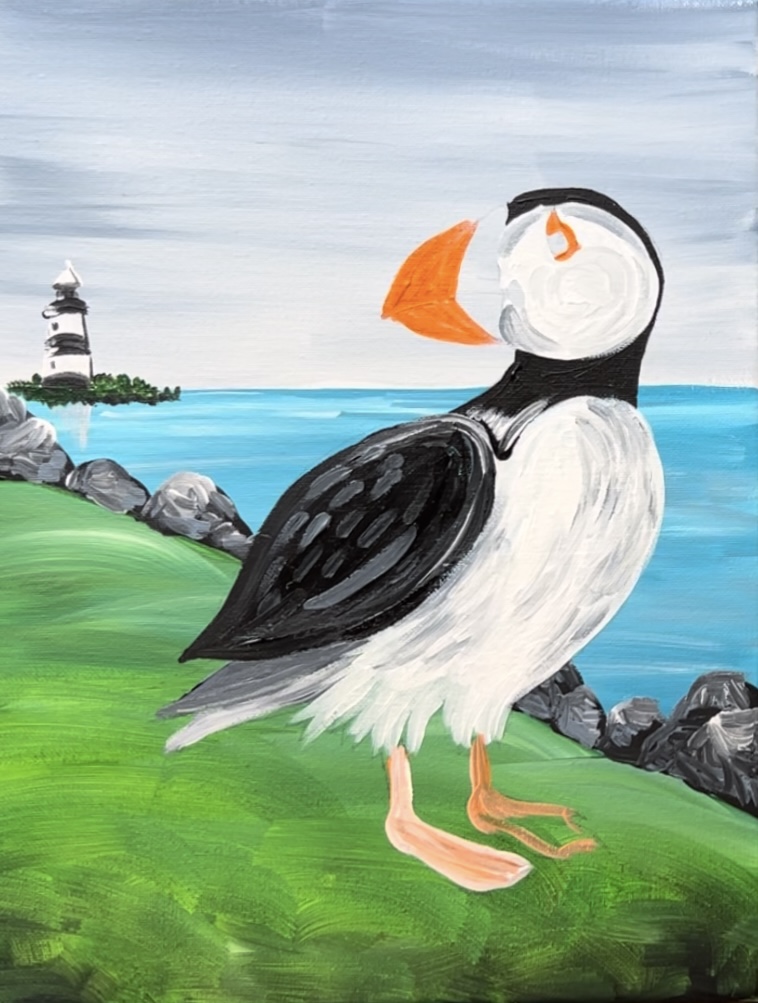
16. Paint Grass
Use the #4 round brush to paint grass blade strokes throughout the green area. Start with using a combination of the “yellow oxide” and “raw umber”. Paint a group of longer grass blades on the right of the puffin and have them overlap the rocks in the background.
Then paint more areas of grass clusters towards the bottom right and some small pieces that overlap the feet. You can use the green and white on your palette to help create different variations of colors.
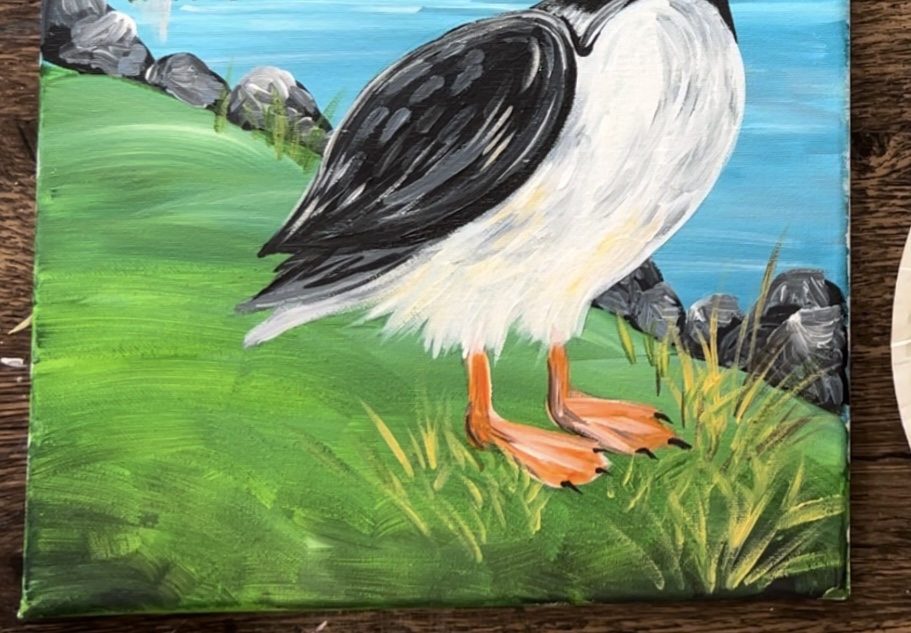
On the lower left, I added darker green paint strokes. You can create darker shades of green by adding small amounts of black into the green.
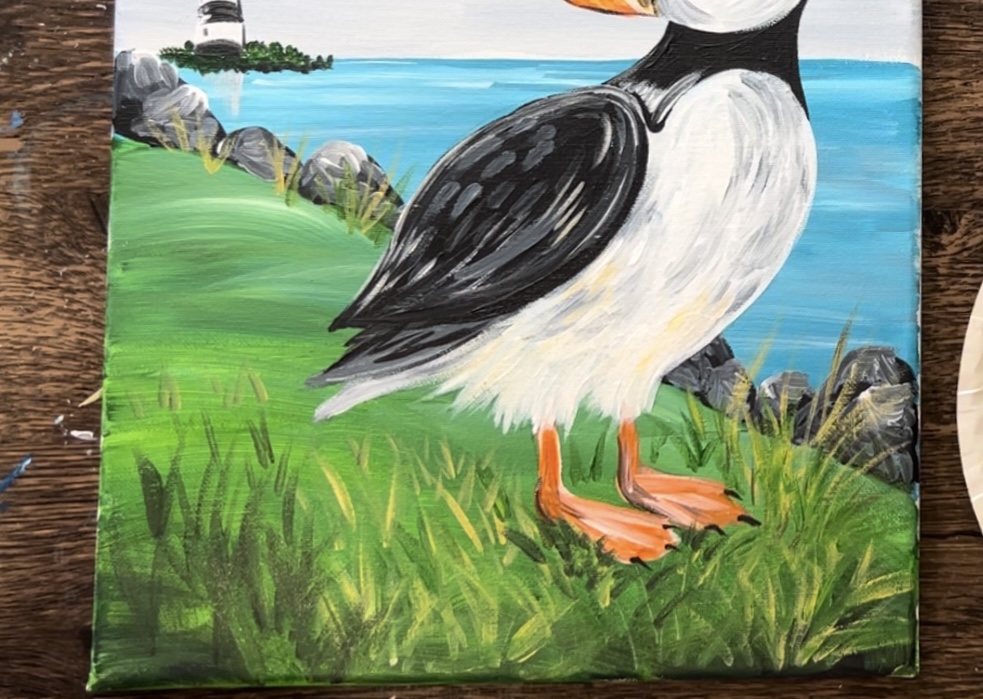
Note: you don’t have to fill up the area with as much grass as I did. You can just do a few grass blades here and there to simplify this.
Then I did a few more grass clusters in the back left area overlapping more of the rocks.
17. Paint Flowers (optional)
Use titanium white and the #4 round brush to paint little five petaled flowers throughout the bottom area.
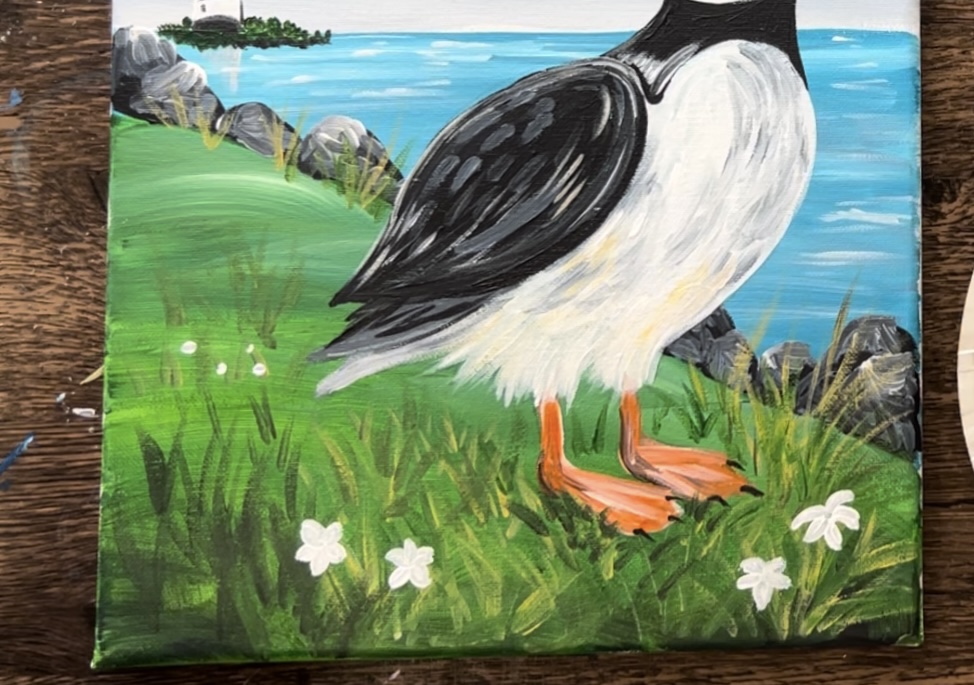
Some of the flowers further in the distance may just be little dots.
Then add a little yellow circle in the centers of each of the flowers.
18. Paint Blue On Beak Brown Area
As a final pop of color to our already colorful puffin, I decided to add just a touch of turquoise over the brown part of the beak as pictured below. I didn’t cover all of the brown, I just added a layer in the middle of it.
Finished!
Absolutely love puffins! I will certainly do your tutorial. Thank you Tracie
Thanks Carol! I love puffins too!