Would you like to save this?
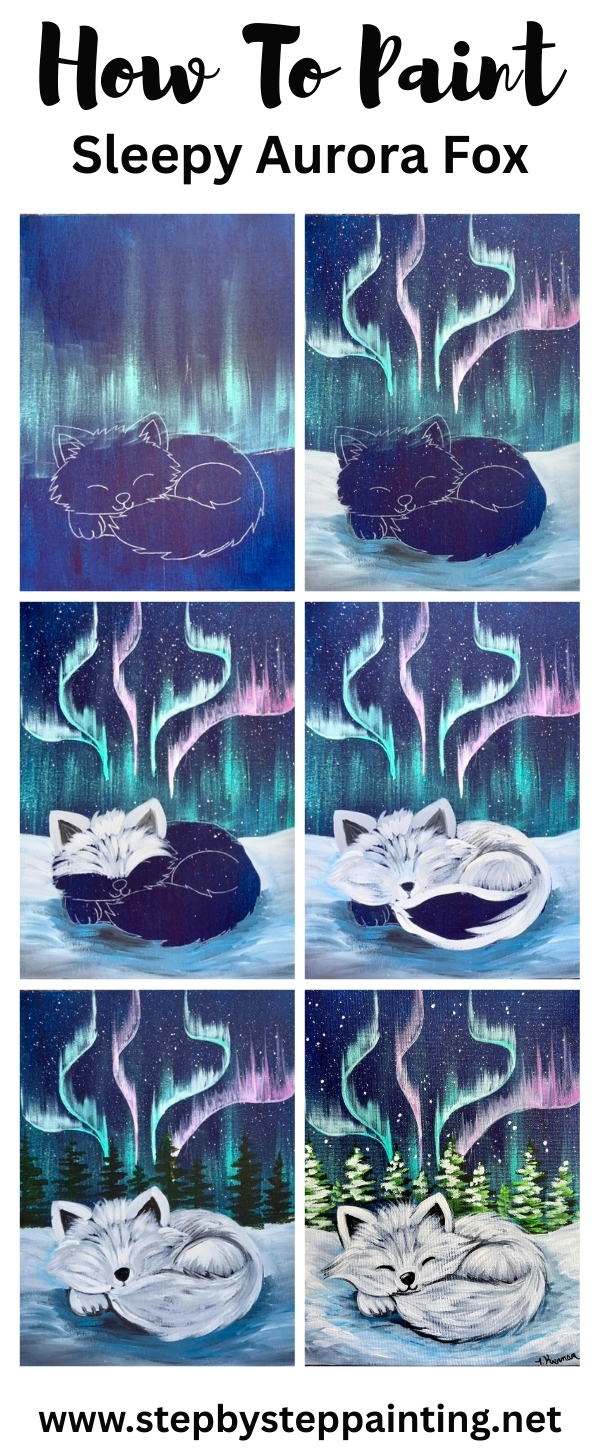
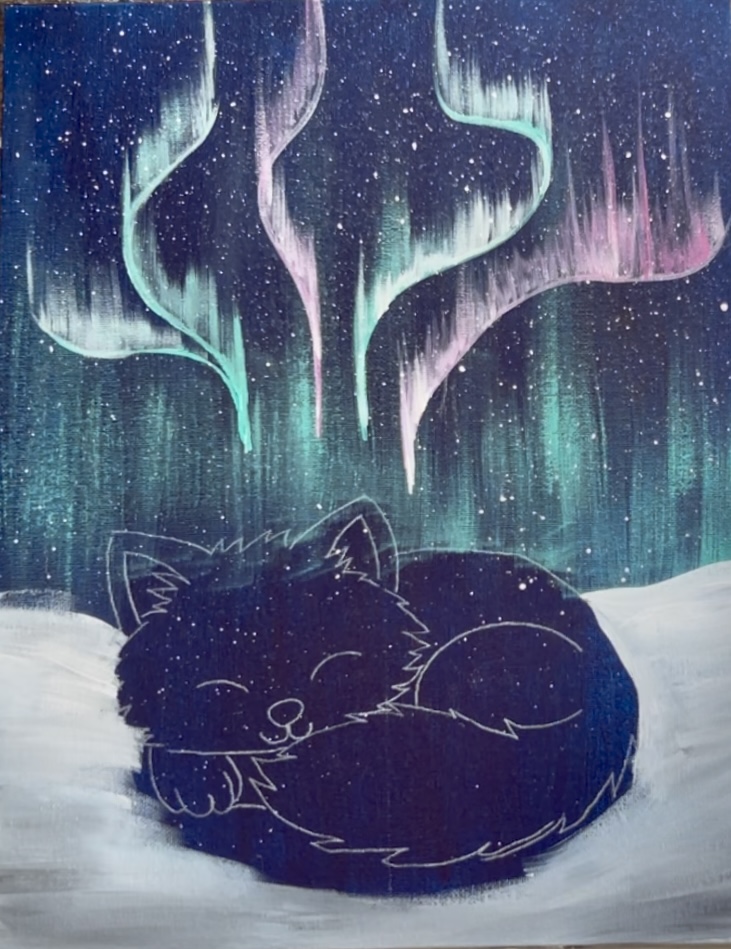
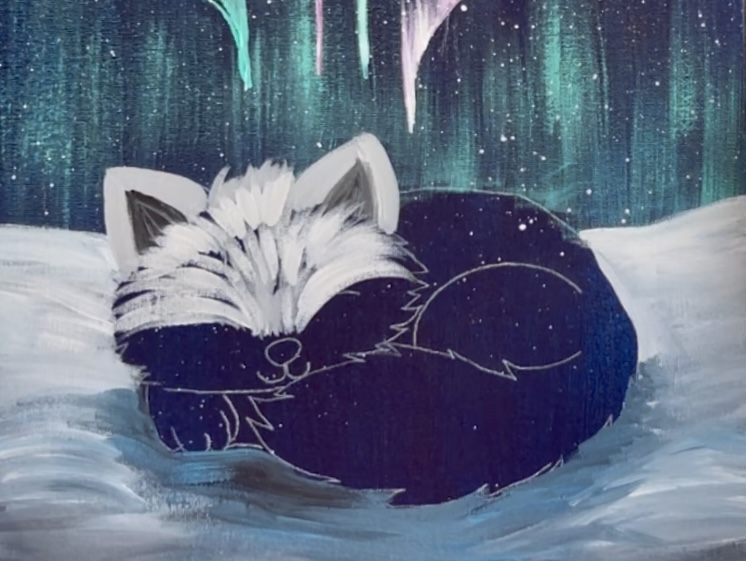
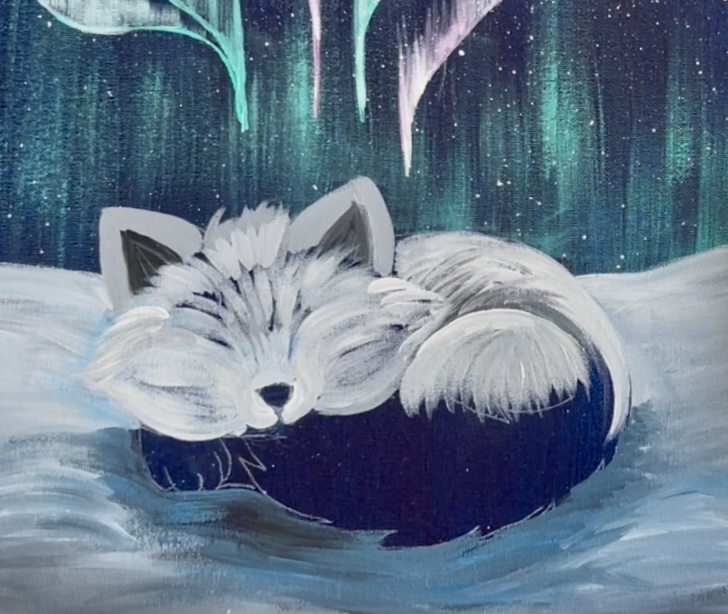
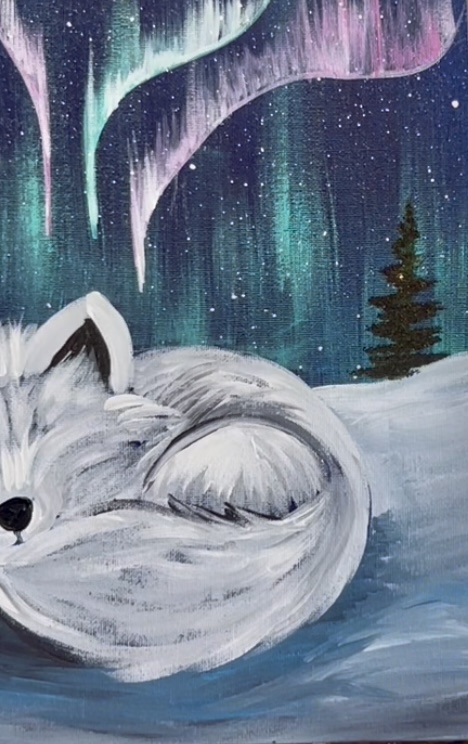
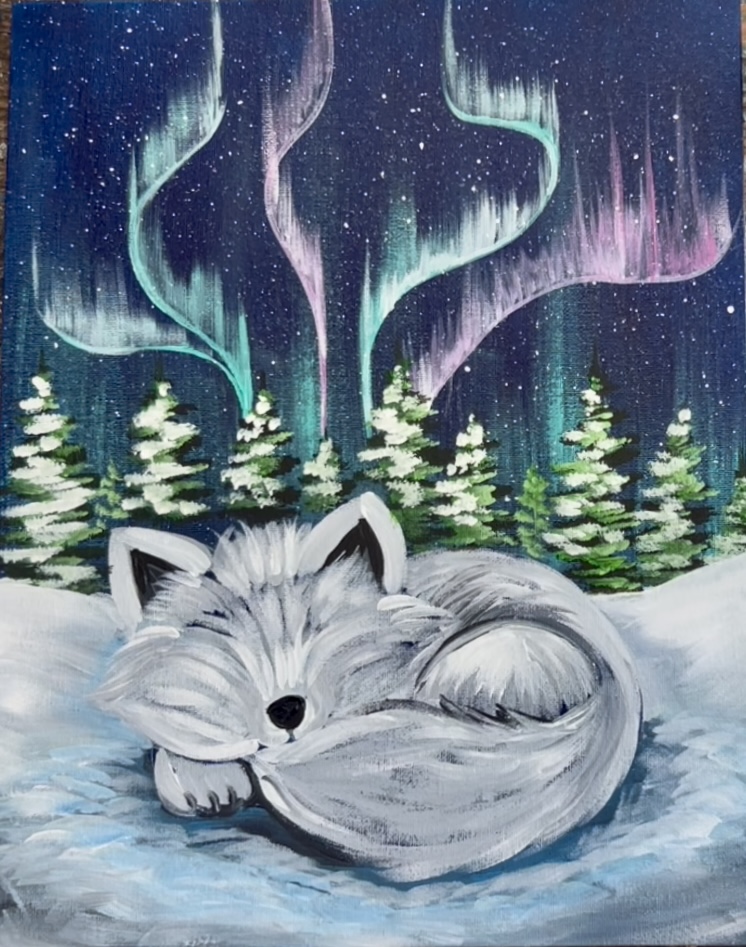
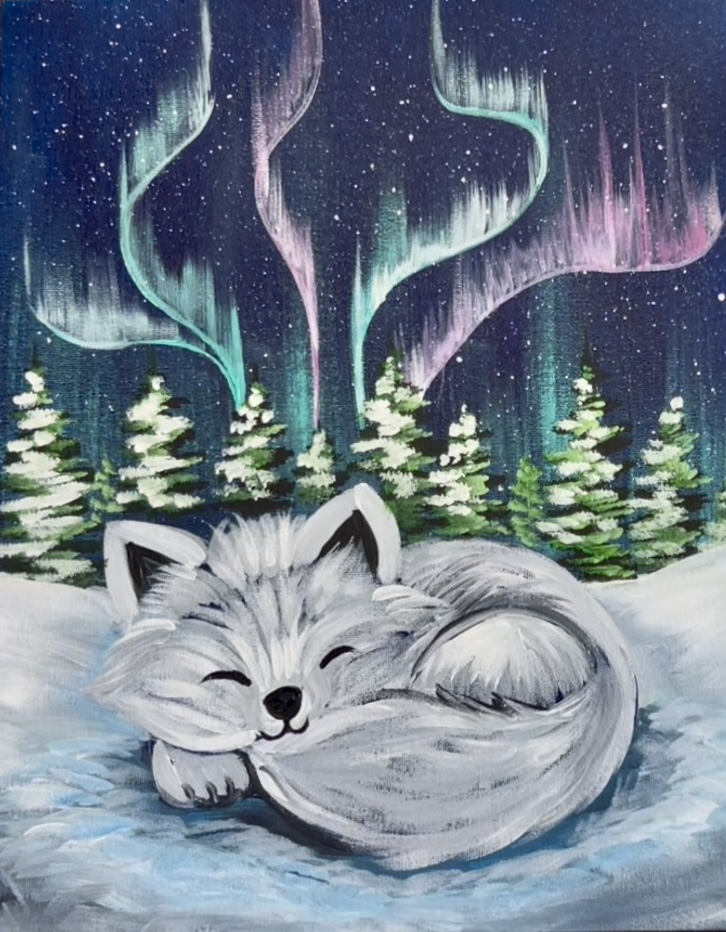
Learn how to paint a peaceful winter scene featuring a sleeping arctic fox beneath a glowing aurora borealis in this beginner-friendly acrylic painting tutorial. This step-by-step online lesson walks you through creating soft fur textures, snowy ground, evergreen trees, and vibrant northern lights using simple, easy-to-follow techniques.
This painting starts off with a canvas painted with a “Prussian Blue” background. Use any large flat brush and paint one solid layer with this dark blue. If you don’t have “Prussian Blue”, you can mix a small amount of black into “Phthalo Blue”.
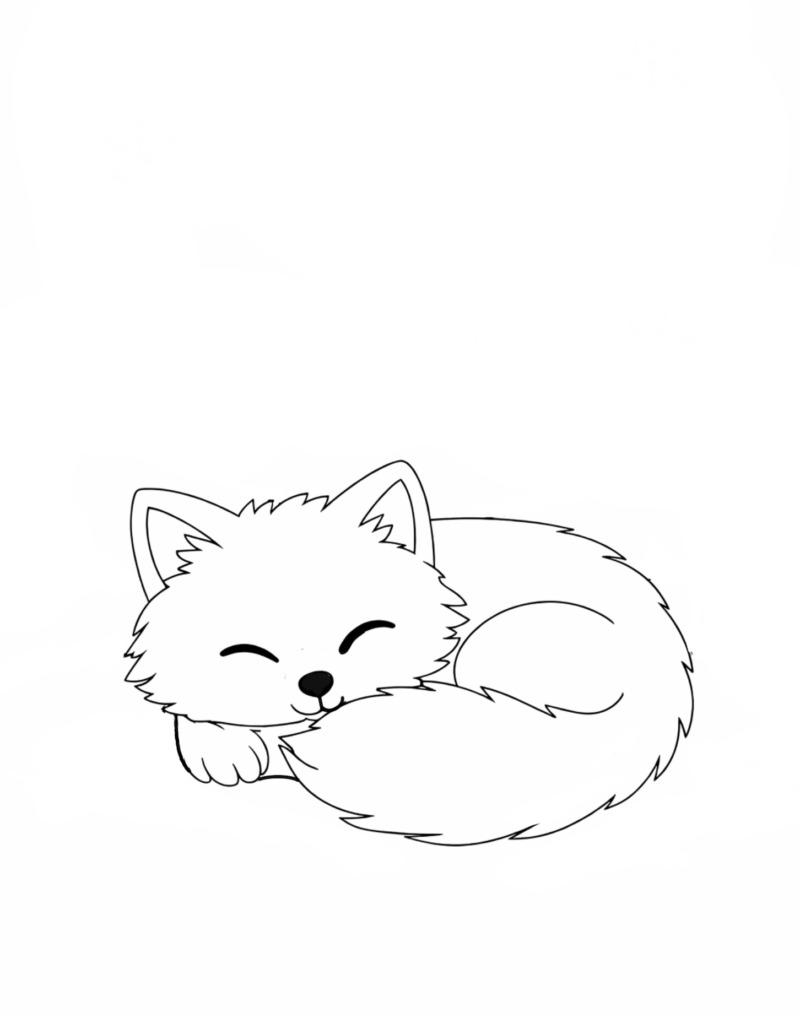
The tutorial also utilizes a template for the cute arctic fox so you don’t have to do any drawing. I like to use “White Graphite Paper” for transferring onto dark surfaces, however, you can also try rubbing white chalk or white color pencil on the back of the printable and transferring that way. I like to use this brand of graphite paper!
Enjoy and happy painting!
Materials Needed
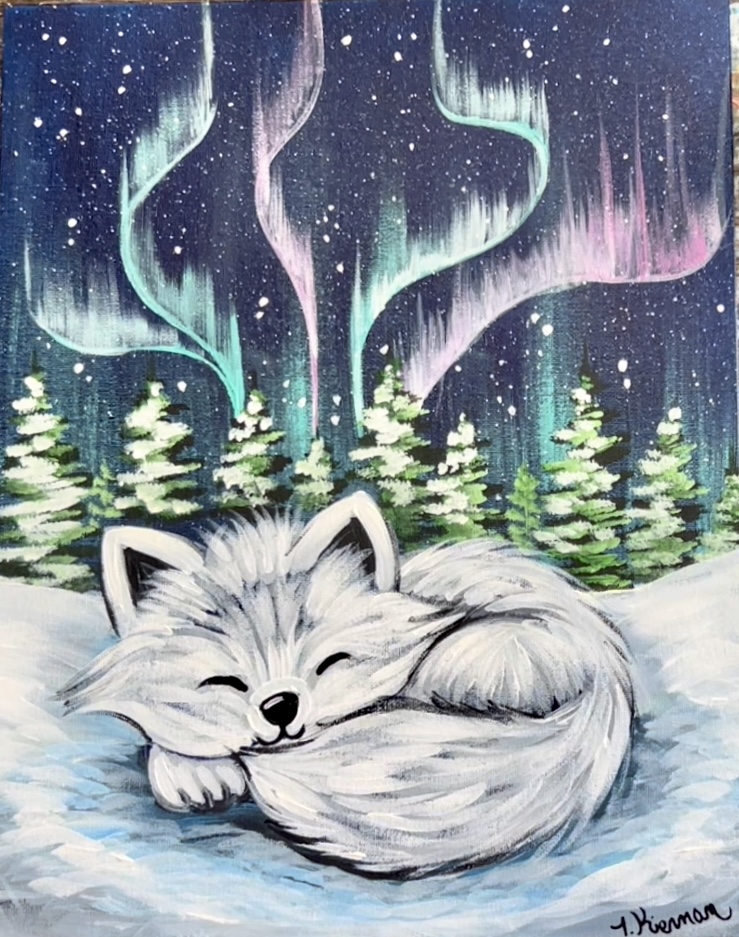
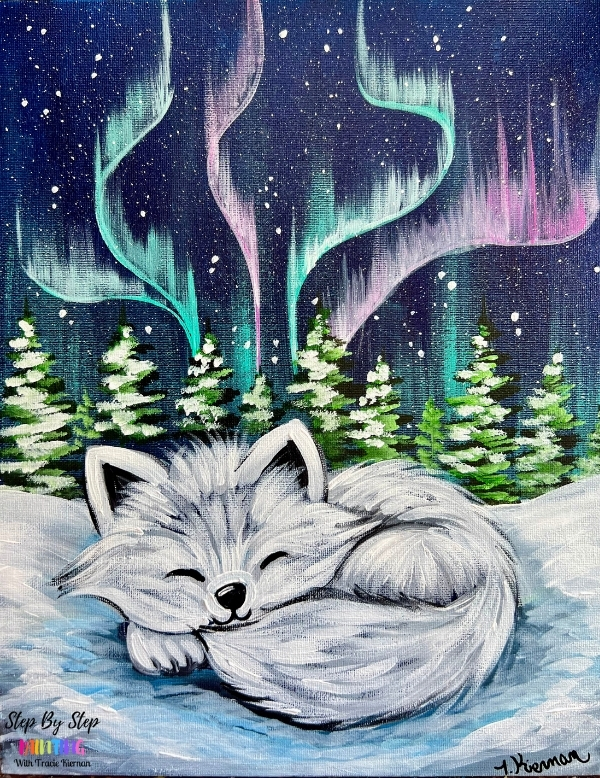
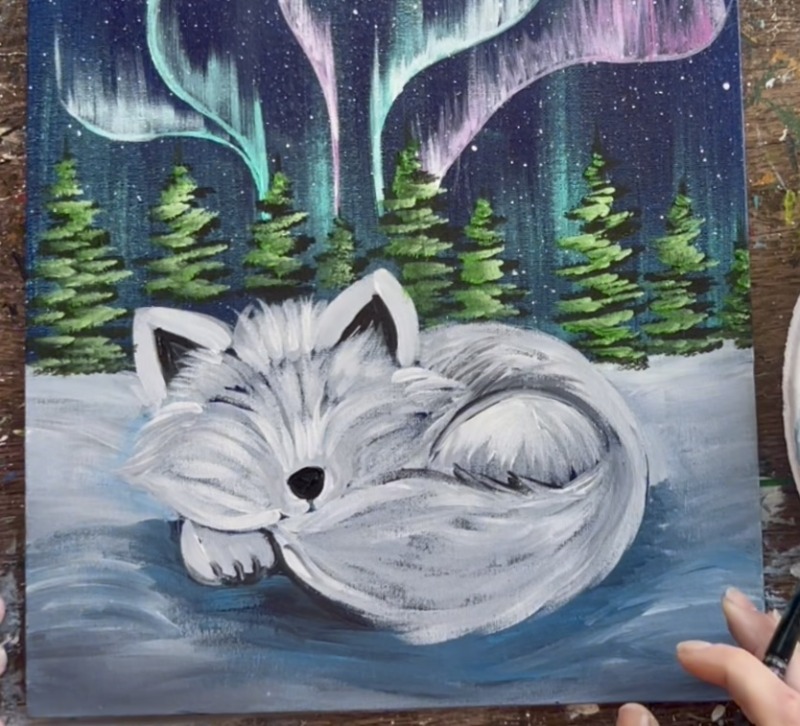
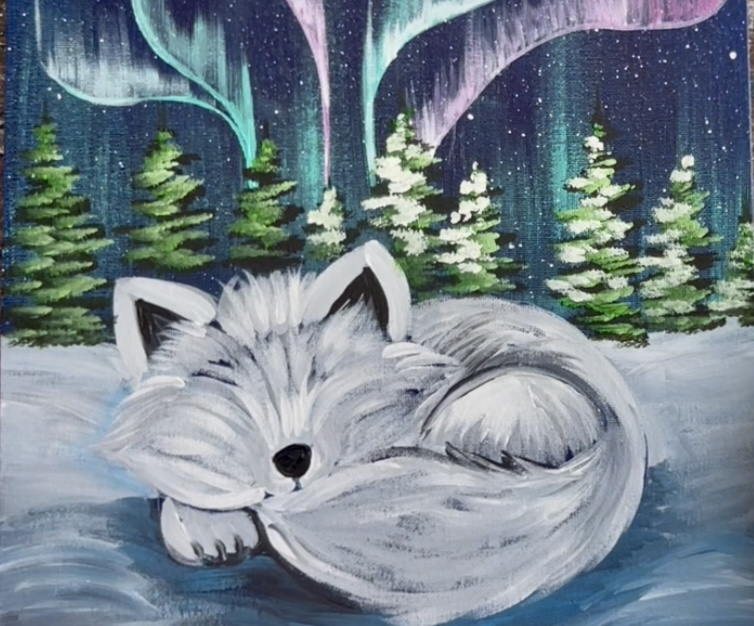
Sleepy Aurora Fox - Acrylic Painting Tutorial
Paint an adorable sleeping arctic fox with aurora sky background and snowy forest.
Materials
- 11 x 14 Canvas
- Acrylic Paints (I use Liquitex BASICS)
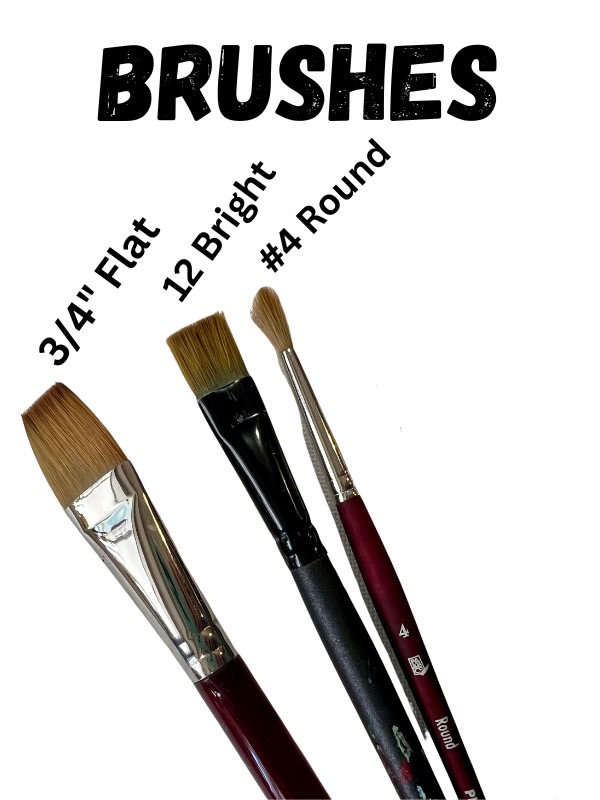
- Brushes (see sizes below)
- White Graphite Paper
- Pencil
- Traceable Template
- Toothbrush
Brushes
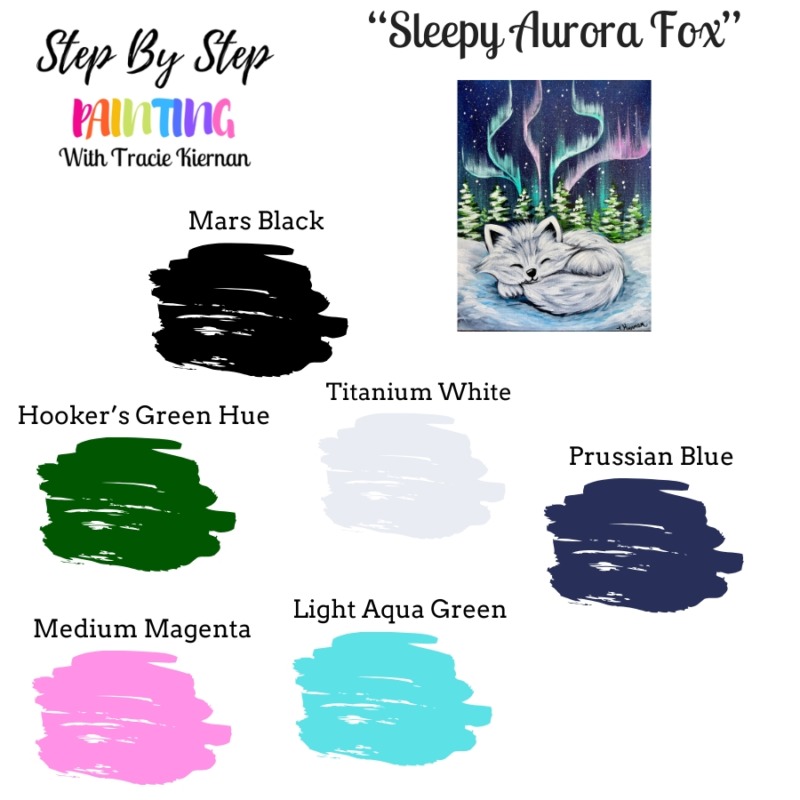
Colors
- Prussian Blue
- Mars Black
- Titanium White
- Medium Magenta
- Hooker's Green Hue
- Bright Aqua Green
Download this tutorial!
You can purchase this as a PDF download in my online digital shop! Ad-free and bonus sized traceables. Find out more here.
Color Palette
Traceable
Directions At A Glance
Video
Step By Step Directions
1. Paint canvas “Prussian Blue”
Use a 3/4 flat to paint the entire canvas a solid coat of “Prussian Blue”. Then let this dry! If you don’t have this exact blue, you can mix a little black into “Phthalo Blue”. Let this dry before going onto the next step.

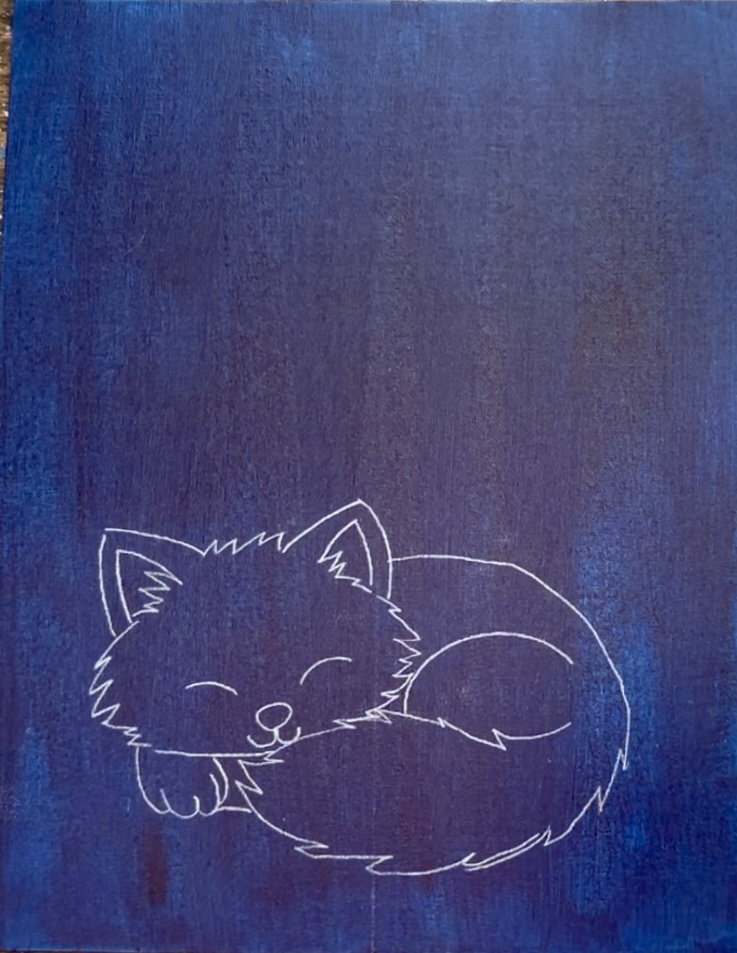
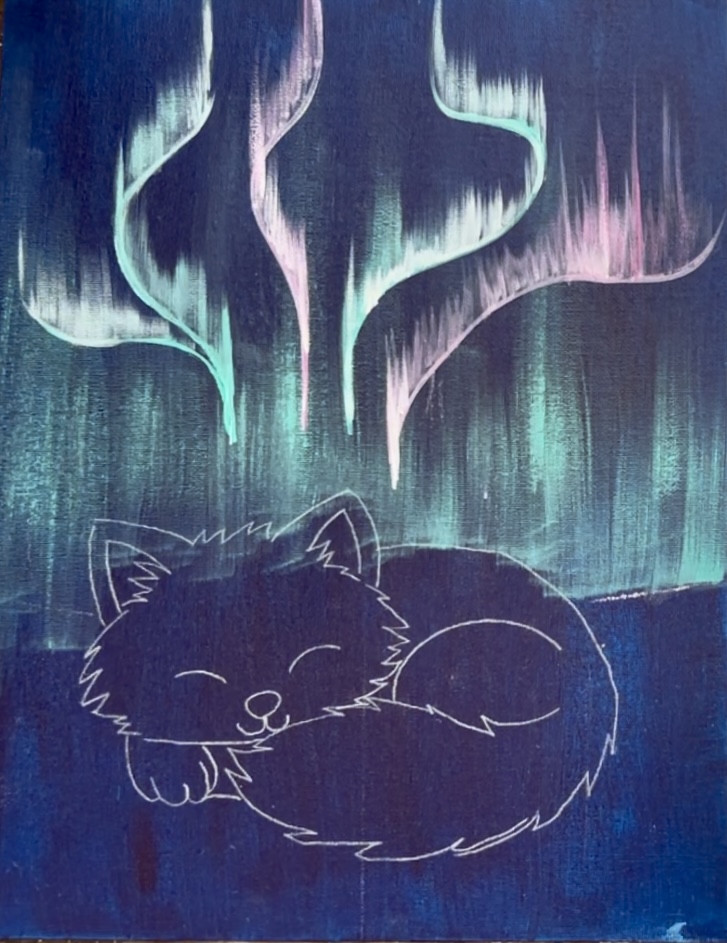
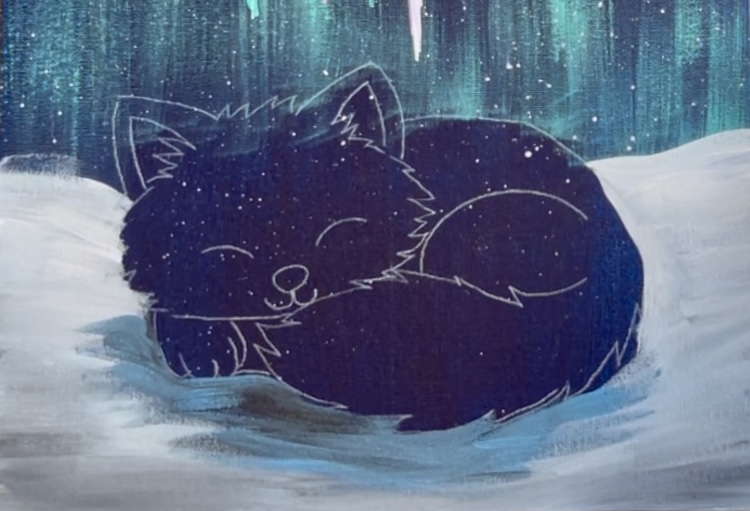
2. Transfer the fox design to the canvas
Print the template of the fox out on standard size paper. Place a sheet of white graphite paper below (shiny side down). Note: the bottom of the fox’s tail (or the dotted outline) is approximately 1″ from the bottom of the canvas. Position accordingly.

Then use a regular pencil or pen to trace the fox.
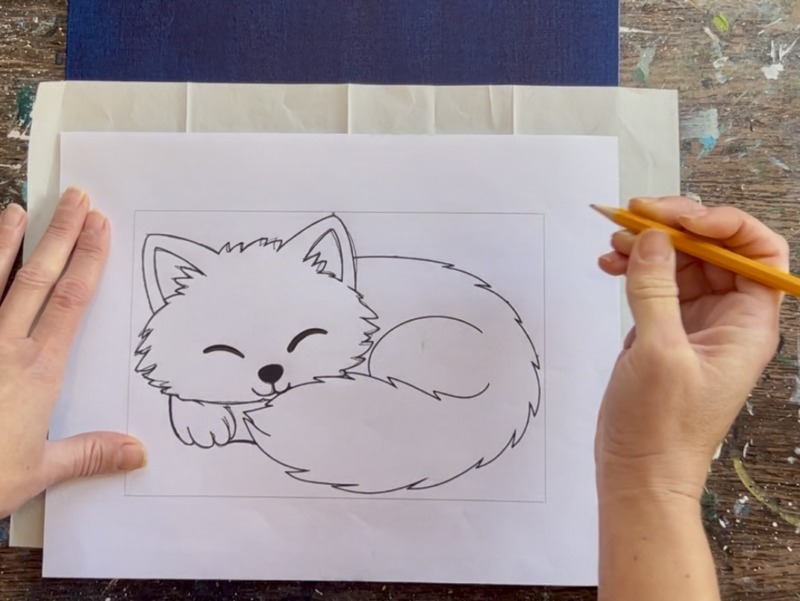
The fox outline will show on the dark canvas background.
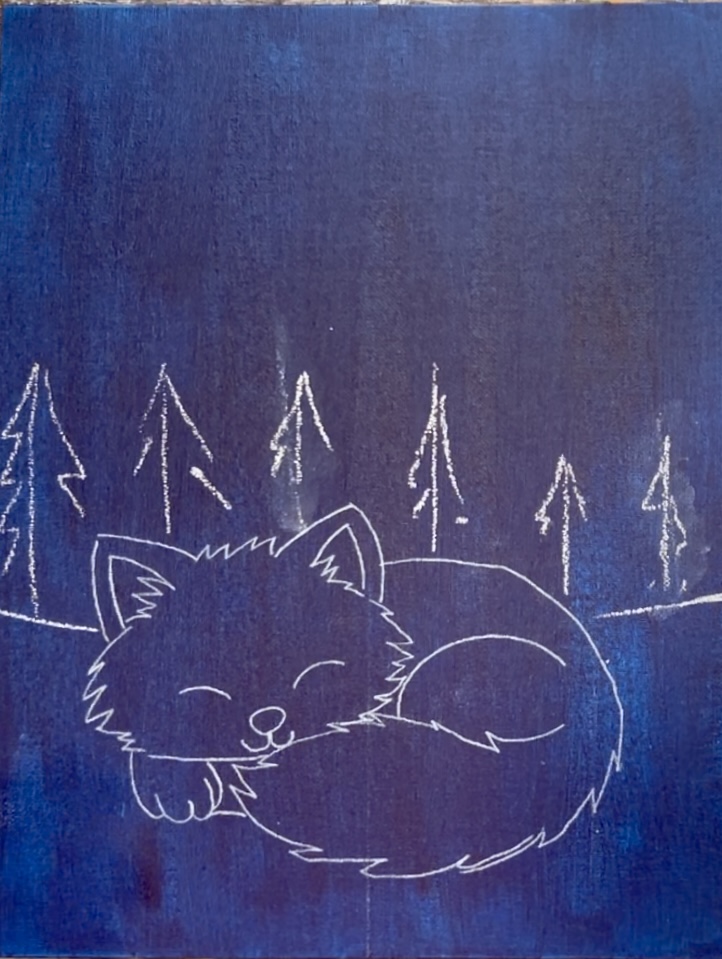
Optional: for reference, I like to draw the rest of the composition of the painting. To do this, use a piece of chalk. Measure 5″ from the bottom of the canvas and draw a “hill line” that goes behind the fox. This will be the “horizon line” in the painting. Everything above this line will be sky and trees! I also opted to draw sketches of the pine trees so I can envision how tall I want theme. Because this is drawn with chalk, it will erase when we paint the sky. Draw multiple vertical lines and sketch basic tree branch lines.
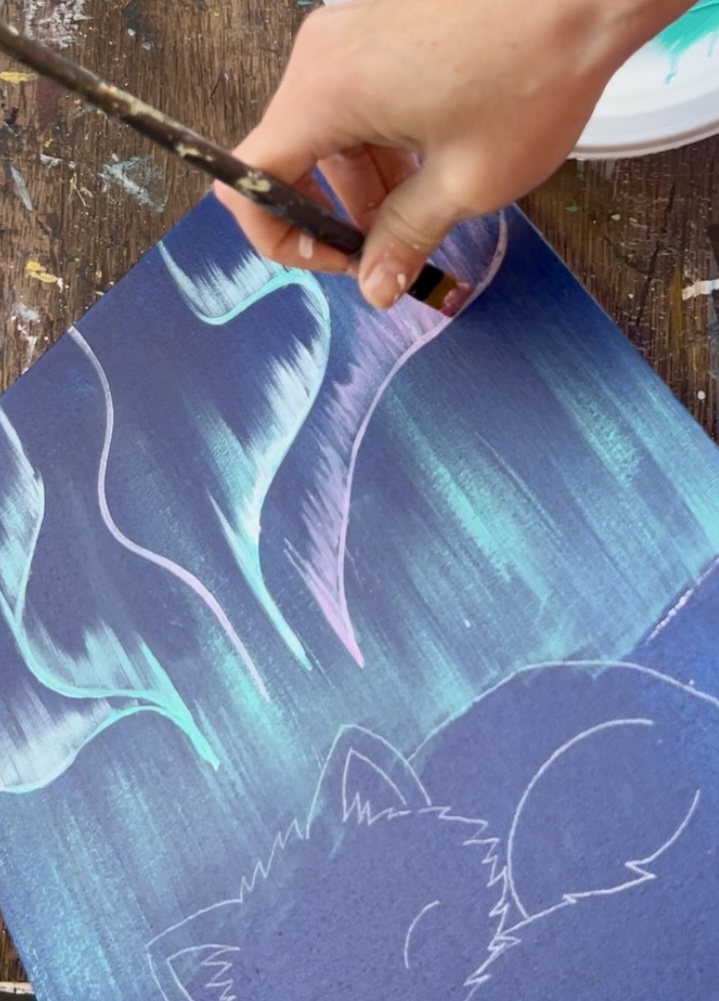
3. Paint Aurora Borealis
The first part of the aurora borealis in this painting is painting bright vertical marks along the horizon line. Doing this will create a pretty backdrop to the trees we will add later.
Load your paint palette with the color “bright aqua green”. Use a 3/4″ flat wash brush. Load the full width with this color. Then wipe the brush so there is only a small amount of paint let on it.

Use the full width of the brush to paint vertical paint strokes that go halfway up the sky. Vary these strokes so they are slightly brighter on the bottom but fade away. You may have to practice this a bit! You want your brush stroke to look dry and “see through”, not solid! Make some lines go all the way up or 3/4 of the way up for a nice varied look. You should still have plenty of dark showing in the sky, especially at the top.

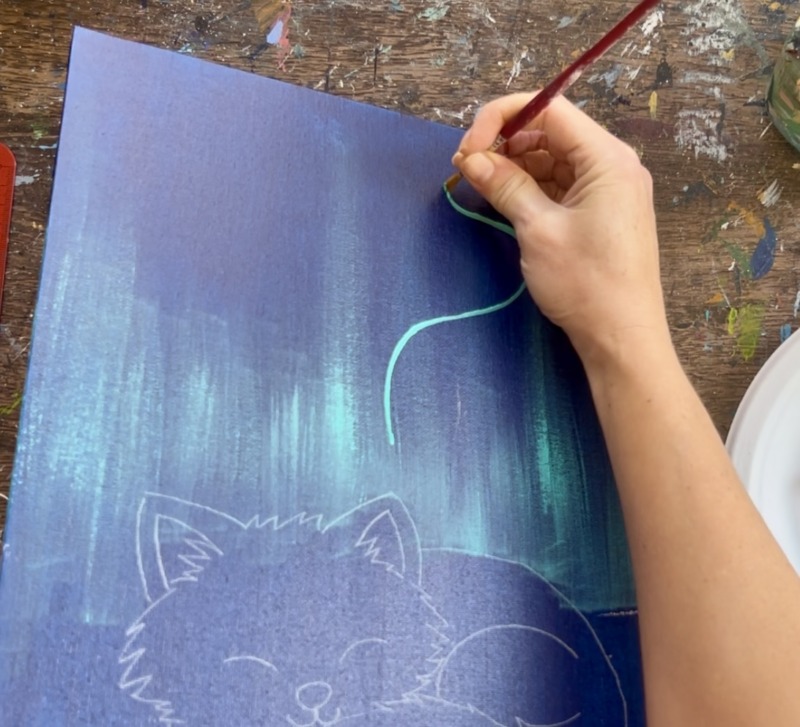
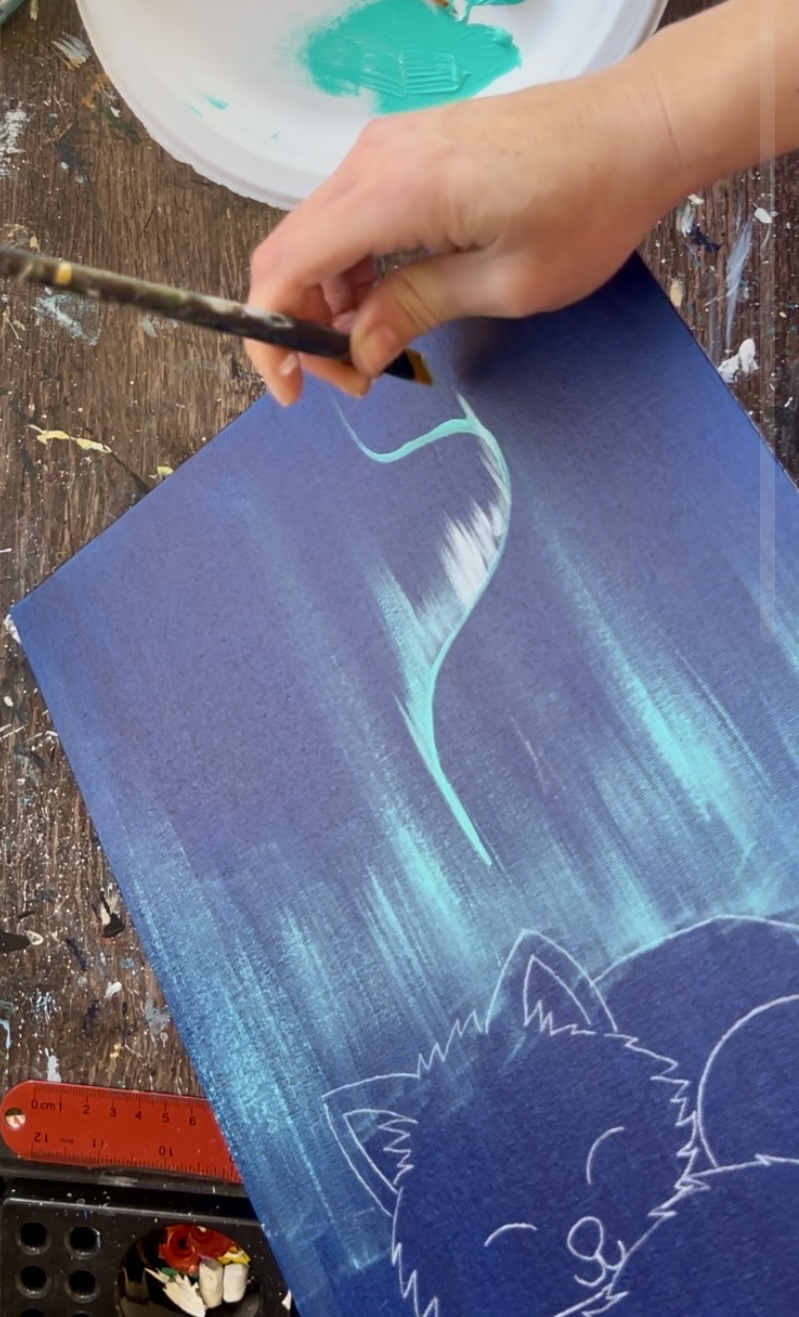
Next we will paint individual Northern lights. Use the #4 round brush and the aqua color to paint a long “S” line that starts in the lower middle of the sky and stretches all the way to the top of the canvas.
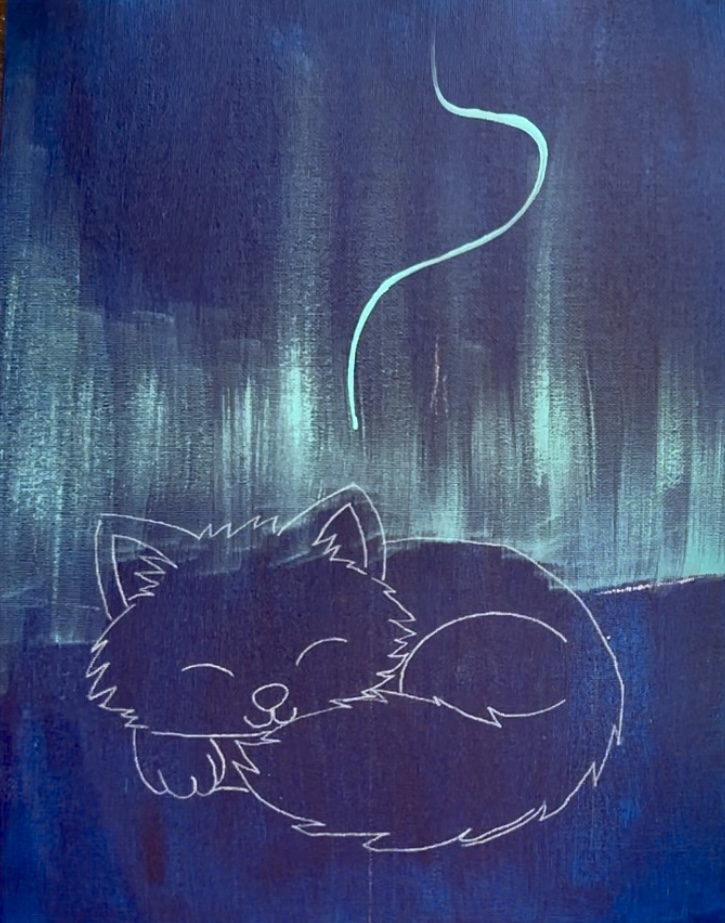
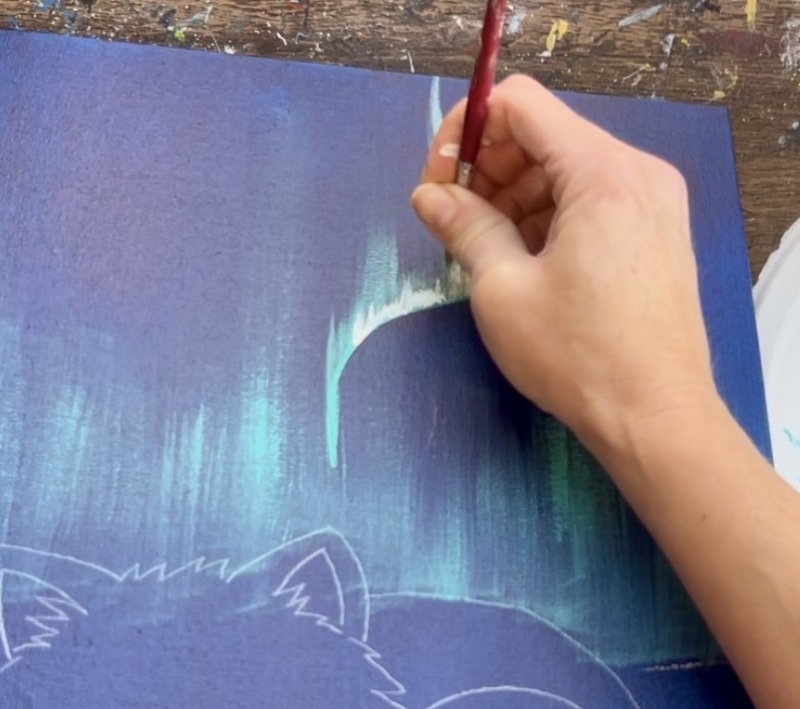
Next, use a #12 bright brush (1/2″ flat) to paint vertical dry brush marks above the “S” line. The trick is to only do these vertical marks anywhere above the line and not below the line. Do the same “dry brush” technique you did along the horizon line but on a smaller scale. Keep a towel handy to wipe the brush off to ensure only a small amount is on the brush.
Do a variety of lengths with these vertical paint strokes. Some stretch up higher and some lower. You can also use just the brush vertically to create smaller paint strokes.
Alternatively, you can paint this with the #4 round brush (or use both brushes interchangeably). The round brush is able to get smaller, more intricate “aurora light” marks. Try adding a little “titanium white” into your color too for a brighter effect!
If needed, touch up the “S” line by re-outlining it again.
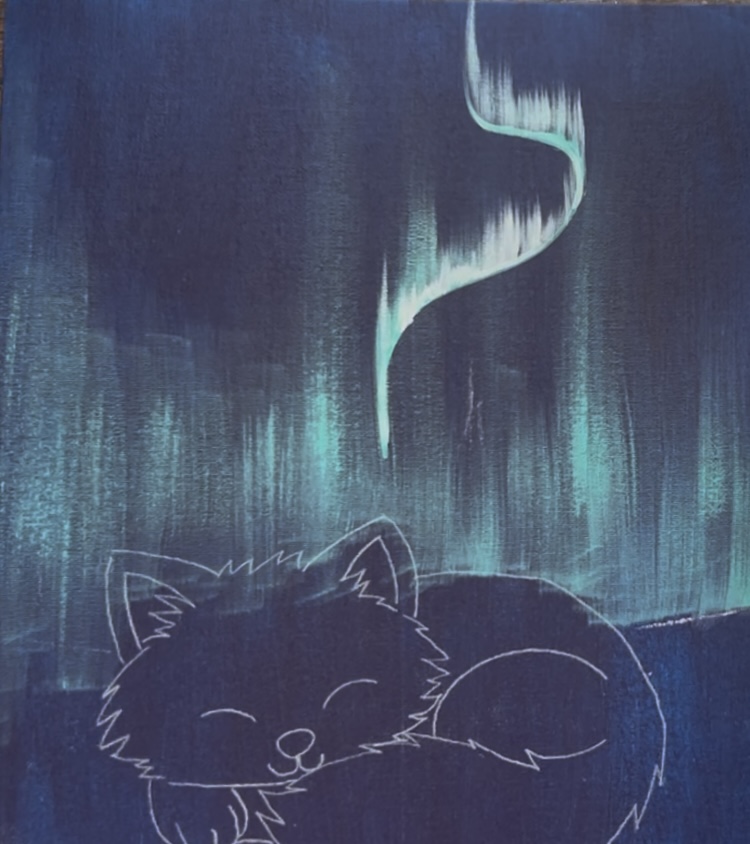
Repeat this to create a second aqua color light in the sky. Start the bottom on the lower middle part of the canvas and have it go up to the top. I made this far left light branch off into two pieces.

Then use the same technique with the #12 bright brush and #4 round brush to paint the vertical light marks.

Next, load “medium magenta” on your paint palette. Create 2 sets of “S” lines in the sky.
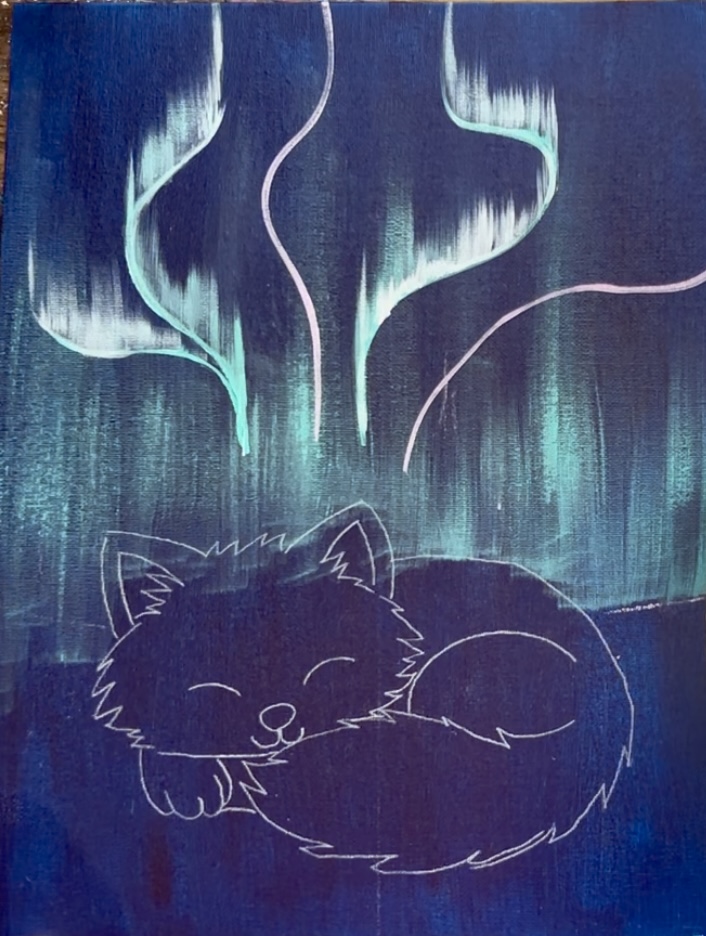
Then use the pink to paint vertical marks just like the aqua lights.
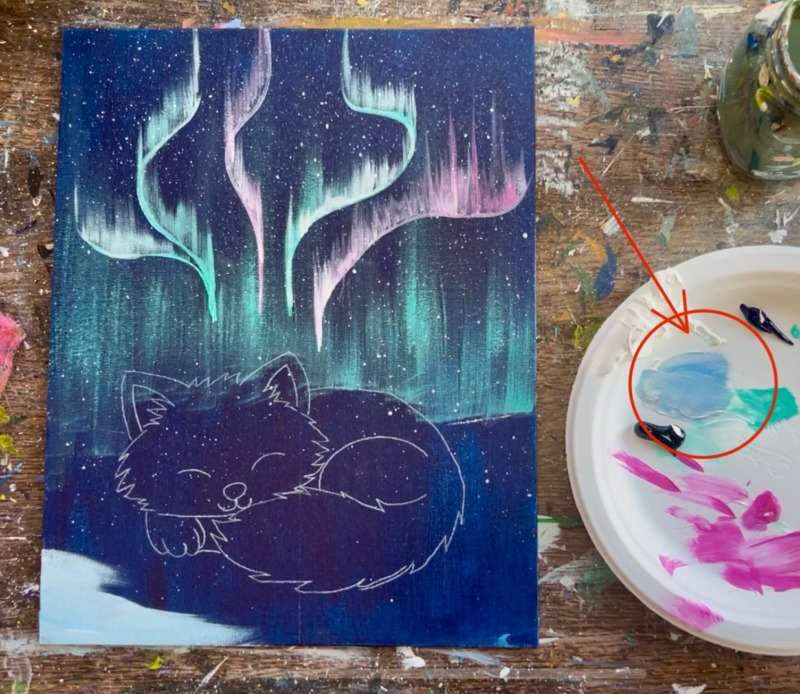
4. Splatter Stars Everywhere
Use a toothbrush or a big flat brush to flick white specks all over the sky!

5. Paint Snow On Ground
The colors in the snow consist of: Prussian blue, Titanium white and Mars black. On your paint palette mix 1 part blue, 4 parts white and 1 part black. This will make a light gray-blue color.
Use the #12 bright brush (or 3/4 flat) to paint the snowy area around the fox.
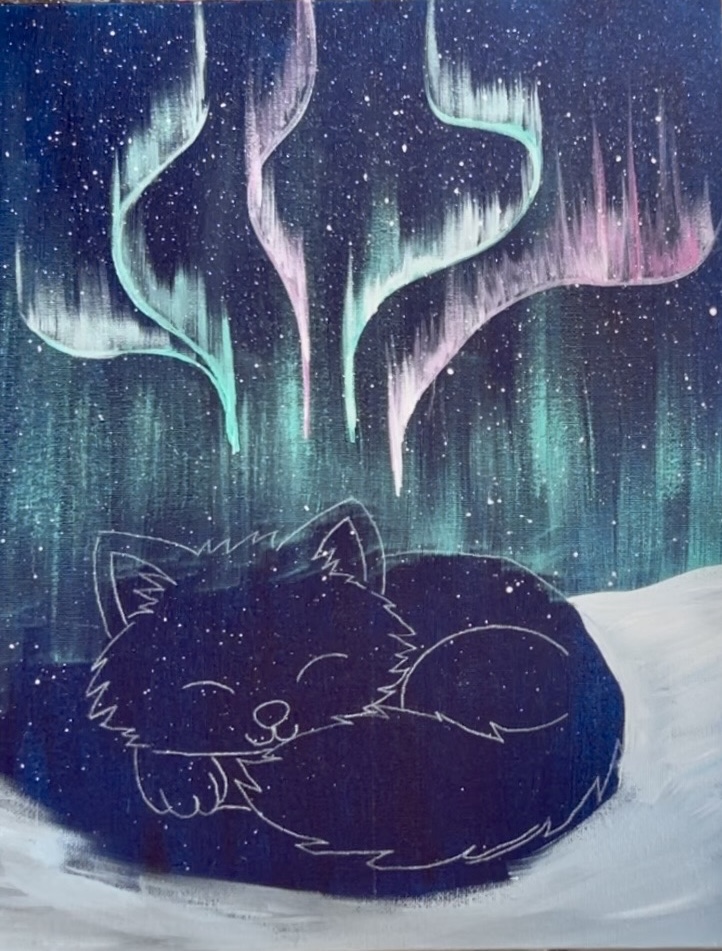
Leave a little space dark blue around the bottom of the fox. We will add shadowing in that area.
Then add a little more black to your light gray color to make a darker gray. Blend this darker gray on the bottom of the canvas so the snow on the bottom left and right corners is darker. When you have the snow darker on the bottom and lighter on the horizon, it creates depth/ perspective in your painting. If needed, add more white along the horizon line and blend it down.
Next, add some shadowing below the fox. Mix more “Prussian blue” and “mars black” into your gray color that you used to paint the snow. Use the #4 round brush to paint a blueish-gray color under the fox. You can do very loose paint strokes in this area.
Blend it with the rest of the snow (but it doesn’t have to blend perfectly).

We will add lighter colors to the snow in a later step! It is supposed to look kind of dark right now.
6. Paint Fox Ears
Mix 3 parts white and 1 part black on your palette (no blue). Use the #4 round brush. Start by painting the ears.

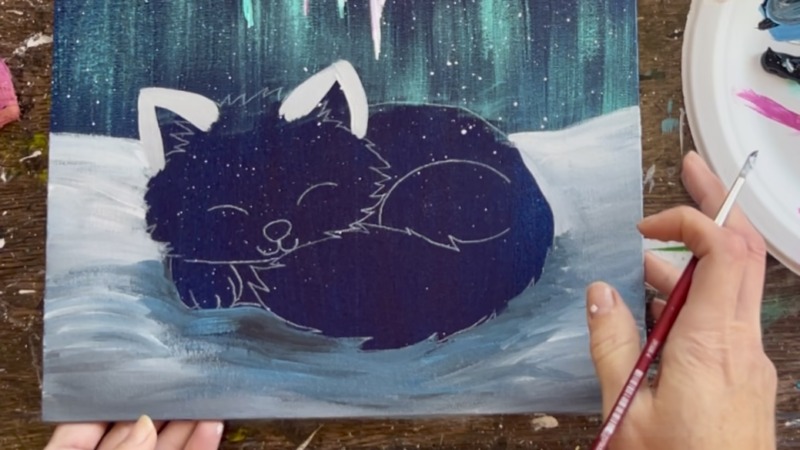
Paint hair texture between the ears. Yes this is supposed to look a little dark right now! We will layer on brighter white fur layers later.
Then load your brush into just “mars black” and paint the inner parts of the ears (it will look like a darker gray here).
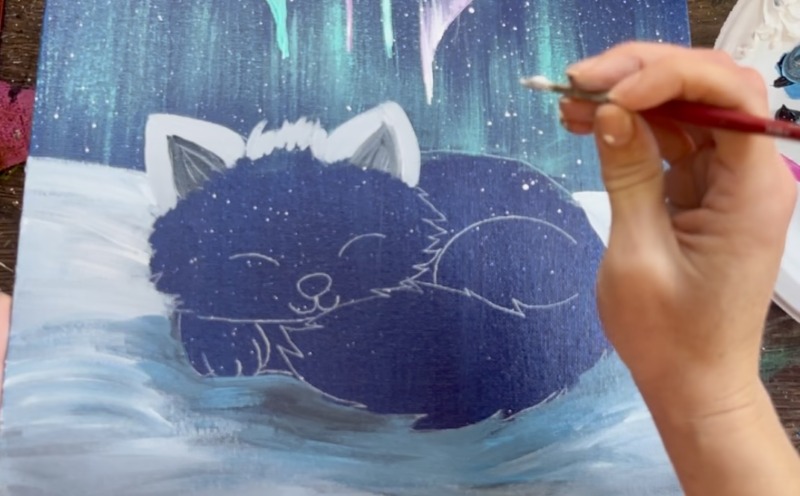
7. Paint Bridge Above Nose/ Fox Fur
Wipe the brush. Then load into your light gray again (what you used for the ears). Paint fur paint strokes that start above the nose. Brush each piece of fur upwards to form the “bridge” of the fox’s nose. This goes from the top of the nose all the way up to the forehead. Each row of fur paint strokes overlaps each other (starting from the bottom and going up). Also, leave some dark blue from the background still showing through, for shadowing.

8. Paint Left & Right Upper Sides Of Fox Head/ Fur
Next, paint more fur paint strokes starting from the top of the nose and brushing in a curved direction outwards to the sides of the fox’s head. Do this only above the eyes. When you paint fur paint strokes under the ears, make the fur pieces slightly overlap the dark inner parts of the ears.
9. Paint Nose Area / Lower Left & Right Head Area Fur
Use the #4 round brush and white to paint a curve just above the nose and then paint a curve that wraps around the bottom sides of the nose just above the mouth. This helps to form the fox’s nose/snout region.

Then paint more fur paint strokers going outwards to fill the bottom left and right half of the fox’s head in. This forms a teardrop shape. There likely won’t be a lot of contrast on the sides of the head where it overlaps the snow in the background. We will lightly outline this part later to help with that.
10. Paint Back & Hind Leg
Use the #4 round brush and the same light gray color. Paint the fox’s back. Leave a little bit of a dark blue gap where the end of his right fur pieces from his head.
Blend a little bit more black (to make a dark gray) at the top curve of his hind leg. This will create some shadow in that area.
Then paint the hind leg. This is a round half circle shape. Your paint strokes start at the top and drag downwards. Leave a little bit of a gap where the tail meets the hind leg area. You can also add a little bit of darker gray in this area. That will help with contrast later when we paint the tail in.
11. Paint Tail
Use the #4 round brush to loosely outline the edges of the fox’s tail to define the area.
Then fill the tail in with long paint strokes that go with the flow of the shape of the tail. Leave some of your dark blue still showing between your paint strokes lines and also leave a little bit of a dark blue gap for the hind leg. Paint some fur paint strokes that overlap the edge of the tail. This will overlap part of the shadowy snow under the fox and parts of the fox’s hind leg. The tip of the tail goes just under the fox’s mouth. We will do some outline work here later to help define that better.
12. Paint Paw / Some Outlining Along Tail
Paint the paw with the same light gray color. Then rinse the brush and load it into “mars black”. Lightly outline the entire shape of the paw including the toes. Then use the black to lightly outline the top of the tail (where it overlaps the hind leg). I decided to not do anymore outlining at this point because there are still more layers to the fox and snow to add.

13. Paint Trees
Use a #12 bright brush and very dark green. This green is about equal parts black and “hooker’s green hue” mixed together. Start each tree by painting a single vertical line (to establish the height of the tree). Paint the branches small at the top by using just the corner of your brush.
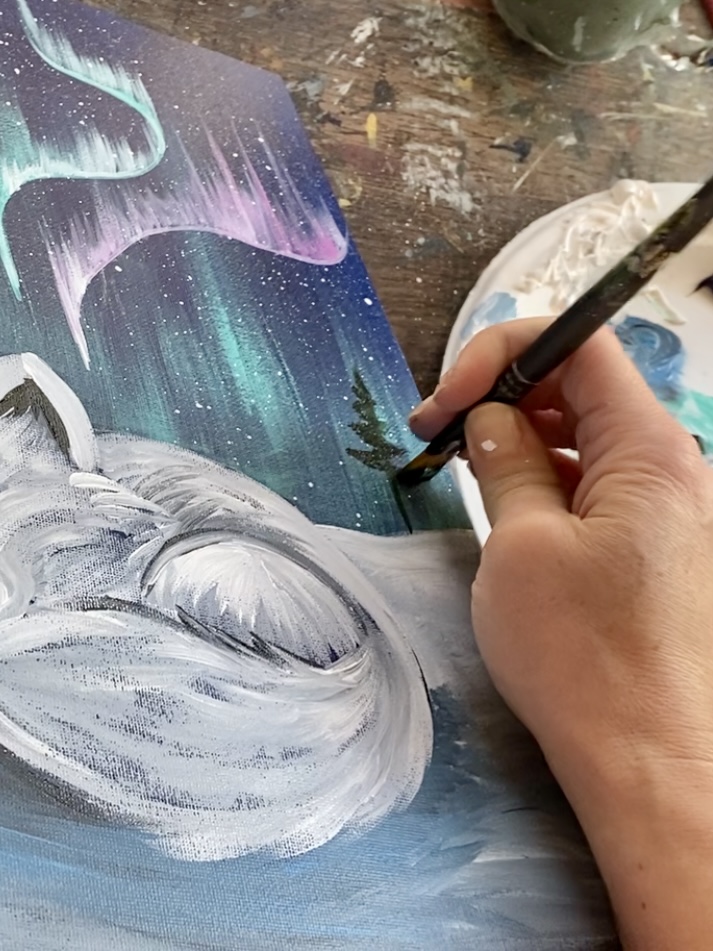
Then tap little branch paint strokes using the tip of the brush and go in a left and right zig-zag direction. The branches get wider on the bottom.
Repeat this technique to create a variety of height of trees all along the horizon line and behind the fox.
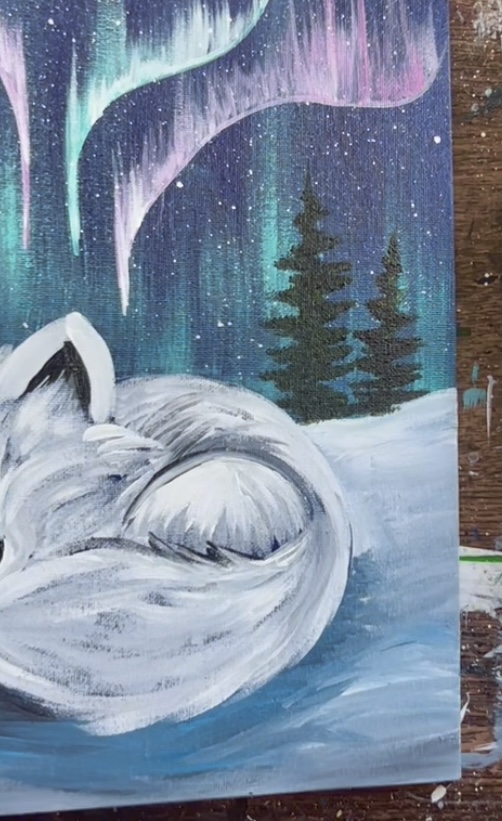

Wait for the trees to dry a little bit. Then mix a lighter green on your palette by mixing 2 parts “hooker’s green hue” and 1 part “titanium white”. Repeat the pine tree painting technique with this lighter layer but don’t cover up all of the darker layer. The darker layer is meant to be the shadowing.
Repeat this for all of the trees.
You don’t need to wait for this to dry to do this next step. We will add our snow layer on next! Wipe the brush off (but don’t rinse). Add a small amount of “titanium white” onto your brush. Paint your bright top layer of branches but don’t cover all of the tree. Only little bits of snow “dabs” are needed to create this effect! I did not make the snow go all the way down the trees that are directly behind the fox. This helps to create better contrast so the snow from the trees doesn’t end up blending with the color of the fox.

14. Second Layering/ Highlighting Snow
Next we will add brighter snow layers on the ground! Use the #12 bright brush and mix a light blue-gray color. You want the same color you initially used to paint the snow but add a little more white to it this time so that it shows up brighter. Loosely paint little curved lines throughout the snow and around the fox. Leave the shadow color around the fox alone.

Go back with a slightly darker blue-gray to make sure your bottom left and right corners are dark as well as the shadowing around the fox. Then, if needed, add pure white in the very back under all of the trees (the horizon line). This area is the brightest part of the snowy landscape.
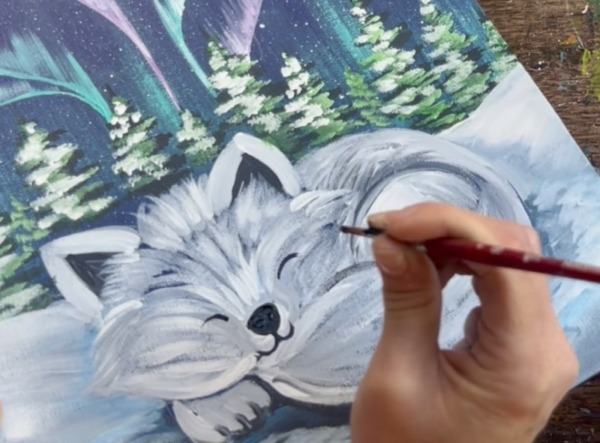
15. Paint Eyes, Nose & Mouth
You can use a black paint pen for this step if it’s easier! Use the #4 round brush and “mars black” or a black paint pen to paint the shape of the nose in. Then paint or draw two curved lines for the eyes. Notice the position of the eyes. They are only just slightly above the top of the nose. You can sketch with a pencil first to get placing right. Draw the mouth in as well. Mine ended up overlapping part of the tail but this can be fixed by lightly outlining the tail edges later.
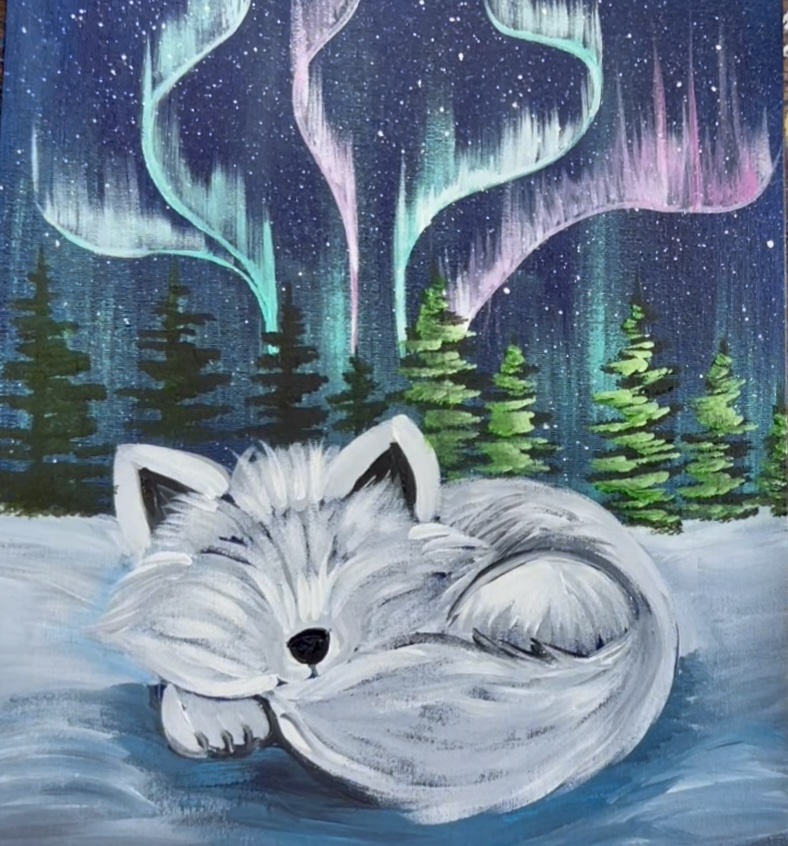
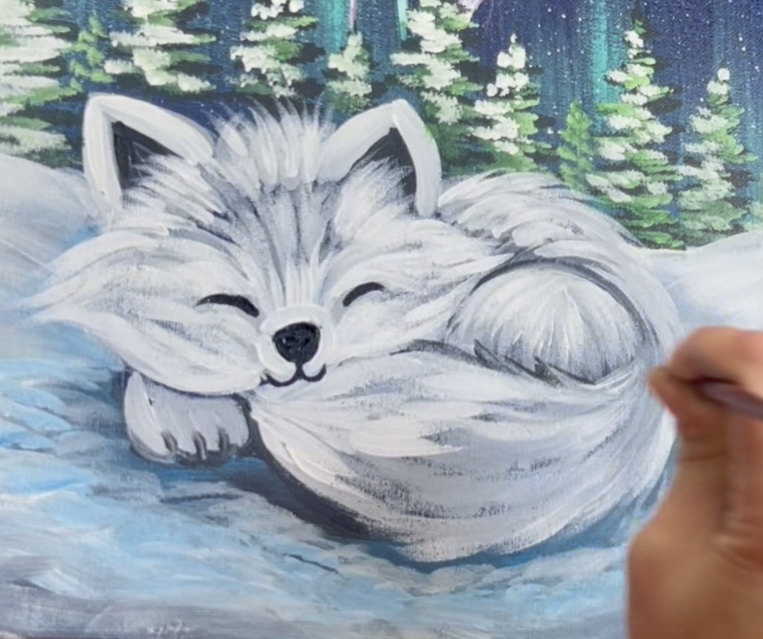
16. Add your bright white fur layers on the fox
Use the #4 round brush and pure titanium white. Repaint the fox fur with your bright layer but you don’t need to paint over all of it and add less this time! Paint this coat over the ears. Then paint your fur starting at above the nose and go in the order you painted the first fur layers of the fox.
Adding this bright white layer of fur on the fox will really brighten it!
Do the tail as well! Big fur lines. I started at the tip of the tail and worked my way to the back.
Paint a coat of white paint over the fox’s paw. But leave some shadowing just below the fox’s head.
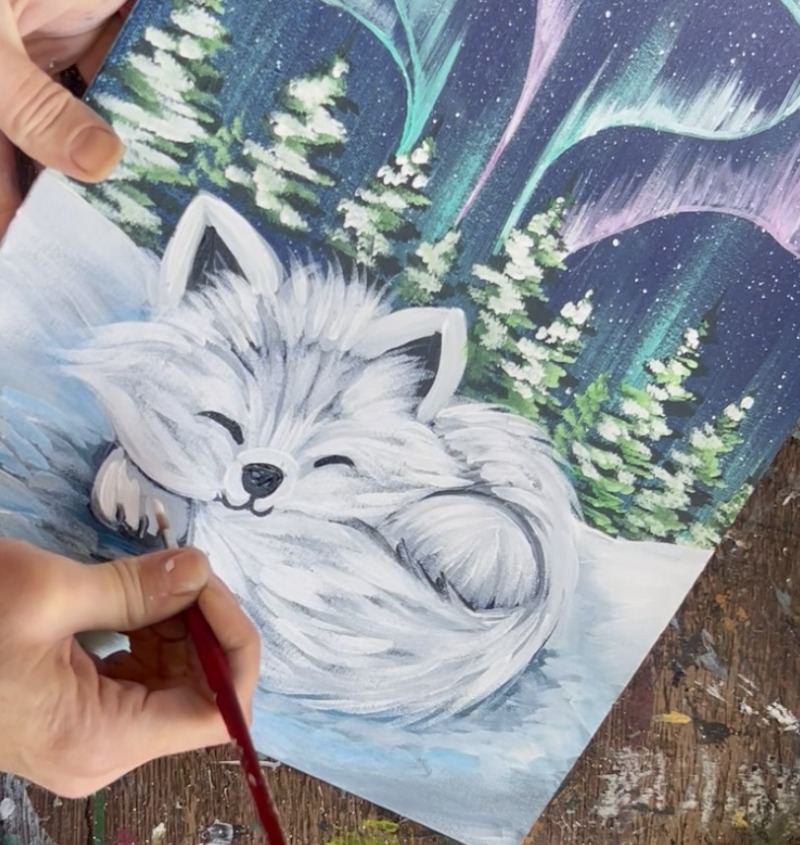
17. Outlining On Edges Of Fox
This is the part where we can outline parts that need to stand out better. Outline the edge of the ears, the sides of the fox’s head, the bottom and top edges of the tail and even the fox’s back if needed. You want a very thin and loose black line to do this. I did it with the #4 round brush but you can use the paint pen for this too. Hold the brush or pen very lightly when outlining. You want very thin lines.

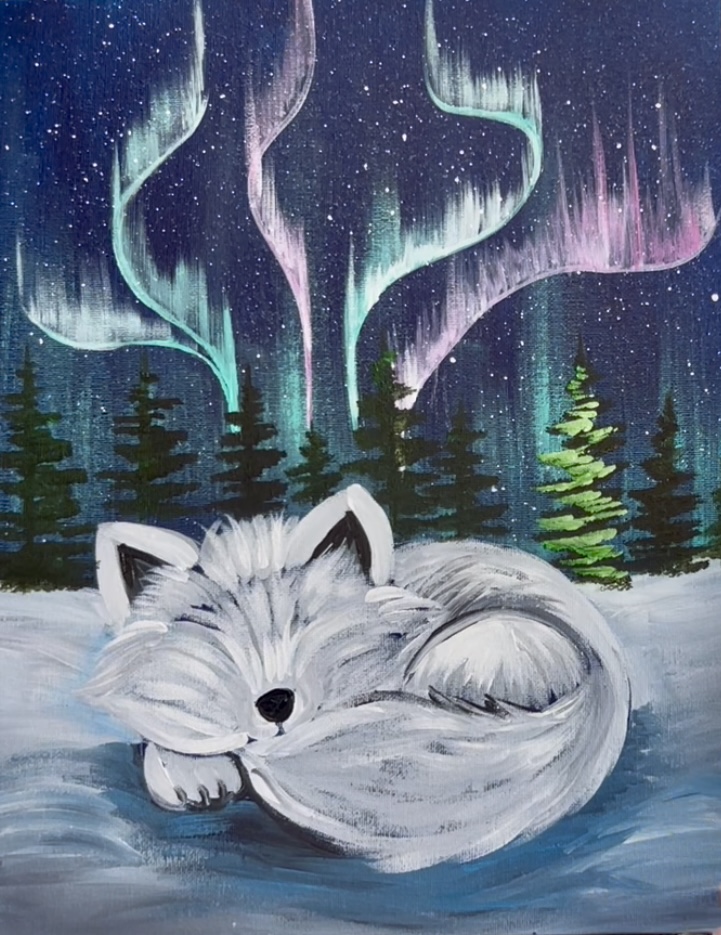
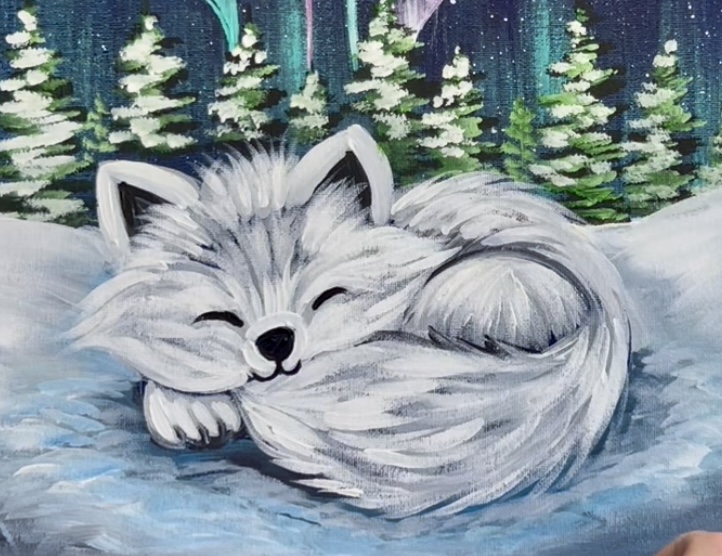
18. Final Touches
Final touches can include adding some brighter white layering on the snow, adding more snow dots or stars in the sky using a brush to “dot” them in, touching up some of the northern lights and adding a small white highlight on the top of the fox’s nose.