
Would you like to save this?
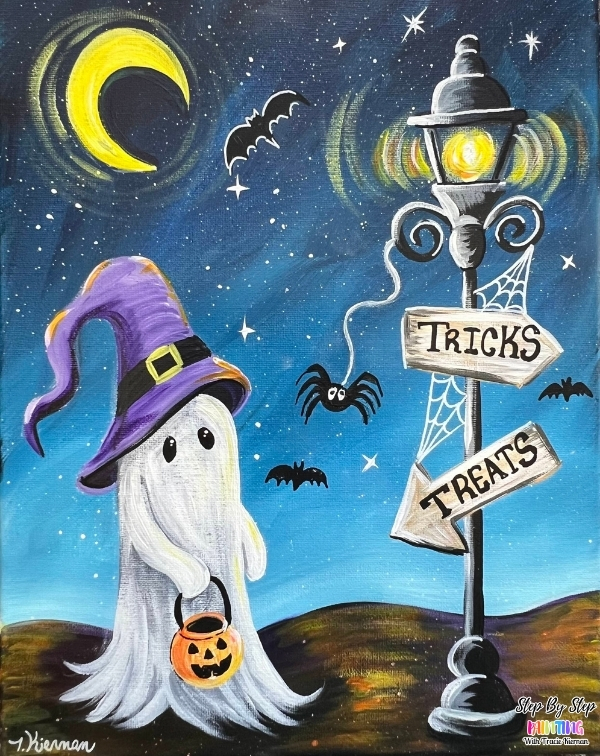
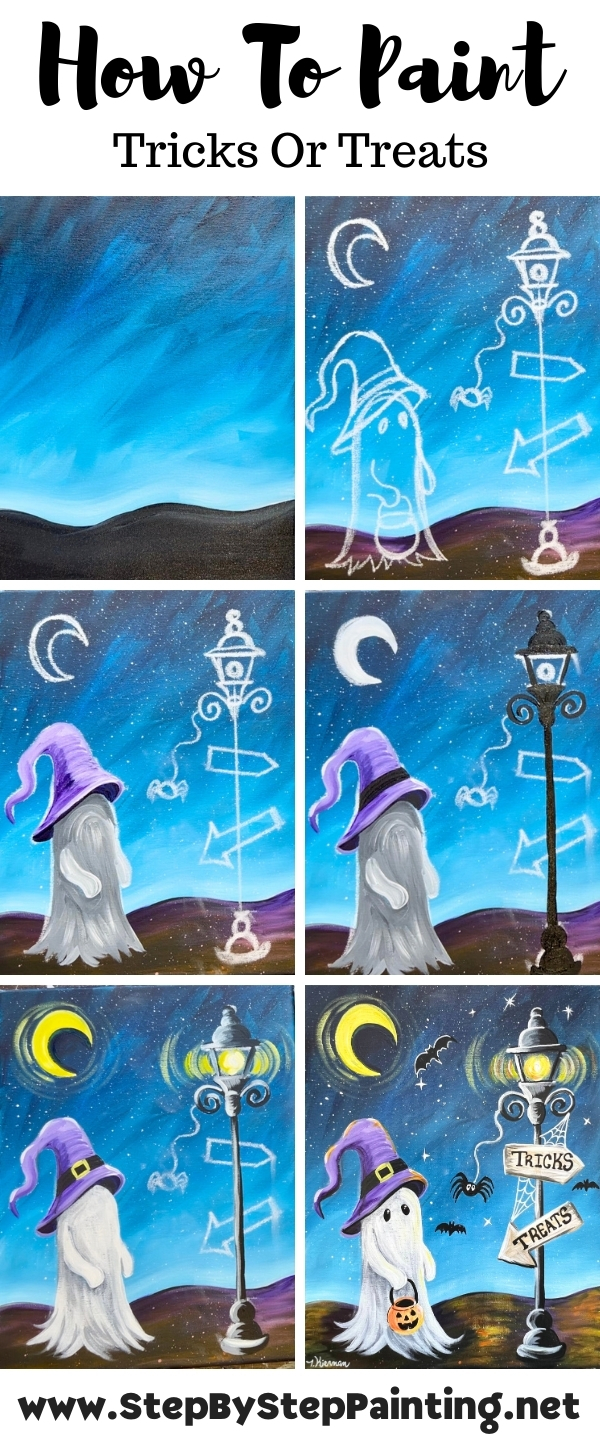
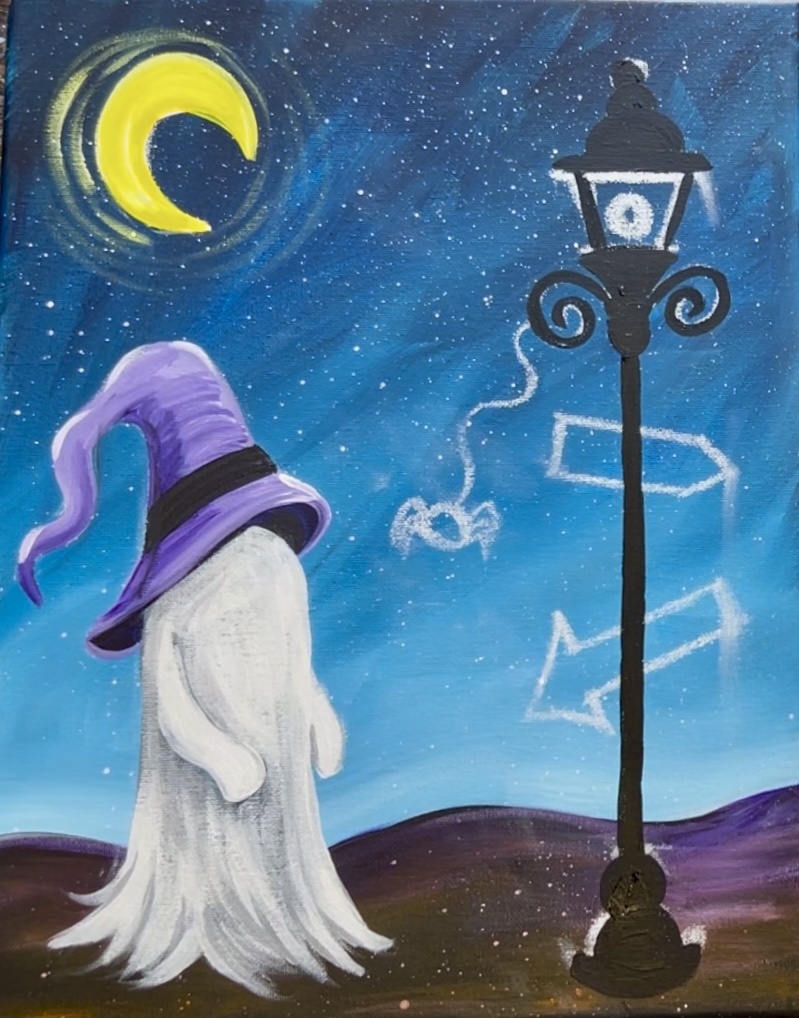
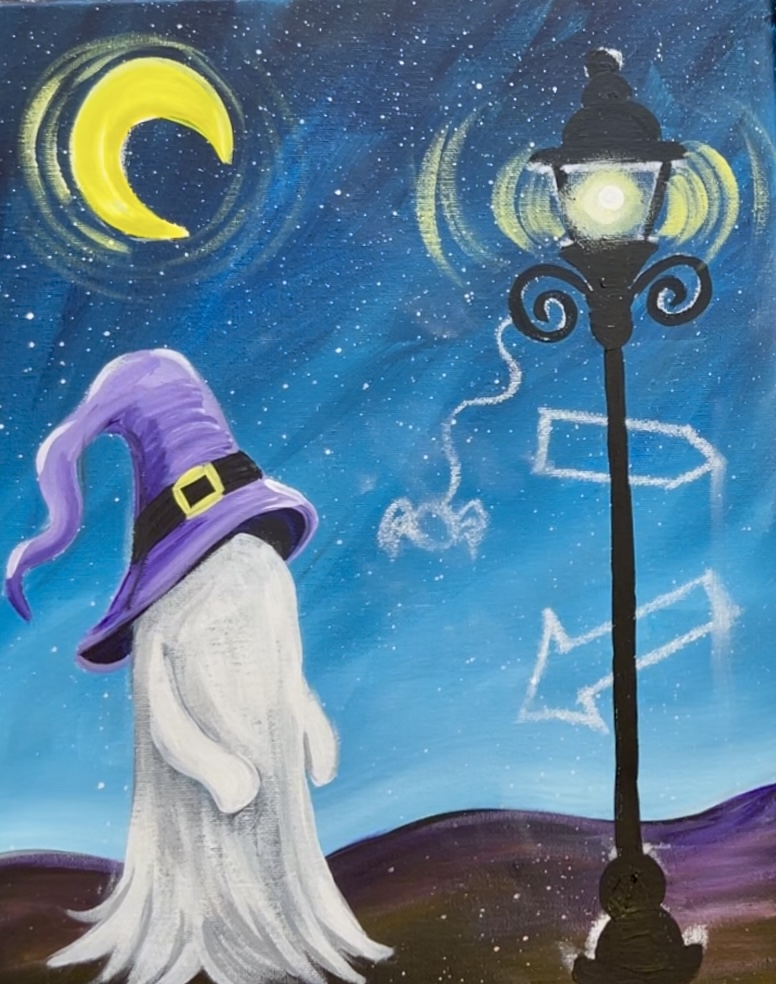
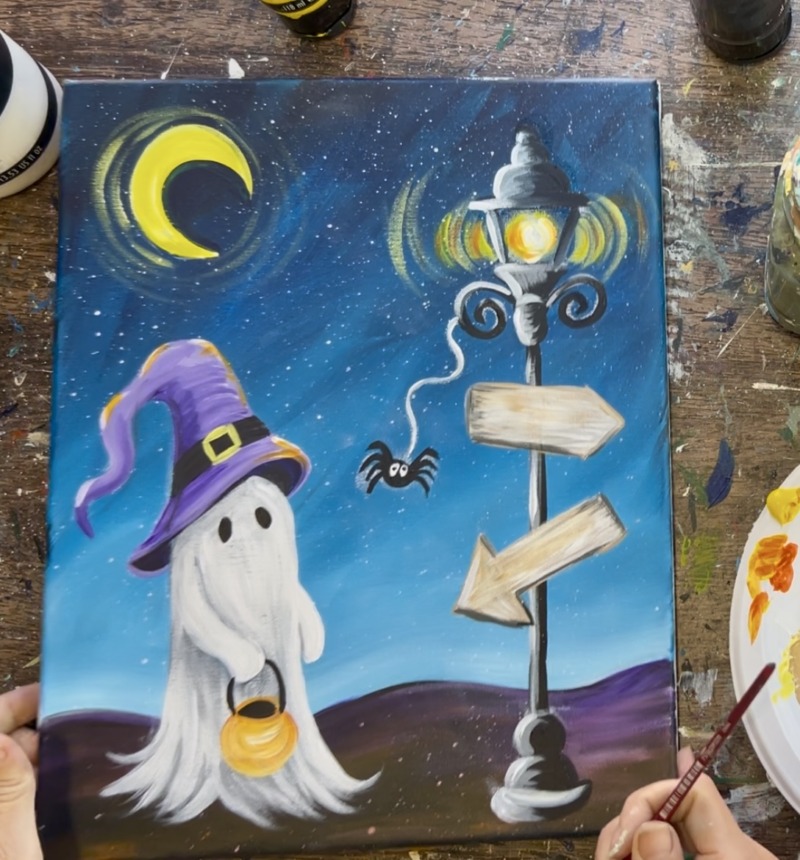
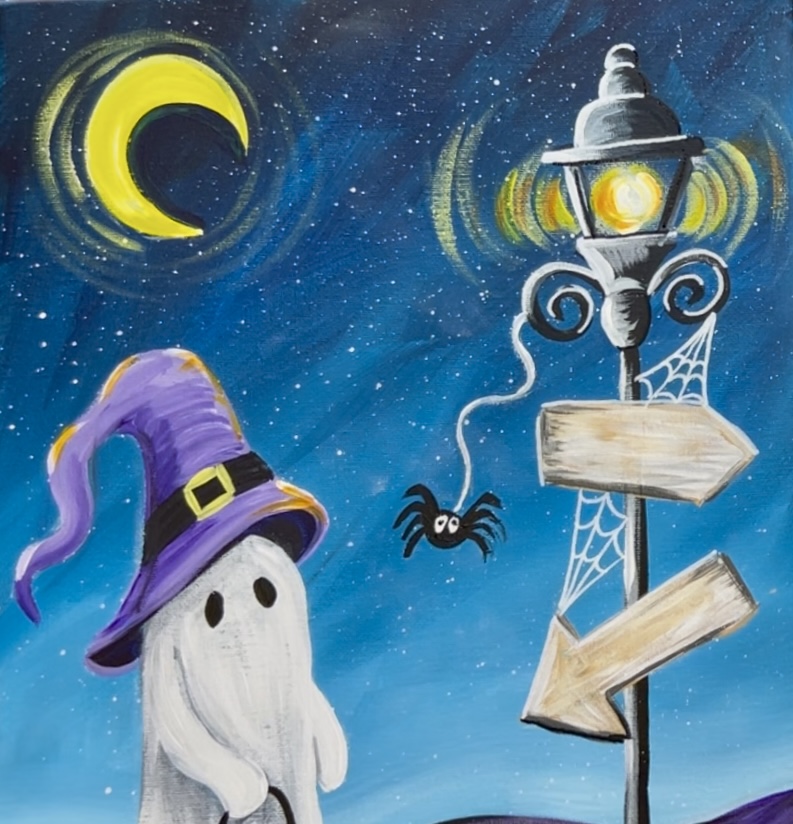
In this step-by-step online tutorial, you’ll learn how to create a whimsical night scene featuring a friendly ghost, glowing moon, and a “Tricks & Treats” signpost. This painting also has a “minimal color palette” (only 6 colors)!
Enjoy and happy painting!
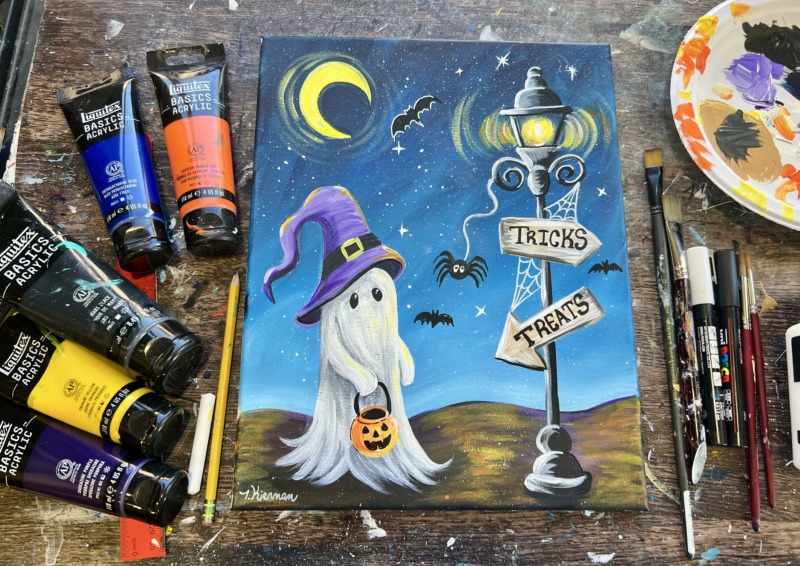
Materials:
- 11 x 14 Canvas (or any size)
- Acrylic Paints (I use Liquitex BASICS)
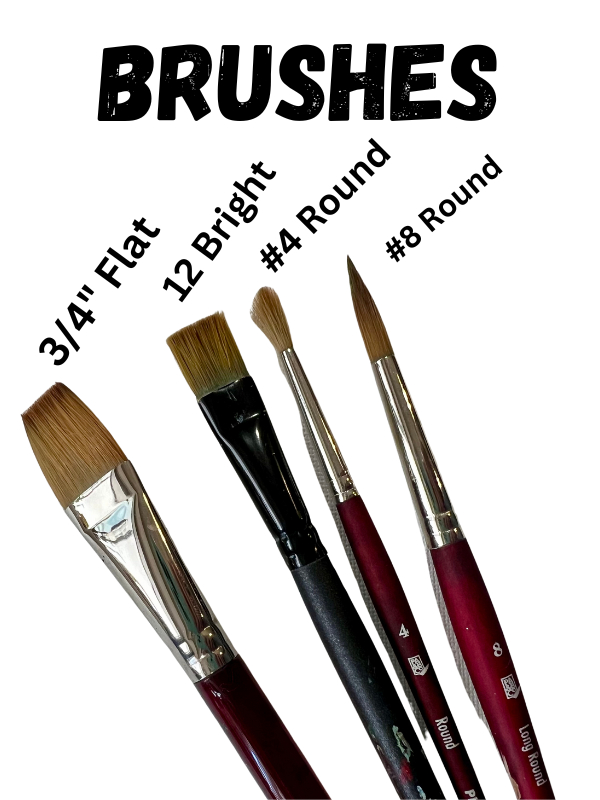
- Brushes (See sizes below)
- White Chalk For Drawing
- Pencil
- Ruler
- Black & White Paint Pens (Optional, a sharpie works too!)
- Toothbrush for splattering
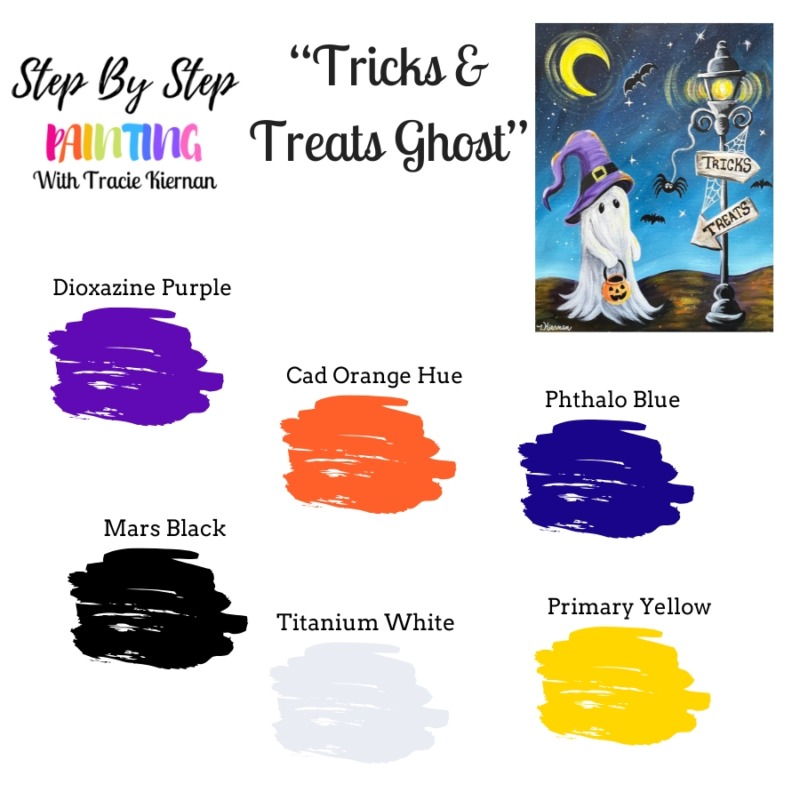
Colors
- Titanium White
- Mars Black
- Primary Yellow
- Cadmium Orange Hue
- Phthalo Blue
- Dioxazine Purple
Brushes
Traceable (optional)
Directions At A Glance
Video
Step By Step Instructions
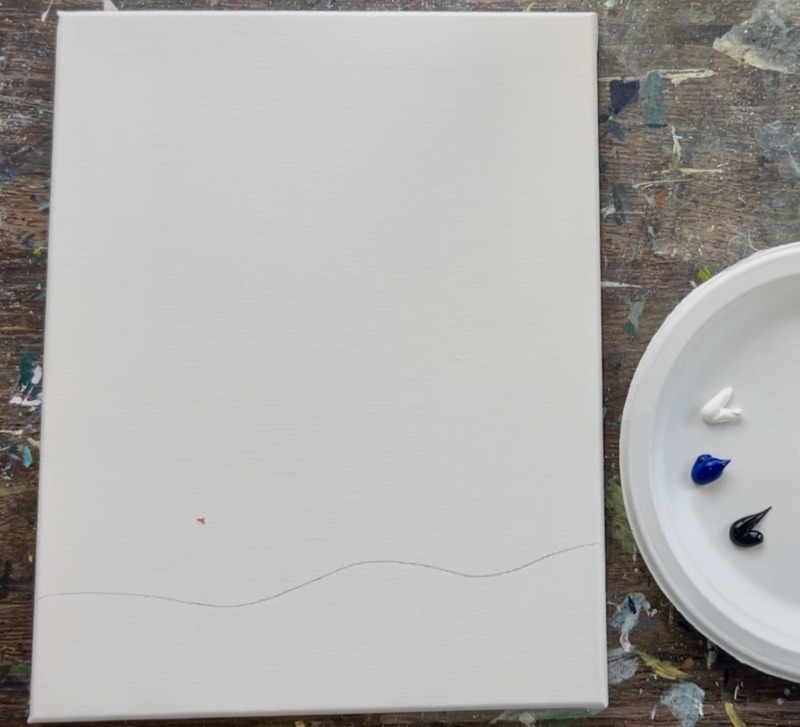
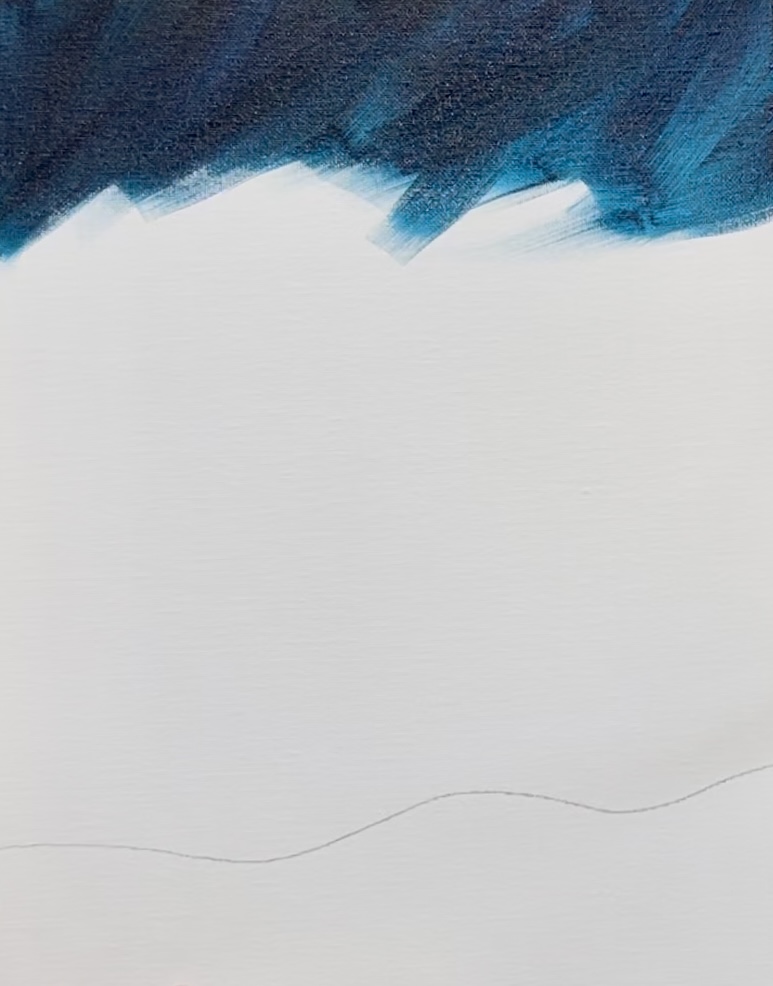
1. Draw Wavy Line
At about 3-4 inches from the bottom of the canvas, use a pencil to draw a wavy line across the canvas. This will divide the sky and the ground.
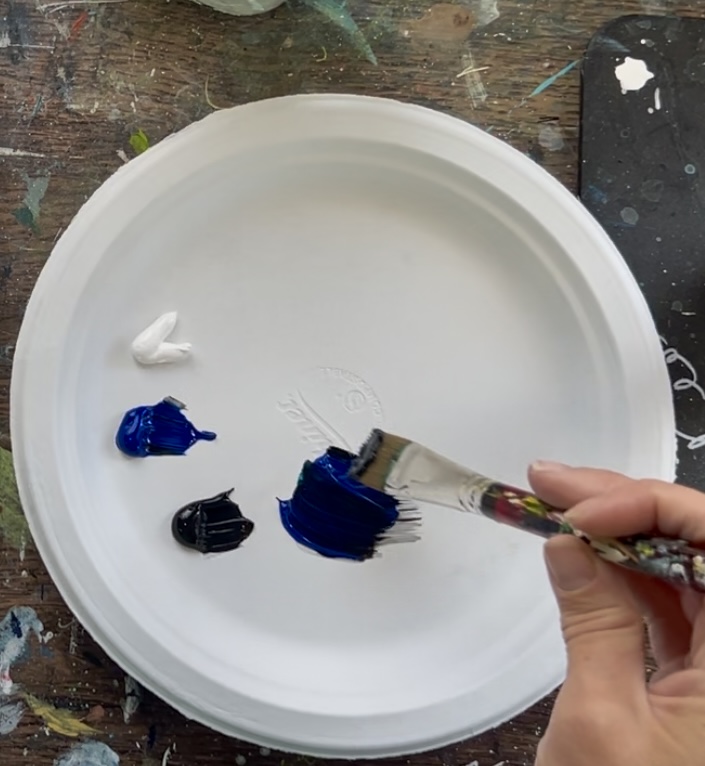
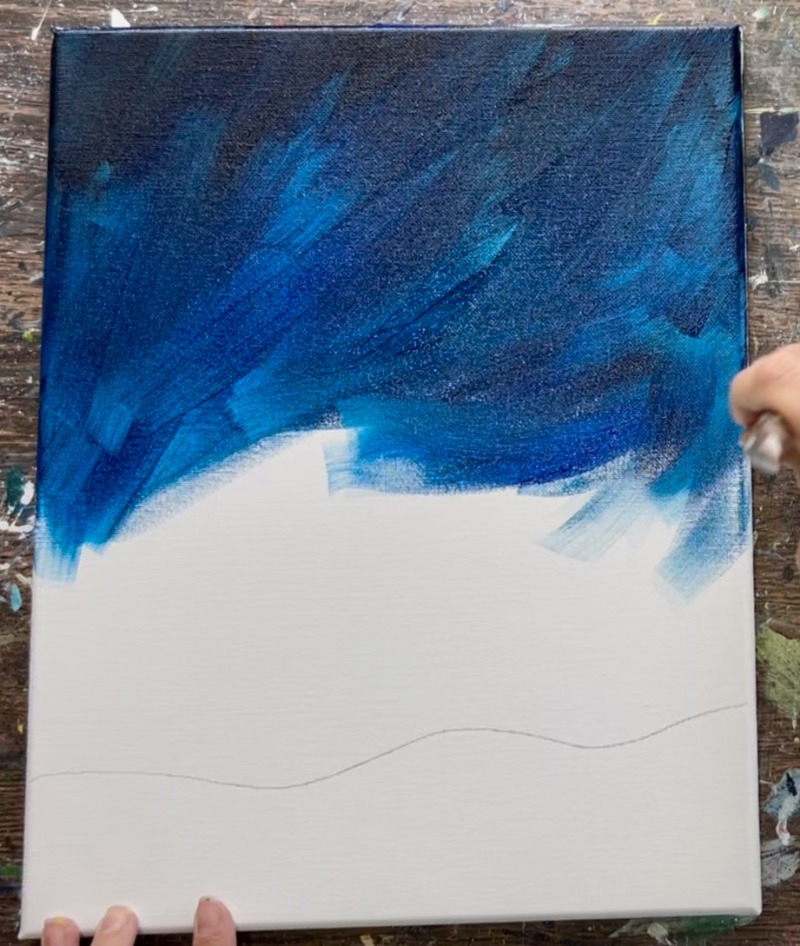
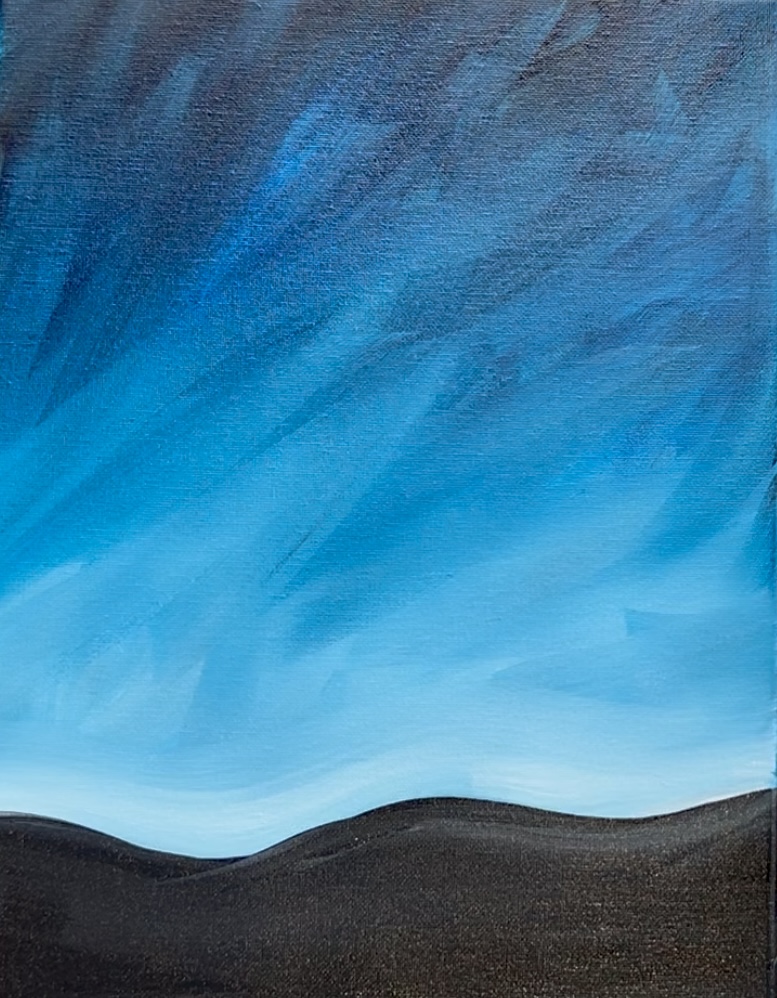
2. Paint Sky
Load your paint palette with the three colors: titanium white, phthalo blue and mars black. Use the 3/4 wash brush and mix about 1 part black to 3 parts blue. This will make a very dark blue!
Start at the top of the canvas with the 3/4 flat brush. Paint big paint strokes going in diagonal directions and criss-crossing each other. Go down a few inches with this dark blue.
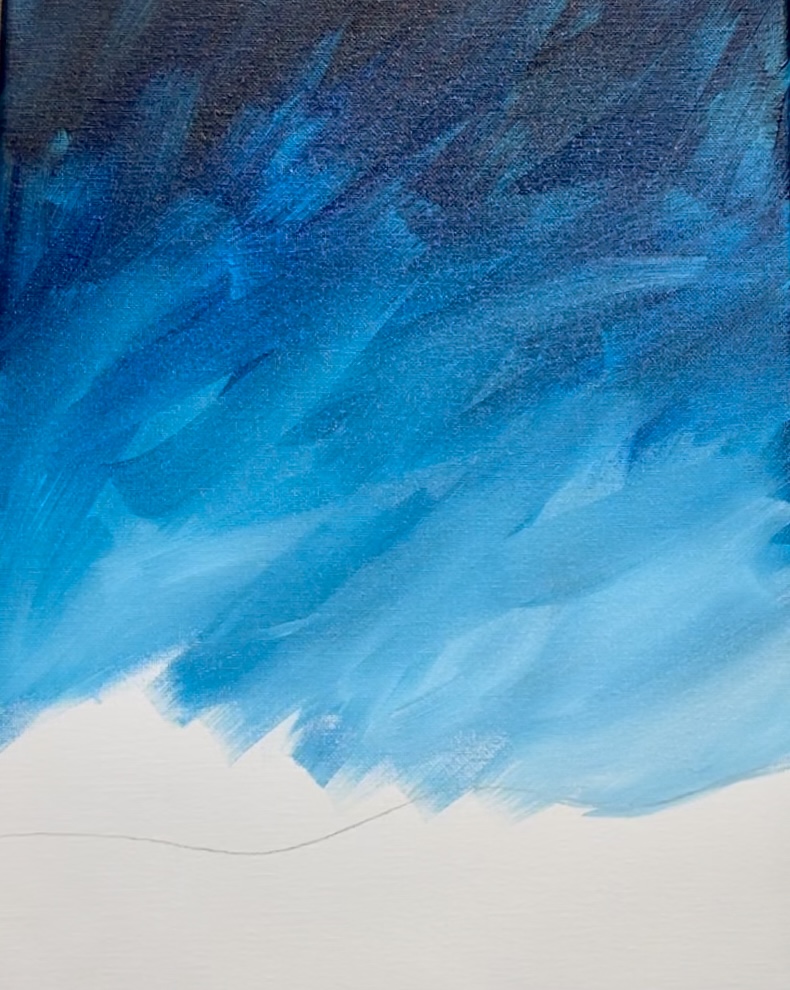
Then wipe the brush. Load it into just “phthalo blue”. Then paint more angle paint strokes below your dark blue. Blend this with the dark blue so that the sky is darker on the top and lighter on the bottom.
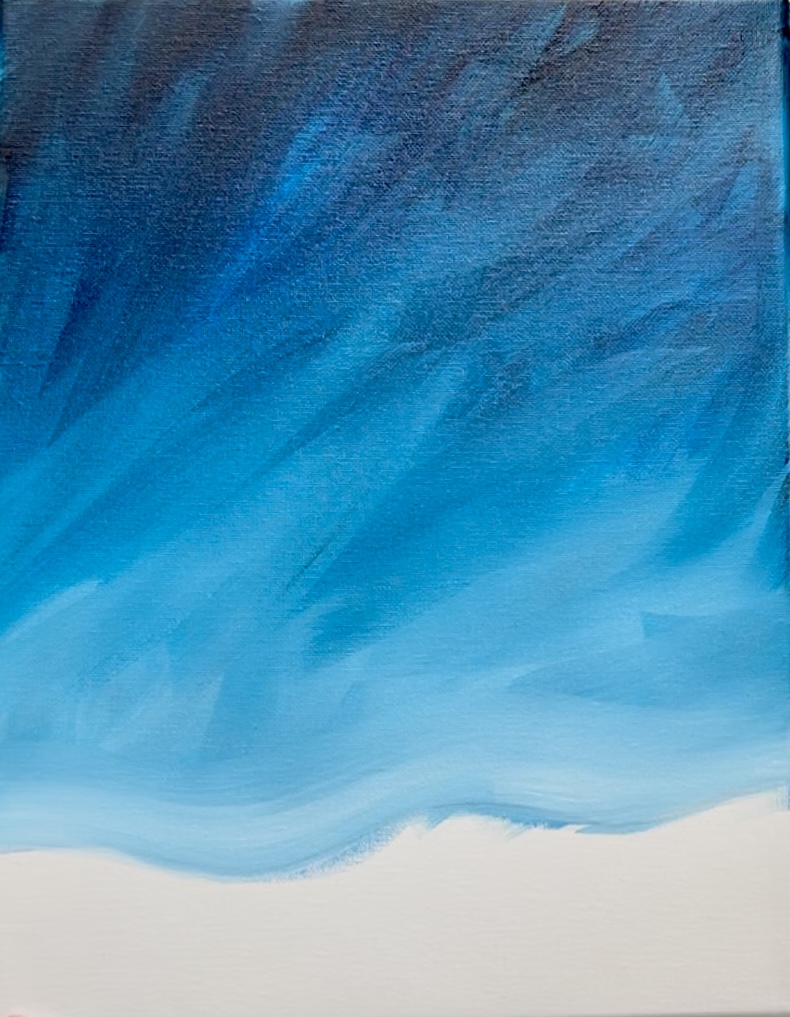
When you approach the wavy line, stop blending the color. Load “titanium white” into the brush and blend white on the bottom.
You want to create this “glow” above that wavy line by blending extra white in that area that will create a really light blue. You can do paint strokes that go smooth and parallel to the wavy line in this lower area (rather than angle paint strokes).
3. Paint Ground
Use “mars black” to paint the wavy ground area a solid coat of black!
4. Splatter White Dots Everywhere
Use a tooth brush or a 3/4 flat brush. Load it into slightly watered down white. Flick the brush to make little white specks everywhere. Do this even on the ground area! It will make the ground look “sparkly” in the end.
Tip: before flicking the brush, I recommend testing a different area first to make sure it doesn’t show up too thick or too watery.
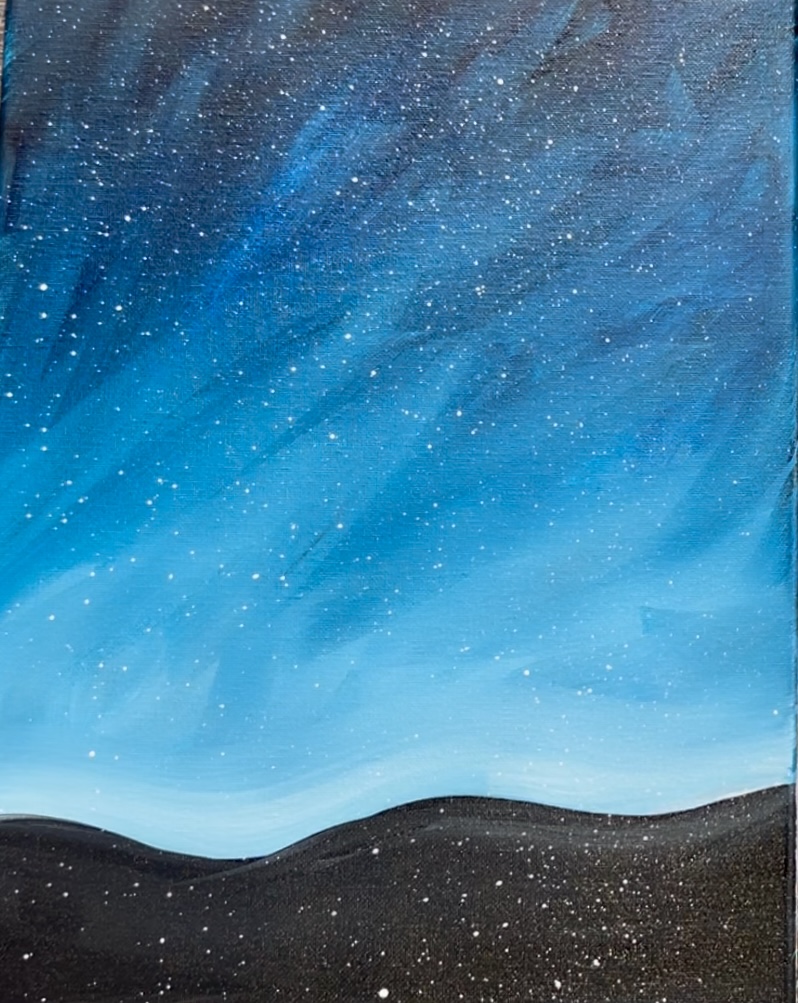
Let this dry before going onto the next step.
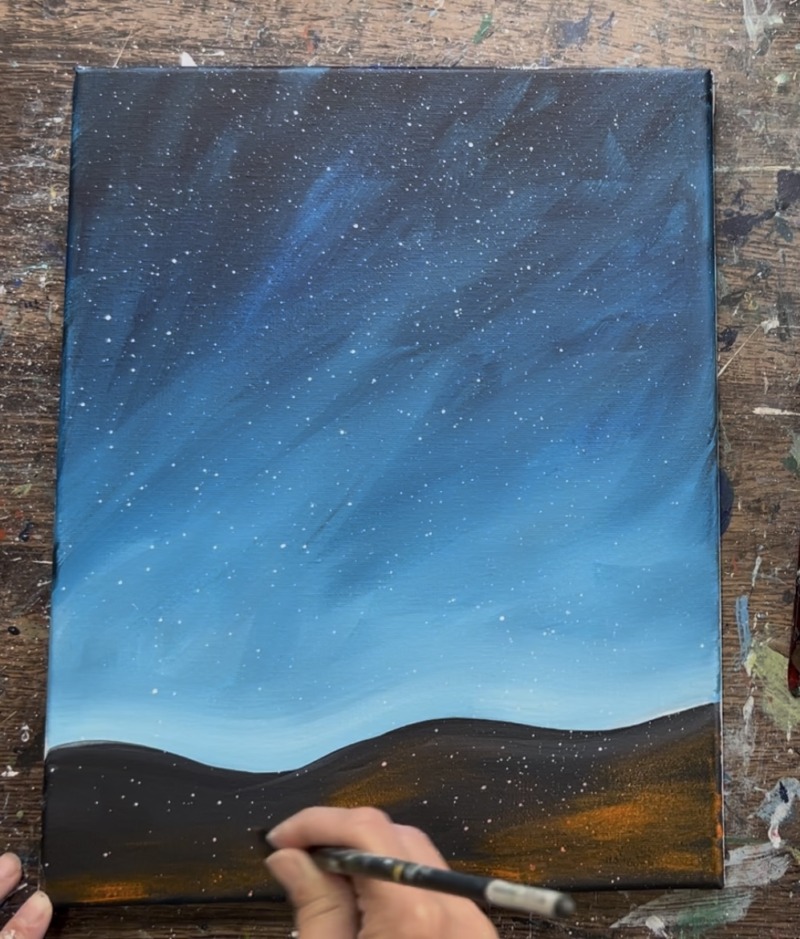
5. Add Purple & Orange On Ground
Use the #12 bright brush for this step. You are going to dry brush “purple” and “orange” paint over the black ground layer. When you “dry brush”, you want to make sure you only load your brush into a small amount of paint. Then you must lightly apply the color while letting the background color still show through. Since purple and orange are usually “translucent” paint colors, this should be easy to achieve this effect!
Start with “cadmium orange hue”. Use the 12 bright brush to lightly brush the orange all throughout the black area. Leave most of the black layer still showing through!
Rinse the brush. Then add “dioxazine purple” to the brush and lightly paint the purple towards the top/ back part of the dark land area. Optional: add a tiny bit of white to the brush with the purple. Blend this in the very back. Don’t add too much white. Just a little bit to add pops of bright purple to some of the areas but we want to make sure the land stays very dark. The white specks from earlier will show through this layer of paint and look a little like “sparkles”.
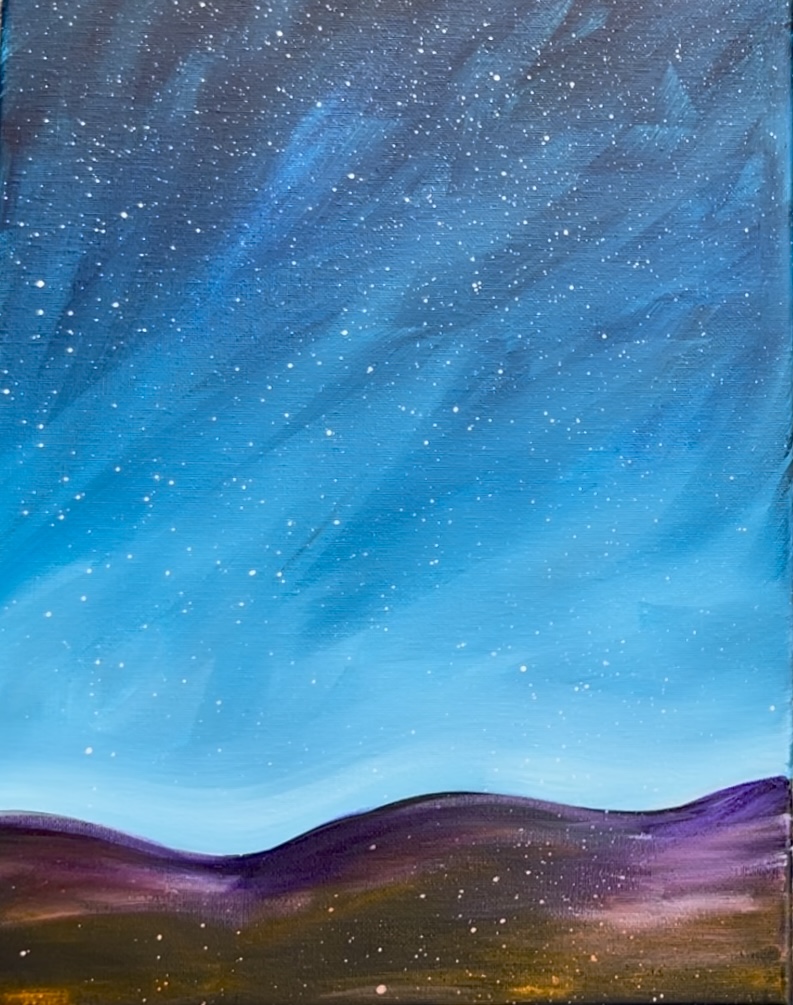
Wait for everything to dry before going onto the next step!
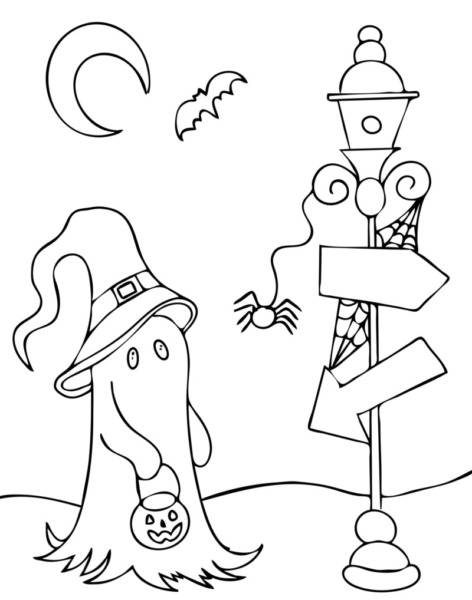
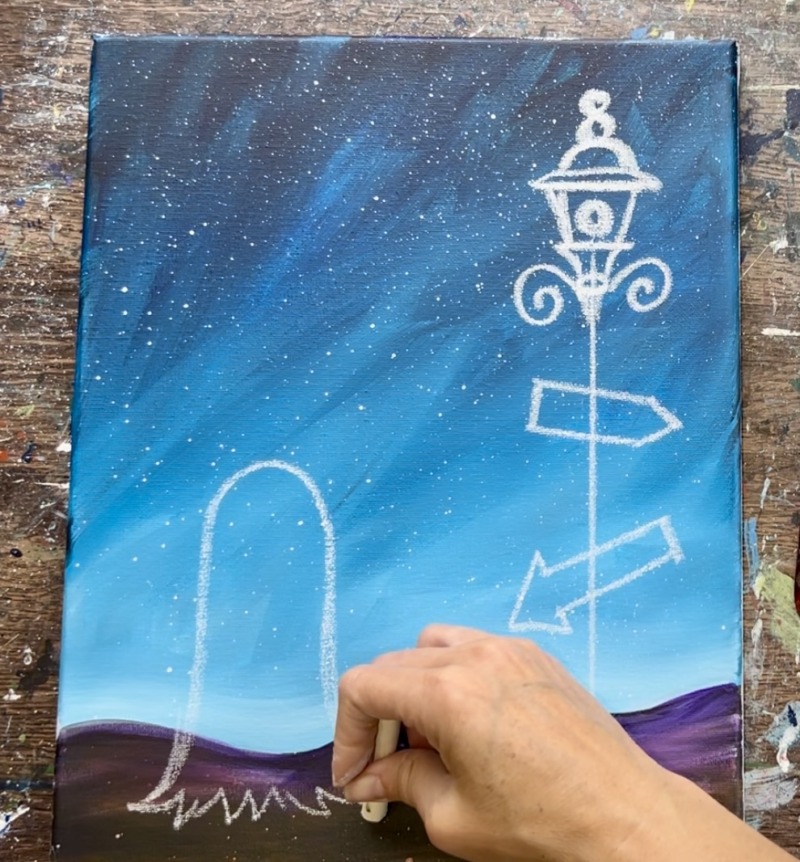
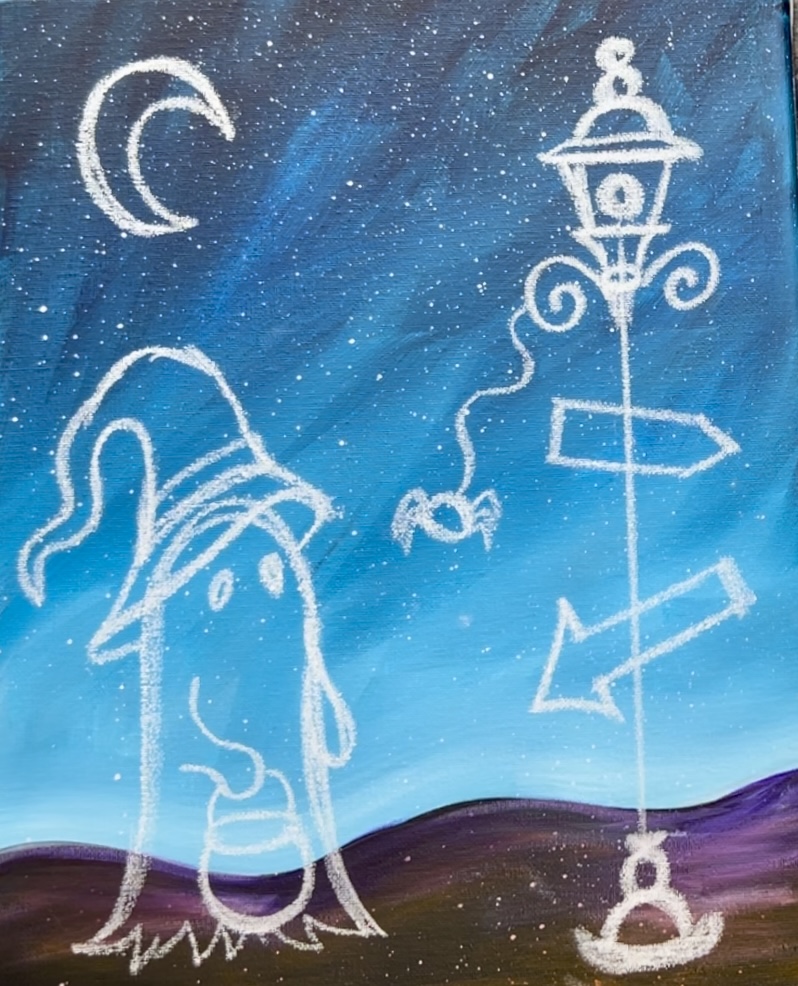
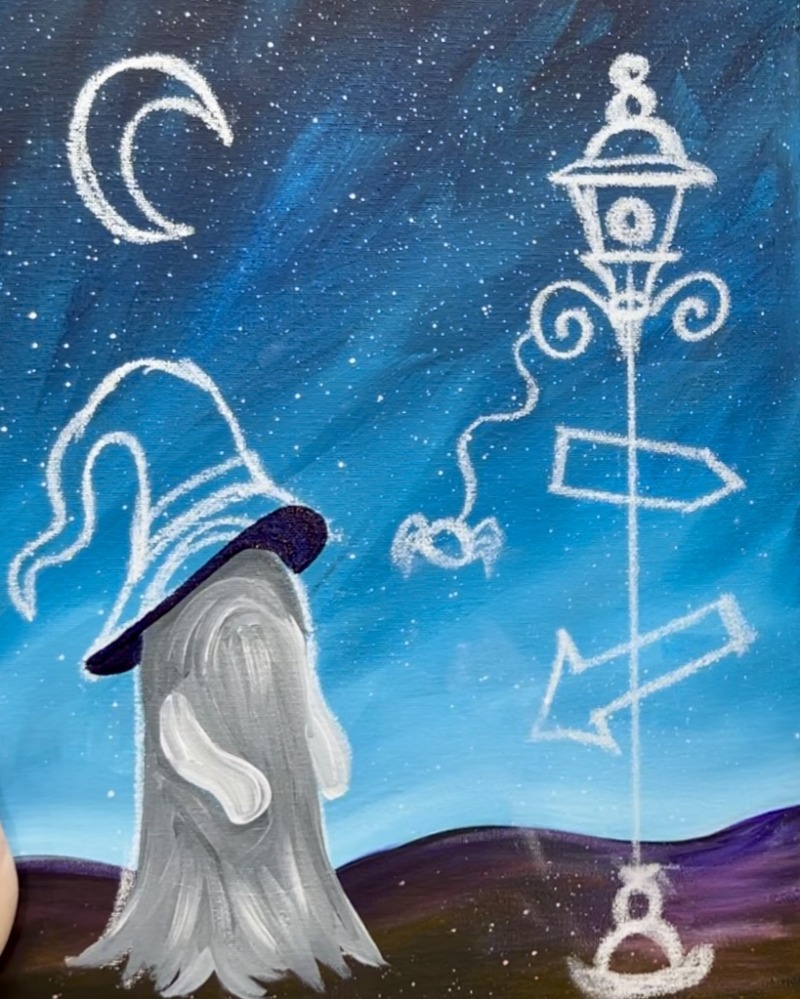
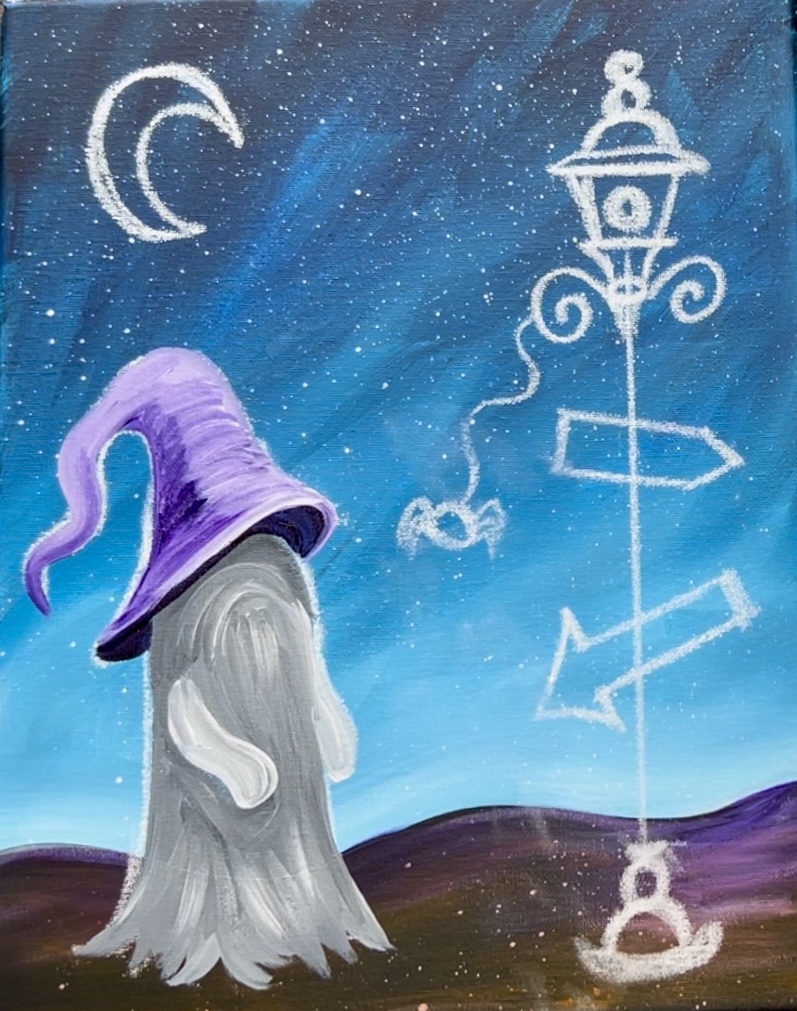
6. Draw Composition Of Painting With Chalk
Use a piece of chalk to draw the composition of the painting including the lamppost, the ghost and the moon.
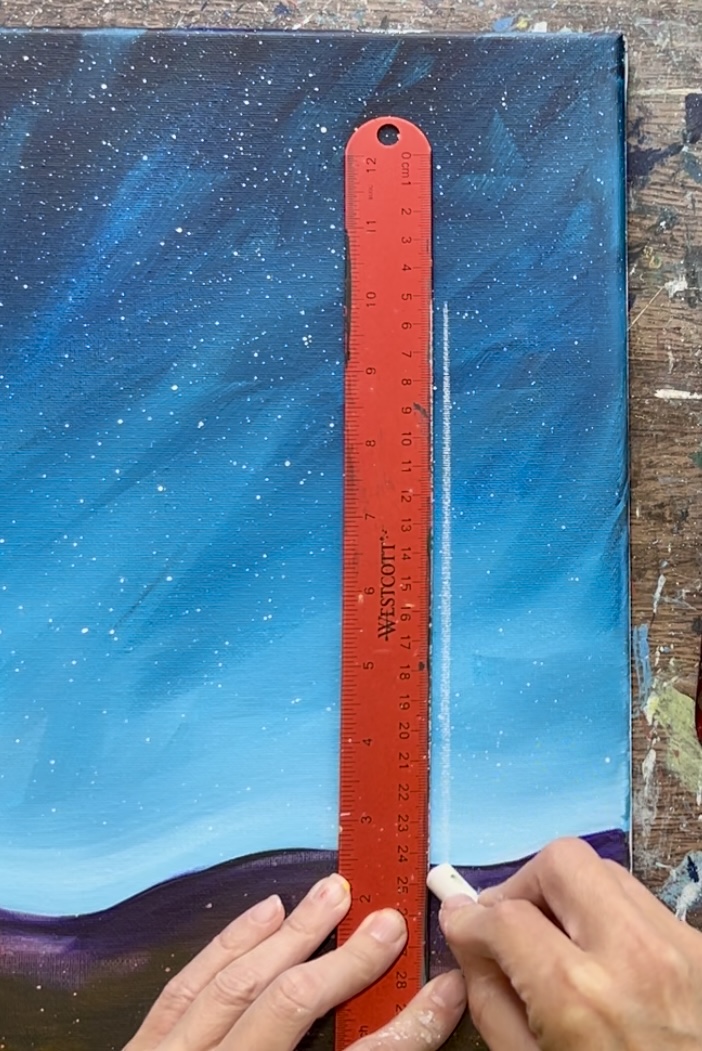
Start with the lamppost on the right. Draw a vertical line. Start in the middle of the land area and draw a long vertical line. This initial line doesn’t have to be exact. I made mine about 10″ tall. Note: the height of my entire lamppost from bottom to top is approximately 12″ when it is finished.
Then draw the light box. I drew a little oval and two curves going outwards. This will be the base of the actual glass part of the lamp.
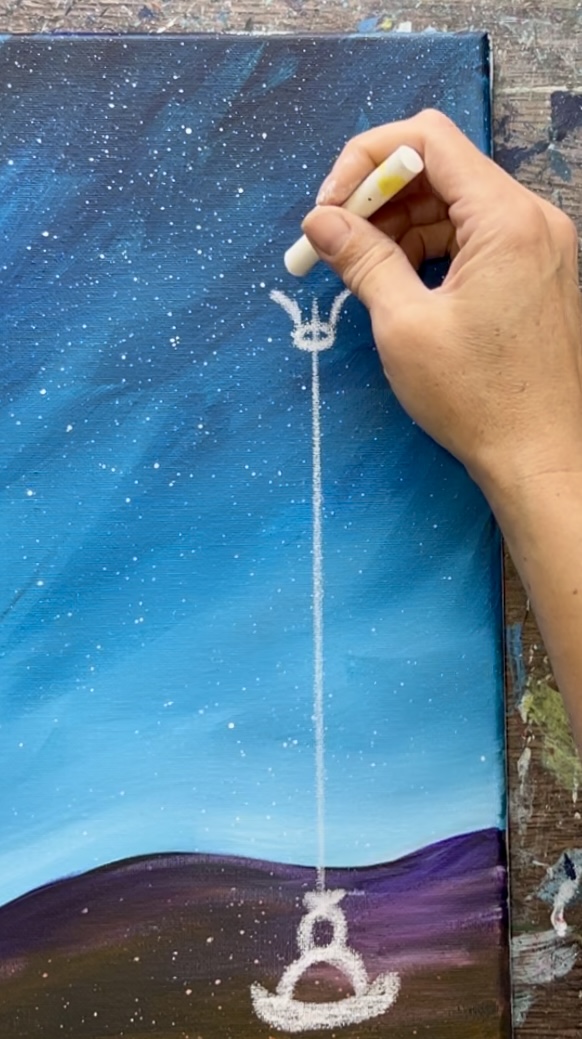
Then draw two diagonal lines above that to form the glass part of the lamp. Draw the top cap part of the lamp which consists of a narrow rectangular shape, a half circle and two smaller circles above that. Draw a set of spiral lines on each side below the lamp. Then draw a small circle for the bulb inside the lamp.
Next, draw the base of the lamppost. This is a little curved line, a half circle above that and a small circle shape above the half circle. Then draw two sign shapes crossing over the pole of the lamppost.

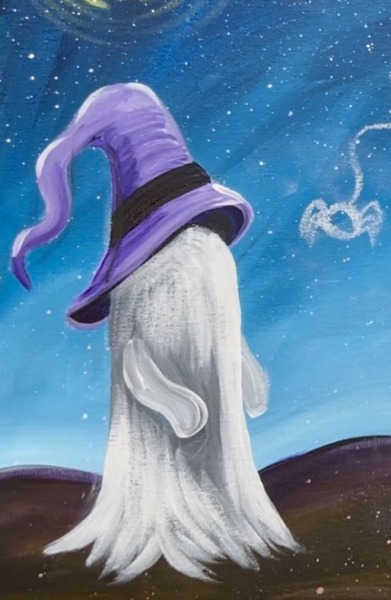
Draw the ghost next. This is a narrow “sheet shape” ghost with pointed edges on the bottom of the sheet. The height of the ghost is approximately 6″ high.
Draw the arms as simple curved shapes. The ghost’s right arm will be curved downwards to hold the pumpkin container.
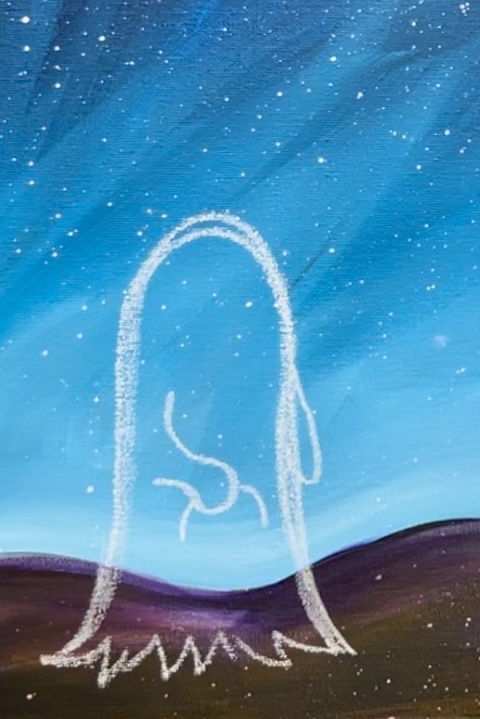
Draw the handle of the pumpkin container and then draw a little circle shape with an oval opening. Draw two oval eyes at the top of the ghost’s head. These eyes are going diagonally inwards.

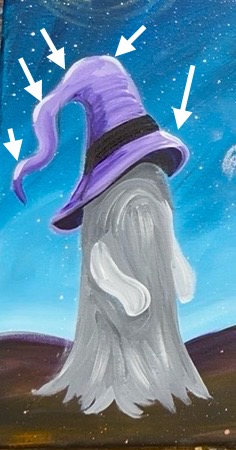
Then draw the brim of the witch hat so that it slants backwards and slightly overlaps the top of the ghost’s head.
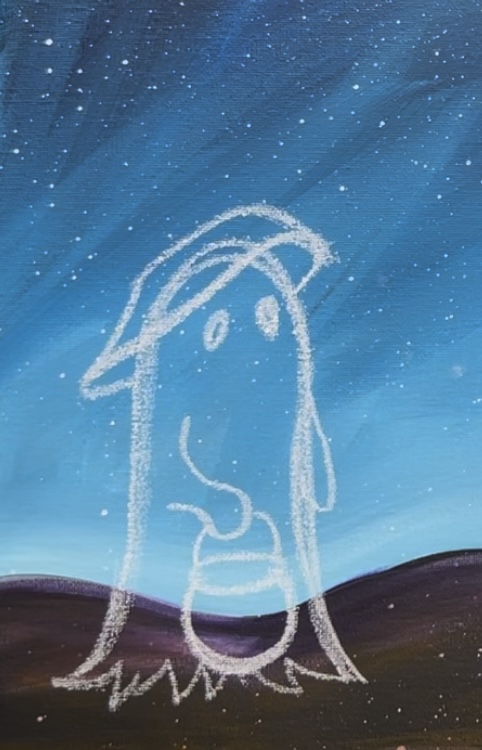
Draw the hat so that it goes diagonally backwards and then slightly folds downwards to a whimsical, slightly twisted point.
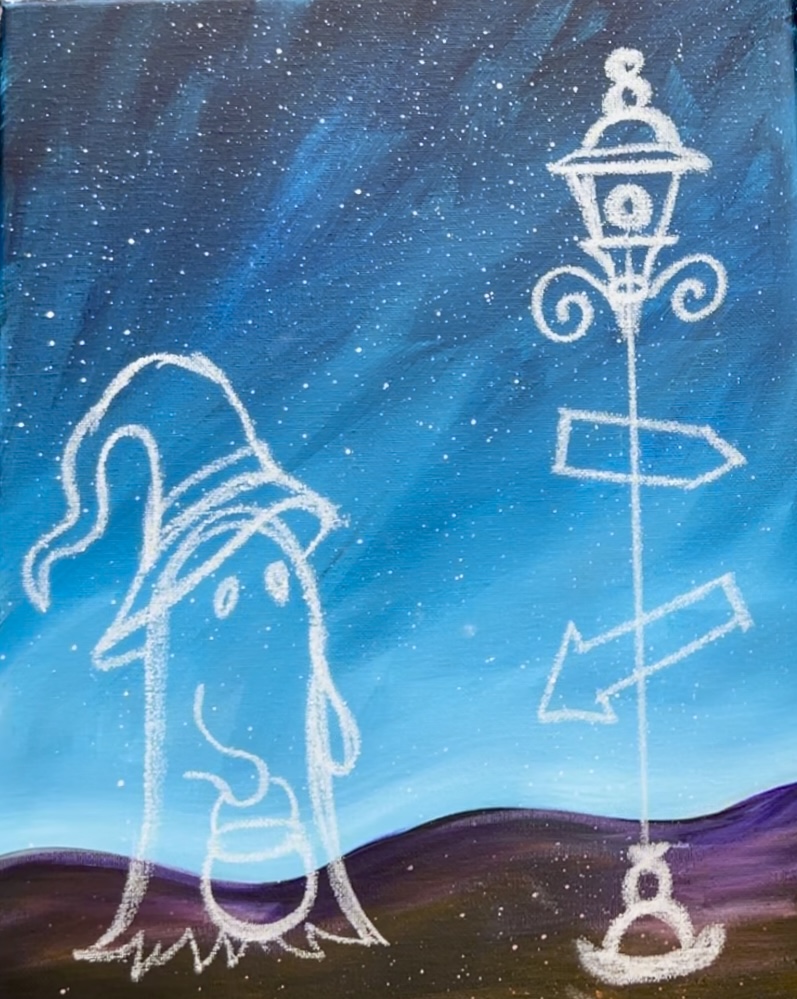
Draw a crescent moon shape in the sky above the ghost. Then draw the spider on a web line attached to the lamppost.
7. Paint First Layer Of Ghost
I recommend painting the ghost with a first layer of medium gray. This will allow us to layer on brighter white in a later step and the gray will create shadowing in our ghost!
Mix about 1 part “mars black” and 3 parts “titanium white”. Use the #4 round brush to paint the ghost. Outline the edges but fill the rest in with all vertical paint strokes.
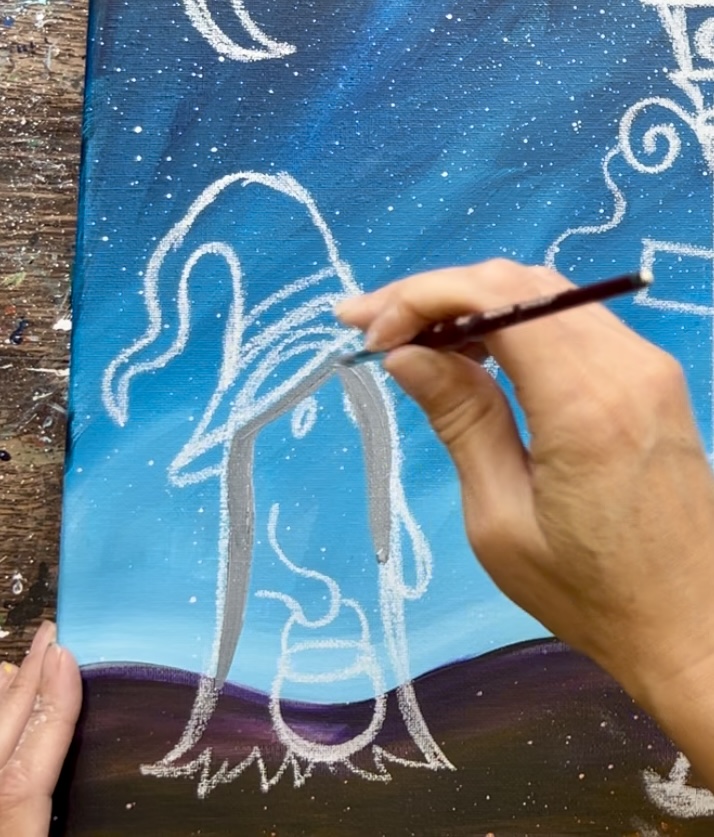

Go around the arms/ don’t paint them yet. Paint over the pumpkin bucket and paint over the eyes. Then add just a few shades darker gray under the hat/ on the top of the ghost’s head. To make the gray darker, mix just a little bit more black into your gray mixture. Also, add this slightly darker gray just under the ghost’s arm (the arm that will be holding the pumpkin bucket).
When you get to the texture on the bottom of the ghost, drag your paint strokes down to create the zig-zag edging.
Then paint the arm with a lighter gray. To make the gray lighter, use the same medium gray “base color” and add more white into it. Paint both of the arms. The arms should show up lighter compared to the rest of the ghost (so they stand out).
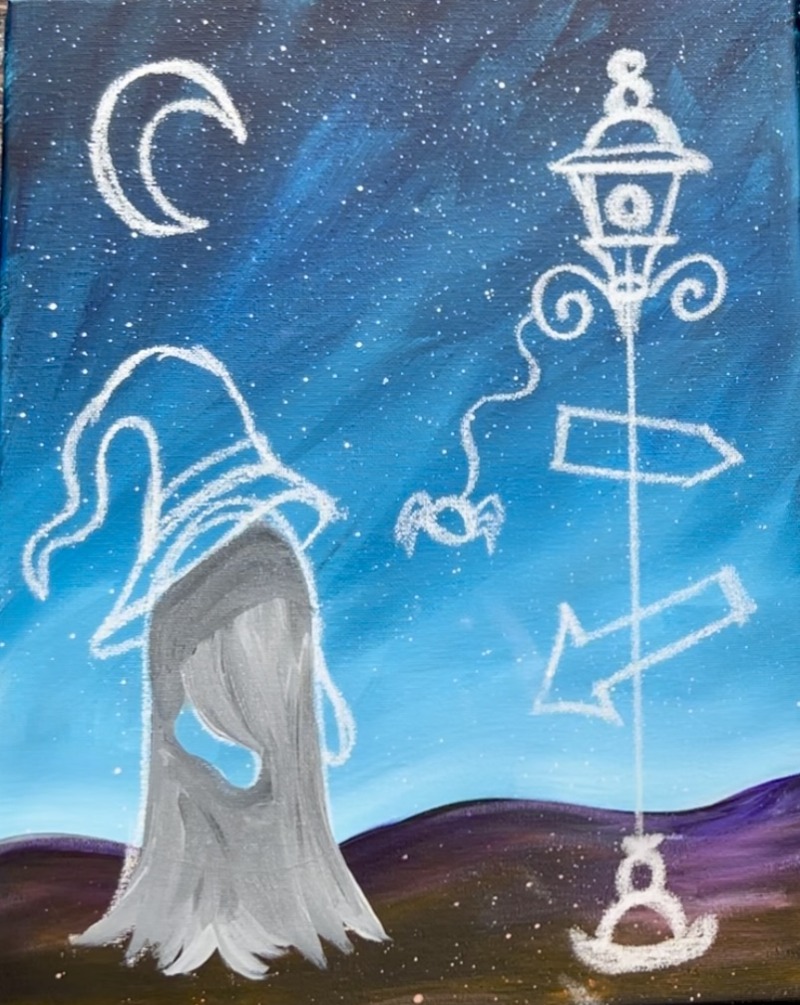
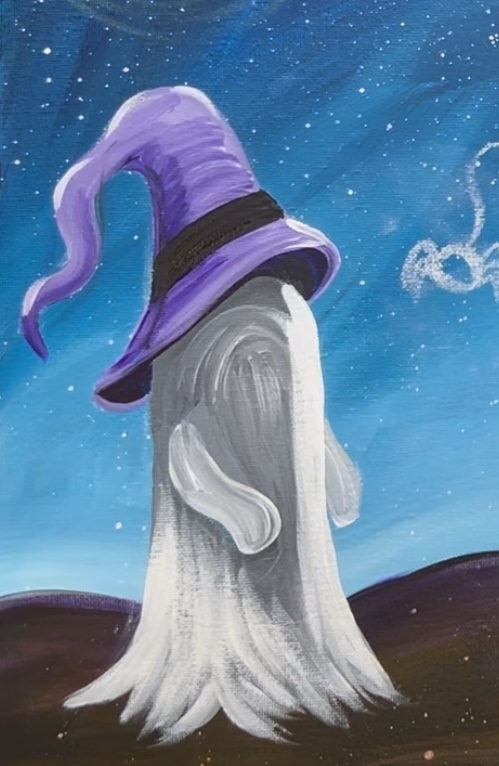
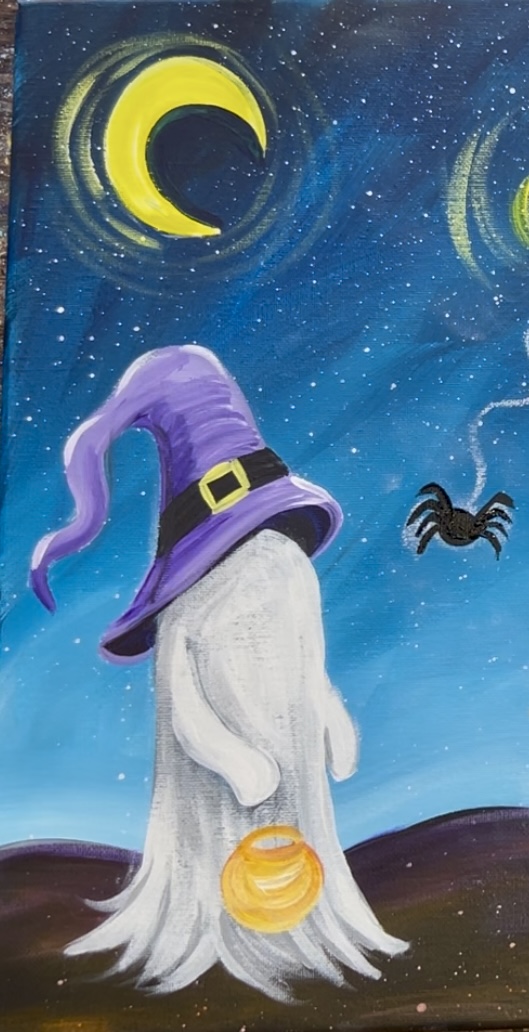
8. Paint Witch Hat
Mix on your palette 1 part “mars black” and 3 parts “dioxazine purple”. Use the #4 round brush to paint the bottom/ under part of the witch hat with this dark purple. This includes the outline that overlaps the top of the ghost’s head.
Mix a light purple next! Rinse the brush. Mix about equal parts “dioxazine purple” and “titanium white”. Paint this bottom part of the hat (below the band) with this light purple. Outline the right edging of the brim.
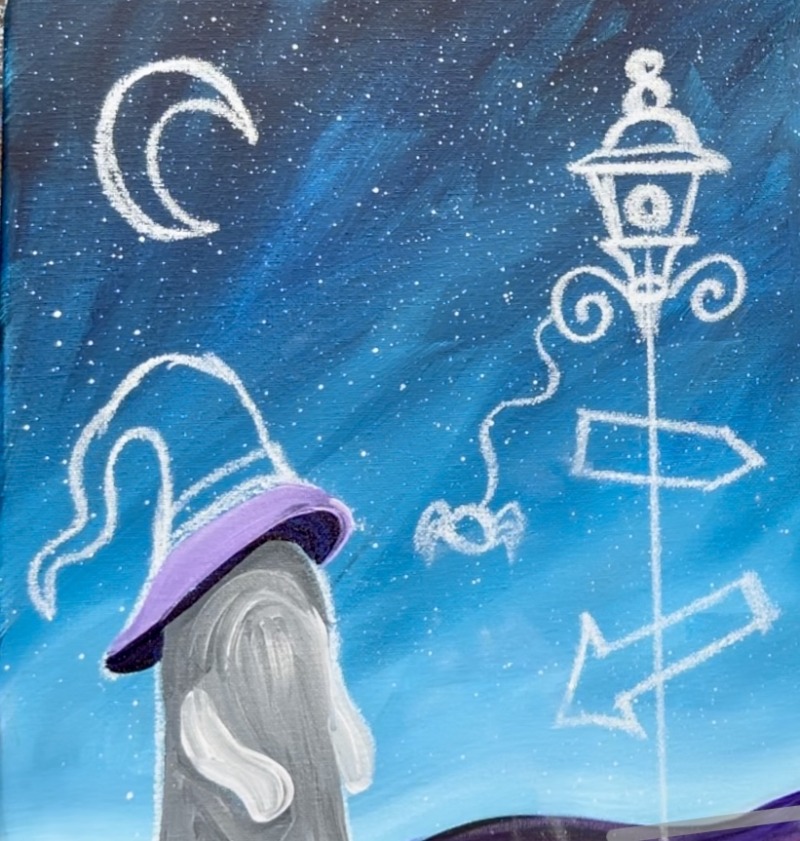
Use “dioxazine purple” not mixed with anything for your “middle color”. This gets blended on the left side of the hat brim so it’s more shadowy on the left. Then paint the pointed part of the hat that extends down. This is done with the light purple but blend some of the “pure purple” on the end tip of the hat.
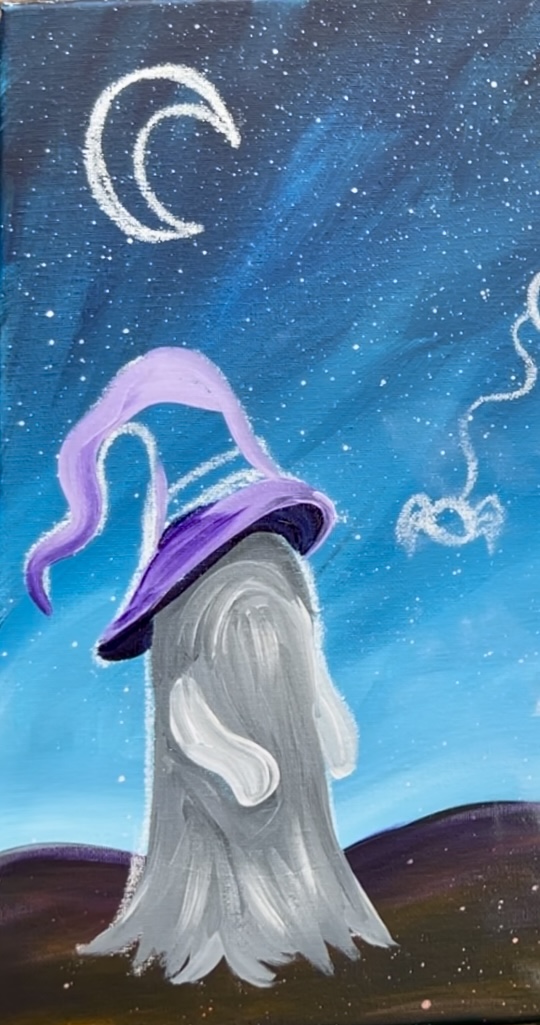
Fill the rest of the hat with paint strokes that go in a curved direction. This gives the hat form. Make the left side of the hat have blended darker colors (just the dioxazine purple) and the right side of the hat has blended lighter purple (purple and white mixed together).
Paint the band on the hat with “Mars black”.

Then use pure “titanium white” to paint/ outline some of the edges of the hat.
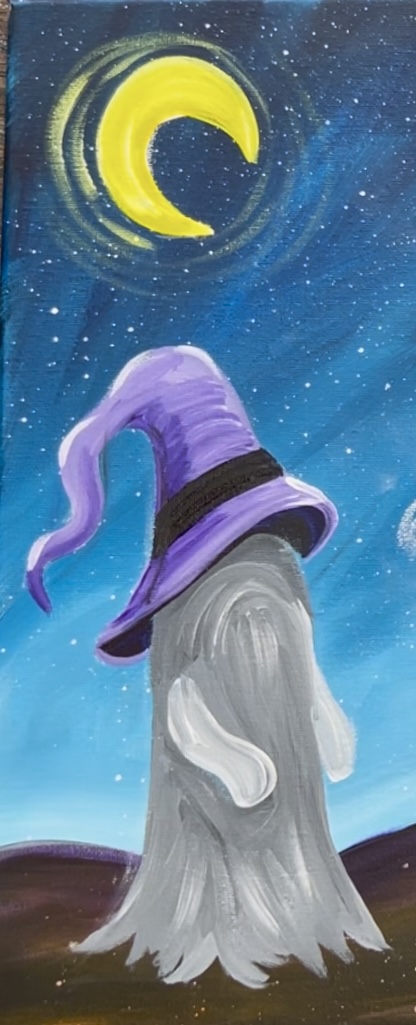
9. Paint Moon
Use “titanium white” and the #4 round brush to paint the crescent moon shape white. Wait for this to dry. Then paint the moon with “primary yellow”.

“Dry Brush” yellow lines around the moon using the #4 round brush. When you “dry brush”, only load a small amount of paint on the brush and lightly apply the color to the canvas so that the background color mostly shows through and the color doesn’t show up bright. Create a few curved “moon beam” lines around the moon.
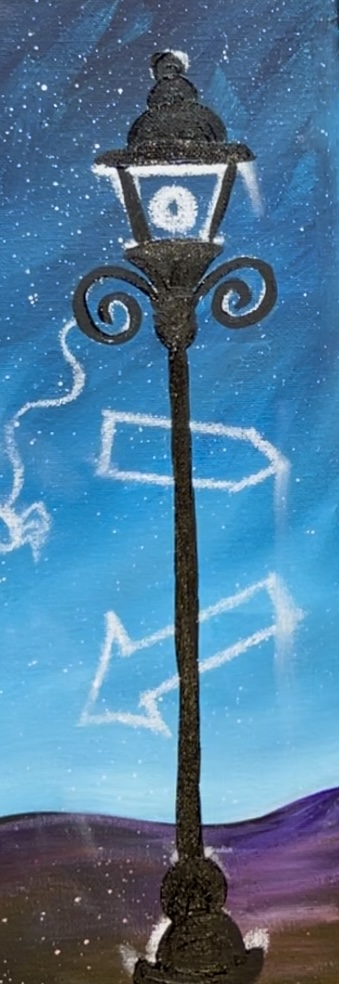
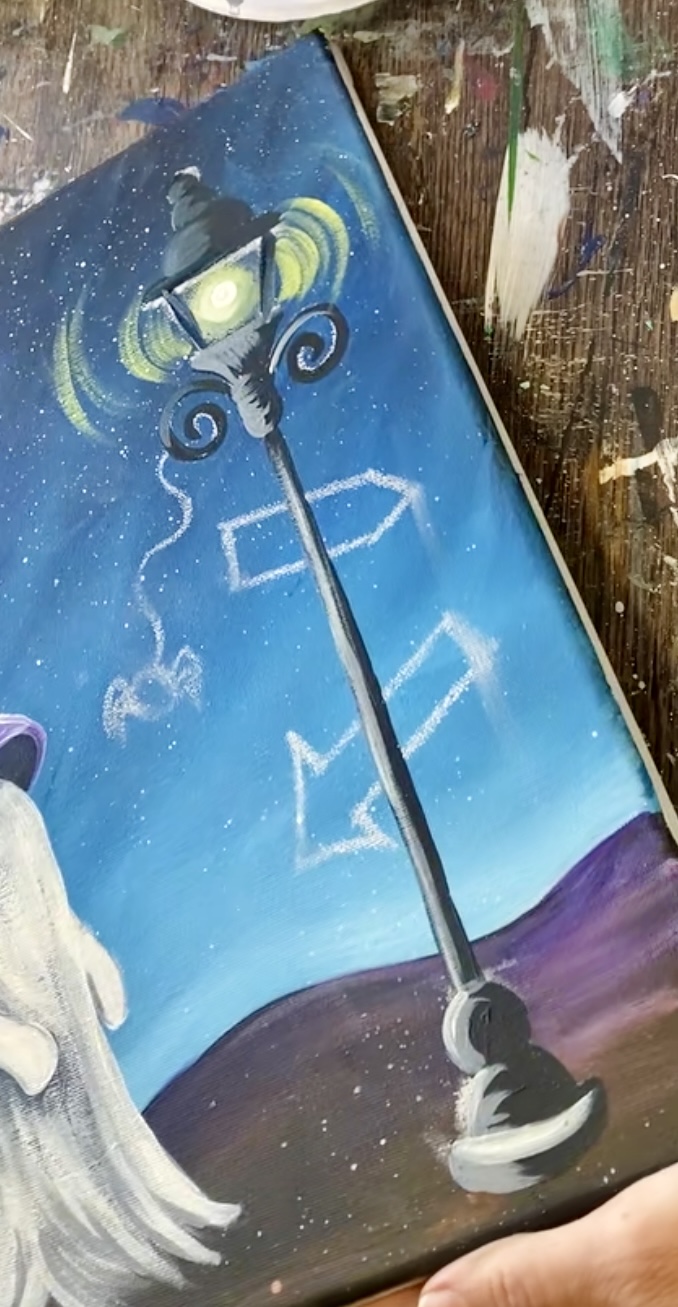
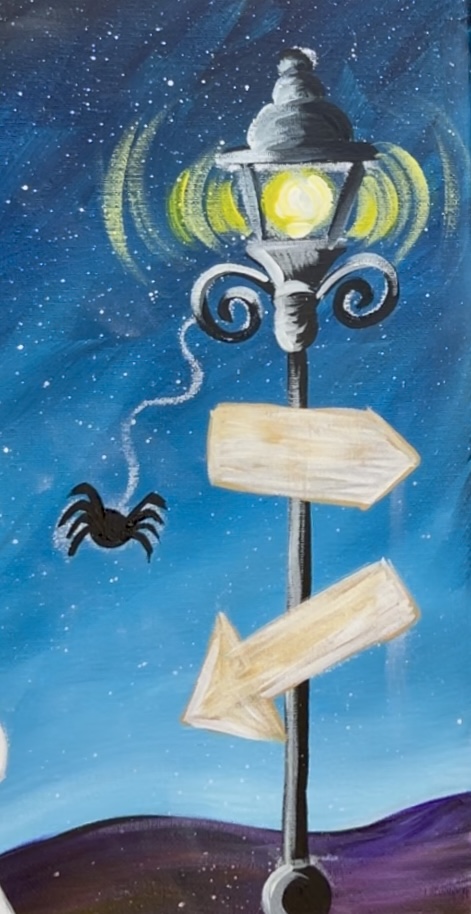
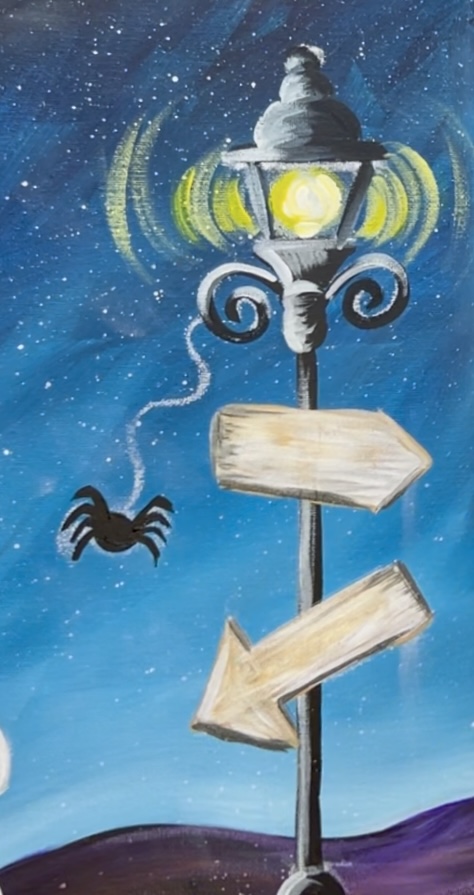
10. Paint Lamppost
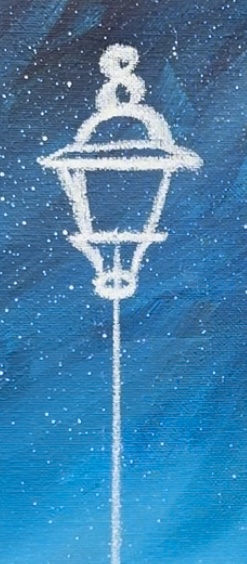
Use the #4 round brush and “mars black” to paint over all of the chalk lines you drew for the lamppost. The chalk will erase as you paint this in. Fill any shapes in with solid black. Wait for this to dry.
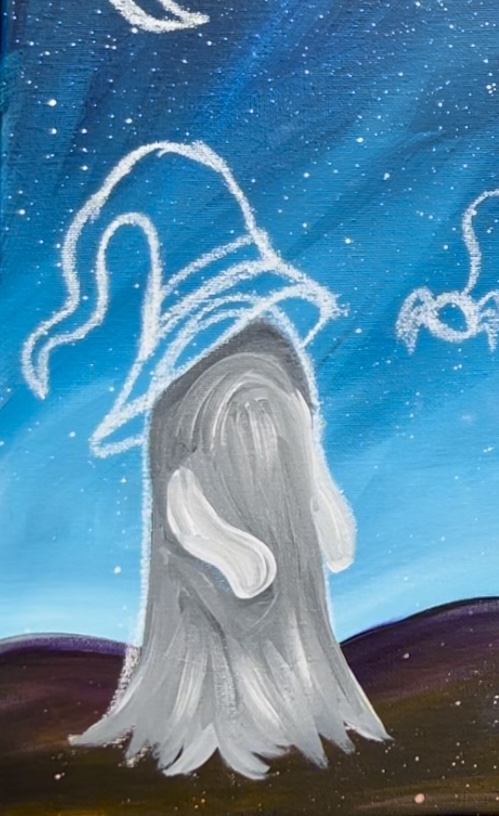
11. Paint White Layer Over Ghost
Use “titanium white” and the #4 round brush to paint the second layer over the ghost. This will brighten the ghost but still allow some dark variations of “shadow” showing. When you paint this in, don’t do a thick layer of white. It is relatively thin with that gray still somewhat showing through. Leave gray lines visible on the bottom zig-zag edging of the ghost.
Leave the part under the hat, around the arms and under the arms “shadowy” with more of the gray showing.
In this finished ghost example below, the top layer is white but we can still see the darker gray used as edging around the arm, under the arm, under the hat and edging on the bottom textured area. If needed, go back with your medium gray and add lines on the bottom of the ghost and around and under the arm.
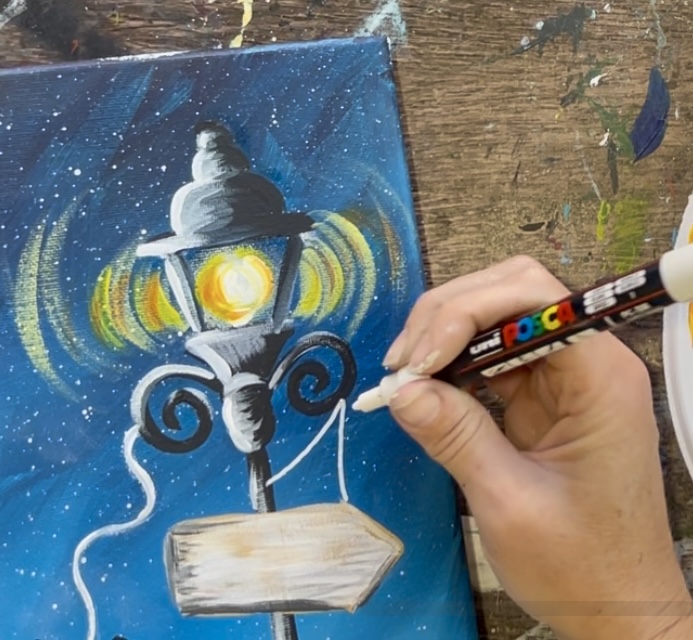
12. Paint Light From Lamp & Buckle On Hat
Use the #4 round brush and “white” mixed with “yellow” to paint a little square buckle on the hat band.

Then paint the light inside of the lamppost. Start by mixing “yellow” and “white” together. Use the round brush to apply the yellow in the middle of the lamp. Then take your index finger and smear the paint so that it turns into a blurry circle.
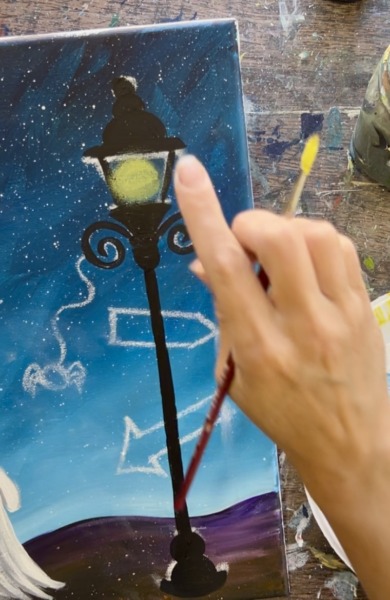
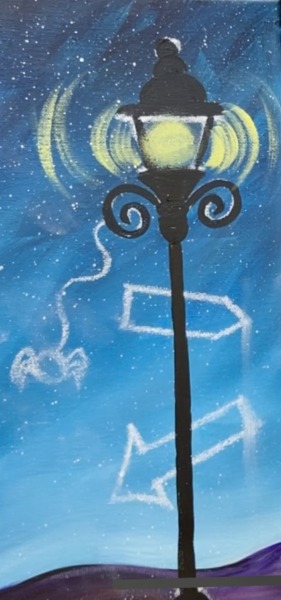
Smear the paint outwards so that it even overlaps the black lines on the lamp. Then take the round brush and paint curved light reflection lines. This is similar to what you did with the moon. Dry brush these lines outwards from the lamp to create a glowing effect.
Then load the brush into just “titanium white”. Paint a small circle on the inside of the yellow glowing circle. This will brighten the light.
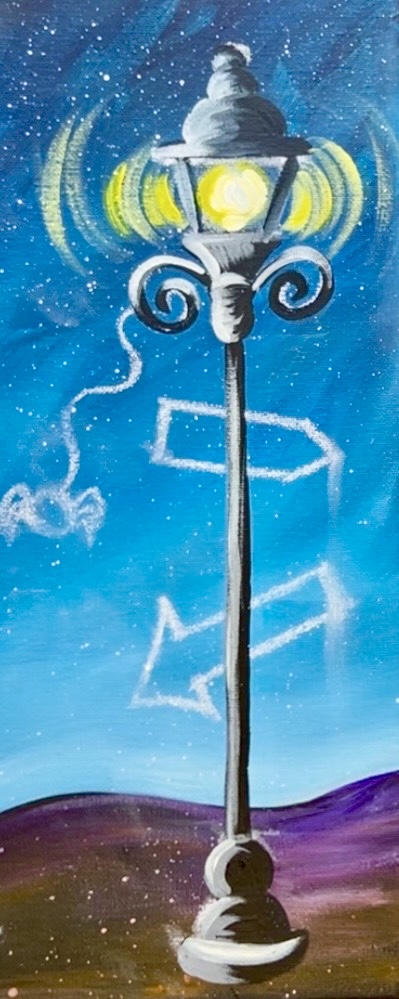
13. Highlights On Lamp
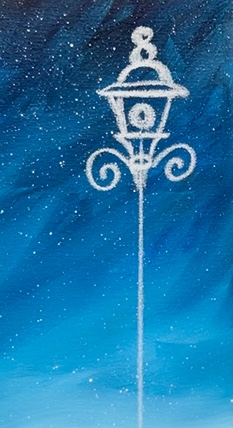
Make a medium gray on your palette (same color you used for the ghost). Then use the #4 round brush to outline the left edges of all of the black lines on the lamp.
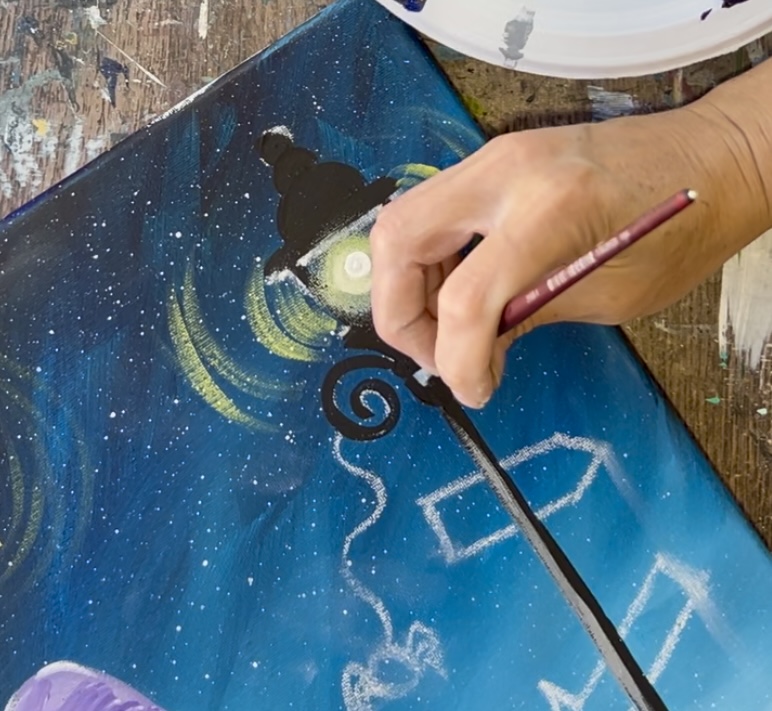
Paint the left side of all of the black lines and shapes on the lamp but leave the right side black. This will start to give “form” to your lamp and help it to stand out against the dark background.
Next, use just “titanium white” and add white on the left side of all of the gray you just painted. Don’t paint over the gray, paint just a little bit of white on the edges. This will really help your lamp to “pop” when you add this highlighting. The far right sides of the lamp are left black.
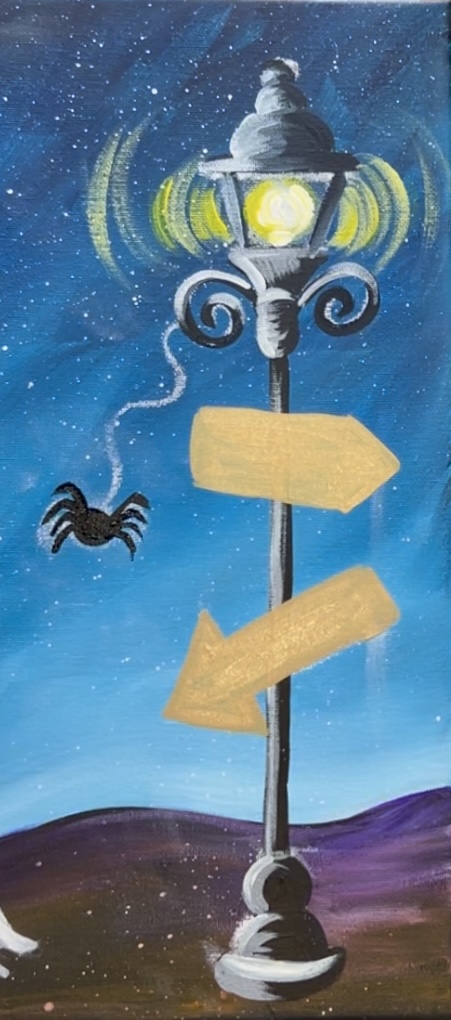
14. Paint Signs & Spider
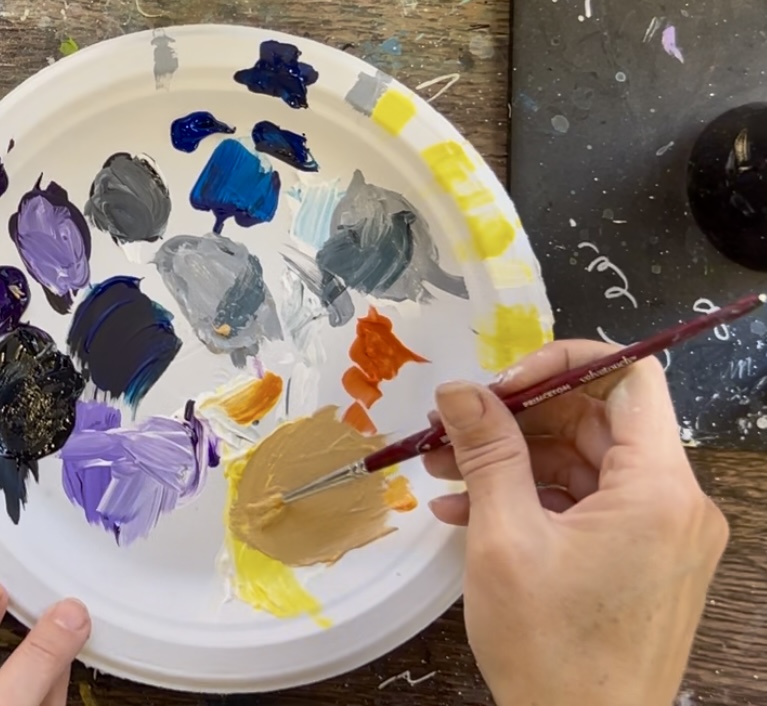
Mix a light brown color on your paint palette by mixing: 2 parts “titanium white”, 1 part “orange”, 1 part “yellow” and add gradual amounts of purple to it! This will make a light orange-brown color.
Use the #4 round brush to paint both of the signs. Also, use “Mars black” or a black paint pen to paint the spider.
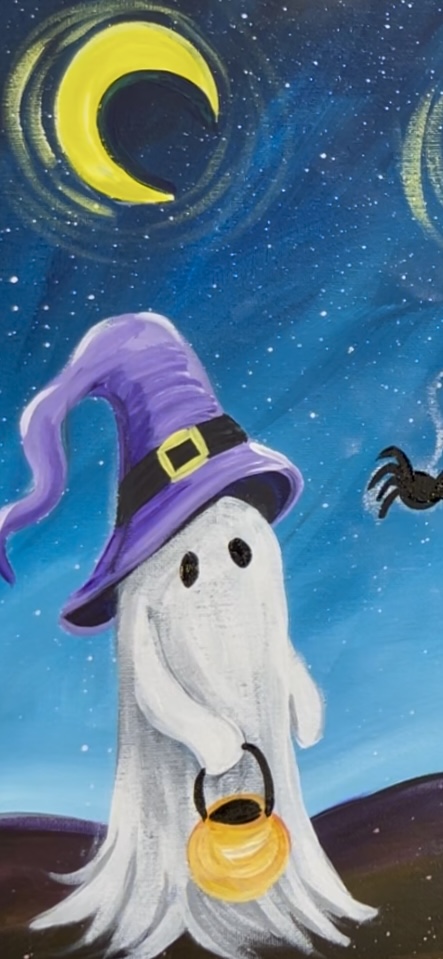
15. Paint Pumpkin Container & More Ghost Details
Mix equal amounts orange, yellow and white together to make a light orange. Use the #4 round brush to paint the pumpkin bucket with a small oval opening. This is located just under the ghost’s right arm with a gap left for the handle.
Use “mars black” to paint the handle of the bucket so that it goes to the ghost’s hand. Paint the oval opening black. Then use the same black to paint two oval eyes.
16. Details On Signs (optional)
For a more “rustic look” on the signs, dry brush “titanium white” using the #4 round brush. Brush this going in horizontal woodgrain directions but don’t cover all of the first orange-brown layer.
Mix a dark brown color on your paint palette by using the same orange-brown color you used to paint the sign and adding just a tiny bit of black to it! You can also use just black for this step. Take the #4 round brush and paint some of the 3D edges/ sides of the sign. This is done simply by outlining the bottom and side edges of the lines on the shapes.
17. More details on spider and witch hat
Paint two eyes on the spider with white paint. Then paint a very tiny black dot inside each of the eyes. You can use the back of the paint brush or even a toothpick for these tiny dots!
Add orange/ yellow glow on the right edges of the witch hat. This is applied using the 4 round brush and it goes over those white highlights/ edging we added in step 8. This adds a fun spooky glow in the painting! You can even add a touch of orange around the lightbulb/ light beams on the lamp.

Paint a white line for the spider’s web that connects to the lamppost.
18. Detail Work With Paint Pens
Use the white paint pen (or a tiny detail brush and white paint) to paint a set of spider webs attached to the signs.
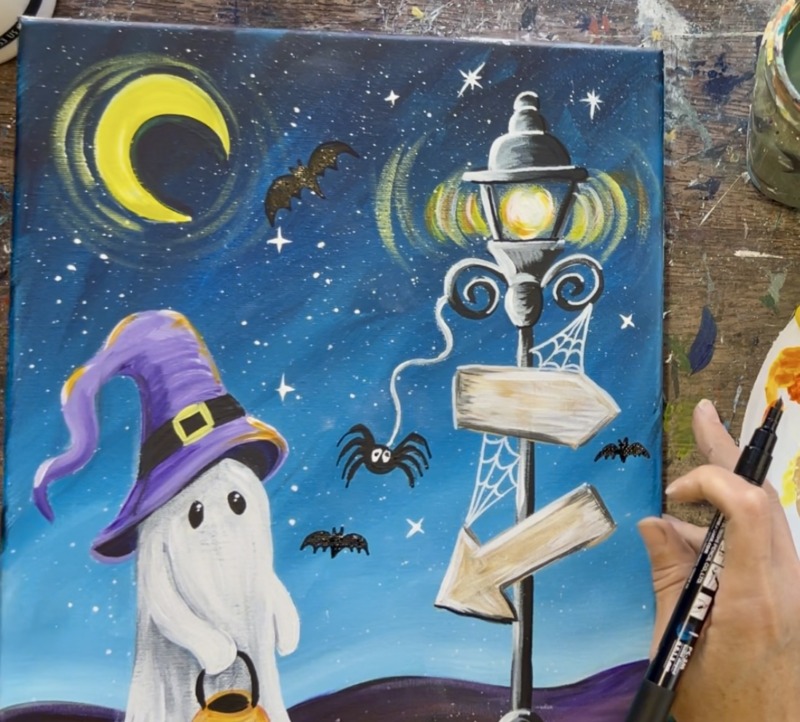
Use a black paint pen to draw and color in a few bats in the sky.
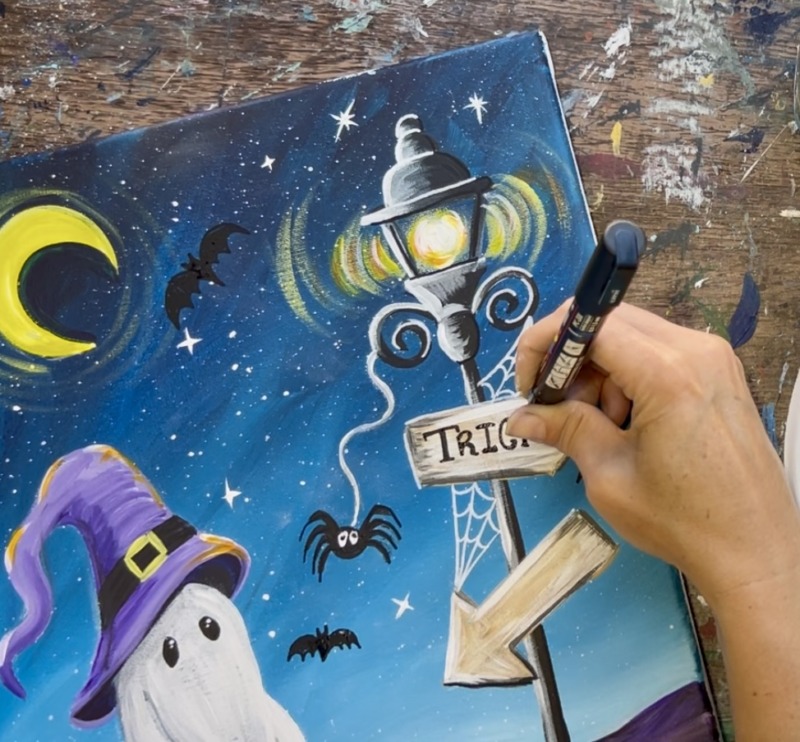
Use a black paint pen to write the words “tricks” and “treats” on the signs.
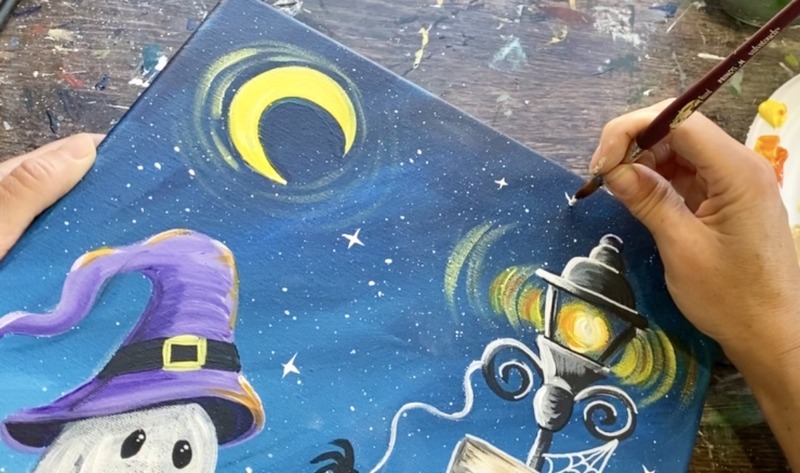
Another final detail of this painting are the stars! You can use a white paint pen or the brush to paint little diamond and “twinkling” stars all throughout the sky. This really adds to the whimsical mood of the entire painting!
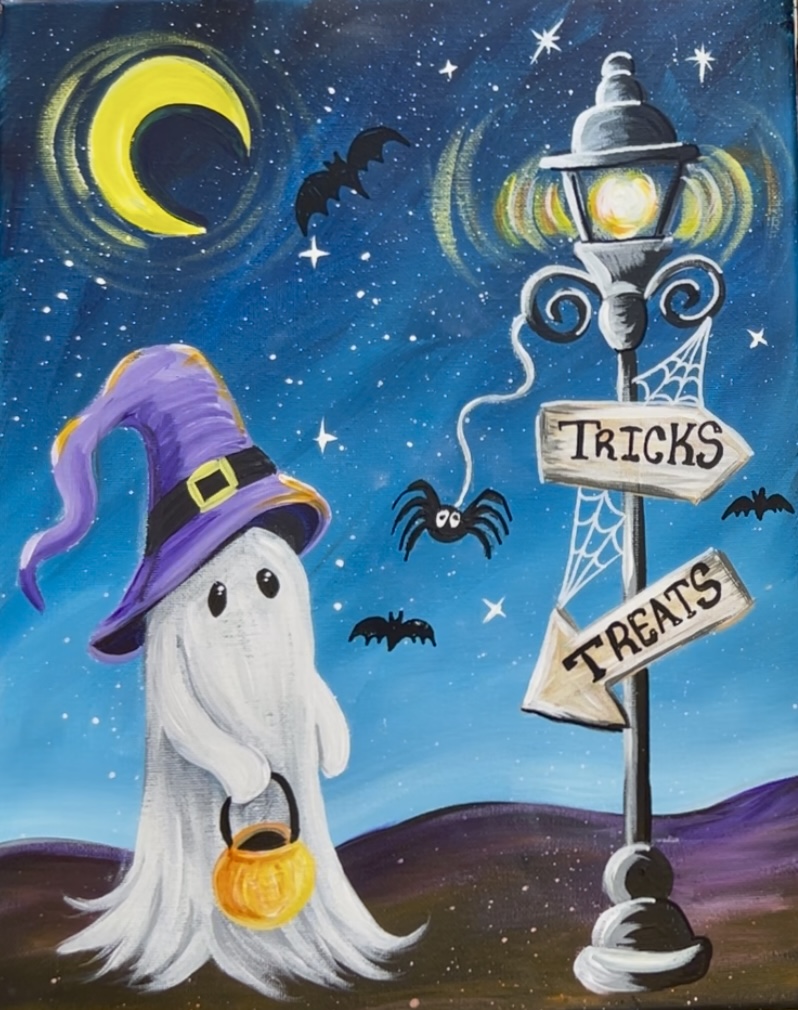
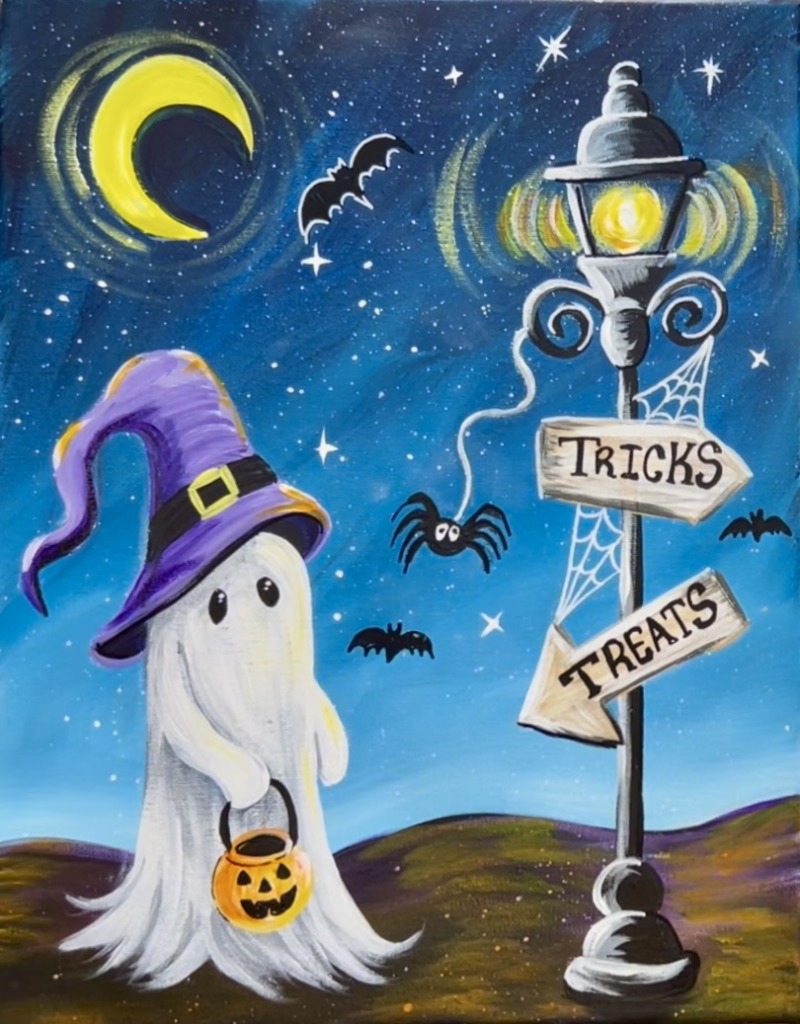
Finished! Feel free to add any more details that you want! Maybe pumpkins on the ground, more bats or a mouth on the ghost!